Whenever I’m craving something fresh, abstract ceramics are my go-to because you can break all the “rules” and let shape, color, and texture do the talking. Here are my favorite ideas to help you explore unconventional silhouettes and surface designs that feel more like modern art than traditional pottery.
Geometric Color-Block Vase
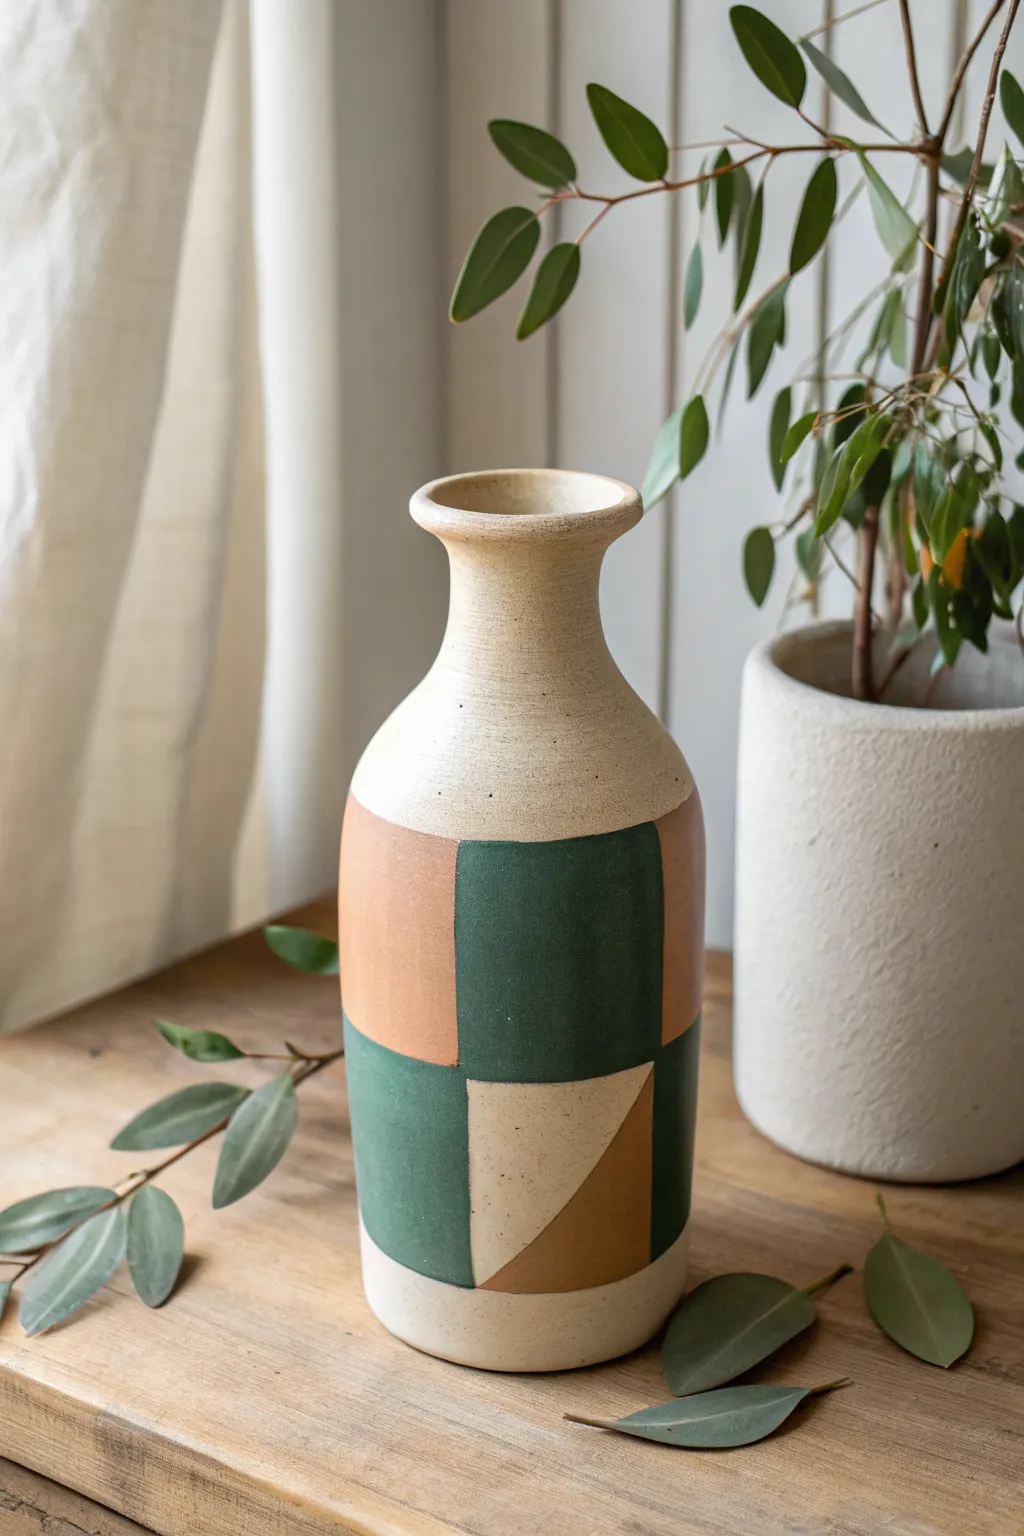
This project transforms a simple vessel into a mid-century inspired statement piece using crisp lines and earthy tones. The design features a playful mix of solid squares and triangles in forest green, terracotta, and soft beige against a speckled clay body.
Step-by-Step Guide
Materials
- Speckled buff stoneware clay (or similar cone 5/6 clay body)
- Pottery wheel and basic throwing tools (sponge, loop tool, wire)
- Rib tool (metal or wood)
- Underglazes (Forest Green, Terracotta/Burnt Orange, Warm Beige)
- Small flat synthetic brushes
- Pencil
- Painter’s tape or graphic tape (1/4 inch or wider)
- Ruler or measuring tape
- Clear matte glaze (optional)
- Wax resist (for the foot)
Step 1: Throwing and Shaping
-
Center the clay:
Start with about 2-3 lbs of well-wedged speckled clay. Center it firmly on the wheel head, ensuring a stable base for the height you’ll need. -
Establish the cylinder:
Open the clay and pull up a tall, consistent cylinder. Aim for even wall thickness from bottom to top before you start shaping the curves. -
Shape the belly:
Gently push from the inside out to create a subtle swelling for the main body of the vase. The widest point should be just below the midpoint. -
Collar the neck:
Collar the clay inwards significantly as you move up towards the neck, creating a distinct bottle shape. Keep the wheel speed steady to prevent twisting. -
Refine the rim:
Flare the very top out slightly to create a defined lip. Use a chamois or sponge to compress and smooth this edge so it’s pleasant to touch. -
Smooth the surface:
Before removing from the wheel, use a metal rib to remove all throwing lines from the exterior. A smooth canvas is crucial for the geometric design later. -
Dry to leather hard:
Wire the pot off and let it dry slowly to a leather-hard state. It should be firm enough to handle without deforming but still cool to the touch.
Clean Lines Only
If underglaze bleeds under your tape, wait for it to dry completely. Then use an X-Acto knife to gently scrape the excess paint off the surface for a razor-sharp edge.
Step 2: Designing and Glazing
-
Trim the foot:
Secure the vase back on the wheel (or use a Giffin Grip) and trim a neat foot ring. Refine the lower curve to ensure the silhouette flows smoothly. -
Map the grid:
Lightly sketch a horizontal line around the vase where the shoulder begins to curve in, and another line near the base. Measure vertical divisions to create a grid of squares. -
Sketch the pattern:
Following your grid, lightly draw your squares and triangles with a pencil. The graphite will burn off in the kiln, so don’t worry if it looks messy now. -
Tape off sections:
Apply tape along your pencil lines to create crisp boundaries. I find it easiest to tape off all vertical lines first, paint, let dry, and then re-tape for horizontal lines. -
Paint the first coat:
Apply your Forest Green and Terracotta underglazes into their respective shapes. Use a flat brush and pull the paint away from the tape edge to prevent bleeding. -
Apply subsequent layers:
Let the first coat dry until it’s no longer shiny, then apply a second and third coat for solid, opaque coverage. This ensures the clay speckles don’t overpower the color. -
Paint the triangles:
For the split square design, carefully paint the diagonal division. Use the Warm Beige for the lighter triangle and a darker tone (like a mix of Terracotta and brown) for the shadow triangle. -
Remove tape and refine:
Peel off the tape while the final coat is slightly damp to get the sharpest line. Use a clean, damp stiff brush or a needle tool to gently scratch away any smudges. -
Leave negative space:
Leave the neck and the very bottom of the vase unpainted to show off the raw speckled clay, framing your color work nicely. -
Bisque fire:
Once fully bone dry, bisque fire the piece to Cone 04. This sets the underglaze permanently. -
Final glazing:
For the finish in the photo, you can leave the exterior unglazed if the clay is vitrified, or apply a very thin coat of matte clear glaze over the whole piece. Glaze the interior with a liner glaze to make it watertight. -
Glaze fire:
Fire correctly to your clay body’s maturation temperature (likely Cone 5 or 6). Allow the kiln to cool completely before opening.
Texture Play
Carve into the raw clay spaces between painted blocks (sgraffito style) or use a textured matte glaze on just the colored sections for a tactile contrast.
Fill your new vase with dried eucalyptus or fresh greenery to highlight those rich, natural colors


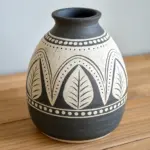
Bold Black-and-White Linework
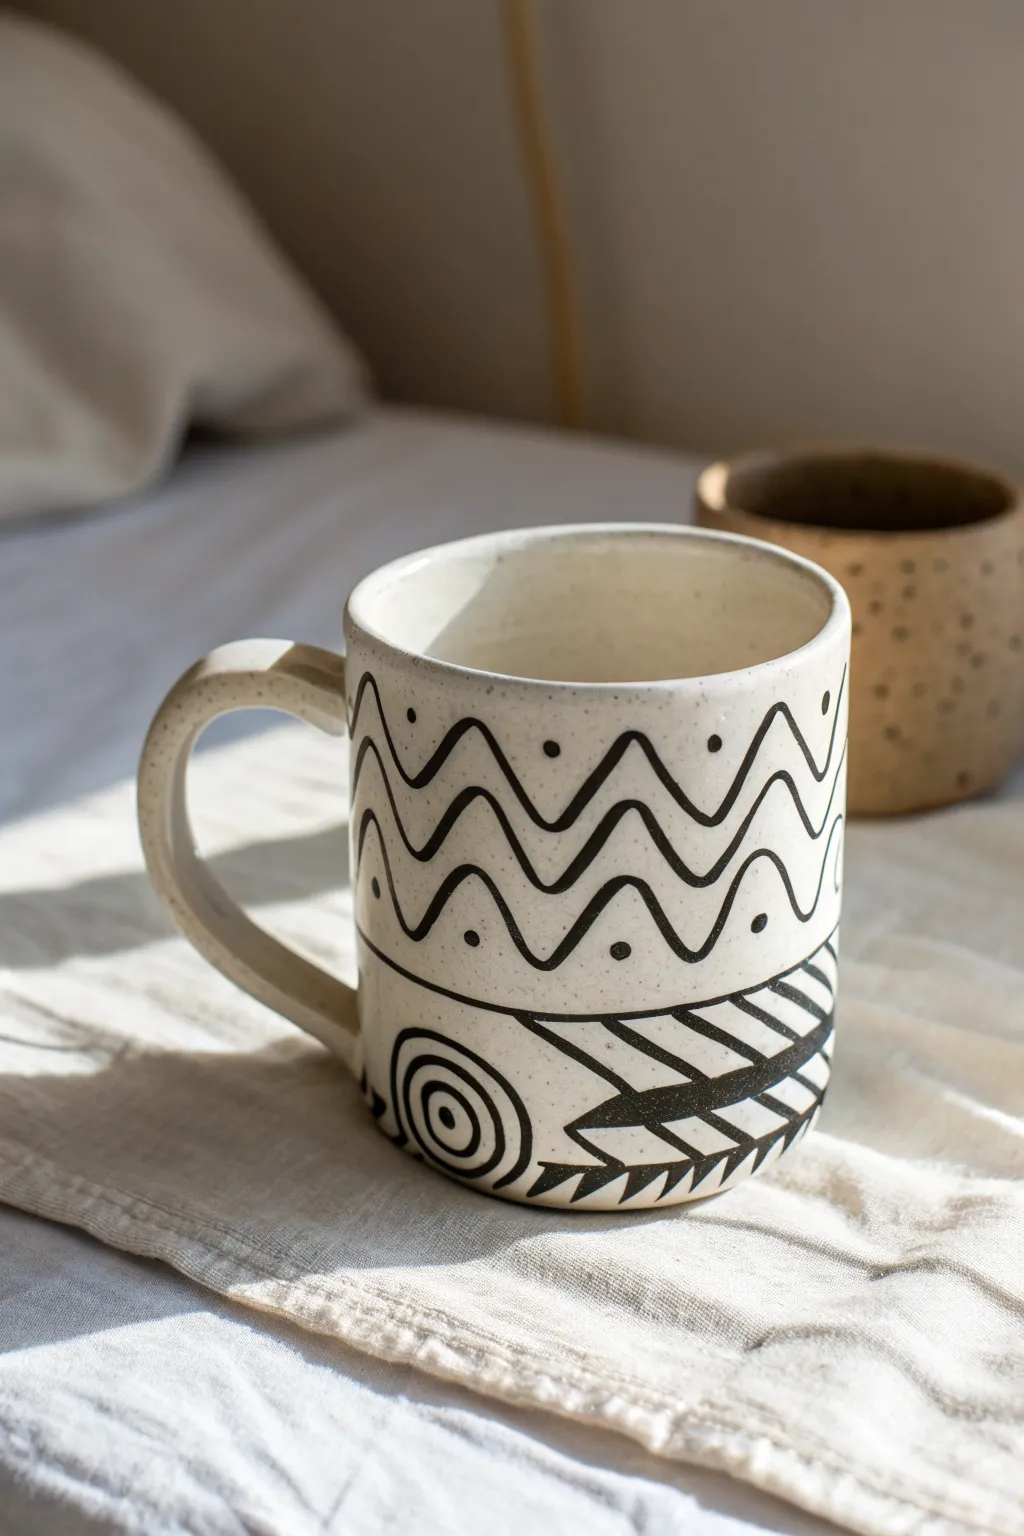
This project transforms a simple vessel into a striking piece of functional art using high-contrast black underglaze against a speckled cream canvas. The design combines rhythmic zig-zags with bold organic shapes for a modern, patterned aesthetic.
How-To Guide
Materials
- Bisque-fired ceramic mug (preferably speckle clay body)
- Black underglaze (or specialized detail slip)
- Transparent glaze (gloss or satin)
- Fine liner brush (size 0 or 00)
- Medium round brush (size 4 or 6)
- Pencil (for sketching)
- Damp sponge
- Kiln access
Step 1: Preparation & Mapping
-
Surface Prep:
Begin by wiping down your bisque-fired mug with a damp sponge. This is crucial as it removes any kiln dust and oils from your hands that might repel the underglaze. -
Divide the Space:
Using a regular pencil, lightly mark a horizontal line around the mug, dividing it roughly into a top two-thirds and a bottom one-third. The pencil lead will burn off the kiln, so don’t worry about marks remaining. -
Sketch the Waves:
In the top section, lightly sketch two parallel wavy or zig-zag lines. Try to keep the peaks and valleys aligned vertically to create a cohesive rhythm. -
Plan the Lower Elements:
In the bottom third, sketch out larger geometric motifs. On one side, draw a spiral or concentric circle target shape. On the adjacent side, outline a stylized branch or feather shape with diagonal striping.
Clean Lines Pro Tip
For ultra-crisp lines, use a trailing bottle with a fine metal tip instead of a brush. It acts like a pen, allowing for constant flow without reloading paint.
Step 2: Applying the Linework
-
Consistency Check:
Check your black underglaze consistency. It should be like heavy cream. If it’s too thick, it will drag; too thin, and the black won’t be opaque. -
Primary Waves:
Load your fine liner brush with black underglaze. Carefully trace the top zig-zag line. Apply steady pressure to keep the line width consistent. -
Secondary Waves:
Paint the second zig-zag line below the first. Maintain an even gap between the two lines to let the clay body breathe through the design. -
Adding Dots:
Using the tip of your brush or a dotting tool, place a single black dot in each ‘valley’ of the upper wave and each ‘peak’ of the lower wave for balance. -
The Dividing Line:
Paint a solid, straight horizontal line over your initial pencil division mark to separate the wave section from the bottom geometric section.
Level Up: Sgraffito
Paint the bottom section solid black, let it dry to leather-hard, and carve the spiral/leaf designs *into* the black to reveal the white clay beneath.
Step 3: Creating the Bold Motifs
-
The Spiral:
Move to the bottom section. Paint the central dot of your spiral motif first. Then, using steady hand movements, paint the rings around it. I find resting my pinky on the table helps stabilize my hand here. -
Geometric Leaf Outline:
Outline the leaf or feather shape. Make the outer boundary lines slightly thicker than your wave lines to ground the design at the bottom of the mug. -
Parallel Striations:
Fill the leaf shape with bold, diagonal parallel lines. Ensure the spacing is wide enough so the lines don’t bleed together during firing. -
Cleanup:
If you make a smudge or a line goes astray, wait for it to dry completely, then gently scratch the mistake off with a needle tool or stiff brush.
Step 4: Glazing & Firing
-
Bisque Drying:
Allow the underglaze to dry completely. It should look chalky and matte before you proceed. -
Clear Coat Application:
Pour clean transparent glaze into the mug, swirl to coat the inside, and pour out. Wipe the rim clean. -
Exterior Glazing:
Dip the exterior of the mug into the clear glaze, or brush it on if you prefer. Ensure a smooth application so the black lines stay crisp. -
Check the Foot:
Wipe the foot of the mug completely clean of glaze to prevent it from sticking to the kiln shelf. -
Final Fire:
Fire the mug to the temperature appropriate for your clay and glaze combination (usually Cone 5 or 6 for stoneware).
Once cooled, fill your new mug with coffee and enjoy how the bold patterns pop against the creamy speckled clay


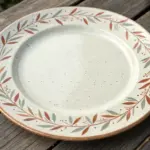
Abstract Brushstroke Plates
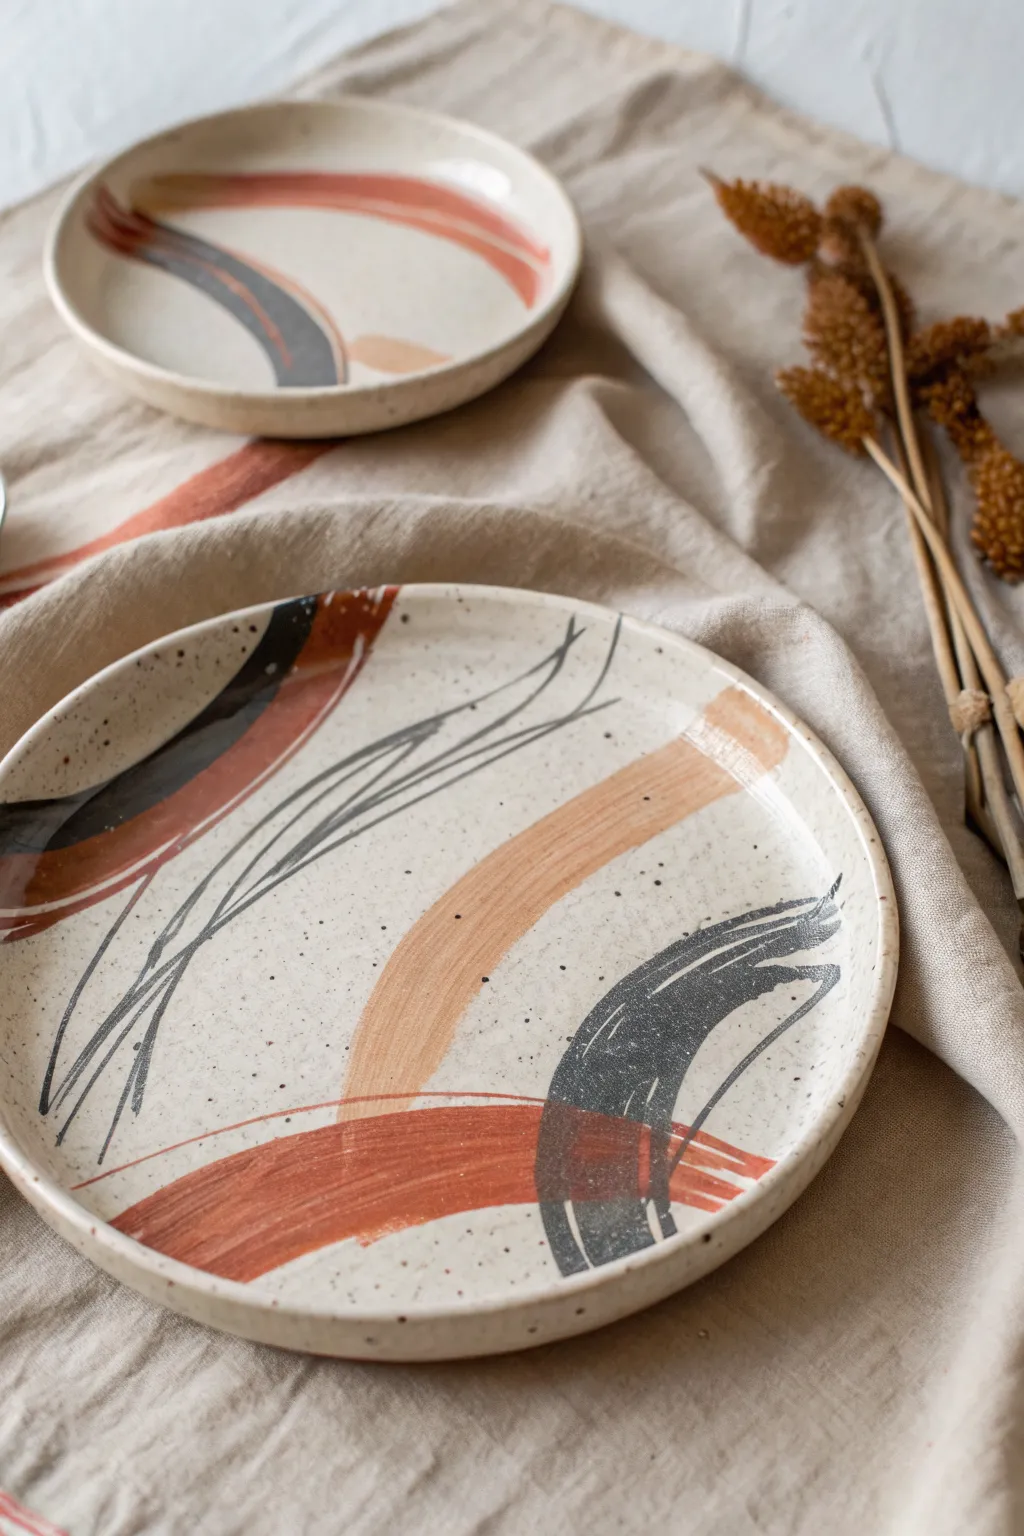
Embrace the imperfect beauty of hand-painted ceramics with these modern, abstract plates. Using a speckled stoneware base and a restrained palette of rust, peach, and charcoal, you can create functional art that feels both earthy and sophisticated.
Step-by-Step
Materials
- Speckled buff stoneware clay
- Rolling pin
- Guide sticks (approx. 1/4 inch thick)
- Circular template or large dinner plate
- Pottery needle tool
- Sponge
- Underglazes: Rust/Terracotta, Soft Peach/Blush, Dark Charcoal/Black
- Assorted brushes: 1-inch flat brush, fan brush, fine liner brush
- Clear matte or satin glaze
- Kiln access
Step 1: Forming the Plate
-
Prep the clay:
Begin by wedging your speckled buff stoneware clay thoroughly to remove any air bubbles. This ensures a consistent canvas for your painting. -
Roll the slab:
Set up your guide sticks on a canvas work surface. Roll the clay out into a smooth slab, rotating it occasionally to keep the thickness even across the entire surface. -
Smooth the texture:
Run a damp sponge or a soft rib tool gently over the slab to compress the clay particles and create a super-smooth finish. This step is crucial for getting clean brushstrokes later. -
Cut the shape:
Place your circular template or an existing dinner plate onto the clay. Holding the needle tool vertically, trace around the template to cut out your perfect circle. -
Form the rim:
Gently lift the edges of the circle to create a shallow rim. You can use a foam mold for support, or hand-shape it by pinching slightly and smoothing with a damp sponge. -
Dry to leather hard:
Allow the plate to dry slowly until it reaches the leather-hard stage. It should be firm enough to hold its shape but still cool to the touch.
Step 2: Designing the Abstract Art
-
Plan your palette:
Prepare your underglazes. You need three distinct tones: a warm rust-red, a soft pastel peach, and a dark charcoal grey. -
The first swoosh:
Load a wide flat brush with the rust-colored underglaze. I like to start with a bold, C-shaped curve near the bottom or side of the plate, letting the bristles create a natural texture at the end of the stroke. -
Layering the peach:
Using a separate clean brush, add a second broad stroke in the peach tone. Overlap it slightly with the rust color or place it parallel to create movement across the plate. -
Adding contrast:
Switch to the charcoal underglaze. Apply a darker, heavy stroke that intersects or complements the lighter colors. Don’t overthink it; quick, confident movements look best. -
Fine line details:
Dip a fine liner brush into the charcoal underglaze. Add thin, wispy lines that echo the shape of your larger strokes to add dynamic energy to the composition. -
Cleaning the rim:
Once the underglaze is dry to the touch, use a slightly damp sponge to clean up the very edge of the rim if any paint strayed too close to the side. -
Bisque fire:
Place the plate in the kiln for a bisque firing (usually cone 04 or 06). This hardens the clay and sets the underglaze permanently.
Brushstroke Texture
Don’t reload your brush mid-stroke. Letting the paint run out naturally creates that desired ‘dry brush’ texture at the end of the swoop.
Step 3: Glazing and Finishing
-
Apply clear glaze:
Once the bisque plate has cooled, wipe it down with a damp sponge to remove dust. A dip or brush-on application of clear matte glaze works best to show off the clay’s natural speckles. -
Check the thickness:
Ensure the clear glaze isn’t applied too thickly, as it can sometimes cloud the crisp lines of your underglaze painting. -
Wipe the foot:
Thoroughly sponge off any glaze from the bottom foot of the plate so it doesn’t fuse to the kiln shelf during the final firing. -
Final firing:
Fire the plate to the final maturity temperature of your clay body (likely cone 5 or 6 for stoneware). Allow the kiln to cool completely before opening.
Smudged Lines?
If underglaze strokes smear when applying clear glaze, dab the glaze on gently with a sponge rather than brushing it, or spray the glaze on.
Now you have a stunning set of plates perfect for serving or display, ready to bring warmth to any table setting


Cubist Face-Inspired Planter
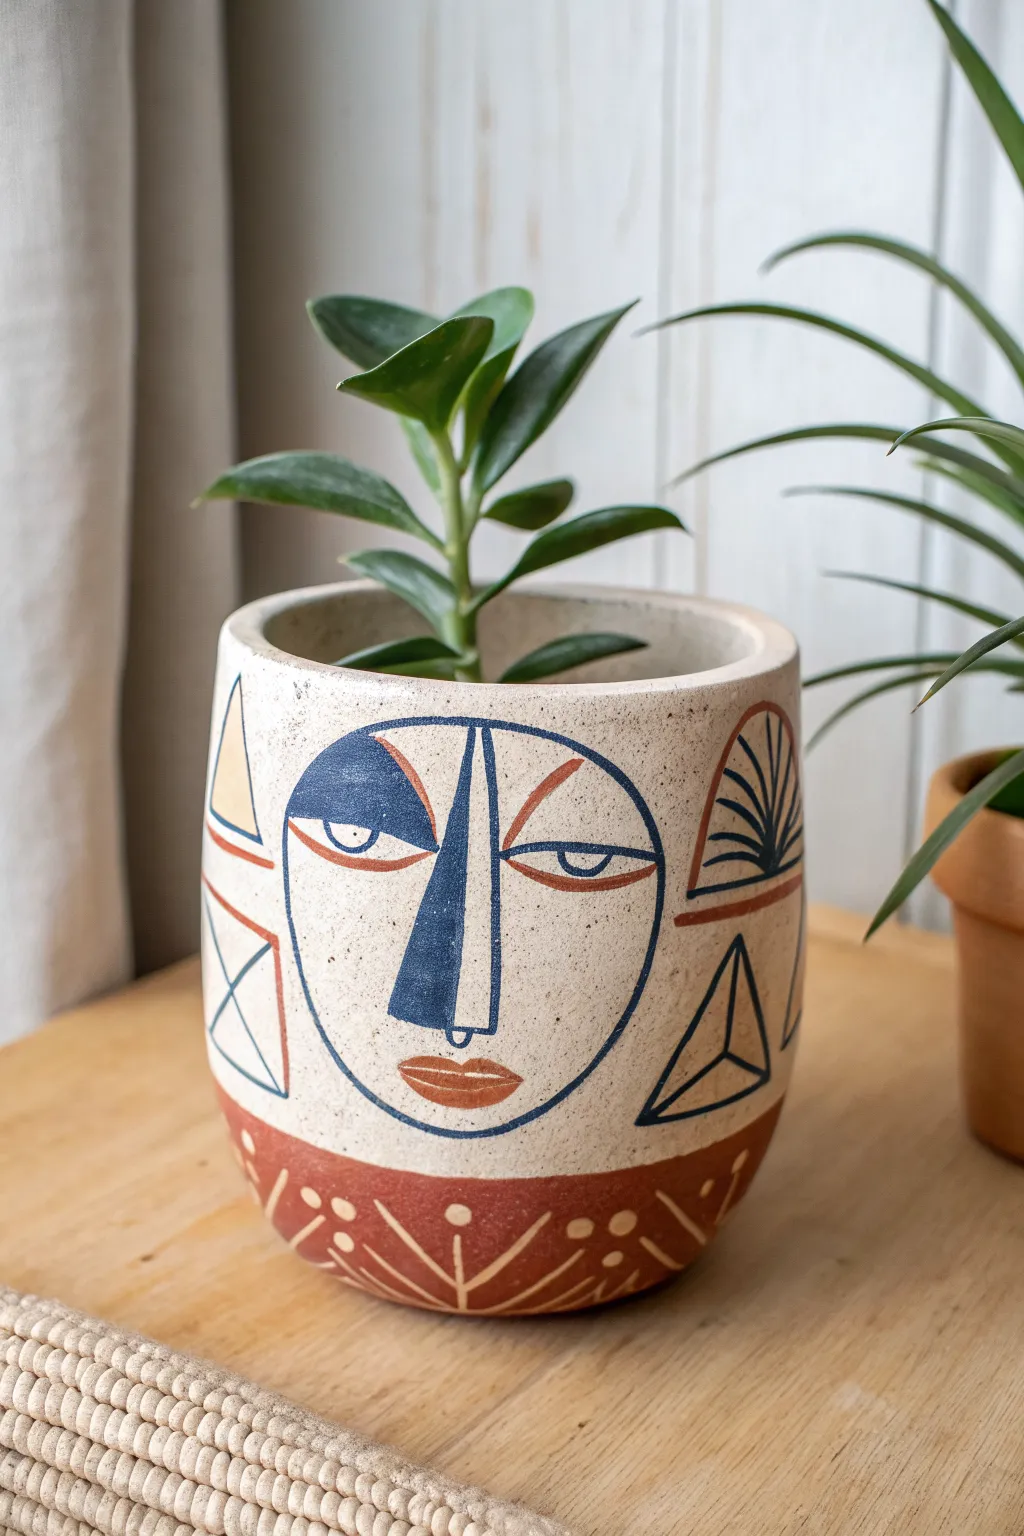
Transform a plain ceramic pot into a stunning piece of modern art with this Cubist face-inspired design. Featuring bold geometric lines, earthy terracotta tones, and striking navy accents, this planter brings a sophisticated, gallery-worthy vibe to your indoor garden.
Step-by-Step Guide
Materials
- Plain cylindrical ceramic planter (matte cream/beige finish)
- Acrylic paints (Navy Blue, Terracotta/Rust, darker Rust)
- Fine liner paintbrush (size 0 or 1)
- Small flat shader paintbrush
- Pencil
- Eraser
- Painter’s tape or masking tape
- Matte spray sealant or varnish
- Compass or round object for tracing
- Ruler
Step 1: Preparation & Base Layout
-
Clean surface:
Begin by wiping down your ceramic pot with a damp cloth to remove any dust or oils. Let it dry completely to ensure the paint adheres properly. -
Mark the bottom section:
Measure about 1.5 to 2 inches from the bottom of the pot. Using a ruler and pencil, lightly mark this height at several points around the circumference. -
Tape the line:
Connect your pencil marks with painter’s tape to create a crisp horizontal line. This will separate the main face design from the patterned base. -
Paint the base:
Using your flat shader brush and the terracotta paint, fill in the bottom section below the tape. Apply two coats for solid opacity, allowing the first coat to dry before adding the second. -
Reveal the line:
Once the paint is tacky but not fully dry, gently peel off the painter’s tape at a 45-degree angle to reveal a sharp edge. Allow the base to cure fully.
Steady Hand Trick
Rest your pinky finger on the pot surface as you paint long lines. This anchors your hand and acts as a pivot point, significantly reducing shakiness for crisp, geometric precision.
Step 2: Sketching the Face
-
Outline the face shape:
In the center of the cream section, use a compass or a round object (like a large jar lid) to lightly sketch a large circle for the face boundary. -
Draw the nose:
Draw an elongated triangle for the nose. The nose should start near the top center of the circle and extend down past the middle, slightly off-center for that abstract look. -
Sketch the eyes:
Add two almond shapes for eyes on either side of the nose. Make them slightly asymmetrical—perhaps one slightly higher or wider—to embrace the Cubist style. Add curved lines above them for eyelids. -
Add the mouth:
Below the nose, sketch a simple oval or leaf shape for the lips. Keep it small and centered under the nose tip. -
Map out side patterns:
On the sides of the pot (outside the face circle), sketch geometric fillers. Draw triangles on the left and a semi-circle with radiating lines on the right.
Textured Dimension
Mix baking soda into your acrylic paint before applying. It creates a fluffy, gritty texture that mimics raw ceramic or stone, perfect for the terracotta areas to feel more authentic.
Step 3: Painting & Detailing
-
Outline in navy:
Load your fine liner brush with slightly watered-down navy blue paint. Carefully trace over your pencil lines for the main circle, the nose, and the geometric side shapes. -
Fill the nose detail:
Paint the left vertical half of the nose triangle solid navy blue. Leave the right side unpainted or fill it with a very light grey if you want subtle contrast. -
Define the eyes:
Outline the eyes carefully with navy. Add a dark pupil shape—I like to place them looking sideways or slightly down for added character. -
Add terracotta accents:
Switch to your terracotta paint. Fill in the lips and add a curved line above the eyes to accentuate the brow bone. You can also add small touches inside the side geometric shapes. -
Detail the base pattern:
On the dry terracotta base, use a very light beige or cream paint (or a white paint pen) to draw the bottom design. Create V-shapes that look like sprouting plants or abstract rays. -
Add base dots:
Finish the bottom pattern by adding small dots at the end of each line on the base, creating a decorative, folk-art feel. -
Clean up lines:
Once fully dry, use an eraser to gently remove any visible pencil marks. If you made any painting slips, touch them up with the original background color. -
Seal the work:
Finish by spray-painting the entire pot with a matte sealant. This protects your artwork from water drips when watering your plant.
Now your ordinary pot has become a striking conversation piece ready to house your favorite greenery.

The Complete Guide to Pottery Troubleshooting
Uncover the most common ceramic mistakes—from cracking clay to failed glazes—and learn how to fix them fast.
Gradient Ombre Glaze Bands
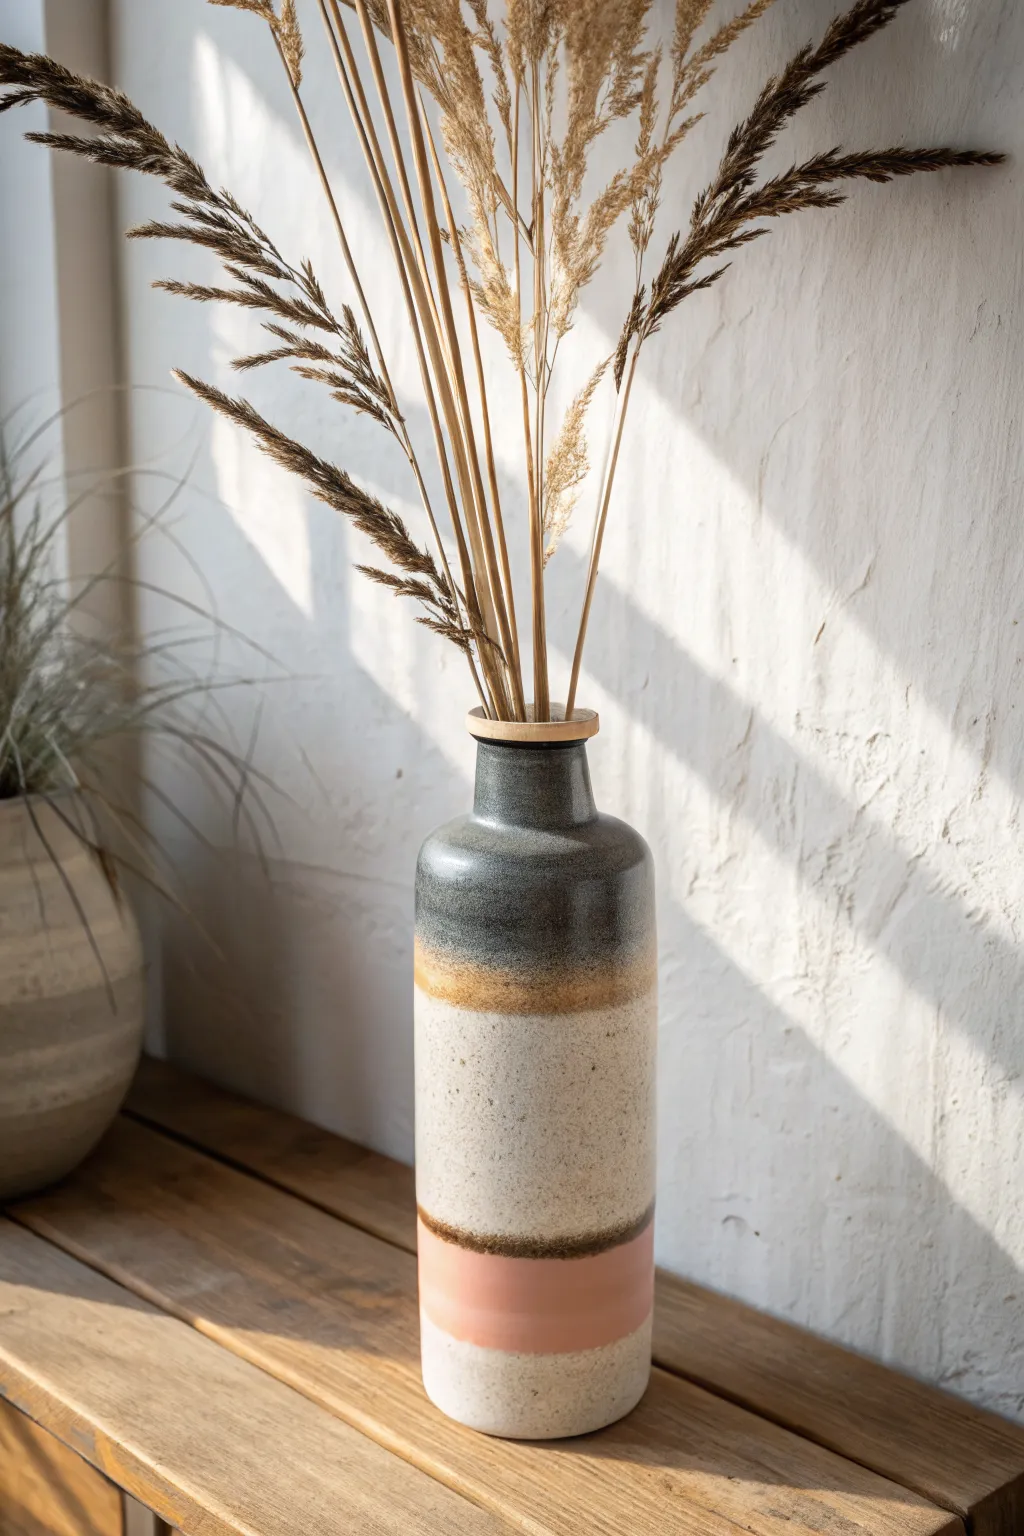
Embrace the natural warmth of this gradient-style vase, featuring crisp bands of glaze that transition from deep charcoal to organic sandy whites and soft blush tones. The distinct segments and textural variations create a modern yet rustic piece perfect for displaying dried botanicals.
Detailed Instructions
Materials
- Stoneware clay body (speckled or buff)
- Pottery wheel
- Throwing tools (sponge, rib, wire cutter)
- Trimming tools
- Liquid wax resist
- Glaze brushes (wide soft fan brush)
- Glaze 1: Deep charcoal/slate (satin or matte)
- Glaze 2: Toasted ochre/rust (glossy or satin)
- Glaze 3: Speckled satin white/cream
- Glaze 4: Opaque blush pink (matte)
- Sponge or fine sandpaper
- Kiln
Step 1: Throwing the Form
-
Center and open:
Start with about 3-4 lbs of speckled stoneware clay. Center it firmly on the wheel and open the clay, keeping the base relatively narrow to support a tall form. -
Pull the cylinder:
Begin pulling up the walls to create a tall, consistent cylinder. Aim for a height of at least 8-10 inches, ensuring the wall thickness is even from bottom to top. -
Shape the shoulder:
Once the height is established, gently collar in the top third of the cylinder to form the shoulder. Use a rib on the outside to maintain a smooth curve as the neck narrows. -
Define the neck:
Pull the remaining clay at the top into a straight, narrow neck, about 1.5 to 2 inches wide. I like to keep this distinctive and straight to contrast with the softer body. -
Detail the rim:
Use a chamois or your finger to compress and slightly flange the rim outward. This creates the subtle ‘lip’ seen at the very top, which can be left unglazed later. -
Smooth the surface:
While the wheel is spinning slowly, run a metal rib up the exterior to remove throwing lines and create a canvas-smooth surface for the glaze bands.
Step 2: Trimming and Bisque Firing
-
Dry to leather hard:
Allow the piece to dry slowly to a leather-hard state. This is crucial for precise trimming without warping the tall neck. -
Trim the foot:
Invert the vase on the wheel and trim a clean, flat bottom. Create a slight undercut at the foot to give the visual impression that the vase is floating slightly. -
Bisque fire:
Once fully bone dry, load the vase into the kiln for a bisque firing (typically Cone 04 or 06). Let it cool completely before handling.
Clean Lines Pro-Tip
Use automotive detailing tape or thin painters tape to mask off sections between glaze colors. Remove the tape as soon as the glaze loses its sheen for crisp, sharp edges.
Step 3: Applying Glaze Bands
-
Wax the rim:
Apply a line of liquid wax resist to the very top edge of the rim if you want to expose the raw clay body as a final detail. -
Clean the surface:
Wipe the bisque ware down with a damp sponge to remove any dust, which ensures the glaze adheres properly without crawling. -
Mark your sections:
Lightly sketch horizontal lines with a pencil to demarcate where your color bands will go. You need four distinct zones: the neck/shoulder, a thin transition strip, the main body, and the bottom band. -
Apply the top charcoal band:
Using a wide brush or by pouring, apply the deep charcoal glaze to the neck and shoulder area. Carefully stop at your first pencil mark. -
Create the ochre transition:
Paint a narrow band of the toasted ochre or rust glaze right below the charcoal. Allow it to slightly overlap the charcoal edge to create a melting effect during firing. -
Glaze the main body:
Apply the speckled satin white glaze to the large central section. Be careful to butt this up cleanly against the ochre band above it without too much dripping. -
Add the blush base:
For the bottom section, apply the opaque blush pink glaze. I prefer to create a deliberate, straight line where it meets the white section to keep the modern geometric look. -
Enhance the texture (Optional):
If your white glaze isn’t naturally speckled, you can flick a stiff toothbrush dipped in iron oxide wash over the white section to mimic stone texture. -
Clean the foot:
Wipe the bottom of the vase and up the side about 1/4 inch clean of any glaze to prevent it from fusing to the kiln shelf. -
Final wipe down:
Check the interior. If you want it watertight, pour a liner glaze inside, swirl to coat, and pour out the excess before the exterior glazes dry completely. -
Glaze fire:
Fire the kiln to your clay body’s maturity temperature (likely Cone 6 or 10). A slow cooling cycle can help matte glazes develop a nicer crystal structure.
Make It Rustic
Instead of a solid blush pink band at the bottom, leave the raw clay exposed and apply a light wash of white slip. This highlights the natural speckle of the clay body.
Once cooled, fill your new vase with dried pampas grass or wheat stems to compliment the organic palette you have created
Tape-Resist Angular Patterns
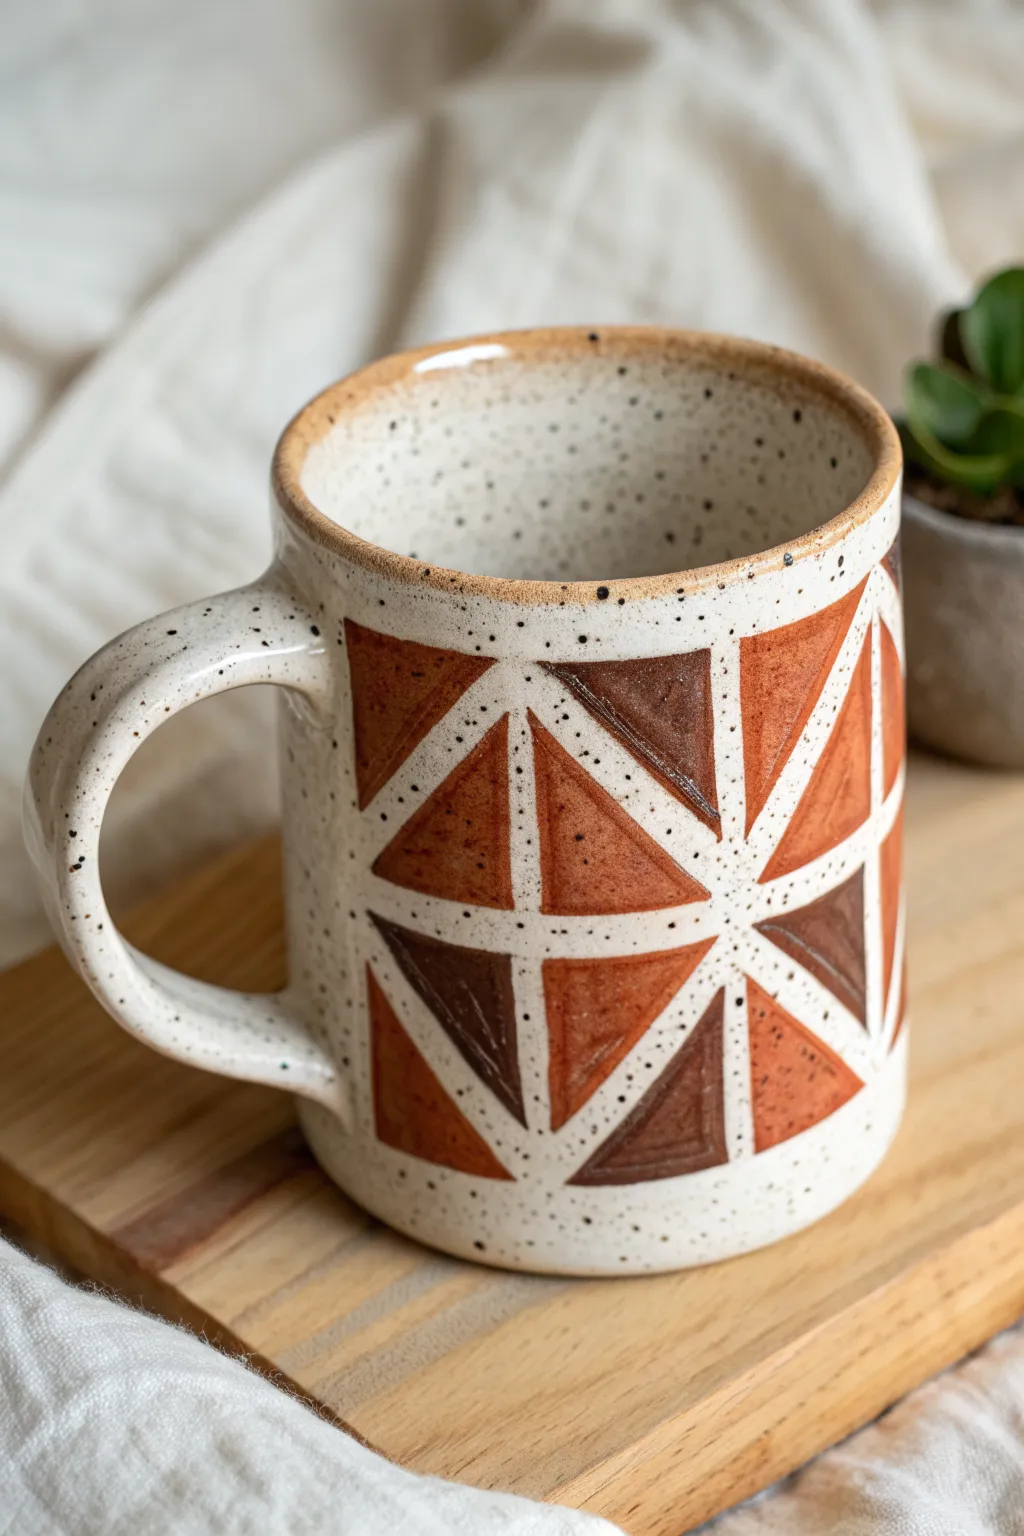
This project combines the earthy charm of speckled stoneware with the crisp precision of geometric design. By using tape resist and a trio of warm underglaze tones, you can create a striking mosaic pattern that beautifully contrasts with the raw, spotted clay body.
Step-by-Step Guide
Materials
- Bisque-fired speckled stoneware mug
- Underglazes in rust orange, terra cotta, and dark chocolate brown
- 1/8-inch or 1/4-inch automotive masking tape or skinny painter’s tape
- Small flat synthetic brush (size 4 or 6)
- Damp sponge
- Clear gloss glaze (cone 6 compatible)
- Fettling knife or X-Acto blade
Step 1: Planning and Taping
-
Prepare the mug:
Begin with a clean, bisque-fired mug made from speckled clay. Wipe it down thoroughly with a damp sponge to remove any kiln dust or oils from your hands, ensuring the surface is ready to accept the tape. -
Establish vertical lines:
Apply strips of the thin masking tape vertically from the top rim down to the bottom edge. Space these lines evenly around the circumference of the mug to create the primary columns for your pattern. -
Create the horizontal grid:
Add horizontal bands of tape crossing the vertical lines at regular intervals. This will form a loose grid of rectangles or squares all around the mug’s surface. -
Form the triangles:
Within each resulting rectangular space, apply diagonal pieces of tape connecting opposite corners. This splits your grid into the sharp, angular triangles seen in the design. -
Secure the edges:
Go over every piece of tape with your finger or a rubber rib, pressing down firmly (burnishing) on the edges. Crucially, ensure there are no air bubbles where the tape strips overlap, as this prevents the underglaze from bleeding underneath.
Burnishing is Key
For ultra-crisp lines, use a wooden modeling tool or the back of a spoon to burnish the tape edges, especially where multiple strips overlap.
Step 2: Applying Color
-
Plan your palette:
Pour small amounts of your rust orange, terra cotta, and dark chocolate brown underglazes onto a palette. Visualize where each color will go to ensure a balanced, alternating distribution across the geometric design. -
Apply the first color:
Start with the rust orange. Fill in scattered triangles across the mug using a small flat brush. Apply two to three even coats, letting each coat dry until it loses its sheen before adding the next one for solid opacity. -
Add the mid-tone:
Move on to the terra cotta shade. Selecting triangles adjacent to the orange ones, paint them carefully, ensuring you brush away from the tape edges when possible to avoid forcing paint under the seal. -
finish with dark tones:
Fill the remaining empty triangles with the dark chocolate brown underglaze. This deep color adds necessary contrast and visual weight to the pattern. I like to double-check my coverage here to ensure no brushstrokes are visible. -
Let it set:
Allow the underglaze to dry completely until it is chalky to the touch. This usually takes about 15 to 20 minutes depending on humidity.
Step 3: Reveal and Finish
-
Peel the tape:
Carefully find the end of your tape strips. Slowly peel the tape away at a 45-degree angle. If layers overlap, start with the pieces you applied last. -
Clean up edges:
If any underglaze has bled under the tape, gently scrape it away with a fettling knife or an X-Acto blade. You can also use a barely damp, stiff brush to clean up minor smudges on the unpainted clay lines. -
Bisque fire (optional but recommended):
For the crispest lines, you can fire the piece to bisque temperature (usually cone 04) again to set the underglaze permanently. This prevents smearing during the glazing step. -
Apply clear glaze:
Dip the entire mug into a clear gloss glaze. If you didn’t do a second bisque fire, dip quickly to avoid re-wetting the underglaze too much. Shake off excess glaze and clean the foot ring. -
Final wipe:
ensure the rim is smooth and the glaze is even. If any specs of underglaze detached during dipping and are floating in the clear coat, carefully pick them out. -
Final firing:
Fire the mug to maturity (likely cone 6 for stoneware) according to your clay body’s specifications to melt the glaze and bring out the iron speckles in the clay.
Bleeding Under Tape?
If paint bleeds, your underglaze might be too watery. Let it thicken slightly on the palette, or apply thinner, dryer coats rather than pooling it on.
Now you have a stunning geometric mug ready for your morning coffee routine


What Really Happens Inside the Kiln
Learn how time and temperature work together inside the kiln to transform clay into durable ceramic.
Splatter and Speckle Surfaces
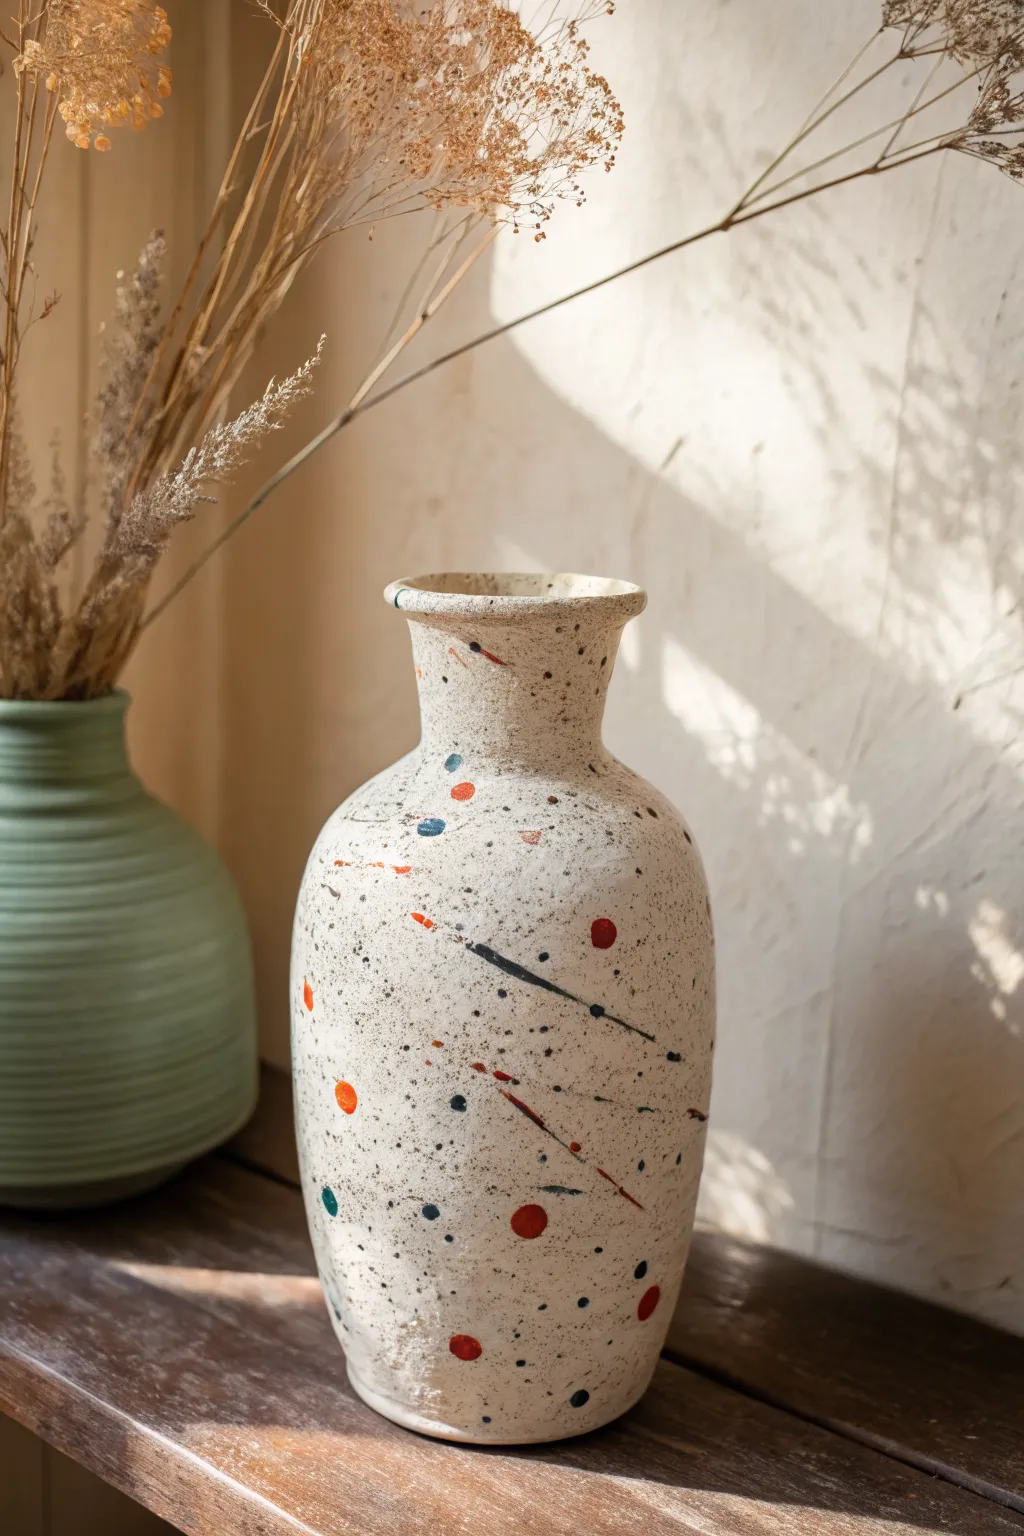
Bring a touch of abstract expressionism to your home decor with this playful ceramic project. By combining a creamy, speckled base with bold, energetic splatters of primary colors, you can transform a plain bisque vase into a modern art piece full of movement and personality.
Step-by-Step
Materials
- Bisque-fired ceramic vase (smooth, classic bottle shape)
- Speckled cream or ‘oatmeal’ brush-on glaze
- Underglazes in bright red-orange, midnight blue, and black
- Fan brush (medium)
- Detail liner brush (long bristles)
- Stiff bristle toothbrush
- Palette or small mixing cups
- Water container
- Damp sponge
- Lazy Susan or banding wheel (optional but helpful)
- Clear transparent glaze (optional, depending on finish desired)
Step 1: Preparation & Base Coat
-
Clean the bisque:
Start by wiping down your bisque-fired vase with a clean, slightly damp sponge. This removes any kiln dust or oils from handling that might resist the glaze application, ensuring a smooth, even bond. -
Mix the base glaze:
Stir your speckled cream glaze thoroughly. The speckling agents often settle at the bottom, so give it a vigorous mix to ensure those lovely little dots are distributed evenly throughout the jar. -
Apply the first coat:
Using a soft fan brush, apply a generous, even coat of the speckled cream glaze to the entire exterior of the vase. Use long, smooth strokes from the rim down to the foot. -
Glaze the interior:
Don’t forget the inside! Pour a small amount of glaze into the vase, roll it around to coat the interior walls, and pour out the excess. Wipe the rim clean if drips occur. -
Apply subsequent coats:
Allow the first coat to dry until it’s chalky to the touch. Apply a second and third coat, alternating the direction of your brush strokes (horizontal then vertical) to prevent visible brush marks. -
Check the speckle density:
Inspect the surface. If you want a denser speckled effect than the glaze naturally provides, you can flick a toothbrush loaded with slightly watered-down brown or black underglaze over the wet base glaze.
Pro Tip: Controlled Chaos
Use a piece of paper or cardboard to mask off areas of the vase while spattering. This keeps sections of the cream base clean and creates sharp, defined boundaries of negative space.
Step 2: Abstract Surface Design
-
Prepare the palette:
Pour small amounts of your red-orange, midnight blue, and black underglazes onto a palette. You want the consistency to be fluid but not watery—think heavy cream. -
Create the spatter effect:
Dip a stiff toothbrush into the black underglaze first. Hold it about 6 inches from the vase and run your thumb across the bristles to flick tiny specks onto the surface. Rotate the vase to get random coverage. -
Add larger dots:
Switch to a round brush. Dip it into the red-orange underglaze and gently tap the handle against your other hand over the vase to create larger, bolder droplets. I like to aim for clusters rather than perfect spacing. -
Controlled placement:
For specific large dots (like the prominent red ones seen in the example), use the tip of a round brush to manually place them. Vary the sizes for visual interest. -
Introduce the blue:
Repeat the spattering or dotting process with the midnight blue underglaze. Keep this color slightly more sparse than the others to act as an accent rather than the main feature. -
Paint dynamic lines:
Using a long-bristled liner brush loaded with black underglaze, paint thin, swift lines across the body of the vase. Let the brush skip across existing texture naturally; don’t try to make straight lines. -
Add colorful strokes:
Clean your liner brush and add one or two longer, sweeping strokes in blue or dark grey. These should intersect with the dots and spatter to create a sense of movement. -
Create directional energy:
Paint a few short, dashed lines in red-orange. Angle them diagonally to guide the viewer’s eye up and around the curve of the vase neck. -
Review the composition:
Step back and look at the vase from a distance. If a spot looks too empty, add a small flick of color. Remember, negative space is important, so don’t overfill it.
Troubleshooting: Runny Dots
If your large color dots are running or dripping, your underglaze is too thin or applied too heavily. Dab excess moisture away with the corner of a dry sponge or paper towel immediately.
Step 3: Firing
-
Final drying:
Let the vase dry completely overnight. The underglaze and base glaze need to be bone dry before entering the kiln to prevent steam explosions or glaze crawling. -
Clear coat (optional):
If your speckled base glaze is matte and you want a glossy finish, apply a thin layer of clear transparent glaze over everything now. If your base is already glossy, skip this step. -
High fire:
Load the vase into the kiln and fire to the temperature recommended by your clay and glaze manufacturer (typically Cone 5 or 6 for stoneware). Allow the kiln to cool fully before opening.
Now you have a stunning, gallery-worthy vase ready to hold your favorite dried botanicals
Terrazzo Clay Inlays
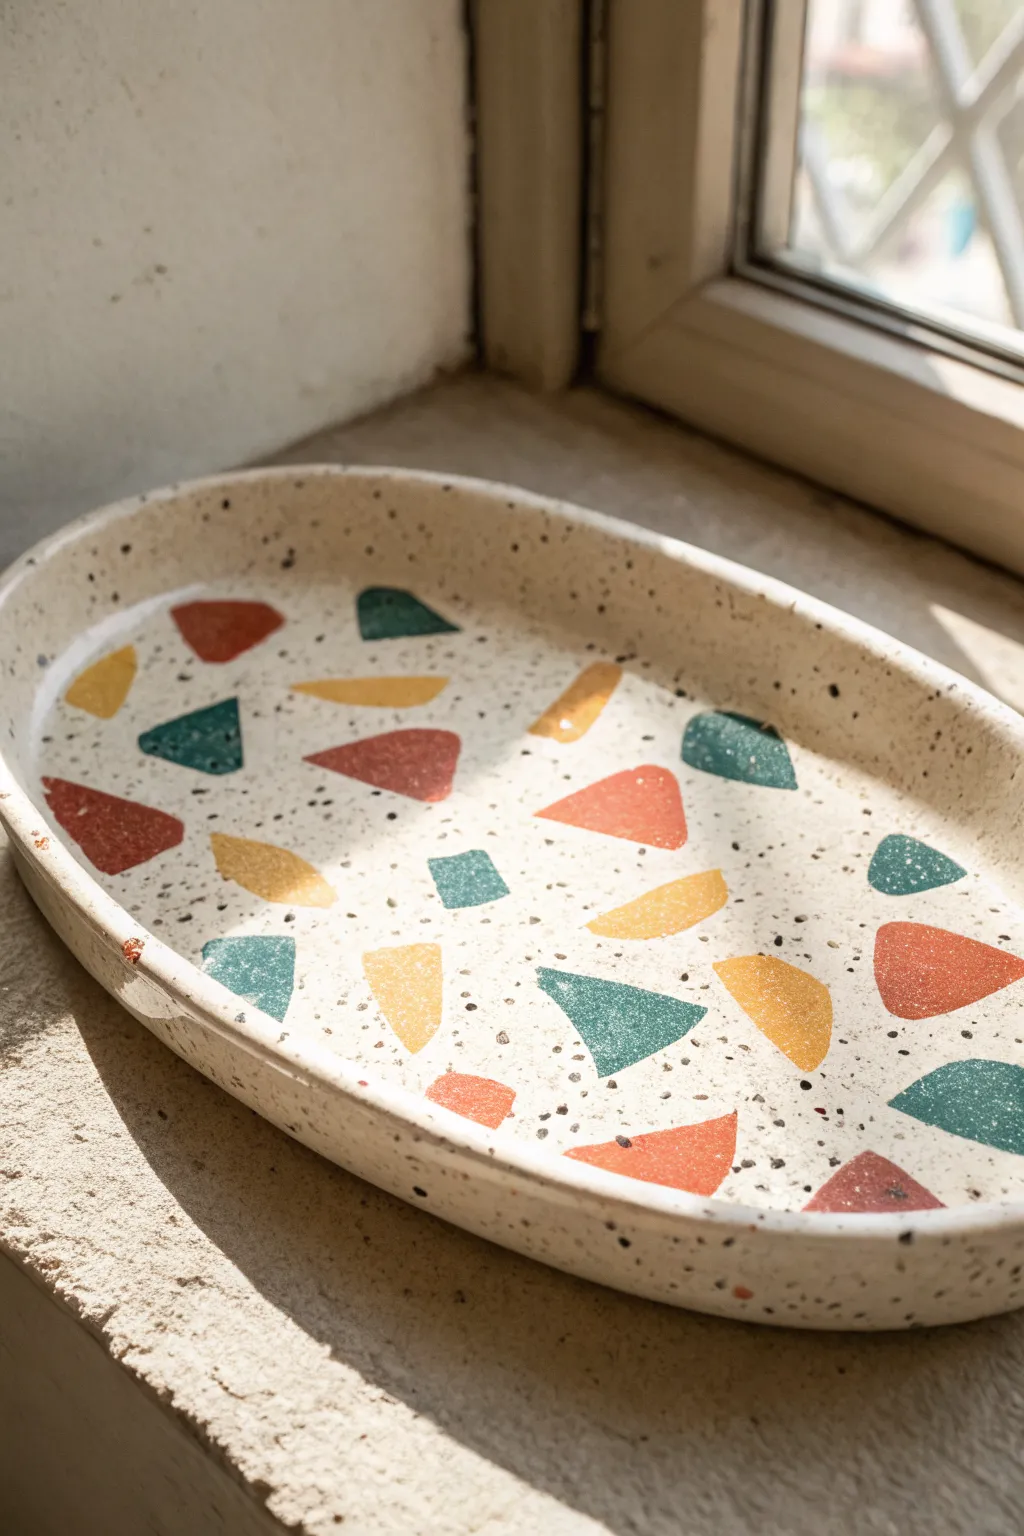
This trendy, oval catch-all tray features a playful terrazzo effect created with inlaid clay rather than paint. The matte, speckled cream base highlights the geometric pops of teal, mustard, and rust, giving it a modern yet handcrafted feel.
Step-by-Step Guide
Materials
- White or cream polymer clay (approx. 2oz)
- Speckled granite effect polymer clay (or black pepper for DIY speckles)
- Teal polymer clay
- Mustard yellow polymer clay
- Terracotta or rust polymer clay
- Acrylic roller or pasta machine
- Oval cutter or paper template and craft knife
- Sandpaper (grits from 400 to 1000)
- Small rolling pin or jar
- Matte varnish (optional)
Step 1: Prepping the Clay Colors
-
Condition the base clay:
Start by thoroughly conditioning your white or cream clay until it is soft and pliable. If you are using pre-mixed granite effect clay, mix it in now. If you want a DIY speckle, knead in a tiny pinch of cracked black pepper or black embossing powder until evenly distributed. -
Create the color palette:
Condition small amounts of the teal, mustard, and rust clays separately. Roll each color out into a thin sheet, approximately 1-2mm thick. These will become your terrazzo chips. -
Cut the shapes:
Using a craft knife, cut the colored sheets into small, irregular geometric shapes—think triangles, trapezoies, and uneven shards. Vary the sizes slightly, but keep them generally small enough to fit many on the tray.
Smudged Colors?
If your colored shapes look ‘dragged’ or smeary after rolling, your clay might be too soft. Pop the slab in the fridge for 10 minutes before the final roll-out to firm it up.
Step 2: Building the Terrazzo Slab
-
Roll the base slab:
Roll out your speckled base clay into a thick, even slab, roughly 4-5mm thick. Ensure the surface is smooth and free of air bubbles. -
Apply the chips:
Gently pick up your colored chips and place them onto the base slab in a random, pleasing pattern. I like to leave plenty of negative space between them to let the speckled base showing through. -
Embed the terrazzo:
Once you are happy with the arrangement, use your acrylic roller to firmly roll over the entire slab. Roll in multiple directions to ensure the colored chips are pressed completely flat and flush with the base clay surface. -
Check for smoothness:
Run your finger over the surface; if you can feel the edges of the colorful shapes, roll perfectly flat again. The surface should be seamless.
Level Up: Stone Texture
For a hyper-realistic stone look, mix translucent clay into your base color (1:1 ratio). When sanded later, this creates a convincing depth that mimics real polished terrazzo.
Step 3: Shaping and Firing
-
Cut the oval:
Place your oval template or cutter onto the terrazzo slab. Cut cleanly around the shape. Save the excess terrazzo scraps—they can be mashed together for unique beads later. -
Create the lip:
To form the tray shape, you need to lift the edges. You can gently curve the clay upwards with your fingers, pinching lightly to create a small vertical rim around the perimeter. -
Refine the form:
Smoothing the rim is crucial. Use a little cornstarch on your finger to buff out any fingerprints or harsh angles on the upturned edge so it looks organic but intentional. -
Bake the piece:
Place the tray on a ceramic tile or a baking sheet lined with parchment paper. Bake according to your polymer clay manufacturer’s instructions (usually 275°F/130°C for 15-30 minutes). -
Cool down:
Allow the tray to cool completely in the oven with the door slightly ajar. This helps prevent thermal shock and brittleness.
Step 4: Finishing Touches
-
Initial sanding:
Once cool, wet sand the piece starting with 400 grit sandpaper. This step is magic—it removes a thin layer of clay to reveal the crispest lines of your terrazzo pattern. -
Refining the finish:
Move up to 600, 800, and finally 1000 grit sandpaper. Sand under slow running water to keep dust down and prevent scratching. The surface should feel silky smooth. -
Buff and seal:
Dry the tray thoroughly. You can vigorously buff it with a denim cloth for a natural sheen, or apply a very thin layer of matte varnish if you want extra protection against stains.
Now you have a chic, custom tray perfect for holding jewelry or keys.

TRACK YOUR CERAMIC JOURNEY
Capture glaze tests, firing details, and creative progress—all in one simple printable. Make your projects easier to repeat and improve.
Nerikomi Swirl Slabs
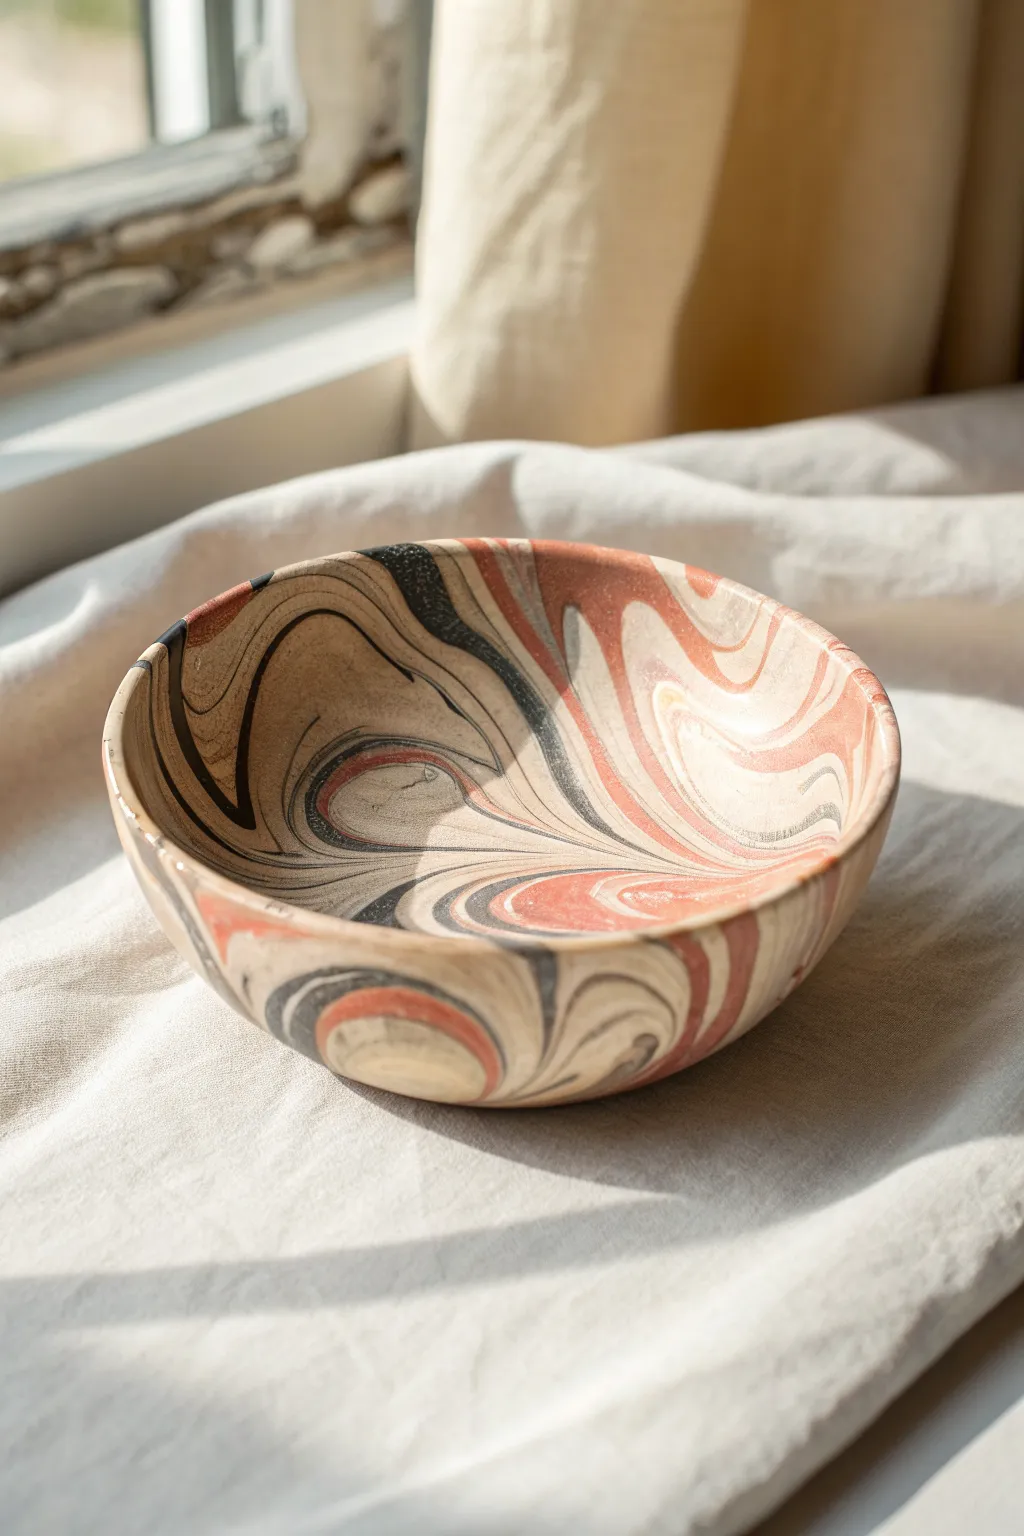
Capture the organic beauty of sedimentary rock with this nerikomi-style swirl bowl. By laminating folded layers of stained clay, you’ll create a stunning, one-of-a-kind pattern that features warm terracotta, dramatic charcoal, and soft sandy beige.
How-To Guide
Materials
- White or light buff stoneware clay
- Mason stains (Red/Orange, Black, Yellow/Ochre)
- Wire cutter
- Rolling pin
- Canvas board or slab mat
- Rib tool (metal or rubber)
- Hump mold (or a round bowl to use as a mold)
- Sponge
- Clear glaze
Step 1: Coloring the Clay
-
Divide your clay:
Cut your main clay block into four unequal portions. You will need a large amount of the plain base clay (about 40%), a medium amount for the terracotta color (30%), and smaller amounts for the black (20%) and darker beige (10%). -
Wedging in pigment:
Create a well in the center of your clay balls. Add the dry Mason stain powder—wear a dust mask for this part. Wedge the color thoroughly into each ball until the tone is uniform and streak-free. The goal is a deep charcoal, a warm terracotta, and a subtle sandy beige.
Clean Lines
Wipe your wire cutter clean after every single slice through the block. Residue on the wire can smear colors across the face of your pattern, muddying the design.
Step 2: Creating the Nerikomi Block
-
Flatten the layers:
Using the heal of your hand or a rolling pin, flatten each colored ball into a thick pancake. They don’t need to be perfectly round or uniform in thickness; variation adds interest. -
Stack the colors:
Begin stacking your pancakes. A good order for this look is the plain base, followed by terracotta, then the thin black layer, and finally the beige. Repeat this stacking order until all clay is used. -
Compress the stack:
Press the tall stack down firmly to remove air pockets between the layers. You can slam it gently onto your work surface a few times to help the layers adhere. -
Slice and restless:
Using your wire cutter, slice the stack vertically in half. Take one half, flip it, and place it on top of the other half. This increases the layer count and complexity. -
Slight marbling:
Gently wedge the stack just two or three times. Do not over-wedge, or the colors will turn to mud. You want to distort the straight lines into curves without blending the colors together.
Step 3: Forming the Slab
-
Roll the main slab:
Place your marbled clay block on the canvas. Roll it out into a slab about 1/4 inch thick. As you roll, the internal pattern will stretch and reveal itself on the surface. -
Smooth the surface:
Take your rubber rib tool and firmly compress both sides of the slab. This aligns the clay particles to prevent cracking and drags a tiny bit of the clay across the surface, softening the transitions between colors. -
Selecting the section:
Look at your large slab and identify the area with the most pleasing swirl composition. Place your template or bowl rim upside down over this area and cut out a circle, leaving about an inch of extra margin.
Double-Sided Design
After rolling the initial slab, try shaving off thin slices of the surface with a sharp blade or wire tool. This reveals the undisturbed pattern hiding just beneath the drag of the rolling pin.
Step 4: Shaping and Finishing
-
Draping the mold:
I prefer to use a plaster hump mold for this stage. Gently drape your clay circle over the mold. Gravity will initiate the curve, but you’ll need to press it down gently to conform to the shape. -
Refining the rim:
Once draped, use a needle tool or knife to trim the excess clay at the bottom (which will be the rim of the bowl) to get a level edge. -
Smoothing the edge:
Run a damp chamois or sponge over the cut rim to round it off. A sharp edge is prone to chipping later. -
Slow drying:
Cover the bowl loosely with plastic. Because colored clays can shrink at slightly different rates, drying slowly is crucial to prevent cracks at the seams between colors. -
Bisque fire:
Once bone dry, fire the piece to bisque temperature (usually cone 04). -
Glazing:
Dip the bowl in a transparent gloss glaze. The clear coat will make the colors pop and darken them slightly to the rich hues seen in the finished piece. -
Final firing:
Fire to the maturation temperature of your clay body (likely cone 6 or 10).
Enjoy using your new bowl for fruit or serving, letting the natural patterns spark conversation
Carved Sgraffito Scribbles
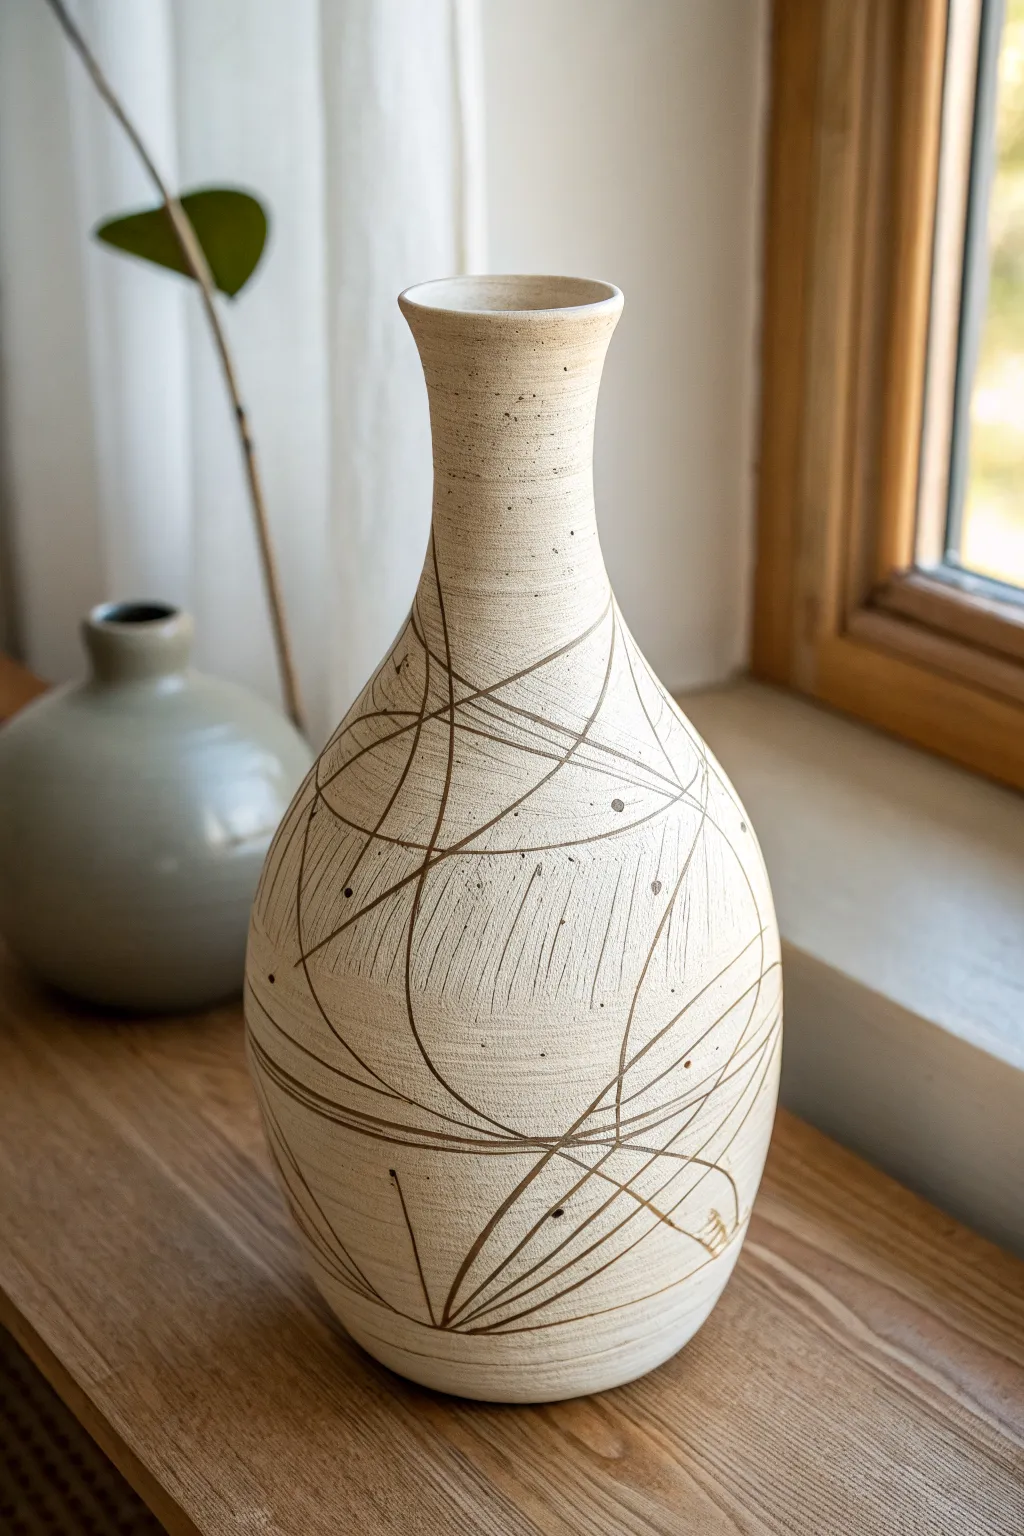
This elegant vase combines a modern, slender silhouette with organic, scratch-style sgraffito lines. The raw, speckled clay body provides a beautiful canvas for the energetic, sweeping marks that give the piece its unique character.
Step-by-Step Guide
Materials
- Stoneware clay (speckled or oatmeal)
- Pottery wheel
- Throwing tools (ribs, sponge, wire cutter)
- Dark brown or black underglaze
- Sgraffito tool or sharp needle tool
- Soft fan brush
- Clear matte glaze
- Kiln
Step 1: Throwing and Shaping
-
Center the Clay:
Begin with about 3-4 lbs of well-wedged speckled stoneware clay. Center it firmly on the wheel head, ensuring it feels stable. -
Open and Pull:
Open the clay and establish a flat floor. Begin pulling the walls upward into a cylinder, aiming for height rather than width. -
Belly the Form:
Using inside pressure, gently push the lower half of the cylinder outward to create a rounded belly. Keep the walls even to prevent collapsing. -
Collar the Neck:
Slowly collar the top half inward to create a long, graceful neck. I find it helps to do this in multiple small passes to avoid twisting the clay. -
Refine the Rim:
Flare the rim slightly outward for a delicate finish. Smooth the entire surface with a metal or silicone rib to remove throwing rings and create a sleek canvas.
Line Variance Pro Tip
Don’t aim for perfect uniform width. Varying the pressure on your carving tool creates lines that taper and swell, making the ‘scribbles’ feel dynamic and hand-drawn rather than mechanical.
Step 2: Applying Design
-
Leather Hard Stage:
Allow the vase to dry to a firm leather-hard stage. The surface needs to be firm enough to carve without burring, but soft enough to cut cleanly. -
Apply Underglaze:
Using a soft fan brush, apply a single, even coat of dark brown underglaze to the areas where you plan to carve. Alternatively, you can inlay the lines later, but for this specific look, lightly brushing thin bands of underglaze where lines will intersect creates a nice depth. -
Plan the Flow:
Visualize sweeping, intersecting arcs. The design relies on energetic movement, so avoid stiff geometric patterns. -
Carve Main Lines:
Take your sgraffito or needle tool and carve long, continuous lines that wrap around the curvature of the vase. Vary your pressure slightly to create line weight interest. -
Add Cross-Hatching:
Create visual tension by sketching thinner, faster lines that intersect the main curves. Let some lines originate from the base and shoot upwards. -
Inlay Technique (Alternative):
If you didn’t apply underglaze first, carve the lines into the bare clay now. Paint underglaze over the carvings, let it dry slightly, then wipe the surface with a damp sponge to leave color only in the grooves. -
Add Speckled Details:
Use the tip of your tool to poke small, random dots or ‘splatter’ marks near the intersections of your lines to mimic natural imperfections. -
Clean Up:
Gently brush away any clay crumbs or burrs from your carving using a dry soft brush. Don’t use water here or you might smudge the lines.
Wash Effect Level Up
Before carving, sponge a very watered-down iron oxide wash over the leather-hard clay. This enhances the natural speckles and gives the bare clay a warmer, toasted almond tone.
Step 3: Firing and Finishing
-
Bisque Fire:
Once bone dry, load the piece into the kiln for a bisque fire (usually cone 04 or 06). -
Glazing:
Wipe the bisqued piece with a damp sponge. Dip or spray the entire vase with a clear matte glaze. A glossy glaze can work, but matte tends to highlight the stone-like texture better. -
Wipe the Foot:
Clean the bottom of the vase thoroughly to ensure no glaze touches the kiln shelf. -
Glaze Fire:
Fire the vase to the final temperature required by your clay body (typically cone 5/6 or cone 10). -
Final Sanding:
After the kiln cools, check the foot for any roughness and sand it smooth with diamond sandpaper if necessary.
Place your finished vase near a window where natural light can emphasize the textural contrast of your carving
Mishima Line Inlay Maps
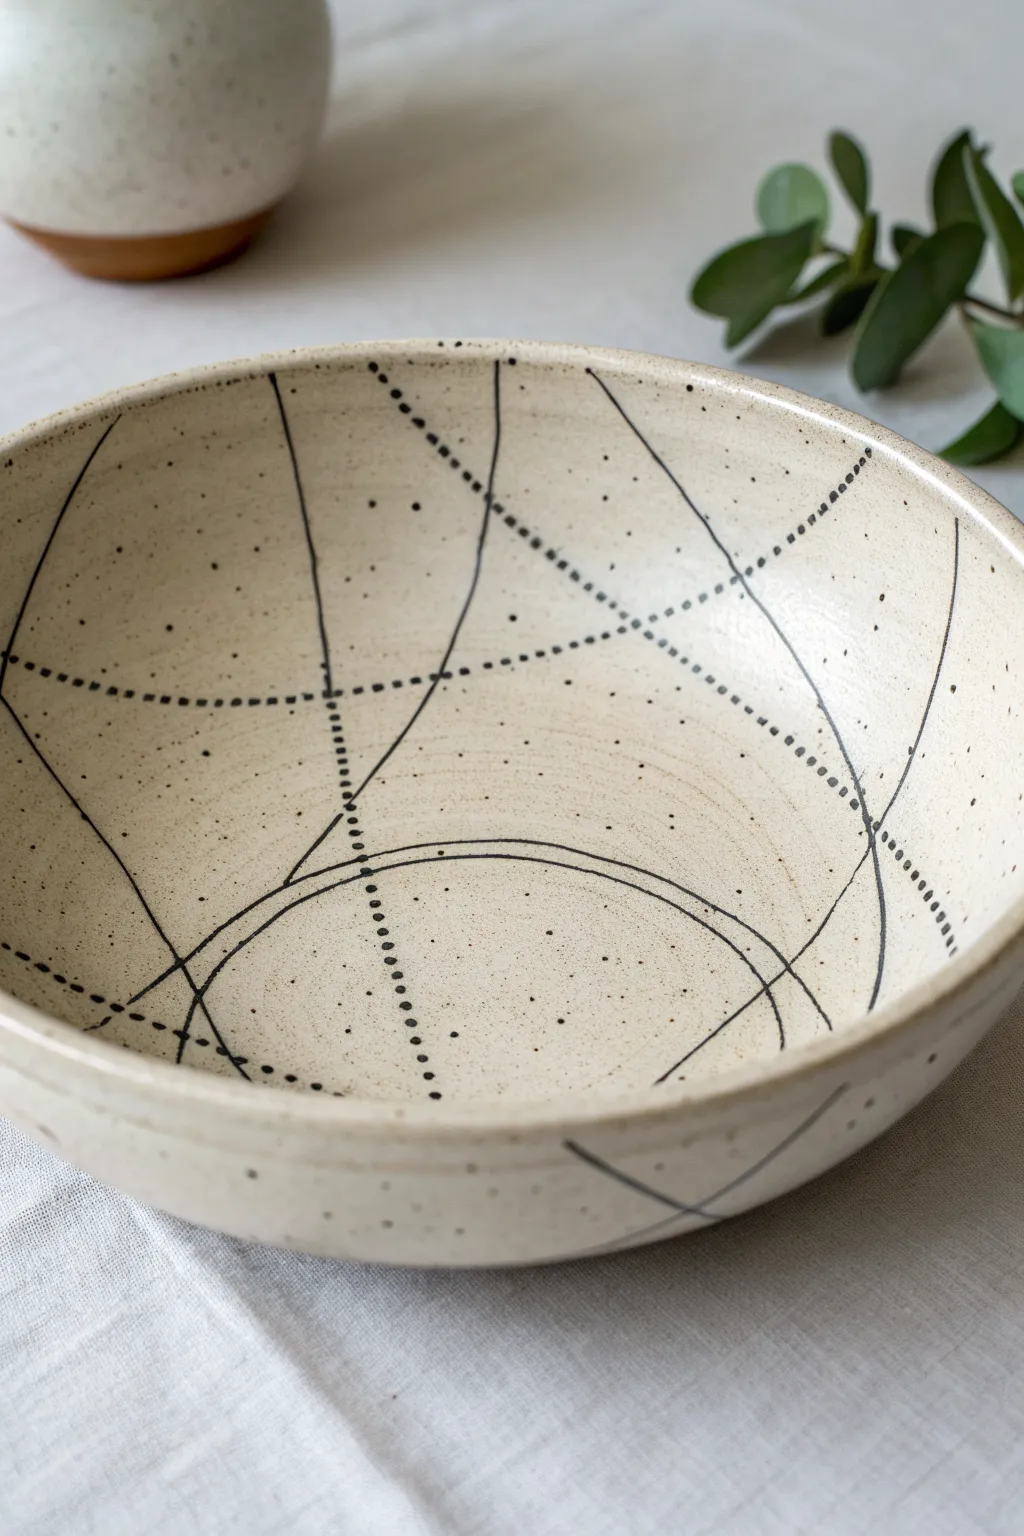
This project transforms a simple stoneware bowl into an abstract cartographic masterpiece using the Mishima inlay technique. By carving delicate lines and filling them with underglaze, you create a striking contrast that looks like star charts or topographic maps etched into stone.
Step-by-Step Tutorial
Materials
- Leather-hard stoneware bowl
- Carving needle tool or X-Acto knife
- Black underglaze or slip
- Stiff paintbrush
- Metal rib scraper
- Clean sponge
- Clear or speckled semi-matte glaze
- Wax resist (optional)
- Damp towels
Step 1: Forming and Design
-
Prepare the Vessel:
Begin with a wheel-thrown or hand-built bowl that has dried to a firm leather-hard stage. The clay needs to be stiff enough to hold its shape while carving but soft enough to cut cleanly without chipping. -
Plan the Pathways:
Use a dull pencil to lightly sketch your ‘map’ onto the surface. Visualize intersecting orbits or flight paths; combine long, sweeping curves with shorter straight segments to create visual tension. -
Carve Solid Lines:
Using a sharp needle tool or a fine loop tool, carve the solid lines first. Apply steady, moderate pressure to create a groove about 1-2mm deep. Keep the shavings clean and brush them away immediately. -
Create Dotted Trajectories:
For the dotted lines that intersect the solid curves, use the needle tool to press vertical holes rather than dragging a line. Space them evenly to mimic the look of a trail or dotted pathway on a map. -
Clean the Burrs:
Gently rub a finger or a very slightly damp sponge over the raised clay burrs created by carving. You want the surface smooth, but be careful not to close up the channels you just created.
Step 2: Inlay Application
-
Apply Wax (Optional):
I sometimes brush a thin layer of wax resist over the surface before applying color. This makes clean-up significantly easier, though it’s not strictly necessary if you are careful with scraping. -
Fill the Grooves:
Generously paint black underglaze or slip over the carved lines and dots. Don’t worry about staying in the lines; you want to ensure the incised areas are completely filled with pigment. -
Let it Set:
Allow the underglaze to dry until it is leather hard. If you scrape too soon while the slip is wet, you’ll smear it out of the lines; if you wait until bone dry, you might chip the pot. -
The Reveal (Scraping):
Take a metal rib scraper and gently scrape the surface of the bowl. This removes the excess black underglaze from the high points, leaving the color trapped only inside the carved lines. -
Final Clean-up:
Wipe the surface with a clean, damp sponge to remove any remaining haze of black pigment. Rinse your sponge frequently to avoid redistributing the black across the light clay body.
Smudged Lines?
If scraping creates a smeared mess, your underglaze is too wet. Wait 15 minutes. If the clay is too dry to scrape, use a barely damp green scouring pad instead of a metal rib.
Step 3: Finishing
-
Bisque Fire:
Once the bowl is bone dry, load it into the kiln for a bisque firing (usually Cone 04 or 06). This sets the shape and the underglaze inlay permanently. -
Glaze Application:
Dip or brush a clear or translucent semi-matte glaze over the entire piece. A glaze with subtle speckling works beautifully to enhance the stone-like aesthetic without obscuring the black lines. -
Glaze Fire:
Fire the bowl to the maturity temperature of your clay and glaze (likely Cone 6 or 10). The heat will fuse the glaze, protecting the inlay and giving the surface a smooth, durable finish.
Add Depth
Try inlaying two different colored slips (like navy and black) on intersecting lines to create complex visual layers.
Your finished bowl will hold a permanent, mysterious map that invites touch and contemplation
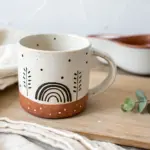
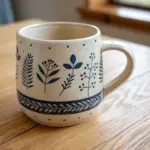
Raised Slip Trail Doodles
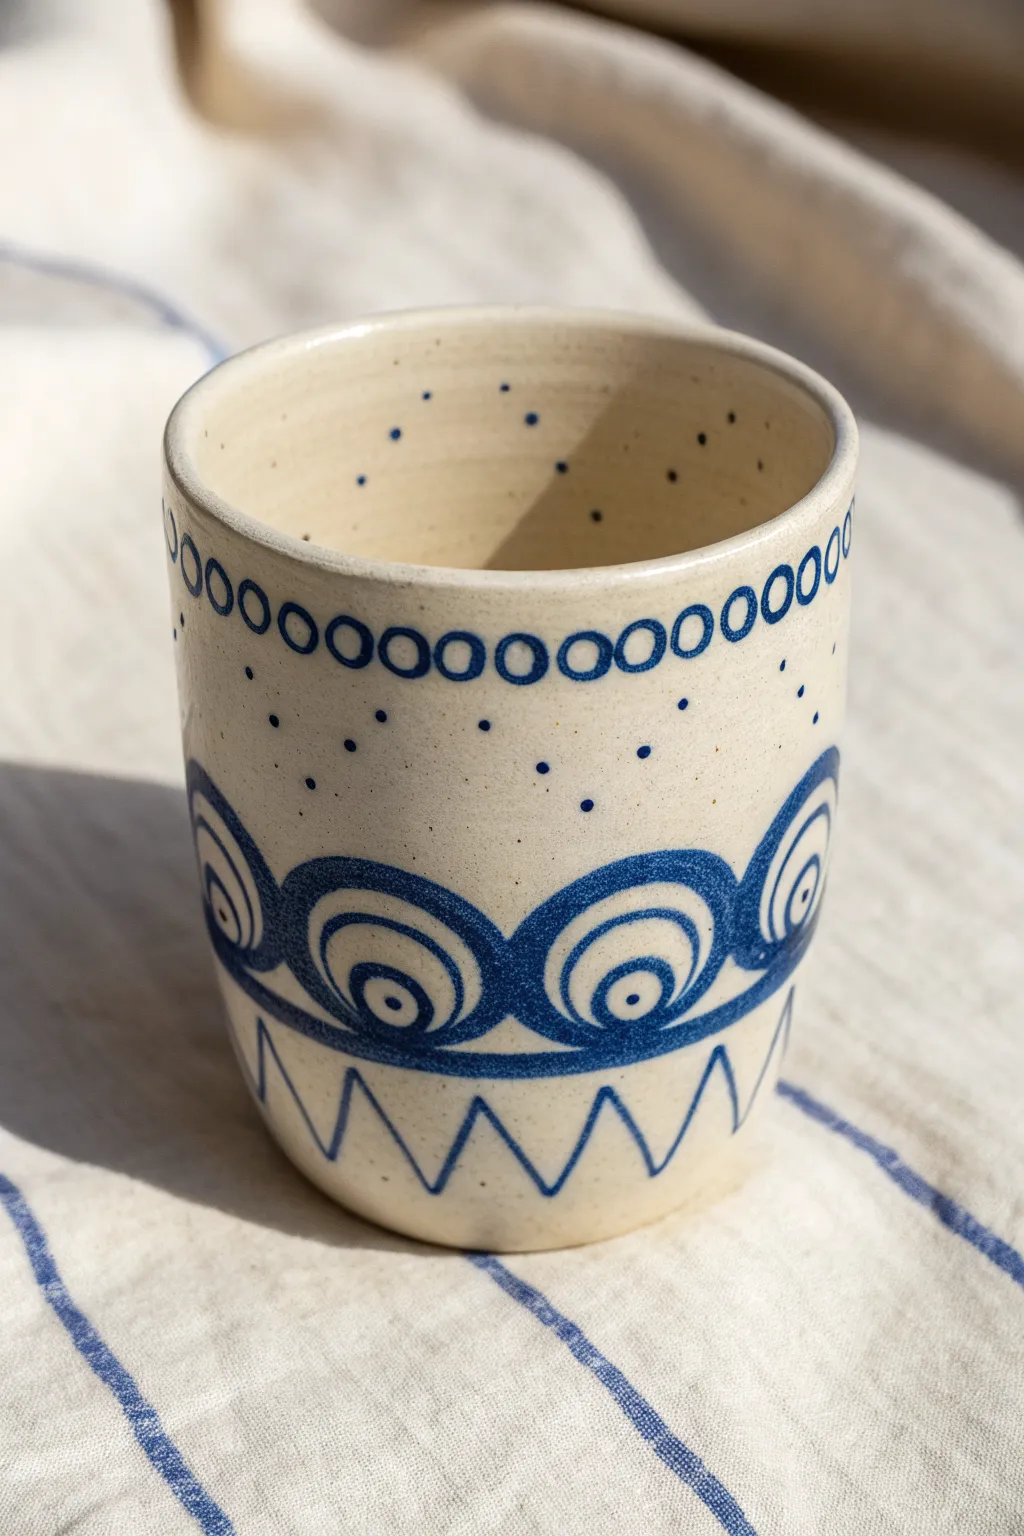
Embrace the texture of raised slip trailing with this charming, folk-inspired ceramic cup. The design features a playful rhythm of circles, waves, and zig-zags in classic cobalt blue against a creamy speckle clay body.
Step-by-Step
Materials
- Bisque-fired ceramic cup (wheel-thrown or hand-built)
- Creamy speckled stoneware glaze (translucent or semi-opaque)
- Cobalt blue underglaze
- Slip trailer bottle with fines metal tip (18-gauge or similar)
- Soft fan brush for glazing
- Clean sponge
- Kiln access
Step 1: Preparation & Planning
-
Clean surface:
Begin by wiping down your bisque-fired cup with a slightly damp sponge to remove any dust or oils from handling. This ensures your underglaze and slip will adhere perfectly. -
Prepare the slip:
Mix your cobalt blue underglaze. If it’s too thin, thicken it slightly with a small amount of slip base, or use a specific slip-trailing underglaze product. It should have the consistency of cake batter or thick yogurt. -
Load the trailer:
Fill your slip trailer bottle with the blue mixture. Tap the bottle firmly on the table to release any air bubbles, which can cause sputtering during application. -
Test flow:
Squeeze a test line onto a scrap piece of paper or clay. You want a smooth, raised line that holds its shape without spreading too much.
Steady Hands
Rest your pinky finger on the cup surface (on a dry spot) to stabilize your hand while trailing slip. This acts as a pivot point for smoother curves.
Step 2: Designing the Top Band
-
Mark the rim:
Using a pencil, lightly mark a guide line about a half-inch below the rim of the cup. Don’t worry, the graphite will burn off in the kiln. -
Draw circles:
Using the slip trailer, gently squeeze out a row of small, uniform circles resting on your pencil line. Keep your hand steady and the tip close to, but not touching, the surface. -
Connect the loops:
Ensure the circles are touching or nearly touching to create a continuous chain-link effect around the top circumference. -
Let it set:
Allow this top band to dry until it loses its wet sheen before your hand accidentally grazes it while working on the lower sections.
Level Up: Wax Resist
Apply wax resist over your blue slip doodles before dipping into the glaze. This leaves the texture raw and matte against the glossy pot.
Step 3: Creating the Wave Pattern
-
Outline the waves:
Move to the bottom third of the cup. Draw a series of large, connected arches (rainbow shapes) to form a scalloped wave pattern. -
Thicken the line:
Go over the top edge of these arches a second time or squeeze slightly harder to create a bold, thick upper boundary for the wave. -
Add inner details:
Inside each large arch, trail a smaller concentric arch. Then, place a solid dot or a tiny circle right in the center of that inner arch to look like an eye. -
Fill the space:
I like to carefully fill in the space between the outer and inner arches with a wash of the blue underglaze using a small brush, rather than just trailing, to create solid blocks of color.
Step 4: Zig-Zags & Accents
-
Bottom border:
Draw a straight horizontal line connecting the bottom corners of your wave pattern, effectively grounding the design. -
Draw zig-zags:
Below that straight line, near the foot of the cup, trail a simple zig-zag or chevron pattern that mimics grass or mountains. -
Add floating dots:
Look at the negative space between the top circle band and the main wave section. Randomly disperse small dots of slip in this area to add texture and whimsy. -
Interior details:
If you are feeling adventurous, add a few small dots on the inside of the rim for a hidden surprise, just like in the inspiration piece.
Step 5: Glazing & Firing
-
Bisque dampening:
Wait for all underglaze details to be bone dry. Then, gently sponge the piece again if needed, being extremely careful not to smear the raised slip. -
Apply clear glaze:
Dip or brush your creamy speckled glaze over the entire cup. Because the slip design is raised, the glaze will naturally break over the texture, highlighting your line work. -
Check thickness:
Ensure the glaze isn’t too thick over the detailed areas, as it might obscure the fine lines. Wipe back slightly with a sponge if it looks gloppy. -
Fire:
Load the kiln and fire to the temperature appropriate for your clay and glaze combination (likely Cone 5 or 6 for stoneware).
Enjoy your morning coffee knowing your hands shaped every beautiful imperfection
Textured Patchwork Tiles
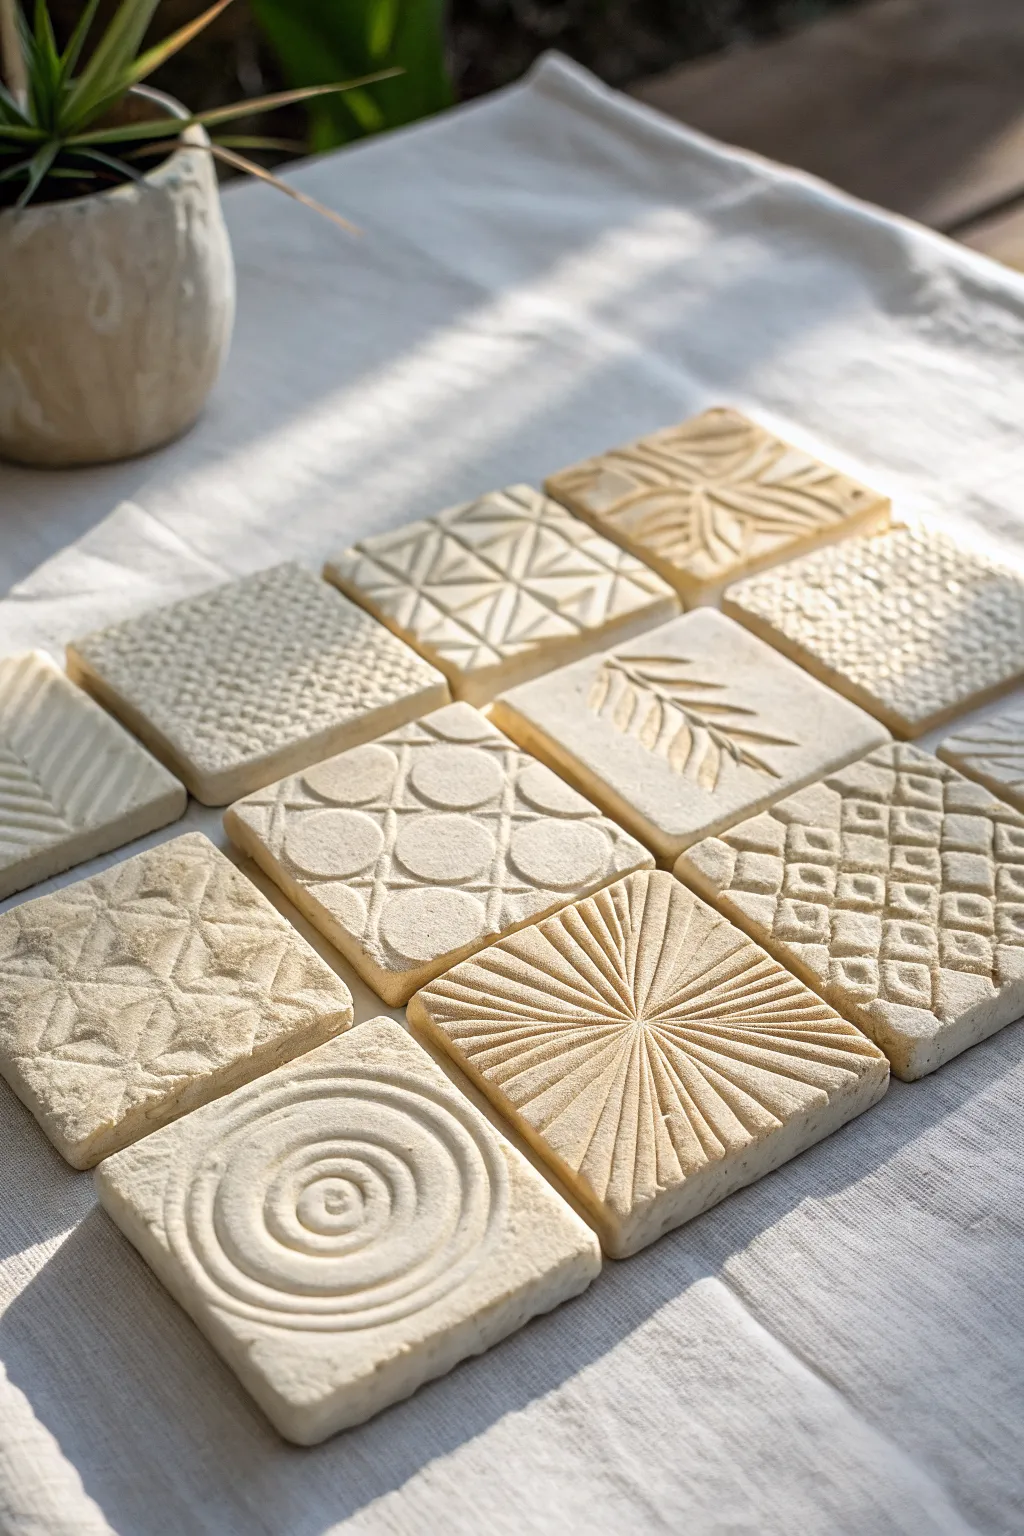
Embrace the tactile beauty of raw clay with this collection of carved and stamped relief tiles. The mix of geometric patterns and organic motifs creates a serene, monochromatic patchwork that highlights shadow and light.
Detailed Instructions
Materials
- Light-colored stoneware clay (buff or cream)
- Square cookie cutter (approx. 4×4 inches) or metal ruler and knife
- Rolling pin
- Canvas board or cloth (to roll clay on)
- Wooden guide strips (approx. 1/4 inch thick)
- Assorted texture tools (lace, burlap, leaves, rubber stamps)
- Clay carving tools (loop tool, needle tool)
- Sponge
- Clear matte glaze (optional)
- Kiln access
Step 1: Preparation & Cutting
-
Wedge the clay:
Begin by thoroughly wedging your stoneware clay to remove any air bubbles and ensure an even consistency, which is crucial for flat tiles. -
Set up guides:
Place your wooden guide strips on either side of your working surface. These will ensure your entire slab is a uniform thickness. -
Roll the slab:
Roll the clay out onto the canvas cloth until the rolling pin rests on the guide strips. Aim for a thickness of about 1/4 to 3/8 inch. -
Compress the surface:
Take a rubber rib or a damp sponge and gently smooth over the surface of the slab. This aligns the clay particles and helps prevent warping later. -
Cut the squares:
Using your square cutter or a ruler and knife, cut out twelve uniform squares. If using a knife, keep the blade perpendicular to the table for straight edges.
Step 2: Texturing Techniques
-
Smooth the edges:
Before texturing, gently tap the edges of each square and smooth any sharp corners with your finger so they are neat. -
Create the sunray pattern:
For the radiate tile, use a needle tool or knife to draw a center point. Press a straight edge into the clay repeatedly, radiating outward from the center to the edges. -
Carve the concentric spiral:
On another tile, use a small loop tool to carve a continuous spiral starting from the center. Vary the pressure slightly to give the line an organic feel. -
Emboss the leaf motif:
Ideally, use a real fern or a botanically accurate stamp. Press it firmly into the center of a diagonal on the tile, then carefully peel it back to reveal the veins. -
Imprint geometric grids:
Use a specialized clay roller or a patterned block to press a diamond or grid texture into several tiles. Apply even pressure so the depth is consistent across the square. -
Detail the ‘knit’ texture:
For the highly textured, bumpy tile, try pressing a piece of coarse fabric or a meat tenderizer tool gently across the surface. -
Carve geometric shapes:
For the triangle and circle patterns, I find it easiest to lightly sketch the design with a needle tool first, then go back and carve out the negative negative space to raise the pattern.
Warp-Free Drying
To keep tiles perfectly flat, sandwich them between two pieces of drywall board while they dry. The board absorbs moisture evenly from both sides.
Step 3: Finishing & Firing
-
Slow drying:
Place the finished tiles on a drywall board or under plastic. Tiles love to warp, so dry them very slowly over several days, flipping them occasionally. -
Bisque fire:
Once bone dry, load them into the kiln for a bisque firing (usually cone 04 or 06). -
Wash and clean:
After firing, wipe the tiles with a damp sponge to remove any dust that settled in the deep crevices. -
Glaze application (optional):
For the natural look in the photo, leave the clay bare or apply a very thin matte clear glaze. Avoid thick glazes that will fill in your beautiful textures. -
Final wipe back:
If glazing, wipe the high points of the texture with a sponge. This leaves glaze in the recesses to accentuate the pattern depth. -
Glaze fire:
Fire the tiles a final time according to your clay body’s specifications (likely cone 5 or 6 for stoneware).
Wall Hanging Idea
Before drying, use a straw to poke holes in the top corners. After firing, thread them together with driftwood and twine for a rustic mobile.
Arrange your finished tiles on a table or mount them in a frame to enjoy the interplay of light across your handmade textures
Rough-and-Glossy Contrast Vessels
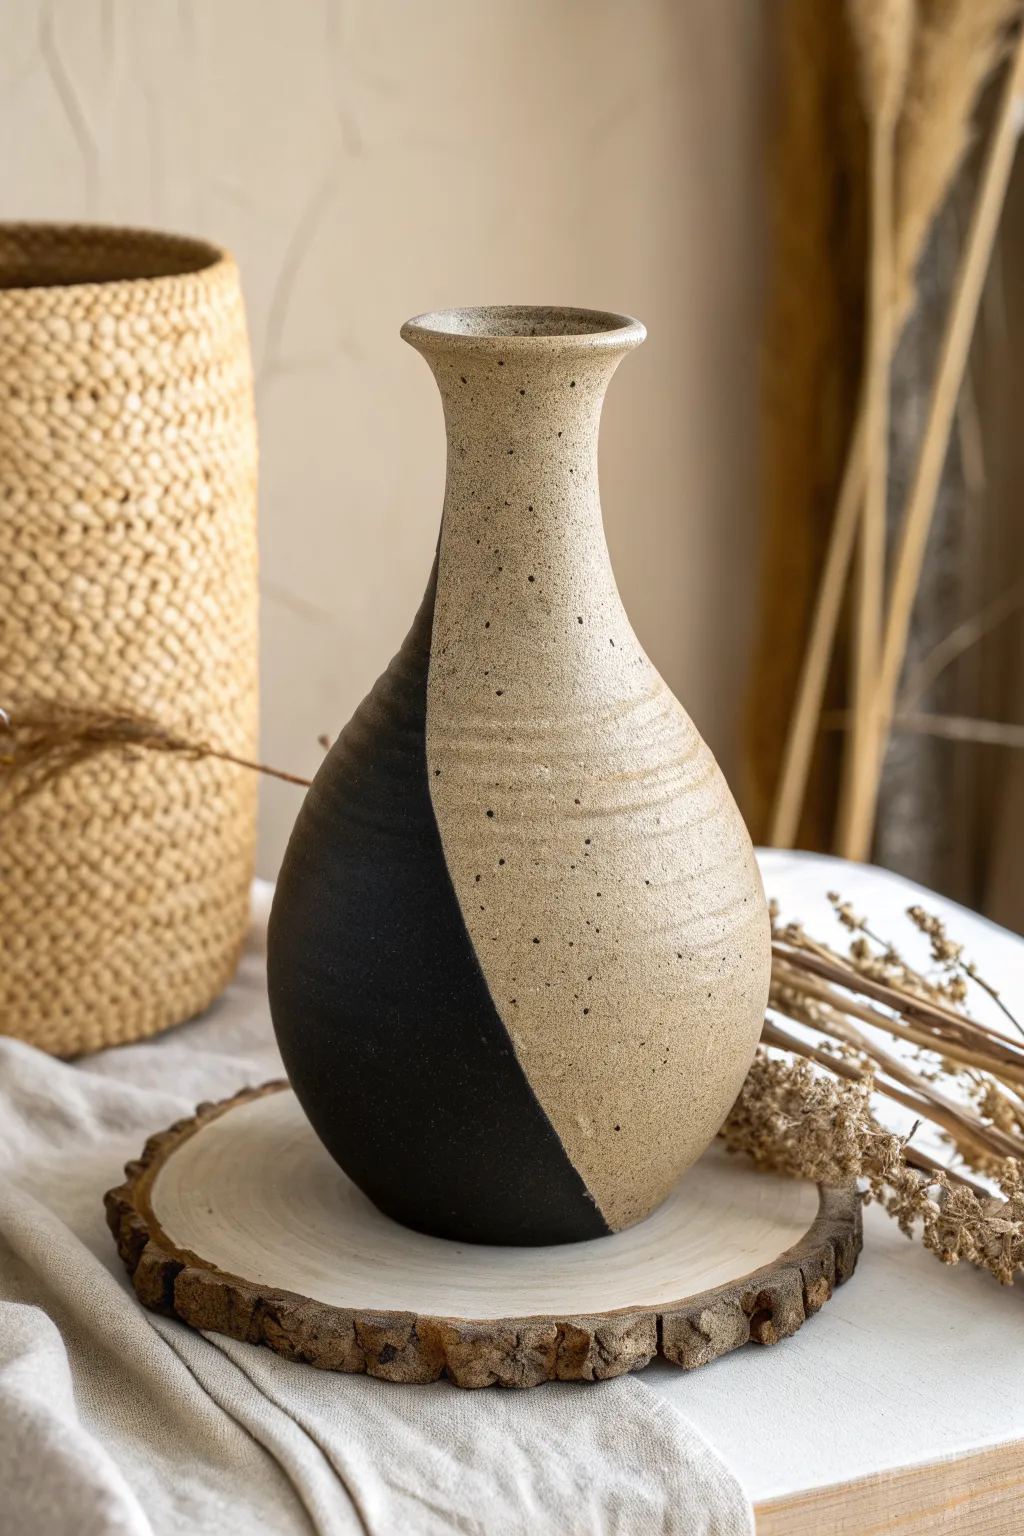
Embrace the beauty of modern contrast with this stunning hand-thrown vase featuring a bold diagonal split. The design pairs a raw, speckled clay body with a smooth, matte black underglaze to create a striking tactical and visual experience.
How-To Guide
Materials
- Speckled stoneware clay (mid-fire)
- Pottery wheel
- Throwing tools (sponge, rib, wire cutter)
- Trimming tools
- Masking tape (flexible, 1/4 inch or similar)
- Matte black velvet underglaze
- Soft fan brush
- Clear matte glaze (optional, for interior)
- Small round brush (for touch-ups)
- Wax resist
Step 1: Forming the Vessel
-
Center and open:
Begin with about 2-3 lbs of well-wedged speckled stoneware clay. Center it firmly on the wheel head and open the clay, pulling the floor out to a medium width for a stable base. -
Pull the cylinder:
Slowly pull up the walls to form a tall cylinder. Keep a consistent thickness as you rise, ensuring the base is slightly heavier to support the narrow neck later. -
Shape the belly:
Using a rib or your fingertips inside the pot, gently push the clay outward near the bottom third to create a rounded belly shape. -
Collar the neck:
As you move upward, collar the clay inward significantly to form a long, slender neck. I find it helpful to keep the rim slightly thicker during this phase to prevent it from buckling. -
Flare the rim:
Finish the form by gently flaring the very top of the lip outward. Use a chamois to smooth the rim for a professional finish. -
Leave texture:
Instead of smoothing the exterior completely with a rib, allow your finger marks to remain as subtle spinal ridges, particularly on the belly, to enhance the organic feel. -
Wire off and dry:
Wire the pot off the wheel and let it dry to a firm leather-hard state.
Step 2: Trimming and Surface Design
-
Trim the foot:
Invert the vase onto a chuck or the wheel head and trim a neat foot ring. Clean up the bottom curve to ensure it transitions smoothly into the body. -
Bisque fire:
Allow the piece to dry completely (bone dry) and fire it to bisque temperature (usually cone 04). -
Clean surface:
Wipe the bisque-ware down with a damp sponge to remove any dust that might interfere with glaze adhesion. -
Glaze the interior:
Pour a clear matte glaze inside the vase, swirl to coat, and pour out the excess. Wipe any drips off the exterior immediately. -
Mask the design:
Using flexible masking tape, create a sharp, sweeping curve starting from near the neck and swooping down around the belly to the base. This divides the ‘raw’ area from the ‘black’ area. -
Seal the edge:
Run your fingernail or a tool firmly along the tape edge to ensure a tight seal so no underglaze bleeds underneath.
Clean Lines Tip
Apply a thin layer of clear wax resist over your tape line before painting the black underglaze. This creates an impenetrable barrier against bleeding.
Step 3: Applying Contrast
-
Apply black underglaze:
Using a soft fan brush, apply 2-3 even coats of matte black velvet underglaze to the section intended to be black. Let each coat dry to the touch before applying the next. -
Remove tape:
Carefully peel back the masking tape while the final coat is still slightly damp to get the crispest line possible. -
Clean up edges:
If there are any jagged spots, use a damp stiff brush or a specialized cleanup tool to gently tidy the line. -
Wax the exterior raw clay:
Apply wax resist over the raw speckled clay section if you are dipping the whole pot, or simply leave it unglazed if you are brush-glazing. The goal is to leave the sandy beige clay exposed. -
Final Fire:
Fire the vase to cone 5 or 6 (depending on your clay body). The raw clay will vitrify and show its speckles, while the black underglaze remains matte and velvety.
Texture Play
Instead of smooth black, scratch through the black underglaze with a needle tool (sgraffito) to reveal the speckled clay beneath for added detail.
Place your finished vase on a simple wooden trivet to heighten the natural aesthetic.
Asymmetrical Torn Rim Bowls
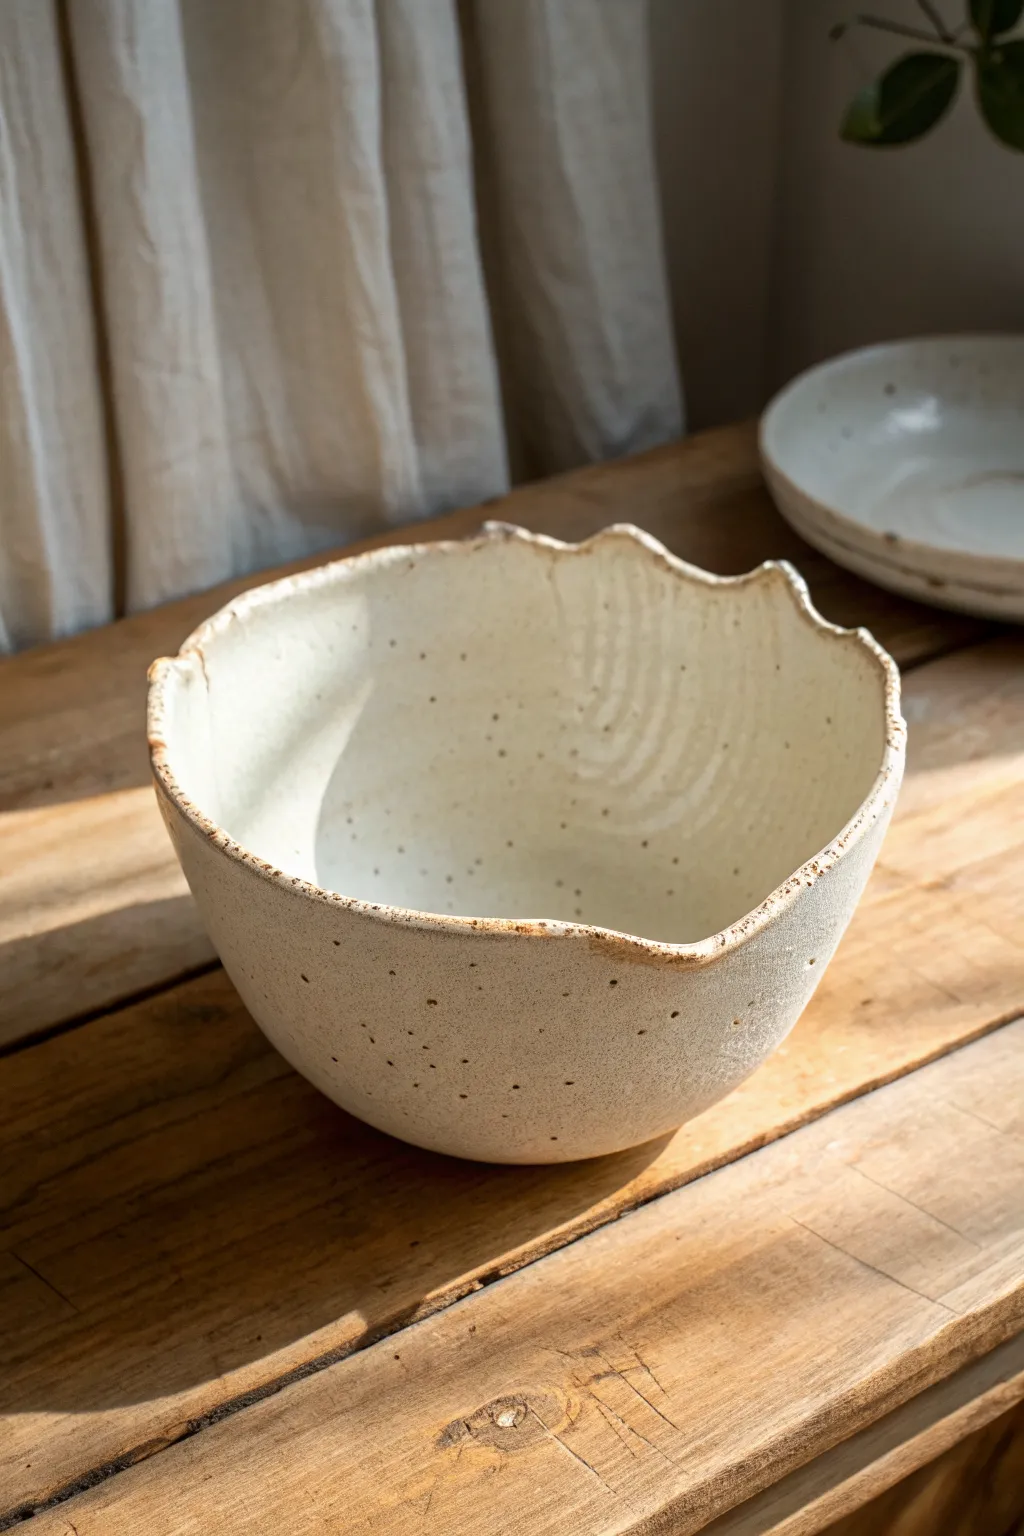
This project embraces the imperfect beauty of raw clay, featuring a creamy white glaze that highlights speckles and breaks over a deliberately jagged rim. The organic, wobbly shape feels tactile and grounded, perfect for adding a touch of rustic modernism to your table.
Step-by-Step
Materials
- Speckled stoneware clay (approx. 2-3 lbs)
- Pottery wheel (or banding wheel for hand molding)
- Potter’s needle tool
- Metal rib scraper
- Wooden throwing ribs
- Wire clay cutter
- Sponge
- Satin matte white glaze
- Kiln
Step 1: Throwing the Base Form
-
Prepare the clay:
Begin by thoroughly wedging your speckled stoneware clay to remove air bubbles and ensure a uniform consistency. Form it into a tight, smooth ball before placing it on the wheel head. -
Center and open:
Center the clay on your wheel using firm pressure. Once steady, open the clay down to the bat, leaving about a half-inch of thickness for the floor. -
Establish the floor:
Compress the floor of the pot by running your fingers or a flat tool from the center outward several times. This prevents S-cracks during drying. -
Pull the walls:
Slowly pull the walls upward to create a cylinder. Maintain a steady speed to ensure even thickness from bottom to top, aiming for slightly thicker walls than usual to support the altering process later. -
Shape the bowl:
Using a rib on the inside and gentle pressure on the outside, belly the cylinder out into a bowl shape. Don’t worry about the rim being perfect; the focus here is on the curve of the body.
Step 2: Creating the Torn Rim
-
Slow the wheel:
Bring the wheel to a complete stop. This next phase is entirely sculptural and done by hand without rotation. -
Alter the rim height:
Using a needle tool, cut a wavy, uneven line into the top 1-2 inches of the rim. Remove the excess clay to create a preliminary uneven profile. -
Tear and texture:
Now for the fun part: gently pinch and tear small sections of the cut rim. I prefer to pull the clay slightly upward and outward to create that raw, broken edge look shown in the photo. -
Softening the sharp bits:
Take a slightly damp sponge and very lightly pat the jagged edges. You don’t want to erase the texture, just soften any razor-sharp burrs that could cut a finger after firing. -
Refining the curve:
Before removing from the wheel, use your hands to gently push the walls slightly out of round if desired, enhancing the organic feel. -
Wire off and dry:
Run your wire cutter under the bowl to release it. Set it aside to dry slowly to a leather-hard state.
Uneven Drying Tip
Because the rim is irregular, it dries faster than the base. Cover the rim loosely with plastic while the base catches up to prevent warping.
Step 3: Trimming and Finishing
-
Trimming the foot:
Once leather hard, flip the bowl over and center it on the wheel. Trim excess weight from the base and carve out a defined foot ring to give the bowl visual lift. -
Smoothing the surface:
Use a smooth metal kidney or rubber rib to compress the exterior walls, smoothing out any unwanted throwing lines while keeping the texture near the rim. -
Bisque fire:
Allow the bowl to dry completely (bone dry) before loading it into the kiln for the bisque firing (usually Cone 04).
Troubleshooting Cracks
If small cracks appear at the low points of your torn rim during drying, compress that specific area with a damp finger immediately to re-bond the clay particles.
Step 4: Glazing
-
Wax the foot:
Apply a wax resist to the bottom foot ring and the underside of the bowl to prevent glaze from sticking to the kiln shelf. -
Wipe the rim:
This is crucial for the look: Apply a thin line of wax resist along the very top edge of the jagged rim, or plan to sponge it clean later. -
Apply the glaze:
Dip the bowl into a satin matte white glaze. Ensure an even coat inside and out. Hold it upside down for a few seconds to let excess drips fall off. -
Reveal the edge:
If you didn’t use wax, take a damp sponge and carefully wipe the glaze off the very high points of the jagged rim. This exposes the speckled clay body, creating that beautiful brown-to-white contrast. -
Final fire:
Load the glazed bowl into the kiln and fire to the maturity temperature of your clay and glaze (typically Cone 5 or 6 for stoneware).
Once cooled, your bowl will have a stunning, rugged elegance that begs to be held
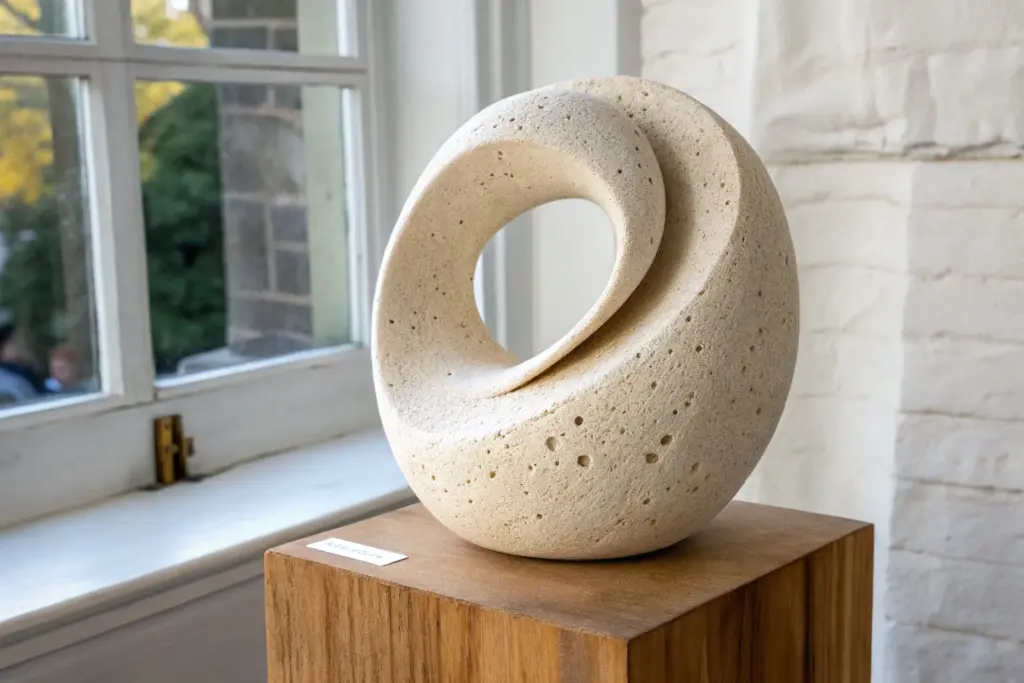
Negative-Space Loop Sculptures
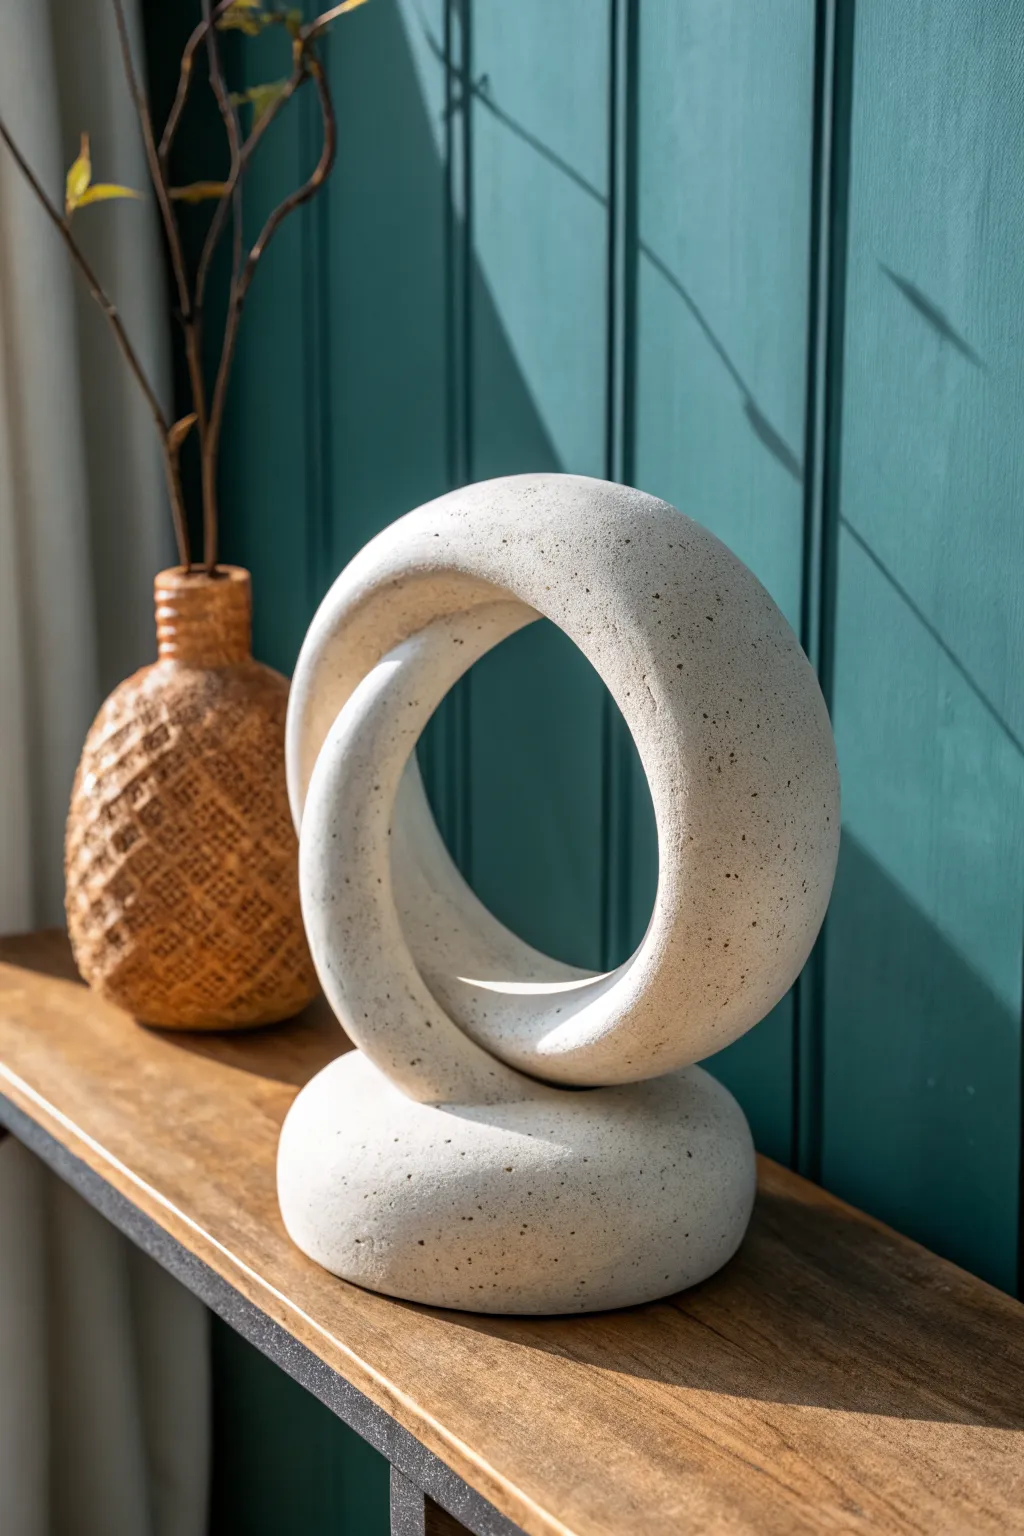
This striking ceramic piece combines the grounded stability of a stone-like base with the airy elegance of a negative-space loop. Its matte, speckled finish mimics natural limestone, making it a sophisticated addition to any modern shelving display.
Step-by-Step Guide
Materials
- Stoneware clay (white or light cream with grog preferred)
- Speckled clay body (or mason stains/oxides for speckling)
- Potter’s wire tool
- Serrated kidney rib (metal or rubber)
- Smooth wooden modeling tool
- Sponge
- Plastic bag for slow drying
- Matte white or transparent matte glaze
- Flexible rib tool
- Needle tool
- Slip (made from your clay body)
Step 1: Forming the Base
-
Prepare the clay:
Begin by wedging a substantial ball of white stoneware clay to remove air bubbles. If your clay doesn’t have natural speckles, wedge in a small amount of granular manganese or dark grog to achieve that peppered look. -
Shape the mound:
Form the clay into a smooth, slightly flattened sphere, resembling a large river stone or a bun. This will act as the heavy anchor for your sculpture. -
Refine the surface:
Use a flexible rib to smooth over the dome of the base, erasing any finger marks. The goal is an organic, eroded-stone texture, not geometric perfection. -
Create the connection point:
Gently press a shallow depression into the top center of your base where the loop will eventually sit. Score this area thoroughly with a serrated kidney or needle tool.
Step 2: Sculpting the Loop
-
Roll the coil:
Take a larger portion of clay and roll out a thick, even coil. I find it helpful to roll this quite thick—at least 1.5 to 2 inches in diameter—to ensure structural integrity while standing. -
Form the circle:
Curve the heavy coil into a ring shape. Instead of a simple doughnut, give the coil a slight twist as you bring the ends together to create movement. -
Join the ends:
Cut the ends of the coil at matching angles. Score the faces, apply slip, and press them firmly together to close the loop. -
Blend the seam:
Using a wooden modeling tool, pull clay across the seam to knit the ends together. Smooth the join until it is invisible, maintaining the continuous flow of the ring. -
Refine the curve:
Stand the ring up on its intended bottom edge to check the balance. Gently paddle the sides to perfect the circular shape and ensure the negative space in the center is pleasingly oval. -
Attach to base:
Score the bottom section of the ring where it will meet the base. Apply slip to both the ring and the scored depression on the base. -
Secure the join:
Press the ring firmly onto the base. Use a small coil of clay to reinforce the seam where the two parts meet, blending it seamlessly into both surfaces so it looks like one continuous object.
Pro Tip: Hidden Support
While the clay is wet, place a small piece of foam or a crumpled kiln brick inside the loop’s ‘chin’ to support the upper arch’s weight until it stiffens to leather hard.
Step 3: Finishing and Firing
-
Initial smoothing:
Once the basic form is assembled, go over the entire piece with a damp sponge to remove rough burrs, but don’t over-wet the clay. -
Texture enhancement:
For that matte, stone-like feel, gently pat the surface with the flat of a wooden paddle or a slightly coarse sponge. This prevents the surface from looking too slick or manufactured. -
Controlled drying:
Cover the sculpture loosely with plastic. Uneven drying leads to cracks, especially at the join between the heavy base and the lighter loop. Let it dry slowly over several days. -
Bisque fire:
Once bone dry, fire the piece to a bisque temperature (usually cone 04) to prepare it for glazing. -
Glaze application:
If your clay body is naturally speckled and white, apply a clear matte glaze. If using plain white clay, use a matte white speckled glaze. Dip or spray for an even coat. -
Final wipe:
Wipe the bottom of the base cleanly with a sponge to ensure no glaze adheres to the kiln shelf. -
Glaze firing:
Fire to the maturation temperature of your specific clay and glaze, typically Cone 5 or 6 for stoneware durability.
Troubleshooting: Cracking Seams
If hairline cracks appear at the join during drying, spray with vinegar water and compress the area with a rounded tool. Slow down the remaining drying time immediately.
Enjoy styling your modern sculpture on a bookshelf where the light can play through the open center.
Biomorphic Seed-Pod Forms
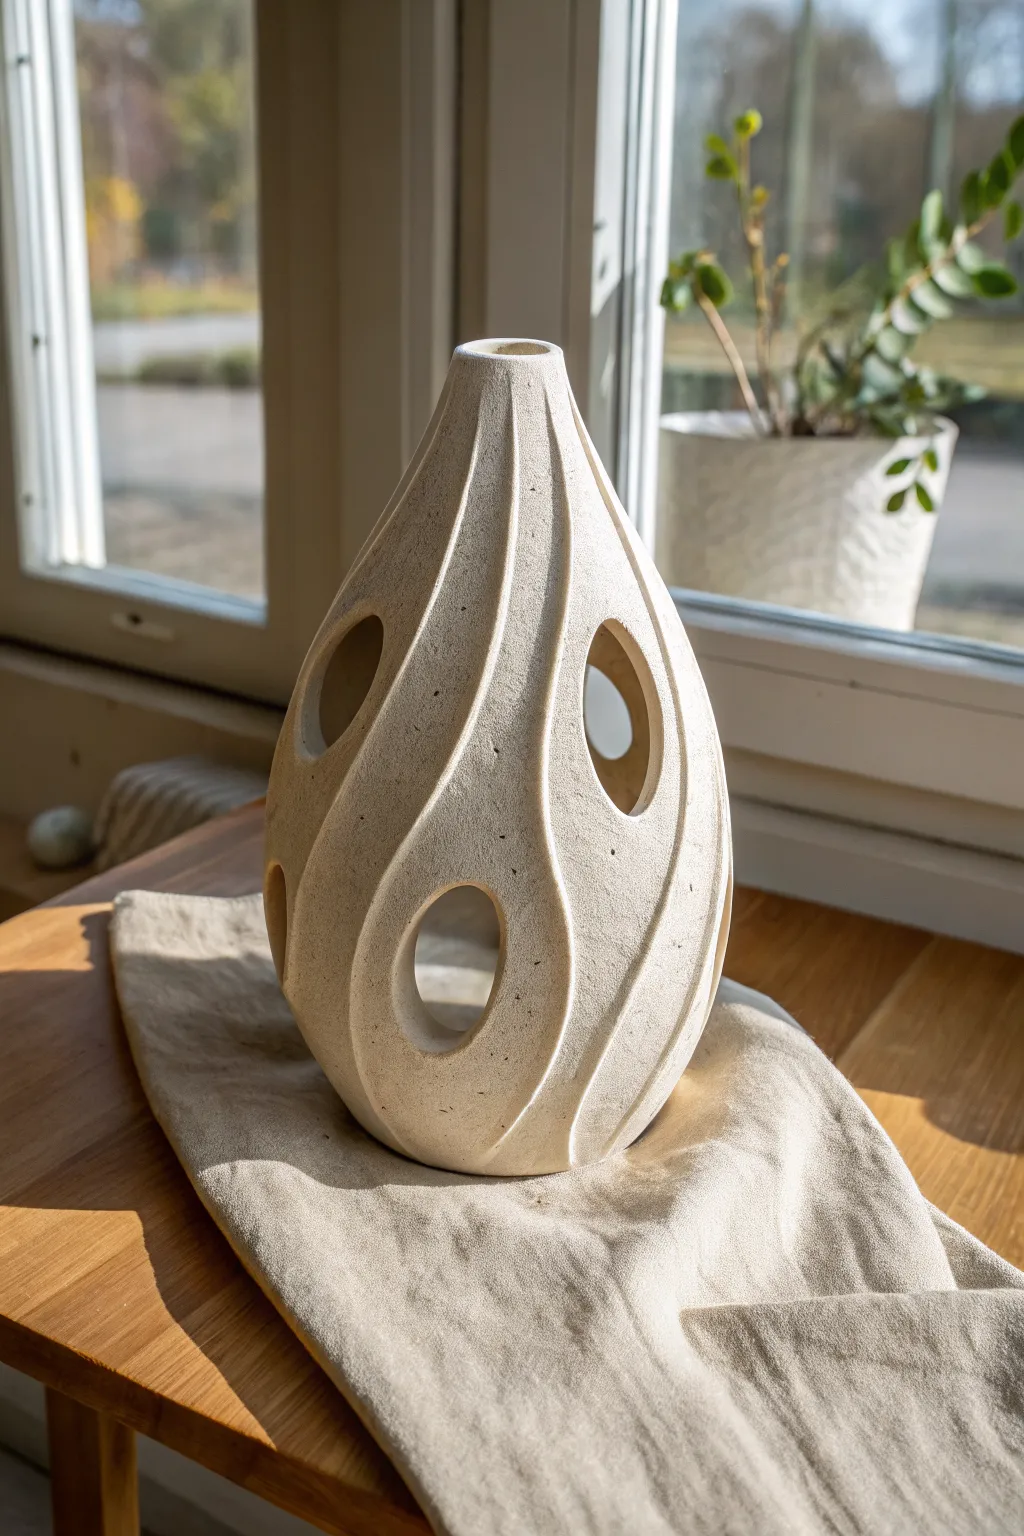
Embrace the natural fluidity of biomorphic design with this teardrop-shaped vessel that mimics the structure of dried seed pods. The piece features gentle, swirling ridges and strategic cutouts that not only add visual lightness but can also cast mesmerizing shadows when illuminated.
Detailed Instructions
Materials
- Stoneware clay (preferably with grog/speckles for texture)
- Pottery wheel (or coil building supplies)
- Wooden modeling rib
- Loop carving tools (large and medium)
- Fettling knife or scalpel
- Sponge
- Matte cream or transparent matte glaze
- Needle tool
- Flexible metal kidney scraper
Step 1: Forming the Base
-
Throwing or Coiling:
Begin by centering roughly 3-4 lbs of clay on the wheel. If you are hand-building, roll out thick coils. Aim to create a tall, closed cylinder first to ensure you have enough height before shaping. -
Belling Out:
Gently push the clay outward from the inside to create a wide belly at the bottom third of the form. Use a rib on the outside to compress the wall and ensure a smooth curve. -
Collaring the Neck:
As you move upward, gradually collar the clay inward to create a steep, tapered cone shape. The form should resemble a narrow teardrop or a fig. Keep the walls slightly thicker than usual (about 1/4 inch or slightly more) to accommodate deep carving later. -
Closing the Top:
Narrow the neck significantly until you have a small opening at the very top, roughly 1-1.5 inches in diameter. refine the rim so it is smooth and slightly rounded. -
Refining the Profile:
Use a flexible metal kidney to smooth the entire exterior surface, removing any throwing rings or finger marks. The surface needs to be a blank canvas for the carving. Let the piece dry slowly to a firm leather-hard stage.
Clay Choice Matters
Use a clay body with fine grog or sand. The added grit provides structural strength for the tall, tapered neck and adds a beautiful stone-like texture to the unglazed areas.
Step 2: Carving the Patterns
-
Mapping the Design:
Once leather-hard, lightly sketch flowing, S-shaped vertical curves around the vessel with a needle tool. Imagine these lines spiraling gently from the base to the tip. -
Establishing the Ridges:
Using a large loop tool, carve away clay between your sketched lines to create valleys. I like to carve deepest at the center of the ‘valley’ and taper up toward the lines, leaving the sketched lines as the high points or ridges. -
Deepening the Definition:
Go back over the valleys with a smaller loop tool or a modeling tool to sharpen the ridges. The transition from the high ridge to the low valley should be smooth and concave. -
Smooth the Texture:
Use a damp sponge or a soft finger to smooth out the tool marks in the carved recesses. You want a flowing, wind-eroded look rather than sharp, jagged cuts.
Glow Up
Turn this into a functional lamp by leaving a hole in the bottom for a cord kit, or simply place a battery-operated LED puck light inside to cast dramatic shadows through the cutouts.
Step 3: Piercing and Finishing
-
Locating Cutouts:
Identify the widest, flattest areas within the valleys you carved. These are ideal spots for the seed-pod ‘windows’. Mark out oval or teardrop shapes. -
Cutting the Openings:
Use a sharp fettling knife or scalpel to carefully cut out the marked shapes. Support the wall from the inside with your hand if possible to prevent warping. -
Beveling the Edges:
Once the hole is cut, smooth the interior edges of the cutout with a damp sponge. Slightly bevel the edge inward to give the clay wall a refined, finished appearance. -
Final Smoothing:
Go over the entire piece one last time with a slightly damp sponge to remove any sharp burrs or clay crumbs. Allow the piece to dry slowly under loose plastic to prevent the thin ridges from cracking. -
Bisque Firing:
Fire the piece to cone 04 (or your clay body’s bisque temperature). -
Glazing:
Dip, spray, or brush on a matte cream or stony white glaze. A shiny glaze might obscure the subtle carving, so a matte finish is best to highlight the shadows and form. -
Final Firing:
Glaze fire to the maturity temperature of your clay (typically Cone 5/6 or Cone 10).
Place your finished biomorphic vessel near a window to let the changing daylight play across its curves
Coil-Extruded Drip Columns
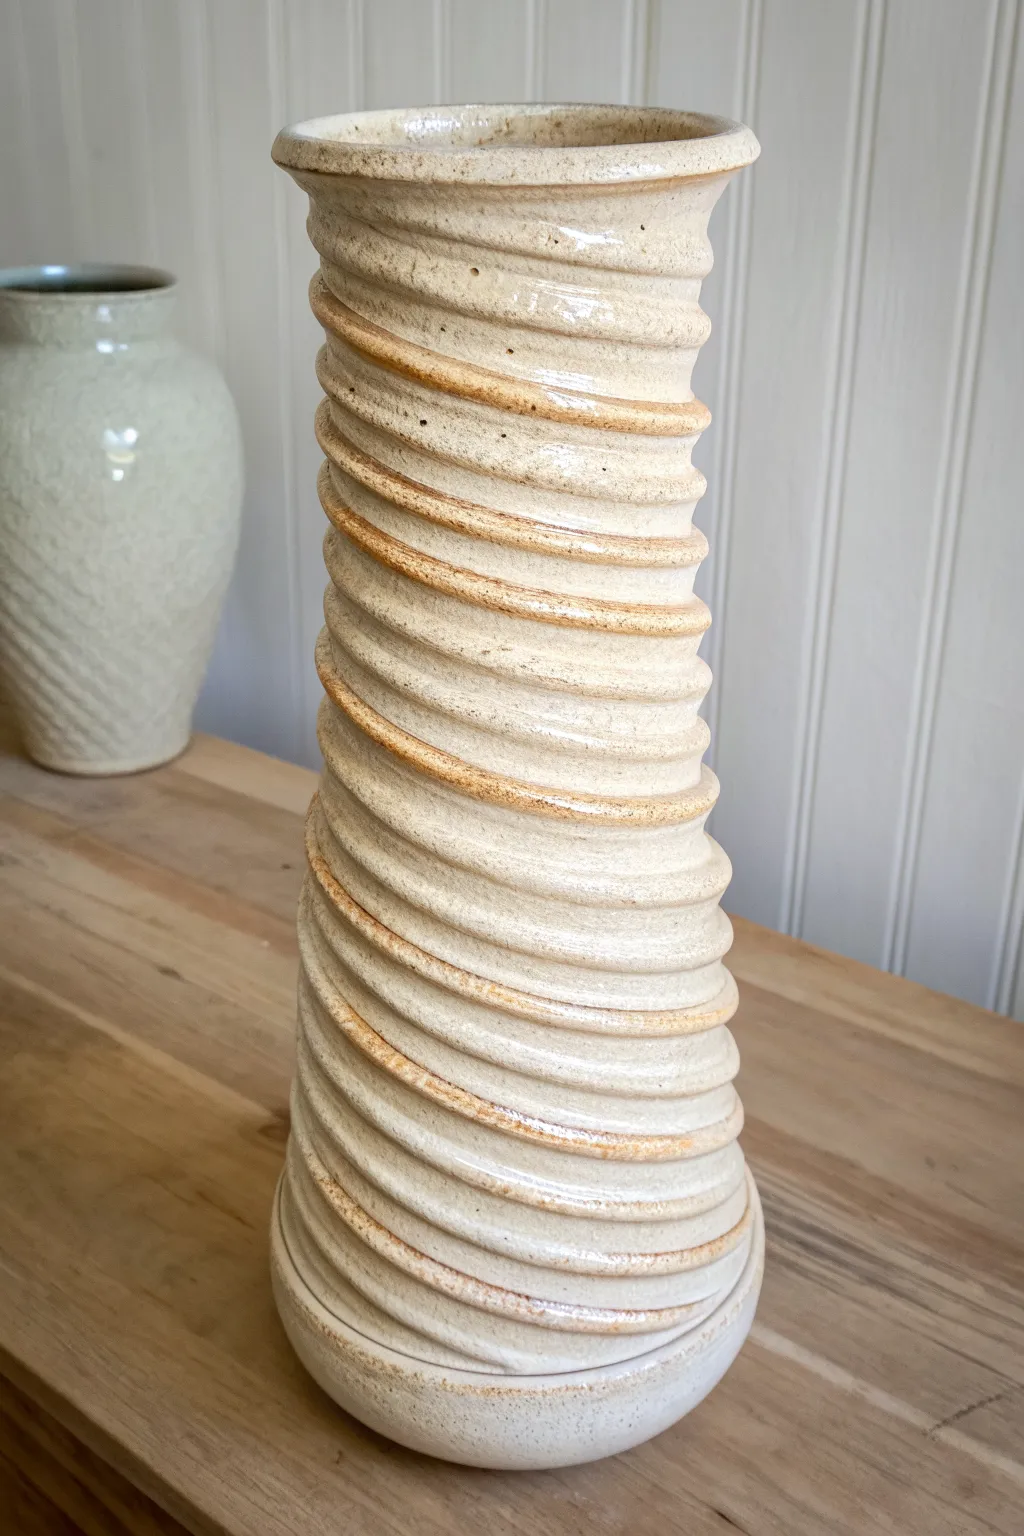
Embrace the organic beauty of clay with this striking columnar vase that features a continuous, rhythmic spiral texture. The piece highlights the natural interaction between form and glaze, creating a sculpture that feels both ancient and modern.
Step-by-Step
Materials
- Stoneware clay (medium grog needed for height)
- Pottery wheel
- Throwing sponges
- Rib tool (wooden or silicone)
- Cutting wire
- Needle tool
- Wooden modeling tool (rounded tip)
- Cream or oatmeal-colored glaze
- Iron oxide wash (optional)
Step 1: Throwing the Cylinder
-
Center the Clay:
Begin with a substantial ball of prepared stoneware clay—about 3-4 pounds is good for this height. Slam it onto the wheel head and center it thoroughly using firm pressure. -
Open the Form:
Open the clay down to the bat, leaving about a half-inch floor. Compress the floor well with your fingers or a flat tool to prevent S-cracks later. -
Pull the Walls:
Pull the clay upward into a tall, narrow cylinder. Focus on keeping the walls even from bottom to top. It doesn’t need to be extremely thin, as you’ll need some thickness to support the texture work. -
Collar the Form:
Gently collar the cylinder inward to ensure it stays vertical and doesn’t flare out. The goal is a straight, pipe-like structure. -
Refine the Profile:
Use a rib tool on the exterior while supporting the interior with your hand to smooth the surface and remove excess slurry.
Uneven Spiral?
If your spiral lines are getting too close or far apart, practice your hand speed without the clay first. Consistent upward velocity is key.
Step 2: Creating the Spiral Texture
-
Establish the Base Ridge:
Start at the very bottom of the cylinder. With the wheel spinning at a slow-to-medium speed, use your finger or a rounded wooden tool to press a deep groove at the base, creating a distinct ridge. -
Begin the Spiral:
Slowly move your hand upward while maintaining steady pressure. The key here is to synchronize your upward movement with the wheel speed to create a consistent, angled spiral. -
Continue the Climb:
Work your way up the entire height of the vessel. Don’t stop. If you hesitate, the line will break. -
Accentuate the Ridge:
Once the initial spiral is formed, go back over the path. Use a slightly sharper tool or the edge of your finger to deepen the trough between the ridges, making the ‘coil’ look more pronounced. -
Form the Rim:
When you reach the top, flair the rim slightly outward to finish the spiral. Smooth the lip with a chamois or sponge for a comfortable, finished edge. -
Undercut the Foot:
Use a wooden knife to trim excess clay from the base of the pot, creating a clean undercut that gives the column a slight lift.
Step 3: Finishing and Glazing
-
Dry to Leather Hard:
Allow the piece to dry slowly to the leather-hard stage. Because it is tall, cover the top rim loosely with plastic so it doesn’t dry out faster than the base. -
Trim the Bottom:
Flip the vessel and trim the bottom if necessary, creating a defined foot ring that mirrors the form’s elegance. -
Bisque Fire:
Fire the piece in a bisque kiln according to your clay body’s specifications (usually Cone 04 or 06). -
Apply Oxide Wash:
For the look in the photo, brush a diluted iron oxide wash over the entire piece, making sure it gets into the deep spiral grooves. -
Wipe Back:
Using a damp sponge, wipe away the oxide from the raised ridges. This leaves the dark color only in the recesses, emphasizing the texture. -
Glaze Application:
Dip or pour a translucent cream or oatmeal glaze over the piece. The glaze should be fluid enough to break over the high points, revealing the clay body beneath. -
Final Fire:
Glaze fire the piece to maturity (Cone 5, 6, or 10 depending on your materials). I find a slow cooling cycle helps develop interesting crystals in the glaze.
Pro Tip: Throwing Tall
Use a heat gun or torch lightly on the lower walls before throwing the top section to stiffen them and prevent the column from collapsing.
Now you have a stunning architectural piece ready to display alone or with dry branches
Modular Stacked Node Totems

This striking modular sculpture combines the raw beauty of speckled stoneware with warm wood accents for a modern mid-century aesthetic. The vertical design features repeating biconical ceramic forms stacked along a central dowel, creating a rhythmic and balanced piece of art.
Step-by-Step Guide
Materials
- Speckled buff stoneware clay (or groggy clay body)
- Wooden dowel (approx. 3/8 or 1/2 inch diameter)
- Wooden spacer beads or smaller dowel segments (stained warm brown)
- Pottery wheel (optional, can be hand-built)
- Rib tool
- Pin tool
- Sponge
- Calipers
- Epoxy or strong craft glue
- Clear matte glaze (optional)
- Beige/cream underglaze (if using non-speckled clay)
- Basic wood stain (for spacers)
Step 1: Forming the Modules
-
Prepare the Clay:
Begin by wedging your speckled clay thoroughly to remove air bubbles. Since this project relies on repetition, weigh out roughly equal balls of clay for the stacked nodes (about 6-7 balls, decreasing slightly in size if you want a subtle taper) and one larger ball for the base. -
Throwing the Base:
On the wheel, center the large ball of clay. Open it up but keep the walls thick. Shape it into a semi-sphere or dome shape, ensuring the bottom is flat and stable. This will anchor the entire sculpture. -
Create the Center Hole:
While the base is still on the wheel, use a pin tool or a dedicated hole cutter to create a vertical channel straight through the center. This hole must be slightly wider than your wooden dowel to account for clay shrinkage during firing. -
Throwing Closed Forms:
For the stacked nodes, throw a hollow, enclosed form. Start by throwing a cylinder, then collar the clay inwards at the top until it closes completely, trapping a pocket of air inside. This air pressure helps hold the shape. -
Shaping the Bicones:
Use a rib tool to refine the closed form into a sharp, lens-like shape (biconical). The widest point should be at the equator, tapering sharply to the top and bottom. Repeat this for all your weighed clay balls. -
Drilling the Nodes:
Wait until the modules require leather-hard status. Carefully poke a hole through the top and bottom center of each bicone. I find it helpful to gently spin the trimming wheel while holding the tool steady to ensure the hole is perfectly centered. -
Refining Texture:
Once leather hard, sponge the surface to bring out the grog or speckles in the clay. If you want a sharper equatorial line, run a trimming tool lightly around the center seam. -
Drying and Firing:
Allow all pieces to dry slowly and evenly to prevent warping. Bisque fire according to your clay body’s specifications.
Shrinkage Check
Clay shrinks 10-15%. Make your dowel holes 20% larger than the wood diameter while wet. If the fired fit is too loose, wrap tape around the dowel inside the ceramic.
Step 2: Finishing and Assembly
-
Glazing:
For this raw look, you might choose to leave the outside unglazed to show off the clay texture. Alternatively, apply a very thin matte clear glaze. Wipe away any glaze from the holes to ensure the dowel fits later. -
Final Firing:
Glaze fire the ceramic components. Ensure they are stilted or placed carefully so the holes don’t get clogged with glaze run-off. -
Prepare the Spacers:
Cut small segments of wood or use pre-made wooden beads that fit your dowel. Stain them a warm terracotta or walnut color to contrast with the pale clay. Let the stain dry completely. -
Construct the Spine:
Cut your main wooden dowel to the desired total height. Test fit all your ceramic pieces and wooden spacers to ensure the stack sits correctly. -
Base Assembly:
Apply a strong epoxy to the bottom of the main dowel and insert it into the ceramic base component. Ensure it stands perfectly 90-degrees upright while the glue cures. -
Stacking the Totem:
Begin threading the pieces: first a wooden spacer, then a ceramic bicone, then another spacer. Repeat this pattern. You can glue each section for permanence or leave them loose if you want to rearrange them later. -
The Final Topper:
Finish the stack with a final wooden bead or a custom-turned finial at the very top to cap off the dowel.
Mixed Media Magic
Swap the wooden spacers for brass washers or darkened cork for a different texture. You could also dip-dye the wooden dowel components for a pop of neon color.
Place your sculpture near a window where the changing light can play across the textured surfaces and cast interesting shadows throughout the day
Suspended Balance Rocker Sculptures
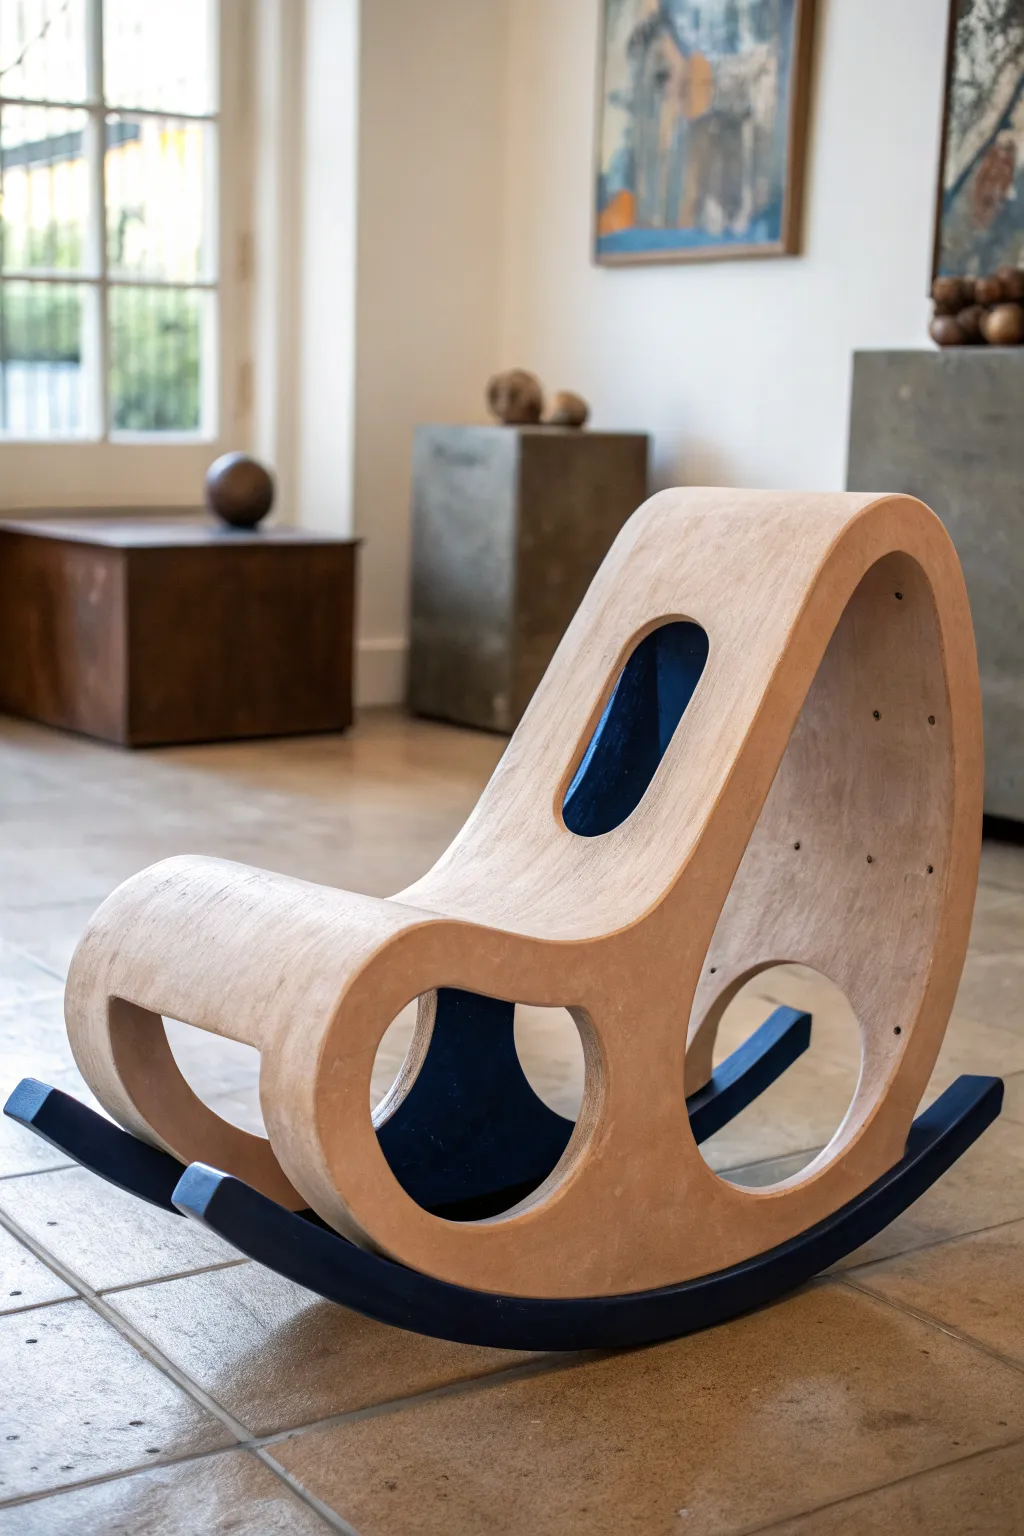
This project blends functional furniture design with sculptural art, resulting in a striking conversation piece. The smooth, curved plywood body features strategic negative space cutouts, all balanced on a contrasting deep blue rocker base.
How-To Guide
Materials
- ¾-inch thick Baltic birch plywood (large sheet)
- Solid hardwood runners (oak or maple)
- Jigsaw or bandsaw
- Belt sander with various grits (80, 120, 220)
- Router with round-over bit
- Wood glue
- Wood filler
- Deep indigo or navy blue acrylic paint
- Matte polyurethane varnish
- Clamps
- Drill with countersink bit
- Wood screws
- Templates (cardboard or paper)
Step 1: Design and Cutting
-
Draft the profile:
Begin by sketching the side profile on large paper or cardboard to create a template. Focus on the organic ‘S’ curve shape that forms the seat and backrest, ensuring the base curve matches your rocker radius. -
Mark negative spaces:
Draw the internal cutouts: a large circular void near the base, a smaller oval on the backrest, and the swoop of the armrest area. Balance is key here for visual weight. -
Trace onto plywood:
Transfer your template shape onto the birch plywood sheet. You will need to cut two identical side panels if you are building a hollow-core structure, or multiple layers to laminate for a solid block look. -
Cut the rough shape:
Use a jigsaw or bandsaw to cut out the main silhouette. Stay slightly outside your line to allow for sanding; I find it’s better to leave an 1/8th inch of material than to cut too deep. -
Internal cuts:
Drill pilot holes inside the marked cutout areas (the circle and ovals) to insert your jigsaw blade, then carefully cut out these interior shapes.
Step 2: Assembly and Shaping
-
Laminate or box build:
If layering plywood, glue and clamp your sheets together to achieve the thick, chunky width shown. If building a box structure, cut spacer blocks to join the two side panels. -
Connect the sides:
Use wood glue and countersunk screws to attach the side panels to your spacers or internal framing. The structure needs to be rigid to handle the rocking motion. -
Bend the skin:
Apply thin, flexible plywood (verify grain direction for bending) over the curved top and seat surfaces. Glue and pin-nail it in place to create a seamless outer skin. -
Rough sanding:
Once the glue is fully cured, use a belt sander with 80-grit paper to level all edges. The goal is to make the laminated layers or the skin joints look like one solid, continuous piece. -
Refine the curves:
Switch to 120-grit paper and smooth out any bumps in the silhouette. Pay special attention to the interior cutouts, hand-sanding them to perfect circles. -
Round the edges:
Use a router with a round-over bit on all exterior edges to soften the look, removing sharp corners and enhancing the organic feel.
Smooth Operator
To get perfectly smooth internal curves on the cutouts, wrap sandpaper around a large can or PVC pipe section.
Step 3: The Base and Finishing
-
Cut the runners:
Cut two curved runners from solid hardwood. The curve radius must be consistent to ensure a smooth rocking motion without bumps. -
Attach the runners:
Position the runners on the bottom of the main plywood body. Screw them in from the bottom up if possible, or use dowelry for a hidden connection. -
Final sanding:
Sand the entire piece, including the runners, with 220-grit sandpaper until the wood feels silky to the touch. -
Masking:
Carefully tape off the main body where it meets the runners. The contrast between the natural wood and the painted base is a defining feature. -
Painting the base:
Apply two coats of deep indigo or navy acrylic paint to the runners and the underside of the sculpture. Let it dry completely between coats. -
Sealing the wood:
Apply a clear matte polyurethane to the natural plywood body. This protects the wood while keeping the raw, architectural aesthetic intact. -
Final assembly check:
Remove the tape and inspect the paint line. Clean up any bleed-through with a razor blade for a crisp transition.
Upholstery Upgrade
Add a hidden layer of thin high-density foam under the top veneer for a slightly cushioned seating surface.
Place your sculptural rocker in a well-lit corner where the shadows can play through the negative spaces