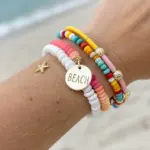
When I’m craving a quick, feel-good jewelry project, I reach for heishi beads and build a stitch-inspired color story in blues, white, and punchy accents. Here are my favorite stitch clay bead bracelet ideas that look playful, polished, and totally wearable.
Blue Ombre Stitch Gradient Stack
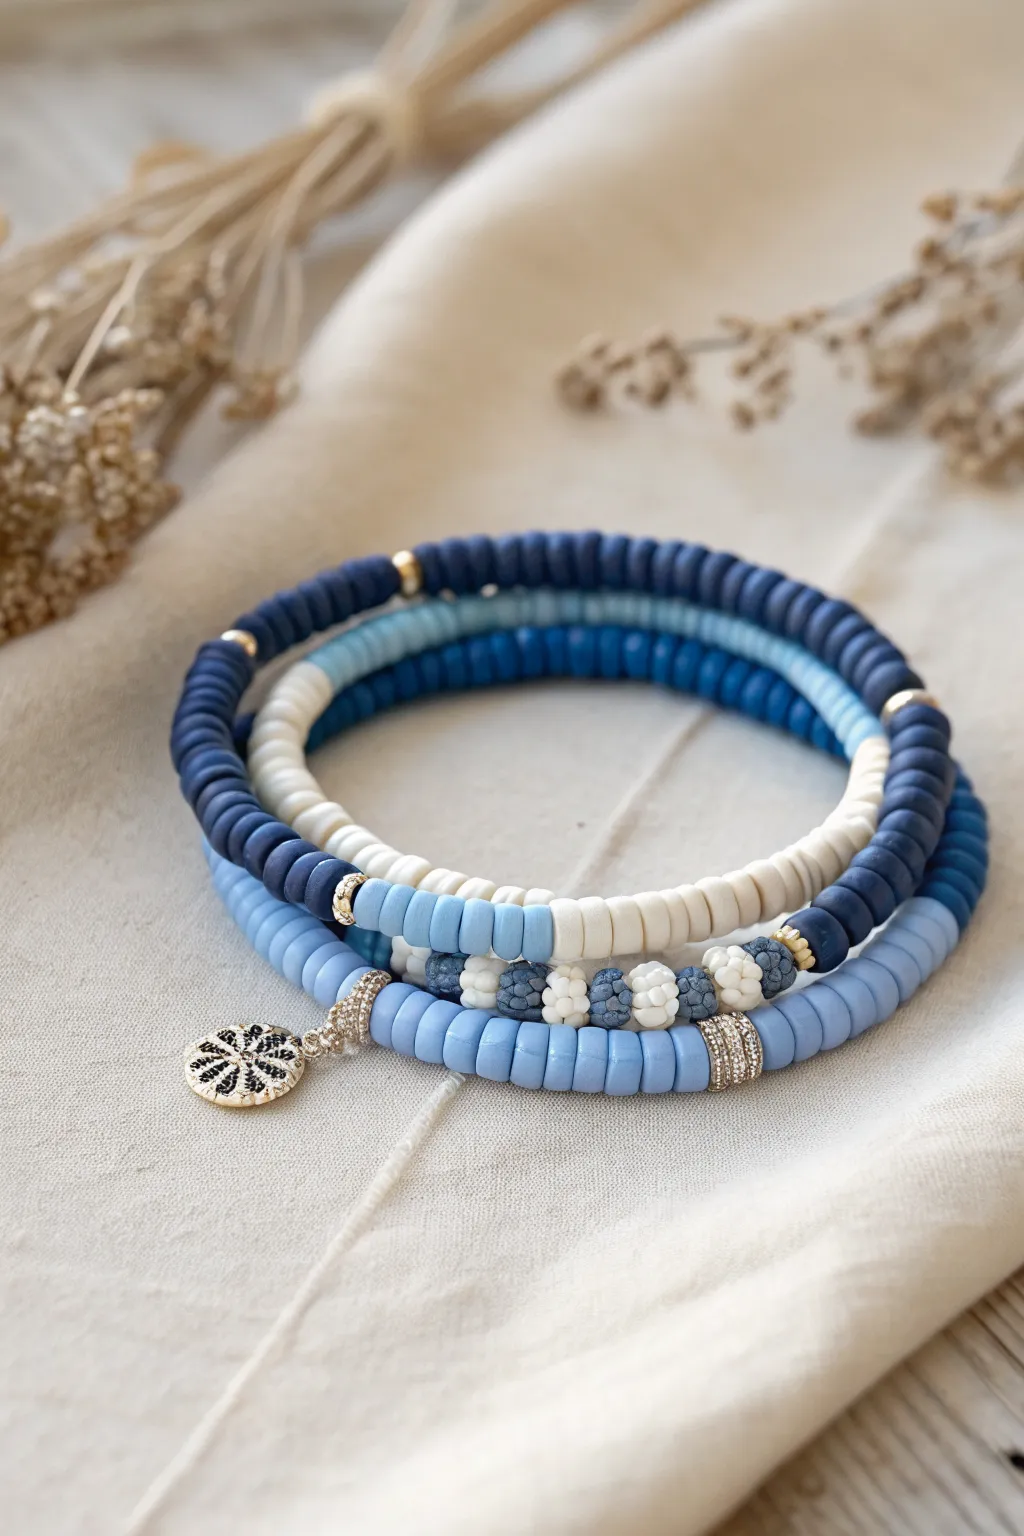
This stunning bracelet stack mimics the classic look of a stitch gradient with four coordinated strands ranging from deep navy to soft sky blue and crisp white. The mix of flat Heishi clay beads, textured spacers, and a delicate silver charm creates a layered accessory that feels both seaside-casual and elegantly put-together.
Step-by-Step Guide
Materials
- Polymer clay Heishi disc beads in Navy Blue
- Polymer clay Heishi disc beads in Cornflower Blue (medium blue)
- Polymer clay Heishi disc beads in Sky Blue (light blue)
- Polymer clay Heishi disc beads in Cream or White
- Textured round beads (6-8mm) in white and blue (stippled or berry texture)
- Small gold or silver spacer beads (discs or tiny rounds)
- Rondelle spacer beads with inset crystals (silver or gold tone)
- Small snowflake or floral charm
- Jump ring for the charm
- Strong elastic cord (0.8mm or 1.0mm recommended)
- Jewelry glue (GS Hypo Cement or superglue)
- Scissors
- Bead stopper or tape
Step 1: Planning the Design
-
Measure your wrist:
Wrap a piece of string around your wrist to find your comfortable size, then add about half an inch for a comfortable fit. Cut four lengths of elastic cord, leaving yourself plenty of extra slack on each end (at least 3-4 inches extra) to make tying easier later. -
Secure the ends:
Place a bead stopper or a piece of masking tape on one end of each elastic string to prevent your beads from sliding off while you work.
Knot Slipping?
If your elastic knots feel slippery, try a surgeon’s knot instead. Wrap the elastic through the loop twice before pulling tight for extra grip.
Step 2: Bracelet 1: The Dark Navy Solid
-
Start the navy strand:
This bracelet acts as the dark anchor for the stack. Begin stringing your Navy Blue Heishi beads continuously. This strand is primarily solid color. -
Add metallic accents:
Every 2 inches or so, slide on a single gold/silver disc spacer bead to break up the color. Continue firmly stringing navy beads until you reach your desired length.
Step 3: Bracelet 2: The Gradient Mix
-
Create color blocks:
For the second bracelet, we want distinct sections. String about 2 inches of Navy Blue beads, followed by a gold spacer. -
Transition to lighter shades:
Switch to your Medium Blue beads for the next 2-inch section. Follow this with a section of White beads. This color-blocking creates the ‘stitch’ effect where colors change abruptly. -
Complete the pattern:
Continue alternating your blocks of color—Navy, Medium Blue, White—separating each section with a thin gold spacer until the bracelet is full.
Pro Tip: Seamless Look
Use a bead reamer or large needle to slightly widen the hole of the bead next to your knot. You can then pull the knot inside perfectly.
Step 4: Bracelet 3: The Textured Centerpiece
-
String the base:
Use your Sky Blue (lightest blue) beads for the majority of this strand. String enough beads to cover about 75% of the total length. -
Create the focal point:
For the center focal section, slide on a crystal rondelle spacer, then alternate your textured round beads: Blue, White, Blue, White. Aim for about 5-6 textured beads total. -
Cap the focal point:
Finish the focal section with another crystal rondelle spacer, then fill the rest of the string with Sky Blue clay beads to complete the loop.
Step 5: Bracelet 4: The Charm Strand
-
Begin the charm strand:
Use the Medium Blue or Sky Blue beads for this final bracelet. String about half of your required length. -
Attach the charm holder:
Slide on a crystal spacer bead, followed by the plain metal jump ring (with your charm attached), and then another crystal spacer. This frames your charm beautifully. -
Finish stringing:
Continue stringing the rest of the blue clay beads until this bracelet matches the length of the others.
Step 6: Finishing Touches
-
Check sizing:
Before tying, carefully lift the strands by the ends and wrap them around your wrist to ensure they fit comfortably without pinching. -
Tie the knots:
For each bracelet, remove the tape/stopper. Tie a standard square knot (right over left, left over right). Pull the elastic tight—I usually pull it until I see the elastic stretch significantly—to ensure the knot is secure. -
Secure with glue:
Dab a tiny drop of jewelry glue onto each knot. Let it dry completely before trimming the excess elastic close to the knot. If possible, gently slide a nearby bead over the knot to hide it.
Wear your new gradient stack all together for a coordinated statement or share them as individual friendship bracelets


Minimal Blue and White Stitch Stripes
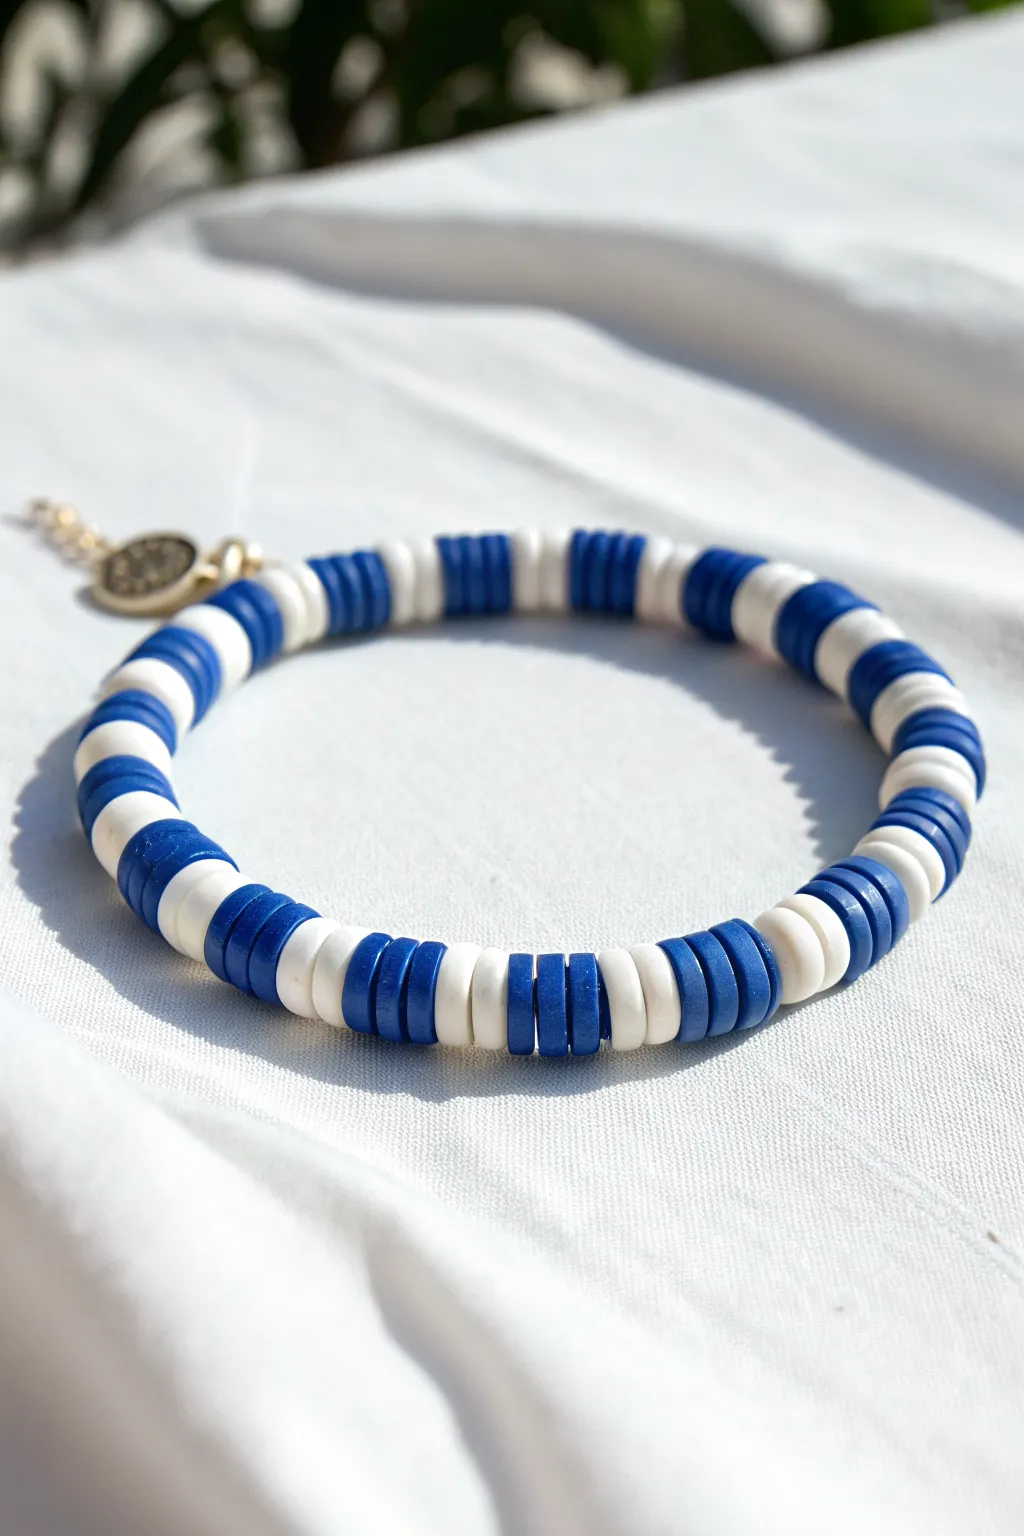
Capture the essence of a classic sailor’s shirt with this crisp blue and white clay bead bracelet. The design uses alternating blocks of color to create a bold, graphic look that pairs perfectly with denim or summer whites.
How-To Guide
Materials
- Polymer clay Heishi beads (flat discs) in royal blue
- Polymer clay Heishi beads (flat discs) in white or cream
- Elastic cord (0.8mm or 1mm transparent stretch string)
- Small gold charm or coin pendant (optional)
- Gold jump ring (to attach the charm)
- Scissors
- Jewelry glue or clear nail polish
- Bead stopper or binder clip
- Flat-nose jewelry pliers (for the jump ring)
Step 1: Preparation
-
Measure your wrist:
Wrap a piece of string or a flexible measuring tape around your wrist to find your size. Add about 1/2 to 1 inch to this measurement depending on how loose you want the fit. -
Cut the cord:
Cut a length of elastic cord about 3-4 inches longer than your final measurement. This extra length makes tying the knot much easier at the end. -
Secure the end:
Attach a bead stopper or a simple binder clip to one end of your elastic cord. I always do this first to prevent beads from slipping off while I’m focused on the pattern. -
Plan the pattern:
The key to this ‘stitch’ look is unequal striping. The pattern consists of a block of blue followed by a thinner slice of white.
Bead Buddy
Use a piece of scotch tape or a bead stopper on the end of your string before you start. There’s nothing worse than finishing a pattern and lifting the string, only for everything to slide off.
Step 2: Beading
-
Start the first blue block:
Thread on four royal blue Heishi beads. Push them down to the stopper. -
Add the white contrast:
Thread on two white Heishi beads. This creates the thin stripe effect. -
Establish the rhythm:
Repeat the sequence: four blue beads, then two white beads. Slide them down to meet the first group. -
Check the spacing:
As you build the strand, ensure the beads are sitting flat against each other. Clay disc beads can sometimes twist, so smooth the strand out occasionally. -
Continue patterning:
Keep repeating the 4-blue, 2-white pattern until the strand reaches your desired length. -
Finish symmetrically:
Try to finish the pattern on a full block of blue beads if you started with blue, or adjust slightly so the connection point looks seamless.
Step 3: Finishing Touches
-
Pre-stretch the cord:
Before tying, gently tug on both ends of the elastic. This pre-stretching prevents the bracelet from growing loose after the first time you wear it. -
Tie the knot:
Remove the bead stopper and tie a surgeon’s knot. This is like a standard shoelace knot, but you loop the end through twice before pulling tight. -
Secure the knot:
Pull the knot tight. Apply a tiny drop of jewelry glue or clear nail polish directly onto the knot to seal it. -
Hide the end:
Once the glue is tacky or dry, trim the excess string. If the hole of the nearest bead is large enough, tuck the knot inside for a professional finish. -
Add the charm:
Locate the jump ring on your gold charm. Using your flat-nose pliers, twist the ring open laterally (side-to-side, not pulling apart). -
Attach to bracelet:
Loop the open jump ring around the elastic cord, ideally near the knot area to help camouflage it further. -
Close the ring:
Use the pliers to twist the jump ring closed again, ensuring the ends meet flush so the cord doesn’t slip out.
Mix It Up
For a funkier ‘stitch’ look, vary the blue sections. Try doing 3 blue beads, then 5 blue beads, keeping the white spacers constant to create an organic texture.
Enjoy wearing your new bracelet stacked with other textures or simply on its own for a clean pop of color


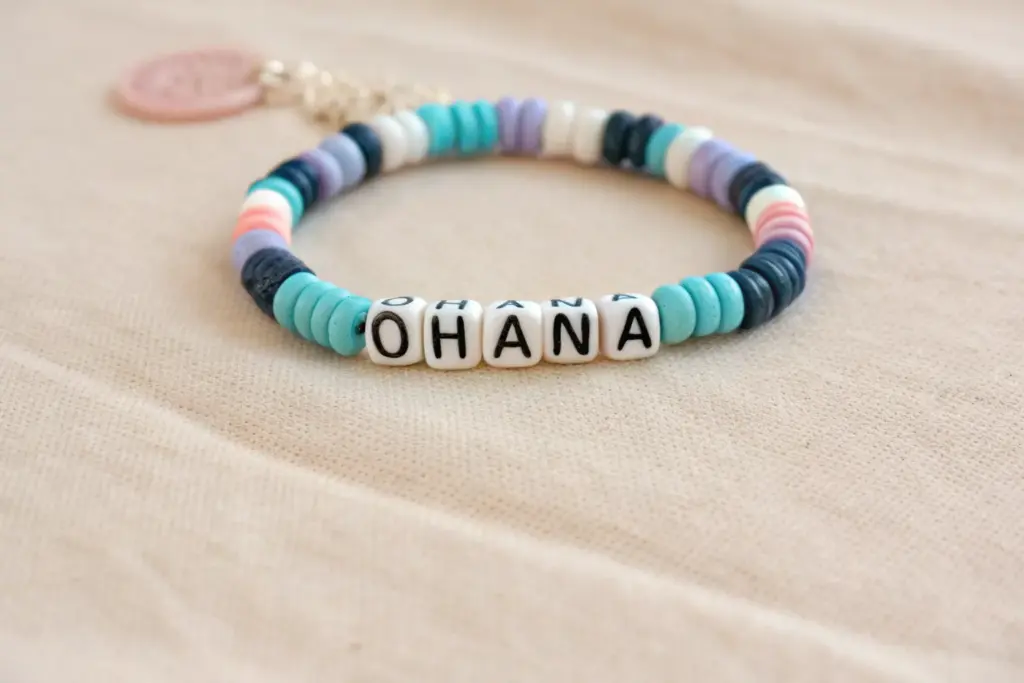
Ohana Word Centerpiece Bracelet
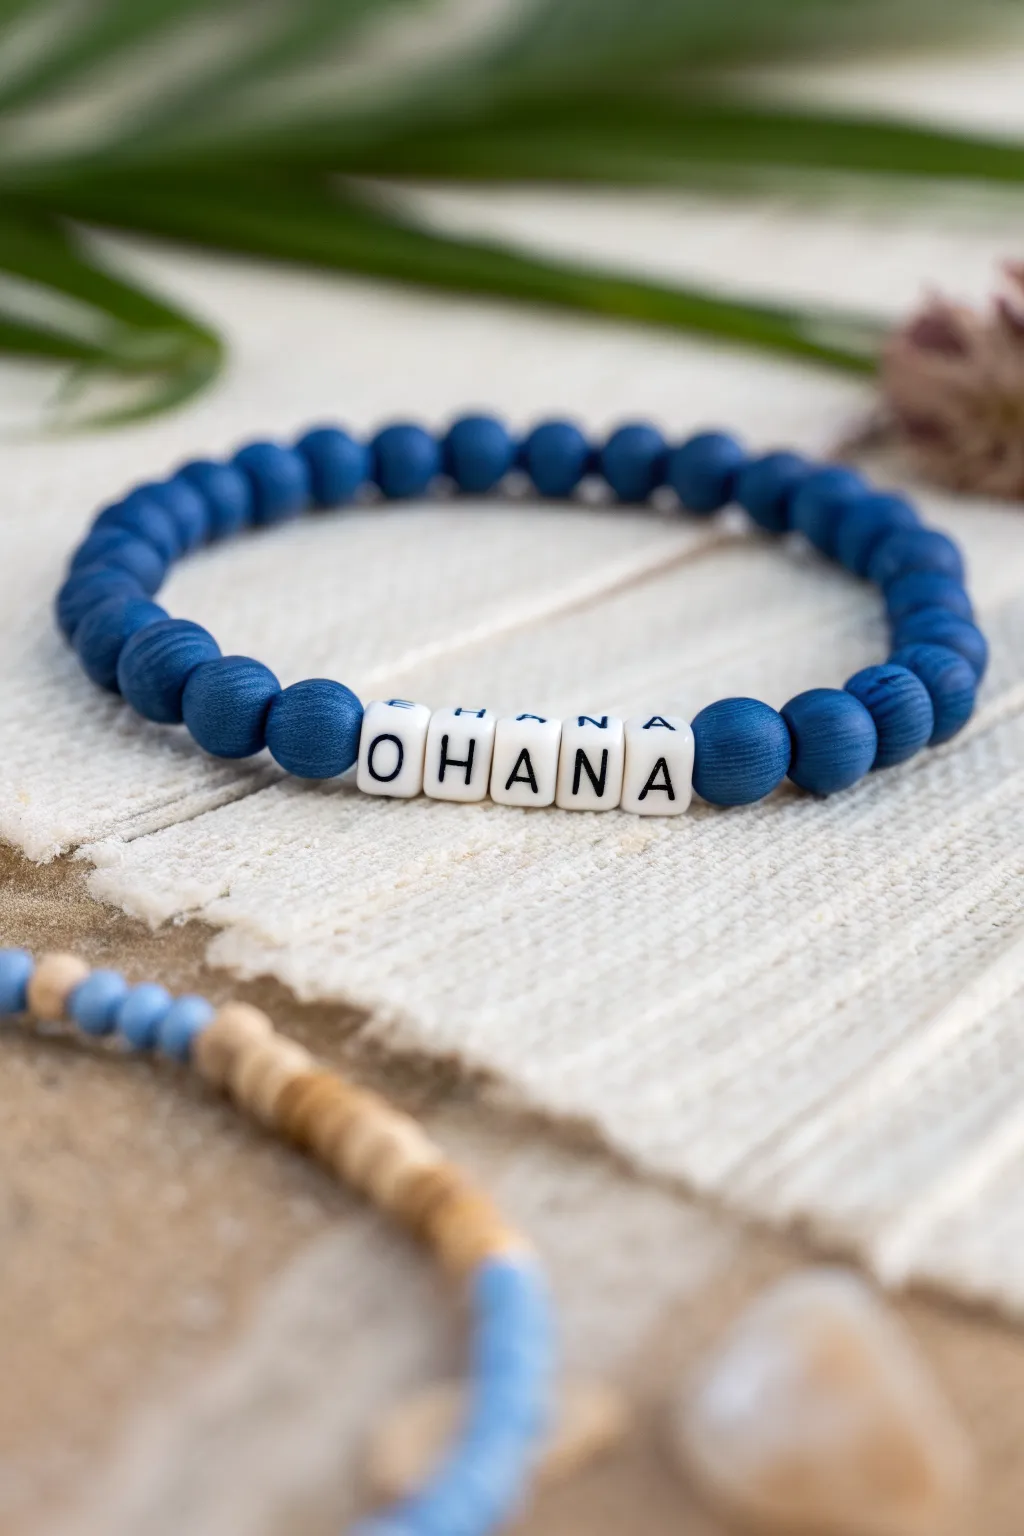
Capture the spirit of family with this striking bracelet featuring deep ocean-blue beads and a central message. The matte texture of the blue beads offers a sophisticated contrast against the crisp white letter cubes, making it a perfect everyday accessory.
Detailed Instructions
Materials
- Matte dark blue frosted beads (6mm or 8mm, likely wood or gemstone)
- White acrylic cube letter beads (spelling OHANA)
- Clear elastic bead cord (0.7mm or 0.8mm)
- Jewelry glue or clear nail polish
- Scissors
Step 1: Preparation
-
Measure your wrist:
Before you begin, wrap a piece of string around your wrist to find the comfortable length. Add about an inch to this measurement to account for the knot and bead bulk. -
Sort your letters:
Locate the specific letter beads needed for your message. For this design, find an O, H, A, N, and another A. -
Arrange the layout:
Lay out your design on a bead board or a soft towel. Place the ‘OHANA’ beads in the center first to anchor the design. -
Balance the sides:
Count out your blue beads and distribute them equally on either side of the word. This ensures the text stays perfectly centered on your wrist.
Step 2: Stringing
-
Prepare the cord:
Cut a length of elastic cord about 10-12 inches long. Having extra length makes tying the final knot much less frustrating. -
Pre-stretch the elastic:
Give the cord a few gentle tugs. This is a crucial step that prevents the bracelet from stretching out and becoming loose after you wear it a few times. -
Secure the end:
Place a piece of tape or a binder clip on one end of the cord so beads don’t slide off while you work. -
Start with blue:
Begin stringing the first half of your blue beads. I usually double-check the bead hole quality as I go to ensure none are jagged. -
Add the message:
Thread the letter beads in order: O-H-A-N-A. Make sure they are all facing the same direction so the text is legible. -
Finish the blue beads:
String the remaining half of the blue beads onto the other side of the text. -
Check fit:
Carefully wrap the unfinished strand around your wrist. If it feels too tight, add one blue bead to each side; if too loose, remove one.
Knot slipping?
If the elastic feels too slick to hold a knot, rough up the ends slightly with sandpaper, or tie a second simple overhand knot on top of your surgeon’s knot for extra security.
Step 3: Finishing
-
Prepare to knot:
Remove the tape or clip. Bring both ends of the cord together, ensuring there is no slack between the beads. -
The first crossover:
Cross the right end over the left, just like starting to tie a shoelace. -
The surgeon’s knot:
Wrap the end through the loop twice instead of just once. This extra loop creates a surgeon’s knot, which holds elastic much more securely. -
Tighten strictly:
Pull the cords tight. You want the beads to touch snugly, but avoid bunching or buckling the line. -
Secure the knot:
Add a tiny drop of jewelry glue or clear nail polish directly onto the knot. Let it dry for a minute or two. -
Hide the mechanics:
Once dry, trim the excess cord ends close to the knot. If the hole of a neighboring blue bead is large enough, gently tug the knot inside it to hide it.
Make it a Stack
Create companion bracelets using light beige wooden beads (like the background bracelet) or solid blue strands to wear alongside your main Ohana piece.
Slip on your new creation and enjoy the customized reminder of family connection


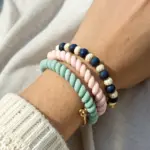
Besties Set: Blue Stitch and Pink Pal
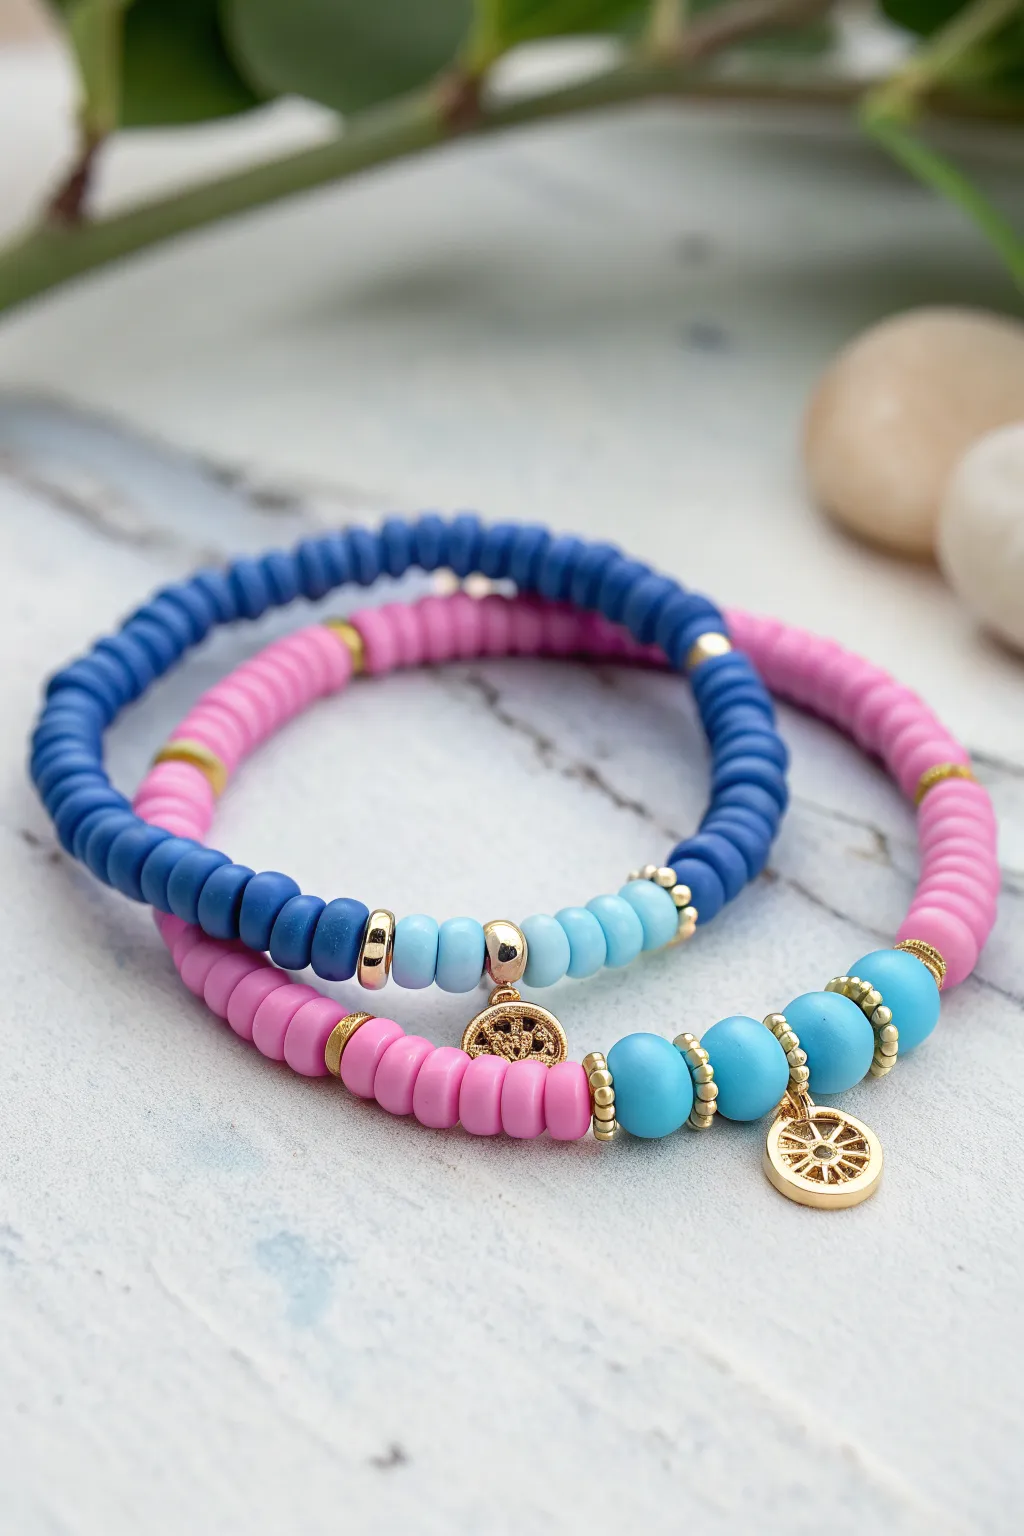
Capture the unbreakable bond between galaxy pals with this adorable bracelet duo featuring Stitch’s deep blue and Angel’s vibrant pink. These stretchy heishi bead bracelets incorporate gleaming gold accents and matching wheel charms for a polished, boutique-style finish.
Step-by-Step
Materials
- Dark blue polymer clay heishi beads (6mm)
- Pastel pink polymer clay heishi beads (6mm)
- Light blue polymer clay heishi beads (6mm)
- Bright turquoise blue round beads (acrylic or coated, approx. 8mm)
- Gold tone flat disc spacer beads
- Small gold seed beads or tiny round spacers (2-3mm)
- Two gold wheel/geometric circular charms
- 4 gold jump rings (open type, 4-5mm)
- Elastic stretch cord (0.8mm clear)
- Scissors
- Jewelry glue or clear nail polish
- Bead stopper or tape
- Chain nose pliers
Step 1: Preparation & Planning
-
Measure and cut:
Cut two pieces of elastic cord, each about 10-12 inches long. This gives you plenty of extra room for tying knots later. -
Secure the ends:
Place a bead stopper or a piece of tape on one end of each cord to prevent your beads from sliding off while you work. -
Prepare your charms:
Using your pliers, gently twist open two jump rings. Slide a wheel charm onto each ring, then close the rings securely. Set these aside for the focal points.
Step 2: Blue Stitch Bracelet
-
Start strong:
Begin threading the dark blue heishi beads onto your first cord. You will need enough to cover about two-thirds of the bracelet’s length. -
Add first gold accent:
Slide on one gold flat disc spacer followed by a single dark blue heishi bead, then another gold spacer. This creates a small solitary accent segment. -
Add the lighter section:
Transition to the light blue heishi beads. Thread about 8-10 of these to create a distinct color block representing Stitch’s lighter fur tones. -
Insert the centerpiece:
Slide on a gold flat disc spacer, then thread the jump ring with your prepared charm. Follow immediately with another gold flat disc spacer. -
Finish the pattern:
Add another small section of light blue heishi beads (about 4-5) to balance the charm area, then switch back to dark blue beads until the bracelet reaches your desired wrist size (usually 6.5-7 inches).
Hiding the Knot
To purely hide the knot, try ending your pattern next to one of the larger turquoise beads or a gold spacer with a larger hole, and pull the knot inside.
Step 3: Pink Angel Bracelet
-
Create the pink base:
On the second cord, thread your pink heishi beads. Fill about two-thirds of the length, similar to the blue bracelet. -
Add side accents:
Instead of flat spacers here, this design uses gold seed beads. Slide on a gold spacer disc, then a few pink beads, then another spacer disc to mirror the other bracelet’s structure. -
Build the focal section:
This bracelet features larger round beads. Thread a gold seed bead, then a turquoise round bead, followed by another seed bead. -
Continue the focal pattern:
Repeat this pattern: gold seed bead, turquoise round bead, gold seed bead. Do this until you have three turquoise beads grouped together. -
Attach the charm:
After the third turquoise bead assembly, slide on the jump ring with your second charm. -
Complete the symmetry:
Add two more turquoise bead assemblies (seed bead, turquoise bead, seed bead) after the charm to balance the design. Finish threading pink heishi beads until the size matches the first bracelet.
Beads Won’t Lay Flat?
If your heishi beads look uneven or twisty, string them slightly looser. Too much tension causes them to buckle instead of sitting flush together.
Step 4: Finishing Touches
-
Check the fit:
Wrap each bracelet around your wrist to check the size. Remove or add heishi beads near the ends if adjustment is needed. -
Pre-stretch the cord:
Gently pull on the ends of the elastic cord a few times. I always do this because it prevents the bracelet from loosening up after the first wear. -
Tie the knot:
Tie a surgeon’s knot (right over left, left over right, looping through twice on the second pass) pulling it tight but careful not to snap the cord. -
Secure and trim:
Apply a tiny dot of jewelry glue to the knot. Let it dry completely before trimming the excess cord close to the knot. Tuck the knot inside a nearby bead if the hole is large enough.
Wear your matching set with your best friend or stack them both for a colorful galactic statement

The Complete Guide to Pottery Troubleshooting
Uncover the most common ceramic mistakes—from cracking clay to failed glazes—and learn how to fix them fast.
Gold Spacer Pop Stitch Bracelet
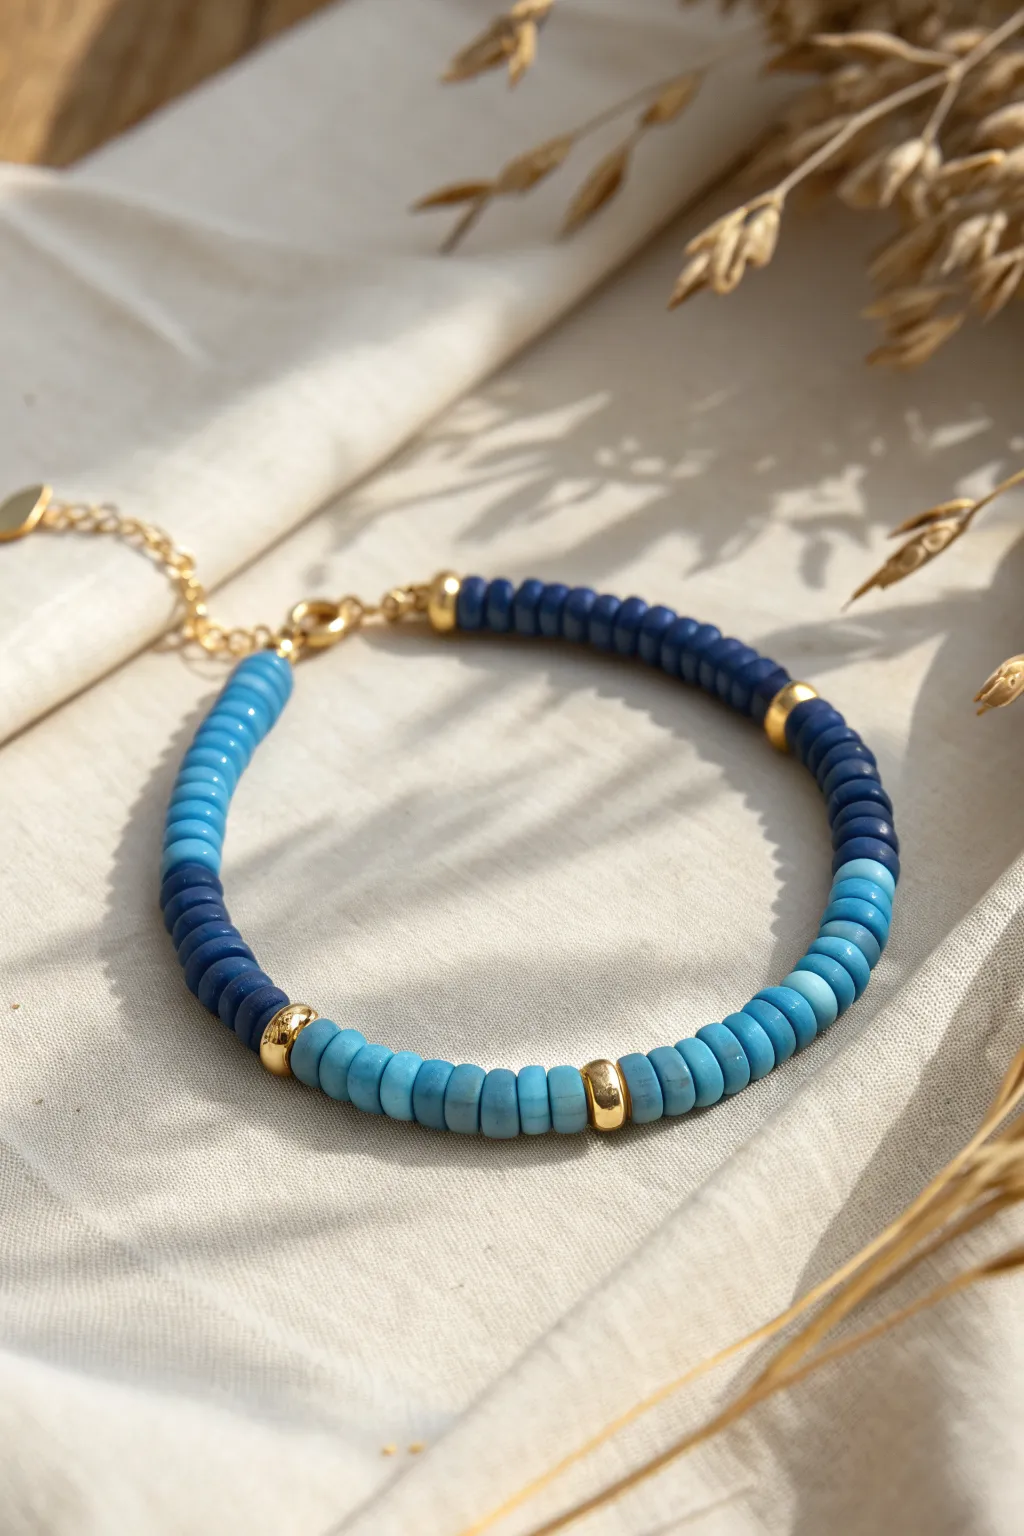
This elegant bracelet balances cool ocean tones with luxurious metallic warmth. By segmenting gradient blues with bold gold spacers, you create a sophisticated rhythm that feels simultaneously modern and classic.
How-To Guide
Materials
- Polymer clay heishi beads (dark navy blue)
- Polymer clay heishi beads (medium royal blue)
- Polymer clay heishi beads (light turquoise/sky blue)
- Gold tone metal spacer beads (rounded, approximately 4-5mm)
- Small gold crimp beads
- Gold jump rings (4mm or 5mm)
- Gold lobster claw clasp
- Gold extension chain (optional but recommended)
- Strong elastic cord or beading wire (0.8mm recommended)
- Jewelry pliers (flat nose and cutting)
- Bead stopper or tape
Step 1: Preparation & Planning
-
Measure your wrist:
Before cutting any wire, wrap a measuring tape around your wrist comfortably. Add about half an inch to this measurement to ensure the bracelet isn’t too tight once all the beads are added. -
Prepare the cord:
Cut a length of elastic cord or beading wire about 10-12 inches long. This gives you plenty of excess room to work with the clasps later without struggling. -
Secure the end:
Place a bead stopper or a piece of masking tape on one end of your cord. This simple step prevents your beads from sliding off the other side while you are stringing. -
Sort your palette:
Separate your heishi beads into three piles: the dark navy, the medium royal blue, and the light turquoise. Having them pre-sorted makes the pattern-building process much smoother.
Step 2: Creating the Bead Pattern
-
Start with navy:
Begin by threading on approximately 1.5 to 2 inches of the dark navy blue heishi beads. This creates the first solid block of color. -
Add a gold accent:
Slide on one gold rounded spacer bead. This will serve as the punctuation mark between your color transitions. -
Transition to royal blue:
Now, thread on a small section of the medium royal blue heishi beads. Aim for a shorter section here, perhaps just 10-12 beads, to act as a bridge between the dark and light tones. -
Insert the second gold spacer:
Place your second gold spacer bead onto the cord, sandwiching the medium blue section. -
String the turquoise section:
Thread on a substantial length of the light turquoise beads. This section mirrors the length of your first navy section, creating visual balance on the opposite side of the wrist. -
Third gold spacer:
Add the third gold spacer bead after the turquoise section is complete. -
Repeat the transition:
Add another short section (10-12 beads) of the medium royal blue beads. -
Final gold spacer:
Slide on the fourth and final gold spacer bead. -
Finish the loop:
Complete the stringing by adding more dark navy beads until the total beaded length matches your wrist measurement plus the allowance you calculated earlier.
Spacer Stability
Use gold spacers with a hole size close to your cord thickness. If the hole is too large, the thin heishi beads might slip inside the spacer and hide.
Step 3: Finishing Touches
-
Prepare the crimp:
Slide a gold crimp bead onto one end of the wire, followed by a jump ring attached to your lobster clasp. -
Secure the clasp side:
Thread the end of the wire back through the crimp bead to create a loop. Pull it tight (but not stiff) and use your flat nose pliers to smash the crimp bead flat, securing the wire. -
Prepare the extension side:
Repeat the crimping process on the other end of the bracelet. Slide on a crimp bead, followed by the extension chain. -
Loop and secure:
Thread the wire back through the crimp bead, pull snugly against the beads, and flatten the crimp bead firmly with your pliers. -
Trim excess wire:
Using your cutting pliers, trim the excess wire tails as close to the crimp beads as possible for a clean finish. I usually tuck a tiny bit of tail back into the first heishi bead if possible. -
Attach charm (optional):
If your extension chain has a plain end, attach a tiny gold drop charm or a single bead on a headpin to the very end for an extra professional detail.
Ombré Effect
Instead of distinct blocks, mix the beads at the transition points (e.g., 1 dark, 1 medium, 1 dark) for a softer, gradient fade between colors.
Now you have a stunning piece of arm candy ready to wear or gift
Pearl Accent Stitch Bracelet
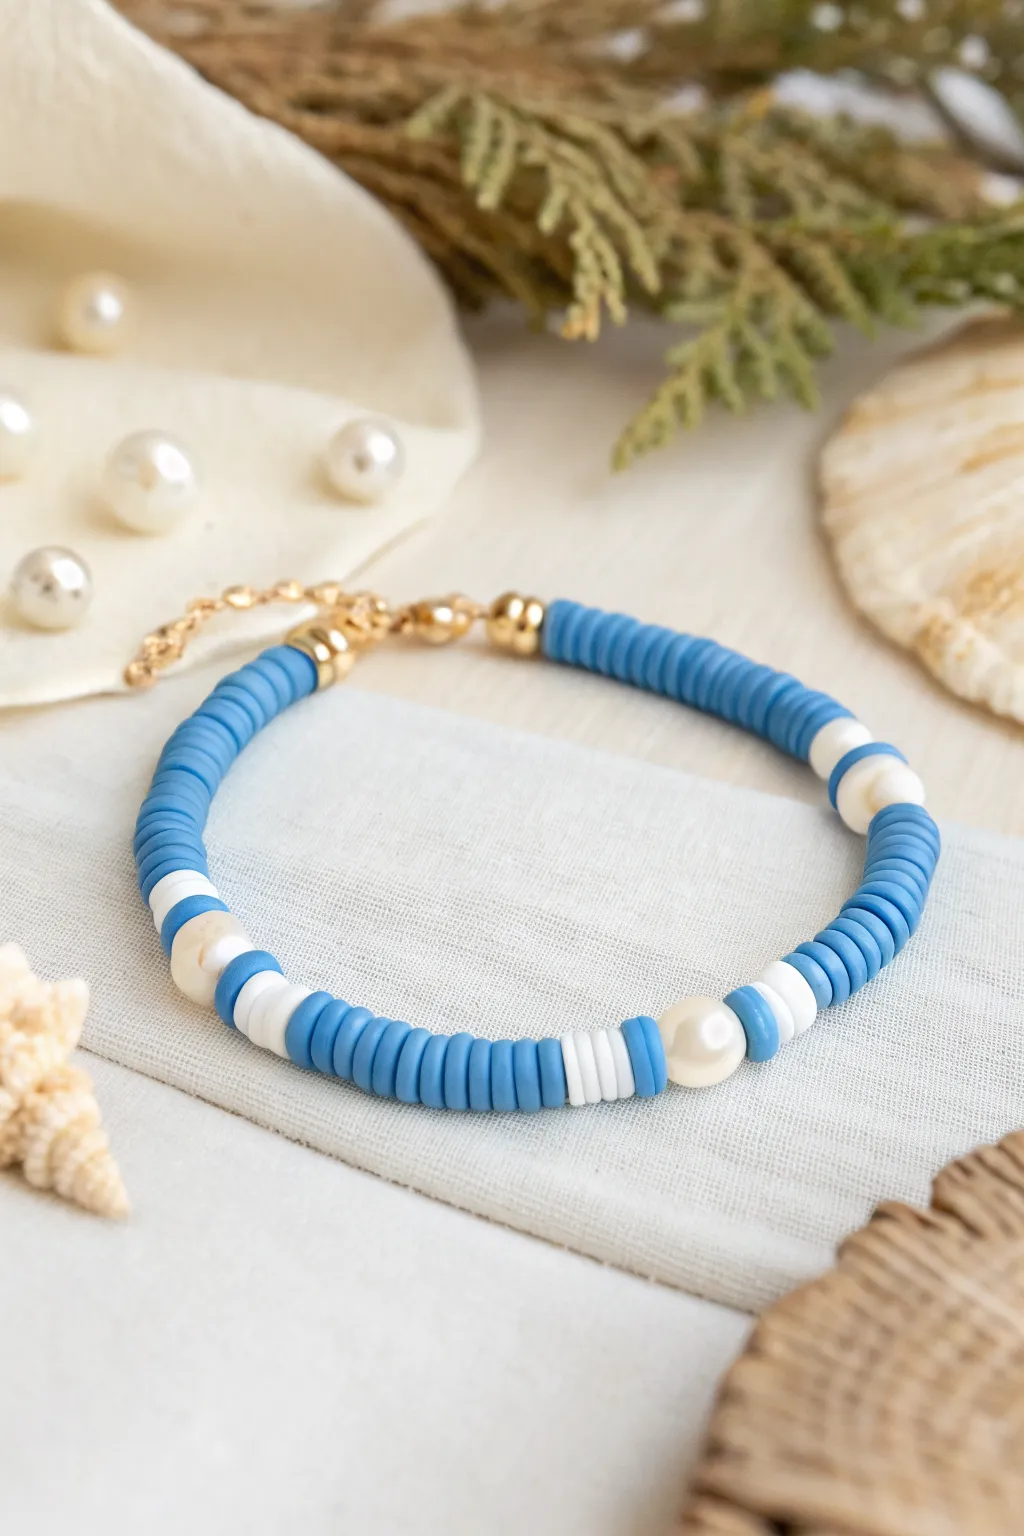
Merging the matte, modern texture of heishi clay beads with the classic elegance of faux pearls creates a design that feels right at home by the seaside. This pattern uses serene blue tones broken up by bright whites and pearls for a fresh, nautical finish.
Step-by-Step Guide
Materials
- Cornflower blue clay heishi beads (6mm)
- White clay heishi beads (6mm)
- Faux pearl beads (approx. 6-8mm, round)
- Elastic beading cord (0.7mm or 0.8mm)
- 2 Gold crimp covers
- 2 Gold jump rings
- 1 Gold lobster clasp
- Short length of gold extender chain
- Jewelry glue (optional)
- Scissors and flat-nose pliers
- Beading needle (optional, for easier threading)
Step 1: Preparation
-
Measure the wrist:
Measure your wrist and add about half an inch to determine your total bracelet length. Cut a piece of elastic cord about 4 inches longer than this measurement to give yourself plenty of room for tying knots later. -
Attach the first finding:
Before stringing any beads, it helps to secure one end if you aren’t just tying a simple knot. Thread on a gold crimp cover and a jump ring. Loop the cord back through the crimp cover. -
Secure the start:
Squeeze the crimp cover shut with your pliers to lock the jump ring in place. This gives you a solid anchor for your beads so they don’t slide off while you work.
Pearl Problems?
If the hole in the pearl is too large and swallows the clay bead, add a tiny gold seed bead between the pearl and the heishi bead to act as a stopper.
Step 2: Stringing the Pattern
-
Start the blue base:
Begin by feeding a solid block of the cornflower blue heishi beads onto the cord. You will want a long section of just blue here, approximately 1.5 to 2 inches long, to serve as the ‘back’ of the bracelet. -
First pearl accent:
Add your first accent section. Thread on one white heishi bead, followed by one faux pearl, and finish with another white heishi bead. The white clay discs act as washers, framing the pearl beautifully. -
Spacing section:
Add a medium-length segment of blue heishi beads. Use about 8 to 10 blue discs here to create separation between your glossy pearl focal points. -
Second pearl accent:
Repeat the previous accent pattern: one white heishi bead, one pearl, and one white heishi bead. -
Central spacing:
Thread on another segment of blue beads. I like to keep this symmetrical with the previous blue section, so count out the same number of discs (8-10). -
The centerpiece pearl:
Add another white/pearl/white combo. This pearl sits roughly in the middle of the design, though asymmetry can also look lovely if you prefer a random scattering. -
Short spacing variation:
For visual interest, you can make the next blue section slightly shorter. Thread on about 5 or 6 blue heishi beads. -
The stitch accent:
Instead of a pearl here, add a small ‘stitch’ of white. Thread on 3 white heishi beads in a row, then continue with your blue beads. -
Final pearl accent:
Add one last pearl section (white/pearl/white) followed by a final run of blue beads until you reach your desired total length.
Mix Your Metals
Swap the white clay washer beads for small gold spacers or faceted brass beads to add a touch of sparkle and make the pearls pop even more.
Step 3: Finishing Touches
-
Add the end hardware:
Thread on your second gold crimp cover and the lobster clasp. -
Loop and secure:
Loop the elastic tail back through the crimp cover. Pull it snug so there are no large gaps between the beads, but not so tight that the bracelet becomes stiff and won’t curve. -
Crimp firmly:
Use your flat-nose pliers to crush the crimp cover flat, securing the elastic in place. -
Knot for insurance:
Tie a double overhand knot with the remaining tail of the elastic right against the crimp bead for extra security. -
Dab of glue:
Apply a tiny drop of jewelry glue to the knot. Let it dry for a moment before trimming away the excess cord. -
Attach the extender:
Open the jump ring you attached at the very beginning using your pliers. Slip the end of the gold extender chain onto it and close the ring securely.
Now you have a breezy, chic accessory ready to pair with your summer wardrobe


What Really Happens Inside the Kiln
Learn how time and temperature work together inside the kiln to transform clay into durable ceramic.
Candy Pink and Blue Stitch Alternating Pattern
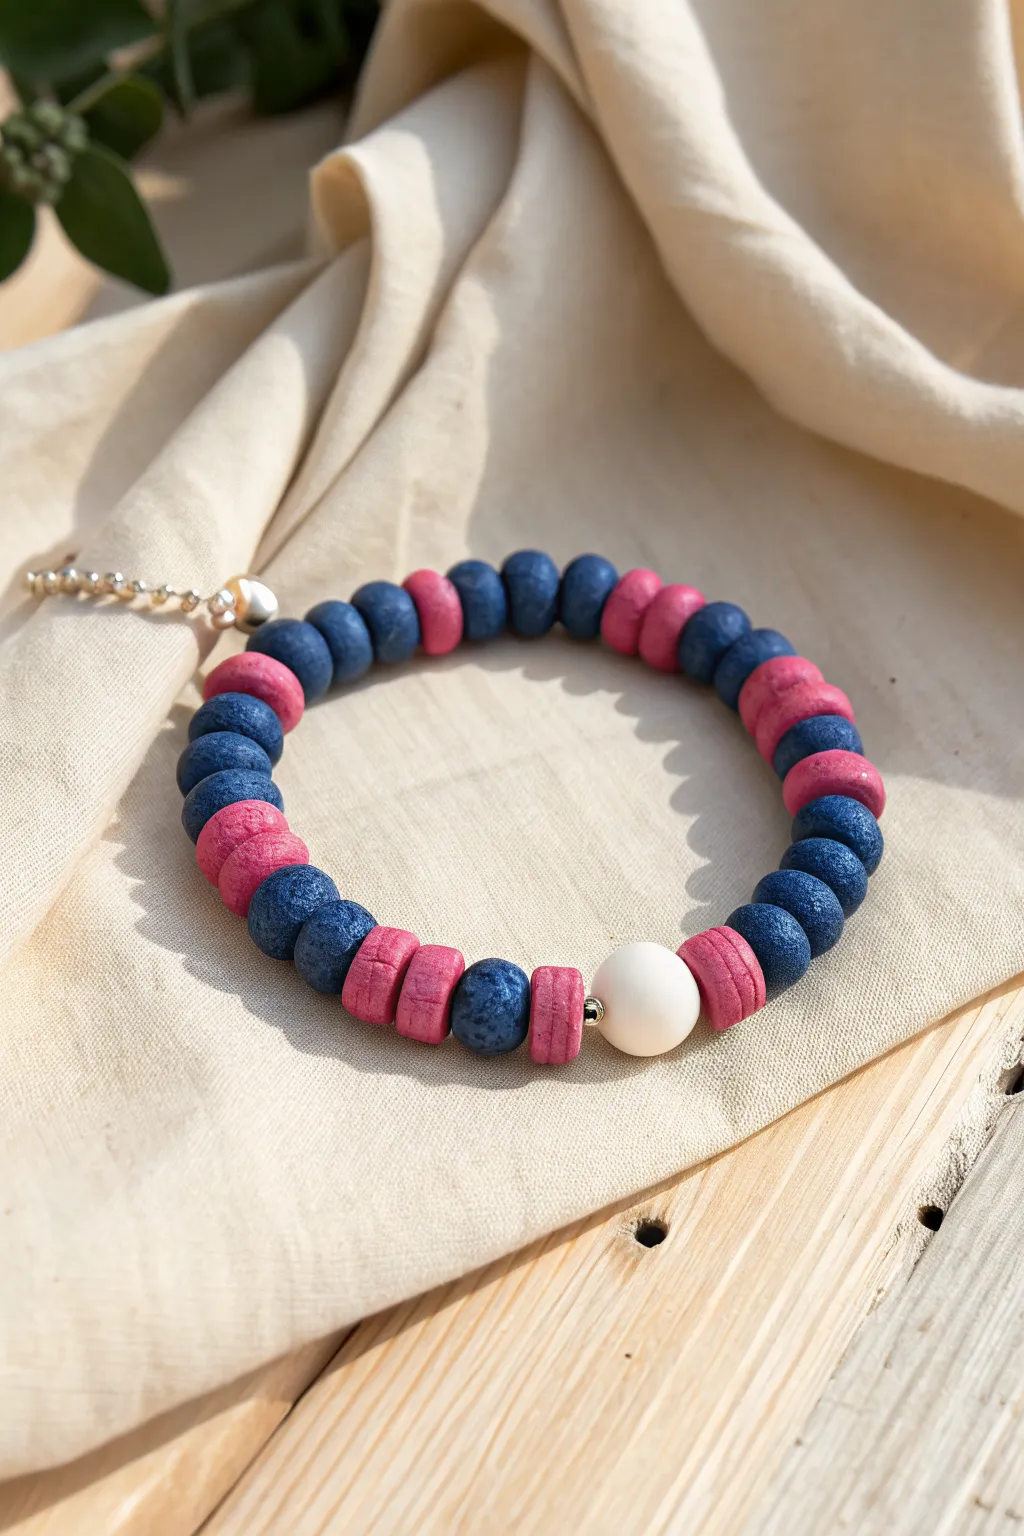
Capture the playful spirit of everyone’s favorite alien with this chunky polymer clay bracelet featuring a textured “Stitch” color palette. The alternating deep blue and candy pink beads create a bold, rhythmic pattern, finished off with a single white accent bead for contrast.
Step-by-Step Tutorial
Materials
- Polymer clay in deep navy blue
- Polymer clay in bright candy pink/magenta
- Polymer clay in white (small amount)
- Elastic stretch cord (0.8mm or 1mm)
- Clay rolling pin or pasta machine
- Small round clay cutter (approx. 8-10mm)
- Toothpick, needle tool, or bead reamer
- Sandpaper (optional, for texturing)
- Jewelry glue (GS Hypo Cement recommended)
- Small silver spacer bead (optional)
- Silver crimp cover or knot cover (optional)
- Parchment paper and baking tray
Step 1: Creating the Beads from Scratch
-
Condition the blue clay:
Start by warming the deep navy blue polymer clay in your hands. Knead it thoroughly until it is soft, pliable, and free of cracks. -
Roll the blue sheet:
Using your rolling pin or pasta machine, roll the blue clay out into a thick slab. Aim for a thickness of about 4-5mm; we want these beads to be substantial and chunky, not thin wafers. -
Condition the pink clay:
Repeat the conditioning process with your candy pink clay. Roll this out to the exact same thickness as the blue slab to ensure your bracelet looks uniform. -
Add texture:
To achieve the organic, slightly stone-like look seen in the photo, gently press a piece of coarse sandpaper or a texture sponge onto the surface of both clay slabs before cutting. -
Cut the rounds:
Use your small round cutter to punch out circles from both the blue and pink slabs. You will need roughly 20-25 blue beads and 12-15 pink beads, depending on your wrist size. -
Form the focal bead:
Take a piece of white clay and roll it into a smooth ball by hand. It should be slightly larger than the diameter of your flat disc beads to act as a centerpiece. -
Pierce the holes:
Carefully poke a hole through the center of every disc and the white ball using a toothpick or needle tool. I find that twisting the tool while pushing prevents the clay from squishing out of shape. -
Bake the beads:
Arrange all your unbaked beads on a parchment-lined baking tray. Bake according to your specific clay package’s instructions (usually around 275°F/135°C for 15-30 minutes). Let them cool completely before handling.
Smooth Edges
If your clay circles have sharp edges after cutting, gently smooth them with your finger before baking. A quick rub with baby oil can remove fingerprints.
Step 2: Assembly and Finishing
-
Prepare the cord:
Cut a length of elastic cord about 10-12 inches long. This gives you plenty of extra room to tie the knot comfortably without losing beads. -
Start the pattern:
Begin threading your beads. The pattern shown relies on blocks of color. Start with a sequence of two or three blue beads. -
Add the pink accents:
Switch to the pink beads. Thread on two pink beads, then switch back to blue found in the previous step. The image shows varying pattern lengths, like 3 blue, 2 pink, 2 blue, 1 pink, so feel free to mix up the rhythm. -
Check the length:
Continue alternating colors until you have filled about 90% of your desired bracelet length. Wrap it around your wrist to check the fit. -
Add the focal point:
Slide on three pink beads, followed by a tiny silver spacer bead (if using), and then your large white spherical bead. -
Finish the loop:
Complete the circle by ensuring the ends meet harmoniously. You might want to end with a blue section to contrast against the pink section near the white bead. -
Tie the knot:
Tie a strong surgeon’s knot (right over left, left over right). Pull the elastic tight enough that the beads touch snugly but not so tight that they buckle. -
Secure and trim:
Apply a tiny dot of jewelry glue to the knot. Once dry, snip the excess cord. If you want a hidden finish, you can pull the knot inside the hole of the large white bead.
Hole Distortion
If piercing the hole squishes your bead into an oval, wait about 15 minutes for the clay to ‘rest’ and cool slightly after rolling, or refrigerate the sheet briefly.
Enjoy wearing your vibrant, custom-made accessory that brings a pop of animation color to your outfit
Stitch Color-Block Sections
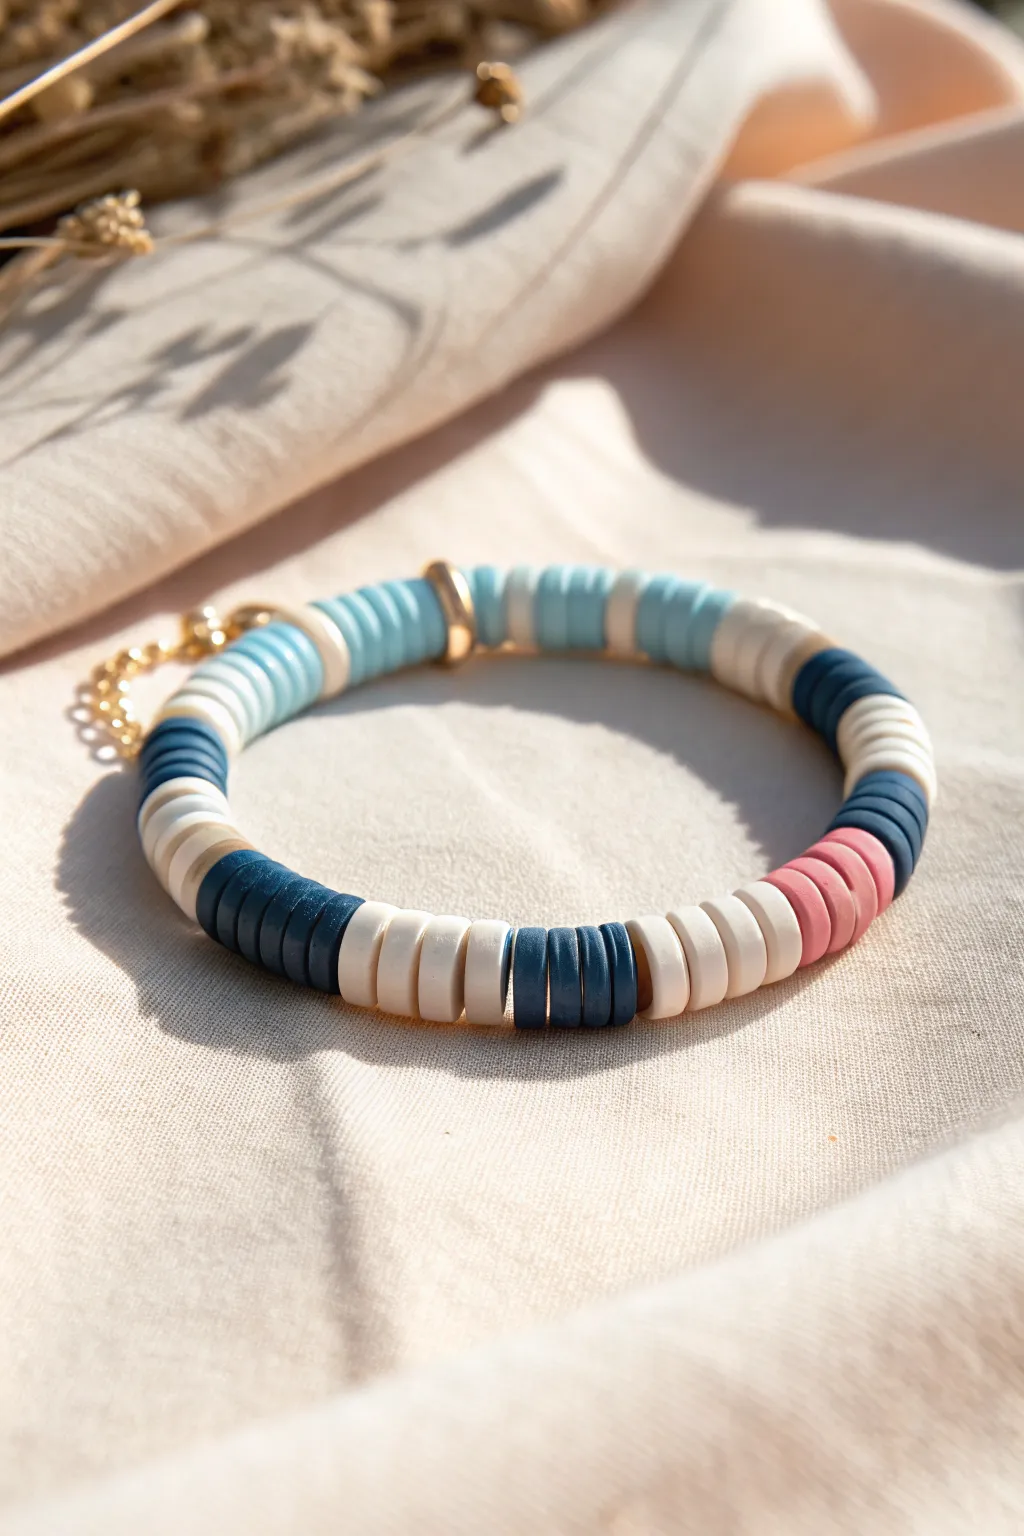
Achieve a sophisticated, modern look with this clay heishi bead bracelet featuring a distinct stitch-inspired pattern. By alternating color blocks with simple bead spacers, you create a rhythmic design that feels both casual and curated.
How-To Guide
Materials
- Polymer clay heishi beads (6mm or 4mm) in: Navy Blue, Denim Blue, Sky Blue, White/Cream, Light Pink
- Gold spacer beads or small gold jump rings
- Strong elastic cord (0.8mm recommended)
- Jewelry glue (e.g., G-S Hypo Cement)
- Scissors
Step 1: Planning the Pattern
-
Sort your beads:
Before you begin stringing, organize your heishi beads by color. You will need roughly 10-15 beads of each color for the main blocks, though this varies by wrist size. -
Understand the ‘Stitch’ concept:
The ‘stitch’ effect comes from breaking up large blocks of color with small segments of contrasting colors, primarily white or cream in this design. -
Lay out the design:
I find it helpful to lay the beads out on a bead board or a piece of felt towel first. This prevents beads from rolling away and lets you visualize the color transitions.
Loose Knot Fix
If your knots slip, try a surgeon’s knot: loop the elastic through twice on the first pass before pulling tight. This friction holds it in place while you finish tying.
Step 2: Creating the Color Blocks
-
Cut the cord:
Cut a piece of elastic cord about 10-12 inches long. This gives you plenty of extra room for tying the knot later without losing beads. -
Pre-stretch the elastic:
Give the cord a few gentle tugs. This prevents the bracelet from stretching out and becoming loose after the first few wears. -
Start the Pink section:
String approximately 5-6 Light Pink beads onto the cord. -
Add a transition:
Place 4-5 White/Cream beads next. This creates the first ‘stitch’ break in the pattern. -
Create a Navy block:
String on a small section of Navy Blue beads, roughly 4-5 beads thick. -
Insert a contrast bead:
Add a single light bead or a very small gold spacer here if you want a subtle shine, though the image relies mostly on solid clay colors. -
Build the main pattern:
Continue the pattern: 3-4 Navy beads, followed by a larger block (8-10 beads) of White/Cream. -
Introduce the blues:
After the white block, add a section of Navy Blue (approx. 10 beads). -
Creating the gradient:
Transition into the lighter blues. Place a small block (4-5 beads) of White/Cream, followed by a long section of Sky Blue. -
Add the gold accent:
Slide a gold spacer bead or a gold jump ring onto the cord in the middle of your blue sections to add a focal point. -
Finish the color loop:
Complete the circle with any remaining colors needed to reach your desired length (typically 6.5 to 7 inches for an average wrist).
Add Texture
Mix in one or two wooden spacers or a textured metal bead instead of just smooth gold to give the bracelet a more organic, boho feel.
Step 3: Securing the Bracelet
-
Check the fit:
Wrap the unfinished strand around your wrist to ensure it fits comfortable. Add or remove a few beads if necessary. -
Tie the knot:
Tie a surgeon’s knot (right over left, left over right) or a triple square knot. Pull it tight enough that there are no gaps between beads, but not so tight the layout buckles. -
Apply glue:
Dab a tiny dot of jewelry glue onto the knot. This is crucial for elastic bracelets to prevent unraveling. -
Hide the knot:
If hole size permits, gently pull the knot inside one of the adjacent beads to hide it. -
Trim excess cord:
Once the glue is tacky or dry, trim the excess elastic tail close to the bead, being careful not to cut the main knot.
Slide your new color-block bracelet on and enjoy the custom pop of color it adds to your outfit

TRACK YOUR CERAMIC JOURNEY
Capture glaze tests, firing details, and creative progress—all in one simple printable. Make your projects easier to repeat and improve.
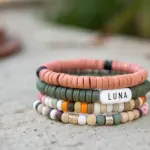
Tropical Stitch Flower Spacer Bracelet
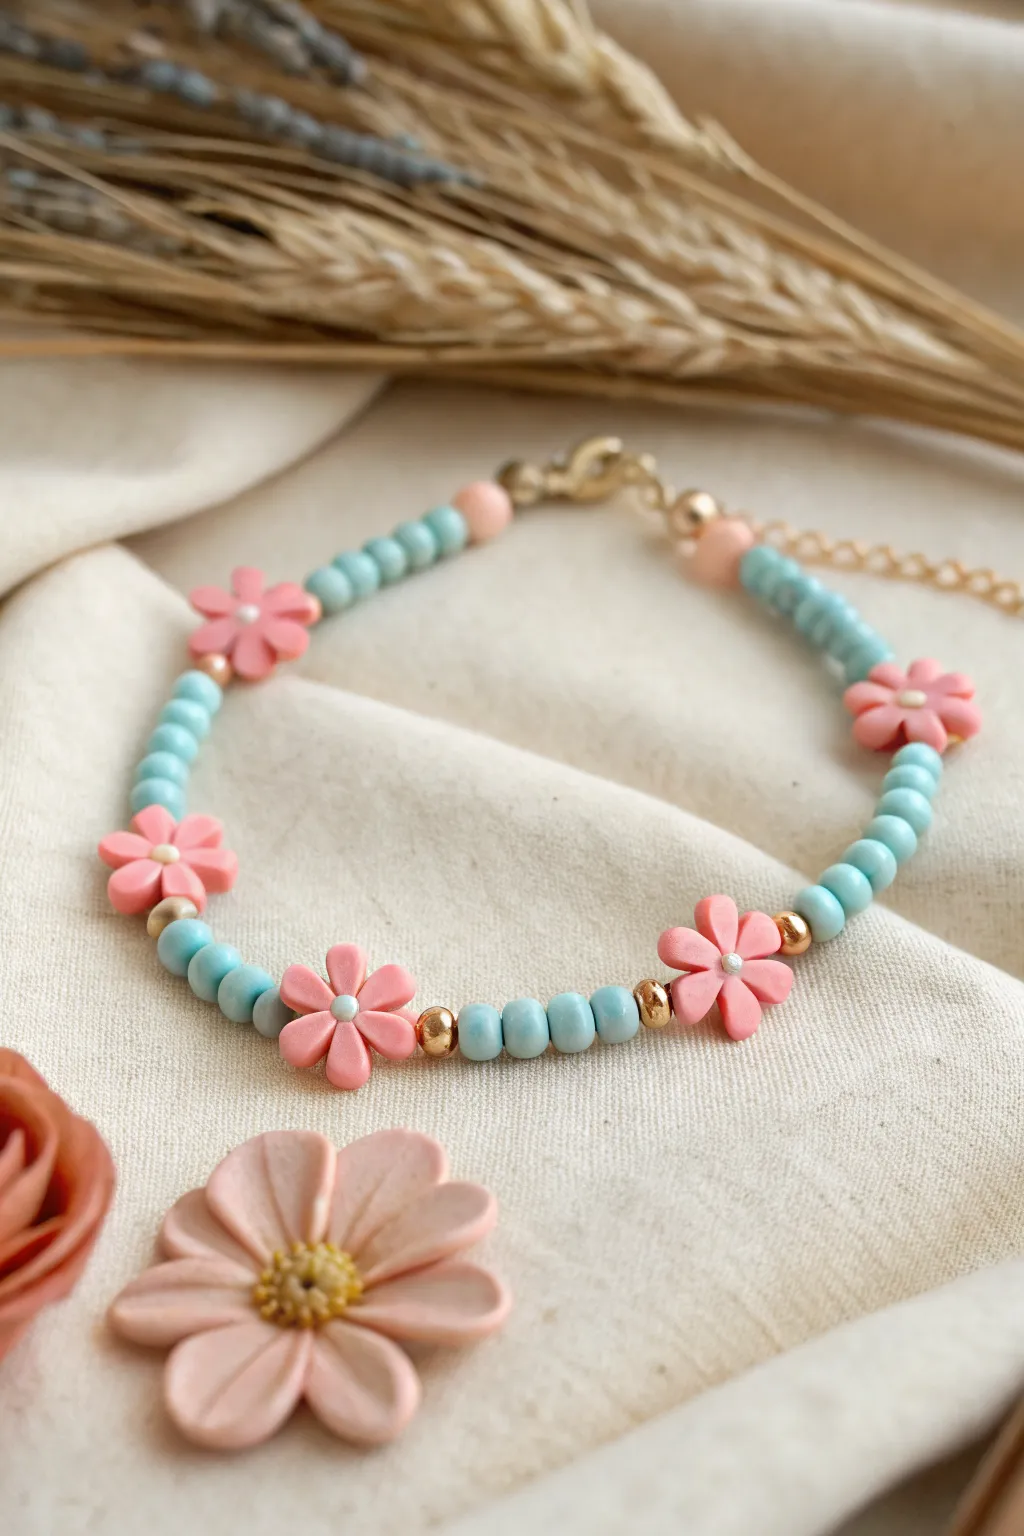
Embrace the effortless charm of Lilo and Stitch with this dainty beaded bracelet. Featuring soft pastel blue beads intersected by cheerful pink flower spacers, this piece captures a sweet, tropical vibe perfect for stacking or wearing solo.
Step-by-Step Guide
Materials
- Light blue/turquoise round seed beads (size 6/0 or 8/0)
- Pink polymer clay flower spacer beads (approx. 8mm)
- Gold round spacer beads (approx. 3-4mm)
- Light pink round bead (size 6/0 or 8/0) for ends
- Beading wire or strong elastic cord
- Gold lobster clasp
- Gold jump rings
- Gold extension chain
- Crimp beads (gold)
- Jewelry pliers (flat nose and cutting pliers)
Step 1: Preparation
-
Measure and Cut:
Begin by measuring your wrist size. Cut a length of beading wire or elastic cord that is about 4-5 inches longer than your wrist measurement to allow plenty of room for tying knots or crimping. -
Secure the End:
Thread a crimp bead onto one end of your wire, followed by a jump ring or the loop of your lobster clasp. Loop the wire back through the crimp bead. -
Crimp to Lock:
Use your flat nose pliers to squash the crimp bead firmly, securing the wire. I like to tuck the short tail of the wire into the first few beads for a cleaner finish. -
Start the Pattern:
Thread one single light pink bead onto the wire first. This acts as a soft transition from the hardware to the main pattern.
Step 2: Beading the Pattern
-
First Blue Section:
String on six of the light blue circular seed beads. This creates the first segment of color. -
Add Metal Spacer:
Slide on a single small gold round spacer bead. -
Add Flower Feature:
Thread one pink polymer clay flower bead. Ensure the hole is centered so it sits flat against the wrist. -
Close the Motif:
Add another gold round spacer bead immediately after the flower to frame it. -
Repeat Beading Segment:
String another set of light blue beads. Looking closely at the original design, the count varies slightly between 4 and 6 beads depending on wrist size, but consistency within your own piece is key. -
Second Flower Motif:
Repeat the gold spacer, pink flower, and gold spacer combination. -
Continue the Rhythm:
Continue alternating between the blue bead segments and the flower/gold combinations until you reach your desired bracelet length. The sample image features five flower motifs total. -
Final Blue Segment:
End with a segment of blue beads to match the beginning of the bracelet. -
Ending Bead:
Finish the beadwork by adding one final light pink bead, mirroring the very first bead you strung.
Loose Flowers?
If the clay flowers spin too much or droop downward, verify your wire gauge. Thicker wire fills the bead hole better, keeping the heavy flowers upright and facing forward.
Step 3: Finishing Touches
-
Add End Hardware:
Thread a crimp bead onto the remaining wire end, followed by the jump ring attached to your extension chain. -
Loop and Secure:
Pass the wire back through the crimp bead and pull it tight so there are no large gaps in the beadwork, but not so tight that the bracelet becomes stiff. -
Final Crimp:
Use your pliers to flatten the crimp bead securely. -
Trim Excess:
Cut off any remaining wire tail close to the beadwork. If possible, thread the tail back through the final pink bead before cutting for extra security. -
Check Connections:
Gently tug on both ends of the bracelet to ensure the crimps are holding tight and the jump rings are fully closed.
Island Style
Swap the blue beads for mint green or soft yellow to change the tropical vibe. You can also mix different pastel flower colors for a wildflower field look.
Now you have a sweet floral accessory ready to bring a subtle touch of summer to your outfit
Red-and-Orange Contrast Stitch Stack Buddy
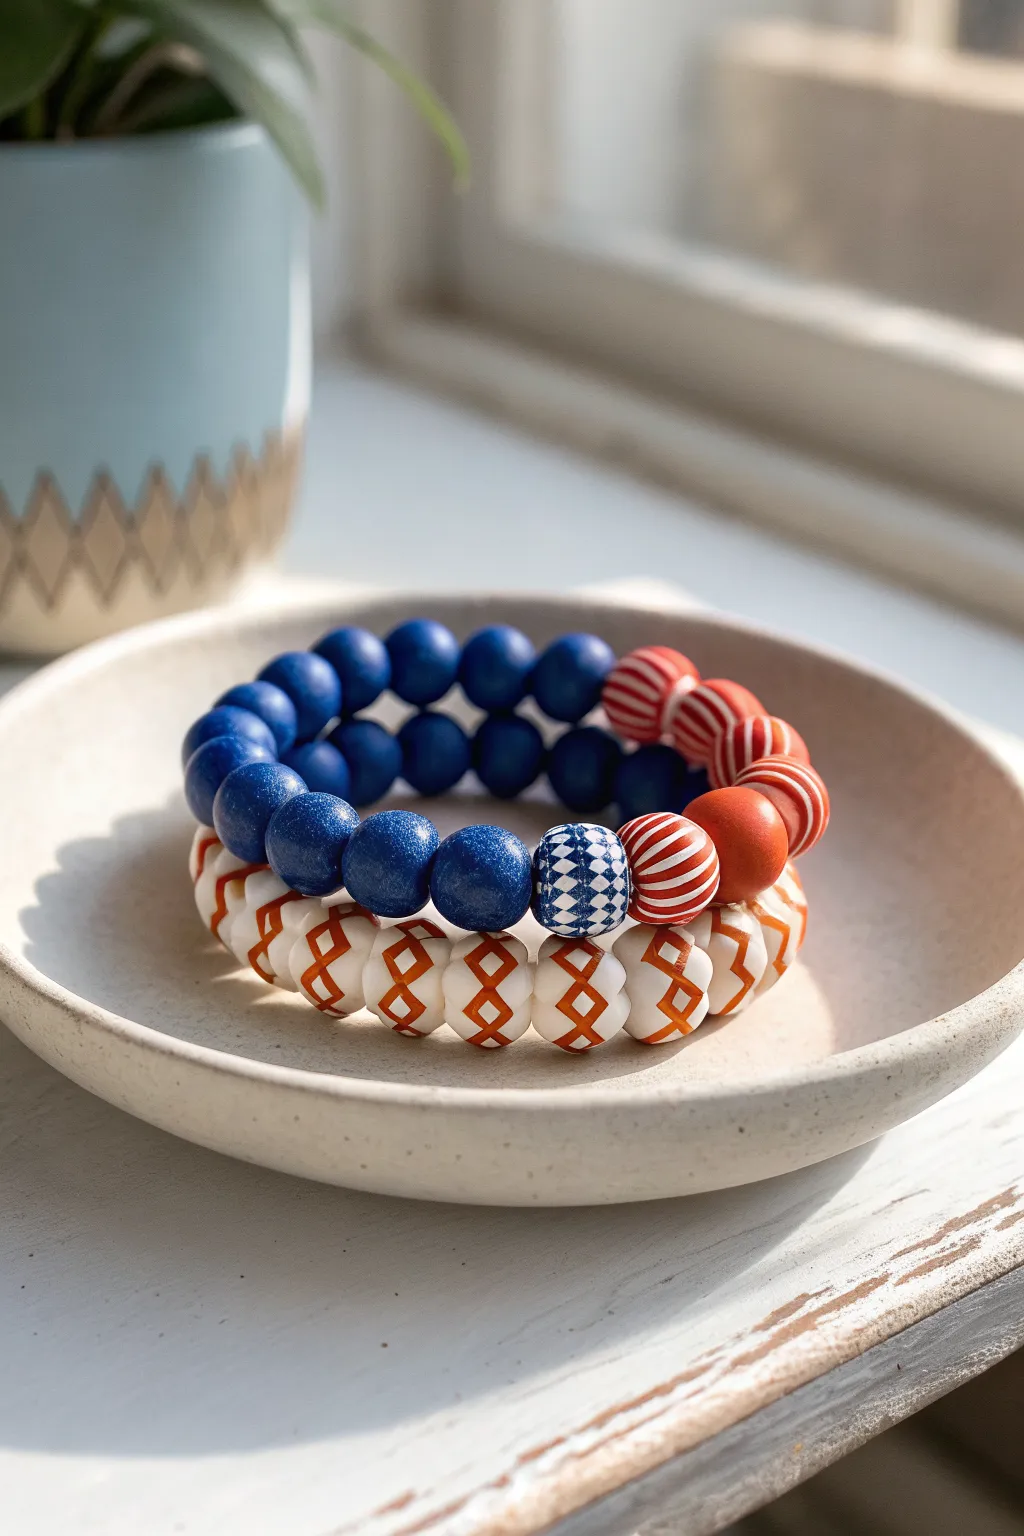
These two coordinating bracelets combine classic navy tones with vibrant pops of orange and cream for a striking, geometric look. The mix of solid textures and bold patterned beads creates a playful yet sophisticated ‘stitch’ aesthetic perfect for stacking.
Step-by-Step Tutorial
Materials
- Polymer clay (Navy Blue, White, Rust Orange, Dark Red)
- Round bead roller (12mm size)
- Bead piercing pins or toothpicks
- Elastic stretch cord (0.8mm or 1mm)
- Super glue or E6000 jewelry glue
- Acrylic paint (Navy Blue, Rust Orange)
- Fine detail paintbrush (00 size)
- Bead reamer
- Gloss glaze (optional for the patterned beads)
- Ruler
- Scissors
Step 1: Creating the Solid Blue Base Beads
-
Condition the Navy Clay:
Start by conditioning your navy blue polymer clay until it is soft and pliable. Use a pasta machine or acrylic roller to flatten it into a thick sheet. -
Measure and Cut:
Use a small circle cutter or measure equal portions of clay to ensure your solid beads are uniform in size. Aim for 12mm diameter spheres. -
Roll the Spheres:
Roll the clay pieces between your palms or use a bead roller to create smooth, perfect spheres. You will need approximately 20-22 blue beads for the top bracelet. -
Pierce the Holes:
Gently twist a bead piercing pin through the center of each sphere. If the bead deforms slightly, give it a quick re-roll while it’s still on the pin to round it back out.
Step 2: Crafting the Patterned Accent Beads
-
Form the Base Colors:
For the geometric stitch bracelet (the bottom one), roll about 20-22 white clay spheres. For the top bracelet accent, roll 3-4 spheres using white clay and one sphere using rust orange clay. -
Pierce and Prep:
Pierce holes through all these new spheres just like the blue ones. Place all your raw clay beads (blue, white, and rust) on a baking tray lined with parchment paper. -
Bake the Beads:
Bake according to your clay manufacturer’s instructions (usually 275°F/135°C for 15-30 minutes). Let them cool completely before handling. -
Adding the ‘Stitch’ Pattern:
For the bottom bracelet’s white beads, use a fine detail brush and rust orange acrylic paint. Paint a repeating geometric diamond or ‘X’ pattern that resembles cross-stitching around the equator of each bead. -
Painting Stripes:
Take the few white accent beads for the top bracelet. Paint thin, vertical stripes using dark red paint to create a textured gathered look. Paint one bead with a navy blue checkerboard pattern as a central focal point. -
Seal the Paint:
Once the paint is fully dry, I like to apply a light coat of matte or gloss varnish to the painted beads to protect the design and give them a finished sheen.
Uneven Patterns?
If painting straight lines on round beads is tricky, use drafting tape or thin washi tape to mask off the areas you want to keep white. Peel carefully while paint is wet.
Step 3: Assembly and Finishing
-
Cut the Cord:
Cut two lengths of elastic cord, each about 10-12 inches long. This gives you plenty of extra room for tying knots. -
Pre-stretch the Elastic:
Give the cord a few firm tugs. This pre-stretching prevents the bracelet from growing loose immediately after you wear it. -
String the Top Bracelet:
Thread the navy blue beads onto the first cord. In the center, add your accent sequence: stripe bead, stripe bead, solid orange bead, stripe bead, navy checkerboard bead. -
String the Stitch Bracelet:
On the second cord, thread your white beads with the painted orange ‘stitch’ pattern. Rotate them so the patterns align nicely or look pleasantly random. -
Tie the Knots:
Bring the ends of the cord together and tie a surgeon’s knot (a square knot passed through twice). Pull it tight until the beads touch snugly. -
Secure and Trim:
Dab a tiny drop of super glue or jewelry glue onto the knot. Let it dry for a minute, then tuck the knot inside the nearest bead hole before trimming the excess cord.
Paint Durability
For a pattern that won’t scratch off, try mixing the paint with a tiny bit of liquid polymer clay before applying, then re-bake the beads for 10 mins to cure the design.
Now you have a custom-designed stack that perfectly balances bold color with intricate detail
Stitch-Inspired Charm Drop Bracelet
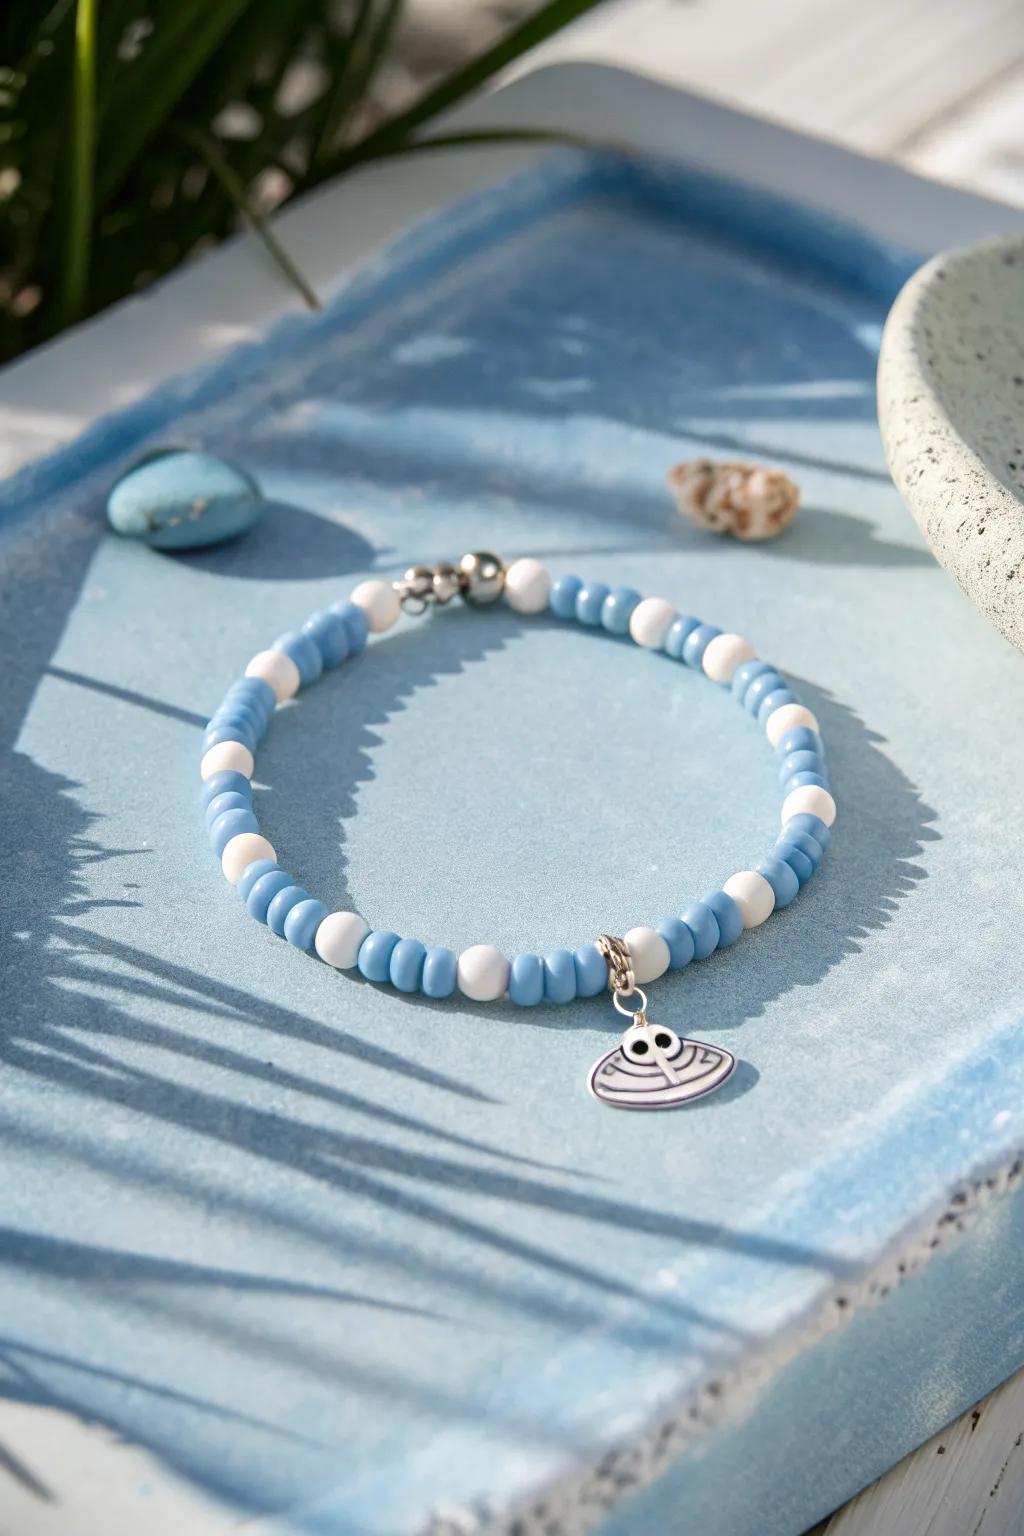
Capture the island breeze with this delightful beaded bracelet inspired by everyone’s favorite alien experiment. Featuring a cool blue palette and a custom-made charm, this accessory is perfect for adding a touch of whimsy to your summer style.
Detailed Instructions
Materials
- Light blue seed beads (size 6/0 or 8/0)
- White seed beads (size 6/0 or 8/0)
- Shrink plastic sheet
- Silver jump rings (4mm or 5mm)
- Silver lobster clasp and connector ring
- Flexible beading wire or strong elastic cord
- Crimp beads (if using wire)
- Permanent markers or colored pencils (blue, black, purple)
- Scissors
- Hole punch
- Jewelry pliers (round nose and flat nose)
- Oven or heat gun
Step 1: Creating the Charm
-
Design the UFO:
Start by drawing Stitch’s iconic red spaceship on your shrink plastic sheet. Remember that shrink plastic reduces in size significantly (usually to about 1/3), so draw your spaceship about 2-3 inches wide to get a nice charm size. -
Coloring:
Color in your spaceship design. Use the reference image to mimic the silver/grey body and the black cockpit window details. If using pencils, lightly sand the plastic first for better grip. -
Cutting:
Carefully cut around your spaceship design, leaving a small border if you prefer a clear outline, or cutting right to the edge for a cleaner look. -
Adding the Hole:
Before shrinking, punch a hole at the top center of the spaceship. Do not skip this step, as it’s nearly impossible to make a hole cleanly after the plastic has hardened. -
Shrinking:
Follow the manufacturer’s instructions to shrink your charm using an oven or heat gun. Watch it curl and then flatten out; I like to press it flat with a heavy book immediately after it comes out of the heat to ensure it’s perfectly level. -
Sealing:
Once cool, you can seal the design with a thin layer of clear resin or dimensional glaze to protect the drawing and add a glossy finish.
Step 2: Assembling the Bracelet
-
Measure and Cut:
Wrap your beading wire or elastic around your wrist to find the desired length, then add about 3-4 inches excess for tying off or crimping. Cut the cord. -
Secure One End:
If using wire, thread a crimp bead and one half of your clasp onto the end. Loop the wire back through the crimp bead and use flat nose pliers to squash it tight. If using elastic, you can just tape one end down for now. -
Pattern Planning:
Lay out your beads on a mat to establish your pattern. The image shows a repeating sequence: five light blue beads followed by one white bead. -
Start Beading:
Begin threading your pattern onto the cord. Start with a white bead, then add five blue beads. -
Continue the Pattern:
Repeat the 1 white, 5 blue pattern continuously. Check the length against your wrist periodically as you work. -
Center Mark:
When you have strung enough beads to reach the halfway point of your bracelet length, pause. This is where we will attach the charm later, though some crafters prefer to thread the charm directly onto the cord. -
Direct Charm Attachment:
To match the image exactly, thread a silver jump ring onto the cord at the center point, then continue your beading pattern. This jump ring will hold your charm. -
Finish Beading:
Continue the 5 blue, 1 white pattern until you reach the full desired length of the bracelet. -
Close the Loop:
Thread a crimp bead and the connector ring (or the other half of the clasp) onto the end. Feed the wire back through the crimp bead and pull tight, leaving just a bit of slack so the bracelet moves fluidly. -
Secure the End:
Flatten the crimp bead firmly with your pliers. Trim the excess wire tail close to the bead. If using elastic, tie a sturdy surgeon’s knot and secure with a dot of glue. -
Attach the Charm:
Open the jump ring you threaded earlier (or add a new one if you skipped that step) using two pairs of pliers. Twist the ends away from each other—never pull them apart. -
Final Touch:
Slip your finished shrink plastic spaceship charm onto the open jump ring and close the ring securely by twisting the ends back together until they are flush.
Fixing Wonky Charms
If your shrink plastic charm curled up and hardened unevenly, reheat it slightly with a heat gun until pliable, then quickly press it flat under a heavy glass.
Level Up: Cosmic Sparkle
Swap the plain white beads for glow-in-the-dark beads or pearlescent ones to give your bracelet an extraterrestrial glow at night.
Now you have a handmade tribute to Experiment 626 ready to wear on your next adventure
Stitch Wave Pattern in Two Blues
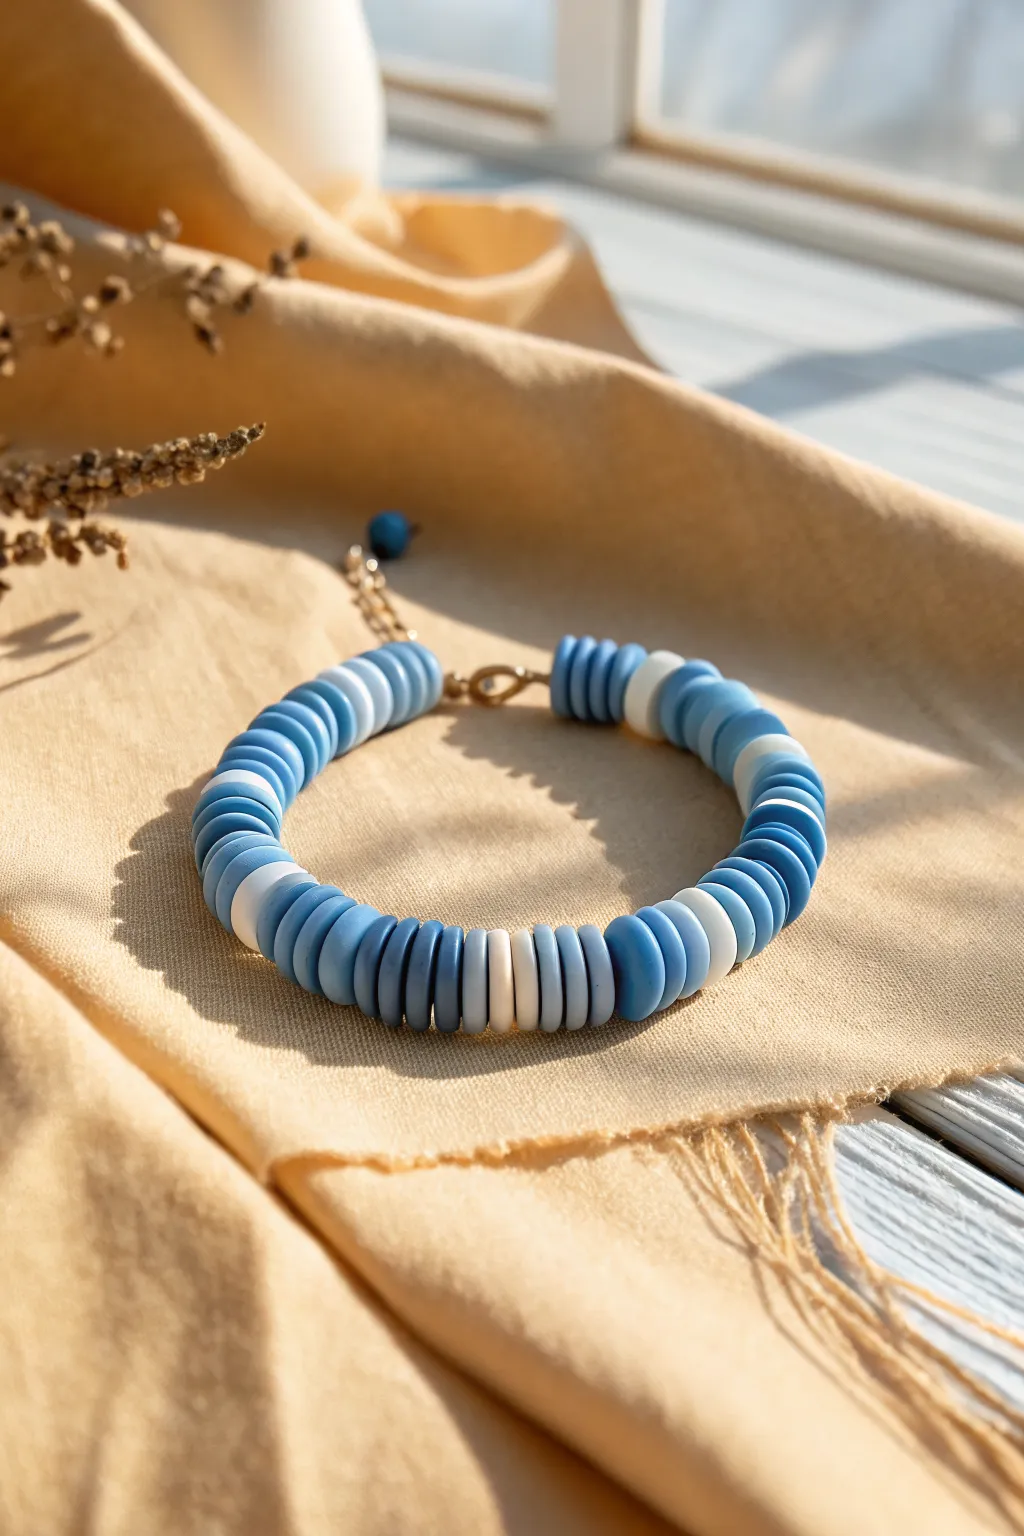
Capture the serene hues of the sea with this calming clay bead bracelet, featuring a rhythmic pattern of deep blues, sky blues, and crisp whites. This design mimics the gentle cresting of waves, making it a perfect accessory for breezy summer days.
Step-by-Step Tutorial
Materials
- 6mm flat round polymer clay beads (Heishi beads) in Navy Blue
- 6mm flat round polymer clay beads in Sky Blue/Light Blue
- 6mm flat round polymer clay beads in White/Cream
- 0.8mm clear elastic stretch cord
- 2 small gold jump rings (4-6mm)
- Gold lobster clasp
- Small length of gold chain extender (1-2 inches)
- Small round charm bead (matching the blue clay)
- Jewelry pliers (flat nose and round nose)
- Scissors
- Super glue or jewelry cement
Step 1: Preparation
-
Measure your cord:
Cut a piece of elastic cord about 10-12 inches long. This generous length gives you plenty of room to knot securely without frustration. -
Pre-stretch the elastic:
Hold the cord at both ends and give it several firm tugs. This step is crucial because it prevents the bracelet from stretching out permanently after the first wear. -
Secure one end:
Attach a piece of tape or a binder clip to one end of your cord to stop the beads from sliding off while you work.
Step 2: Stringing the Pattern
-
Start the main segment:
Begin by threading on a block of Navy Blue beads. Aim for about 5-6 beads to create a solid start to the pattern. -
Transition the color:
Add 2-3 Sky Blue beads next. This acts as the gradient transition between the dark and light sections. -
Add the highlight:
Thread on 2 White beads. These bright pops of color represent the foam of a wave and break up the blue tones beautifully. -
Complete the wave segment:
Finish this pattern block by adding another 2-3 Sky Blue beads. This mirrors the previous transition, leading you back into the darker color. -
Repeat the wave:
Start the next block with 4-5 Navy Blue beads. Continue repeating the sequence: Navy -> Sky Blue -> White -> Sky Blue -> Navy. -
Check the fit:
Wrap the beaded cord around your wrist occasionally. You want the beaded section to sit comfortably without gaps, but not feel tight. -
Adjust the pattern:
Continue until you reach your desired length. I usually end with a Navy Blue section to match the beginning for symmetry.
Smooth Transitions
For a smoother look, use thinner disc beads (4mm vs 6mm). Thinner discs create a more fluid, seamless gradient than chunkier beads.
Step 3: Finishing Touches
-
Prepare for closure:
Instead of a simple knot, we are adding hardware for a professional finish. Thread the cord end through a small crimp bead (optional) or directly through a small wire loop if using wire guards. -
Attaching the clasp:
For this specific look, knot the elastic cord securely onto a closed jump ring on one side. Use a surgeon’s knot (right over left, left over right) and pull very tight. -
Secure the knot:
Place a tiny drop of super glue on the knot. Let it dry completely before trimming the excess elastic tail close to the knot. -
Install the other side:
Repeat the knotting process on the other end of the bracelet, attaching it to a short length of gold extender chain. -
Add the lobster clasp:
Using your pliers, open a separate jump ring, slide on the lobster clasp, and attach it to the jump ring you just tied to the bracelet. Close the ring securely. -
Create the dangle charm:
Take a headpin (or a piece of wire with a loop), thread one single Navy Blue bead onto it, and make a wrapped loop at the top. -
Attach the charm:
Open the last link of your extender chain and hook on your little blue bead charm. This adds that lovely dangling detail seen in the reference image.
Add Some Texture
Replace one of the White clay bead sections with gold spacer discs or a single freshwater pearl for an elegant, mixed-media upgrade.
Step 4: Final Check
-
Test the hardware:
Gently tug on the jump rings and clasp to ensure everything is connected securely. -
Align the beads:
Roll the beads slightly between your fingers to smooth out the curve of the bracelet so the pattern lies flat.
Now you have a refreshing accessory that brings a bit of coastal calm to any outfit
Speckled “Galaxy” Stitch Bracelet

Capture the magic of a starry night sky with this textured beaded bracelet, featuring a mix of deep indigo hues and playful speckled accents. It combines the tactile appeal of ribbed stitch-style beads with smooth polymer clay rounds for a sophisticated yet earthy accessory.
Step-by-Step Guide
Materials
- Dark indigo round beads (6mm or 8mm), preferably lava stone or matte agate
- White or cream polymer clay round beads with black speckles (Dalmatian jasper style)
- Blue polymer clay beads with ribbed ‘stitch’ texture
- Plain white round spacer beads
- Silver metallic spacer discs or heishi beads
- Strong elastic beading cord (0.8mm or 1mm)
- Beading needle (optional but helpful)
- Scissors or jewelry snips
- Super glue or jewelry adhesive (G-S Hypo Cement works well)
Step 1: Planning the Design
-
Measure your wrist:
Wrap a piece of string around your wrist to find your comfortable size, then add about half an inch for ease. This ensures the bracelet won’t pinch or leave marks. -
Lay out the pattern:
Before stringing, lay your beads out on a bead board or a soft towel to visualize the design. The centerpiece of this bracelet is a symmetrical arrangement of speckled and ribbed beads, flanked by the darker indigo base beads. -
Define the focal point:
Arrange the center sequence: Place a speckled white bead in the very middle, flanked by two blue ribbed ‘stitch’ beads. Then add a plain white bead on either side of those blue ribbed ones.
Step 2: Stringing the Beads
-
Prepare the cord:
Cut a length of elastic cord about 12 inches long. Isretching the cord a few times before starting prevents it from sagging later on. -
Start the sequence:
Secure one end of the cord with a bead stopper or a piece of tape. Begin threading with the main dark indigo beads that will form the back of the bracelet. -
Thread the first transition:
Once you’ve added about 8-10 dark beads, slide on a silver spacer disc, followed by a plain white bead. -
Build the texture section:
Now for the fun part: add a ribbed blue bead, which mimics a knitted stitch texture, followed by a speckled white bead. -
Create the center motif:
Slide on another ribbed blue bead, then your central speckled bead, and a third ribbed blue bead. I like to double-check the symmetry here to ensure the pattern looks balanced. -
Finish the focal pattern:
Complete the central section by mirroring your previous steps: a speckled bead, a ribbed blue bead, and finally a plain white bead. -
Close the focal section:
Add a silver metallic spacer disc to bracket the design, giving it a polished, professional finish. -
Complete the circle:
Finish stringing by adding the remaining dark indigo beads until the strand reaches your desired length.
Knot Slipping?
If your elastic knot feels insecure, try pre-stretching the cord vigorously before stringing. The thinner the elastic gets, the tighter the knot will hold.
Step 3: Finishing Touches
-
Check the fit:
Carefully bring the ends of the cord together and wrap the bracelet around your wrist to check the size. Add or remove dark base beads if necessary. -
Knot the elastic:
Tie a surgeon’s knot (right over left, left over right, looping the second pass twice) to secure the ends tightly. Pull firmly on all four strands to lock the knot in place. -
Secure the knot:
Place a tiny drop of jewelry glue or super glue onto the knot. Let it dry completely before handling. -
Hide the mechanics:
Trim the excess cord ends close to the knot, leaving just a millimeter or two. -
Tuck it away:
Gently pull the knot inside the hole of one of the neighboring dark lava beads to hide it from view.
Add a Scent
Use actual porosity lava beads for the dark sections. Add a drop of essential oil (like lavender or cedar) to them for a diffuser bracelet.
Wear your new stellar creation stacked with silver bangles or let it shine solo as a textured statement piece
Marbled Blue Stitch Statement Center
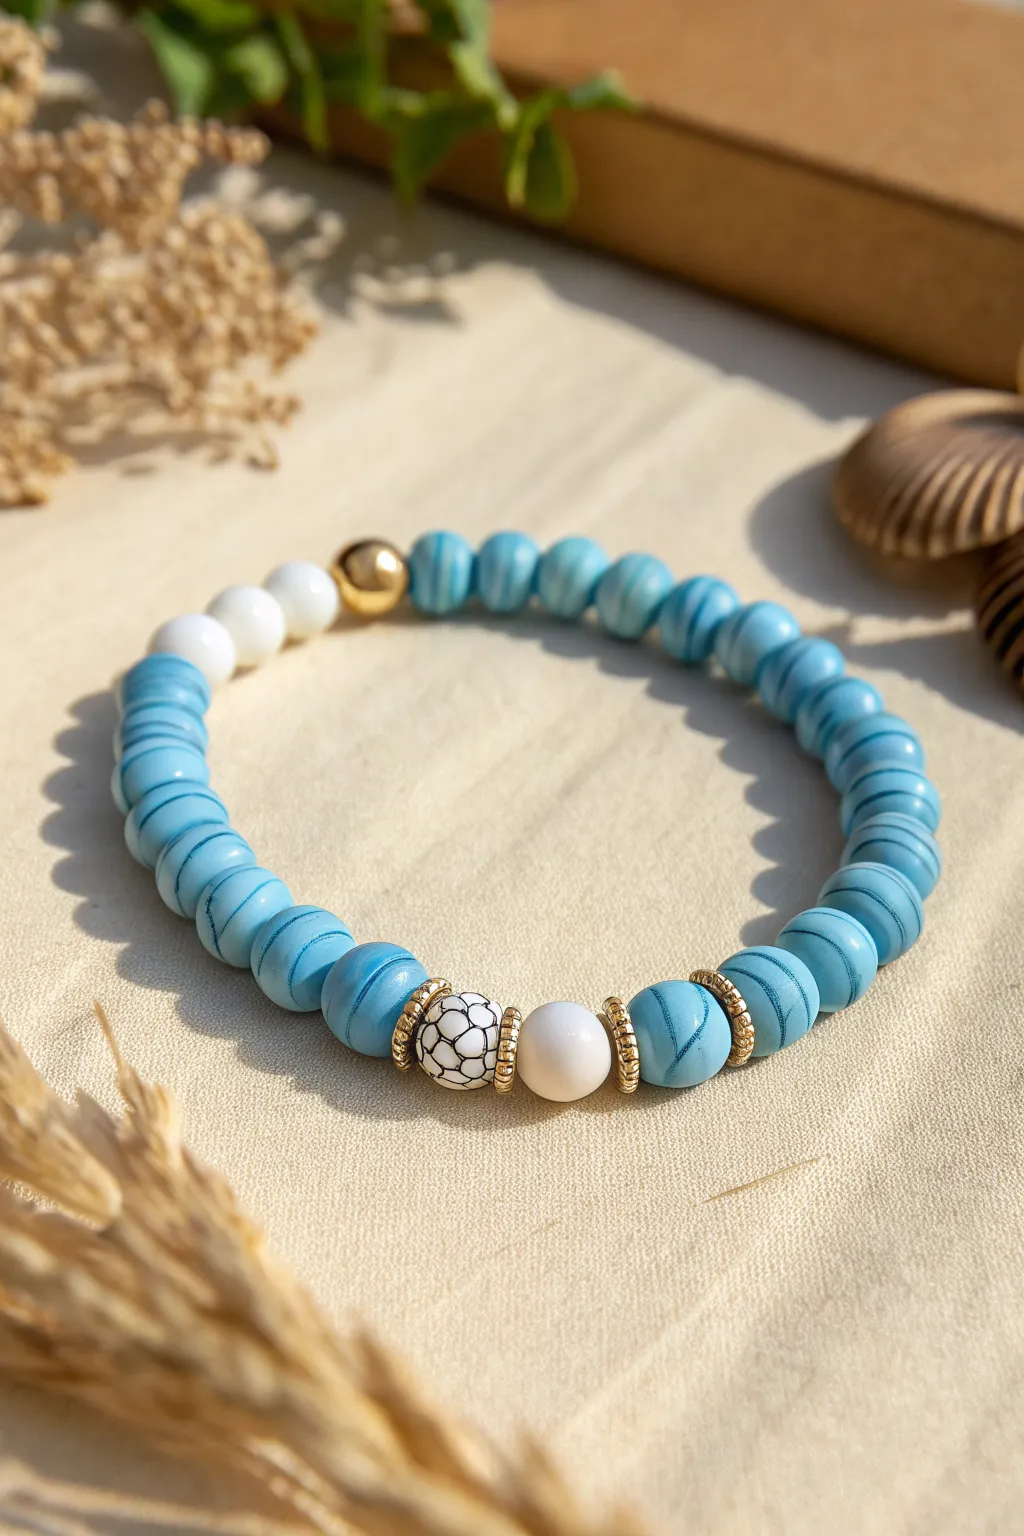
This bracelet combines the soothing hues of summer skies with sophisticated gold accents, creating a perfect accessory for both casual days and dressy evenings. The unique blend of marbled blue polymer clay beads and a distinct crackled focal point makes this piece a true standout.
Step-by-Step Tutorial
Materials
- Blue marbled polymer clay heishi disk beads (approx. 6mm)
- White polymer clay heishi disk beads (approx. 6mm)
- Round polymer clay bead (white)
- Crackle-pattern round focal bead (white/black)
- Gold tone metal accent bead (smooth, round)
- Gold tone rhinestone rondelle spacers
- Strong elastic cord (0.8mm or 1mm)
- Jewelry adhesive or clear nail polish
- Scissors
Step 1: Preparation
-
Measure your wrist:
Wrap a piece of string or a flexible measuring tape around your wrist to find your size. Add about half an inch to this measurement to ensure the bracelet fits comfortably without being too tight. -
Cut the cord:
Cut a length of elastic cord about 10-12 inches long. Having this extra length makes tying the finishing knots significantly easier than struggling with short ends. -
Pre-stretch the elastic:
Hold the ends of your cut cord and give it a few gentle tugs. This pre-stretching helps prevent the bracelet from loosening up and sagging after you’ve worn it a few times. -
Secure the end:
Attach a piece of tape or a bead stopper to one end of the cord so your beads don’t slide off while you are working.
Step 2: Creating the Focal Section
-
Start the pattern:
Begin threading beads starting from one side of the central focal point. Slide on one blue marbled heishi bead followed by a gold rhinestone spacer. -
Add the crackle bead:
Thread on the white bead with the black crackle pattern. This acts as the visual anchor for the bottom of the bracelet. -
Include the secondary focal:
Add another gold spacer, then string the plain white round bead. This provides a nice textural contrast to the flat disk beads. -
Finish the center grouping:
Place one last gold spacer onto the cord, followed by a blue marbled heishi bead. This completes the complex center arrangement.
Knot Slipping?
If the elastic feels slippery, rough up the ends slightly with sandpaper before tying, or use a Surgeon’s Knot (looping twice) for extra grip.
Step 3: Building the Band
-
String the blue side:
On the side of the focal cluster that ends with the crackle bead, start threading the blue marbled heishi beads. Continue adding these until you have covered about half the length of the remaining band. -
Create the white transition:
Switch to the other side of your cord. Add about three white heishi beads. This creates a color block effect on the ‘top’ of the wrist. -
Add the gold accent:
After the three white beads, thread on the single large gold round bead. This adds a flash of metallic shine opposite the main focal point. -
Complete the blue section:
Fill the rest of the strand with the blue marbled beads until you reach your desired total length. Check the fit by wrapping it around your wrist.
Make it a Stack
Make two more bracelets to wear with this one: one solid white strand and one solid blue strand to create a cohesive layered look.
Step 4: Finishing Touches
-
Prepare to tie:
Remove the tape or bead stopper carefully. Bring the two ends of the cord together, ensuring there are no gaps between the beads. -
Tie the knot:
Make a square knot (right over left, left over right). Pull it tight. I usually like to tie a second surgeon’s knot over this for extra security. -
Secure with glue:
Apply a tiny dab of jewelry glue or clear nail polish directly onto the knot. Let it dry for a few minutes to ensure it won’t slip. -
Hide the knot:
Trim the excess cord ends close to the knot. Gently pull the elastic so the knot slides inside the hole of the nearest large bead to conceal it.
Enjoy wearing your new handcrafted piece that captures the essence of coastal elegance
Glow-in-the-Dark Stitch Night Bracelet

Capture the magic of a starry island night with this elegant yet playful bracelet featuring deep indigo and soft mint hues. Perfect for fans of a certain mischievous alien, the pastel beads add a secret glow-in-the-dark surprise when the lights go out.
Detailed Instructions
Materials
- Polymer clay (Deep Navy/Indigo Blue)
- Polymer clay (Glow-in-the-dark or Pale Mint)
- Small silver daisy spacer beads (approx. 4-6mm)
- Elastic jewelry cord (0.8mm clear)
- Bead roller tool (optional but helpful)
- Needle tool or toothpick
- Jewelry glue (E6000 or similar)
- Lobster clasp and jump rings (optional alternative to elastic)
- Crimping beads (if using clasp)
- Parchment paper and baking sheet
Step 1: Crafting the Clay Beads
-
Condition the dark clay:
Begin by warming the deep navy blue polymer clay in your hands. Knead it thoroughly until it is soft, pliable, and free of cracks. -
Portion the dark beads:
Roll the navy clay into a long, even snake about 1cm thick. Slice this snake into equal segments to ensure your beads are all the same size. -
Roll the rounds:
Take each blue segment and roll it between your palms or use a bead roller to create perfectly spherical balls. You will need about 12-14 of these, depending on wrist size. -
Prepare the glow clay:
Clean your hands to avoid color transfer. Repeat the conditioning process with your glow-in-the-dark or pale mint clay. -
Form the light beads:
Roll an equal number of light-colored spheres. Aim to keep them exactly the same diameter as your dark blue beads for a uniform look. -
Create the holes:
Using a needle tool or toothpick, carefully pierce the center of each bead. Twist the tool gently as you push through to avoid squashing the spherical shape. -
Texture check:
For the matte finish seen in the photo, ensure you don’t polish the beads before baking. A light dusting of cornstarch can help maintain that soft, powdery texture during curing. -
Bake the batch:
Arrange the beads on a parchment-lined baking sheet. Bake according to your clay package instructions (usually 275°F/135°C for 15-30 minutes) and let them cool completely.
Sticky Situation
If clay sticks to your hands or tools, dust them lightly with cornstarch or baby powder. This also helps remove fingerprints for a smoother finish.
Step 2: Stringing the Design
-
Measure the cord:
Cut a length of elastic cord about 10-12 inches long. This gives you plenty of extra room to tie the knot comfortably. -
Pre-stretch the elastic:
Give the cord a few firm tugs. This crucial step prevents the bracelet from stretching out permanently after wearing it the first time. -
Start the pattern:
Establish a consistent pattern. Looking at the photo, the design works in blocks: string three dark navy beads, followed by sticking three light mint beads. -
Add the spacers:
This is where the detail comes in. Place a silver daisy spacer bead between the color transitions. I find placing them on either side of the light colored sections frames them beautifully. -
Continue the rhythm:
Repeat the pattern—three dark, spacer, three light, spacer—until the strand reaches your desired wrist length. -
Check the fit:
Wrap the unfinished strand around your wrist. It should sit comfortably without pinching skin or drooping too low. -
Tie the knot:
Tie a surgeon’s knot (right over left, left over right, and loop through an extra time). Pull it very tight so the beads press firmly together. -
Secure the finish:
Dab a tiny drop of jewelry glue onto the knot. Let it dry for a distinct moment before trimming the excess cord tails close to the knot.
Cosmic Sparkle
Mix a pinch of ultrafine silver glitter into the navy clay before rolling. It mimics a starry night sky to complement the glowing ‘moon’ beads.
Slip on your new creation and enjoy the subtle glow when the sun goes down
Mixed-Shape Stitch Bead Texture Mix
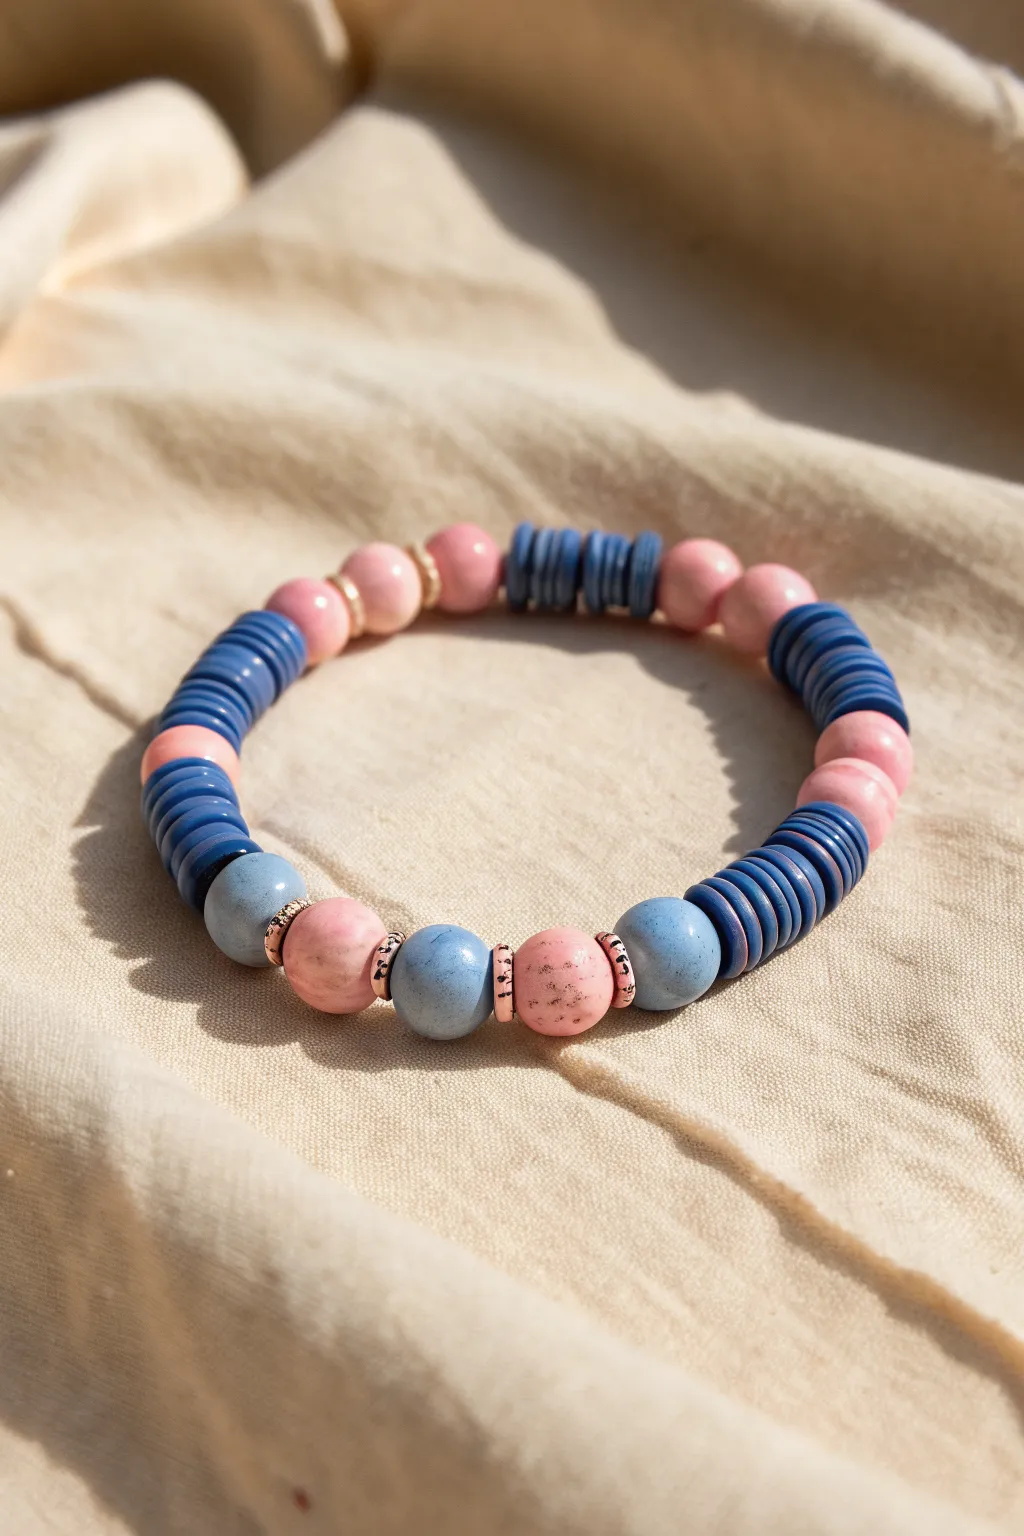
Embrace a playful rhythm of color and shape with this mixed-bead bracelet that balances chunky round beads with sleek heishi discs. The combination of speckled clay rounds, smooth pink accents, and classic blue discs creates a tactile accessory perfect for stacking or wearing solo.
Detailed Instructions
Materials
- Stretch cord (0.8mm or 1mm thickness)
- Blue polymer clay heishi disc beads (approx. 6mm)
- Speckled pink round beads (10mm – likely ceramic or polymer clay)
- Speckled blue round beads (10mm – matching the pink ones)
- Solid pink round beads (8-10mm – likely wood or acrylic)
- Gold or copper spacer rings (small, textured or smooth)
- Jewelry glue or clear nail polish
- Scissors
Step 1: Planning and Sorting
-
Analyze the pattern:
Take a close look at the design. This bracelet isn’t symmetrical; it relies on ‘blocks’ of texture. Notice you have sections of stacked blue discs, pairs of large round beads, and transition points marked by metallic spacers. -
Measure your wrist:
Wrap the stretch cord loosely around your wrist and add about 3-4 inches of excess. Cut the cord. I find it helpful to secure one end with a piece of tape or a bead stopper so nothing slides off while working.
Spacer Secrets
Use textured or ‘daisy’ spacers next to larger round beads. Their ridges grip the bead surface better than smooth rings, keeping your focal beads from spinning too much.
Step 2: Stringing the Speckled Section
-
Start the focal point:
Begin by threading on your large round beads. The pattern starts with an alternating sequence: Blue Round, Metallic Spacer, Pink Round, Metallic Spacer. -
Continue the sequence:
Repeat that small pattern. Add another Blue Round, then a transition section of blue heishi discs. -
Add the disc block:
String approximately 8-10 blue heishi disc beads. These flat discs create a wonderful visual break from the chunky round beads.
Step 3: Building the Sides
-
Transition back to rounds:
After the blue discs, add a single large Pink Round bead. Then, add a smaller stack of blue discs (about 5-6). -
Create the mirrored section:
Add another large Pink Round bead to balance the previous one. -
Add a long disc section:
Thread on a longer section of blue discs now, perhaps 12-15 beads. This will sit on the side of the wrist.
Color Swap
Replace the blue heishi beads with matte black discs and the pink rounds with white marble beads for a modern, high-contrast monochrome version of this stitch design.
Step 4: Completing the Loop
-
Insert the final round beads:
Add two Solid Pink Round beads. Because these lack the speckling of the focal beads, they add a nice smoothness to the back or side of the design. -
Add subtle spacers:
Place a thin metallic spacer ring between these two solid pink beads if you want extra shine, though they can also sit side-by-side. -
Finish with discs:
Fill the remaining space on your cord with a final small segment of blue heishi discs (about 5-8) until the bracelet reaches your desired length.
Step 5: Finishing Touches
-
Check the fit:
carefully wrap the strand around your wrist. It should be snug but not tight. Add or remove a few heishi discs to adjust the size without disrupting the main pattern. -
Pre-stretch the cord:
Give the ends of the cord a gentle tug. Pre-stretching helps prevent the bracelet from sagging or loosening after the first few wears. -
Tie the knot:
Tie a strong surgeon’s knot (right over left, left over right). Pull it tight, ensuring no gaps appear between the beads. -
Secure and trim:
Apply a tiny dot of jewelry glue to the knot. Let it dry completely before trimming the excess cord close to the knot. If possible, tug the knot inside one of the larger round beads to hide it.
Now you have a wonderfully textured piece that adds a pop of playful color to any outfit