When I’m craving a low-pressure sculpting day, air dry clay figurines are my go-to because you can build adorable little characters from the simplest shapes. Here are some of my favorite air dry clay figurine ideas, starting with the classic crowd-pleasers and drifting into the extra-whimsical stuff.
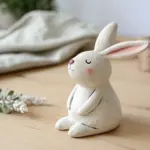
Simple Sitting Bunny

This charming, alert rabbit stands tall on its hind legs, showcasing large expressive ears and a lovely antique finish. The texture and simple painting style give it the warm, handcrafted look of vintage folk art.
Step-by-Step
Materials
- White air dry clay (approx. 500g)
- Aluminum foil (for armature)
- Masking tape
- Water in a small cup
- Clay sculpting tools (needle tool, smoother)
- Acrylic paints (Titanium White, Burnt Umber, Light Pink, Black)
- Paintbrushes (medium flat brush, small detail brush)
- Fine-grit sandpaper
- Paper towel or sponge
Step 1: Armature & Base Shape
-
Form the foil core:
Crumple a piece of aluminum foil into a pear shape for the body, about 4-5 inches tall. Create a smaller, slightly elongated oval for the head. This saves clay and makes the figure lighter. -
Assemble the structure:
Attach the head foil to the narrower top of the body foil using masking tape. Ensure the head is angled slightly upward, as if the bunny is looking at something. -
Cover with clay:
Roll out sheets of air dry clay about 1/4 inch thick. Wrap the clay around your foil armature, smoothing the seams together with a little water on your fingers until the foil is completely hidden.
Step 2: Sculpting the Anatomy
-
Shape the hind legs:
Form two large, thick teardrop shapes of clay. Attach these to the bottom sides of the body to create the powerful thighs of a sitting rabbit. Blend the edges seamlessly into the main body. -
Add the feet:
Create two elongated ovals for the feet and attach them sticking out from under the thighs. Use a sculpting tool to press lines into the front of the feet to indicate toes. -
Attach the front paws:
Roll two smaller sausage shapes for the front arms. Attach them to the upper chest area, bending them slightly at the ‘elbow’ so the paws tuck close to the body in a classic ‘begging’ pose. -
Construct the tail:
Roll a small ball of clay and attach it to the lower back for a fluffy tail. Use a needle tool to scratch texture onto it for a fur-like appearance. -
Refine the face:
Add small bits of clay to build up the cheeks and muzzle. Use a smoothing tool to create slight hollows for the eye sockets.
Drooping Ears?
If the long ears won’t stay upright while wet, prop them up with cardstock or toothpicks inserted into the head as temporary supports until the clay hardens.
Step 3: Ears & Details
-
Sculpt the ears:
Roll two long, flattened oval shapes for the ears. Pinch them slightly at the base. Gently press your thumb or a tool into the center of each to create the inner ear depression, leaving a rim around the edge. -
Attach the ears:
Score the top of the head and the base of the ears (scratch cross-hatch marks). Apply a dab of water or slip and press the ears firmly in place. I like to smooth clay around the join to ensure they don’t crack later. -
Add texture:
Wait for the clay to firm up just slightly, then use a stiff bristled brush or a crumpled ball of foil to gently tap texture all over the body, mimicking short fur. -
Dry completely:
Let the bunny dry for at least 24-48 hours. Turn it occasionally so the bottom dries too. It should be fully white and hard to the touch.
Whiskers Upgrade
Before the clay dries, poke tiny holes in the muzzle with a needle. After painting, you can glue in short lengths of fishing line or stiff bristles for real whiskers.
Step 4: Painting & Finishing
-
Base coat:
Paint the entire sculpture with two coats of Titanium White acrylic paint. Let the first coat dry before applying the second for solid coverage. -
Paint the inner ears:
Mix a soft, dusty pink using white and a tiny dot of red. Paint the inside depression of the ears with this color. -
Facial features:
Using your smallest detail brush, paint the nose pink. Paint the eyes distinctively: a dark reddish-brown iris with a black pupil, or simply dark brown/black. Add tiny black dots on the muzzle for whisker spots. -
Antiquing technique:
Mix Burnt Umber with a lot of water to create a wash. Brush it over the textured areas (legs, neck, tail) and immediately wipe most of it off with a paper towel. This leaves brown in the crevices, aging the piece. -
Final dry brushing:
Dip a dry brush into a tiny amount of white paint and lightly skim over the brown areas. This ‘dry brushing’ highlights the texture and softens the antiquing effect.
Place your finished bunny by a window or on a mantle to enjoy its sweet, rustic charm


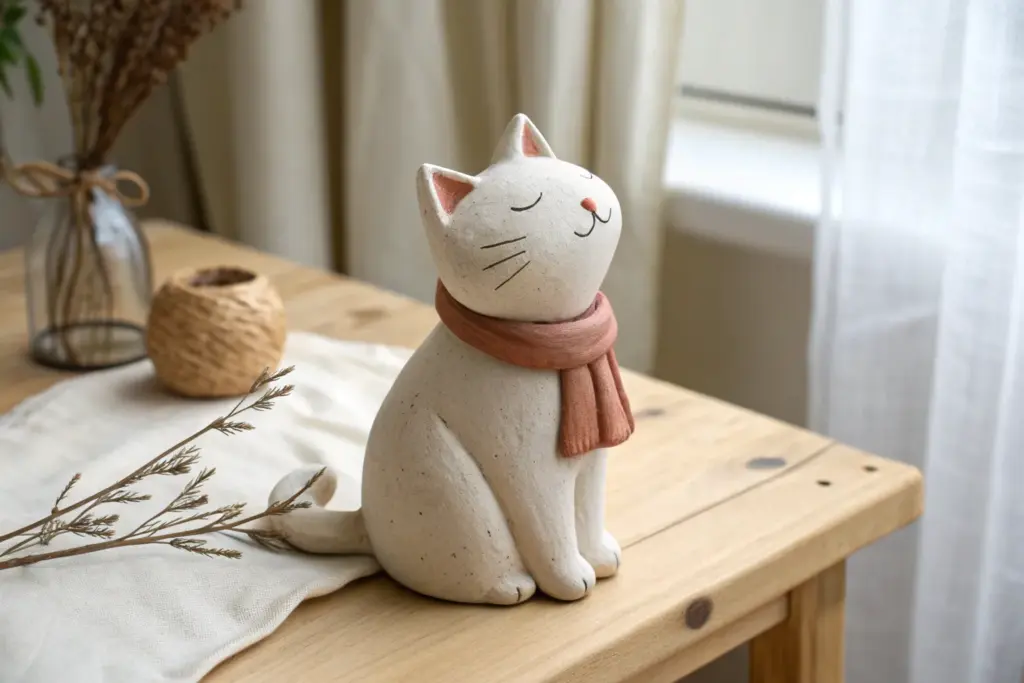
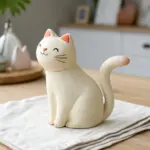
Chunky Cat Mini Trio
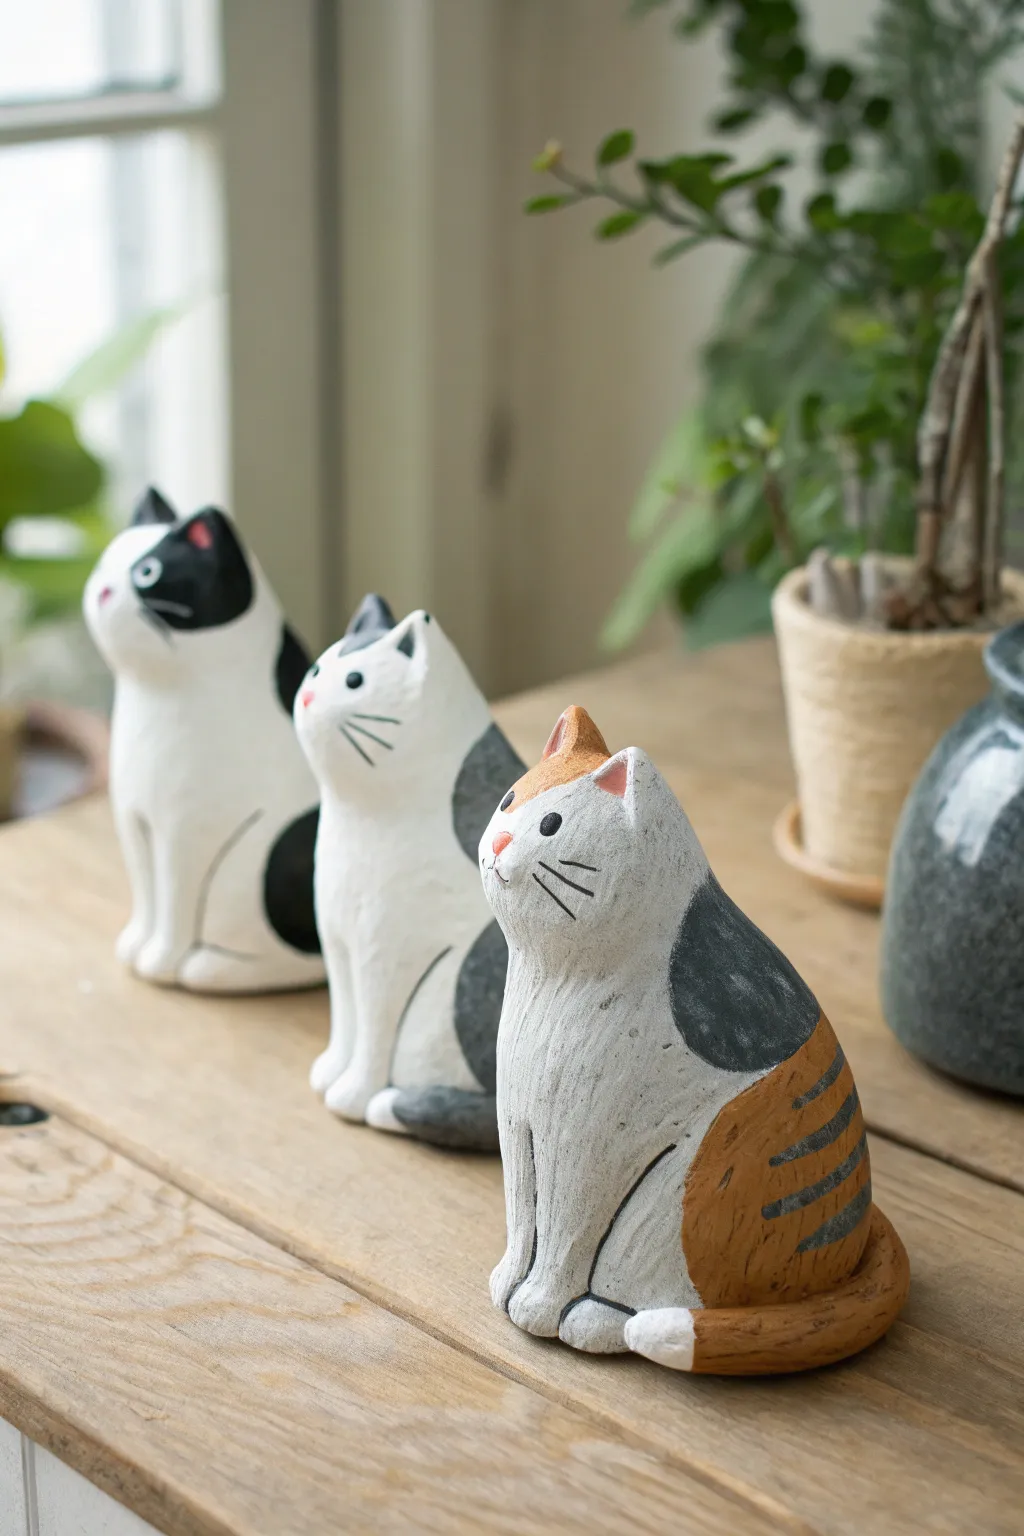
Sculpt a set of irresistibly chubby feline friends with this simple air dry clay project. These minimalist cats feature smooth, rounded bodies and hand-painted details that give them a charming folk-art aesthetic.
Step-by-Step Tutorial
Materials
- White air dry clay
- Aluminum foil (for armature core)
- Small cup of water
- Clay carving tools (needle tool, smoothing spatula)
- Fine grit sandpaper
- Acrylic paints (White, Black, Orange/Ochre, Pink, Dark Grey)
- Small flat brush
- Fine detail brush (size 0 or 00)
- Matte finish varnish
Step 1: Sculpting the Base Form
-
Create a foil core:
Since these cats are chunky, start by crumpling aluminum foil into a rough pear shape. This saves clay and helps the sculpture dry evenly. Make the bottom wide and flat so the cat sits securely. -
Cover with clay:
Roll out a slab of white air dry clay about 1/4 inch thick. Wrap this entirely around your foil armature, pressing the seams together firmly. -
Shape the body:
Roll the clay-covered form on your work surface to smooth it out. You want a teardrop shape—wider at the bottom and slightly tapering toward the chest area, but keep the neck very thick and integrated. -
Add the head:
Roll a separate, smaller ball of clay for the head. It shouldn’t be a perfect sphere; flatten the face slightly. Score the top of the body and the bottom of the head, add a dab of water (slip), and press them together. -
Blend the neck seam:
Using a smoothing tool or your thumb, drag clay from the neck down to the body and vice versa until the seam disappears completely. The head should look like natural extension of the body, not a separate snowman ball.
Step 2: Adding Details
-
Pinch the ears:
Take two very small triangles of clay. Score and slip them onto the top of the head. Gently pinch and smooth them so they curve slightly forward, blending the base of the ears completely into the head. -
Sculpt the front legs:
Roll two small sausages of clay. Press them vertically onto the front of the chest area. Flatten the top of these rolls into the body so they disappear, but leave the bottom paws slightly protruding. -
Define the paws:
Use a needle tool or knife to press two small vertical lines into the bottom of each front leg to suggest toes. -
Add the tail:
Roll a long, tapered snake of clay. Wrap it around the base of the cat’s body, curving it around the side. Blend the starting point of the tail into the back of the cat so it looks seamless. -
Refine the surface:
Dip your finger in a little water and run it over the entire sculpture to remove any fingerprints or cracks. I find this step crucial for that smooth, ceramic look. -
Dry thoroughly:
Let the cats dry for at least 24-48 hours. Turn them occasionally so the bottom dries well. -
Sand imperfections:
Once fully rigid/white, gently use fine-grit sandpaper to buff away any remaining bumps or rough textures.
Smoother Seams
Keep a wet sponge nearby. If your clay starts cracking while you blend the head to the body, dab the sponge on the trouble spot to rehydrate the surface instantly.
Step 3: Painting and Finishing
-
Base coat:
Paint the entire cat with opaque white acrylic paint. You may need two coats to get a clean, solid finish over the raw clay. -
Block in color patches:
For the calico, paint an orange patch on the rear flank and one ear, and a dark grey patch on the mid-back using a flat brush. For the black and white cat, create large, sweeping black spots. -
Add texture lines:
Once the color patches are dry, use a very fine brush or a black fine-liner pen to add subtle dashing or stripes over the colored areas to mimic fur texture. -
Paint the face:
Using your smallest detail brush, dot two small black eyes wide apart. Paint a tiny pink triangle for the nose directly between them. -
Draw whiskers:
Paint three very thin, short lines radiating from each cheek area for whiskers. Keep these delicate. -
Ear details:
Paint the inside of the ears with a pale pink color to add depth. -
Seal the work:
Finish with a coat of matte varnish to protect the paint and give the clay a professional, finished sheen.
Change the Pose
Try making one cat looking upwards by tilting the head back slightly before blending, or curl a tail over the paws for a sleepy, tucked-in pose.
Set your trio on a windowsill or shelf to supervise your home with silent, adorable judgment.


Sleepy Sloth on a Branch
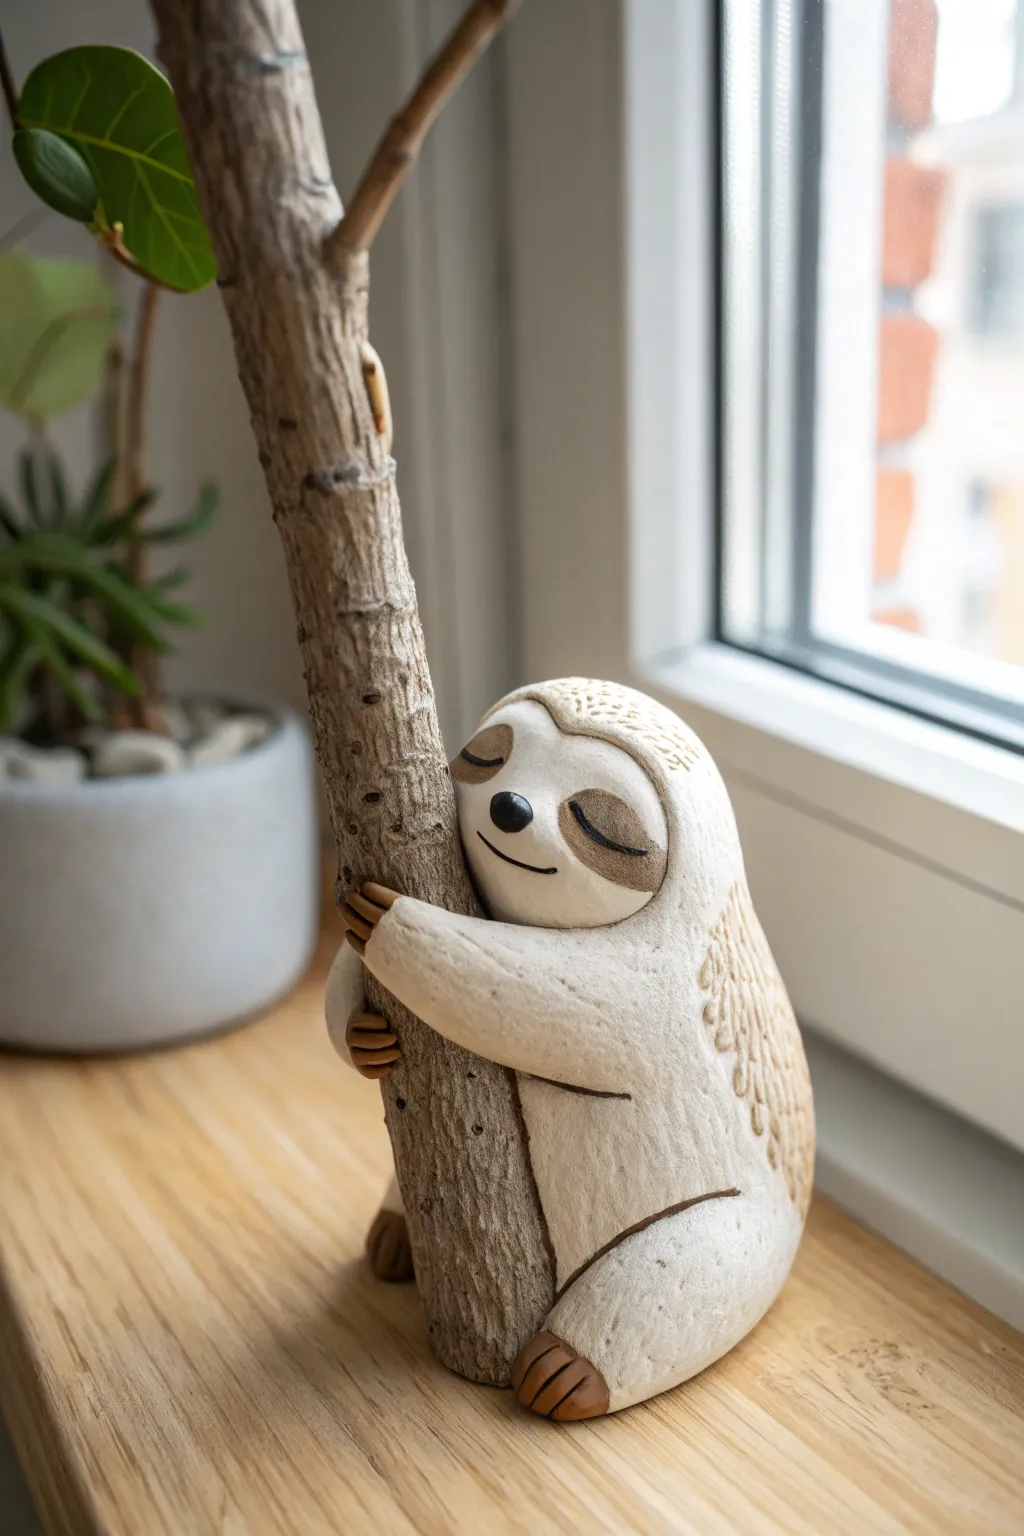
This charming project features a peaceful sloth clinging contentedly to a real wooden branch. Its rounded, smooth forms and simple painted details make it an approachable sculpture that adds a touch of whimsy to any windowsill.
Detailed Instructions
Materials
- White air-dry clay
- Sturdy wooden branch (approx 1 inch diameter)
- Aluminum foil
- Clay sculpting tools (modeling tool, needle tool)
- Water and a small sponge
- Acrylic paints (dark brown, black)
- Fine detail paintbrush
- Texture tool or toothbrush
- Varnish (matte or satin)
- Strong craft glue or epoxy
Step 1: Building the Base
-
Prepare the branch:
Begin by selecting a sturdy branch that stands upright on its own, or cut one flat at the bottom. Clean off any loose bark or dirt to ensure the clay adheres properly later. -
Create the foil armature:
Ball up aluminum foil to form the core shape of the sloth’s body. Create a hefty oval for the torso and a slightly smaller, rounded shape for the head. This saves clay and reduces drying time. -
Attach armature to branch:
Press your foil shapes against the branch in a sitting position. Adjust the foil until the ‘sloth’ looks like it’s comfortably leaning against the wood.
Smooth Operator
Keep a small bowl of water nearby. Wetting your finger and rubbing the clay surface repeatedly is the secret to getting that porcelain-like, lump-free finish before drying.
Step 2: Sculpting the Body
-
Cover the foil:
Roll out a sheet of white air-dry clay to about 1/4 inch thickness. Wrap this securely around your foil armature, smoothing the seams together with a bit of water. -
Shape the head:
Refine the head shape into a smooth dome. Use your thumbs to gently flatten the face area slightly, creating the distinct heart-shaped facial disc characteristic of sloths. -
Blend firmly:
Ensure the clay body is pressed firmly against the wooden branch. Use a modeling tool to blend the clay slightly around the contact points for a secure bond. -
Form the legs:
Roll two thick sausages of clay for the legs. Attach them to the bottom of the body, bending them so the knees point outward and the feet rap around the branch or rest on the surface. -
Add the arms:
Create two longer arm shapes. Attach them high on the shoulders and wrap them affectionately around the branch. The hands should meet or overlap slightly on the front of the wood.
Step 3: Refining Details
-
Sculpt the claws:
At the ends of the hands and feet, use a needle tool or small knife to press in indentations, separating the clay into three distinct, curved claws per limb. -
Detail the face:
Add a tiny, round ball of clay for the nose. Use a smooth modeling tool to carve gentle indentations for the eye sockets, ensuring they look relaxed and sleepy. -
Smooth everything:
Dip a sponge or your finger in water and run it over the entire sculpture to erase fingerprints and lumps. The finish should be very smooth like polished stone. -
Add fur texture:
On the back and top of the head, use a needle tool or texture brush to scratch in shallow, short lines. This mimics coarse fur while leaving the face and belly smooth. -
Let it dry:
Allow the sculpture to dry completely. This usually takes 24 to 48 hours depending on thickness. Rotate it occasionally if possible to let air reach all sides.
Make it a Planter
Before the clay dries, create a hollow space or insert a small glass vial into the top of the sloth’s back to turn your sculpture into a propagation station for small plant cuttings.
Step 4: Painting and Finishing
-
Paint the face:
Using a fine brush and dark brown paint, carefully fill in the eye patches with a swooping shape. Paint a simple curved line for the closed eyelids and a gentle smile. -
Highlight the nose:
Paint the nose button black. I like to add a tiny white dot as a highlight once the black is dry to give it a wet, healthy look. -
Define the claws:
Paint the three claws on each hand and foot with a medium brown shade to distinguish them from the white fur. -
Apply wash (optional):
To enhance the fur texture on the back, you can apply a very watered-down brown paint and immediately wipe it off with a paper towel, leaving color only in the crevices. -
Seal the piece:
Once all paint is perfectly dry, coat the clay parts with a matte varnish to protect the surface. -
Reinforce the bond:
If the clay shrunk slightly away from the wood during drying, add a dab of strong glue or epoxy in the gap to secure the sloth permanently to its branch.
Now you have a serene little companion to keep your plants company


Tiny Turtle With Patterned Shell
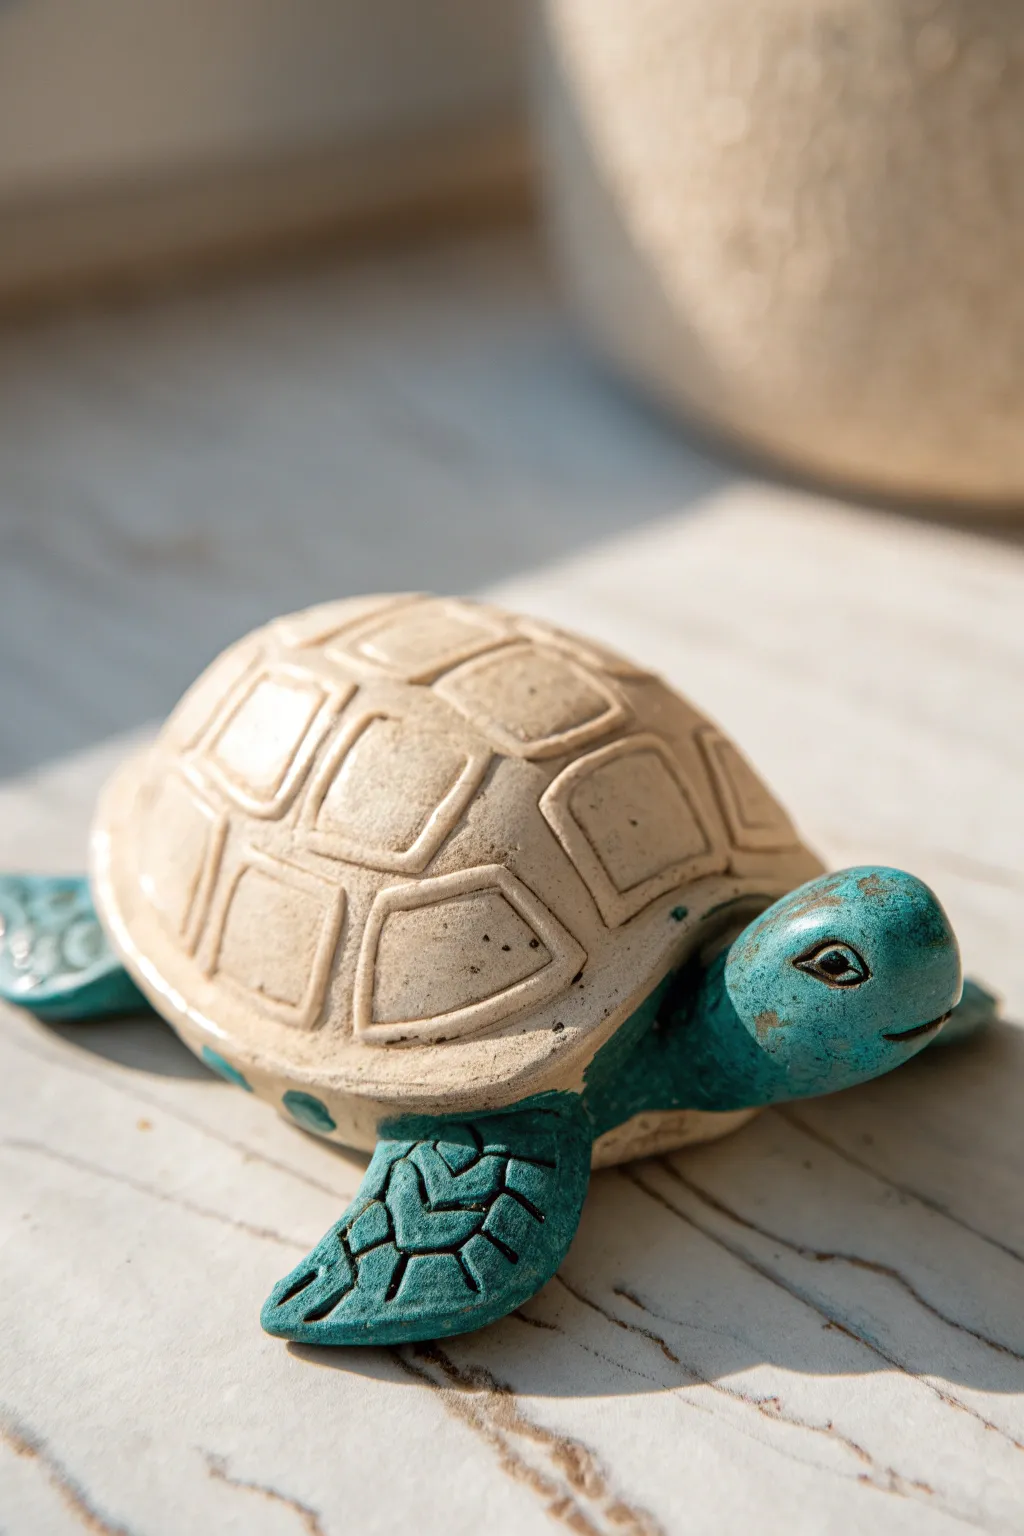
This charming little turtle features a striking contrast between its carved beige shell and vibrant teal flippers. Its simple yet detailed design makes it a perfect project for practicing texture techniques and two-tone painting.
Step-by-Step
Materials
- Air dry clay (white or light grey)
- Acrylic paints (teal/turquoise, cream/beige, dark brown)
- Clay sculpting tools (needle tool, small spatula)
- Rolling pin
- Small cup of water
- Aluminum foil
- Paintbrushes (small detail brush, flat shader brush)
- Clear varnish (glossy or satin)
Step 1: Sculpting the Body
-
Create the armature:
Crumple a small piece of aluminum foil into a flattened dome shape, about the size of a tangerine. This saves clay and keeps the figurine lightweight. -
Cover the shell:
Roll out a slab of clay to about 1/4 inch thickness. Draper this over your foil dome, smoothing it down the sides. Trim the excess clay at the bottom so you have a neat, hollow dome shape. -
Close the bottom:
Roll out a second, smaller slab for the plastron (the bottom of the shell). Place the dome on top of it, creating a seal. Trim the excess around the edges and smooth the seam with a bit of water until the join is invisible. -
Form the limbs:
Roll four tear-drop shapes for the flippers—two larger for the front and two smaller for the back. Flatten them gently with your thumb. -
Shape the head:
Roll a ball of clay for the head, slightly elongating it into an oval. Smooth it slightly so it isn’t perfectly round. -
Attach the parts:
Score the attachment points on the shell and the limbs/head (make small scratches). Add a dab of water or slip (clay mixed with water) and press the flippers and head firmly onto the underside edge of the shell.
Step 2: Adding Texture & Details
-
Draw the shell pattern:
Using a needle tool, lightly sketch a pattern of rectangles or trapezoids onto the top of the shell. Start with a central row and work your way down the sides. -
Carve the shell plates:
Go back over your sketched lines with a sculpting tool, carving deeper grooves to make the plates look raised. Soften the sharp edges of the clay plates with a damp finger or brush so they look worn and natural. -
Detail the flippers:
Use your needle tool to carve geometric, scale-like patterns into the top of each flipper. Press deeply enough that the texture will hold paint later. -
Carve the face:
Use the needle tool to gently carve outlines for the eyes and a small curved line for the mouth. You can use the back of a small paintbrush to indent the eye pupil. -
Dry completely:
Let the turtle dry for 24-48 hours. Turn it over halfway through the drying process to ensure the bottom dries evenly.
Smooth Seams Tip
If you struggle to smooth the clay seams where the limbs attach, use a wet paintbrush instead of your finger. It gets into tight corners without distorting the shapes.
Step 3: Painting & Finishing
-
Base coat the shell:
Paint the entire shell area with a creamy beige acrylic paint. You may need two thin coats for solid coverage. -
Paint the body:
Carefully paint the head, tail, and flippers with a rich teal or turquoise color. Use a small brush to get close to the shell without messy overlap. -
Apply an antique wash:
Mix a very small amount of dark brown paint with water to create a thin wash. Brush this over the dried shell, ensuring it gets into the carved grooves. -
Wipe back the wash:
Before the wash dries, use a paper towel or damp cloth to wipe the surface. This leaves the brown paint in the crevices, highlighting the texture, while the raised areas return to beige. -
Distress the fins:
I like to dry-brush a tiny bit of the dark wash over the teal flippers to highlight the carved scales, giving them a weathered look. -
Highlight the eyes:
Use a fine liner brush to paint the inside of the carved eye line black or dark brown for definition. -
Varnish:
Finish with a coat of satin or gloss varnish to protect the paint and give the turtle a ceramic-like sheen.
Make it a Set
Create a whole family of turtles in different sizes. Vary the shell patterns—try hexagons or spirals on the smaller ones for variety.
Place your finished turtle on a shelf or desk for a delightful pop of handmade oceanic charm.

The Complete Guide to Pottery Troubleshooting
Uncover the most common ceramic mistakes—from cracking clay to failed glazes—and learn how to fix them fast.
Mini Dog With Floppy Ears
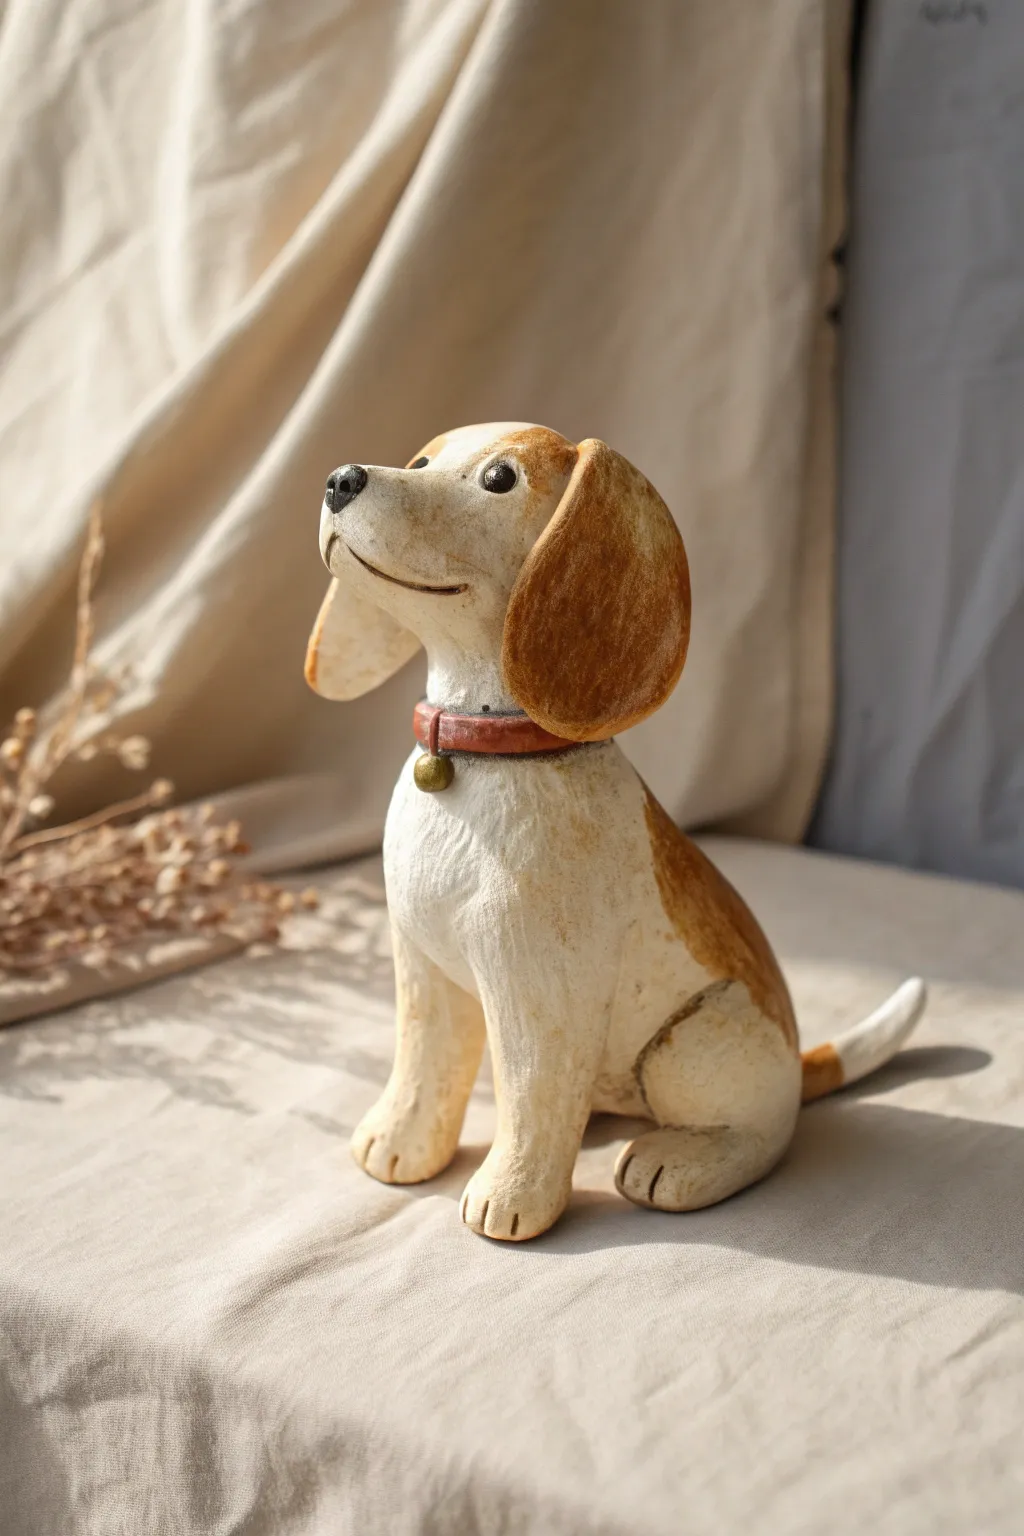
This charming, soulful beagle brings a touch of rustic warmth to any shelf with its textured finish and sweet, upward gaze. You will sculpt a sturdy sitting pose and finish it with a specialized painting technique to achieve that vintage, wood-carved appearance.
Detailed Instructions
Materials
- Air dry clay (white or natural stone color)
- Aluminum foil
- Wire (for armature/ears)
- Sculpting tools (needle tool, blending tool)
- Acrylic paints (Cream/Off-White, Burnt Sienna, Dark Brown, Red, Gold, Black)
- Paintbrushes (flat brush, fine detail brush, stiff bristle brush)
- Water cup
- Sandpaper (fine grit)
- Matte varnish or sealant
Step 1: Building the Core Structure
-
Form the foil armature:
Begin by scrunching aluminum foil into two main shapes: a larger oval for the body and a smaller, slightly elongated sphere for the head. Compress them tightly to remove air pockets. -
Connect the pieces:
Insert a short piece of wire or a toothpick into the top of the body piece and push the head piece onto it. Secure the connection with a bit of super glue or masking tape if it feels wobbly. -
Bulk out the clay body:
Flatten a sheet of clay and wrap it completely around your foil armature. Use your thumbs to push the clay into the foil, ensuring a tight bond. Smooth the seams where the clay sheets meet using a little water. -
Shape the neck and chest:
Add extra clay to the neck area to create a smooth transition from head to body. Build up the chest area so it looks proud and slightly puffed out, blending the clay downward.
Brush It Up
Use an old toothbrush to texture the clay while wet. The stiff bristles create subtle, fur-like scratches that catch the antique wash beautifully later.
Step 2: Sculpting the Features
-
Attach the legs:
Roll two thick logs for the front legs and two shorter, rounded shapes for the back haunches. Attach the back legs first, blending them into the hips. Then place the front legs vertically, pressing them firmly onto your work surface so the dog sits flat. -
Refine the paws:
At the bottom of each leg, slightly flatten the clay to form paws. Use a knife or needle tool to press in three lines on each paw to create the toes. -
Shape the snout:
Add a small ball of clay to the front of the face and blend it back towards the eyes. Pinch slightly to lift the nose upwards, giving the dog that happy, sniffing expression. -
Add the tail:
Roll a tapered snake of clay for the tail. Attach it to the lower back, curving it slightly sideways so it rests against the ground or hovers just above it. -
Create the signature ears:
Flatten two teardrop shapes of clay. Position them on either side of the head, high up. Let them drape down heavily. I find it helps to put a tiny piece of wire inside if the ears are heavy, but for this size, simple scoring and slipping should hold them. -
Add the collar strip:
Roll a very thin, flat strip of clay and wrap it around the neck. Use a tiny ball of clay to make the bell at the front. -
Final texture application:
Before the clay dries, take a stiff bristle brush or a texture tool and lightly drag it vertically across the ‘fur’ areas—especially the chest and ears—to mimic a carved wood look.
Different Breeds
Change the ear shape to triangles for a terrier, or elongate the body for a dachshund. The base sitting pose works for almost any dog breed.
Step 3: Painting and Finishing
-
Base coat:
Once fully dry (24-48 hours), sand any weird rough spots, then paint the entire figurine with a coat of Cream or Off-White acrylic. -
Mapping the spots:
Using Burnt Sienna, paint the ears completely. Then, sketch out irregular patches on the back and the base of the tail. Don’t worry about perfect edges; a little roughness adds character. -
Dry brushing for texture:
Dip a dry, stiff brush into a lighter shade of brown (or mix your brown with a little white). Wipe most of the paint off on a paper towel, then lightly brush over the brown ear and body patches to highlight the texture. -
Painting the details:
Paint the collar a deep red and the bell gold. Use black for the nose and the eyes. Add a tiny white dot to the eyes for a ‘spark regarding life’ reflection. -
The antique wash:
Mix a very watered-down brown or grey paint. Brush it over the entire dog and immediately wipe it off with a damp cloth. The dark paint will stay in the crevices of the textured fur, creating that aged, rustic depth. -
Seal the work:
Finish with a matte varnish to protect the paint while maintaining the natural, non-glossy aesthetic.
Place your faithful new friend on a windowsill where he can keep watch over your home
Baby Dinosaur Buddy
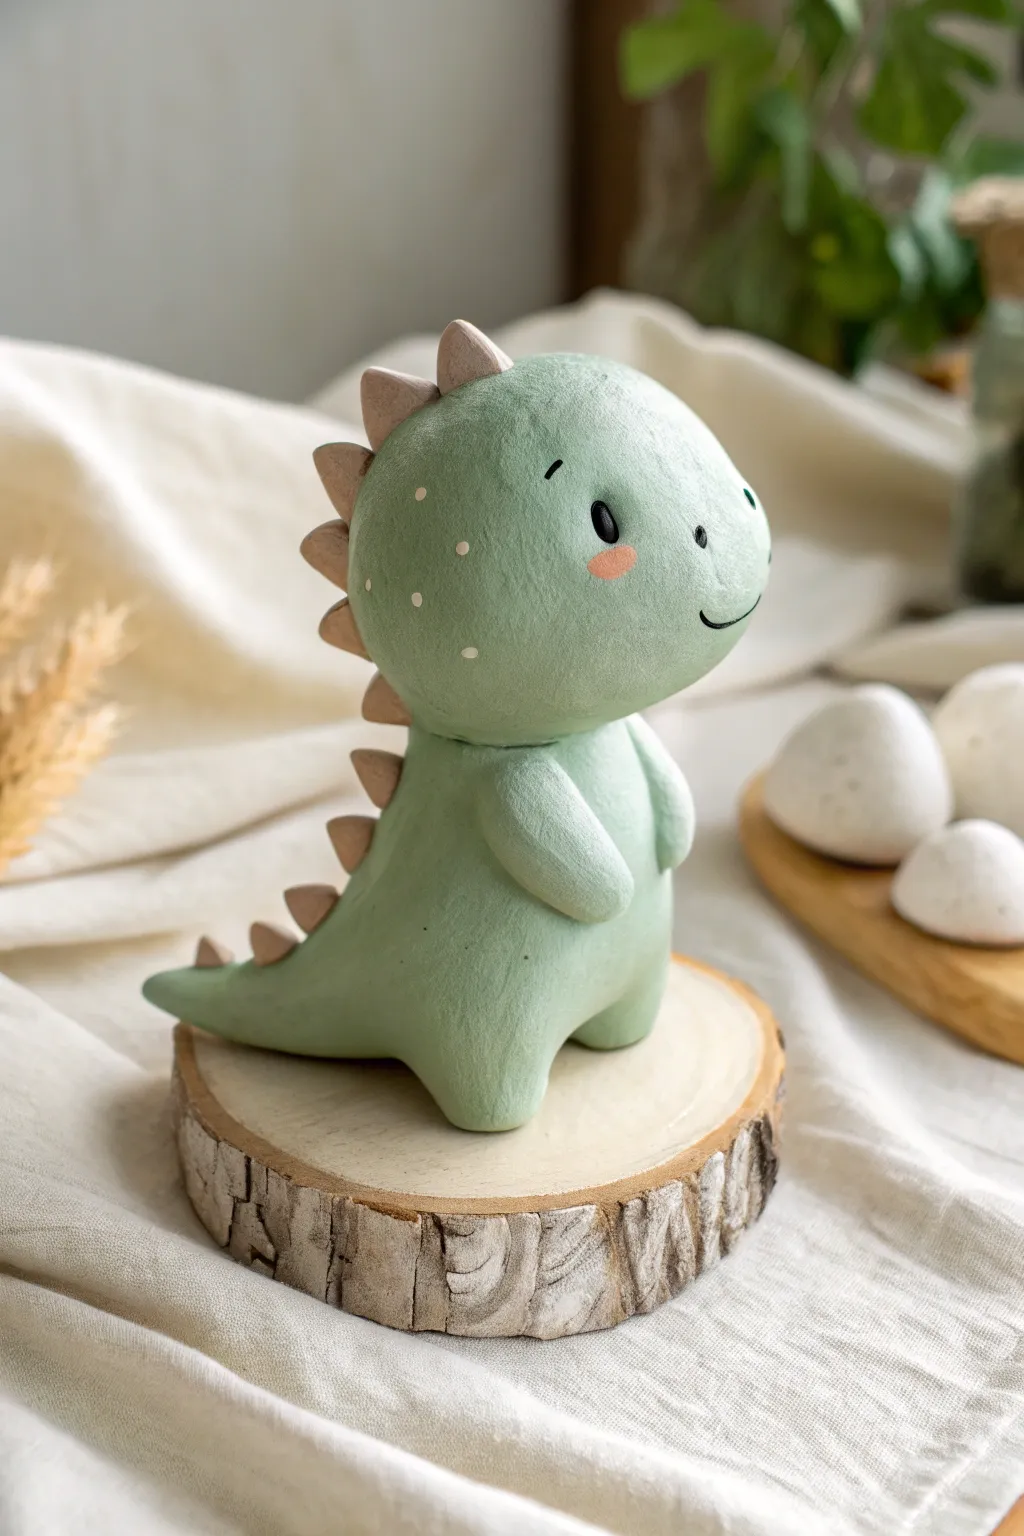
Travel back to the Jurassic with this undeniably adorable baby dinosaur figurine. With its soft sage green color, chubby belly, and gentle expression, this handcrafted buddy creates a peaceful vibe on any desk or shelf.
How-To Guide
Materials
- Air dry clay (white or light grey base)
- Acrylic paints (Sage green, pale beige/pink, black, salmon pink, white)
- Small rolling pin
- Sculpting tools (needle tool, blending tool)
- Water and a small brush for smoothing
- Fine detail paintbrush
- Aluminum foil (for the core)
- Matte sealant or varnish
- Optional: Wood slice for display
Step 1: Forming the Body
-
Create the core:
Start by scrunching a small amount of aluminum foil into a teardrop shape. This saves clay and helps the figure dry faster and lighter. -
Wrap the foil:
Knead your clay until soft, roll out a flat sheet, and wrap it completely around the foil core. Smooth out any seams with a wet finger until you have a solid, seamless teardrop shape. -
Shape the head:
Roll a second, slightly smaller ball of clay for the head. Flatten the back slightly where it will attach to the body, keeping the front round and chubby. -
Attach head to body:
Score the top of the body and the bottom of the head with a needle tool. Add a dab of water or slip clay, press them together firmly, and use a blending tool to seamlessly merge the clay at the neck. -
Add the tail:
Pull gently at the bottom back of x the body to elongate the clay into a short, tapered tail. Alternatively, attach a small cone of clay and blend the seams perfectly.
Step 2: Limbs and Details
-
Sculpt the legs:
Roll two small, stout cylinders for the legs. Press them onto the bottom of the body, blending the clay upwards so the dinosaur stands stably. Tap the figure on the table to flatten the feet. -
Create the arms:
Form two small sausage shapes for arms. Attach them high on the belly, angling them slightly inward as if the dino is shyly holding its tummy. -
Make the spikes:
Roll tiny balls of clay—about 6 to 8 of them—gradually getting smaller. Pinch each one into a triangular spike shape. -
Attach the spine:
Starting at the top of the head and working down to the tail, attach the spikes in a row. Use a drop of water for each and press them firmly into the back, blending the base of the triangle into the body. -
Smooth the surface:
Before drying, take a slightly damp brush and go over the entire figure to remove fingerprints and ensure a stone-smooth finish. -
Let it dry:
Place the figure in a safe spot to dry completely. Depending on your brand of clay and humidity, this usually takes 24 to 48 hours.
Cracks in the Clay?
If small cracks appear while drying, don’t panic. Mix a tiny bit of fresh clay with water to make a paste and fill the cracks, then sand smooth once dry.
Step 3: Painting and Finishing
-
Base coat:
Mix a soft sage green using green, white, and a touch of brown acrylic paint. Paint the entire body, head, and limbs, leaving the spikes unpainted for now. Apply two thin coats for opaque coverage. -
Paint the spikes:
Mix a dusty beige or pale pink colour. Carefully paint the triangular spikes along the back. I find using a small angle brush helps keep the paint off the green body. -
Add facial features:
Using your finest detail brush and black paint, add two small oval eyes, tiny eyebrows, and a simple curved smile. Keep the lines very thin for a delicate look. -
Rosy cheeks:
Dip a brush into salmon pink paint, wipe most of it off on a paper towel, and gently dab oval blush marks underneath the eyes. -
Add white highlights:
Place a tiny white dot in the upper corner of the black eye for a spark of life. You can also add very subtle white freckles on the cheeks or body for texture. -
Seal the work:
Once all paint is bone dry, apply a layer of matte varnish to protect your new prehistoric pet without making it look plastic and shiny.
Smooth Seams Secret
Use a silicone-tipped tool dipped in water to blend limbs seamlessly. It removes tool marks better than fingers and creates that flawless skin look.
Now you have a charming little dinosaur friend ready to guard your desk.


What Really Happens Inside the Kiln
Learn how time and temperature work together inside the kiln to transform clay into durable ceramic.
Smiling Mushroom Friends
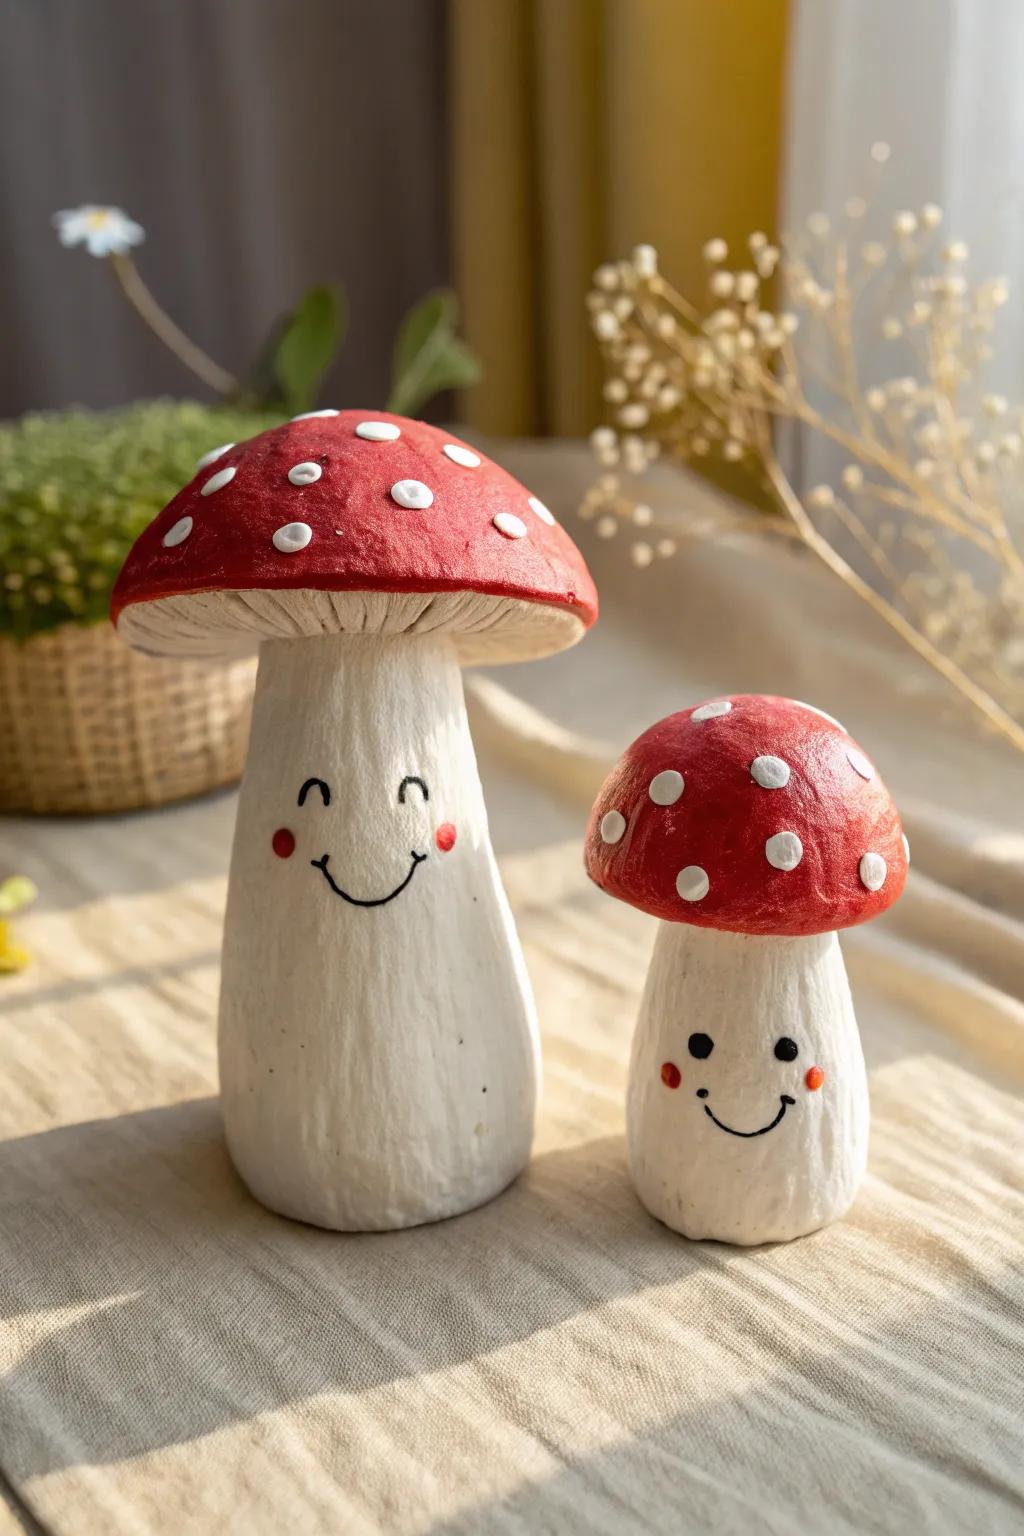
Create a pair of charming mushroom friends that bring a touch of fairytale magic to any shelf or desk. These air-dry clay figurines feature textured stems, vibrant red caps with classic white polka dots, and sweet, hand-painted expressions that are impossible to resist.
Step-by-Step Tutorial
Materials
- White or natural air-dry clay (approx. 500g)
- Aluminum foil (for armature)
- Acrylic paints (bright red, white, black, pink)
- Sculpting tools (needle tool, slightly curved smooth tool)
- Small stiff-bristled brush or toothbrush (for texture)
- Fine detail paintbrush
- Medium flat paintbrush
- Cup of water
- Matte or satin varnish (optional)
Step 1: Shaping the Bodies
-
Build the cores:
Begin by crumpling aluminum foil into two distinct shapes to save clay and reduce weight. Form a taller, thick cylinder for the larger mushroom’s stem and a shorter stout one for the smaller friend. Create two separate foil domes for the mushroom caps. -
Cover the stems:
Roll out a slab of clay to about 1/4 inch thickness. Wrap the clay around your foil stem cylinders, smoothing the seams together with a bit of water until invisible. Ensure the bottom is flat so they stand securely. -
Cover the caps:
Cover the foil domes with a similar layer of clay. Smooth the surface with a bit of water on your finger to remove any fingerprints or cracks. -
Attach cap to stem:
Score (scratch hatch marks) the top of the stem and the underside of the cap where they will join. Add a tiny bit of water or slip (clay mush), then press the pieces firmly together. Smooth the clay at the join underneath to secure it.
Cracked Cap Crisis?
If cracks appear while drying, don’t panic. Mix a small amount of fresh clay with water to make a paste (slip) and fill the cracks. Smooth it out and let dry again before painting.
Step 2: Texturing and Refining
-
Create stem texture:
To achieve that organic, fibrous look on the stems, take a needle tool or a stiff toothbrush and drag it vertically down the stem from just under the cap to the base. Vary the pressure to create natural-looking grooves. -
Detail the gills:
For the taller mushroom, flip it gently upside down or look underneath the cap. Use a knife tool to gently press thin lines radiating from the stem to the edge of the cap to mimic gills. I like to keep these subtle rather than deep cuts. -
Final smoothing:
Check the red cap area again. Use a slightly damp sponge or finger to make the top surface perfectly smooth, as this contrasts beautifully with the textured stem. -
Dry completely:
Let the figures dry in a cool, dry place for 24-48 hours. Turn them occasionally to ensure even drying. The clay will turn opaque and feel lighter when fully dry.
Make it a Trio
Make a tiny baby mushroom with a pointy ‘gnome hat’ cap instead of a round one. Paint the cap teal or mustard yellow to create a colorful woodland family.
Step 3: Painting the Magic
-
Base coat:
Paint the stems with an off-white or creamy white acrylic paint. You might need two thin coats to cover the greyish tone of dried clay. Let this dry fully. -
Red caps:
Paint the tops of the mushrooms with a vibrant red acrylic. Be careful around the rim—use a steady hand or a smaller brush to keep a clean line where the cap meets the gills or stem. -
Adding polka dots:
Dip the back end of a paintbrush into white paint to create perfect circles. Stamp these randomly over the red caps. Vary the sizes slightly for a more natural, whimsical look. -
Painting the faces:
For the tall mushroom, use a fine detail brush and black paint to draw two small upside-down ‘U’ shapes for sleeping eyes and a simple ‘U’ for a smile. Add pink cheeks. -
The small friend’s face:
For the shorter mushroom, paint two solid black dots for open eyes and a small smile. Add tiny rosy cheeks with pink paint.
Step 4: Finishing Touches
-
Highlighting eyes:
Once the black eye paint is bone dry, add a minuscule white dot to the upper corner of the small mushroom’s eyes to bring them to life. -
Protective seal:
Apply a coat of matte or satin varnish over the entire piece to protect the paint and give the clay a finished, professional porcelain look.
Place your happy mushroom duo near a potted plant or on a windowsill to enjoy their cheerful company every day
Woodland Fox With Textured Tail
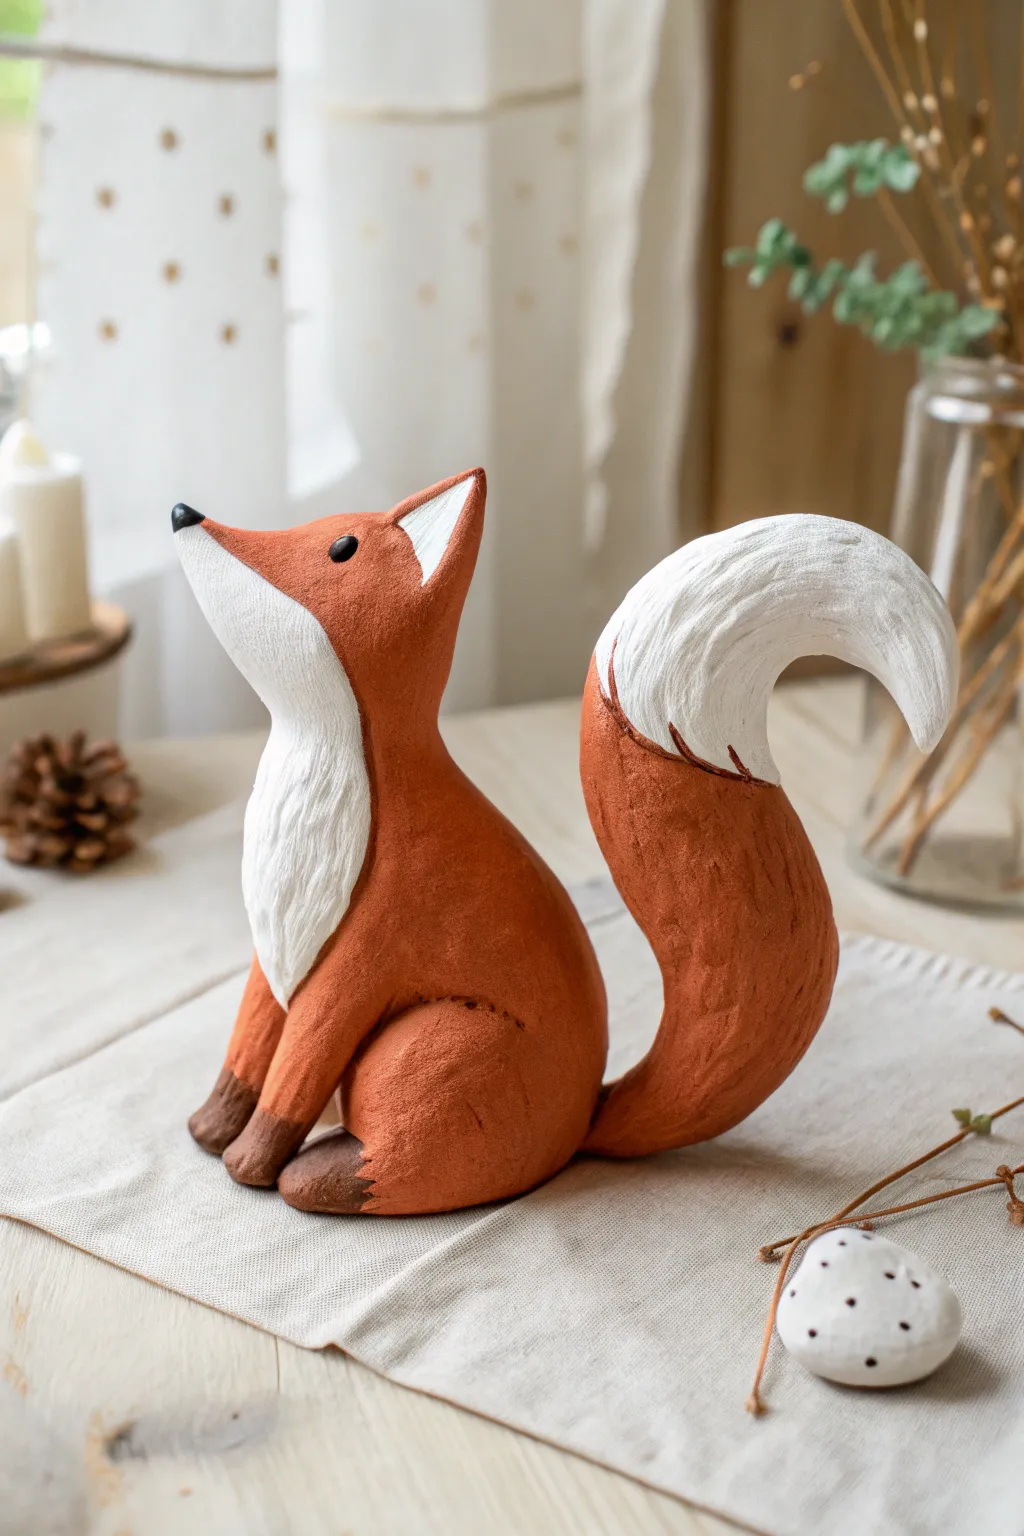
This charming fox figurine captures the quiet magic of the forest with its upward gaze and textured fur detailing. You will sculpt a stylized sitting pose that feels both rustic and refined, perfect for adding a touch of nature to your shelf.
Step-by-Step Guide
Materials
- Air dry clay (terracotta or white)
- Acrylic paints (burnt sienna/terracotta orange, titanium white, dark brown, black)
- Sculpting tools (needle tool, modeling tool, textural wire brush)
- Water in a small cup
- Aluminum foil
- Fine grit sandpaper
- Matte spray varnish
Step 1: Forming the Core Structure
-
Create the foil armature:
Begin by crumpling aluminum foil into a pear shape for the body and a smaller, slightly pointed ball for the head. This saves clay and keeps the figurine lightweight. -
Cover the body:
Flatten a sheet of clay and wrap it completely around the larger foil pear. Smooth the seams with a little water on your finger until the surface is uniform. -
Shape the head:
Cover the foil head with clay, pinching one side gently to form a distinct, upturned snout. The snout should be pointed but soft. -
Join head to body:
Score (scratch) the top of the body and the bottom of the neck area. Add a dab of water or clay slip, press the pieces together, and blend the clay across the seam until the join is invisible.
Step 2: Sculpting the Features
-
Add the hind legs:
Roll two thick teardrop shapes of clay. Press these onto the sides of the lower body to create the haunches, blending the upper edges seamlessly into the main body while leaving the rounded hip shape visible. -
Form the front legs:
Roll two cylinders for the front legs. Attach them vertically to the front of the chest, blending the tops into the shoulders so they look like part of the anatomy, not just stuck on. -
Sculpt the tail:
Create a large, thick snake of clay that tapers at both ends. Attach one end to the lower back and curve it upwards in a generous ‘S’ shape so the tip hangs in the air or rests against the body. -
Attach the ears:
Shape two small triangles. Score and slip them onto the top of the head, positioning them high and alert. -
Refine the face:
Use a modeling tool to slightly flatten the eye area. Sometimes I like to gently press small indentations where the eyes will go to add depth before painting.
Natural Texture
For the chest ruff, layer small, flattened teardrops of clay over each other before texturing. This builds physical volume for the fur, not just surface scratches.
Step 3: Texturing and Finishing
-
Add fur texture:
Before the clay dries, use a needle tool or a stiff wire brush to scratch subtle fur lines into the surface. Focus the texture on the tail, the chest ruff, and the haunches. -
Let it dry completely:
Allow the fox to dry for at least 24-48 hours. It should feel room temperature to the touch, not cool. -
Base coat painting:
Paint the entire body with a burnt sienna or terracotta orange acrylic paint. Depending on your clay color, you might need two coats for opaque coverage. -
Paint the white accents:
Using a smaller brush, paint the chest area, the lower half of the face/snout, and the large tip of the tail with titanium white. Use varied brushstrokes to mimic the fur texture underneath. -
Detail the markings:
Mix a dark brown and apply it to the tips of the ears and the feet (creating ‘socks’). Keep the edges somewhat uneven to look natural. -
Paint the face:
Use a fine detail brush with black paint to add the nose tip and two simple, oval eyes. Add a tiny white reflection dot to each eye for liveliness. -
Seal the piece:
Once the paint is fully dry, spray the entire figurine with a matte varnish to protect the finish without making it look plasticky.
Seasonal Twist
Make a tiny clay scarf or a holly wreath to drape around the fox’s neck for a festive winter decoration, or place a clay mushroom near its feet.
Now you have a sweet woodland companion ready to display on your desk or windowsill

TRACK YOUR CERAMIC JOURNEY
Capture glaze tests, firing details, and creative progress—all in one simple printable. Make your projects easier to repeat and improve.
Kawaii Giraffe Cake-Topper Style
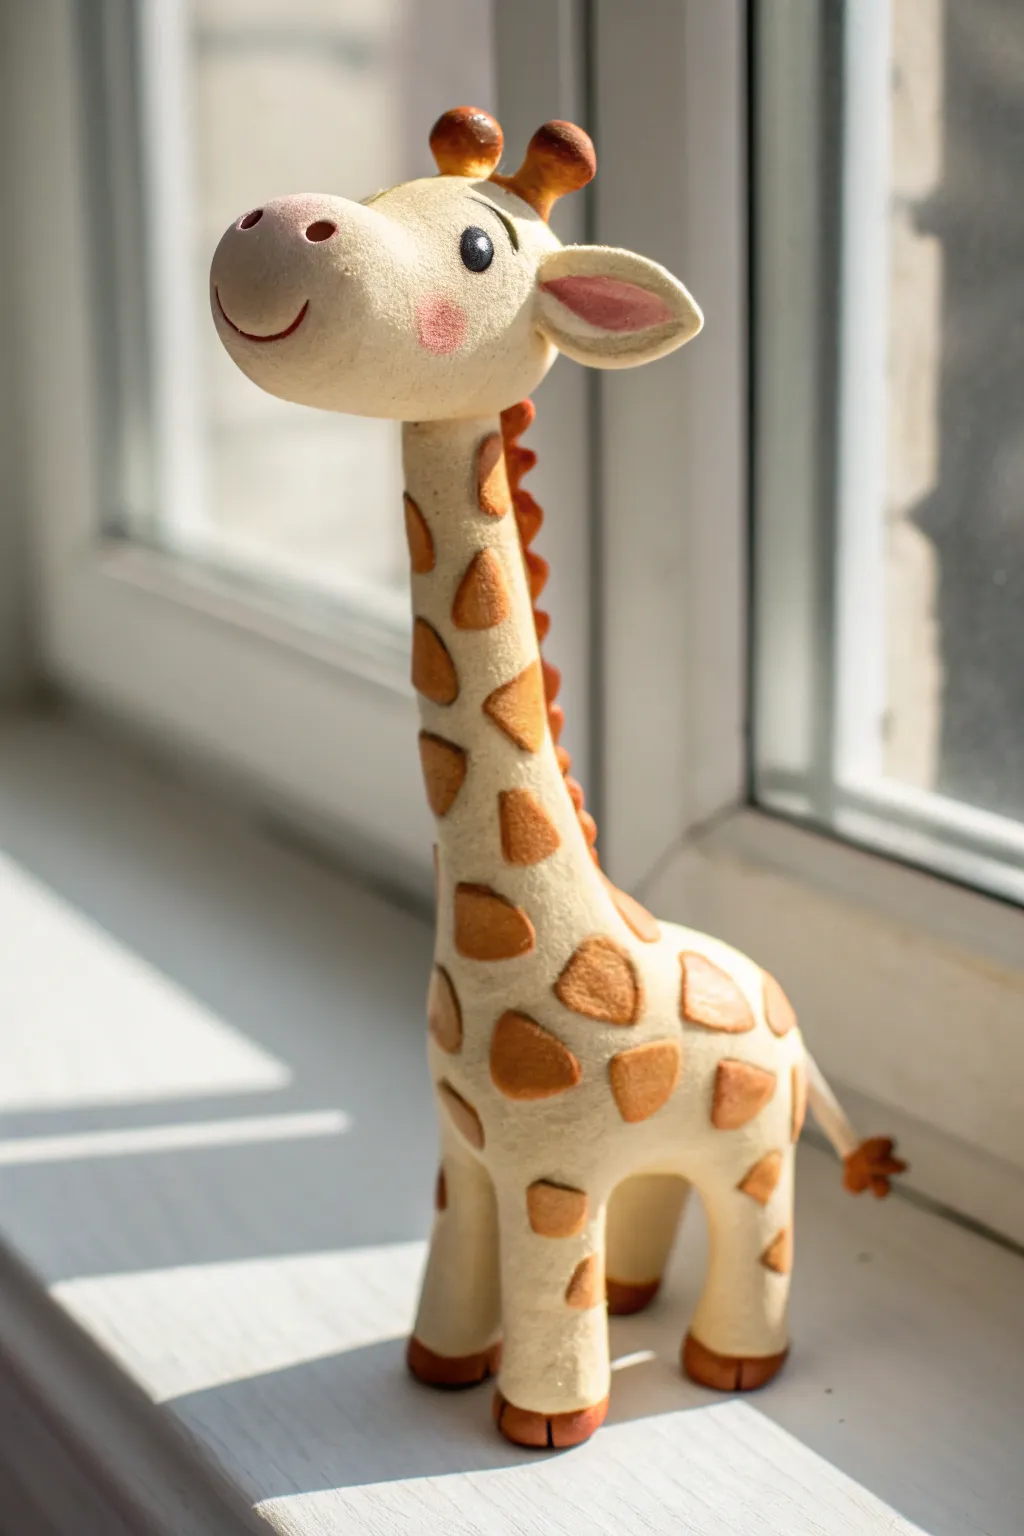
Standing tall with a gentle smile, this kawaii giraffe brings a touch of safari sunshine to any shelf or cake top. Its creamy, matte finish and carefully placed spots give it a professional yet handmade charm that is surprisingly simple to achieve.
Detailed Instructions
Materials
- Lightweight air dry clay (white or cream)
- Acrylic paints (burnt sienna, pink, black)
- Clay sculpting tools (ball tool, needle tool)
- Toothpicks or a small wooden dowel (for neck support)
- A small brush for dry brushing
- Water for smoothing
- Rolling pin
Step 1: Forming the Base Structure
-
Create the body:
Start by rolling a ball of cream-colored clay roughly the size of a tangerine. Gently taper one end upwards to form a teardrop shape—this will be the torso leading into the neck. -
Add internal support:
Since giraffes have long necks, insert a toothpick or cut wooden dowel vertically into the center of the tapered ‘neck’ end, leaving about half an inch exposed to hold the head later. -
Shape the legs:
Roll four equal sausage shapes for the legs. They should be sturdy and slightly thicker at the bottom. Attach two to the front and two to the back of the body, blending the seams with a little water so they look seamless. -
Create the hooves:
Flatten the bottom of each leg slightly so the giraffe stands on its own. Using a knife tool, mark a small horizontal line near the bottom of each leg to define the hooves.
Step 2: Sculpting the Head & Face
-
Base head shape:
Roll a slightly smaller oval of clay for the head. Gently press it onto the exposed dowel on the neck. Orient it horizontally so the snout projects forward. -
Define the snout:
Using your fingers, slightly flatten the front of the oval to create a wide, friendly snout area. Use a medium ball tool to press two small indents for nostrils. -
Add the smile:
Take a needle tool or a small curved blade and carve a wide U-shape connecting the cheeks. Gently deepen the cut to create a happy, permanent smile. -
Attach ears and horns:
Form two small leaf shapes for ears and pinch them at the base before attaching them to the sides of the head. For the ossicones (horns), roll two tiny cylinders with rounded tops and place them between the ears. -
Smooth the surface:
Dip your finger in a tiny bit of water and rub it over the entire sculpture to remove fingerprints and create that velvety, matte texture.
Balance Check
Work directly on a flat surface or mirror. If the head gets too heavy, lean your giraffe against a mug while it dries so the neck doesn’t droop.
Step 3: Adding Details & Color
-
Create the mane:
Roll a very thin snake of clay. Press it gently down the back of the neck. Use a needle tool to create vertical texture lines all the way down, resembling hair. -
Paint the spots:
Once the clay has formed a skin or dried slightly, use burnt sienna acrylic paint. Paint irregular, rounded geometric shapes all over the body and neck, spacing them out evenly like a puzzle. -
Detail the hooves and mane:
Use the same burnt sienna color to paint the hooves at the bottom of the legs and the textured mane running down the back. -
Color the horns and tail:
Paint the tips of the ossicones brown. For the tail, attach a small piece of clay to the rear, fray the end with a tool, and paint the tuft brown. -
Add facial features:
Paint two solid black circles for the eyes. Add a tiny white dot in each for a ‘sparkle.’ Dry brush a soft pink circle on the cheeks for a blush effect. -
Final texture check:
I like to take a clean, dry stiff brush and gently stipple the unpainted cream areas while the clay is still slightly soft to give it a fabric-like or plush toy texture.
Make it a Party
Create a tiny party hat out of a paper cone or a scrap of colored clay and glue it between the ears to turn this figure into a birthday cake topper.
Let your new friend dry completely before placing it in its sunny spot
Elephant With a Tiny Flower Crown
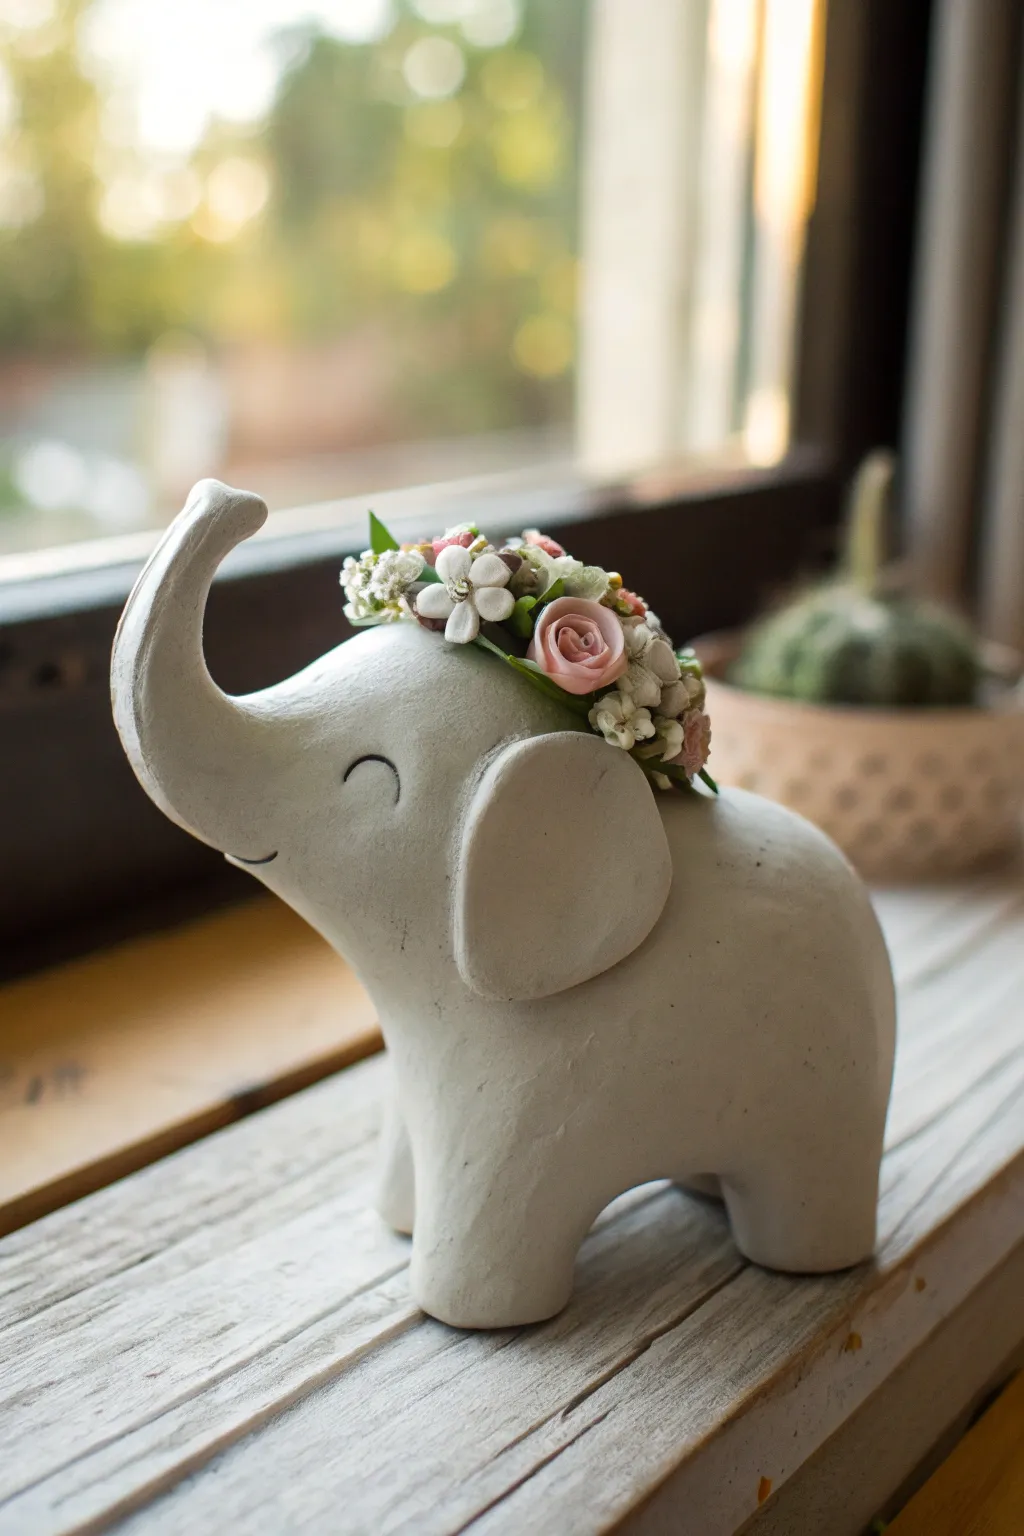
This joyful little elephant figurine brings instant charm to any shelf with its upturned trunk and delicate headpiece. The smooth, stone-like finish of the clay pairs perfectly with the intricate, pastel-colored flowers for a sweet, handmade keepsake.
Step-by-Step
Materials
- Stone-colored or white air-dry clay (smooth texture)
- Set of small clay sculpting tools (needle tool, ball tool, knife)
- Water in a small cup
- Acrylic paints (pink, cream, sage green, dark grey/black)
- Fine detail paintbrush
- Rolling pin or smooth jar
- Sandpaper (fine grit)
- Matte varnish or sealant
Step 1: Sculpting the Elephant
-
Form the main body:
Start with a large ball of clay roughly the size of a tennis ball. Gently roll it into a smooth, slightly elongated pear shape. The bottom wider part will be the body, and the narrower top part will become the head. -
Shape the legs:
Instead of attaching separate legs, gently pinch and pull four short, sturdy stumps from the bottom corners of your pear shape. Tap the base on your work surface to flatten the feet so the elephant stands stably. -
Create the heavy curve:
Use your thumb to gently press an indentation between the head and body area to define the neck, but keep the transition very subtle and smooth. -
Form the trunk:
Pull a section of clay from the front of the head area and roll it between your fingers to elongate it. Curve it upwards dramatically in an ‘S’ shape. Use a ball tool to make a tiny indentation at the tip of the trunk. -
Attach the ears:
Roll two small balls of clay and flatten them into teardrop shapes. Attach these to the sides of the head using a bit of water and your clay tool to blend the seams completely disappear into the head. -
Smooth everything out:
Dip your finger in a little water—just a drop—and run it over the entire surface to remove fingerprints and minor cracks. I like to spend extra time here to get that porcelain-smooth look. -
Add facial details:
Using a needle tool or a very sharp pencil, lightly carve two crescent shapes for the closed, happy eyes. Add a tiny curved line for the smile near the base of the trunk.
Water Wisdom
Use water sparingly when smoothing clay. Too much water can make clay sticky and weak. A damp finger is better than a wet one.
Step 2: Crafting the Flower Crown
-
Prepare the base:
Roll a very thin snake of clay and drape it over the elephant’s head where you want the crown to sit. Create a textured surface on this strip by poking it with a needle tool to mimic foliage. -
Make the roses:
Roll extremely tiny sausages of clay and flatten them into strips. Roll these strips up in a spiral to create miniature roses. Make about 3-4 of these in different sizes. -
Sculpt simple blossoms:
Create tiny balls of clay and press them flat. Use a needle tool to indent the center and divide the edges into 4 or 5 petals. These will be your filler flowers. -
Arrange the crown:
Using tiny dabs of water, attach your roses and simple blossoms onto the base strip on the elephant’s head. Cluster them tightly together. -
Add leaves:
Pinch tiny bits of clay into football shapes and tuck them under the flowers to create leaves. Allow the entire sculpture to dry completely, usually for 24-48 hours.
Step 3: Finishing Touches
-
Sand imperfections:
Once fully bone dry, gently sand any rough spots on the elephant’s body with fine-grit sandpaper. Be very careful around the delicate flowers. -
Paint the flowers:
Using a fine brush, carefully paint the roses in soft pinks and creams. Paint the center of the simple blossoms yellow or white, and the leaves in a muted sage green. -
Define the face:
Mix a very watery dark grey paint. Use your finest brush to paint into the carved eye and mouth grooves. Wipe away any excess on the surface immediately with a damp cloth/paper towel so the paint only stays in the crevices. -
Seal the piece:
Apply a coat of matte varnish over the entire sculpture to protect the clay and give it a unified, professional finish.
Texture Twist
Before the clay dries, gently press a clean piece of denim or linen onto the elephant’s body to give it a subtle fabric-like texture.
Place your finished elephant near a window to let natural light highlight the sweet details of the crown
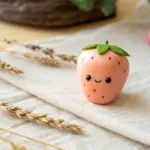
Anthropomorphic Fruit Characters
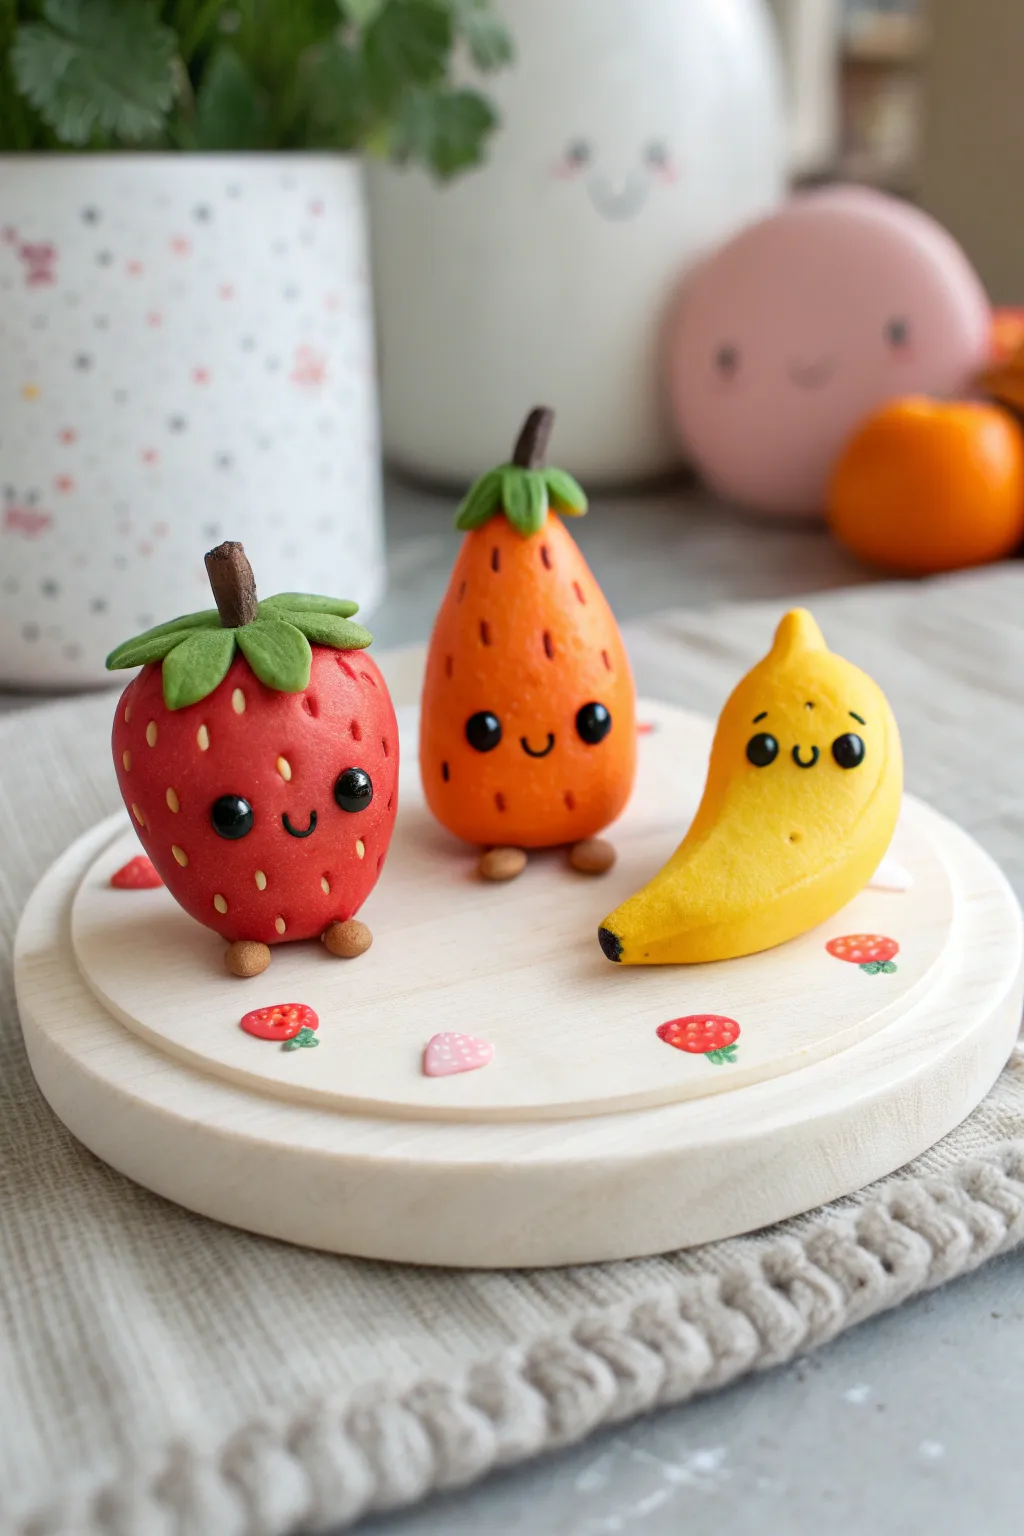
Brighten up your desk with this adorable set of kawaii fruit characters made from air-dry clay. These miniature strawberry, orange pear, and banana buddies feature tiny smiling faces and simple shapes that are perfect for beginners to sculpt.
Step-by-Step Guide
Materials
- Air dry clay (white or pre-colored)
- Acrylic paints (red, orange, yellow, green, brown, black, pink)
- Fine detail paintbrushes
- Small ball tool or toothpick
- Gloss varnish or clear nail polish
- Wooden coaster or base
- Strong craft glue
Step 1: Sculpting the Shapes
-
Form the strawberry base:
Start with a walnut-sized ball of clay. Roll it into a smooth sphere, then gently taper the bottom half to create a rounded, heart-like strawberry shape. Flatten the bottom slightly so it stands upright. -
Create the orange pear body:
Take a similar amount of clay and roll a teardrop shape that is wider at the bottom and tapers significantly toward the top. This hybrid shape sits between an orange and a pear. -
Shape the banana curve:
Roll a cylinder of clay and curve it gently into a crescent moon shape. Pinch the top end into a stem and blunt the bottom end. Check that it can balance on its curve, or flatten a tiny spot on the bottom for stability. -
Add tiny limbs:
Roll extremely tiny balls of clay for the feet. Attach two to the base of the strawberry and two to the orange character using a dab of water to secure them. The banana rests on its belly, so no feet are needed. -
Sculpt the strawberry leaves:
Flatten five small teardrops of green clay (or white clay to be painted later). Arrange them in a starburst pattern on top of the strawberry. Add a small stalk known as a peduncle in the center. -
Top the orange pear:
Create a smaller, three-leaf cluster for the orange pear character and attach a thin, brown stem sticking straight up from the center. -
Refine surfaces:
Dip your finger in a little water and smooth out any fingerprints or cracks on all three figures. Let them dry completely, usually for 24-48 hours depending on humidity.
Cracking Clay?
If small cracks appear while drying, mix a tiny bit of fresh clay with water to make a paste (slip) and fill the cracks. Sand smooth once dry.
Step 2: Painting and Details
-
Base coat colors:
Paint the strawberry body bright red, the pear shape a vibrant orange, and the banana sunny yellow. I like to apply two thin coats rather than one thick one for a smoother finish. -
Paint the greens:
Use a leaf green shade for the leafy tops of the strawberry and the orange pear. Paint the stems brown. -
Add strawberry seeds:
Using a very fine brush or a toothpick, dab tiny yellow or light beige specks all over the red strawberry body to mimic seeds. -
Texture the orange:
Use a darker orange or reddish-brown paint to make tiny, short vertical dashes on the orange pear to give it skin texture. -
Detail the banana:
Paint the very tip of the banana stem yellow-green and add a small black spot on the bottom end for realism. You can add faint brown speckles for a ripening effect if desired. -
Paint the faces:
This is the most crucial step for cuteness. Paint two medium-sized black circles for eyes on each fruit. Add a tiny ‘U’ shape between them for a mouth. -
Add the sparkle:
Once the black eye paint is dry, use a toothpick to place a tiny white dot in the upper corner of each eye. This ‘catchlight’ brings them to life. -
Finishing touches:
Seal your fruits with a gloss varnish, paying special attention to the eyes to make them look wet and shiny. Glue them to a wooden coaster if you want a permanent display
Pro Tip: Eye Placement
Place the eyes lower on the fruit body than you think they should go. This ‘low face’ technique is a key secret to the kawaii aesthetic.
Enjoy your customized fruit bowl of cheer on your desk or shelf
Marshmallow Campfire Figurines
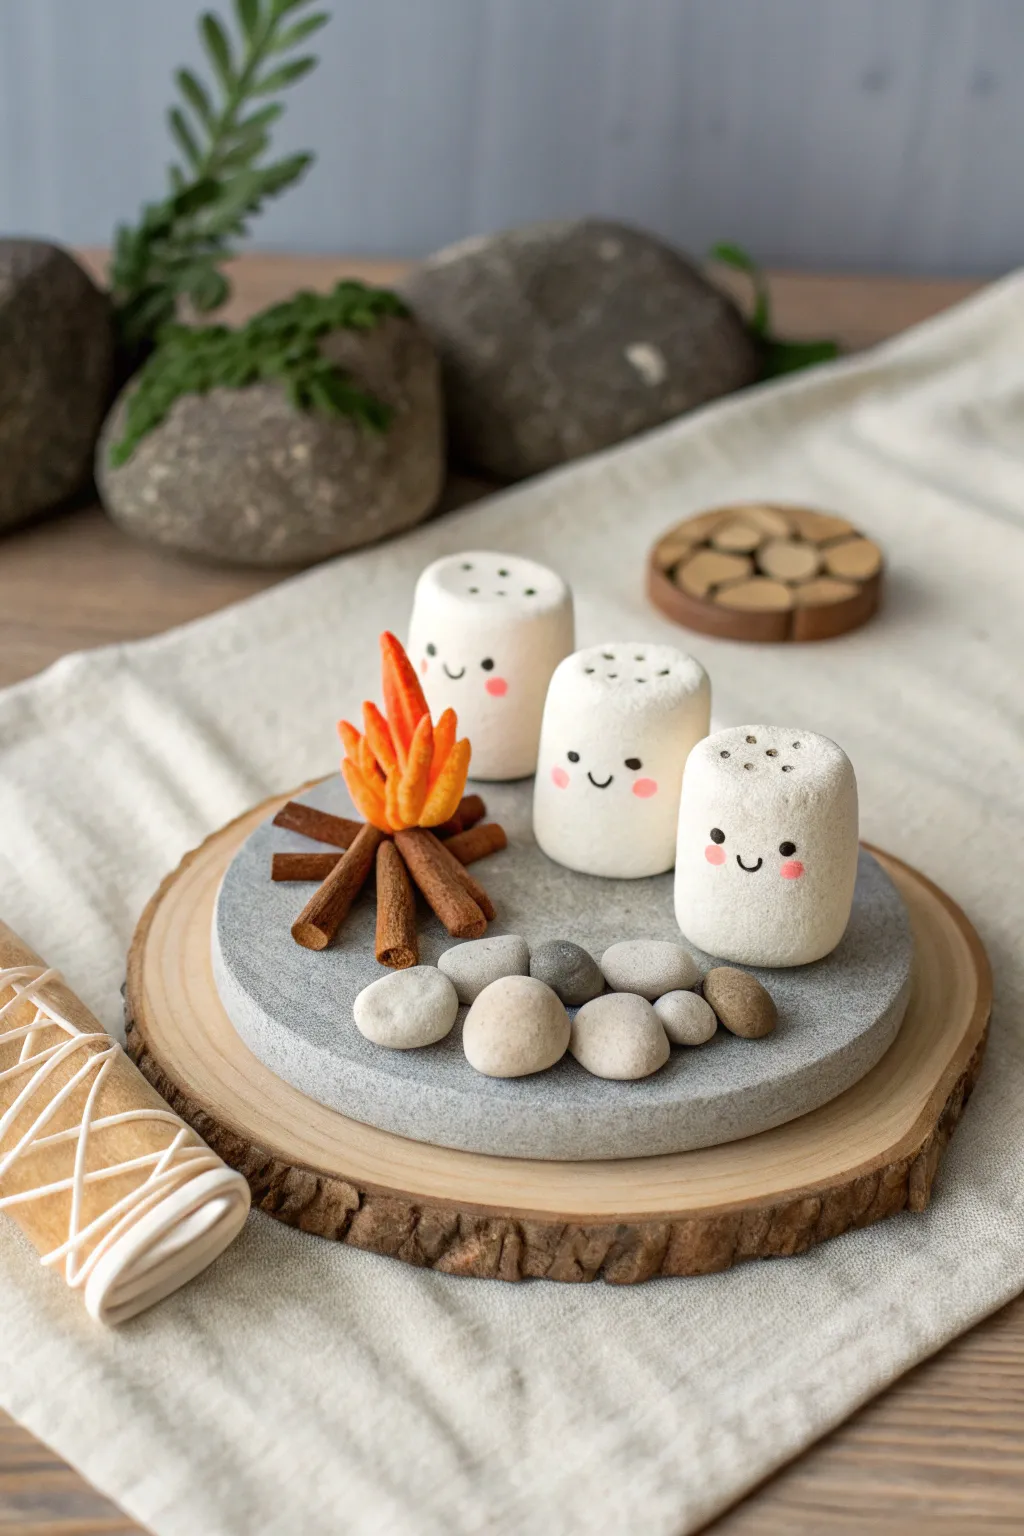
Create a cozy camping scene featuring three adorable marshmallow characters roasting by a clay fire. This charming air dry clay diorama rests on a simple circular base and makes for perfect autumn decor or a sweet handmade gift.
Detailed Instructions
Materials
- White air dry clay
- Orange and yellow air dry clay (or acrylic paint)
- Brown air dry clay (or brown paint)
- Grey air dry clay (or grey paint)
- Black and pink fine-point markers or acrylic paint
- Small wooden slice (for display)
- Real pebbles (small, smooth)
- Sculpting tools (needle tool, smoother)
- Toothbrush (for texturing)
- Strong craft glue
Step 1: Sculpting the Marshmallows
-
Form the cylinders:
Start by rolling three equal-sized balls of white air dry clay. Gently roll each ball against your work surface to form a cylinder shape with a flat top and bottom, ensuring they stand stably on their own. -
Soften the edges:
Use your finger and a tiny bit of water to round off the sharp edges slightly. Real marshmallows aren’t perfectly geometric, so a soft, puffy look is ideal. -
Add texture:
Take a clean toothbrush and gently dab the surface of the clay cylinders. This creates a subtle, porous texture that mimics the surface of a real marshmallow, rather than leaving it perfectly smooth. -
Create the ‘shaker’ holes:
Using a needle tool or the tip of a toothpick, poke 5-7 small holes in a random pattern on the very top of each marshmallow.
Tip: Weight it Down
While the flat grey base is drying, place a lightweight book on top of it (with parchment paper in between) to prevent the edges from curling up.
Step 2: Building the Campfire
-
Roll the logs:
Using brown clay (or white clay you will paint later), roll out thin snakes about the thickness of a pencil. Cut them into small segments, roughly 1 inch long. -
Texture the wood:
Use a needle tool or knife to scratch lines lengthwise down the logs to simulate wood grain. -
Stack the fire pit:
Arrange the logs in a teepee or pyramid shape, leaning them against each other at the center. Use a dab of water or slip to join them where they touch. -
Shape the flames:
Mix orange and yellow clay to get a fiery marbled effect. Pinch small pieces into teardrop shapes, flatten them slightly, and curve the tips. -
Attach the fire:
Nestle the flame shapes into the center of your log pile, securing them with a little glue or water if the clay is still wet.
Step 3: Base and Assembly
-
Create the stone base:
Roll out grey clay into a flat disc, about 4-5 inches in diameter and half an inch thick. You can use a round cookie cutter or a bowl to get a perfect circle. -
Stone texture:
I like to gently press a crumpled ball of aluminum foil over the grey disc to give it a realistic stone texture. -
Dry everything:
Allow all your components (marshmallows, fire, and base) to dry completely. This usually takes 24-48 hours depending on humidity. -
Paint the details:
If you used white clay for the wood or stone, paint them now using acrylics. Let the paint dry. -
Draw the faces:
Using a fine-point black marker or a tiny paintbrush, draw simple eyes and a smile on each marshmallow. Add barely-there pink cheeks with a marker or diluted pink paint for that kawaii look. -
Glue the scene:
Arrange the marshmallows and the campfire on the grey base. Once you are happy with the spacing, glue them down firmly. -
Add the stones:
Take your small real pebbles and glue a ring of them in front of the marshmallows or around the fire for extra detail. -
Final display:
Place the finished grey disc onto a rustic wooden slice to complete the presentation.
Trouble: Cracks?
If small cracks appear as the marshmallows dry, mix a tiny amount of fresh clay with water to make a paste and smooth it into the cracks with your finger.
Now you have a permanent campfire scene that looks sweet enough to eat
Pocket-Sized Mermaid on a Rock
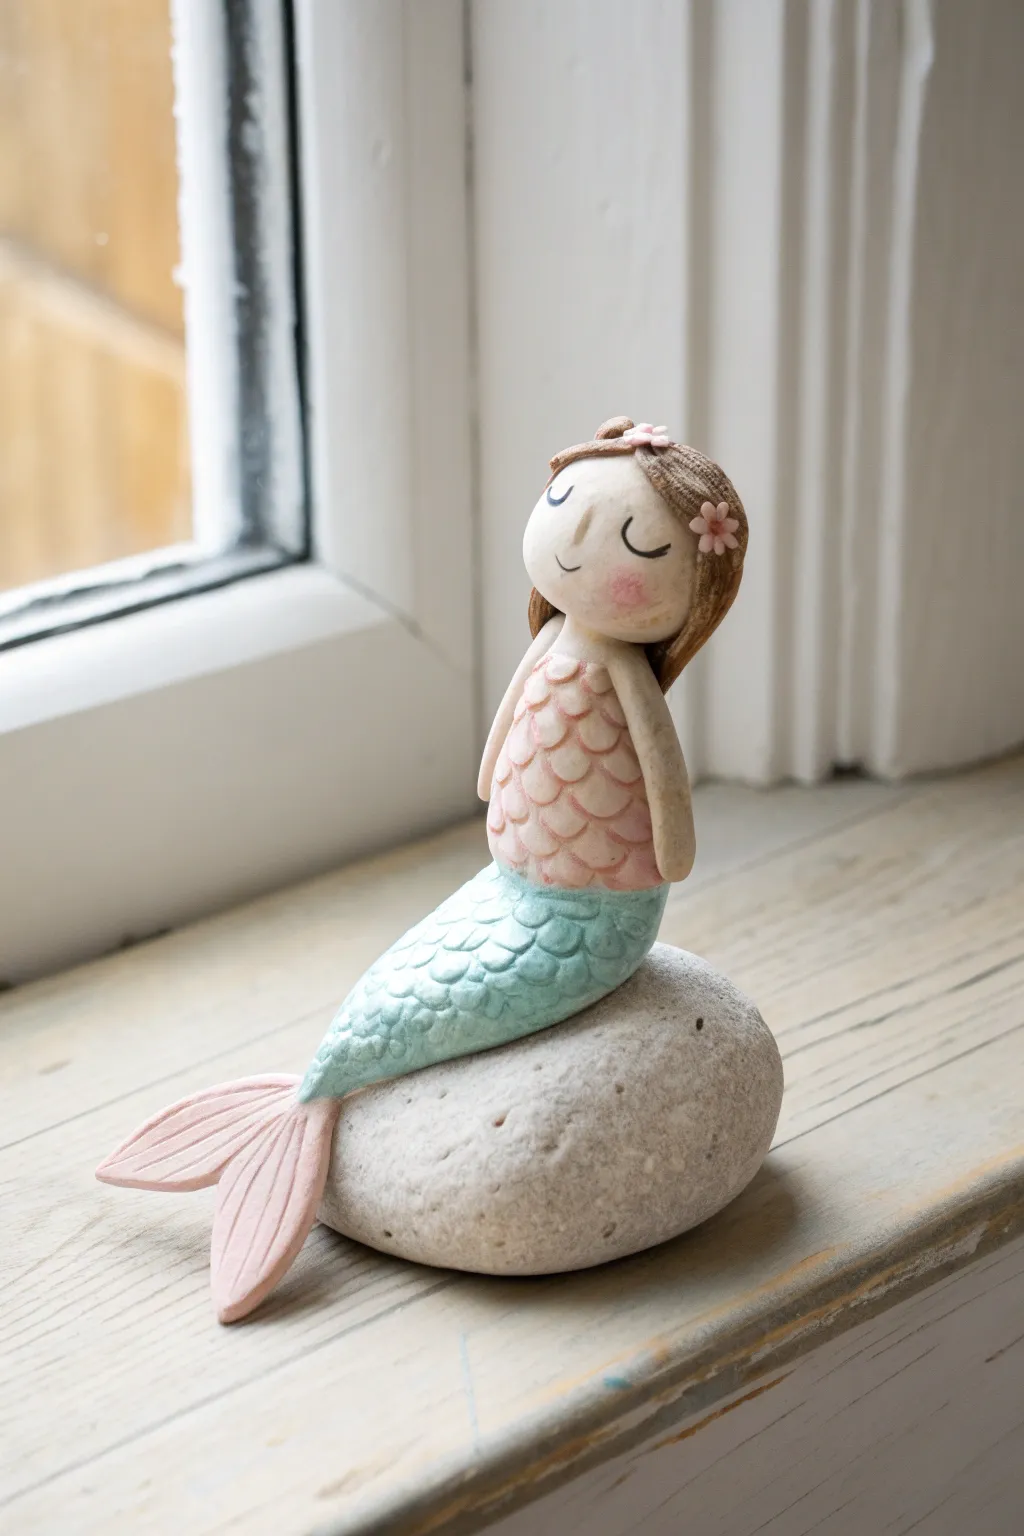
Bring the magic of the ocean to your windowsill with this serene little mermaid perched on a natural pebble. Her textured scales and peaceful expression make for a charming, tactile collectible that blends crafting with nature.
Step-by-Step Guide
Materials
- Air dry clay (white or light beige)
- Smooth, round river rock (approx. 2-3 inches wide)
- Acrylic paints (pastel pink, teal/mint, brown, black, white)
- Small detail brushes
- Modeling tools (needle tool and small ball stylus)
- Clay roller
- Water cup (for smoothing)
- Strong craft glue (e.g., E6000 or super glue)
- Matte varnish (optional)
Step 1: Shaping the Base and Tail
-
Prepare the Rock:
Clean and dry your chosen river rock thoroughly. Test the balance to find the flattest, most stable side for the bottom. -
Form the Tail Core:
Roll a small cone of clay about 1.5 inches long. Bend it gently into a curve so it will sit naturally on the rounded top of your rock. -
Sculpt the Tail Fin:
Flatten a separate small ball of clay into a fan shape. Use a needle tool or knife to cut a V-notch in the center, creating two distinct flukes. -
Attach the Fin:
Score and slip (scratch the surface and add water) the end of the tail cone and the fin, then press them together firmly. Smooth the seam so it looks like one continuous piece. -
Texture the Fins:
Using a needle tool or a dull knife edge, press long, radiating lines into the tail fins to mimic the ribbed texture shown in the photo.
Clean Scale Impressions
If you don’t have a U-shaped tool for scales, cut the tip of a plastic drinking straw in half lengthwise. It creates perfectly uniform semi-circle impressions for the scales.
Step 2: Building the Body
-
Torso Construction:
Create an oval shape for the torso and attach it vertically to the top of the tail section. Ensure the posture leans slightly backward or upright for a relaxed look. -
Head and Neck:
Roll a smooth sphere for the head and a tiny cylinder for the neck. Attach the neck to the torso first, then place the head on top, tilting it slightly upward. -
Adding Arms:
Roll two thin snakes of clay for arms. Attach them at the shoulders, smoothing the clay downward so they rest gently against her sides, blending seamlessly at the top. -
Creating the Hair:
Flatten a thin pancake of clay and drape it over the back of the head. Add smaller strands near the front to frame the face. Use your needle tool to texture deep hair strands. -
Scale Details:
For the scales on the torso and upper tail, use a small U-shaped tool (like the end of a straw or a tiny loop tool) to impress repeating scallop patterns into the soft clay.
Step 3: Painting and Assembly
-
Drying Time:
Allow the clay figure to dry completely. I prefer to let this sit for at least 24 hours to ensure the core is solid before painting. -
Base Layers:
Paint the tail section a soft mint or teal green. Paint the torso section with a pale dusty pink. -
Skin Tone:
Mix a creamy white with a tiny dot of brown to create a pale skin tone. Paint the face, neck, and arms carefully. -
Hair and Face:
Paint the hair brown, letting the paint settle into the textured grooves. use a fine-tip brush or pen to draw two simple U-shapes for closed eyes and a tiny curve for the smile. -
Adding Blush:
Dry brush a tiny amount of pink paint onto the cheeks for a rosy glow. Paint the flower hair accessory pink with a darker center. -
Scale Highlights:
Once the base colors are dry, lightly dry-brush white over the raised areas of the scales on both the tail and torso to make the texture pop. -
Final Assembly:
Apply strong craft glue to the bottom of the mermaid and press her firmly onto the river rock. Hold for a minute to set the bond.
Cracks while drying?
If hairline cracks appear as the clay shrinks, mix a tiny bit of fresh clay with water to make a paste (slip) and fill the cracks. Smooth over with a damp finger before painting.
Place your finished mermaid near a sunny window to enjoy her peaceful presence
Moon-and-Star Dream Sprite
Capture the magic of bedtime with this whimsical figurine featuring a sleepy sprite resting on a crescent moon. The textured, stone-like finish and delicate gold stars give it a dreamy, vintage storybook quality perfect for a nursery shelf.
Step-by-Step Tutorial
Materials
- White air-dry clay (smooth or slightly textured)
- Acrylic paints (pale blue, cream/stone, metallic gold, black)
- Small rolling pin
- Sculpting tools (needle tool, ball stylus)
- Aluminum wire or armature wire (for structural support)
- Fine grit sandpaper
- Clear matte varnish
- Small paintbrushes (flat and fine liner)
- Old toothbrush (for texturing)
- Star-shaped plunge cutters (optional)
Step 1: Shaping the Crescent Moon
-
Form the armature:
Cut a piece of wire about 6 inches long and bend it into a strong ‘C’ shape. This will be the spine of your moon to prevent it from drooping while drying. -
Build the moon base:
Roll a thick sausage of white clay. Insert your wire armature into the center of the clay log, ensuring no wire is poking out the ends. -
Refine the curve:
Gently shape the clay into a tapered crescent moon. The middle should be thickest (about 1.5 inches), tapering to elegant points at the top and bottom. -
Add texture:
Before the clay dries, lightly tap the surface with an old toothbrush or crumpled foil. This gives it that slightly pitted, stone-like appearance seen in the photo. -
Create the seat:
Press a thumb gently into the lower inner curve of the moon to create a slight indentation. This ‘seat’ will help your sprite balance securely later.
Moon Balance Check
If the moon tips over, glue a small flat disk of clay to the bottom, or sand the drying moon’s base flat to create a stable resting point.
Step 2: Sculpting the Sleepy Sprite
-
Form the body:
Roll a teardrop shape of clay for the body. Gently flatten the bottom so the sprite can sit properly. -
Attach the head:
Roll a sphere for the head and attach it to the top of the body tear-drop using a small bit of water or slip (clay mixed with water) as glue. Tilt it slightly downward for a sleepy look. -
Add the legs:
Create two small clay logs for legs. Attach them to the lower body, bending them at the knees so they dangle over the edge of the moon. -
Sculpt the boots:
Add tiny oval balls to the ends of the legs for feet, smoothing the seam where they join the ankle. -
Create the arms:
Roll two smaller logs for arms. Position one resting in the lap and the other bent upward near the face, as if rubbing a sleepy eye or hiding a yawn. -
Fashion the hat:
Making the hat is my favorite part; roll a cone shape and hollow out the base with your thumb. Place it on the head, pulling the tip down so it droops charmingly over one side. -
Refine facial features:
Use a needle tool to very gently mark the line of the nose. Keep the face minimal and smooth. -
Assemble and dry:
Place the sprite into the indentation on the wet moon. Use slip to bond them. Let the entire piece dry for at least 24-48 hours until completely hard and white.
Starry Texture
Press tiny star-shaped studs or sequins into the wet clay before painting to create embossed stars instead of just painting them on.
Step 3: Painting and Detailing
-
Base coat the sprite:
Paint the sprite’s outfit (hat and pajama suit) in a very pale, muted blue. Leave the face and hands the natural clay color or paint them a pale skin tone. -
Paint the moon:
Apply a wash of cream or off-white paint to the moon if you want to alter the raw clay color, but keeping it natural often works best. -
Add the sleepy eyes:
Using your finest liner brush and black paint (or a fine-tip archival ink pen), draw two simple, down-turned ‘U’ shapes for closed eyes. -
Gild with stars:
Dip a small brush in metallic gold paint. Hand-paint small five-point stars scattered across the crescent moon and the sprite’s hat. -
Add speckles:
For a magical dust effect, load a stiff brush with gold paint and flick the bristles to spatter tiny gold dots over the moon and the sprite’s clothes. -
Seal the piece:
Finish with a coat of clear matte varnish to protect the paint and give the clay a unified, porcelain-like finish.
Place your finished sprite on a nightstand or shelf to bring a peaceful atmosphere to the room
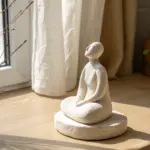
Modern Mini Torso Sculpture
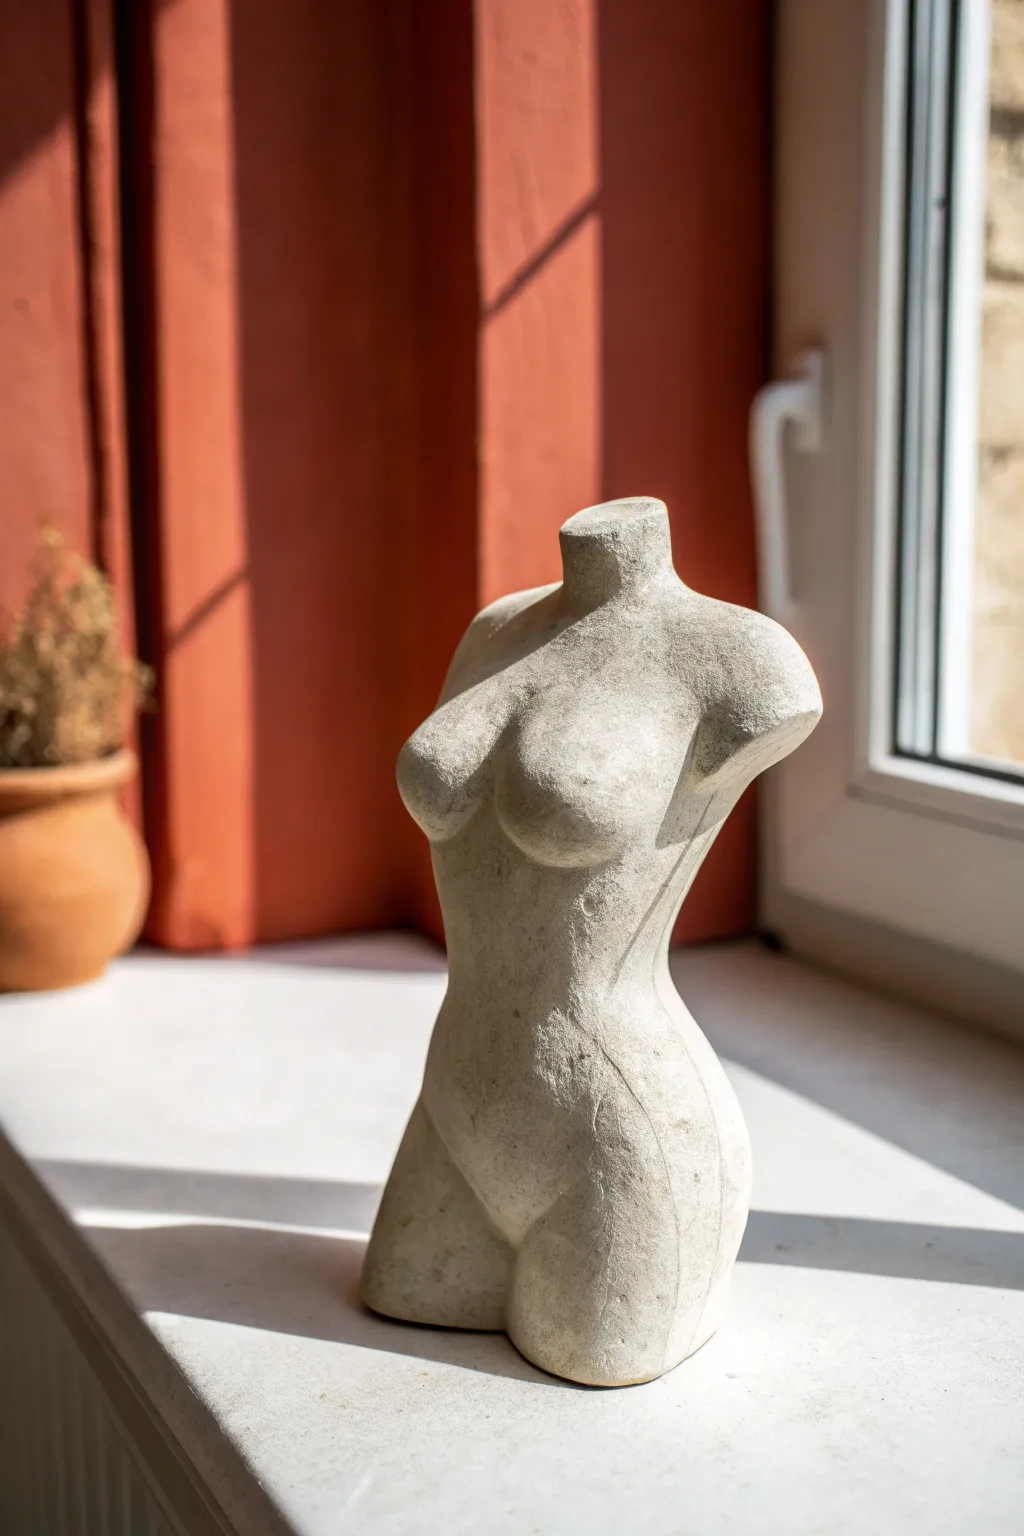
Capture the timeless elegance of the feminine form with this contemporary stone-effect torso. Despite its sophisticated, museum-quality appearance, this project relies on simple shaping techniques and clever texturing to achieve that rugged, ancient look.
Step-by-Step
Materials
- White or stone-colored air-dry clay (approx. 500g)
- Aluminum foil
- Small cup of water
- Needle tool or toothpick
- Sponge (natural sea sponge works best)
- Sandpaper (medium and fine grit)
- Old toothbrush
- Sculpting tools (loop tool and smoother)
- Acrylic paint (beige, grey, white)
- Matte sealant spray
Step 1: Armature Construction
-
Create the core:
Crumple aluminum foil into a tight cylinder shape. This will serve as the inner core to save clay and reduce weight. -
Shape the torso form:
Add more foil to build out the chest and hip areas, creating a rough hourglass shape. Keep it slightly smaller than your desired final size. -
Prepare the foil:
Compress the foil firmly. If it’s too squishy, the clay might crack later. Wrap a final smoother layer of foil around the whole form if it’s too jagged.
Seamless Blending
When adding new clay (like for the chest or hips), always score (scratch) both surfaces and add a dab of water (slip) before joining to prevent pieces from popping off as they dry.
Step 2: Adding the Clay Body
-
Condition the clay:
Knead your air-dry clay until it is warm and pliable. If it feels dry, dip your fingers in water and work the moisture in. -
Cover the armature:
Flatten sheets of clay and press them firmly onto the foil armature. Ensure there are no air pockets trapped between the foil and the clay. -
Thicken the layer:
Build up the clay to a thickness of about 1/4 to 1/2 inch uniformly around the form. Smooth out the seams where different pieces of clay join using a little water. -
Define the neck and shoulders:
Pinch the top gently to create the stump of the neck. Slope the clay downwards on either side to suggest the beginning of shoulders.
Step 3: Sculpting the Curves
-
Build the chest:
Add two small balls of clay to the upper torso area. Blend the edges downward and sideways into the main body so they look organic, not just stuck on. -
Refine the waist:
Use your thumbs to gently press inward at the waistline, accentuating the curve between the ribs and the hips. -
Shape the hips and thighs:
Add extra clay to the hip area if needed to create fullness. Smooth the clay down to the base, which should be flat so the sculpture stands on its own. -
Carve the details:
Using a loop tool or your fingers, create the subtle depression of the spine on the back and the slight indentation of the navel/stomach area. -
Create the ‘broken’ look:
At the neck and arm stumps, don’t smooth the clay perfectly. Use a needle tool or twist the clay slightly to mimic the rough texture of broken stone.
Faux Marble Finish
Mix tiny flecks of dried black tea leaves or ground pepper into your white clay before sculpting. When you sand the finished piece, it reveals a stunning speckled granite effect.
Step 4: Texturing and Finishing
-
Initial smoothing:
Use a damp sponge to wipe over the entire surface. This removes fingerprints and softens harsh tool marks. -
Add stone texture:
Take an old toothbrush or a stiff bristle brush and gently stipple (poke) the surface of the wet clay. I prefer to focus on the sides and crevices to simulate aged stone. -
Drying:
Let the sculpture dry completely in a draft-free area. This usually takes 24-48 hours depending on humidity. Rotate it occasionally so the bottom dries too. -
Sand and soften:
Once bone dry, use fine-grit sandpaper to knock back any overly sharp texture bumps, leaving a smooth yet matte finish. -
Stone-effect wash:
Mix a tiny drop of grey or beige paint with plenty of water. Brush this wash over the sculpture and immediately wipe most of it off with a paper towel. The color will stick in the textures. -
Seal the work:
Finish with a matte spray sealant to protect the clay from moisture without making it look glossy or plastic.
Place your finished torso on a windowsill where the natural light can highlight the delicate curves and organic texture
Realistic Cat With Armature and Fur Texture
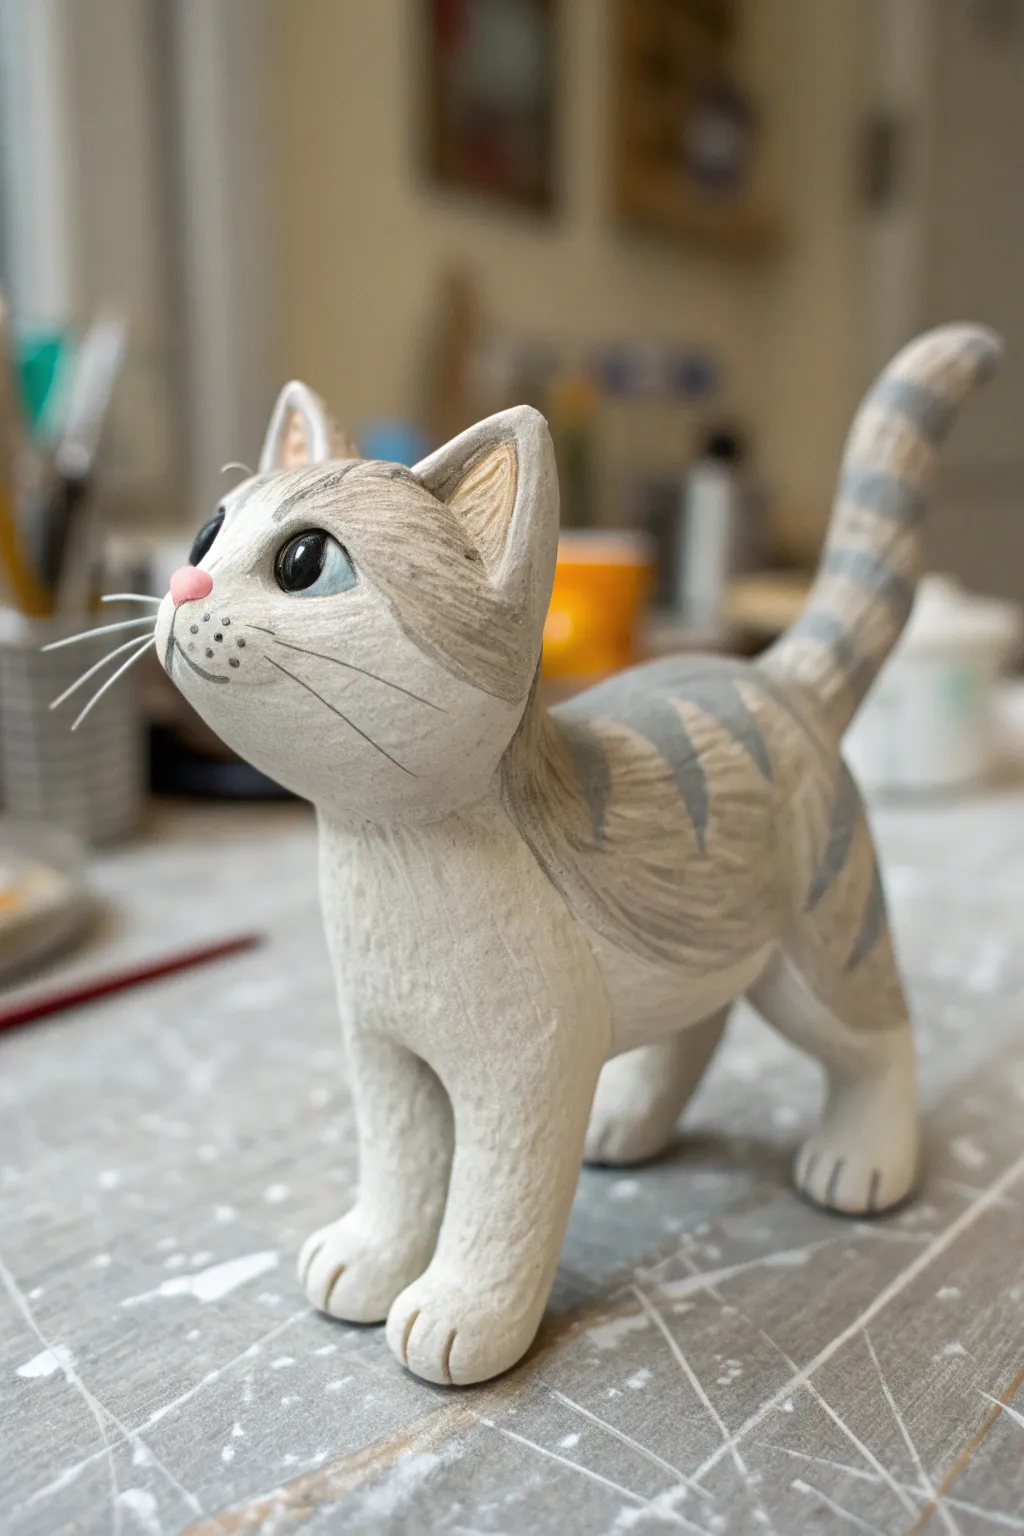
This charming, wide-eyed tabby cat figurine captures a sense of curiosity with its uplifted gaze and textured fur. By combining a sturdy armature with detailed surface carving, you will create a durable and expressive piece that looks ready to pounce or purr.
How-To Guide
Materials
- High-quality air dry clay (e.g., stone clay or paper clay)
- Aluminum crafting wire (approx. 1.5mm – 2mm)
- Aluminum foil
- Pliers and wire cutters
- Sculpting tools (needle tool, small loop tool, rib tool)
- Water and a small slip brush
- Sandpaper (fine grit)
- Acrylic paints (white, grey, black, pink, blue)
- Fine detail paintbrushes
- White nylon bristles or clear fishing line (for whiskers)
- Needle or pin vise drill
- Matte or satin varnish
Step 1: Building the Skeleton
-
Create the armature:
Cut two lengths of wire. Bend the first wire into a ‘U’ shape to form the front legs and neck/head connection. Bend the second wire for the back legs and tail. twist them together at the spine to create a basic cat skeleton shape. -
Bulk up the body:
Crumple aluminum foil tightly around the wire spine, ribcage, and hips to build volume without using too much clay. Leave the wire exposed for the lower legs and tail tip. -
Secure the foil:
Wrap thin masking tape or painter’s tape around the foil to keep it compressed and help the clay adhere better essentially creating a ‘mummy’ version of your cat.
Cracking Up?
If small cracks appear during drying, don’t panic. Make a ‘slip’ by mixing clay and water into a paste, fill the cracks, smooth it over, and let it dry again.
Step 2: Sculpting the Form
-
Apply the base layer:
Roll out thin sheets of air dry clay. Wrap them around the foil core and the exposed limb wires. Use a wet finger to smooth the seams together as you work. -
Refine the legs and paws:
Add small snakes of clay to build up the muscles in the thighs and shoulders. Shape the paws into rounded mounds, keeping the bottom flat so the figure stands securely. -
Shape the head:
Form a slightly flattened sphere for the head. Add a smaller muzzle shape on the front. Attach triangular wedges for the ears, blending the clay seamlessly into the skull. -
Attach the tail:
Coat the tail wire with clay, tapering it gently toward the tip. Smooth the connection point at the base of the spine so it looks like a natural extension of the body. -
Initial drying:
Let this main form dry until it feels leathery or stiff, which usually takes a few hours. This makes it easier to add texture without squishing your shape.
Step 3: Detailing and Texture
-
Carve the paws:
Use a needle tool or small knife to score distinct lines into the paw pads to separate the toes. -
Sculpt the face:
Press indentations for the eye sockets. Add a tiny triangle of clay for the nose and use a needle tool to create the mouth line and whisker dimples. -
Create fur texture:
Using a needle tool or a fine rake tool, drag short, shallow lines across the surface of the clay. Follow the natural growth direction of cat fur—away from the nose and down the back. -
Refine the ears:
Carve out the inner ear slightly to create depth. I find it helpful to leave the insides relatively smooth compared to the furry exterior. -
Whiskers preparation:
Before the clay hardens completely, use a pin or needle to poke small holes in the muzzle where the whiskers will eventually go. -
Final dry:
Allow the sculpture to dry completely, ideally for 24-48 hours. The clay should turn white and feel room temperature (not cold) to the touch.
Eyes That Shine
For extra lifelike eyes, add a drop of UV resin or clear nail polish over the painted eye. It creates a domed, glass-like lens effect instantly.
Step 4: Painting and Finishing
-
Base coat:
Paint the entire cat with an off-white or cream acrylic paint. Work the paint into the fur texture grooves, but wipe away excess if it clogs the details. -
Grey markings:
Mix a soft grey wash. Paint the classic tabby stripes on the back, tail, and forehead. Use a dry-brush technique to keep the edges of the stripes soft and fur-like. -
Facial features:
Paint the nose a soft pink. For the eyes, paint a black circle, then add a crescent of blue or green, and finish with a tiny white reflection dot to bring the cat to life. -
Insert whiskers:
Cut nylon bristles or fishing line to length. Dip the ends in a tiny bit of superglue and insert them into the pre-drilled holes on the muzzle. -
Seal the work:
Apply a coat of matte varnish to the fur to protect the paint. Use a gloss varnish only on the eyes and nose for a wet, realistic look.
Place your finished tabby on a shelf where its sweet gaze can greet you every day.