If you’re craving that sweet “I made this!” feeling, these easy clay sculpture ideas are the fastest way to get there with simple shapes and chill, forgiving details. I’m sharing projects I’d absolutely hand to a first-timer in my studio—cute, recognizable, and doable with air-dry clay or polymer clay.
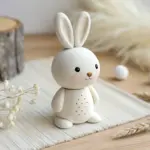
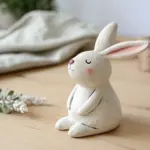
Pinch-Pot Mini Animals
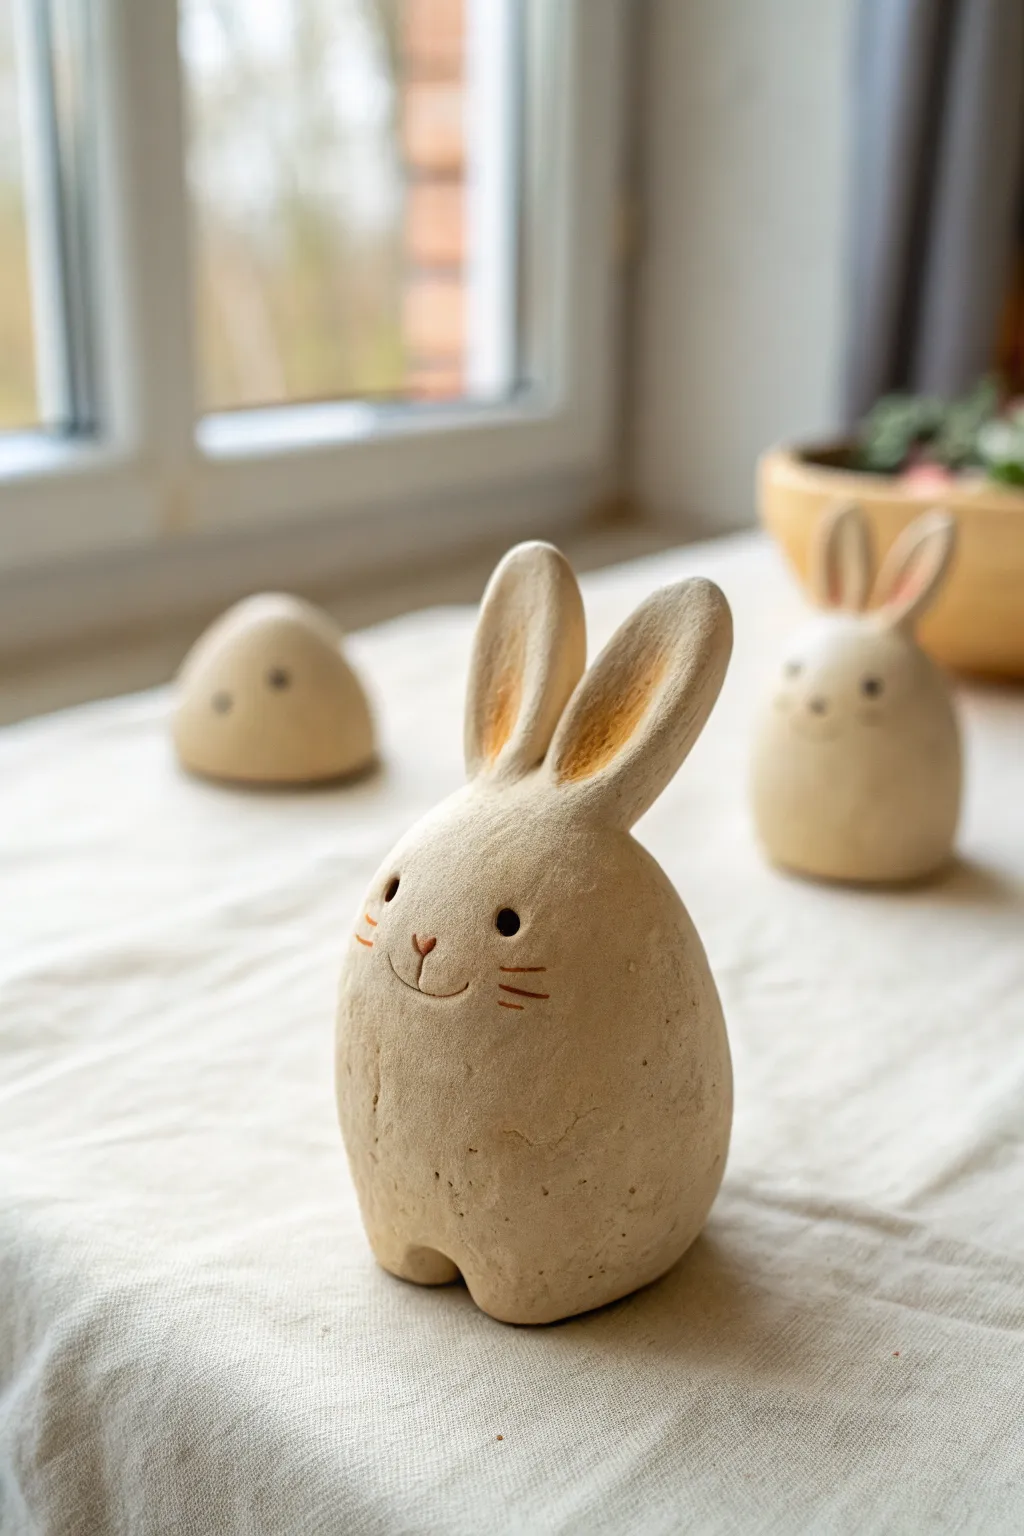
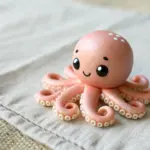
These charming, minimalist rabbits rely on the natural warmth of unglazed clay and simple, rounded forms to create a sweet, rustic aesthetic. By starting with a basic pinch pot, you’ll build sturdy, egg-shaped bodies that are perfect for holding their shape while adding playful ears and whiskers.
Step-by-Step
Materials
- Air-dry clay (buff or stone color)
- Small cup of water
- Pointed sculpting tool or toothpick
- Small wooden sculpting rib or spoon back
- Acrylic paint (orange/brown for details)
- Fine detail paintbrush
Step 1: Forming the Body
-
Prepare the clay:
Start with a ball of clay roughly the size of a tangerine. Keep your hands slightly damp to prevent cracking, but avoid soaking the clay. -
Create a pinch pot:
Push your thumb into the center of the ball, but not all the way through. Gently pinch and turn the clay between your thumb and fingers to open up a hollow, cup-like shape. -
Close the form:
Gradually pinch the opening of your pot inward to close it up, trapping air inside. This creates a hollow sphere which is lighter and safer for drying than a solid lump. -
Shape the egg:
Roll the closed sphere gently against your work surface to smooth the seams. Apply gentle pressure to taper the top slightly, creating a rounded egg shape for the bunny’s body. -
Flatten the base:
Tap the bottom of the egg shape firmly against the table so the bunny stands upright without wobbling. -
Add little feet:
At the very bottom front edge, use your thumb or a modeling tool to press a small indentation upward, hinting at two separated paws or a slight leg gap.
Pro Tip: Hollow Core
Don’t skip the hollow pinch-pot method! A solid lump of clay this thick will likely crack as the outside dries faster than the center.
Step 2: Adding Character
-
Shape the ears:
Roll two small logs of clay, tapering them at both ends to look like fat leaves. These should be about one-third the height of the body. -
Detail the ears:
Flatten the logs slightly with your thumb. Use a modeling tool to press a long, shallow indentation down the center of each ear to create the inner ear canal. -
Attach the ears:
Score (scratch) the bottom of the ears and the top of the head. Add a tiny dab of water or slip (muddy clay) to the scored areas and press the ears firmly onto the head. -
Blend the seams:
Using a small wooden tool or your finger, drag clay from the base of the ears down onto the head to smooth the connection completely. I find this step crucial for durability. -
Refine the surface:
Once assembled, gently smooth the entire sculpture with a barely damp sponge or finger. Leave a bit of natural texture; these bunnies shouldn’t be perfectly polished plastic.
Step 3: Face and Finish
-
Poke the eyes:
Use the rounded end of a paintbrush handle or a small dowel to press two distinct, round holes for eyes about halfway down the face. -
Carve the mouth:
Use a sharp tool or toothpick to carve a small ‘Y’ or anchor shape below the eyes for the nose and mouth. Keep the lines thin and delicate. -
Add whiskers:
Lightly scratch three short horizontal lines on each cheek area for whiskers. -
Dry partially:
Let the sculpture sit for an hour or so until the surface is leather-hard (firm but cool). -
Paint the details:
Dilute a tiny bit of orange-brown acrylic paint with water. Carefully paint inside the ear indentations and trace the whisker/mouth lines. -
Wipe back excess:
If the paint looks too stark, quickly wipe the surface with a paper towel. This leaves the color settled deep in the crevices for a natural, stained look. -
Final dry:
Allow the bunny to dry completely for at least 24 hours before displaying.
In The Details
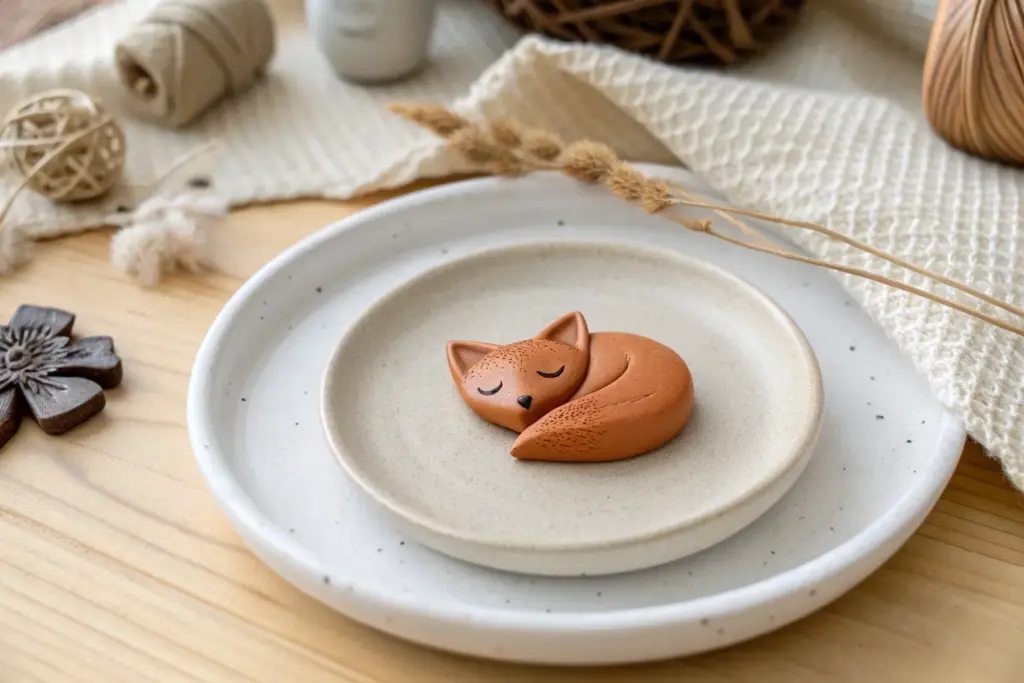
For the darker eyes shown in the photo, dip your eye-poking tool in black paint before pressing it into the wet clay. Painting inside the hole is tricky later.
Set your finished trio on a windowsill to enjoy their cheerful, organic presence


Simple Penguin From Three Shapes
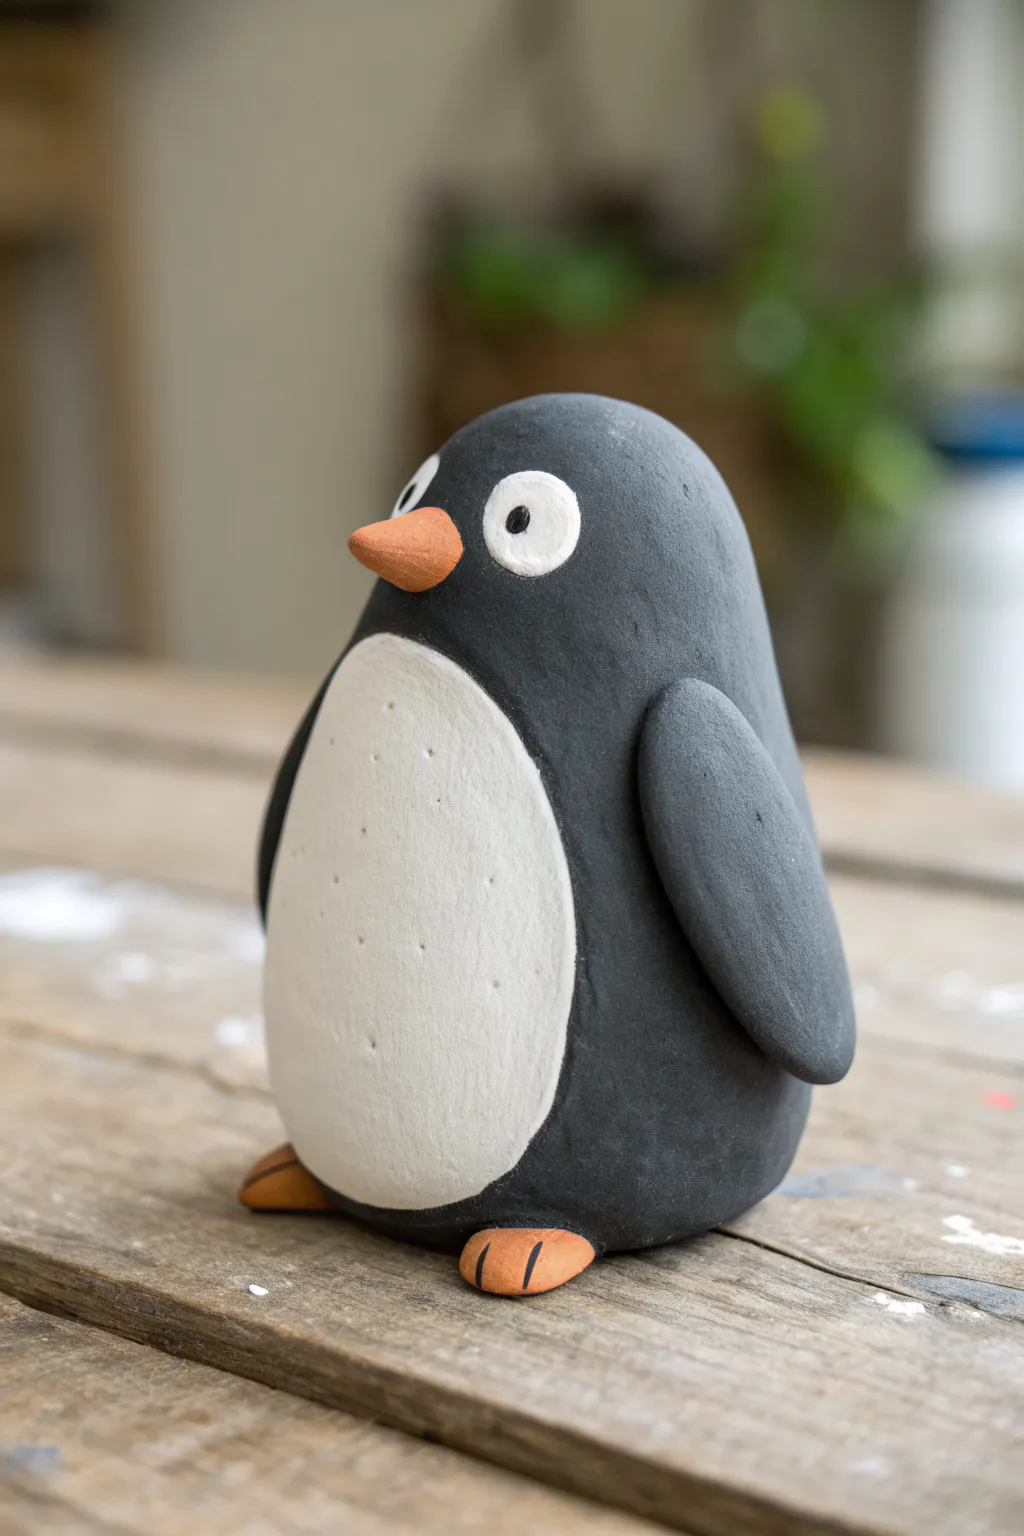
Transform three simple lumps of clay into a charming, minimalist penguin sculpture complete with a bright white belly and a curious expression. This beginner-friendly project relies on basic shaping techniques to create a smooth, rounded figure that looks fantastic on a shelf.
How-To Guide
Materials
- Air-dry clay or polymer clay (black, white, and orange)
- Clean work surface or clay mat
- Sculpting tool with a needle point
- Small cup of water (for smoothing)
- Dotting tool or toothpick
- Acrylic varnish (optional for finish)
Step 1: Forming the Body
-
Create the main shape:
Start with a large ball of black clay, roughly the size of a tangerine. Roll it between your palms until it is perfectly smooth and free of cracks. -
Refine the silhouette:
Gently gently roll the ball into a tall, rounded egg shape. You want the bottom to be slightly wider than the top, creating a classic penguin hunch. -
Flatten the base:
Tap the wider end of your egg shape firmly against your work surface. This creates a flat bottom so your penguin stands upright without wobbling. -
Smooth the surface:
Inspect your form for fingerprints. If you are using air-dry clay, dip your finger in water and gently rub away any imperfections until the surface is matte and featureless.
Clean Hands Tip
When switching from black to white clay, wash your hands thoroughly or use baby wipes. Black residue transfers easily and can stain the pristine white belly.
Step 2: Adding the Belly
-
Prepare the white clay:
Take a smaller portion of white clay and roll it into a ball. Then, flatten it into a thin, oval pancake using your palm or a small rolling pin. -
Attach the belly:
Press this white oval onto the front of your black body shape. Position it low, so the bottom of the white patch almost touches the table surface. -
Blend the edges:
Use your thumb or a modeling tool to gently press the edges of the white clay into the black. You want distinct lines but a smooth transition so it doesn’t look like a sticker stuck on top. -
Add texture:
Using a needle tool, poke tiny, sparse holes across the white belly area to mimic feather texture. Keep these random and light.
Step 3: Wings and Feet
-
Shape the wings:
Create two equal-sized teardrop shapes from black clay. Flatten them slightly so they look like paddles. -
Attach the wings:
Press the wings onto the sides of the body. Angle them slightly backward and downward, blending the top shoulder joint into the main body for a seamless look. -
Form the feet:
Roll two small balls of orange clay. Flatten them into semi-circles to create the webbed feet. -
Detail the toes:
I like to use a knife tool or the edge of a ruler to press two indentations into each orange foot to suggest toes. -
Position the feet:
Slide the orange feet slightly under the front of the body so just the tips are peeking out, supporting the figure.
Winter Accessories
Before baking or drying, sculp a tiny scarf and beanie hat in bright red or green clay to give your penguin a cozy winter vibe.
Step 4: The Face Details
-
Make the eyes:
Roll two tiny spheres of white clay and press them flat against the head area. Make sure they are level with each other. -
Add pupils:
Take extremely small specks of black clay and press them into the center of the white circles to bring the character to life. -
Sculpt the beak:
Form a small cone from the orange clay. Use your fingers to curve the tip slightly downward. -
Place the beak:
Attach the beak directly between and slightly below the eyes. Press firmly to adhere it. -
Final drying:
Allow your penguin to dry or bake according to your specific clay package instructions. Once cured, the matte finish looks lovely as is.
Place your finished penguin on a windowsill or desk for a friendly little companion that is sure to make you smile


Coil Snail With Spiral Shell
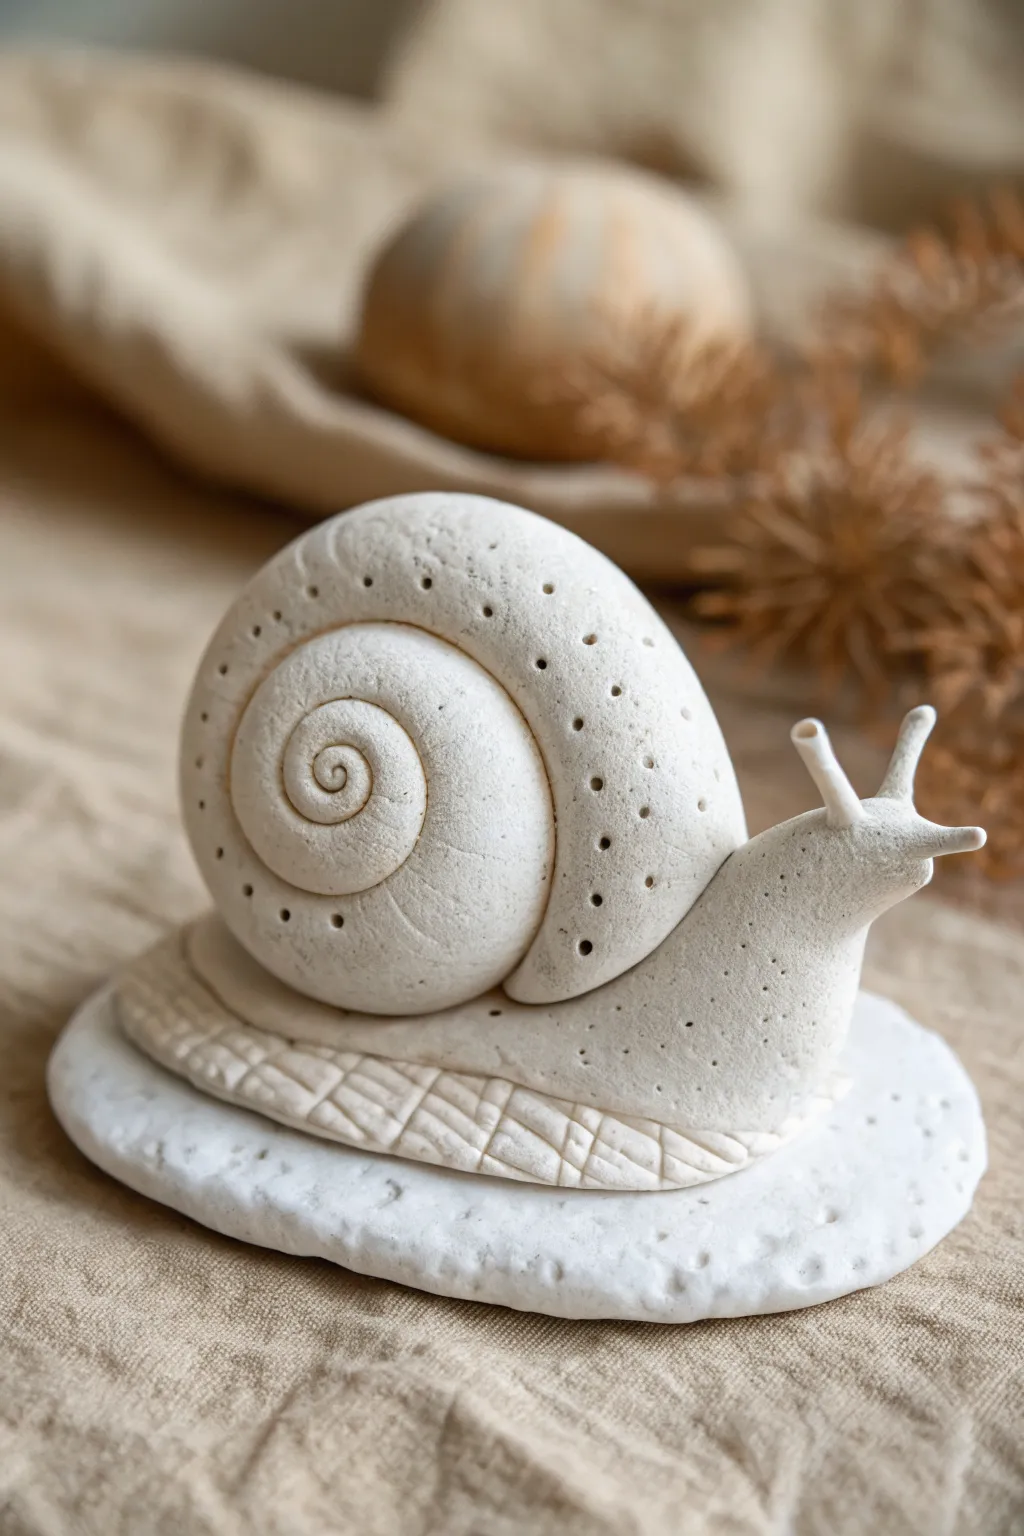
Sculpt a charming, earthy snail featuring a textured spiral shell and delicate spotted details. This monochromatic project relies on simple piercing techniques and clean lines to create a sophisticated, nature-inspired figurine perfect for display.
Step-by-Step
Materials
- White or cream-colored air-dry clay (or polymer clay)
- Small rolling pin
- Sculpting needle tool or toothpick
- Small ball stylus or paintbrush handle
- Flat modeling tool
- Water (for bonding)
- Fine-grit sandpaper (optional)
- Textured fabric or mesh (optional for body texture)
Step 1: Forming the Base & Body
-
Roll the base slab:
Begin by rolling out a thick, flat oval of clay about 1/4 inch thick. This will serve as the decorative base platform for your snail. -
Shape the base shape:
Smooth the edges of your oval slab with a wet finger to create a soft, river-stone appearance. If you want added texture like the example, gently press a piece of rough stone or sponge onto the surface. -
Create the body coil:
Roll a thick sausage or log of clay that is tapered at one end (for the tail) and thicker at the other (for the head). This log should be slightly shorter than your base slab. -
Flatten the foot:
Gently flatten the bottom of the body log so it sits securely. Use a modeling tool to press cross-hatched lines along the lower edge of the body to mimic the muscular ‘foot’ texture seen in the photo. -
Attach body to base:
Score the bottom of the body and the top of the base slab. Add a dab of water or clay slip, then press the body firmly onto the center of the base. -
Lift the head:
Gently bend the thicker end of the body upwards to create the snail’s neck and head area. Smooth out any wrinkles that form during the bending process.
Fixing Sagging Shells
If your shell is heavy and sags while the clay is wet, prop it up with a crumpled ball of paper or foil placed underneath the overhang until the clay stiffens enough to hold its shape.
Step 2: Sculpting the Spiral Shell
-
Roll the shell coil:
Roll a very long, consistent snake of clay. It should be thickest at one end and taper down gradually to a finer point. -
Wind the spiral:
Starting with the thinnest end, tightly coil the snake into a flat spiral. I find it easiest to work on a piece of parchment paper so the clay doesn’t stick to the table. -
Dome the shell:
As you continue winding the thicker parts of the coil, start overlapping them slightly outward rather than just flat, creating a domed, concave cup shape rather than a flat coaster. -
Seal the seams:
On the *inside* of the shell (the part that won’t be seen), smooth the coils together with your thumb or a tool to ensure structural integrity so it doesn’t unwind. -
Refine the spiral:
On the outside, use a modeling tool to deepen the spiral groove, defining the separation between each coil loop clearly. -
Add the spotted texture:
Using a needle tool or small stylus, poke rows of small, decorative holes following the curve of the spiral. Vary the depth slightly for visual interest, but don’t poke all the way through. -
Attach the shell:
Score the back of the snail’s body and the opening of the shell. Apply slip and press the shell firmly onto the back of the body, blending the clay where they meet underneath for a seamless join.
Step 3: Detailing & Finishing
-
Form the tentacles:
Roll two very small, thin tapered cones of clay for the eye stalks (tentacles). Make them about half an inch long. -
Attach the tentacles:
Score two tiny spots on the top of the head. Attach the tentacles, blending the clay downwards into the head so they look like they grow from the body, not just stuck on top. -
Add head texture:
Continue the dotted texture pattern onto the neck and head area to unify the design, fading the dots out as you reach the tentacles. -
Final smoothing:
Check the sculpture for any fingerprints. Dip a soft brush in water and lightly sweep it over the surface to smooth imperfections. -
Drying:
Allow the piece to dry slowly away from direct heat to prevent cracking. If using air-dry clay, this may take 24 to 48 hours.
Pro Tip: Stone Texture
To get that gritty, realistic stone look on the finished surface, gently tap the drying clay with a stiff toothbrush or a ball of aluminum foil before it fully hardens.
Now you have a serene little clay companion to bring a touch of nature into your home


Chubby Turtle With Textured Shell

This charming little sculpture combines the rustic look of speckled stone clay with a vibrant pop of teal glaze. Its round, segmented shell and gentle expression make it a delightful project for beginners looking to practice simple carving and glazing techniques.
Detailed Instructions
Materials
- Speckled stoneware clay (or polymer clay with faux stone effect)
- Teal underglaze or acrylic paint (matte finish)
- Small loop tool or carving needle
- Fine-point paintbrush
- Sponge and water
- Rolling pin
- Scoring tool (or fork)
- Slip (clay glue) or liquid clay
Step 1: Sculpting the Body
-
Form the shell base:
Start with a ball of speckled clay about the size of a tangerine. Gently press it onto your work surface to flatten the bottom while keeping the top perfectly domed and smooth. -
Shape the head:
Roll a smaller ball of clay into a slightly elongated tear-drop shape. This will be the turtle’s head and neck. -
Create the legs:
Create four small, equal-sized nuggets of clay. Shape them into short, sturdy flippers or rounded stumps, flattening the bottoms so the turtle will stand level. -
Attach the limbs:
Score the underside of the shell and the tops of the legs using a needle tool or fork. Apply a dab of slip (clay mixed with water) and press the legs firmly into place. -
Attach the head:
Score the front of the shell and the back of the neck piece. Use slip to join them, smoothing the clay with your finger or a tool so the transition between shell and neck is seamless. -
Add facial details:
Use the rounded end of a tool or a small dowel to press shallow indentations for the eyes on either side of the head. Use a needle tool to carve a simple, curved smile line.
Step 2: Carving & Refining
-
Map the shell segments:
Lightly sketch the design on the shell with a needle tool before committing to deep cuts. You want a central oval area at the top, surrounded by trapezoidal segments flowing down the sides. -
Carve the grooves:
Using a small loop tool or V-tip carving tool, deepen the lines between the shell segments. These channels should be distinct enough to separate the sections clearly. -
Add top texture:
On the very top center segment of the shell, carve a series of parallel curved lines running horizontally for added visual interest. -
Smooth the surface:
Take a slightly damp sponge and gently wipe over the entire sculpture. This removes any sharp clay burrs from your carving and softens the edges. Let the piece dry completely (bone dry) if using kiln clay, or bake according to package instructions if using polymer.
Clean Lines Pro Tip
When painting the shell, use masking tape or liquid frisket over the carved groove lines. This ensures your teal paint stays strictly on the raised panels and keeps the separation crisp.
Step 3: Painting & Finishing
-
Base coat the shell:
Apply a coat of teal underglaze (or acrylic paint) to the shell sections only. Avoid getting paint into the deep carved grooves; we want those to remain the natural clay color for contrast. I find a flat shader brush works best here. -
Clean the edges:
If paint got into the grooves, use a damp stiff brush or a clay tool to gently scrape it away, revealing the stone texture underneath. -
Paint the dots:
Using a very fine detail brush or a dotting tool, apply small dots of cream or white paint. Place larger dots in the center of the side panels and a row of tiny dots along the bottom rim of the shell. -
Enhance the top details:
Carefully paint thin lines of the cream color inside the carved parallel lines on the top shell segment. -
Darken the eyes:
Dip a toothpick in black paint and place a small dot inside the eye indentations to bring the character to life. -
Final texture check:
Leave the head and legs unpainted to show off the beautiful speckles of the clay. If using acrylics on baked clay, you can seal the painted shell with a matte varnish for protection.
Make It a Box
Slice the dry, unfired clay shell horizontally to create a lid. Hollow out the body underneath before firing to turn this cute sculpture into a functional trinket dish.
Place your finished turtle on a shelf and enjoy the calm, earthy vibes it brings to your space

The Complete Guide to Pottery Troubleshooting
Uncover the most common ceramic mistakes—from cracking clay to failed glazes—and learn how to fix them fast.
Sleepy Fox With a Teardrop Body
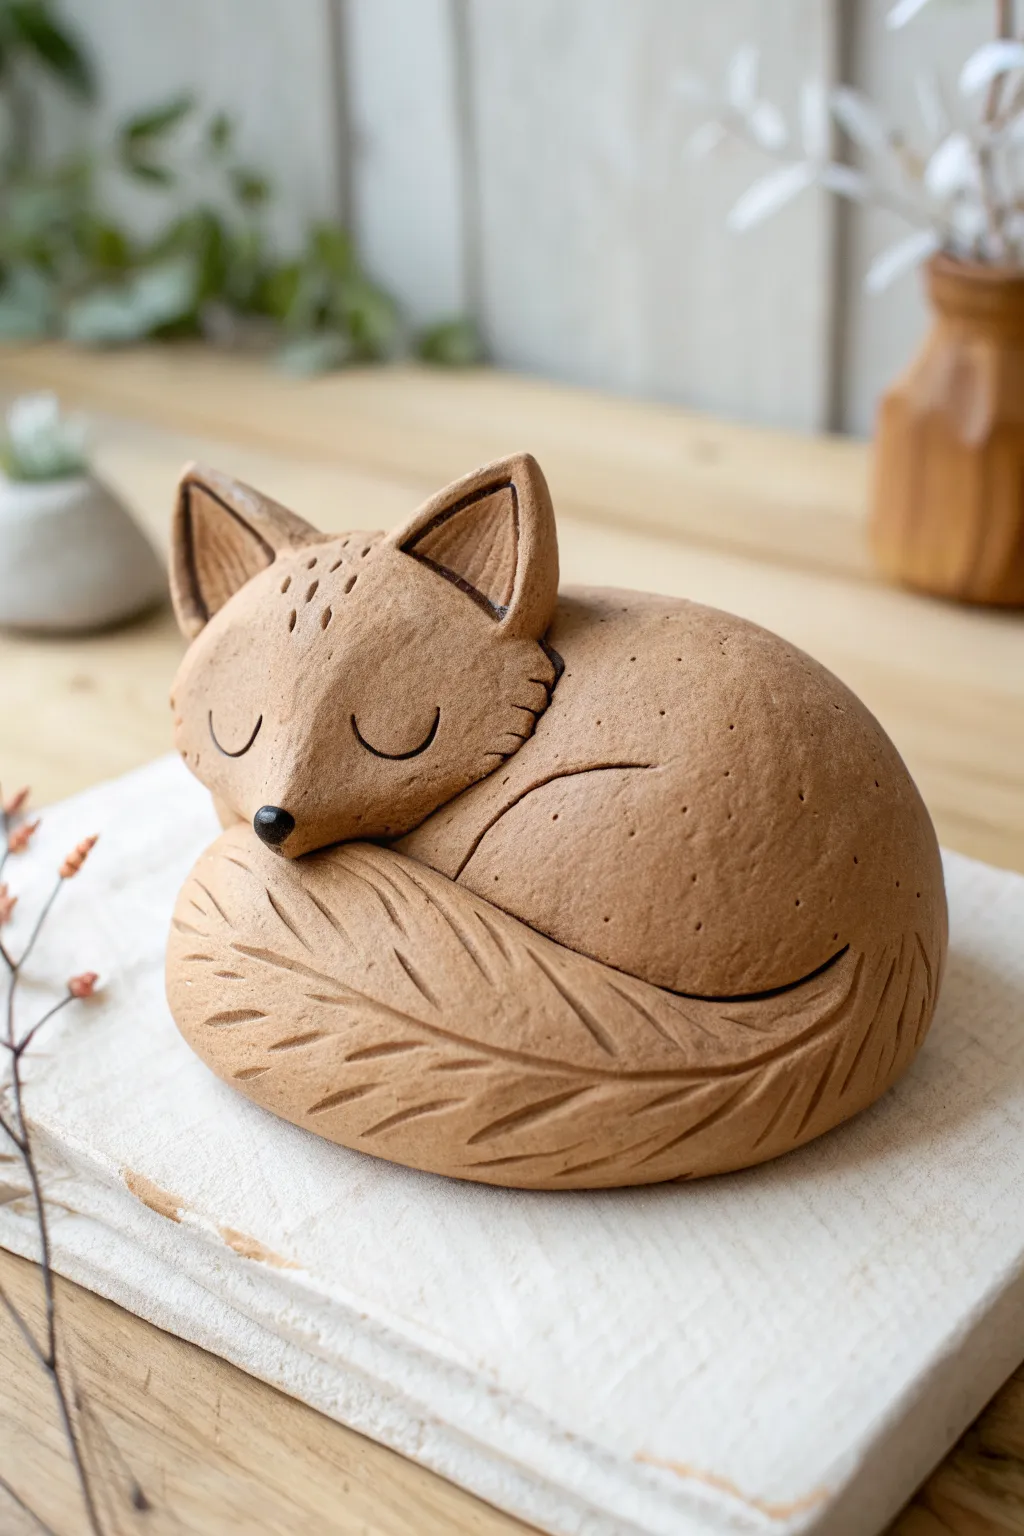
Embrace the rounded, cozy form of this sleeping fox sculpture, designed around simple teardrop shapes. The natural finish and carved details give this piece a delightful tactile quality that is perfect for a desk companion or a bookshelf accent.
Step-by-Step
Materials
- Air-dry clay or polymer clay (terracotta or natural earthenware color)
- Small rolling pin
- Modeling tools (needle tool, small spatula)
- Rubber-tipped shaping tool
- Soft paintbrush
- Water (for smoothing)
- Black acrylic paint (or fine tip marker)
- Matte varnish (optional)
Step 1: Shaping the Base
-
Form the Body:
Start with a large ball of clay about the size of a tennis ball. Gently roll it on your work surface into a distinct ‘teardrop’ or pear shape. The fat end will be the fox’s haunches, and the tapered end will curve around to become the neck area. -
Curve the Posture:
Gently bend the tapered end of your teardrop shape so it hugs the side of the larger end. You want to create a compact, curled-up bean shape that looks like a sleeping animal. -
Create the Tail:
Roll a second, sausage-shaped coil of clay. Taper it at both ends, making one side slightly pointier for the tail tip. Flatten it just slightly so it isn’t perfectly round. -
Attach the Tail:
Score (scratch) the clay surface along the bottom curve of the body and apply a little water or slip. Press the tail coil firmly against the body, wrapping it around the front so the tip rests where the paws would be.
Pro Tip: Seamless Blending
If you struggle with seams showing, use a tiny bit of water on a rubber sculpting tool. The rubber drags clay across the gap more effectively than metal tools without Gouging.
Step 2: Sculpting the Head
-
Base Head Shape:
Roll a smaller ball of clay and pinch one side to create a pointed snout. The head should look somewhat triangular but with soft, rounded edges. -
Position the Head:
Score the neck area on the body and the underside of the head. Attach the head securely, resting the chin slightly on top of the curled tail section so the fox looks tucked in tight. -
Blend the Seams:
Use a rubber-tipped tool or your thumb to smooth the clay where the neck meets the body. The transition should be seamless, though you can leave a small definition line where the chin rests on the tail. -
Add the Ears:
Form two small triangles of clay. Gently pinch them to create a slight curve. Attach them to the top of the head using the score-and-slip method, blending the base of the ears into the skull.
Step 3: Carving Details
-
Define the Ear Inner:
Use a small carving tool or a loop tool to create a triangular indentation inside each ear. This adds depth and creates the rim seen in the reference image. -
Carve the Fur Texture:
Focusing on the tail, use a needle tool or small knife to carve shallow, sweeping V-shaped lines. These should flow in the direction of the fur, curving with the shape of the tail. -
Add Head Details:
Add tiny dashed lines on the forehead for extra texture. Use the same needle tool to lightly define the separation line between the cheek and the shoulder. -
Smooth the Surface:
Before the clay hardens, dip your finger or a soft brush in water and gently glide it over the smooth parts of the body (the back and flank) to remove any fingerprints. -
Poke Texture:
Use a needle tool or a stiff brush to add subtle stippling dots on the back for a porous, natural stone look.
Level Up: White Accents
Before sealing, dry-brush a tiny amount of white paint onto the tips of the carved tail fur and the very tip of the ears to mimic a fox’s natural coloring.
Step 4: Painting and Finishing
-
Dry Completely:
Allow your sculpture to dry fully. For air-dry clay, this usually takes 24-48 hours depending on thickness. I usually flip it over halfway through to let the bottom breathe. -
Paint the Sleeping Eyes:
Using a very fine brush and black acrylic paint, paint two U-shaped curves for the closed eyes. Keep the lines thin and delicate. -
Paint the Nose:
Paint the very tip of the snout black for the nose. You can make it a small rounded triangle shape. -
Enhance the Ear Rims:
Carefully paint a thin black line along the inner ridge of the ears to define their shape against the lighter clay. -
Seal (Optional):
If you want to protect the paint, apply a coat of matte varnish. Avoid glossy finishes to maintain the natural, earthen aesthetic shown in the photo.
Place your little sleeping fox on a sunny windowsill and enjoy the peaceful vibe it brings to the room
Tiny Bird Buddy Pair
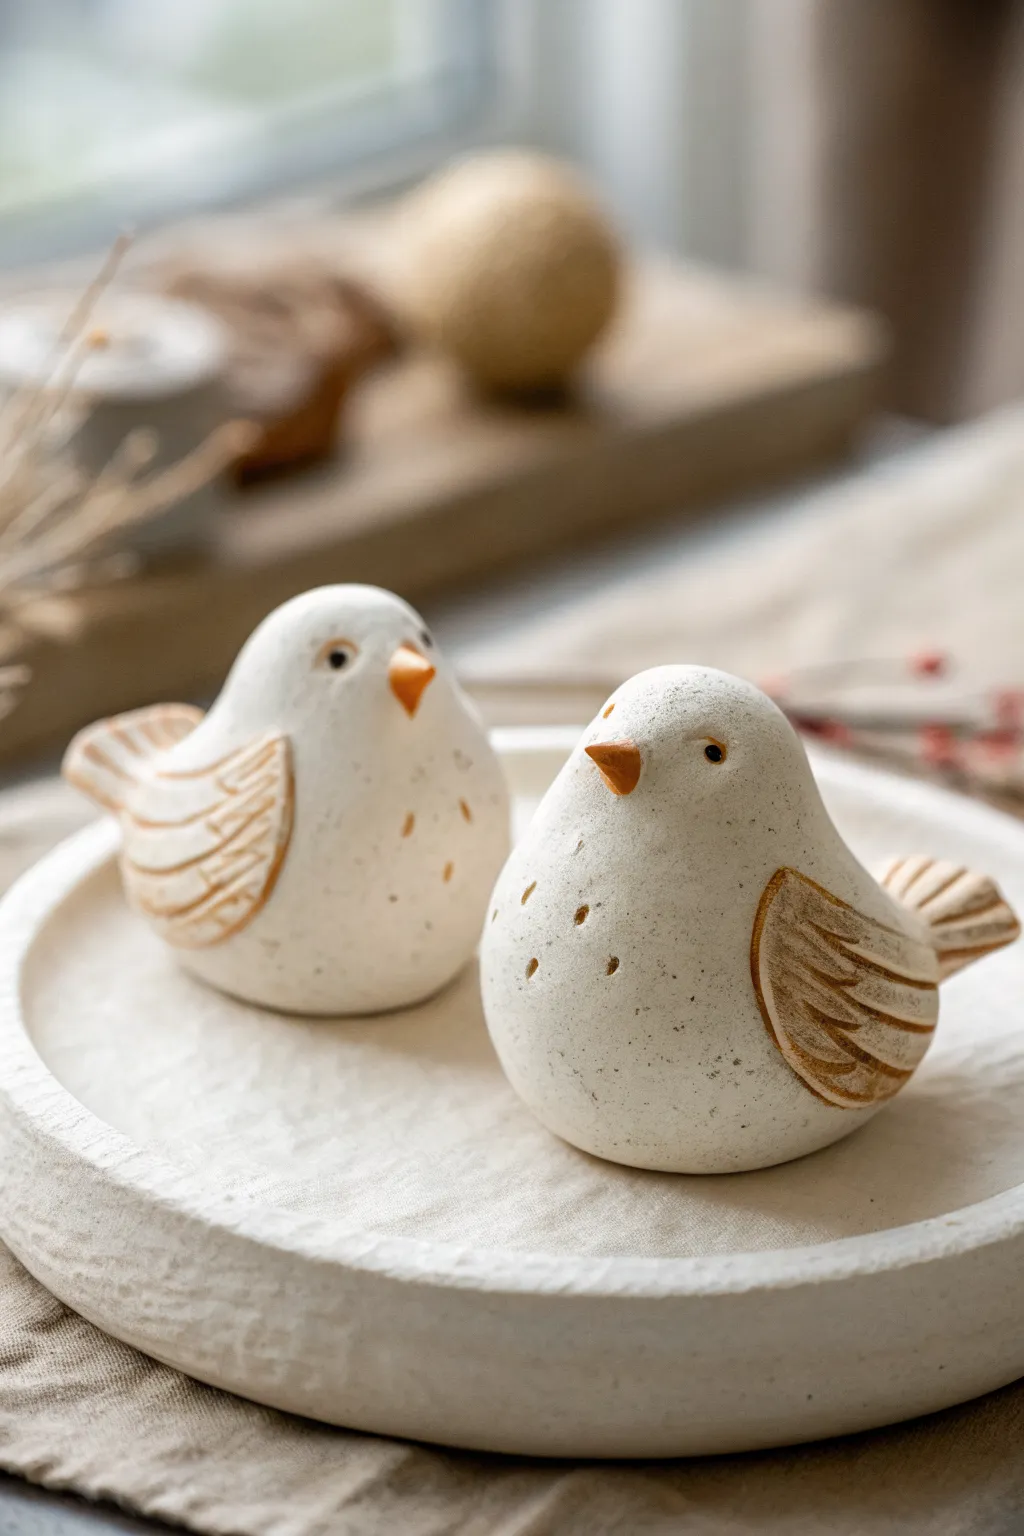
Create a charming pair of chubby, minimalist birds perfect for a windowsill or shelf display. These stone-look sculptures feature carved wing details and a speckled finish that gives them a sophisticated, artisanal feel.
Detailed Instructions
Materials
- White polymer clay (or air-dry clay)
- Acrylic paints (White, Burnt Sienna, Orange, Black)
- Foil (for armature)
- Needle sculpting tool
- Small loop tool or carving gouge
- Old toothbrush
- Fine-grit sandpaper
- Matte spray varnish
- Soft detail paintbrush
Step 1: Forming the Bodies
-
Prepare the Core:
Crumple a small piece of aluminum foil into a tight ball, roughly the size of a ping-pong ball. Press it firmly to smooth out sharp edges. Repeat this for the second bird. -
Condition the Clay:
Warm up your white clay in your hands until it becomes soft and pliable. Flatten it into a pancake thick enough to cover your foil core without tearing. -
Cover the Core:
Wrap the clay sheet around the foil ball. Smooth the seams completely by rubbing your thumb over the clay until the surface is uniform. -
Shape the Teardrop:
Roll the ball gently between your palms, applying slightly more pressure on one side to create a fat teardrop shape. The wider end will be the body, and the tapered end will become the tail. -
Define the Head:
Gently pinch the rounded front end to distinguish a head area, but keep the transition very subtle. The bird should look like one continuous, chubby form rather than separate body parts. -
Flatten the Base:
Tap the bottom of the bird firmly against your work surface. This creates a flat base so the sculpture will sit steadily without rolling over.
Cracking Up?
If using air-dry clay, cracks can happen as moisture evaporates. Fix this by mixing a tiny bit of fresh clay with water to make a paste, then fill the cracks and smooth over.
Step 2: Adding Details
-
Sculpt the Tail:
Pinch the tapered tail end to flatten it slightly. Use a needle tool to press three or four linear indentations into the tail to suggest feathers. -
Mark the Beak:
Use your needle tool to poke a small, triangular hole where the beak will go. Roll a tiny cone of clay, insert it into the hole, and smooth the edges to attach it seamlessly. -
Outline the Wings:
Lightly trace a water-drop shape on the side of the bird for the wing. Repeat on the other side, ensuring they are symmetrical. -
Carve Wing Texture:
Using a small loop tool or a toothpick, care deeper grooves inside the wing outline to mimic flight feathers. Make these strokes curve slightly downward. -
Add Eye Sockets:
Press a small ball-end tool or the back of a paintbrush into the head to create small indents for the eyes. -
Create Texture:
Before baking or drying, gently tap the entire surface (except the beak and wings) with a stiff-bristled toothbrush to create a subtle, stony stone texture.
Step 3: Finishing Touches
-
Cure the Clay:
If using polymer clay, bake according to the package instructions. If using air-dry clay, allow it to dry completely for at least 24 hours. -
Base Coat:
Paint the entire bird with an creamy off-white acrylic paint. I usually apply two thin coats for better coverage. -
Paint the Details:
Mix a light brown or tan wash (paint diluted with water) and carefully paint inside the carved wing grooves and tail feathers. Wipe away excess surface paint with a paper towel to leave color only in the crevices. -
Color the Beak:
Paint the beak with a bright, matte orange acrylic paint. -
Add Eyes and Speckles:
Dot the eyes with black paint. For the speckled effect, dilute brown paint with water, load an old toothbrush, and flick the bristles with your thumb to spray tiny dots over the bird’s body. -
Seal the Project:
Once all paint is dry, spray the birds with a matte varnish to protect the finish and eliminate any unnatural glossy shine.
Display Idea
Create a matching textured dish for your birds using the same clay. Roll out a flat circle, curve up the edges slightly, and apply the same speckling technique for a cohesive set.
Now you have a sweet pair of avian friends ready to brighten your decor


What Really Happens Inside the Kiln
Learn how time and temperature work together inside the kiln to transform clay into durable ceramic.
Wide-Eyed Mini Owl
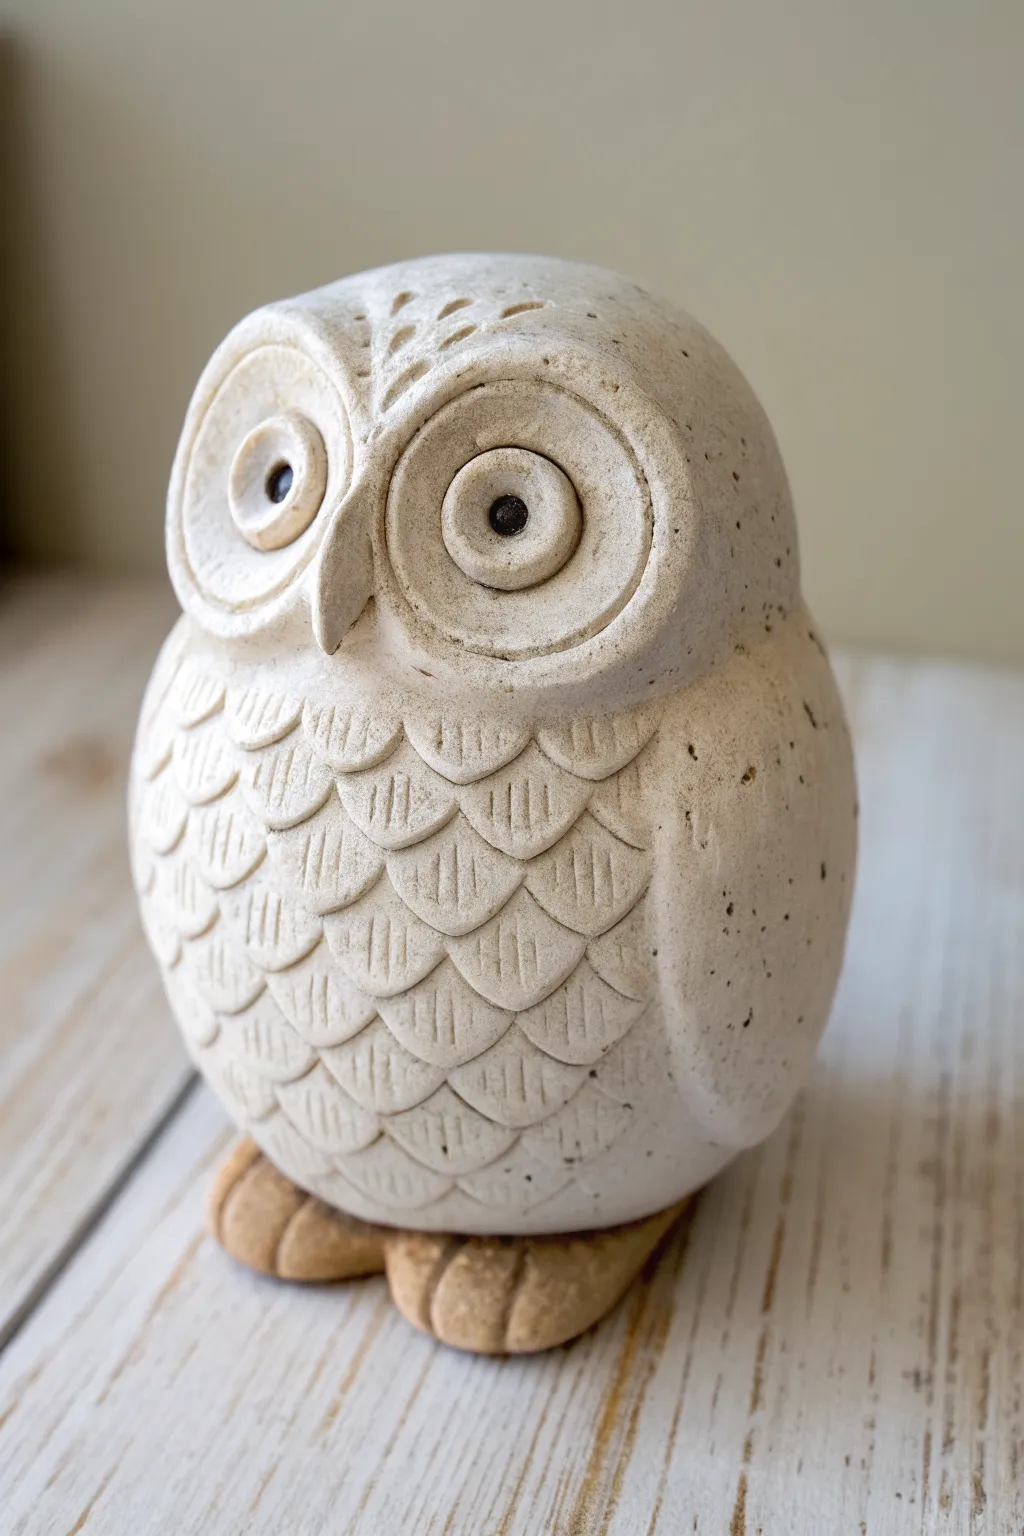
This charming, wide-eyed miniature owl looks like a carved river stone but is actually crafted from simple air-dry or polymer clay. Its distinctive scale-like feathers and textured finish give it a timeless, rustic appeal perfect for a bookshelf or desk.
Step-by-Step Tutorial
Materials
- Stone-colored polymer clay or air-dry clay (granite or beige)
- Small amount of brown clay (for the feet)
- Black acrylic paint or tiny black clay beads (for the eyes)
- Simple sculpting tools (needle tool, small ball tool)
- A straw or small circular cutter (approx. 1/4 inch)
- Toothbrush or crumpled foil (for texturing)
- Rolling pin
- Water or liquid clay (for joining)
Step 1: Forming the Body and Head
-
Shape the base:
Start by conditioning a large ball of your stone-colored clay. Roll it into a smooth egg shape, slightly flattening the bottom so it stands upright securely. This will serve as both the body and the head. -
Define the head:
Gently press your thumbs into the upper third of the egg to create a subtle indentation, separating the head area from the body without fully detaching them. The transition should be smooth, not a sharp neck. -
Add surface texture:
Before adding details, lightly tap a clean toothbrush or a ball of crumpled aluminum foil over the entire surface. This removes fingerprints and creates that realistic, porous stone look. -
Attach the wings:
Roll two flattened teardrop shapes of clay.Attach these to the sides of the body, curve them slightly to follow the owl’s round form, and blend the edges just enough so they stick but remain distinct panels.
Fixing Flat Feathers
If your U-shaped feather imprints look too shallow or flat, try angling your tool upward as you press in. This slightly lifts the bottom edge of each ‘feather’ for a 3D effect.
Step 2: Creating the Face
-
Make the eye discs:
Roll two medium-sized balls of clay and flatten them into thick discs. Press these firmly onto the face area, side-by-side, so they touch in the middle. -
Indent the eye sockets:
Use a large ball tool or the back of a paintbrush to press a deep, concave indentation into the center of each disc, leaving a raised rim around the edge. -
Add the eyeballs:
Roll two smaller balls of the same clay and place them into the indentations you just made. Flatten them slightly, but ensure they don’t protrude past the outer rims. -
Detail the pupils:
Press a tiny bead of black clay into the center of each eye. Alternatively, use a small tool to make a hole that you will paint black after baking/drying. -
Sculpt the beak:
Form a small, sharp triangle of clay. Attach it vertically right between the two eye discs. Use a tool to curve the top slightly downward so it looks like a hooked beak.
Speckled Stone Effect
Mix a pinch of used coffee grounds or cracked black pepper into your clay before sculpting. This creates organic specks throughout the body that look exactly like real granite.
Step 3: Feather Details and Feet
-
Start the chest feathers:
Using a U-shaped tool (like a straw cut in half or a small clay gouge), press a row of U-shapes into the clay starting just below the neck area. -
Continue the pattern:
Work your way down the chest in rows. Offset each row slightly—like bricks or shingles—so the bottom of a ‘U’ sits between the two ‘U’s below it. I find this staggered pattern looks much more natural than straight columns. -
Add feather texture:
Inside each U-shaped feather impression, use a needle tool or knife to gently score 2-3 vertical lines. This mimics the barbs of the feathers. -
Create the feet:
Take your brown clay and form two thick, flattened ovals. Use a knife tool to press two deep indents into the front of each oval, creating three ‘toes’. -
Attach the feet:
Place the feet underneath the owl’s body, angling them slightly outward. Press the owl down firmly onto them to ensure a good bond and a stable base. -
Final inspection:
Look over your owl for any accidental fingerprints. If you find any, gently dab them with your texture tool (toothbrush or foil) to blend them back into the stone finish. -
Curing:
Bake or air-dry your sculpture according to the specific instructions on your package of clay.
Place your finished owl on a shelf where its watchful gaze can keep you company
Smiley Mushroom Friend

Bring a touch of forest magic to your desk with this adorable clay sculpture. Featuring a textured white stalk and a classic red-and-white spotted cap, this little friend is guaranteed to make you smile.
Step-by-Step
Materials
- Air-dry clay (white)
- Acrylic paints (bright red, black, pink, white)
- Small paintbrush
- Sculpting tools (or a toothpick)
- Aluminum foil (optional for core)
- Cup of water
- Matte varnish (optional)
Step 1: Shaping the Base
-
Form the stem:
Start by rolling a ball of white air-dry clay roughly the size of a golf ball. Gently roll it into a cylinder shape, keeping the bottom slightly wider than the top to ensure your mushroom stands up securely. -
Add texture:
The stem in the photo has a lovely, organic texture rather than being perfectly smooth. Use your fingertips to gently press vertical ridges into the clay, or lightly drag a sculpting tool up and down the sides to create subtle bark-like lines. -
Flatten the top:
Press the top of your stem cylinder down gently to create a flat surface. This will act as the platform where the mushroom cap will sit later. -
Create the cap core:
Roll a second, slightly larger ball of clay. Press your thumb into the center and pinch around the edges to create a bowl or dome shape. If you want a lighter sculpture, I sometimes crumple a small ball of foil and wrap the clay around it. -
Refine the cap:
Smooth out the dome of the cap with a little water on your finger. The edges should curl downward slightly, looking like a little umbrella. -
Create the gills:
Flip the cap over to work on the underside. Take a sharp tool or a toothpick and scribe fine lines radiating from the center to the outer edge to mimic mushroom gills.
Step 2: Assembly and Details
-
Join the parts:
Score (scratch) the top of the stem and the center of the cap’s underside. Add a dab of water or clay slip to both scratched areas and press them firmly together. -
Blend the seam:
Use a small tool to smudge the clay from the underside of the cap onto the stem just slightly, ensuring a strong bond so the head doesn’t fall off later. -
Make the spots:
Instead of painting the spots, this project uses clay for a 3D effect. Roll tiny, flat discs of white clay and press them randomly onto the cap. Make sure to vary the sizes slightly for a natural look. -
Dry thoroughly:
Set your mushroom aside in a safe spot. Air-dry clay needs time—usually 24 to 48 hours depending on thickness—to harden completely before you apply any paint.
Cracks appearing?
If you see small cracks forming while the clay dries, don’t panic. Mix a tiny bit of fresh clay with water to make a paste and smooth it into the cracks with your finger.
Step 3: Painting the Personality
-
Paint the cap:
Using a bright red acrylic paint, carefully fill in the space around the white clay dots. You might need a small brush to get close to the dots without painting over them. -
Touch up the spots:
If any red paint got onto your white 3D spots, clean them up with a dab of fresh white paint once the red is dry. -
Enhance the stem:
The stem is naturally white, but you can dry-brush a tiny amount of beige or light grey over the textured ridges to give it depth and make it look earthy. -
Outline the gills:
Mix a very watery black or dark grey wash. Paint it into the gill lines under the cap, then quickly wipe the surface with a paper towel. The dark color creates shadows in the grooves. -
Paint the eyes:
Using a fine-tip brush or a dotting tool, paint two solid black ovals on the upper half of the stem. Leave enough space between them for a cute expression. -
Add the smile:
Paint a thin, U-shaped black line between and slightly below the eyes. A steady hand is key here, but you can also use a fine-tip black marker if painting feels too risky. -
Add highlights and cheeks:
Dip the end of a toothpick in white paint to add a tiny ‘sparkle’ dot to the top right corner of each eye. Finally, add two small pink dots on the cheeks for a blush effect. -
Seal (optional):
For longevity, coat your finished friend with a matte varnish to protect the paint and clay from moisture.
Level Up: Forest Floor
Create a display base! Glue real dried moss and small twigs onto a wooden coaster, then glue your mushroom in the center for a complete scene.
Place your new cheerful mushroom on a windowsill or shelf to brighten up your room

TRACK YOUR CERAMIC JOURNEY
Capture glaze tests, firing details, and creative progress—all in one simple printable. Make your projects easier to repeat and improve.
Mini Mushroom House Diorama

This charming miniature abode evokes the feeling of a fairy tale forest, featuring a textured clay body and a softly colored mushroom cap. The project balances rustic details like the wooden-style door with the soft, organic curves of the roof for a delightful shelf decoration.
How-To Guide
Materials
- White polymer clay or air-dry clay
- Beige or light terracotta polymer clay
- Brown polymer clay
- Speckled clay (or black pepper to mix in)
- Round wood slice base (approx. 4-5 inches)
- Small rolling pin
- Clay sculpting tools (needle tool, small ball tool)
- Craft knife
- Dried moss
- Strong craft glue or hot glue
- Liquid clay (optional, for bonding)
- Aluminum foil (for armature)
Step 1: Forming the Base Structure
-
Make the foil core:
Begin by scrunching aluminum foil into a thick, cylindrical shape that tapers slightly towards the top. This will be the armature for the mushroom stem, saving clay and reducing weight. -
Prepare the speckled clay:
Condition your white clay. To achieve the speckled eggshell look seen in the photo, knead in a tiny pinch of ground black pepper or dried used coffee grounds until evenly distributed. -
Cover the stem:
Roll the speckled white clay into a sheet about 1/4 inch thick. Wrap this around your foil cylinder, smoothing the seams together with your fingers or a clay shaper until the surface is seamless. -
Shape the stem:
Gently roll the clay-covered cylinder on your work surface to ensure it is round. Flatten the bottom so it stands straight, and slightly curve the top edges inward.
Pro Tip: Texture Trick
Use a crumpled ball of aluminum foil to gently texture the white stem before baking. It creates a realistic, porous stone or stucco effect.
Step 2: Sculpting the Mushroom Cap
-
Create the cap armature:
Form a second piece of aluminum foil into a wide, shallow dome shape. This should be significantly wider than your stem to create that classic mushroom overhang. -
Sheet the cap clay:
Using beige or light tan clay, roll out a large, smooth circle. Drape this over your foil dome, gently pressing it down to conform to the shape without trapping air bubbles. -
Add the spots:
Take small pieces of terracotta or darker pink-brown clay and flatten them into imperfect circles of varying sizes. Press these randomly onto the mushroom cap, flattening them until they are flush with the surface. -
Refine the cap:
Use a sponge or your fingertip to smooth out the transition between the spots and the main cap color. I like to gently texture the surface with a toothbrush for a more organic, matte finish.
Troubleshooting: Sagging Cap
If the mushroom cap sags while baking, prop the edges up with extra balls of foil or polyester batting to maintain the domed shape until it hardens.
Step 3: Adding Architectural Details
-
Cut the door opening:
Roll out a slab of brown clay. Cut an arched shape that fits proportionally on the front of your white stem. -
Texture the wood:
Using a needle tool or craft knife, score vertical lines into the brown arch to mimic wood planks. Add shorter horizontal lines to suggest wood grain variation. -
Create the door frame:
Roll a thin snake of beige or light brown clay. Flatten it slightly and wrap it around the arched door piece. Use your knife to mark separating lines, making it look like stone or brickwork. -
Add hardware:
Form two tiny hinges and a small round doorknob from dark brown clay. Press these onto the door carefully without squashing the wood texture. -
Make the window:
Create a small arched window using the same technique as the door frame. Fill the center with a dark clay square and lay thin strips of clay across it to form the window panes. -
Attach features:
Use a dab of liquid clay or score-and-slip (for air dry clay) to attach the door and window securely to the white stem.
Step 4: Assembly and Finishing
-
Bake or dry:
If using polymer clay, bake the stem and cap separately according to the package instructions. If using air-dry clay, allow them to dry completely (24-48 hours). -
Join the pieces:
Once cured and cooled, use strong craft glue to attach the mushroom cap to the top of the stem. Center it carefully. -
Mount to base:
Glue the finished house onto the center of your wood slice. -
Add landscaping:
Apply small dabs of glue around the base of the house and press in clumps of dried moss. Add a few small clay pebbles near the door for a cute stepping-stone effect.
Place your little cottage on a shelf near some plants to complete the enchanting scene
Balloon-Animal Style Dog
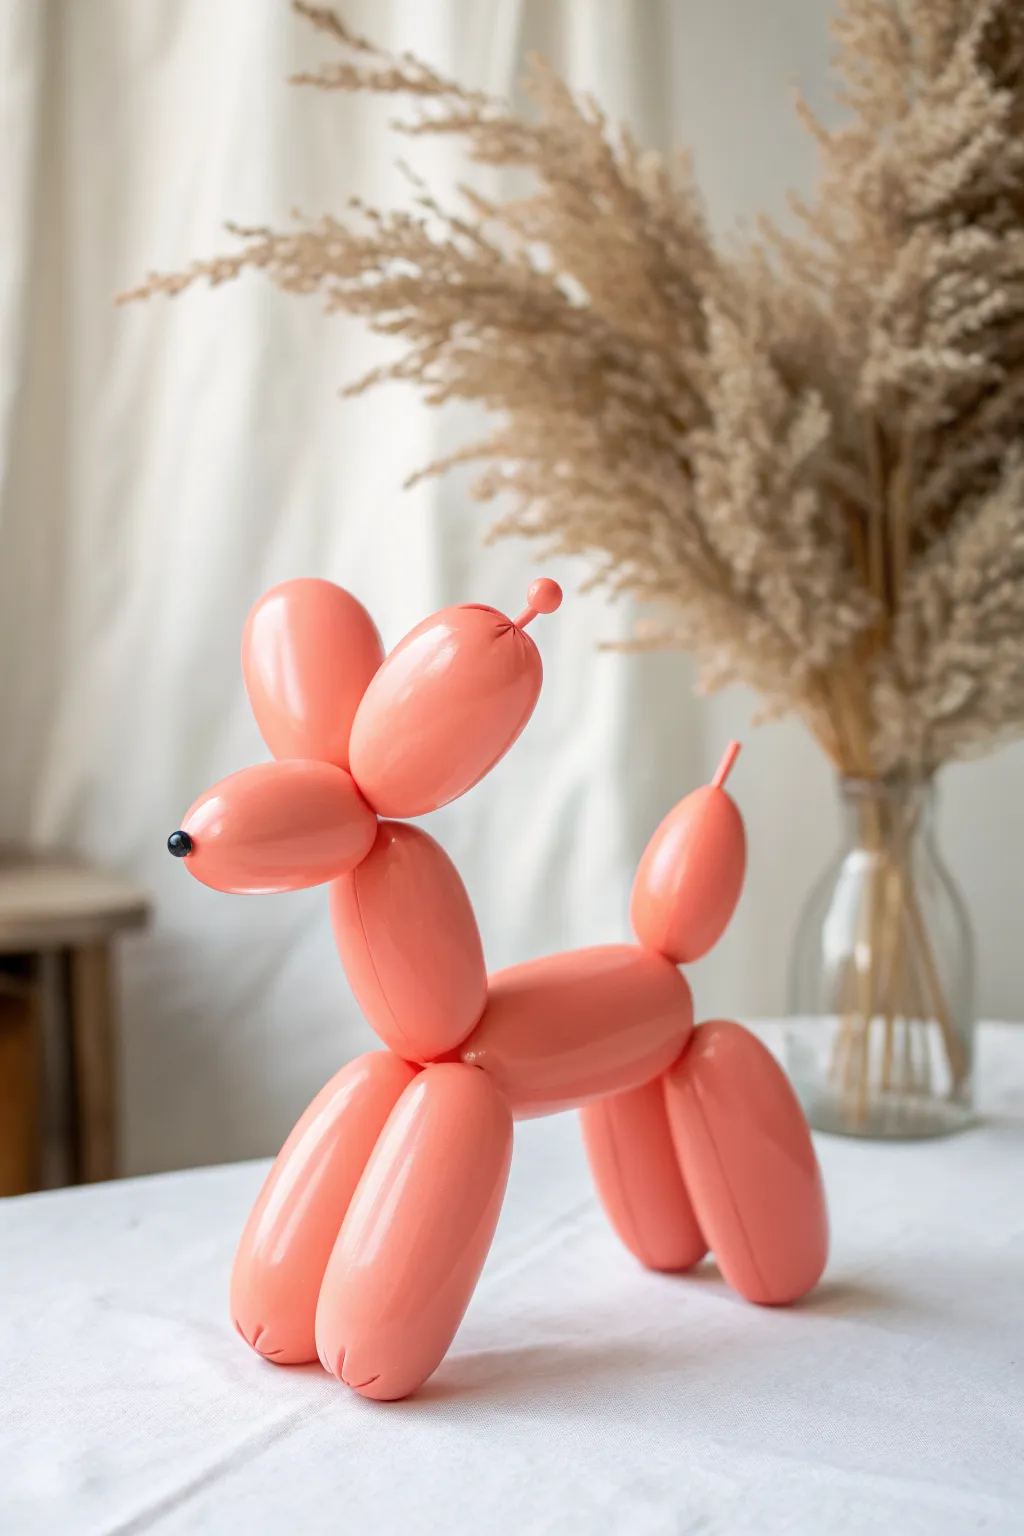
Capture the whimsical nostalgia of childhood parties with this surprisingly sophisticated sculpture that mimics an inflated balloon dog. Using basic polymer clay and a high-gloss finish, you can create a piece that looks light as air but has the satisfying weight of art.
Step-by-Step Tutorial
Materials
- Pink polymer clay (approx. 4-6 oz)
- Glossy polyurethane varnish or glaze
- Soft synthetic paintbrush
- Modeling tool or toothpick
- Small black bead or black clay (for the nose)
- Parchment paper or ceramic tile (surface)
- Oven (for baking)
- Super glue (optional)
Step 1: Preparation and Segmenting
-
Condition the clay:
Begin by kneading your pink polymer clay thoroughly until it is soft, pliable, and free of air bubbles. Warm hands make this much easier. -
Roll the main log:
Roll the entire lump of clay into a long, even snake or sausage shape. Aim for a thickness of about 1 inch (2.5 cm), attempting to keep the diameter consistent just like a real balloon. -
Divide the segments:
Cut your clay log into the necessary segments. You will need: four legs (equal length), one body (slightly longer), one neck, one head/muzzle, and two ears. Keeping the pieces proportional now saves adjustment time later.
Smooth Operator
Before baking, use a brush dipped in rubbing alcohol to smooth away fingerprints. This saves sanding time later and ensures a perfect ‘plastic’ surface.
Step 2: Forming the “Balloons”
-
Shape the segments:
Take each cut segment and roll it individually against your work surface to smooth it. Gently round off the ends of each piece with your fingers so they look domed and inflated, rather than sharp cuts. -
Create the twisted ends:
For a realistic look, slightly pinch the very ends of each segment where they will join other pieces. This mimics the ‘knot’ or pinched latex of a real balloon animal. -
Detail the head:
The head piece needs a specific detail for the snout. Take a tiny pinch of extra pink clay and form a minuscule knot shape, attaching it to the front of the muzzle where the balloon would be tied off. -
Detail the tail:
Similarly, select the piece for the tail. Pinch one end into a tiny, thin protrusion to represent the uninflated nipple of the balloon.
Metallic Makeover
Instead of pink clay, use silver or gold mica powder on the raw clay before baking to mimic the famous metallic balloon dog art sculptures.
Step 3: Assembly
-
Build the legs:
Take two leg segments and join them at the top in an inverted ‘V’ shape. Repeat this for the hind legs. Smooth the clay together gently at the connection point so they stick without losing their individual rounded shapes. -
Attach the body:
Place the body segment horizontally between the two pairs of legs. Press the front leg pair onto the front of the body, and the back leg pair onto the back. Reinforce the connection by blending the clay underneath where it won’t be seen. -
Add the neck:
Position the neck segment vertically on top of the front leg junction. Ensure it’s centered and stable. -
Secure the head:
Place the muzzle segment horizontally on top of the neck. I often use a small piece of toothpick inserted inside the neck and head as an internal armature for extra strength here. -
Attach the ears:
Press the two ear segments together at their base, then attach this dual unit to the top of the head/neck junction carefully. -
Place the tail:
Attach the tail segment to the rear of the body, angling it upwards for a perky, happy look. -
Add the nose:
Press a tiny black bead or a very small ball of black clay into the center of the ‘knot’ on the muzzle to create the nose.
Step 4: Finishing
-
Final smooth:
Check the entire sculpture for fingerprints. Lightly buff them out with a drop of baby oil on your finger if needed. -
Bake the sculpture:
Bake the piece according to your specific clay brand’s instructions (usually around 275°F/135°C for 15-30 minutes). Let it cool completely. -
Apply the gloss:
This is the magic step. Apply a thick, even coat of high-gloss polyurethane varnish. Avoid over-brushing to prevent bubbles. -
Second coat:
Once the first coat is dry, apply a second coat to achieve that reflective, wet-look finish that makes the clay look exactly like stretched latex.
Place your shiny new sculpture on a shelf or desk where it can bring a pop of color and joy to your space
Mini Whale on a Wave Base
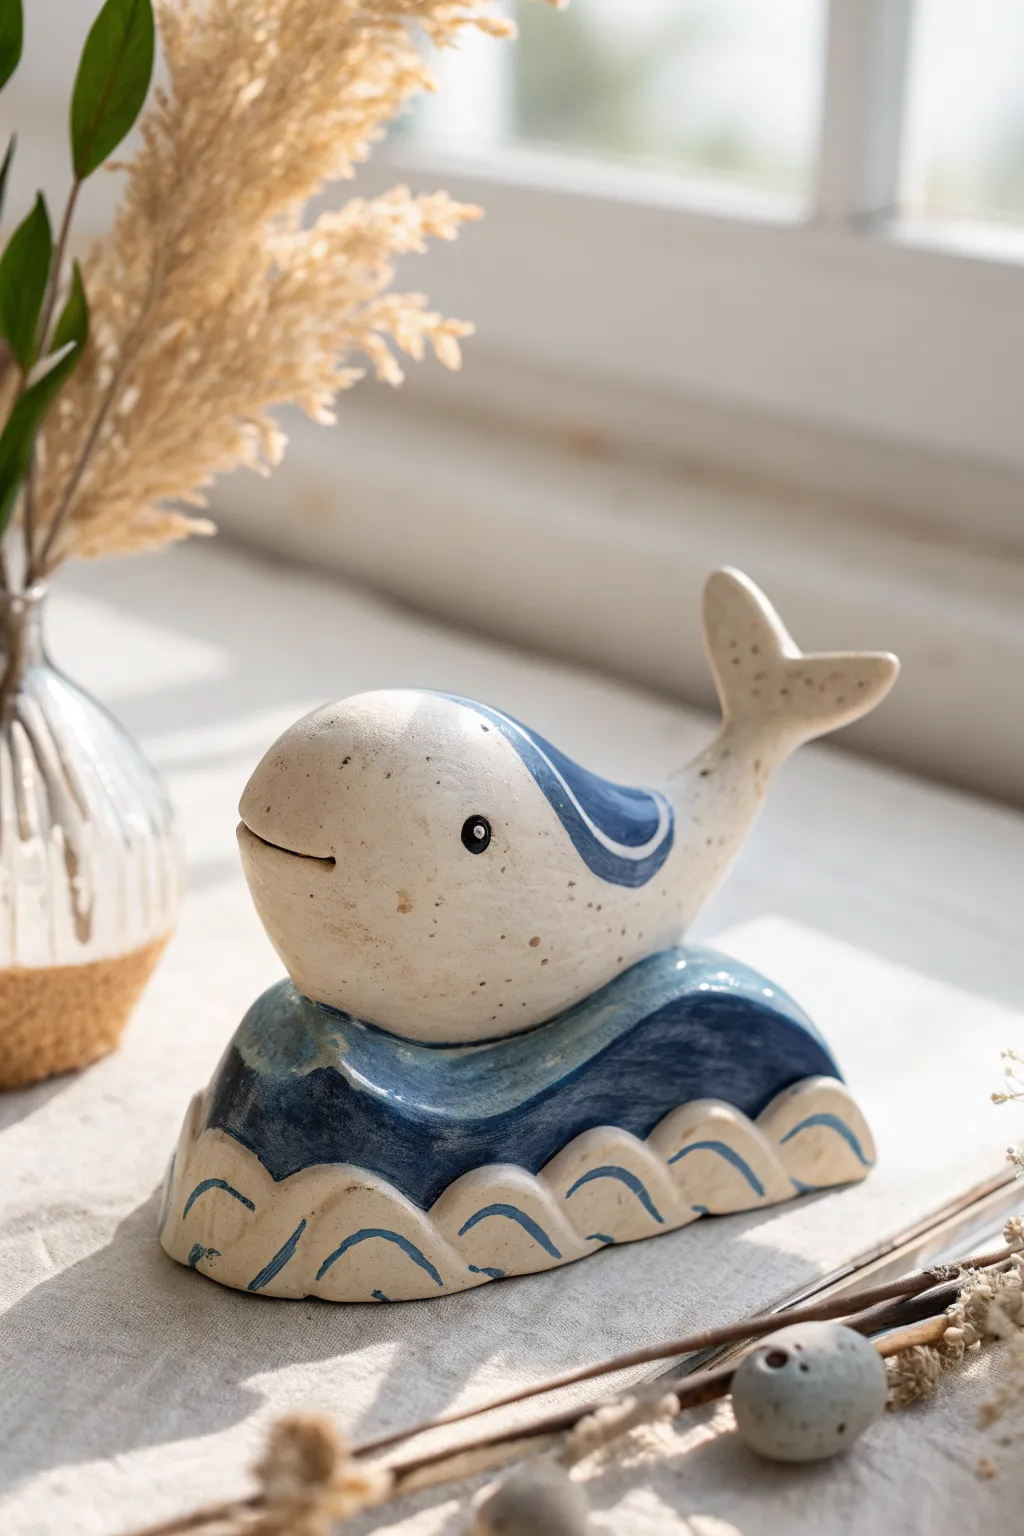
Capture the playful spirit of the ocean with this charming folk-art style sculpture. Featuring a stylized white whale perched atop rolling blue waves, this project combines simple slab and modeling techniques for a delightful, rustic finish.
Step-by-Step
Materials
- Air-dry clay or polymer clay (white or light beige)
- Clay roller or rolling pin
- Modeling tools (needle tool, smoothing tool)
- Wooden sculpting tool or popsicle stick
- Acrylic paints (White, Cream/Beige, Navy Blue, Light Blue, Black)
- Small round paintbrushes (sizes 0 and 2)
- Matte varnish or sealant
- Small cup of water (for smoothing)
Step 1: Sculpting the Base
-
Prepare the wave mass:
Start by taking a substantial lump of clay, roughly the size of a tennis ball. Roll it into a thick log shape, then flatten the bottom against your work surface to create a stable base. -
Shape the wave curve:
Gently pinch and pull the top of the clay log upwards to create a sloped, mound-like shape. One side should be slightly higher than the other to mimic a rolling swell. -
Create the wave texture:
Using a modeling tool or the side of your thumb, press distinct indentations along the bottom edge of the base. These scallops will become the stylized whitecaps later. -
Create the resting spot:
Press a shallow, curved indentation into the very top of your wave mound. This concave area will cradle the whale’s belly so it sits securely without rolling off.
Smoother Sailing
Keep a damp sponge nearby while sculpting. Wiping the clay periodically removes fingerprints and ensures a porcelain-smooth finish before painting.
Step 2: Forming the Whale
-
Body shape:
Roll a new piece of clay into a smooth teardrop shape. The rounded end will be the head, and the tapered end will become the tail. -
Refining the head:
Gently tap the rounded nose against the table to blunt it slightly, giving the whale that cute, knobby profile seen in the photo. -
Creating the tail flukes:
Flatten the very tip of the tapered tail. Use a knife or needle tool to split the end, then separate and round off the two flukes, curving them slightly upward. -
Adding the mouth:
Use a needle tool or the edge of a credit card to slice a simple, happy curve into the side of the head for the mouth. Keep the line clean and deep enough that paint won’t fill it later. -
Assembly:
Score (scratch) the bottom of the whale and the top indentation of the wave base. Add a tiny dab of water or slip, then press the whale firmly onto the wave. Smooth the seam slightly where they verify contact.
Make a Function
Before drying, carve a wide slot into the whale’s back to turn this sculpture into a functional and cute business card or photo holder.
Step 3: Painting and Finishing
-
Base coat:
Allow the clay to dry completely according to package instructions. Once dry, paint the entire sculpture with a mix of white and a tiny drop of brown to achieve an antique cream or bone color. -
Painting the deep ocean:
Load a brush with navy blue paint. Paint the main body of the wave, carefully avoiding the scalloped bottom edge which should remain the cream base color. -
Adding wave details:
Dilute the blue paint slightly with water for a translucent effect, or mix a lighter blue. Paint curved lines inside the bottom scallops to accentuate the wave shape. -
Whale markings:
Draw a sweeping, curved teardrop shape on the whale’s back using the navy blue paint. Outline it first with a thin brush, then fill it in. -
White accents:
Once the blue paint is dry, use a fine liner brush and pure white paint to add a thin contour line inside the blue patch on the whale’s back. -
The eye:
Dip the back end of a paintbrush into black paint and dot the eye. Once dry, add a tiny white spectral highlight to bring the character to life. -
Distressing (Optional):
I like to dilute some brown paint to a watery consistency and wash it over the cream areas, wiping it off immediately with a paper towel. This settles into pores and gives it that speckled, ceramic look. -
Sealing:
Finish the piece with a coat of matte varnish to protect the paint and unify the sheen.
Place your finished whale near a sunny window to let the natural light highlight those painted curves
Koala Hugging a Branch
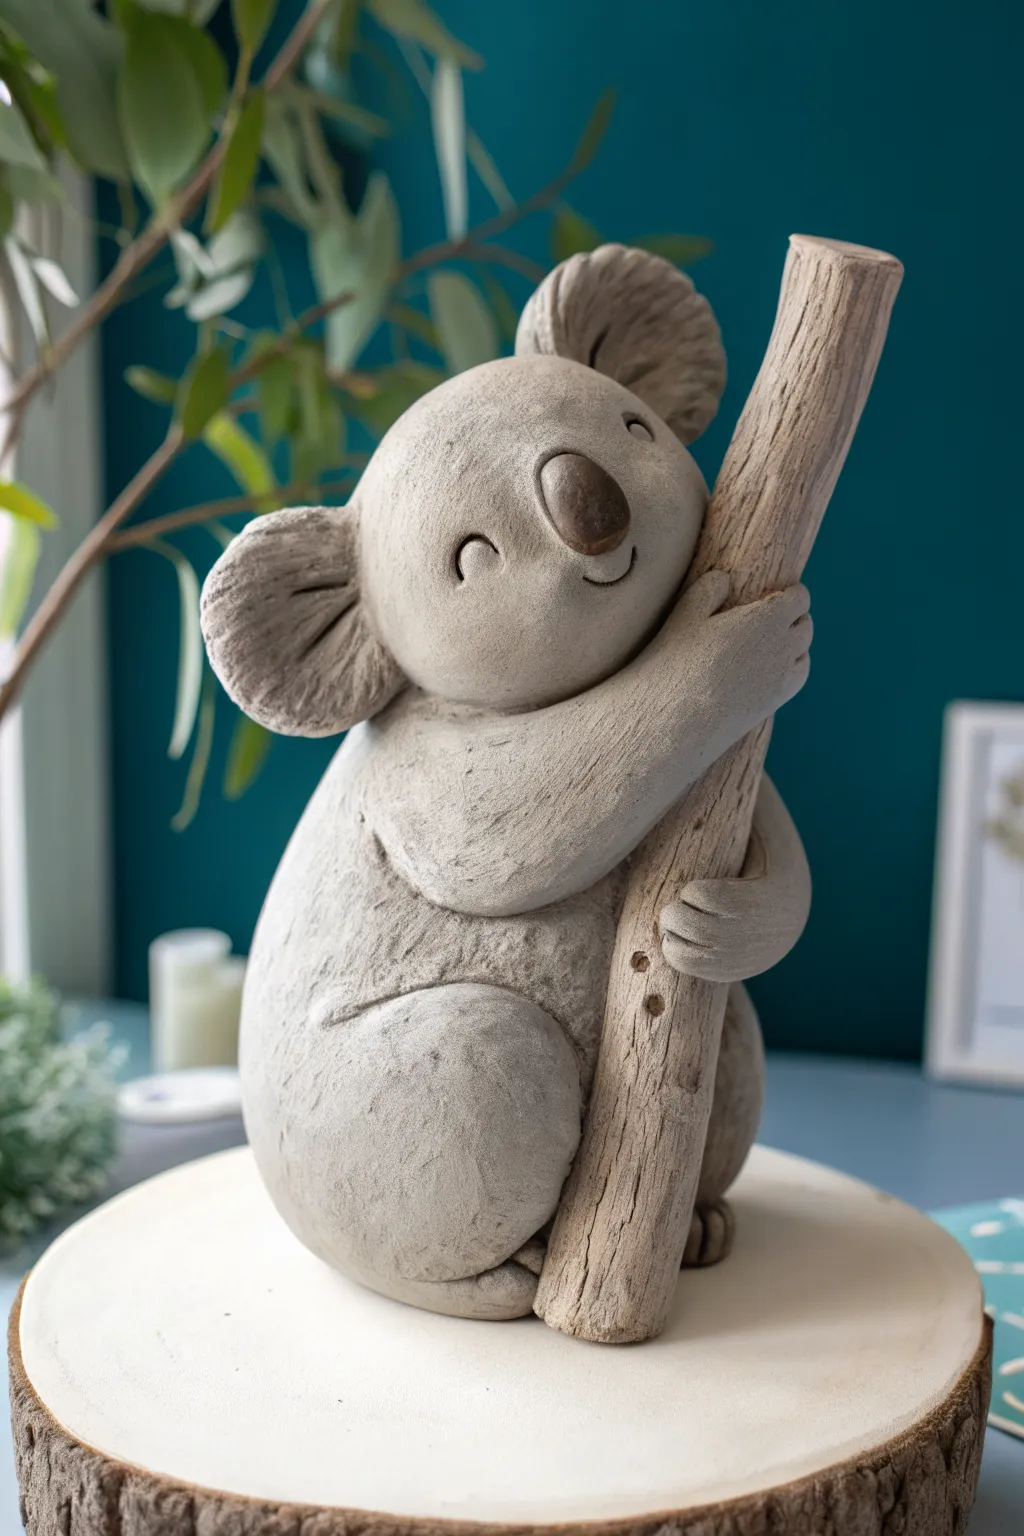
This adorable sculpture captures a happy koala mid-embrace, clinging tightly to its favorite eucalyptus branch. With its textured, stone-like finish and sweet expression, it makes a charming decorative piece for any nature lover’s shelf.
Detailed Instructions
Materials
- Air-dry clay (grey or stone-colored)
- Wooden dowel or thick stick (armature for the branch)
- Aluminum foil
- Sculpting tools (needle tool, ball tool)
- Small brush and water (for smoothing)
- Texture sponge or stiff bristle brush
- Brown acrylic paint (for the nose)
- Clear matte varnish
- Wooden base slice
Step 1: Building the Core
-
Prepare the branch armature:
Cut your wooden dowel or stick to the desired height, roughly 6-8 inches tall. Wrap it irregularly with a thin layer of aluminum foil to give it natural bumps and thickness, then cover it with a layer of clay. Roll the clay-covered stick on your work surface to smooth it out slightly, but leave some texture. -
Create the wood texture:
Using a needle tool or a stiff brush, drag long, vertical lines down the length of the clay branch to simulate bark. Vary the depth of the lines for realism and add a couple of small knot holes by pressing the end of a paintbrush into the clay. -
Form the body base:
Roll a large ball of foil into an egg shape for the koala’s body to save on clay weight. Cover this foil egg with a persistent layer of clay, smoothing it until you have a solid, heavy pear shape that will sit at the base of your branch. -
Attach body to branch:
Score (scratch) the side of the body and the lower part of the branch where they will touch. Add a dab of water or clay slip, then press them firmly together. Blend the clay seams so the koala looks like it’s physically leaning against the wood.
Loose Ears?
If the large ears sag before drying, prop them up with crumpled paper or toothpicks underneath until the clay stiffens enough to hold its own weight.
Step 2: Sculpting the Koala
-
Shape the head:
Roll a slightly smaller ball of clay for the head. Flatten the back slightly and attach it to the top of the body, tilting it so the cheek rests against the branch. -
Add the leg:
Create a thick sausage shape for the rear leg. Bend it into a ‘C’ shape and blend it onto the side of the body, creating that rounded thigh look. Add a small oval for the foot at the bottom. -
Form the arms:
Roll two thick coils of clay for the arms. Position the top arm reaching high up the branch and the bottom arm wrapping lower down. Flatten the ends to suggest paws. -
Carve the paws:
Use a knife or needle tool to cut two slits into the end of each paw, creating three simple, chunky fingers that grip the branch. -
Sculpt the ears:
Make two flat, rounded triangles for the ears. Pinch the edges to make them irregular and furry. Attach these to the sides of the head, blending the clay well behind the ear so they don’t fall off. -
Refine the face:
Add a small oval of clay for the nose in the center of the face. Use a needle tool to carve two crescent shapes for the sleeping eyes and a tiny curved line for the smiling mouth.
Texture Pro Tip
For a ‘stone’ look like the photo, dab the clay with a crumpled ball of aluminum foil. The random creases create a fantastic, rocky organic surface.
Step 3: Texturing and Finishing
-
Add fur texture:
This step brings the koala to life. Take a stiff bristle brush or a texture sponge and firmly dab it all over the koala’s body (avoiding the nose and inside ears). I like to do this while the clay is still slightly soft to get deep, fluffy-looking divots. -
Create ear details:
Use a needle tool to scratch deeper lines inside the ears to simulate the longer tufts of hair koalas have there. -
Drying time:
Let the sculpture dry completely. Since the core has foil, this might take 24-48 hours depending on humidity. Place it away from direct heat to prevent cracking. -
Painting the nose:
Once dry, paint the nose with a dark brown acrylic paint. You can water it down slightly for a more natural, stained look rather than a solid plastic coating. -
Final assembly:
Apply a strong adhesive to the bottom of the sculpture and press it firmly onto your wooden slice base to ensure it stands securely without tipping over.
Now you have a serene little companion to bring a touch of calmness to your desk
Toothpick-Textured Hedgehog
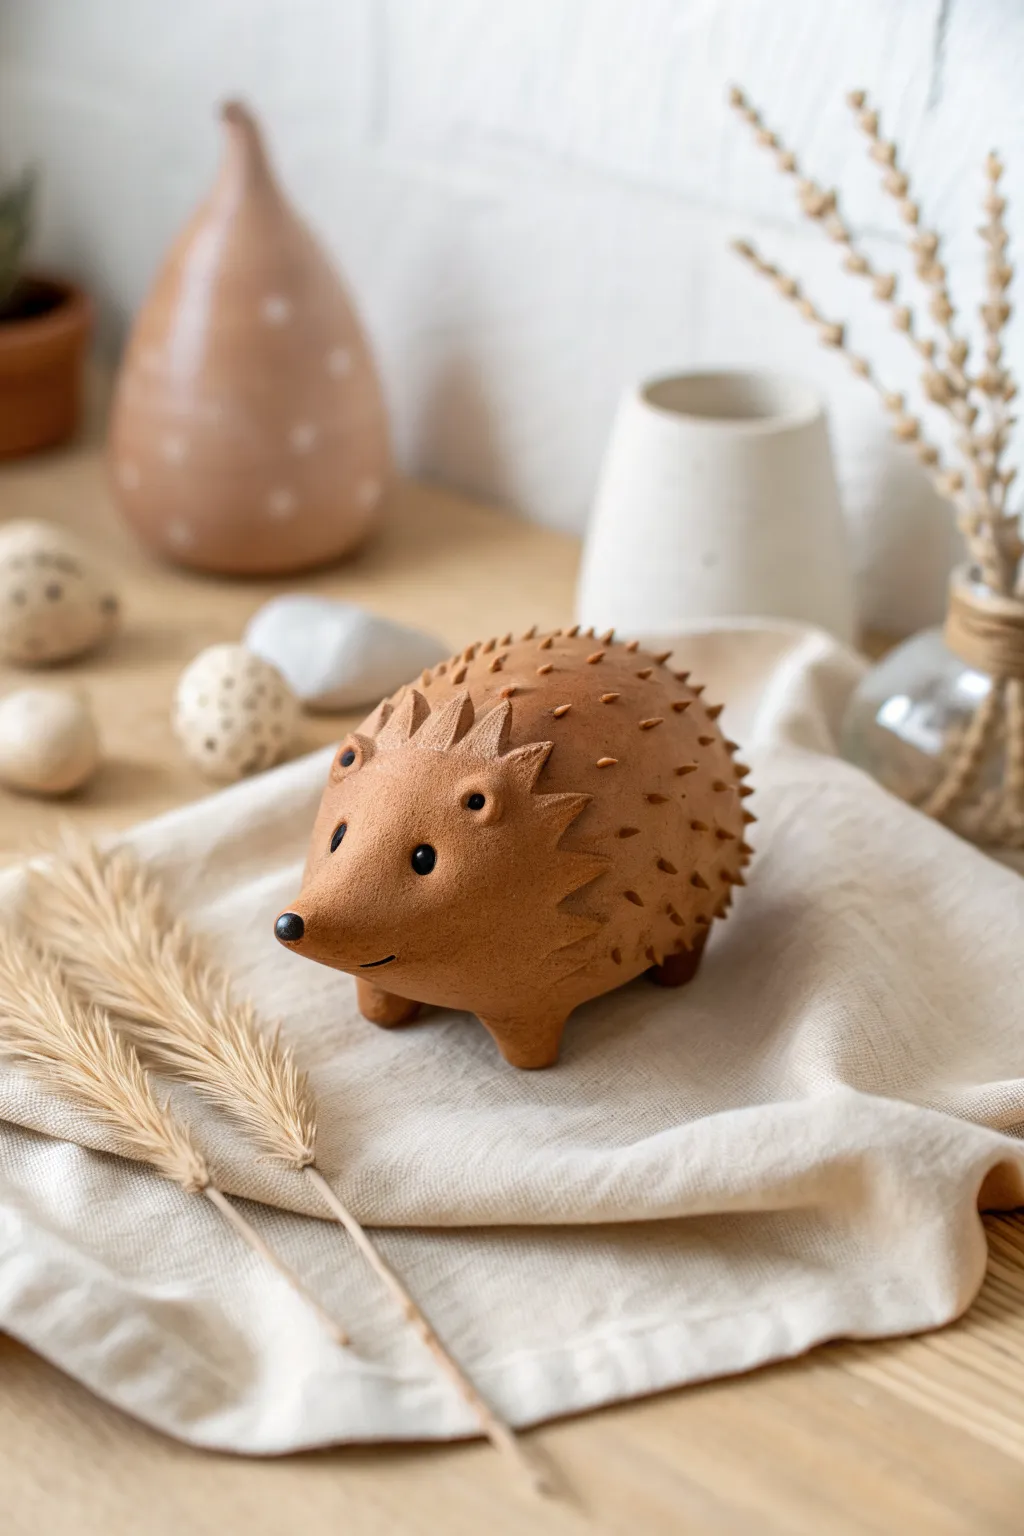
This charming, rustic hedgehog brings a touch of woodland whimsy to your shelf with its warm terracotta tone and simple, textured spikes. It’s a wonderfully tactile project that uses basic hand-building techniques to create a character full of personality and charm.
Step-by-Step Guide
Materials
- Terracotta-colored polymer clay (or air-dry clay painted terracotta)
- Black polymer clay (tiny amount for eyes/nose)
- Basic sculpting tools (needle tool, modeling tool)
- Small craft knife or clay blade
- Pointed shaping tool (for creating spike indentations)
- Smooth work surface/mat
- Aluminum foil (for optional armature bulk)
Step 1: Forming the Base Body
-
Condition the Clay:
Start by taking a generous amount of your terracotta clay and kneading it thoroughly in your hands until it becomes soft, pliable, and free of any cracks. -
Create the Core Shape:
Roll the clay into a smooth, solid ball. If you want to save clay or make a lighter figure, you can use a tightly crumpled ball of aluminum foil as a core and wrap the clay around it. -
Refine the Silhouette:
Gently gently roll the ball into an egg shape. Use your palms to slightly flatten the bottom so the hedgehog sits stably without rolling over. -
Pinch the Snout:
On the narrower end of the egg shape, use your thumb and forefinger to gently pinch the clay outward to form a pointed, slightly upturned snout. -
Smooth the Transition:
Use your fingers to smooth the area where the snout meets the body, ensuring there are no harsh lines, just a gentle slope up to the forehead.
Keep it Clean
Terracotta pigment can stain hands quickly. Keep wet wipes nearby to clean your fingers before touching the black clay eye pieces to avoid purposeful smudges.
Step 2: Adding Limbs and Details
-
Make the Legs:
Roll four small, equal-sized balls of terracotta clay. Flatten them slightly into short, thick cylinders to create stubby legs. -
Attach the Legs:
Press the legs firmly onto the underside of the body. You may need to score the clay (scratching tiny hash marks) and add a dab of water or liquid clay to ensure a strong bond. -
Check balance:
Set the hedgehog down on your work surface to make sure all four feet touch the ground evenly and that the nose is lifted cheerfully. -
Create Eye Sockets:
Using a small ball tool or the rounded end of a paintbrush, make two small indentations on either side of the snout where the eyes will go. -
Add the Eyes:
Roll two tiny, peppercorn-sized balls of black clay. Press them gently into the sockets you just created. I like to flatten them just a fraction so they don’t bulge out too much. -
Add the Nose:
Roll a slightly larger ball of black clay for the nose. Press this onto the very tip of the snout. -
Carve the Smile:
Use a curved modeling tool or the edge of a spoon to press a small, shy smile into the clay just under the snout.
Step 3: Texturing the Spikes
-
Define the Face Line:
Before starting the spikes, use a modeling tool to lightly mark a loose semi-circle around the face. This separates the smooth face area from the spiky body. -
Plan the Spikes:
The spikes on this hedgehog are created by pinching and pulling the clay. Start at the top of the head, just behind the face line. -
Pinch the First Row:
Using small, triangular pinches with your thumb and forefinger (or small scissors for a sharper look), pull up small tufts of clay to create pointed spikes. -
Work Backwards:
Continue creating rows of these pinched spikes, moving from the head down toward the tail. Stagger the rows slightly so the spikes nest between each other. -
Refine the Spikes:
Once the general texture is pulled up, go back with a shaping tool to sharpen any spikes that look too blunt or rounded. -
Smooth the Final Surface:
Do a final check on the face and legs, smoothing out any accidental fingerprints with a drop of baby oil or water on your fingertip. -
Bake or Dry:
Follow the specific instructions for your clay type. If using polymer clay, bake in an oven at the recommended temperature. If using air-dry, set it in a safe, dry place for 24-48 hours.
Natural Finish
After baking, lightly brush a watered-down brown acrylic wash over the spikes and wipe it off quickly. Ideally, the dark paint stays in the crevices for depth.
Place your finished hedgehog near a potted plant or on a windowsill to enjoy its friendly face every day
Cute Cactus Cluster Sculptures
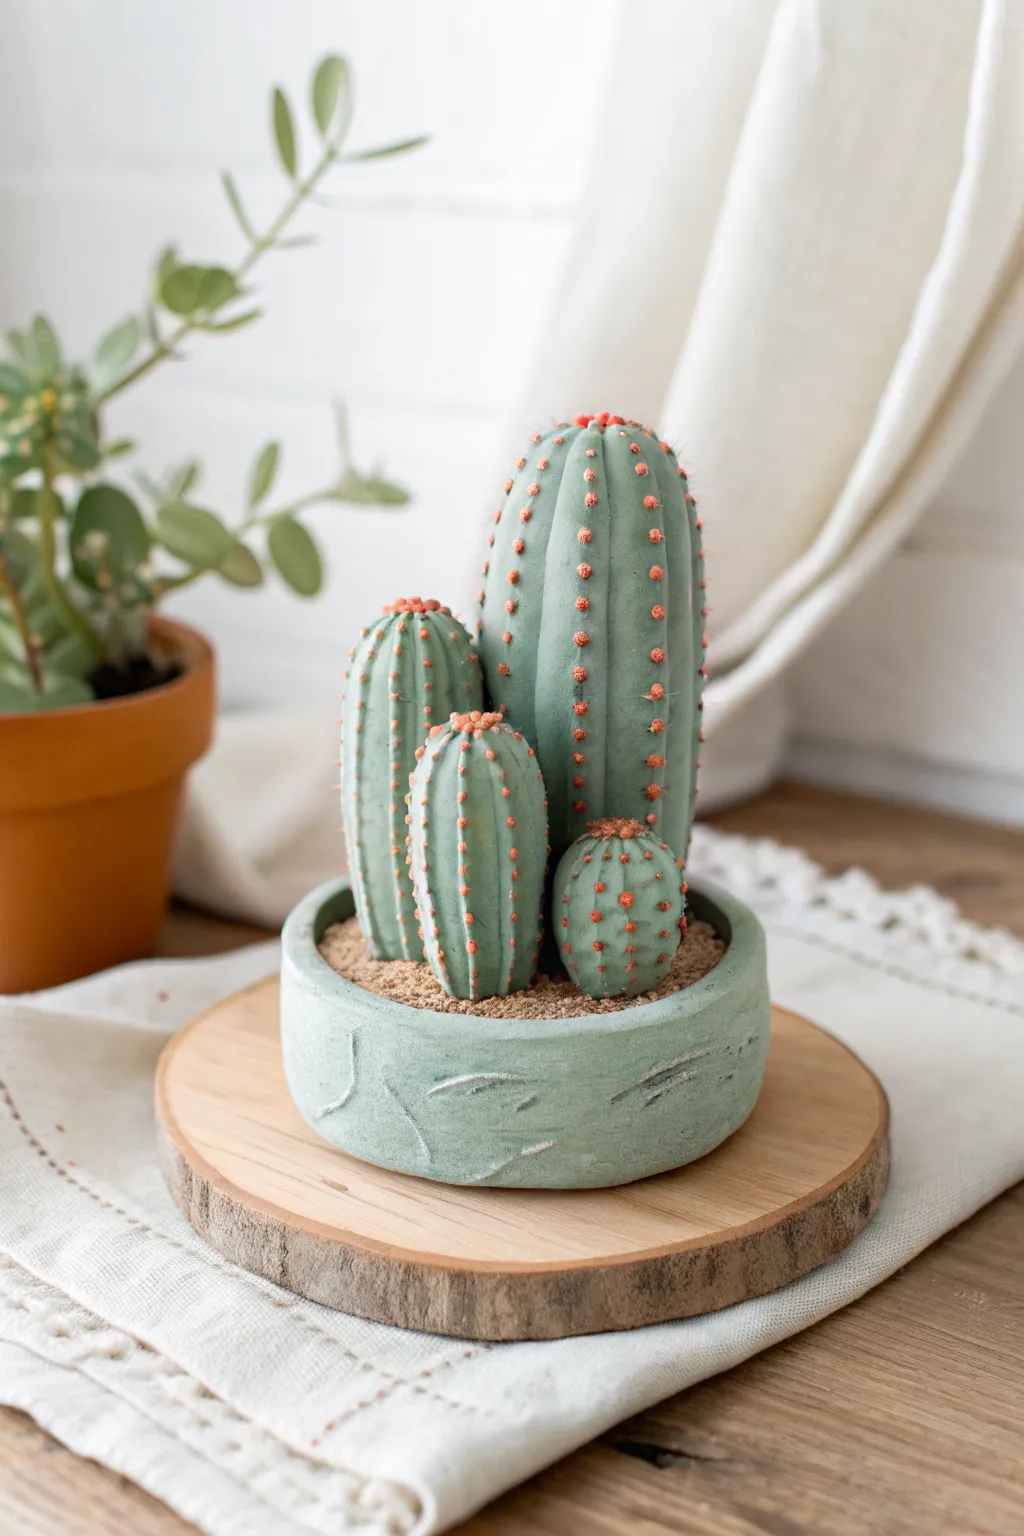
This adorable cluster of smooth, matte cacti brings a touch of the desert to your desk without the prickly thorns. The soft sage green tone paired with vibrant coral dots creates a modern, calming aesthetic perfect for any shelf.
Detailed Instructions
Materials
- Polymer clay or air-dry clay (Sage green, Grey to mix)
- Acrylic paint (Coral/Orange-red, Matte Sage Green if not using colored clay)
- Clay sculpting tools (specifically a needle tool or toothpick)
- Small round paintbrush
- Aluminum foil (for bulk)
- Medium-grit sandpaper
- Textured sand or brown clay crumbs (for soil)
- Clear matte varnish
Step 1: Sculpting the Pot
-
Base Formation:
Start by rolling a ball of sage green mixed with a tiny bit of grey clay to desaturate it. Flatten this into a thick disk about 3-4 inches in diameter to serve as the bottom of your pot. -
Building the Rim:
Roll a long, thick snake of the same clay mixture. Coil it around the edge of your base disk to create a low wall. Blend the seams on the inside and outside until completely smooth, aiming for a height of about 1 inch. -
Adding Texture:
Before the clay hardens, use a modeling tool or the back of a knife to gently press shallow, angled indentations around the exterior of the pot. These should look like stylized stone chips or organic marks.
Uneven Clay Surface?
If you can’t smooth out fingerprints with your hands, little bit of baby oil (for polymer) or water (for air-dry) on your finger acts as a fantastic smoothing lubricant before baking.
Step 2: Forming the Cacti
-
Internal Structure:
To save clay and reduce weight, crumple small pieces of aluminum foil into four distinct shapes: one tall cylinder, two medium cylinders, and one small sphere. These will be the cores of your cacti. -
covering the Cores:
Roll out sheets of your sage green clay. Wrap each foil core completely, smoothing the seams so the foil is hidden and the surface feels seamless and rounded. -
Defining the Ribs:
Use a dull knife or the side of a sculpting tool to press vertical indentations from the top center of each cactus down to the bottom. This creates the puffy ‘ribs’ typical of barrel cacti. -
Refining the Shape:
Gently soften the ridges with your finger so they aren’t sharp; you want a chubby, soft look. Ensure the tops are rounded, not flat. -
Assembling the Cluster:
Arrange the four cacti inside the pot while the clay is still pliable. Place the tallest one slightly off-center, flanked by the medium ones, with the smallest pup in the front. Press them gently into the base and against each other to bond them.
Step 3: Finishing Details
-
Creating the Soil:
Fill the gaps around the base of the cacti with leftover clay. While this surface is fresh, press coarse sand or crumbled dried brown clay into it to mimic desert gravel. -
Curing or Drying:
If using polymer clay, bake according to package directions (usually 275°F for 15-30 mins per 1/4 inch). If using air-dry clay, I prefer to let this sit for at least 24-48 hours to ensure the core is dry. -
Sanding:
Once fully cured and cooled, lightly sand any fingerprints or rough spots on the smooth surfaces of the cacti to get that matte, flawless finish. -
Painting the Texture:
If your clay wasn’t pre-colored, paint the entire sculpture (except the soil) with matte sage green acrylic paint. Let it dry completely. -
Adding the Spines:
Using a fine-tip brush or a dotting tool, apply small, raised dots of coral or orange-red paint along the vertical ridges of each cactus. Group them in tight clusters near the tops for a blooming effect. -
Sealing:
Finally, seal the green parts of the cacti with a clear matte varnish. Avoid varnishing the sandy soil area to keep the textural contrast strong.
Flower Power
Before baking, add tiny balls of clay to the very tops of the cacti and texture them with a needle tool to look like blooming flowers, painted in the same coral tone.
Place your finished piece on a sunny windowsill or a wooden coaster to complete the natural vibe
Simple Face Planter Heads
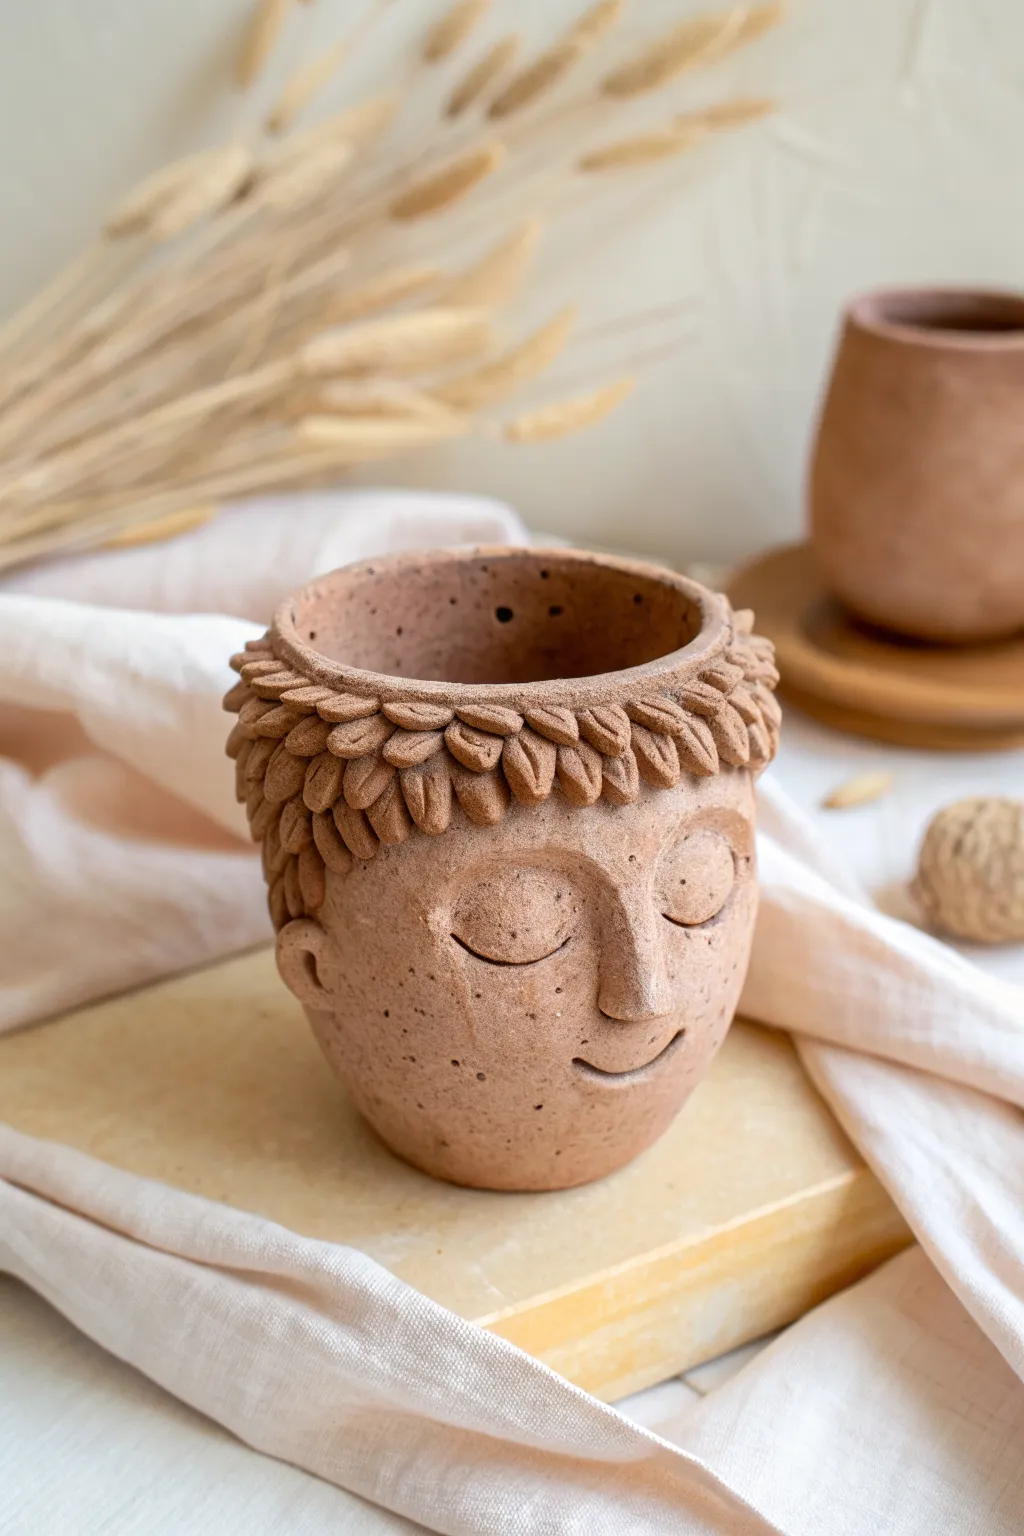
Create a peaceful little guardian for your plants with this charming clay face pot. Featuring closed, serene eyes and a textured wreath of clay leaves along the rim, this planter brings a calm, earthy aesthetic to any shelf.
Step-by-Step Guide
Materials
- Speckled stoneware clay or terracotta clay
- Rolling pin
- Clay carving tools (needle tool, small loop tool)
- Small bowl or cylinder (to use as a slump mold)
- Serrated rib tool or fork
- Slip (clay and water mixture)
- Sponge
- Canvas or cloth work surface
Step 1: Forming the Base
-
Roll your slab:
Begin by rolling out a medium slab of clay, roughly 1/4 inch thick. Aim for an even thickness throughout to prevent cracking during drying. -
Cut the walls:
Cut a rectangular strip long enough to wrap around your chosen cylinder mold, plus a circle for the base. -
Assemble the cylinder:
Wrap the rectangular strip around your mold or form it freely into a cylinder. Score the meeting edges deeply with a serrated tool, apply slip, and press firmly to join. -
Attach the base:
Score and slip the bottom edge of your cylinder and the perimeter of your circular base. Press them together, smoothing the clay upwards from the base to the wall to create a seamless seal. -
Shape the chin:
While supporting the inside with one hand, gently push the clay outwards near the bottom third to create a slightly tapered, rounded chin shape.
Cracking Issues?
If leaves detach during drying, your clay was likely too dry when joining. Wrap the pot in damp paper towels and plastic for 24 hours to rehydrate slightly, then repair with slip.
Step 2: Sculpting the Face
-
Add the nose:
Roll a small, elongated triangle of clay. Score the center of the face where the nose belongs, apply slip, and blend the clay triangle onto the surface, smoothing the edges until it looks natural. -
Form the ears:
Shape two small ‘C’ curves from clay coils. Attach these to the sides of the head using the score-and-slip method, blending the back edges into the main pot. -
Carve the features:
Using a needle tool, carefully incise two closed, curved eyelids. I find it helpful to sketch lightly first before committing to the deeper cut. -
Create the smile:
Carve a small, gentle upward curve for the mouth. You can press slightly deeper at the corners to emphasize the cheeks. -
Smooth the surface:
Use a slightly damp sponge to gently wipe the face, removing any sharp crumbs of clay from your carving and softening the facial transitions.
Step 3: Adding the Foliage Texture
-
Make the leaves:
Roll out many small, bean-sized balls of clay. Flatten slightly and pinch one end to create a simple leaf or seed shape. -
Impress detail:
Use a dull knife or tool to press a center line indentation into each small leaf for added texture. -
Start the bottom row:
Score a band around the upper rim of the pot. Apply a row of leaves pointing downwards, overlapping them slightly as you go around the circumference. -
Layer the top row:
Add a second row of leaves just above the first, closer to the rim. Ensure these are securely attached with slip, as small additions like this can pop off if too dry. -
Final wipe down:
Check the interior for any rough spots and wipe the exterior one last time with a sponge to reveal the grog or speckles in the clay. -
Dry slowly:
Cover the pot loosely with plastic for the first day to let the moisture equalize, then uncover to dry completely before firing.
Creative Twist
Mix oxides or mason stains into the clay used for the leaves to create a permanent color contrast (like subtle greens or muted reds) without needing glaze later.
Once fired, this serene vessel is ready to hold your favorite succulent or dried grass bundle
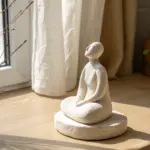
Tiny Hands Holding a Heart
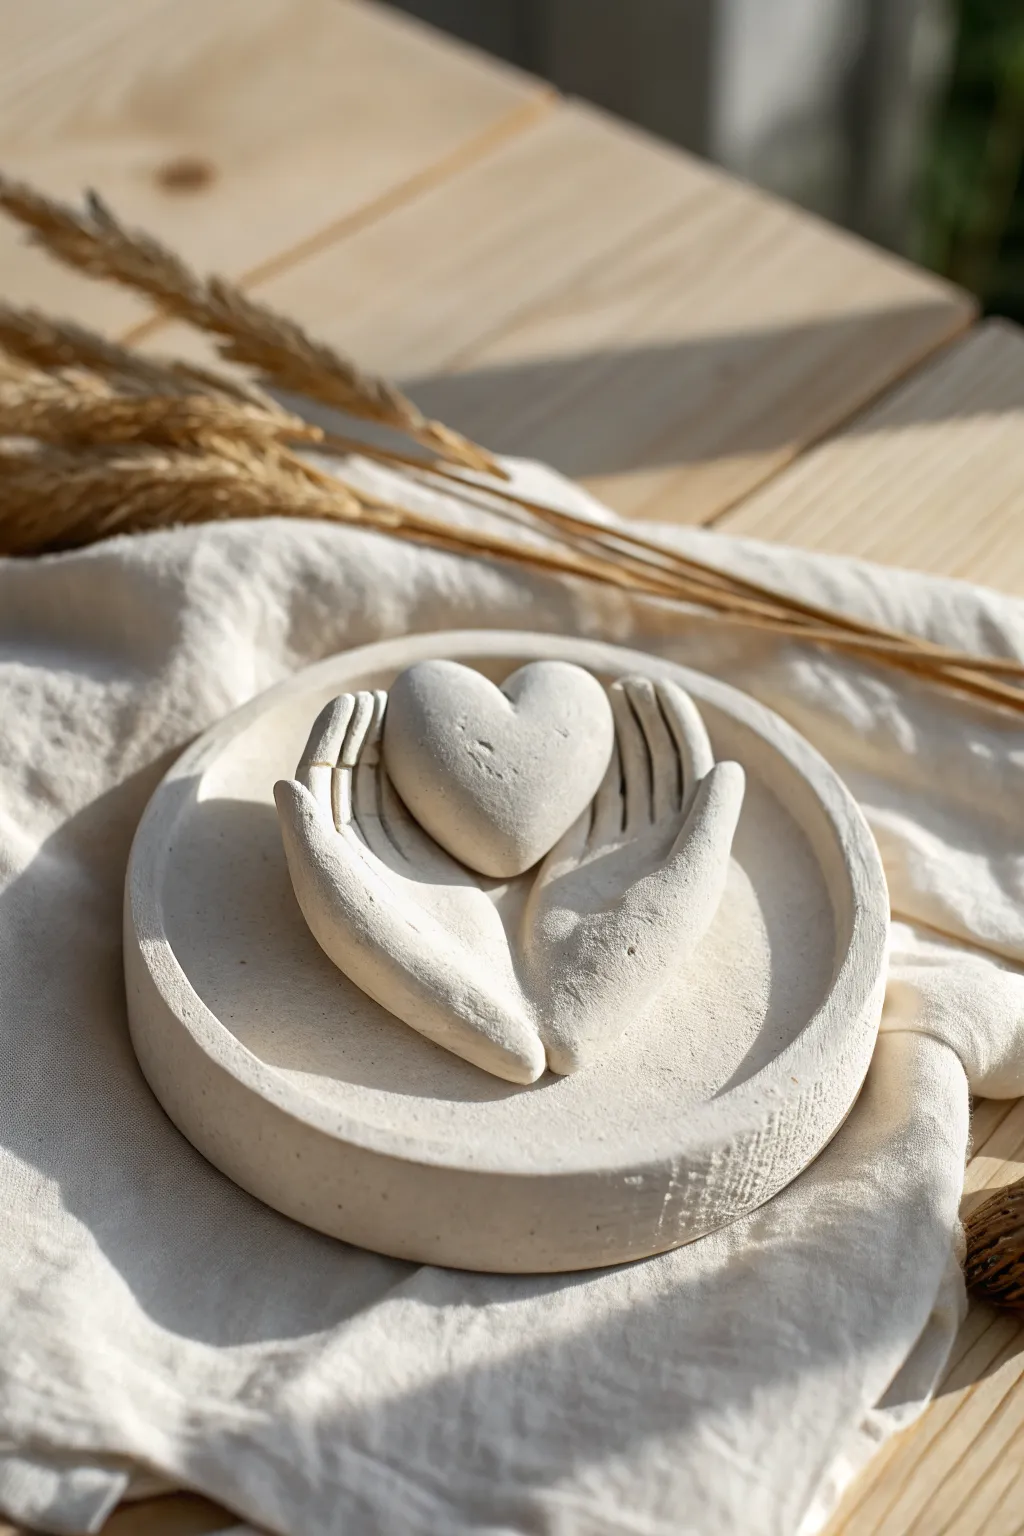
This minimalist sculpture captures a tender moment of care and affection, featuring two stylized hands cradling a heart within a simple circular tray. The matte, monochromatic white finish gives it a modern, serene aesthetic perfect for a ring dish or decorative accent.
Detailed Instructions
Materials
- White or light gray air-dry clay (or polymer clay)
- Small rolling pin
- Round cookie cutter (approx. 4-5 inches)
- Clay knife or scalpel tool
- Small bowl of water
- Fine-grit sandpaper (400 and 800 grit)
- Smoothing tool or sponge
- A small, smooth stone or polishing tool
Step 1: Forming the Base Dish
-
Roll the foundation:
Begin by conditioning a large ball of clay until it is warm and pliable. Using your rolling pin, roll it out into a flat slab that is roughly 1/4 inch thick. Try to keep the thickness consistent across the entire surface. -
Cut the circle:
Use your round cookie cutter or trace around a bowl with a clay knife to cut a perfect circle from the slab. This will be the floor of your tray. -
Create the rim:
Roll a long snake of clay, slightly thicker than the base slab. Lay this coil around the perimeter of your circle base. -
Blend the seams:
Using your thumb or a modeling tool, firmly blend the inside and outside seams where the coil meets the base. The transition should be seamless so it looks like one solid piece. -
Refine the walls:
Pinch the walls gently to straighten them and smooth the top edge with water on your finger. The walls should be low, similar to a coaster with a lip.
Fixing Cracks
If hairline cracks appear while drying, mix a small amount of clay with water to make a paste (slip). Fill the crack, smooth it over, and let it dry again.
Step 2: Sculpting the Hands
-
Shape the palm bases:
Take two equal-sized pieces of clay and roll them into elongated teardrop shapes. These will become the hands. Flatten them slightly, keeping the wider end (the wrist) a bit thicker. -
Define the fingers:
On the narrower end of each teardrop, use your knife to cut four slits to create five fingers. Gently separate them. The thumb should be slightly lower down on the side. -
Curve the fingers:
Gently curve the fingers upward and inward, mimicking a cupped hand shape. Smooth the rugged cut edges with a damp finger or brush so the fingers look soft and organic rather than blocky. -
Position the hands:
Place the two hands into the center of the tray. Arrange them so the wrists are touching or slightly overlapping at the bottom, and the palms open upward like a flower. -
Secure the hands:
Score the bottom of the hands and the spot on the tray where they will sit (scratch cross-hatch marks). applied a dab of water or slip (liquid clay) and press them firmly into place.
Speckled Stone Effect
Knead slightly dry coffee grounds or black pepper into your white clay before sculpting to create a faux granite or speckled stone texture.
Step 3: Adding the Heart & Finishing
-
Form the heart:
Roll a smaller ball of clay and pinch one side to form a point. Indent the opposite side to create the top lobes of a heart. Keep it plump and rounded rather than flat. -
Nestle the heart:
Place the heart into the center of the cupped hands. Adjust the fingers so they look like they are actively holding or supporting the heart, curving them around its sides. -
Final smoothing:
Dip a soft brush or sponge in water and go over the entire piece to remove fingerprints. Pay close attention to the area where the wrists meet the tray base. -
Drying:
Allow the piece to dry slowly in a cool place away from direct sunlight. I usually cover mine loosely with a plastic bag for the first 24 hours to prevent cracking. -
Sanding:
Once fully dry (bone dry), use fine-grit sandpaper to smooth any rough edges on the rim of the tray or the tips of the fingers. -
Create the stone texture:
To achieve the specific matte, stone-like look in the image, avoid glossy varnishes. Instead, buff the dry clay with a smooth stone or the back of a spoon to compact the surface slightly.
Now you have a serene little sculpture ready to hold your jewelry or simply sit beautifully on a shelf
Dreamy Cloud With Dangling Stars
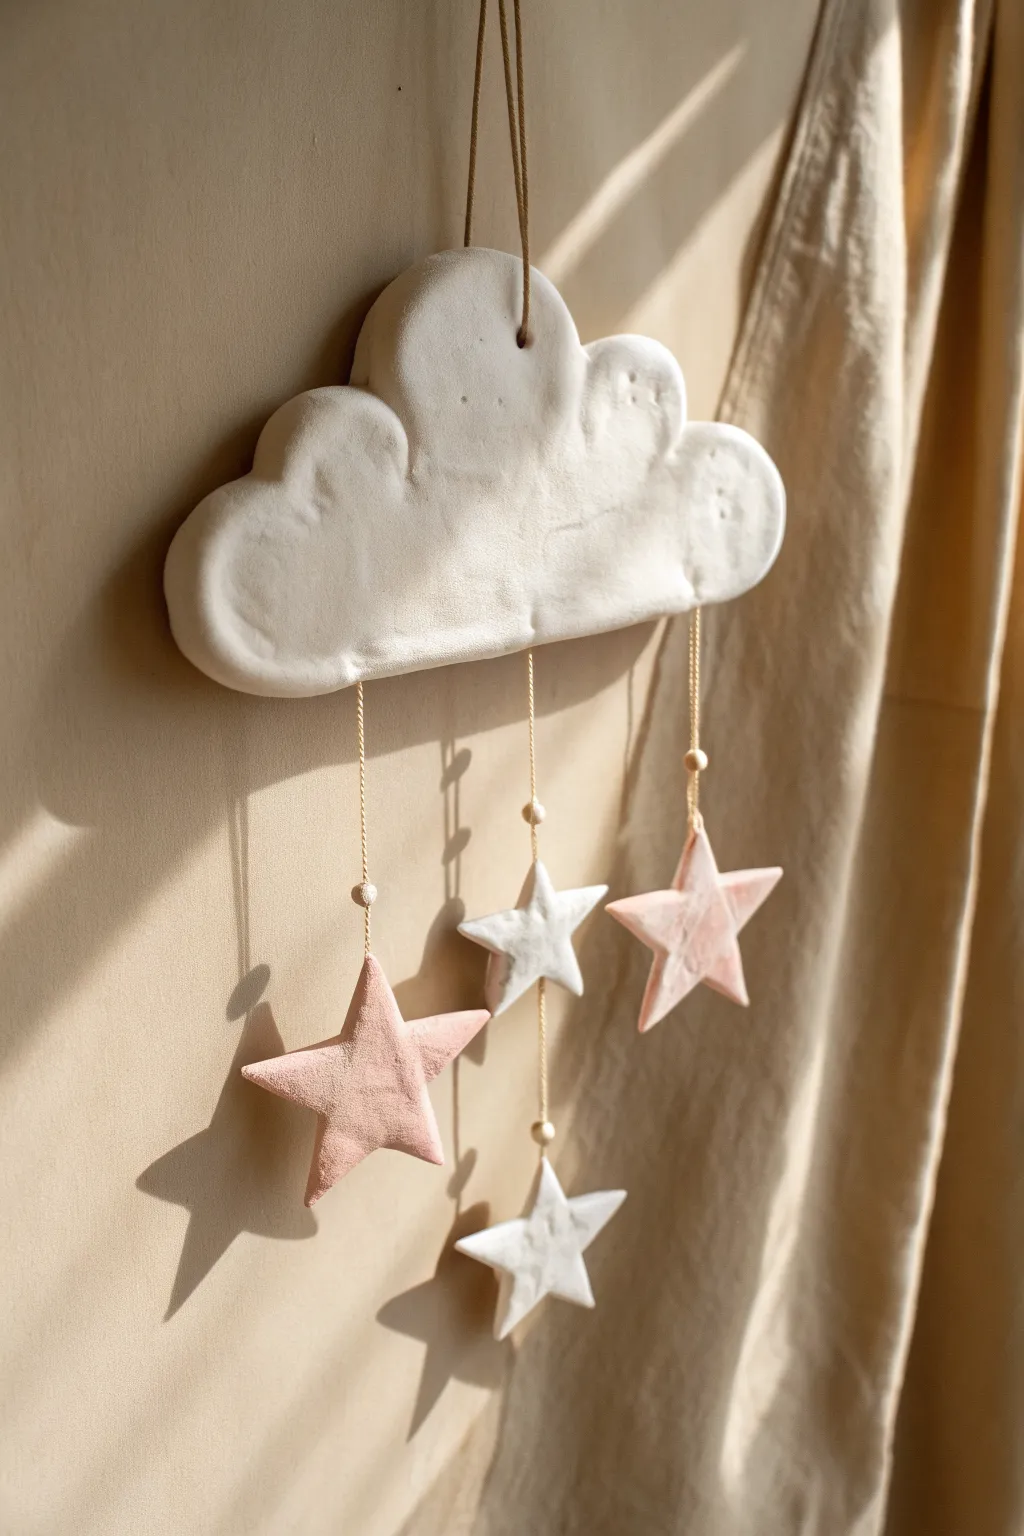
Bring a touch of the dreamy outdoors inside with this charming hanging mobile featuring a puffy cloud and delicate stars. The soft, matte finish and subtle pastel accents make it perfect for a nursery or a cozy reading nook.
Step-by-Step Guide
Materials
- White air-dry clay (or polymer clay)
- Rolling pin
- Cloud cookie cutter (optional) or craft knife
- Star cookie cutter (small size)
- Tool for making holes (like a straw or toothpick)
- Sandpaper (fine grit)
- Acrylic paint (pale pink and white)
- Paintbrushes
- Cotton or hemp twine
- Small wooden beads
- Scissors
- Water bonding slip (clay mixed with water)
Step 1: Sculpting the Shapes
-
Prepare the workspace:
Lay down a clean mat or parchment paper to work on. Knead your clay until it is soft, pliable, and free of cracks. -
Roll the main slab:
Roll out a large slab of clay for the cloud. Aim for a thickness of about 1/4 to 1/2 inch so it has some nice volume and sturdiness. -
Cut out the cloud:
Use a large cloud cookie cutter if you have one. If not, lightly sketch a cloud shape onto the clay using a toothpick and carefully cut it out with a craft knife. -
Soften the edges:
Dip your finger in a little water and run it along the cut edges of the cloud to round them off. You want a soft, puffy look rather than sharp, sliced edges. -
Create hanging holes:
Using a straw or a sculpting tool, punch one hole at the very top center of the cloud for hanging. Then, punch three holes along the bottom edge where the stars will dangle. -
Cut the stars:
Roll out a second, slightly thinner slab of clay. Use your star cutter to create four individual star shapes. -
Detailed star prep:
Just like the cloud, smooth the edges of each star with a damp finger. Poke a single hole through the top point of each star. -
Drying time:
Place all your clay pieces on a wire rack or a flat surface to dry. If using air-dry clay, this usually takes 24-48 hours. Flip them halfway through to ensure even drying.
Uneven drying?
If your cloud starts curling up while drying, gently weigh it down with a heavy book (place parchment paper in between) to flatten it back out.
Step 2: Painting and Assembly
-
Sand for smoothness:
Once fully dry, gently sand any rough spots or uneven edges with fine-grit sandpaper until the surface feels satisfyingly smooth. -
Paint the cloud:
Apply a coat of white acrylic paint to the cloud to give it a bright, clean finish. You might need two coats for full coverage. -
Paint the stars:
Paint two of the stars white to match the cloud. For the other two, mix a tiny dot of red into your white paint to create a very pale, dusty pink, and paint them. -
Cut the twine:
Cut three lengths of twine for the stars. Make the center string slightly shorter (or longer, depending on your preference) to create a staggered, interesting look. -
Attach the stars:
Thread a piece of twine through a star. Tie a secure knot at the star’s top point. I like to add a dab of glue to the knot for extra security. -
Thread the beads:
Slide a small wooden bead onto each string, positioning it about an inch or two above the star. You can tie a small knot below the bead to keep it in place if the fit is loose. -
Connect to the cloud:
Thread the top ends of the star strings through the bottom holes of the cloud. Tie knots on the back side of the cloud to secure them. -
Add the main hanger:
Cut a longer piece of twine and loop it through the top center hole of the cloud. Tie a loop at the end so it’s ready to hang.
Add texture
Before the clay dries, gently press a piece of lace or textured fabric into the surface of the cloud or stars for an intricate, imprinted pattern.
Hang your new creation near a window to catch the light and enjoy the peaceful vibe it brings to the room