An ash tray is one of my favorite little clay projects because it’s quick, useful, and basically made for showing off your style. If you want something way more fun than a plain circle, these clay ash tray ideas will get your hands moving and your imagination fired up.
Classic Pinch-Pot Ash Tray
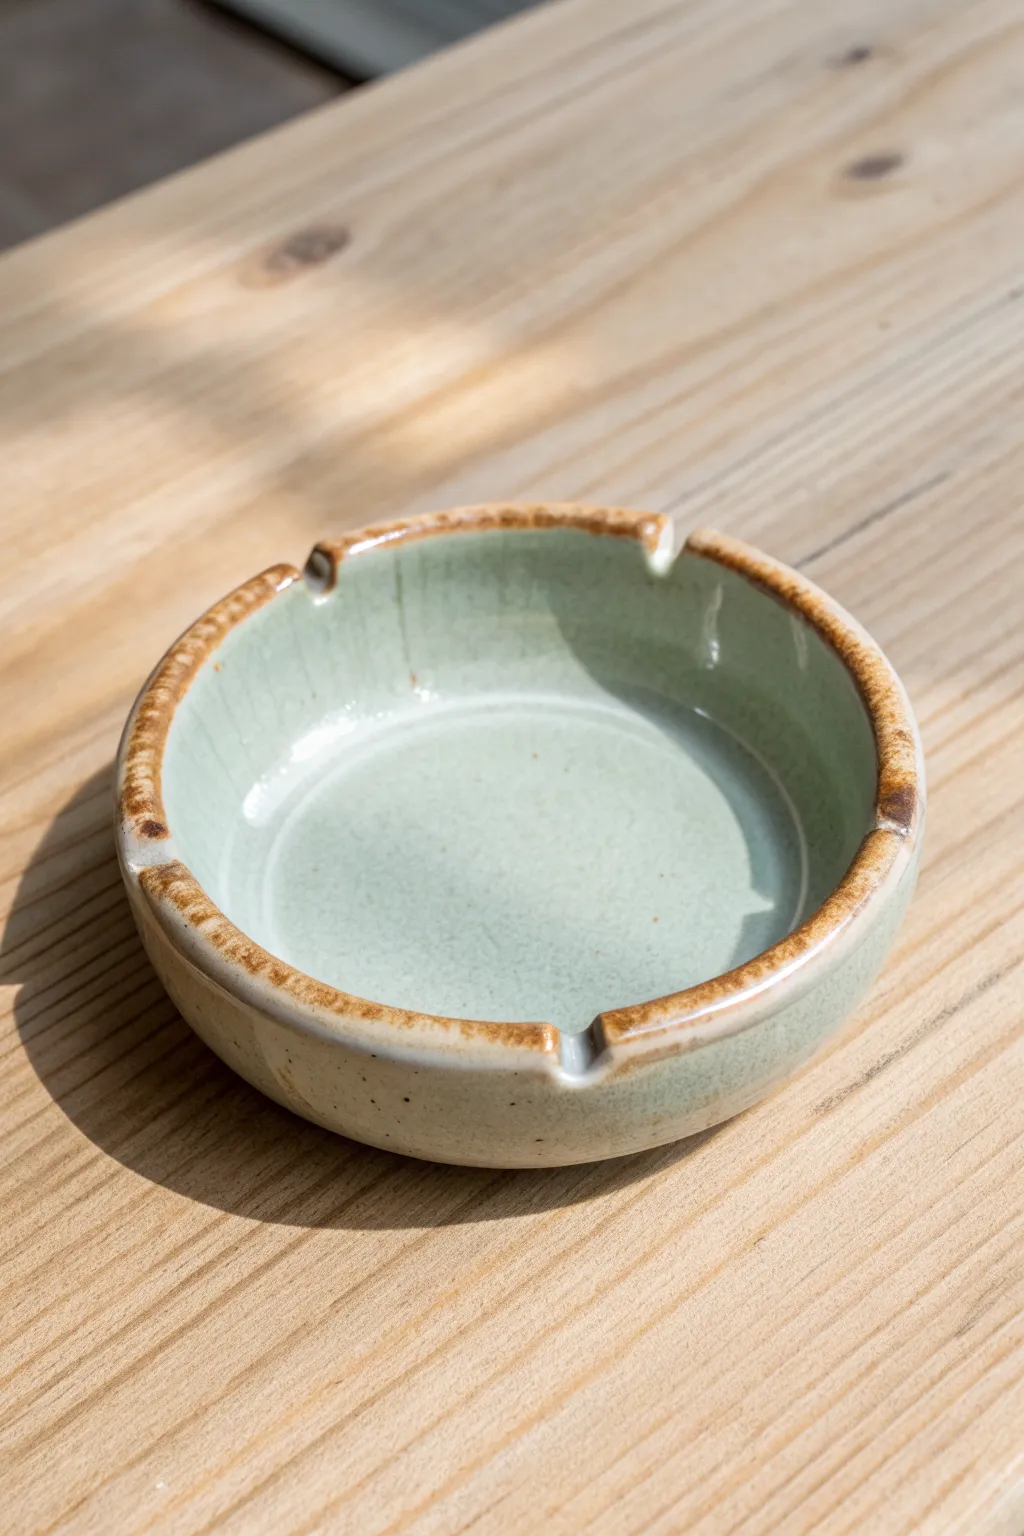
This classic pottery project results in a durable, functional piece with a serene aesthetic. By combining a soothing celadon glaze with a rustic oxide rim, you’ll create a professional-looking finish that highlights the handcrafted nature of the clay.
Step-by-Step Guide
Materials
- Stoneware clay body (white or light buff)
- Pottery wheel (optional) or rolling pin for hand-building
- Pottery needle tool
- Small loop tool or carving tool
- Sponge
- Wooden rib tool
- Celadon glaze (light green/blue)
- Iron oxide wash or dark brown underglaze
- Kiln for firing
Step 1: Forming the Body
-
Prepare the clay:
Begin by thoroughly wedging a ball of stoneware clay about the size of a large orange to remove air bubbles and ensure consistency. -
Open the form:
If using a wheel, center the clay and open it into a low cylinder. If hand-building, pinch a ball into a bowl shape or use a rolling pin to create a slab base and attach a coil wall. -
Shape the walls:
Pull the walls up to a height of about 1.5 to 2 inches. Keep the walls thick enough (roughly 1/4 inch) to support the notches later without warping. -
Refine the rim:
Use a chamois or a damp sponge to compress the rim, smoothing it out so it becomes rounded and pleasant to the touch. -
Clean the interior:
Take a wooden rib tool and smooth the interior floor and walls, removing any throwing rings or fingerprints to create that sleek, glass-like surface seen in the reference.
Oxide Magic
Iron oxide interacts beautifully with celadon. If you want a more dramatic ‘burn’ effect on the rim, apply the oxide *over* the glaze instead of under it.
Step 2: Detailing and Trimming
-
Let it firm up:
Allow the piece to dry to a ‘leather-hard’ stage. This is crucial; the clay should be stiff enough to cut without deforming but still hold moisture. -
Mark the notches:
Using a needle tool, lightly mark three equidistant points around the rim where the cigarette rests will go. -
Carve the rests:
Use a rounded tool or the handle of a paintbrush to gently press down and carve out the U-shaped notches at your marked points. Smooth the edges with a damp finger immediately. -
Trim the foot:
Turn the pot over. Using a loop tool, trim away excess clay from the bottom to create a defined foot ring, which gives the piece a visual lift off the table. -
Bisque fire:
Once fully bone dry, load the piece into the kiln for a bisque firing (usually to Cone 04 or 06) to prepare it for glazing.
Step 3: Glazing and Finishing
-
Wipe down:
After the bisque fire, wipe the piece with a damp sponge to remove any kiln dust that might repel the glaze. -
Apply rim accent:
I like to dip a small sponge or brush into iron oxide wash (or a dark brown stain) and gently dab it along the very edge of the rim and inside the notches. Wipe away any drips. -
Dip in celadon:
Using glazing tongs, dip the entire piece into a translucent celadon glaze bucket. Hold it for about 3 seconds to ensure an even coat. -
Clean the foot:
Immediately wipe the bottom of the foot ring clean with a sponge so the pot doesn’t fuse to the kiln shelf. -
Check the rim:
As the glaze dries, the oxide on the rim might bleed through slightly; this is desired. Ensure the glaze isn’t too thick on the sharp edges of the notches. -
Glaze fire:
Fire the piece again to the maturity temperature of your clay and glaze (typically Cone 5 or 6 for stoneware). -
Cool slowly:
Allow the kiln to cool naturally. Opening it too soon can cause the celadon glaze to craze (crack) more than intended.
Uneven Notches?
If your rests aren’t perfectly spaced, trace a circle on paper, fold it into thirds to find exact 120-degree marks, and use that as a template on your clay.
Place your finished piece on a wooden table to admire how the natural glaze tones complement organic textures


Slab-Built Tray With Crisp Edges
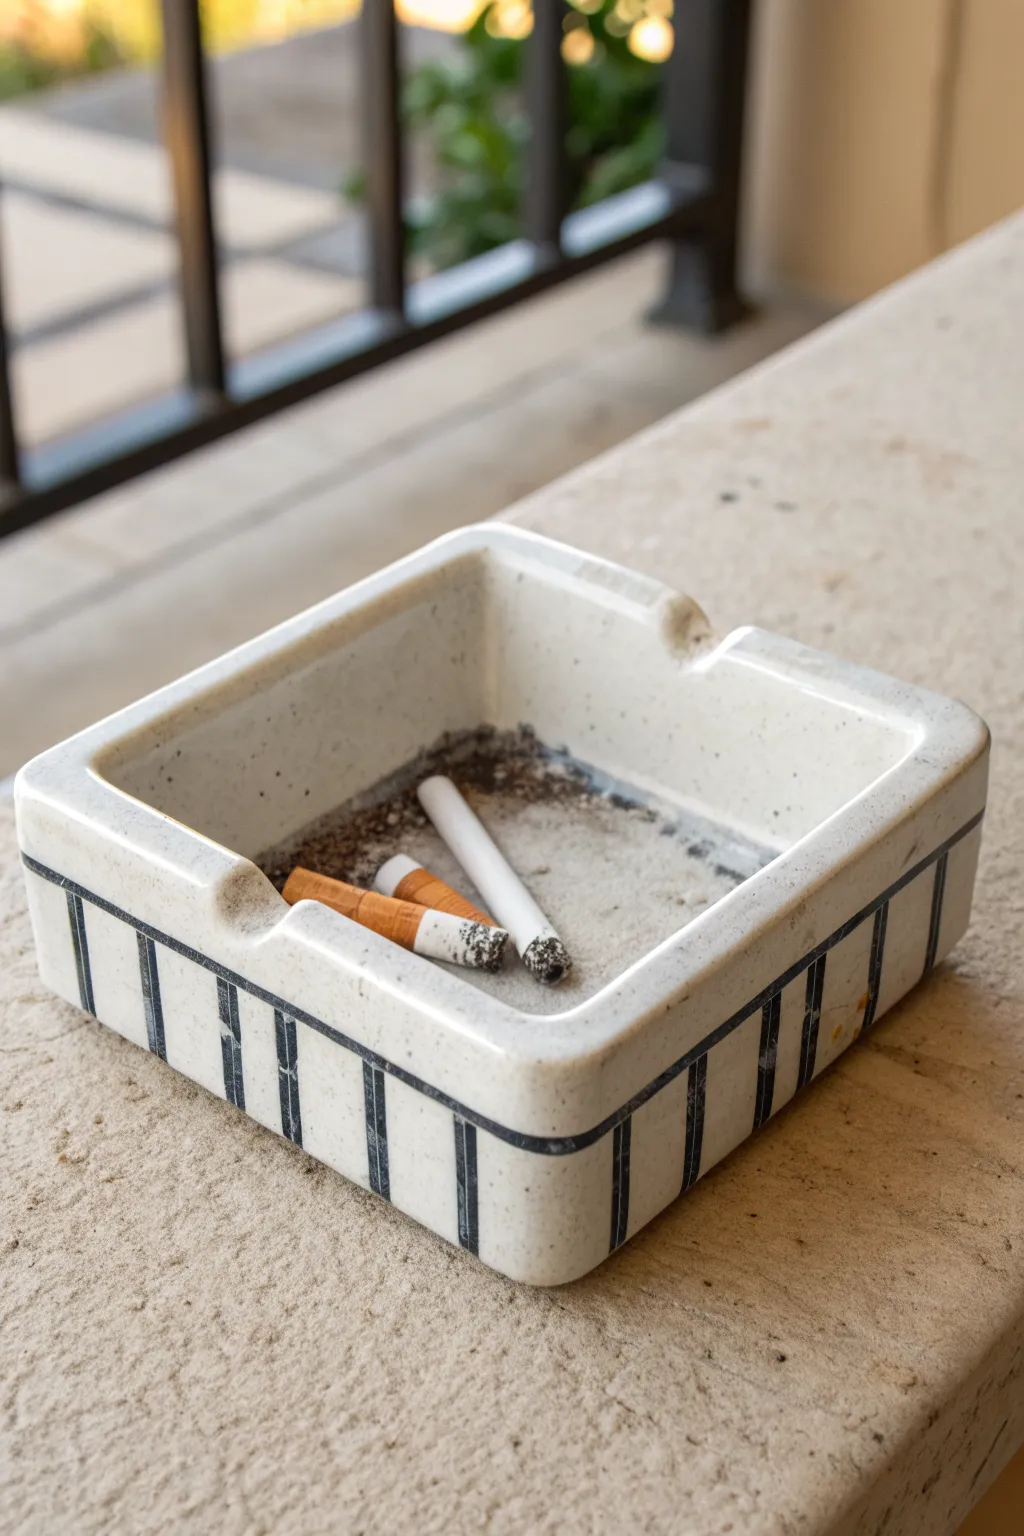
Achieve a clean, contemporary look with this square slab-built tray featuring distinct vertical striping. The creamy speckled glaze paired with geometric navy lines creates a timeless piece that works beautifully as a catch-all or traditional ashtray.
How-To Guide
Materials
- White stoneware clay with speckles (or grog)
- Rolling pin
- Two wooden guide strips (approx. 1/4 inch thick)
- Fettling knife or needle tool
- Paper template (square, approx. 5×5 inches)
- Ruler
- Scoring tool (serrated rib)
- Slip
- Sponge
- Modeling tool or wooden spoon handle (for notches)
- Underglaze pencil or distinct black/navy underglaze
- Small flat brush
- Clear or transparent white glaze
Step 1: Slab Preparation
-
Roll the clay:
Begin by wedging your clay to remove air bubbles. Place the clay between two wooden guide strips and roll it out into a smooth, even slab about 1/4 inch thick. -
Compress the slab:
Use a rib tool to compress the clay on both sides. This aligns the clay particles, preventing warping during firing, and creates a nice smooth surface for our glaze later. -
Cut the base:
Place your square paper template onto the slab. Using your fettling knife, cut vertically around the template to create a perfect square base. -
Cut the walls:
From the remaining slab, cut four rectangular strips. These should be the same length as the sides of your base and about 1.5 inches tall.
Clean Lines Pro Tip
For ultra-crisp underglaze stripes, apply thin masking tape to the leather-hard clay before painting. Peel it off immediately after painting for sharp edges.
Step 2: Assembly & Shaping
-
Score and slip:
Score the outer edges of the base and the bottom long edge of each wall strip. Apply a generous amount of slip to the scored areas. -
Attach the first wall:
Press the first wall onto the base edge firmly. I like to start with opposite sides first to ensure squareness before adding the remaining two. -
Secure the corners:
Once all four walls are attached, score and slip the vertical seams where the walls meet. Pinch them together firmly to create a seal. -
Reinforce the joints:
Roll a very thin coil of clay and press it into the interior seams where the walls meet the floor. Smooth this coil out completely with a rounded tool or your finger. -
Smooth the exterior:
On the outside, use a rib to smooth the vertical seams. Gently paddle the walls if necessary to ensure they are straight and vertical, sharp 90-degree angles are key here. -
Round the corners:
While the overall shape is square, gently run a damp sponge over the sharp, vertical corners to soften them slightly, mimicking the look in the photo. -
Refine the rim:
Use a damp chamois or sponge to compress and round the top rim. It should feel smooth to the touch with no sharp edges.
Step 3: Detailing & Decoration
-
Create cigarette notches:
If using as an ashtray, select two opposite walls. Press a round modeling tool or the handle of a wooden spoon into the center of the rim to create a gentle U-shaped indentation. -
Outline the design:
Once the piece is leather-hard, lightly sketch vertical lines on the exterior walls using a pencil (graphite burns off in the kiln). Space them evenly, about half an inch apart. -
Paint the stripes:
Isolating the area between your pencil lines, carefully paint vertical stripes using black or navy underglaze and a small flat brush. Extend the bottom stripe horizontally around the perimeter of the base. -
Bisque fire:
Allow the tray to dry completely slowly to avoid warping. Fire to cone 04 (or your clay’s specific bisque temperature). -
Glaze application:
Dip or pour a transparent glaze over the entire piece. A glaze with slight opacity or speckles adds that lovely vintage texture seen in the example. -
Final fire:
Fire the piece again to the maturation temperature of your glaze and clay body.
Level Up: Texture
Instead of painting stripes, carve vertical channels into the leather-hard clay, then inlay a dark coloured slip into the grooves before scraping back the surface.
Now you have a sleek, custom-designed ceramic tray ready for use or display


Heart-Shaped Ash Tray
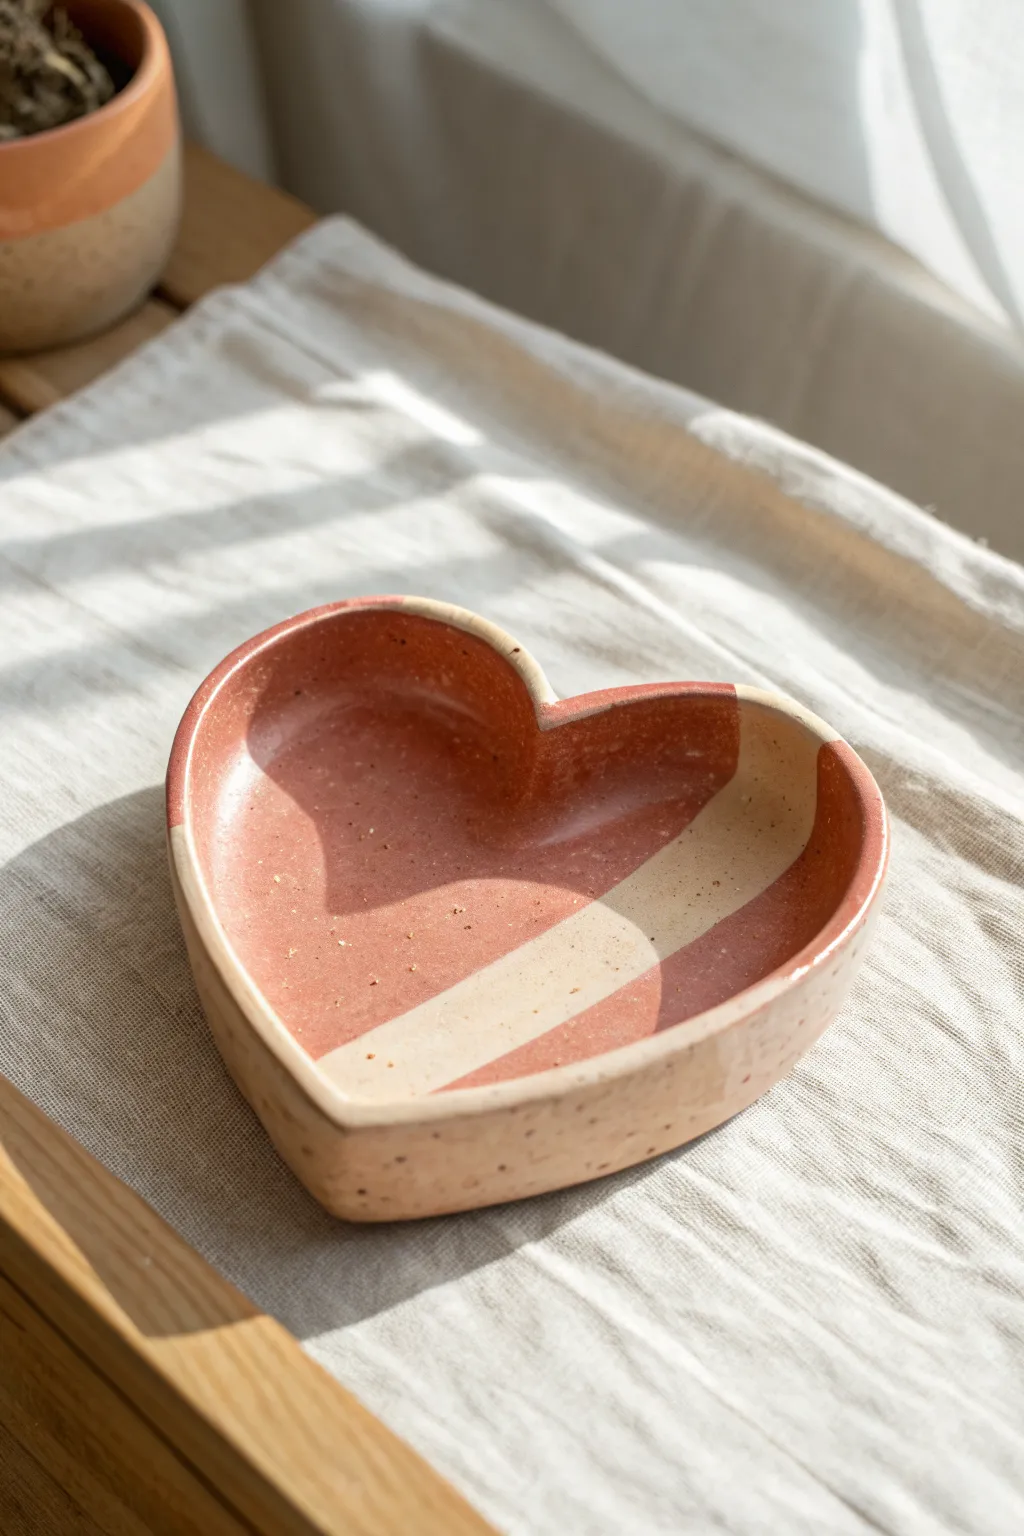
This charming heart-shaped dish features a warm, earthy aesthetic with bold terracotta color blocking against a speckled cream clay body. Whether used as a delicate ash tray or a jewelry catch-all, its smooth curves and modern geometric pattern make it a lovely handmade addition to any table.
Detailed Instructions
Materials
- Speckled cream stoneware clay (cone 5/6)
- Terracotta or reddish-brown underglaze
- Clear glossy glaze
- Rolling pin
- Canvas mat or cloth
- Heart-shaped paper template (approx. 5-6 inches wide)
- Needle tool or fettling knife
- Scoring tool (serrated rib or fork)
- Slip (clay mixed with water)
- Flat shader brush
- Sponge
- Painter’s tape or wax resist (optional)
Step 1: Building the Form
-
Roll the slab:
Start by wedging your speckled clay to remove air bubbles. Roll it out on your canvas mat to an even thickness of about 1/4 inch. If you have guide sticks, use them to ensure the slab is perfectly level. -
Cut the base:
Place your heart-shaped paper template onto the clay slab. Using your needle tool, trace around the template to cut out the base of your dish. Set the excess clay aside for the walls. -
Prepare the walls:
Gather the remaining clay and roll out a long strip, maintaining that same 1/4 inch thickness. Cut a strap about 1 to 1.5 inches tall and long enough to wrap around the entire perimeter of the heart base. -
Score the edges:
Take your scoring tool and rough up the top edge of your heart base and the bottom edge of your clay strip. This texture is crucial for a strong bond. -
Apply slip:
Dab a generous amount of slip onto the scored areas. This acts as the glue for your clay ceramic piece. -
Attach the wall:
Carefully place the clay strip onto the base, following the heart outline. Press it down firmly. Where the strip ends meet (usually at the top dip of the heart or the bottom point), cut them at an angle for a seamless overlap. -
Blend the seams:
Use a modeling tool or your finger to smooth the clay where the wall meets the floor on the inside and outside. I find dragging the clay from the wall down to the floor creates the strongest seal. -
Refine the shape:
Once constructed, gently pinch the top rim to round it off slightly. Use a damp sponge to smooth away any fingerprints or harsh tooling marks. -
Slow dry:
Loosely cover the piece with plastic and let it dry slowly to the leather-hard stage. This prevents warping.
Smoothing Secret
Use a flexible rubber rib on the inside curve of the heart while the clay is soft. It compresses the clay particles and eliminates fingerprints much better than a sponge alone.
Step 2: Decorating and Glazing
-
Bisque fire:
Once bone dry, fire the piece to bisque temperature (usually cone 04) to prepare it for glazing. -
Clean the surface:
Wipe the bisque-fired heart with a clean, damp sponge to remove any kiln dust that might repel the glaze. -
Mask the design:
To get those crisp lines seen in the reference, use thin painter’s tape to mark off a diagonal stripe across the heart. Press the edges down firmly. -
Apply underglaze:
Using a flat shader brush, apply 2-3 coats of terracotta underglaze to the exposed sections of the interior floor. Let each coat dry for a few minutes before adding the next. -
Remove tape:
Peel the tape away carefully while the final coat is still slightly damp to keep the edges sharp. Clean up any bleeds with a damp cleanup tool. -
Clear glaze:
Once the underglaze is fully dry, dip the entire piece into a clear glossy glaze, or brush on three smooth coats. Avoid pooling in the corners. -
Wipe the foot:
Use a sponge to wipe the glaze completely off the bottom of the dish so it doesn’t stick to the kiln shelf. -
Final fire:
Fire the piece to the maturity temperature of your clay body (likely cone 5 or 6). Allow the kiln to cool completely before removing your finished heart dish.
Dual-Tone Texture
Leave the outside of the heart unglazed! The raw, speckled clay has a beautiful tactile finish that contrasts wonderfully with the smooth, glossy interior.
Now you have a durable, custom piece perfect for gifting or keeping for yourself


Star-Shaped Ash Tray
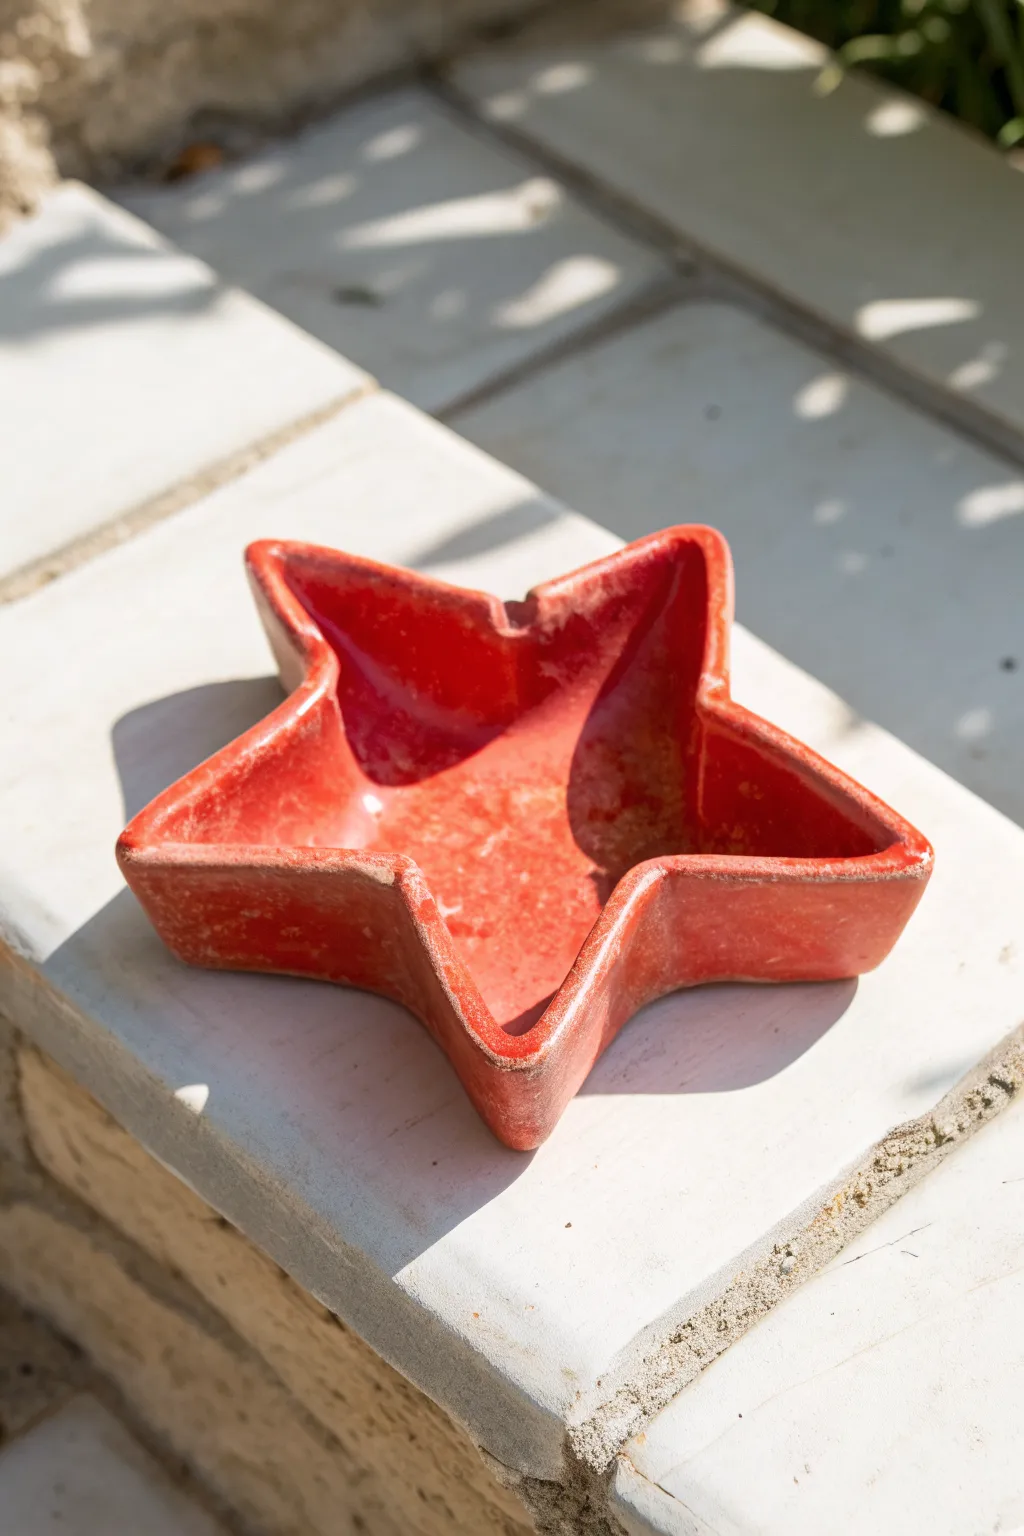
This handmade ceramic ashtray features a classic five-point star shape with gently sloped sides and a vibrant, glossy red glaze. Its rustic, handmade charm comes from the slightly softened edges and the subtle variations in the glaze texture, making it a striking conversation piece for any patio table.
Step-by-Step Tutorial
Materials
- Earthenware or stoneware clay (low fire)
- Rolling pin
- Paper and scissors (for template)
- Fettling knife or clay needle tool
- Small sponge
- Modeling tool (curved or spoon-shaped)
- Bright red glossy glaze (food safe optional)
- Glaze brushes (soft bristles)
- Kiln access (or use air-dry clay and acrylics for a decorative-only version)
Step 1: Shaping the Star
-
Prepare the template:
Begin by drawing a five-pointed star on a piece of thick paper or cardstock. A star about 5 to 6 inches across is a good manageable size. Cut it out to use as your guide. -
Roll out the slab:
Take a manageable chunk of clay and wedge it briefly to remove air bubbles. Roll it out into an even slab, aiming for a consistent thickness of about 1/4 inch to ensure durability. -
Cut the shape:
Place your paper star template gently onto the clay slab. Using your fettling knife or needle tool, trace around the edges, cutting straight down to create crisp vertical walls. -
Initial smoothing:
Remove the excess clay. Run a slightly damp sponge or your finger along the cut edges to remove any sharp burrs or clay crumbs. -
Lift the edges:
Carefully lift the clay star. Using your fingers, gently pinch and pull up the edges of each star point to create a rim. You want to create a wall height of about 3/4 of an inch. -
Define the points:
As you lift the walls, pay special attention to the tips of the star. Gently pinch them to maintain a slightly rounded, soft point rather than a needle-sharp edge, which is prone to chipping.
Fixing Warp
If the star tips curl up while drying, gently weigh them down with small sandbags or dry the piece upside down on a flat board for the first day.
Step 2: Refining the Form
-
Create the basin:
Use a spoon-shaped modeling tool or your thumb to press down gently into the center of the star, smoothing the transition between the floor and the walls. The interior should curb seamlessly. -
Form the cigarette rests:
Select two or three valleys between the star points where you want cigarette rests. Using the side of your finger or a round tool, gently press down on the rim to create a subtle indentation. -
Level the rim:
Place the piece on a flat surface and inspect it at eye level. If one wall is significantly higher, gently pinch or pat it down so the rim is relatively level all around. -
Sponge smooth:
Take a damp (not soaking) sponge and go over the entire surface. This softens the texture and ensures that handmade, organic look seen in the reference photo. -
Dry slowly:
Let the piece dry slowly under loose plastic for a day, then uncover it to dry completely. This prevents warping, especially at the star tips. -
Bisque fire:
Once bone dry, fire the piece in a kiln to the appropriate cone for your specific clay body (usually Cone 04 to 06).
Starry Night Effect
After applying the red glaze, flick a toothbrush loaded with white or blue glaze over the piece for a speckled galaxy effect.
Step 3: Glazing and Finishing
-
Dust and clean:
After the first firing, wipe the bisque ware with a damp sponge to remove any kiln dust. This helps the glaze adhere properly. -
Apply first coat:
Using a soft brush, apply a generous coat of bright red glaze to the interior and exterior. Brush in one direction to minimize streaks. -
Let it dry:
Allow the first coat to dry until it is chalky to the touch. This usually takes about 15 to 20 minutes depending on humidity. -
Apply second coat:
Apply a second coat of glaze, brushing in a cross-direction to the first coat. I find this creates a deeper, more opaque color coverage. -
Check the thickness:
If your glaze is translucent, a third coat may be necessary. The reference piece has a thick, rich color, so ensure your application is sufficient. -
Wipe the foot:
Use a damp sponge to meticulously wipe all glaze off the bottom surface that will touch the kiln shelf. Any leftover glaze here will fuse your project to the shelf. -
Glaze fire:
Fire the piece again to the maturation temperature of your glaze (check the bottle label, typically Cone 05 or 06 for low fire).
Once cooled from the kiln, your starry creation is ready to add a pop of color to your outdoor space

The Complete Guide to Pottery Troubleshooting
Uncover the most common ceramic mistakes—from cracking clay to failed glazes—and learn how to fix them fast.
Organic Blob Ash Tray
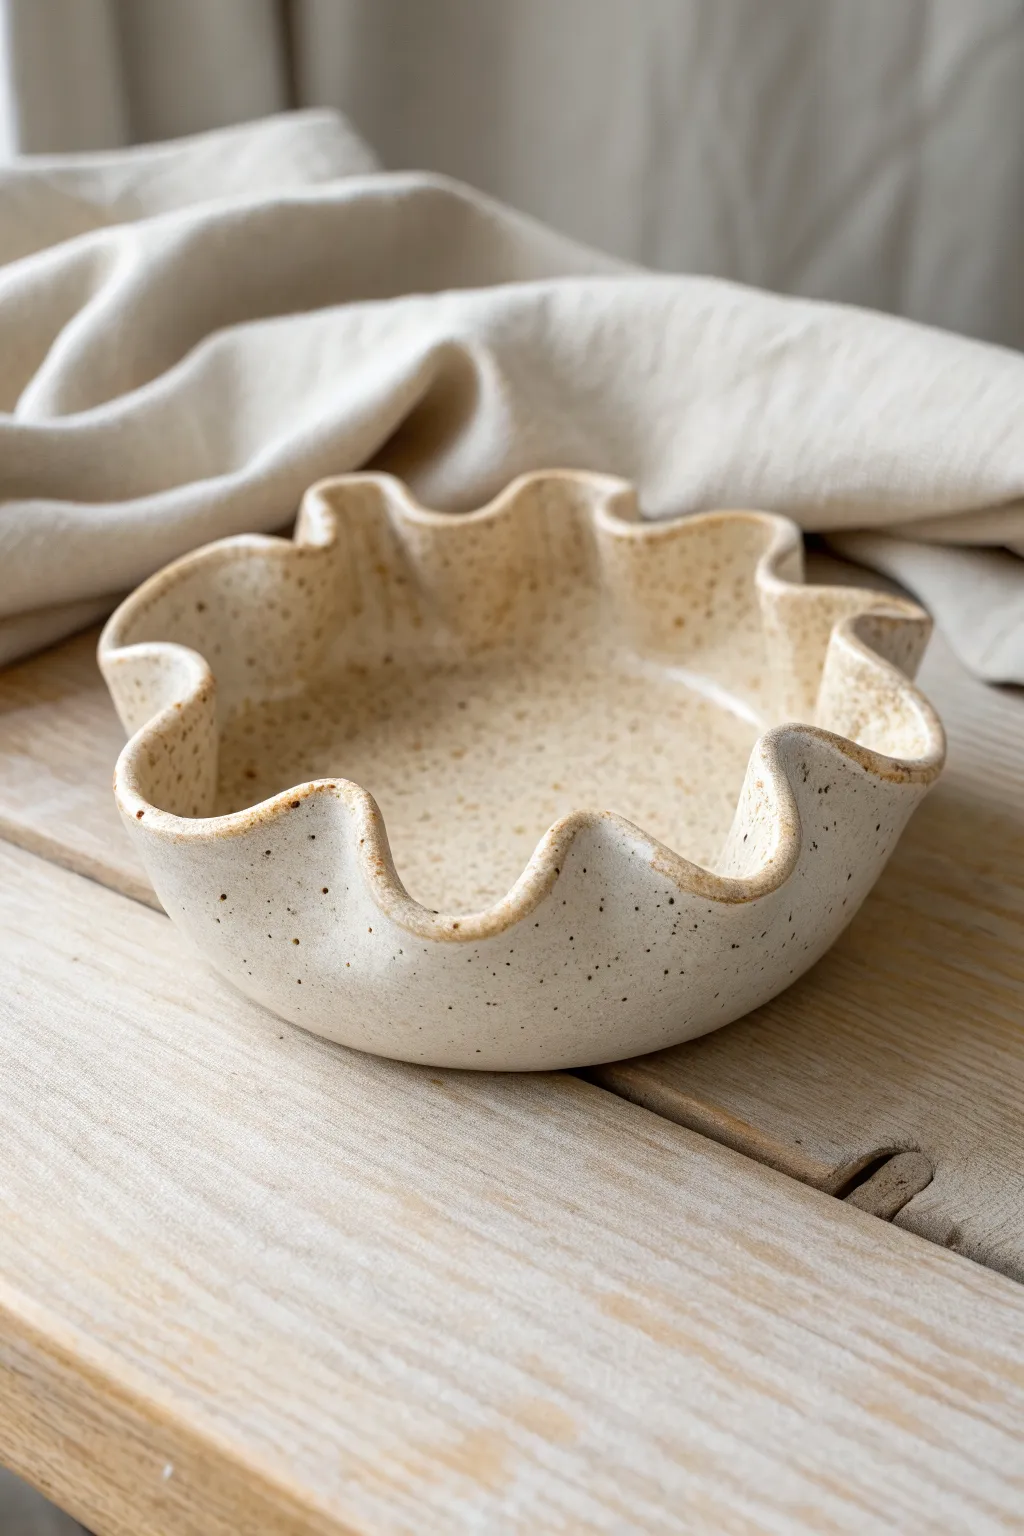
This charming, organically shaped dish features a playful wavy rim that mimics the soft folds of fabric or a flower petal. The warm, creamy glaze speckled with brown flecks gives it a cozy, rustic feel perfect for holding trinkets or serving as a unique ash tray.
Step-by-Step
Materials
- White stoneware clay with grog/speckles (or speckled buff clay)
- Rolling pin
- Canvas mat or slab roller
- Needle tool or fettling knife
- Rib tool (soft kidney)
- Small sponge
- Loop tool (for trimming)
- Creamy white dipping glaze (gloss or satin)
- Kiln access
Step 1: Forming the Base
-
Prepare the clay:
Begin by wedging a softball-sized amount of speckled clay to remove air bubbles and ensure consistency. Pat it into a flat, round pancake. -
Roll the slab:
Using a rolling pin over a canvas mat (to prevent sticking), roll the clay out into an even slab. Aim for a thickness of about 1/4 inch across the entire surface. -
Smooth the surface:
Take a soft rib tool and gently compress the clay surface on both sides. This removes the canvas texture and aligns the clay particles which helps prevent warping later. -
Cut the circle:
Place a circular template (like a paper plate or bowl) onto the slab or freehand a circle about 6-7 inches in diameter. Cut around it cleanly with a needle tool. -
Lift the edges:
Gently lift the clay circle and place it onto a piece of foam or cup it in your hands. Slowly encourage the edges upward to create a shallow bowl shape.
Step 2: Sculpting the Ruffles
-
Establish the wave pattern:
With the bowl form resting in one hand or on a banding wheel, use your thumb and forefinger to gently push the rim in and out. Push strictly from the inside out and outside in to start the waves. -
Deepen the folds:
Refine the undulations by supporting the clay underneath a ‘wave’ with your finger while pressing down lightly between the waves. You want deep, distinct curves rather than shallow wrinkles. -
Smooth the rim:
Run a damp chamois or a very lightly moistened sponge along the top edge of the rim. This softens any sharp cutting marks and rounds over the lip for a professional finish. -
Define the interior:
I like to take this moment to use a damp sponge to wipe the interior curve where the wall meets the floor, ensuring a smooth transition without sharp corners. -
Slow drying:
Cover the piece loosely with plastic. Because of the delicate rim, you need to let it dry slowly to the leather-hard stage to avoid uneven shrinkage or cracking.
Supporting the Slump
If the ruffles are collapsing while the clay is soft, prop them up with varied sizes of balled-up newspaper or foam scraps until the clay stiffens.
Step 3: Finishing and Glazing
-
Trimming (Optional):
If the bottom feels heavy once leather-hard, flip it over and use a loop tool to trim away excess weight from the foot. Or, simply smooth the bottom with a rasp and rib. -
Bisque fire:
Once bone dry, fire the piece in the kiln to cone 04 (or your clay’s specific bisque temperature). -
Prepare the glaze:
Stir your creamy white glaze thoroughly. If your clay body doesn’t have speckles, you can add iron filings or granular ilmenite to the glaze to achieve that spotted look. -
Dip the piece:
Using glazing tongs, dip the entire bowl into the glaze bucket. Hold it submerged for 3-4 seconds to get an even coat. -
Clean the foot:
Wipe the bottom of the dish completely clean with a wax resist or a wet sponge so it doesn’t fuse to the kiln shelf. -
Glaze fire:
Fire the piece again to the maturation temperature of your clay and glaze (typically cone 5 or 6 for stoneware). Allow the kiln to cool completely before opening.
Cracked Rims?
Rims dry fastest. If you see tiny hairline cracks forming on the edge, mist the rim lightly and wrap the edges more tightly with plastic to equalize moisture.
Once cooled, your organic dish is ready to add a touch of handmade warmth to any table or nightstand
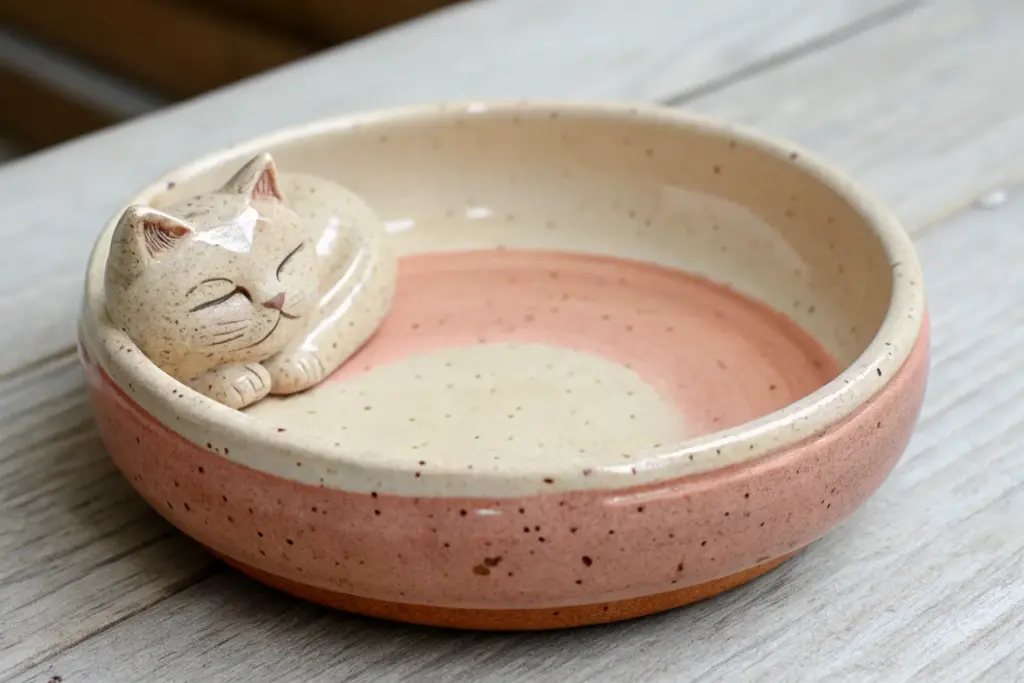
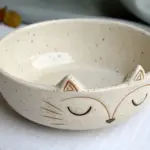
Cat Face Ash Tray With Notches
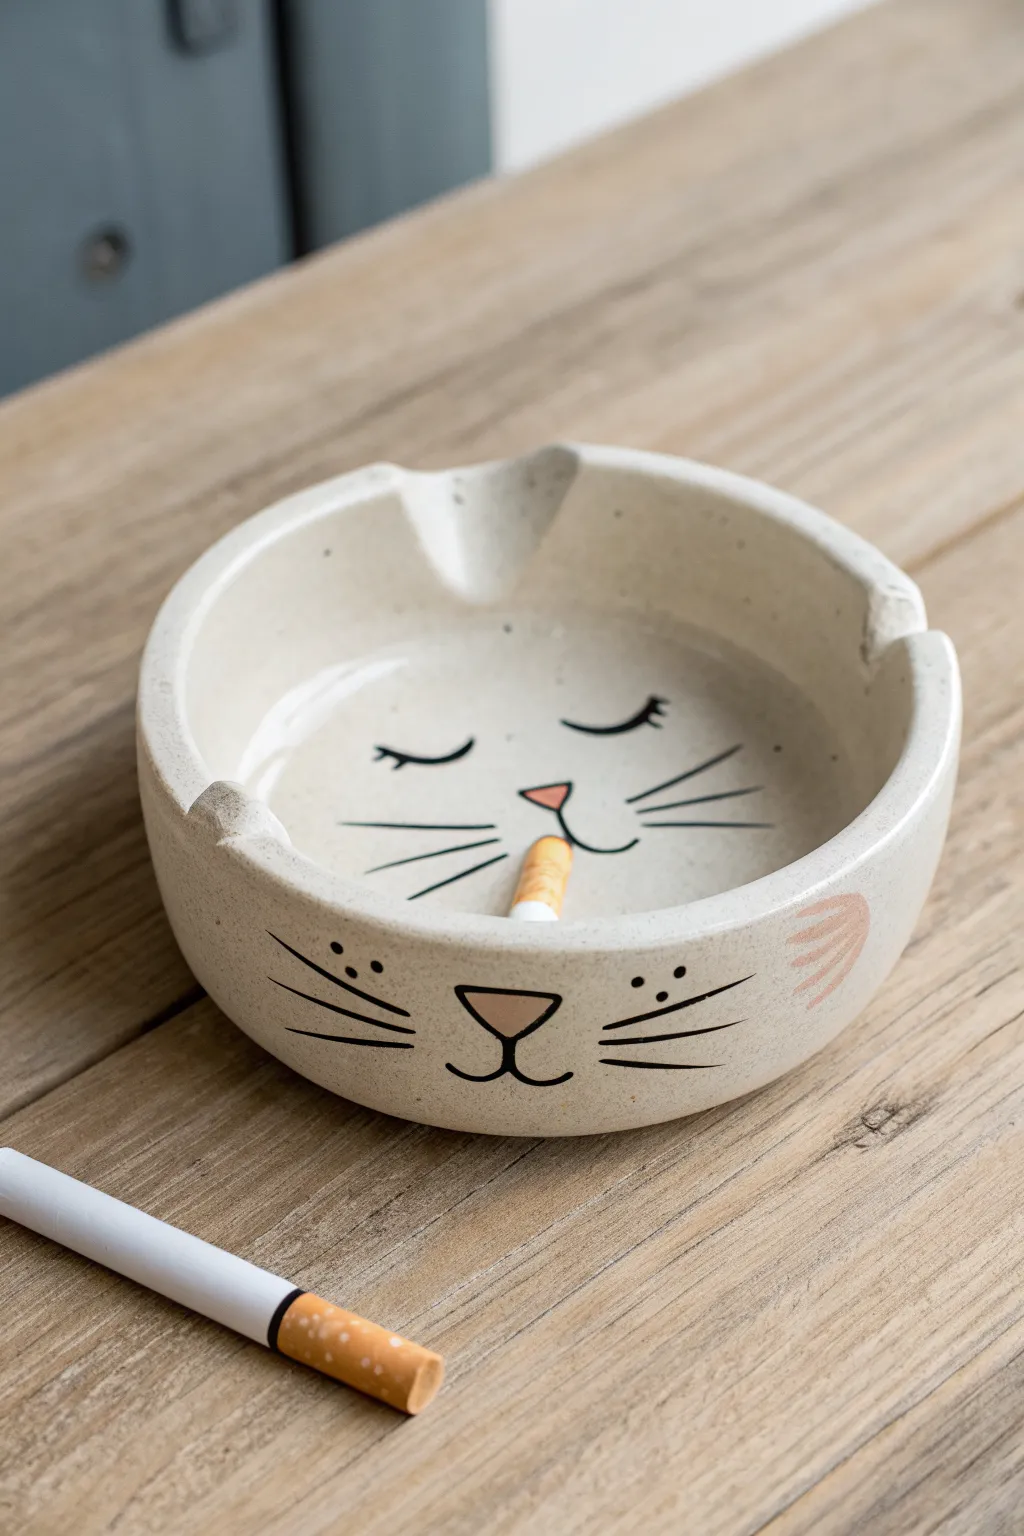
This charming ceramic project combines functionality with a dash of humor, featuring a sleepy cat face on the interior and an alert one on the exterior. The speckled clay body and minimal painted details give it a modern, playful aesthetic perfect for any table.
Step-by-Step Guide
Materials
- Speckled buff stoneware clay (or polymer clay for non-functional decorative use)
- Clay rolling pin
- Circle template or bowl (approx. 5-6 inches diameter)
- Needle tool or fettling knife
- Pottery sponge
- Loop tool for carving
- Rib tool (smooth kidney)
- Black underglaze or acrylic paint (if not firing)
- Pink underglaze or acrylic paint
- Fine detail paintbrushes
- Clear glaze (food safe if using stoneware)
- Optional: Small scrap of clay for the decorative cigarette
Step 1: Forming the Base
-
Roll and Cut:
Begin by rolling out your speckled clay to an even thickness of about 1/4 inch. Place your circle template or bowl onto the slab and cut around it using a needle tool to create the base of your tray. -
Create the Walls:
Roll out a long strip or ‘snake’ of clay, approximately 3/4 inch thick. Flatten it slightly into a rectangular strip that is long enough to wrap around the circumference of your base circle. -
Attach the Walls:
Score the outer edge of your base circle and the bottom edge of your clay strip. Apply a little slip (liquid clay) to the scored areas and wrap the strip around the base, pressing firmly to join them. -
Smooth the Seams:
Using your thumb or a wooden modeling tool, blend the clay from the wall down onto the base on both the inside and outside seams. I like to use a damp sponge afterward to smooth everything out and erase any tool marks. -
Shape the Rim:
Gently pinch the rim with your fingers to round it off. Ensure the wall height is consistent all the way around, trimming slightly with a needle tool if necessary.
Fixing Wobbly Walls
If your walls keep slumping inward, stuff the inside of the tray with crumpled newspaper or plastic wrap to support the shape while it dries to the leather-hard stage.
Step 2: Adding Details
-
Carve the Notches:
Identify three equidistant points on the rim. Using a loop tool or simply your thumb, press down or carve out U-shaped notches deep enough to hold a cigarette securely. -
Sculpt the Interior Cigarette:
For the clever 3D detail inside, roll a tiny cylinder of clay about the size of a cigarette butt. Score and slip it onto the bottom center of the tray, angling it as if it’s resting in the cat’s mouth area. -
Smooth the Inner Element:
Blend the bottom edge of the clay ‘cigarette’ into the floor of the tray so it stays permanently attached. Smooth the top end flat. -
Refine the Surface:
Once the clay is leather-hard, use a rib tool to burnish the outside and inside surfaces. This compresses the clay and gives it that professional, sleek finish seen in the photo.
Add Little Ears
Before firing, attach two small triangles of clay to the rim to serve as standing 3D ears, positioning them to align with the painted face on the exterior wall.
Step 3: Painting and Finishing
-
Draft the Faces:
Lightly sketch the face designs with a pencil directly onto the dry clay. Draw sleep-closed eyes on the inside floor and wide-open eyes on the exterior wall. -
Paint the Whiskers and Eyes:
Using a very fine liner brush and black underglaze, paint the thin whiskers, the eyes, and the mouth lines. Keep your hand steady and apply light pressure for thin, crisp lines. -
Add Pink Accents:
Fill in the nose triangle and add small blush spots or ear details (on the exterior) using pink underglaze. Don’t forget to paint the tip of the interior sculpted cigarette yellow or orange to mimic the filter. -
Initial Firing (Bisque):
For ceramic clay, fire the piece to bisque temperature (usually Cone 04) to set the shape and underglaze. -
Glazing:
Dip or brush the entire piece in a clear glossy glaze. This will make the speckled clay body pop and ensure the tray is easy to clean. -
Final Firing:
Fire the piece again to the maturity temperature of your clay body (likely Cone 5 or 6 for stoneware). If using polymer clay, bake according to package instructions and seal with varnish instead.
Now you have a quirky, handcrafted piece that adds character to your space and sparks conversation


What Really Happens Inside the Kiln
Learn how time and temperature work together inside the kiln to transform clay into durable ceramic.
Frog Mouth Ash Tray
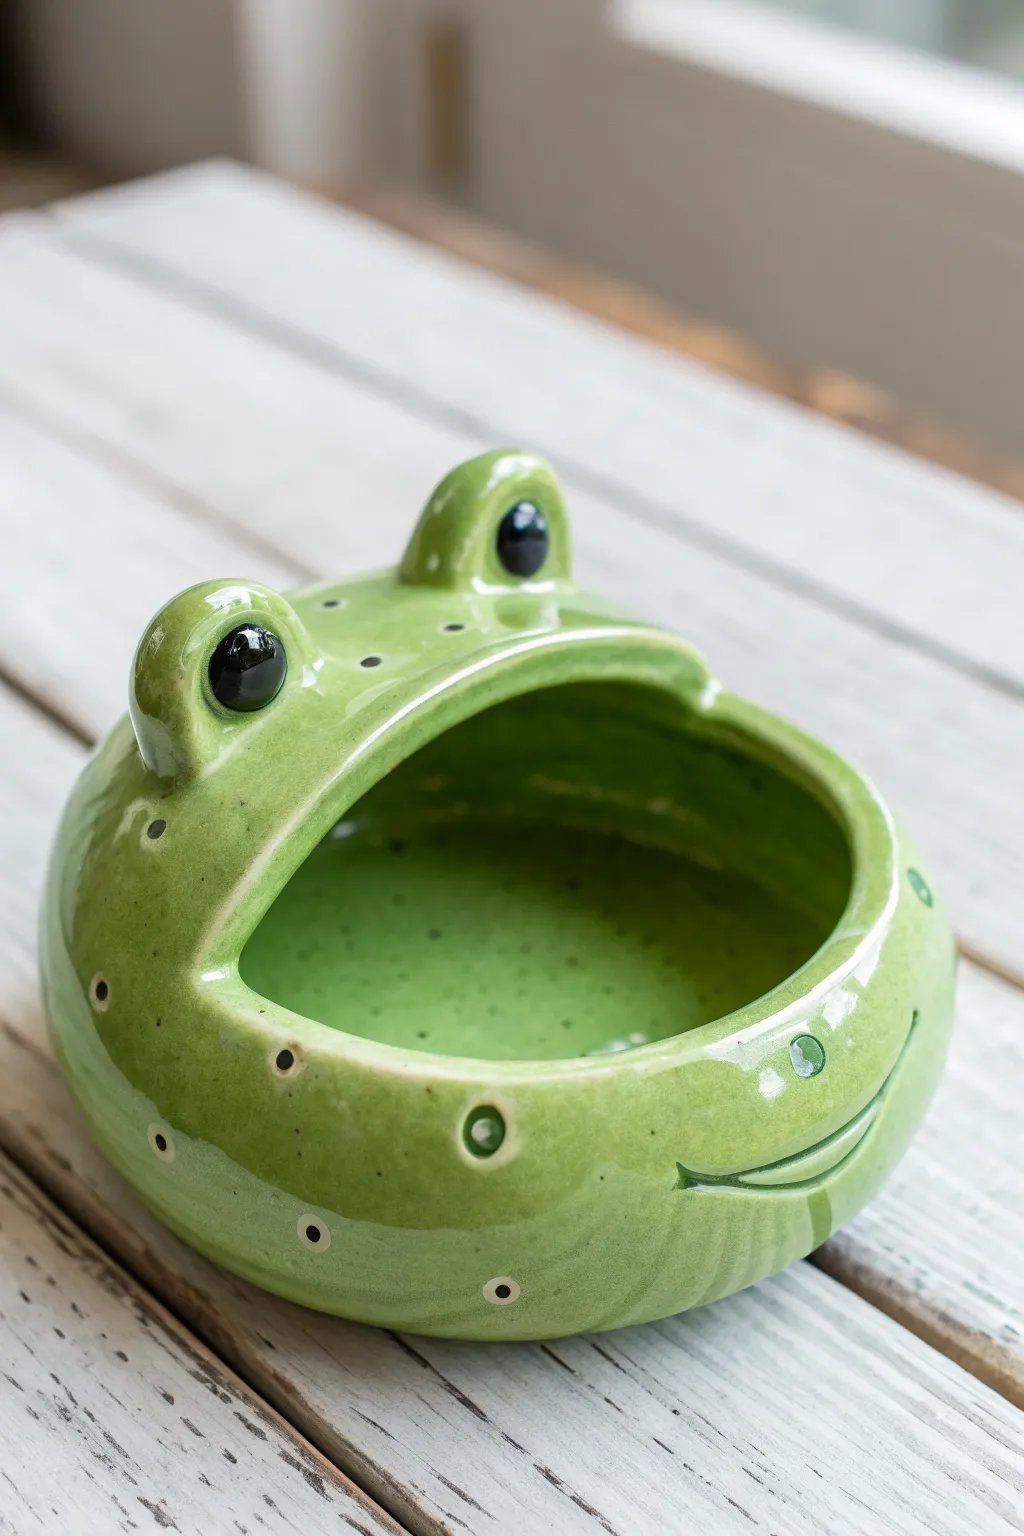
Hop into pottery with this charming frog-shaped ashtray featuring a wide, open mouth design perfect for catching ash or holding trinkets. Its glossy green finish and expressive eyes make it a functional conversation piece that adds a touch of whimsy to any table.
Step-by-Step Tutorial
Materials
- Low-fire white earthenware clay
- Pottery wheel (optional, can be hand-built)
- Rib tool
- Needle tool
- Sponge
- Scoring tool
- Slip
- Underglaze (Lime Green, Dark Green, Black, White)
- Clear glossy glaze
- Small paintbrush
- Medium paintbrush
- Kiln
Step 1: Forming the Base
-
Create a sphere:
Start with a ball of clay roughly the size of a large grapefruit. You can either throw a closed form on the wheel or use the pinch pot method to create a hollow sphere by joining two pinch pots together. -
Smooth the exterior:
Using a rib tool, smooth out the exterior of your sphere until it represents a perfect round shape. Ensure the walls are even in thickness. -
Flatten the bottom:
Gently tap the sphere on your work surface to create a flat, stable base so the frog won’t roll away. -
Cut the mouth opening:
Visualize where the frog’s mouth should be. Using a needle tool, slice a wide, crescent-shaped wedge out of the upper-front section of the sphere. This creates the large, open mouth cavity. -
Refine the lip:
Smooth the cut edges of the mouth opening with a damp sponge. You want a rounded, soft edge rather than a sharp slice.
Cracking at the Attachments?
If cracks appear around the eyes as they dry, your clay might be too dry. Lightly spritz with water, score deeper, and use more slip. Compress the seam firmly with a wooden tool.
Step 2: Adding Features
-
Shape the eyes:
Roll two small balls of clay for the eyes. Gently press them into slightly oval shapes to give the frog a distinct expression. -
Attach the eyes:
Score the top of the head behind the mouth opening and the bottom of your eye pieces. Apply a dab of slip and press the eyes firmly into place. -
Blend the seams:
Use a modeling tool or your finger to smooth the clay where the eyes meet the head, ensuring a seamless transition so they don’t pop off during firing. -
Define the smile:
Using the needle tool, carve shallow lines extending from the corners of the open mouth to create smile creases, enhancing the frog’s friendly look.
Pro Tip: Weighted Base
Make the bottom of the pinch pot slightly thicker than the top walls. This added weight at the base prevents the frog from tipping over easily when used.
Step 3: Glazing and Finishing
-
Bisque fire:
Let the piece dry completely to bone dry, then bisque fire it in the kiln according to your clay’s specifications. -
Apply base color:
Brush three coats of Lime Green underglaze over the entire exterior and interior of the frog. Let each coat dry before applying the next. -
Paint the eyes:
Carefully paint the distinct eye bumps. Use white for the sclera if desired, or skip straight to painting a large black pupil directly onto the green for a cartoony look. Add a tiny white dot for a highlight. -
Add texture spots:
I prefer using the back end of a paintbrush for this part. Dip the handle tip into Dark Green or Black underglaze and dot it randomly around the body to create the spotted texture. -
Apply clear glaze:
Once the underglaze design is completely dry, apply a coat of clear glossy glaze over the entire piece (excluding the bottom footprint) to make it shiny and easy to clean. -
Glaze fire:
Fire the piece again to the temperature required for your clear glaze to seal the surface.
Place your little green friend on the patio table and enjoy the customized charm
Bear Head Ash Tray Bowl

This whimsical ceramic ashtray features a charming bear head sculpture resting on the rim, doubling as a clever cigarette rest. Finished with a warm, speckled amber glaze, it brings a cozy, rustic feel to your coffee table.
Detailed Instructions
Materials
- Stoneware clay (speckled or buff)
- Pottery wheel (optional, can be hand-built)
- Needle tool
- Sponge
- Loop trimming tool
- Scoring rib or serrated rib
- Slip (clay and water mixture)
- Hole cutter or small circular tubing
- Black underglaze
- Clear or Amber high-gloss glaze
- Kiln
Step 1: Forming the Base
-
Throw or Build the Bowl:
Start by throwing a simple, straight-walled cylinder on the wheel using about 1 lb of clay. Aim for a wide, low profile—approximately 4-5 inches wide and 2 inches tall. If hand-building, create a long rectangular slab, join the ends to form a ring, and attach it to a circular base slab. -
Refine the Rim:
Wait until the clay is leather hard. Trim the bottom to create a foot ring if desired, and smooth out the rim with a damp sponge to reshape any sharp edges. -
Punch Ventilation Holes:
Using a small hole cutter or a piece of metal tubing, carefully punch three to four small circular holes evenly spaced along one side of the bowl’s wall. Smooth the edges of these holes with a damp finger so they aren’t sharp.
Step 2: Sculpting the Bear
-
Shape the Head:
Roll a ball of clay roughly the size of a golf ball or slightly larger. Gently pinch one side to create a snoot shape, forming the bear’s muzzle. -
Attach the Head:
Score the area on the rim opposite the ventilation holes, and score the underside of your bear head. Apply slip generously and press the head firmly onto the rim, blending the clay downwards on the outside and inside of the bowl to secure it. -
Create the Mouth:
This is crucial for function. Use a modeling tool or your thumb to press deeply into the muzzle, creating a wide, open mouth cavity. This opening will serve as the actual rest for the cigarette, so ensure the angle allows it to sit securely without rolling out. -
Add Ears:
Roll two small pea-sized balls of clay. flattened them slightly and attach them to the top of the head using the score-and-slip method. Use a small rounded tool to indent the center of each ear. -
Refine Facial Features:
Add a tiny, flattened triangle of clay for the nose tip. Smooth out all attachment seams with a slightly damp sponge so the bear looks like it’s emerging organically from the bowl. -
Add Eyes:
Use a needle tool or a small stylus to make shallow divots where the eyes will go. You don’t adding clay balls here; we will use underglaze later to define them.
Hollow it Out
If your bear head is thicker than 1 inch, hollow it out from underneath (before attaching) or poke a hidden vent hole with a needle tool to prevent explosions in the kiln.
Step 3: Glazing and Firing
-
Bisque Fire:
Allow the piece to dry completely slowly to prevent cracking, especially where the thick bear head meets the rim. Once bone dry, bisque fire the piece to Cone 04 (or your clay body’s recommendation). -
Detail the Face:
After the bisque firing, use a fine brush to apply black underglaze to the nose tip and make two small dots for the eyes. Let this dry fully. -
Apply Glaze:
Dip the entire piece into a transparent amber or honey-colored glaze. This type of glaze breaks beautifully over texture, making the bear’s features pop while showing the clay body underneath. -
Clean the Foot:
Wipe the bottom of the foot ring completely clean with a sponge to prevent it from sticking to the kiln shelf. -
Final Fire:
Glaze fire the piece to the temperature required by your chosen glaze and clay (typically Cone 5 or 6 for stoneware). Let the kiln cool completely before unloading to avoid thermal shock.
Cracks at the Neck
The bear head dries slower than the thin bowl wall. Wrap the joined area tightly with plastic for a day to equalize moisture and prevent separation cracks.
The result is a functional piece of art that looks adorable even when not in use

TRACK YOUR CERAMIC JOURNEY
Capture glaze tests, firing details, and creative progress—all in one simple printable. Make your projects easier to repeat and improve.
Surreal Face Ash Tray
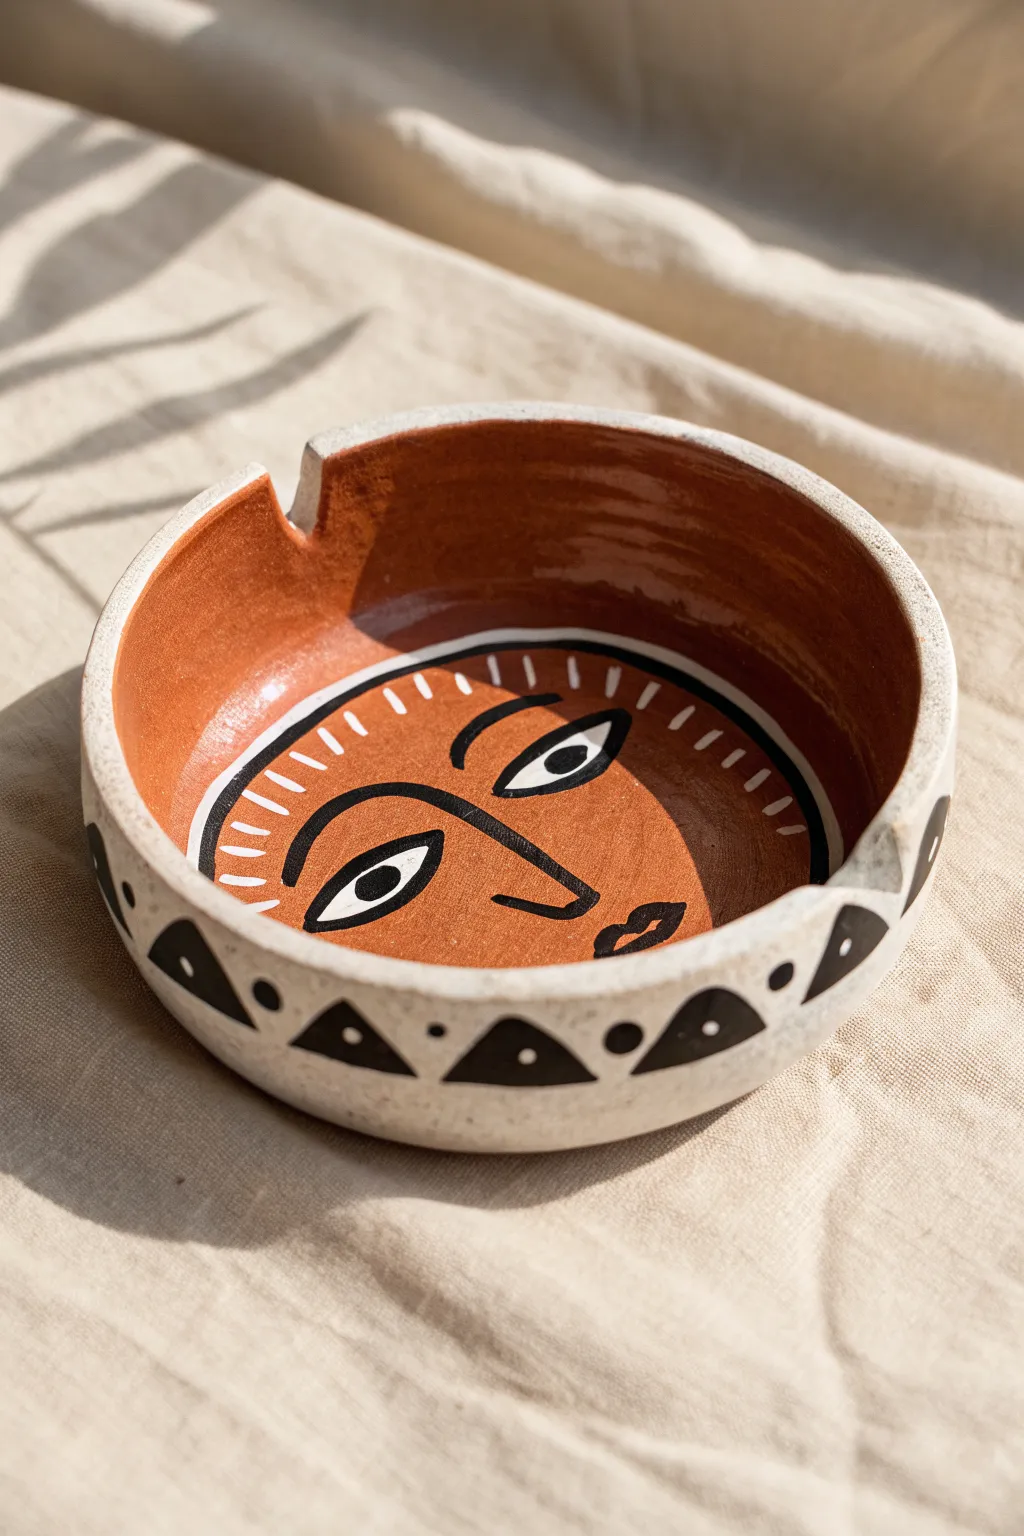
Bring a touch of modern bohemian art to your table with this striking hand-painted clay ashtray. Featuring a stylized, dreamy face against a warm terracotta backdrop and a playful geometric rim, this piece is as functional as it is beautiful.
Step-by-Step Guide
Materials
- Air-dry clay or kiln-fire clay (white or light grey)
- Clay rolling pin
- Fettling knife or craft knife
- Sponge and small bowl of water
- Terracotta colored acrylic paint (or underglaze if kiln firing)
- Black acrylic paint (or underglaze)
- White acrylic paint (or underglaze)
- Fine detail paintbrush (0 or 00 size)
- Medium flat paintbrush
- Gloss varnish or clear glaze
- Sandpaper (fine grit)
Step 1: Shaping the Base
-
Roll the slab:
Begin by rolling out a ball of clay into an even slab, aiming for a thickness of about 1/4 inch. Ensure the surface is smooth and free of air bubbles by compressing it gently with a rib tool or old credit card. -
Cut the circle:
Place a circular template (like a small bowl or lid, approx. 4-5 inches wide) onto the clay and cut around it with your knife to create the base. Smooth the cut edge with a damp finger. -
Form the walls:
Roll a long coil of clay, slightly thicker than a pencil. Score and slip the outer edge of your base circle, then attach the coil on top to form the wall. Repeat with a second coil if you want more height, blending the coils seamlessly into the base and each other using your thumb or a modeling tool. -
Smooth the surfaces:
I like to use a slightly damp sponge here to refine the walls, ensuring they are vertical and even. The rim should be flat and about 1/4 inch thick to accommodate the pattern later. -
Carve the notch:
While the clay is still leather-hard, use your fettling knife or a specialized cutting tool to carve a U-shaped or V-shaped notch on one side of the rim. Smooth the edges of the cut with a little water so they aren’t sharp. -
Dry and sand:
Allow the piece to dry completely (24-48 hours for air-dry clay). Once bone dry, use fine-grit sandpaper to remove any bumps or rough textures, wiping away the dust with a barely damp cloth afterwards.
Smooth Surface Secret
Before painting, wipe your dried clay with a damp sponge. This removes invisible dust that causes bumpy paint and helps your brush glide smoothly for those fine contour lines.
Step 2: Painting the Design
-
Base coat the interior:
Mix your terracotta paint to get a warm, earthy red-orange. Apply two even coats to the entire interior of the bowl, letting the first coat dry completely before adding the second for solid opacity. -
Paint the exterior:
Paint the outside wall and the top rim in a creamy white color. Avoid getting white on the interior terracotta; if you do, touch it up once dry. -
Outline the face shape:
Using your finest brush and black paint, carefully draw a large U-shape or circle outline in the center of the terracotta base. This will frame the face. -
Add the sun rays:
Paint short, white dashes radiating inward from the black outline you just painted. Space them evenly to create a ‘halo’ effect around the face area. -
Draw the features:
Switch back to the fine black brush. Paint a long, continuous line for the nose that connects to one eyebrow. Add the second eyebrow separately, then paint two almond shapes for the eyes and a small, stylized lip shape. -
Fill the eyes:
Carefully fill the almond eye shapes with white paint. Let this dry fully before adding the black pupils—make them look towards the side for that surrealist expression. -
Decorate the rim:
On the white exterior rim, paint a repeating pattern of black triangles pointing upwards. In the white space between each triangle, add a single black dot.
Step 3: Sealing and Finishing
-
Apply varnish:
Once all paint is completely dry, apply a coat of gloss varnish to the interior. This mimics the look of glazed ceramic and protects the painting from ash. I usually do two thin coats for extra durability. -
Seal the exterior:
You can use a matte varnish for the exterior to keep that natural clay texture, or continue with the gloss if you prefer a uniform shine. Let it cure for the time recommended on your varnish bottle before use.
Level Up: Sgraffito Style
Instead of painting the white rays, paint the whole interior white first, then layer terracotta on top. While wet, scratch through the red to reveal the white rays underneath.
Now you have a stunning conversation piece ready to display on your coffee table or gift to a friend
Mystic Eye Symbol Ash Tray
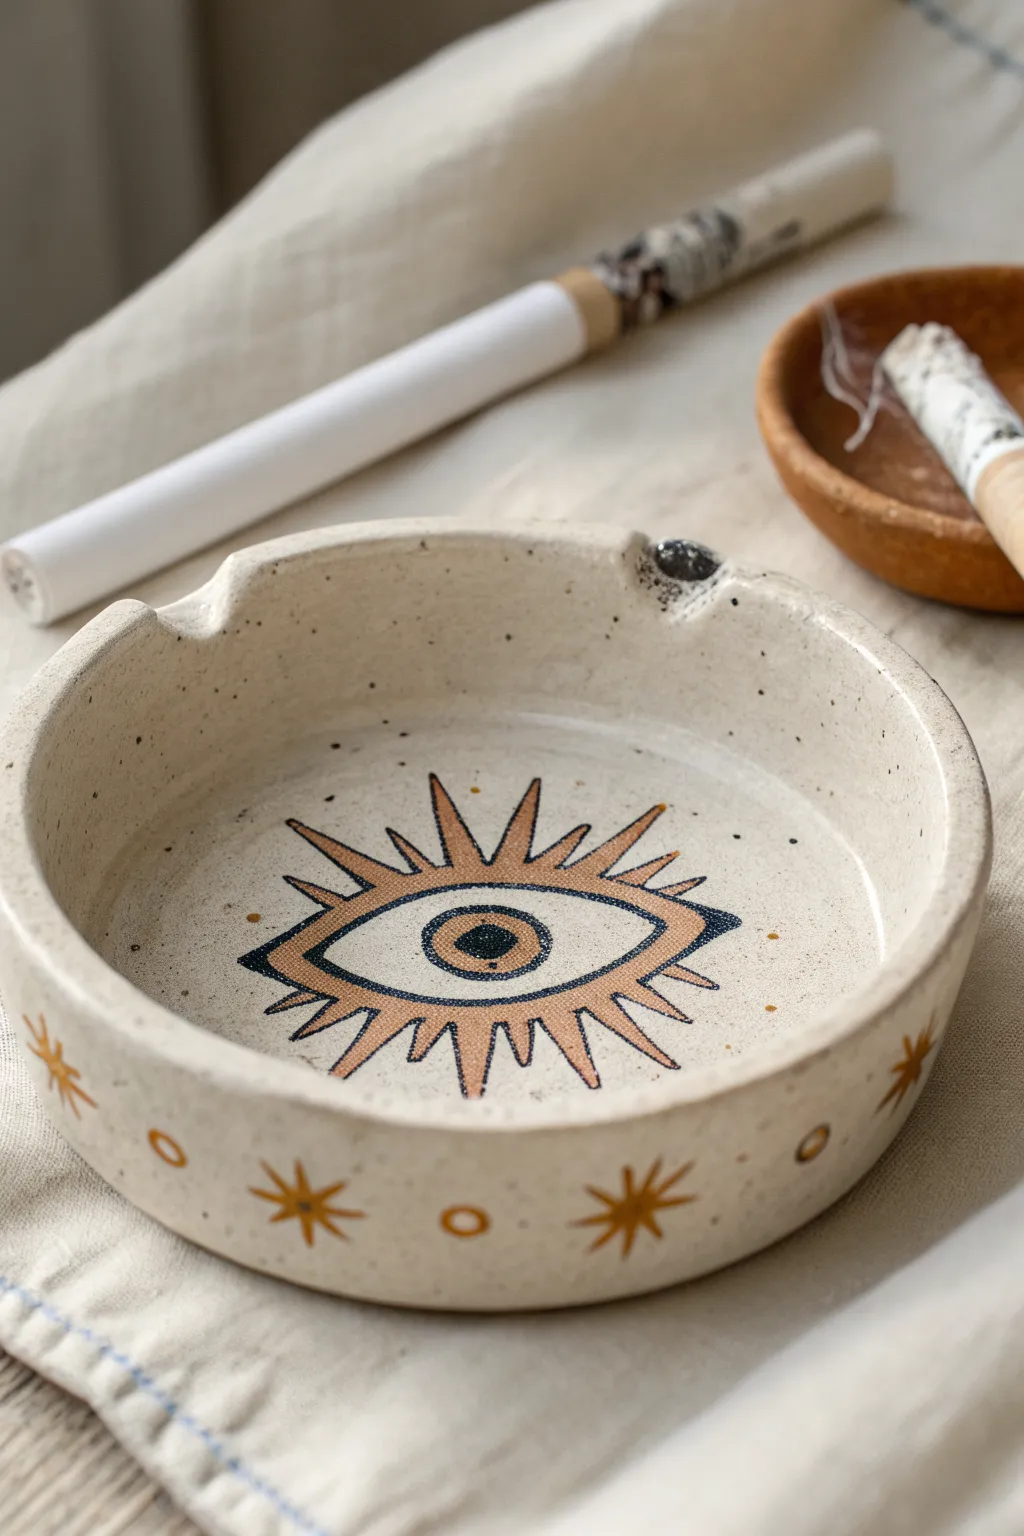
Channel a bit of cosmic energy into your home decor with this celestial-inspired clay ashtray. Featuring a stylized eye motif and sunburst details, this speckled stoneware piece balances rustic charm with mystic symbolism.
Step-by-Step
Materials
- Speckled stoneware clay (approx. 1-1.5 lbs)
- Rolling pin
- Circle template or bowl (approx. 5-6 inches diameter)
- Needle tool or fettling knife
- Sponge
- Small loop tool (for carving notches)
- Black underglaze
- Mustard yellow or gold underglaze
- Fine detail paintbrush (0 or 00 size)
- Clear glossy glaze
- Kiln (or access to firing services)
Step 1: Forming the Base
-
Preparation:
Begin by wedging your speckled stoneware clay thoroughly to remove air bubbles. This step is crucial for preventing cracks during firing. -
Rolling the slab:
Roll out a slab of clay to an even thickness of about 1/4 inch. Use guide sticks if you have them to ensure the thickness is consistent across the entire piece. -
Cutting the circle:
Place your circle template or an upturned bowl onto the slab. Using your needle tool, cut cleanly around the edge to create the base of your ashtray. -
Smoothing the base:
Take a moment to smooth the surface of your circle with a damp sponge or a flexible rib to remove any canvas texture from the rolling process.
Clean Lines Pro-Tip
If your hand shakes while painting thin lines, rest your pinky finger on the dried clay surface to stabilize your brush strokes as you work.
Step 2: Building the Walls
-
Creating the coil:
Roll a long, even coil of clay, roughly the thickness of your thumb. Ensure it’s long enough to wrap around the entire circumference of your base. -
Scoring and slipping:
Score the outer edge of your circular base and one side of the coil using a serrated rib or needle tool. Apply slip generously to both scored areas. -
Attaching the wall:
Place the coil onto the base edge. Press it down firmly to secure it. I like to overlap the ends slightly, cut through both at an angle, and join them for a seamless look. -
Blending the seams:
Use your thumb or a wooden modeling tool to blend the clay from the coil down onto the base on the inside. Repeat this on the outside, blending the clay up from the base into the coil until the seam disappears. -
Refining the height:
Once blended, use a flat rib to smooth and straighten the walls. If the rim is uneven, you can trim it level with a needle tool while rotating the piece on a banding wheel. -
Adding rests:
Using a small loop tool or just your finger, gently press or carve out 2-3 notches on the rim for the cigarettes to rest. Smooth the edges of these indentations carefully so they aren’t sharp.
Step 3: Painting the Eye
-
Initial drying:
Let the piece dry to a leather-hard state. It should be firm enough to handle without deforming but still cool to the touch. -
Sketching the design:
Lightly sketch the large eye design in the center and the starbursts on the outer wall using a pencil. The pencil lead will burn off in the kiln, leaving no trace. -
Painting the outlines:
Dip a fine detail brush into black underglaze. Carefully paint the outline of the central eye, the pupil, and the surrounding sun rays. Keep your hand steady and reload your brush often for crisp lines. -
Filling the iris:
Paint a ring around the black pupil using the mustard yellow or gold underglaze. You may need two coats for opaque coverage. -
Adding the sun rays:
Using the mustard underglaze again, fill in every other ray of the sunburst design surrounding the eye to create an alternating pattern. -
Outer details:
Move to the outside wall of the ashtray. Paint small eight-pointed stars and open circle motifs using the mustard underglaze, spacing them evenly around the perimeter. -
Bisque firing:
Allow the ashtray to dry completely until it’s bone dry. Fire it to cone 04 (or your clay’s specific bisque temperature).
Gilded Level Up
After the final glaze firing, apply a gold luster overglaze to the sun rays and star motifs, then fire a third time at a lower temp for real metallic shine.
Step 4: Glazing and Finishing
-
Wax resist (optional):
If you want the raw clay texture on the bottom, apply wax resist to the foot of the ashtray. -
Applying clear glaze:
Dip the entire piece into a clear glossy glaze. Alternatively, you can brush on a commercial clear glaze. Ensure the coat is even so it doesn’t cloud the underglaze design. -
Final wipe:
Use a damp sponge to wipe any glaze off the bottom foot of the ashtray to prevent it from sticking to the kiln shelf. -
Glaze firing:
Fire the piece again to the maturity temperature of your clay and glaze (typically cone 5 or 6 for stoneware).
Now you have a stunning, handmade piece ready to serve as a conversation starter on your coffee table
Yin-Yang Mini Ash Tray
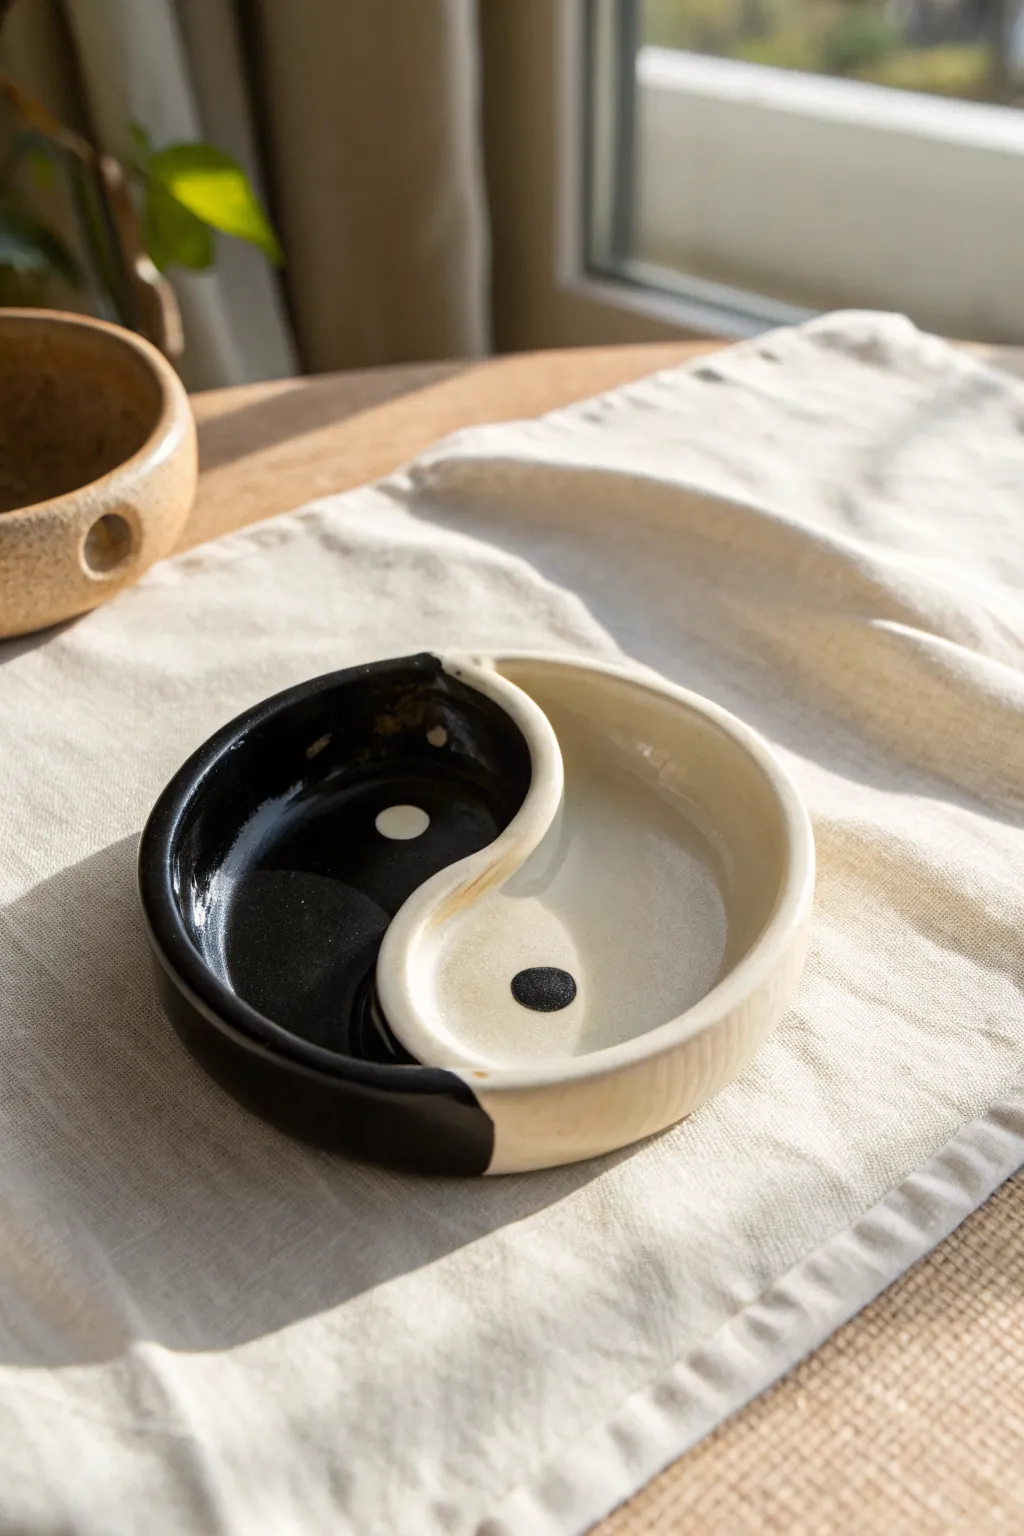
Create a stunningly simple yet symbolic piece for your home with this ceramic Yin-Yang ashtray. The contrasting black and white glaze, coupled with the smooth S-curve design, makes for a functional art piece that brings a sense of balance to any table setting.
Step-by-Step Tutorial
Materials
- Air-dry clay or kiln-fire clay (white works best)
- Circle cutter or a round bowl to trace (approx. 4-5 inches diameter)
- Clay carving tool or butter knife
- Pottery sponge
- Small cup of water
- Rolling pin
- Sandpaper (fine grit)
- Acrylic paints (black and white) or ceramic glazes if firing
- High-gloss varnish or clear glaze
- Paintbrushes (medium flat brush and small detail brush)
Step 1: Shaping the Base
-
Prepare the Clay:
Start by taking a handful of clay and kneading it briefly to warm it up. Roll it out into a smooth slap on a flat surface until it is roughly 1/4 inch thick. Aim for an even thickness throughout to prevent cracking. -
Cut the Circle:
Place your circle cutter or a round bowl onto the clay slab. Press down firmly or trace around the bowl with a knife to cut out a perfect circle. -
Build the Rim:
Roll a separate snake of clay (a coil) that is long enough to go around the circumference of your circle. Score the top edge of your base and the underside of the coil, apply a little water or slip, and attach the coil to create the raised wall. -
Smooth the Connection:
Using your thumb or a modeling tool, blend the coil downward into the base on both the inside and outside so no seam is visible. This integrates the wall fully.
Uneven Divider?
If your center ‘S’ wall looks lumpy, use a damp flat brush to ‘paint’ water along the sides of the clay wall. This smooths irregularities better than fingers.
Step 2: Sculpting the Design
-
Draw the S-Curve:
Lightly sketch a large ‘S’ curve across the center of the dish using a needle tool or toothpick. This line should divide the circle into the two teardrop shapes of the Yin-Yang. -
Form the Divider:
Roll a smaller, thinner coil of clay. Following your sketched ‘S’ line, attach this coil to the center of the dish, blending it smoothly into the bottom and the side walls. This divider needs to be the same height as the outer rim. -
Create Cigarette Rests:
If using this as a traditional ashtray, use a the handle of a paintbrush or your finger to gently press two concave notches into the outer rim—one on the black side, one on the white side. -
The Smooth Finish:
Dip your pottery sponge in a little water and wipe down the entire piece. Focus on rounding the top edges of the rim and the center divider to remove any sharpness or fingerprints. -
The Drying Phase:
Set the piece aside in a safe, dry spot. Let it air dry completely for 24-48 hours. I find flipping it over halfway through helps the bottom dry evenly.
Step 3: Painting and Glazing
-
Sanding:
Once fully dry (bone dry), lightly sand any rough spots or uneven edges with fine-grit sandpaper. Wipe away the dust with a barely damp cloth. -
Base White Coat:
Paint the entire ‘Yang’ side (the white section) with white acrylic paint. You may need two coats for opaque coverage. -
The Black Coat:
Carefully paint the ‘Yin’ side with black paint. Use a steady hand near the center S-curve divider to keep the line crisp and clean. -
Adding the Dots:
Using the back end of a paintbrush, dip it in paint to create the opposing dots. Place a distinct black dot in the center of the white teardrop’s widest part. -
The Second Dot:
Clean the brush handle, dip it in white paint, and place a white dot in the center of the black teardrop’s widest part. -
Varnishing:
Allow the paint to dry completely. Apply a coat of high-gloss varnish or sealer over the entire piece. This gives it that ceramic-glaze look and protects the paint from ash or heat. -
Final Cure:
Let the varnish cure according to the bottle’s instructions before using your new dish.
Level Up: Texture
Before the clay dries, gently press a piece of lace or a textured fabric into just the white section for a tactile contrast against the smooth black side.
Now you have a perfectly balanced centerpiece ready for use or display.
Fruit Slice Ash Tray
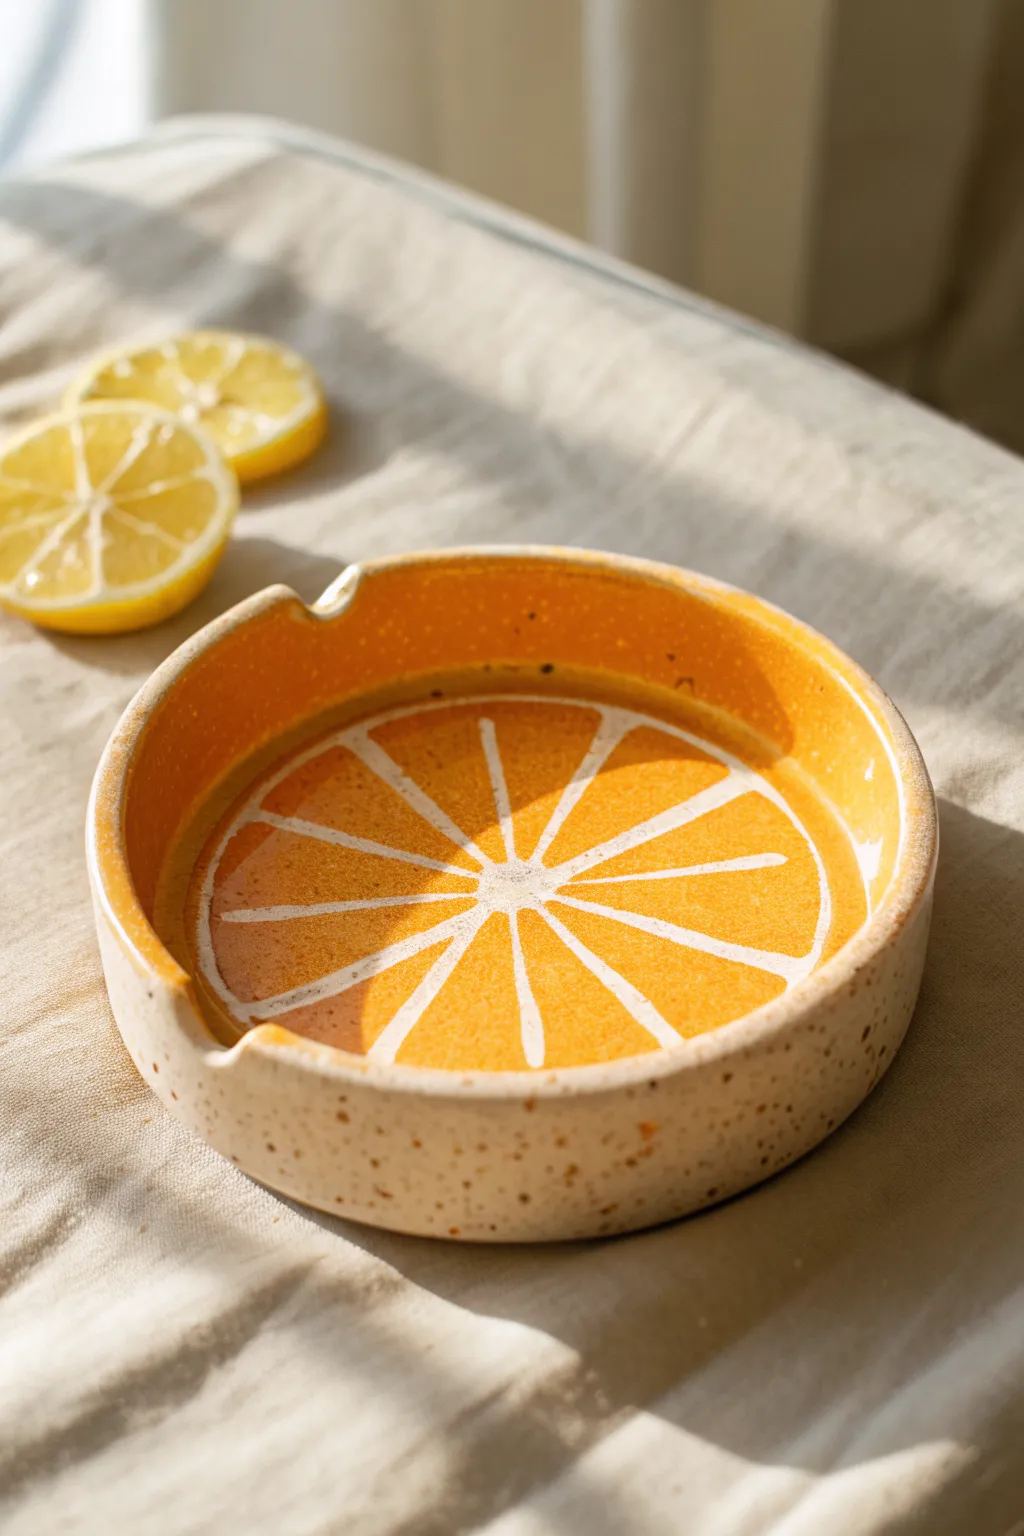
Bring a splash of summer to your coffee table with this delightful ceramic ashtray designed to look like a fresh slice of fruit. The speckled clay body contrasts beautifully with the juicy, glossy orange interior, complete with charming hand-painted citrus segments.
Detailed Instructions
Materials
- Speckled stoneware clay (mid-fire)
- Pottery wheel (or rolling pin and slab mold for hand building)
- Wooden throwing ribs
- Pin tool or needle tool
- Wire cutter
- Sponge
- Trim tool
- Small carving tool or rounded file
- Underglaze (bright orange and white)
- Clear glossy glaze
- Detail brushes
- Fan brush or wide soft brush
Step 1: Forming the Basin
-
Prepare the clay:
Begin by wedging about 1 to 1.5 pounds of speckled stoneware clay to remove any air bubbles. This clay body is crucial for achieving that natural, earthy texture on the exterior. -
Throw the base shape:
Center your clay on the wheel and open it up into a low, wide cylinder, similar to a pet bowl shape. You want the walls to be roughly 1.5 inches high. -
Define the rim:
Pull the walls up vertically, keeping them relatively thick—about a quarter-inch is ideal for durability. Use a wooden rib to smooth the exterior and create a straight, clean profile. -
Refine the interior floor:
Compress the floor of the pot with your rib to prevent cracking. I like to create a very slight curve at the bottom corner where the wall meets the floor to make cleaning easier later. -
Initial smoothing:
Use a damp sponge to smooth the rim, ensuring it is rounded and comfortable to the touch. Cut the piece from the bat with a wire tool.
Step 2: Trimming and Carving
-
Leather hard stage:
Allow the piece to dry to a leather-hard state. It should be firm enough to handle without warping but still hold an impression from your fingernail. -
Trim the foot:
Place the piece upside down on the wheel, center it, and trim a clean, flat foot ring. Clean up any tool marks on the speckled exterior with a damp sponge. -
Carve the rests:
Flip the piece right-side up. Using a rounded file or a carving tool, gently carve two or three U-shaped notches into the rim. These will serve as the rests. -
Smooth the notches:
Use your finger and a tiny bit of water to compress and smooth the carved notches so there are no sharp edges. -
Bisque fire:
Let the piece dry completely to bone dry, then fire it in the kiln to bisque temperature (usually cone 04).
Fixing Wobbly Lines
If your white lines look shaky, wait for the underglaze to dry completely. Use a stiff, damp tools to gently scratch away the excess white, sharpening the orange edges again.
Step 3: Glazing the Citrus Design
-
Clean the bisque:
Wipe the bisque-fired piece with a damp sponge to remove any dust that might interfere with glaze adhesion. -
Apply base color:
Using a fan brush, apply 2-3 coats of bright orange underglaze to the *entire interior* of the tray. Extend this color up the inside walls to just below the rim. -
Sketch the segments:
Once the orange underglaze is dry to the touch, lightly sketch your citrus wheel design using a graphite pencil. Create a center circle and radiate lines outward. -
Paint the pith lines:
Dip a fine detail brush into white underglaze. Paint over your pencil lines, creating the radiating segments. Varying the thickness slightly gives it a more organic, fruit-like feel. -
Paint the rim line:
Paint a thin white line around the inner circumference of the floor to frame the segments, mimicking the pith between the fruit flesh and the rind. -
Clean the exterior:
Check the exterior speckled clay. If any glaze dripped onto the raw clay outside, sponge it off gently to keep that matte, natural look. -
Clear glaze:
Once the underglaze design is completely dry, dip the entire piece into a transparent clear glaze, or brush a clear gloss over the interior. -
Final firing:
Fire the piece to your clay body’s vitrification temperature (likely cone 5 or 6). This will activate the speckles and make the orange pop.
Try A Different Fruit
Switch up the palette for a full fruit basket set! Use yellow underglaze for lemons, pink for grapefruit, or lime green. Change the clay body to dark brown for a moody vibe.
Once cooled, your vibrant ceramic slice is ready to be used or displayed as a cheerful piece of decor
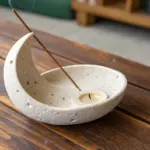
Mushroom Garden Ash Tray
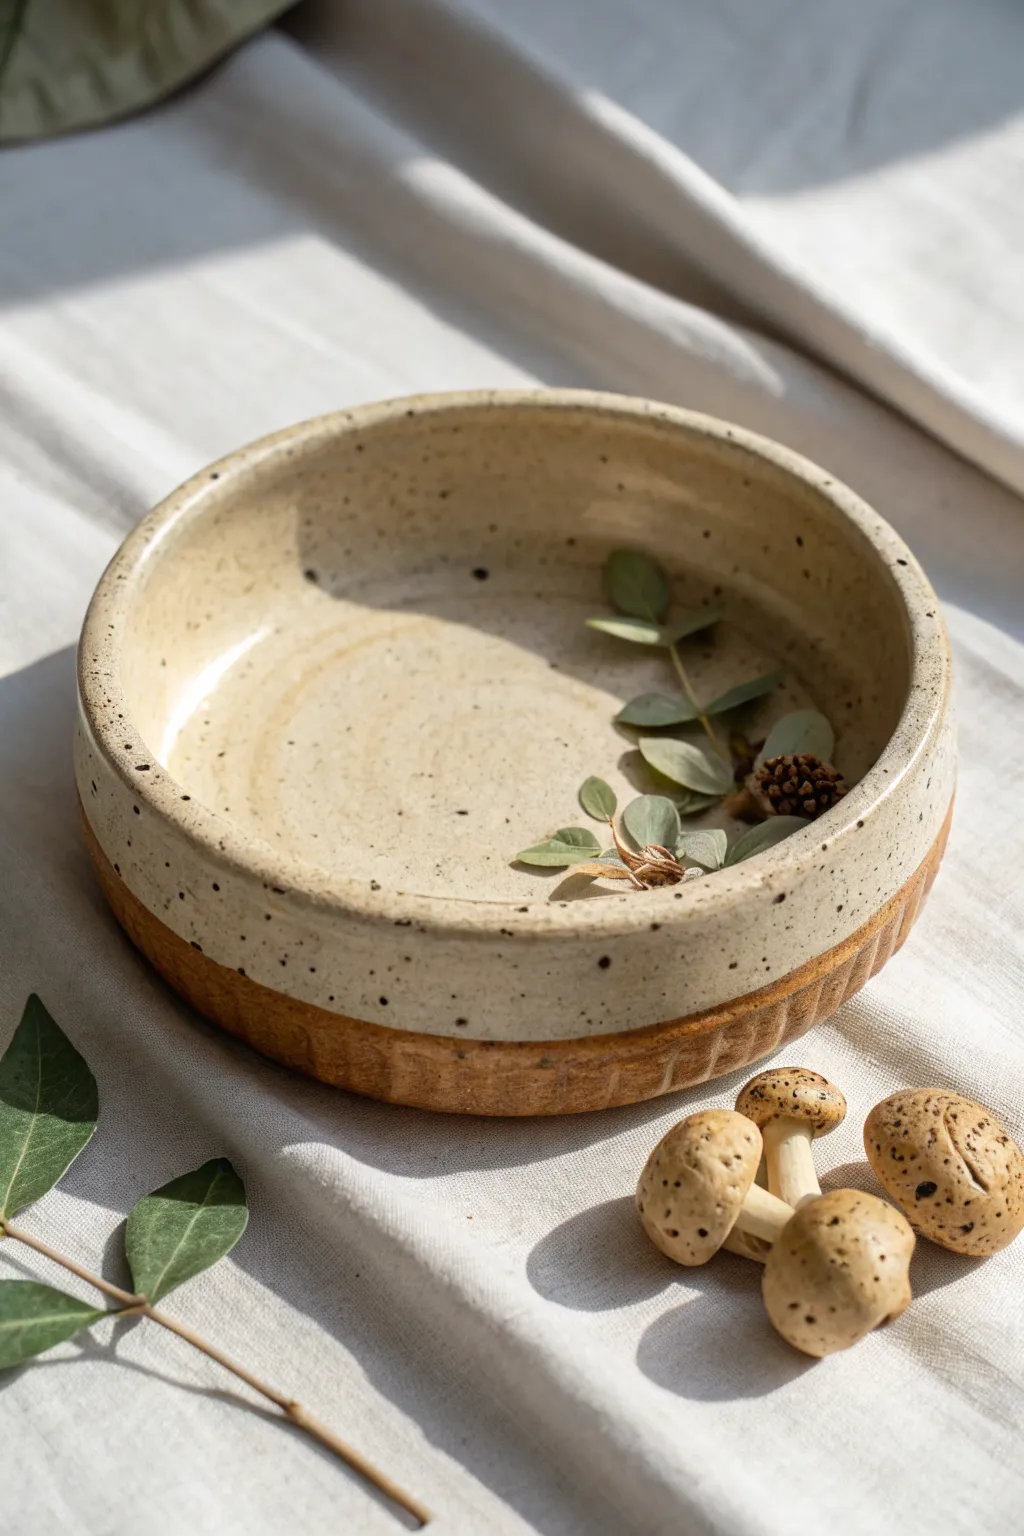
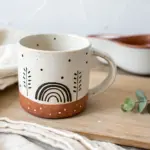
Capture the essence of a forest floor with this beautiful dual-textured ash tray. Combining a smooth spotted cream glaze with raw, grooved clay and adorable mushroom accents, this piece feels both rustic and modern.
Detailed Instructions
Materials
- Speckled stoneware clay (or buff clay with grog)
- Pottery wheel (or rolling pin for hand-building)
- Rib tool (wooden or silicone)
- Carving tool or loop tool (for texturing)
- Sponge
- Cream/Oatmeal speckled glaze (food safe recommended)
- Small paintbrush
- Needle tool
- Kiln access
Step 1: Forming the Base
-
Wedge the clay:
Start by wedging about 1-1.5 lbs of speckled stoneware clay to remove air bubbles and ensure even consistency. -
Throw or roll the form:
If using a wheel, center the clay and throw a shallow, wide cylinder with thick walls (about 1/4 inch). If hand-building, roll a slab and slump it over a mold, smoothing the edges perfectly. -
Define the rim:
Using a chamois or a wet sponge, gently compress the rim to make it rounded and smooth. This softness is key to the finished look. -
Dry to leather hard:
Allow the piece to dry until it reaches the leather-hard stage—firm enough to handle without deforming, but soft enough to carve.
Uneven Glaze Line?
If the glaze drips onto your textured raw clay area, wait for it to dry completely, then gently scrape it off with a craft knife before firing.
Step 2: Texture & Sculpting
-
Trim the foot:
Flip the bowl over. If wheel-thrown, trim the bottom to create a neat foot ring. If hand-built, smooth the bottom surface flat. -
Carve the exterior texture:
Using a loop tool or carving tool, create vertical grooves along the bottom inch of the exterior wall. Leave the clay raw and textured here; don’t smooth it out. -
Sculpt small mushrooms:
With small scraps of clay, roll tiny stems and caps. Join them by scoring and slipping. These can be attached to the rim or kept as separate decorative ‘stones’ like in the photo. -
Poke texture into mushrooms:
Use a needle tool or stiff brush to poke tiny holes into the mushroom caps to mimic natural textures. -
Bisque fire:
Let everything bone dry completely. Fire the ash tray and the mushrooms in the kiln to cone 04 (or your clay’s bisque temperature).
Sculpt More Nature
Instead of loose mushrooms, sculpt a small frog or distinct leaf shapes directly onto the rim before the first firing for an integrated forest theme.
Step 3: Glazing & Finishing
-
Clean the bisque:
Wipe the fired piece with a damp sponge to remove any dust that might resist the glaze. -
Wax resist the texture:
Apply wax resist carefully to the textured bottom section you carved earlier. This ensures the raw clay color remains visible after firing. -
Glaze the interior:
Pour your cream speckled glaze into the bowl, swirl it to coat the entire interior, and pour out the excess. -
Glaze the upper exterior:
Dip the top rim of the bowl into the glaze, stopping right where the textured carving begins. The wax should protect the bottom, but wipe away any drips instantly. -
Glaze the mushrooms:
Dip the mushroom stems in the cream glaze, but leave the caps unglazed or lightly sponge them with an iron oxide wash for a toasted look. -
Final Fire:
Fire the piece to cone 5/6 (or your clay’s maturity temperature). This will melt the glaze and reveal the beautiful speckles. -
Display:
Arrange the loose mushrooms near the tray or glue them inside for a permanent scene. Add dried eucalyptus for the photo finish.
Now you have a functional piece of art that brings a touch of organic warmth to any table