If you’ve ever looked at an avocado and thought, “Yep, that’s basically already a little clay character,” you’re in the right place. These avocado clay ideas are my go-to projects when I want something cute, giftable, and totally customizable—whether you’re into polymer clay minis or air dry clay decor.
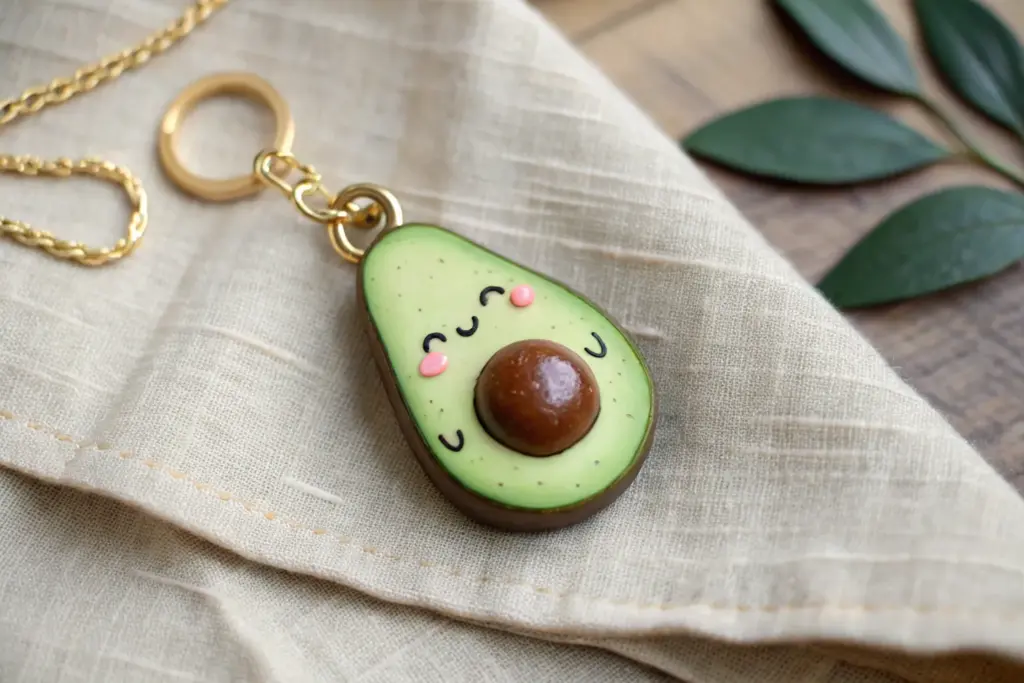
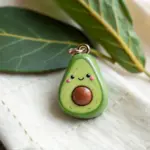
Classic Smiley Avocado Charm
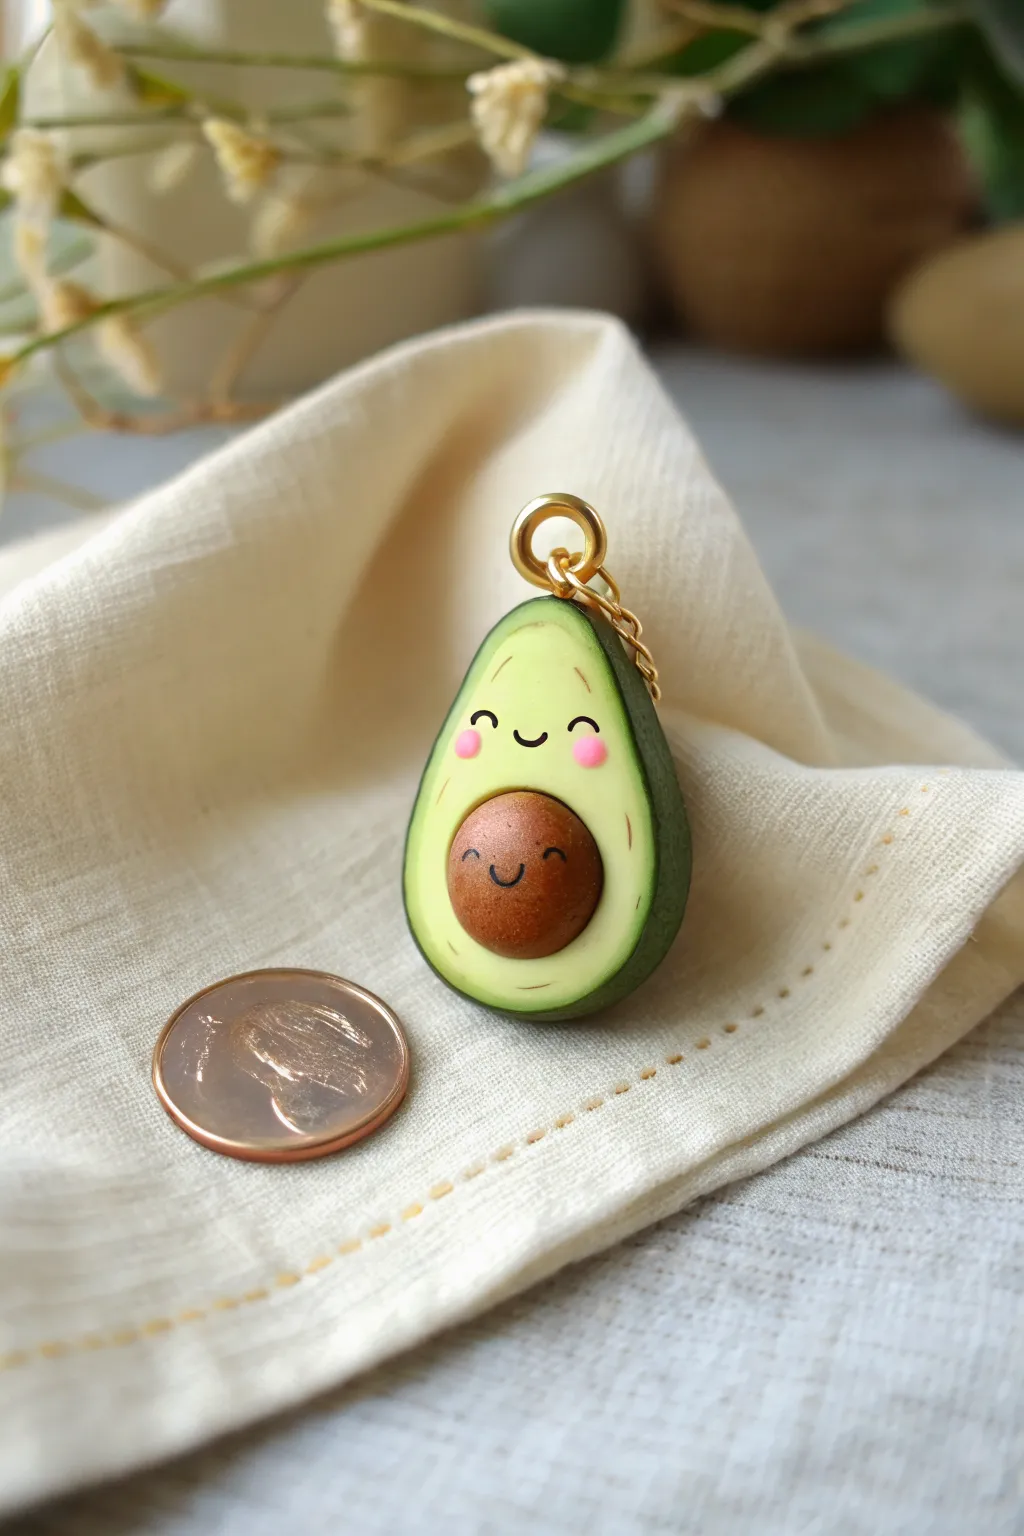
This adorable polymer clay avocado charm features a double dose of cuteness with a smiling pit nestled inside a smiling fruit. The smooth ombre shading of the green flesh and the carefully sculpted details make this a professional-looking piece perfect for jewelry or keychains.
Step-by-Step
Materials
- Polymer clay: Dark green, lime green, translucent white or pale yellow, and brown
- Acrylic paint or paint markers: Black and pink
- Gold eye screw eye pin
- Fine detail paintbrush or dotting tool
- Needle tool or toothpick
- Rolling pin or clay machine
- Craft blade or X-Acto knife
- Glaze or UV resin (optional for shine)
- Ball stylus tool
Step 1: Forming the Avocado Base
-
Mix the flesh color:
Start by mixing a small amount of lime green clay with translucent white or very pale yellow. You want a fresh, creamy avocado color, so keep adding white until it looks soft and pastel. -
Shape the body:
Roll your mixed light green clay into a smooth ball about the size of a grape. Then, gently pinch and roll one end to create a teardrop or pear shape, flattening it slightly so it isn’t perfectly round. -
Create the skin:
Condition a piece of dark forest green clay until it is soft. Roll this out into a thin, even sheet. It needs to be thin enough to look like skin but durable enough to handle. -
Wrap the avocado:
Place your light green teardrop onto the dark green sheet. Carefully wrap the dark green sheet around the back and sides of the teardrop, trimming away excess with your craft blade so the seams meet cleanly on the back or sides. -
Smooth the transition:
Using your fingers, gently rub the dark green clay where it meets the light green front face to create a seamless border. The dark skin should just barely rim the front edge, mimicking a real sliced avocado. -
Add texture (optional):
If you want a realistic Hass avocado texture, you can lightly tap the dark green exterior with a toothbrush or sandpaper, careful not to distort the shape.
Fingerprint Fiasco?
If you see fingerprints on the smooth light green clay, lightly brush it with a tiny amount of baby oil or cornstarch before baking to smooth them out completely.
Step 2: Sculpting the Pit & Details
-
Indent the seed hole:
Using a large ball tool or the rounded end of a paintbrush, press a circular indentation into the lower, wider part of the light green face. Make it deep enough to nestle the pit securely. -
Form the pit:
Roll a ball of brown clay. Test the size by placing it into the indentation you just made; it should stick out prominently, like a hemisphere. -
Secure the pit:
Once sized correctly, press the brown ball firmly into the socket. You can add a tiny dab of liquid clay or bake-and-bond if you want extra security. -
Insert hardware:
Take your gold screw eye pin. Careful to center it, screw it into the very top center of the avocado. I find twisting slightly back and forth helps it grip without cracking the raw clay.
BFF Keychains
Make a second avocado without the pit and create an indentation instead. Make the pit a separate charm that fits into the hole—perfect matching gifts for best friends.
Step 3: Adding Personality
-
Bake the piece:
Bake the charm according to your clay manufacturer’s instructions (usually 275°F/135°C for 15-30 minutes). Let it cool completely before painting. -
Paint the fruit face:
Using a fine detail brush or a very fine black paint pen, draw two small arched eyes on the upper light green area. Add a tiny U-shaped smile right between them. -
Paint the pit face:
Repeat the process on the brown pit. Give it its own tiny smiley face. Keeping the features close together makes it look cuter. -
Add rosy cheeks:
Dip a dotting tool or toothpick into pink paint. Dab two small dots onto the light green face, just below the eyes. -
Add cheek details:
Don’t forget the pit! Add two smaller pink dots to the brown seed’s cheeks for continuity. -
Draw subtle details:
For extra realism, you can dry brush a tiny bit of darker green/yellow pastel dust around the edges of the light green flesh before sealing, or paint tiny thin lines to mimic fibers. -
Seal the charm:
Once the paint is totally dry, coat the entire piece in a matte or satin polyurethane varnish to protect the paint. Avoid high gloss unless you want a wet look. -
Attach findings:
Add a jump ring to the eye screw so it’s ready to hang on a chain or keychain.
Now you have a charming little avocado friend ready to brighten up your day


Best-Friends Avocado Half Keychains
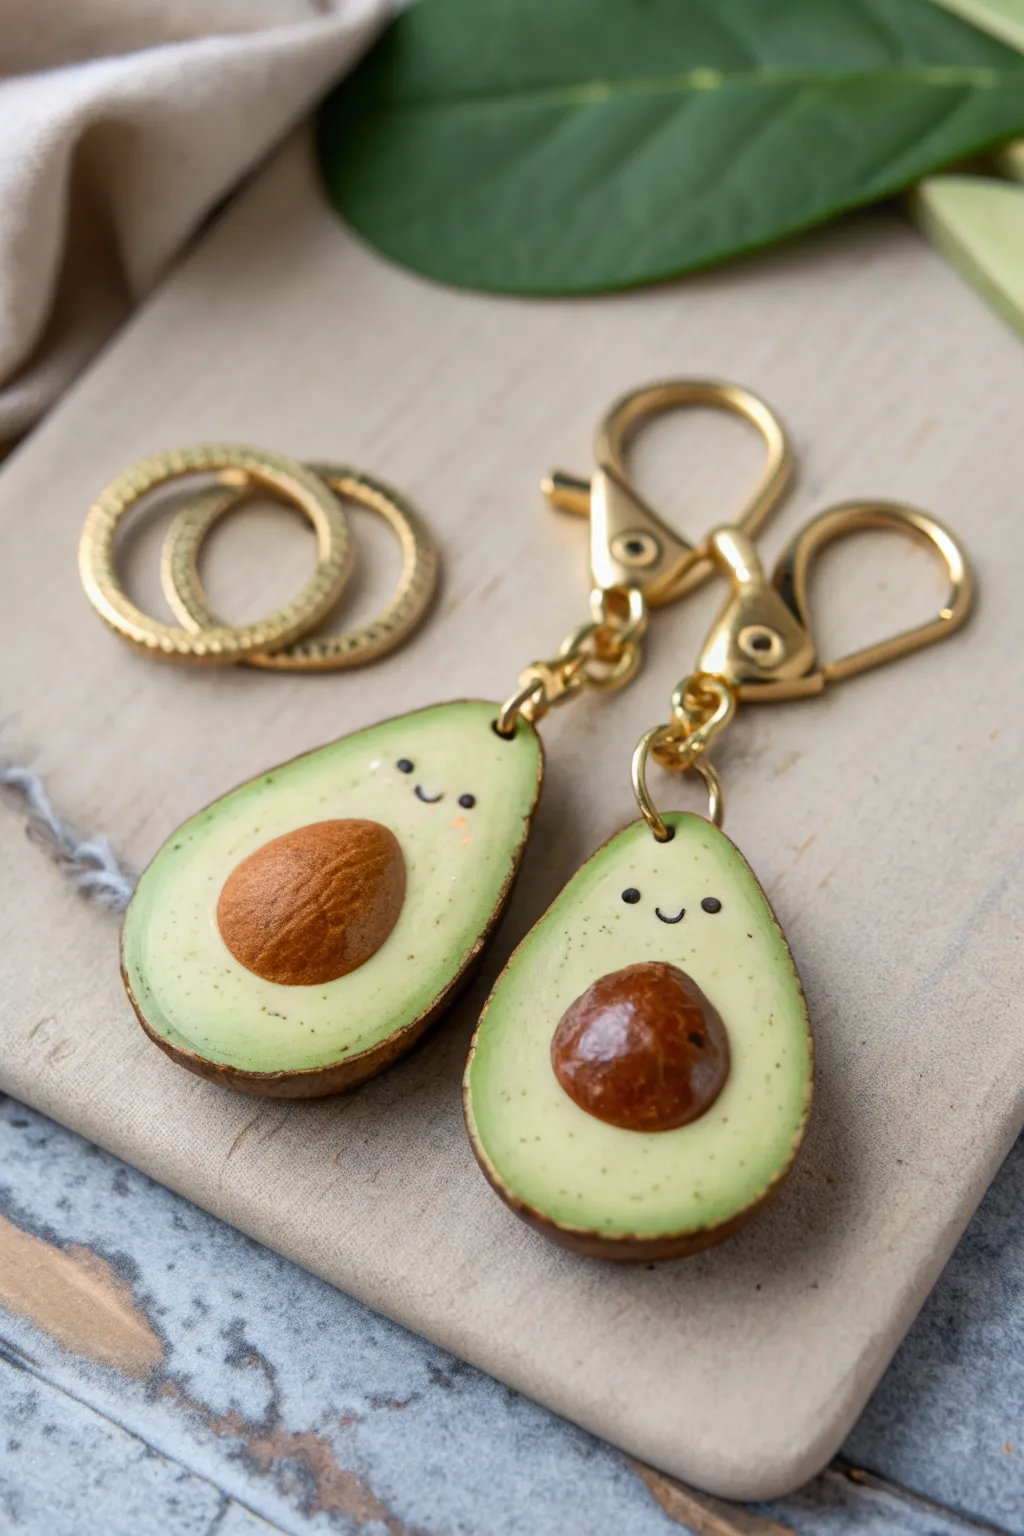
Celebrate friendship with these adorable matching avocado keychains, featuring realistic textures and sweet little smiling faces. Crafted from polymer clay, each half showcases a unique pit style—one matte and textured, the other glossy and smooth—hanging on sturdy gold clasps.
How-To Guide
Materials
- Polymer clay (translucent, white, yellow, green, dark brown)
- Chalk pastels (dark green, yellow ochre, brown)
- Acrylic paint (black, white)
- Sculpting tools (needle tool, ball tool)
- Texture tool (sandpaper, toothbrush, or crumpled foil)
- Gloss glaze or UV resin
- Liquid polymer clay (optional)
- 2 Screw eye pins
- 2 Gold lobster clasp keychains with jump rings
- Craft blade
- Small paintbrush
- Oven
Step 1: Mixing the Perfect Green
-
Create the base color:
Start by mixing a large portion of white clay with a small amount of yellow and a tiny touch of translucent clay. This creates the creamy inner flesh color. -
Make the gradient green:
Take about one-third of your creamy mix and blend in a very small amount of green clay. You want a pale, lime-green shade that mimics the outer flesh of an avocado.
Textured Skin Tip
For ultra-realistic avocado skin, dab the unbaked brown clay with a coarse sponge or even a real avocado feel to transfer the bumpy pattern.
Step 2: Shaping the Avocados
-
Form the core:
Roll two balls of the creamy yellow-white mixture. Pinch the top of each slightly to create that classic pear or teardrop shape, then flatten them gently so they are rounded but not spherical. -
Add the green rim:
Roll your pale green clay into a long, thin snake. Wrap this snake around the edge of your flattened pear shapes, smoothing the seams with your finger so the transition from green edge to yellow center is seamless. -
Create the skin:
Roll out a thin sheet of dark brown clay mixed with a pinch of green. Wrap this sheet around the back and sides of your avocado shapes, trimming away any excess at the front face. The brown should cradle the green flesh. -
Texture the skin:
Use a piece of sandpaper, a stiff toothbrush, or a ball of crumpled foil to gently press texture into the dark brown skin on the back and sides.
Step 3: Sculpting the Pits
-
Form the pits:
Roll two balls of brown clay. For visual interest like the photo, make one slightly lighter brown for a matte look, and one dark brown for a glossy look. -
Create the nesting spots:
Use a large ball tool or your thumb to press a deep, rounded indentation into the center of the lower, wider part of each avocado half. -
Embed the pits:
Place a brown clay ball into each indentation. Press them in firmly so they adhere. If you want extra security, add a drop of liquid clay or translucent liquid sculpey in the hole before placing the pit. -
Texture the matte pit:
For the lighter brown pit designated as matte, use a needle tool to scratch fine, vertical lines to mimic a woody texture.
Level Up: Heart Pit
Make the pits heart-shaped instead of round! One half can have a protruding heart, and the other can have an empty heart-shaped hole for a true puzzle fit.
Step 4: Adding Details & Hardware
-
Shade the flesh:
Scrape some dark green and yellow ochre chalk pastels into fine dust. With a dry brush, gently dust the outer green rim of the avocado face to intensify the color gradient. -
Insert eye pins:
Insert a metal screw eye pin into the top center of each avocado. I usually dip the end in a little liquid clay or super glue before insertion to ensure it never pulls out. -
Bake:
Bake the pieces according to your polymer clay package instructions (typically 275°F/135°C for 15-30 minutes). Let them cool completely.
Step 5: Bringing them to Life
-
Paint the faces:
Using a very fine detail brush or a needle tool dipped in black acrylic paint, add two small dots for eyes and a tiny ‘u’ shape for a smile on the upper half of the avocado flesh. -
Glaze the pits:
Apply a thick coat of gloss glaze or UV resin ONLY to the dark brown pit to give it that wet, fresh shine. Leave the textured pit matte or apply a matte varnish. -
Final assembly:
Open the jump ring on your gold keychain clasp using pliers. Loop it through the eye pin on the avocado, and close the ring securely.
Now you have a charming set of veggie pals ready to share with your best friend.

Couple Avocados With Cute Details
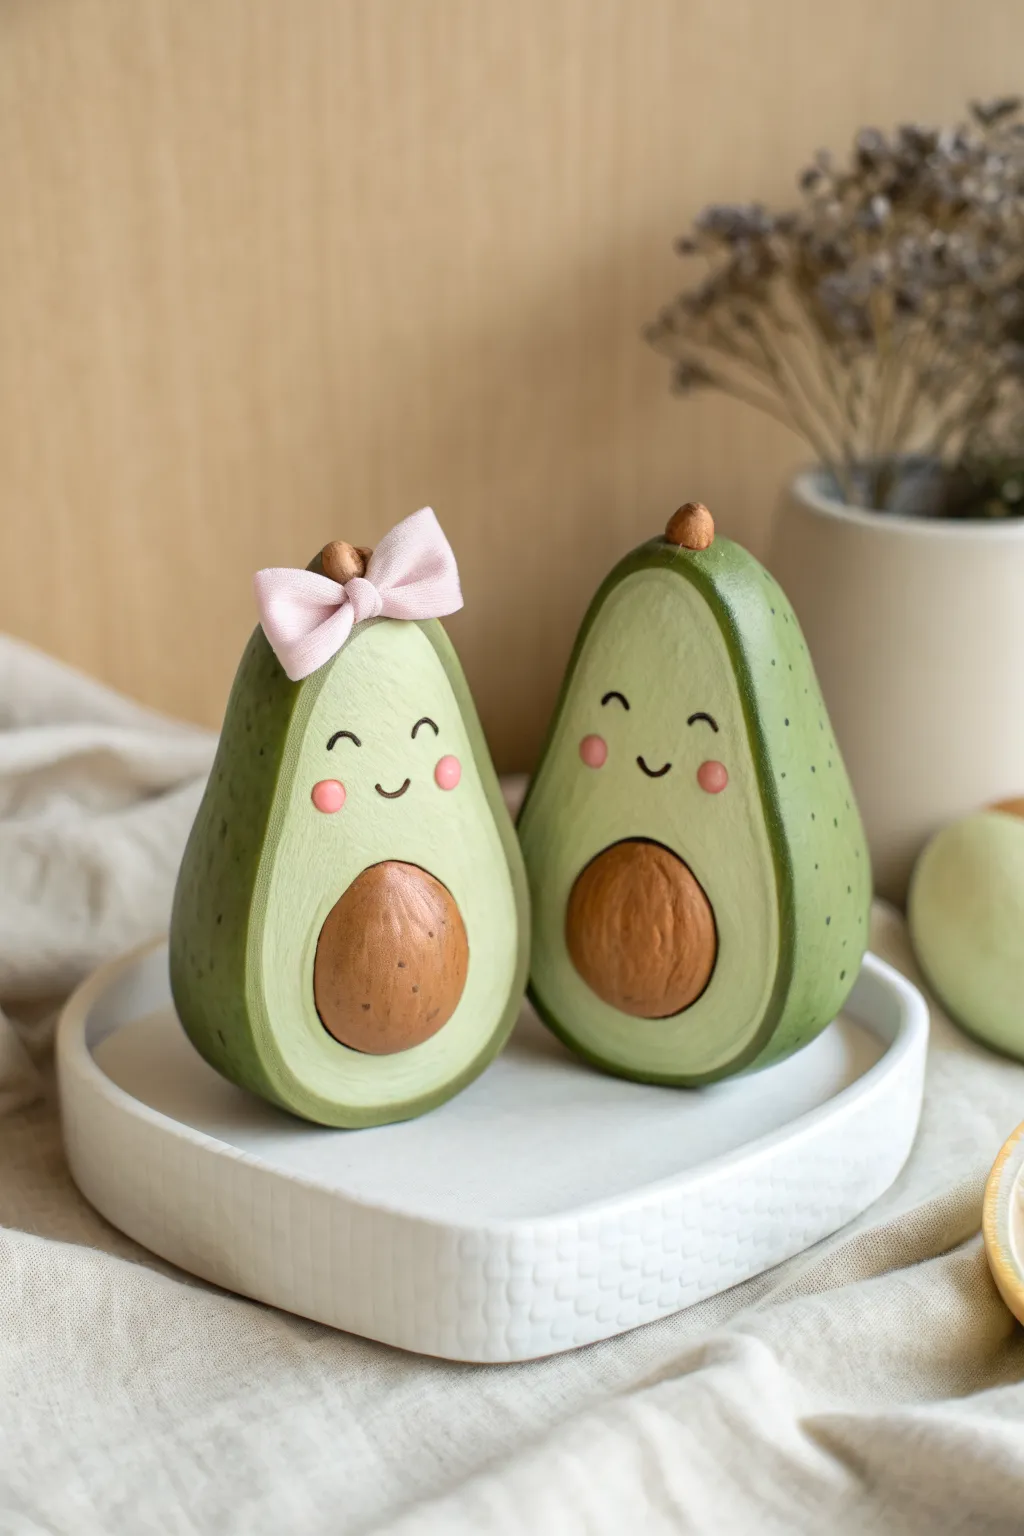
Create this adorable duo of avocado halves that fit perfectly together, featuring textured wooden-style pits and charming hand-painted expressions. The addition of a sweet pink fabric bow makes one half distinct, turning them into a perfect gift for a partner or best friend.
Step-by-Step
Materials
- Polymer clay (dark green, light pistachio green, light brown, dark brown)
- Acrylic paints (black, pink)
- Fine detail paintbrush or dotting tool
- Small pink fabric ribbon or pre-made mini bow
- Sculpting tools (needle tool, smoothing tool)
- Aluminium foil (for core)
- Texturing tool or toothbrush
- Clear matte varnish
- Strong craft glue
Step 1: Sculpting the Base Forms
-
Form the aluminum cores:
Start by crumpling two pieces of aluminum foil into rough pear shapes. This saves clay and keeps the figurines lightweight. Make sure one side of each shape is flattened so the avocados can stand upright securely. -
Prepare the skin layer:
Condition the dark green polymer clay until soft. Roll it out into a sheet about 3mm thick. Carefully drape this over the back and sides of your aluminum cores, smoothing the seams so the foil is completely covered on the rounded sides. -
Add the flesh layer:
Roll out a thicker slab of the light pistachio green clay. Cut it to match the flat front face of your avocado shapes. Press this onto the front, blending the edges where it meets the dark green skin for a seamless transition. -
Refine the shape:
Use your fingers to smooth the join between the dark and light greens. You want the dark green to frame the light green slightly, mimicking a real avocado peel. -
Create the pit hollow:
Use a large ball tool or your thumb to press a deep, circular indentation into the lower center of the light green face on both figurines. This is where the seed will sit.
Seed Texture Tip
For a deeper wood-grain look on the pit, lightly brush dark brown acrylic paint into the texture grooves after baking, then wipe the surface clean with a damp cloth.
Step 2: Creating the Rustic Pits
-
Mix the pit colors:
Take your light brown clay and swirl in a tiny amount of dark brown. Don’t mix it completely; a marbled effect adds realism to the wooden texture seen in the reference. -
Shape the seeds:
Roll two balls of the marbled brown clay that fit snugly into the indentations you made earlier. Flatten them slightly so they protrude realistically but aren’t perfect spheres. -
Texture the seeds:
Using a needle tool or an old toothbrush, gently scratch and stipple the surface of the brown clay balls. This creates that fibrous, woody texture. I find dragging the needle vertically adds a nice grain. -
Insert the stems:
Create tiny nubs from the brown clay mixture and attach them to the very top of each avocado to act as the stem remains.
Step 3: Adding Details & Baking
-
Add skin texture:
Before baking, lightly press a toothbrush or texturing sponge against the dark green skin on the back and sides to give it a realistic, bumpy avocado peel finish. -
Bake the clay:
Place your creations on a baking sheet lined with parchment paper. Bake according to your polymer clay package instructions (usually 275°F/130°C for 15-30 minutes). Let them cool completely before handling. -
Paint the faces:
Using a very fine brush and black acrylic paint, draw two small arched eyes and a tiny ‘u’ shaped smile on the light green face, just above the pit. -
Add rosy cheeks:
Dip a dotting tool or the back of a brush into pink acrylic paint. Dab two small dots on either side of the smile to create blushing cheeks. -
Detail the skin dots:
If you look closely at the reference, there are tiny dark green painted dots on the side of the light green flesh. Use a diluted dark green paint to add these subtle speckles near the border.
Troubleshooting: Cracks?
If small cracks appear after baking, fill them with a mix of liquid clay and the matching solid clay color. Smooth it out and bake again for a short period to seal.
Step 4: Finishing Touches
-
Seal the work:
Once the paint is fully dry, apply a thin coat of clear matte varnish over the entire piece. This protects the paint and removes the ‘plastic’ look of the clay. -
Attach the bow:
Take your small pink fabric bow. Apply a dab of strong craft glue to the top left of one avocado (near the stem) and press the bow firmly in place. -
Final drying:
Allow the glue and varnish to cure for at least 24 hours to ensure everything is durable and secure.
Display these charming little partners on a shelf or gift one to a friend so you each have half of the pair


Mini Avocado Earrings
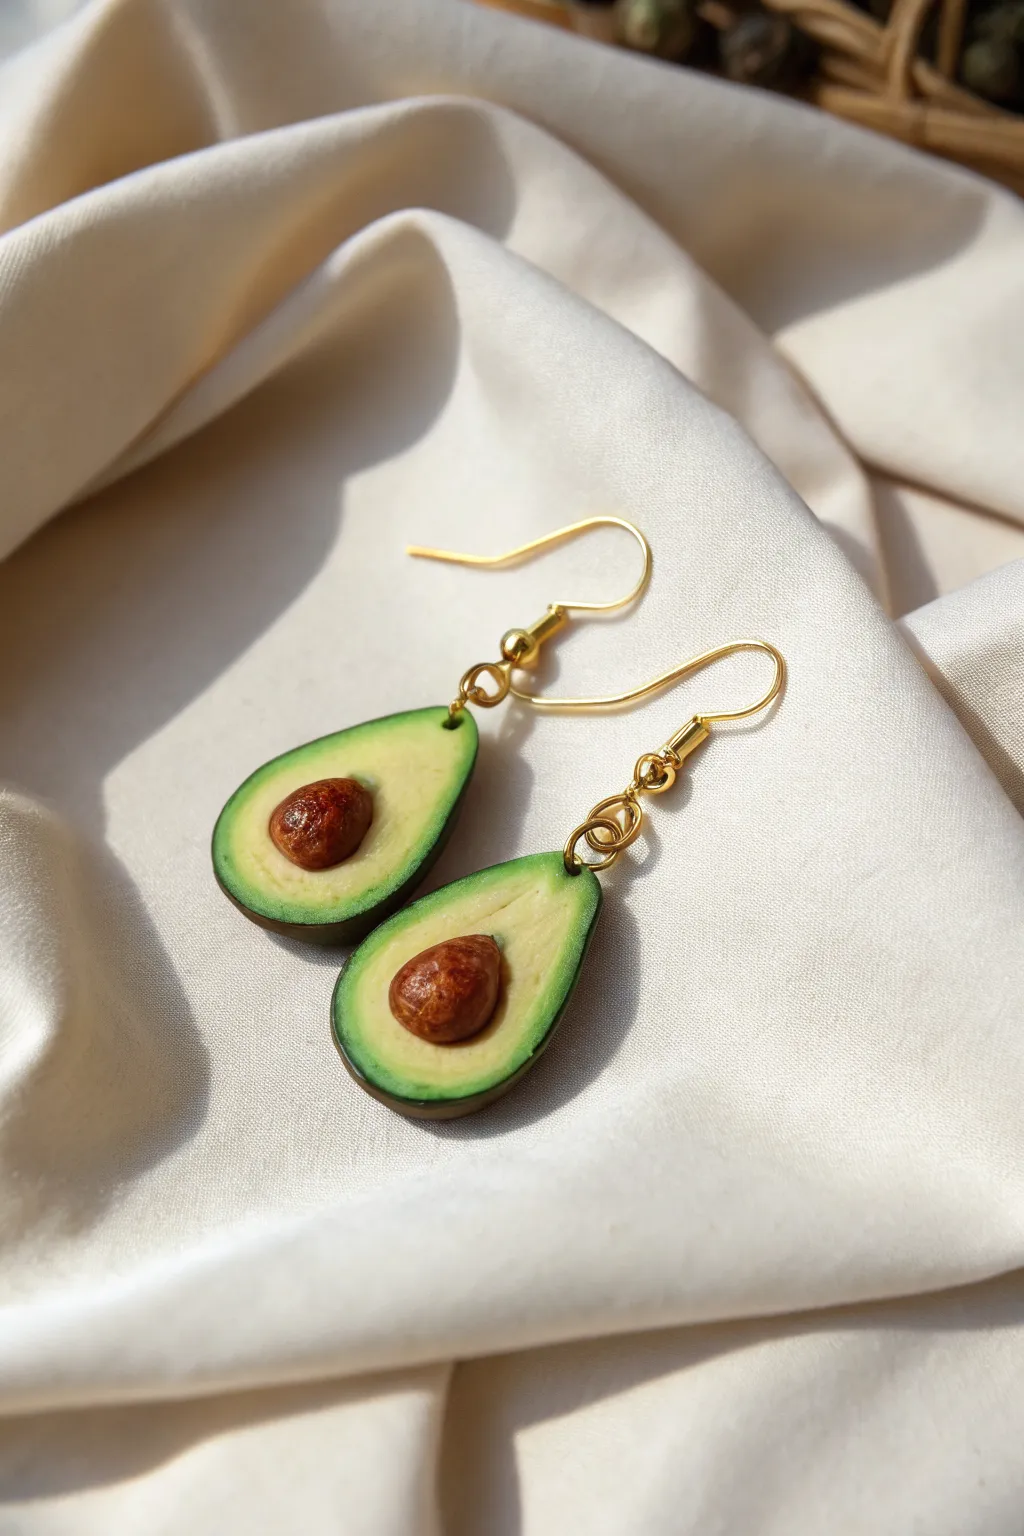
These charming earrings feature meticulously detailed avocado halves, complete with textured pits and a gradient of perfectly ripe green flesh. They are lightweight enough for everyday wear and make a fantastic conversation starter for any food lover.
Step-by-Step Guide
Materials
- Polymer clay: translucent, white, yellow, forest green, and brown
- Liquid polymer clay (optional but helpful)
- Pastel chalks: yellow, light green, dark green, brown, and burnt sienna
- Needle tool or toothpick
- Soft paintbrush
- Scalpel or craft knife
- Gloss varnish or polyurethane
- Jewelry findings: gold ear wires and jump rings
- Jewelry pliers
- Small round cutter (approx. 1.5 cm) or a teardrop cutter if available
- Sandpaper (fine grit)
Step 1: Creating the Avocado Flesh
-
Mix the Base Color:
Start by mixing translucent clay with a very small amount of yellow and green to create a pale, milky yellow-green. The translucent base is key for that realistic, waxy flesh look. -
Shape the Core:
Form two equal-sized balls from your mixed color and shape them into teardrops. Flatten them slightly with your finger to create the main body of the avocados. -
Create the Gradient:
Shave some yellow and light green pastel chalk into a fine powder. Using a soft brush, dust the center of your teardrops with yellow, fading outward. -
Add the Outer Green:
Dust the edges of the teardrop with a darker green chalk powder to simulate the greener flesh that sits just under the skin. -
Indent the Pit Hole:
Use a ball tool or the rounded end of a paintbrush to gently press a concave hollow into the wider bottom part of each teardrop where the pit will sit. Don’t go all the way through.
Dirty Clay?
Work light to dark. If dark green lint gets on the yellow flesh, use a cotton swab dipped in rubbing alcohol or acetone to gently wipe the surface clean before baking.
Step 2: Forming the Skin
-
Prepare the Skin Layer:
Roll out a very thin sheet of dark forest green clay. You can mix in a tiny bit of black or brown if your green is too bright. -
Wrap the Avocado:
Place your teardrop flesh shapes onto the rolled-out green sheet. Carefully cut around the shape with a scalpel, leaving a tiny margin. -
Smooth the Edges:
Gently fold the green backing up around the curved sides of the avocado flesh. Use your finger to smooth the seam so the ‘skin’ hugs the flesh perfectly without overlapping the top face too much. -
Texture the Skin:
I like to take a piece of sandpaper or a stiff toothbrush and gently tap the dark green exterior to give it that bumpy avocado skin texture.
Step 3: Creating the Pit
-
Mix the Pit Color:
Blend brown clay with a touch of translucent and a speck of orange to get a rich, mahogany shade. -
Shape the Seeds:
Roll two small balls that fit snugly into the indentations you made earlier. Slightly flatten the bottom so they sit flush. -
Texture the Pits:
Before attaching them, hold the pit on a needle tip and gently scratch the surface to create a fibrous texture. It shouldn’t be perfectly smooth. -
Color Depth:
Dust the pits with a little burnt sienna or dark brown chalk to highlight the texture, then press them firmly into the hollows of your avocado halves. -
Simulate Knife Marks:
For extreme realism, use your needle tool to drag very faint lines across the yellow flesh, mimicking the striations left by a knife cutting through the fruit.
Make it a Necklace
Create a whole avocado by placing two halves together before baking! You can slice it open later, or create a matching pendant on a delicate gold chain.
Step 4: Assembly and Finishing
-
Insert Eye Pins:
Trim two standard eye pins or make loops from wire. Insert the shaft into the top, narrow part of the avocado. -
Secure the Hardware:
If necessary, add a tiny drop of liquid clay or bake-and-bond to the pin shaft before insertion to ensure it doesn’t slide out after baking. -
Bake:
Bake the pieces according to your clay package instructions. Usually, this is around 230°F – 275°F (110°C – 135°C) for 15-30 minutes. -
Varnish:
Once cooled, apply a gloss varnish only to the pit to make it look moist. Leave the flesh matte or use a satin finish for authenticity. -
Attach Findings:
Use your pliers to open the jump rings. Connect the loop at the top of the avocado to the ear wire loop.
Now you have a pair of adorable, healthy-looking accessories ready to wear

The Complete Guide to Pottery Troubleshooting
Uncover the most common ceramic mistakes—from cracking clay to failed glazes—and learn how to fix them fast.
Avocado Pendant Necklace
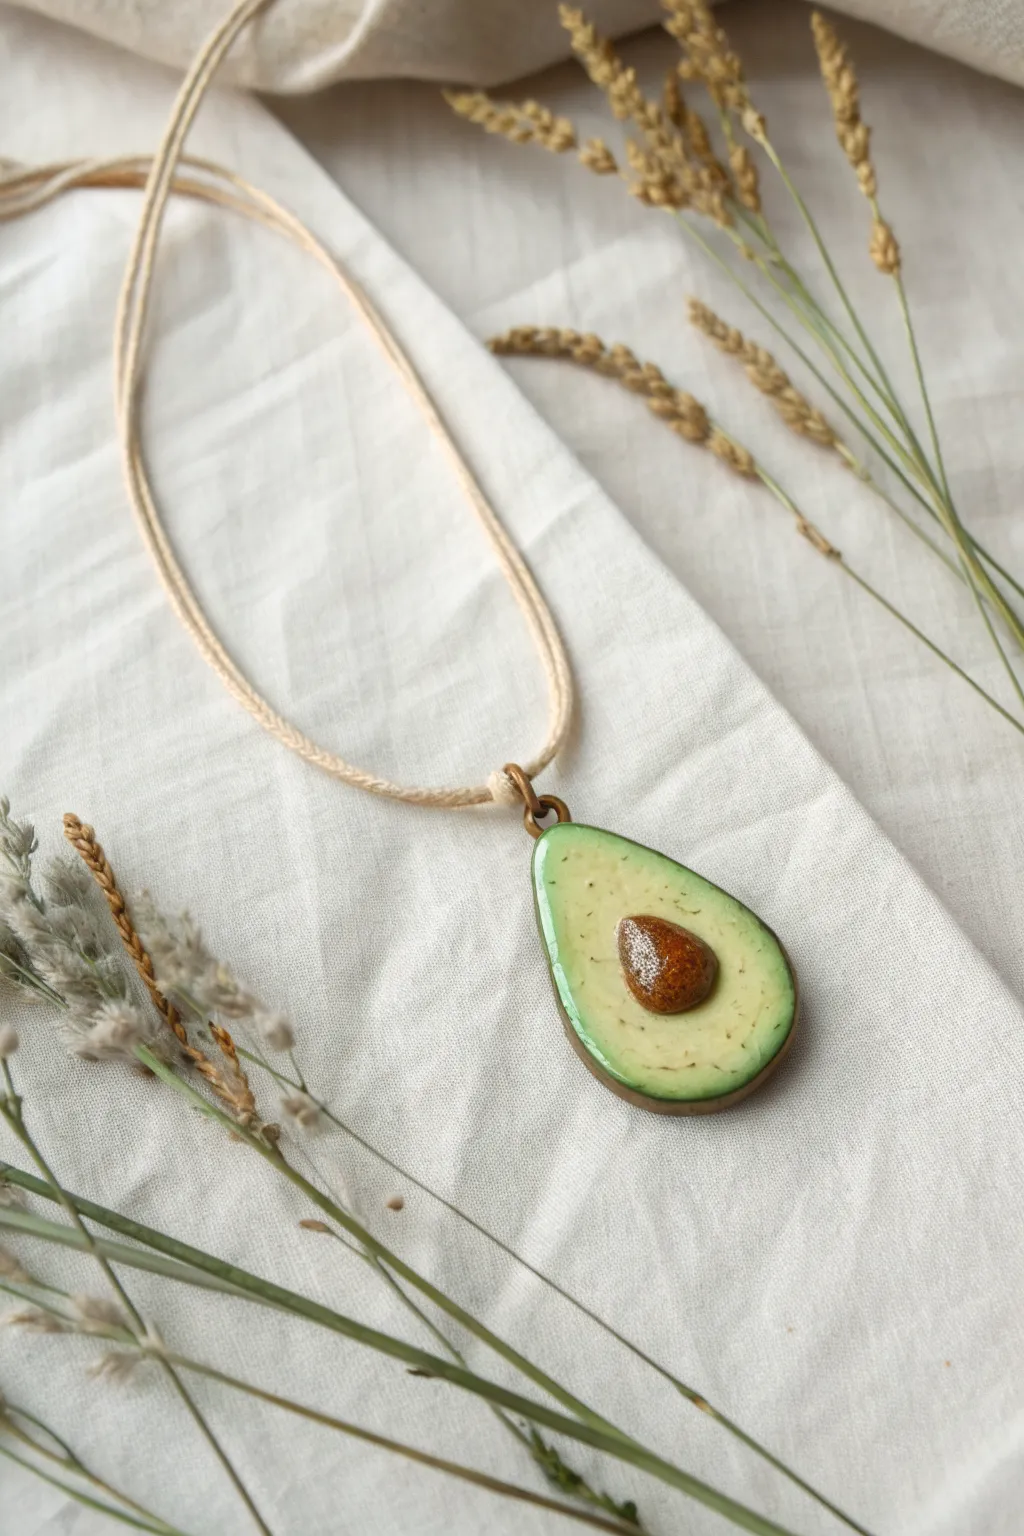
Capture the creamy texture of nature’s favorite fruit with this charming jewelry piece. This pendant features a realistic avocado half with a glossy finish and a textured pit, hanging simply on a minimalist cord.
Step-by-Step Tutorial
Materials
- Polymer clay (translucent white, yellow, green, brown)
- Acrylic rolling pin
- Pointed sculpting tool or needle tool
- Soft pastel chalks (dark green, varying browns)
- Small paintbrush
- UV resin or glossy glaze
- UV lamp (if using resin)
- Bronze jump ring
- Waxed jewelry cord (beige or light brown)
- Sandpaper (fine grit)
- Precision knife or clay blade
- Toothbrush or texturing sponge
Step 1: Sculpting the Avocado Base
-
Mix the flesh color:
Begin by blending translucent white clay with a small amount of yellow and the tiniest speck of green. You want a pale, creamy chartreuse color that mimics the inner flesh of an avocado. -
Shape the teardrop:
Roll your mixed clay into a ball, then flatten it slightly and pinch one end to form a classic teardrop shape. Aim for a thickness of about 4-5mm. -
Create the gradient:
To achieve that realistic gradient near the skin, dust the edges of your teardrop with scraped green pastel chalk using a soft brush. Keep the center pale. -
Apply the skin:
Roll out a thin sheet of dark green clay. Place your teardrop onto this sheet and trim around the edges with a craft knife, leaving the dark green backing flush with the pale flesh. -
Round the edges:
Gently smooth the seam between the dark green backing and the pale flesh with your finger so the transition looks organic, like a real peel.
Glazing Trick
When glazing, I prefer to avoid coating the brown skin edge. Keeping the ‘peel’ matte while making all the inner flesh glossy creates a fantastic contrast.
Step 2: Adding the Pit and Details
-
Form the pit:
Take a small piece of brown clay and roll it into a ball. Press it gently into the lower, wider part of your avocado shape to create an indentation. -
Texture the pit:
Remove the brown ball momentarily. Use a rough texturing tool, like an old toothbrush or a ball of aluminum foil, to tap texture onto the brown clay sphere. -
Shade the pit:
Dust the textured pit with dark brown and reddish-brown pastel dust to enhance the depth of the texture. Place it back securely into the indentation on the slice. -
Add fibrous details:
Using a needle tool or a very fine blade, make tiny, random marks or shallow cuts on the pale flesh, focusing near the pit area. Darken these tiny cuts slightly with a dry brush and brown pastel dust to simulate fibers. -
Insert hardware:
Carefully push a small bronze jump ring into the top, narrow part of the avocado. Ensure the clay closes slightly around the wire to hold it secure.
Spice It Up
Before baking, sprinkle real black pepper, poppy seeds, or crushed dried herbs onto the surface to make it look like seasoned avocado toast.
Step 3: Finishing and Assembly
-
Bake the piece:
Bake the pendant according to your clay manufacturer’s instructions (usually around 275°F/130°C for 15-30 minutes). Let it cool completely. -
Sand for smoothness:
If there are any fingerprints on the back or sides, lightly wet-sand them away with fine-grit sandpaper. -
Apply the glaze:
This is the most crucial step for realism. Apply a generous layer of UV resin or high-gloss glaze over the entire front surface. This mimics the natural moisture of cut fruit. -
Cure the finish:
If using UV resin, cure it under a UV lamp for 1-2 minutes until rock hard and non-tacky. If using glaze, allow it to air dry fully. -
Prepare the cord:
Cut a length of beige waxed cotton cord or hemp twine, roughly 18-20 inches long. -
String the pendant:
Fold the cord in half. Pass the folded loop through the jump ring, then pull the loose ends through the loop to create a lark’s head knot, or simply thread it through freely. -
Tie the closure:
Tie the two loose ends of the cord together using a sliding knot or a simple overhand knot to finish the necklace.
Now you have a quirky, fresh accessory to add a pop of green to your outfit
Avocado Bag Charm Tassel
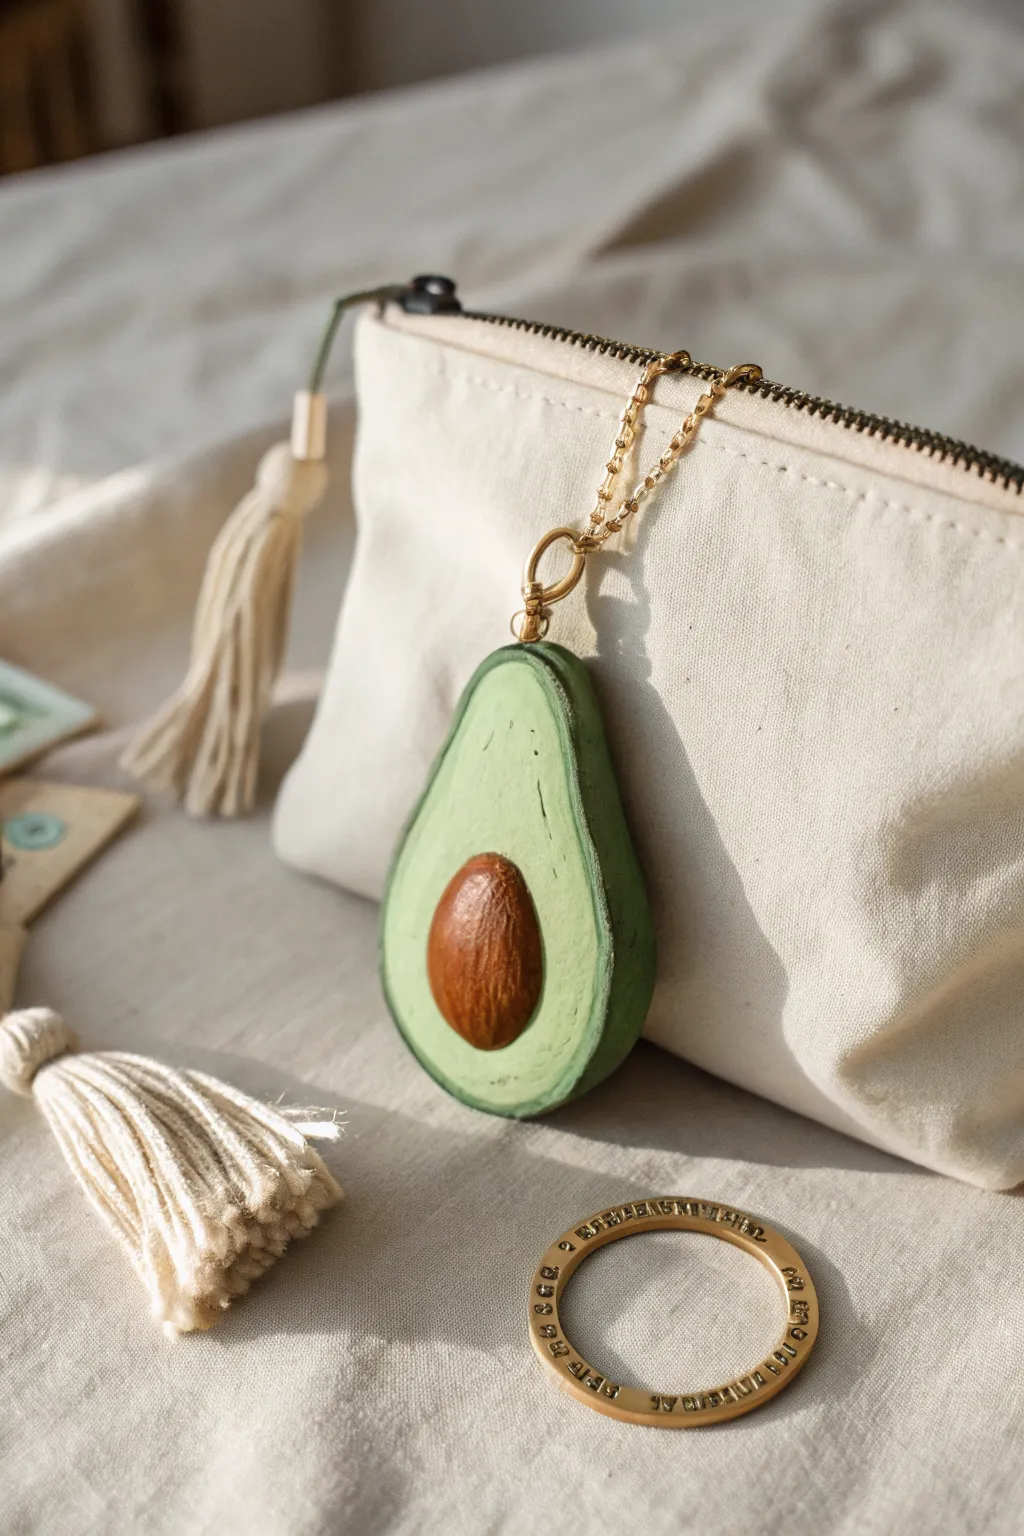
Transform a simple canvas pouch into a quirky accessory with this surprisingly realistic avocado bag charm. Made from polymer clay, it features lifelike texture and a dimensional pit that adds a perfect pop of earthy color to your daily carry.
Step-by-Step Guide
Materials
- Polymer clay (dark green, light yellow-green, translucent, and brown)
- Acrylic rolling pin or pasta machine
- Teardrop-shaped clay cutter (approx. 2-3 inches)
- Dotting tool or ball stylus
- Soft pastel chalks in brown and burnt sienna
- Small paintbrush
- Texture sponge or toothbrush
- Jewelry eye pin (gold)
- Gold chain and jump rings
- Gloss glaze or polyurethane varnish (optional)
- Sculpting tools (needle tool)
- Oven for baking
Step 1: Forming the Avocado Base
-
Mix the Flesh Tone:
Begin by conditioning your clay. To get that perfect creamy avocado flesh color, mix a large amount of light yellow-green with a small amount of translucent clay. This adds depth and prevents it from looking too plastic. -
Roll the Slab:
Roll your mixed green clay into a thick slab, about 1/4 inch thick. You want it substantial enough to be durable as a bag charm. -
Cut the Shape:
Use your teardrop cutter to punch out the main avocado shape. If you don’t have a cutter, you can freehand cut a teardrop shape using a craft knife and a paper template. -
Smooth the Edges:
Gently gently rub the cut edges with your finger to soften the sharp angles left by the cutter, creating a more organic, rounded look. -
Create the Pit Hollow:
Using your thumb or a large ball tool, press a gentle indentation into the lower, wider part of the teardrop where the seed will sit. Don’t go too deep; just create a nesting spot.
Step 2: Adding the Skin and Texture
-
Prepare the Skin Layer:
Roll out a thin sheet of dark green clay. Use the same distinctive teardrop cutter or your template to cut a matching shape. -
Attach the Skin:
If you are working with layers, you can actually wrap a thin strip of the dark green clay around the perimeter of your light green base instead of layering it underneath. Gently press the dark strip into the side of the light green slab, blending the seam slightly so they bond. -
Texture the Flash:
Take a texture sponge or an old clean toothbrush and gently tap the surface of the light green clay. This mimics the slightly granular texture of real avocado flesh. -
Detail the Rim:
Use a needle tool to create very faint, irregular concentric lines near the outer edge of the flesh, just inside the dark skin. This subtle detail adds immense realism.
Pro Tip: Ombré Effect
Before texturing the flesh, dust the very outer edges of the light green clay with a tiny bit of yellow-green pastel chalk. This mimics the gradient found in real ripe avocados.
Step 3: Sculpting the Pit
-
Form the Seed:
Roll a ball of brown clay and flatten it slightly into an oval. Press this firmly into the hollow you created earlier. -
Texture the Seed:
Use a needle tool or stiff brush to scratch vertical, woody texture lines onto the brown seed. -
Shade for Realism:
Scrape some brown and burnt sienna pigment from your chalk pastels. Use a dry brush to dust these powders onto the pit to enhance the woody look, and add a tiny bit of darker green pastel around the edge where the flesh meets the skin.
Level Up: Mix & Match
Create a second charm that is a slice of toast or a fried egg. Hang them together on the same chain for a complete ‘brunch’ themed accessory set.
Step 4: Assembly and Baking
-
Insert Hardware:
Trim a gold eye pin to about half an inch long. Insert it into the very top center of the avocado shape. I recommend adding a tiny dab of liquid clay or bake-and-bond to the pin before inserting it to ensure it stays put. -
Bake:
Bake the piece according to your specific polymer clay manufacturer’s instructions, usually around 275°F (130°C) for 30 minutes. Let it cool completely. -
Varnish the Pit:
Once cool, apply a coat of gloss glaze only to the brown pit. This makes the seed look fresh and contrasts beautifully with the matte texture of the flesh. -
Attach the Chain:
Open a jump ring with pliers and attach it to the eye pin. connect your gold chain loop to this ring. -
Secure to Bag:
Attach the other end of the chain to the zipper pull of your canvas pouch using a clasp or another jump ring.
Now your pouch has a fresh, handmade touch that looks good enough to eat


What Really Happens Inside the Kiln
Learn how time and temperature work together inside the kiln to transform clay into durable ceramic.
Avocado Brooch Pin
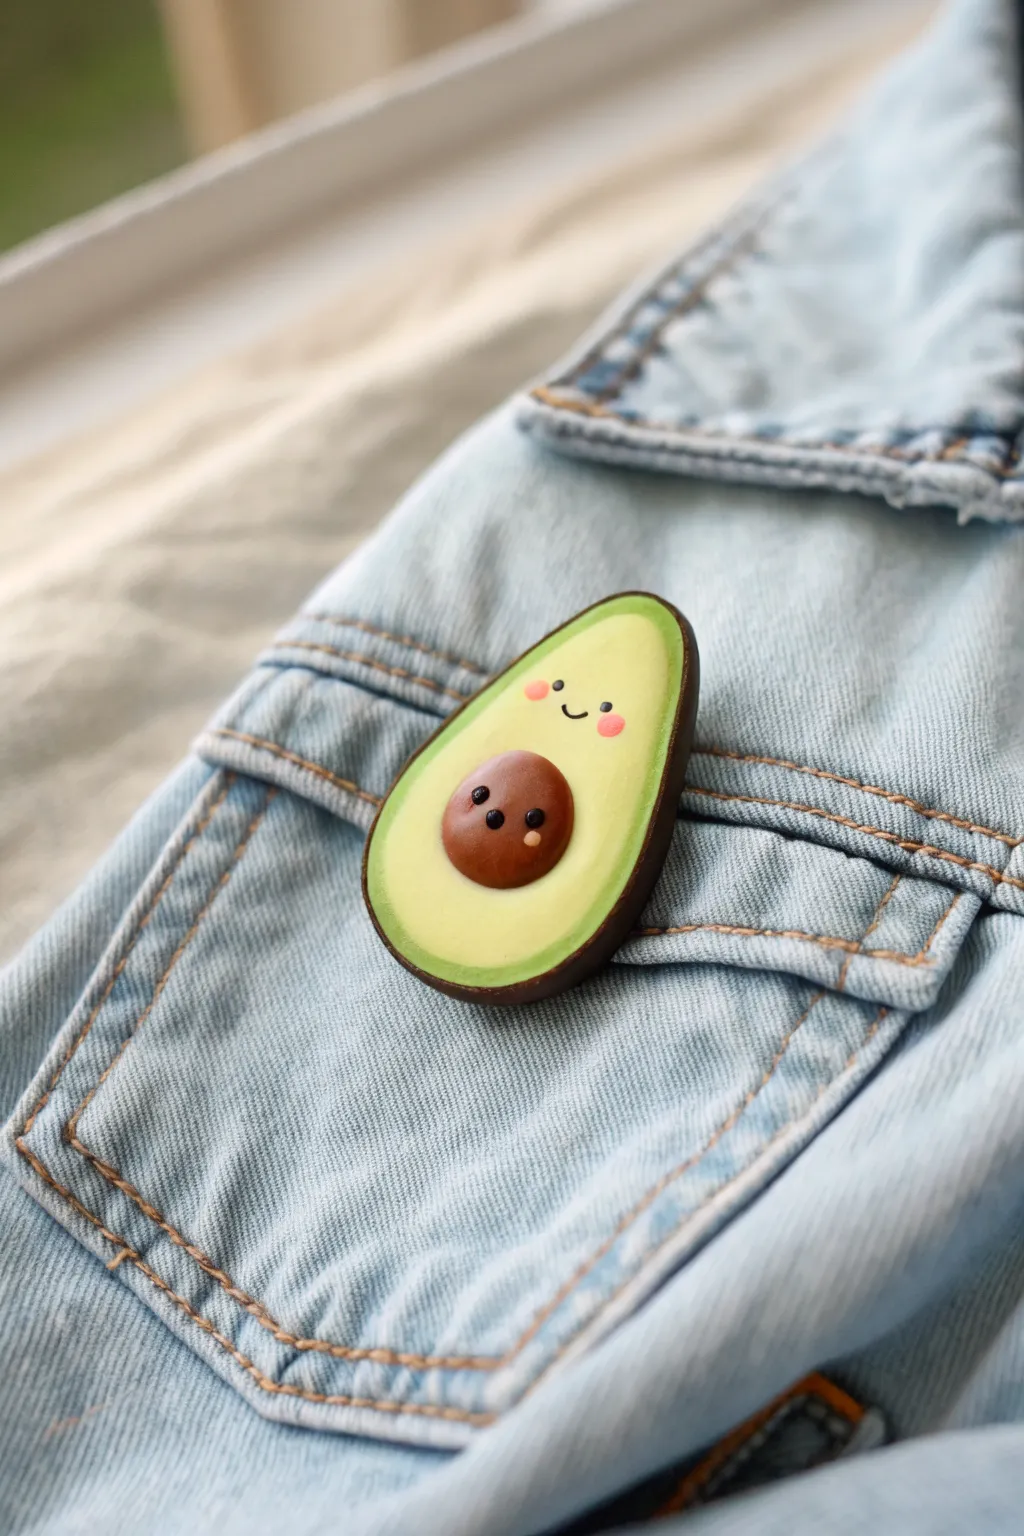
Add a dollop of cuteness to your jacket with this charming avocado brooch. This project features a cheerful smiley face and a uniquely dimensional pit that adds character to any outfit.
Step-by-Step Tutorial
Materials
- Polymer clay: Dark brown, light green, pale yellow/cream, pink, black
- Rolling pin or pasta machine
- Clay cutting blade or X-Acto knife
- Oval cutter (optional)
- Small ball stylus tool
- Needle tool
- Soft pastels or chalk (dark green)
- Soft paintbrush
- Brooch pin backing
- Strong craft glue (e.g., E6000) or liquid polymer clay
- Oven for baking
Step 1: Shaping the Avocado Body
-
Condition the Clay:
Start by warming up your light green and pale yellow clay in your hands until soft and pliable. This prevents cracks later on. -
Mix the Gradient:
Create a ‘skinner blend’ by placing a log of light green clay next to a log of pale yellow clay. Roll them together, fold, and roll repeatedly until the colors transition smoothly from green to yellow in the middle. -
Form the Base Shape:
Roll your blended clay into a thick slab, about 1/4 inch thick. Cut out a teardrop or pear shape. If you don’t have a cutter, you can hand-sculpt this by rolling a ball into a tapered log and flattening it gently. -
Smooth the Edges:
Use your finger to gently round off the sharp cut edges of your avocado slice so it looks soft and organic. -
Make the Skin:
Roll out a very thin sheet of dark brown clay. Wrap this strip around the straight edges of your avocado shape to create the contrasting skin or rind. -
Blend the Skin Seam:
Where the brown skin meets the green flesh, gently press them together. I like to use a flat tool to make sure the seam is tight without distorting the shape. -
Shade the Edges:
Scrape a little dark green soft pastel onto a piece of paper. Use a soft brush to dust this powder around the very outer edge of the light green clay, right inside the brown skin, to enhance the depth. -
Create the Pit Socket:
Press a thumb or a large ball tool into the lower, wider part of the avocado to create a shallow indentation where the seed will sit.
Step 2: Adding the Pit and Personality
-
Form the Pit:
Roll a ball of medium-brown clay. Flatten it slightly into a dome shape that fits perfectly into the indentation you just made. -
Give the Pit a Face:
Using a tiny ball stylus, make two small indentations for eye sockets on the brown pit. Roll two minuscule balls of black clay and press them into these sockets. -
Add Pit Highlights:
To make the pit look shiny and alive, add a microscopic dot of white or pale clay to the upper corner of each black eye. -
Secure the Pit:
Place a drop of liquid clay or bake-and-bond in the socket and press the finished pit into place. -
Create the Main Face:
Now for the avocado’s face! Use your needle tool to gently impress a small smiling mouth onto the upper, pale yellow section of the avocado. -
Add Rosy Cheeks:
Roll two very small, flat circles of pink clay. Press them onto the ‘face’ area, wider apart than the eyes would be, to create a blushing effect. -
Add Main Eyes:
Just above the cheeks, add two small black clay dots for the eyes. Use your needle tool to curve the clay slightly if you want them to look like happy, squinting eyes.
Fingerprint Fix
If you see fingerprints on your raw clay, lightly brush the surface with a tiny bit of baby oil or cornstarch before baking to smooth them away instantly.
Step 3: Finishing Up
-
Baking:
Place your creation on a ceramic tile or baking sheet. Bake according to your brand of clay’s instructions (usually 275°F/135°C for 15-30 minutes). -
Cooling:
Let the piece cool completely inside the oven if possible, or on a cooling rack. Do not touch it while hot as it can be fragile. -
Attach the Pin:
Flip the cooled avocado over. Apply a strong adhesive like E6000 to the flat side of a brooch pin backing and press it firmly onto the back of the clay. -
Final Seal (Optional):
If you want a glossy finish, brush a thin layer of water-based polyurethane varnish over the ‘skin’ and the pit, keeping the green flesh matte for contrast.
Texture Time
Before baking, use an old toothbrush to gently tap the dark brown ‘skin’ layer. This creates a realistic bumpy texture that mimics a real Hass avocado.
Pin this cheerful little friend to your favorite denim jacket and get ready for compliments
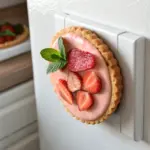
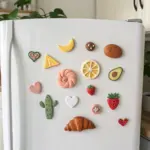
Avocado Fridge Magnets Set
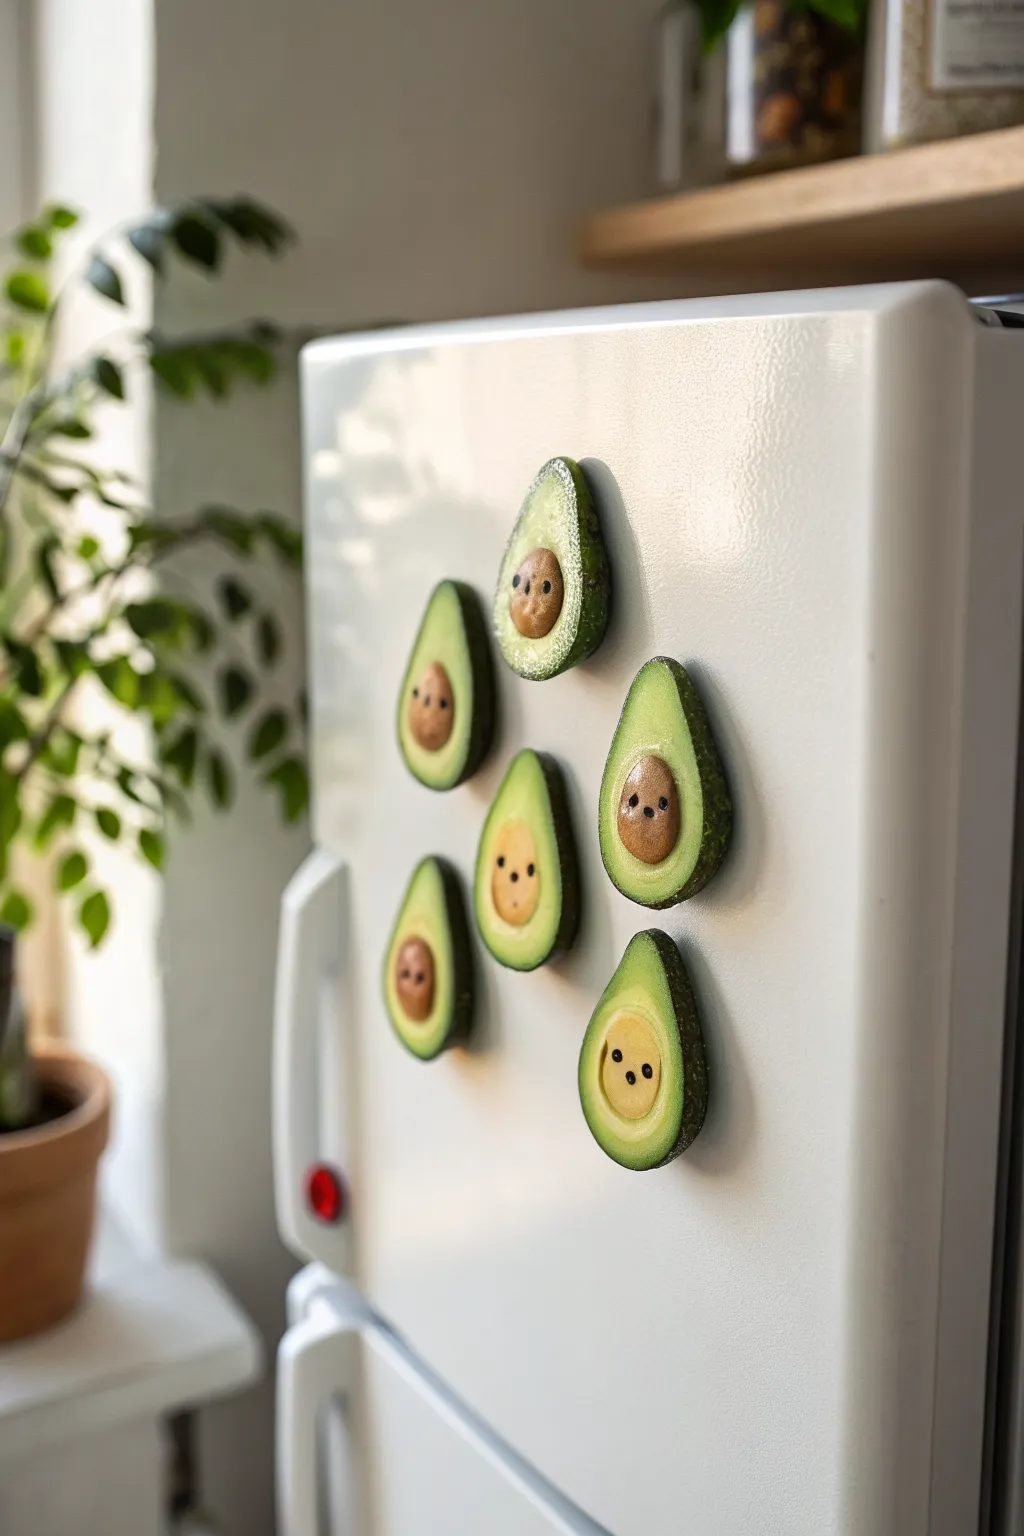
Brighten up your kitchen with this adorable set of smiling avocado magnets made from polymer clay. These miniature cuties feature textured skins and distinct personality-filled faces, perfect for holding up your grocery lists.
Detailed Instructions
Materials
- Green polymer clay (dark green for skin)
- Light green polymer clay (for flesh)
- Yellow polymer clay (for center gradient)
- Brown polymer clay (for pits)
- Black acrylic paint or polymer clay (for eyes/mouth)
- Toothbrush or texturing sponge
- Small round magnets
- Strong craft glue (E6000 or superglue)
- Sculpting tools (needle tool, small ball stylus)
- Gloss glaze (optional)
Step 1: Forming the Avocado Halves
-
Mix the flesh gradient:
Start by conditioning your light green and yellow clays. Create a subtle ombre effect by mixing a small amount of yellow into the light green to create a transition shade. -
Create the base pear shape:
Roll the light green clay into a smooth ball, then pinch one end slightly to form a classic pear or teardrop shape. Flatten the back against your work surface so it sits flush. -
Add the yellow center:
Take a small ball of your yellow clay and press it gently into the wider bottom part of the pear shape. Blend the edges with your finger or a smoothing tool so the transition from yellow to green is seamless. -
Prepare the skin layer:
Roll out a thin sheet of dark green clay. I like to keep this just thick enough to hold texture without tearing. -
Wrap the avocado:
Place your light green pear shape onto the dark green sheet. Carefully wrap the dark green sheet around the sides and back, trimming away any excess clay. -
Texture the skin:
Using an old toothbrush or a coarse texturing sponge, gently tap the dark green exterior. This creates that realistic, bumpy avocado skin look.
Step 2: Adding Personality
-
Sculpt the pit:
Roll a small ball of brown clay for the pit. Press it firmly into the yellow center of the avocado. Make sure it protrudes slightly for a 3D effect. -
Indent the face:
Use a small ball stylus to make tiny indentations on the brown pit where you want the eyes to go. This helps the paint or clay eyes sit securely. -
Create the faces:
Roll microscopic balls of black clay for the eyes and press them into the indents on the pit. Alternatively, you can use a needle tool to create a tiny mouth impression directly into the brown clay. -
Variation: Faces on flesh:
For variety, leave some avocados without pits. Instead, place the tiny black clay eyes and mouth directly onto the yellow center area of the flesh. -
Refine the shape:
Give the entire piece a final check. Smooth out any fingerprints on the light green flesh, ensuring the skin texture hasn’t been smudged.
Texturing Trick
For ultra-realistic skin, roll your dark green clay over 60-grit sandpaper before wrapping it around the avocado base.
Step 3: Baking and Assembly
-
Pre-bake check:
Ensure the backs are perfectly flat. If they aren’t, press them gently onto a ceramic tile or glass sheet. -
Bake the clay:
Bake your pieces according to the polymer clay package instructions. Usually, this is around 275°F (135°C) for 15-30 minutes depending on thickness. -
Cool down:
Let the avocados cool completely in the oven with the door slightly ajar to prevent cracking. -
Paint details (optional):
If you didn’t use black clay for the faces, now is the time to use a fine-tip paintbrush or toothpick to dot on black acrylic paint for the eyes and mouths. -
Glaze the pit:
For a realistic touch, apply a small amount of gloss glaze only to the brown pit (or the eyes) to make them shine. -
Attach magnets:
Apply a dab of strong craft glue to the back of the cooled clay avocado. Press a small round magnet firmly into the glue. -
Final cure:
Allow the glue to cure fully (usually 24 hours) before sticking your new friends to the fridge.
Fingerprint Fix
If you leave fingerprints on the smooth inner flesh, brush on a tiny bit of baby oil or clay softener before baking to smooth them out.
Your fridge is now home to the cutest healthy snacks in the house