If you’re craving a clay project that’s instantly cute, axolotl clay is basically the perfect muse. I love how you can keep it super simple with smooth shapes and big eyes, or go all-in on frilly gills, fun colors, and tiny accessories.
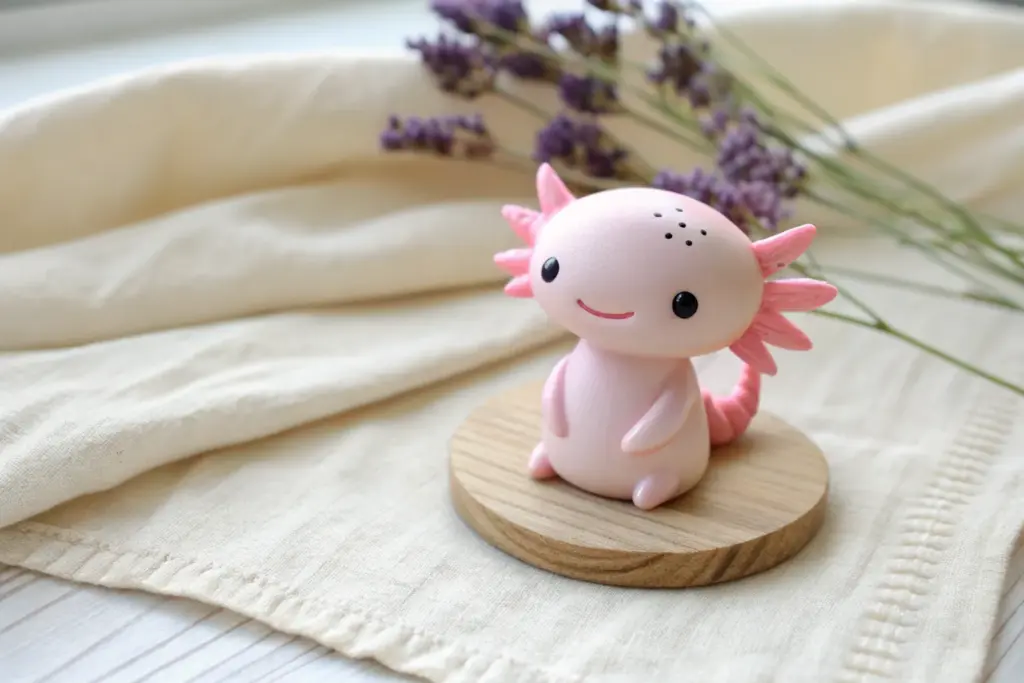
Classic Kawaii Axolotl Mini Figurine
Capture the charm of everyone’s favorite aquatic salamander with this adorable polymer clay project. This figurine features a simplistic, kawaii style with a soft pink body, distinct feathery gills, and a sweet, welcoming smile.
Step-by-Step Tutorial
Materials
- Light pink polymer clay (body)
- Medium or coral pink polymer clay (gills and blush)
- Black polymer clay (eyes)
- Needle tool or toothpick
- Ball stylus tool (small)
- Blending tool or silicone shader
- Translucent liquid clay (optional for bonding)
- Soft pastel chalk (pink) and a small brush
- Gloss glaze or UV resin (for the wet look)
Step 1: Shaping the Head
-
Create the base:
Start by conditioning a large portion of light pink clay until it is soft and pliable. Roll it into a smooth, seamless ball about the size of a walnut to form the head. -
Flatten the face:
Gently press the ball against your work surface to create a slightly flattened bottom, then gently press the front to form a distinct face area, keeping the overall shape round and chubby. -
Mark the features:
Using a small ball stylus, make two indentations where the eyes will go. These should be wide-set to achieve that classic kawaii look.
Clean Clay Tip
Use baby wipes or hand sanitizer before switching from the darker pink clay back to the light pink. This prevents color transfer and keeps your axolotl looking pristine.
Step 2: Forming the Body
-
Shape the torso:
Take a slightly smaller piece of light pink clay and roll it into a teardrop shape. Flatten the bottom so the figurine can stand on its own. -
Attach head to body:
Cut a small piece of wire or a toothpick to use as an armature. Insert it into the body and then place the head on top. I like to add a tiny drop of liquid clay here for a secure bond. -
Blend the neck:
Using a silicone shader or your finger, gently smooth the clay where the head meets the body to create a seamless transition, giving the axolotl a chubby, neckless appearance.
Aquatic Accessories
Before baking, press the feet onto a textured surface or craft small clay sand dunes and seashells to create a permanent beachy base for your character.
Step 3: Adding the Limbs
-
Make the arms:
Roll two small sausages of light pink clay for the arms. They should be slightly tapered at one end. -
Attach the arms:
Press the arms onto the sides of the body, curving them slightly inward so they rest against the tummy. Blend the shoulders into the main body. -
Create the feet:
Form two small, flattened ovals for the feet. Using a craft knife or needle tool, make three tiny cuts on the front of each oval to suggest toes. -
Position the feet:
Place the feet under the body, positioning them slightly outward to help stabilize the figurine.
Step 4: The Iconic Gills
-
Prepare the gill stalks:
Switch to your darker, coral pink clay. Roll six small cones of graduating sizes—three for each side of the head. -
Texture the gills:
Before attaching, use a needle tool to score tiny horizontal lines across each cone. This mimics the feathery texture of real axolotl gills. -
Attach the gills:
Press the gills onto the sides of the head. Place the largest one at the top and the smallest at the bottom, fanning them out slightly.
Step 5: Face & Details
-
Add the eyes:
Roll two tiny balls of black clay. Place them into the eye sockets you made earlier and flatten them gently so they sit flush with the face. -
Create the smile:
Use a needle tool or a small curved blade to impress a simple, tiny ‘u’ shape between the eyes for the mouth. -
Blush via clay:
Take two minuscule flattened ovals of your coral pink clay and place them just below the eyes for permanent blushing cheeks. Blend the edges very slightly. -
Soft shading:
Scrape a little pink pastel chalk into dust. With a dry fluffy brush, gently dust the top of the head and the belly to add a soft, natural gradient. -
Bake carefully:
Bake the figurine according to your polymer clay package instructions. Usually, this is around 275°F (130°C) for 15-20 minutes. -
Gloss finish:
Once cool, apply a coat of gloss glaze or UV resin to the entire figurine to give it that ‘wet’, aquatic shine visible in the photo.
Place your shiny new friend on a windowsill or desk to bring a little bit of aquatic joy to your day


Axolotl Charm With Eye Pin Loop
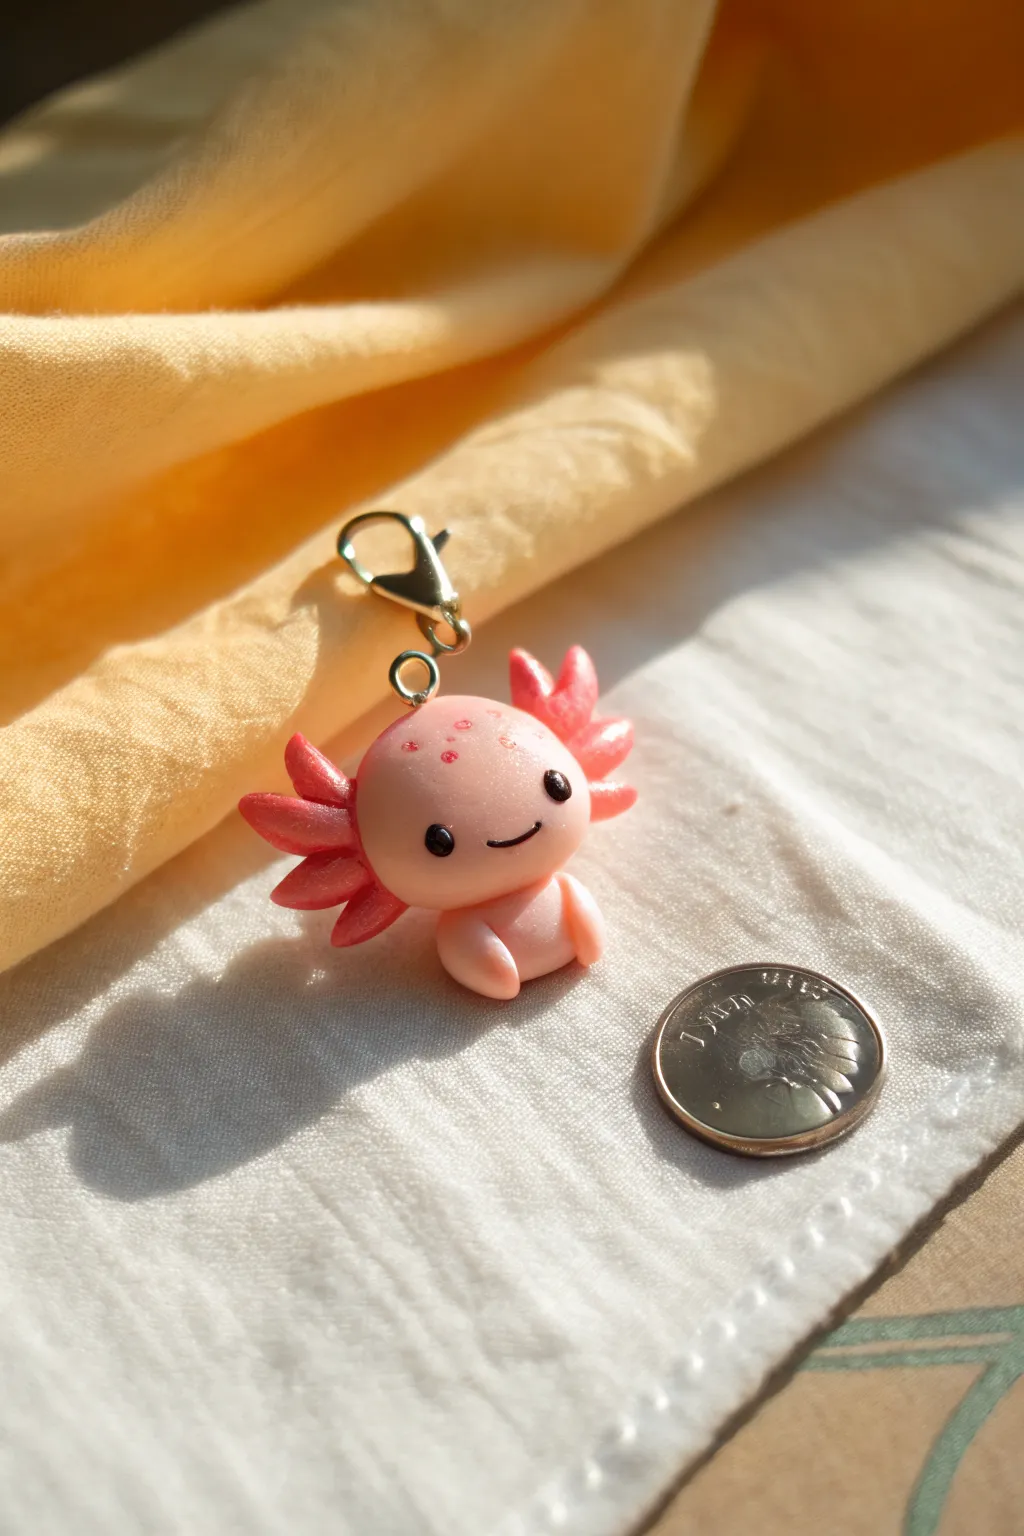
This adorable little axolotl charm captures the gentle smile and distinctive gills of everyone’s favorite aquatic salamander. Perfect for attaching to zippers or keychains, this project uses smooth polymer clay and simple shapes to create a kawaii character that fits in the palm of your hand.
Detailed Instructions
Materials
- Polymer clay (light pink for the body)
- Polymer clay (darker pink for gills/freckles)
- Polymer clay (black for eyes)
- Eye pin
- Small lobster clasp and jump ring
- Needle tool or toothpick
- Ball tool (small)
- X-acto knife or clay blade
- Clear glaze (optional)
- Oven for baking
Step 1: Sculpting the Head and Body
-
Mix your base color:
Start by conditioning your light pink clay until it is soft and pliable. If the pink is too bright, mix in a tiny amount of white to achieve that soft, pastel baby-pink hue seen in the photo. -
Form the head:
Roll a portion of the light pink clay into a smooth sphere about the size of a large marble. Gently flatten it just slightly between your thumb and forefinger to create a rounded bun shape. -
Shape the body:
Take a slightly smaller piece of the same light pink clay and roll it into a teardrop or gumdrop shape. The top should be flat enough to support the head. -
Attach head to body:
Press the head firmly onto the wider part of the body piece. You can blend the seam at the back of the neck with your finger or a smoothing tool to ensure they stick together well during baking. -
Create the limbs:
Roll two very tiny logs of light pink clay for the arms. They should be just a few millimeters long. -
Attach the arms:
Press the tiny arms onto the front of the body, curving them slightly inward so the axolotl looks like it’s resting its hands on its belly.
Smudge Patrol
Work with the darkest colors (black) last, or wash your hands thoroughly between colors. Keep baby wipes nearby to clean dust off the light pink clay before baking.
Step 2: Adding the Gills
-
Prepare the gill clay:
Condition a small amount of darker pink clay. This contrast color will define the axolotl’s famous feathery gills. -
make the stalks:
Roll out six tiny teardrop shapes from the dark pink clay. These should be quite small, roughly 3-4mm in length. -
Flatten the gills:
Gently press each teardrop flat. Use a needle tool to press tiny indentations or lines into them if you want extra texture, though smooth works perfectly for a kawaii look. -
Positon the gills:
Arrange three gills on the left side of the head and three on the right. Start with the middle gill to center the placement, then add the top and bottom ones. -
Blend the attachment points:
Use a small ball tool or the tip of a toothpick to gently press the base of each gill into the side of the head so they don’t fall off later.
Step 3: Face and Hardware
-
Mark the eye sockets:
Using a small ball tool, make two shallow indents on the face where the eyes will go. Spacing them widely apart increases the cute factor. -
Add the eyes:
Roll two microscopic balls of black clay. Pick them up with the tip of your needle tool and press them gently into the sockets you just created. -
Carve the smile:
Use a needle tool or a small arc-shaped tool to press a simple, tiny curved line between the eyes for the mouth. -
Insert the eye pin:
Trim a metal eye pin to about half an inch long. Push it straight down into the center of the top of the head. I like to add a tiny dab of liquid clay or bake-and-bond to the shaft for extra security. -
Add freckles:
Take extremely tiny specks of the dark pink clay and press them onto the forehead area randomly. Flatten them flush against the skin so they look like spots.
Tail Variation
Extend the body clay slightly at the back and flatten it vertically to create a swimming tail. You can wrap it around the side of the body for a curled sleeping pose.
Step 4: Finishing Up
-
Bake the charm:
Place your axolotl on a ceramic tile or baking sheet lined with parchment paper. Bake according to your brand of clay’s instructions (usually 275°F/135°C for 15-30 minutes). -
Cool down:
Let the piece cool completely before handling. Polymer clay is still slightly soft when hot and hardens as it cools. -
Glaze eyes:
For that bright, wet look visible in the photo, apply a tiny drop of gloss glaze or UV resin specifically to the black eyes. -
Attach hardware:
Using pliers, open a small jump ring and thread it through the eye pin loop on the head. Attach your lobster clasp before closing the ring securely.
Now your little aquatic friend is ready to dangle from your keys or bag!


Axolotl Stud Or Dangle Earrings
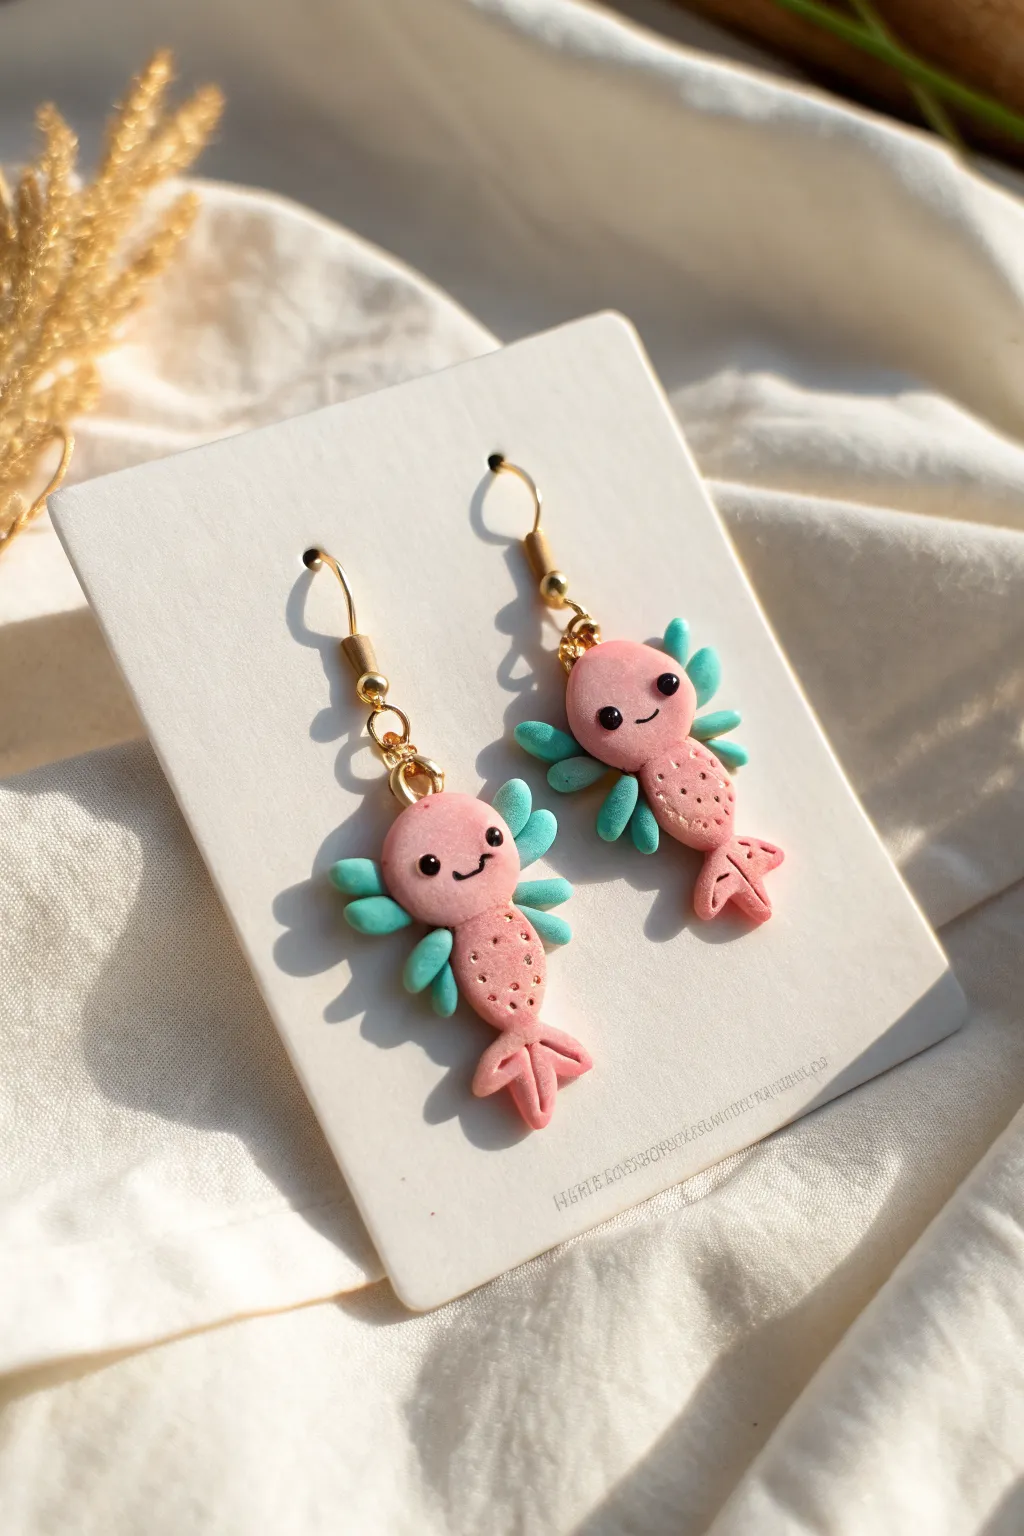
Create your own underwater friends with these charming dangling earrings featuring pastel pink bodies and soft teal gills. These polymer clay miniatures capture the friendly face of the axolotl, complete with tiny dotted textures and a playful swimming pose.
How-To Guide
Materials
- Polymer clay in pastel pink and soft teal/mint
- Polymer clay in black (tiny amount for eyes)
- Liquid polymer clay or bake-and-bond
- Gold-tone fishhook earring wires (2)
- Gold-tone eye pins (2)
- Needle tool or toothpick
- Small ball tool
- Round nose pliers
- Wire cutters
- Gloss glaze (optional)
Step 1: Sculpting the Body
-
Prepare the clay:
Begin by conditioning your pastel pink clay until it is soft and pliable. Roll two equal-sized spheres, roughly 1cm in diameter, to ensure your earrings will match in size. -
Shape the head:
Take one pink sphere and flatten it slightly into a rounded oval shape to form the head. -
Form the torso:
Roll a slightly smaller amount of pink clay into a teardrop or cone shape. Flatten the wider end slightly where it will attach to the head. -
Connect head and body:
Press the head onto the top of the body securely. Use a smoothing tool or your finger to gently blend the seam on the back side so the pieces won’t separate. -
Add the eye pin:
Before adding details, trim an eye pin to about 1cm long. Insert it vertically through the top center of the head. I like to add a tiny dab of liquid clay to the pin’s shaft for extra grip before baking.
Fingerprints showing?
If you see fingerprints on the smooth head area before baking, lightly brush the raw clay with a little baby oil or cornstarch to smooth them away instantly.
Step 2: Adding Fins and Gills
-
Create the tail fin:
Roll two small pink teardrops. Flatten them and press them onto the bottom point of the body, angling them outwards to look like a forked tail. -
Texture the tail:
Use a needle tool to impress a single line down the center of each tail section to give it definition. -
Make the external gills:
Switch to your teal or mint clay. Roll six tiny rice-grain shapes, three for each side of the head. -
Attach the gills:
Press three teal shapes onto the left side of the head and three onto the right side, fanning them out slightly. -
Detail the gills:
Using the needle tool, carefully press a horizontal indentation across the center of each teal gill to create a segmented look.
Make it Sparkle
Mix a tiny amount of pearlescent mica powder into the pink clay before sculpting. This gives the axolotl’s skin a subtle, magical shimmer perfect for aquatic creatures.
Step 3: Face and Details
-
Add texture:
Take a needle tool and gently poke shallow dots onto the pink body section to create a skin-like texture. -
Position the eyes:
Use a small ball tool to make two divots on the face where the eyes will go. Since these are Kawaii style, place them somewhat wide apart. -
Insert the eyes:
Roll two minuscule balls of black clay. Place them into the eye sockets and press gently to flatten them slightly. -
Carve the smile:
Use a needle tool or a very small curved blade to press a simple, happy ‘U’ shape mouth between the eyes. -
Bake the pieces:
Place your axolotls on a baking tile or parchment paper. Bake according to your brand of polymer clay instructions (usually 275°F/130°C for 15-30 minutes).
Step 4: Assembly
-
Cool and varnish:
Let the pieces cool completely. If desired, brush a light coat of gloss glaze over the eyes to make them shine. -
Open the ear wire:
Using your pliers, gently twist the loop at the bottom of the fishhook ear wire open sideways (never pull it straight apart). -
Attach the charm:
Slide the eye pin loop of your axolotl onto the ear wire loop. -
Close the loop:
Twist the ear wire loop back into place so the opening is flush. Repeat for the second earring.
Enjoy wearing your adorable new amphibian companions or gift them to a friend as a sweet surprise

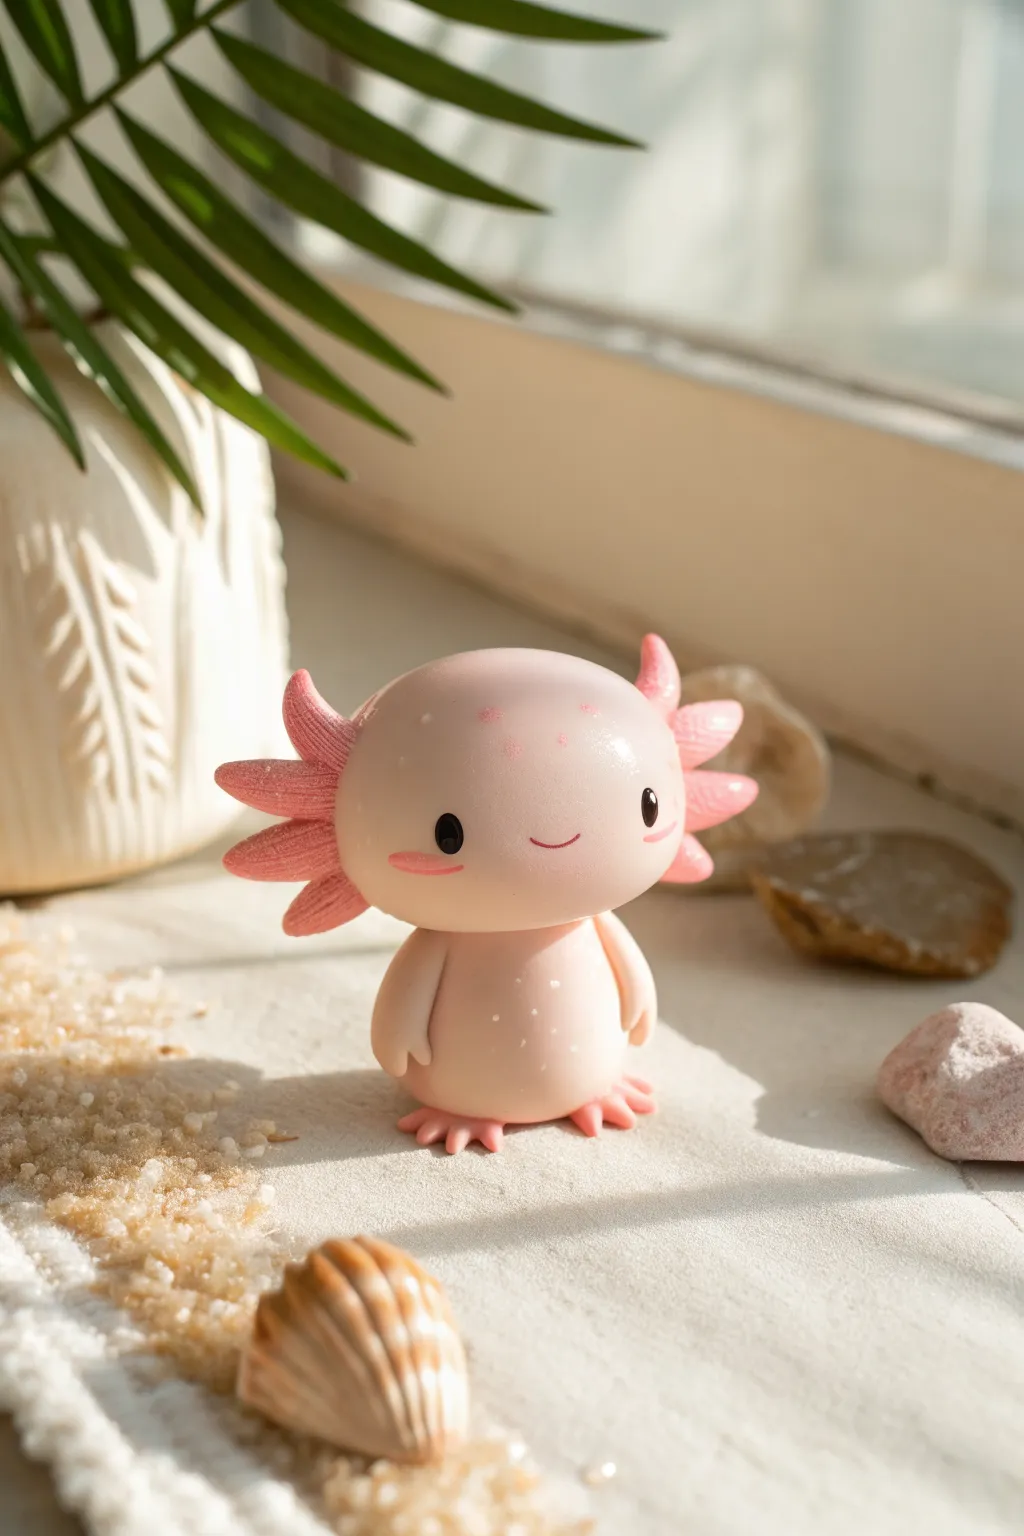
Axolotl Magnet Set
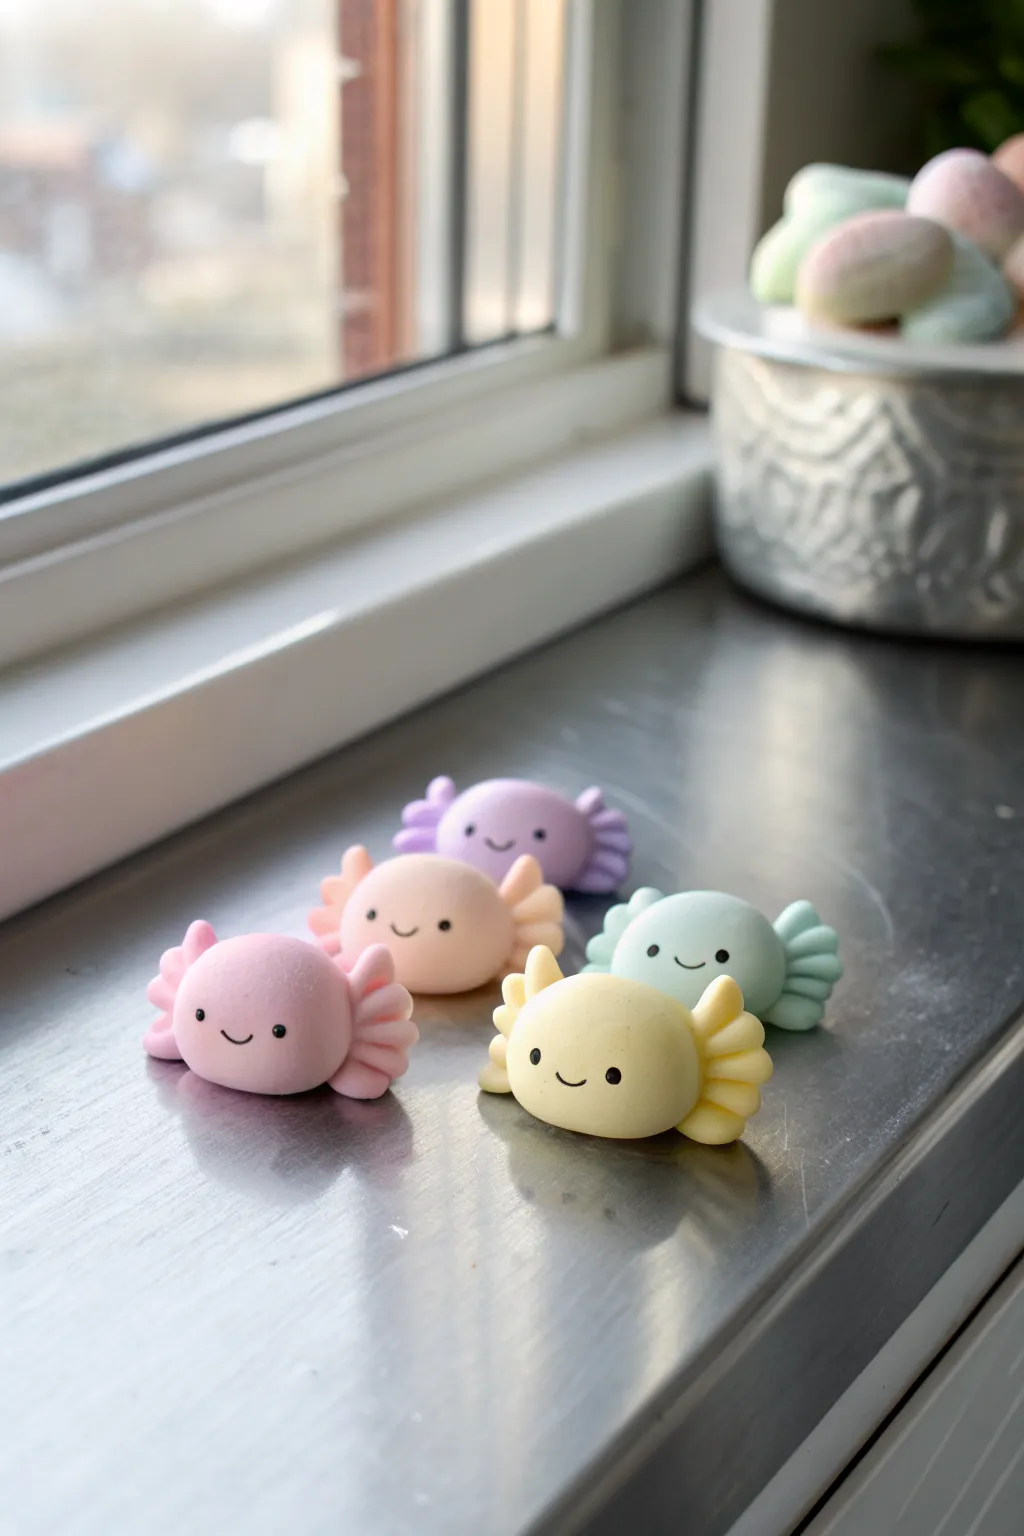
These adorable little axolotl magnets bring a splash of pastel sweetness to your fridge or locker. Their impossibly smooth, pill-shaped bodies and cheerful expressions make them a perfect beginner-friendly clay project.
Step-by-Step Tutorial
Materials
- Polymer clay (white, pink, lavender, mint green, pale yellow, peach)
- Black polymer clay (tiny amount)
- Small round magnets
- Super glue or heavy-duty craft glue
- Ball stylus tool (or a round-headed pin)
- Fine-point needle tool or toothpick
- Clay roller or pasta machine
- Baking sheet with parchment paper
- Craft knife or blade
- Oven
Step 1: Prepping the Palette
-
Condition the clay:
Start by thoroughly kneading each color of your clay until it is soft, pliable, and warm to the touch. This prevents cracks later on. -
Mix pastel shades:
To achieve the soft look in the photo, mix a large amount of white clay with very small amounts of your pigments (pink, purple, green, yellow) to create light, milky pastel tones. -
Portion control:
Divide your conditioned clay into equal portions. Aim for a ball about the size of a large grape or small walnut for each axolotl body.
Clean Clay Tip
Keep wet wipes handy! Clean your hands and tools thoroughly between colors (especially before touching white) to prevent dirty smudges on your pastels.
Step 2: Shaping the Bodies
-
Roll the main form:
Take one colored ball and roll it between your palms until it is perfectly smooth and free of fingerprints. -
Create the pill shape:
Gently apply pressure while rolling back and forth to elongate the ball into a chubby oval or pill shape. Keep the ends rounded rather than flat. -
Flatten the base:
Press the oval gently onto your work surface to create a flat bottom. This ensures the magnet will attach securely later without the figure rolling off. -
Smooth the surface:
Check for any lint or fingerprints. I like to lightly buff the surface with my finger dipped in a tiny bit of cornstarch or baby oil to get that matte finish.
Step 3: Adding the Details
-
Make the gills:
Roll six tiny balls of the same clay color for each axolotl. These should be very small, roughly the size of a peppercorn. -
Shape the tufts:
Slightly flatten the three tiny balls and press them together in a vertical stack. Repeat this for the other side. -
Attach the gills:
Press a stack of three gills onto the left side of the main body, and the other stack on the right side. Blend the seams gently with your finger or a silicone tool if necessary. -
Create texture:
Using a needle tool or toothpick, gently press a single horizontal indentation into the center of each gill tuft to give it a fluted look. -
Add the eyes:
Roll two minuscule specks of black clay into balls. Use your smallest ball tool to make tiny divots on the face, then press the black specks into the holes so they sit flush. -
Carve the smile:
Use a needle tool or a small curved blade to gently impress a shallow ‘u’ shape between the eyes for the mouth. Keep the line thin and delicate.
Sticky Situation
If your clay is too soft and sticky, leach it by placing it between two sheets of plain white paper for an hour to absorb excess oil before shaping.
Step 4: Finishing and Assembly
-
Bake carefully:
Place your finished axolotls on a baking sheet lined with parchment paper. Bake according to your polymer clay manufacturer’s instructions—usually around 275°F (130°C) for 15-20 minutes. -
Cool down:
Turn off the oven and let the clay cool down completely inside or on the counter before handling to prevent warping. -
Prepare the magnet:
Once cool, apply a drop of strong super glue to the center of the flat back of the axolotl. -
Attach backing:
Press the magnet firmly into the glue and hold for 30 seconds to set the bond. -
Final cure:
Let the glue cure fully for an hour before sticking your new amphibian friends onto the fridge.
Now you have a whole rainbow of tiny water monsters to guard your groceries

The Complete Guide to Pottery Troubleshooting
Uncover the most common ceramic mistakes—from cracking clay to failed glazes—and learn how to fix them fast.
Axolotl Plant Pot Hugger
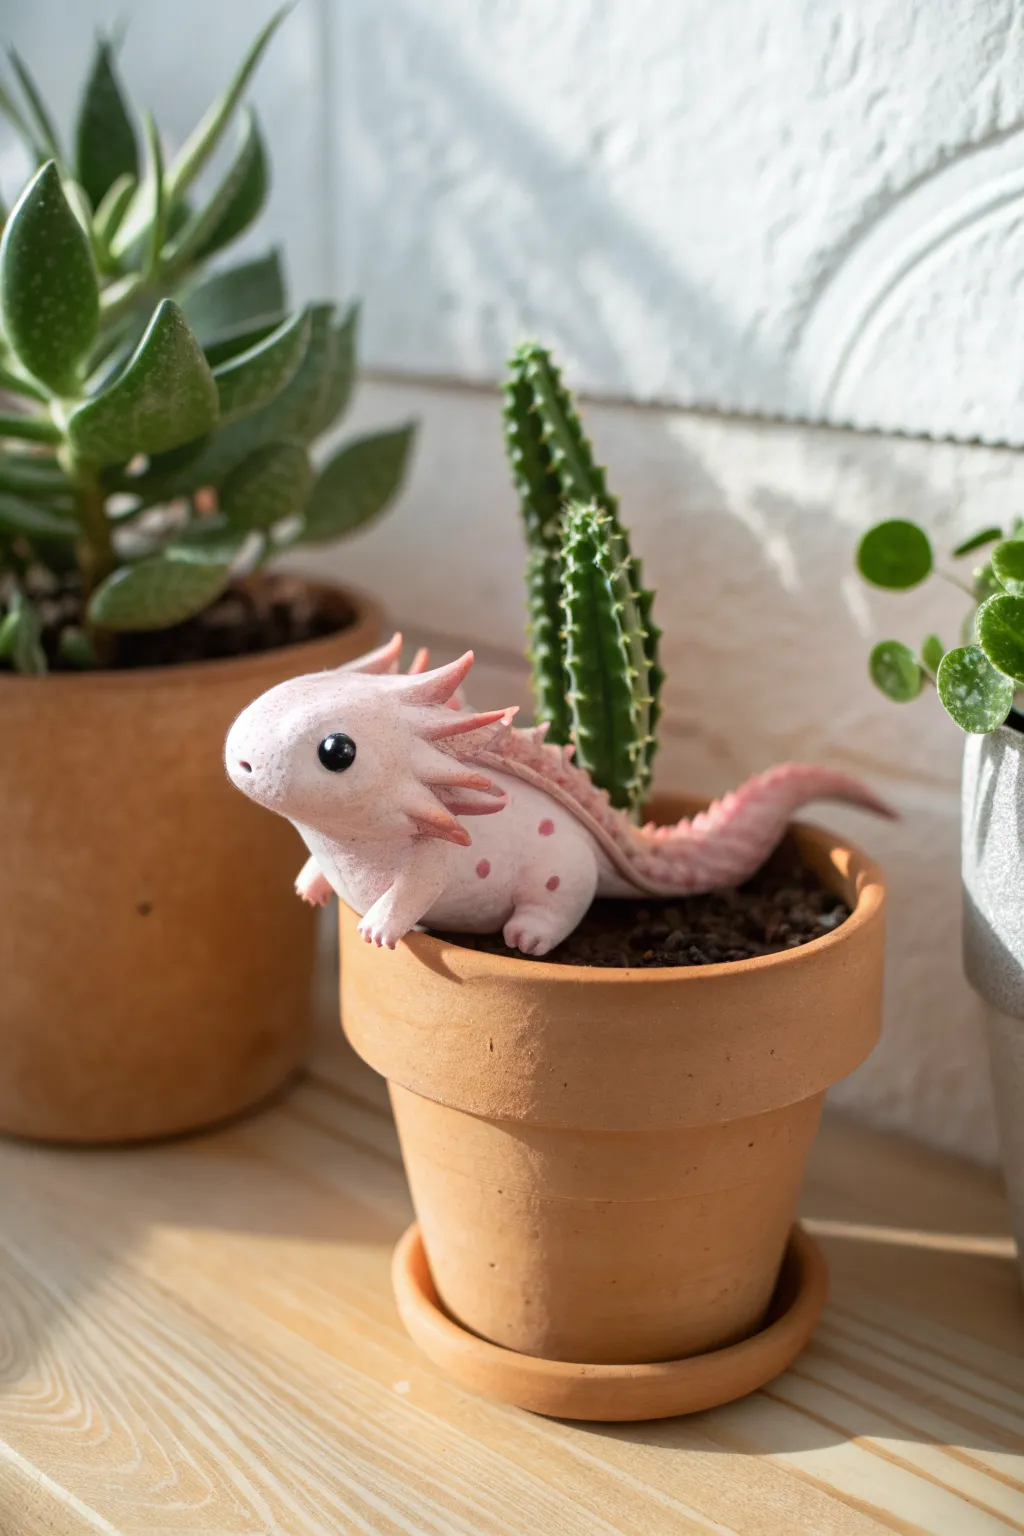
Add a touch of whimsy to your indoor garden with this adorable polymer clay axolotl that hugs the rim of your favorite plant pot. Its soft pink body, detailed gills, and gentle pose make it the perfect companion for a small cactus or succulent.
Detailed Instructions
Materials
- Light pink polymer clay (main body)
- Darker rose/coral pink polymer clay (gills and details)
- Translucent polymer clay (optional, for blending)
- Two small black glass beads or black clay
- Basic sculpting tools (needle tool, ball stylus)
- Wire armature or heavy gauge foil
- Texture sponge or toothbrush
- Soft pastel chalks in pink and red
- Small paintbrush
- Terracotta pot (for sizing)
- Liquid clay (TLS) or Bake and Bond
Step 1: Forming the Base Body
-
Create the armature:
Since this figure needs to curve over a pot rim, start by crumpling a small worm of aluminum foil into a curved shape that mimics the axolotl’s spine. Test the fit on your actual pot rim to ensure the curve is correct before covering it. -
Condition the clay:
Mix your light pink clay with a tiny bit of translucent clay if you want a more realistic, fleshy look. Knead it thoroughly until it is soft and conditioned. -
Cover the armature:
Flatten a sheet of the pink clay and wrap it around your foil core. Smooth out the seams completely until you have a seamless, sausage-like shape that tapers slightly towards the tail end. -
Shape the head:
Add a slightly larger ball of clay to the front end to form the head. Blend the neck seam meticulously so the transition is smooth. Flatten the snout area gently to give it that characteristic amphibian profile.
Step 2: Adding Limbs and Texture
-
Sculpt the front legs:
Roll two small logs of pink clay. Attach them to the upper body, positioning them so they look like they are gripping or resting on the pot rim. Blend the shoulder seams into the body. -
Shape the tiny toes:
Use a needle tool or small knife to carefully cut four tiny toes into the end of each paw. Gently separate and round them off so they don’t look sharp. -
Form the back legs:
Repeat the process for the back legs, but position them slightly lower and further back. I like to pose one leg slightly bent to give the impression of movement. -
Texture the skin:
To avoid a plastic look, gently tap the entire surface of the clay with a texture sponge or an old toothbrush. This creates a realistic, porous skin texture.
Sliding creature?
If your baked axolotl slips off the pot rim too easily, add a tiny dot of museum wax or poster putty underneath the belly to secure it safely without damaging the plant.
Step 3: Detailed Features
-
Insert the eyes:
Use a ball tool to make two small indentations on the sides of the head. Press your black glass beads (or tiny balls of black clay) into the sockets. -
Create the gill stalks:
Using the darker rose/coral clay, roll out six small, tapered cones. Attach three on each side of the head, behind the eyes. -
Add dorsal fin details:
Run a thin ridge of the darker pink clay down the center of the back and tail. Use your needle tool to press small indentations along this ridge to simulate the fin structure. -
Apply spots:
Roll tiny, paper-thin discs of the darker pink clay. Press these randomly onto the body, focusing on the back and tail, to create subtle spotted patterns. Roll over them gently to set them flush with the skin.
Glow Up
Mix glow-in-the-dark powder into your light pink clay or use glow clay for the spots. Your little garden guardian will faintly illuminate your plant shelf at night.
Step 4: Shading and Finishing
-
Shade with pastels:
Before baking, use a soft brush to apply pink pastel powder around the base of the gills, the elbows, and the tip of the tail. This adds depth and life to the sculpture. -
Final fitting:
Place the raw sculpture back onto the pot rim one last time to ensure the curve hasn’t warped during detailing. Adjust the legs if necessary to ensure a snug fit. -
Bake the piece:
Bake according to your clay manufacturer’s instructions. Pro-tip: Bake it while it’s resting on an oven-safe terracotta pot (or a crumpled foil mold) to ensure it holds that curved shape perfectly. -
Finish and seal:
Once cool, you can apply a matte varnish for protection, or add a dab of gloss varnish to the eyes to make them look wet and alert.
Now you have a charming little amphibian friend bringing life to your potted plants
Axolotl Ring Dish

Create a charming home for your jewelry with this handcrafted speckle-clay dish featuring a sculpted axolotl friend. The gentle contrast between the teal and coral glazes gives it a lovely, watery feel perfect for a bedside table.
Step-by-Step Guide
Materials
- Speckled polymer clay (or white clay mixed with faux granite powder)
- Acrylic paints (Teal, Coral/Salmon, Gold, Black)
- Gloss varnish or resin
- Rolling pin
- Circle cutter or bowl for template
- Sculpting tools (needle tool, blending tool)
- Small paintbrushes
- Sandpaper
Step 1: Forming the Base
-
Prepare the Clay:
Condition your speckled clay until it is soft and pliable. If you don’t have pre-speckled clay, mix a small amount of black pepper or granite-effect powder into white clay for that artisanal ceramic look. -
Roll the Slab:
Roll the clay out to a consistent thickness of about 1/4 inch. Making it too thin might cause the rim to warp later. -
Cut the Circle:
Use a large circle cutter or trace around a bowl (approx. 4-5 inches diameter) to cut out your base shape. -
Create the Rim:
Roll a long snake of clay. Place it on top of the circle’s outer edge. Blend the seam on the inside and outside using a modeling tool or your finger until the join is invisible and the wall stands up straight. -
Smooth the Surface:
Use a little water (for air dry clay) or baby oil (for polymer) to smooth out any fingerprints or tool marks on the dish’s interior.
Fixing Cracks
If you see cracks after baking polymer clay, fill them with a mix of liquid clay and raw clay, then rebake briefly to seal.
Step 2: Sculpting the Axolotl
-
Shape the Body:
Form a teardrop shape from clay for the axolotl’s body. Curve the tail slightly so it hugs the interior curve of the bowl. -
Attach the Axolotl:
Score and slip (or use liquid clay) to attach the body to the inside wall of the dish. Position it so the head peeks over the rim slightly. -
Add Limbs:
Roll four tiny logs for legs. Attach two near the head and two further back, pressing them gently onto the dish surface to secure them. -
Make the Gills:
Create three small, flattened petal shapes for each side of the head. Attach these behind the head area to form the axolotl’s signature external gills. -
Refine Details:
Use a needle tool to poke a tiny hole for the eye if you plan to paint it later, or just smooth the face for a minimal look.
Step 3: Finishing Touches
-
Bake or Dry:
Follow the instructions for your specific clay. If baking polymer clay, tent it with foil to prevent scorching the thin gill pieces. -
Sand the Edges:
Once fully cured/dried, lightly sand the rim of the bowl to ensure it is perfectly round and smooth. -
Paint the Interior:
Dilute your teal and coral acrylic paints slightly with water to create a watercolor glaze effect. Paint half the interior bottom teal and the other half coral, blending them softly in the middle. -
Decorate the Exterior:
Using the coral paint, add swirling, semi-circle brushstrokes along the outside wall of the dish to mimic water ripples. -
Paint the Axolotl:
Paint the gills gold for a metallic pop. Add stripes of coral down the axolotl’s back and tail. Use a tiny dot of black paint for the eye. -
Seal the Dish:
Coat the entire piece, especially the painted areas, with a high-gloss varnish or a thin layer of resin to give it that shiny, ceramic-glazed appearance.
Glow Up
Mix glow-in-the-dark powder into the teal paint for the water section so your ring dish illuminates softly at night.
Place your favorite rings inside and enjoy your customized little amphibian friend


What Really Happens Inside the Kiln
Learn how time and temperature work together inside the kiln to transform clay into durable ceramic.
Axolotl Keepsake Box
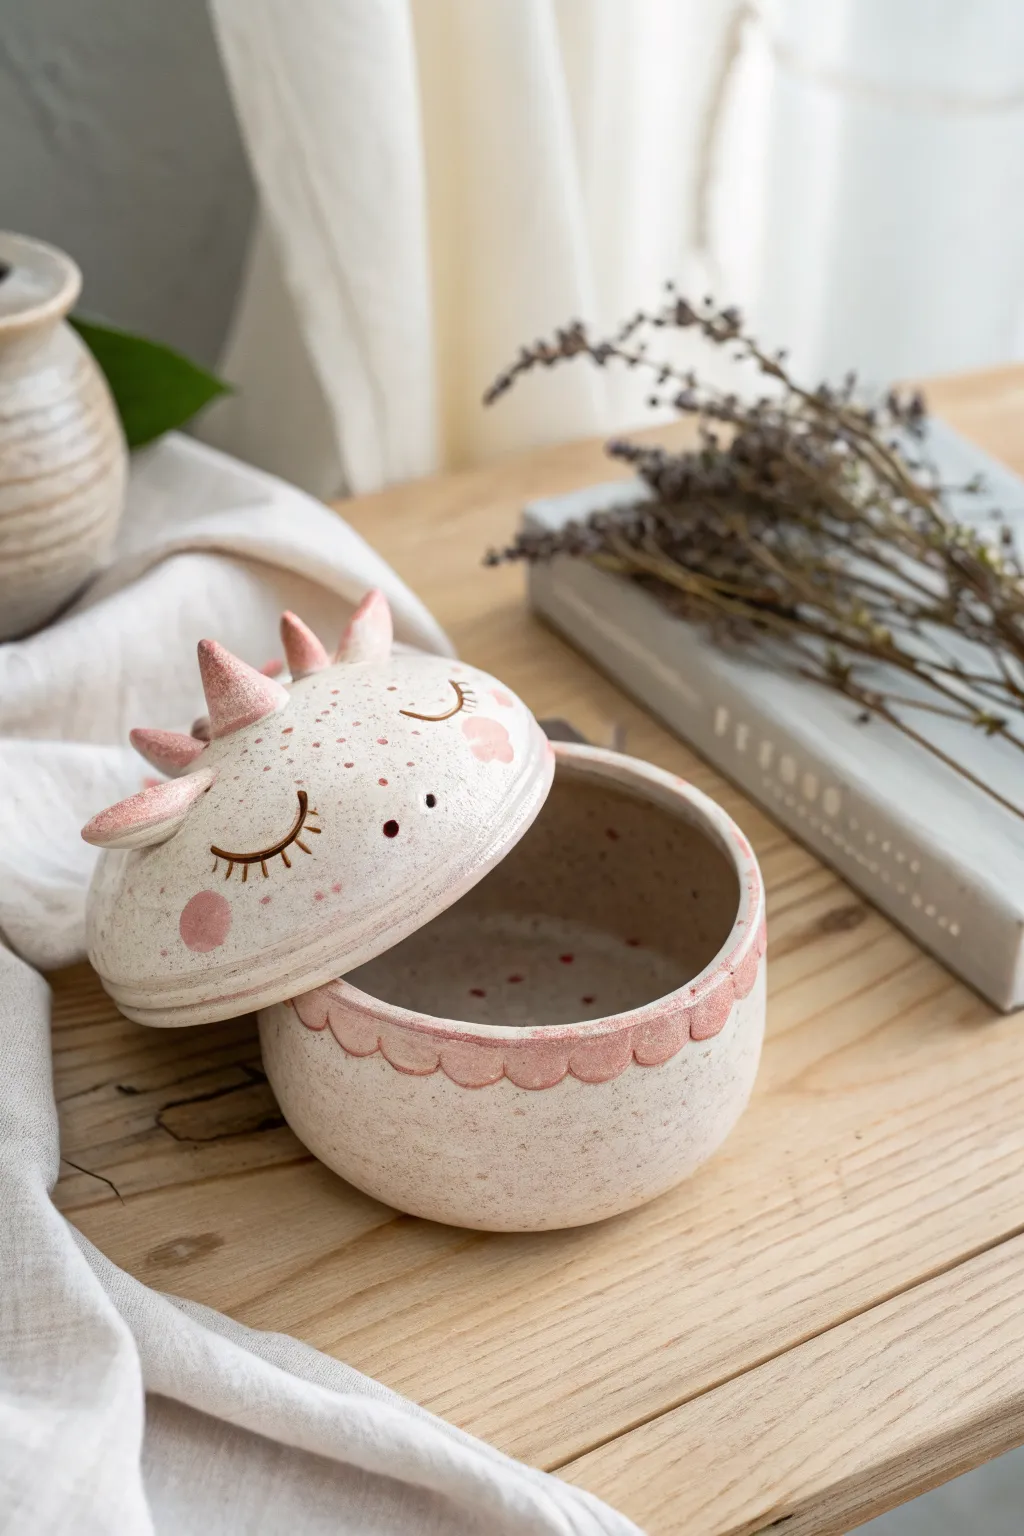
This whimsical speckled clay pot features a lid modeled after a sleeping axolotl, complete with iconic fringe gills and a gentle smile. The textured stoneware finish and soft pink glaze accents make it a sweet, functional piece for storing small treasures.
Detailed Instructions
Materials
- Speckled buff stoneware clay (or polymer clay with faux speckles)
- Pottery wheel (optional) or slab roller/rolling pin
- Kemper pottery needle tool
- Scoring tool or serrated rib
- Slip (clay and water slurry)
- Small sponge
- Pink underglaze or acrylic paint (if using polymer)
- Clear matte or satin glaze
- Small round paintbrush
- Loop tool for trimming
- Circle template or cookie cutter (approx. 4-inch diameter)
Step 1: Forming the Vessel
-
Roll the base slab:
Begin by rolling out a quarter-inch thick slab of speckled clay. Cut a long rectangular strip for the walls (about 2 inches high and 13 inches long) and a circular base about 4 inches in diameter. -
Construct the cylinder:
Score the edges of the circular base and the bottom edge of your rectangular strip. Apply slip generously to both scored areas. -
Join the walls:
Wrap the strip around the base, pressing firmly to adhere. Where the two ends of the wall meet, bevel cut them at a 45-degree angle, score, slip, and join the seam so it is invisible. -
Smooth the form:
Use a damp sponge or a flexible rib to smooth the outside and inside walls, blending the clay connection at the bottom so it becomes one seamless piece. Gently curve the walls outward slightly to create a rounded belly shape.
Step 2: Sculpting the Lid
-
Create the lid curve:
Roll a second slab for the lid slightly larger than your pot’s opening. Gently drape it over a small bowl or a mold to create a shallow dome shape. Let it stiffen slightly so it holds its curve. -
Add a flange:
Flip the domed lid over. Roll a small coil of clay and attach it to the underside of the lid, measuring carefully so it fits snugly inside the rim of your pot base to keep the lid from sliding off. -
Smooth the lid surface:
Turn the lid right-side up. Use a rib tool to ensure the dome is perfectly smooth and rounded, ready for the facial details. -
Form the gills:
Hand-roll six small cones of clay for the external gills—three for each side. The longest should be about an inch, getting progressively smaller. Gently curve the tips backward somewhat. -
Attach the gills:
Score and slip the base of each cone and attach them to the top back sides of the lid, arranging them in a fan-like cluster.
Lid Fit Troubleshooting
If the lid is wobbly after firing, use a bit of wet sanding paper or a grinding stone on the underside flange to even out high spots for a perfect, chatter-free fit.
Step 3: Detailing and Surface Design
-
Sculpt decorative scallops:
Roll a very thin coil. Flatten it slightly and cut it into small semi-circles. Attach these along the upper rim of the base pot significantly overlapping, creating a scalloped lace pattern. -
Carve the face:
Using a needle tool, carefully carve two U-shaped curves for the sleeping eyes. Make small impressions for the nostrils. -
Add texture:
I like to use a stiff bristle brush or a toothbrush to gently tap the clay surface, enhancing the natural speckled texture, but be careful not to blur your carved lines. -
Apply the blush:
Using pink underglaze, paint two round circles on the cheeks and fill in the scalloped edge on the base pot. Paint the tips of the sculpted gills pink as well. -
Paint the eyelashes:
Use a dark brown underglaze with a very fine detail brush to carefully paint the eyelashes flowing downward from the carved eye slits. -
Add final speckles:
Dip a toothbrush in watered-down pink underglaze and flick the bristles to create a spray of pink freckles across the forehead and nose area of the axolotl. -
Bisque fire:
Allow the piece to dry slowly under plastic for several days to prevent warping, then bisque fire to cone 04. -
Glaze and final fire:
Dip the entire piece in a clear matte or satin glaze. Wipe the bottom of the foot clean with a sponge so it doesn’t stick to the kiln shelf, then fire to cone 6 (or your clay’s specific temperature).
Level Up: Tail Handle
Add a small, curled clay tail handle to the back of the lid base. It adds character and makes the lid easier to lift off the jar.
Place your rings or trinkets inside this adorable amphibian friend for safe keeping
Rainbow Gill Color Variations
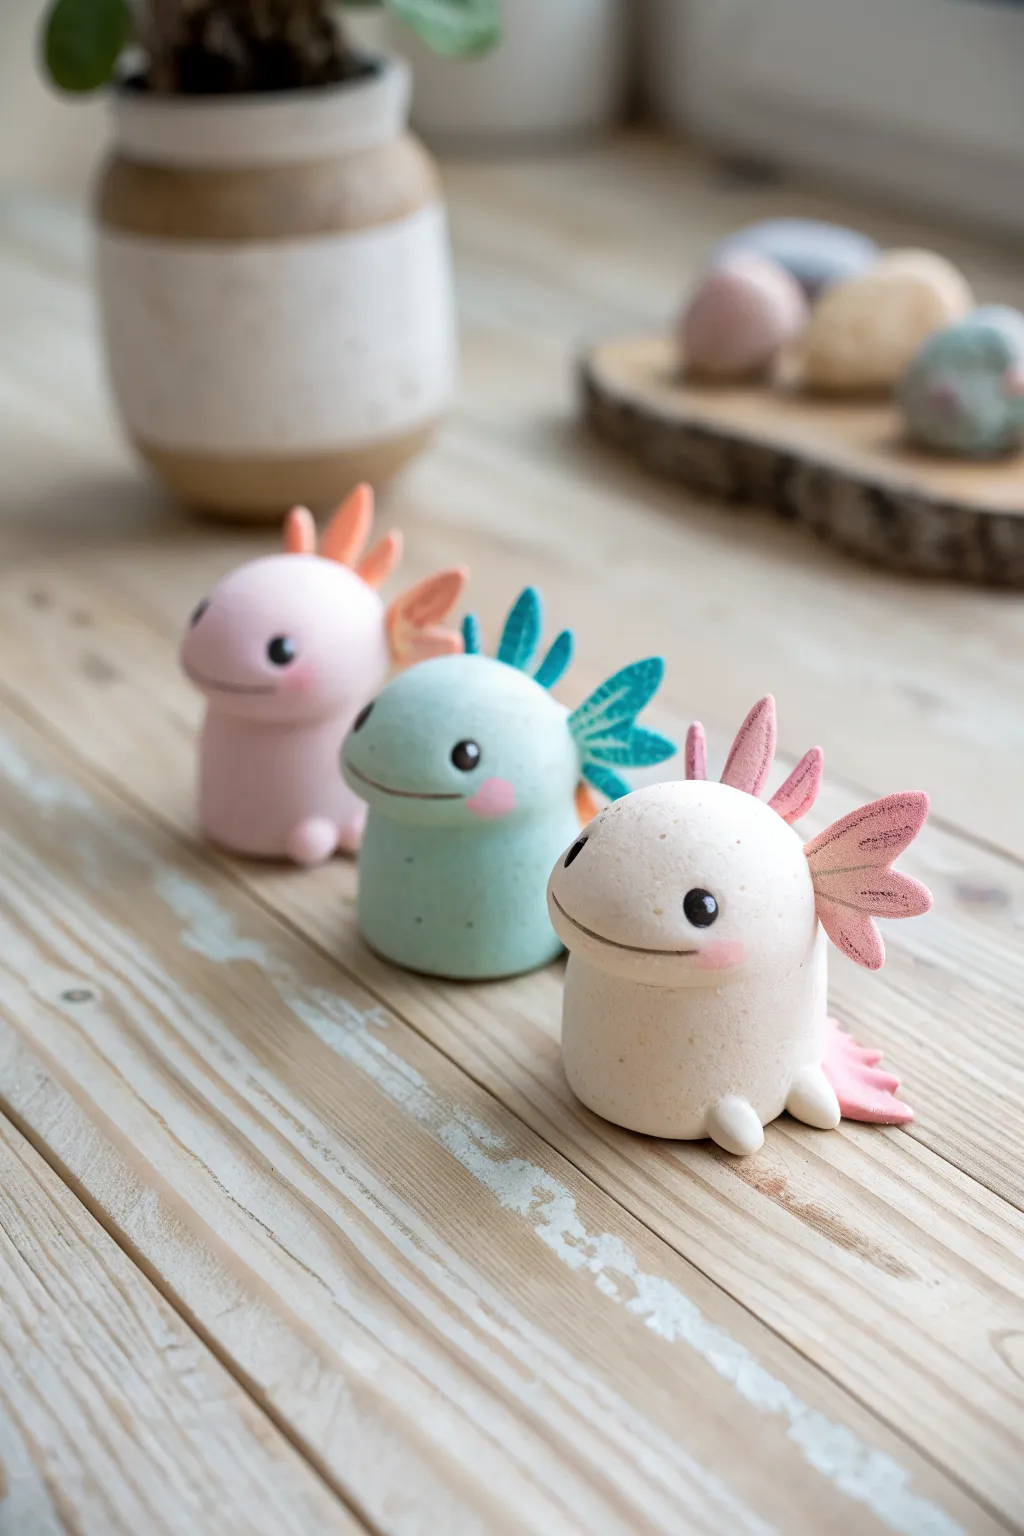
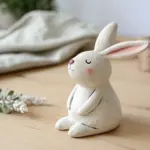
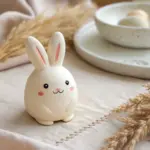
Create a charming set of minimal, stylized axolotls with distinct, leaf-like gills and soft pastel bodies. These rounded salamanders feature a smooth, matte finish and gradient gill details that make them perfect desk companions.
Step-by-Step
Materials
- Polymer clay (baby pink, mint green, cream/white, dark pink)
- Black polymer clay or small black beads (for eyes)
- Clay sculpting tools (needle tool, small ball stylus)
- Acrylic rolling pin
- Soft artist pastels (pinks and reds) for shading
- Small fluffy paintbrush
- Oven for baking
- Aluminum foil (for armature/support)
- Matte varnish (optional)
Step 1: Shaping the base bodies
-
Condition the clay:
Start by warming up your clay in your hands until it is pliable. You’ll need separate balls of pink, mint green, and cream clay for the three different characters. -
Form the main shape:
Roll a large ball of clay into a smooth cylinder with a rounded top and a flat bottom. It should look like a squat, thick marshmallow—this serves as the combined head and body. -
Smooth the surface:
Gently roll the cylinder on your work surface to ensure the sides are perfectly smooth and remove any fingerprints. If the clay gets too warm, let it rest for a moment. -
Define the face area:
Using your thumb, press ever so slightly into the upper front section to create a faint indentation where the face will sit, giving the creature a bit of a snout profile.
Drooping Gills?
If the gills are sagging before baking, prop them up with small crumpled pieces of paper towel or polyester fiberfill. This holds the shape during baking without leaving marks.
Step 2: Creating the signature gills
-
Roll thin sheets:
For the pink axolotl, mix a slightly darker pink or peach clay. Roll this out into a thin sheet, about 2-3mm thick. -
Cut gill shapes:
Cut out three teardrop shapes for each side of the head (six total). Make the top one slightly smaller, the middle largest, and the bottom one medium-sized. -
Add texture:
Use a needle tool or small knife to gently press vein lines into each gill piece. I like to score a central line and then tiny diagonal lines branching off to mimic a leaf or feather. -
Dry brush shading:
Before attaching, shave a little bit of red or dark pink pastel into a powder. Use a soft brush to dust the tips and centers of the gills to create a gradient effect. -
Repeat for all colors:
Repeat this process for the mint green axolotl (using teal or darker green gills) and the cream axolotl (using pink gradient gills).
Make it Sparkle
Mix a small amount of mica powder or fine glitter into the translucent clay for the gills before shaping. This gives the fins an aquatic, shimmering effect that catches the light.
Step 3: Assembly and details
-
Attach the gills:
Press the gill pieces onto the sides of the head using a blending tool to smooth the seam where the clay connects. Arrange them so they fan out beautifully. -
Create the tail:
Form a small, flattened teardrop shape for the tail fin. Add the same textured vein details as the gills and attach it to the lower back center of the body. -
Add tiny feet:
Roll tiny balls of the body color clay and press them onto the front bottom edge of the cylinder to create little nubby feet. You only need two in the front for this stylized look. -
Sculpt the mouth:
Use a needle tool or a clay knife to press a wide, shallow ‘U’ shape into the face area. Curve the ends slightly upward to ensure a happy expression. -
Place the eyes:
Roll two minuscule balls of black clay. Press them firmly into the face above the mouth, spacing them wide apart for maximum cuteness. Flatten them slightly so they aren’t bulging. -
Add blush:
Take your pink pastel powder again and use a small brush or q-tip to gently dab rosy cheeks right under the eyes.
Step 4: Baking and finishing
-
Pre-bake check:
Look over your figures for any lint or dust. You can remove specks using a q-tip dipped in a tiny bit of rubbing alcohol. -
Bake:
Bake the figures according to your clay manufacturer’s instructions (usually 275°F/135°C for 15-30 minutes depending on thickness). -
Cool down:
Let the figures cool completely in the oven with the door likely ajar to prevent cracking from thermal shock. -
Sanding (optional):
If there are any rough spots on the bottom, gently sand them with fine-grit sandpaper once the clay is fully hard and cool.
Now you have a trio of sweet water monsters ready to brighten up any shelf.

TRACK YOUR CERAMIC JOURNEY
Capture glaze tests, firing details, and creative progress—all in one simple printable. Make your projects easier to repeat and improve.
Mini Pond Diorama With Axolotl
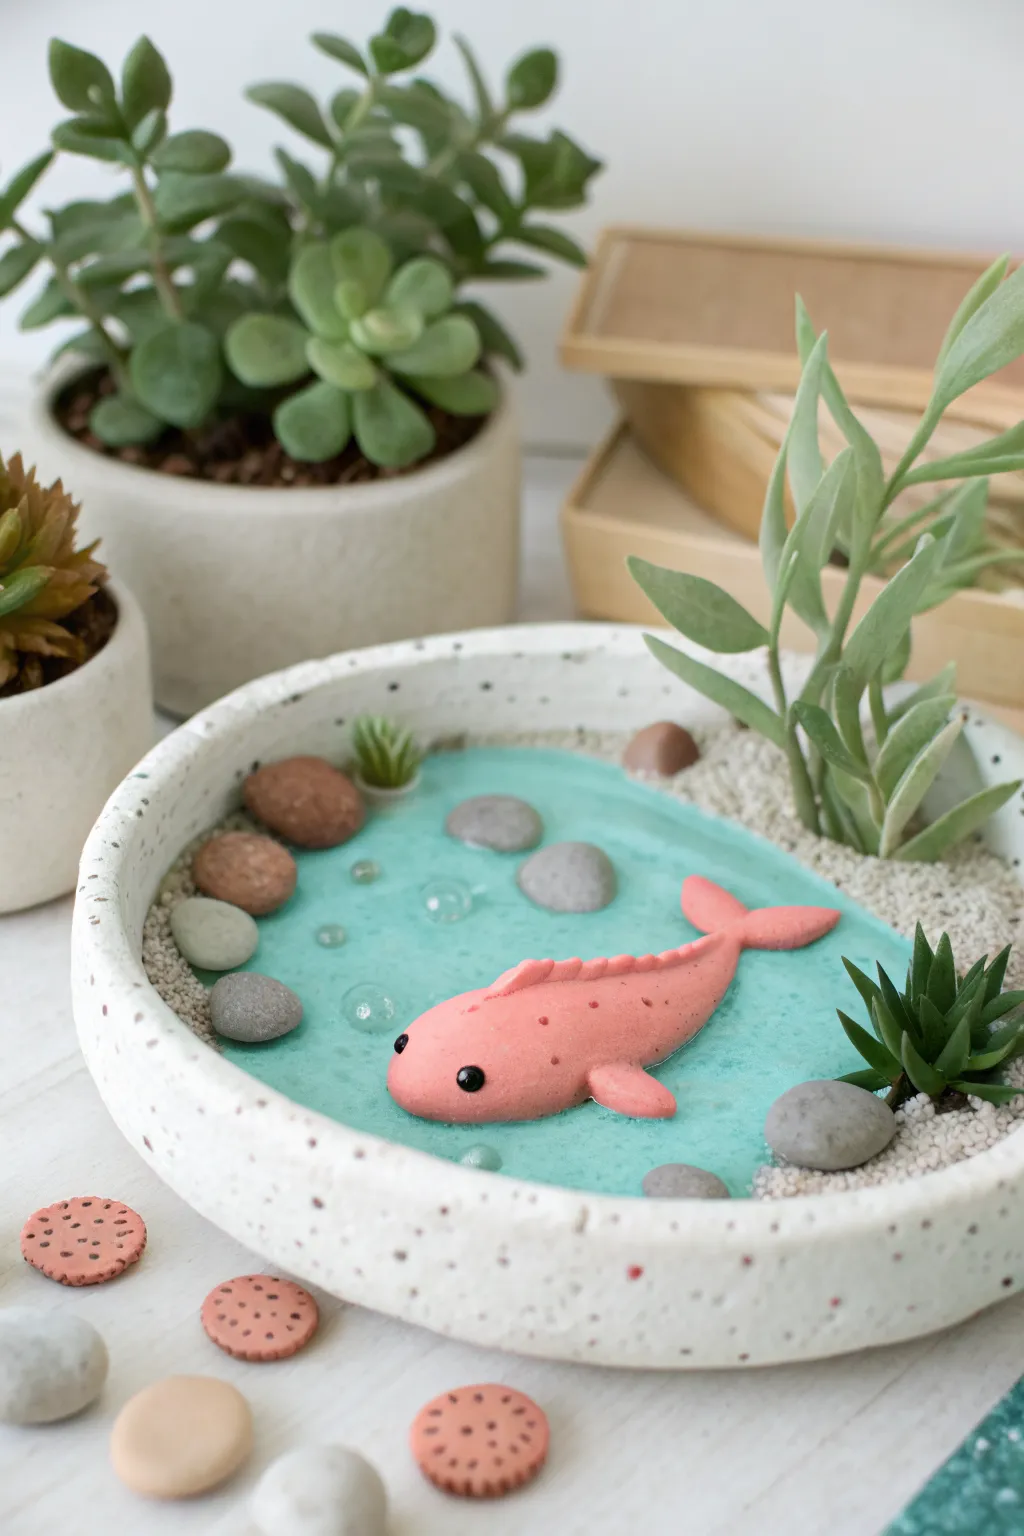
Create a serene miniature world with this charming clay diorama, featuring a peaceful pink axolotl swimming in a crystal-clear pond. The mix of textures—from the sandy shore to the smooth ‘water’—makes this a delightful desk companion that never needs feeding.
Step-by-Step Guide
Materials
- Air-dry clay or polymer clay (pink, white, terracotta, stone grey)
- Shallow ceramic bowl or saucer (white speckled preferred)
- Clear UV resin or 2-part epoxy resin
- Light blue pigment or alcohol ink (for resin)
- Fine white crafting sand
- Small artificial succulents
- Acrylic paints (black, pink shading)
- Clay sculpting tools
- UV light (if using UV resin)
- Gloss varnish
- Small pebbles or rocks
Step 1: Sculpting the Residents
-
Shape the Axolotl Body:
Start with pink clay, rolling a smooth, elongated teardrop shape for the body. Gently curve the tail to one side to simulate movement. -
Add Fins and Gills:
Flatten small pieces of pink clay into triangles for the back dorsal fin. Attach two small ovals for the side flippers, blending the seams with a silicone tool so they look natural. -
Detail the Face:
Use a small dotting tool to indent eye sockets. Press tiny balls of black clay into these spots for eyes. Add barely-there spots along the back using a darker pink paint or clay specks. -
Create Companion Decor:
Roll out small discs of terracotta-colored clay to create the little ‘lotus root’ slices seen outside the bowl. Use a needle tool to poke the signature hole pattern. -
Bake or Dry:
If using polymer clay, bake your axolotl and loose pieces according to package instructions. If using air-dry clay, allow 24-48 hours for full drying before proceeding.
Cloudy Water Fix
If your resin looks cloudy after curing, it might be humidity or incorrect mixing. Add a glossy topcoat of clear polyurethane varnish to restore the crystal-clear ‘wet’ look instantly.
Step 2: Preparing the Habitat
-
Set the Base Layer:
Take your ceramic bowl. If the bottom is uneven, add a thin layer of clay to level it out, but keep it lower than the rim to allow space for the water. -
Design the Coastline:
Decide where your water line will be. Keep the center open for the pond, but build up the edges slightly if you want a deeper sandy bank. -
Position the Rocks:
Place your larger smooth grey stones and reddish pebbles into the bowl. I find glueing them down with a dab of superglue helps prevent them from floating away during the resin pour. -
Secure the Sand:
Mix a small amount of white craft sand with white glue or clear resin to create a paste. Apply this ‘wet sand’ mixture around the taller edges of your bowl to lock the beach in place. -
Dry Sand Top Coat:
While the glue mix is wet, sprinkle loose dry sand over the top. This hides the glossy glue texture and makes the beach look realistic.
Glow Up
Mix a tiny amount of glow-in-the-dark powder into the white sand or the resin water. Your mini pond will turn into a magical bioluminescent lagoon when the lights go out.
Step 3: Pouring the Pond
-
Mix the Water:
Prepare your resin. Add a tiny drop of light blue pigment or alcohol ink. You want it translucent teal, not opaque blue, so go easy on the color. -
The First Pour:
Pour a thin base layer of resin into the center. Cure this layer with your UV light or let it harden if using epoxy. This ensures no bubbles get trapped under the axolotl later. -
Placement:
Place your hardened axolotl onto the first cured layer of resin. Position it swimming centrally or slightly off-center for a natural look. -
The Final Pour:
Pour the remaining resin around the axolotl until it reaches halfway up its body. Careful pouring creates a surface tension effect against the clay skin. -
Removing Bubbles:
Use a lighter or heat gun quickly over the surface to pop any rising air bubbles. Watch for bubbles specifically trapped under the fins. -
Curing:
Place under UV light or let set for 24 hours. Ensure it is perfectly level while curing.
Step 4: Finishing Touches
-
Planting Succulents:
Once the resin is hard, snip the stems of your faux succulents. Glue them into the dry sandy areas or wedge them securely between rocks. -
Surface Details:
For extra realism, you can add tiny drops of clear UV resin on the water surface to mimic ripples or bubbles created by the axolotl’s movement. -
Arrangement:
Place the little clay lotus root slices and extra smooth decorative pebbles casually around the outside of the bowl for a complete aesthetic display.
Enjoy the peaceful presence of your new aquatic friend on your desk or shelf