If you’re in the mood to make something ridiculously sweet, capybara clay projects are basically instant joy. I love them because you can keep the shapes simple and still get tons of personality with just a few tiny details.
Classic Loaf-Shaped Capybara Figurine
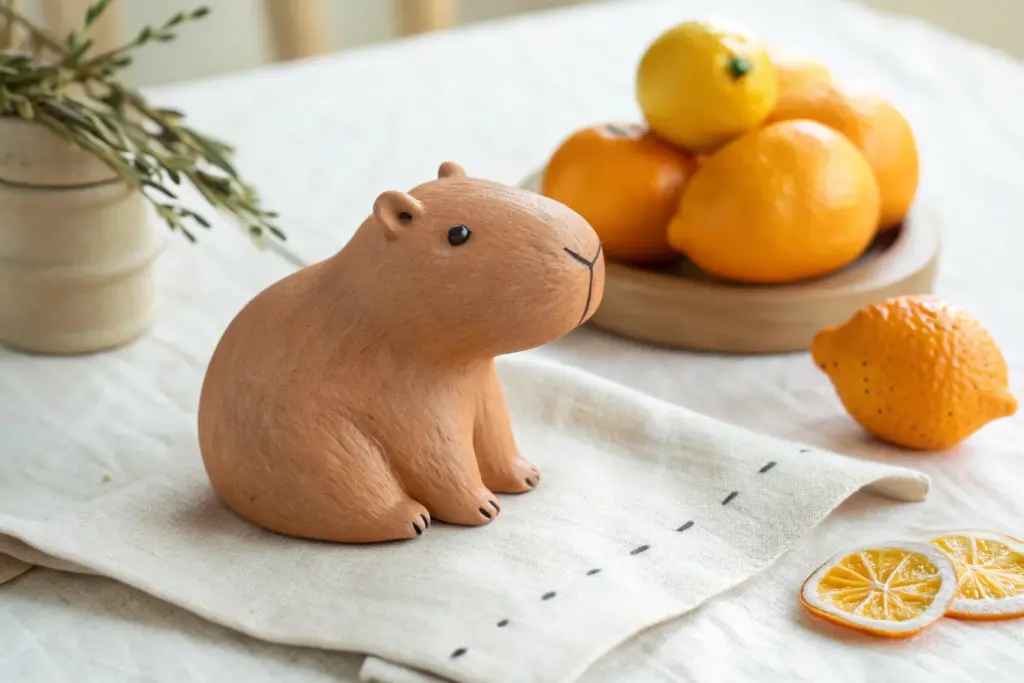
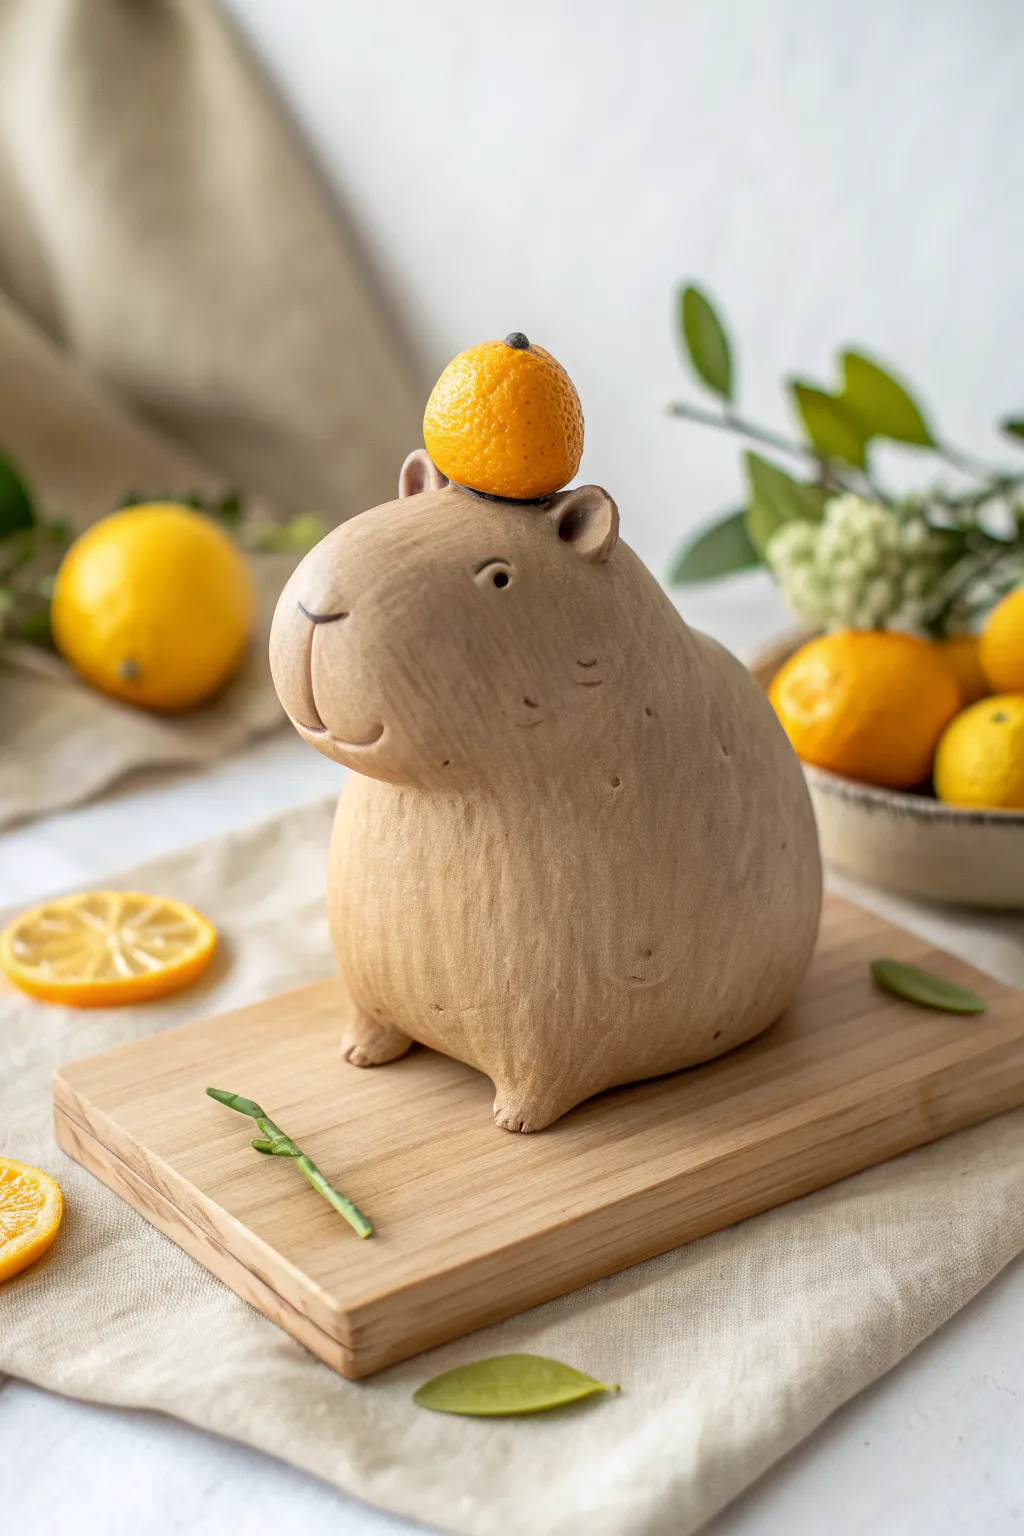
This tutorial guides you through sculpting a charmingly simple capybara figurine with a classic blocky head and rounded body. The result is a smooth, earthy-toned keepsake that captures the peaceful essence of everyone’s favorite giant rodent.
Step-by-Step Guide
Materials
- Light brown or terracotta air-dry clay (or polymer clay)
- Small black beads or black clay for eyes
- Sculpting tools (needle tool, small spatula)
- Water and a sponge (for smoothing)
- Fine-grit sandpaper
- Thin black wire or black paint (for the nose/mouth)
Step 1: Forming the Base
-
Prepare the clay:
Start by kneading a fist-sized ball of clay until it is warm and pliable. This conditioning step prevents cracks later on. -
Shape the main body:
Roll your clay into a smooth oval or egg shape. Gently flatten the bottom so it sits stable on your work surface. -
Define the head:
Use your fingers to pinch and pull one end of the oval upwards and outwards slightly to form the head area. Capybaras have very rectangular, blunt snouts, so don’t make it too pointy. -
Squaring the snout:
Tap the front of the face gently against your table or smooth it with a flat tool to create that signature boxy capybara profile. It should look heavy and blunt. -
Smooth the transition:
Blend the neck area into the body. Capybaras are notoriously neckless, so aim for a thick, minimal transition rather than a defined neck.
Step 2: Sculpting the Legs and Details
-
Mark led positions:
Flip the figurine over gently. Using a modeling tool, mark four spots where the legs will go. Keep them relatively centered to maintain that chubby look. -
Pull out the legs:
Instead of attaching separate pieces, I prefer to gently pull the clay down from the main body to form four short, stubby legs. This ensures a stronger structure. -
Refine the stance:
Tap the figurine on the table again to flatten the bottom of the feet. Ensure it stands level and doesn’t wobble. -
Create the ears:
Roll two very small balls of clay. Flatten them slightly and gently press them onto the top of the head, set fairly far back. Use a rounded tool to create a small indentation in the center of each ear. -
Blend the ears:
Use a small tool or your finger to smooth the base of the ears into the head so they don’t look like they were just stuck on.
Fixing Cracks
If small fissures verify appear as your air-dry clay shrinks, mix a tiny amount of fresh clay with water to make a paste (slip) and fill the cracks, then smooth over.
Step 3: Adding Texture and Facial Features
-
Add surface texture:
If you want that slightly brushed, realistic look shown in the photo, take a stiff bristle brush or a textured sponge and lightly tap it over the body. Do this while the clay is still damp. -
Position eye sockets:
Use a small ball-ended tool to press two small indentations on either side of the head. Capybara eyes are quite high up on their face. -
Insert the eyes:
Press a small black bead into each socket. If you are using polymer clay, make sure the beads are oven-safe, or use bits of black clay instead. -
Carve the mouth:
Using a needle tool or a very thin blade, carefully incise a ‘Y’ shape at the front of the snout. The vertical line should be the mouth, splitting off into the nostrils at the top. -
Final smoothing:
Dip your finger in a little water (for air-dry clay) or baby oil (for polymer) and give the whole piece a final gentle rub to remove harsh fingerprints. -
Drying or baking:
Allow the piece to dry fully according to your clay’s instructions. If baking, support the belly with a bit of polyester batting so it doesn’t sag in the oven. -
Finishing touches:
Once hardened, you can use fine-grit sandpaper to buff away any unintentional rough spots gently.
Citrus Spa Twist
Make a tiny orange fruit out of scrap clay and glue it to the top of your capybara’s head for that iconic ‘hot spring capybara’ vibe.
Now you have a serene little desk companion to keep you company during your day


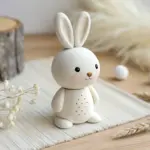
Chibi Capybara With Blush Cheeks
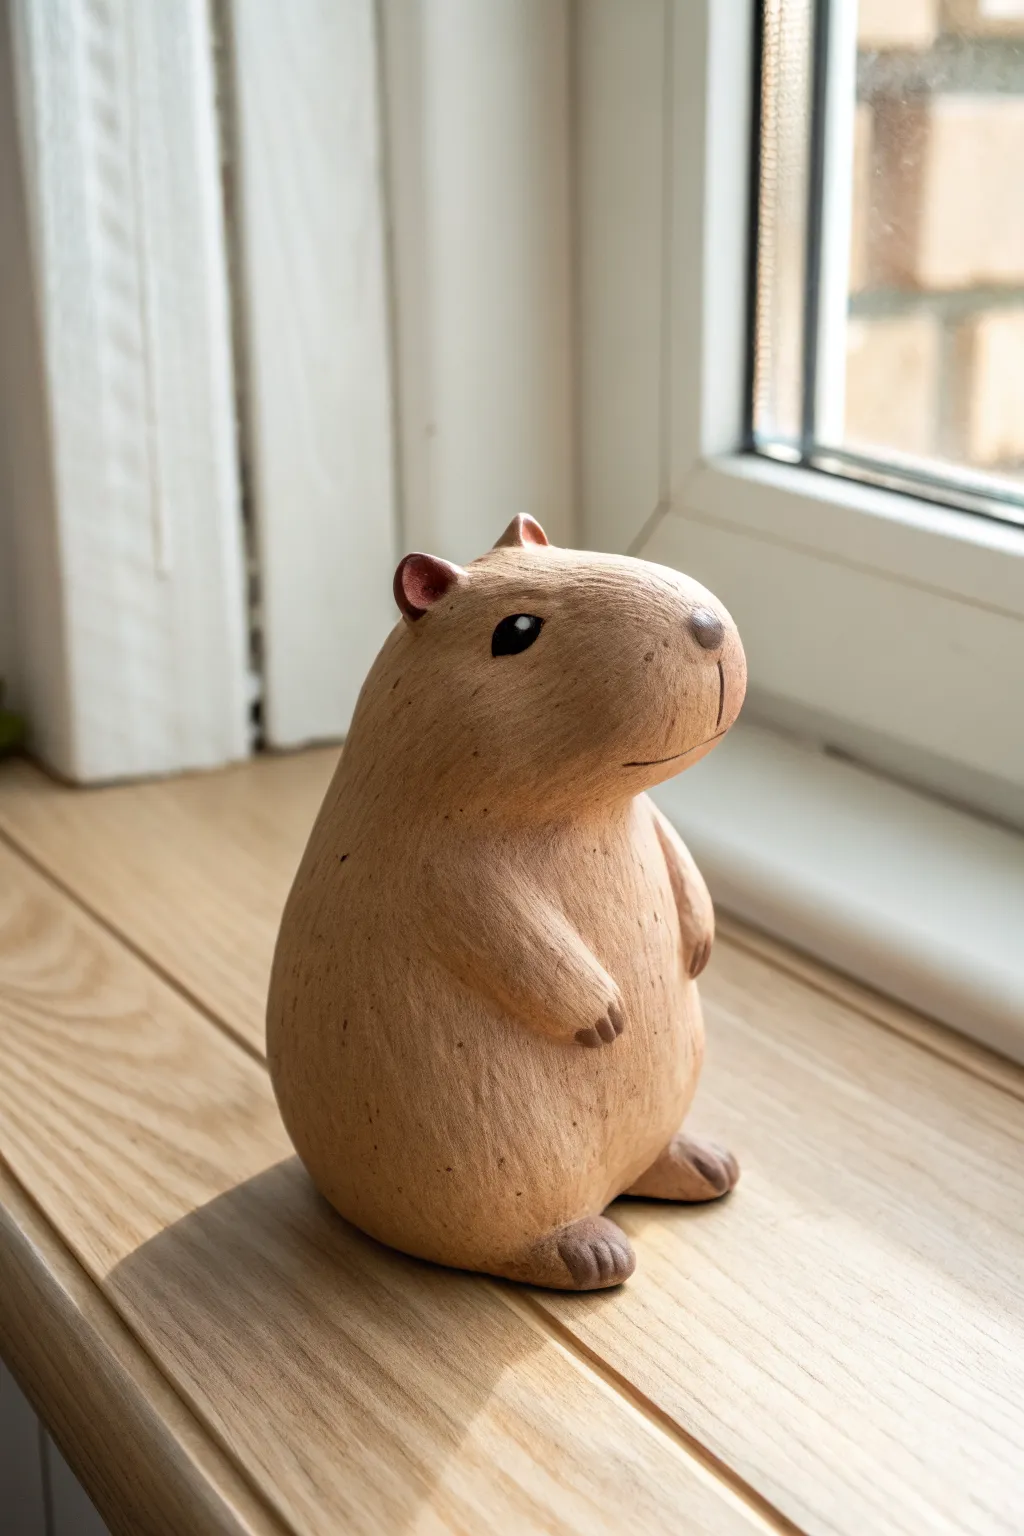
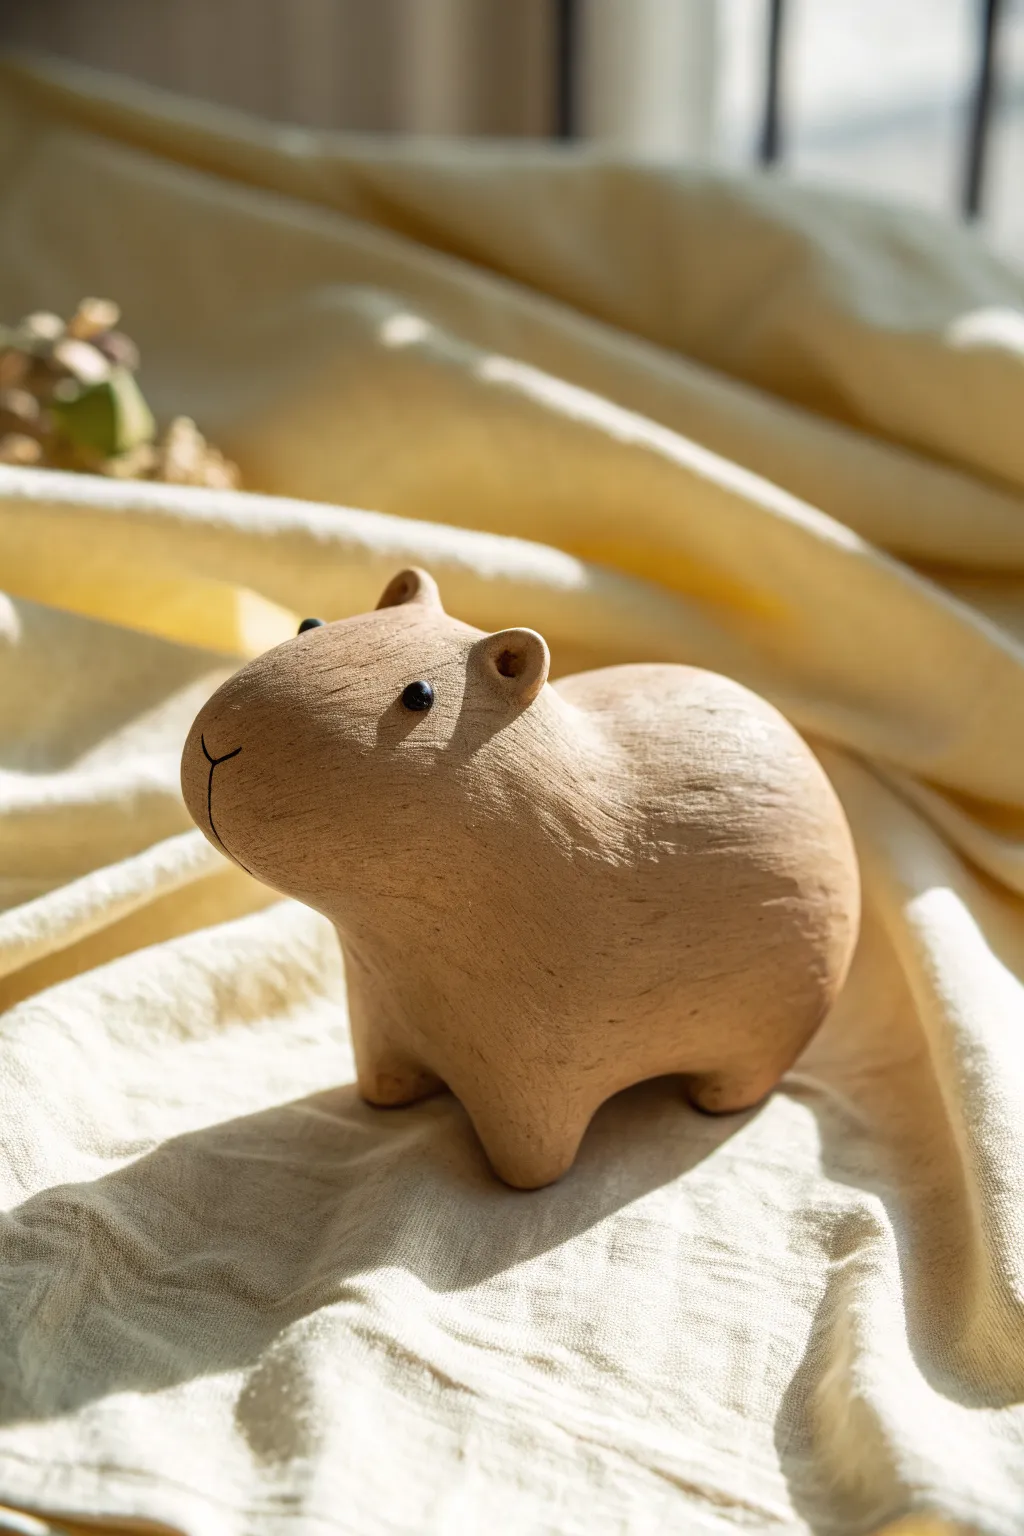
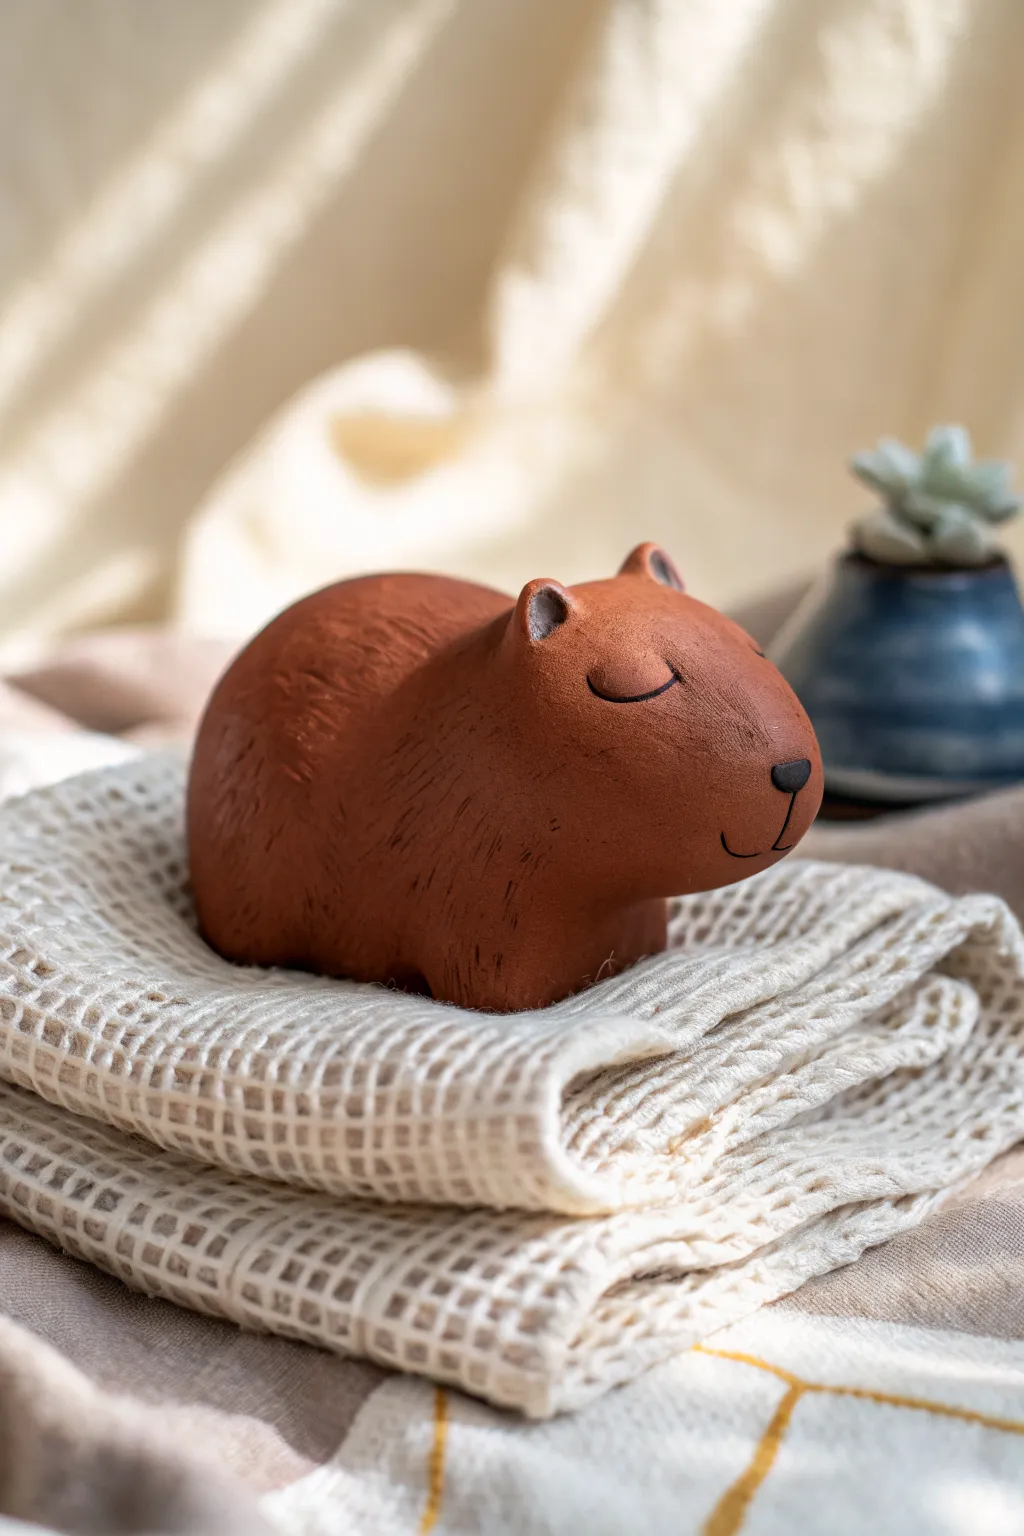
Create a charming, rustic-style capybara figurine that looks like carved wood or terracotta with this simple clay project. This upright, chubby friend features sweet brown tones, tiny paws, and a calm expression perfect for sitting on a sunny windowsill.
Step-by-Step Tutorial
Materials
- Polymer clay (terracotta or light brown)
- Acrylic paints (dark brown, black, muted pink)
- Detail brush (size 0 or 00)
- Texture tools (needle tool, stiff bristled brush)
- Aluminum foil (for armature)
- Matte varnish
Step 1: Shaping the Base
-
Prepare the core:
Ball up a piece of aluminum foil into a teardrop shape about roughly two inches high. This saves clay and keeps the figurine lightweight. -
Condition the clay:
Knead your terracotta or light brown polymer clay until it is soft and pliable, ensuring no cracks will appear during baking. -
Cover the core:
Flatten the clay into a sheet and wrap it completely around your foil core. Smooth out all seams with your thumbs until you have a seamless, elongated potato shape. -
Define the head:
Gently pinch the upper portion of the form to distinguish the head from the body. The transition should be subtle, not a skinny neck; capybaras have very blocky heads. -
Shape the snout:
Press the front of the face to flatten it slightly into that characteristic boxy capybara snout profile.
Texture Trick
For a directional fur look, drag a ball of aluminum foil over the raw clay in downward strokes before baking.
Step 2: Adding Features
-
Attach the feet:
Roll two small marble-sized balls for the back feet. Flatten them slightly and press them onto the bottom sides of the body so the figure sits stably. -
Sculpt the arms:
Roll two small clay sausages for the arms. Attach them to the chest area, blending the shoulder joint smoothly into the body so they look integrated, not glued on. -
Detail the paws:
Using a needle tool or small knife, gently score three little lines into the ends of each arm and foot to create toes. -
Add the ears:
Create two tiny semi-circles of clay. Press them onto the top sides of the head, blending the back edge downward. -
Texture the surface:
To mimic the coarse fur or wood texture seen in the image, lightly drag a stiff toothbrush or a texture sponge vertically over the entire body.
Make it a Planter
Hollow out the top of the head before baking to create a tiny space for a mini air plant or succulent.
Step 3: Finishing Touches
-
Bake the piece:
Bake the figurine according to your specific clay package’s temperature and time instructions. I usually let it cool completely inside the oven to prevent cracking. -
Darken the extremities:
Mix a watery wash of dark brown acrylic paint. Lightly brush this onto the tips of the ears and the paws for a gradient effect. -
Paint the eyes:
Using your smallest brush and black paint, add two oval eyes on the sides of the head. Add a tiny white dot for a reflection highlight. -
Draw the mouth:
Use a very thin line of dark brown paint or a fine clay marker to draw the simple nose and mouth lines. -
Add gentle blush:
Dry brush a tiny amount of muted pink inside the ears and very lightly on the cheeks for warmth. -
Seal the work:
Apply a coat of matte varnish to protect the paint and give the piece a finished, professional look without making it too shiny.
Place your finished capybara in a sunny spot to enjoy its peaceful presence


Capybara Charm for Bracelets and Necklaces
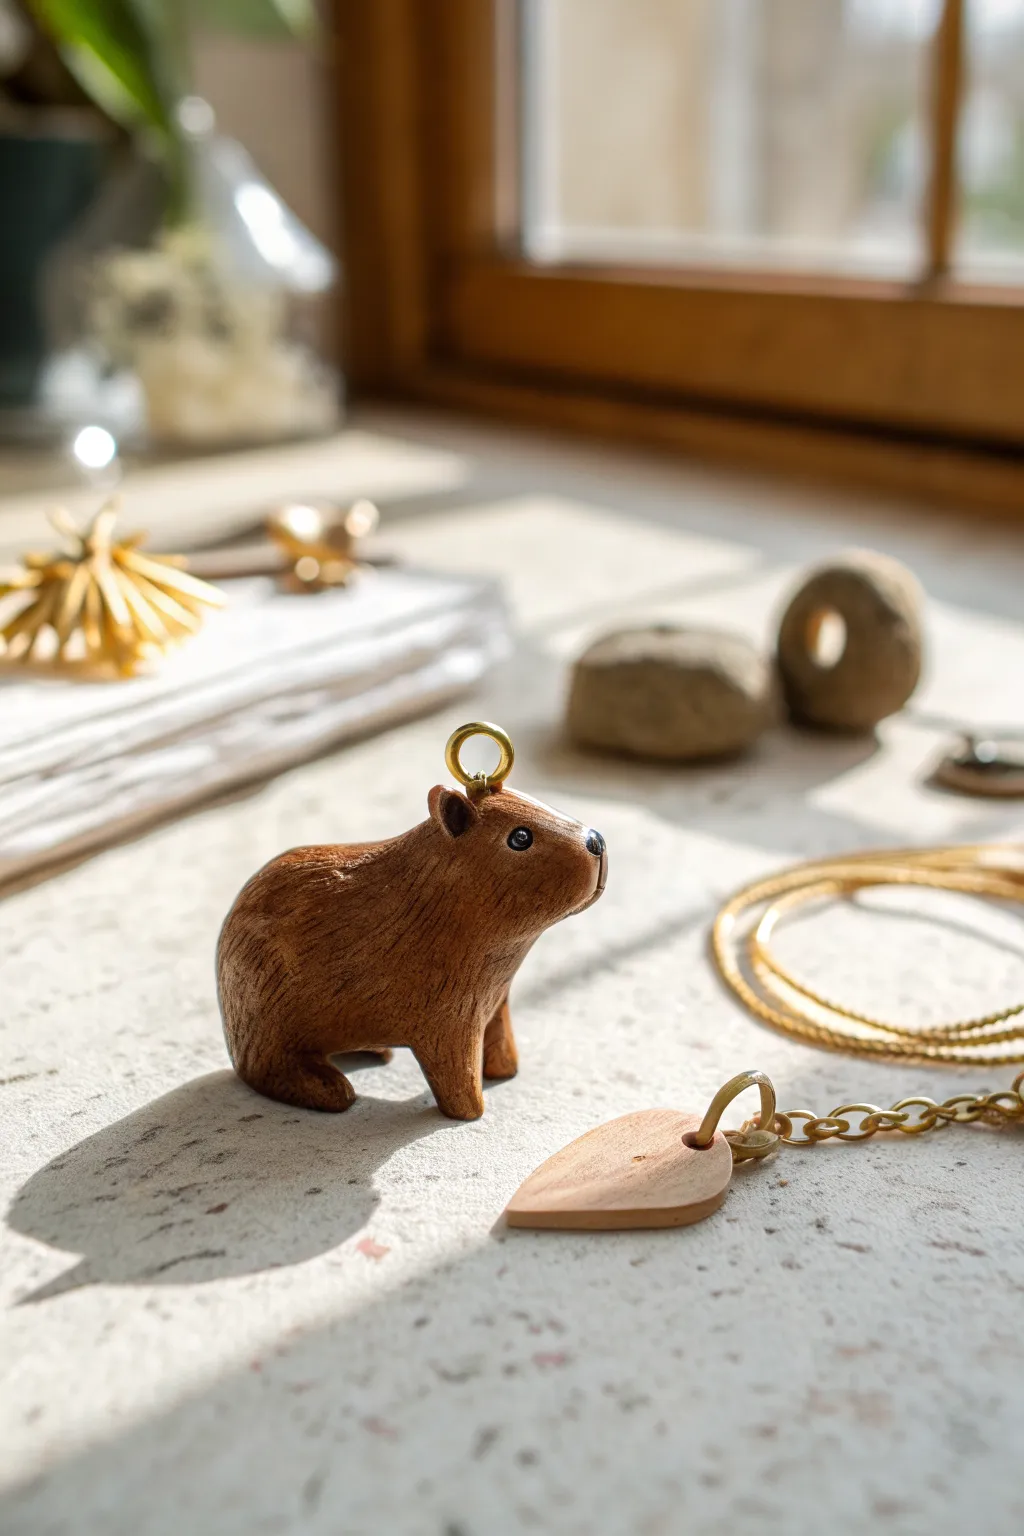
Create a charmingly realistic capybara pendant that mimics the warmth of carved wood using polymer clay. This tiny friend features delicate fur texturing and a sweet expression, perfect for dangling from bracelets or necklaces.
How-To Guide
Materials
- Polymer clay (warm milk chocolate brown)
- Small amount of black polymer clay (for eyes/nose)
- Fimo liquid or liquid clay adhesive
- Pointed sculpting tool or large needle
- Ball stylus tool (small)
- Gold screw-eye pin or heavy-gauge jump ring
- Acrylic paint (dark brown/burnt umber)
- Matte water-based glaze or varnish
- Small paintbrush
- Soft cloth or paper towel
Step 1: Sculpting the Form
-
Condition the clay:
Start by warming a walnut-sized piece of brown polymer clay in your hands until it is soft and pliable. Roll it into a smooth ball free of cracks. -
Shape the body:
Gently shape the ball into an elongated bean or potato shape. The front end should be slightly taller and blunter for the head, tapering down towards the rump. -
Define the head:
Using your fingers, pinch slightly at the neck area to distinguish the head from the body, keeping the transition very subtle and chunky—capybaras have thick necks. -
Form the snout:
Flatten the front of the face slightly to create that signature blunt, rectangular snout shape characteristic of capybaras. -
Create the legs:
Pull four small nubs of clay from the bottom of the body to form short, sturdy legs. Flatten the bottoms so the charm can stand on its own. -
Attach ears:
Roll two tiny brown rice-sized pieces of clay. Press them onto the top of the head, slightly back from the eyes, and use a small ball tool to indent the centers.
Grain Direction Tip
Vary your pressure when scratching the fur texture. Deeper scratches mixed with light ones mimic the inconsistent grain found in real hand-carved wood.
Step 2: Detailing and Texturing
-
Add facial features:
Roll two minuscule balls of black clay for the eyes and a tiny oval for the nose. Press these firmly into place on the face. -
Secure the hardware:
Dip the threads of your screw-eye pin into a drop of liquid clay adhesive. Screw it gently but firmly into the center of the capybara’s back. -
Texture the fur:
This is the most critical step for the wood-carved look. Using a pointed tool or needle, scratch short, directional lines all over the body. -
Follow the growth direction:
Ensure your scratch marks flow from the nose backwards towards the tail and down the legs, mimicking natural fur growth patterns. -
Refine the texture:
Don’t be afraid to go over areas twice. I find that layering the scratch marks creates a deeper, more realistic ‘carved’ appearance. -
Check stability:
Give the legs a final gentle press against your work surface to ensure the charm sits level before baking.
Accessorize Your Clay
Before baking, sculpt a tiny orange or tangerine and place it on the capybara’s head for that internet-famous ‘zen capybara’ aesthetic.
Step 3: Finishing the Faux-Wood Look
-
Bake the charm:
Bake the piece according to your clay manufacturer’s instructions (usually 275°F/130°C for 15-30 minutes). Let it cool completely. -
Apply an antique wash:
Dilute a small dab of dark brown acrylic paint with water. Brush this wash over the entire baked charm, making sure it gets into all the texture crevices. -
Wipe away excess:
Immediately use a soft cloth to wipe away the surface paint. The dark color will remain in the carved lines, enhancing the wood grain effect. -
Highlight the eyes:
If painting over the eyes dulled them, use a tiny dot of gloss varnish or black paint to make them shine again. -
Seal the piece:
Once the paint is fully dry, apply a thin coat of matte varnish to protect the surface without making it look plasticky.
String your new little friend onto a chain for a charmingly rustic accessory


Capybara Keychain With a Tiny Orange
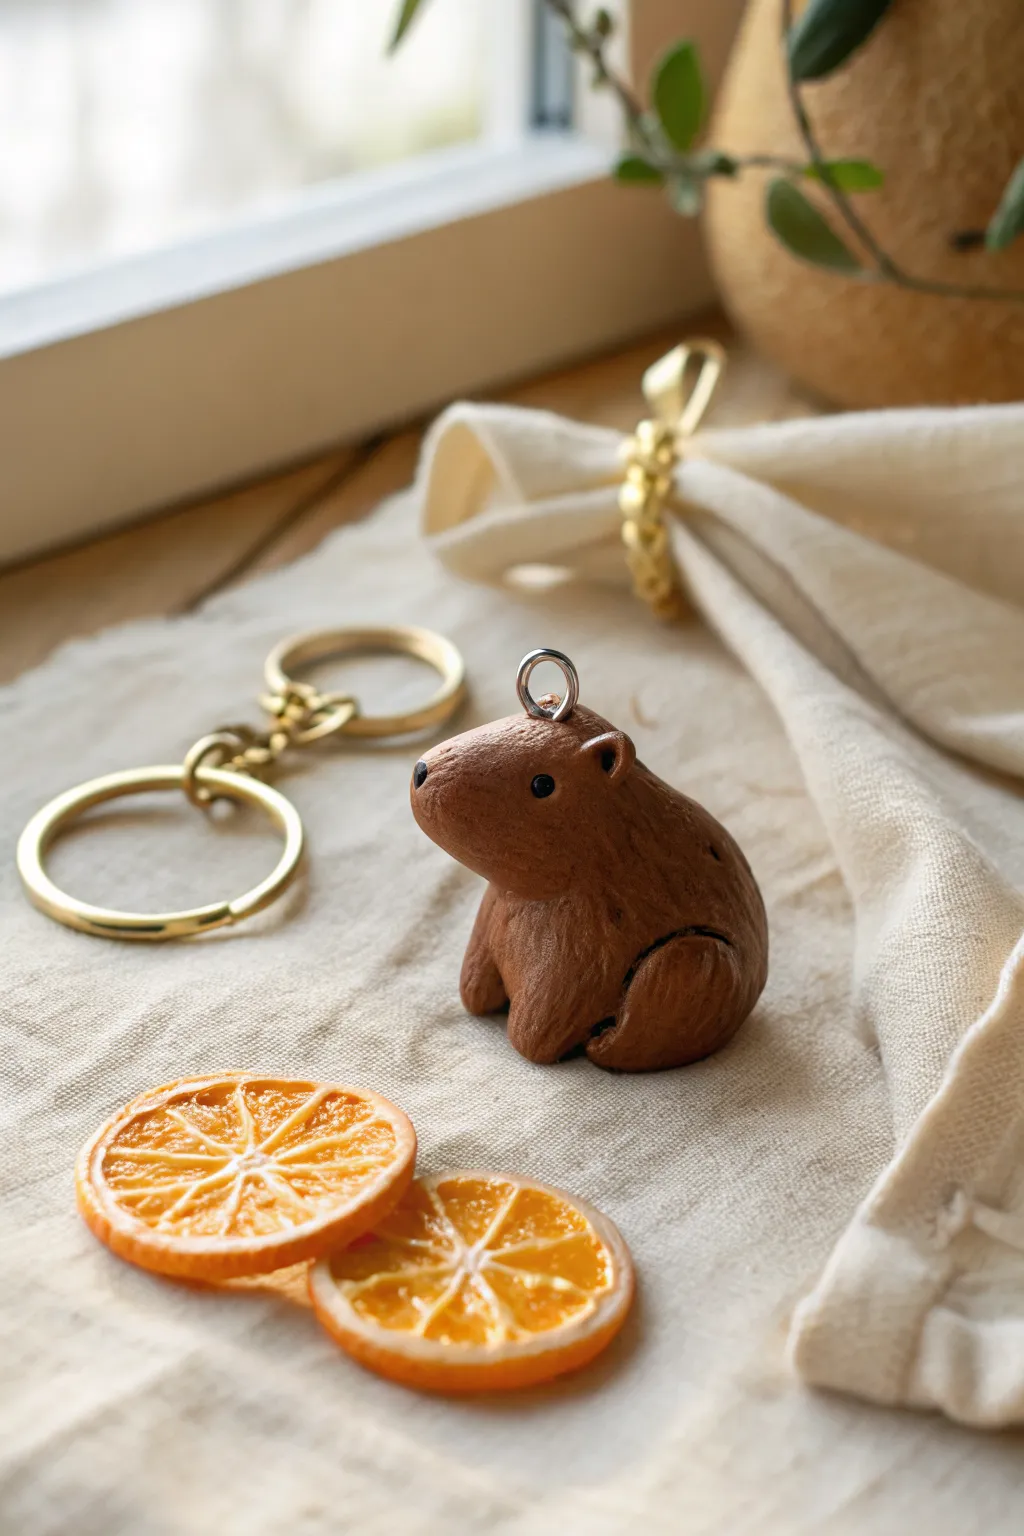
This adorable polymer clay capybara captures the relaxed nature of the world’s largest rodent in a sturdy, pocket-sized format. With its smooth chocolate brown finish and a sturdy attachment loop, it’s ready to hang from your keys alongside a tiny citrus slice for a pop of color.
Step-by-Step Tutorial
Materials
- Polymer clay (chocolate brown and black)
- Small metal eye pin or screw eye
- Sculpting tools (needle tool, ball stylus)
- Acrylic rolling pin
- Aluminum foil (optional, for armature)
- Liquid polymer clay or Bake and Bond
- Gloss or matte glaze (optional)
- Key ring hardware
- Oven and baking tray
Step 1: Shaping the Base Body
-
Condition the Clay:
Begin by thoroughly kneading your chocolate brown polymer clay until it is soft, pliable, and free of cracks. Warm clay is much easier to smooth later on. -
Form the Main Bulk:
Roll a large walnut-sized ball of clay. If you want a lightweight charm, you can start with a small ball of crumbled aluminum foil as a core and wrap the clay around it. -
Create the Slope:
Gently shape the ball into a rounded, slightly elongated mound. Use your palm to flatten the bottom so it sits stable, then gently press one side to create a sloped back that transitions into the head area. -
Define the Head:
Pinch the front upper portion of your mound to distinguish the head from the body. The capybara has a unique blocky-yet-rounded muzzle, so don’t make it too pointy.
Fingerprint Fix
Before baking, lightly brush the raw clay with baby oil or cornstarch to smooth away accidental fingerprints without ruining the shape.
Step 2: Adding Details and Hardware
-
Sculpt the Legs:
Instead of attaching separate legs, use a sculpting tool to carve deep grooves into the bottom sides of the body mass. This creates the illusion of folded, seated front legs without adding fragile protruding parts. -
Create the Haunches:
Roll two small, flattened oval pieces of brown clay. Attach these to the lower rear sides of the body to represent the folded hind legs. Smooth the seams with your finger or a rubber shaper. -
Refine the Seams:
Wet your finger slightly with water (or clay softener) and gently rub the areas where the haunches meet the body to make the transition invisible. -
Insert the Hardware:
Before baking, this is the crucial moment for the keychain attachment. Insert a small metal screw eye or eye pin into the center of the upper back. I find dipping the screw threads in a dab of Liquid Sculpey first acts like glue for a permanent hold.
Step 3: Facial Features and Finishing
-
Add Ears:
Shape two tiny, half-circles of brown clay. Attach them high on the sides of the head. Use a small ball stylus to indent the center of each ear slightly for depth. -
Place the Eyes:
Use a ball stylus to press two small sockets on either side of the face. Roll tiny specks of black clay and press them firmly into these sockets. -
Sculpt the Nose:
Capybaras have distinct nostrils. Use a needle tool to gently impress two small marks at the very front of the snout. -
Texture the Fur (Optional):
You can leave the surface smooth for a cartoon look, or drag a needle tool lightly across the surface in the direction of hair growth for realistic texture. -
Bake:
Place your capybara on a baking sheet lined with parchment paper. Bake according to your clay package instructions (usually 275°F/130°C for 15-30 minutes per 1/4 inch thickness). -
Cool and Glaze:
Allow the piece to cool completely inside the oven to prevent cracking. Once cold, you can apply a thin layer of matte varnish for protection or gloss glaze just on the eyes for a wet look. -
Attach Keychain:
Use jump rings to connect your baked capybara to a standard keyring.
Citrus Companion
Make the orange slice charm using a cane technique: wrap a translucent orange cylinder in white clay, slice it, and texture the inside with a needle tool.
Now your calm little creature is ready to travel with you wherever you go

The Complete Guide to Pottery Troubleshooting
Uncover the most common ceramic mistakes—from cracking clay to failed glazes—and learn how to fix them fast.
Yuzu Bath Capybara Mini Sculpture
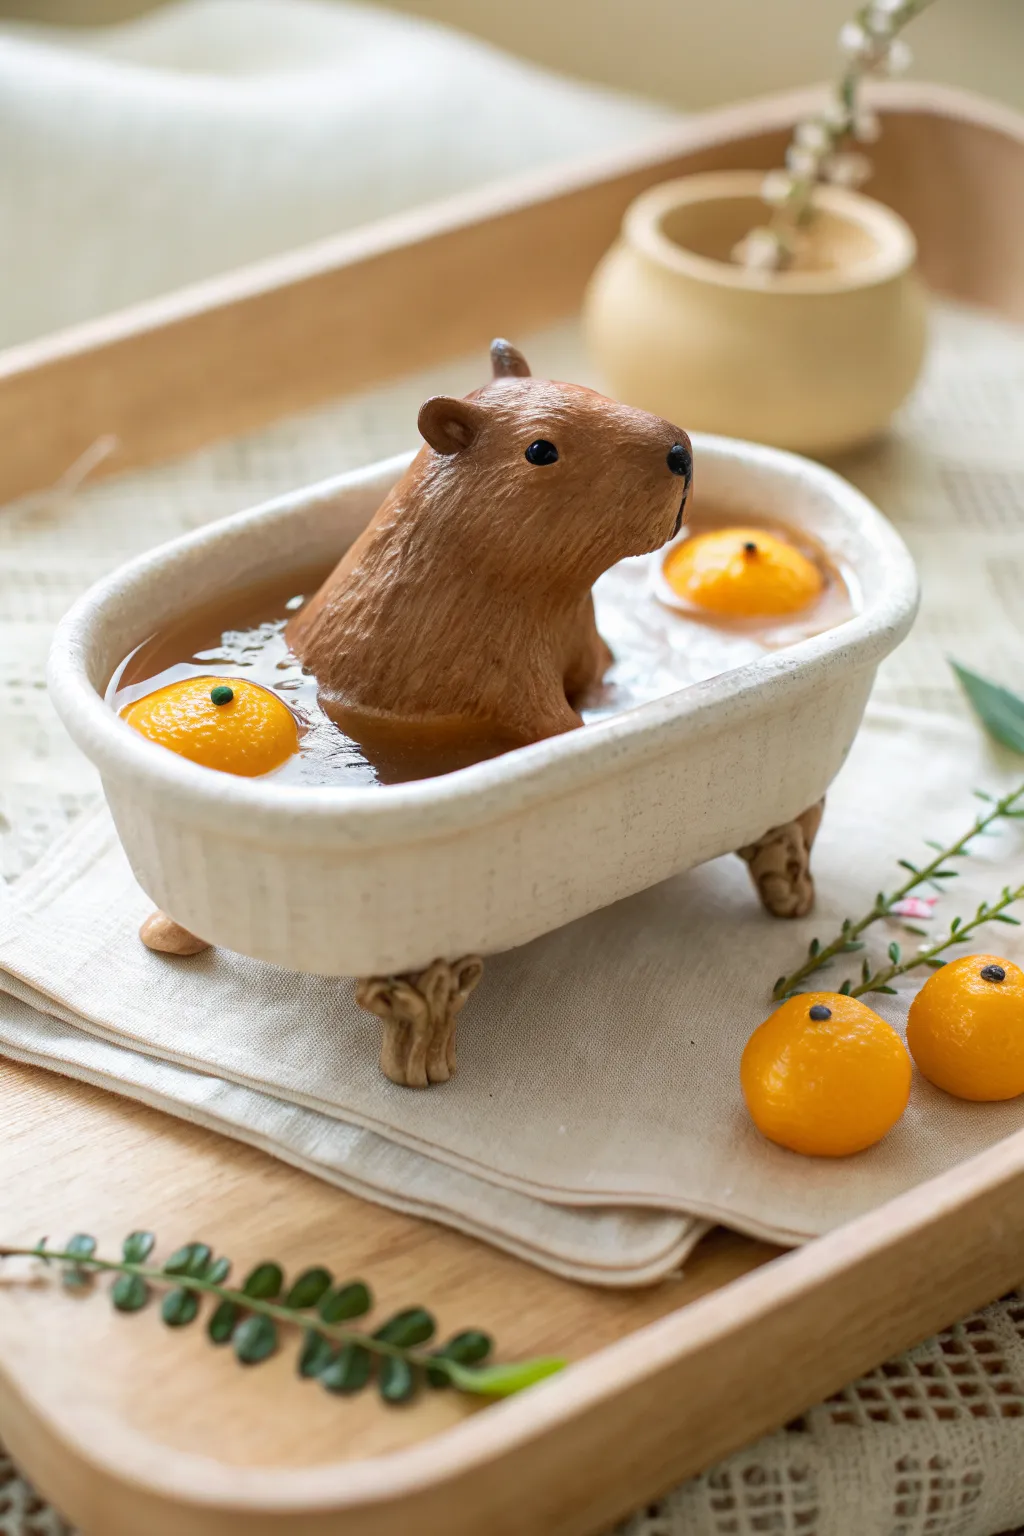
This delightful miniature captures the ultimate relaxation vibe with a detailed capybara sculpture soaking in a tiny tub filled with resin ‘water’ and bright yuzu fruits. It makes for a serene desk companion or a charming gift for animal lovers.
Detailed Instructions
Materials
- Polymer clay (brown, darker brown, white/cream, orange, green, black)
- Small oval ceramic dish or white polymer clay for the tub
- UV resin or 2-part epoxy resin
- Liquid clay (translucent)
- Sculpting tools (needle tool, ball stylus, rubber shaper)
- Texture sponge or toothbrush
- Soft pastel chalks (brown, reddish-brown)
- Brush for shading
- Gloss varnish
- Alcohol ink (yellow/orange tint)
Step 1: Sculpting the Tub
-
Form the Base:
Create an oval bathtub shape using white or cream polymer clay. Make the walls reasonably thick and smooth out the interior curve where the ‘water’ will sit. -
Add Texture:
Gently tap the exterior of the tub with a clean toothbrush or texture sponge to give it a stone-like or rustic ceramic finish. -
Attach Legs:
Roll four small bits of clay into decorative feet. Attach these to the bottom corners of the tub, blending the seams so they are secure. -
Pre-bake the Tub:
Bake the tub alone according to your clay package instructions. This ensures it stays rigid while you sculpt the capybara inside it later.
Fur Reality Check
Use a lighter touch with the needle tool near the face and a deeper stroke near the neck. Varying the pressure prevents the fur texture from looking mechanical.
Step 2: Creating the Capybara
-
Head and Body Core:
Mix a medium brown clay. Roll a large teardrop shape for the capybara’s head and neck area. It just needs to be the upper torso, as the rest will be submerged. -
Positioning:
Place this clay form into the cooled, pre-baked tub to check the size. It should look like it’s comfortably leaning against the back edge. -
Facial Features:
Use a ball tool to indent sockets for the eyes. Add small flattened ears high up on the head. Use a needle tool to create the signature split nose/mouth shape. -
Adding Fur Texture:
Using a needle tool or specialized rake tool, carefully scratch in fur lines. Start from the nose and work backward, mimicking the direction of real fur growth. Leave the eyes and nose tip smooth. -
Details:
Insert tiny black beads or balls of black clay for the eyes and a small triangle for the nose. I like to add a tiny highlight to the eyes with white paint later for extra life. -
Shading:
Before baking, lightly brush crushed brown soft pastel dust into the fur grooves and around the ears to create depth and realism.
Step 3: Making the Yuzus
-
Fruit Forms:
Roll small balls of orange clay. These should be scaled correctly against the capybara head. -
Fruit Texture:
Gently roll the balls over sandpaper or stipple them with a toothbrush to create the pitted texture of citrus peel. -
Stems:
Add a tiny speck of green clay to the top of each fruit for the stem connection. Prepare about 4-5 fruits, including a couple cut in half if you wish.
Wet Fur Effect
After the resin cures, brush a thin layer of gloss varnish over the capybara’s fur where it meets the water line to make the fur look wet and matted.
Step 4: Assembly and Resin
-
Final Bake:
Place the capybara and the separate yuzu fruits into the oven and bake everything fully. -
Secure the Capybara:
Once cool, use a dab of super glue or resin to permanently fix the capybara into the tub. -
Prepare the ‘Water’:
Mix your resin. Add a tiny drop of yellow or orange alcohol ink to tint it warm and tea-like, mimicking a traditional yuzu bath. -
Pouring:
Carefully pour the resin into the tub, surrounding the capybara. Stop before it reaches the rim to avoid spillage. -
Placement:
Using tweezers, carefully place the baked yuzu fruits into the wet resin. Let some float freely and place one or two partially submerged near the capybara. -
Curing:
Cure the resin under a UV lamp (if using UV resin) or cover and let sit for 24 hours (if using epoxy). Ensure no dust falls into the liquid.
Display your tranquil creation on a small wooden coaster to complete the spa atmosphere
Capybara With Citrus on Its Head
This delightful sculpture captures the peaceful essence of a capybara sporting a vibrant tangerine hat. Its rounded, substantial form and textured finish give it a warm, organic feel perfect for brightening up any shelf or kitchen counter.
Step-by-Step Guide
Materials
- Stoneware clay (buff or speckled)
- Small styrofoam ball or foil armature (optional for weight reduction)
- Needle tool
- Wooden modeling tool
- Serrated metal rib or scoring tool
- Slip (clay and water slurry)
- Sponge
- Underglaze (brown/tan, bright orange, green)
- Clear matte glaze
- Small paintbrush
- Modelling wire tool
Step 1: Forming the Body
-
Prepare the main mass:
Start with a large, softball-sized lump of clay. Wedging it thoroughly is crucial to remove air bubbles. Shape it into a slightly elongated, stout egg shape that is wider at the bottom for stability. -
Define the head:
Using your hands, gently pinch and pull one end of the egg shape upwards and forwards to create the neck and head area. The transition should be smooth, not a sharp angle, keeping that signature blocky capybara profile. -
Sculpt the snout:
Flatten the front of the face slightly creating a boxy muzzle. Capybaras have very distinctive, blunt snouts, so avoid making it too pointy. -
Add the feet:
Form four small, short cylinders of clay. Since the capybara is sitting, you really only need to suggest the front feet protruding slightly from the base and the hint of the back legs tucked into the side. -
Attach the limbs:
Score the body where the legs will go and score the back of your leg pieces. Apply slip to both sides and press them firmly together. Use a wooden tool to blend the seams completely until they are invisible.
Fruit falling off?
If the orange feels heavy or unstable on the head, insert a small piece of toothpick or wire between the head and fruit while the clay is wet to act as an internal dowel for extra support.
Step 2: Adding Details & Texture
-
Create the ears:
Roll two small balls of clay and flatten them into thick discs. Pinch one side to create a teardrop shape. Attach these high on the head, pressing the pinch point into the skull and blending well so they stand upright. -
Carve the facial features:
Use a needle tool or small loop tool to carve the nostrils, which should be high on the snout. Carve a gentle ‘Y’ shape for the mouth to give it a serene expression. -
Add the eyes:
Press a small, round tool into the sides of the head to make eye sockets. You can add tiny balls of clay inside for the eyes, or leave them as indented details for a more stylized look. -
Texture the fur:
This is where the piece comes to life. Using a wire tool or a serrated rib, gently drag vertical lines down the body. Keep the pressure light; you want to suggest coarse hair, not deep gouges. -
Refine the surface:
I like to gently dab the textured areas with a slightly damp sponge. This softens any sharp crumbs of clay left by the texturing tool while keeping the fur impression intact.
Step 3: The Citrus Crown
-
Form the fruit:
Roll a separate ball of clay about the size of a ping-pong ball. Flatten the top and bottom just a tiny bit so it isn’t a perfect sphere, mimicking a tangerine or mandarin. -
Texture the peel:
Take a stippling brush or a coarse sponge and press it all over the surface of the fruit clay ball to create that pitted, citrus-skin texture. -
Add a stem connection:
Make a tiny indentation on the top center of the fruit and add a minuscule coil of clay for the stem remnant. -
Attach the fruit:
Score the top of the capybara’s head and the bottom of the fruit. Apply slip generously and press the fruit onto the head. Wiggle it slightly to ensure a strong bond.
Make it a set
Make a whole family of varying sizes! Try stacking different fruits on them—lemons, limes, or even a tiny pumpkin—to create a seasonal display or a colorful centerpiece.
Step 4: Finishing
-
Dry slowly:
Let the piece dry under a loose plastic bag for a day or two before uncovering it. This prevents the ears or fruit from cracking due to uneven drying. -
Bisque fire:
Fire the piece in a kiln to cone 04 (or according to your clay body’s specifications). -
Apply stains or underglaze:
Water down a brown oxide or underglaze and wash it over the capybara’s body, then wipe it back with a sponge. This leaves color in the texture grooves, emphasizing the ‘fur.’ -
Glaze the fruit:
Paint the fruit with a bright orange underglaze. Apply 2-3 coats for opacity. -
Final fire:
Apply a clear matte glaze over the entire piece (or just the fruit if you prefer the raw clay texture on the body) and fire to the final temperature for your clay body.
Once out of the kiln, find a sunny spot for your calm citrus guardian to sit


What Really Happens Inside the Kiln
Learn how time and temperature work together inside the kiln to transform clay into durable ceramic.
Capybara Holding a Leaf Umbrella

This charming project features a serene capybara taking shelter under a large, vibrant leaf. The combination of textured fur details and the delicate, dew-covered foliage creates a peaceful, nature-inspired scene perfect for any desk or shelf.
How-To Guide
Materials
- Polymer clay (beige/tan, dark brown, green, white)
- Aluminum foil for armature
- Wire (floral or armature wire, approx. 18 gauge)
- Sculpting tools (needle tool, ball stylus, rubber shaper)
- Texture brush or stiff toothbrush
- Acrylic paints (brown wash, lighter tan for dry brushing)
- UV resin or clear gloss varnish (for water droplets)
- Matte finish varnish
- Round clay cutter (approx. 3 inches) or jar lid
Step 1: Forming the Base & Structure
-
Prepare the Base:
Roll out a slab of white or speckled clay about 1/2 inch thick on a piece of parchment paper. Use your round cutter or a jar lid to stamp out a precise circle for the main platform. -
Add Texture Details:
Using a needle tool or a small stylus, gently poke random holes around the edge of the base to give it a porous, stone-like appearance. Smooth the sharp upper edge slightly with your finger. -
Create the Rock Platform:
Form a smaller, irregular patty of dark brown or grey clay to serve as the immediate rock the capybara stands on. Press this firmly into the center of your white base and texture it roughly with a crumpled ball of aluminum foil. -
Secure the Support Wire:
Cut a length of wire about 6 inches long. Insert it into the base where the leaf stem will eventually go, slightly off-center behind where the figure will stand. Bake this base structure now according to your clay’s instructions to provide a solid foundation.
Natural Weight
When sculpting the capybara, keep the majority of the clay volume in the lower belly area. This pear shape is key to capturing their distinctively sturdy, ‘potato-like’ silhouette.
Step 2: Sculpting the Capybara
-
Foil Core:
scrunch a small amount of aluminum foil into a pear shape—distinctly bottom-heavy—to save clay and keep the figure lightweight. -
Basic Body Shape:
Cover the foil core with a sheet of beige or tan clay. Smooth out all seams until you have a clean, seamless pear shape that stands sturdily on its own. -
Defining the Head:
Gently pinch and pull the top narrower section to define the snout. Capybaras have blunt, rectangular muzzles, so try to flatten the front slightly rather than making it pointy. -
Adding Limbs:
Roll two small sausages of clay for the arms and blend them onto the upper chest, positioning the paws as if they are clasping something invisible near the belly. Add tiny definition for toes using a knife tool. -
Facial Features:
Press two tiny indentations for eye sockets using a small ball tool. Insert tiny balls of dark brown clay for the eyes and a small, rounded triangle for the nose. Don’t forget two small, rounded ears set high on the head. -
Fur Texture:
This is the most crucial step for realism. Take a needle tool or a stiff texture brush and create short, directional strokes all over the body. Stroke downwards, following the gravity of the fur, avoiding the nose and eyes. -
Attaching to Base:
Apply a dab of liquid clay or bake-and-bond to the rock platform you baked earlier. Press the capybara firmly onto the rock so it sits securely.
Step 3: The Leaf Umbrella
-
Stem Construction:
Cover the exposed wire sticking out of your base with green clay. Roll the clay between your fingers to ensure it coats the wire thinly and evenly. -
Leaf Shape:
Roll a thin sheet of green clay. Cut out a large arrowhead or heart shape, significantly larger than the capybara itself. Soften the edges with your fingertip. -
Veining Detail:
Use a needle tool to score a central vein down the middle of the leaf, and branching veins radiating outwards. For extra realism, roll tiny snakes of lighter green clay and press them into these scored lines. -
Assembly:
Gently drape the leaf over the top of the wire stem. I find it helpful to bend the wire slightly forward first so the leaf curves naturally over the capybara’s head. Blend the clay on the underside of the leaf to the stem for a strong bond. -
Final Bake:
Bake the entire sculpture again. You may need to prop the leaf up with some polyester fiberfill or crumbled tissue paper so it doesn’t droop in the heat.
Drooping Leaf?
If the leaf feels too heavy for the wire during sculpting, temporarily prop it up with a small customized cardboard stand. Keep the prop in place during baking until the clay rigidifies.
Step 4: Finishing Touches
-
Enhancing Shadows:
Once cool, mix a very watered-down brown acrylic paint. Brush it over the capybara’s fur and immediately wipe off the excess with a paper towel. This leaves dark paint in the crevices of your texture. -
Leaf Accents:
Dry brush a little pale yellow or white paint very lightly over the raised veins of the leaf to make them pop against the darker green. -
Matte Varnish:
Seal the capybara and the base with a matte varnish to protect the paint without making it look plastic. -
Dew Drops:
For the final magical touch, use a toothpick to apply tiny drops of UV resin (cured with a lamp) or clear gloss glaze onto the leaf surface to simulate fresh rain.
Enjoy the calm atmosphere this little rain-sheltered friend brings to your space
Sleepy Capybara With a Tiny Blanket
Capture the serene essence of the world’s largest rodent with this charming clay project. You’ll sculpt a smooth, loaf-shaped body featuring gentle fur textures and a peaceful sleeping expression, perched atop a folded cloth base.
Step-by-Step Tutorial
Materials
- Red-brown polymer clay or air-dry clay (terracotta color)
- Black acrylic paint
- Fine detail paintbrush (00 or 000 size)
- Needle tool or toothpick
- Ball stylus tool
- Small piece of textured fabric (cheesecloth or mesh)
- Matte varnish (optional)
- Modeling tools (smoothing tool, clay knife)
Step 1: Sculpting the Body
-
Prepare the clay:
Begin by conditioning your red-brown clay until it is soft and pliable. Roll it into a smooth ball to remove any air bubbles or cracks. -
Form the loaf shape:
Gently elongate the ball into a thick oval or ‘potato’ shape. Flatten the bottom slightly by tapping it against your work surface so it sits stability. -
Define the head:
Use your fingers to subtly pinch one end of the oval to create a slightly narrower snout area. The transition from head to body should be smooth, with just a slight dip for the neck. -
Shape the snout:
Blunt the tip of the snout so it isn’t pointy. Capybaras have distinctively boxy, rectangular muzzles, so try to square off the front slightly.
Tip: Smooth Transitions
Use a drop of baby oil (for polymer) or water (for air-dry) on your finger to smooth out fingerprints before adding texture.
Step 2: Adding Features & Texture
-
Add the ears:
Roll two tiny balls of clay, roughly the size of peppercorns. Flatten them slightly and pinch one side to create a teardrop shape. -
Attach the ears:
Place the ears high on the sides of the head, somewhat far back. Blend the bottom edge of each ear into the head using a small modeling tool so they are seamlessly attached. -
Indent the ears:
Use a small ball stylus to gently press into the center of each ear, creating the hollow inner ear shape. -
Create fur texture:
Taking your needle tool, make short, shallow scratches across the back and sides of the body. Keep the strokes going in the same direction—from head to tail—to mimic the look of coarse fur. -
Refine the surface:
Leave the face mostly smooth to contrast with the textured body. I find this helps the painted facial features stand out clearly later. -
Bake or dry:
Follow the instructions for your specific clay type. If using polymer, bake at the recommended temperature. If using air-dry, let it cure for at least 24 hours.
Level Up: The Yuzu Bath
Sculpt a tiny orange yuzu fruit and balance it on the capybara’s head to reference the famous Japanese hot spring capybaras.
Step 3: Painting & Finishing
-
Paint the eyes:
Once hardened and cool, dip your fine detail brush into black acrylic paint. Paint two soft, downward-curving crescents for the sleeping eyes. -
Paint the nose:
Paint a small, rounded triangle at the very tip of the snout for the nose. It should be small and positioned centrally. -
Paint the mouth:
Draw a thin vertical line down from the nose, splitting into a ‘Y’ shape or a gentle curve to create that classic capybara smile. -
Highlight the ears:
If you want extra definition, you can carefully paint the inner hollows of the ears dark grey or black, or leave them natural for a softer look. -
Apply varnish:
For durability, apply a thin coat of matte varnish over the entire piece. This protects the paint and gives the clay a professional finish. -
Prepare the display:
Fold a small square of mesh or cheesecloth into a neat stack. This mimics the blanket seen in the inspiration image. -
Final assembly:
Place your finished clay capybara atop the folded cloth stack to complete the cozy scene.
Now you have a peaceful little friend to keep you company on your desk

TRACK YOUR CERAMIC JOURNEY
Capture glaze tests, firing details, and creative progress—all in one simple printable. Make your projects easier to repeat and improve.
Capybara Family Set in Three Sizes
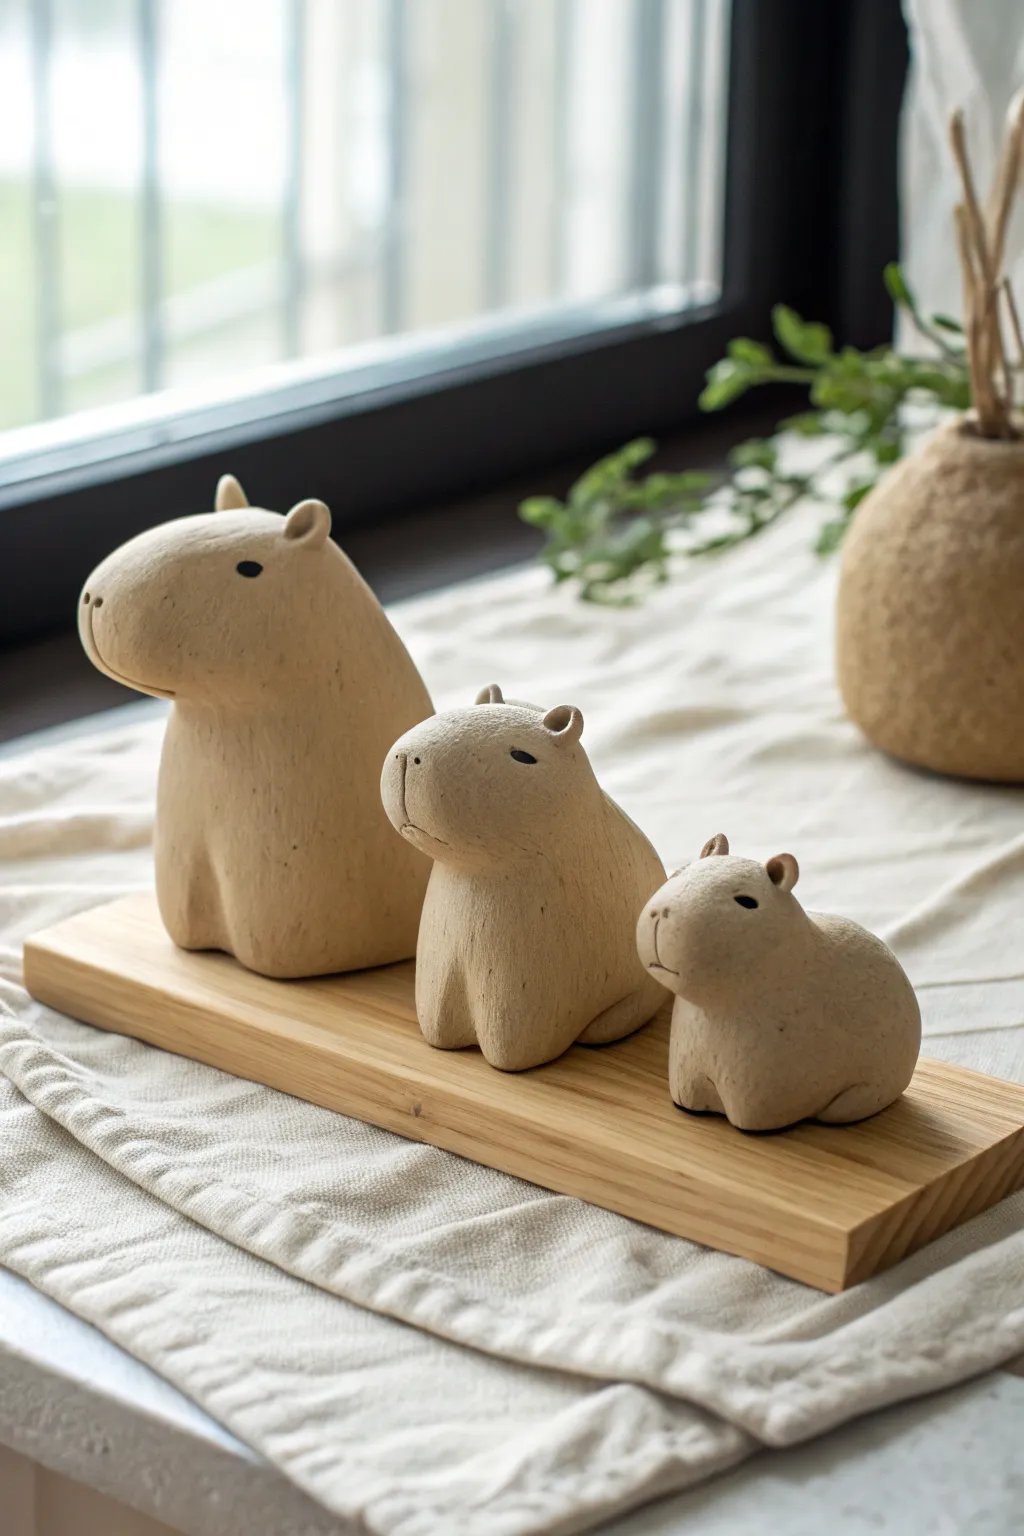
Create a charming family of three capybaras in graduated sizes, perfect for adding a touch of calm whimsy to any windowsill. These sculptures embrace a smooth, minimalist aesthetic, using natural stoneware tones to capture the gentle nature of the animal.
Step-by-Step
Materials
- Buff or tan-colored stoneware clay (smooth grog)
- Wooden sculpting tools
- Rubber kidney tool
- Needle tool
- Slip (clay slurry)
- Sponge
- Black underglaze or acrylic paint (for eyes)
- Fine-grit sandpaper (optional)
- Small wooden display board
Step 1: Shaping the Bodies
-
Portion the Clay:
Begin by separating your clay into three distinct piles for the large, medium, and small capybaras. Aim for a ratio roughly like 3:2:1 so you get a clear difference in size between the ‘parent’ and the ‘babies’. -
Form the Base Shapes:
Starting with the largest lump, roll the clay into a smooth, slightly elongated egg shape. Tap the bottom gently on your work surface to create a flat base so the figure sits securely without wobbling. -
Define the Chest:
Using your thumb, gently press into the front lower third of the shape to define the chest area. You want to create a subtle separation between where the head will be and the seated body. -
Shape the Head:
Smooth the upper portion of the clay forward to create the signature boxy snout of a capybara. The top of the head should be relatively flat, sloping gently down to a blunt nose. -
Repeat for the Family:
Repeat the previous shaping steps for the medium and small figures. Keep them near each other as you work to ensure the proportions look right as a set.
Step 2: Adding Details
-
Create the Ears:
Roll tiny balls of clay—two for each figure. Flatten them slightly into small discs and attach them high on the back of the head using a dab of slip. -
Refine the Ear Shape:
Once attached, use a small wooden tool to gently press an indentation into the center of each ear, giving them a slight cup shape, and smooth the seams where they join the head so they look seamless. -
Carve the Snout:
Use a needle tool or a thin modeling tool to press a simple vertical line at the very front of the snout. This mimics the capybara’s nose and mouth cleft. -
Sculpt the Legs:
Instead of attaching separate legs, we will suggest them. Use a rounded sculpting tool to carve vertical grooves into the front of the body base. This creates the illusion of two front legs tucked neatly under the chest. -
Suggest Hind Legs:
Add a very subtle curve or slight bulge on the lower sides of the body to suggest the haunches of the seated animal.
Uneven Drying?
If the snout dries faster than the thick body, it might crack. Cover the thinner head areas with small bits of plastic wrap while the core body stiffens up.
Step 3: Finishing Touches
-
Smooth the Surface:
The charm of this set is the texture. Use a damp sponge or a soft rubber kidney to smooth out any fingerprints or harsh tool marks. I personally like to leave just a hint of texture so it doesn’t look like manufactured plastic. -
Create Eye Sockets:
Use a small, round tool to press very tiny, shallow indentations where the eyes will go. Place them high on the head and relatively far back from the snout for anatomically cute accuracy. -
Drying:
Allow the clay to dry slowly under loose plastic for a few days to prevent cracking, especially the largest figure. Once bone dry, fire the pieces according to your clay’s specific temperature instructions. -
Painting the Eyes:
Once fired (or fully dried if using air-dry clay), dip a fine-point brush into black underglaze or acrylic paint. Carefully paint small, almond-shaped eyes in the indentations you made earlier. -
Final Assembly:
Arrange your finished trio on a simple, light-colored wooden plank to complete the warm, natural look shown in the inspiration photo.
Pro Tip: Eye Placement
Capybaras have eyes high on their heads (for swimming!). placing the eyes slightly higher than you think looks natural gives them that classic chill expression.
This little family brings a sense of peaceful companionship to your home decor
Stackable Capybara Buddy Pile

These delightfully chubby capybaras stack perfectly on top of one another to create a whimsical desk companion or plant shelf buddy. The design captures the naturally rounded, relaxed shape of the world’s largest rodent using simple, smooth clay forms and minimalist facial features.
Step-by-Step Tutorial
Materials
- Beige or oatmeal-colored polymer clay (or air-dry clay)
- Small amount of darker brown clay for noses
- Aluminum foil (for armature)
- Ball stylus tool or small dotting tool
- Needle tool or toothpick
- Ceramic sponge or soft brush
- Sandpaper (fine grit)
- Translucent liquid clay or slip (as glue)
- Matte varnish (optional)
Step 1: Shaping the Bodies
-
Prepare the foil cores:
Crumple aluminum foil into three distinct balls in graduating sizes: large for the base, medium for the middle, and small for the top. Compress them tightly into flattened oval shapes, similar to smooth river stones. -
Condition the clay:
Warm up your beige clay by kneading it well until it’s pliable and smooth. Roll it into sheets about 1/4 inch thick to ensure even coverage over your foil cores. -
Cover the armatures:
Wrap each foil shape completely with the clay sheets. Gently massage the seams together until they disappear, creating three seamless, potato-shaped lumps. -
Refine the forms:
Roll each clay body in your palms to smooth out fingerprints. Flatten the bottom of the largest piece slightly so it sits stable on a table. Flatten the top slightly to receive the next capybara. -
Test the stack:
Before adding details, stack your three shapes to check balance. Press them gently together to form subtle indentations where they meet, ensuring a snug fit later.
Step 2: Adding Facial Features
-
Sculpt the ears:
Roll six tiny balls of beige clay. Flatten them slightly and use your small ball tool to create an indentation in the center of each, curving them into small cup shapes. -
Attach the ears:
Place two ears on the upper back section of each head. I find using a tiny dab of liquid clay helps secure them. Blend the back of the ear seamlessly into the head using a modeling tool but leave the front distinct. -
Create the eyes:
Using a medium-sized ball stylus or the blunt end of a paintbrush, press two firm indentations into the sides of the face area. Capybaras have wide-set eyes, so place them further apart than you might think. -
Form the noses:
Take tiny pinches of the darker brown clay and roll them into small ovals. Press these onto the very front center of each face, slightly higher than the mouth line will be. -
Carve the mouths:
Use a needle tool to draw a simple ‘Y’ shape beneath the nose. A long vertical line dropping down, splitting into a gentle smile, captures that classic serene capybara expression. -
Texture the surface:
To mimic the stone-like texture in the photo, gently tap the entire surface with a toothbrush or a crumpled ball of aluminum foil. This removes the plastic look of fresh clay.
Wobbly Stack?
If the dried pieces don’t stack securely, attach small magnets to the top and bottom of the segments, or use a sanding block to flatten the contact points for better friction.
Step 3: Finishing Touches
-
Final inspection:
Check the stack one last time to ensure the ears don’t interfere with the capybara sitting on top. Adjust angles if necessary. -
Baking or drying:
If using polymer clay, bake according to the package instructions (usually 275°F/135°C for 15-30 minutes per 1/4 inch of thickness). If using air-dry clay, let them cure for 24-48 hours. -
Sanding:
Once fully cured and cooled, lightly sand any rough spots or fingerprints with fine-grit sandpaper to achieve a velvety matte finish. -
Adding depth:
If you want the eyes to pop, dilute a tiny bit of dark brown acrylic paint with water and wash it into the eye sockets and mouth lines, wiping away the excess rapidly. -
Sealing:
Finish with a matte varnish to protect the surface while keeping that natural, earthy look intact.
Zen Garden Vibes
Make the largest capybara hollow or shape it like a pinch pot before closing it up. Before baking, cut a hole in the back to turn the totem into an incense cone hideaway.
Enjoy the calming presence of your new ceramic friend pile as they oversee your daily tasks
Capybara With a Flower Crown
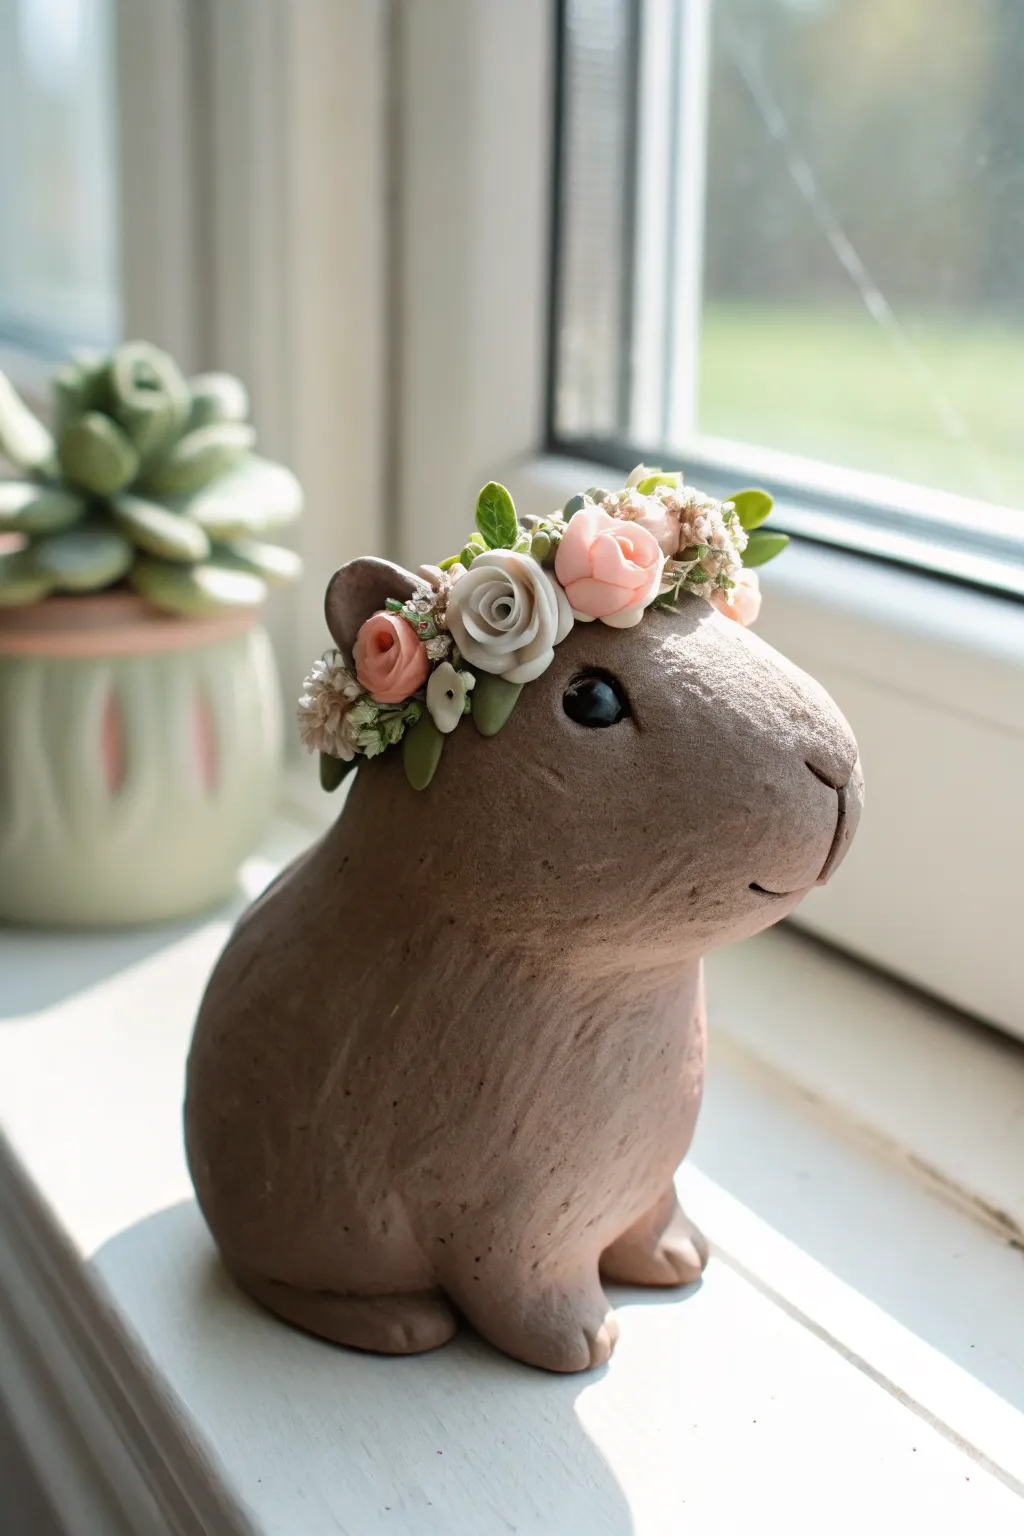
Sculpt a serene, nature-loving capybara adorned with a delicate floral headpiece. This project combines simple organic shapes with intricate floral details for a charming desk companion with a soft, matte finish.
How-To Guide
Materials
- Brown polymer clay (or air-dry clay)
- Pink, white, and green polymer clay (small amounts)
- Black glass beads or clay for eyes
- Pointed detailing tool or needle tool
- Ball stylus tool
- Texture brush or old toothbrush
- Sculpting wire or toothpick (for internal support)
- Tiny dried flowers (optional filler)
- Matte varnish
Step 1: Shaping the Base
-
Create the core:
Start with a large ball of brown clay for the body. Roll it into a smooth, slightly elongated pear shape. The wider bottom will be the seated base, tapering up to where the head will attach. -
Form the head:
Roll a smaller ball of brown clay for the head. Shape it into a rounded rectangle, slightly flattening the front to create that distinctively blunt capybara snout. -
Connect head and body:
Insert a short piece of wire or a toothpick into the top of the body. Press the head firmly onto this support. Use your thumb or a smoothing tool to blend the clay at the neck seam until the transition is invisible. -
Add the legs:
Create two small sausage shapes for the front legs. Attach them to the lower chest area, blending the top edges into the body so they look integrated rather than just stuck on. -
Sculpt the feet:
Flatten the ends of the legs slightly against your work surface. Use a needle tool to press in three small indentations on each foot to suggest toes. -
Add the hind leg hint:
For the sitting posture, add a small, flattened mound of clay to the lower rear side of the body to suggest a folded hind leg. Blend the edges smooth.
Fixing Cracks
If you see cracks forming as the clay dries or after baking, mix a small amount of fresh clay with water (or liquid clay softener) to make a paste. Fill the crack, smooth it, and let it set again.
Step 2: Facial Details & Texture
-
Create the face:
Use a ball tool to make two small sockets on the sides of the head. Press black glass beads or small balls of black clay into these sockets for the eyes. Add a tiny roll of clay for an eyelid if you want a sleepy look. -
Define the mouth and nose:
With your needle tool, carve a ‘Y’ shape at the very front of the snout. The vertical line defines the mouth, and the top ‘V’ suggests the nose. Deepen the mouth line slightly for a gentle smile. -
Shape the ears:
Form two small, flat teardrop shapes from brown clay. Attach these to the top sides of the head, just behind the eyes. Use a ball tool to create a shallow indentation inside each ear. -
Texturing the fur:
This is where the magic happens. Take a texture brush or an old toothbrush and gently tap it all over the clay surface. This creates a realistic, short-furred texture rather than a smooth plastic look. -
Refine the texture:
I like to go back with a sharp needle tool and drag fine, short lines through the textured areas, especially on the chest and back, to simulate the direction of hair growth.
Step 3: The Flower Crown
-
Make the roses:
Roll a tiny snake of pink clay and flatten it. Roll it up into a spiral to create a miniature rosebud. Make 3 to 5 of these in varying sizes, perhaps mixing in a white one for contrast. -
Create leaves:
Pinch tiny pieces of green clay into teardrops and flatten them. Use a knife tool to score a center vein down each leaf. Make plenty of these to serve as the base of the crown. -
Assemble the crown base:
Arrange a line of the green leaves directly onto the capybara’s head, curving from one ear to the other. Press them gently so they adhere to the head. -
Place the blooms:
Press your clay roses into the bed of leaves. Group the largest flowers slightly off-center for a natural, asymmetrical look. -
Add filler details:
Roll incredibly tiny balls of white or light pink clay to mimic baby’s breath or berry clusters. Press these into the gaps between the larger roses. -
Final smooth check:
Give the entire piece a once-over. Smooth out any accidental fingerprints on the smooth parts (like the nose) and re-texture any fur areas you might have squished while adding flowers. -
Bake or dry:
Follow the instructions for your specific clay. If baking polymer clay, support the chin with a bit of polyester fiberfill or paper towel to keep the head from drooping in the oven.
Earthy Tones
For a more natural look, use a dry brush to dust brown pastel chalk powder into the fur texture before baking. It settles in the grooves and adds amazing depth to the coat.
Once fully cured, your peaceful capybara is ready to bring a touch of garden calmness to your shelf.
Mushroom Hat Capybara
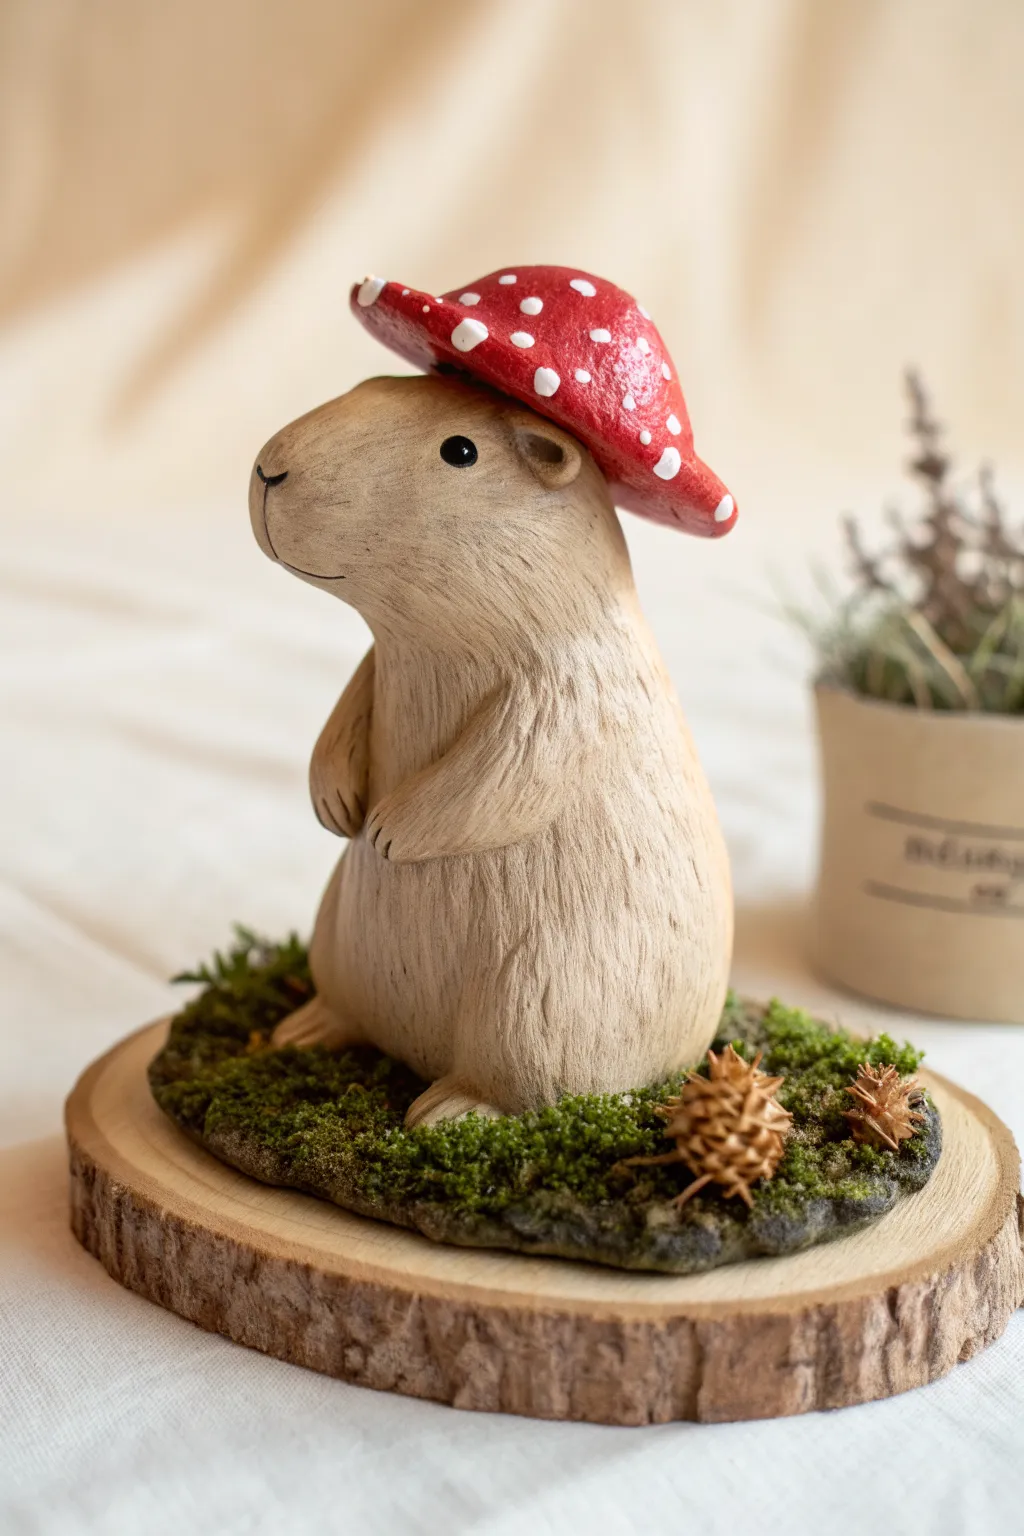
Embrace the whimsical side of nature with this charming clay sculpture of a capybara donning a mushroom hat. Standing proudly on a mossy base, the textured finish gives this piece a lovely, organic feel perfect for woodland decor.
Step-by-Step
Materials
- Polymer clay or air-dry clay (beige/tan, red, white)
- Sculpting tools (needle tool, ball stylus, rubber shaper)
- Foil armature wire and aluminum foil
- Acrylic paints (black, white, brown shades)
- Fine detail paintbrush
- Wooden slice base
- Faux moss and miniature pinecones
- Matte varnish or sealant
- Strong craft glue (E6000 or similar)
Step 1: Sculpting the Body
-
Create the armature:
Begin by crumpling a small ball of aluminum foil into an elongated pear shape to serve as the core of the capybara’s body. This saves clay and makes the sculpture lighter. -
Cover with clay:
Roll out a sheet of beige or tan clay to about 1/4 inch thickness. Wrap this smoothly around your foil core, blending the seams until invisible. -
Shape the head:
Using your fingers, refine the top of the pear shape to form the distinct blunt snout of the capybara. The nose area should be boxy but rounded at the edges. -
Add the limbs:
Roll two small logs of clay for the front arms and attach them to the upper chest, blending the shoulders into the body. Score tiny lines for paws. -
Form the feet:
Add two flattened ovals at the base for the hind feet, ensuring they are wide enough to help the figure stand stable. -
Attach the ears:
Create two small tabs of clay and attach them high on the sides of the head. Use a small ball tool to make a slight indentation in each ear.
Pro Tip: Fur texture
Work in layers when texturing. Start with deeper strokes for the undercoat and finish with very light, quick scratches for the fluffy top coat.
Step 2: Adding Texture & Details
-
Texture the fur:
Use a needle tool or a stiff bristle brush to scratch fine lines all over the body. Follow the direction fur would naturally grow—down the back and around the curves of the limbs. -
Define the face:
Use a sculpting tool to press in a gentle smile line just under the snout. Mark the location for the eyes with small indentations. -
Sculpt the mushroom cap:
Take a ball of red clay and flatten the bottom while doming the top. Curve the edges slightly upward to mimic a classic toadstool shape. -
Fit the hat:
Test the fit of the mushroom cap on the capybara’s head. Press it down gently so it conforms to the skull shape, then remove it for baking or drying if using polymer clay.
Step 3: Finishing Touches
-
Bake or dry:
Follow the manufacturer’s instructions for your specific clay. Ensure the main body and hat are fully cured before painting. -
Paint the details:
Using acrylic paint, fill in the eyes with solid black and add a tiny white highlight dot. Paint the nose line and mouth with a thin black or dark brown line. -
Wash for depth:
I find mixing a very diluted brown paint creates a great wash; brush this over the textured fur and wipe away the excess to make the details pop. -
Decorate the mushroom:
Paint the mushroom cap a vibrant red if you didn’t use colored clay. Once dry, dot on irregular white spots using the handle end of a paintbrush. -
Assemble the piece:
Glue the mushroom cap securely onto the capybara’s head. -
Prepare the base:
Apply a layer of glue to the center of your wooden slice. Press create a small mound of clay or use floral foam to create uneven ground, then cover with faux moss. -
Final assembly:
Glue the finished capybara onto the moss bedding. Add miniature pinecones or tiny dried florals around the feet to complete the forest scene.
Level Up: Seasonal Swap
Don’t glue the hat down! Instead, embed small magnets in the head and hat. Sculpt a pumpkin, flower, or Santa hat so you can swap them out.
Now you have a serene little forest friend to keep you company on your desk or shelf.
Capybara With a Little Bird Rider
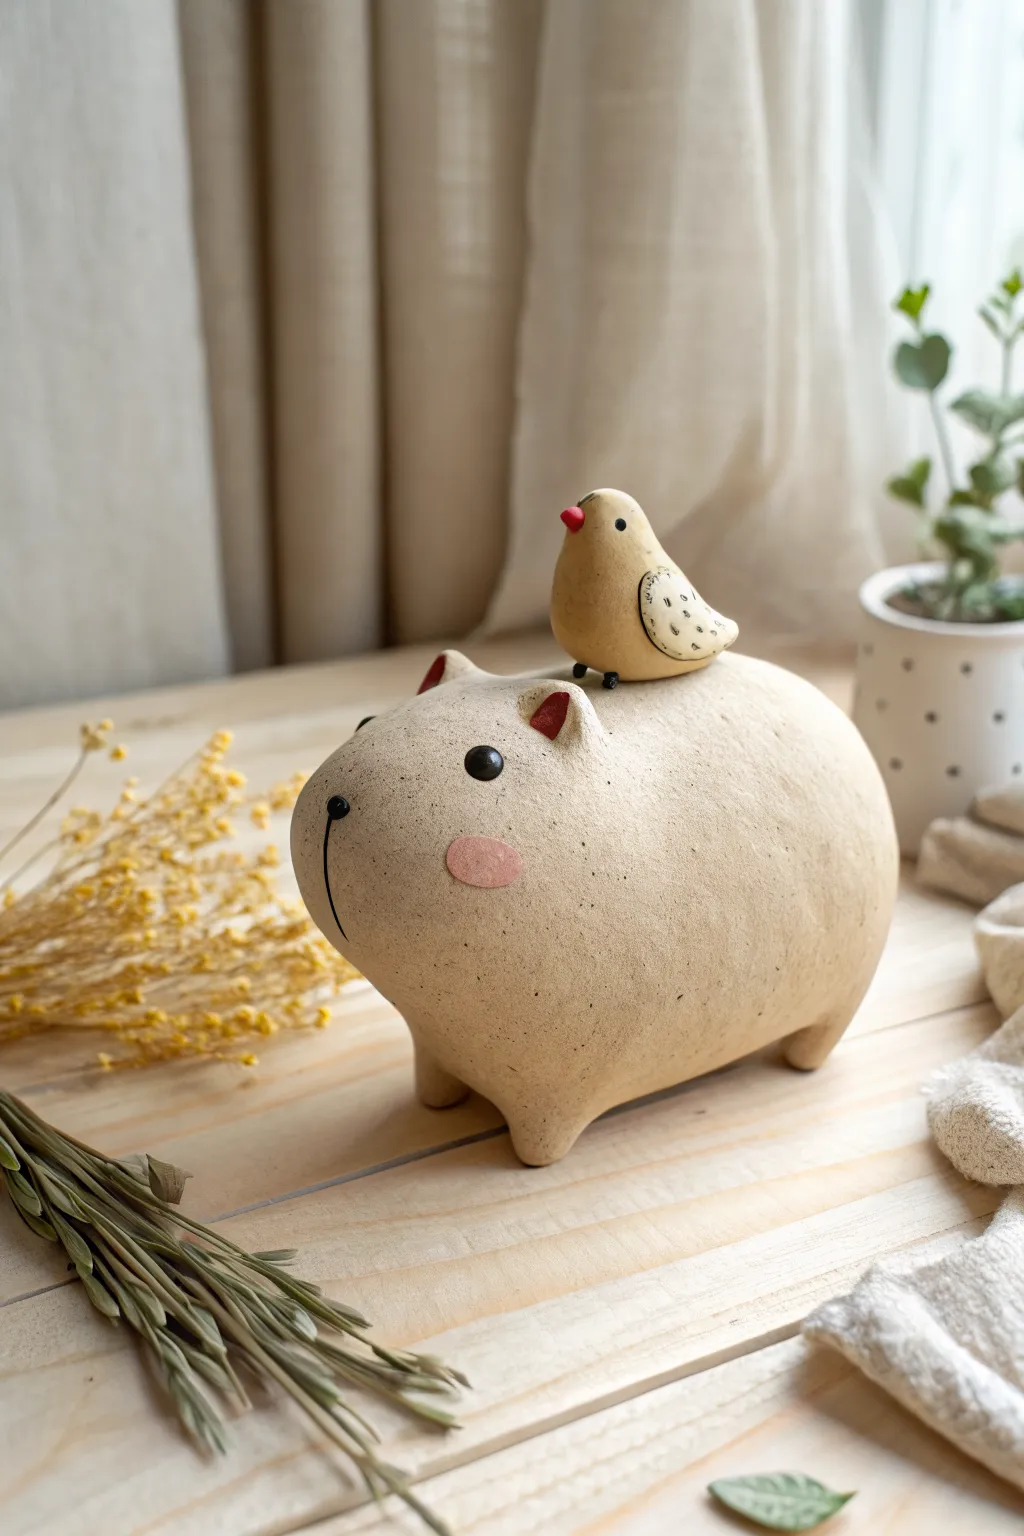
Create this heartwarming duo featuring a minimalist, rounded capybara carrying a tiny bird passenger on its back. The finished piece has a lovely speckled, stone-like texture that gives it a rustic and organic charm suitable for any shelf.
How-To Guide
Materials
- Light tan stoneware or polymer clay (approx. 500g)
- Small amount of red or orange clay (for details)
- Black acrylic paint or clay slip
- Pottery needle tool or toothpick
- Small sponge
- Clear matte varnish (if using polymer clay) or transparent glaze (if using ceramic)
- Soft paintbrush
- Toothbrush (for speckling)
- Black and brown watered-down acrylic paint (for speckles)
Step 1: Sculpting the Capybara Base
-
Form the main body:
Start with a large ball of tan clay and gently roll it into an oblong, potato-like shape. One end should be slightly blunter for the head, tapering very gradually towards the rear. -
Create the legs:
Instead of attaching separate legs, these stumpy legs are pulled directly from the body. Gently pinch and pull four small nubs from the bottom of the form, keeping them short and rounded for stability. -
Refine the shape:
Tap the figure gently on your work surface to flatten the feet, ensuring it stands level. Smooth out the transition between the legs and the belly so it looks like one cohesive, organic mass. -
Add the ears:
Pinch two small, triangular shapes from the clay at the top of the head area. Press a small indentation into the front of each ear using a rounded modeling tool or your pinky finger. -
Sculpt the face details:
Use a needle tool to gently scribe a vertical curved line for the mouth/nose area at the very front. Keep the expression minimal to match the reference style. -
Add cheek blush:
Taking a tiny amount of pinkish-tan clay, flatten it into a paper-thin oval and press it firmly onto the cheek area. Blend the edges slightly so it doesn’t look like a sticker. -
Insert the eyes:
Roll two small balls of black clay (or paint them later). Press them into the face above the snout line. If using clay eyes, press them deep enough securely so they don’t pop off.
Stone Texture Secret
Mix a small amount of used coffee grounds or cracked black pepper into your clay before sculpting. This creates a natural speckled texture without needing to paint it later.
Step 2: Crafting the Bird Companion
-
Shape the bird body:
Roll a small ball of lighter tan or cream-colored clay, about the size of a large marble. Pinch one side to form a tail and press the other side slightly to define the head. -
Attach the beak:
Roll a tiny cone of red clay. Press this onto the front of the bird’s face. Using a needle tool, ensure the seam is blended or firmly attached. -
Position the bird:
Place the bird on the highest part of the capybara’s back. I like to score (scratch) the contact points on both the bird and the back, adding a drop of water or slip to act as glue before pressing them together. -
Detail the wings:
Use a needle tool to lightly scratch wing shapes onto the side of the bird. You can poke tiny holes or dash marks inside the wing area for added texture.
Step 3: Finishing Touches
-
Ear details:
Take a tiny bit of red or dark orange clay (color matching the beak is nice) and press it into the hollows of the capybara’s ears. -
Smoothing the surface:
Use a slightly damp sponge to wipe down the entire sculpture. This removes fingerprints and creates that smooth, stone-like skin texture. -
Baking or Firing:
Follow the instructions for your specific clay type. If using polymer clay, bake at the recommended temperature. If using ceramic clay, let it dry slowly before bisque firing. -
Applying the speckles:
Once hardened and cooled, mix a watery brown-black paint. Load an old toothbrush, hold it near the sculpture, and run your thumb across the bristles to flick tiny speckles over the capybara’s body. -
Final Varnish:
Protect your work with a coat of matte varnish. This seals the paint speckles and gives the piece a professional, finished look without being too glossy.
Make It Functional
Before the clay hardens, cut a slot in the top of the capybara’s back (behind the bird) and hollow out the belly to turn this cute sculpture into a coin bank.
Now you have a serene capybara buddy ready to bring a sense of calm to your desk or shelf
Capybara Planter Buddy for Tiny Succulents
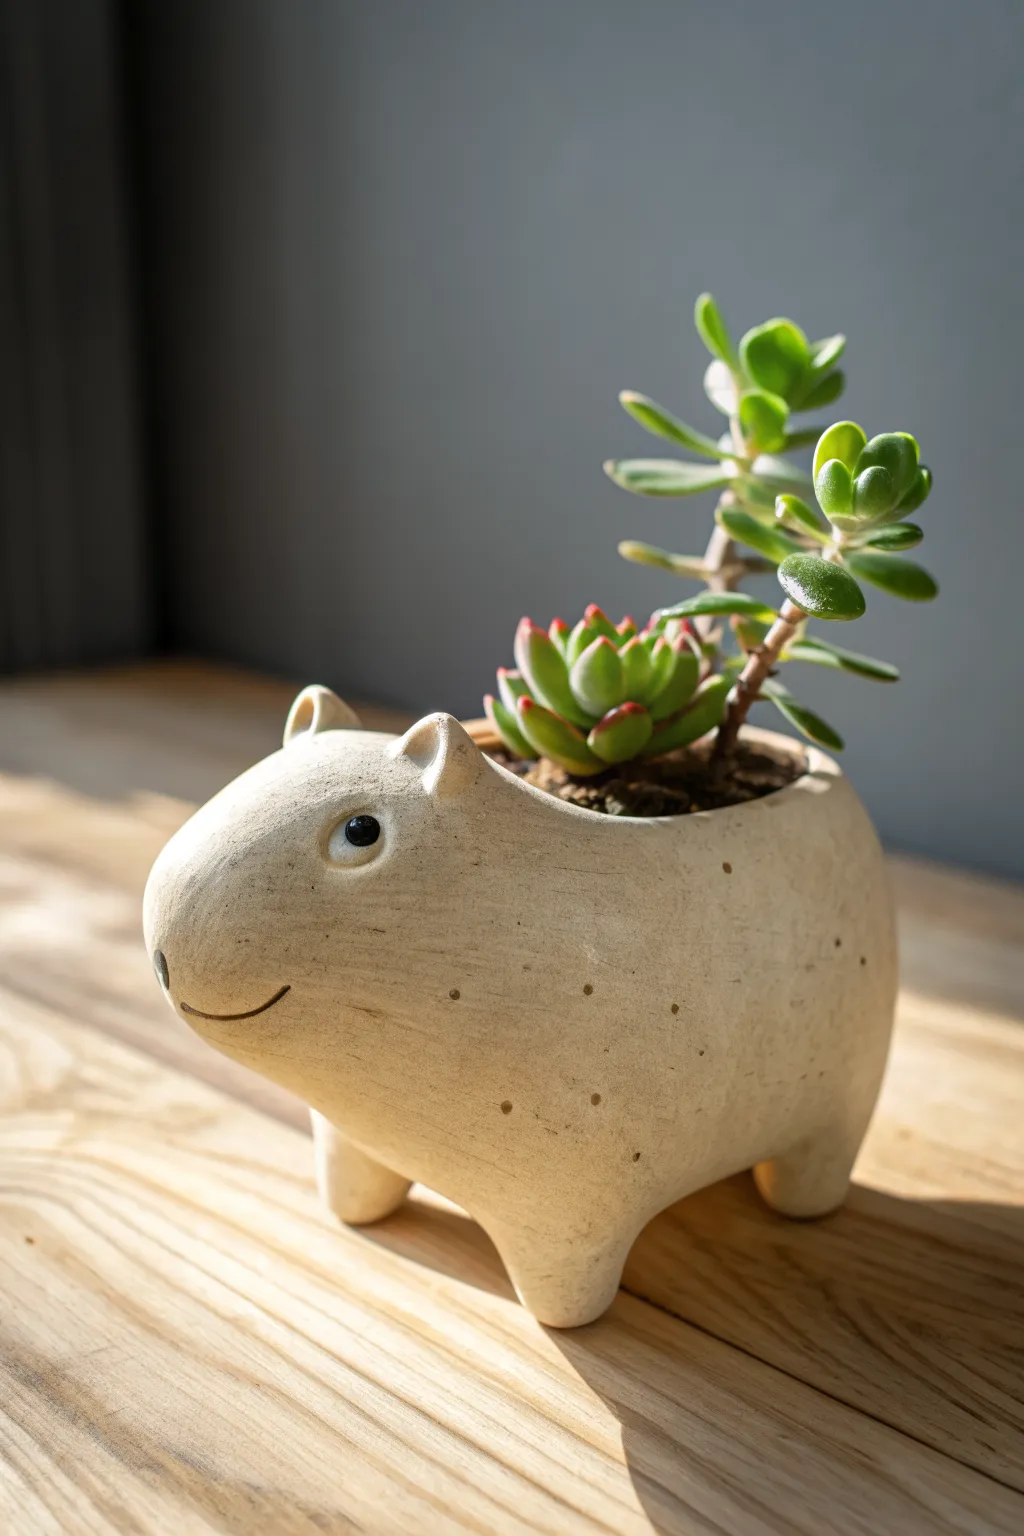
Transform a lump of clay into the chillest animal on earth with this adorable capybara planter project. Featuring a creamy, speckled finish and a gentle smile, this sturdy little friend is perfectly sized to cradle your favorite tiny succulents or cacti.
Step-by-Step Tutorial
Materials
- Light-colored stoneware or polymer clay (beige/cream)
- Small rolling pin
- Sculpting tools (needle tool, loop tool)
- Small sponge
- Slip (clay slurry) and scoring tool
- Black underglaze or acrylic paint (for eyes/nose)
- Speckled glaze (if using ceramic clay) or brown acrylic paint (for faux speckles)
- Clear matte varnish (if using polymer clay)
- Potting soil and small succulents
Step 1: Forming the Body
-
Prepare the base:
Start by wedging your clay to remove air bubbles, then roll or pat it into a thick, elongated oval shape. This will become the main body of the capybara, so ensure it is wide enough to eventually hold soil. -
Hollow out the center:
Using a loop tool or your thumbs, gently pinch and carve out the center of the oval to create the planting cavity. leave the walls about 1/4 inch thick for stability, ensuring the bottom remains solid. -
Shape the snout:
Smoothly taper one end of the oval to create the distinctive, blunt snout of the capybara. The head should flow seamlessly from the body without a distinct neck divot, mimicking their blocky shape. -
Refine the surface:
Take a damp sponge and gently wipe the entire surface to remove fingerprints or tool marks. I find doing this early helps keep the shape organic and smooth.
Smart Weighting
Keep the bottom of the planter slightly thicker than the walls. This adds weight to the base so your capybara won’t tip over once the heavy plants are added.
Step 2: Adding Features
-
Attach the legs:
Roll four equal-sized, short cylinders of clay for the legs. Score (scratch) the attachment points on the body and the legs, apply a dab of slip, and press them firmly onto the underside. -
Blend the seams:
Use a modeling tool or your finger to smooth the clay where the legs meet the body until the seam is invisible. The legs should look like they are growing out of the torso, not just stuck on. -
Create the ears:
Shape two small, rounded triangles for the ears. Attach them near the top back of the head area, keeping them relatively small and close to the body, slightly cupped forward. -
Sculpt the face:
Use a needle tool or small ball stylus to gently indent sockets for the eyes on the sides of the head. Then, carve a simple, curved line for the mouth to give him that signature serene smile. -
Add drainage:
Don’t forget to poke a hole in the very bottom of the planter to allow excess water to escape, which is crucial for succulent health.
Step 3: Finishing Touches
-
Create the eyes:
Roll two tiny spheres of clay and press them into the eye sockets you created earlier. Alternatively, you can paint these on later, but sculpted eyes add nice dimension. -
Dry or Bake:
If using air-dry or ceramic clay, let the piece dry slowly under plastic to prevent cracking. If using polymer clay, bake according to the manufacturer’s instructions. -
Apply base color:
Once fired or hardened, apply a cream or light beige base. If you used colored clay initially, you can skip this step. -
Add speckles:
To achieve the textural look in the photo, flick a toothbrush loaded with watered-down brown paint or glaze over the surface to create random, subtle speckles. -
Paint details:
Carefully paint the eyes shiny black and trace the smile line with a very fine brush and brown paint to make the expression pop. -
Seal:
Apply a coat of matte varnish or clear glaze to protect the finish, especially on the inside if you plan to water frequently. -
Plant:
Once fully dry, fill the cavity with succulent soil and arrange your plants, placing taller ones in the back and shorter rosettes near the front.
Add a Yuzu Fruit
Make a tiny orange sphere out of clay and balance it on the capybara’s head before baking. It mimics the popular Japanese ‘capybara in a yuzu bath’ aesthetic.
Place your new serene friend on a sunny windowsill and enjoy the calm vibes it brings to the room
Capybara Wall Hanging Face Plaque
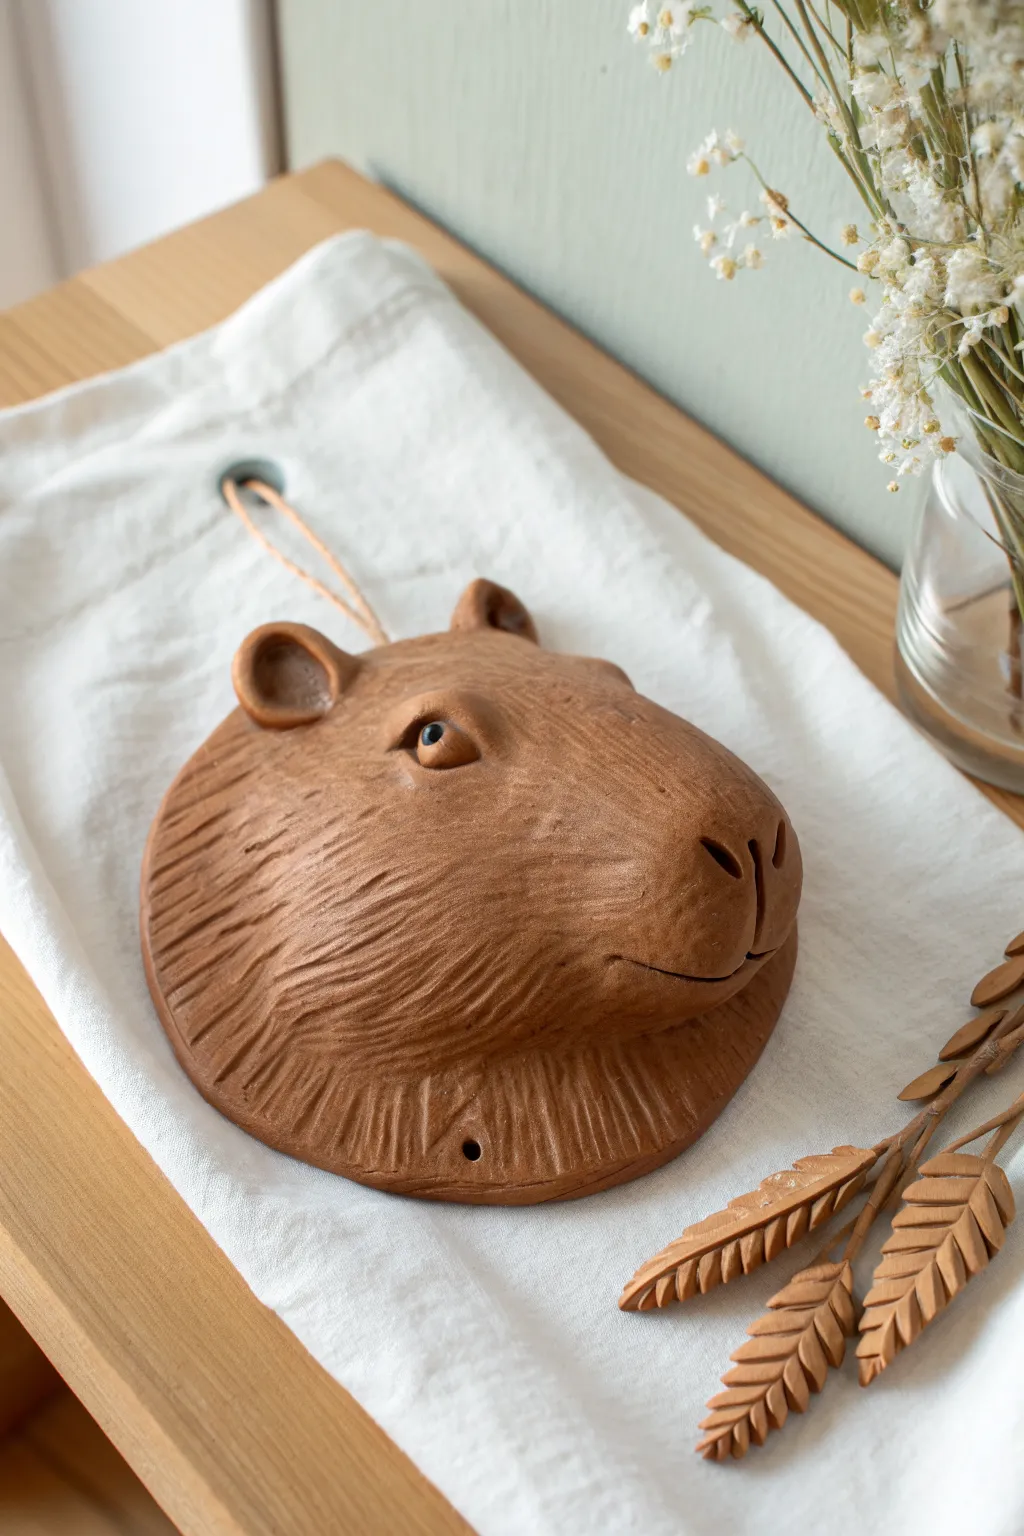
Bring the chill vibes of the capybara into your home with this charming clay wall plaque. Sculpted from rich terracotta-colored clay, this reliefs style piece captures the animal’s gentle expression and distinctive fur texture.
Step-by-Step
Materials
- Terracotta air-dry clay or polymer clay
- Rolling pin
- Clay carving tools (needle tool, small loop tool)
- Small sponge
- Water cup
- Twine or leather cord for hanging
- Acrylic paints (black, white, dark brown)
- Fine detail paintbrush
- Matte varnish (optional)
Step 1: Base Shaping
-
Prepare the Clay:
Start by conditioning a large ball of terracotta clay until it’s smooth and pliable. You want a lump roughly the size of a grapefruit to ensure you have enough depth for the relief. -
Form the Mound:
Press the ball down onto your work surface to create a thick, domed oval shape. The back should be flat against the table, while the top remains rounded. -
Define the Snout:
Using your fingers, gently pull and smooth the clay to elongate one side of the oval, creating the capybara’s characteristic blunt, rectangular snout area. -
Create the Hanger Hole:
Before the clay hardens at all, use a straw or a round tool to punch a clean hole near the top center edge for the hanging cord later.
Step 2: Sculpting the Features
-
Draft the Face:
Lightly sketch the position of the eyes, ears, and mouth with a needle tool to ensure symmetry before committing to the shape. -
Add the Eye Socket:
Press your thumb firmly into the side of the head where the eye will go to create a subtle depression. This adds realistic dimension to the skull structure. -
Form the Eye:
Roll a small ball of clay and press it into the socket. Add tiny eyelids by rolling thin coils of clay and blending them over the top and bottom of the eye ball. -
Sculpt the Ears:
Shape two small, rounded triangles for the ears. Attach them near the top of the head using the score-and-slip method (scratching both surfaces and adding water) to ensure they stick permanently. -
Define the Nose:
Carve two distinct, comma-shaped nostrils at the very front of the snout. Capybaras have somewhat prominent nostrils, so don’t be afraid to make them deep. -
Carve the Mouth:
Use a curved sculpting tool to cut in a gentle, slightly upturned mouth line. This gives the capybara its signature ‘chill’ or smiling expression.
Cracks Appearing?
If you see hairline cracks while air-drying, mix a tiny bit of fresh clay with water to make a paste (slip) and fill them in immediately with a brush.
Step 3: Texturing and Finishing
-
Start the Fur Texture:
Using a needle tool or a stiff bristled brush, begin scratching fine lines into the surface. I like to start from the nose and work backward, following the natural curve of the face. -
Deepen the Fur Details:
Vary the pressure of your strokes. Capybara fur is coarse and wiry, so create deeper grooves specifically around the neck and cheeks to mimic this density. -
Smooth the Sensitive Areas:
Use a slightly damp sponge or finger to gently smooth the clay around the eye, the very tip of the nostrils, and the inside of the ears, leaving these areas texture-free. -
Dry the Piece:
Allow the clay to dry completely according to the package instructions. If using air-dry clay, turn it over halfway through the drying process to let the back breathe. -
Paint the Details:
Once dry, paint the eye black with a tiny white reflection dot. You can also add a dark wash into the nostrils and mouth line to increase contrast. -
Add the Hanger:
Thread a piece of rustic twine or leather cord through the hole you made earlier and tie a secure knot.
Depth Perception
When carving fur, angle your tool slightly sideways rather than straight down. This lifts the clay slightly, creating a more realistic ‘layered’ hair look.
Hang your new peaceful friend on the wall and enjoy the calm atmosphere it brings to the room
Capybara Diorama on a Wood Slice Base
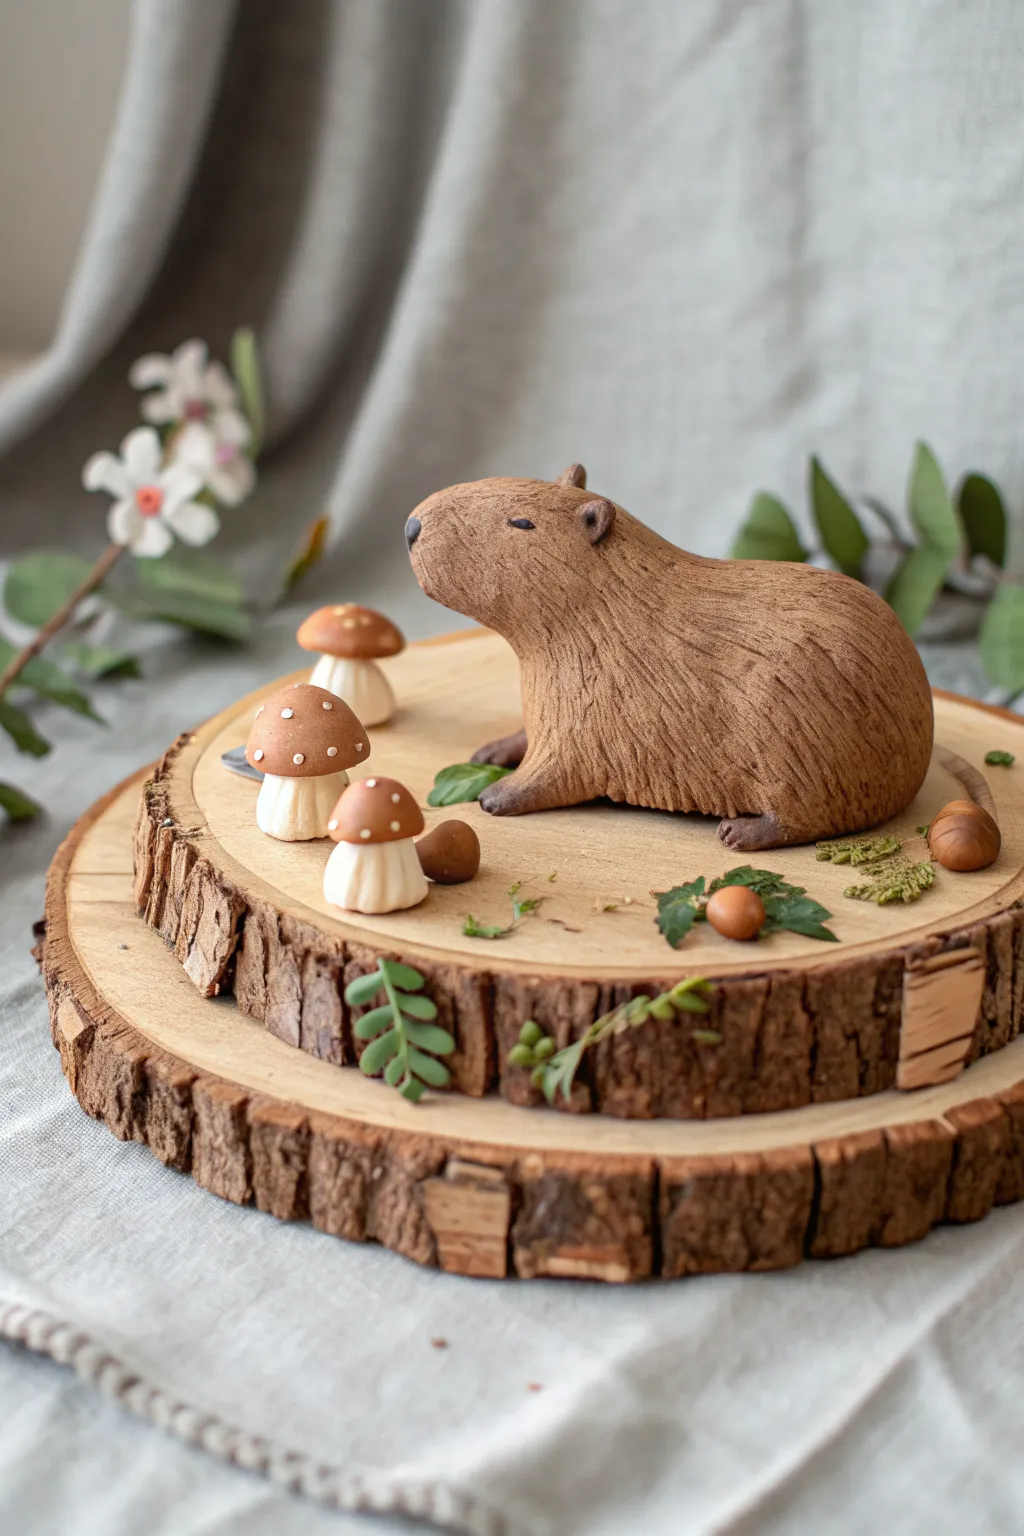
Capture the serene nature of the world’s largest rodent with this charming clay diorama on a rustic wood slice. This project combines sculpting techniques with natural elements to create a peaceful forest floor scene perfect for a desk or shelf.
How-To Guide
Materials
- Polymer clay (medium brown, dark brown, white, tan)
- Small wood slice base (approx. 6-8 inches)
- Sculpting tools (needle tool, ball stylus, rubber shaper)
- Texture tool or toothbrush
- Aluminum foil (for armature)
- Acrylic paints (black, brown washes)
- Small acorns or nuts
- Faux greenery or preserved moss
- Strong craft glue (E6000 or tacky glue)
- Matte varnish (optional)
Step 1: Sculpting the Capybara
-
Form the Core:
Crumple a piece of aluminum foil into a tight oval shape, about the size of a lemon, to serve as the lightweight core for the capybara’s body. -
Condition the Clay:
Knead your medium brown polymer clay until it is soft and pliable. Flatten it into a large sheet, roughly 1/4 inch thick. -
Cover the Armature:
Wrap the clay sheet around the foil core, smoothing the seams together with your fingers until the foil is completely hidden and the surface is uniform. -
Shape the Head:
Gently pinch and pull one end of the oval to form the blocky, rectangular snout characteristic of a capybara. The head should flow seamlessly into the body without a distinct neck. -
Add Limbs:
Roll four small logs of brown clay. Attach these to the underside of the body, blending the clay upwards so they look integrated. Flatten the ends slightly to create paws. -
Create Facial Features:
Attach two tiny ears high on the head. Use a needle tool to indent nostrils at the front of the snout and press in small, closed eye shapes for a sleepy look.
Step 2: Adding Texture and Details
-
Fur Texture:
Using a needle tool or a fine rake tool, scratch short, directional lines across the entire body. Follow the natural growth of fur, moving from head to tail. I prefer to leave the nose and ears smoother for contrast. -
Darken the Paws:
Dust a little dark brown pastel powder or gently blend a tiny flattened piece of dark clay onto the paws and nose to give them realistic definition. -
Sculpt Mushrooms:
Create the mushroom stems by rolling thick cylinders of white or tan clay. Press the bottoms flat so they stand upright. -
Mushroom Caps:
Shape domes from rust-colored or brown clay. Place these on top of the stems. Use a small ball tool to add tiny white clay dots to the caps for a classic toadstool look. -
Bake the Pieces:
Place the capybara and the mushrooms on a baking sheet. Bake according to your customized clay package instructions (usually 275°F for 15-30 minutes).
Cracking Clay?
If you see cracks forming while sculpting, your clay might be too dry. Mix in a drop of clay softener or baby oil to restore flexibility.
Step 3: Assembly and Finishing
-
Wood Base Prep:
Ensure your wood slice is clean and dry. If the bark is loose, secure it with a dab of glue beforehand. -
Paint Washes:
Once the clay is cool, apply a very watered-down brown acrylic wash over the capybara’s fur texture. Wipe away the excess immediately with a paper towel; this leaves pigment in the crevices to highlight the fur. -
Mount the Main Figure:
Apply strong craft glue to the bottom of the capybara and press it firmly onto the center of the wood slice. -
Arrange the Scene:
Glue the clay mushrooms in a cluster near the capybara. Add the real acorns and snippets of faux greenery around the base to create a forest floor environment. -
Final Touches:
If desired, brush a matte varnish over the capybara’s eyes and nose to give them a slight, life-like wet sheen.
Realistic Fur Tip
Vary your stroke pressure when texturing. Deeper lines mixed with shallow scratches make the ‘fur’ look thicker and more organic.
Now you have a tranquil woodland friend to keep you company on your desk.