
If you’ve ever wanted a ceramic phone amplifier that actually works without cords, it all comes down to shaping a smart little acoustic chamber in clay. Here are my favorite forms to try—starting with the classics and drifting into the delightfully weird studio ideas I can’t stop making.
Horizontal Tube Resonator Dock
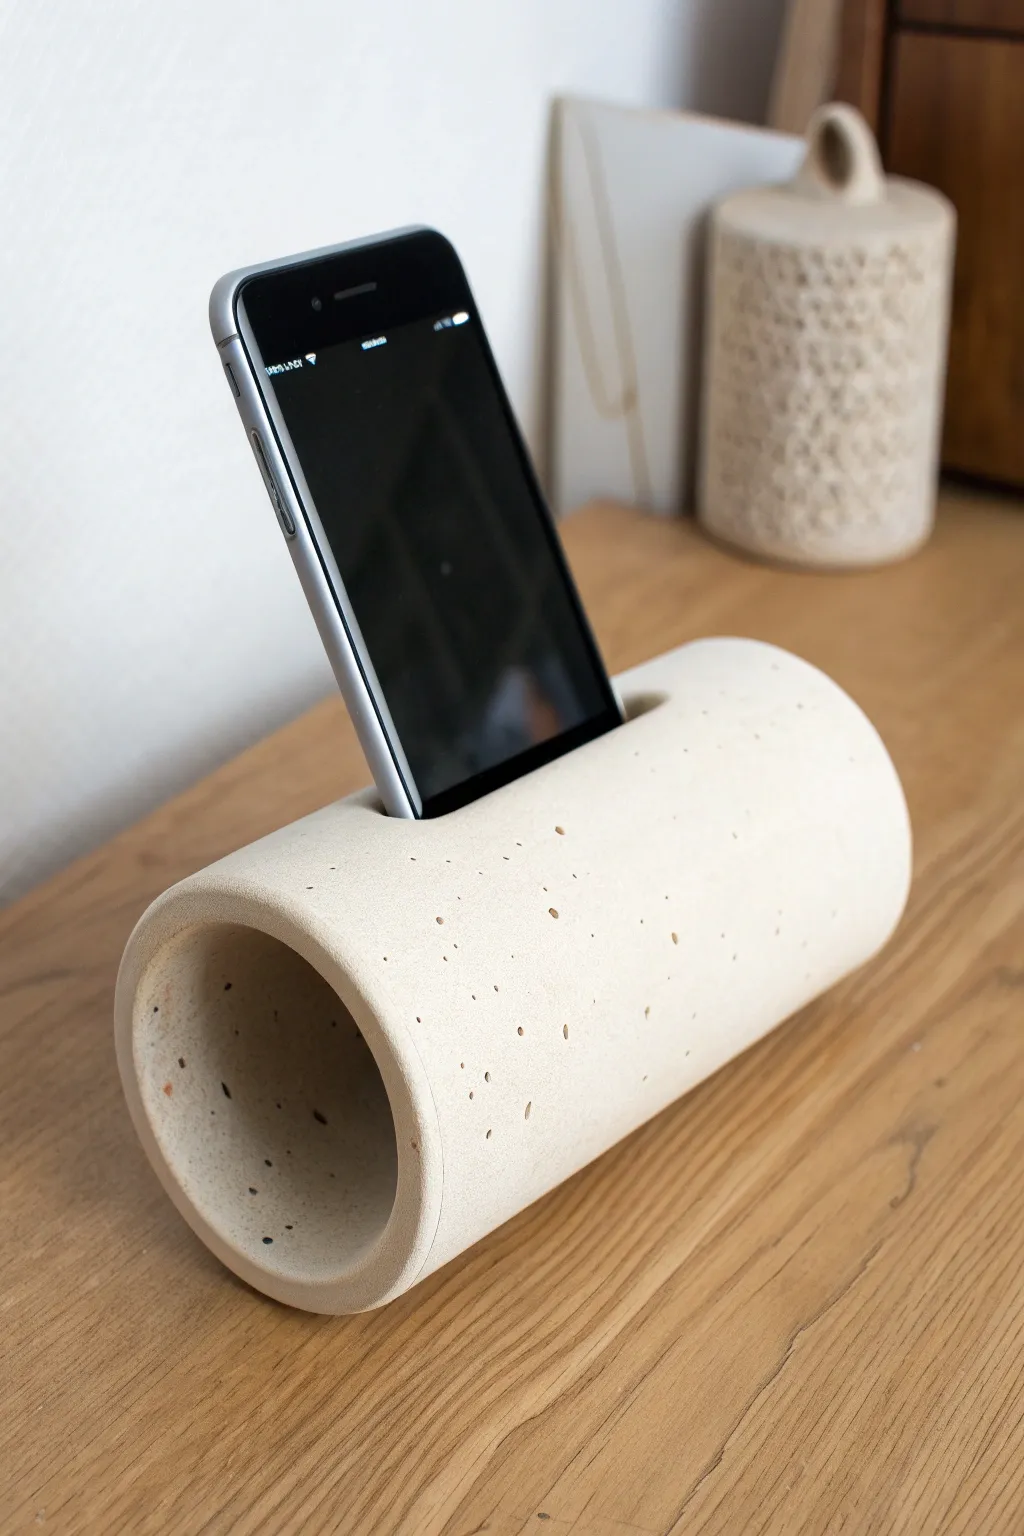
This minimalist amplifier uses natural acoustics to boost your phone’s volume without a single wire. Crafted from speckled stoneware, its hollow cylindrical shape acts as a resonance chamber while holding your device at the perfect viewing angle.
Step-by-Step Guide
Materials
- Speckled stoneware clay (approx. 2-3 lbs)
- Rolling pin
- Canvas mat or slab roller
- PVC pipe or sturdy cardboard tube (approx. 3-4 inch diameter) for a mold
- Newspaper or craft paper
- Fettling knife or clay cutting tool
- Scoring tool (or serrated rib)
- Slip (clay mixed with water)
- Smoothing sponge
- Flexible rib tool
- Phone for measuring (or measurements of your specific device)
Step 1: Forming the Cylinder
-
Prepare the Mold:
Begin by wrapping your PVC pipe or cardboard tube form in a sheet of newspaper. Tuck the ends in or tape them lightly so the paper stays in place; this prevents the clay from sticking to the form later. -
Roll the Slab:
Roll out a slab of speckled stoneware clay to a uniform thickness, aiming for about 1/4 inch to 3/8 inch. I like to flip the slab once or twice during rolling to compress the clay particles gently. -
Cut to Size:
Wrap the slab loosely around your tube form to determine the needed length, allowing for a slight overlap. Trim the excess clay with your fettling knife to create a clean rectangle. -
Bevel the Edges:
Cut the two short ends of your clay rectangle at 45-degree angles in opposite directions. This creates a stronger, seamless join where the tube overlaps. -
Attach to Form:
Carefully wrap the clay slab around the paper-covered tube. Bring the beveled edges together ensuring a snug fit against the form. -
Score and Slip:
Score both beveled surfaces aggressively with your tool and apply a generous amount of slip. Press the edges firmly together to bond them. -
Smooth the Seam:
Use a wooden tool or your thumb to smear the clay across the seam line, blending it until it disappears. Follow up with a flexible rib to smooth the surface perfectly.
Step 2: Sculpting the Opening
-
Initial Drying:
Let the clay sit on the form until it reaches a soft leather-hard stage. It needs to hold its shape when the interior tube is removed but still be carveable. -
Remove the Form:
Gently slide the PVC pipe or cardboard tube out. Peel away the newspaper lining from the inside of the clay cylinder. -
Mark the Slot:
Place your phone (or a template of it) on top of the cylinder to mark the width and thickness. Add a little wiggle room to account for clay shrinkage during firing. -
Cut the Channel:
Using a sharp knife, carefully cut out the rectangular slot. Cut straight down initially, or angle the cut slightly backward if you want the phone to lean. -
Refine the Edges:
Use a damp sponge or your finger to round over the sharp cut edges of the phone slot. This prevents chipping later and protects your phone from scratches. -
Finish the Ends:
Check the open ends of the cylinder. If they distorted during cutting, gently reshape them into perfect circles and smooth the rims with a damp chamois or sponge. -
Surface Texture:
Wipe the entire exterior with a damp sponge to remove any tool marks. This also exposes the beautiful grit and speckles in the stoneware.
Sagging Cylinder?
If your tube flattens when you remove the mold, the clay is too wet. Slide the form back in and let it stiffen to strict leather-hard before trying again.
Step 3: Firing
-
Slow Dry:
Cover the piece loosely with plastic for a day or two to equalize moisture, then uncover and let it dry completely to bone dry state. -
Bisque Fire:
Load the bone-dry piece into the kiln for a bisque firing (usually to Cone 04). Since it is a tube, ensure it doesn’t roll into other pots. -
Glazing Decision:
For the raw look in the photo, leave the exterior unglazed. You might choose to pour a clear liner glaze inside for easier cleaning, but bare clay works fine for sound resonance. -
Final Fire:
Fire the piece to the maturity temperature of your specific clay body (e.g., Cone 5, 6, or 10). Sand the bottom lightly after firing if there are any rough grog spots.
Acoustic Boost
Make the tube longer for deeper bass resonance, or slightly flare the open ends like a trumpet bell to project the sound outward more effectively.
Now you have a stylish, functional piece of ceramic art that blends technology with earthy design

Angled Stand With Hidden Sound Chamber
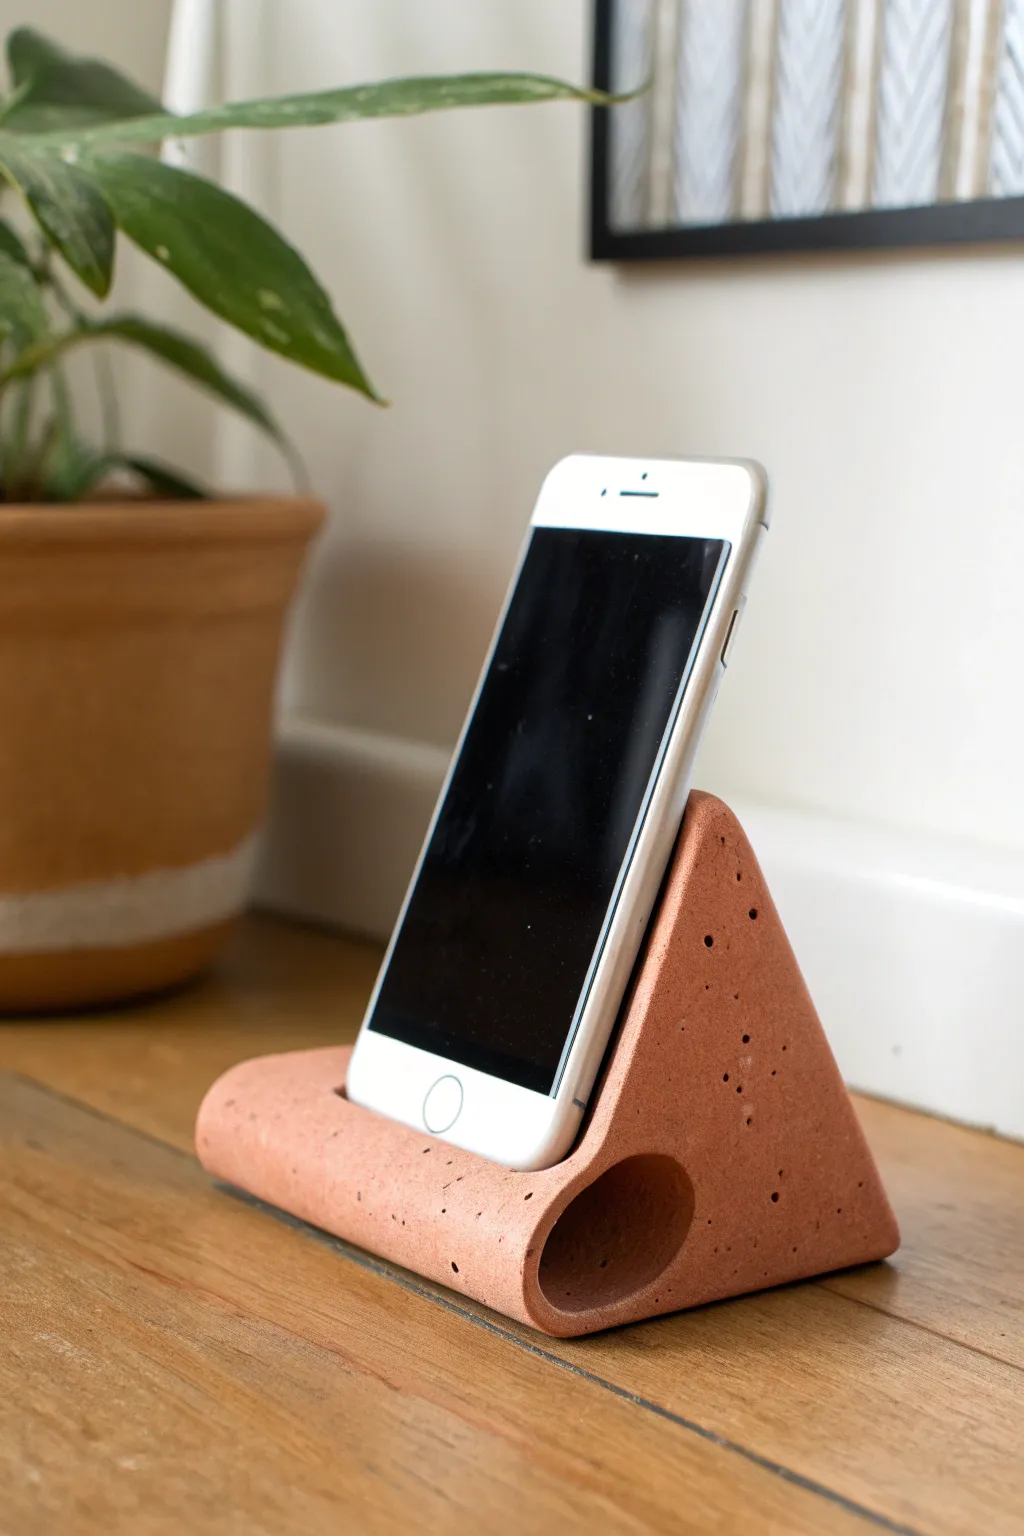
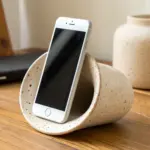
Transform a simple slab of clay or concrete into a sleek, triangular phone stand that naturally amplifies sound through a hidden chamber. This modern, minimalist design features a warm, earthy texture that looks perfect on a desk or nightstand.
Step-by-Step Tutorial
Materials
- Air-dry clay, terracotta clay, or cement mix
- Rolling pin
- Ruler
- Sharp craft knife or clay cutting tool
- PVC pipe section or wooden dowel (1-inch diameter)
- Sandpaper (various grits)
- Small sponge
- Cardboard (for template making)
- Water
- Slip (clay mixed with water)
Step 1: Preparation & Shaping
-
Create a template:
Begin by sketching a right-angled triangle on cardboard for the side profile. A base of about 4 inches and a height of 3.5 inches works well for most phones. Cut this out to use as your guide. -
Roll out the material:
Roll your clay or cement-mix dough onto a flat surface to a thickness of approximately 3/4 inch. If using clay, I like to roll it on canvas to prevent sticking. -
Cut the triangular block:
Using your cardboard template, cut several triangles from the clay and stack them, or if your slab is thick enough, cut a single block that is roughly 2.5 inches wide. -
Smooth the block:
If you stacked layers, score and slip between them to bond them tight, then smooth the sides into a solid triangular prism shape.
Step 2: Forming the Chamber
-
Position the channel:
Lay the prism on its side. Place your PVC pipe or dowel near the bottom, running lengthwise through the widest part of the triangle base. -
Create the hollow:
Carefully push the pipe through or carve out the material to create a tunnel that goes all the way through from left to right. This is your sound chamber. -
Refine the tunnel walls:
Smooth the inside of this tunnel with water on your finger or a sponge; a smooth interior reflects sound better.
Acoustic Clarity
For the best sound amplification, coat the inside of the tunnel with a layer of gloss varnish or glaze. A harder, smoother surface bounces sound waves more effectively.
Step 3: Carving the Slot
-
Mark the phone slot:
Stand the prism up. On the angled face, mark a rectangular slot where the phone will sit. Ideally, this should intersect with the tunnel you just created. -
Excavate the slot:
Use your knife to carefully carve out the slot. Go deep enough so it breaks through into the horizontal tunnel below, allowing sound to travel from the speaker down into the chamber. -
Test the fit:
Gently test the width with your phone (wrapped in plastic wrap if the clay is wet) to ensure it sits at a comfortable viewing angle.
Cracking Issues?
If you see hairline cracks while drying, your clay is drying too fast. Patch them immediately with a little slip and cover the piece more tightly with plastic.
Step 4: Finishing
-
Smooth the exterior:
Use a damp sponge to wipe away any fingerprints or sharp ridges on the outer surfaces. -
Add texture (optional):
If you want the speckled look shown in the photo, you can gently press coarse sand or grog into the surface while it’s still damp. -
Initial drying:
Let the piece dry slowly under a loose plastic bag for 24 hours to prevent cracking. -
Full cure:
Remove the plastic and let it air dry completely for another 2-3 days, or fire it in a kiln if using ceramic clay. -
Sanding:
Once fully hard, sand the edges lightly to soften the corners and ensure the bottom is perfectly flat so it doesn’t wobble.
Place your phone in the slot and enjoy naturally amplified music without any cords or batteries


Monster Mouth Phone Amplifier
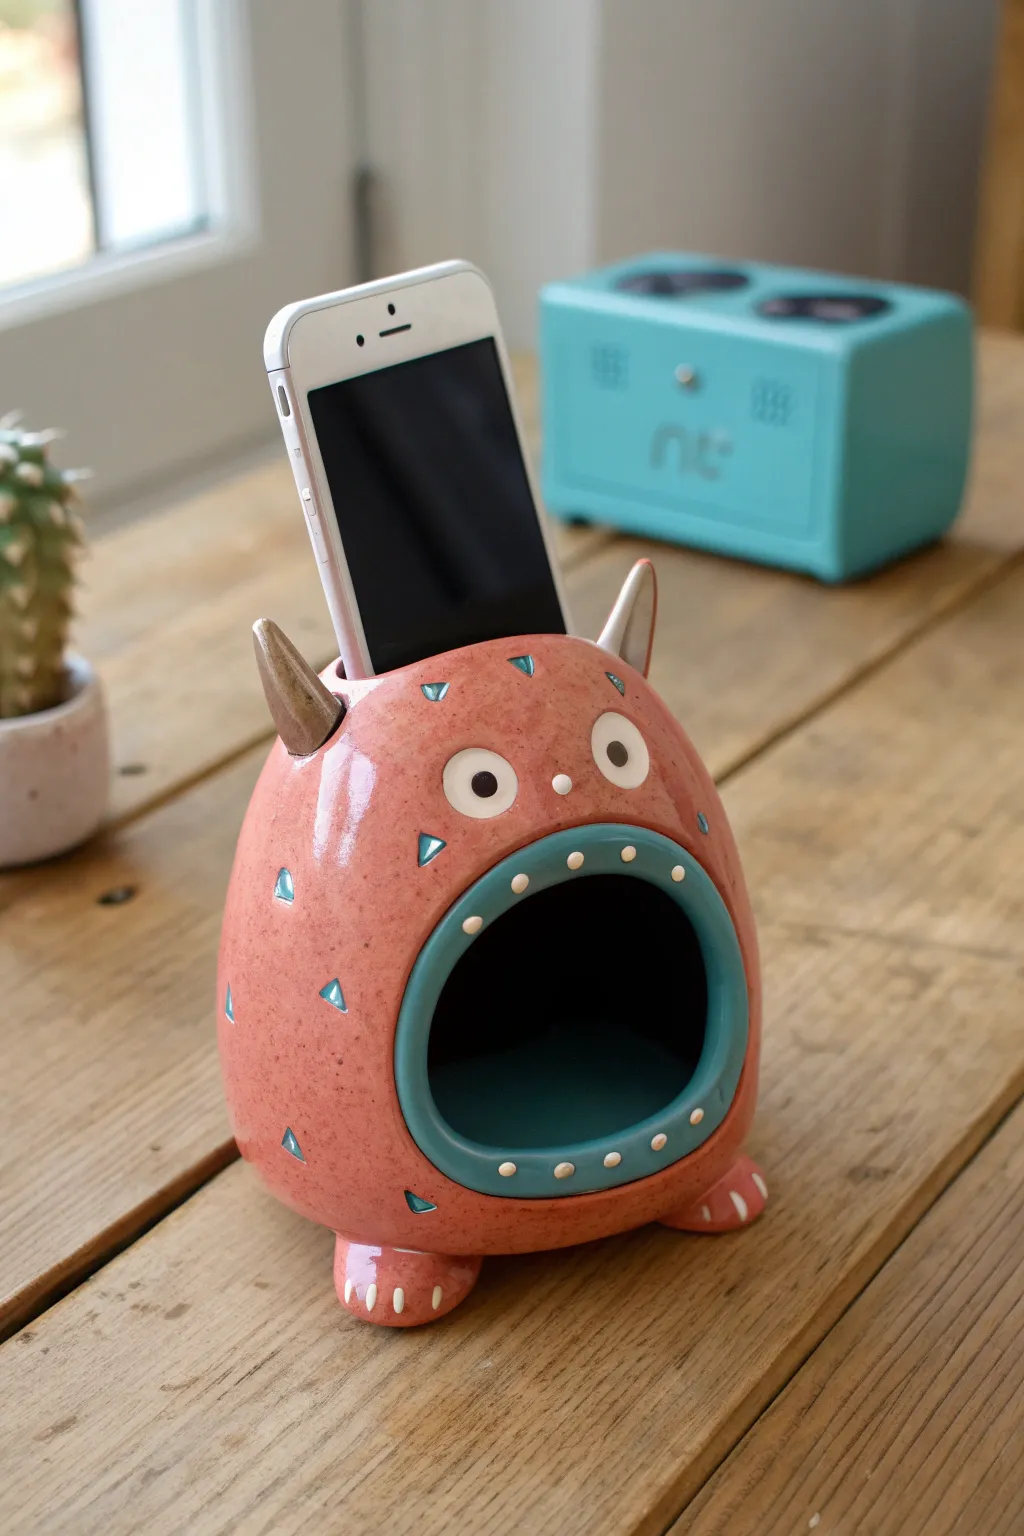
This adorable ceramic amplifier solves the problem of quiet phone speakers with monstrous style. Featuring a speckled pink glaze, a cavernous blue mouth to project sound, and quirky little horns, this project is as functional as it is fun to sculpt.
Step-by-Step
Materials
- Cone 5-6 stoneware clay (white or buff)
- Pottery wheel (optional, can be hand-built)
- Ribs (wooden and rubber)
- Needle tool
- Fettling knife
- Scoring tool or serrated rib
- Loop tool for carving
- Sponge
- Underglazes: Blue-green, White, Black
- Glossy speckled pink glaze (cone 5/6)
- Clear glaze (if underglazes aren’t glossy)
- Small round brushes
Step 1: Forming the Body
-
Throw or Build the Dome:
Begin by creating a hollow, enclosed dome shape. If throwing on the wheel, throw a cylinder, neck it in completely to close the top, and refine the curve with a rib. If hand-building, use coil or pinch pot methods to create a smooth, egg-like form approximately 6 inches tall. -
Flatten the Base:
Once the form is leather hard, gently tap the bottom against a flat surface to create a stable base so the monster won’t roll away. -
Cut the Speaker Opening:
Sketch a large, wide circle on the front belly of the monster. Using a fettling knife, carefully cut this circle out. Keep the removed clay handy; you won’t need it, but it’s good for test tiles. -
Refine the Mouth Interior:
Use a damp sponge to smooth the cut edges of the mouth opening until they are perfectly rounded. This smoothness is crucial for the colored rim later. -
Carve the Phone Slot:
On the very top of the head, measure your phone’s width. Cut a rectangular slot slightly wider than your device. I prefer to test fit gently (don’t force it!) to ensure the angle tilts slightly backward for better viewing.
Slumping Slot?
If the phone slot sags while drying, insert a piece of folded cardboard wrapped in newspaper into the slot. This supports the clay until it’s leather hard but burns out safely if forgotten.
Step 2: Adding the Details
-
Sculpt the Feet:
Roll two small balls of clay and flatten them slightly into rounded pads. Attach these to the bottom front of the body using the score and slip method. -
Add Toes:
Use a small tool to press indentations into the feet to suggest three toes, then roll tiny rice-sized clay bits and attach them as white claws later (or sculpt them directly now). -
Create the Horns:
Roll two small cones of clay. Bend them slightly to give them character and attach them securely to the top sides of the head, blending the clay downwards so the seam disappears. -
Form the Eyes:
Make two flat coin-sized discs of clay. Slip and score them onto the face, positioned widely above the mouth opening. Add a tiny dot of clay in the center for the pupil texture. -
Clean and Dry:
Go over the entire piece with a finishing sponge to remove any fingerprints or burrs. Allow the piece to dry slowly under plastic to prevent cracking, then bisque fire to cone 04.
Step 3: Glazing and Finishing
-
Apply Wax Resist:
Wax the bottom of the feet to prevent sticking to the kiln shelf. -
Paint the Mouth Interior:
Apply three coats of a teal or blue-green underglaze to the inside of the mouth cavity. Extend this color onto the ‘lip’ rim surrounding the opening to create a frame. -
Adding Teeth and Eyes:
Using a fine brush and white underglaze, paint small dots around the blue rim to create the ‘teeth.’ Paint the eye discs white, and add black pupils. Paint the horns a solid metallic bronze or leave them raw clay color if you like the contrast. -
Detailing the Triangles:
Paint small blue triangles scattered across the body using the same blue form the mouth. -
Apply the Main Glaze:
Carefully apply your speckled pink glaze to the entire outer body, avoiding the eyes, horns, and the blue mouth rim. You may need a smaller brush to cut in close to these details. -
Clear Glaze (Optional):
If your blue underglaze is matte, dab a little clear gloss glaze over the mouth rim and eyes to make them shine. -
Final Fire:
Fire the piece to cone 5 or 6 (depending on your clay body and glaze instructions).
Acoustic Advantage
For better sound amplification, smooth the interior walls as much as possible. A smoother inner surface reflects sound waves more efficiently than a rough texture.
Pop your phone into the slot and enjoy your favorite tunes with a monstrous boost in volume


Frog Croak Amplifier Dock
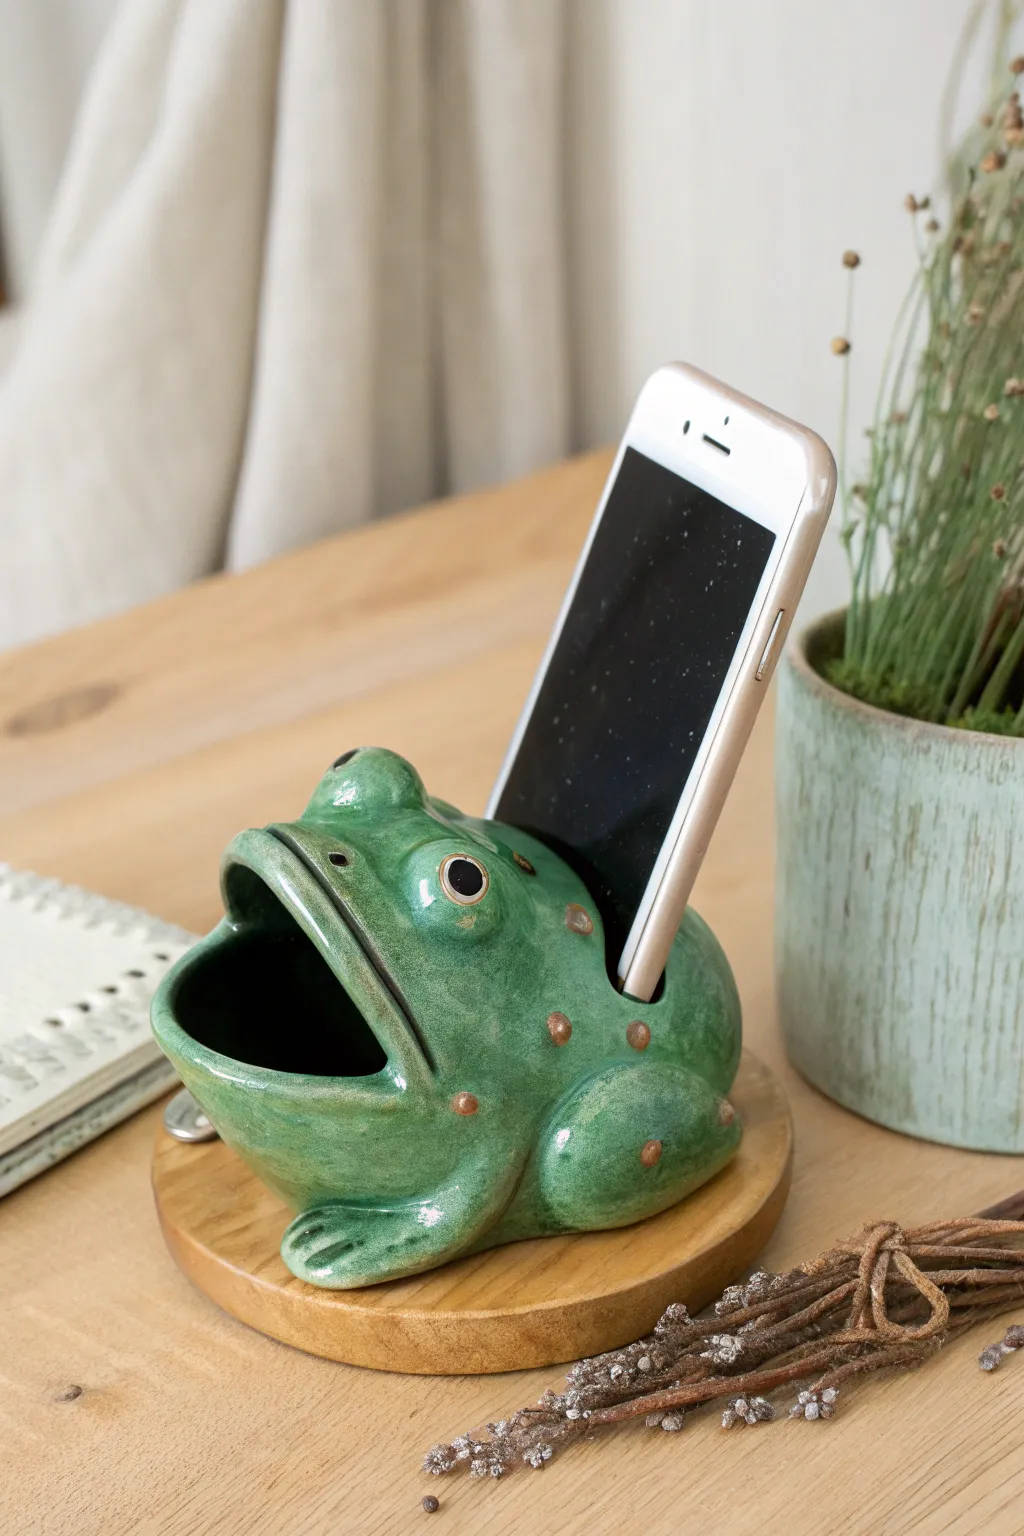
Transform a lump of clay into a functional piece of desk art with this whimsical frog amplifier. With its wide-open mouth designed to catch and boost your phone’s speaker sound, this glossy green companion sits on a wooden base ready to serenade you.
How-To Guide
Materials
- Stoneware clay (cone 5/6 recommended)
- Pottery wheel (optional, can be hand-built)
- Modeling tools (ribs, needle tool, loop tools)
- Slip and score tool
- Sponge
- Underglaze (dark, earthy green)
- Glossy transparent glaze
- Iron oxide wash (for spots)
- Small round wooden base (pre-cut)
- Strong adhesive (E6000 or epoxy)
Step 1: Forming the Body
-
Throw or pinch the base:
Start with a ball of clay about the size of a grapefruit. If you are throwing on the wheel, create a closed form that is slightly wider at the bottom (like a squat teardrop). If hand-building, use the pinch pot method to create two deep bowls, join them rim-to-rim, and smooth the seam completely. -
Shape the frog’s posture:
Gently paddle the clay form into an oval shape. Flatten the bottom so it sits stable on your work surface. Push and manipulate the clay so the ‘head’ area is slightly elevated, creating a natural slope. -
Carve the mouth opening:
Using a needle tool, sketch a wide, exaggerated frown on the front of the form. Cut this section out carefully. This large cavity is crucial because it acts as the reverberation chamber for the sound. -
Create the hollow interior:
If your form is thick, carefully scoop out excess clay through the mouth opening using a loop tool. You want an even wall thickness of about 1/4 inch to prevent cracking during firing. -
Form the phone slot:
Measure the width and depth of your phone. Cut a rectangular slot into the top back of the frog’s head. It needs to angle downward so the phone rests securely. Test the fit carefully (remembering clay shrinks!), ensuring the slot connects directly into the hollow belly chamber.
Step 2: Sculpting Details
-
Add the eye sockets:
Roll two small balls of clay and attach them to the top of the head using the score and slip method. Blend the clay downward into the head so they look like bulging frog eyes rather than just stuck-on spheres. -
detail the eyes:
Press a smaller, indented circle into the center of each eye mound to create the pupil area. This adds depth and character to the face. -
Build the legs:
Roll two thick coils for the rear legs. Bend them into a ‘V’ shape to mimic the folded leg of a sitting frog. Attach these to the sides of the body, blending the seams thoroughly so they look muscular and integrated. -
Sculpt the feet:
At the front of the body, attach small flattened pads of clay for the front feet. Use a modeling tool to press indentations for the toes, giving them a slightly webbed appearance. -
Refine the mouth rim:
Taking a damp sponge, smooth the sharp edges of the cut mouth. I like to gently flare the lip outward just a tiny bit, which helps detailed glazing later and enhances the projection shape.
Acoustic Trick
Make the interior of the frog as smooth as possible. A rough interior absorbs sound waves, while a burnished, smooth interior reflects them louder.
Step 3: Glazing and Finishing
-
Bisque fire:
Allow the frog to dry completely—this can take up to a week depending on humidity. Once bone dry, bisque fire the piece to your clay body’s specifications (usually Cone 04). -
Apply base color:
Paint the entire exterior with two to three coats of a rich, leafy green underglaze or glaze. Avoid the bottom where it sits on the kiln shelf. -
Add the spots:
Dip a small brush into iron oxide wash or a brownish glaze. Dab small, irregular spots across the back and sides of the frog. These will interact with the green glaze to create those lovely organic speckles. -
Highlight the eyes:
Carefully paint the pupil indentation black and the surrounding eye ridge a lighter green or leave it lighter to stand out. -
Final glaze firing:
Apply a clear gloss glaze over the entire piece to give it that wet, amphibious look. Fire again to the maturity temperature of your clay (likely Cone 5 or 6). -
Mount to base:
Once the ceramic is cool, apply a strong adhesive like E6000 to the bottom of the frog and center it on your wooden round base. Let it cure for 24 hours before docking your phone.
Level Up: Lily Pad
For a more immersive scene, paint the wooden base with green and white acrylics to resemble a lily pad, or glue felt leaves to the wood before mounting.
Set your new green friend on your desk and enjoy the natural boost to your favorite tunes

The Complete Guide to Pottery Troubleshooting
Uncover the most common ceramic mistakes—from cracking clay to failed glazes—and learn how to fix them fast.
Speckled Terrazzo-Look Amplifier Block
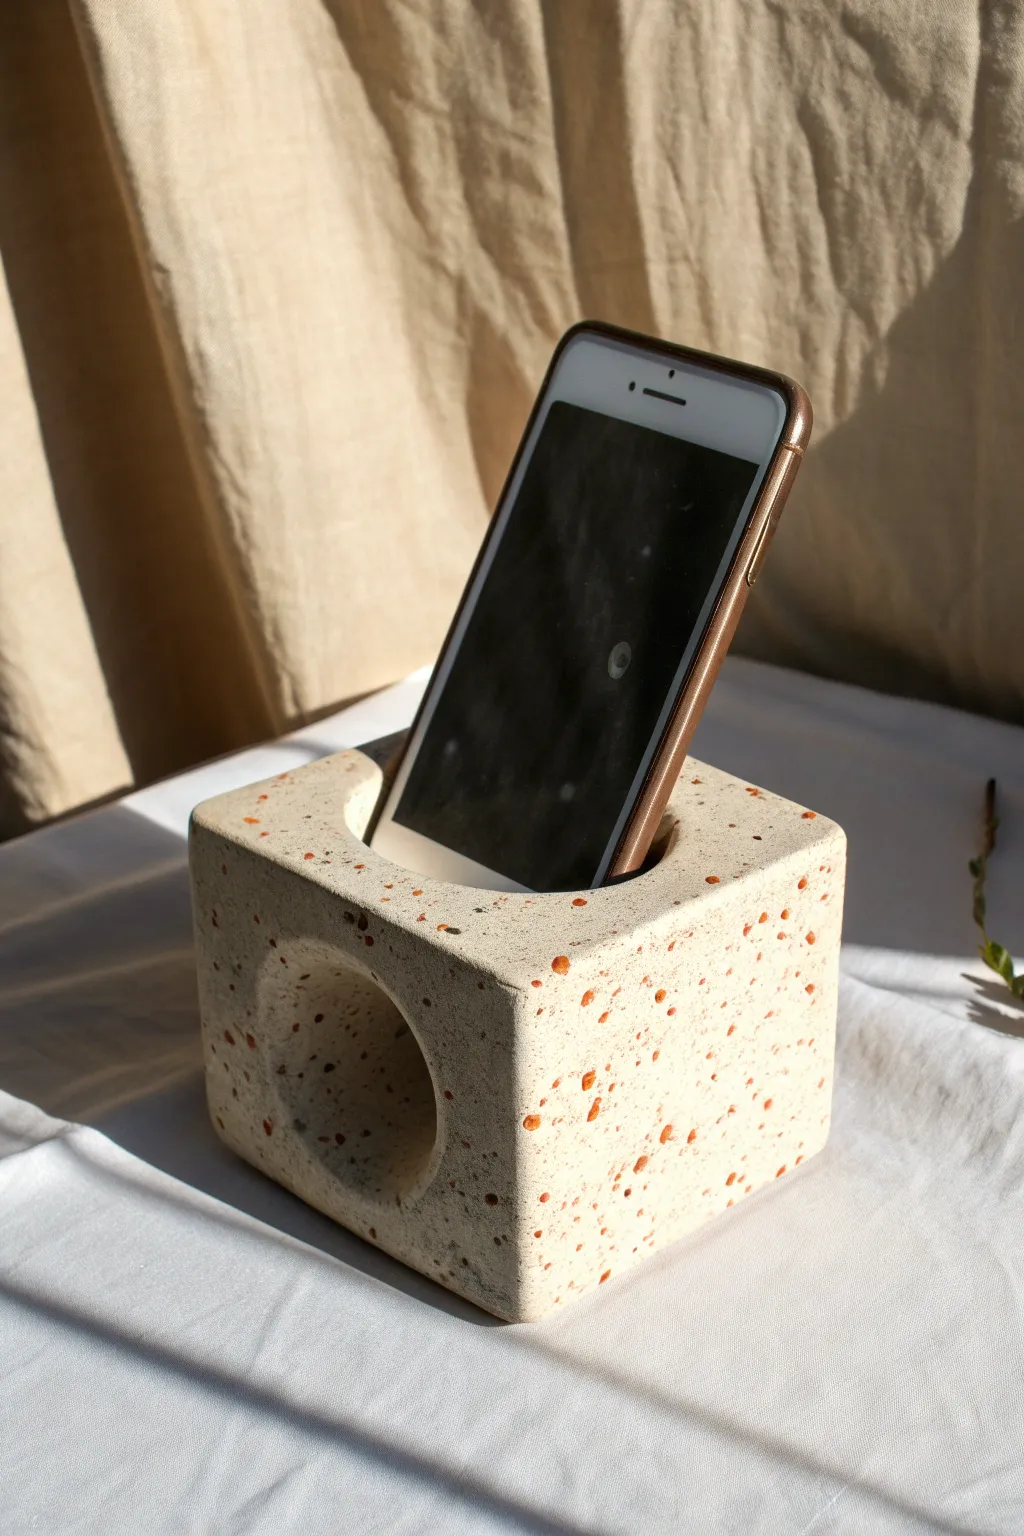
This minimalist phone amplifier combines acoustic function with a trendy terrazzo aesthetic. By casting simple concrete or plaster with embedded color chips, you can create a sturdy, modern desk accessory that naturally boosts your phone’s speaker volume without any cords.
Detailed Instructions
Materials
- White concrete mix or casting plaster
- Terracotta colored polymer clay (or crushed terracotta pot shards)
- Square cardboard gift box (approx. 4-5 inch cube)
- Sturdy cardboard tube (toilet paper or paper towel roll)
- Thick foam sheet or styrofoam block
- Sandpaper (various grits: 120, 220, 400)
- Craft knife
- Masking tape or hot glue
- Cooking spray or petroleum jelly (release agent)
- Mixing bowl and spoon
- Water
Step 1: Creating the Color Chips
-
Prepare the speckles:
If using polymer clay, roll it out into a very thin sheet and bake according to package instructions until hard. Once cooled, chop the baked clay into small, irregular shards ranging from 1mm to 3mm in size. -
Alternative method:
For a more authentic ceramic feel, safely crush an old terracotta saucer inside a heavy cloth bag with a hammer until you have fine chips.
Vibrate for Density
Use an orbital sander (without grit) held against the table surface while pouring. The vibrations help the concrete settle tightly, reducing surface bubbles.
Step 2: Building the Mold
-
Prepare the box:
Select a sturdy square cardboard box to serve as your main mold. Reinforce the outside corners with masking tape to prevent leakage when the wet concrete is poured. -
Create the sound tunnel:
Cut a piece of cardboard tube to fit exactly inside the width of the box. Trace the tube’s circular shape onto one side of the box and cut out the hole. -
Secure the tunnel:
Insert the tube into the hole. It should span halfway across the box’s interior or go all the way to the back wall, depending on your design preference; for this look, secure it so it creates a cavity but doesn’t exit the back. -
Create the phone void:
Cut a rectangular block of foam or Styrofoam that matches the width and depth of your phone. This block needs to be long enough to touch the cardboard tube inside the mold and stick out the top of the box. -
Connect the voids:
Glue the foam block perpendicularly onto the cardboard tube inside the mold. This connection is crucial—it’s the channel where sound travels from the phone into the amplifier tunnel. -
Seal the seams:
Use hot glue or tape to seal any gaps where the tube meets the box wall to prevent the casting material from leaking inside.
Step 3: Casting
-
Lubricate the mold:
Spray the inside of the box, the tube, and the foam block lightly with cooking spray or coat with a thin layer of petroleum jelly. This ensures easy removal later. -
Mix the base:
In your mixing bowl, combine the white concrete mix or plaster with water according to the manufacturer’s ratio. Aim for a consistency similar to pancake batter. -
Add the terrazzo:
Fold your prepared terracotta chips into the wet mix. Stir gently to distribute them evenly without creating too many air bubbles. -
Pour the mixture:
Slowly pour the mix into the box around the tube and foam block. Tap the sides of the box firmly and repeatedly to release trapped air bubbles and help the aggregate settle. -
Let it cure:
Allow the project to dry completely. This usually takes 24 to 48 hours for concrete, or less for plaster. Don’t rush this step or the corners may crumble.
Seal the deal
Apply a matte concrete sealer or beeswax after sanding. This protects the porous surface from finger oils and deepens the contrast of the speckles.
Step 4: Finishing
-
Demold the cube:
Tear away the cardboard box. Carefully pull out the foam block from the top and the cardboard tube from the front. If the tube is stuck, you can dampen it with a little water to soften and peel it out. -
Initial sanding:
Start with 120-grit sandpaper to remove any rough casting seams and surface imperfections. Sand squarely to sharpen the edges of the cube. -
Reveal the chips:
Wet the sandpaper slightly and sand the flat surfaces firmly. This wet-sanding technique wears down the top layer of concrete to expose the colorful terracotta chips hidden just beneath the surface. -
Smooth the interior:
Roll a piece of sandpaper and verify the phone slot and circular opening are smooth so they won’t scratch your device. -
Final polish:
Finish with 400-grit sandpaper for a buttery smooth finish. Wipe away all dust with a damp cloth.
Place your creation on your desk and enjoy the naturally amplified sound from your new functional art piece
Coil-Built Spiral Horn Sculpture
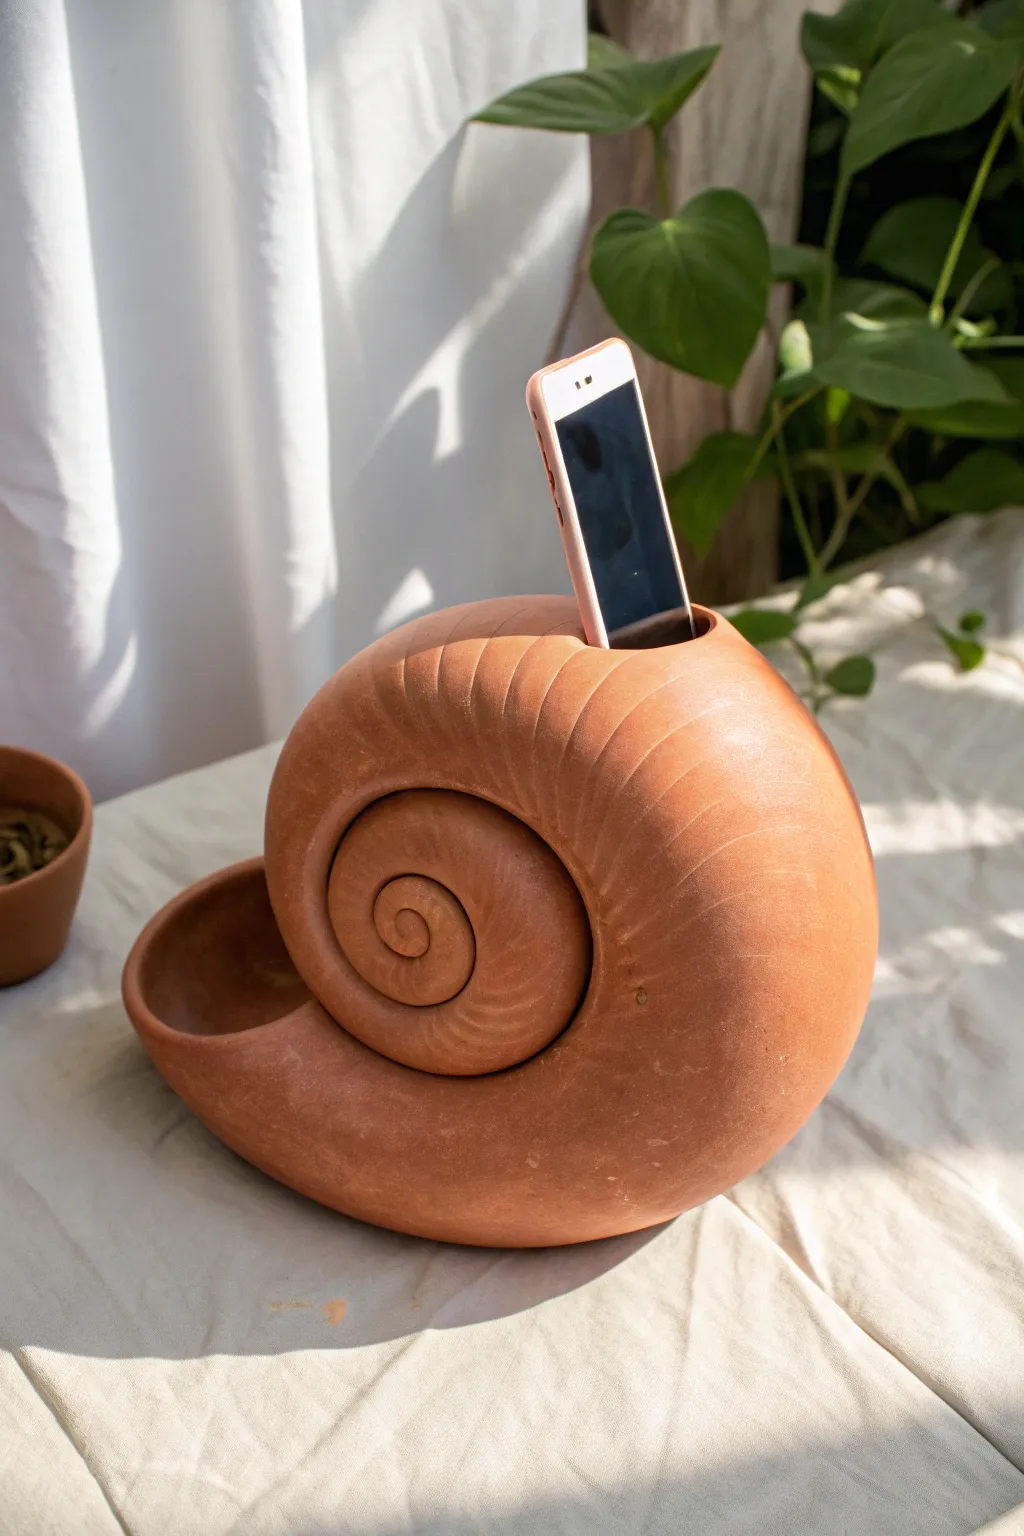
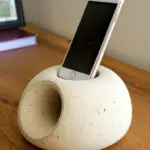
Blend sculptural beauty with functional design in this stunning acoustic amplifier inspired by a nautilus shell. Crafted from warm terracotta clay, its spiraled chamber naturally boosts your phone’s volume while adding an organic touch to your tabletop.
Step-by-Step Tutorial
Materials
- Terracotta stoneware clay (smooth or with fine grog)
- Pottery wheel (optional, for the base bowl)
- Clay extruder or rolling surface for coils
- Serrated rib tool
- Rubber kidney rib
- Needle tool
- Sponge
- Slip (clay mixed with water)
- Wooden modeling tools
Step 1: Forming the Base Structure
-
Create the base pinch pot:
Start by forming a large ball of clay, roughly the size of a grapefruit. Pinch it open to create a deep, rounded bowl shape. This hollow form will become the main resonant chamber of the shell. -
Refine the curve:
Use a rib to smooth the inside of your pinch pot while it is still accessible. The smoother the interior, the better the sound will travel, so take a moment here to remove any finger marks. -
Begin the spiral construction:
Roll out several thick coils of clay, about 3/4 inch in diameter. Score and slip the rim of your bowl, then attach the first coil, winding it inward slightly to begin closing the form. -
Build the nautilus shape:
Continue adding coils, stacking them so they lean progressively inward to create a domed spiral. Unlike a standard pot, you aren’t just going up; you are spiraling in towards a center point on the side. -
Blend the coils:
As you stack, firmly blend the clay coils together on both the inside and outside. I find using a serrated rib first helps lock the clay together before smoothing it with a rubber rib.
Slumping Shell?
If the shell starts sagging while building, stop adding coils. Stuff the interior loosely with newspaper or plastic bags to support the walls, then let it stiffen for an hour before continuing.
Step 2: Sculpting the Details
-
Create the sound slot:
Before the form is completely closed or too hard, determine where the phone will sit at the top. Use a needle tool to cut a rectangular slot sized specifically for your device, ensuring it’s wide enough for the speakers to project into the hollow body. -
Form the decorative spiral center:
Roll a long, tapering coil of clay. Wind it into a tight flat spiral (like a cinnamon roll) to create the ‘eye’ of the shell. Score and slip this onto the side of the main body, blending the edges so it looks continuous. -
Add the front dish:
Attach a small, curved slab or distinct coil extension to the front, lower section of the shell. This open ‘mouth’ serves as a catch-all tray and visually balances the heavy spiral behind it. -
Refine the exterior texture:
Using a wooden modeling tool, gently press angled lines into the upper curve of the shell, mirroring the growth lines found on real fossils. These ridges add tactile interest and emphasize the curved form. -
Smooth the phone dock:
Double-check the slot for your phone. Smooth the edges with a damp sponge or chamois so it won’t scratch your device. You want a snug but safe fit.
Step 3: Finishing and Firing
-
Final smoothing:
Wait until the piece is leather hard. Go over the entire surface with a soft rubber rib to compress the clay particles and create that burnished, matte look seen in the photo. -
Slow drying:
Because the walls vary in thickness due to the spiral construction, cover the piece loosely with plastic. Let it dry very slowly over a week to prevent cracking at the coil seams. -
Bisque fire:
Once bone dry, fire the piece to bisque temperature (usually roughly cone 04). Since this is a functional amplifier, ensure the interior is clear of debris before loading the kiln. -
Glazing choice:
To match the reference, leave the exterior unglazed (raw terracotta). However, for better sound reflection, pour a small amount of clear or liner glaze inside the shell and swirl it to coat the inner chamber. -
Final firing:
Fire the piece to maturity (cone 6 or depending on your clay body). The unglazed exterior will develop a rich, earthy finish that looks wonderful in sunlight.
Acoustic Boost
For maximum volume, make the interior walls as smooth and hard as possible. Burnishing the inside or using a glossy liner glaze helps sound waves bounce rather than being absorbed by porous clay.
Place your phone in the cradle and enjoy the surprisingly rich sound of your handmade amplifier


What Really Happens Inside the Kiln
Learn how time and temperature work together inside the kiln to transform clay into durable ceramic.
Perforated Lantern-Style Amplifier Pod
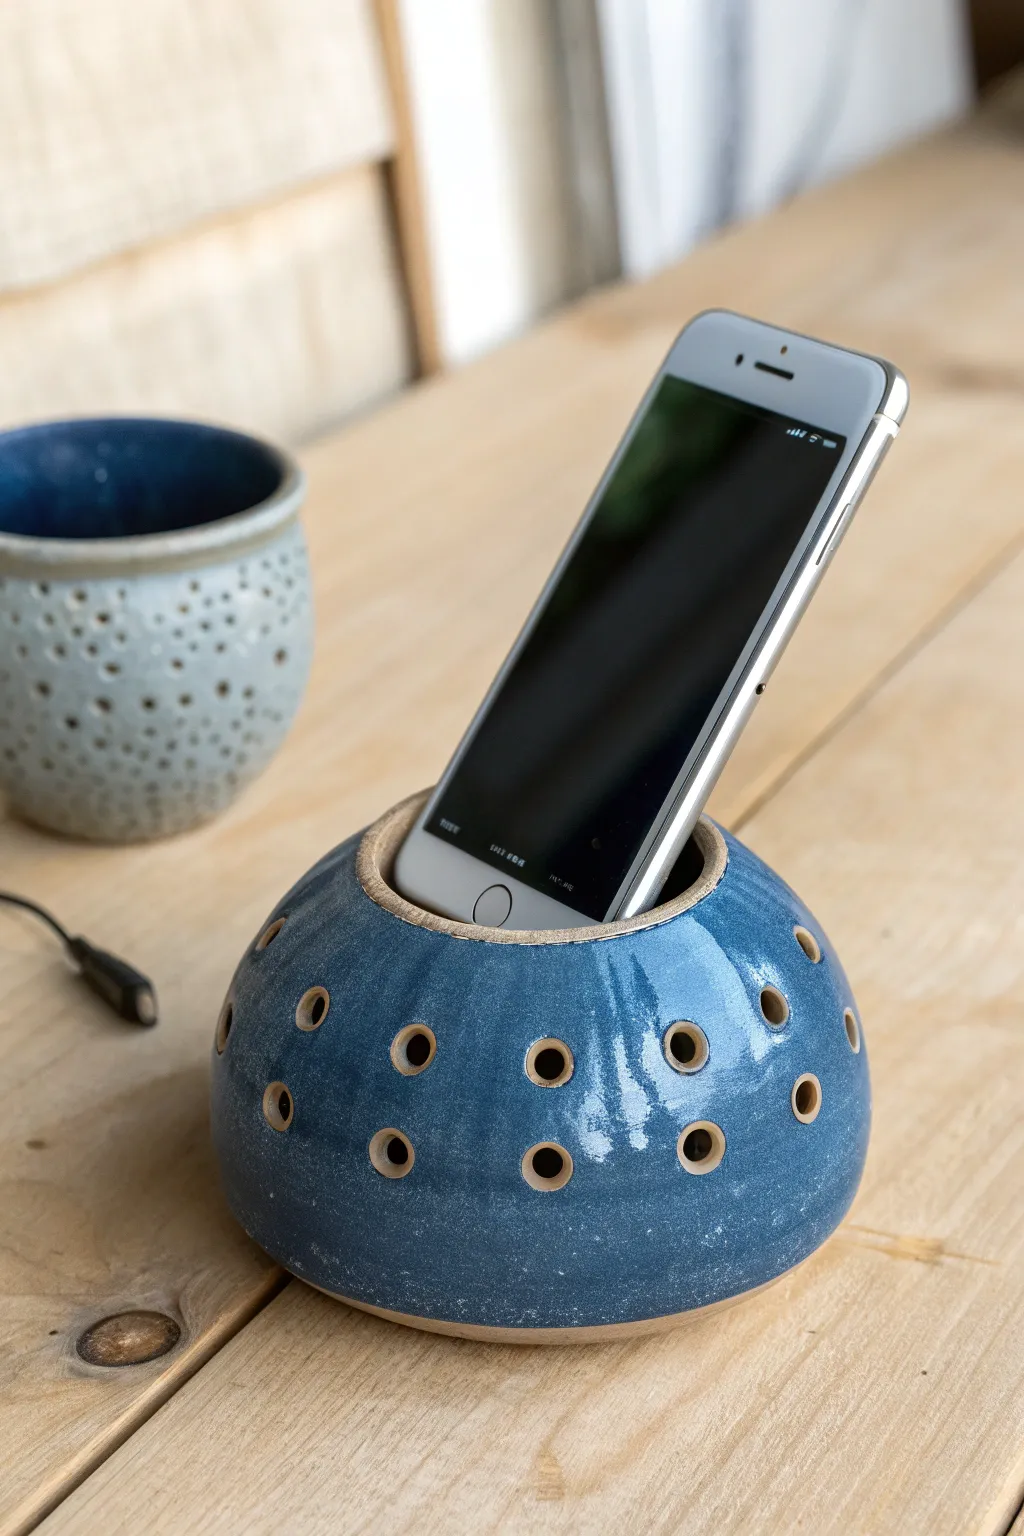
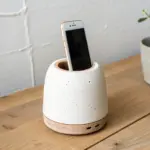
This charming ceramic project functions as an acoustic amplifier for your smartphone, boosting volume naturally without electricity. The design features a rounded, dome-like form glazed in a deep, speckled ocean blue, punctured with a series of decorative sound holes that mimic the look of a traditional lantern.
Step-by-Step
Materials
- Stoneware clay (smooth or with grog)
- Pottery wheel (or coil building supplies)
- Circular hole cutter or drill bit tool (approx. 1cm diameter)
- Needle tool
- Rib tool (metal or rubber)
- Sponge
- Wire cutter
- Ocean blue glossy glaze (high-fire or cone appropriate for your clay)
- Kiln
Step 1: Throwing the Form
-
Center the Clay:
Begin with about 1.5 to 2 pounds of well-wedged clay. Center it firmly on the wheel head, ensuring it is wide rather than tall since we are making a dome shape. -
Open and Pull:
Open the clay but keep the floor somewhat thick to provide weight and stability. Pull the walls outward first, creating a wide bowl shape, then curve them inward aggressively to form the enclosed dome. -
Close the Top:
Collar the neck in significantly until you have a small opening at the top, roughly 3-4 inches wide—just enough to eventually fit a phone but tight enough to capture sound. -
Final Shaping:
Use a rib tool on the exterior to smooth the curve and remove throwing lines. You want a consistent, continuous curve from the base to the rim. -
Refine the Rim:
Compress the top rim with a chamois or your sponge to ensure it is smooth and rounded, which prevents chipping later. -
Make the Phone Slot:
While the clay is leather hard, take your phone (or a template slightly larger than your phone) and mark a rectangular slot across the top opening. Cut this slot carefully with a needle tool, smoothing the edges immediately so they won’t scratch a device.
Acoustic boost
Make the interior of the dome as smooth as possible. A rough interior absorbs sound waves, while a burnished or smooth interior reflects them better for louder volume.
Step 2: Perforation and Detailing
-
Plan Hole Placement:
Lightly mark where you want your sound holes. A staggered pattern usually looks best and distributes sound well. I like to target the upper mid-section of the dome for the best acoustic projection. -
Cut the Holes:
Using a circular hole cutter or a drill tool, punch clean holes through the leather-hard clay at your marked spots. Twist the tool as you extract it to keep the hole clean. -
Clean the Edges:
Once the holes are cut, use a slightly damp sponge or a soft brush to soften the sharp edges of every hole, both inside and out. Sharp ceramic edges can be very unforgiving. -
Trim the Foot:
Flip the piece over and trim a neat foot ring. This lifts the amplifier slightly and gives it a finished, professional look. -
Bisque Fire:
Let the piece dry slowly and completely before loading it into the kiln for a bisque fire.
Slumping dome?
If the dome collapses while throwing, your walls may be too thin or wet. Use a heat gun to stiffen the lower walls before collaring the top inward.
Step 3: Glazing and Finishing
-
Wax Resist:
Apply wax resist to the foot ring and slightly up the bottom edge to create that clean unglazed line shown in the photo. -
Apply Glaze:
Dip or brush on your ocean blue glaze. Ensure the glaze gets inside the perforations but doesn’t clog them. You might need to blow gently on the holes while the glaze is wet to pop any bubbles. -
Clean the Slot:
Wipe away any excess glaze from the rim of the phone slot if you prefer the raw clay look there, or ensure the glaze application is thin so the phone still fits. -
Glaze Fire:
Fire the piece to the maturity temperature of your clay and glaze. The speckled effect seen in the photo often comes from iron flecks in the clay body reacting with the glaze. -
Final Sanding:
After firing, use a diamond sanding pad or wet sandpaper to briefly smooth the bottom foot ring to ensure it won’t scratch your table.
Enjoy the rich, amplified sound of your music flowing through this handcrafted piece of functional art