If you love making earrings that look like you spent all day on them (but didn’t), clay bead hoop earrings are the sweetest little win. I’m sharing my favorite heishi bead hoop ideas—starting with the classics everyone reaches for, then sliding into the fun, slightly unexpected twists.
Gold-Tone Spacer Bead Center Accent
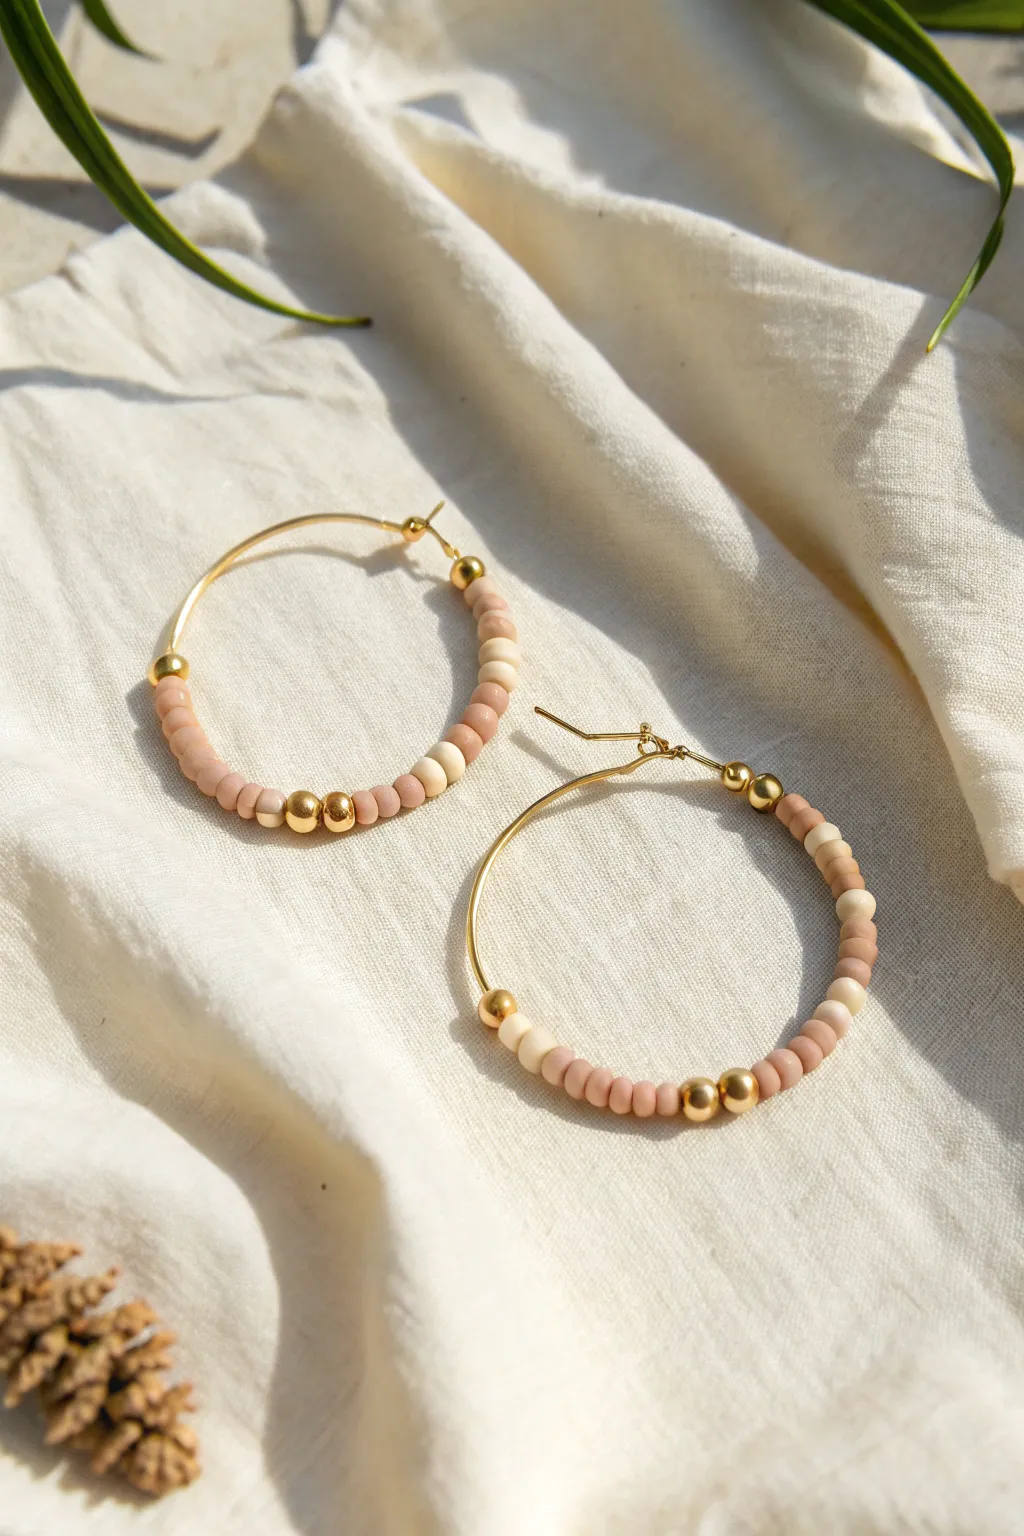
These elegant earrings combine soft blush and cream tones with striking gold accents for a look that is both earthy and refined. The central gold spacer detail draws the eye, while the lightweight heishi beads make them comfortable enough for all-day wear.
Step-by-Step Tutorial
Materials
- 2 Large gold-tone wire hoop frames (approx. 40-50mm diameter)
- Polymer clay heishi beads in ‘Blush Pink’ (flat disc shape)
- Polymer clay heishi beads in ‘Cream’ or ‘Beige’ (flat disc shape)
- 4 Small round gold spacer beads (approx. 3-4mm)
- 4 Medium round gold spacer beads (approx. 5-6mm)
- Chain-nose pliers (optional, for adjusting the hoop catch)
Step 1: Preparation
-
Open the hoop:
Begin by gently unlatching the wire of your hoop frame. If the wire catch is tight, you can carefully bend it slightly outward, but use a light touch to avoid distorting the circle. -
Sort your beads:
Lay out your beads on a bead mat or soft cloth. This prevents them from rolling away and helps you visualize the pattern before threading. You will need a mix of blush and cream clay beads, plus your gold spacers.
Keep it Symmetrical
Count your beads! Polymer clay discs vary slightly in thickness, so measure length visually rather than just counting to ensure both earrings match.
Step 2: Creating the First Side
-
Start with a gold accent:
To begin the pattern, slide one of the medium-sized round gold spacer beads onto the hoop wire. Push it all the way to the end near the hinge or stopper. -
Add first clay section:
Thread on approximately 6-8 blush pink heishi beads. These sit flush against that first gold bead. -
Transition to cream:
Add 2-3 cream-colored clay beads to create a soft gradient effect. -
Return to blush:
Follow simple color blocking by adding another 3-4 blush beads. This variation keeps the texture interesting rather than uniform. -
Continue the pattern:
String on another segment of about 5-6 blush beads until you have covered roughly one-third of the hoop’s circumference.
Loose Beads?
If the beads slide around too much leaving gaps, add one final thin heishi bead near the catch to make the fit snug before closing the wire.
Step 3: The Center Focal Point
-
Add the center accent:
Now for the defining feature: slide on two small gold spacer beads side-by-side. These should sit right at the bottom curve of the hoop when worn. -
Check balance:
Hold the hoop up by the ear wire. Ensure that your gold center accent hangs directly at the bottom lowest point. If it’s off-center, add or remove a clay bead from the previous section to adjust.
Step 4: Finishing the Pattern
-
Mirror the pattern:
Start the second half by threading on roughly 5-6 blush beads. -
Add cream contrast:
Add 2-3 cream beads, mirroring what you did on the first side. -
Final blush section:
Finish the clay portion with a final run of 6-8 blush beads. I find it helpful to count the beads on the first side to ensure the lengths match perfectly. -
Close the design:
Complete the beading by sliding on the second medium gold spacer bead. This bookends the design, matching the start. -
Secure the wire:
The hoop wire usually has a small crimp or bent end to hold beads in place; if yours is straight wire, you may need to bend the very tip vertically with pliers to prevent beads from sliding off, then latch the hoop closed.
Slip these on to add a touch of warm, handmade sophistication to any outfit


Soft Ombré Fade From Light to Dark
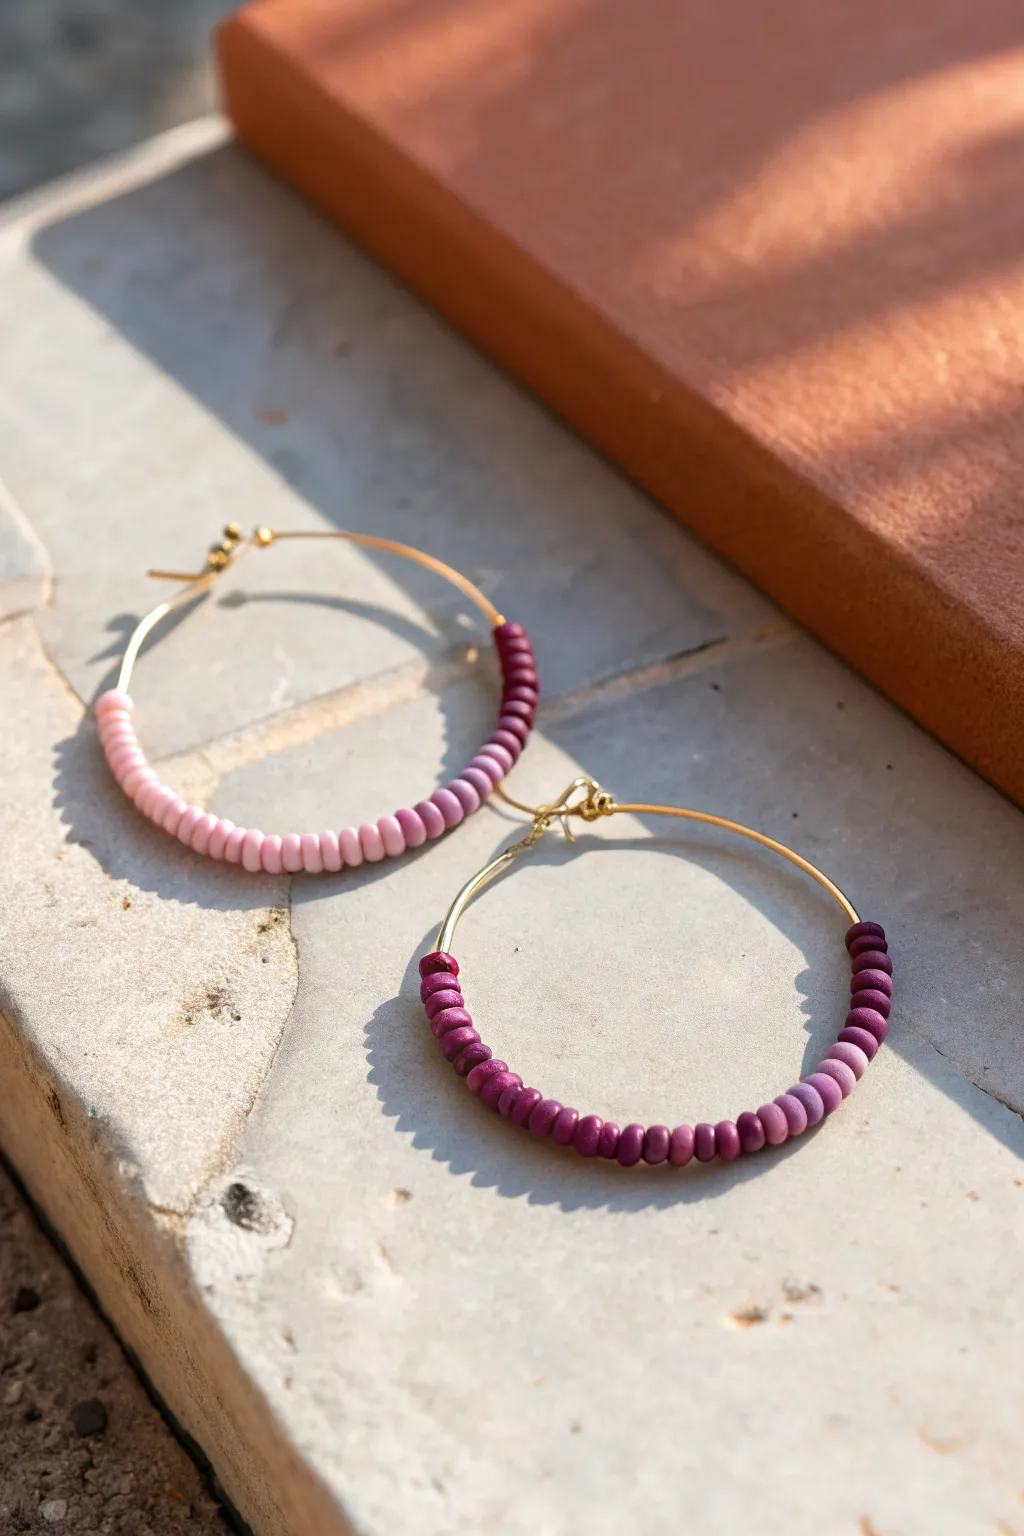
Capture the soft, romantic hues of a summer sunset with these beginner-friendly hoop earrings. The design relies on a smooth gradient of polymer clay heishi beads, transitioning gently from pale blush to a rich berry tone for a sophisticated finish.
Step-by-Step
Materials
- Gold tone hoop earring findings (30mm – 40mm diameter)
- Polymer clay heishi beads (4mm or 6mm)
- Bead colors: Pale pink, rose pink, mauve, dark berry/purple
- Jewelry pliers (chain nose)
- Beading mat or tray
Step 1: Planning the Gradient
-
Sort your palette:
Begin by separating your clay heishi beads into distinct color piles. You will need four distinct shades: a very light pale pink, a medium rose, a deeper mauve, and a dark berry purple. -
Lay out the design:
Before threading anything, arrange your beads on a beading mat in a straight line to visualize the transition. Aim for a pattern that uses roughly 7-8 beads of each color. -
Refine the transition:
Check your layout to ensure the colors flow naturally. The transition should look like: Pale Pink > Rose > Mauve > Dark Berry. Adjust the number of beads if your hoop is larger or smaller than 35mm.
Beads Won’t Curve?
If the beads look blocky or stiff on the curve, try using slightly thinner heishi beads (disc spacers) or reducing the total number of beads slightly to allow more movement.
Step 2: Assembling the First Earring
-
Prepare the hoop:
Take one of your gold hoop findings. If the end has a sharp 90-degree bend for the closure mechanism, identify the opposite end where you will begin threading. -
Start with the light:
Begin threading the palest pink beads onto the hoop wire first. Slide on about 7 or 8 beads, pushing them gently around the curve. -
Add the mid-tone:
Next, thread on the rose pink beads. Push these flush against the pale pink section. I find that giving them a little twist helps them navigate the curve without gaps. -
Transition to dark:
Add your mauve beads next, followed finally by the dark berry beads. Keep the count consistent for each color section (e.g., 8 beads per color) for a balanced look. -
Check the spacing:
Once all beads are on, slide them to the center of the hoop. You need to leave approximately 1/4 inch of bare wire at both ends of the hoop so the beads don’t interfere with the ear lobe or the closure.
Step 3: Securing the Beads
-
Bend the end:
Using your chain nose pliers, grasp the very tip of the wire on the threading end (the end without the closure mechanism). -
Create a stopper:
Gently bend this tip upwards to create a small 90-degree angle or a tiny loop. This acts as a stopper so the beads cannot slide off the wire. The friction of the clay beads often holds them in place, but this adds security. -
Verify movement:
Ensure there is just enough wiggle room for the beads to sit comfortably on the curve. If they are packed too tightly, the hoop will look rigid and unnatural.
Add Some Sparkle
Insert a single gold spacer bead or a tiny faceted crystal between each color change. This clearly defines the ombré sections and adds a hint of luxury.
Step 4: Completing the Set
-
Mirror the design:
For the second earring, you want to replicate the exact same pattern so they match perfectly as a pair. -
Thread the second hoop:
Repeat the threading process: Pale Pink > Rose > Mauve > Dark Berry. It helps to keep the first finished earring right next to you on the mat for quick visual comparison. -
Final adjustments:
Once both earrings are beaded, hold them up side-by-side. Make sure the color transitions align at the same height on the hoop curve. -
Secure the second hoop:
Use your pliers to bend the end of the second hoop wire, locking the beads in place just like the first one. -
Clean up:
Wipe the beads gently with a soft cloth to remove any fingerprints from handling the clay material.
Now you have a stunning gradient pair ready to wear or gift.


Half-Hoop Bead Coverage
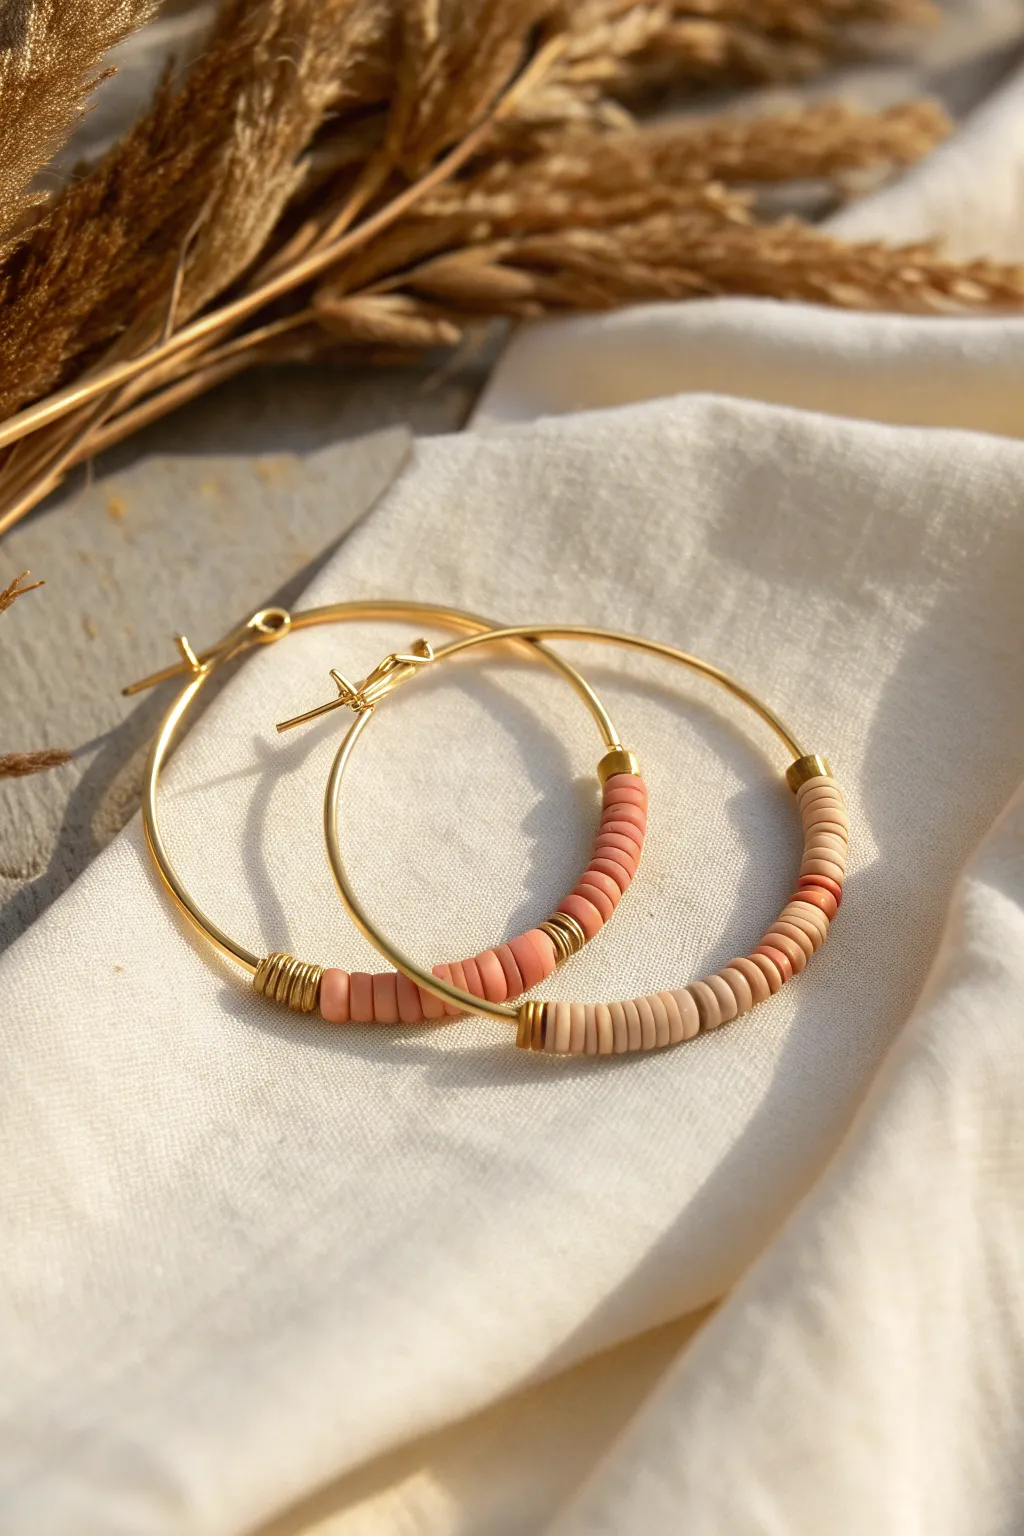
These charming hoops combine the sleekness of gold with the earthy, matte texture of polymer clay discs for a refined bohemian look. By only beading half of the hoop, you let the metal hardware shine while adding a soft gradient of coral and sand tones.
Step-by-Step Tutorial
Materials
- Gold-tone hoop earring findings (approx. 40-50mm diameter)
- Polymer clay heishi beads (approx. 4-6mm) in coral/salmon
- Polymer clay heishi beads (approx. 4-6mm) in sand/beige
- Gold wire (approx. 24-26 gauge) for wrapping
- Small gold cylindrical spacer beads or crimp beads
- Needle-nose pliers
- Wire cutters
- Strong jewelry glue (optional)
Step 1: Preparation
-
Open the finding:
Begin by unlatching your gold hoop finding. Identify the side of the hoop that is stationary (opposite the latch mechanism) as this is often where you will secure your beads to prevent them from sliding off the latch end. -
Sort your beads:
Pour out a small amount of both the coral and sand-colored heishi beads onto your workspace. Having them spread out makes it easier to spot any imperfect discs before you string them. -
Plan the color block:
Decide on your pattern. The image shows a color-blocking technique where one half of the beaded section is coral and the other half is sand. Visualize where these sections will meet on the curve.
Step 2: Creating the Stopper
-
Cut the anchor wire:
Cut a piece of gold wire about 3 inches long. This will be used to create the wrapped coil that acts as a stopper for the beads. -
Position the wire:
Hold the hoop wire at the approximate starting point where you want your beads to begin—usually just slightly past the halfway point or bottom curve of the hoop. -
Wrap the coil:
Tightly wrap the 24-gauge wire around the hoop wire to create a neat coil. Aim for about 5 to 7 wraps so it looks like a deliberate decorative element, similar to the one shown on the left side of the earring in the photo. -
Trim and tuck:
Use your wire cutters to trim the ends of the wrapping wire as close to the coil as possible. Use your needle-nose pliers to gently squeeze the cut ends flush against the hoop so they don’t snag. -
Add a gold spacer:
Slide one small gold cylindrical spacer bead (or a large crimp bead) onto the hoop until it rests snugly against your wire coil. This creates a polished transition.
Loose Beads?
If the clay beads have large holes and wobble on thin hoops, add a tiny drop of clear glue every 5 beads to stabilize them without losing flexibility.
Step 3: Beading the Pattern
-
Start with coral:
Begin threading the coral-colored clay beads onto the hoop. Add roughly 15-20 beads, depending on the thickness of your discs. -
Check the curve:
Pause to slide the beads down against the stopper. I find it helpful to hold the earring up to my ear at this stage to ensure the color block starts exactly where I want it to. -
Transition point:
Once you have enough coral beads to cover about a quarter of the hoop’s circumference, add a decorative element. You can use a few wraps of gold wire here, or a gold spacer bead as a divider. -
Switch to sand:
Now, begin threading the sand/beige colored beads. Add the same amount as your first section to keep the design symmetrical, covering the next quarter of the hoop. -
Compress the stack:
Gently push all the beads together. Clay beads have a little bit of flexibility, so clear any gaps, but don’t squeeze them so tight that the hoop warps.
Level Up: Texture Mix
Intersperse tiny gold seed beads between every 3 clay discs. This adds a subtle sparkle that catches the light and breaks up the matte texture.
Step 4: Securing the End
-
Add final spacer:
Finish the bead stack with one last gold cylindrical spacer bead. -
Secure with glue (Option A):
If using a thick gold spacer that fits tightly on the hoop, you can dab a tiny amount of strong jewelry glue inside the last bead to fix it in place. -
Secure with wire (Option B):
Alternatively, repeat the wire-wrapping process from the beginning. Wrap a 3-inch piece of gold wire tightly against the final spacer bead to lock everything in place mechanically. -
Repeat for second earring:
Repeat all steps for the second hoop. Pay close attention to the bead count so both earrings match perfectly. -
Final polish:
Wipe down the metal parts with a soft cloth to remove any fingerprints from handling.
Enjoy styling these versatile hoops that bring a warm, handcrafted touch to any outfit


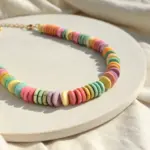
Playful Confetti Mix With Random Colors
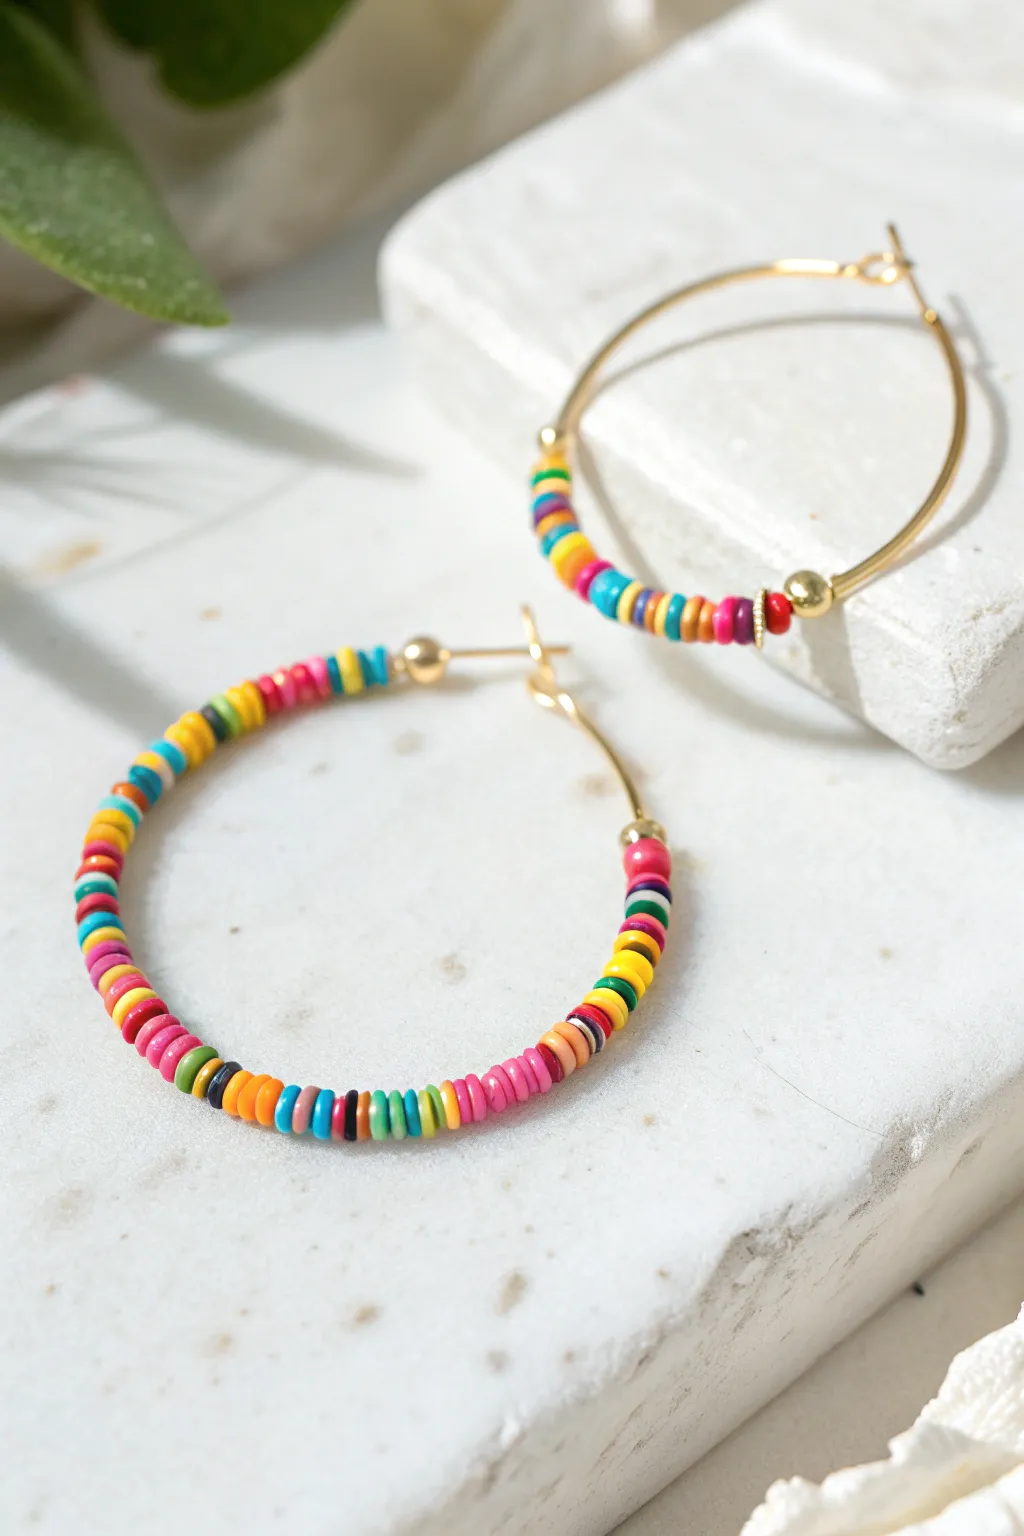
Brighten up any outfit with these vibrant, playful hoop earrings that capture the joy of a summer festival. Using a simple random mix of colorful heishi beads on a gold wire hoop creates a stunning confetti effect that is effortlessly chic.
Step-by-Step Tutorial
Materials
- Gold-tone wire hoop earrings (approx. 40-50mm diameter) with a thin enough gauge to fit beads
- Polymer clay Heishi disc beads in assorted colors (hot pink, yellow, turquoise, orange, purple, green, black, white)
- 4 small gold round spacer beads (approx. 3-4mm)
- Jewelry pliers (chain nose or flat nose)
- Bead mat or small tray
Step 1: Preparation
-
Select your hoops:
Choose a pair of gold wire hoops. The best type for this project are the ones where the wire end can be unlatched or opened to slide beads directly onto the hoop itself. -
Prepare the bead mix:
Pour a small amount of each color of your clay disc beads onto your bead mat. You want a wide variety of hues to achieve that true ‘confetti’ look. -
Straighten the wire:
If the end of your hoop wire has a sharp bend or hook that prevents beads from sliding on, use your pliers to gently straighten it out just enough to allow passage.
Step 2: Beading
-
Start with a gold spacer:
Slide one small gold round spacer bead onto the hoop first. This acts as a polished bookend for your colorful section. -
Begin the random pattern:
Start threading your clay beads onto the wire. Pick colors randomly to avoid creating a predictable repeating pattern. -
Mix vibrant hues:
Combine brights like yellow and hot pink with deeper tones like navy or black to create contrast. I prefer grabbing beads without looking too closely to keep the randomness authentic. -
Create small clusters:
Occasionally place two beads of similar tones near each other, but generally try to alternate warm and cool colors. -
Check the coverage:
Continue adding beads until you have covered about three-quarters of the hoop’s circumference. You want to leave some gold wire exposed near the closure mechanism. -
Push beads snugly:
Gently push the beads together around the curve of the hoop so there are no gaps between the discs, ensuring a solid line of color. -
Finish the sequence:
Once you are happy with the length of the beaded section, slide on the second gold round spacer bead to cap off the design.
Randomizer Trick
Mix your chosen beads in a small bowl before starting. Picking blindly from the bowl forces a truly random pattern without overthinking it.
Step 3: Finishing Up
-
Secure the beads:
If your wire hoop doesn’t have a built-in stopper, you may need to make a small bend at the end of the wire with your pliers to keep the beads from sliding off. -
Repeat for the second earring:
Grab your second hoop and repeat the process. Don’t worry about matching the color order exactly; the beauty lies in the mismatched, organic feel. -
Verify symmetry:
Hold both earrings up side-by-side to ensure the beaded sections are roughly the same length and start/stop at similar points on the circle. -
Final adjustment:
Give the beads one last gentle squeeze around the curve to ensure they are sitting flat against each other and facing the right direction. -
Close the loop:
Re-bend the latch mechanism if you straightened it earlier, ensuring the earring closes securely and clicks into place.
Wire Gauge Check
If beads won’t slide onto the hoop, the wire gauge is likely too thick. Check that your hoop wire is 20-gauge or thinner for standard heishi beads.
Enjoy wearing your colorful new accessories that bring a pop of fun to any ensemble

The Complete Guide to Pottery Troubleshooting
Uncover the most common ceramic mistakes—from cracking clay to failed glazes—and learn how to fix them fast.
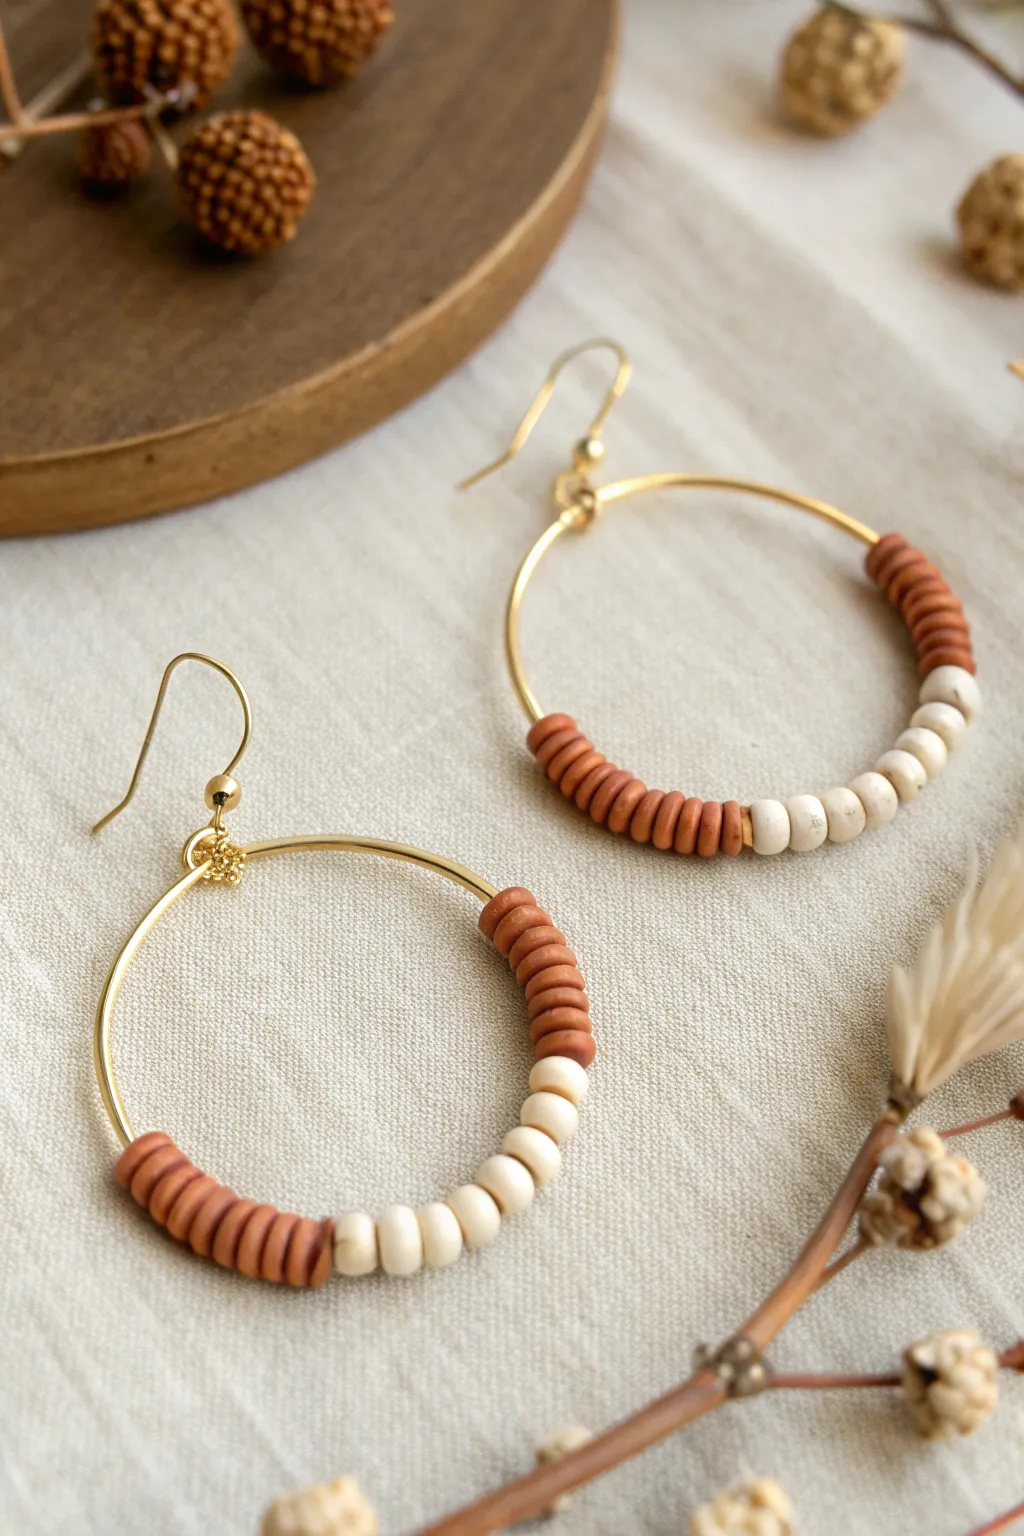
Earthy Neutrals for Everyday Wear
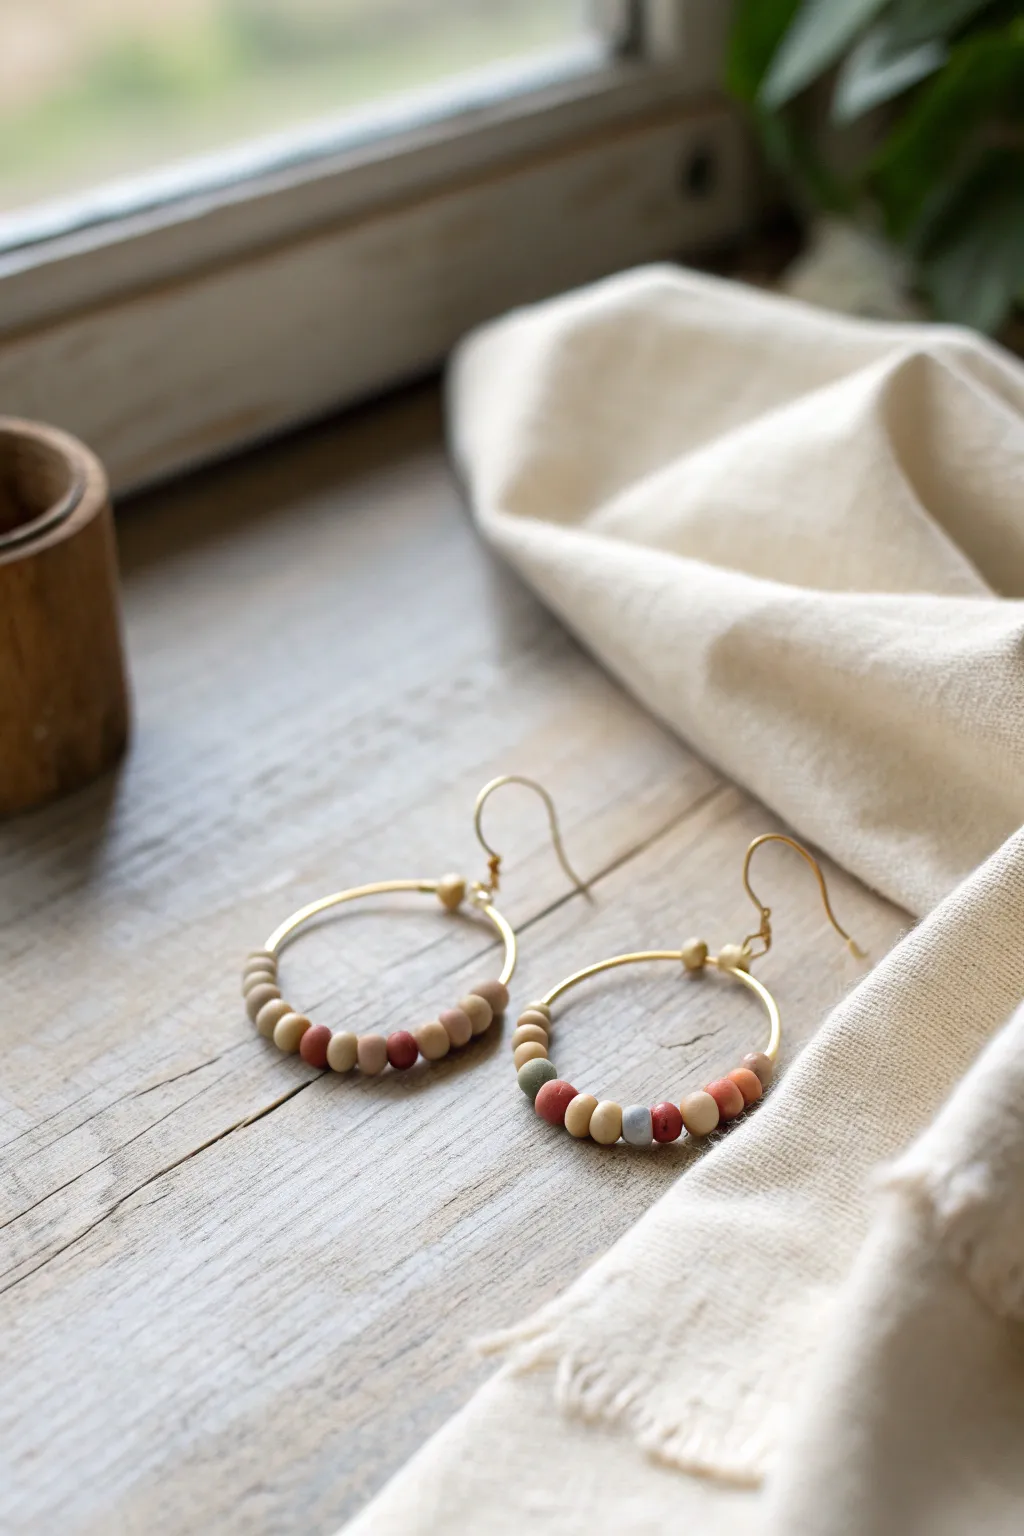
These lightweight earrings blend the warmth of natural wood tones with soft, matte clay textures for a grounded, everyday look. The effortless mix of terracotta, sage, and pale cream beads on a delicate gold hoop creates a versatile accessory that pairs beautifully with linens and knits.
Step-by-Step Guide
Materials
- 2 Gold wire hoop earring frames (approx. 30-40mm diameter)
- 2 Gold French hook ear wires
- Small polymer clay beads (terracotta, sage green, dusty blue, cream)
- Small natural wood spacer beads
- Jewelry pliers (chain nose and round nose)
- Wire cutters (if wire adjustment is needed)
- Jump rings (optional, depending on hoop style)
Step 1: Preparation
-
Unlatch the hoops:
Begin by gently unhooking the closure of your gold hoop frames. Most hoops of this style have a small eyelet on one side and a bent latch wire on the other. -
Assess the bead hole size:
Check that all your chosen clay and wood beads slide easily onto the wire hoop. Clay beads can sometimes have irregular holes; if one feels tight, gently twist a craft needle inside it to widen the opening slightly. -
Plan the pattern:
Before threading, lay out your beads on a flat surface to visualize the sequence. For the ‘Earthy Neutral’ look, aim for an asymmetrical but balanced mix: try alternating a colored clay bead with a wooden spacer, or group two clay beads together.
Hoop Distortion?
If the wire hoop gets bent out of shape during beading, place it flat on a table and gently roll a cylindrical object (like a marker) over it to flatten it back out.
Step 2: Beading the Hoops
-
Begin the sequence:
Starting with the first earring, slide a small wood bead onto the wire first. This acts as a nice textural bookend for the colorful section. -
Add the focal colors:
Thread on your clay beads according to your plan. In the reference style, there isn’t a strict alternating pattern, so feel free to be organic. I like to place the darkest colors, like the terracotta, near the bottom center for visual weight. -
Mix in textures:
Interject the wooden beads sporadically between the clay ones. This breaks up the solid colors and adds that rustic, natural vibe. -
Fill the curve:
Continue adding beads until the bottom third to half of the hoop is covered. Avoid overfilling; leaving the top sections of the gold wire exposed keeps the design airy and elegant. -
Mirror the design:
Using the first completed loop as a guide, lay out the beads for the second earring next to it. You don’t have to make them identical twins, but they should be ‘sisters’ with similar color proportions. -
Thread the second hoop:
Slide the beads onto the second wire frame, ensuring the start and end points match the height of the beads on the first earring.
Pro Tip: Matte Finish
For that ultra-matte, stone-like finish seen in the photo, lightly buff shiny polymer clay beads with a fine-grit sanding sponge before threading them.
Step 3: Assembly and Finishing
-
Secure the beads:
Once you are happy with the placement, locate the top loop or crimp area of your hoop. Some jewelry hoops have a built-in stopper; if yours slide too freely, you may need to add a tiny dab of jewelry glue to the bead closest to the closure to keep the pattern centered. -
Close the hoop latch:
Re-latch the hoop wire into its catch to close the circle. Ensure it clicks or sits firmly so beads cannot escape. -
Bend the catch angle:
If the latch feels loose, use your chain nose pliers to ever-so-slightly pinch the catch loop tighter, or bend the end of the wire up by a millimeter for a more secure fit. -
Prepare the ear wire:
Take your French hook ear wire and look for the small loop at the bottom. Using your pliers, gently twist this loop open sideways (never pull it straight apart, as this weakens the metal). -
Attach the hoop:
Slide the top loop of your beaded hoop frame into the open loop of the ear wire. -
Close the connection:
Using your pliers, twist the ear wire loop back into its original closed position. Ensure the gap is completely shut so the hoop doesn’t slip out. -
Double check alignment:
Hold the earring up by the hook. Check that the hoop hangs facing forward. If it twists sideways, you made need to add a small jump ring between the hook and the hoop to rotate it 90 degrees.
Now you have a stunning pair of nature-inspired earrings ready to complement your favorite casual outfit.
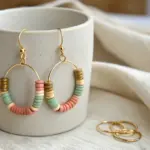
Pastel Sorbet Stripes
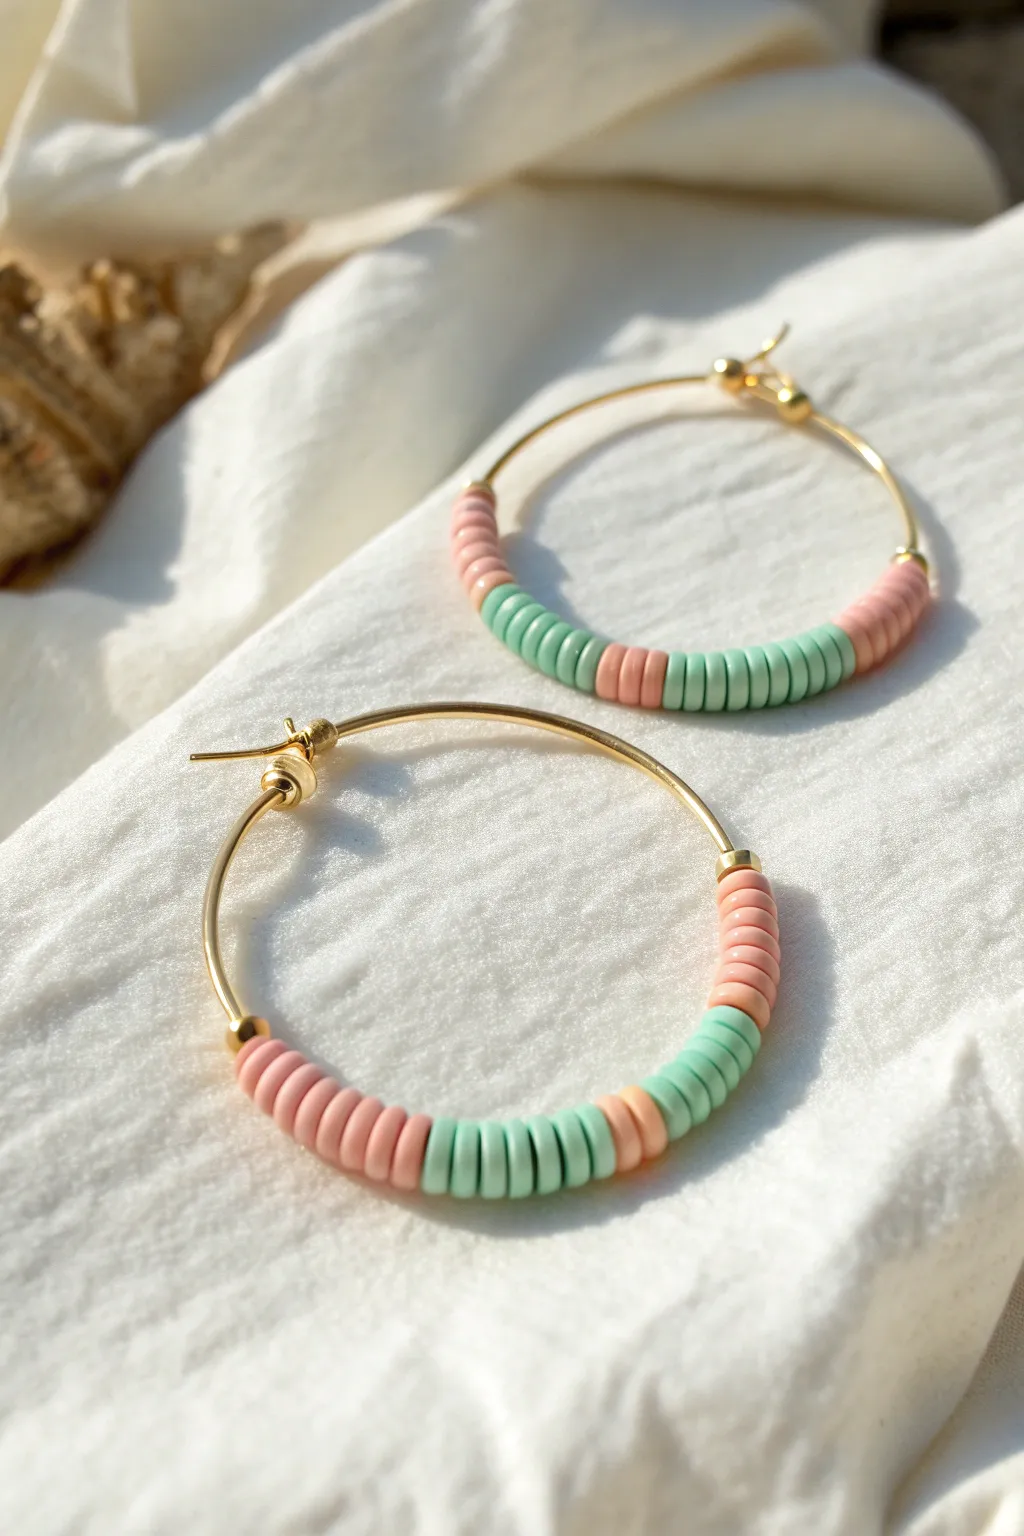
Capture the sweetness of summer with these delightful hoop earrings featuring a refreshing combination of mint and peach tones. The soft, matte finish of the clay heishi beads contrasts beautifully against the shine of the gold wire, creating a playful yet chic accessory.
Step-by-Step
Materials
- 30-40mm gold-tone hoop earring findings (thin wire style)
- 6mm polymer clay heishi beads in pastel peach
- 6mm polymer clay heishi beads in pastel mint green
- 2 small gold spacer beads or crimp beads (optional, to secure ends)
- Jewelry pliers (flat nose or chain nose)
- Small bead tray or mat
Step 1: Preparation and Planning
-
Open the findings:
Begin by gently opening the latch or closure of your gold hoop findings. If the wire is bent slightly out of shape, carefully straighten the main beading section with your fingers or nylon-jaw pliers. -
Plan your pattern:
Before stringing, decide on your striping sequence. For the look in the photo, you will need sections of solid color. A good starting pattern is a block of peach, a block of mint, a small accent of peach, and a final block of mint. -
Sort your beads:
Pour a small amount of your peach and mint heishi beads onto your bead mat. This makes it much easier to pick them up quickly without chasing them across the table.
Keep it uniform
Clay heishi beads vary in thickness. Instead of counting beads, measure the length of each color block in millimeters for perfectly matching earrings.
Step 2: Beading the Pattern
-
Start the first section:
Slide your first bead onto the hoop wire. To keep the beads from sliding right off the other end while you work, you can temporarily bend the very tip of the wire or hold it firmly. -
Build the first block:
String approximately 8 to 10 peach beads onto the wire. Push them snugly against the end of the hoop, ensuring they sit flat against each other. -
Transition to mint:
Switch colors and add your first block of mint green beads. Use roughly the same number (about 10-12 beads) to create a visual balance, or go slightly longer for an asymmetrical look. -
Add the accent stripe:
For that cute interrupted stripe effect seen in the photo, add a very short section of peach beads now—just 3 or 4 beads should do the trick. -
Finish the sequence:
Complete the beading pattern with a final block of mint green beads. I usually like to check the length here to make sure there is enough bare wire left at the end for the closure to function properly.
Loose beads?
If the beads are sliding over the hoop’s end loop, add a tiny dab of clear jewelry glue to the last bead to secure it against the metal finding.
Step 3: Securing and Finishing
-
Verify symmetry:
Before closing anything up, hold this first earring next to your second empty hoop. Count the beads or measure the sections to ensure you can replicate the pattern exactly on the second one. -
Add a stopper bead:
If your hoop finding doesn’t have a built-in stopper, slide on a small gold crimp bead or spacer bead at the very end of your clay bead stack. -
Secure the beads:
Most hoop findings have a small bend or mechanism to stop beads. If yours is just plain wire, use your flat nose pliers to make a tiny 90-degree bend at the end of the wire, pointing upwards. This acts as a catch for the latch. -
Tighten the stack:
Gently push all the beads together so there are no large gaps, but don’t pack them so tightly that the hoop warp or loses its curve. -
Repeat for the second earring:
Follow the exact same steps for the second hoop, paying distinct attention to the bead counts to keep them matching. -
Final adjustment:
Inspect the curve of both hoops. The weight of the beads might flatten the wire slightly, so gently reshape them into perfect circles with your fingers if needed. -
Polish up:
Wipe the gold wire parts with a soft jewelry cloth to remove any fingerprints from handling.
Now you have a refreshing pair of pastel hoops ready to brighten up any outfit


What Really Happens Inside the Kiln
Learn how time and temperature work together inside the kiln to transform clay into durable ceramic.
Black-and-White Graphic Pattern
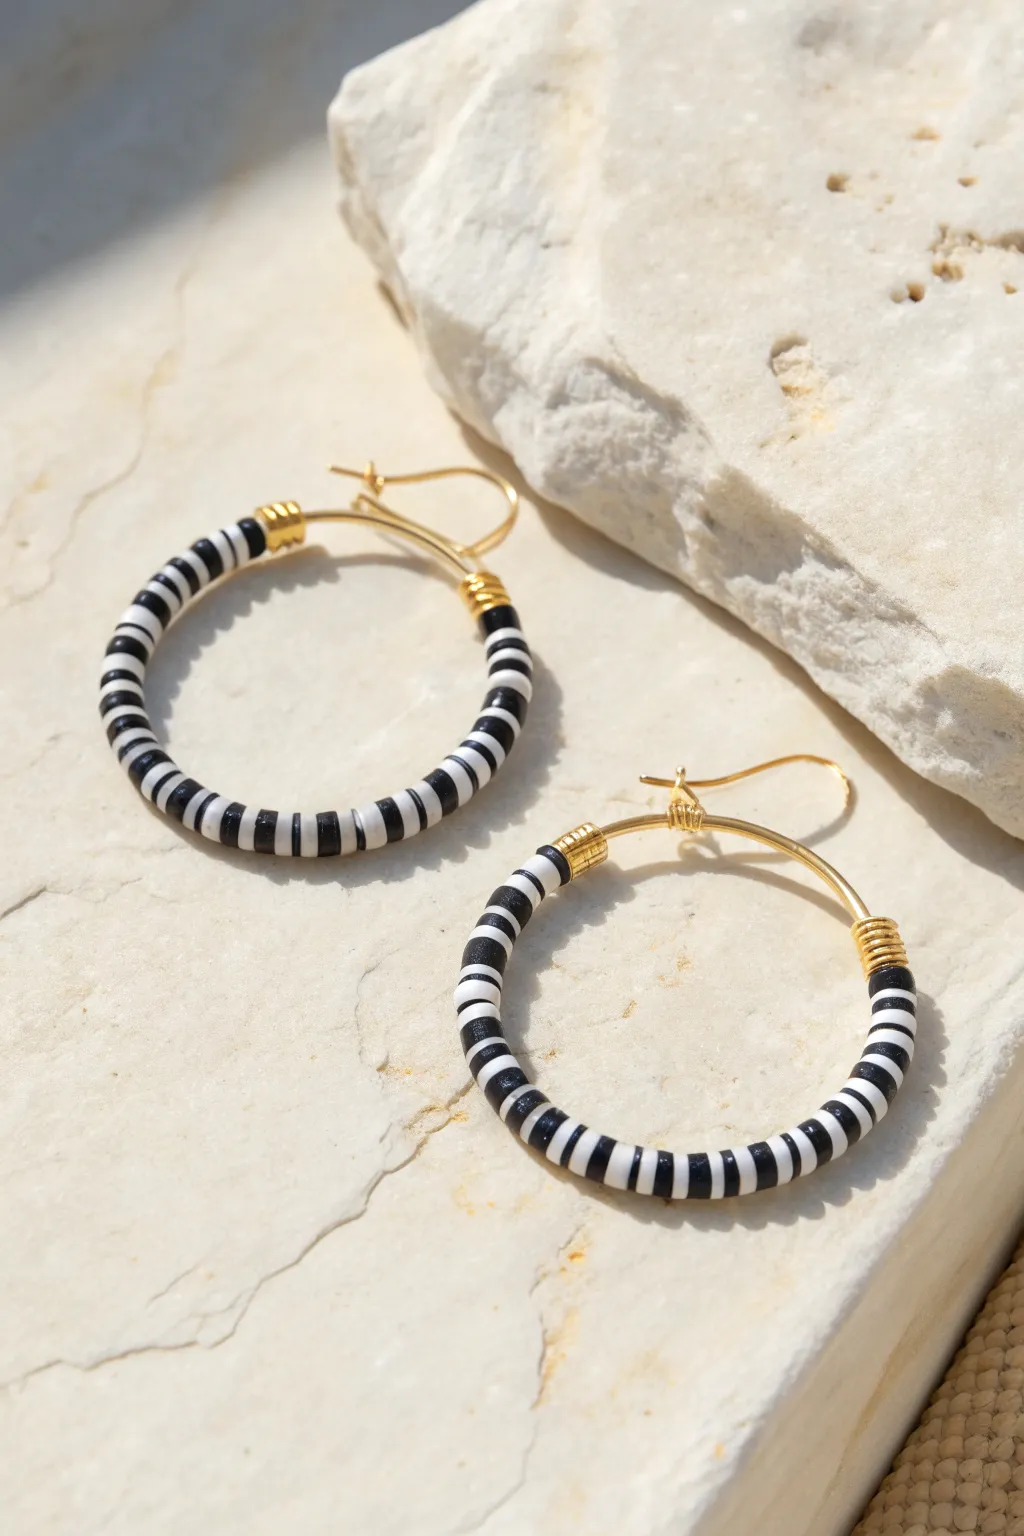
These striking earrings combine a timeless color palette with the laid-back texture of heishi clay beads for a versatile accessory. The alternating black and white pattern creates a bold, graphic look that transitions effortlessly from day to night.
Detailed Instructions
Materials
- Gold-tone hoop earring findings (approx. 40-50mm diameter)
- Black polymer clay heishi beads (flat disc beads, approx. 4-6mm)
- White polymer clay heishi beads (flat disc beads, approx. 4-6mm)
- 24-gauge gold jewelry wire (dead soft)
- Wire cutters
- Flat-nose pliers
Step 1: Preparation
-
Examine Your Findings:
Start by checking the mechanism of your chosen hoop findings. You want a hoop where the wire is thin enough to thread beads onto directly, or a style that allows you to open one end completely. -
Straighten the Wire:
If your hoops have a bent latch or hook at the end where you will be threading, use your flat-nose pliers to gently straighten it out temporarily so beads can slide over it effortlessly. -
Plan the Pattern:
Lay out a small section of beads on your workspace to test the pattern. For this graphic look, we are using a simple 1:1 ratio—one black bead followed by one white bead.
Loose Beads?
If the beads slide loosely, add a tiny drop of clear jewelry glue under the wire coils at each end. This locks the ‘stoppers’ in place permanently.
Step 2: Beading the Hoops
-
Secure the Start:
Before adding beads, cut a 2-inch piece of gold wire. Wrap it tightly around the hoop wire about three times, starting roughly 1/2 inch away from the hinge or mechanism. -
Trim the Anchor:
Use your wire cutters to trim the excess tail of your anchor wire close to the coil. Use flat-nose pliers to squeeze the cut end flush against the hoop so it won’t scratch you. -
Create the Stop:
This wire coil acts as a stopper so your beads don’t slide all the way to the ear wire part. Push it firmly into place. -
Begin Threading:
Start threading your heishi beads onto the hoop. Begin with a black bead, sliding it all the way down to abut the gold wire coil you just made. -
Continue the Pattern:
Add a white bead next. Continue alternating one black and one white bead. Ensure the beads sit flush against each other without forcing them. -
Check Consistency:
Periodically hold the hoop up to check the pattern. Clay beads can vary slightly in thickness, so if one looks too thin, you might swap it out to keep the striping uniform. -
Fill the Arc:
Continue beading until you have covered the majority of the hoop, leaving about 1/2 inch of bare wire at the end for the closure mechanism. -
Verify Symmetry:
Before closing off the first earring, start the second one and bead it to match the exact length and bead count of the first. This ensures they hang evenly.
Level Up
Add a gold spacer bead every 5-6 stripes for a touch of metallic shine that breaks up the monochrome pattern.
Step 3: Finishing Touches
-
Anchor the End:
Cut another 2-inch piece of 24-gauge gold wire for the second stopper. -
Wrap the Coil:
Wrap this wire tightly around the hoop immediately after the last bead. Create about three or four tight loops, mirroring the starting coil. -
Compress the Beads:
Before you fully tighten the final wrap, gently push the beads together to eliminate gaps, but not so tight that the hoop warps or stiffens into a strange shape. -
Final Trim:
Trim the excess wire tails with your flush cutters. I usually run my finger over the cut end to make sure it’s smooth; if it’s sharp, tuck it in with pliers. -
Restore the Hook:
If you straightened the hoop’s closure hook in step 2, use your pliers to gently bend it back into its original shape so the earring can latch closed. -
Clean Up:
Wipe the beads gently with a lint-free cloth to remove any fingerprints or dust from the clay surface.
Now you have a chic pair of graphic hoops ready to elevate any casual outfit
Checkerboard-Inspired Alternating Stacks
These lightweight statement earrings combine earthy textures with minimalist design, featuring a striking color block pattern of rust-colored clay discs and smooth cream wooden beads. The warm tones and mixed shapes create a versatile accessory perfect for transitioning from casual daywear to an elegant evening look.
Detailed Instructions
Materials
- 2 Large gold-tone hoop earring findings (approx. 40-50mm diameter)
- 2 Gold-tone ear wires (French hook style)
- Strand of rust/terracotta heishi polymer clay beads (approx. 4-6mm)
- Small round cream wooden or bone beads (approx. 4-5mm)
- 2 Gold jump rings (4mm)
- Jewelry pliers (flat nose and chain nose)
- Soft cloth or bead mat
Step 1: Preparing the Hoops
-
Inspect the findings:
Begin by examining your large gold hoop components. Check that the wire is smooth and free of sharp burrs. If the hoop has a ‘hook and eye’ closure built into the wire itself, locate the thin end that opens to allow beading. -
Open the hoop:
Gently unhook the closure mechanism of the hoop wire. Often, this involves carefully sliding the thin wire end out of the small looped or crimped catch on the other side. -
Check bead fit:
Before committing to your pattern, take one disc bead and one round wooden bead and test-slide them onto the wire. Ensure they move freely around the curve without getting stuck.
Clay Disc Stability
If the clay heishi discs slide over the hoop’s closure catch due to large holes, add a tiny gold crimp bead or seed bead at both ends of the beaded section to act as a stopper.
Step 2: Creating the Bead Pattern
-
Start the first block:
Begin threading the rust-colored heishi clay beads onto the extensive curve of the hoop. You want a solid block of color to start. -
Count your stack:
Add approximately 10 to 12 disc beads. I like to visually check that this stack is about 1.5 cm long, but you can adjust based on your hoop size. -
Compress the beads:
Gently push the stack of clay beads around the curve. They should sit snugly against each other but not be forced so tight that they buckle outward. -
Add the center highlight:
Switch to your round cream-colored wooden beads. Thread these one by one directly after the rust stack. -
Center the design:
Add about 8 to 10 of these round cream beads. This lighter section will act as the focal point at the very bottom of the hoop when worn. -
Finish the symmetry:
Return to the rust heishi beads. Thread on an identical amount to your first stack (10-12 beads) to create a symmetrical color-blocked look on the other side. -
Verify balance:
Hold the hoop up by the closure point. Let gravity settle the beads to ensure the cream section sits perfectly at the bottom center and the rust sections rise equally up the sides.
Texture Play
Swap the central wooden beads for freshwater pearls or faceted crystals. This instantly upgrades the design from earthy-casual to elegant while keeping the modern block layout.
Step 3: Closing and Assembly
-
Secure the wire:
Carefully re-hook the thin wire end back into its catch or closure loop. Use flat nose pliers to gently squeeze the catch closed if it feels loose, ensuring the wire won’t pop out. -
Prepare the jump ring:
Using two pairs of pliers, grip a 4mm gold jump ring. Twist your wrists in opposite directions to open the ring sideways (never pull it apart outward). -
Attach to ear wire:
Slide the open jump ring through the top loop of the hoop finding. Then, slide the loop of your French hook ear wire onto the same jump ring. -
Close the connection:
Use your pliers to twist the jump ring back into a closed circle, ensuring the ends meet perfectly flush so the connection is secure. -
Repeat for second earring:
Follow the exact same beading count and assembly steps for the second earring to ensure a perfectly matched pair.
Wear your new creations with a simple linen top to let the textures really shine

TRACK YOUR CERAMIC JOURNEY
Capture glaze tests, firing details, and creative progress—all in one simple printable. Make your projects easier to repeat and improve.
Textured Heishi Beads for Extra Dimension
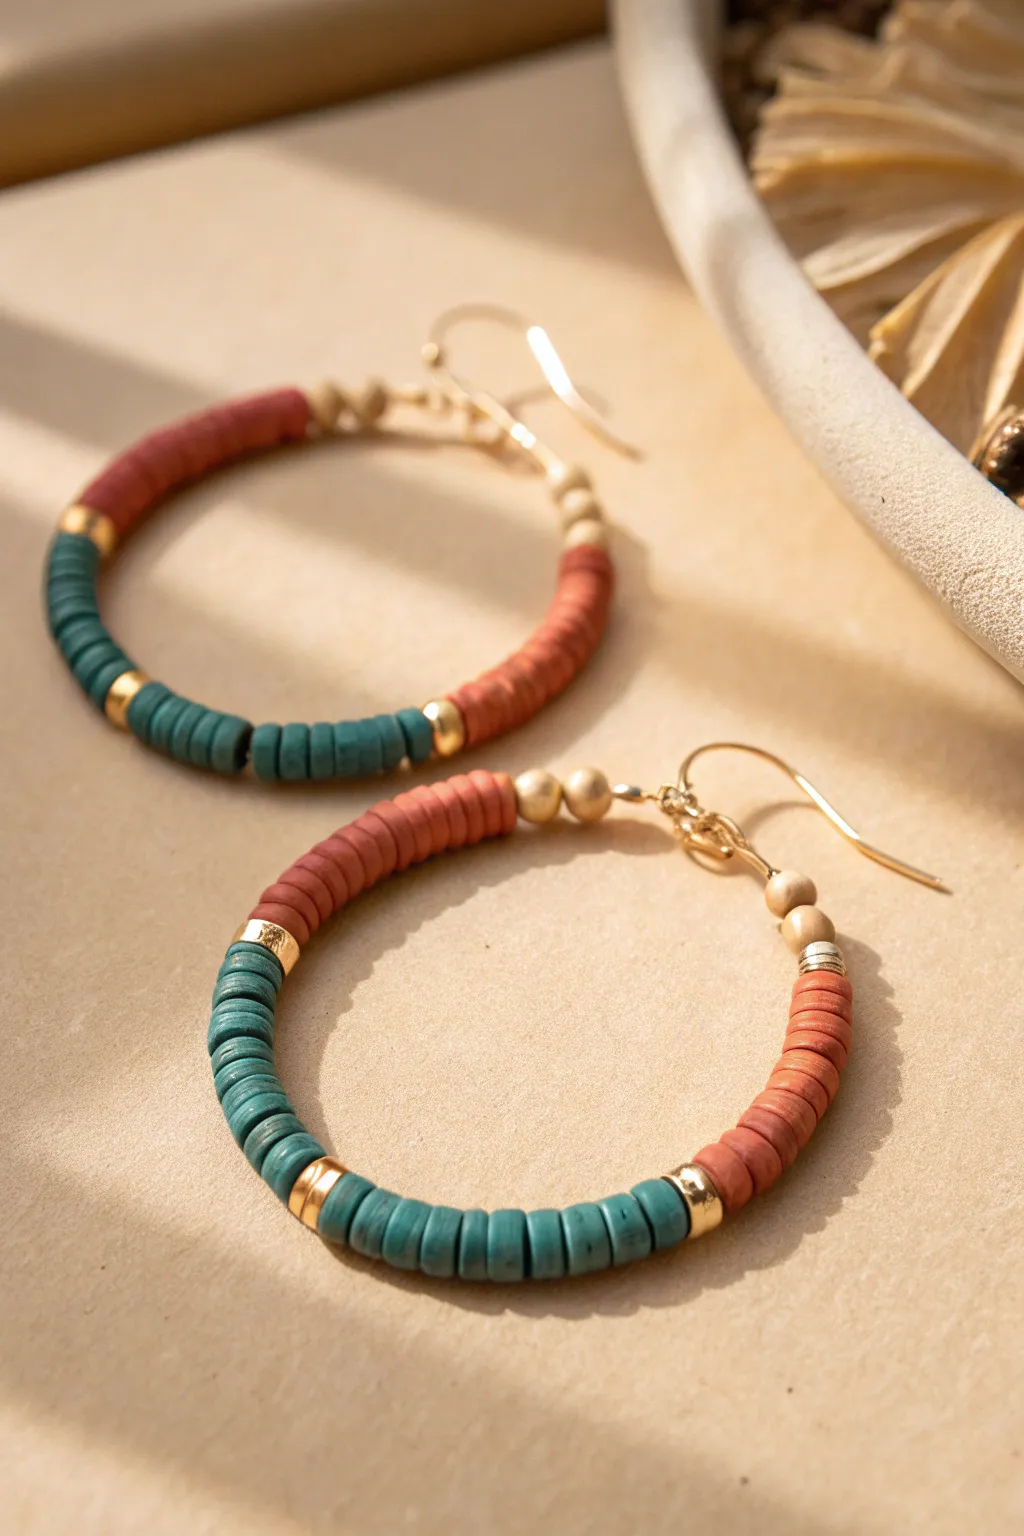
These statement earrings combine the earthy charm of textured heishi beads in terracotta and teal with the elegance of gold accents. The result is a dimensional, bohemian accessory that looks far more expensive than the simple materials required to make it.
Step-by-Step
Materials
- Large gold hoop earring findings (approx. 40-50mm diameter) with a loop closure
- Polymer clay heishi beads in matte terracotta/rust
- Polymer clay heishi beads in muted teal/green (textured if available)
- Gold tone spacer beads (small nuggets or rondelles)
- Round gold beads (approx. 3-4mm)
- Gold ear wires (French hook style)
- Jewelry pliers (flat nose and round nose)
- Jump rings (4mm or 5mm gold)
Step 1: Preparing the Base
-
Open the hoop:
Locate the latch or opening mechanism of your large gold hoop finding. If it’s a wire that slots into a catch, gently unhook it so the wire is straight and ready for beading. -
Secure the start:
If your hoop doesn’t have a built-in stopper, you may need to bend the very end of the wire slightly or use a tiny dab of glue on the first bead to keep the pattern from sliding off while you work, though gravity usually helps here.
Choosing Texture
Look for “waffle” or ribbed heishi beads rather than perfectly smooth ones. This subtle surface texture catches the light and adds depth to the design.
Step 2: Beading the Pattern
-
Start with gold:
Thread two small round gold beads onto the wire first. These act as a polished bookend for your colorful clay section. -
First color block:
Begin your first color section by sliding on the terracotta heishi beads. You’ll need a stack roughly 1 inch long. Count perfectly if you want exact symmetry, or eyeball it for a more organic feel. -
Add a spacer:
Slide on a gold nugget or rondelle spacer bead. This breaks up the matte clay texture with a flash of metallic shine. -
Second color block:
Switch to your teal/green heishi beads. Add a stack that matches the length of your terracotta section, creating a distinct color block. -
Midpoint accent:
Place another gold spacer bead. This central gold accent helps define the transition back to the first color. -
Third color block:
Repeat the terracotta section again. Make sure the count or length matches your very first terracotta block to keep the design balanced. -
Final gold cap:
Finish the beading sequence by adding two round gold beads, mirroring the start of the hoop.
Fixing Sliding Beads
If beads slide too much, add small crimp beads hidden next to the main gold end beads. Crush them gently to lock the entire beaded section in the center.
Step 3: Assembly and Finishing
-
Check the spacing:
Slide all beads to the center of the hoop. Ensure there is enough empty wire on both sides to allow the hoop to hang naturally without the beads crowding the closure mechanism. -
Reshape the wire:
The weight of the beads might slightly distort the wire circle. Gently use your fingers to curve the wire back into a perfect round shape if it has flattened out. -
Close the hoop:
Re-engage the hoop’s closure mechanism. If it’s a simple wire hook, ensure it is firmly seated in its catch. -
Prepare the jump ring:
Take a single gold jump ring and twist it open using two pairs of pliers. Remember to twist sideways (one hand forward, one back) rather than pulling the ends apart, which weakens the metal. -
Attach the ear wire:
Loop the open jump ring through the top loop of your large hoop finding. Then, slide your French hook ear wire onto the jump ring. -
Seal the connection:
Gently twist the jump ring closed again until the two ends meet perfectly flush, ensuring the ear wire can’t slip out. -
Repeat for the pair:
Follow all the steps exactly for the second earring. I like to lay the first finished earring next to my work surface as a visual guide to ensure the color blocks align perfectly.
Slip on these beautifully textured hoops to add an instant splash of color and artistry to your outfit
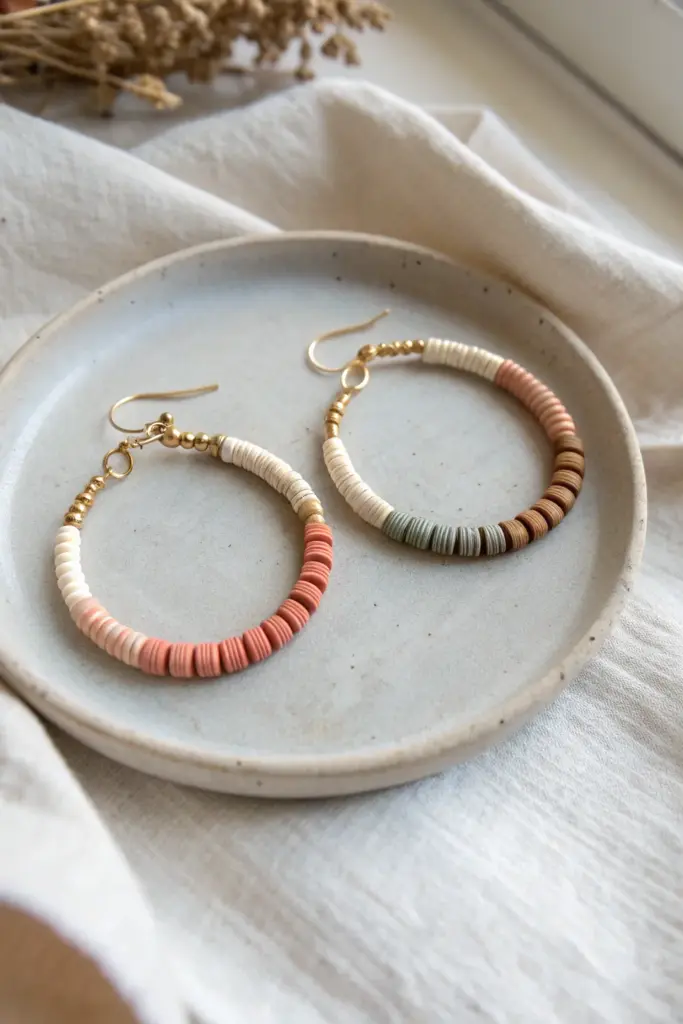
Mismatched Pair With Coordinated Color Stories

These charming hoops embrace the beauty of asymmetry by playing with coordinated earthy tones across two distinct designs. The blend of matte clay heishi beads and gleaming gold accents creates a versatile set that feels both modern and effortlessly handcrafted.
Step-by-Step Tutorial
Materials
- 50mm gold hoop earring components (round wire type)
- Gold ear wires (fishhook style)
- 4mm-6mm polymer clay heishi beads (Color Palette A: Cream, Peach, Terracotta)
- 4mm-6mm polymer clay heishi beads (Color Palette B: Cream, Sage Green, Brown)
- 3mm gold spacer beads (round)
- Small gold jump rings (4mm or 5mm)
- Needle-nose pliers
- Flat-nose pliers
Step 1: Prepping the Base
-
Inspect the hoops:
Take your 50mm gold hoops and ensure the wire is smooth. Locate the end of the wire that opens; unlike endless hoops, these usually have a loop or a crimped end meant to hold beads in place. -
Open the mechanism:
If your hoop has a designated closure wire, gently unhook it to allow for beading. If you are using a simple memory wire style hoop, bend one end into a tiny loop with your pliers to act as a stopper before you begin.
Smoother Curves
Because heishi beads are flat discs, they can sometimes look jagged on a curve. Flex the hoop gently back and forth after beading to help them settle.
Step 2: Designing Earring One (The Terracotta Story)
-
Start the gold section:
Begin threading beads onto the first hoop. Start with approximately 5 to 6 small gold spacer beads. -
Add the first cream block:
Slide on about 10 to 12 cream-colored clay heishi beads. This creates a clean, neutral start to the pattern. -
Transition with gold:
Add a single gold spacer bead to separate the cream section from the next color. -
Create the main color block:
This is the ‘Terracotta’ earring. Thread on a long sequence of rusty-red or terracotta clay beads. This section should cover about half of the hoop’s circumference. -
Soften the gradient:
After the main terracotta block, add a smaller section of peach or light pink clay beads—about 8 to 10 beads. -
Finish the clay sequence:
End the clay section with another small block of cream beads, roughly the same length as the peach section. -
Cap it off:
Finish this hoop by threading on 5 to 6 gold spacer beads to mirror the beginning of the hoop.
Gap Prevention
If you see wire showing between beads, add just one extra bead. It should be a tight fit! Too much slack makes the hoop look flimsy and cheap.
Step 3: Designing Earring Two (The Sage & Brown Story)
-
Mirror the start:
Grab your second hoop wire. Just like the first, start with 5 to 6 small gold spacer beads. -
Begin the cream section:
Thread on a longer section of cream beads here, perhaps slightly longer than on the first earring, for visual interest. -
Add the green accent:
Slide on your sage green clay beads. I like to keep this section fairly short—about 12 to 15 beads—so it acts as a pop of color rather than the main event. -
Introduce the brown tone:
Follow the green directly with a medium-brown or coffee-colored section of clay beads. Make this section roughly equal in length to the green section. -
Complete the arc:
Finish the bead sequence with a long stretch of nude or lighter brown beads until you reach the end of the wire, leaving just enough room for the closing metallic beads. -
Final gold touch:
Add your final set of 5 to 6 gold spacer beads to balance the design.
Step 4: Assembly and Closure
-
Close the hoops:
If your hoops have a pre-made latch, secure the wire into the catch. If using wire that needs finishing, use your needle-nose pliers to bend the open end into a small, secure loop that prevents beads from sliding off. -
Angle the loops:
Inspect the top loops of both hoops. Ensure they are facing the correct direction to hang flat against the side of the face. Twist them gently with flat-nose pliers if adjustment is needed. -
Prepare the jump rings:
Using two pairs of pliers, grip a jump ring on either side of the split. Twist one hand forward and one back to open the ring laterally; never pull it apart outward. -
Attach the ear wire:
Slide the open jump ring through the top loop of your beaded hoop, and then slide on the loop of the fishhook ear wire. -
Secure the join:
Using the same twisting motion with your pliers, close the jump ring tightly. Listen for a subtle ‘click’ or feel the metal ends grind slightly to know it is flush. -
Final check:
Repeat the attachment process for the second earring. Hold both up to ensure the lengths hang similarly, celebrating their intentional mismatch.
Enjoy styling these uniquely coordinated hoops with your favorite casual outfits for an effortless splash of color