If you love clay as much as I do, the sweetest projects are the ones you can actually use every day. Here are my favorite clay functional art ideas that balance real-life usefulness with that “I made this with my own hands” magic.
Character Mugs With Big Handles
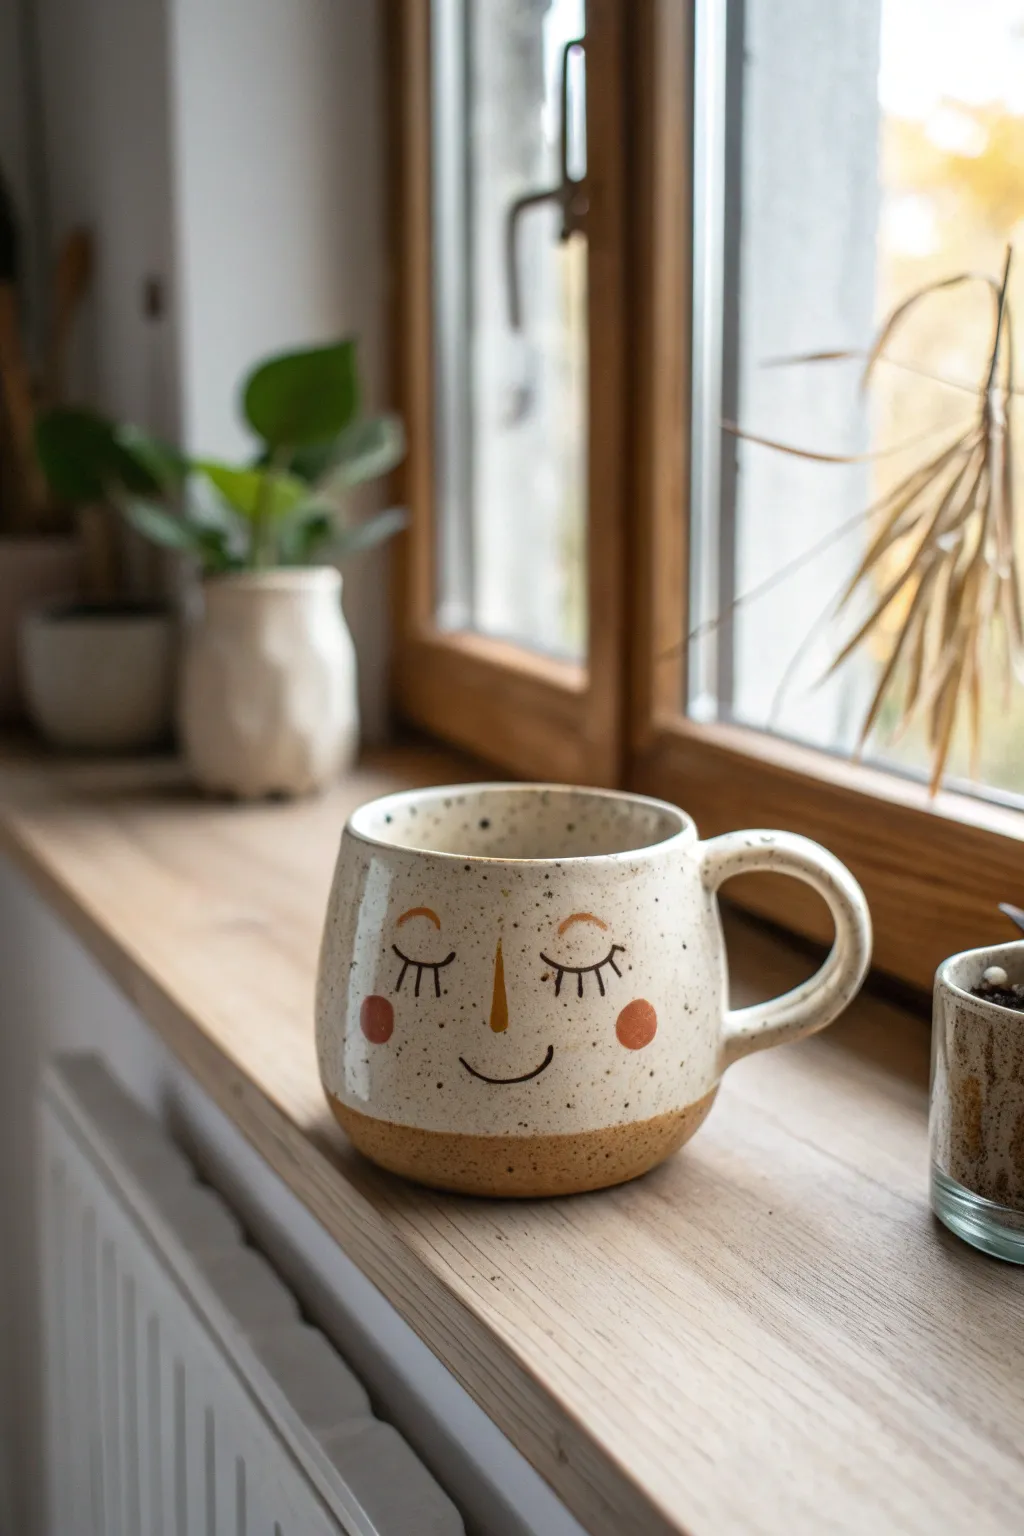
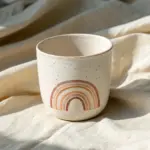
Bring a sense of calm to your morning routine with this speckled stoneware mug featuring a serene, sleepy face. The design combines a classic speckled clay body with a sweet, hand-painted expression and a generous, oversized handle for maximum comfort.
Detailed Instructions
Materials
- Speckled stoneware clay (approx. 1.5 lbs)
- Pottery wheel (or hand-building tools for pinch pots)
- Rib tool (metal or rubber)
- Needle tool
- Sponge
- Wire cutter
- Underglaze (black for details, terra cotta/rust for cheeks, ochre/mustard for nose)
- Clear transparent glaze (cone 5/6 compatible)
- Fine liner brush
- Small round brush
- Wax resist (optional)
Step 1: Throwing and Shaping the Body
-
Prepare the Clay:
Begin by thoroughly wedging your speckled stoneware clay to remove air bubbles and ensure consistency. Center about 1 pound of clay on the wheel, leaving the rest aside for the handle. -
Open and Pull:
Open the centered clay and pull up the walls. Aim for a slightly wider base than the rim to create that tapered, cozy silhouette shown in the photo. Keep the walls even, roughly 1/4 inch thick. -
Refine the Profile:
Use a rib tool on the outside while supporting the inside with your hand to smooth the surface and create a gentle curve near the bottom. The final shape should feel softly rounded, not rigid. -
Trim the Rim:
Check the rim for evenness. Use a chamois or a damp sponge to round it off smoothly so it will be comfortable to drink from. -
Cut and Dry:
Wire the mug off the bat but leave it sitting on a ware board. Let it dry to a ‘leather hard’ state before trimming the bottom or attaching the handle.
Step 2: The Big Handle and Trimming
-
Trim the Foot:
Once leather hard, flip the mug over and trim the bottom. Create a slight foot ring or a flat bottom, but keep the raw clay texture exposed near the base as a design element. -
Pull the Handle:
Take your remaining clay and pull a thick strap handle. For this specific ‘Character Mug’ style, you want the handle to be substantial—about an inch wide and fairly thick. -
Shape the Curve:
Curve the pulled strap into a generous loop. It should have a high attachment point near the rim and a lower point near the base, resembling a classic ‘ear’ shape. -
Attach Securely:
Score and slip both the attachment points on the mug and the handle ends. Press firmly to join, smoothing the seams with your thumb or a wooden tool until they disappear. -
Slow Dry:
Cover the mug loosely with plastic to let the moisture content equalize between the handle and the body. This prevents cracking at the joints.
Smudged Lines?
If you smudge the black underglaze while painting the eyes, don’t wipe it with water immediately. Let it dry completely, then gently scratch the mistake off with a needle tool.
Step 3: Painting the Character
-
Draft the Face:
Once the mug is bone dry (greenware), you can lightly sketch the face position with a pencil. The graphite will burn off in the kiln, leaving no trace. -
Paint the Cheeks:
Dip a small round brush into terra cotta or rust-colored underglaze. Paint two solid circles on either side of where the nose will be to create rosy cheeks. -
Add the Nose:
Using an ochre or mustard yellow underglaze, paint a long, slender teardrop shape for the nose. I prefer to place this quite centrally to anchor the face. -
Detail the Eyes:
Switch to a fine liner brush and black underglaze. Carefully paint two downward-curving arcs for closed eyelids, adding short, vertical lashes for a peaceful sleeping expression. -
Finish the Smile:
Using the same fine liner brush, paint a simple, thin U-shape curve for the mouth, centering it below the nose. -
Bisque Fire:
Load the mug into the kiln for a bisque fire (usually Cone 04). This sets the shape and makes the underglaze permanent.
Try Colored Clay
Instead of underglaze for the nose and cheeks, create a 3D effect by using small bits of colored slip or attaching tiny, thin pieces of colored clay before the bisque firing.
Step 4: Glazing and Final Firing
-
Wax the Base:
Apply wax resist to the bottom half-inch of the mug’s exterior and the entire underside. This leaves the raw speckled clay exposed at the bottom, mimicking the reference image. -
Dip in Clear Glaze:
Dip the entire mug into a clear, glossy glaze. Ensure the inside is fully coated and the outside is covered down to the wax line. -
Wipe the Foot:
Use a damp sponge to wipe away any glaze beads that may be clinging to the waxed area at the bottom. -
Glaze Fire:
Fire the mug to maturity (likely Cone 5 or 6, depending on your clay body). The clear glaze will reveal the speckles underneath.
Enjoy your comforting new mug during your next quiet coffee break


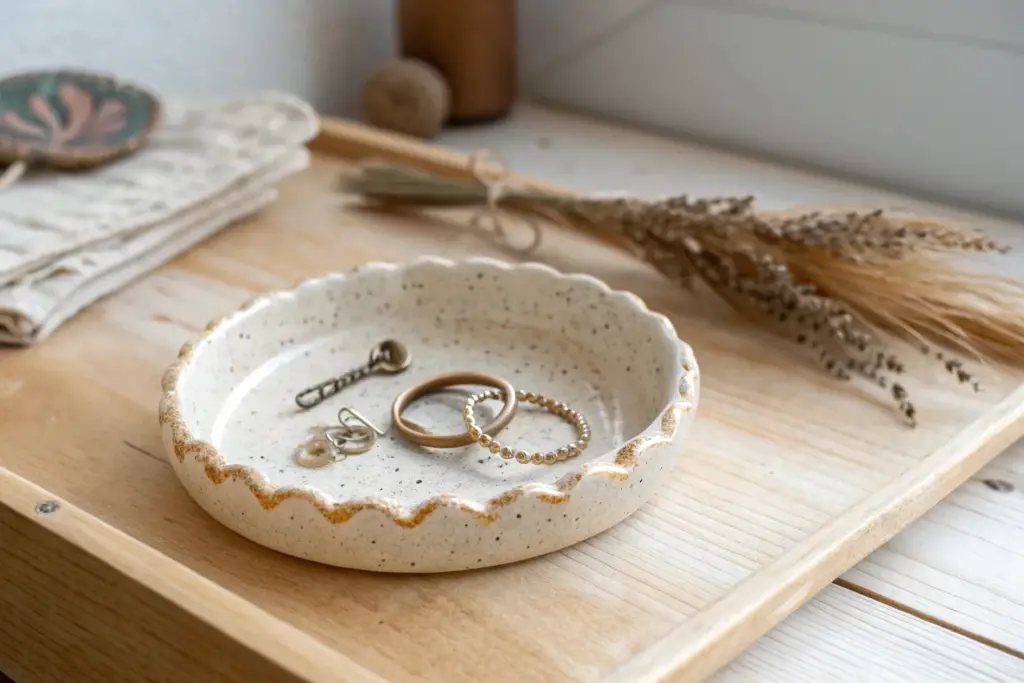
Textured Trinket Dishes and Catch-Alls
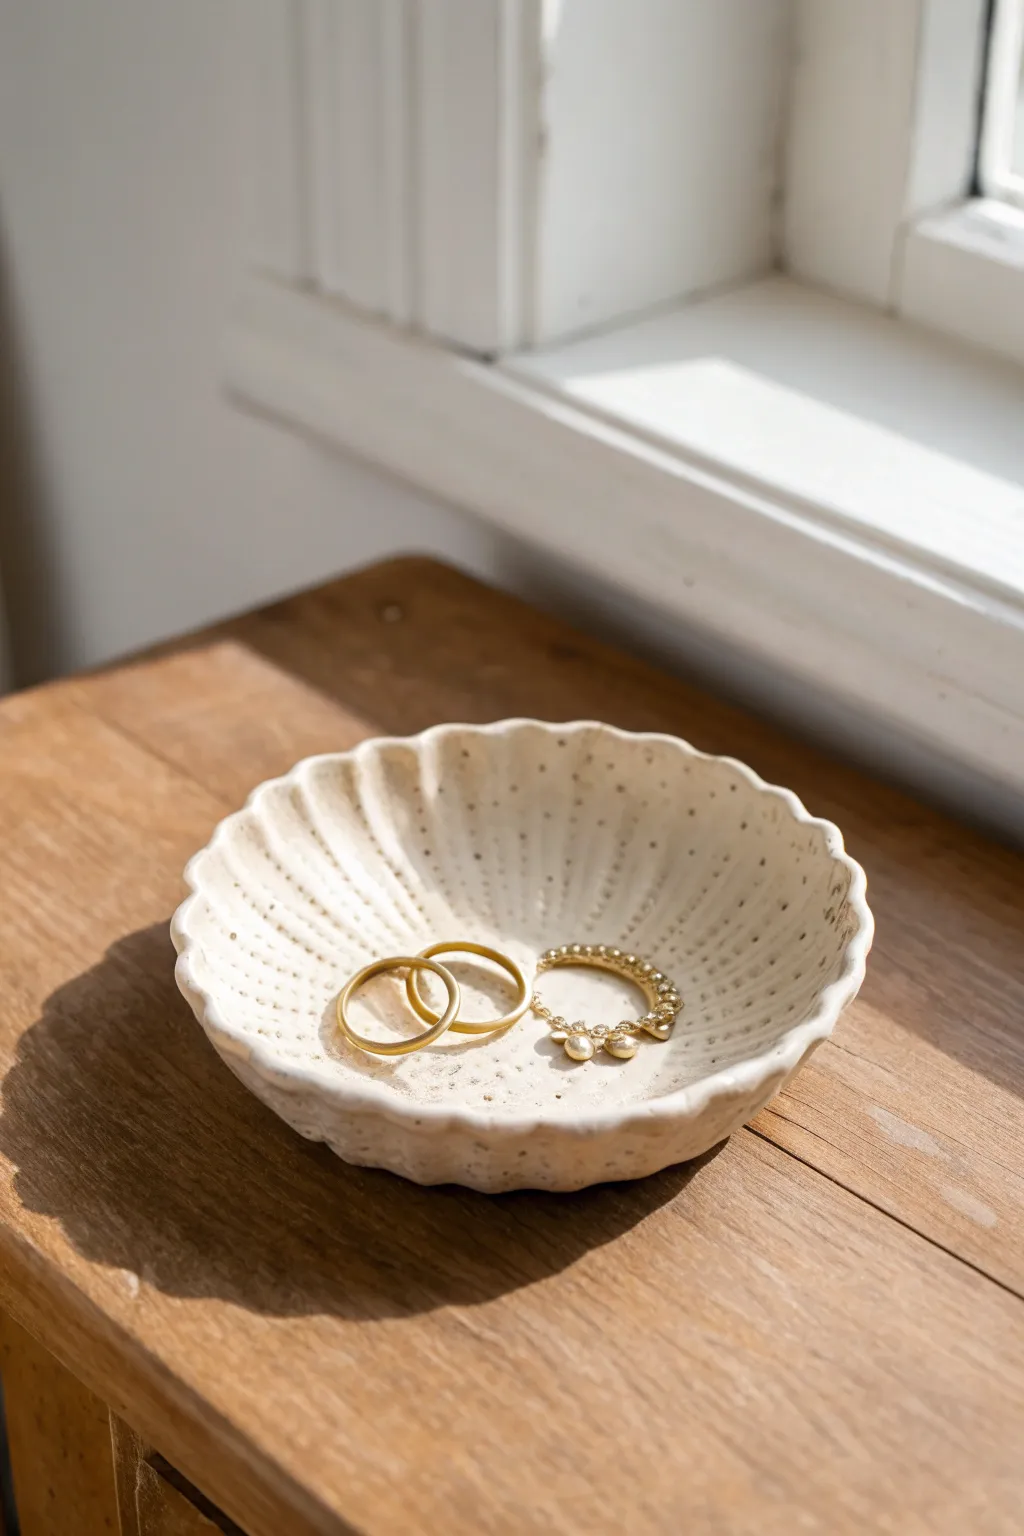
This charming, seashell-inspired trinket dish combines a soft, speckled stoneware body with delicate, radiating textures to create the perfect landing spot for your daily jewelry. Its organic, wavy rim and matte finish give it a modern, earthy feel that looks beautiful on any nightstand.
Step-by-Step Tutorial
Materials
- Speckled stoneware clay (mid-fire)
- Small rolling pin
- Canvas work surface
- Small slump mold (or a small bowl covered in plastic)
- Needle tool or clay knife
- Modeling tool with a long, rounded edge (or wooden rib)
- Small sponge
- Matte white or clear glaze (food safe recommended)
Step 1: Forming the Base
-
Prepare the Clay:
Begin by wedging a ball of speckled stoneware clay about the size of a tangerine to remove air bubbles. This ensures your final piece is strong and crack-free. -
Roll the Slab:
Place the clay on your canvas and roll it out into an even slab, approximately 1/4 inch thick. Try to keep the pressure consistent so the thickness doesn’t vary. -
Smooth the Surface:
Take a slightly damp sponge or a rubber rib and compress the surface of the slab on both sides. This smooths out canvas texture and aligns the clay particles. -
Cut the Circle:
Use a needle tool or knife to cut a loose circle from your slab, about 4 to 5 inches in diameter. I like to freehand this slightly rather than using a template to maintain that organic, handmade quality.
Clean Texture Tip
Wait until the clay firms up slightly (soft leather hard) before adding the texture lines. The tools won’t drag as much, leaving cleaner impressions.
Step 2: Adding Texture and Shape
-
Create Radiating Lines:
Using a modeling tool with a rounded edge (or the side of a wooden skewer), gently press lines into the clay starting from the center and radiating outward to the rim. -
Vary Pressure:
Press slightly deeper near the rim and lighter near the center to mimic the fluting of a shell. Space these indentations evenly around the entire circle. -
Add Dot Texture:
Between the radiating lines, use a smaller rounded tool or the blunt end of a paintbrush to press small, random dots into the clay surface, enhancing the speckled look. -
Slump the Form:
Gently lift your textured slab and place it centered over your slump mold or bowl. Press very gently so it takes on the concave curve. -
Enhance the Curve:
You don’t want a deep bowl, just a shallow dish, so ensure the edges curve upward gently. If using a deep bowl as a mold, don’t press the clay all the way to the bottom.
Step 3: Refining the Rim
-
Scallop the Edges:
Where your radiating lines meet the rim, use your finger to gently push the clay downward slightly, creating a wavy, scalloped edge. -
Smooth the Rim:
Run a damp sponge or your fingertip along the rim to soften any sharp edges created by the cutting or texturing process. -
Dry Slowly:
Leave the dish on the mold until it is leather hard. Drying it too fast can cause warping, so cover it loosely with plastic if your room is dry. -
Refine the Bottom:
Once leather hard, remove it from the mold. Flip it over and lightly sponge the bottom smooth. You can carve your initials here if you wish.
Gilded Edge
After the final glaze firing, apply a rim of gold luster overglaze and fire it a third time at a low temperature (Cone 018) for a luxurious, high-end finish.
Step 4: Firing and Glazing
-
Bisque Fire:
Allow the piece to dry completely until bone dry, then bisque fire it in the kiln according to your clay body’s specifications (usually Cone 04). -
Apply Glaze:
Dip the piece into a matte white or clear glaze. Because the clay is speckled, a semi-transparent glaze works beautifully to let those spots show through. -
Wipe the Foot:
Ensure the bottom surface that will touch the kiln shelf is completely free of glaze. Wipe it clean with a wet sponge. -
Final Fire:
Glaze fire the piece to the maturity temperature of your clay (typically Cone 5 or 6 for mid-fire stoneware).
Place your favorite rings in your new dish and enjoy the simple, handmade beauty on your dresser


Spoon Rests With Sculptural Notches
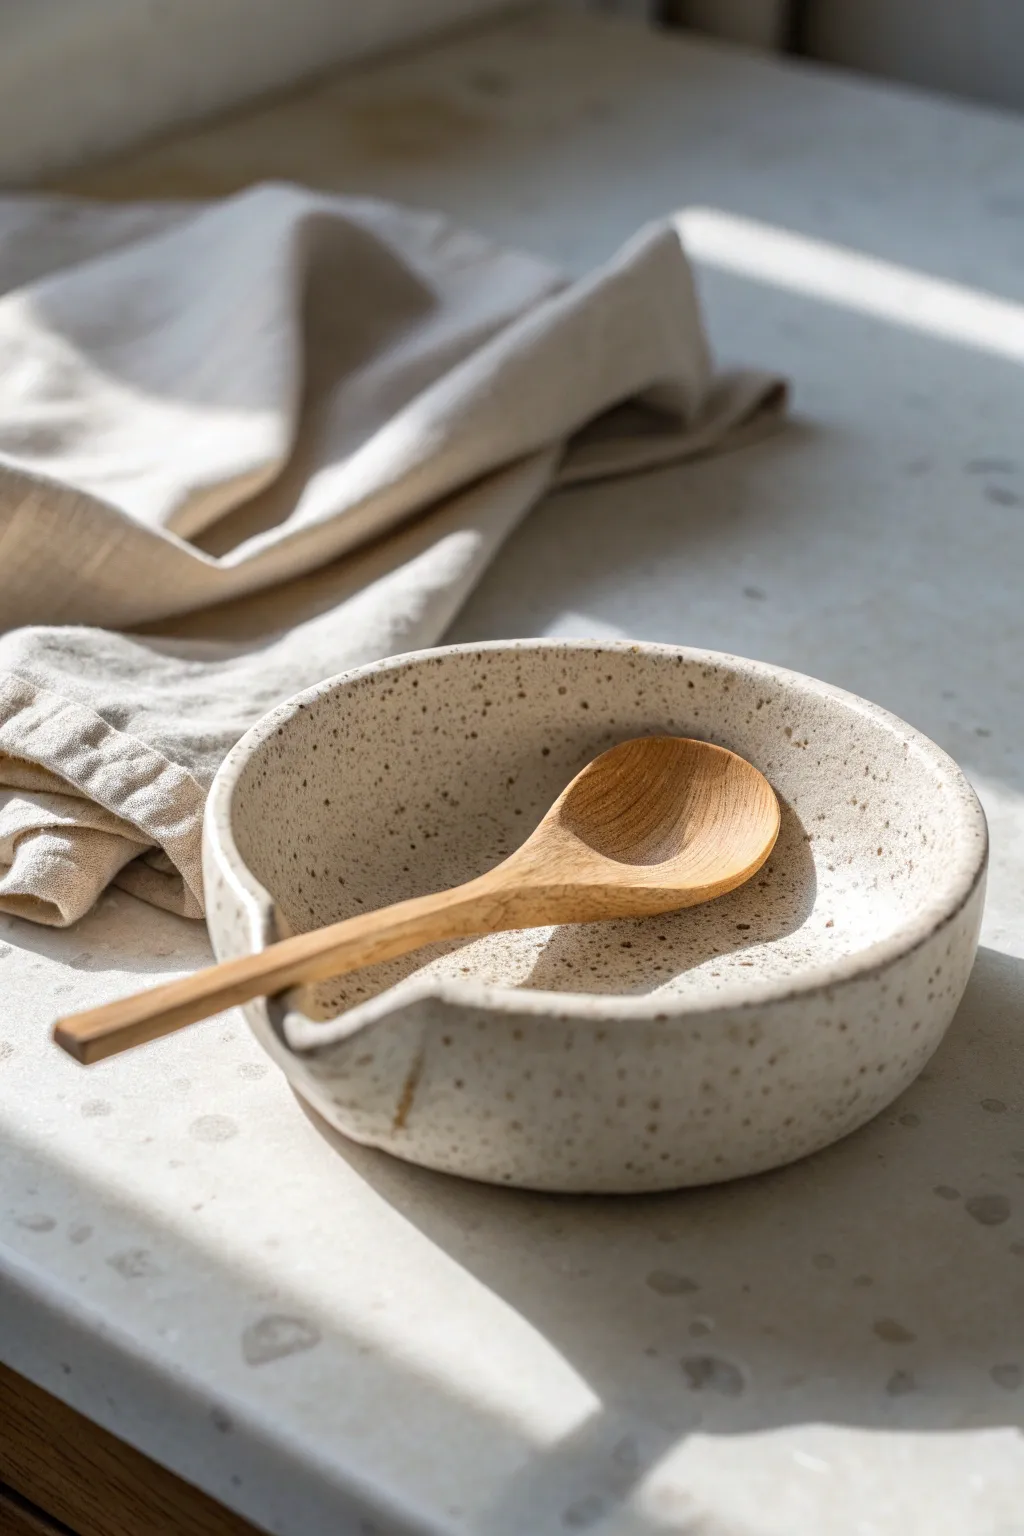
This minimalist spoon rest combines the depth of a small bowl with the functionality of a dedicated utensil holder, featuring a distinct sculptural V-notch. The speckled finish gives it an organic, modern feel that looks beautiful on any countertop.
Detailed Instructions
Materials
- Stoneware clay (speckled or buff)
- Pottery wheel (or slab roller/rolling pin for hand-building)
- Needle tool
- Wire cutter
- Rib tool (metal or rubber)
- Sponge
- Trimming tools
- Wooden modeling tool or small knife
- Clear matte glaze
- Kiln
Step 1: Throwing the Form
-
Prepare the clay:
Begin by wedging about 1 to 1.5 pounds of speckled stoneware clay until it is uniform and free of air bubbles. Center the clay firmly on the wheel head. -
Open the form:
Open the centered clay wider than a typical cup but narrower than a plate. You aim for a broad, flat floor with enough clay left in the walls to pull up height. -
Pull the walls:
Pull the walls up to create a shallow bowl shape, approximately 2-3 inches high. Keep the walls relatively thick at the rim to support the notch later. -
Refine the curve:
Using a rib tool, smooth the interior curve to ensure there are no sharp angles where the wall meets the floor. This makes cleaning the finished piece easier. -
Cut from the bat:
Run a wire cutter underneath the pot and set the piece aside to dry until leather-hard. This usually takes a few hours or overnight depending on humidity.
Step 2: Sculpting the Notch
-
Start trimming:
Once leather-hard, center the piece upside down on the wheel and trim the foot. A simple, flat foot or a slight varying bevel works best for this modern shape. -
Mark the notch:
Turn the pot right-side up. Visualize where the spoon handle will rest. Use a needle tool to lightly mark a V-shape on the rim. -
Cut the V-shape:
Using a sharp fettling knife or wire tool, carefully slice straight down through the rim to remove the wedge of clay. The cut should go about halfway down the wall height. -
Round the edges:
The fresh cut will be sharp. Use a damp sponge or your fingers to gently round over the cut edges. I find that compressing this area prevents future cracking. -
Create the spout lip:
Gently press the clay outward just below the cut to create a slight lip or spout effect, which helps the spoon handle rest securely without sliding inside. -
Smooth the transition:
Use a wooden modeling tool to blend the cut area back into the main body of the bowl so it looks intentional and sculptural, rather than just sliced.
Rim Cracks?
If the rim cracks while cutting the notch, the clay is too dry. Spray it with water, wrap it in plastic for 2 hours to rehydrate slightly, then try cutting again.
Step 3: Finishing and Glazing
-
Bisque fire:
Let the piece dry completely to the bone-dry stage. Load it into the kiln and bisque fire to typically Cone 04 or 06. -
Clean the bisque:
Wipe down the bisque-fired piece with a damp sponge to remove any dust or debris that could interfere with glaze application. -
Apply clear glaze:
Dip the piece into a clear matte glaze. A clear glaze is crucial here to let the natural speckles of the clay body shine through. -
Wipe the foot:
Remove any glaze from the bottom foot ring with a sponge to prevent the piece from fusing to the kiln shelf. -
Glaze fire:
Fire the piece again to the maturation temperature of your specific clay and glaze combination, usually Cone 5 or 6 for stoneware. -
Sand the bottom:
Once cool and out of the kiln, briefly sand the bottom foot with a sanding pad or wet-dry sandpaper to ensure it won’t scratch your table.
Double Duty
Make the notch slightly wider and curved rather than sharp. This transforms the spoon rest into a functional pouring bowl for beating eggs or mixing dressings.
Enjoy using your custom spoon rest to keep your counters clean and add a handmade touch to your cooking routine


Soap Dishes With Drainage Patterns
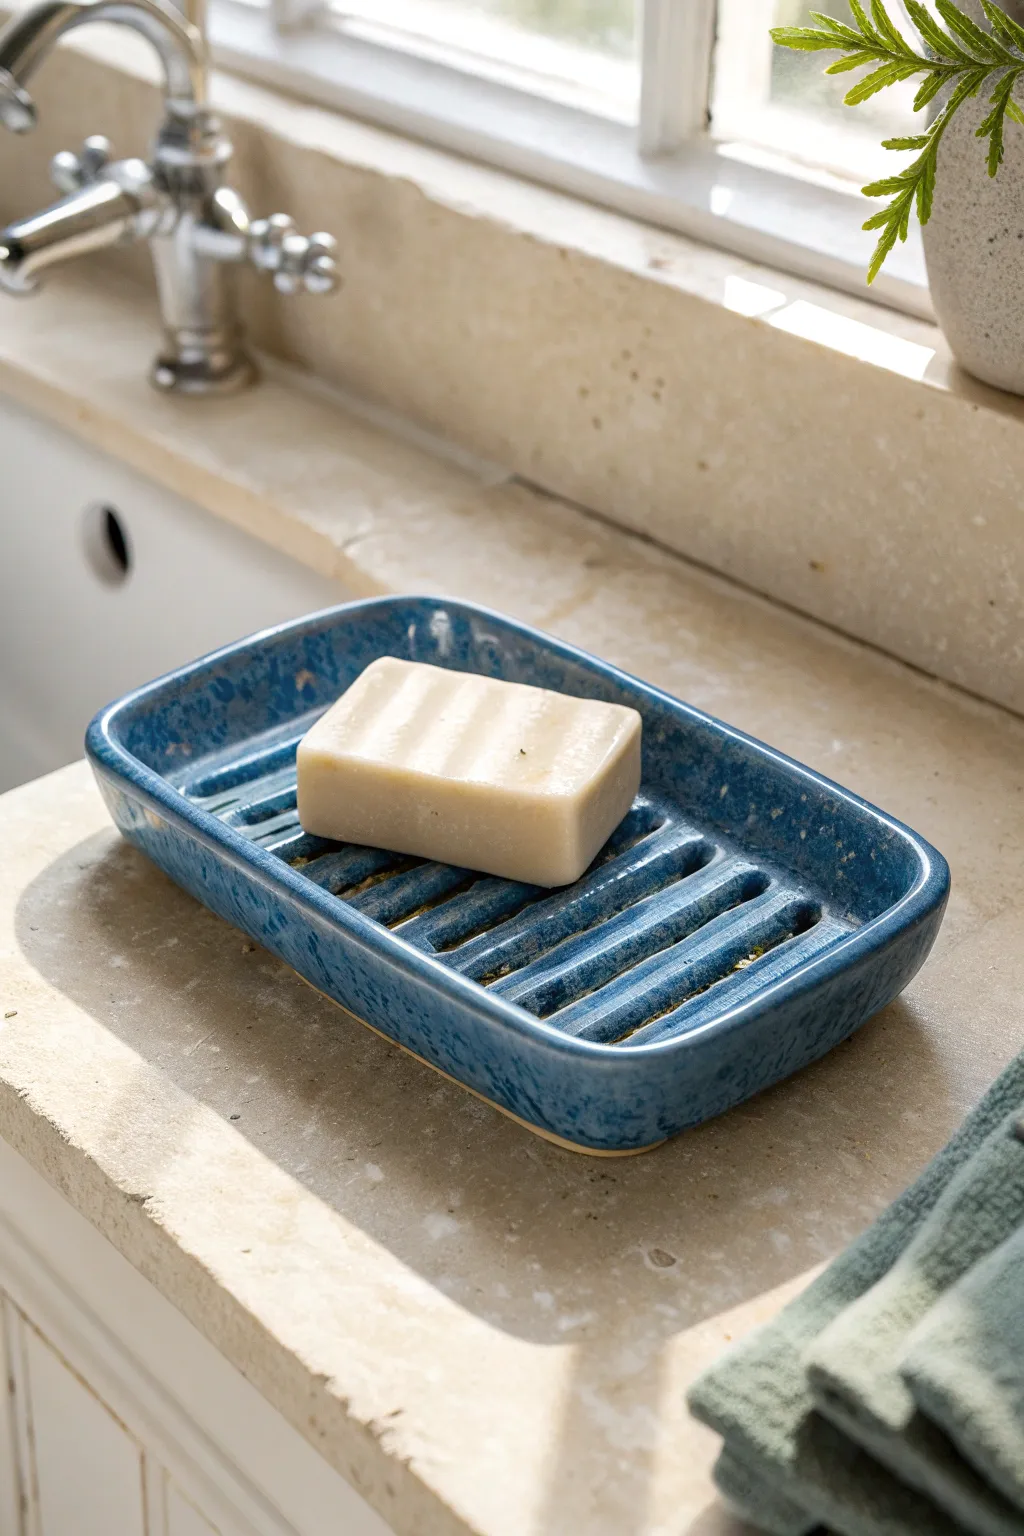
This handmade ceramic soap dish combines rustic charm with practical functionality, featuring deep, hand-carved drainage channels. The rich, speckled blue glaze breaks beautifully over ridges, creating a piece that feels both organic and deliberately crafted.
How-To Guide
Materials
- Stoneware clay (smooth or light grog)
- Rolling pin
- Two wooden guide slats (approx. 1/4 inch thick)
- Rectangular template (paper or card)
- Fettling knife
- Loop tool or ribbon tool (medium width)
- Sponge
- Soft rib tool (rubber or silicone)
- Scoring tool or fork
- Slip
- Speckled glossy blue stoneware glaze
- Kiln
Step 1: Forming the Base
-
Prepare the slab:
Begin by wedging your stoneware clay to remove air bubbles, then place it on a canvas board. Use your wooden guide slats on either side and roll the clay out into a smooth, even slab about 1/4 inch thick. -
Cut the rectangle:
Place your rectangular template onto the slab. Using your fettling knife held vertically, cut around the template to create your base shape. Remove the excess clay and set it aside for the walls. -
Smooth the surface:
Take a soft rib tool and gently compress the surface of the slab. This aligns the clay particles to prevent warping and creates a nice, smooth canvas for your carving work later. -
Lift the edges:
Gently lift the slab and place it on a ware board. If your clay is very soft, let it stiffen slightly until it reaches a soft leather-hard stage—this makes the carving much cleaner.
Warping Woes?
If your base curls up while drying, weight it down slightly with a small sandbag in the center, or dry it on a drywall board which absorbs moisture evenly.
Step 2: Carving the Drainage
-
Plan the channels:
Lightly mark parallel lines across the width of the rectangle to guide your carving. These don’t need to be perfectly straight; a little hand-drawn character adds to the aesthetic. -
Carve the ridges:
Using a medium-width loop tool, drag it across the clay to create the deep channels. Apply steady pressure to ensure the grooves are deep enough to hold water away from the soap but not so deep they weaken the base. -
Refine the grooves:
Run a damp finger or a small, moist sponge along the carved channels to smooth out any sharp clay burrs or crumbs left by the loop tool. -
Create drainage holes (optional):
If you prefer vertical drainage, use a small hole punch tool to create openings in the lowest points of a few channels. In this specific design, however, the deep grooves act as a reservoir, so holes aren’t strictly necessary.
Make It Match
Make a matching toothbrush holder by using the same blue glaze and carving vertical ribs into a cylinder to mimic the horizontal flow of the soap dish.
Step 3: Building the Walls
-
Roll coils:
Roll out a consistent coil of clay, slightly thicker than a pencil. You want enough length to go around the entire perimeter of your rectangular base. -
Score and slip:
Thoroughly score the outer edge of your rectangular base and one side of your coil. Apply a generous amount of slip to the scored areas on the base. -
Attach the rim:
Place the coil onto the edge of the base. Press it down firmly to ensure a strong bond, pinching it slightly to merge it with the slab underneath. -
Blend the coil:
Using a modeling tool or your thumb, smear the clay from the coil down onto the base on the inside seem to make it seamless. Do the same on the outside, or keep a slight ridge if you like the definition. -
Shape the wall:
Pinch the wall upwards to give it some height, curving the corners gently so they are rounded rather than sharp 90-degree angles. Use a wet sponge to smooth the rim into a soft, rounded lip.
Step 4: Glazing and Firing
-
Bisque fire:
Allow the piece to dry slowly and completely under loose plastic to prevent warping. Once bone dry, fire the piece to bisque temperature (usually cone 04 or 06). -
Wax the foot:
Apply wax resist to the bottom of the dish and about 1/8th of an inch up the side. This ensures the piece won’t stick to your kiln shelf. -
Apply the glaze:
Dip the piece into your speckled blue stoneware glaze. I find that holding it submerged for about 3 seconds gives good coverage without being too thick. -
Check groove thickness:
Check the carved channels. If the glaze has pooled too thickly in the grooves, gently wipe a little out with a finger so the detail isn’t lost during melting. -
Glaze fire:
Fire the piece to the maturity temperature of your clay and glaze (typically cone 5 or 6 for stoneware). The glaze should break over the high points, revealing the clay color underneath.
Once cooled, your durable stoneware dish is ready to add a splash of artisan color to your bathroom sink

The Complete Guide to Pottery Troubleshooting
Uncover the most common ceramic mistakes—from cracking clay to failed glazes—and learn how to fix them fast.
Coasters With Pressed Botanicals
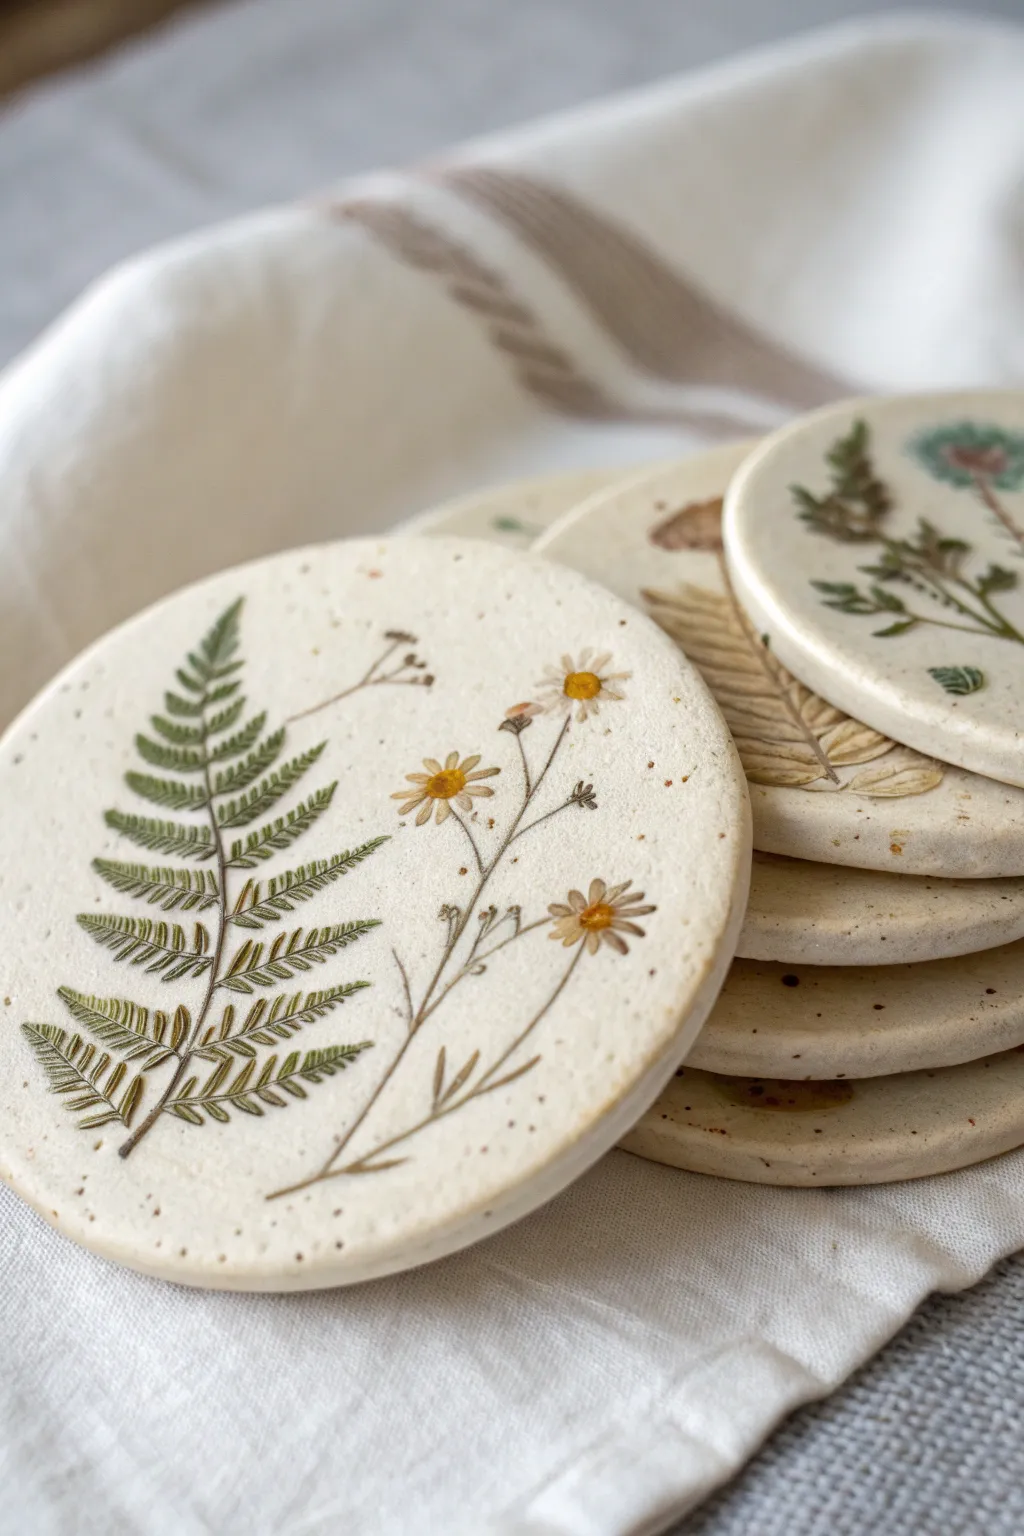
Capture the delicate beauty of a garden walk with these rustic clay coasters featuring deeply impressed ferns and daisies. The creamy, speckled clay allows the vibrant greens and yellows of the botanical designs to truly pop, creating a functional piece of art that brings nature indoors.
Detailed Instructions
Materials
- White or cream speckled air-dry clay (or polymer clay)
- Rolling pin
- Circle cookie cutter (approx. 4 inches)
- Fresh or dried botanical elements (fern leaves, small daisies, wildflowers)
- Fine-grit sandpaper
- Acrylic paints (hunter green, olive green, yellow ochre, white, brown)
- Fine detail paintbrush (size 0 or 00)
- Matte or satin waterproof varnish/sealer
- Wax paper or canvas mat for rolling
- Sponge
Step 1: Prepping and Shaping
-
Condition the clay:
Begin by taking a handful of your speckled clay and kneading it in your hands until it becomes warm, pliable, and free of cracks. -
Roll out the slab:
Place the clay on a piece of wax paper or a canvas mat. Use your rolling pin to flatten it into an even slab, aiming for a consistent thickness of about 1/4 inch to ensure durability. -
Arranging the botanicals:
Select your botanical elements. Gently place a fern frond and a few small daisy stems onto the clay surface in a pleasing composition, leaving a little negative space around the edges. -
Pressing the impression:
Take the rolling pin and roll firmly *over* the plant matter once. You want to press the vegetation flush with or slightly below the clay surface without distorting the round shape too much. -
Remove the plants:
Carefully peel the plant material away from the clay. Use a needle tool or tweezers to lift the edges if they stick, revealing the detailed impression left behind. -
Cut the shape:
Position your circle cutter over the design to frame it perfectly. Press down firmly to cut the coaster shape. If you don’t have a cutter, trace a bowl with a knife. -
Smooth the edges:
Dip your finger in a little water and gently run it around the rim of the cut circle to smooth out any sharp or ragged edges created during cutting.
Sticky Situation?
If fresh flowers are sticking to the clay as you roll, place a sheet of parchment paper or plastic wrap over the botanicals before rolling to create a barrier while still getting a good impression.
Step 2: Finishing and Painting
-
Drying phase:
Place the coasters on a flat, absorbent surface to dry. I prefer to flip them over halfway through the drying process to prevent curling. Let them cure for 24-48 hours depending on humidity. -
Sanding:
Once bone dry, lightly buff the edges and surface with fine-grit sandpaper to remove any imperfections or fingerprints. -
Base hues for the fern:
Using a fine detail brush, paint the impressed fern shape. Mix a hunter green with a touch of brown for the stems, and use a lighter olive green for the leaf tips. -
Painting the flowers:
Fill in the daisy petals with white or a very pale cream. Use a small dot of yellow ochre mixed with brown for the flower centers to give them depth. -
Adding details:
To mimic the look in the photo, add tiny, sparse speckles if your clay wasn’t pre-speckled. You can flick a toothbrush with watered-down brown paint lightly over the surface. -
Dry the paint:
Allow the painted details to dry completely before moving on to the sealing step. -
Seal for protection:
Apply a coat of waterproof matte or satin varnish. This is crucial for coasters, as it protects the clay from condensation and moisture rings. -
Final coat:
For extra durability, apply a second coat of sealer once the first is dry, paying special attention to the deep crevices of the botanical impressions.
Natural Texture
To enhance the antique look, after painting, wipe the surface quickly with a damp cloth. This leaves paint in the deep crevices while cleaning the high points for a weathered effect.
Stack your set of coasters and enjoy the permanent garden you’ve created for your coffee table
Small Vases That Double as Art Objects
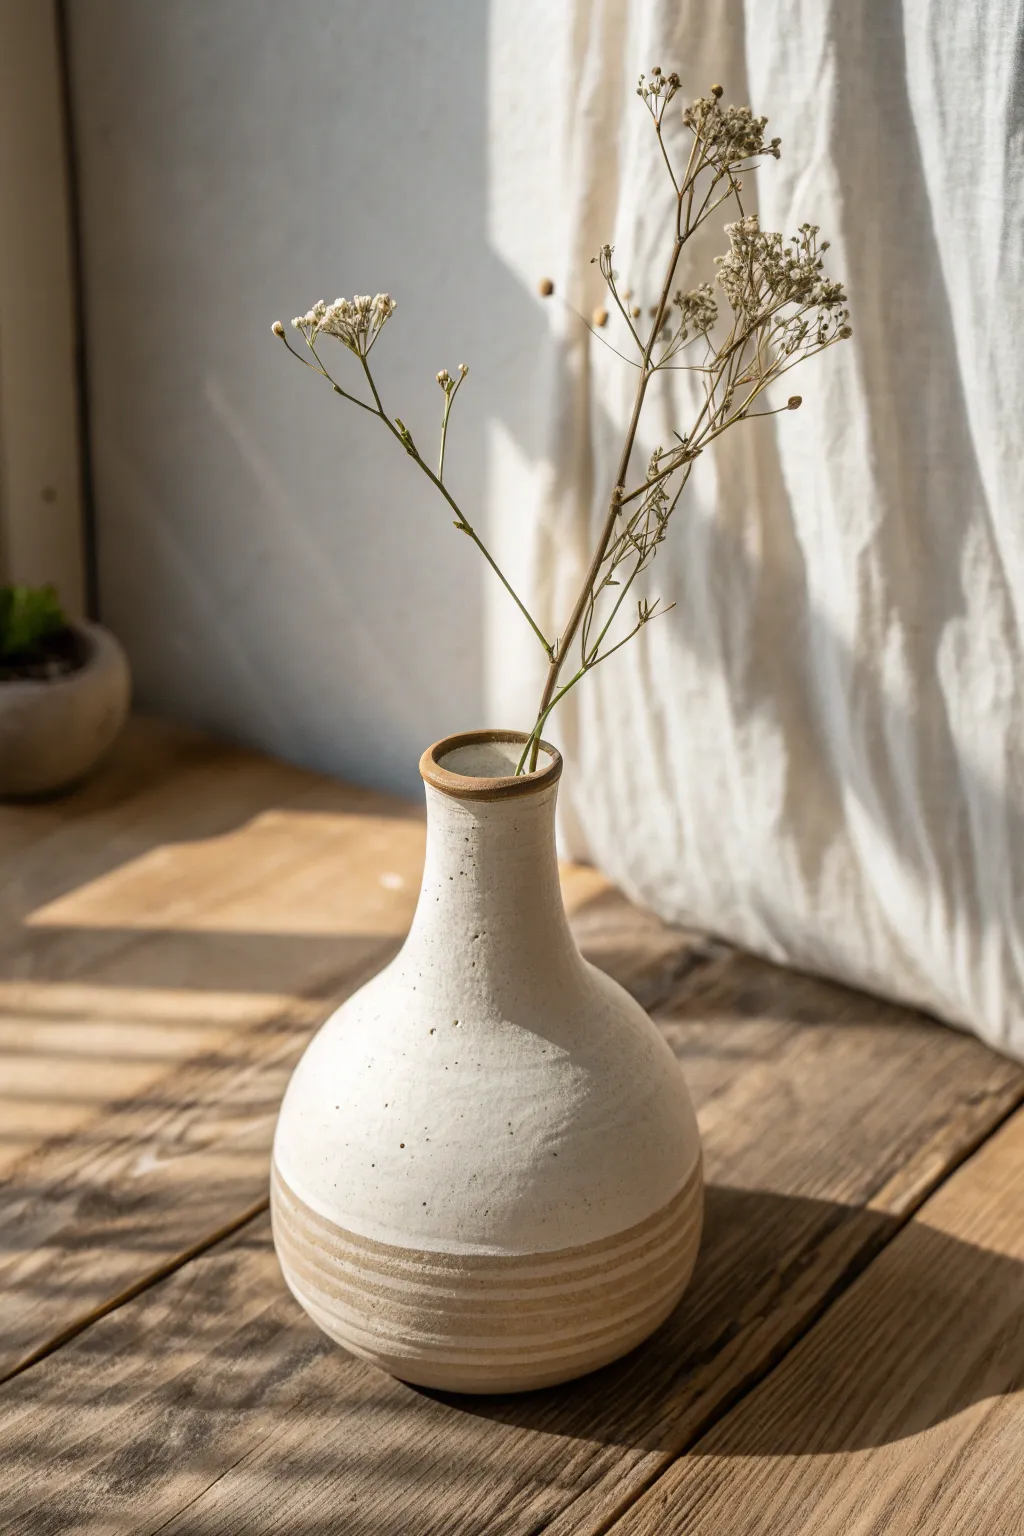
This small, elegant vase combines the raw beauty of exposed stoneware with a smooth, matte white glaze for perfect contrast. Its bulbous base and slender neck create a timeless silhouette that works beautifully as a standalone art object or a functional vessel for dried stems.
Step-by-Step Guide
Materials
- Stoneware clay (buff or speckled)
- Pottery wheel
- Throwing tools (sponge, needle tool, ribs, wire cutter)
- Trimming tools
- Matte white or cream dipping glaze
- Wax resist
- Brush for wax resist
- Kiln
Step 1: Throwing the Form
-
Prepare the clay:
Start by wedging about 1.5 to 2 pounds of buff stoneware clay thoroughly to remove air pockets. Form it into a uniform ball before taking it to the wheel. -
Center and open:
Secure the clay to the wheel head and center it. Open the clay up, leaving about a half-inch of thickness for the floor to allow for creating a foot later. -
Establish the base:
Pull the walls up, keeping them relatively thick at the bottom. As you pull, gently bell the clay outward to create the rounded, bulbous shape for the lower half of the vase. -
Collar the neck:
Begin collaring (squeezing in) the clay at the top of the bulbous section to form the neck. Do this gradually over several rotations to prevent the clay from buckling. -
Refine the neck shape:
Pull the neck upward to elongate it. I like to use a small rib on the outside while supporting the inside with a finger or sponge to get a clean, straight line that transitions smoothly from the shoulder. -
Finish the rim:
Gently flare the very top of the rim outward just slightly. Compress the rim with a chamois or sponge to ensure it is smooth and durable. -
Cut and dry:
Undercut the base with your wooden tool, run a wire under the pot, and set it aside to dry to a leather-hard state.
Step 2: Trimming and Glazing
-
Centering for trim:
Once leather hard, invert the vase centered on the wheel. Secure it with clay lugs or a gripping tool. -
Define the foot:
Trim away excess weight from the bottom curve to match the interior shape. Carve a small foot ring to give the vase a slight lift off the table. -
Add texture lines:
While the wheel is spinning slowly, use a trimming tool or a specifically designed texture comb to carve shallow, horizontal grooves into the bottom third of the vase. These will be left unglazed later. -
Bisque fire:
Allow the piece to dry completely until it is bone dry, then load it into the kiln for a bisque firing (usually Cone 04 or 06). -
Wax the design:
After bisque firing, wipe the pot with a damp sponge. Apply liquid wax resist to the bottom section, covering the foot and the textured grooved area up to where you want the white glaze to start. -
Glaze application:
Dip the vase into a matte white or cream glaze. The wax will repel the glaze from the bottom, creating that clean, straight line separation. -
Rim detail:
If you want the exposed clay rim shown in the reference, carefully wipe the glaze off the very top edge of the rim with a damp sponge, or wax the rim before dipping. -
Clean up:
Before firing, double-check the waxed bottom area. Use a sponge to wipe away any beads of glaze that might remain on the textured grooves. -
Final firing:
Fire the vase to the final temperature required by your specific clay and glaze body (typically Cone 5, 6, or 10).
Clean Lines
For a razor-sharp glaze line, use automotive striping tape (pinstripe tape) instead of freehand wax. Apply the tape firmly, wax over it, peel it off, then glaze.
Level Up: Speckles
Use a clay body with heavy iron or manganese speckling (like a speckled buff). The speckles will bleed through the matte white glaze, adding organic depth and character.
Once cooled, fill your new vase with dried wildflowers to complement natural tones


What Really Happens Inside the Kiln
Learn how time and temperature work together inside the kiln to transform clay into durable ceramic.
Planters With Face or Figure Details
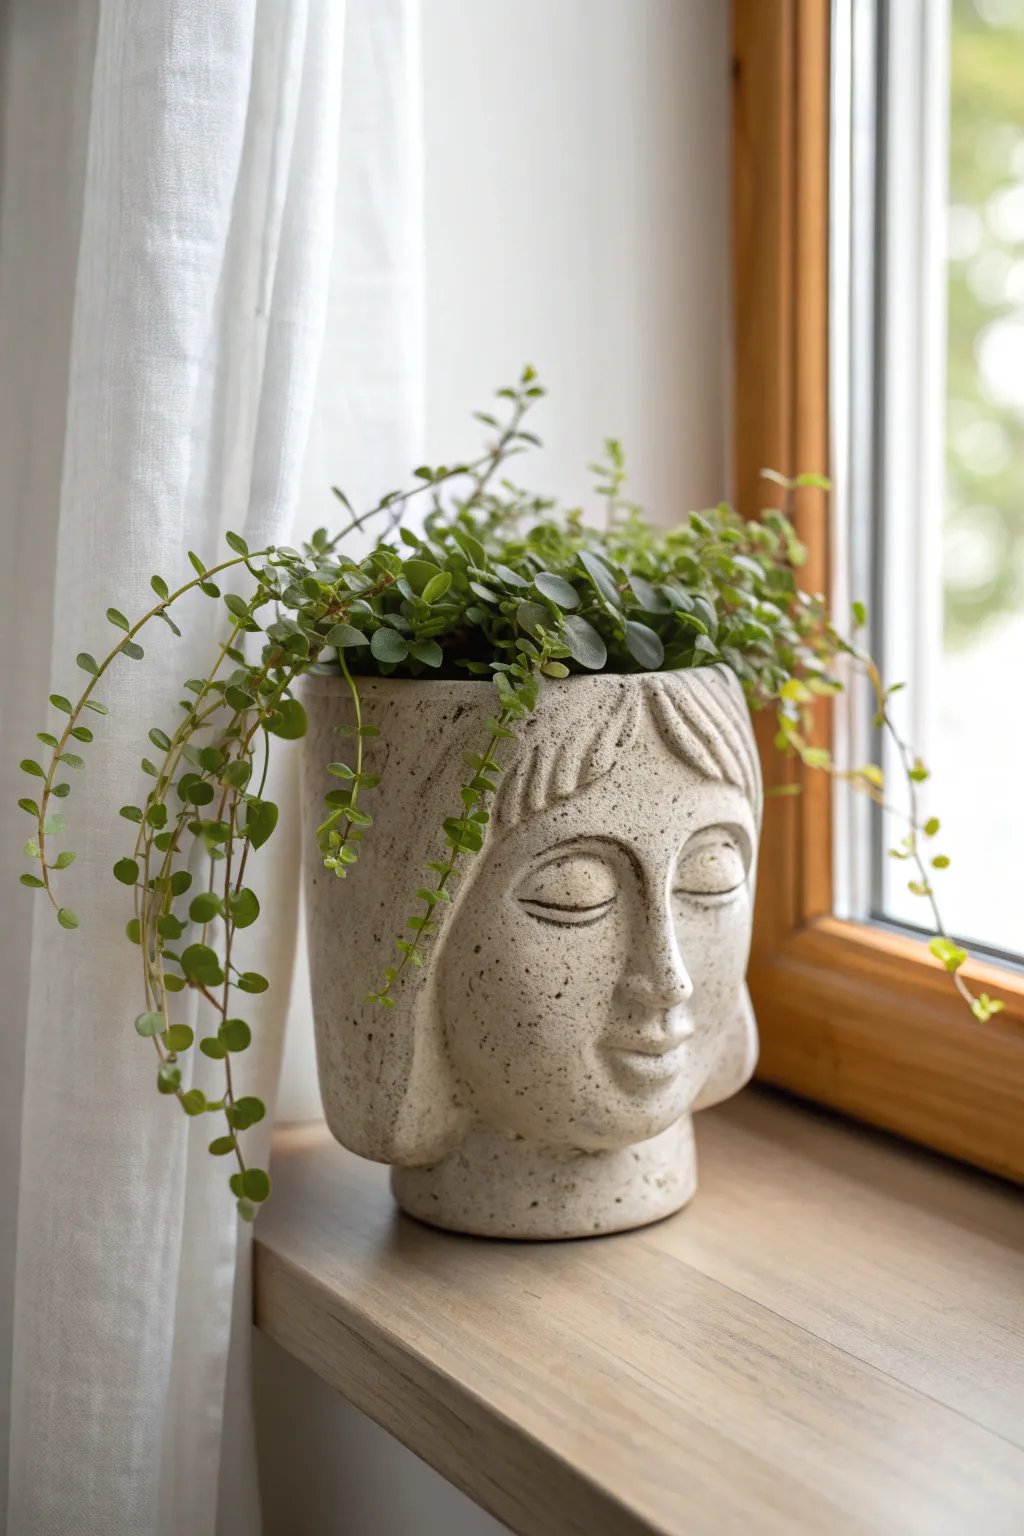
Bring a sense of calm to your windowsill with this meditative face planter, featuring a gentle, textured finish that mimics natural stone. The serene expression and trailing vines create a harmonious balance between sculpture and nature.
Step-by-Step
Materials
- Stoneware clay (speckled or buff)
- Pottery wheel (optional, can be hand-built)
- Needle tool
- Loop tools (various sizes)
- Rib tool (wooden or silicone)
- Sponge
- Modeling tools (wooden)
- Clay wire cutter
- Kiln
- Clear matte glaze
Step 1: Forming the Base Structure
-
Create the cylinder:
Begin by throwing a medium-sized cylinder on the wheel, leaving the walls slightly thicker than usual (about 1/2 inch) to allow for carving later. Alternatively, slab-build a cylinder if you are hand-building. -
Shape the neck:
While the clay is still plastic, gently collar in the bottom third to form a distinct, narrower neck, then flare out slightly at the very base for stability. -
Define the head shape:
Push the clay out from the inside above the neck to create the rounded volume of the head, ensuring the rim remains open and circular. -
Drying to leather hard:
Allow the piece to dry slowly until it reaches a sturdy leather-hard stage. This is crucial for carving details without warping the pot.
Crack Checking
If hairline cracks appear around the added nose or ears during drying, score the crack deeply, add a tiny bit of vinegar slip, and compress the area with a wooden tool immediately.
Step 2: Sculpting the Features
-
Map out the face:
Use a needle tool or a dull pencil to lightly sketch the vertical centerline and horizontal eye line directly onto the clay surface. -
Build up the nose:
Score and slip a small wedge of clay onto the center of the face. Smooth it down thoroughly to integrate it, then shape the bridge and tip of the nose. -
Carve the eye sockets:
Using a loop tool, gently carve away shallow depressions where the eyes will sit. This creates the natural brow bone structure. -
Shape the eyelids:
Roll two small, flattened coils of clay. Score and attach them into the sockets to form the closed upper eyelids, smoothing the edges into the surrounding skin. -
Detail the eyes:
Use a fine modeling tool to press a clean, curved line defining the bottom of the eyelid, mimicking the ‘sleeping’ look. -
Form the lips:
Add a small oval of clay below the nose. Use a wooden tool to press a horizontal line for the mouth, gently pushing up the corners for a subtle smile. -
Add the ears:
Attach elongated lobes on the sides of the head. I like to keep these stylized and elongated, almost like hair framing the face, rather than anatomically perfect ears.
Mossy Patina
For an aged look, after the final firing, dab a mixture of yogurt and moss spores into the crevices of the hair and let it sit in a shady, damp spot to grow a living green patina.
Step 3: Texturing and Refining
-
Sculpt the hair:
Carve deep grooves into the top rim of the planter to simulate bangs or hair texture. Make the strokes fluid and uneven for an organic feel. -
Smooth the skin:
Use a damp sponge or a soft rib to smooth out the facial features, softening any harsh tool marks while keeping the definition of the nose and eyes. -
Add drainage:
Don’t forget to cut a drainage hole in the bottom of the pot so your future plant stays healthy. -
Slow drying:
Cover the piece loosely with plastic to let it dry very slowly. The added clay pieces (nose, ears) dry at different rates, so rushing this can cause cracks.
Step 4: Firing and Finishing
-
Bisque fire:
Once bone dry, fire the piece in the kiln to bisque temperature (usually Cone 04). -
Glaze application:
Apply a clear matte glaze or a very light wash. If you used speckled clay, the specks will show through beautifully after firing. -
Final wipe down:
Use a sponge to wipe back the glaze slightly on the high points of the face (nose, brows) to accentuate the texture. -
Glaze fire:
Fire the piece to the final maturity temperature for your specific clay body (often Cone 5 or 6).
Once fired, fill your planter with a cascading plant like Creeping Jenny or String of Pearls to maintain the peaceful, natural vibe
Desk Organizers Built From Slabs
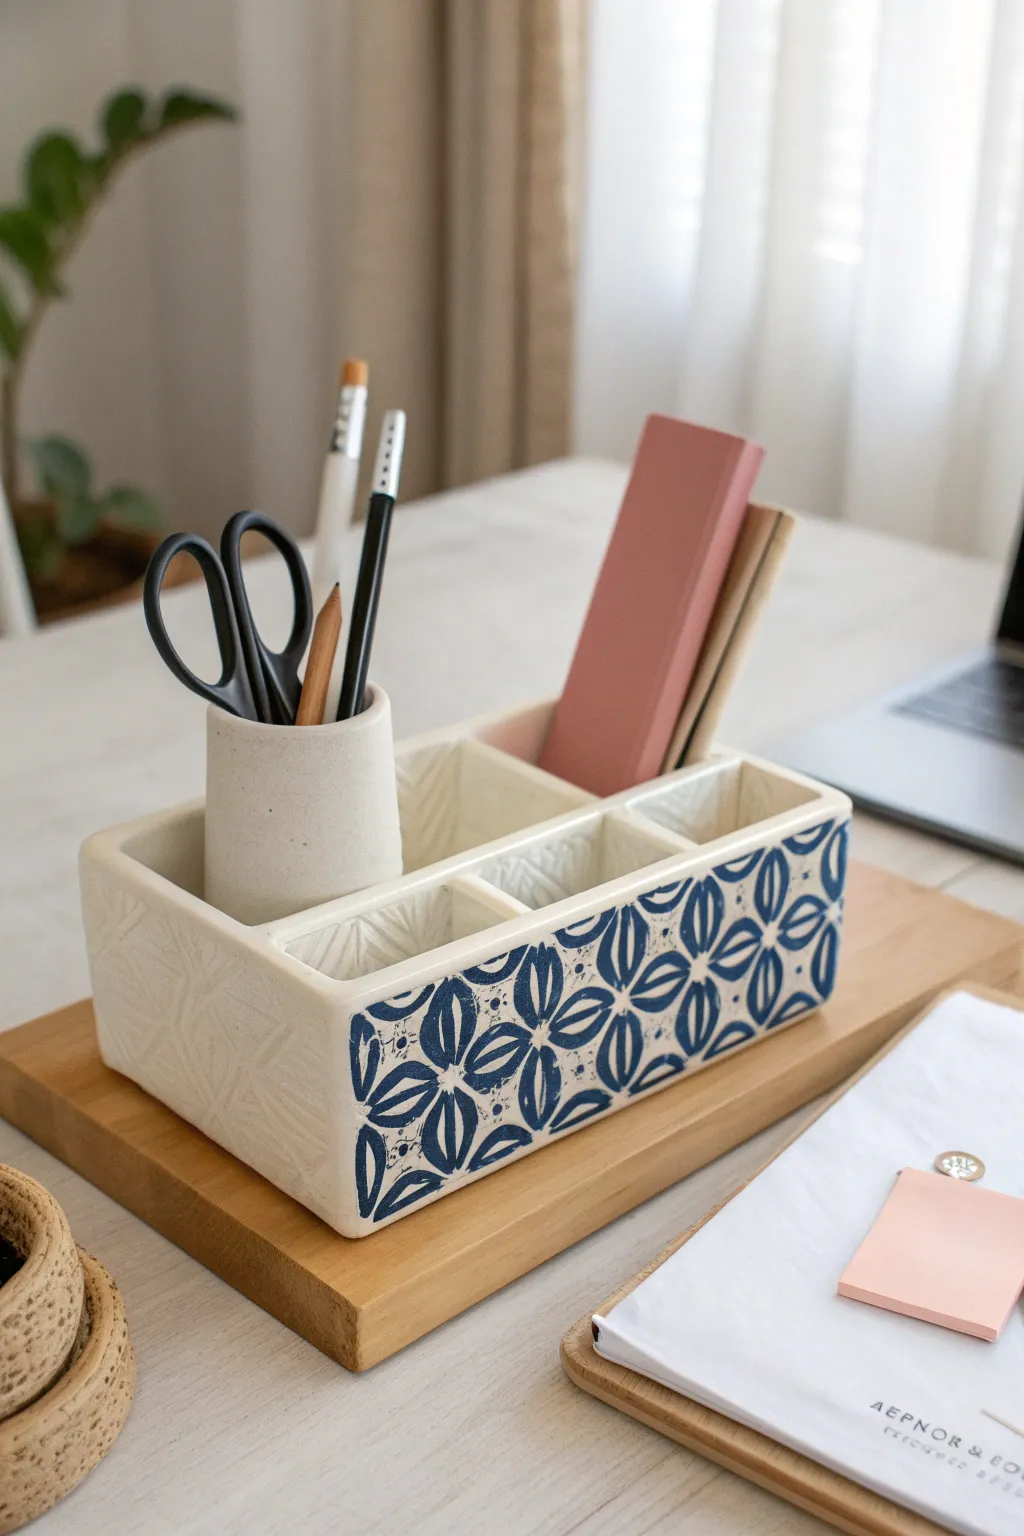
Bring order to your workspace with this elegant, multi-compartment desk organizer constructed from clay slabs. Featuring a clever mix of textured white relief and bold blue geometric patterns, this piece combines modern aesthetics with practical storage for your favorite stationery.
How-To Guide
Materials
- White stoneware clay or porcelain
- Rolling pin and guide sticks (approx. 1/4 inch)
- X-Acto knife or fettling knife
- Ruler
- Slip and scoring tool
- Texture mat or carving tool (for side patterns)
- Underglaze (Cobalt Blue)
- Fine liner brush
- Clear transparent glaze
- Small circle cutter (optional, for the cup base)
- Wooden paddle
- Sponge
Step 1: Preparing the Slabs
-
Roll the clay:
Begin by rolling out a medium-sized block of white stoneware clay. Use guide sticks to ensure an even thickness of about 1/4 inch throughout, which is crucial for the structural integrity of the box walls. -
Texture the side walls:
Before cutting your shapes, decide which sections will be the side walls. Gently press a texture mat into the clay slab for those areas, or lightly carve a subtle geometric relief pattern using a needle tool if you prefer a hand-carved look. The front panel should remain smooth. -
Measure and cut components:
Using a ruler and knife, cut out the base rectangle (approx. 8×4 inches), four exterior walls, and two internal divider pieces. Be precise with your measurements to ensure square corners. -
Create the cup cylinder:
For the tall pencil holder, cut a rectangular strip of clay. Roll it into a cylinder that fits comfortably inside one of your planned compartments. Score and slip the seam, blending it smooth so the join disappears. -
Firm up the slabs:
Let all your cut pieces sit until they reach a soft leather-hard state. This stiffness makes assembling the box much easier without the walls sagging.
Warping Walls?
If your long walls start bowing inward during drying, place a piece of soft foam inside the box to support the shape until it stiffens completely.
Step 2: Assembly and Construction
-
Attach walls to base:
Score the edges of the base and the bottom of your first wall. Apply slip and press the wall firmly onto the base. Repeat this for all four outer walls, ensuring the textured sides face outward. -
Reinforce the seams:
Roll tiny coils of clay and press them into the interior corners where the walls meet the base and each other. Smooth these coils down with a modeling tool or your finger to create a strong, seamless bond. -
Insert dividers:
Install the internal divider walls to create the compartments. I like to measure the placement against the items I plan to store, like sticky notes or an eraser, to ensure a perfect fit. -
Refine the rim:
Once the basic box is assembled, use a damp sponge to smooth the top rim. You want a slightly rounded, soft edge that feels good to the touch. -
Place the cup:
Decide where the cylindrical cup will go. You can slip and score it to the bottom of the box permanently, or leave it as a removable insert. If permanent, smooth the connection point at the bottom carefully.
Make it Modular
Make the internal dividers removable by creating small slots or tracks on the interior walls, allowing you to reconfigure the compartments later.
Step 3: Decoration and Glazing
-
Pencil the design:
Once the piece is bone dry or very stiff leather-hard, lightly sketch your geometric floral pattern onto the smooth front panel using a standard graphite pencil. The graphite will burn off in the kiln. -
Paint the pattern:
Using a fine liner brush and cobalt blue underglaze, carefully paint the geometric petal shapes. Aim for solid coverage, applying two coats if the underglaze feels translucent. -
Clean up lines:
If you make a mistake or smudge a line, gently scrape away the excess underglaze with a sharp knife tip rather than wiping it, which can smear the pigment into the porous clay. -
Bisque fire:
Load the thoroughly dried piece into the kiln for a bisque firing to cone 04. This hardens the clay and prepares it for the final glaze. -
Apply clear glaze:
Dip the entire piece into a clear transparent glaze, or brush it on evenly. Ensure the glaze doesn’t pool too thickly in the textured side panels, as this can obscure the relief detail. -
Final firing:
Fire the piece to the maturity temperature of your clay body (likely cone 6 for stoneware). Once cooled, check the bottom for any sharp bits and sand them smooth if necessary.
Now you have a custom piece of functional art ready to organize your desk with style

TRACK YOUR CERAMIC JOURNEY
Capture glaze tests, firing details, and creative progress—all in one simple printable. Make your projects easier to repeat and improve.
Paintbrush and Tool Holders With Wave Forms
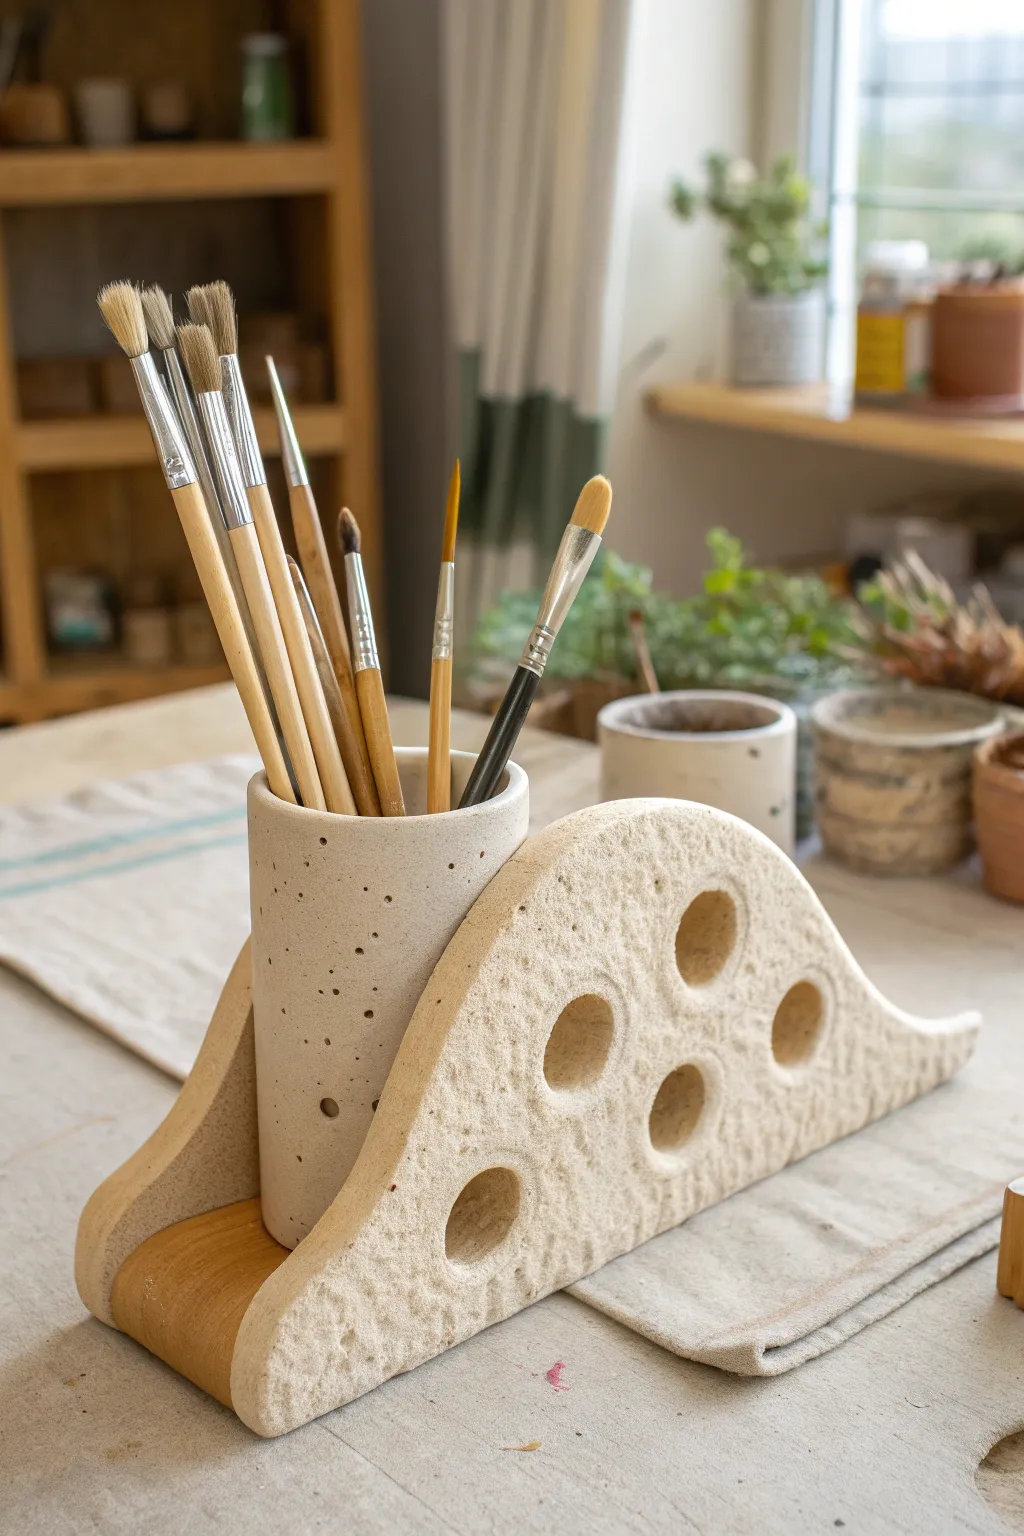
Elevate your studio space with this sculptural paintbrush holder that blends organic textures with functional design. Featuring a smooth cylindrical cup for upright storage and a rugged, wave-shaped slab with organizing cutouts, this piece mimics the raw beauty of porous stone.
Step-by-Step
Materials
- Stoneware clay (smooth body with grog added, or speckled clay body)
- Wooden rolling pin
- Rolling guides (approx. 1/4 inch)
- Circle cutters (various sizes: 2-inch for large holes, 3-inch for base)
- Needle tool
- Fettling knife
- Slip and scoring tool
- PVC pipe or cardboard tube (for forming the cylinder)
- Rough texture tool (e.g., stiff wire brush, rough sponge, or crumpled foil)
- Small drill bit or needle tool (for tiny texture holes)
- Matte white or cream glaze (speckled optional)
Step 1: Forming the Cylinder Cup
-
Roll the Slab:
Begin by rolling out a medium-sized slab of clay to a consistent thickness of about 1/4 inch using your rolling guides. -
Cut the Rectangle:
Measure the circumference of your tube form (approx. 3 inches diameter) and cut a rectangular strip of clay to match this length plus a little overlap, with a height of about 5 inches. -
Texture the Surface:
Before assembling, use a needle tool to poke random, shallow holes across the surface of the rectangle. Vary the depth and spacing to create an organic, porous look. -
Create the Cylinder:
Wrap the clay rectangle around your tube form (wrap the tube in paper first to prevent sticking). Score and slip the overlapping edges, pressing them firmly together to create a seamless join. -
Add the Base:
Cut a circle of clay slightly larger than your cylinder’s diameter. Score and slip the bottom of the cylinder and the edge of the circle, then attach them. Trim any excess clay flush with the cylinder wall. -
Refine the Rim:
Smooth the top rim of the cup with a damp sponge or chamois to ensure it’s comfortable to the touch.
Step 2: Sculpting the Wave Feature
-
Shape the Wave:
Roll a second slab, slightly thicker than the first (approx. 3/8 inch). Freehand cut a long, asymmetrical shape with a flat bottom and a sloping, curved top edge that resembles a wave crest. -
Add Rugged Texture:
This is the fun part—aggressively texture one side of the slab. I like to press a stiff wire brush or a real rough stone into the clay to achieve that pitted, rock-like surface shown in the photo. -
Cut the Organizing Holes:
Using circle cutters or a sharp knife, remove 5-6 circles of varying sizes from the wave shape. These lighten the visual weight and can serve as resting spots for tools. -
Clean Up Edges:
Soften the sharp edges of your cutouts with your finger, but leave the main surface texture rough.
Natural Stone Look
Add coarse grog or sand to your clay body before rolling. When you sponge it down later, the grit exposures will mimic real sandstone.
Step 3: Assembly and Finishing
-
Create the Connector Base:
Cut a rectangular base slab that is long enough to support both the cylinder and the wave form standing parallel to each other. -
Attach the Components:
Score and slip the bottom of the cylinder and place it on one end of the base. Do the same for the wave form, positioning it lengthwise along the base beside the cylinder. -
Reinforce Joints:
Roll thin coils of clay and press them into the interior seams where the pieces meet the base. Smooth these out completely for structural integrity. -
Drying:
Cover the piece loosely with plastic to dry slowly. This is crucial as the different shapes may dry at different rates, which can cause cracking. -
Bisque Fire:
Once bone dry, fire the piece to bisque temperature (usually Cone 04). -
Glazing:
Apply a matte white or cream glaze. If your clay body is not already speckled, consider using a glaze with iron speckles to enhance the stone effect. -
Wipe Back Texture:
If glaze pools too thickly in the textural holes, gently wipe the raised surfaces with a damp sponge to highlight the rugged texture of the wave form before the final firing.
Slumping Wave?
If the wave wall starts leaning during assembly, prop it up with a crumpled newspaper or a spare kiln brick until it stiffens to leather-hard.
Once fired, fill your new organizer with your favorite brushes and enjoy the clean, artistic vibe it brings to your desk
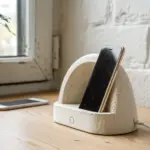
Phone Stands That Look Like Creatures
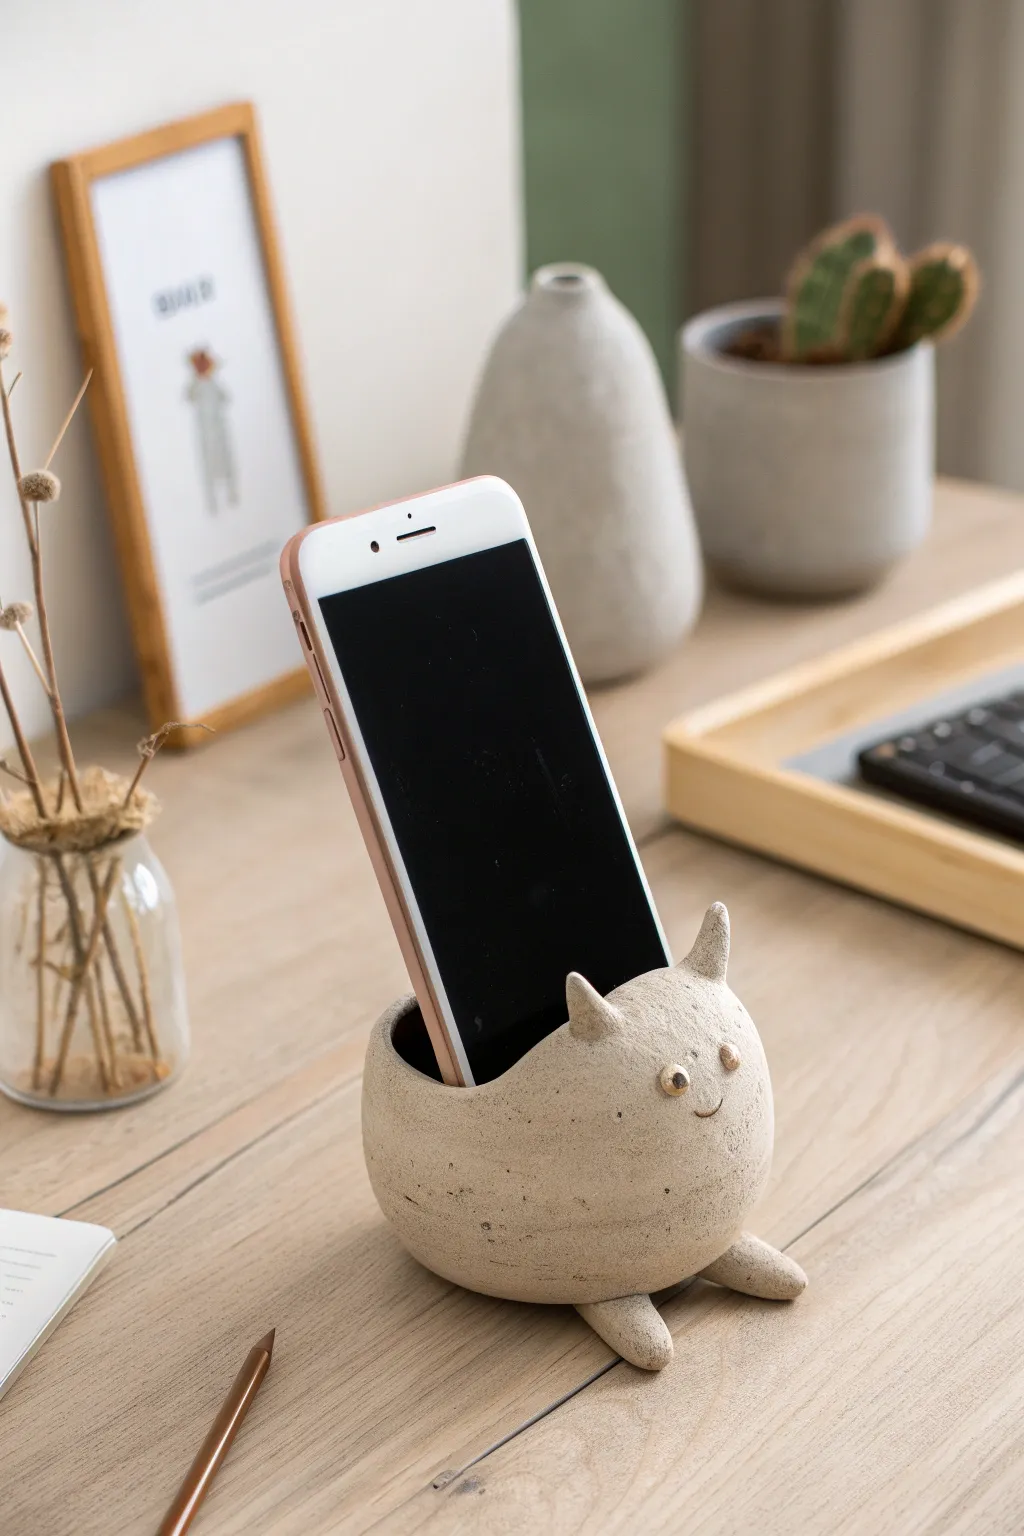
This charming little desktop companion combines helpful utility with a touch of whimsy. Modeled from speckled stoneware clay, its round body and tiny feet create a stable base for your device while adding a friendly face to your workspace.
Step-by-Step Guide
Materials
- Speckled stoneware clay (approx. 1 lb)
- Pottery wheel (optional, can be hand-built)
- Needle tool
- Small loop tool or carving tool
- Rib tool (wood or rubber)
- Score and slip tool (or serrated rib)
- Sponge
- Small paintbrush
- Clear matte glaze
- Kiln
Step 1: Forming the Body
-
Center and throw:
Begin by centering your ball of speckled clay on the wheel. Open it up to create a wide, low floor, keeping the walls thick enough to support the phone’s weight later. -
Shape the sphere:
Pull the walls up and curve them inward dramatically to create a closed, spherical form. Don’t close it completely; leave an opening at the top slightly wider than the width of a standard smartphone. -
Refine the curve:
Use a rib tool on the exterior while supporting the interior with your sponge to perfect that smooth, round ‘belly’ shape. Smooth out any throwing lines if you prefer the clean look shown in the photo. -
Modify for hand-building:
If you aren’t using a wheel, create two pinch pots of equal size. Score and slip the rims, then join them together to form a hollow sphere. Paddle it gently to round it out before cutting your opening.
Tipping Over?
If the stand falls forward when you insert the phone, add a small fishing weight inside the back of the hollow body before closing it up, or simply make the back wall much thicker.
Step 2: Sculpting the Features
-
Define the opening:
Once the clay is leather hard, use your needle tool to trim the rim of the opening to be level. The opening needs to be deep enough to hold the phone securely but not so deep it hides the screen. -
Shape the ears:
Form two small, triangular cones of clay. Gently curve them so they look perky. Score and slip the top of the pot where the ‘head’ will be, then attach the ears firmly. -
Blend the seams:
Use a small modeling tool or your finger to smooth the clay from the ears down onto the body, ensuring a seamless transition so they don’t pop off during firing. -
Create the feet:
Roll two small sausage shapes of clay for the feet. Taper one end slightly. Attach these to the front bottom of the sphere, positioned so they stick out playfully and help stabilize the pot from tipping forward. -
Add the balancing nub:
I always add a third, smaller nub of clay to the back underside of the pot. This creates a tripod effect, ensuring the phone stand doesn’t wobble on a flat surface.
Change the Creature
Modify the ears to be long and floppy for a bunny, or round and wide for a bear. You can also paint the nose area with pink underglaze before the bisque fire for a pop of color.
Step 3: The Face & Finish
-
Make the eyes:
Roll two tiny spheres of clay and flatten them slightly into discs. Score and slip them onto the face area. Use the back of a small drill bit or tool to impress a pupil into the center of each eye. -
Carve the smile:
Using a needle tool, gently incite a small, simple curved line for the mouth. Keep it subtle to match the minimalist aesthetic. -
Smooth everything:
Take a slightly damp sponge and wipe down the entire piece to remove any burrs, sharp edges, or fingerprints. Pay special attention to the rim where the phone sits so it won’t scratch your device. -
Dry slowly:
Cover the piece loosely with plastic to let it dry slowly to the bone-dry stage. This prevents the added appendages (ears and feet) from cracking away from the body. -
Bisque fire:
Fire the piece to cone 04 (or your clay’s specific bisque temperature). -
Glaze application:
Dip or brush the piece with a clear matte glaze. The speckles in the clay body will show through, providing the texture seen in the reference image. -
Final firing:
Fire to the maturity temperature of your stoneware clay (likely cone 5 or 6). Ensure the feet are wiped clean of glaze so they don’t stick to the kiln shelf.
Now you have a sturdy, adorable friend to hold your screen while you work
Tealight Holders With Cutout Shadows
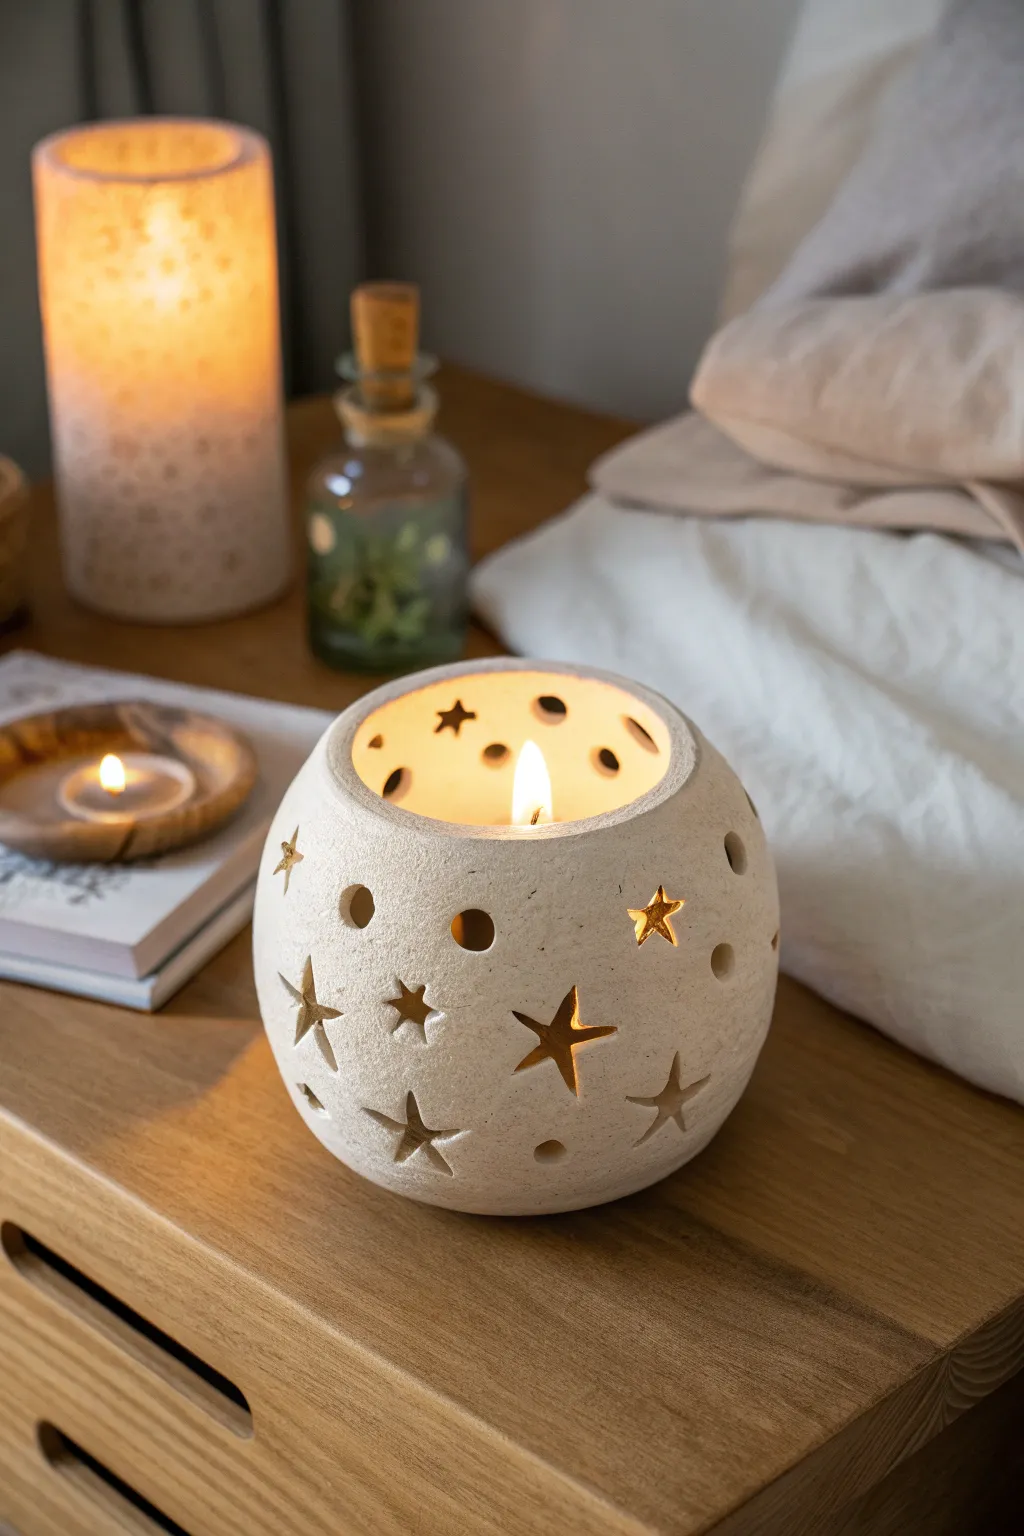
Bring a touch of celestial magic into your bedroom with this charming, handcrafted tealight holder. The simple, rounded form is punctuated by hand-carved stars and circles that cast dancing shadows when lit from within, creating a cozy and dreamy atmosphere.
Detailed Instructions
Materials
- White or speckled stoneware clay (approx. 1-1.5 lbs)
- Pinch pot tools (rib, sponge)
- Miniature star-shaped cookie cutters (various sizes)
- Small circular hole cutter or straw
- Fettling knife or X-Acto knife
- Smooth sanding sponge
- Matte white or transparent glaze (optional)
- Small tealight candle
Step 1: Forming the Sphere
-
Prepare the Clay:
Start by wedging your clay thoroughly to remove air bubbles. Form it into a smooth, tight ball roughly the size of a large orange or grapefruit. -
Open the Pinch Pot:
Hold the clay ball in one hand and push your thumb deep into the center, leaving about 1/2 inch of clay at the bottom for the base. -
Pinch the Walls:
Gently pinch and rotate the clay, working from the bottom up. Aim for an even wall thickness of about 1/4 inch throughout the vessel. -
Collaborate the Shape:
Instead of opening the rim wide like a bowl, gently curve the top edges inward to create a spherical, enclosed form with an opening at the top big enough for your hand. -
Refine the Surface:
Use a flexible rib tool to smooth the exterior, removing your fingerprints and refining the round shape. I like to tap the bottom gently on the table to create a stable, flat foot. -
Dry to Leather Hard:
This is crucial: Let the pot dry until it is ‘leather hard’—firm enough to hold its shape without distorting, but soft enough to cut. This usually takes a few hours or overnight under loose plastic.
Step 2: Carving the Night Sky
-
Plan Your Pattern:
Lightly sketch the positions of your stars and circles on the surface with a needle tool or pencil. Aim for a random, scattered look rather than perfect rows. -
Cut the Stars:
Use your miniature star cutters to punch through the clay walls. Support the wall from the inside with your other hand to prevent collapsing. -
Add Celestial Dots:
Use a small hole cutter or a sturdy straw to punch out circular dots between the stars, adding variety to the light pattern. -
Clean the Edges:
Once the cuts are made, use a small, damp brush or sponge to smooth the sharp edges of the cutouts. Remove any little clay crumbs from the inside. -
Final Smoothing:
Given the textured, stone-like appearance in the photo, you can sponge the exterior with a slightly coarse sponge to expose the clay’s natural grit or grog.
Pro Tip: Sharp Shadows
Make sure your cutout edges are sharp and clean on the inside, not just the outside. Beveling the inner edge of the cut slightly outward allows more light to pass through at angles.
Step 3: Firing and Finishing
-
Bone Dry:
Allow the piece to dry completely. It will feel room temperature to the touch (not cool) and color will lighten significantly. -
Bisque Fire:
Fire the piece in a kiln to bisque temperature (usually Cone 04). This hardens the clay permanently. -
Glazing Strategy:
For the matte, stone look seen here, leave the exterior unglazed or apply a very thin matte wash. You might glaze just the inside to help reflect candlelight better. -
Clean the Foot:
If you applied any glaze, ensure the bottom is wiped completely clean so it doesn’t fuse to the kiln shelf. -
Glaze Fire:
Fire the piece a second time to the maturation temperature of your specific clay body (e.g., Cone 5 or 6 for stoneware). -
Final Sanding:
Once cool, use a sanding pad on the bottom to ensure it sits perfectly flat and won’t scratch your furniture.
Troubleshooting: Warping
If your sphere slumps while cutting, the clay is too wet. Stop and let it stiffer up. If it cracks while cutting, it’s too dry—spritz lightly with water and wrap in plastic for an hour.
Now dim the lights, drop in a tealight, and enjoy the starry galaxy you’ve created right on your nightstand
Incense Holders With Built-In Ash Trays
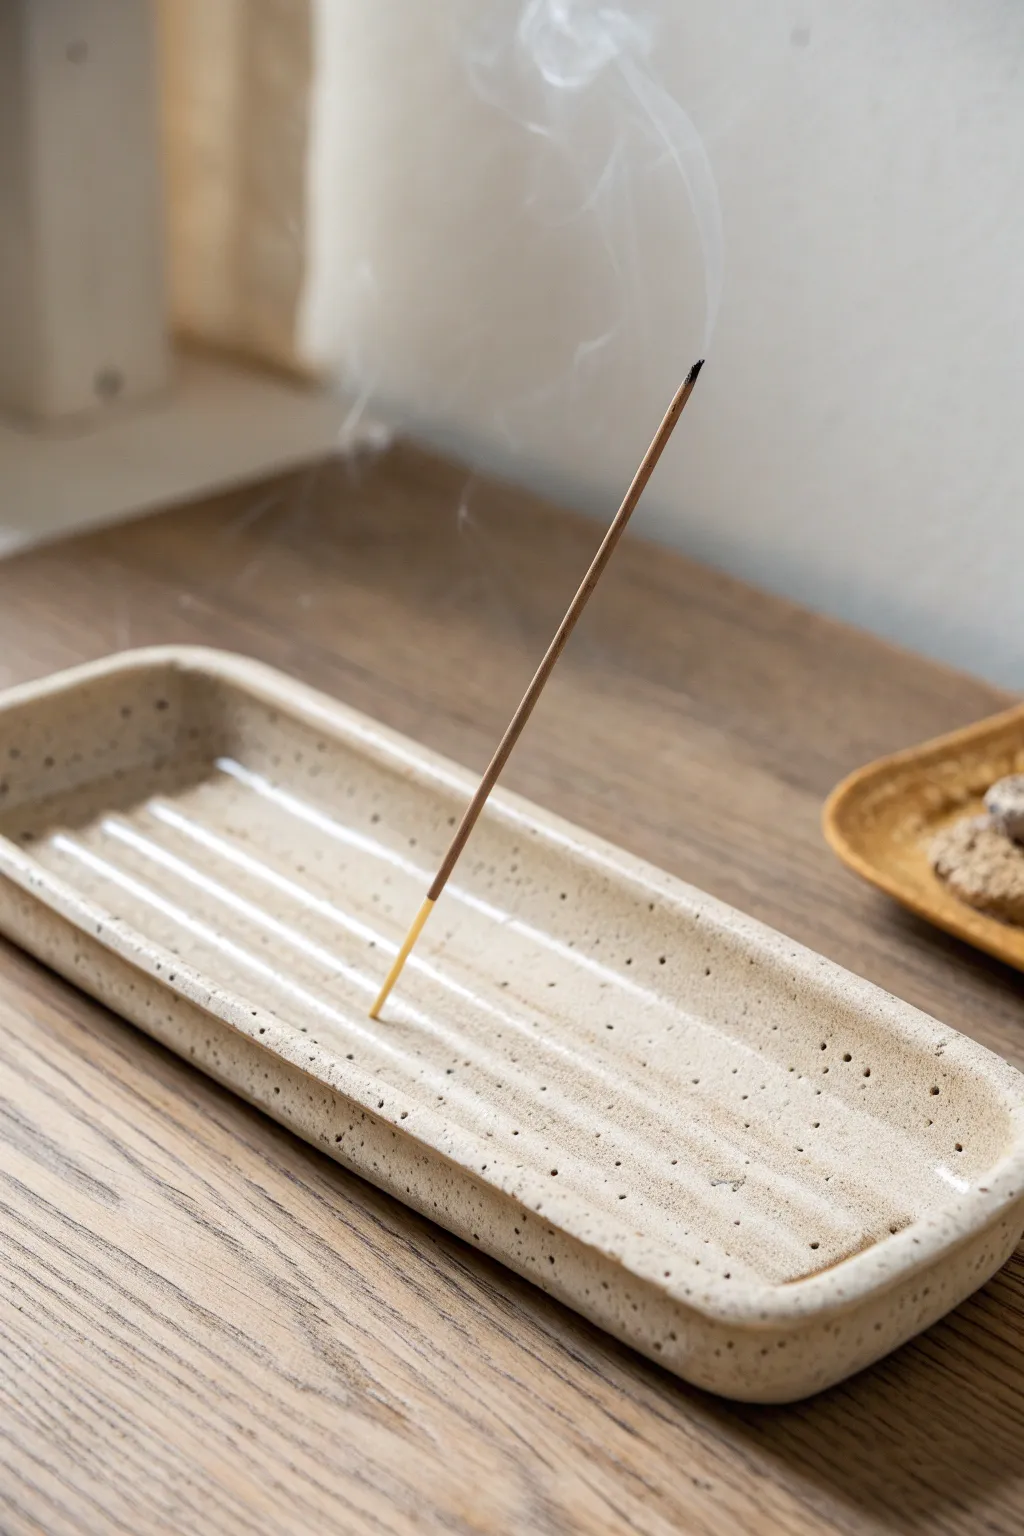
This elegant incense holder combines minimalist design with practical functionality, featuring deep grooves to catch falling ash effortlessly. The speckled clay body and soft, rounded corners give it a modern, organic aesthetic perfectly suited for calming spaces.
Step-by-Step Tutorial
Materials
- Speckled stoneware clay (mid-fire)
- Rolling pin
- Two wooden depth guides (approx. 1/4 inch thick)
- Fettling knife
- Wooden modeling tool with a rounded edge
- Small sponge
- Incense stick (for sizing)
- Needle tool or small drill bit
- Clear matte glaze
Step 1: Forming the Base
-
Prepare the Clay:
Begin by wedging a pound of speckled stoneware clay to remove air bubbles and ensure a uniform consistency. Pat it into a rough rectangular block. -
Roll the Slab:
Place your clay between two wooden depth guides on a canvas-covered surface. Roll the clay out into an even slab about 1/4 inch thick. -
Cut the Shape:
Using a fettling knife, cut a rectangle approximately 3 inches wide by 9 inches long. You can use a paper template if you want precise measurements, but eyeballing it works for a more organic feel. -
Round the Corners:
Gently smooth and round off the four sharp corners of your rectangle using your fingertip or a damp sponge to achieve the soft silhouette seen in the image.
Step 2: Creating the Walls
-
Roll Coils:
Roll out a long, even coil of clay, roughly the thickness of a pencil. -
Score and Slip:
Score the outer perimeter of your rectangular base and apply a small amount of slip or water. -
Attach the Wall:
Place the coil along the scored edge to create a raised rim. Gently press it down to ensure a good bond. -
Pinch and Seamless:
Use your thumb and forefinger to pinch the coil upwards to create height. Using a wooden tool or your finger, blend the inside seam of the coil down into the base slab until the join is invisible. -
Refine the Rim:
Smooth the outside of the coil downwards to blend it with the slab edge. Run a damp sponge over the rim to ensure it is level and uniform.
Clean Lines Pro Tip
When blending the coil wall to the base, support the outside wall with one hand while smoothing the inside with the other to keep the walls vertical and straight.
Step 3: Detailing the Interior
-
Mark Groove Lines:
Lightly sketch three or four parallel lines running lengthwise down the center of the tray using a needle tool. These will be your guides for the ridges. -
Carve the Channels:
Using a rounded wooden modeling tool or a loop tool, gently press or carve along your guide lines to create shallow, concave channels. I like to dampen the tool slightly to help it glide. -
Smooth the Ridges:
Run a damp finger along the channels to smooth out any rough clay crumbs and soften the transitions between the ridges. -
Drill the Holder Hole:
Select a spot on the center ridge, roughly in the middle or slightly towards one end. Use a needle tool or small drill bit to pierce a hole for the incense stick. Angle it slightly if you want the stick to lean. -
Test Fit:
Carefully insert a spare incense stick (the wooden end) to ensure the hole is wide enough. Keep in mind clay shrinks during firing, so make the hole slightly larger than needed.
Level Up: Texture
Leave the exterior of the tray unglazed or use a raw clay finish. The contrast between the smooth, glazed interior grooves and the rougher, matte exterior adds tactile interest.
Step 4: Finishing and Firing
-
Slow Drying:
Loosely cover the piece with plastic and allow it to dry slowly to the leather-hard stage to prevent warping. -
Bisque Fire:
Once bone dry, fire the piece to bisque temperature (usually cone 04 or 06, depending on your clay body). -
Glaze Application:
Wipe the bisque piece with a damp sponge to remove dust. Dip or brush on a clear matte glaze. This will seal the clay while letting the natural speckles show through. -
Glaze Fire:
Fire the piece again to the maturation temperature of your clay (likely Cone 5 or 6 for stoneware).
Once fired, place your favorite scent in the holder and enjoy the peaceful atmosphere you’ve created
Bookends With Bold Geometric Shapes
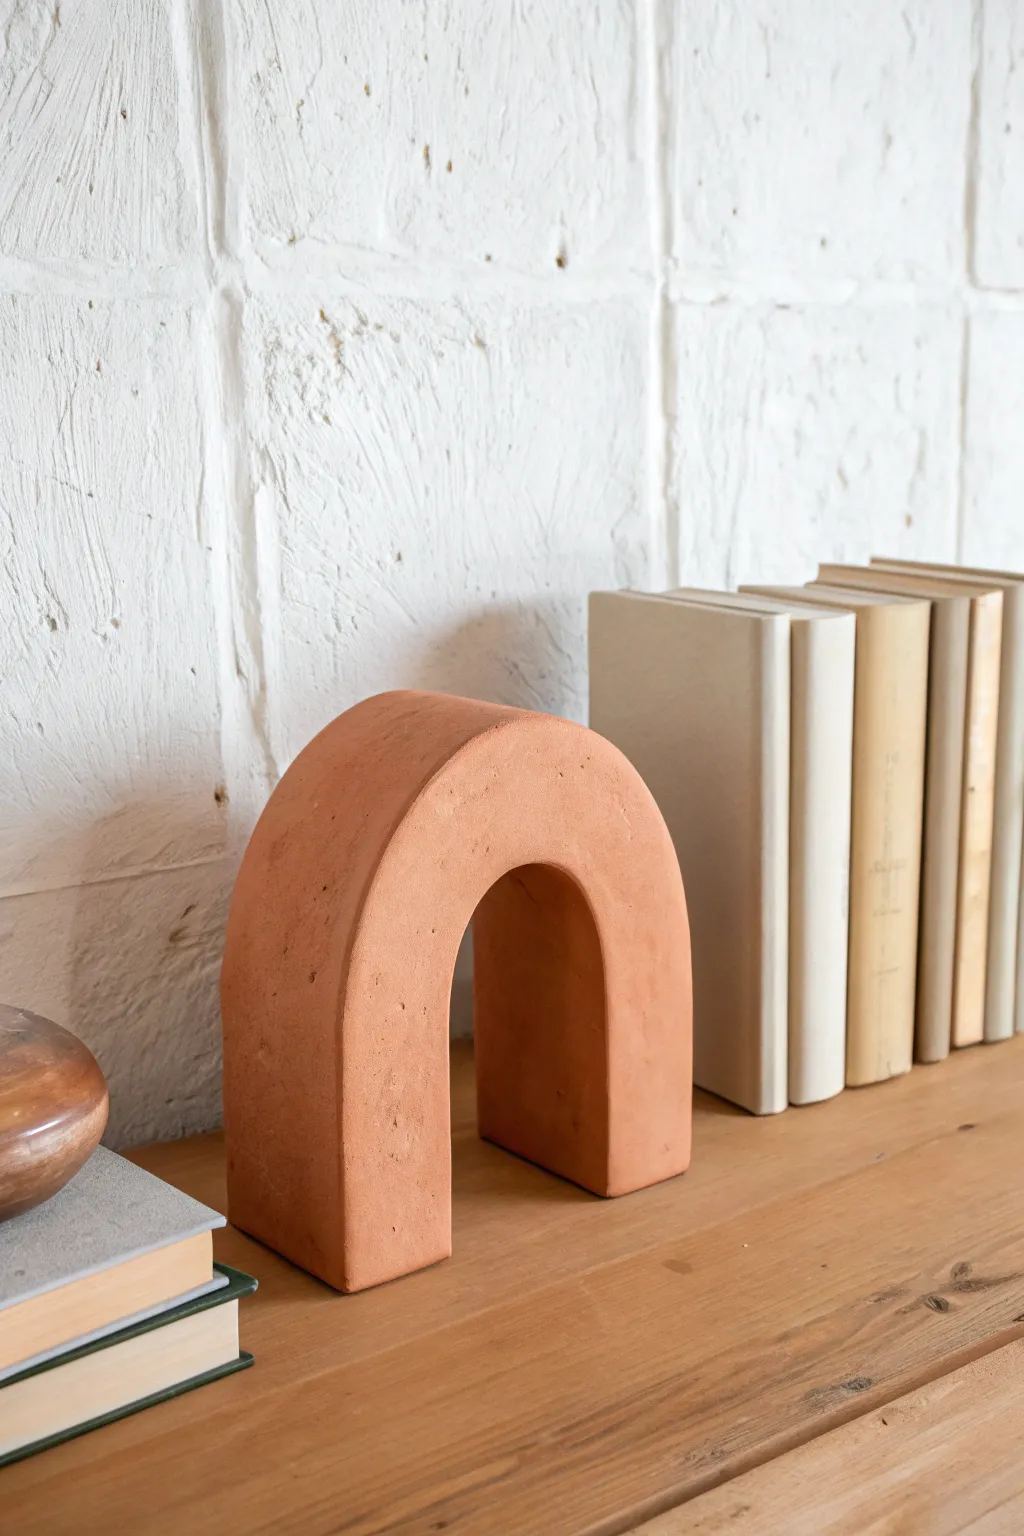
Bring warmth and modern architectural vibes to your bookshelf with this chunky terracotta arch. Its substantial weight and textured finish make it not just a striking sculptural piece, but a sturdy, functional bookend that holds its ground.
Step-by-Step Guide
Materials
- Air-dry clay (terracotta color)
- Cardboard or foam core (for the mold)
- Craft knife or box cutter
- Rolling pin
- Ruler
- Tape (masking or painters)
- Sandpaper (medium and fine grit)
- Clay sculpting tools or a butter knife
- Water and a sponge
- Weighted filling (optional: dried beans, sand, or heavy scrap clay)
Step 1: Creating the Mold
-
Design the arch profile:
Begin by sketching your arch shape on a piece of sturdy cardboard. For a standard bookend, aim for about 6 inches tall and 4-5 inches wide. Use a bowl or compass to get a perfect curve at the top. -
Cut the formwork:
Cut out two identical arch shapes from your cardboard. These will form the front and back of your temporary mold. -
Prepare the side strips:
Measure the curved perimeter of your arch and the straight bottom and inner sections. Cut long strips of cardboard roughly 2-3 inches wide—this width determines how thick and chunky your bookend will be. -
Assemble the structure:
Tape the cardboard strips between the two arch faces to create a hollow 3D box. Leave the bottom open for now so you can access the interior if needed, or build it as an open-faced mold (just walls) if you prefer the slab-building method.
Seamless Corners
When joining two clay slabs at a 90-degree angle, cut the edges at a 45-degree angle (beveling) before joining. This creates a stronger bond and a sharper, cleaner corner.
Step 2: Building the Form
-
Condition the clay:
Knead your terracotta air-dry clay thoroughly until it’s warm and pliable. This prevents cracking later on. -
Roll out slabs:
Roll the clay onto a smooth surface using guide sticks or a ruler to ensure an even thickness of about 1/4 to 1/2 inch. You want sturdy slabs for this project. -
Cut the panels:
Using your cardboard mold as a template (or building directly inside the mold lined with plastic wrap), cut two arch shapes for the faces and long strips for the sides and inner curve. -
Construct the shell:
If using the cardboard box as an internal support (armature), apply the clay slabs directly onto the cardboard. Score and slip the edges where clay meets clay to bond them permanently. -
Add internal weight:
If you aren’t using a solid cardboard core, I recommend filling the hollow bottom half of the structure with heavier scrap clay or a small bag of sand before sealing the bottom. This ensures it’s heavy enough to hold large books. -
Seal the seams:
Use a modeling tool or your finger to smooth out the seams where your slabs join. Add a little coil of clay into the corners if needed for reinforcement.
Faux Stone Effect
Mix varying sizes of sand or used coffee grounds directly into your clay before rolling it out. This creates a stunning speckled, organic texture.
Step 3: Refining and Finishing
-
Smooth the surface:
With a slightly damp sponge, wipe down the entire surface to remove fingerprints and harsh tool marks. The goal is a uniform look, though a little texture adds character. -
Sharpen the edges:
To get that geometric, architectural look, use a flat wooden paddle or ruler to gently tap the sides and faces, flattening them and sharpening the corners. -
Slow drying process:
Place the bookend in a cool, dry spot away from direct sunlight. To prevent warping, cover it loosely with a plastic bag for the first 24 hours, then uncover it to finish drying over the next 2-3 days. -
Initial look check:
As the clay dries, it will lighten in color. Check for any small cracks that appear during shrinking; fill these immediately with a wet slurry of clay. -
Sand for texture:
Once bone dry, use medium-grit sandpaper to even out stubborn bumps. Finish with fine-grit sandpaper to achieve a soft, stone-like feel. -
Clean up dust:
Wipe the piece with a dry cloth or soft brush to remove all sanding dust. -
Seal the piece:
Apply a clear matte varnish or sealant to protect the clay from moisture and handling, which helps maintain that raw terracotta aesthetic without the dust.
Now you have a substantial, custom-made piece of decor ready to organize your shelves with style
Flower Frogs for Effortless Arrangements
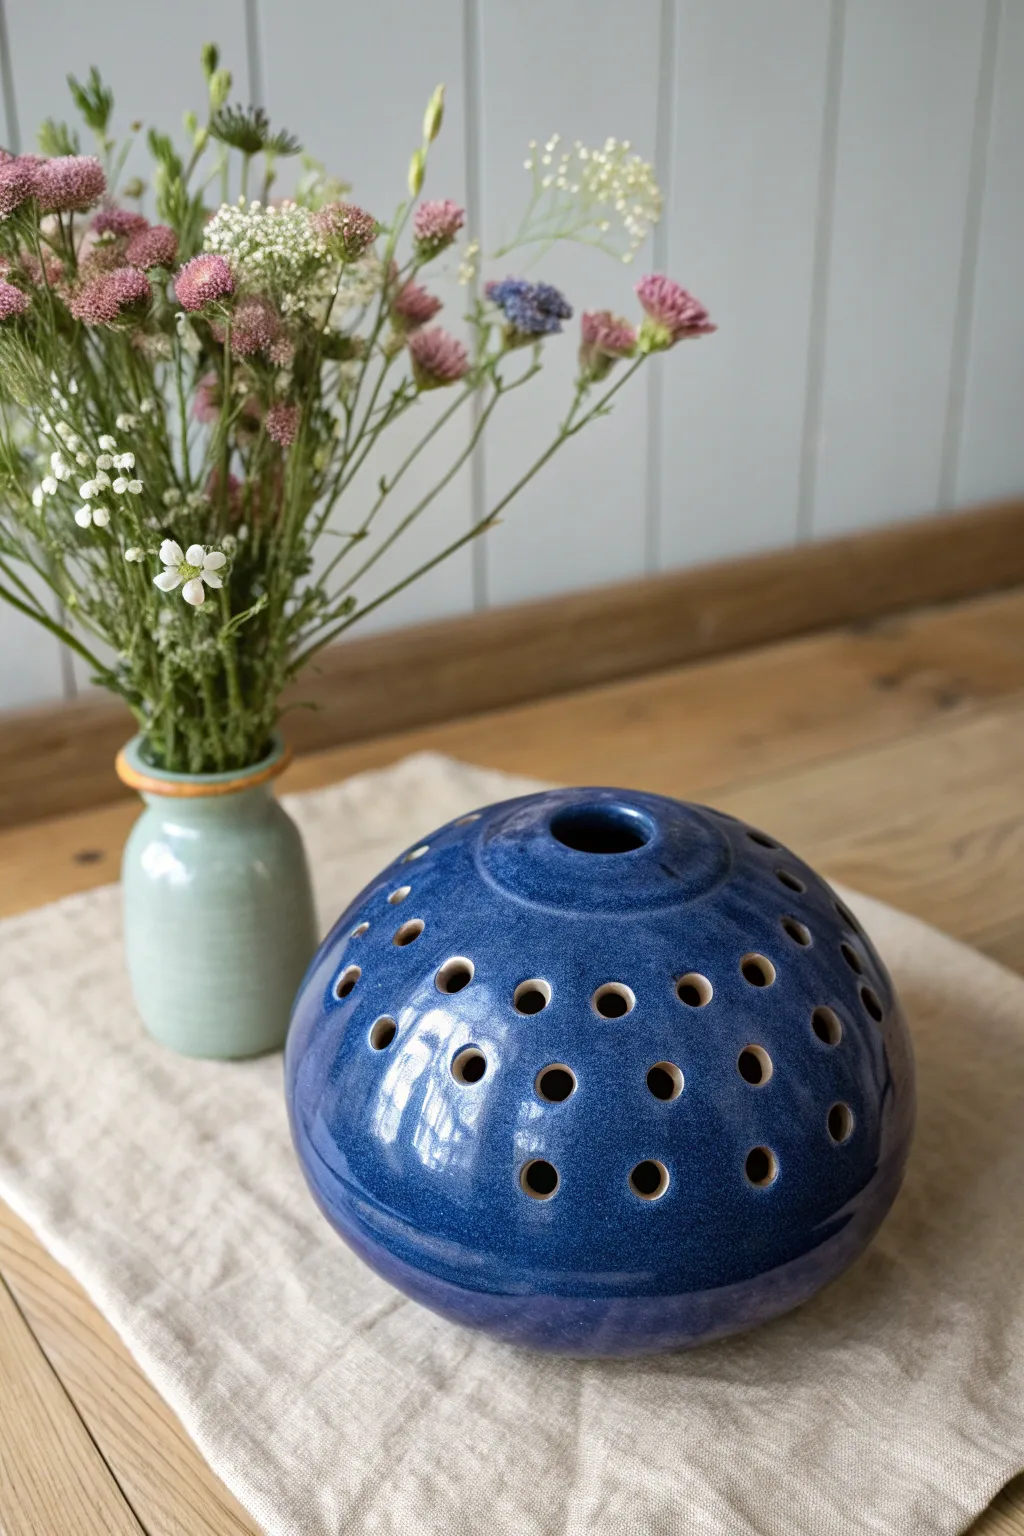
This stunning ceramic flower frog features a rich, speckled cobalt glaze and a spherical form designed to hold stems securely at various angles. It’s a perfect blend of sculpture and utility, transforming a simple bouquet into an arranged masterpiece.
Step-by-Step Tutorial
Materials
- Stoneware clay body (smooth)
- Pottery wheel (or rolling pin for hand-building)
- Needle tool
- Sponge
- Wire cutter
- Hole cutters (various sizes, typically 5mm – 10mm)
- Rib tool (wooden or metal)
- Cobalt blue reactive glaze
- Kiln
Step 1: Forming the Sphere
-
Prepare the Clay:
Begin by thoroughly wedging about 2-3 pounds of stoneware clay to remove any air bubbles. This ensures your sphere won’t crack during firing. -
Center on the Wheel:
Throw the clay onto the wheel head and center it perfectly. I like to cone the clay up and down twice to align the particles before opening. -
Open and Pull:
Open the clay as if making a bowl, leaving the floor slightly thicker than usual. Pull the walls upward and curve them inward aggressively to start forming a closed dome shape. -
Close the Form:
Continue collaring the neck inward until you have nearly closed the top, leaving a small opening about 1-1.5 inches wide. This will be the central stem hole. -
Refine the Curve:
Use a flexible metal or wooden rib on the outside while gently pressing from the inside (if your hand still fits) to create a perfect, taut curve. Smooth out any throwing lines for a sleek surface. -
Trim the Base:
Use a wooden knife to undercut the base slightly, creating a shadow line that lifts the form visually. Cut the sphere off the wheel with a wire tool.
Step 2: Creating the Frog Mechanism
-
Leather Hard Stage:
Allow the piece to dry slowly to a leather-hard state. It should be firm enough to handle without deforming but soft enough to cut cleanly. -
Trim the Bottom:
Flip the piece over and trim the bottom on the wheel or by hand to create a smooth, flat foot ring. This ensures stability when it’s full of water and flowers. -
Plan the Holes:
Lightly mark the positions for your holes with a needle tool. Create a radial pattern or a random scatter, but ensure they are spaced evenly enough to maintain structural integrity. -
Punch the Holes:
Using a sharp hole cutter tool, punch holes through the clay wall at your marked spots. Twist the tool gently as you withdraw it to keep the edges clean. -
Clean and Smooth:
Once all holes are punched, use a small damp sponge or your finger to smooth the sharp edges of each hole. Rough edges can snag delicate flower stems later. -
Final Drying:
Let the piece dry completely to the bone-dry stage. Cover it loosely with plastic for the first day to ensure even drying, as the areas around the holes are fragile.
Sticky Situation
Glaze running into holes? Before dipping, use a Q-tip to apply a tiny bit of wax resist inside each hole. The glaze will bead away, leaving the openings perfectly clear.
Step 3: Glazing and Firing
-
Bisque Fire:
Fire the piece in the kiln to a bisque temperature (usually Cone 04 or 06). This prepares the clay to accept the glaze. -
Apply Wax Resist:
Apply wax resist to the bottom foot ring to prevent the glaze from adhering where the pot touches the kiln shelf. -
Glaze Interior:
Pour a small amount of glaze inside the sphere, roll it around to coat the interior, and pour out the excess. This makes the vessel fully waterproof. -
Dip or Spray Exterior:
Dip the entire sphere into a bucket of deep cobalt blue reactive glaze. Alternatively, spray the glaze for an even coat. Ensure the glaze doesn’t clog the smaller holes; blow gently through them if needed. -
Cleaning Holes:
Check every single hole again. If glaze has bridged any opening, clean it out with a small brush or needle tool so the hole remains open after firing. -
Glaze Fire:
Fire the piece to the maturity temperature of your clay and glaze (often Cone 5 or 6). Allow the kiln to cool naturally.
Two-Tone Effect
Dip the top third of the sphere into a different, lighter glaze like a floating white. Where it overlaps the cobalt, you’ll get fascinating drips and color breaks.
Now you have a functional sculpture ready to turn even a few wild stems into an elegant display
Carved Story Vessels With Hidden Scenes
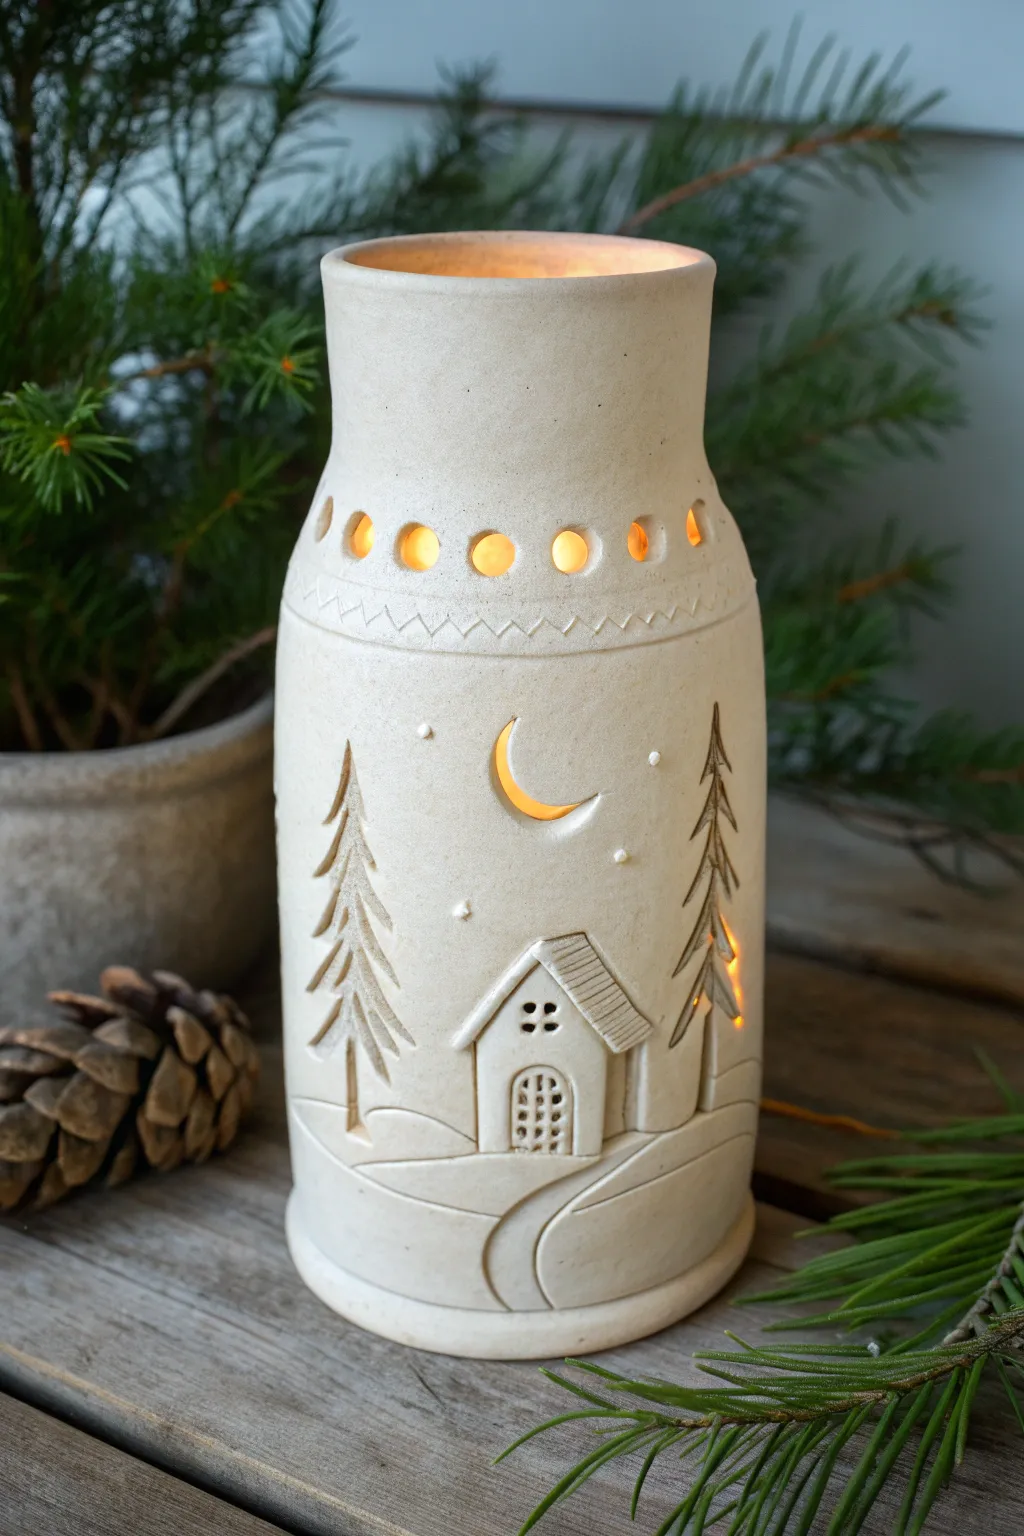
Illuminate your winter evenings with this charming carved story vessel, crafted from creamy stoneware clay to glow with warmth. The cylindrical form features a relief-carved woodland scene where light peeks through a crescent moon and clever cutouts, creating a cozy atmosphere on any mantle.
Step-by-Step
Materials
- Light-colored stoneware clay (smooth body)
- Rolling pin and guide strips (approx. 1/4 inch)
- Cylindrical form for draping (PVC pipe or bisque mold, approx. 4-inch diameter)
- Needle tool
- Fettling knife
- Small circular clay cutter (1/2 inch)
- Carving loop tools (small and medium)
- Slip and scoring tool
- Sponge and water
- Flexible metal rib
- Clear matte glaze (optional) or raw finish
Step 1: Constructing the Cylinder
-
Roll the Slab:
Begin by rolling out your clay slab on a canvas surface. Use guide strips to ensure an even thickness of about 1/4 inch, which provides enough stability for the vessel walls without being too heavy. -
Cut to Size:
Measure and cut a rectangular strip approximately 13 inches long by 8 inches tall (adjust based on your cylinder mold circumference). Reserve the excess clay for the base. -
Form the Cylinder:
Wrap the rectangular slab around your cylindrical mold or PVC pipe. Be careful to handle the clay gently to avoid stretching it unevenly. -
Join the Seams:
Score the meeting edges thoroughly and apply clay slip. Press the edges together firmly. I like to use a small wooden roller or paddle over the seam to ensure it is completely integrated and invisible. -
Attach the Base:
Cut a circle from your reserved clay slightly larger than the cylinder’s diameter. Score and slip the bottom edge of your cylinder and the perimeter of the base, then join them. Trim any excess clay flush with the wall. -
Shape the Neck:
Gently collar the top inch of the cylinder inward to create a slightly tapered neck. Use wet fingers to smooth and compress the rim so it is rounded and durable.
Collapsing Walls?
If the cylinder sags while you work, the clay is too wet. Stuff the inside lightly with newspaper or foam to support the shape, then wait until it reaches a true leather-hard state.
Step 2: Carving the Narrative Scene
-
Draft the Design:
Once the clay is leather-hard (firm but cool to the touch), lightly sketch your scene onto the surface using a needle tool. Draw the winding path, the house silhouette, and the trees. -
Carve the Background:
Using a small loop tool, gently carve away the clay *around* the trees and house. This technique, called relief carving, makes your subject matter pop out. Remove about 1/8 inch of depth. -
Detail the Trees:
Use a sharp needle tool or knife to incise downward strokes on the tree shapes, mimicking the texture of pine boughs. -
Create the Cottage:
Define the roof shingles with small overlapping lines. For the windows and door, cut all the way through the clay wall so the candlelight will shine out from the ‘interior’ of the house. -
Add Celestial Details:
Cut a crescent moon shape completely through the clay in the upper sky area. Use the tip of your needle tool to poke small holes for stars or add small raised dots of slip for texture. -
Sculpt the Path:
Carve deep, fluid grooves to define the winding path leading to the cottage door. Smooth the edges of these grooves with a damp sponge so they look like soft snow banks.
Step 3: Upper Decoration and Finishing
-
Add the Upper Border:
Just below the tapered neck, use your needle tool to scratch a horizontal decorative band. A zigzag pattern works beautifully here to frame the top of the scene. -
Cut the Light Ring:
Using your small circular cutter, punch a row of evenly spaced holes around the neck of the vessel. Support the clay from the inside with one hand to prevent the wall from buckling as you press. -
Clean and Smooth:
Go over the entire piece with a barely damp sponge. Remove any sharp burrs or clay crumbs from the carving process, paying special attention to the cutout windows and moon. -
Drying:
Cover the vessel loosely with plastic for the first 24 hours to let the moisture equalize, then uncover it to dry completely. This slow drying helps prevent the seam from cracking. -
Firing:
Bisque fire the piece. If you want the natural stone look shown here, fire it to maturity without glaze, or dip just the inside in a clear glaze for easier cleaning later.
Sharp Cutouts
rest your finger on the inside of the wall directly behind where you are cutting. This creates resistance and results in much cleaner window and moon cutouts with less cleanup needed.
Place a tea light or LED candle inside your finished vessel and watch your snowy scene come to life with a gentle glow