A good clay name plate is like a tiny hello you get to sculpt—part practical sign, part mini art piece. Here are my favorite ways to mix typography, texture, and sweet little details so your family name (and even your house number) feels truly handmade.
Stamped Block-Letter Name Plate
This rustic yet refined name plate captures the warmth of traditional terracotta with a crisp, modern typographical touch. Its speckled, glossy finish and deeply impressed block letters make it a charming addition to a desk or a thoughtful personalized gift.
Step-by-Step Tutorial
Materials
- Terracotta-colored polymer clay (e.g., Sculpey or Fimo)
- Speckled clay effects (black pepper or fine dark glitter) if using plain clay
- Rolling pin or acrylic roller
- Rectangle clay cutter or craft knife
- Large serif alphabet stamps
- Sandpaper (fine grit)
- Gloss glaze or varnish for polymer clay
- Paintbrush (soft bristle)
- Baking sheet and parchment paper
- Ruler
Step 1: Preparing the Base
-
Condition the Clay:
Begin by warming the terracotta polymer clay in your hands, kneading it until it becomes soft and pliable. If your clay doesn’t already have speckles, knead in a small pinch of coarse black pepper or specialty clay inclusions to achieve that earthy, stone-like texture. -
Roll out the Slab:
Place the conditioned clay on a clean, flat surface. Using your acrylic roller, roll the clay out into an even slab. Aim for a thickness of about 1/4 inch (6mm) to ensure the plate feels substantial and sturdy. -
Cut the Shape:
Use a rectangular clay cutter for precise lines, or use a ruler and craft knife to cut a rectangle approximately 3 inches by 5 inches. Clean up any ragged edges by gently running your finger along the cut line.
Uneven Impressions?
If your letters aren’t pressing to the same depth, place a thin book or acrylic block on top of all the stamps at once and press down evenly, rather than doing them one by one.
Step 2: Stamping and Shaping
-
Plan Your Spacing:
Before pressing into the clay, lay your alphabet stamps gently on the surface to determine the spacing. Center the word ‘NAME’ on the top line and ‘PLATE’ directly beneath it to check alignment. -
Impress the Letters:
Press each stamp firmly and evenly into the clay. Rock the stamp extremely slightly to ensure the serif edges catch, but be careful not to create a double impression. Lift the stamp straight up to keep the edges crisp. -
Create the Rim:
To create the raised dish shape, gently pinch the outer perimeter of the rectangle upwards. Use your thumb on the inside and forefinger on the outside to mould a subtle lip, smoothing the corners so they round off slightly. -
Refine the Surface:
Check for any fingerprints or accidental nail marks. I find that a tiny drop of baby oil on a finger works wonders for smoothing out these imperfections before baking.
Gold Fill Effect
After baking but before glazing, use a fine-tip brush to paint gold acrylic paint inside the impressed letters. Wipe the surface quickly with a damp cloth to leave gold only in the grooves.
Step 3: Baking and Finishing
-
Bake the Piece:
Transfer your name plate to a parchment-lined baking sheet. Bake according to the manufacturer’s instructions for your specific brand of clay—usually around 275°F (135°C) for 15-30 minutes depending on thickness. -
Cool and Sand:
Allow the piece to cool completely on a flat surface. Once hard, use fine-grit sandpaper to gently buff the edges or any rough spots on the rim, wiping away the dust with a damp cloth afterward. -
Apply the Glaze:
Dip a soft brush into your gloss glaze. Apply a thin, even coat over the entire top surface, including inside the stamped letters. This gives the piece that wet, ceramic look. -
Dry and Recoat:
Let the first coat dry fully. For a higher shine and better protection, add a second coat of glaze, paying attention to the rim where handling usually occurs.
Place your finished name plate on your desk or vanity to enjoy that custom, handcrafted charm every day

Hand-Lettered Script Name Plate
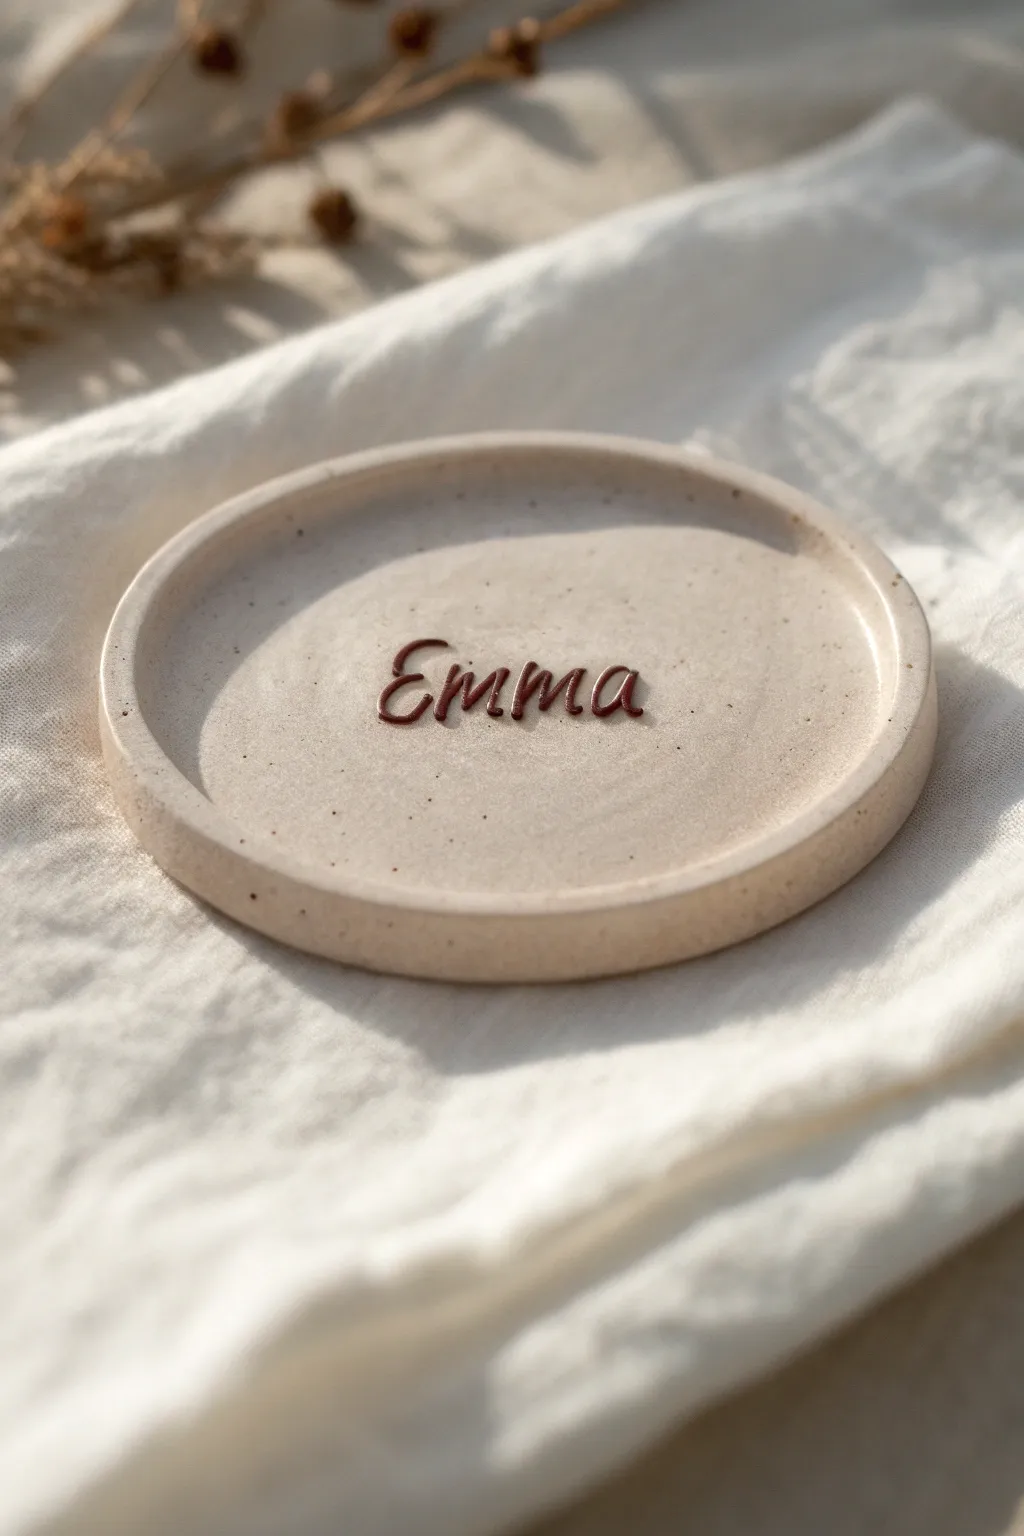
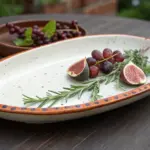
This elegant and understated trinket dish features a smooth, speckled stone finish with custom raised lettering for a personalized touch. The delicate cursive script creates a dimensional effect that looks professional yet is surprisingly achievable at home.
Step-by-Step Guide
Materials
- White or beige polymer clay (preferably ‘granitex’ or speckled finish)
- Dark brown or burnt umber liquid polymer clay
- Rolling pin or acrylic roller
- Round cookie cutter or jar lid (approx. 4 inches)
- Sandpaper (fine grit)
- Small squeeze bottle with fine-tip precision nozzle
- Tracing paper and pencil
- Soft paintbrush
- Oven-safe baking tile or tray
- Matte glaze or sealant (optional)
Step 1: Shaping the Base
-
Condition the clay:
Begin by warming the speckled polymer clay in your hands, kneading it until it is soft, pliable, and free of cracks. -
Roll it out:
Using your acrylic roller, flatten the clay into a smooth sheet. Aim for a thickness of about 1/4 inch (6mm) to ensure the final dish feels substantial. -
Cut the circle:
Press your large round cutter or jar lid firmly into the clay sheet to create a perfect circle. Peel away the excess clay from the edges. -
Form the rim:
Gently pinch and push the edges of the circle upward with your thumbs while rotating the piece. This creates a shallow, raised lip around the perimeter. -
Smooth the edges:
Dip your finger in a tiny bit of water or clay softener and run it along the rim to blend any fingerprints or rough spots, ensuring a seamless curve. -
Check surface level:
Place the dish on your baking tile. Ensure the bottom is flat and touching the surface evenly so it doesn’t wobble after baking.
Step 2: Adding the Script
-
Draft your name:
On a piece of paper, write or print out the name ‘Emma’ (or your chosen word) in a cursive font to serve as your guide. -
Transfer the guide:
Lightly trace the name onto tracing paper. Place the paper centrally on the unbaked clay and gently rub over the lines with a blunt tool to leave a faint indentation guide. -
Prepare the liquid clay:
Fill your precision squeeze bottle with the dark brown liquid polymer clay. Tap the bottle upside down to remove air bubbles. -
Test the flow:
Before moving to your project, squeeze a line onto a scrap piece of paper. The flow should be steady and consistent, like icing a cookie. -
Pipe the letters:
Carefully trace over your indented guide on the clay dish with the liquid clay. Move slowly, keeping steady pressure to maintain an even line thickness. -
Refine the script:
If a line ends abruptly, use a needle tool or toothpick to gently drag the liquid clay into a tapered point for a natural calligraphy look.
Air Bubble Prevention
Tap the clay dish firmly on the table before adding lettering. This brings trapped air bubbles to the surface, where they can be popped with a pin.
Step 3: Baking and Finishing
-
Bake the project:
Place the tile with the dish into a preheated oven according to your manufacturer’s instructions (usually 275°F or 130°C for 15-30 minutes). -
Let it cool:
Allow the piece to cool completely inside the oven with the door slightly ajar. This prevents thermal shock and cracking. -
Sand for perfection:
Once fully cooled, take your fine-grit sandpaper and very gently buff the outer rim to remove any tiny imperfections. -
Optional sealing:
I usually prefer the matte look of the raw clay, but if you plan to use this near water, brush on a thin layer of matte sealant for protection.
Metallic Accent Upgrade
After baking, paint the raised edge of the liquid clay lettering with a very fine line of liquid gold leaf for a luxurious, mixed-metal effect.
Now you have a chic, modern nameplate dish perfect for holding jewelry or gifting to a friend.


House-Shaped Door Name Plate
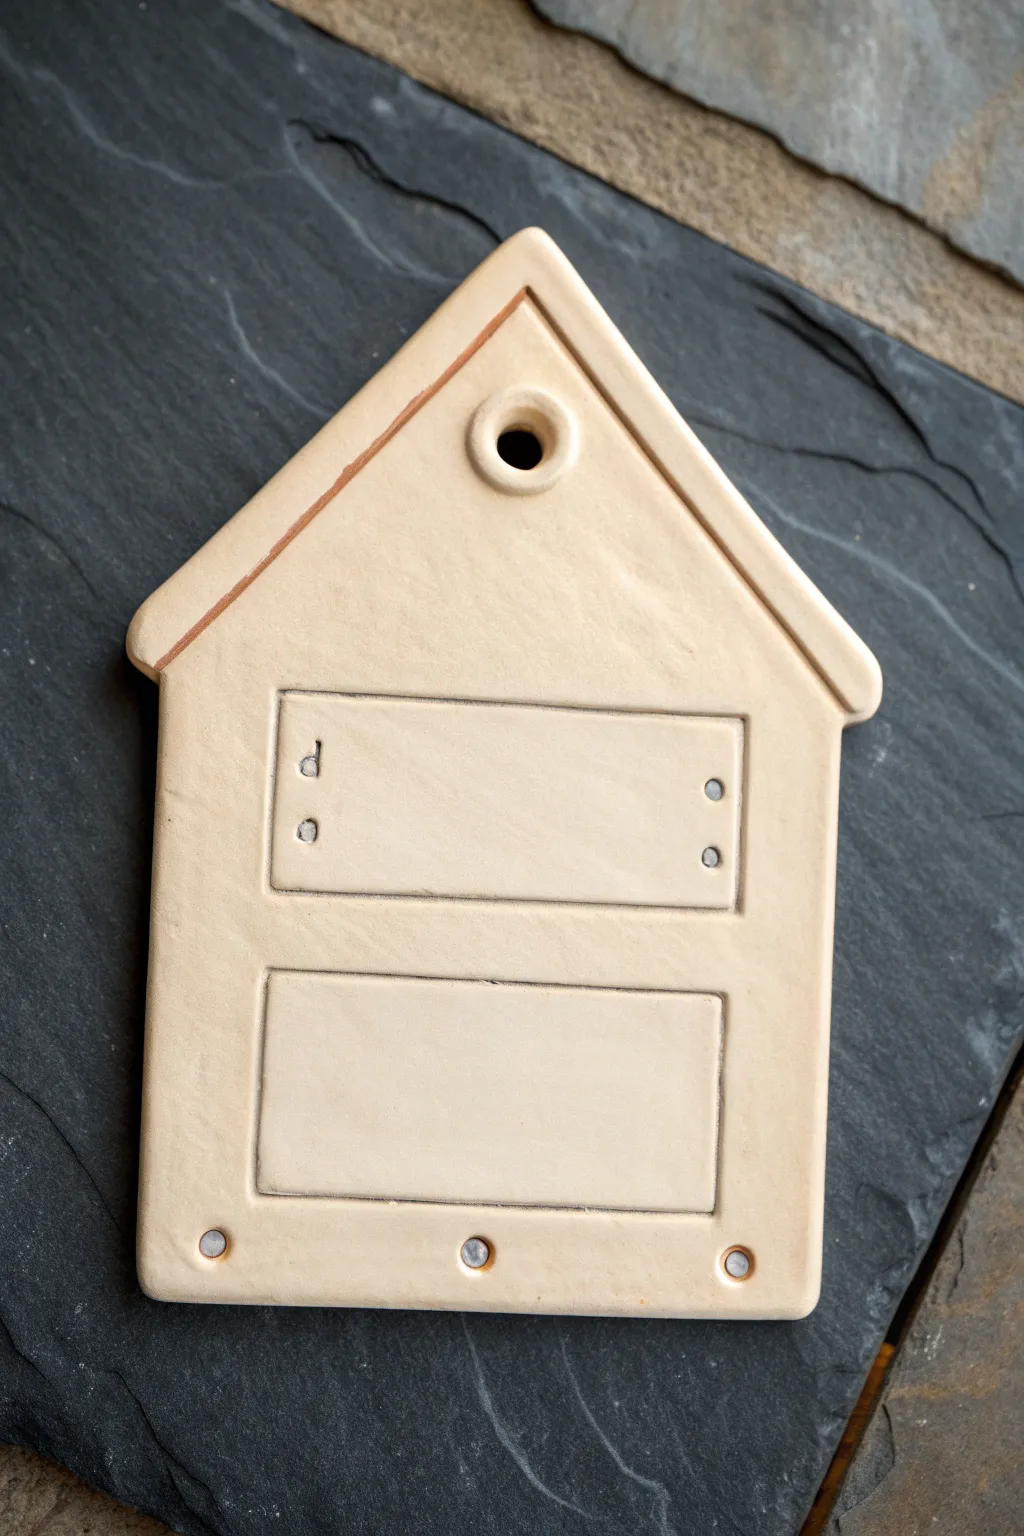
This charming, unglazed clay nameplate offers a minimalist and welcoming touch to any entryway. Its simple house silhouette features recessed rectangular zones for customization and pre-punched holes for easy hanging and assembly.
Detailed Instructions
Materials
- Rolled slab of stoneware or high-quality air-dry clay
- Rolling pin
- Two wooden guide strips (approx. 1/4 inch thick)
- Needle tool or fettling knife
- Ruler or straight edge
- Small circular cutter or straw (for hanging hole)
- Smaller straw or drill bit (for rivet holes)
- Carving tool or loop tool (for recessed areas)
- Sponge and water
- Sandpaper (fine grit)
Step 1: Shaping the Base
-
Prepare the slab:
Begin by wedging your clay to remove air bubbles. Place the clay between two wooden guide strips on a canvas mat and roll it out with a rolling pin. This ensures an even thickness across the entire plate. -
Cut the house outline:
Using a paper template or a ruler, lightly sketch a house shape directly onto the clay surface. The shape should have a square base and a triangular roof. -
Refine the edges:
Cut along your sketched lines using a needle tool or fettling knife. Hold the tool perpendicular to the work surface for clean, straight edges. Remove the excess clay. -
Smooth the perimeter:
Dip your finger or a small sponge in a little water and run it along the cut edges to soften any sharpness. This prevents the clay from becoming brittle or sharp after drying.
Step 2: Adding Details & Dimension
-
Create the roofline border:
Use a ruler to lightly impress a V-shaped line inside the roof area, parallel to the outer edges. This creates a subtle border detail that frames the top of the house. -
Mark the text zones:
Measure two rectangular areas in the center of the house body where names or numbers will go. Lightly outline these rectangles with your needle tool. -
Recess the rectangles:
Use a small loop tool to carefully scrape away a thin layer of clay from inside the marked rectangles. Keep the depth consistent and the floor of the recessed area as flat as possible. -
Smooth the recessed area:
I find that using a wet finger or a barely damp brush works best to smooth out the tool marks inside these new recessed zones. -
Punch the main hanging hole:
Position a small circle cutter or a large straw near the peak of the roof. Press firmly to punch out a clean hole for the hanging cord. -
Add protective grommet detail:
Roll a tiny coil of clay and wrap it around the edge of the hanging hole you just punched. Blend the outer edge of the coil into the main slab, leaving the inner ring raised for a reinforced look. -
Punch screw holes:
Using a smaller straw or tool, punch three small holes along the bottom edge and two on the sides of the top rectangle. These can be decorative or functional for attaching metal plates later.
Keep it Flat
To prevent warping, flip the slab over periodically while it dries. Weighting the edges gently can also ensure it stays perfectly flat.
Step 3: Finishing Touches
-
Final smoothing:
Inspect the entire piece for crumbs or rough spots. Use a damp sponge to wipe the surface gently, ensuring the edges of your recessed boxes are crisp. -
Dry slowly:
Place the plate on a wire rack or a piece of drywall to dry. Cover it loosely with plastic for the first day to prevent the corners from curling up as they dry. -
Sand for perfection:
Once the clay is bone dry (or fully cured if using air-dry clay), take a piece of fine-grit sandpaper and gently sand the edges and surface flat. -
Clean up dust:
Wipe away all sanding dust with a dry brush or tack cloth to leave the surface pristine and ready for firing or sealing. -
Fire or seal:
If using ceramic clay, bisque fire the piece to cone 04. If using air-dry clay, apply a matte sealant to protect it from moisture.
Crack Repairs
Tiny cracks at the corners of your rectangles? Create a paste of clay and vinegar (slip) to fill them in before the piece dries completely.
Now your custom nameplate is ready to be painted or hung as a natural, minimalist statement piece


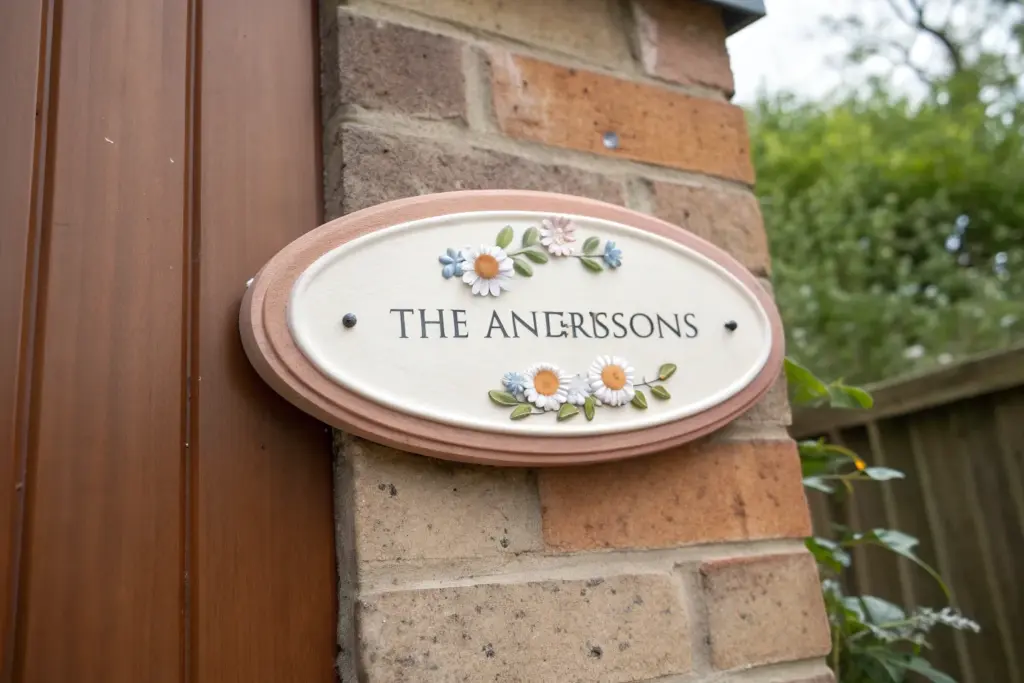
“The Surname Family” Layout

This elegant, timeless nameplate features deep blue lettering impressed into creamy white clay, framed by delicate green botanical accents. The smooth, rounded edges and glossy finish give it a professional ceramic look that fits perfectly with farmhouse or traditional decor.
Step-by-Step Guide
Materials
- White polymer clay or air-dry clay (approx. 1 lb block)
- Rolling pin or clay machine
- Rectangle clay cutter or craft knife
- Letter stamp set (serif font)
- Leaf sprig stamp or needle tool
- Acrylic paints (navy blue, sage green)
- Fine detail paintbrush
- Damp sponge or baby wipes
- GLoss varnish or glaze
- Sandpaper (fine grit)
- Parchment paper or work mat
Step 1: Shaping the Base
-
Condition and roll:
Begin by kneading your white clay until it is soft and pliable. Roll it out on a piece of parchment paper to a uniform thickness of about 1/4 inch to ensure durability. -
Cut the shape:
Use a rectangular cutter or guide a craft knife around a template to cut out the main plaque shape. Aim for a rectangle approximately 6 inches by 4 inches. -
Soften the edges:
Dip your finger in a little water (for air-dry clay) or baby oil (for polymer) and gently run it along the cut edges. You want to round them off slightly to remove that sharp, machined look. -
Smooth the surface:
Check the main face of the plaque for any fingerprints or lint. Gently buff them away with your palm or a smooth roller.
Uneven Stamping?
If a stamp doesn’t leave a deep enough impression, don’t try to realign it perfectly. Instead, smooth that small area with your thumb and stamp again.
Step 2: Imprinting the Design
-
Plan your spacing:
Before stamping, lightly mark the center of your plaque. Use a ruler to visualize where ‘THE’, ‘SURNAME’, and ‘FAMILY’ will sit to keep everything symmetrical. -
stamp the middle line:
Start with the surname in the middle. Press your letter stamps firmly into the clay. I find starting with the center letter of the name and working outward helps keep it perfectly centered. -
Add the supporting text:
Stamp ‘THE’ centered above the name and ‘FAMILY’ centered below it. Use slightly less pressure if you want these words to appear subtler than the main name. -
Add botanical accents:
If you have leaf stamps, press them into the four corners, angling them inward. If not, use a needle tool or toothpick to hand-draw a simple curved stem with small attached leaves. -
Clean up edges:
Stamping can sometimes distort the rectangular shape. gently push the outer edges back in with a ruler to square it up again.
Level Up: Hanging Holes
Before drying, use a straw to punch two clean holes in the top corners. After finishing, thread rustic twine or leather cord through for easy hanging.
Step 3: Curing and coloring
-
Dry or bake:
Follow the instructions for your specific clay type. If baking polymer clay, tent it with foil to prevent yellowing. If air-drying, let it sit for 24-48 hours until fully hard. -
Sand for perfection:
Once fully cured, use fine-grit sandpaper to smooth out any rough texture on the corners or surface. Wipe away all dust with a damp cloth. -
Apply the blue wash:
Dilute a bit of navy blue acrylic paint with water. Brush it generously into the letter impressions, ensuring the paint gets deep into the crevices. -
Wipe the surface:
Immediately take a damp sponge or cloth and wipe the surface of the plaque. This removes the paint from the high points but leaves the blue inside the stamped letters. -
Paint the leaves:
Using a fine detail brush and sage green paint, carefully fill in the leaf impressions. You can use the wipe-back technique here too, or paint them precisely for a bolder look. -
Seal the piece:
Once the paint is completely dry, apply two coats of gloss varnish or glaze. This gives the piece that shine resembling fired ceramic and protects the paint.
Now you have a personalized family heirloom that looks like it came straight from a pottery kiln

The Complete Guide to Pottery Troubleshooting
Uncover the most common ceramic mistakes—from cracking clay to failed glazes—and learn how to fix them fast.
Couple Names With Ampersand Focus
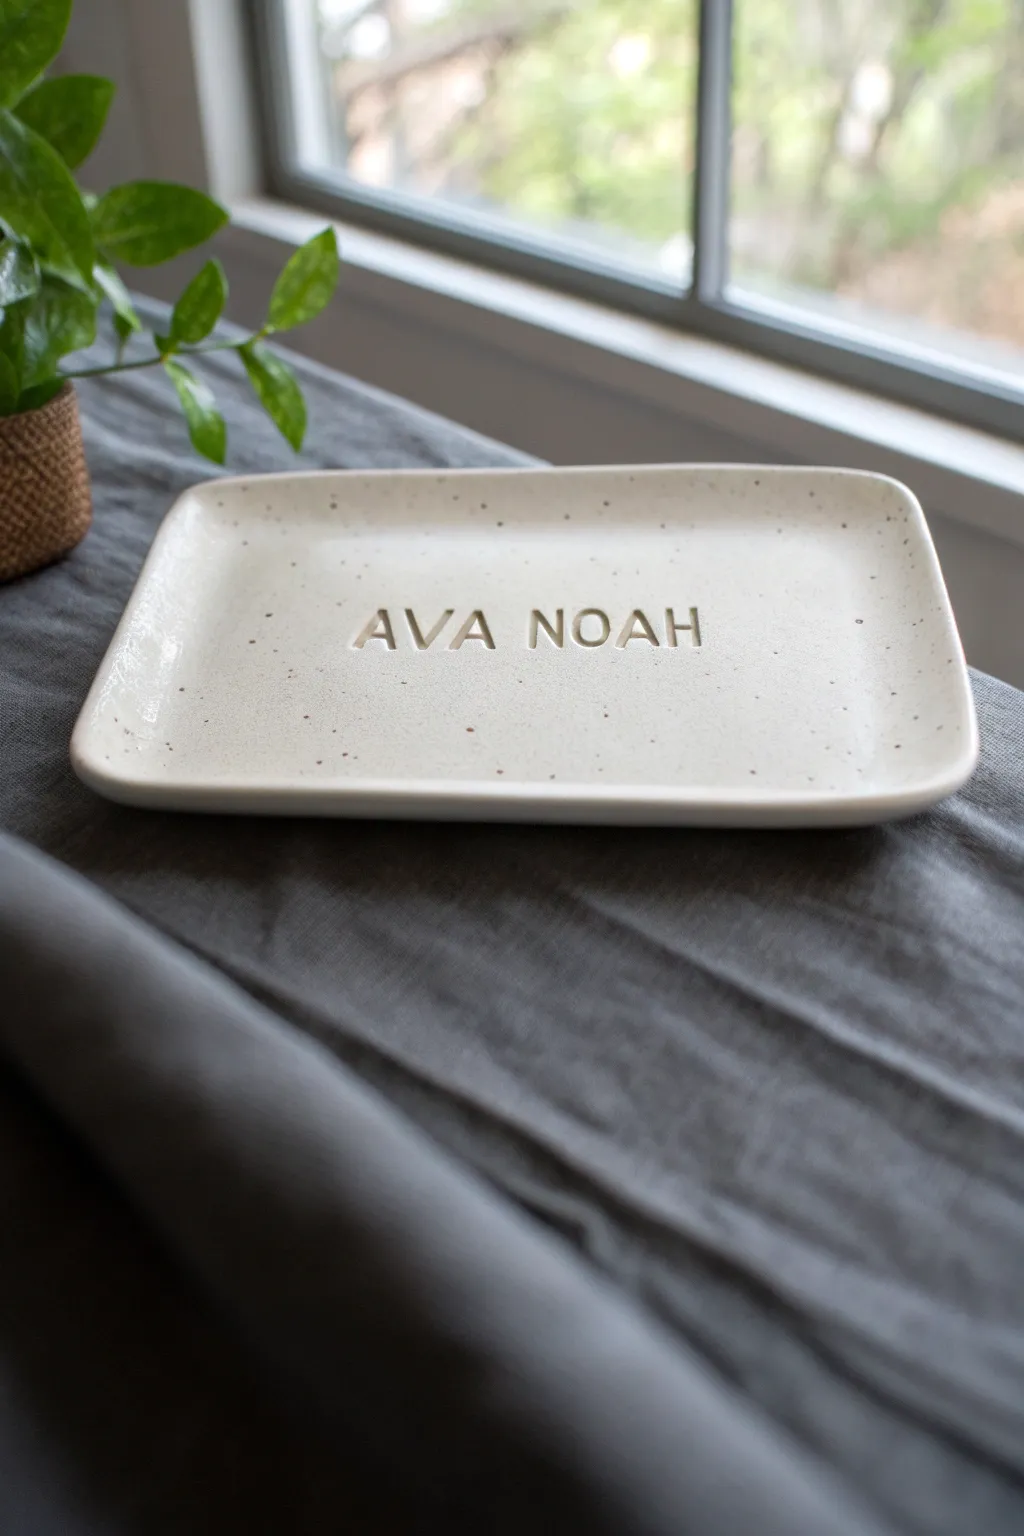
Create a sophisticated and personalized rectangular tray that looks like it came straight from a boutique studio. This project features a natural speckled finish and deeply impressed lettering for clean, modern typography.
Detailed Instructions
Materials
- White polymer clay (approx. 8 oz)
- Speckled clay inclusions (ground black pepper or dried coffee grounds)
- Acrylic rolling pin
- Rolling guides (1/4 inch thickness)
- Rectangular clay cutter or ruler and craft knife
- Alphabet stamp set (serif font)
- Cornstarch (for release)
- Ceramic sealant or matte water-based polyurethane varnish
- Sandpaper (400 and 800 grit)
- Soft paintbrush
Step 1: Preparing the Speckled Clay
-
Condition the clay:
Start by thoroughly kneading your white polymer clay in your hands until it becomes soft, pliable, and warm. -
Add texture:
To mimic the stonewear look in the photo, flatten the clay and sprinkle a very small pinch of ground black pepper or dried coffee grounds over the surface. -
Blend the speckles:
Fold the clay over the inclusions and knead repeatedly. Continue folding and rolling until the speckles are evenly distributed throughout the entire block. -
Roll out the slab:
Place the clay between your rolling guides on a smooth work surface. Use the acrylic roller to create an even slab that is exactly 1/4 inch thick so it feels substantial.
Step 2: Shaping and Stamping
-
Cut the rectangle:
Use a rectangular cutter for perfectly rounded corners, or measure a rectangle (approx. 5×7 inches) with a ruler and cut cleanly with a craft knife. If cutting by hand, use your finger to gently round the sharp corners. -
Plan the text:
Arrange your alphabet stamps for the names ‘AVA’ and ‘NOAH’ (or your chosen names) to ensure they are centered. I usually press them lightly into a scrap piece of clay first to check the spacing. -
Dust the surface:
Lightly dust the center of the clay slab with a tiny amount of cornstarch or dip your stamps into the powder to prevent sticking. -
Impress the names:
Press the stamps firmly into the center of the slab. Apply even pressure to get a deep, legible impression, but be careful not to push all the way through. -
Create the rim:
Gently lift the edges of the rectangle with your fingertips, smoothing them upward to create a slight lip. You want a shallow, dish-like curve rather than a sharp 90-degree wall. -
Smooth imperfections:
Dip your finger in a little bit of water (or baby oil if using polymer clay) and run it over the rim and surface to smooth out any fingerprints or rough textures.
Sticky Stamps?
If clay gets stuck inside the letters of your stamps, use an old toothbrush or a needle tool to pick it out immediately before it hardens.
Step 3: Finishing Touches
-
Bake the tray:
Transfer the tray onto a parchment-lined baking sheet. Bake according to your specific clay manufacturer’s instructions, usually 275°F (135°C) for 30 minutes per 1/4 inch of thickness. -
Cool down:
Let the tray cool completely in the oven with the door slightly ajar. This gradual cooling helps prevent warping. -
Sand the edges:
Once cool, use 400-grit sandpaper under running water to smooth any sharp edges on the rim. Finish with 800-grit for a polished feel. -
Seal the piece:
Apply a thin coat of matte ceramic sealant or polyurethane varnish. This protects the faux-stone finish and gives it that professional sheen seen in the photo.
Make it Shine
For high contrast, after baking, dilute a drop of brown acrylic paint with water and wash it over the letters, wiping away the excess so the color stays only in the grooves.
Place your finished tray on a side table to catch keys or jewelry and admire your custom handiwork
Name Plate With House Number
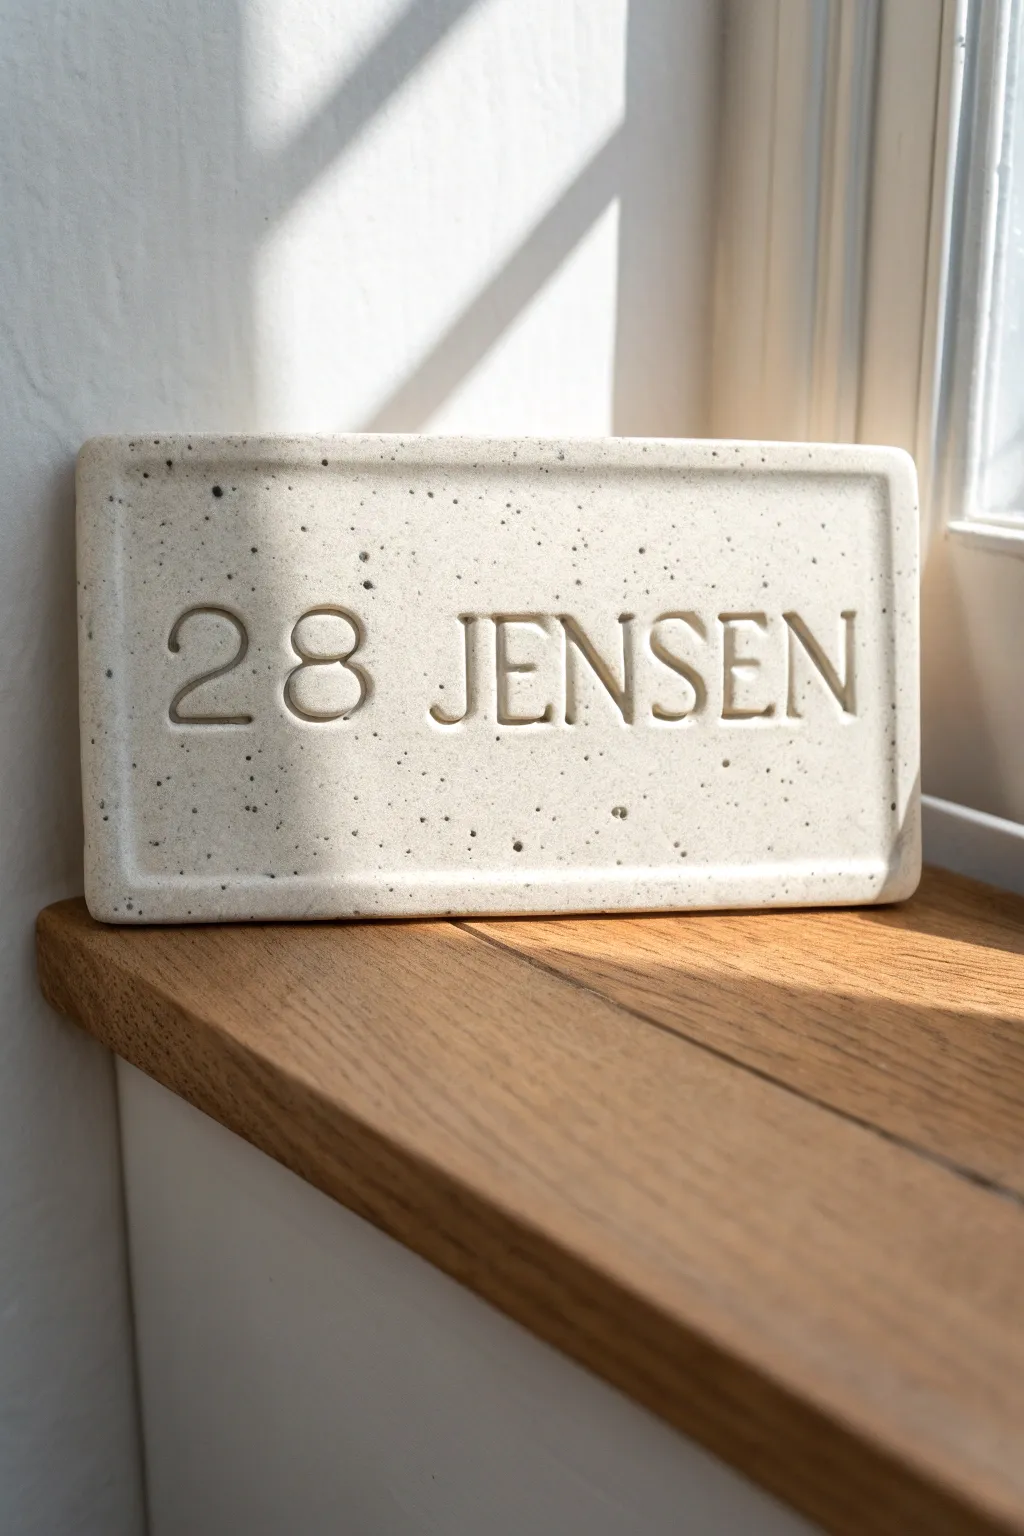
This elegant house number plaque combines a clean, modern aesthetic with the timeless texture of speckled stoneware clay. The deep, seriffed lettering creates beautiful shadows that change with the light, offering a sophisticated way to display your address.
Step-by-Step Guide
Materials
- Speckled stoneware clay (white or light cream)
- Clay slab roller or rolling pin
- Wooden guide strips (1/2 inch thick)
- Rectangular clay cutter or ruler and needle tool
- Alphabet and number stamps (serif font)
- Cornstarch or slip for release
- Soft sponge
- Clay rib (rubber or metal)
- Matte clear glaze or sealant (optional)
Step 1: Preparing the Slab
-
Wedge the clay:
Begin by thoroughly wedging your speckled stoneware clay to remove air bubbles and ensure an even consistency, which is crucial for preventing cracks during drying. -
Set up guides:
Place your wooden guide strips on either side of your workspace. These will help you roll the clay to a perfectly uniform thickness, giving it that professional manufactured look. -
Roll out the slab:
Using a rolling pin, flatten the clay between the guides until the pin rests on the wood strips. Ensure the surface is smooth and free of major imperfections. -
Compress the surface:
Take a rubber or metal rib and drag it firmly across the surface of the clay in multiple directions. This compresses the clay particles, aligning them for strength and creating a pristine, smooth canvas. -
Cut the shape:
Measure a rectangle—roughly 4 inches by 8 inches is a standard size—and cut it out using a rectangular cutter or a ruler and needle tool. I like to keep the edges crisp for this specific design.
Warped Edges?
If corners lift while drying, flip the plaque over onto a fresh board and place a small weight (like a bag of rice) on the center to gently press it flat again.
Step 2: Stamping and Detailing
-
Create the border:
To achieve the subtle indented frame effect seen in the photo, gently press a smaller rectangular object or a wide modeling tool about a quarter-inch in from the edge all around the perimeter. -
Plan your spacing:
Lightly hover your stamps over the clay to visualize the spacing of your numbers and name. You want the text centered both vertically and horizontally within the indented border. -
Dust the stamps:
Lightly dab your alphabet and number stamps into a bit of cornstarch. This acts as a release agent and prevents the clay from sticking inside the deep crevices of the letters. -
Stamp the numbers:
Press the numbers (’28’) firmly into the left side of the plaque. Apply even, downward pressure to get a deep, legible impression, but avoid rocking the stamp to keep the edges sharp. -
Stamp the name:
Continue with the name (‘JENSEN’), ensuring the baseline aligns with your numbers. A ruler placed gently below the text area can help keep everything straight. -
Clean up edges:
Once stamped, the clay might bulge slightly around the letters. Wait until the clay is leather-hard, then gently smooth any displaced clay back down with your finger or a soft rib.
Boost Contrast
After bisque firing, brush a black oxide wash or underglaze into the stamped letters, then sponge it off the high points. This makes the text pop from a distance.
Step 3: Finishing and Firing
-
Smooth the rims:
Run a slightly damp sponge along the outer edges of the rectangle to soften the sharpness just enough to prevent chipping, while maintaining that geometric look. -
Create hanging holes:
If you plan to mount this with screws, use a straw or hole cutter to create holes now. Alternatively, you can score the back later for epoxy mounting. -
Dry slowly:
Place the plaque on a flat board covered with newsprint or drywall board. Cover it loosely with plastic for the first day to ensure it dries slowly and stays perfectly flat. -
Bisque fire:
Once bone dry, fire the piece to bisque temperature (usually cone 04) based on your clay body’s specifications. -
Glazing:
For the look in the photo, leave the clay unglazed to show off the raw stone texture, or apply a very thin, clear matte glaze to seal it against weather without adding shine. -
Final firing:
Fire the piece a final time to the maturity temperature of your stoneware clay (likely cone 5 or 6). This vitrifies the clay, making it durable for outdoor use.
Now you have a durable, custom piece of stoneware that adds instant curb appeal to your home


What Really Happens Inside the Kiln
Learn how time and temperature work together inside the kiln to transform clay into durable ceramic.
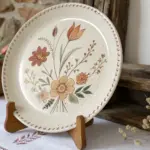
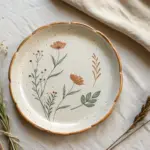
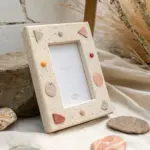
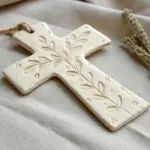
Floral Border Relief Frame
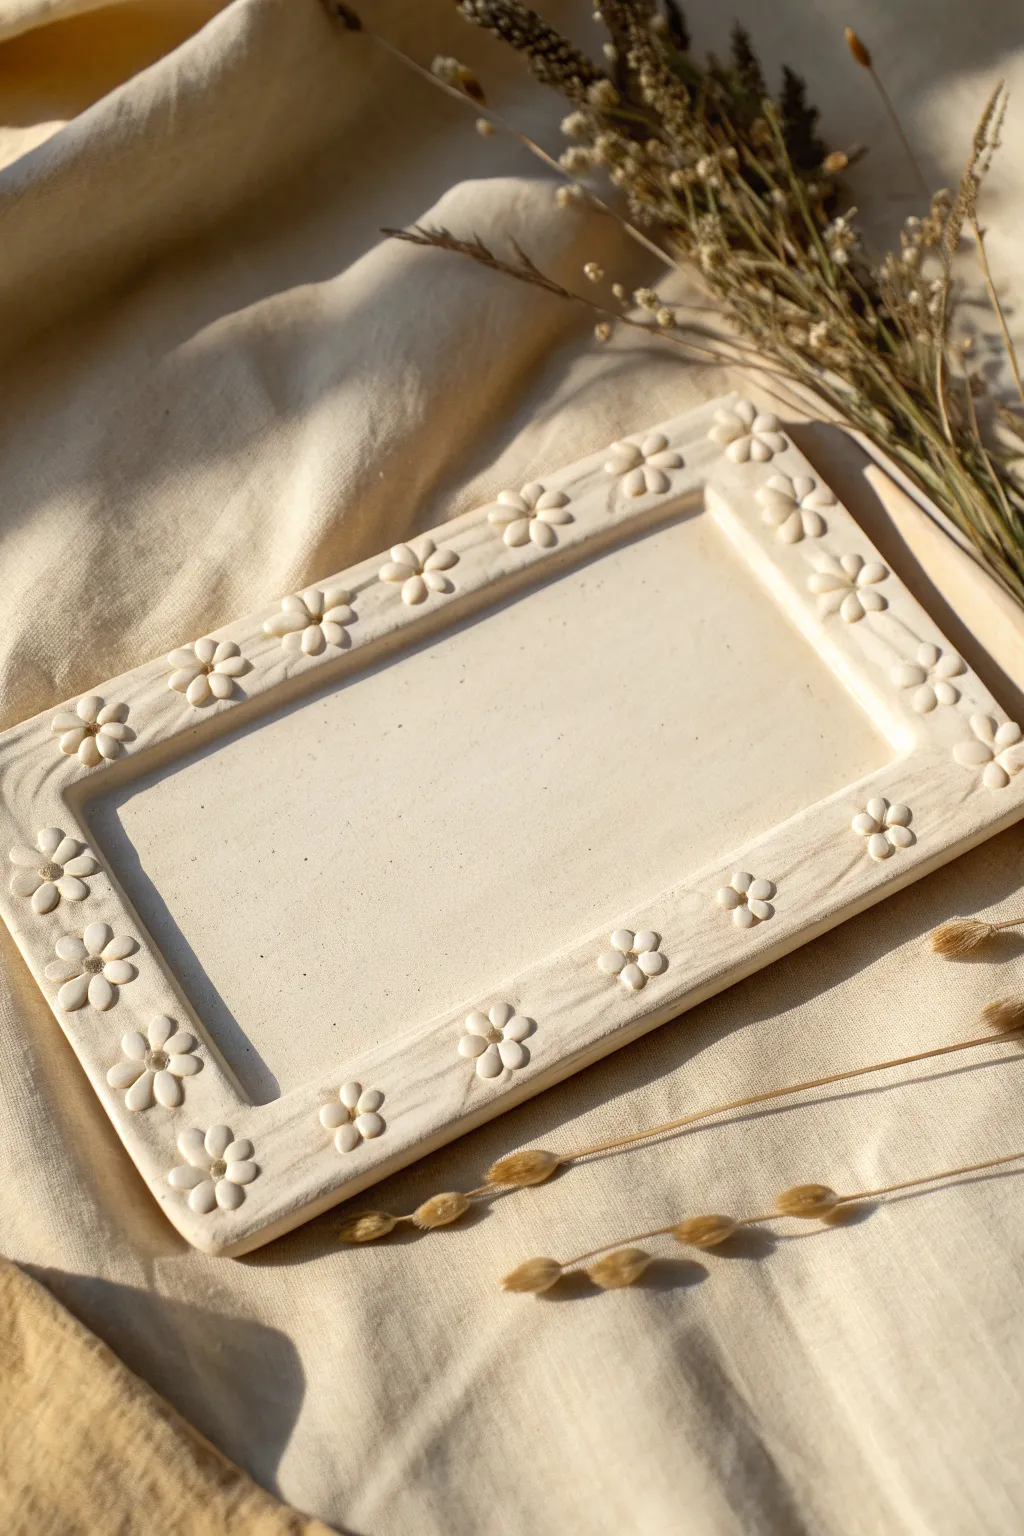
This minimalist, cream-colored nameplate brings a gentle warmth to any room with its simple relief floral border and subtle texture. It mimics the look of raw stoneware, using basic hand-building techniques to create a piece that feels both rustic and refined.
Step-by-Step
Materials
- Air-dry clay (white or cream) or polymer clay
- Rolling pin
- Clay knife or craft knife
- Ruler
- Small flower plunger cutter (daisy shape) or modeling tools
- Small ball stylus tool
- Sandpaper (fine grit)
- Water and a brush (for smoothing)
- Acrylic sealer (matte finish)
Step 1: Forming the Base
-
Prepare your clay:
Begin by conditioning your clay. Knead a generous amount until it is soft, pliable, and free of cracks. If visualizing the final size, aim for enough clay to create a rectangle roughly 5×7 inches. -
Roll the slab:
Using your rolling pin, roll the clay out into an even slab. You want this to be sturdy but elegant, so aim for a thickness of about 1/4 inch (6mm). Rotate the clay occasionally to ensure it doesn’t stick to your work surface. -
Cut the rectangle:
Use your ruler and clay knife to cut a clean, sharp rectangle. Remove the excess clay and set it aside for the decorative elements later. -
Create the recessed center:
To define the border area, lightly score a smaller rectangle inside your main slab, leaving about a 3/4-inch border all the way around. Do not cut through; just mark it. -
Build the rim:
Roll thin coils of clay from your scraps. Score and slip (add water) along the outer border, then press these coils onto the rim to build it up slightly higher than the center. Smooth the coils down into the base slab so they become one seamless piece. -
Refine the edges:
Use your fingers or a flat tool to smooth the transition between the raised rim and the flat center. The center should look like a recessed tray now. Soften any sharp corners on the outer edge.
Clean Lines
Dip your tools in water (or cornstarch for polymer clay) before touching the clay. This prevents sticking and ensures your flower petals detach cleanly from the cutter.
Step 2: Adding the Floral Relief
-
Make the flowers:
Take a small ball of fresh clay. If you have a plunger cutter, punch out roughly 18-20 small daisy shapes. If sculpting by hand, roll tiny balls, flatten them, and use a knife to press in 5-6 petal indentations around a center point. -
Attach the first flower:
Starting at a corner, apply a tiny dot of water or liquid clay to the back of a flower. Press it gently onto the raised rim. You want it to look integrated, not just sitting on top. -
Create the pattern:
Continue placing flowers along the rim. Space them evenly, leaving a small gap between each bloom to let the texture of the base show through. I find that spacing them about half a flower-width apart looks best. -
Detail the centers:
Take your ball stylus tool and press firmly into the very center of each attached flower. This secures the flower further and adds that classic daisy dimension. -
Add petal texture:
Using a needle tool or the back of a knife, gently re-impress the lines between the petals if they got flattened during attachment. This makes the relief pop. -
Texture the background:
To mimic the stone-like finish in the photo, gently tap a clean toothbrush or hard bristle brush over the empty spaces of the clay (both the center and the gaps between flowers). This removes the ‘plastic’ look of smooth clay.
Center Stage
Before the clay dries, use alphabet stamps to press a name into the flat center panel for a customized finish, or paint the name in a soft gold after it dries.
Step 3: Finishing Touches
-
Dry the piece:
Let the nameplate dry completely. If using air-dry clay, this may take 24-48 hours. Place a lightweight board on top if the corners start to curl, or flip it carefully halfway through drying. -
Sand for smoothness:
Once fully dry (and before painting/sealing), take fine-grit sandpaper and gently gently buff the edges and any rough spots on the flat center area. Be careful near the delicate flowers. -
Seal the surface:
Apply a coat of matte acrylic sealer. This protects the clay from moisture and gives it that finished, ceramic-like sheen without being too glossy.
This charming, textured frame is now ready to be personalized with paint or left natural for an organic look
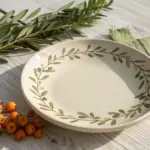
Leafy Vine Corner Accents
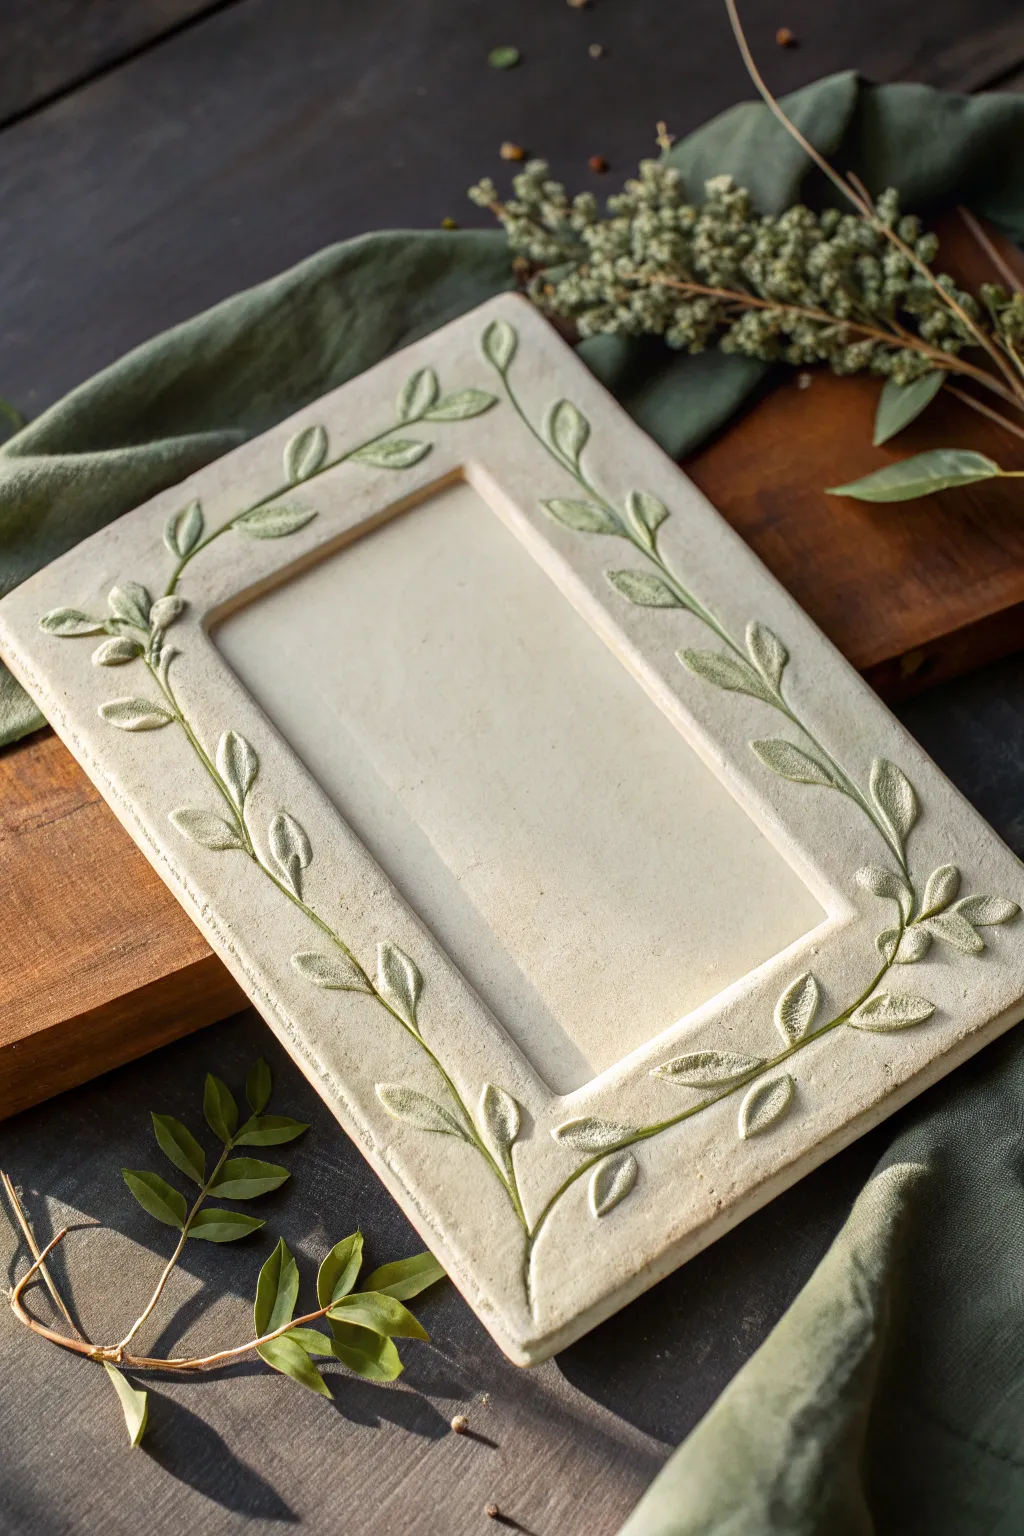
Embrace the beauty of nature with this serene clay frame project featuring delicate leafy vines trailing across opposing corners. Its simple, off-white palette and subtle bas-relief texture create a sophisticated, organic border perfect for framing cherished memories or names.
Step-by-Step Tutorial
Materials
- Air-dry clay (stone or white color)
- Rolling pin
- Rectangle template (cardboard or sturdy paper)
- Craft knife or clay cutter
- Sculpting tools (needle tool, small spatula)
- Water in a small cup
- Fine grit sandpaper
- Ruler
- Canvas mat or parchment paper (for working surface)
- Acrylic matte sealer (optional)
Step 1: Prepping the Base
-
Condition the Clay:
Begin by kneading your air-dry clay thoroughly until it is warm and pliable. This prevents cracks later on. If it feels too stiff, dip your fingers in water and work it in. -
Roll the Slab:
Roll out the clay on your canvas mat or parchment paper to an even thickness of about 1/4 to 1/2 inch. Ensure it’s large enough to accommodate your entire frame design. -
Cut the Frame Shape:
Place your rectangular template onto the clay. Using a sharp craft knife and a straight edge, careful cut around the outer perimeter. -
Create the Opening:
Measure and mark the inner window. Cut this center rectangle out carefully. Save the excess clay; you’ll need it for the vines. -
Refine the Edges:
Dip your finger in a little water and smooth all cut edges to remove any harsh angles or burrs.
Cracks Appearing?
If tiny cracks appear while drying, mix a small amount of clay with water to make a paste (slip) and fill them in. Smooth with a damp finger.
Step 2: Sculpting the Vines
-
Roll Thin Coils:
Take small pinches of the leftover clay and roll them into very thin snakes or coils. These will serve as the stems for your vine accents. -
Position the Stems:
Lay the coils onto the frame in opposite corners, creating a gentle, meandering S-curve. Press them down lightly to adhere them to the base. -
Form the Leaves:
Roll tiny balls of clay, then flatten them into teardrop or marquise shapes with your fingertip to create individual leaves. -
Attach the Leaves:
Position the leaves along the vine stem stems in an alternating pattern. Use a tiny dab of water or slip (clay mixed with water) on the back of each leaf to act as glue. -
Blend the Seams:
Using a small sculpting tool, gently blend the base of each leaf stem into the main vine so they look organically connected rather than just stuck on.
Nature’s Stamp
Instead of sculpting leaves by hand, press real small leaves (like boxwood or thyme) into the clay to create authentic fossil-like impressions.
Step 3: Detailing and Finishing
-
Add Vein Textures:
With a needle tool or a dull knife edge, gently press a center line down the middle of each leaf to create a vein impression. -
Imprint Side Veins:
For extra realism, add very faint diagonal lines branching from the center vein on the larger leaves. -
Enhance Frame Texture:
If you want that stone-like finish seen in the photo, lightly dab the surrounding smooth areas of the frame with a stiff bristle brush or a crumpled ball of foil. -
Set to Dry:
Place the frame on a wire rack or mesh screen to ensure air circulation on both sides. Let it dry completely for 24-48 hours. -
Sand for Smoothness:
Once fully dry, use fine-grit sandpaper to gently smooth out any rough patches on the edges or back, being careful not to damage the raised vines. -
Seal (Optional):
Apply a coat of matte acrylic sealer to protect the clay from moisture and dust, preserving that natural, unglazed look.
Now your beautiful, nature-inspired frame is ready to add a touch of tranquility to your home decor

TRACK YOUR CERAMIC JOURNEY
Capture glaze tests, firing details, and creative progress—all in one simple printable. Make your projects easier to repeat and improve.
Bird Family On a Branch Name Plate
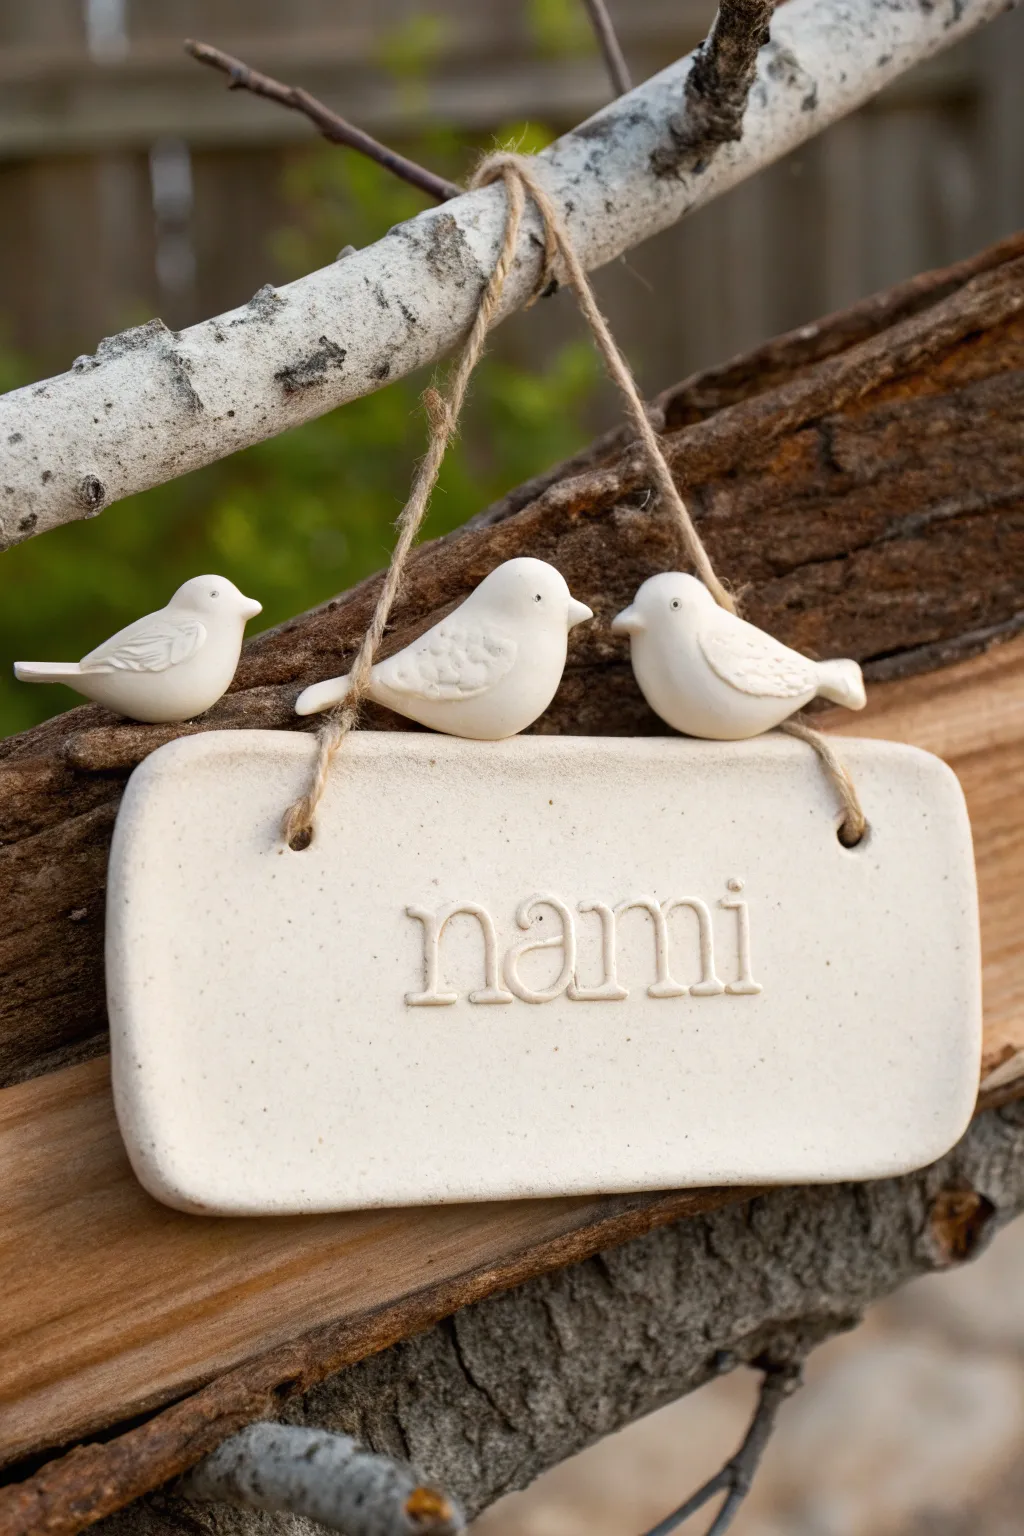
Bring a touch of nature to your doorway with this charming ceramic-style project. Featuring three sculpted songbirds perched atop a personalized hanging plaque, this piece relies on simple hand-building techniques to achieve a clean, minimalist look.
Step-by-Step Guide
Materials
- White air-dry clay or polymer clay
- Rolling pin
- Rectangular clay cutter or craft knife
- Small letter stamps
- Jute twine
- Clay sculpting tools (needle tool, small ball stylus)
- Water in a small cup
- Small paintbrush (for smoothing)
- Fine-grit sandpaper
- Matte spray varnish
Step 1: Forming the Base
-
Prepare the clay:
Begin by conditioning a large ball of white clay until it is soft and pliable. If using air-dry clay, keep your hands slightly moist to prevent cracks. -
Roll the slab:
Use your rolling pin to flatten the clay into an even slab, aiming for a thickness of about 1/4 inch (6mm). This sturdiness is important for hanging. -
Cut the rectangle:
Using a rectangular cutter or a ruler and craft knife, cut out the main plaque shape. Round off the four corners gently with your fingertips for a softer, organic look. -
Punch the holes:
Create two holes in the top corners for hanging using a straw or a large needle tool. Ensure they are evenly spaced and not too close to the edge to prevent tearing. -
Create the texture:
To mimic the speckled stone look in the image, you can gently press a coarse sandpaper or a stiff brush onto the surface of the wet clay, or simply leave the natural clay texture if it has grog.
Step 2: Sculpting the Bird Trio
-
Divide the clay:
Roll three small balls of clay for the bird bodies. Make the center ball slightly larger than the two side ones to create visual balance. -
Shape the bodies:
Take one ball and gently pull one side into a teardrop shape to form the tail. Pinch the opposite side slightly upwards to suggest the head. -
Refine the form:
Smooth out the transitions so the bird looks like a cohesive, smooth pebble shape with a distinct tail and chest. -
Add wings:
Roll tiny flattened teardrops of clay and press them onto the sides of the bird bodies. Use a needle tool to etch delicate lines into these wings to represent feathers. -
Add facial details:
Use a small ball stylus or a toothpick to press a clean indentation for the eye. Pinch the front of the face very slightly to form a tiny beak. -
Repeat the process:
Repeat these sculpting steps for the remaining two birds, varying their poses slightly if you wish—perhaps having one look up or tilt its head.
Clean Impressions
Dust your letter stamps with a tiny bit of cornstarch or baby powder before pressing them into the clay. This prevents sticking and ensures crisp, readable text.
Step 3: Assembly and Finishing
-
Attach the birds:
Position the three birds along the top edge of your rectangular plaque. The center bird should sit in the middle, with the others flanking it. -
Secure the bond:
For air-dry clay, score the bottom of the birds and the top of the plaque with a needle tool, add a dab of water or slip, and press firmly to join. Blend the seams at the back with a sculpting tool. -
Personalize with text:
Press your letter stamps into the center of the plaque to spell out the desired name. Apply even pressure so the impression depth is consistent across all letters. -
Final smoothing:
Dip a soft paintbrush in water and gently brush over the entire piece to smooth out fingerprints and harsh edges. I find this step crucial for that professional ceramic finish. -
Dry or bake:
Allow the piece to dry completely (24-48 hours for air-dry) or bake according to your polymer clay package instructions. -
Sand and seal:
Once fully cured, use fine-grit sandpaper to buff away any remaining rough spots. Finish by spraying the entire piece with a matte varnish for protection. -
Add the hanger:
Cut a length of jute twine. Thread it through the holes from front to back, tying secure knots on the front side to create the rustic hanger shown in the photo.
Speckled Stone Effect
Knead coarsely ground black pepper or dried tea leaves into white clay before sculpting. This creates a natural faux-granite speckle without needing paint.
Hang your new handcrafted sign proudly on a branch or hook and enjoy the serene vibe it brings to your space.
Raised 3D Letter Name Plate
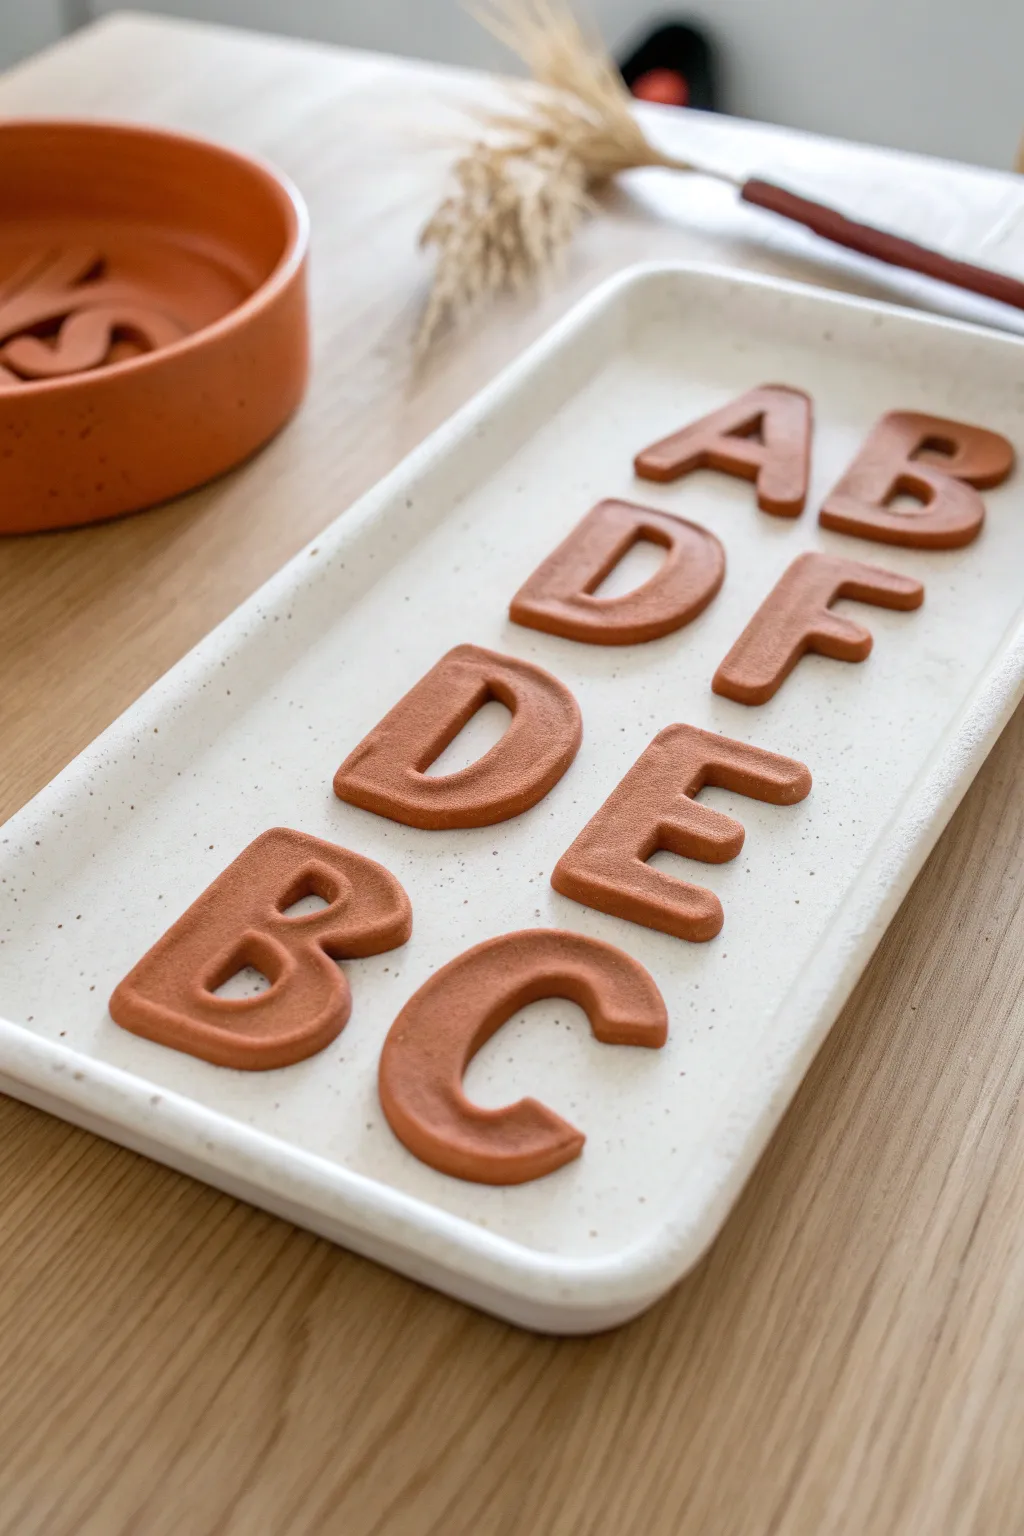
Learn to continually impress with this sleek, modern decorative piece featuring raised 3D letters in a warm terracotta hue. The contrast between the rich clay tones and the speckled cream tray creates a sophisticated, tactile finish perfect for learning or decor.
Detailed Instructions
Materials
- Terracotta-colored polymer clay (or air-dry clay mixed with burnt sienna acrylic)
- White or cream polymer clay (for the tray base)
- Coarse black pepper or brown speckle inclusions (mock granite)
- Alphabet cookie cutters (sans-serif font)
- Acrylic rolling pin
- Parchment paper
- Craft knife or scalpel
- Fine-grit sandpaper
- Matte sealant or varnish
- Ruler
- Smooth work surface/ceramic tile
Step 1: Creating the Speckled Tray Base
-
Prepare the base clay:
Begin by conditioning your white or cream polymer clay until it is soft and pliable. -
Add texture:
Sprinkle a pinch of coarse black pepper or designated faux-granite clay inclusions onto the flattened white clay. -
Fold and mix:
Fold the clay over the speckles and roll it out repeatedly to distribute the flecks evenly without blending them into a solid grey color. -
Roll out the slab:
Roll the speckled clay into a large, even rectangle, aiming for a thickness of about 1/4 inch (6mm) to ensure sturdiness. -
Cut the shape:
Use a ruler and your craft knife to cut a clean, perfect rectangle. I like to round the corners slightly with a small circular cutter for a softer look. -
Form the rim:
Roll a long, thin snake of the same speckled clay. Place it along the perimeter of your rectangular base. -
Blend the seams:
Use a modeling tool or your fingertip to seamless blend the snake into the base, creating a raised lip that looks cohesive.
Sticky Letters?
If clay sticks inside your cutters, dip the cutter into cornstarch or water before pressing it into the clay slab. This acts as a release agent.
Step 2: Crafting the Terracotta Letters
-
Condition the terracotta clay:
Take your terracotta-colored clay and condition it thoroughly. If you are mixing colors, aim for a warm, reddish-brown earth tone. -
Roll for thickness:
Roll the clay out to a uniform thickness, slightly thinner than the tray base, perhaps 3/16 inch (4-5mm). -
Cut the letters:
Press your alphabet cutters firmly into the clay. Give them a little wiggle before lifting to ensure a clean cut. -
Smooth the edges:
Gently push the raw edges of each letter inward with your finger to remove any sharp ridges left by the cutter. -
Arrange the composition:
Place the cut letters onto the raw tray base to check spacing. Don’t press them down permanently yet. -
Secure the letters:
Once happy with the layout, apply a tiny dab of liquid clay or clay adhesive to the back of each letter and press them firmly onto the tray.
Add Magnetism
Instead of gluing the letters down, bake them separately and glue small magnets to the back. Use a magnetic sheet under the tray liner for movable play.
Step 3: Baking and Finishing
-
Bake the project:
Place the tray on parchment paper and bake according to your clay manufacturer’s instructions (usually 275°F/135°C for 15-30 minutes). -
Cool down:
Let the piece cool completely in the oven with the door slightly ajar to prevent cracking from sudden temperature changes. -
Sand for perfection:
Once cool, use fine-grit sandpaper to buff out any fingerprints or rough spots on the rim of the tray. -
Seal the surface:
Apply a thin coat of matte varnish to protect the surface while maintaining that lovely natural clay texture.
Display your beautiful handcrafted tray on a desk or shelf to add warmth and personality to the room
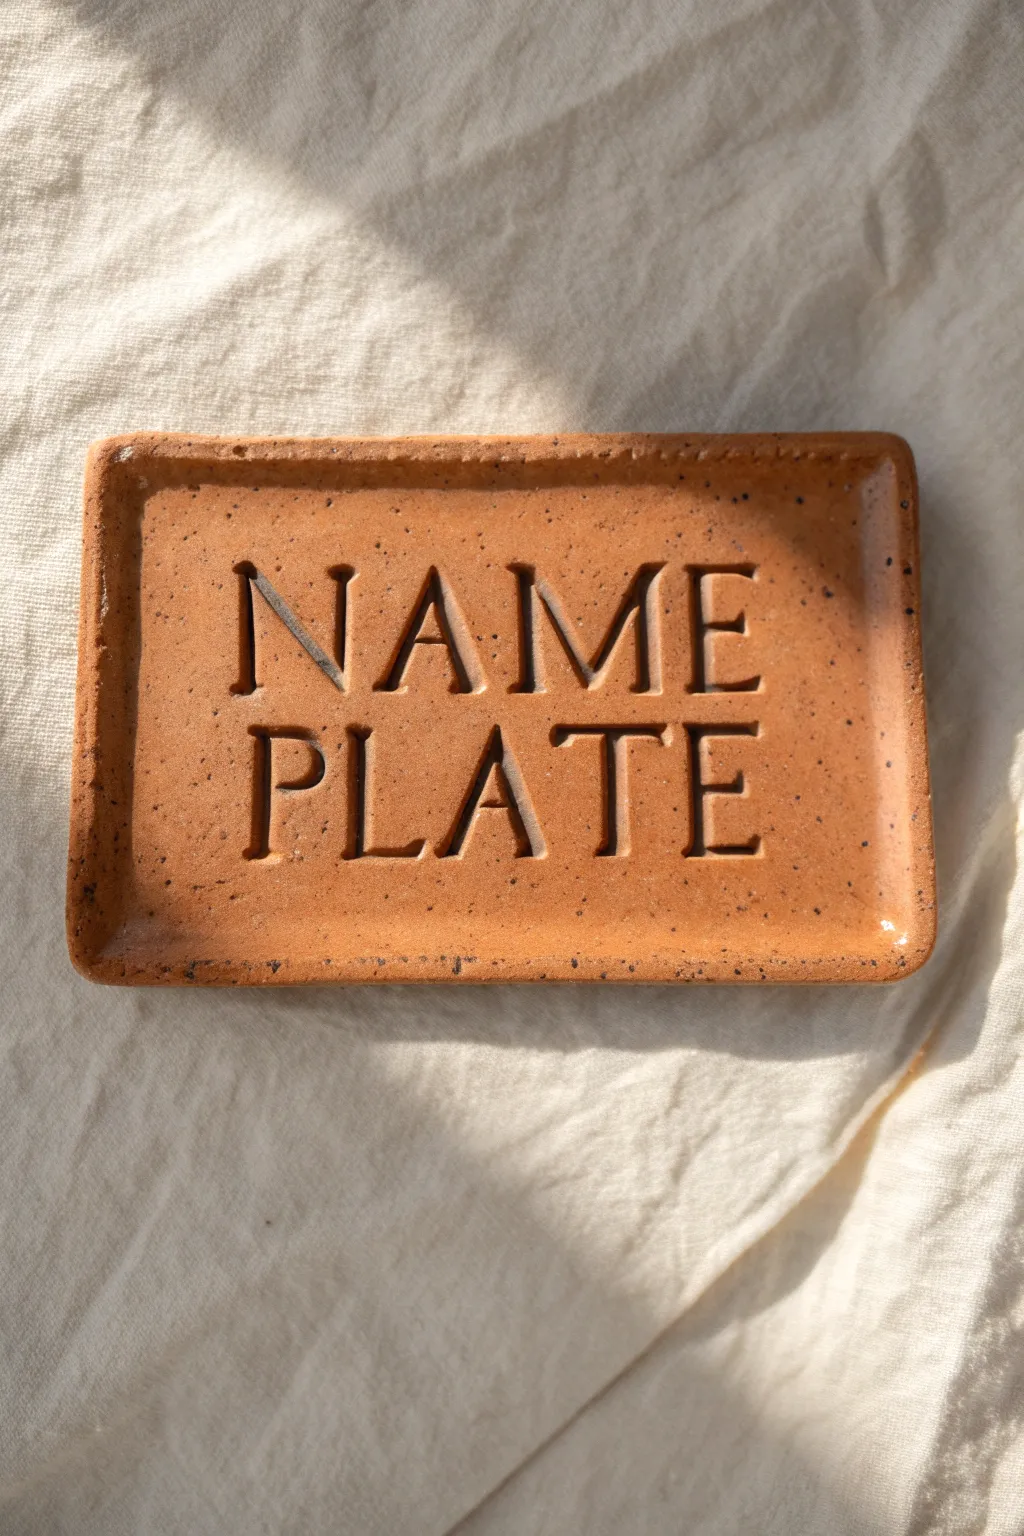
Engraved Letters With Paint Fill
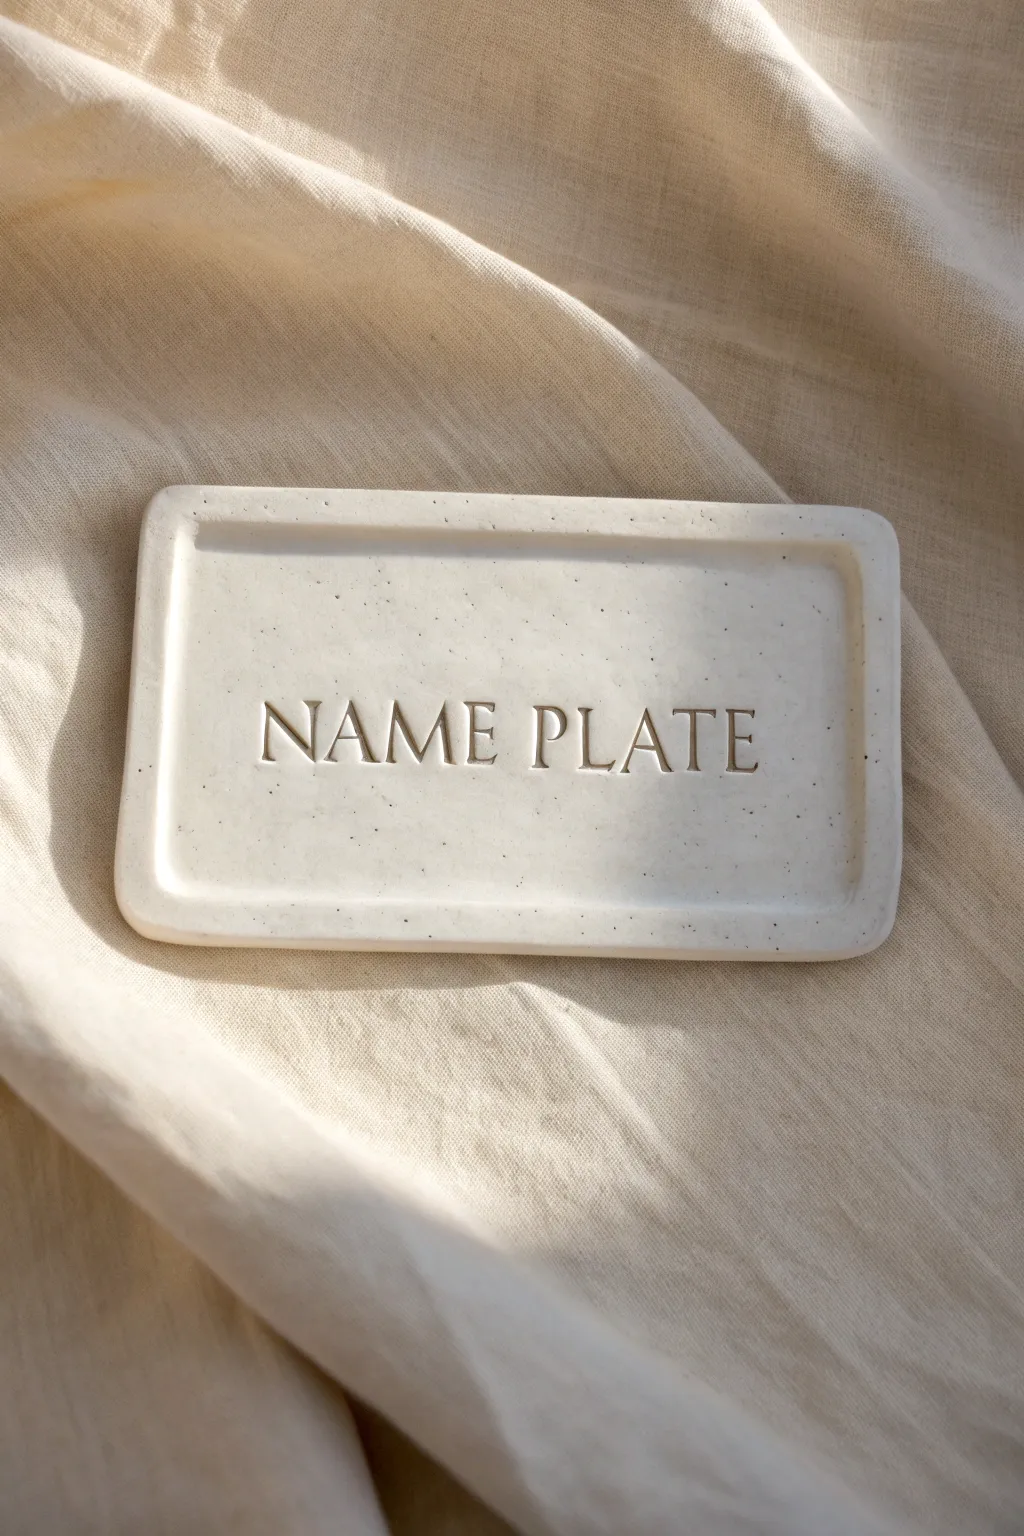
Master the art of understated elegance with this cream-colored speckled clay nameplate. The deep, clean impressions and slightly raised rim create a professional finish that looks beautiful on a desk or as part of a flat lay display.
How-To Guide
Materials
- White polymer clay (oven-bake) or air-dry clay
- Rolling pin or pasta machine
- Cracked black pepper (for speckling)
- Small rectangular cookie cutter or craft knife
- Alphabet stamp set (serif font)
- Ruler
- Fine-grit sandpaper (400-600 grit)
- Clear matte sealant spray
- Brown or beige acrylic paint (optional for wash)
- Damp cloth or sponge
Step 1: Preparation and Forming
-
Condition the clay:
Begin by warming the white clay in your hands until it becomes soft and pliable. If you are using polymer clay, this conditioning step is crucial to prevent cracks later. -
Add texture:
To achieve that subtle speckled look seen in the photo, sprinkle a very small pinch of cracked black pepper or dried coffee grounds onto the clay. Fold the clay over and knead it until the specks are evenly distributed but sparse. -
Roll the slab:
Roll out the clay onto a smooth work surface. Aim for a uniform thickness of about 1/4 inch. If you want perfectly even sides, place two playing cards or craft sticks on either side of the clay to guide your rolling pin. -
Cut the shape:
Using a rectangular cookie cutter or a ruler and craft knife, cut out your base rectangle. Ensure the corners are slightly rounded for a softer, organic feel. -
Create the rim:
You can create the raised rim in two ways. The easiest method is to take a smaller rectangle tool or just your thumb and gently press down the center area of the clay, leaving the outer 1/8 inch slightly higher. Alternatively, roll a very thin snake of clay, place it around the perimeter, and blend it seamlessly into the base. -
Smooth the surfaces:
Dip your finger in a little bit of water (for air-dry clay) or baby oil (for polymer clay) and run it over the surface and edges to smooth out any fingerprints or harsh tool marks.
Clean Stamp Trick
Place a piece of cling film or plastic wrap over the clay before stamping. This creates softer, pillowy edges around the letters and prevents clay from getting stuck in fine stamp details
Step 2: Stamping the Typography
-
Align your letters:
Before stamping the actual clay, test your word spacing on a scrap piece. Arrange your serif alphabet stamps in order, ensuring they are clean and free of old clay residue. -
Find the center:
Use your ruler to lightly mark the center point of the tray. This will be your guide to ensure the text ‘NAME PLATE’ is perfectly symmetrical. -
Impress the text:
Press the stamps firmly into the clay. I usually start with the middle letters and work my way outward to the left and right to maintain perfect centering. Apply even pressure so every letter is the same depth. -
Check carefully:
Inspect closely for any little walls of clay that might have pushed up around the letters. You can gently pat these down with a flat tool or your finger to keep the surface level.
Step 3: Finishing Touches
-
Curing or drying:
If using polymer clay, bake it according to the package instructions (usually 275°F for 15-30 minutes). If using air-dry clay, allow it to dry fully for 24-48 hours in a cool, dry place to prevent warping. -
Sanding edges:
Once fully cured and cooled, take your fine-grit sandpaper and gently buff the edges and the rim. This refines the shape and removes any tiny imperfections from the cutting process. -
Optional coloring:
Though this style relies on the shadow of the impression, you can enhance legibility by mixing a tiny bit of brown paint with water. Brush it into the letters and immediately wipe the surface clean, leaving pigment only in the deep crevices. -
Clean up:
Use a barely damp cloth to do a final wipe of the surface, ensuring no dust from sanding or excess paint remains on the main flat areas. -
Seal the piece:
Finish by applying a light coat of clear matte sealant spray. This protects the clay from dust and moisture without adding an artificial gloss, preserving that natural, stone-like appearance.
Stone Effects
For a more realistic stone look, mix in small amounts of translucent clay or granite-effect embossing powder. This adds depth and shimmer that mimics real quartz or ceramic
Now you have a sophisticated, custom piece ready to organize your space or gift to a friend
Two-Layer Plaque With Shadow Line
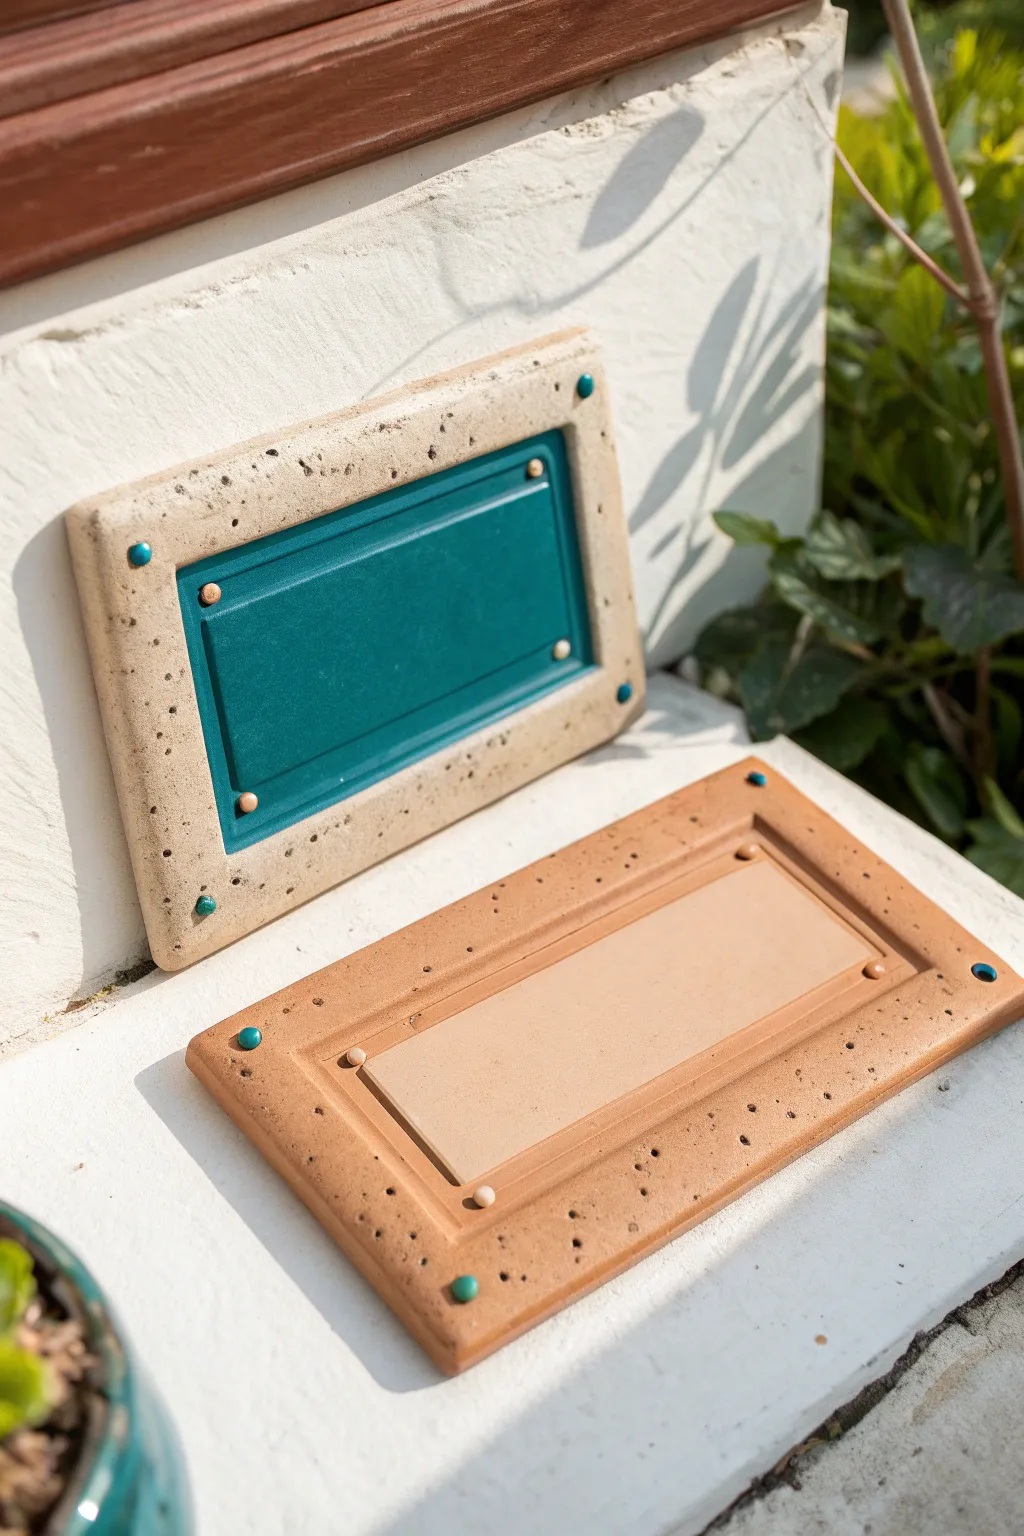
Achieve a professional, architectural look with this clever two-layer clay plaque design. By layering a distinct frame over a recessed center panel, you create natural shadow lines that give your name plate depth and high-end sophistication.
Step-by-Step Tutorial
Materials
- Polymer clay or air-dry stoneware clay (two contrasting colors)
- Rolling pin with guide rings (or thickness slats)
- Rectangular clay cutters or a sharp craft knife
- Ruler
- Texture sponge or coarse sandpaper
- Small ball stylus tool
- Liquid clay (for polymer) or slip (for air-dry)
- Small round beads or extra clay for decorative ‘rivets’
- Acrylic paints (optional, if using white clay)
- Matte finish varnish
Step 1: Planning and Base Construction
-
Design your dimensions:
Decide on the total size of your plaque first. A good starting size is typically around 6×4 inches. Sketch out the frame width, aiming for a border that is at least 1 inch thick to provide stability. -
Roll the inner panel:
Condition your clay for the inner panel (the teal or beige color). Roll this out to a medium thickness, roughly 1/4 inch. This needs to be sturdy enough to be the backplate. -
Cut the recessed rectangle:
Using a ruler and craft knife, cut a clean rectangle for the center panel. If you want the raised border effect shown in the teal version, simply score a border line about 1/8 inch from the edge rather than cutting it completely separate. -
Create the center shadow gap:
To get that distinct ‘inset’ look, use a modeling tool to gently bevel or press down the edges of your center rectangle. This creates a small gap between the frame and center, emphasizing the ‘shadow line’ effect.
Step 2: Creating the Rustic Frame
-
Roll the frame clay:
Roll out your second clay color (the cream or terracotta shade) to the same 1/4 inch thickness. I find it helpful to roll this slab slightly larger than your intended final dimensions to allow for trimming. -
Texture the surface:
Before cutting, press a coarse sponge, sea sponge, or crumpled foil gently into the clay surface. You want a pitted, stone-like texture, not a uniform pattern. -
Add faux speckles:
If your clay isn’t pre-speckled, you can sprinkle some dried coffee grounds or black pepper into the surface and roll over it once more to embed them. This mimics the look of natural stoneware. -
Cut the frame opening:
Measure the size of your inner panel carefully. Cut a rectangular window out of your textured slab that is slightly smaller than your back panel, so they can overlap securely. -
Refine the edges:
After cutting the outer perimeter of the frame, use your finger or a smoothing tool to round over the sharp cut edges. They should look softened, like tumbled stone, rather than sharp and machined.
Warping Woes?
If using air-dry clay, large flat pieces often curl while drying. To prevent this, dry your plaque slowly under a plastic bag and flip it over every 12 hours for even airflow.
Step 3: Assembly and Detail Work
-
Join the layers:
Apply a thin layer of liquid clay (sculpey) or slip (air-dry) to the back of the frame. Center it over the inner panel and press firmly, ensuring a strong bond without squishing your texture. -
Add the corner rivets:
Roll four tiny balls of clay in a contrasting color (like teal or brown). Make a small indentation in each corner of the frame using your ball stylus, add a dot of adhesive, and press the balls in to look like decorative bolts. -
Detail the inner panel:
Repeat the rivet process on the inner panel if desired. Place smaller clay balls near the corners of the recessed area to tie the design together visually. -
Create hanger holes:
If you plan to hang this with wire or screws, poke holes through the frame now while the clay is soft. Ensure they go through both layers for maximum strength. -
Final texture check:
Handling the clay often smooths out your texture. Go back with a needle tool or toothpick to add a few deeper pockmarks or scratches for that weathered, authentic feel. -
Bake or dry:
Follow the manufacturer instructions for your specific clay. If baking polymer clay, tent it with foil to prevent the light-colored frame from scorching. -
Sand the edges:
Once fully cured or dried, use fine-grit sandpaper to smooth any rough burrs on the outer edges and corners. -
Seal the piece:
Apply a coat of matte varnish to protect the surface. The matte finish is crucial here to maintain the look of porous stone rather than glossy plastic.
Pro Tip: Clean Lines
For super crisp straight lines on the inner rectangle, chill your clay in the fridge for 15 minutes before cutting. Firm clay resists dragging and deforming under the knife blade.
Once mounted, the natural light will catch those recessed edges and bring your architectural design to life
Rustic Wood-Grain Name Plate
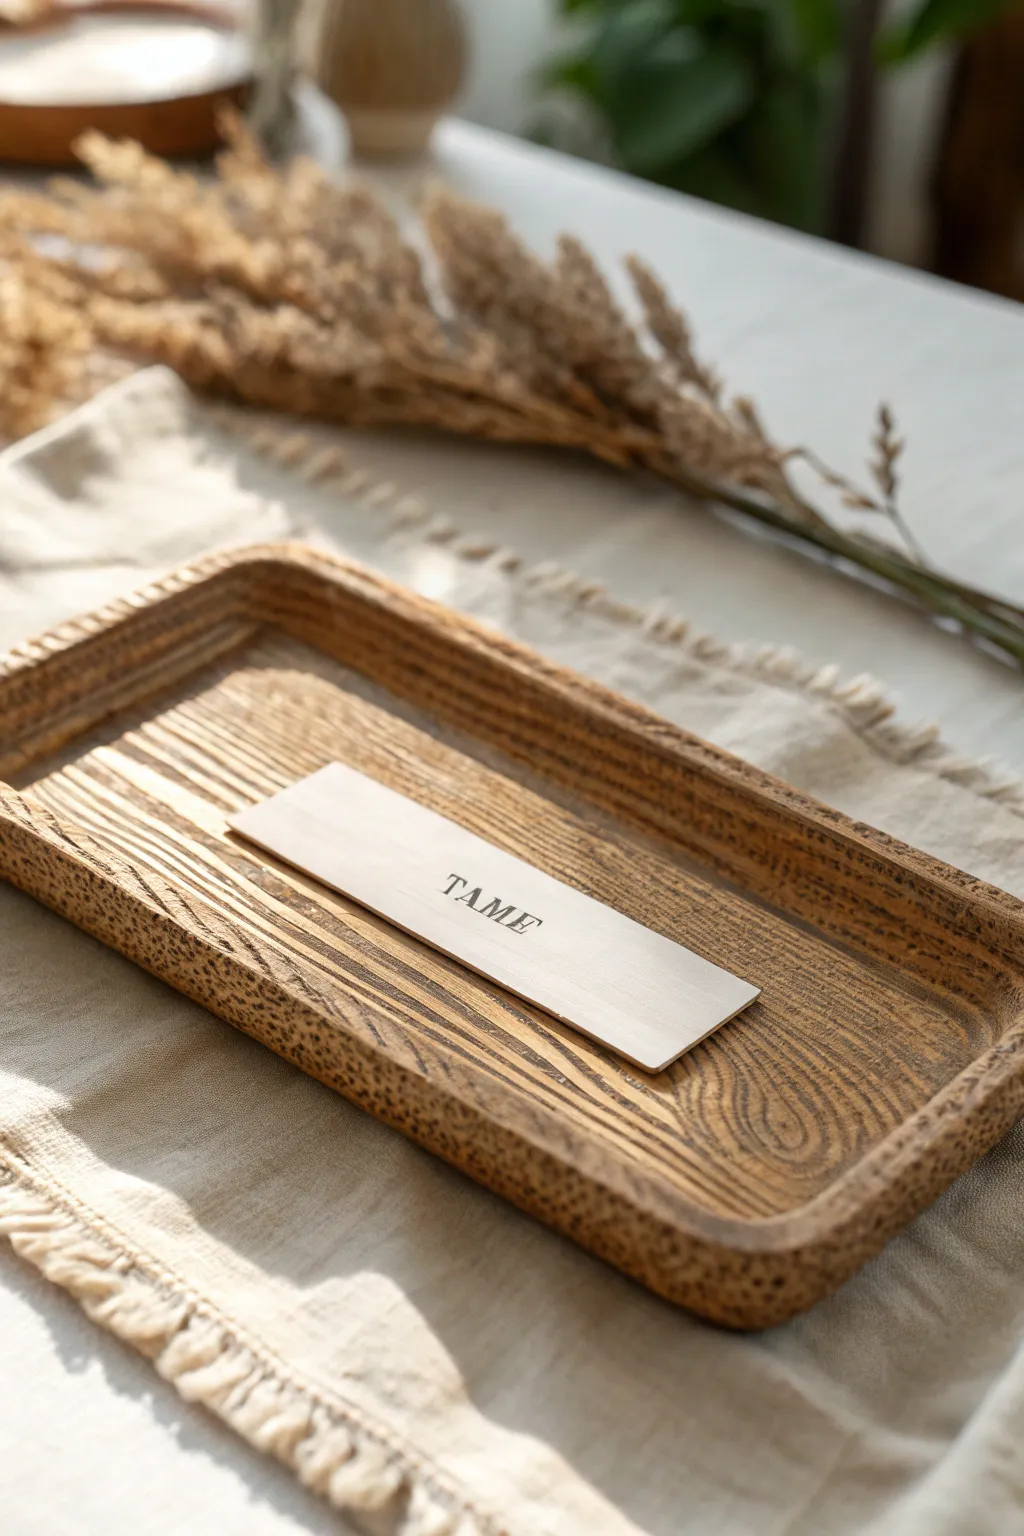
Achieve the rustic elegance of sanded timber without picking up a single saw. This project uses polymer or air-dry clay to create a sleek, minimalist name plate with a surprisingly realistic wood-grain texture and a clean stamped finish.
How-To Guide
Materials
- White or beige polymer clay (or air-dry clay)
- Acrylic rolling pin
- Coarse sandpaper (80 grit)
- Fine sandpaper (220 grit or higher)
- Brown acrylic paint (burnt umber or raw sienna)
- Cream or off-white acrylic paint
- Matte varnish or sealant
- Small letter stamps
- Black ink pad (permanent)
- Craft knife
- Ruler
- Soft cloth or paper towel
- Flat paintbrush
Step 1: Shaping the Clay Base
-
Condition the clay:
Begin by warming up your polymer clay in your hands until it becomes soft and pliable. If you are using air-dry clay, knead it briefly to remove any air bubbles. -
Roll out the slab:
Using an acrylic rolling pin, flatten the clay into a smooth, even sheet. Aim for a thickness of about 1/4 inch (6mm) to ensure it’s sturdy enough to act as a substantial plate. -
Create the texture:
Before cutting the final shape, take a piece of coarse 80-grit sandpaper. Press it firmly onto the surface of the clay and drag it in one single direction to create deep, parallel scratches that mimic wood grain. -
Enhance the grain:
For more prominent ‘knots’ or grain variation, you can gently drag a wire brush or even the teeth of a comb through the clay in slightly wavy lines, following the direction of your previous sanding marks. -
Cut to size:
Place your ruler on the textured clay slab. Using a sharp craft knife, cut out a clean, perfect rectangle. The one in the example is long and narrow, roughly 1.5 inches by 4 inches. -
Smooth the edges:
Gently tap the cut edges with your finger to soften the sharp corners slightly, ensuring it doesn’t look too industrial.
Step 2: Stamping and Curing
-
Prepare the stamps:
Select the letters for your word (e.g., ‘TAME’) from your stamp set. Test the alignment on a scrap piece of paper first to ensure the spacing is pleasing. -
Ink and impress:
Lightly tap the stamps onto a black permanent ink pad. Do not over-ink, or the lines will bleed. Carefully press the stamps into the center of the clay rectangle. I prefer to press just hard enough to leave ink, but not so hard that it creates a deep indentation. -
Bake or dry:
If using polymer clay, place the piece on a ceramic tile or baking sheet and bake according to the package instructions (usually 275°F/135°C for 15-30 minutes). If using air-dry clay, let it dry flat for 24-48 hours.
Uneven Stamping?
If your letters look patchy, use a fine-tip black permanent marker to carefully fill in the missing ink. Just be sure to follow the existing stamped impression.
Step 3: Painting and Finishing
-
Apply the base wash:
Mix a small amount of brown acrylic paint with water to create a thin wash. Brush this over the entire surface, ensuring the liquid settles into the texture grooves you created earlier. -
Wipe away excess:
Immediately wipe the surface with a soft cloth or paper towel. The dark paint will stay in the scratches (the grain), while the raised areas will remain lighter, highlighting the texture. -
Dry brush highlights:
Dip a dry flat brush into a tiny amount of cream or off-white paint. Offload most of the paint onto a paper towel until the brush is almost dry. -
Apply the highlight:
Lightly brush against the direction of the grain. This catches the raised areas, making the piece look like bleached or weathered wood. -
Sand for realism:
Once the paint is fully dry, take your fine-grit sandpaper and very lightly sand the edges and the surface. This removes any paint bumps and gives the piece a worn, naturally aged feel. -
Seal the piece:
Finish by applying a thin coat of matte varnish. This protects the paint and ink without adding an unnatural glossy shine.
Level Up: Magnetic Backing
Make this functional by gluing strong neodymium magnets to the back once dry. It turns a decorative plate into a stylish, minimal magnet for your fridge or metal board.
Place your finished name plate in a decorative tray or on a shelf to add immediate organic calm to the space
Faux Brick Texture Background
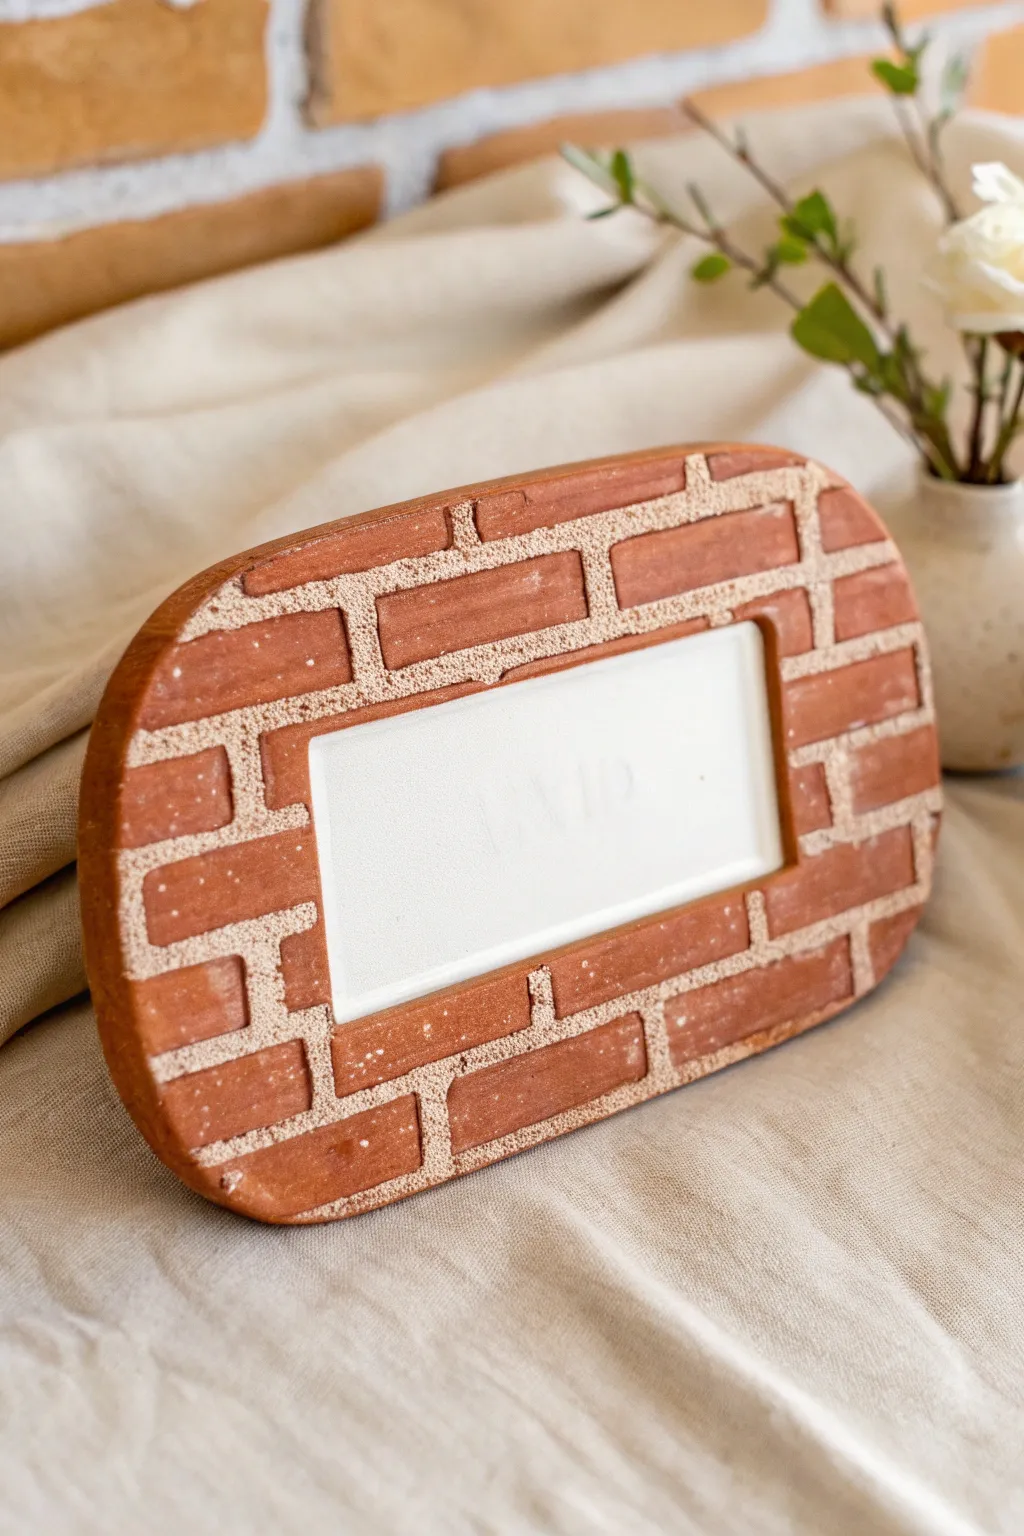
Bring an industrial yet cozy touch to your decor with this faux brick textured name plate. Crafted from clay to mimic a classic masonry wall, this oval plaque features a clean white center perfect for personalization.
Step-by-Step
Materials
- Terracotta-colored polymer clay (or air-dry clay)
- White polymer clay (or white acrylic paint for finishing)
- Oval clay cutter or paper template
- sharp craft knife or scalpel
- rectangular cutter (or ruler)
- Sand or coarse salt (for texturing mortar)
- Acrylic rolling pin
- Liquid clay or PVA glue
- Sculpting needle tool
- Sandpaper
Step 1: Base Preparation
-
Condition the Clay:
Begin by thoroughly conditioning your terracotta-colored clay until it is soft and pliable. If you are mixing colors to achieve that perfect brick red, ensure they are fully blended without streaks. -
Roll the Slab:
Roll out the clay into a smooth, even slab approximately 1/4 inch thick. This thickness ensures the plate will be sturdy enough to stand or hang once cured. -
Cut the Shape:
Use a large oval cutter to stamp out the main shape of your plaque. If you don’t have a cutter this size, lightly trace an oval paper template onto the clay and carefully cut around it with your craft knife. -
Define the Center:
Place a smaller rectangular cutter in the exact center of the oval to mark the nameplate area. Press down gently just to mark slightly, or cut out the rectangle entirely if you plan to insert a separate white clay slab later.
Step 2: Brickwork Construction
-
Mark Horizontal Guidelines:
Using a ruler and a needle tool, very lightly score horizontal lines across the terracotta surface. These will serve as guides for your brick rows, ensuring they stay straight. -
Carve the Mortar Lines:
With a sculpting tool or the back of a knife, carve out channels along your horizontal guidelines. You want these channels to be wide enough to resemble mortar joints between bricks. -
Create Vertical Joints:
Carve short vertical lines to separate individual bricks. Remember to stagger these lines on alternating rows—just like a real brick wall—so the vertical joints don’t line up perfectly. -
Refine Brick Edges:
Use your fingers or a rubber shaping tool to gently round the sharp edges of each ‘brick.’ Real bricks are rarely perfect rectangles, so softening the corners adds realism. -
Texturing the Mortar:
To create that gritty, sandy mortar look, press coarse sand or salt into the recessed channels you carved. If the clay is getting dry, brush a tiny amount of liquid clay or water into the grooves first to help the texture stick.
Mortar Magic
Mix a pinch of real baking soda into white liquid clay to create a paste. Apply this into the grooves for a fluffy, realistic cement texture.
Step 3: Finishing and Curing
-
Insert the Name Panel:
If you cut out the center earlier, roll a piece of white clay to the same thickness and fit it snugly into the rectangular opening. Smooth the seams where the white meets the brick texture. -
Add Surface Details:
For extra detail, lightly pock-mark the surface of the terracotta bricks with a toothbrush or crumpled foil. I like to add a few tiny imperfections to make it look weathered. -
Final Cleanup:
Wipe away any stray sand particles from the brick faces and the white center panel with a baby wipe or a cotton swab dipped in rubbing alcohol. -
Bake or Dry:
Bake the piece according to your polymer clay manufacturer’s instructions, typically around 275°F (135°C) for 30 minutes. If using air-dry clay, let it sit in a cool, dry place for 24-48 hours. -
Optional Painting:
Once cured and cooled, if you didn’t use colored sand, you can paint the mortar lines with a beige acrylic wash. Wipe the paint off the raised brick surfaces immediately so it only stays in the cracks. -
Adding Text:
Finally, use stamps, vinyl lettering, or a fine paintbrush to add your desired name or word to the white center panel.
Make it Mossy
After baking, dab tiny bits of dark green acrylic paint or flocking powder into the corners of the bricks to simulate moss growth.
Now you have a charming, rustic brick sign ready to personalize your space
Bright Color-Block Modern Name Plate
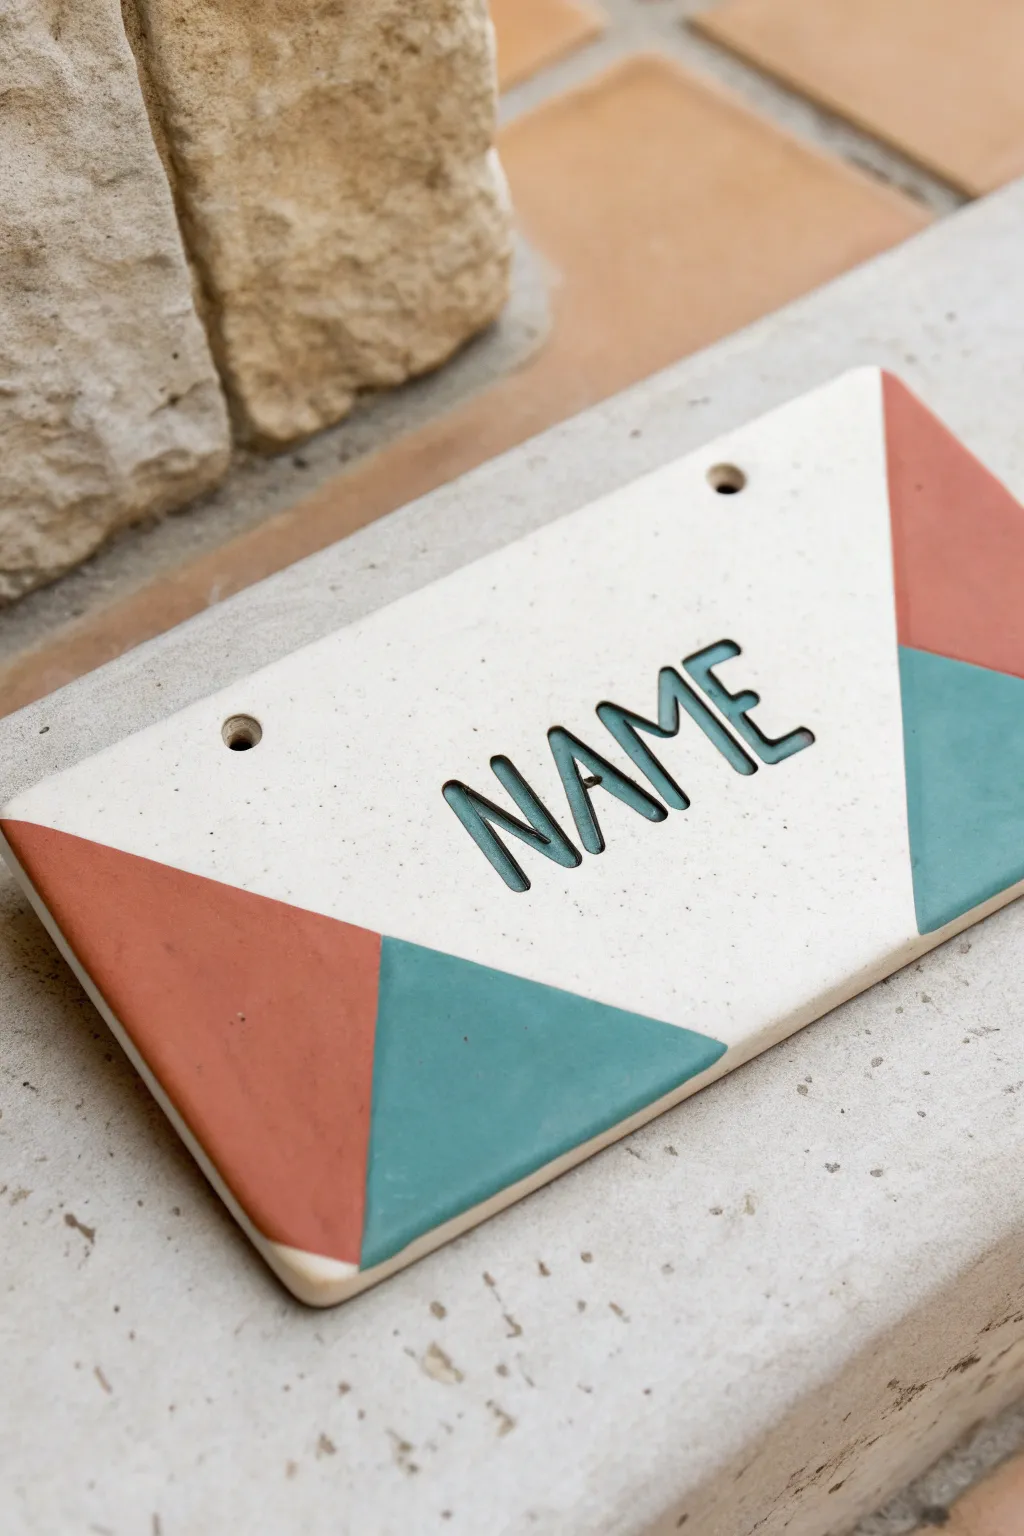
Bring a touch of modern art to your doorstep with this crisp, color-blocked clay name plate. The combination of clean geometric lines, speckled white clay, and deep teal and terracotta glazes creates a striking mid-century modern aesthetic.
Step-by-Step Guide
Materials
- White classic stoneware clay (preferably speckled)
- Rolling pin
- Canvas or fabric working surface
- Rectangular paper template (approx 8″ x 4″)
- Fettling knife or craft knife
- Letter stamps or stencils
- Carving tool (loop tool or needle tool)
- Hole cutter or straw
- Masking tape
- Underglazes (Terracotta/Rust and Teal)
- Clear matte glaze
- Small paintbrush
- Sponge
Step 1: Shaping the Slab
-
Prepare the Clay:
Begin by wedging your speckled stoneware clay to remove any air bubbles. This is crucial for ensuring the plate doesn’t crack in the kiln. -
Roll the Slab:
Roll out the clay on your canvas surface until it is an even thickness, slightly thicker than a standard ceramic tile—about 1/4 to 3/8 inch is ideal for durability. -
Smooth the Surface:
Use a smooth kidney rib or a damp sponge to compress the clay surface. This aligns the clay particles and creates that beautiful, flat canvas we need for glazing later. -
Cut the Rectangle:
Place your rectangular paper template onto the clay. Using your fettling knife, cut straight down around the edges to create a sharp, clean rectangle. -
Smooth the Edges:
Run a damp finger or sponge along the sharp cut edges to round them slightly. This prevents chipping later and gives the piece a professional finish.
Crisp Lines Only
Burnish the edge of your masking tape with a fingernail or spoon before painting. This seals the tape to the bisque ware and prevents glaze from bleeding under.
Step 2: Carving and Details
-
Add Mounting Holes:
While the clay is still leather-hard, use a hole cutter or a simple straw to punch two holes near the top edge. Ensure they are evenly spaced and far enough from the edge to prevent cracking. -
Layout the Text:
Lightly sketch or press your letter stencils into the center of the plate to plan spacing. You don’t want to run out of room for the last letter. -
Carve the Name:
Using a small loop tool or needle tool, carefully carve out the letters. The letters in the image have a hand-carved, slightly recessed look rather than a simple stamp indent. -
Clean Up Burrs:
After carving, small crumbs of clay (burrs) will remain. Wait until the clay is bone dry to brush these away easily without smudging the crisp lines.
Step 3: Glazing the Design
-
Initial Firing:
Bisque fire your piece according to your clay body’s instructions (usually Cone 04). This hardens the clay and prepares it for glazing. -
Tape the Design:
Using masking tape or painter’s tape, mask off the central diagonal area. We want to create two triangular sections at the corners for the colors. -
Apply the Terracotta:
Apply 2-3 coats of the rust/terracotta underglaze to the masked triangular sections. I find that brushing in alternating directions helps achieve solid, opaque coverage. -
Apply the Teal:
Once the terracotta is dry, switch to the teal underglaze for the opposing areas of the triangles, creating that color-blocked effect. Apply 2-3 coats here as well. -
Recess the Letters:
Carefully paint the inside of your carved letters with the teal glaze to make the name pop against the white background. -
Remove Tape:
Peel away the masking tape carefully before the glaze is completely rock hard to keep the lines sharp. -
Clean the Center:
If any glaze seeped under the tape into the white center section, gently scrape it away with a craft knife or wipe with a damp Q-tip. -
Apply Clear Glaze:
Once the underglaze is dry, dip or brush the entire piece with a clear matte glaze. This seals the bare clay and intensifies the colored sections. -
Final Fire:
Fire the piece again to the temperature recommended for your clear glaze (often Cone 5 or 6 for stoneware) to finish the project.
Warping Woes?
If your flat slab curls up while drying, flip it over daily and dry it slowly under a loose plastic sheet. Uneven drying is the main cause of warping.
Hang your new modern nameplate proudly and enjoy the custom welcome it offers every guest
Marbled Clay Name Plate
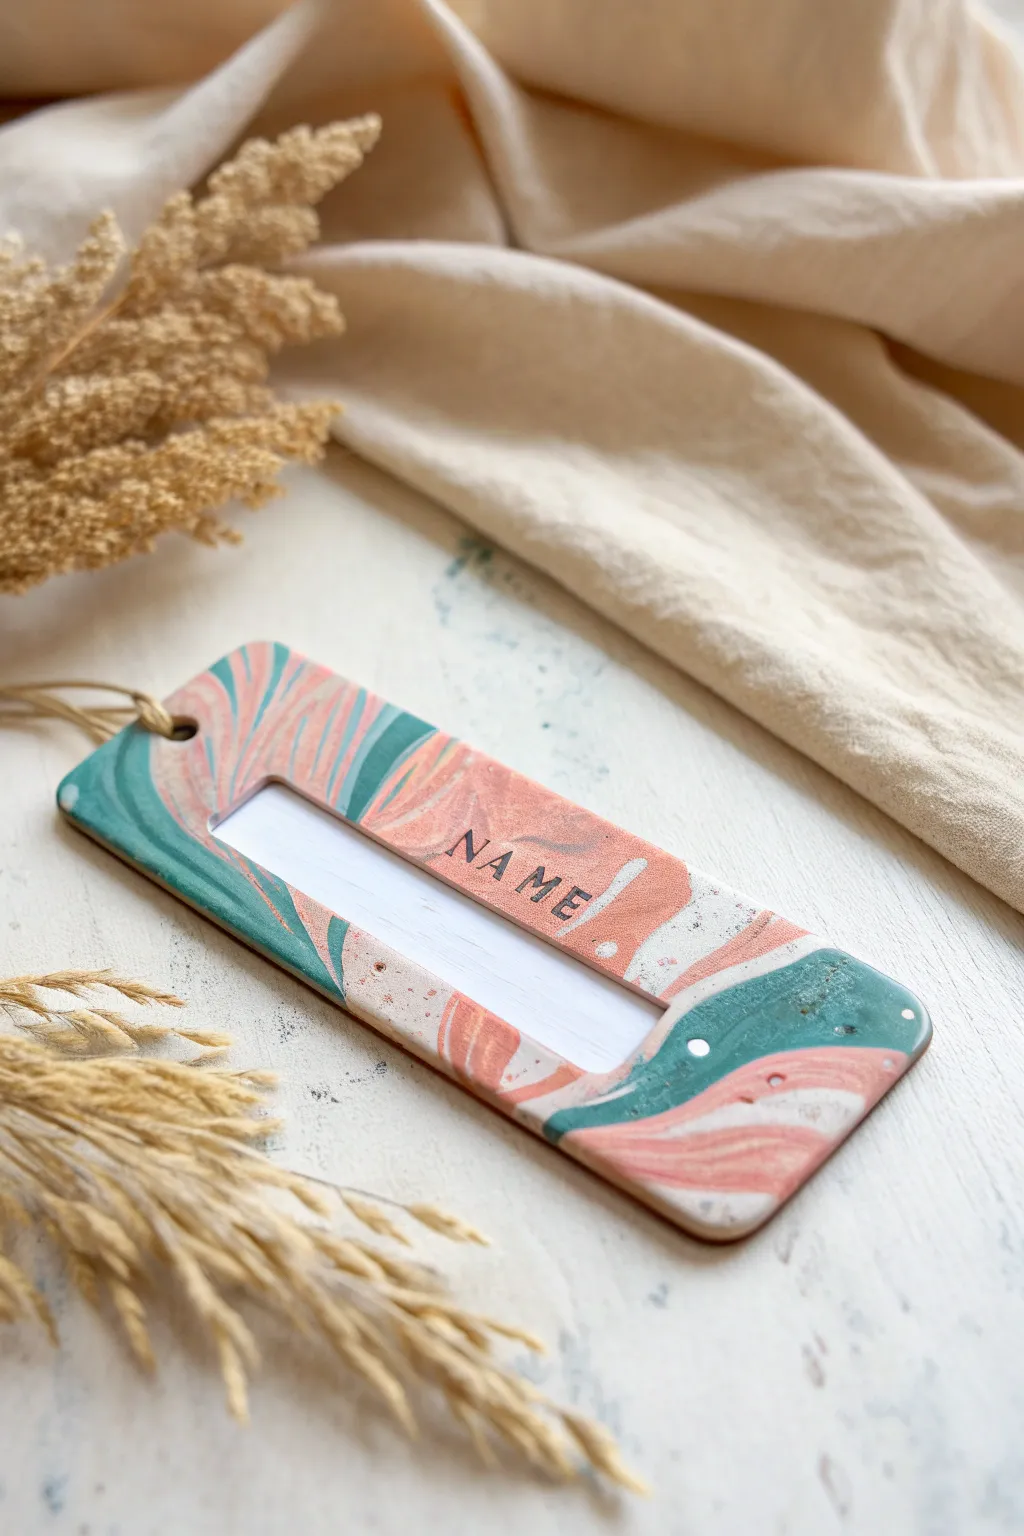
This sophisticated nameplate combines soothing teal, muted rose, and white clays in a mesmerizing marbled pattern, perfect for adding a personalized touch to gifts, luggage, or place settings. The design features a sleek cutout window for writing and is finished with a glossy, stone-like texture that feels satisfyingly high-end.
Step-by-Step Tutorial
Materials
- Polymer clay (Teal or Sage Green)
- Polymer clay (Muted Rose or Coral)
- Polymer clay (White)
- Acrylic rolling pin
- Sharp craft knife or scalpel
- Cardstock for template making
- Alphabet stamp set (small)
- Black acrylic paint
- Small paintbrush
- Paper towel or wet wipe
- Toothpick or small straw
- Small piece of white cardstock (for the insert)
- Sandpaper (fine grit, 400-1000 wet/dry)
- Gloss or satin glaze (optional)
Step 1: Preparing the Pattern
-
Condition the clays:
Begin by conditioning the three colors of polymer clay separately. Knead them until they are soft and pliable, ensuring no air bubbles are trapped inside. -
Rolling snakes:
Roll each color into several long, thin snakes. Aim for the teal and rose snakes to be slightly thicker than the white ones, as the white acts as a subtle accent. -
Twist and combine:
Bundle the snakes together randomly and twist them into one large rope. Fold the rope in half and twist again. Repeat this folding and twisting process 3-4 times, but be careful not to over-mix, or the colors will turn muddy. -
Compress into a block:
Once you have a nice swirled rope, squash it down into a rough rectangular block. This helps to compact the layers together before flattening. -
Roll out the slab:
Use your acrylic rolling pin to flatten the block into a slab about 3-4mm thick. Roll in different directions to stretch the marble pattern organically. -
Check the pattern:
Examine your slab. If you don’t love the pattern on one side, flip it over; the underside often reveals surprising swirls that look better than the top.
Fixing Smudged Colors
If you mix the clay too much and colors look muddy, stop rolling. Slice the slab in half, stack the halves, and slice thinly (Mokume Gane style) to reveal fresh, crisp patterns inside.
Step 2: Shaping and Stamping
-
Create a template:
Draw a rectangle approximately 2 inches by 4 inches on cardstock with rounded corners. Draw a smaller, long rectangular window in the center for the writing area. Cut this template out. -
Cut the clay:
Place your cardstock template onto the most attractive part of your marbled slab. Use a sharp craft knife to trace around the outer edge. -
Cut the window:
Carefully cut out the inner rectangular window. I find it helps to cut slightly inside the line first and then trim back to the edge for a cleaner finish. -
Smooth the edges:
Dip your finger in a little bit of water (or baby oil) and gently run it along all the cut edges to smooth out any ragged bits or sharpness. -
Punch the hole:
Using a small straw or a tool, punch a hole at one end of the tag. This will be used later for threading a string or ribbon. -
Stamp the label:
Take your alphabet stamps and gently press the word ‘NAME’ (or your desired label) into the clay above the window cutout. Press firmly enough to leave an impression, but not so deep it distorts the tag. -
Bake the clay:
Place the tag on a ceramic tile or a parchment-lined baking sheet. Bake according to your brand of clay’s instructions (usually around 275°F/130°C for 30 minutes).
Step 3: Finishing Touches
-
Cool and sand:
Let the tag cool completely. Once hard, use fine-grit sandpaper wet with water to lightly sand the edges and surface for a professional, stone-smooth feel. -
Darken the lettering:
Paint a wash of black acrylic paint over the stamped letters. Immediately wipe the surface with a damp paper towel, leaving the paint only inside the recessed letters. -
Cut the paper insert:
Cut a strip of white cardstock slightly larger than the window opening. Write the necessary information on it using a fine pen. -
Attach the insert:
Turn the clay tag over and use a small amount of strong craft glue or heavy-duty tape to secure the paper strip across the back of the window opening. -
Seal (optional):
For extra durability, you can apply a thin coat of matte or satin glaze, though the sanded finish often looks beautiful on its own. -
Add the cord:
Thread a piece of natural twine or leather cord through the hole you punched earlier to complete the project.
Gilded Edges
Elevate the look by painting the outer edges of the tag with liquid gold leaf or a gold paint marker after baking. This adds a luxurious metallic frame to the marble effect.
Your beautiful, reusable nameplate is now ready to add a touch of class to your belongings
Terrazzo Speckled Name Plate
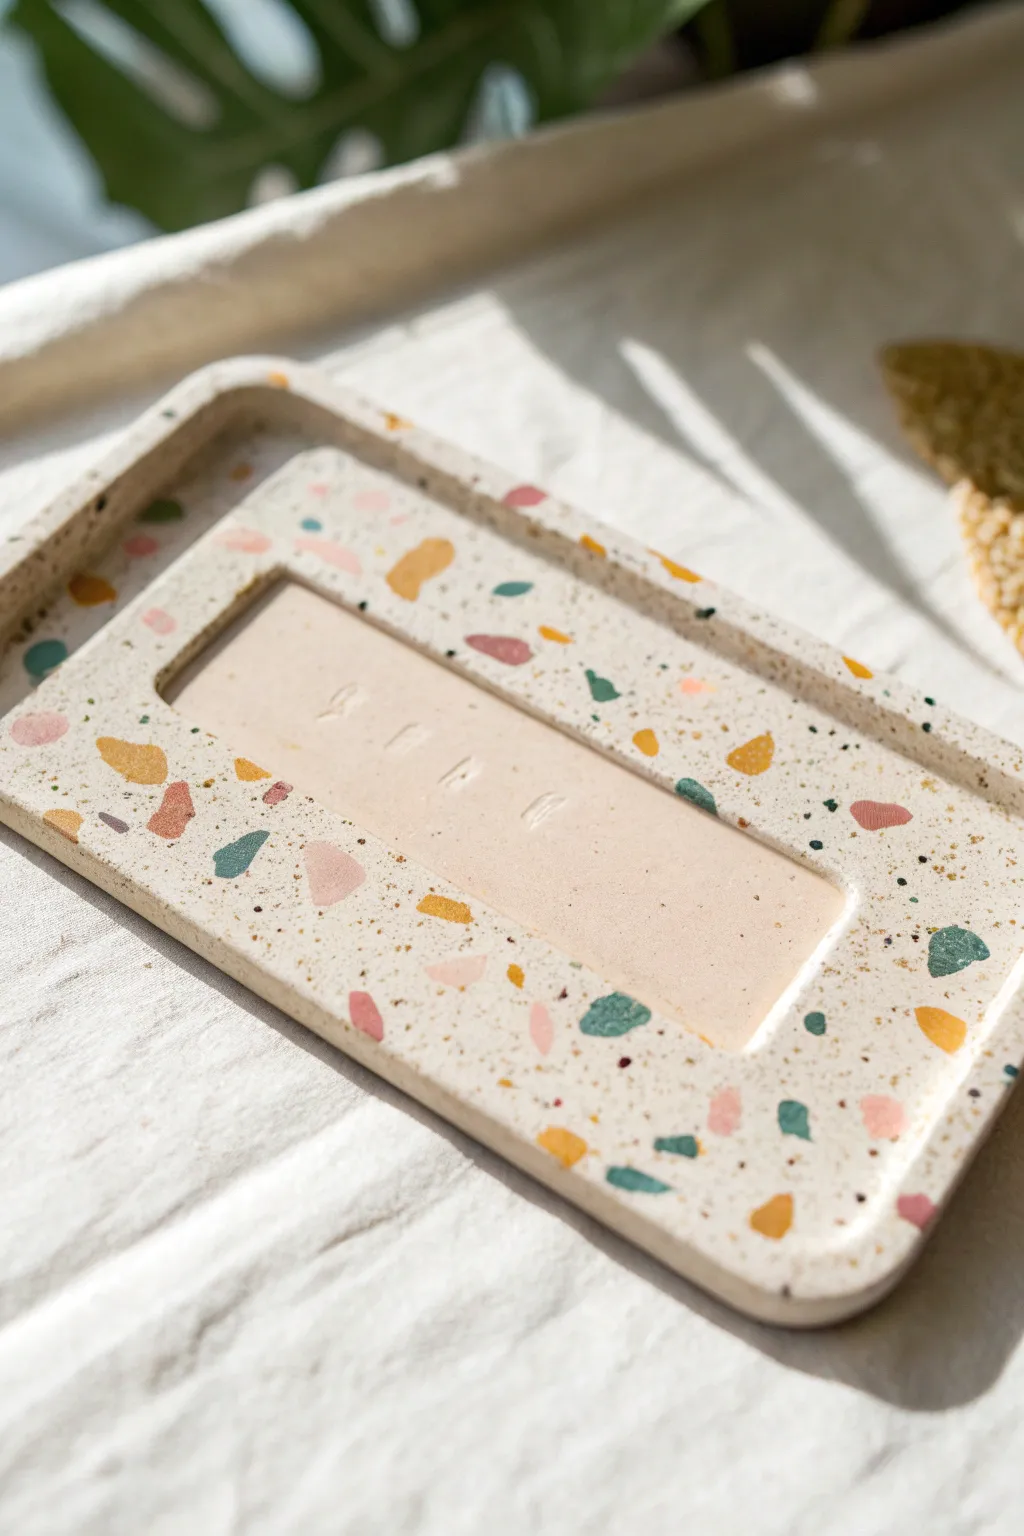
Embrace the playful elegance of terrazzo with this custom clay name plate, featuring a creamy base studded with vibrant, geometric chips. The recessed center provides the perfect stage for stamped lettering, creating a modern desk accessory or jewelry catchall.
Step-by-Step Guide
Materials
- Polymer clay (white or beige for the base)
- Polymer clay (assorted colors for chips: pink, teal, mustard, rust)
- Rolling pin or pasta machine
- Rectangle clay cutter (approx. 4×6 inches)
- Smaller rectangle clay cutter (for the recess)
- Clay knife or craft blade
- Letter stamp set
- Parchment paper or baking tile
- Sandpaper (various grits: 400, 600, 800)
- UV resin or water-based gloss varnish (optional for sealing)
Step 1: Creating the Chips
-
Roll Colored Sheets:
Begin by conditioning your colored clays individually. Roll each color out into a very thin sheet, roughly 1mm thick or the thinnest setting on your pasta machine. -
Bake the Sheets:
Place these thin colored sheets on a baking tile and bake them according to the package directions, but for only about half the recommended time. We just want them hard enough to chop. -
Chop into Chips:
Once cooled, take your craft knife and chop the baked clay sheets into small, irregular fragments. Aim for variety in size and shape to mimic real stone chips, keeping them sharp and angular.
Smearing Colors?
If your chips smear during rolling, your base clay might be too soft or the chips not baked enough. Ensure chips are fully hard before embedding them.
Step 2: Forming the Base
-
Condition Base Clay:
Take your white or beige base clay and condition it thoroughly until it is soft and pliable. Use enough to create a thick slab, roughly 5-6mm thick. -
Add the Chips:
Scatter your chopped colored chips generously over the surface of the white clay slab. Gently press them down with your fingers so they stick. -
Embed the Pattern:
Use your acrylic roller to firmly roll over the slab. This forces the baked chips into the raw clay, creating a smooth, flat surface. Roll in different directions to ensure even distribution. -
Cut the Main Shape:
Place your large rectangle cutter over the best-looking section of your terrazzo slab and press down firmly to cut out the main tray shape. Smooth the edges with your finger.
Gold Inlay
After baking, carefully paint inside the stamped letter impressions with gold acrylic paint or liquid gilding to make the name really stand out.
Step 3: Creating the Recess & Stamping
-
Mark the Center:
Lightly position your smaller rectangle cutter in the center of the tray to mark where the indented area will be. Do not cut all the way through. -
Excavate the Clay:
Carefully remove the clay from the inside of that marked rectangle. You can use a blade to slice layers away until you have a recessed area about 2-3mm deep, leaving a raised border. -
Smooth the Recess:
Use a smoothing tool or your finger to tidy up the bottom of the recessed area. It should be relatively flat, though the handmade texture adds charm. -
Stamp the Name:
Arrange your letter stamps to spell your desired name. Press them gently but firmly into the center of the recessed area. If the clay is sticky, dust the stamps with cornstarch first. -
Final Shaping:
Check the outer rim of the tray. I like to gently round the top edges of the border with my fingertips to soften the look before baking.
Step 4: Finishing Touches
-
Full Bake:
Bake the entire piece according to your clay manufacturer’s instructions for the full duration. Ensure your oven temperature is accurate to prevent scorching the white clay. -
Initial Sanding:
Once fully cooled, wet sand the surface using 400 grit sandpaper. This is the magic step that reveals the sharp edges of the terrazzo chips hidden under the surface film of clay. -
Refine the Surface:
Move to 600 and then 800 grit wet sandpaper. Sand in circular motions until the surface feels incredibly smooth and the colored chips pop clearly against the white background. -
Wash and Dry:
Rinse the piece under water to remove all clay dust and dry immediately with a lint-free cloth. -
Seal (Optional):
If you want a glossy finish or extra durability, apply a thin layer of gloss varnish or UV resin, curing as required. For a natural stone look, leave it unsealed.
Now you have a chic, personalized tray perfect for holding trinkets or gifting to a friend
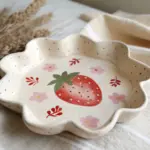
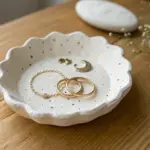
Cottagecore Mini Scene Name Plate
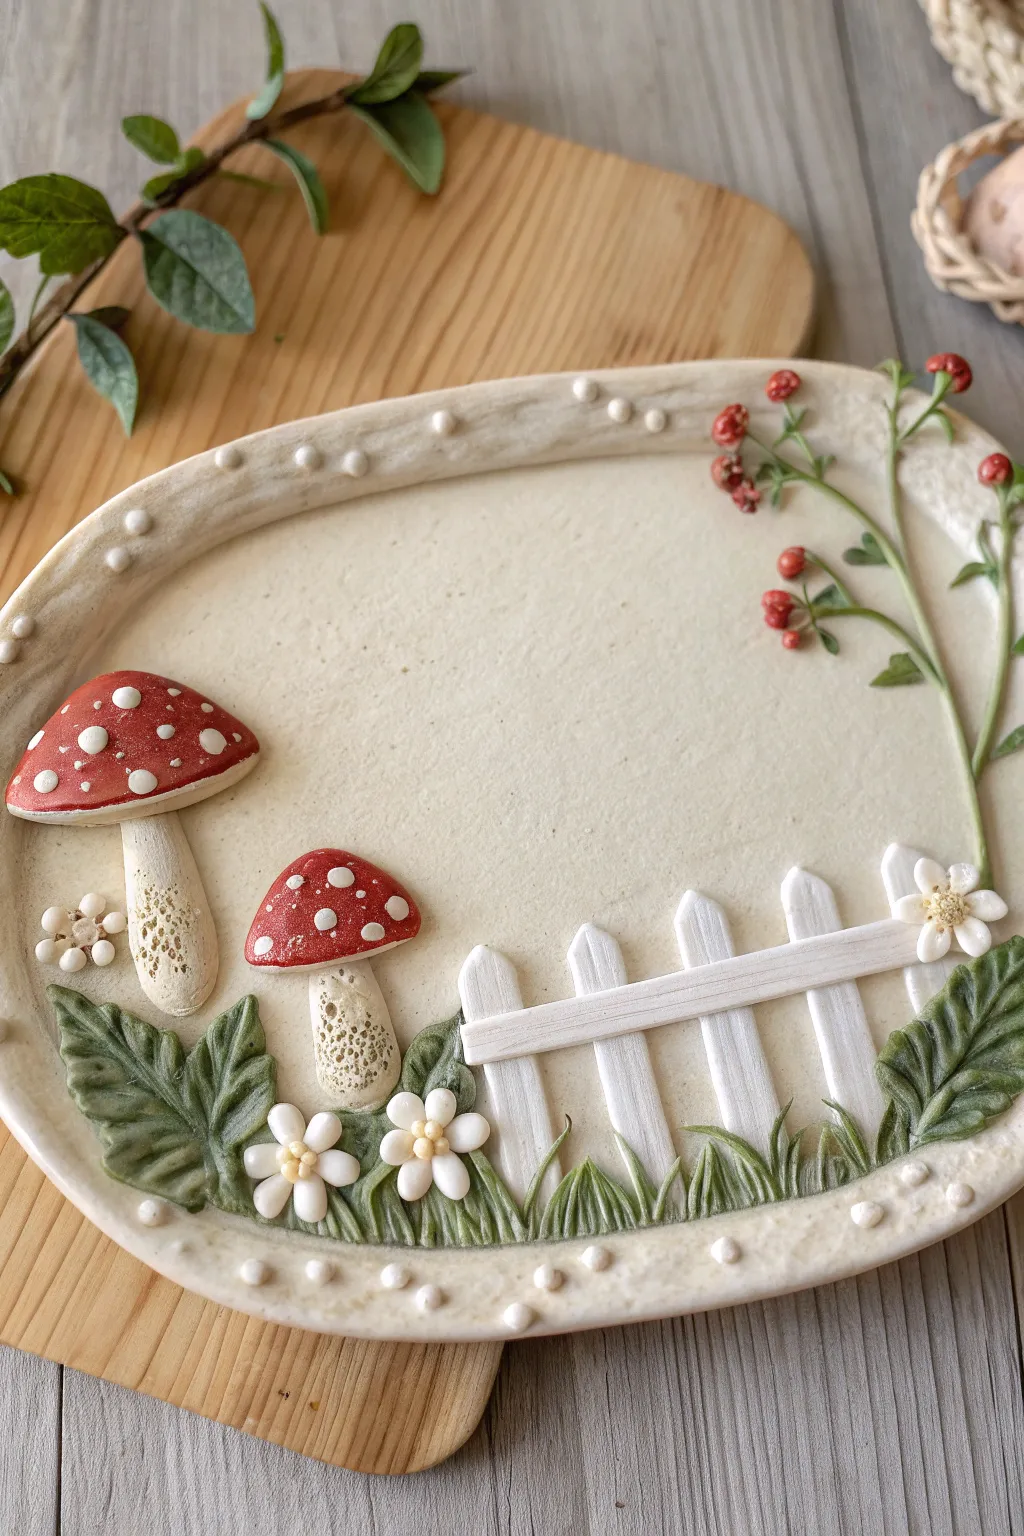
Bring a touch of cottagecore charm to your decor with this delightful oval name plate featuring sculpted toadstools and a tiny picket fence. The creamy, textured background provides the perfect canvas for vibrant red mushrooms and delicate vines, making it an enchanting addition to a nursery or garden room.
How-To Guide
Materials
- Polymer clay or air-dry clay (Cream/Off-white, Red, Green, White, Brown)
- Clay rolling pin
- Oval cutter or paper template with craft knife
- Various clay sculpting tools (needle tool, ball stylus, rubber shaper)
- Liquid clay (for polymer) or slip/PVA glue (for air-dry)
- Texture sponge or stiff brush
- Acrylic paints (optional, if using only white clay)
- Matte varnish
Step 1: Base Preparation
-
Roll out the slab:
Begin by conditioning your cream or off-white clay until it’s pliable. Roll it out to an even thickness of about 1/4 inch (6mm). Using an oval cutter or a paper template, cut out the main base shape. -
Create the raised rim:
Roll a long, thin snake of the same cream clay. Gently press this along the perimeter of the oval to create a raised border. Seamlessly blend the inside edge of the coil into the base using a modeling tool so it looks like one cohesive piece. -
Add surface texture:
Gently dab a textured sponge or a stiff brush over the entire surface of the base and rim. This gives it that organic, stone-like finish rather than being perfectly smooth. -
Decorative dot border:
Roll tiny balls of the cream clay and press them at intervals along the raised rim. Flatten them slightly so they look like subtle rivets or decorative dimples.
Step 2: Sculpting the Elements
-
Form the mushroom caps:
Take red clay and shape two flattened domes—one larger, one slightly smaller. Press them gently onto the left side of the plate. If you aren’t using colored clay, shape them from white clay to paint later. -
Add mushroom stems:
Create thick, slightly tapered stalks from cream clay. Attach them beneath the red caps. Use a needle tool to create rough, porous textures on the stalks for realism. -
Detail the caps:
Roll tiny, flat discs of white clay and press them onto the red caps to create the classic toadstool spots. Vary the sizes for a natural look. -
Construct the fence:
Roll out a thin sheet of white clay and cut narrow strips. Cut pointed tips on several vertical strips to form the pickets. Lay them onto the bottom right area, then overlay two horizontal rails to connect them. -
Sculpt the foliage:
Using green clay, shape several textured leaves. Press veins into them with a needle tool and arrange them around the base of the mushrooms and the fence corners. -
Add grass texture:
Roll thin, tapered snakes of green clay or use an extruder to make grass blades. Cluster these along the bottom edge of the fence to ground the scene.
Clay Cracking?
If using air-dry clay, cracks often appear while drying. Smooth them out with a little water and fresh clay paste (slip) immediately. Dry slowly away from direct heat to prevent warping.
Step 3: Floral Details & Refining
-
Create dainty flowers:
Form five small teardrops of white clay and press them together in a circle to make flower petals. Add a textured yellow or tan center. Place these near the fence and mushroom base. -
Vine assembly:
Roll a very thin green vine and trail it up the right side of the plate. Attach small leaves along the stem. -
Berry clusters:
Roll tiny spheres of red clay. Cluster them in groups of three or four along the upper part of the vine to mimic holly or red berries. -
Add your lettering:
The center remains open for customization. You can either use clay stamps to impress a name now, or wait until the plate is dry to paint the name in the center space. -
Final inspection:
Check all attachment points. If using polymer clay, a dab of liquid clay helps secure heavy items like mushrooms. I like to do a final pass with a damp brush to smooth out any fingerprints. -
Baking or drying:
Follow the instructions for your specific clay type. For polymer clay, bake at the recommended temperature. for air-dry, let it cure for 24-48 hours. -
Finishing touches:
Once cured (and cooled), apply a matte varnish to protect the piece. If you used white clay for everything, now is the time to carefully paint the details with acrylics.
Customization Idea
Make the plate functional by poking two holes near the top rim before drying. After finishing, thread rustic twine or ribbon through them so the name plate can be hung easily on a door.
Once fully cured, your charming woodland name plate is ready to welcome visitors to your space