If your desk is starting to look like a pen tornado hit it, a handmade clay pen holder is the quickest way to make things feel tidy and personal. Here are my favorite clay pen holder ideas—from classic beginner shapes to playful, wow-factor designs you’ll want to make in batches.
Classic Slab-Wrapped Pen Cup

Capture the rustic elegance of leatherwork in ceramic form with this slab-wrapped pen holder. The simple cylindrical shape is elevated by delicate stitch detailing and a warm oxide wash that highlights the texture.
Step-by-Step Tutorial
Materials
- White stoneware or porcelain clay body
- Rolling pin with guide strips (approx. 1/4 inch thickness)
- Fettling knife or clay cutter
- Needle tool
- Slip and scoring tool (serrated rib)
- Ruler
- Circular template (cookie cutter or jar lid, approx. 3-4 inches)
- Tracing wheel or small dull point tool (for stitch marks)
- Sponge
- Clear matte glaze
- Iron oxide wash or brown underglaze
Step 1: Preparing the Slab
-
Roll out the clay:
Begin by wedging your white stoneware clay to remove air bubbles. Roll it out into a long, even slab using guide strips to maintain a consistent 1/4 inch thickness. -
Compress the slab:
Use a rubber rib to smooth and compress the clay on both sides. This aligns the clay particles, reducing the chance of warping later, and creates that smooth, leather-like canvas. -
Cut the base:
Using your circular template, cut out a round disc that will serve as the floor of your pen cup. -
Measure the wall:
Calculate the circumference of your base disc (Diameter x 3.14) or simply wrap a string around it to find the length needed. Add about half an inch for a bevel overlap. -
Cut the rectangle:
Using a ruler and fettling knife, cut a clean rectangle from the slab based on your measurements. A height of 4 to 5 inches works well for most pens.
Clean Lines Pro Tip
To get perfectly straight ‘stitches’, hold a flexible ruler against the curve of the pot as a guide while you press your tool into the clay.
Step 2: Assembling the Form
-
Bevel the edges:
Cut 45-degree angles on the short ends of your rectangular slab. Bevel them in opposite directions so they will overlap seamlessly to form a cylinder. -
Score and slip the base:
Rough up the outer edge of the circular base and the bottom long edge of your rectangular wall. Apply clay slip generously to these scored areas. -
Attach the wall:
Carefully wrap the rectangular slab around the base. I like to do this on a banding wheel if available. Press the wall firmly onto the base. -
Seal the vertical seam:
Press the two beveled ends together. Support the wall from the inside with one hand while smoothing the seam on the outside with a rib or your finger. -
Refine the joins:
Use a wooden modeling tool to blend the clay where the wall meets the floor on the inside to ensure a watertight seal. Smooth away any fingerprints with a slightly damp sponge, keeping the form crisp.
Step 3: Adding the Faux-Stitch Detail
-
Mark the guide lines:
Lightly trace two horizontal lines around the cylinder—one near the top rim and one near the bottom. Don’t cut deep; just make a faint indentation. -
Create the heavy stitching:
Using a dull needle tool or a tracing wheel, press vertical dash marks along your guide lines. Press firmly enough to create texture but not so hard that you warp the wall. -
Soften the rim:
Run a damp sponge or a piece of chamois leather over the top rim to round it off slightly, making it comfortable to touch. -
Slow drying:
Cover the pot loosely with plastic to let it dry slowly to the leather-hard stage, then uncover until bone dry. Bisque fire the piece according to your clay body’s instructions.
Troubleshooting: Warping
If your cylinder creates an oval shape during drying, place a supportive object (like a cardboard tube) inside loosely until it reaches leather-hard.
Step 4: Glazing and Finishing
-
Apply the oxide wash:
Mix iron oxide with water (or use a watered-down brown underglaze). paint this into the stitched lines and around the rim. -
Wipe back:
Using a clean, damp sponge, wipe away the excess oxide from the surface. The dark color should remain only in the recessed ‘stitch’ marks and faintly on the rim, creating an antiqued look. -
Clear glaze application:
Dip or brush a clear matte glaze over the entire piece. The matte finish enhances the leather aesthetic while sealing the clay. -
Final firing:
Fire the piece to the maturity temperature of your clay and glaze (typically Cone 5 or 6 for stoneware).
Once fired, this durable vessel is ready to organize your workspace with handmade charm

Coil-Built Spiral Pen Holder
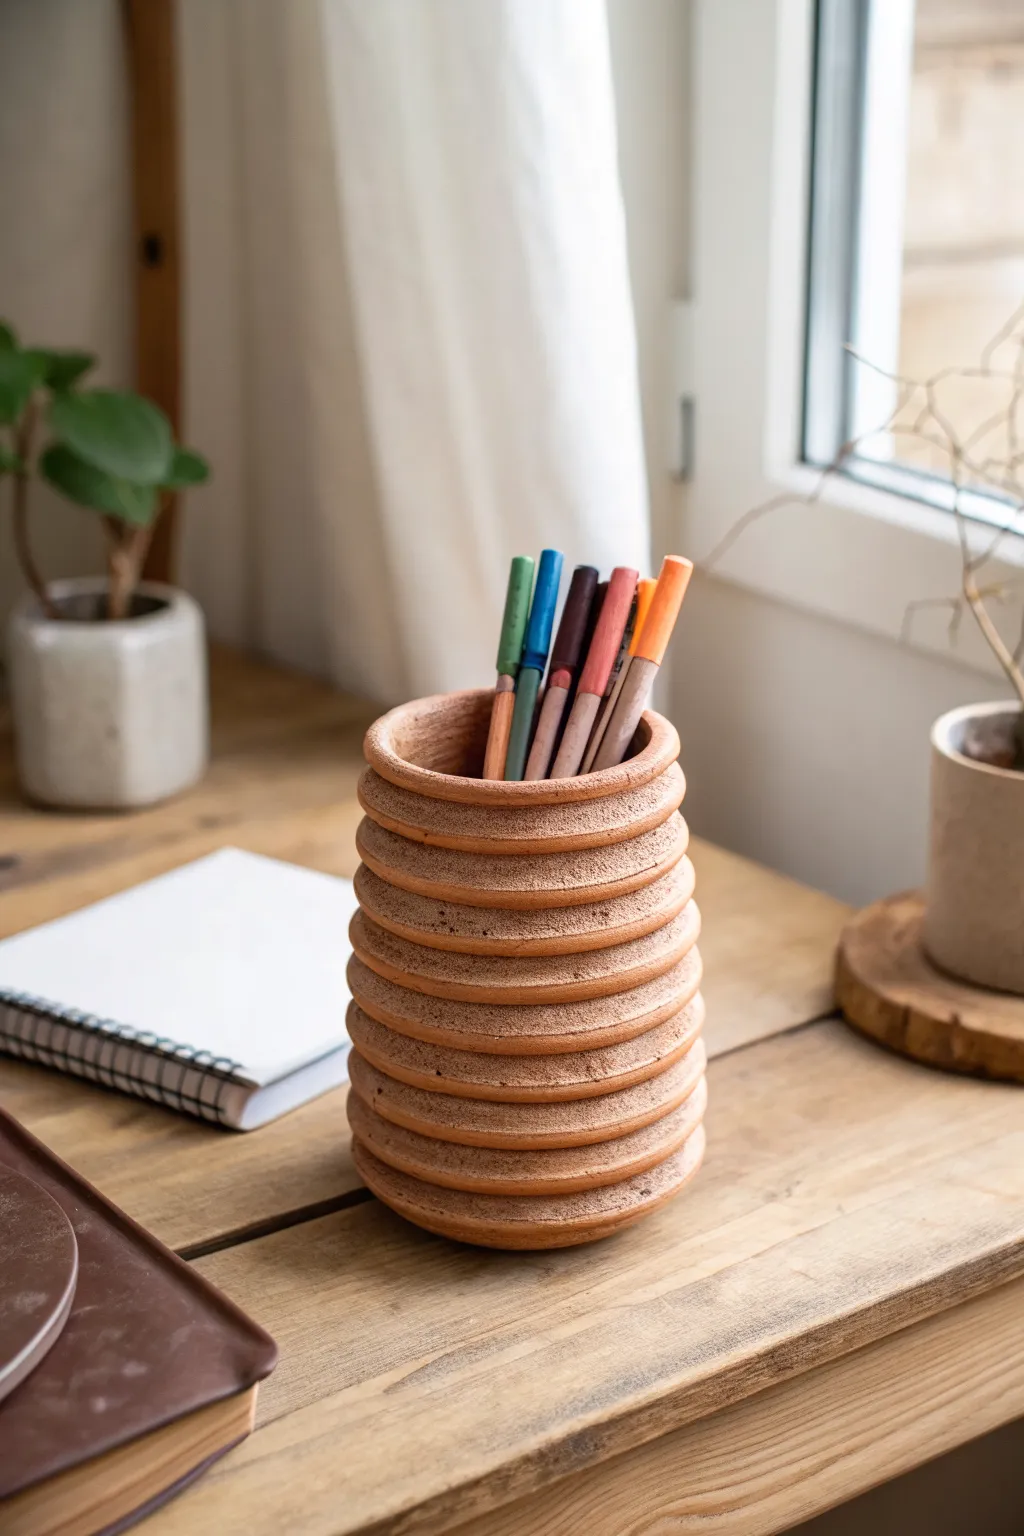
This earthy, minimalist pen holder features distinct horizontal ridges that mimic layers of stacked stone or sediment. The warm terracotta tone and tactile ribbed texture bring a grounded, organic feel to any desktop workspace.
Step-by-Step
Materials
- Terracotta or stoneware air-dry clay (or kiln-fire clay)
- Circle cutter or circular template (approx. 3-3.5 inches)
- Rolling pin
- Two wooden guide strips (approx. 1/4 inch thick)
- Scoring tool or needle tool
- Slip (clay mixed with water) or vinegar
- Small sponge
- Modeling tool or old credit card for scraping
- Fine-grit sandpaper (optional)
Step 1: Preparing the Base and Rings
-
Roll the Slabs:
Begin by wedging your clay to remove air bubbles. Place the clay between two wooden guide strips and roll it out into a consistent slab. The guides help ensure every ring will be perfectly even in thickness. -
Cut the Base:
Using your circle cutter or template, cut out a solid circle. This will serve as the bottom floor of your pen holder. Set it aside on a piece of cardboard or fabric to prevent warping. -
Cut the Rings:
From the remaining slab, cut out approximately 10 to 12 identical circles using the same cutter. For each of these circles, use a slightly smaller cutter or freehand cut a hole in the center to create rings. The wall thickness (the ring width) should be sturdy, about 1/2 to 3/4 inch.
Uneven Stack?
If your tower starts leaning while wet, insert a cardboard tube wrapped in parchment paper inside the cylinder. This acts as a temporary internal support until the clay stiffens up.
Step 2: Assembling the Stack
-
Score the Base:
Take your solid base circle and rough up the outer edge of the top surface using a scoring tool or a fork. Apply a generous dab of slip or vinegar to the scratched area. -
Attach First Ring:
Score the bottom of your first ring and press it firmly onto the base. Gently wiggle it back and forth a tiny bit to lock the clay particles together and remove trapped air. -
Continue Stacking:
Repeat the score-and-slip process for each subsequent ring. Stack them directly on top of one another. As you build height, check from all angles to ensure the tower isn’t leaning. -
Interior Smoothing:
Every 2 or 3 rings, pause to smooth the *inside* seams. It’s much harder to reach the bottom once the cylinder is full height. Use a long modeling tool or your finger to smear the clay downwards across the interior joints.
Step 3: Refining the Texture
-
Round the Edges:
Once all rings are stacked to your desired height, use a damp sponge or your fingertip to gently round off the sharp outer edges of each individual ring. You want to maintain the deep groove between layers but soften the look. -
Deepen the Grooves:
If the joining slip has filled in the gaps between rings too much, carefully run a needle tool or the edge of a credit card horizontally between the layers to redefine those shadow lines. -
Surface Texture:
To achieve the specific sandy look in the photo, dab a stiff-bristled brush or a rough sponge over the exterior. I find that lightly stippling the surface breaks up the shine and makes it look more like natural stone. -
Drying Phase:
Allow the piece to dry slowly away from direct heat or drafts. Cover it loosely with plastic wrap for the first day to equalize moisture, then uncover it to finish drying completely. -
Final Sanding:
Once fully bone dry (or fired, if using kiln clay), use fine-grit sandpaper to knock off any sharp burrs or rough patches on the rim, leaving a smooth, professional finish.
Level Up: Ombré Effect
Blend small amounts of different colored oxides or pigments into your clay batches before rolling. As you stack the rings, transition from dark to light clay for a stunning gradient effect.
Now your desktop has a functional piece of art that combines modern geometry with ancient potting techniques.
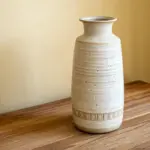

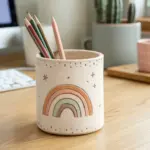
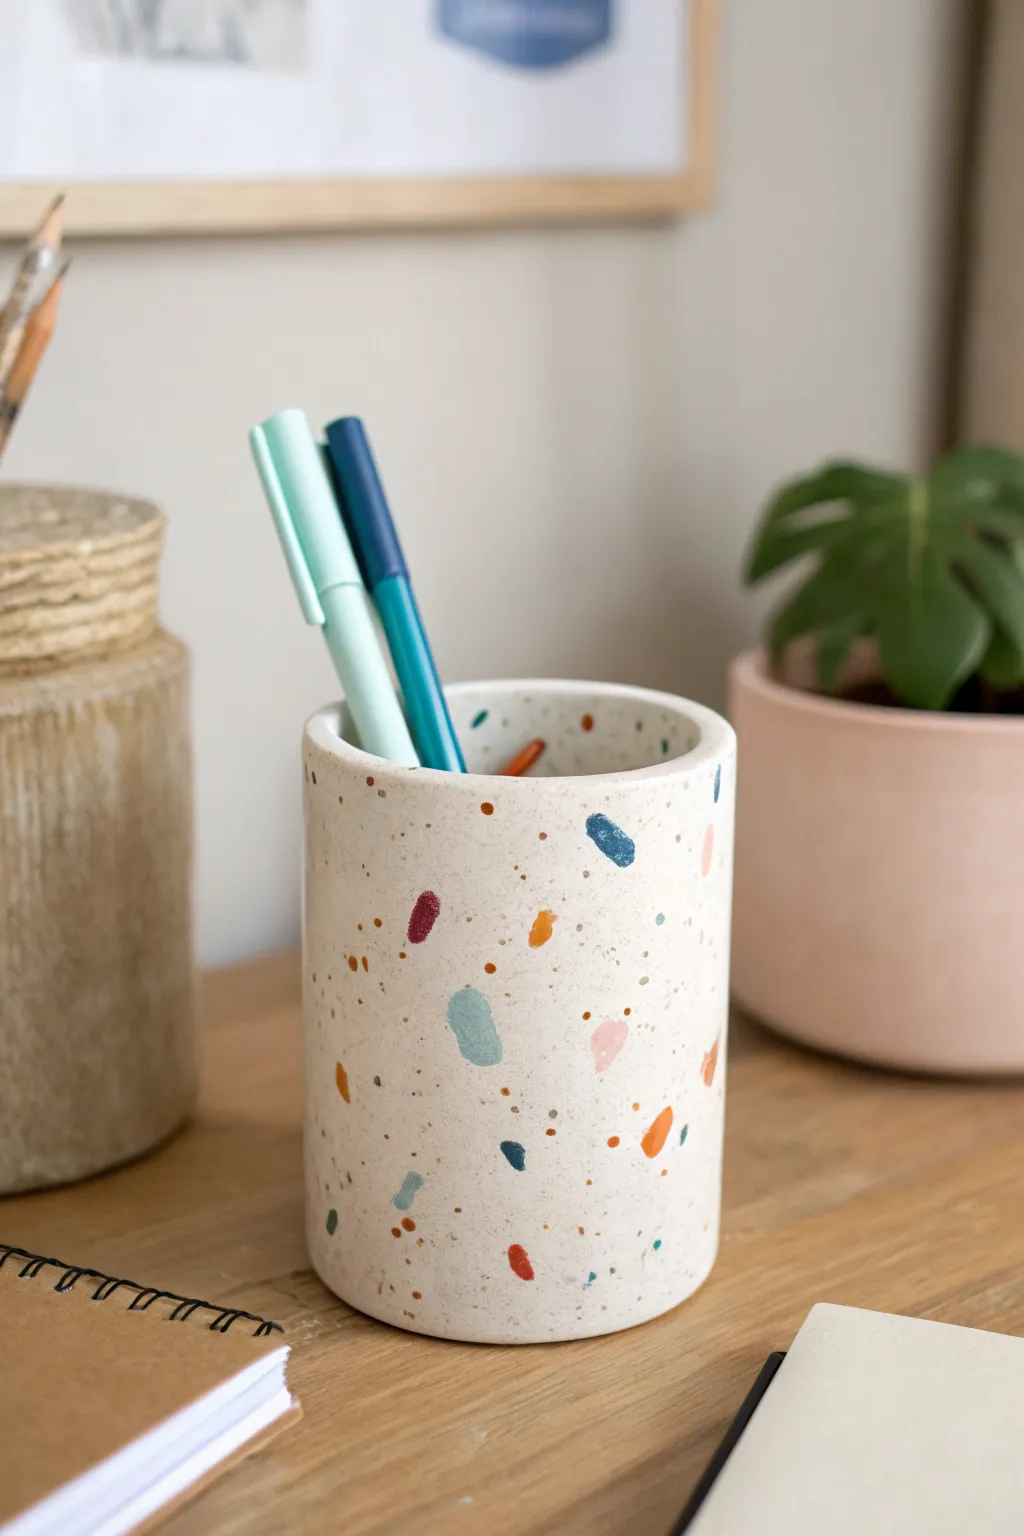
Easy Pinch-Pot Pen Cup
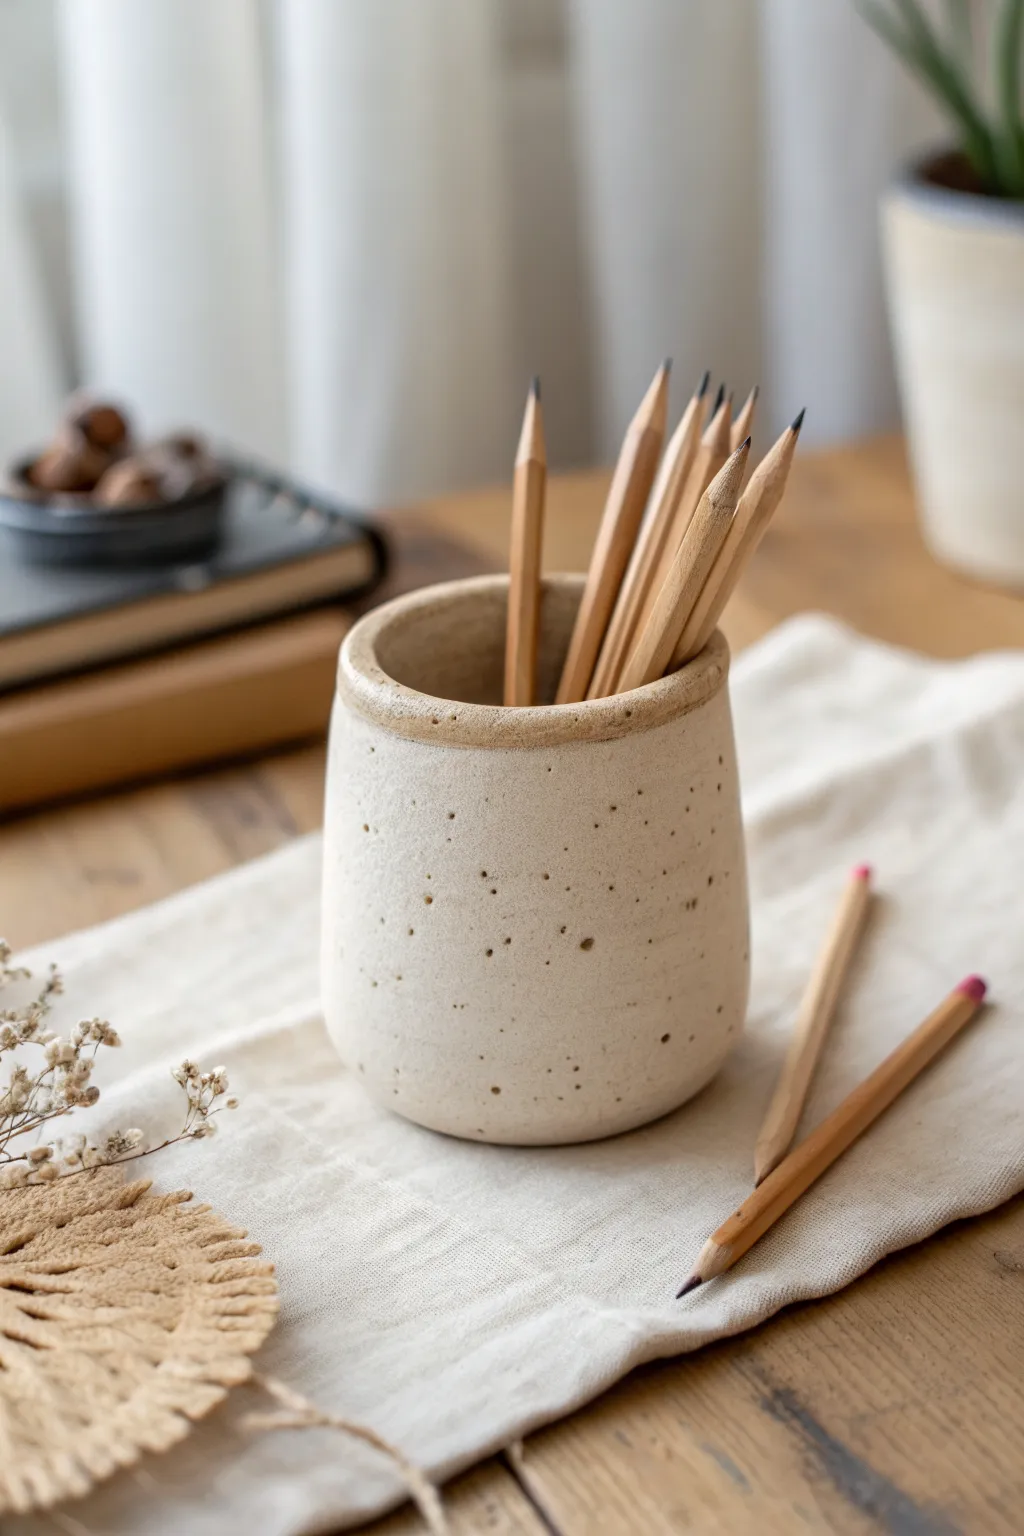
Embrace the beauty of imperfection with this lovely hand-built pen holder, featuring a warm, sandy glaze dotted with charming speckles. Its organic, slightly tapered shape and rounded rim make it a cozy addition to any desk setup.
Detailed Instructions
Materials
- Air-dry clay or stoneware clay (white or light grey)
- Speckled cream or ‘oatmeal’ ceramic glaze (if firing)
- Acrylic paints (Speckled Cream/Buff) + speckling brush (if using air-dry)
- Rolling pin
- Sponge
- Water cup
- Needle tool or fettling knife
- Potter’s rib or old credit card
- Clear matte varnish (for air-dry only)
Step 1: Forming the Base
-
Wedge the clay:
Start by wedging a baseball-sized amount of clay to remove any air bubbles and ensure an even consistency. This prevents cracking later on. -
Roll the bottom slab:
Roll out a small portion of your clay to about 1/4 inch thickness. Use a round cutter or trace a circle (about 3 inches in diameter) and cut it out with your needle tool to create the floor of the cup. -
Prepare the walls:
Roll the remaining clay into a long variety of coils or a single rectangular slab. For the look in the photo, a slab construction works best to get that smooth surface. Roll a rectangle roughly 4 inches tall and long enough to wrap around your base.
Keep it Clean
Wipe your sponge continuously. A dirty sponge just moves mistakes around. A clean, damp sponge is the secret to that pro-smooth finish.
Step 2: Assembly and Refining
-
Score and slip:
Score (scratch) the outer edge of your base circle and the bottom edge of your rectangular wall. Apply water or slip (liquid clay) to the scored areas. -
Attach the wall:
Wrap the clay wall around the base, pressing firmly where the scored edges meet. Join the vertical seam where the wall ends meet by scoring, slipping, and smoothing the clay together until the seam disappears. -
Shape the taper:
Gently gently squeeze the clay walls slightly inward as you move toward the top to create that subtle tapered look seen in the photo. It shouldn’t be a perfect cylinder; a slight narrowing adds elegance. -
Smooth the exterior:
Use a potter’s rib or a damp sponge to smooth out the outside walls. I find it helpful to support the wall from the inside with one hand while smoothing the outside with the other. -
Refine the rim:
Pay special attention to the rim. Use a wet sponge or your fingers to round it off completely. The reference image shows a thick, soft rim, so don’t make it too sharp or thin. -
Add surface texture:
For that earthy feel, don’t over-polish. Leave a few tiny distinct pores or marks if you like, or sponge it lightly to expose the clay’s grit.
Step 3: Finishing and Glazing
-
Dry properly:
Let the piece dry slowly under loose plastic for a day, then uncover to bone dry. If using kiln clay, bisque fire it now. -
Applying the base color:
If using glaze: Dip or brush on a ‘Speckled Buff’ or ‘Oatmeal’ glaze. Ensure the coat is thick enough around the rim to create that distinct lighter band where the glaze breaks. -
Painting alternative:
If using air-dry clay: Paint the entire cup a creamy off-white. Let it dry completely. -
Creating the speckles:
For the painted version, mix a dark brown paint with a little water. Dip an old toothbrush or stiff bristle brush in the mix and flick the bristles to splatter tiny dots across the surface. -
Highlighting the rim:
Dab a very slightly darker beige or tan color right along the rounded rim to mimic how glaze interacts with clay edges. -
Seal and protect:
Once your paint is fully dry, apply a matte varnish to seal the clay and give it a finished, ceramic-like sheen without being overly glossy.
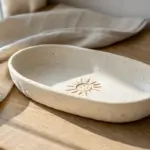
Make it a Set
Create a matching shallow dish for paperclips or erasers using the same clay body and glaze for a cohesive, minimalist desk organizer set.
Place your favorite pencils inside and enjoy the calm aesthetic of your new handmade creation


Stamped Pattern Pen Holder
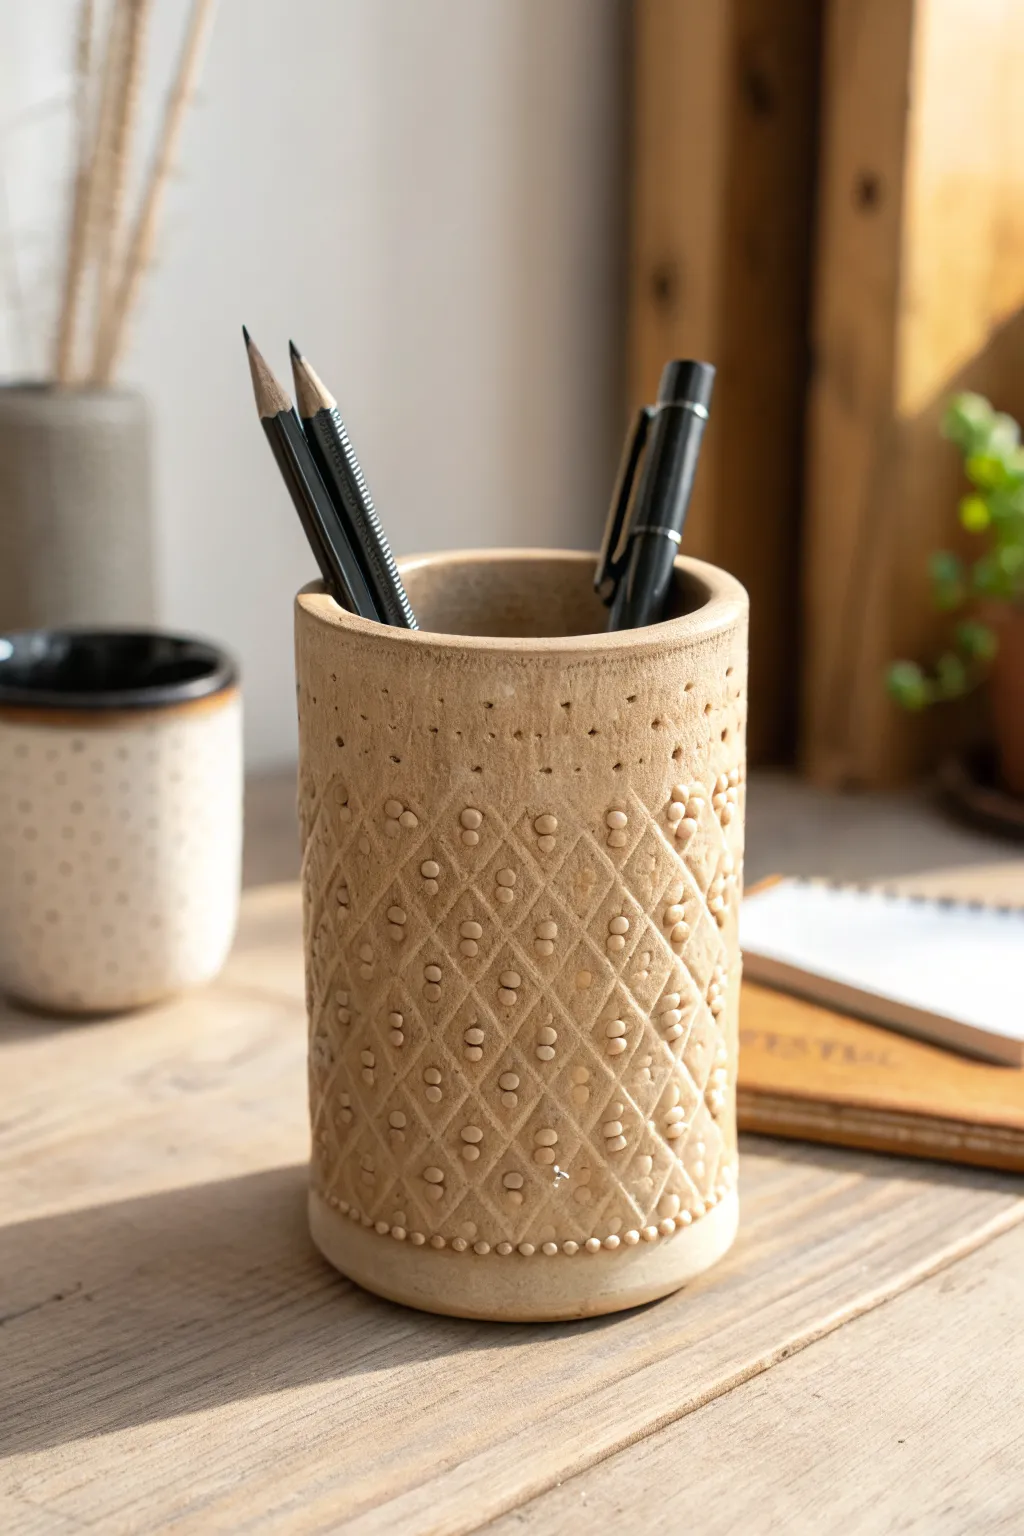
This earthy, textured pen holder combines practical organization with the satisfying tactile appeal of handmade pottery. Featuring a stamped diamond lattice pattern accented with raised dots, its natural beige tone fits perfectly into any rustic or minimalist workspace.
Step-by-Step Guide
Materials
- Air-dry clay or polymer clay (beige or sand color)
- Non-stick rolling pin
- sharp craft knife or clay slicing blade
- Cylindrical form (like a sturdy cardboard tube or a jar wrapped in wax paper)
- Ruler
- Pattern stamp or embossing tool (diamond grid)
- Small ball stylus or toothpick
- Slip (clay mixed with water) or liquid clay adhesive
- Fine grit sandpaper
- Matte clear sealant spray
Step 1: Preparing the Base
-
Condition the clay:
Start by warming a generous chunk of beige clay in your hands. Knead it thoroughly until it is soft, pliable, and free of any air bubbles, as these can cause cracks later. -
Roll out a slab:
Using your rolling pin, flatten the clay into a long rectangular slab. Aim for an even thickness of about 1/4 inch (6mm). If you want perfect uniformity, place guide sticks on either side of the clay while rolling. -
Trim to size:
Measure the circumference and height of your chosen cylindrical form. Using a ruler and a craft knife, cut the clay slab into a precise rectangle that will wrap around the form with just a tiny bit of overlap for the seam. -
Cut the base:
From the remaining scraps of rolled clay, place your cylindrical form down and trace around it. Cut out this circle to serve as the bottom of your cup.
Seam Smoothing
If the visible seam is stubborn, roll a very thin coil of fresh clay, lay it over the crack, and blend it outward in both directions until the transition disappears completely.
Step 2: Texturing the Surface
-
Plan the design grid:
Before assembling, it’s easier to texture the flat slab. Lightly score a grid of diagonal lines to create diamonds using a ruler and a dull tool, or press a diamond-patterned texture mat firmly into the clay slab. -
Add upper detailing:
Leave the top inch of the slab relatively smooth, but add a horizontal row of small indentations just above where the diamond pattern begins. Use a small tool to poke tiny, random holes near the rim for an organic, porous look. -
Create the raised dots:
Roll tiny, consistent spheres of clay between your fingers. These should be very small, like peppercorns. Place one dot at every intersection point of your diamond grid. I find pressing them gently with a flat finger helps them adhere without squashing them completely. -
Detail the base rim:
For the bottom edge decoration, roll a long, thin snake of clay. Cut it into equal small segments and roll them into balls. Press these along the very bottom edge of your rectangular slab to create a beaded border effect.
Step 3: Assembly and Finishing
-
Wrap the form:
Carefully lift your textured slab and wrap it around the cylindrical form. Be gentle so you don’t smudge your beautiful latticework. -
Seal the vertical seam:
Where the two ends of the rectangle meet, score the edges (scratch them up) and apply a little slip or adhesive. Press the edges together firmly and smooth the seam with your finger or a modeling tool so it becomes invisible. -
Attach the bottom:
Score the bottom edge of the cylinder and the outer edge of your base circle. Apply slip/adhesive and press the cylinder onto the base. Blend the clay on the inside using a rounded tool to ensure a watertight seal. -
Refine the rim:
Check the top rim of the cup. If it got distorted during handling, gently reshape it into a perfect circle. Smooth the edge with a bit of water on your fingertip to remove sharpness. -
Slow drying:
Allow the piece to dry slowly away from direct sunlight or heat sources. Turn it occasionally to ensure even verify drying, which helps prevent warping. -
Sanding:
Once bone dry (or cured, if using polymer), inspect for any rough spots. Use fine-grit sandpaper to gently smooth the rim or any sharp jagged bits, being careful not to sand off your texture. -
Seal the piece:
To protect the porous surface and give it a finished look, spray the entire holder with a matte clear acrylic sealant. Two light coats are better than one heavy coat.
Make it Antique
After baking or drying, brush a diluted brown acrylic paint over the texture and immediately wipe it off with a damp cloth. The dark paint will stay in the grooves, highlighting the diamond pattern.
Place your favorite pens in your new creation and enjoy the customized touch it adds to your desk

The Complete Guide to Pottery Troubleshooting
Uncover the most common ceramic mistakes—from cracking clay to failed glazes—and learn how to fix them fast.
Terrazzo Speckle Pen Holder
Bring a splash of modern artistry to your desk with this faux-terrazzo pen cup, featuring a creamy base dotted with vibrant, rugged chips of color. This project uses polymer clay to mimic the high-end look of stone or ceramic without needing a kiln or complicated molds.
Step-by-Step
Materials
- White or beige polymer clay (large block for the base)
- Assorted colored polymer clay (teal, navy, rust, mustard, pink)
- Rolling pin or acrylic roller
- Craft knife or tissue blade
- Empty soda can or glass jar (to use as a form)
- Parchment paper or baking paper
- Smooth work surface (ceramic tile or glass mat)
- Oven
- Fine-grit sandpaper (optional)
- Matte finish varnish (optional)
Step 1: Preparing the Terrazzo ‘Chips’
-
Condition the colored clay:
Start by taking small amounts of your chosen accent colors—teal, navy, rust, mustard, and pink—and kneading them individually until they are soft and pliable. -
Create thin sheets:
Roll each color out into a very thin, uneven sheet on your work surface. The thinner these are, the more seamless your final surface will look. -
Chop into fragments:
Use your craft knife to roughly chop these colored sheets into tiny, irregular angular pieces. Make a variety of sizes, from mere specks to slightly larger, distinct shards. -
Set aside:
Scoop your pile of colorful confetti into a small bowl or onto a scrap of paper so they are ready for the embedding step.
Step 2: Building the Base
-
Condition the base clay:
Take your large block of white or beige clay and condition it thoroughly. Since this will form the structure, ensure there are no air bubbles trapped inside. -
Roll the main slab:
Roll the base clay out to a consistent thickness of about 1/4 inch (6mm). This needs to be thick enough to stand up on its own but thin enough to bake evenly. -
Trim to size:
Measure the height and circumference of your soda can or jar form. Cut a rectangle from your clay slab that roughly matches these dimensions, adding a slight overlap for the seam. -
Prepare the form:
Wrap your soda can or glass jar in a layer of parchment paper. This is crucial as it prevents the clay from sticking to the form during baking.
Clean Color Tip
Wash your hands or use baby wipes between handling different clay colors. Dark pigments like navy can easily transfer to the white base clay and dirty the whole look.
Step 3: Applying the Terrazzo Pattern
-
Sprinkle the chips:
While the clay slab is still flat on your work surface, sprinkle your prepared colored chips randomly over the top. Don’t overthink the placement; randomness creates the most authentic look. -
Roll to embed:
Gently use your rolling pin to press the colored chips flat into the white base. Roll just enough to make the surface flush and smooth, being careful not to distort the rectangular shape too much. -
Check the underside:
I like to flip the slab over and add a few chips to the reverse side as well, just in case the inside of the cup is visible.
Surface Smoothing
If your roller is dragging the chips and smearing the colors, lay a sheet of baking paper over the clay before rolling. This keeps the colors crisp and distinct.
Step 4: Forming and Baking
-
Wrap the form:
Carefully lift your terrazzo slab and wrap it around the parchment-covered can. Bring the two short ends together. -
Seal the seam:
Gently press the seam together, smoothing the clay with your finger or a modeling tool until the join is invisible. You can roll the can on the table slightly to help flatten the seam. -
Create the base:
Roll out a separate small disk of base clay for the bottom. Place your cylinder on top of it and blend the clay from the bottom disk up onto the walls of the cylinder to seal it shut. -
Smooth the rim:
Use your finger to gently round off the top rim of the pen holder so it isn’t sharp or uneven. -
Bake:
Bake the clay upright on the form according to the manufacturer’s temperature instructions, typically for about 30-45 minutes to ensure strength. -
Cool and remove:
Allow the project to cool completely before sliding the can and parchment paper out. Don’t rush this, as warm clay is fragile. -
Sand and finish:
If desired, lightly sand the outside with fine-grit sandpaper to remove fingerprints, then apply a matte varnish to protect the surface.
Fill your new speckled cup with your favorite pens and enjoy a tidier, more stylish workspace
Swirled Marble Clay Pen Holder
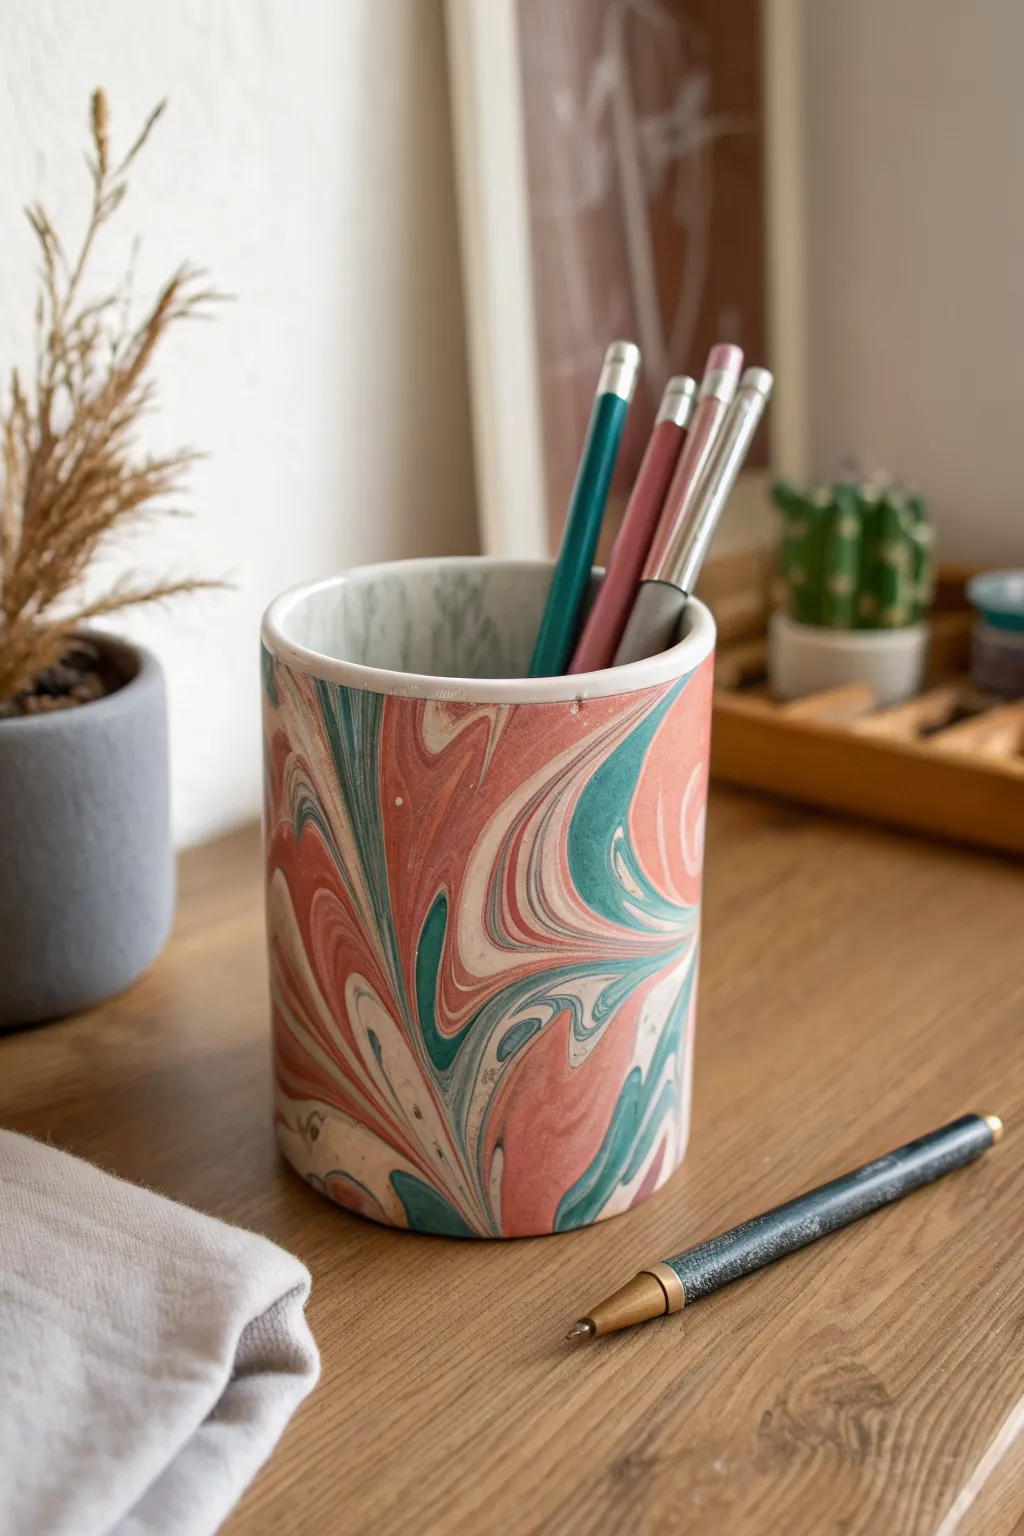
This elegant pen holder combines soft coral, teal, and cream tones in a mesmerizing marbled pattern that brings a touch of organic art to your desk. By swirling colored clay together before forming the vessel, you create a completely unique design that mimics the sophisticated look of natural stone.
Detailed Instructions
Materials
- White or cream polymer clay (primary base)
- Coral/terracotta polymer clay
- Teal/blue-green polymer clay
- Empty soda can or glass jar (to use as a mold)
- Rolling pin or acrylic roller
- Clay slicing blade or craft knife
- Parchment paper
- Sandpaper (fine grit)
- Matte or satin varnish (optional for sealing)
Step 1: Preparing the Colors
-
Condition the clay:
Start by warming up the polymer clay in your hands. Knead each color separately until they are soft, pliable, and free of any cracks. -
Create base logs:
Roll each color into long ‘snakes’ or logs. Since white is the main background color in the photo, make the white log thicker than the others. The teal and coral logs should be slightly thinner to act as accent veins. -
Combine the logs:
twist the three colored logs together into one large rope. Fold the rope in half and twist it again. Repeat this twisting and folding process 3-4 times. Be careful not to over-mix, or the colors will turn muddy instead of distinct swirls.
Keep it Clean
Baby wipes are essential! Clean your hands and roller between touching different colors to keep the white clay crisp and prevent accidental tinting.
Step 2: Marbling and Rolling
-
Form a ball:
Once the colors look sufficiently streaked, roll the entire twisted rope into a tight, smooth ball. This compresses the layers together. -
Roll out the slab:
Place the ball on a sheet of parchment paper. Using your acrylic roller, flatten the ball into a long rectangular slab, aiming for about 1/4 inch thickness. I find rolling in different directions helps stretch the pattern organically. -
Check the pattern:
Examine your slab. If the marble pattern isn’t swirly enough for your taste, you can fold the slab over and roll it out one more time to elongate the streaks. -
Trim the edges:
Using your slicing blade, trim the uneven edges of the clay slab to create a clean rectangle. ensure the rectangle is long enough to wrap fully around your chosen mold (soda can or jar) with a slight overlap.
Step 3: Constructing the Cylinder
-
Prepare the mold:
Wrap your glass jar or soda can in parchment paper. This is crucial so the clay doesn’t stick permanently to the mold while baking. -
Wrap the clay:
Carefully lift the clay slab and wrap it around the parchment-covered mold. Bring the two short ends together. -
Seal the seam:
Where the ends meet, slice through both layers of overlap simultaneously with your blade for a perfect flush join. Gently smooth clays over the seam with your finger or a smoothing tool so the line disappears. -
Create the base:
Roll out a separate piece of leftover clay (or solid white) for the bottom. Place your wrapped cylinder on top of this piece and cut around the circle to create the floor of the pot. -
Attach the bottom:
Gently press and blend the clay from the cylinder walls down onto the base piece to create a watertight seal. A modeling tool works well here to merge the clay without denting the shape. -
Refine the rim:
Smooth the top rim with your finger. If you want the clean white lip seen in the photo, you can carefully slice the top edge flat or add a very thin coil of white clay to finish the rim.
Add Gold Accents
After baking, paint the very top rim with liquid gold leaf or metallic paint for a chic, high-end finish that contrasts beautifully with the matte stone look.
Step 4: Baking and Finishing
-
Bake:
Bake the clay strictly according to the manufacturer’s package instructions (usually around 275°F or 130°C for 15-30 minutes depending on thickness). Leave the clay on the mold while baking to keep its shape. -
Cool down:
Allow the piece to cool completely inside the oven or on a wire rack before attempting to remove the mold. Clay is fragile when hot. -
Remove mold:
Gently slide the jar or can out of the clay cylinder. Peel away the parchment paper from the inside. -
Sand for smoothness:
Using fine-grit sandpaper wet with a little water, lightly sand the outside of the holder to remove fingerprints or bumps and give it a stone-like finish. -
Apply varnish:
For durability and a slight sheen, apply a thin coat of matte or satin varnish to protect the surface.
Now you have a stylish, custom-made desk accessory ready to organize your creative tools


What Really Happens Inside the Kiln
Learn how time and temperature work together inside the kiln to transform clay into durable ceramic.
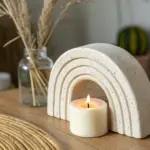
Carved Linework (Sgraffito) Pen Cup
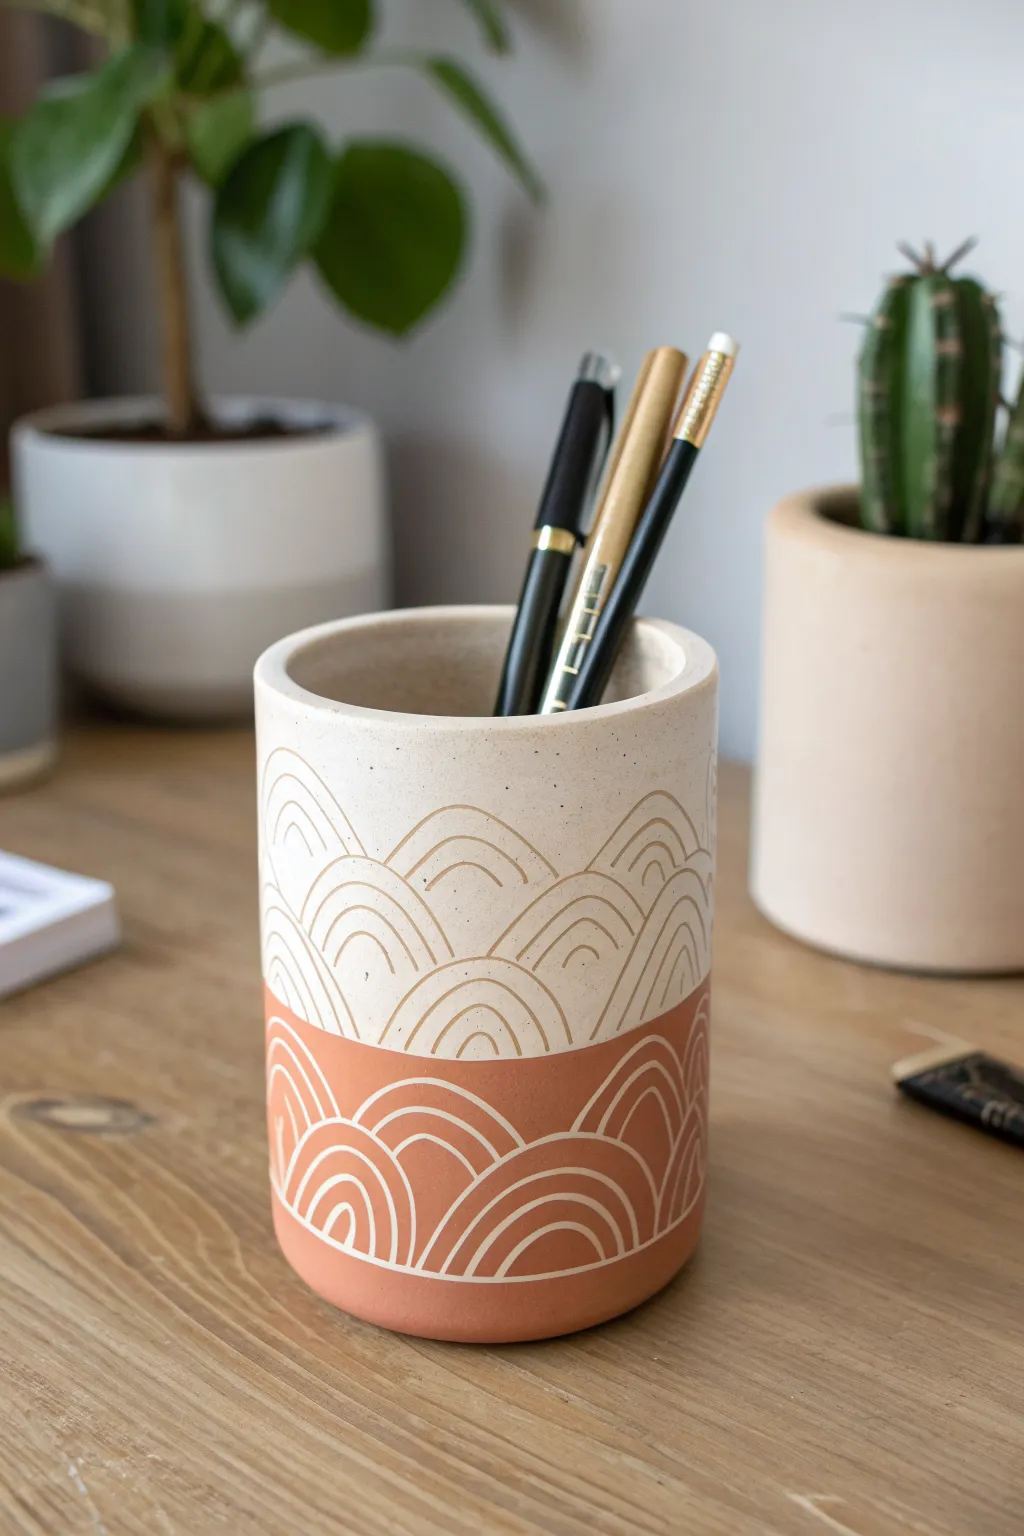
This modern pen holder combines the warmth of raw terracotta with a crisp, creamy glaze in a stunning two-tone design. The repeating arch motif is carved directly into the surface, creating a tactile, rhythmic pattern that feels both ancient and contemporary.
Step-by-Step Guide
Materials
- White or speckled stoneware clay
- Terracotta underglaze (or a red clay slip)
- White underglaze (or white slip)
- Clear matte glaze
- Rolling pin
- Clay slab visual template (rectangular paper)
- Needle tool
- Scoring tool (serrated rib)
- Slip (clay glue)
- Stylus tool or loop carving tool
- Sponge
- Kiln (or access to a firing service)
Step 1: Forming the Cylinder
-
Roll the slab:
Begin by wedging your stoneware clay thoroughly to remove air bubbles. Roll it out into an even slab, aiming for a thickness of about 1/4 inch. I like to use wooden guide strips on either side of the clay to ensure the thickness is perfectly consistent. -
Cut the rectangle:
Place your paper template onto the slab. Using a needle tool, cut cleanly around the template to create a large rectangle that will form the walls of your cup. -
Bevel the edges:
Cut a 45-degree bevel on the two shorter ends of the rectangle. Bevel one side facing up and the opposite side facing down; this creates an overlapping joint that is stronger and seamless. -
Score and slip:
Rough up the beveled edges with your scoring tool and apply a generous amount of slip. Carefully curb the slab into a cylinder, pressing the beveled edges together firmly. -
Add the base:
Roll a small piece of clay for the base. Place your cylinder on top of it and trace a circle slightly larger than the cylinder’s diameter. Score and slip the bottom edge of the cylinder and the new base circle, then attach them. -
Clean and perfect:
Trim any excess clay from the base. Use a damp sponge to smooth the seams inside and out until they disappear completely. Let the piece dry to a leather-hard state—this is crucial for the carving step.
Clean Lines Pro-Tip
For steadier arches, keep your elbow tucked against your ribs while carving and rotate the banding wheel instead of moving your hand. It stabilizes the tool.
Step 2: Decorating and Carving
-
Apply the color block:
Once leather hard, mask off the top half of the cylinder with tape (optional) or just use a steady hand. Paint the bottom half of the cylinder with 2-3 coats of terracotta underglaze or red slip. Let it dry until it’s no longer tacky. -
Sketch the guide:
Using a very light touch with a pencil, sketch the horizon line where your arches will connect. You can lightly mark out the spacing for the arches to ensure they wrap around evenly. -
Carve the bottom half (Sgraffito):
This is the sgraffito portion. Using a stylus or small loop tool, carve through the layer of terracotta underglaze to reveal the white clay body underneath. Draw concentric arches, starting with the smallest inner arch and working outward. -
Carve the top half:
Continue the pattern onto the bare clay at the top. Here, you aren’t scratching through color, but scratching into the clay itself to create texture. Carve these lines slightly deeper so they catch the light. -
Clean the burrs:
After carving, you’ll see little crumbs of clay (burrs) along the lines. Don’t brush them off yet! Wait until the pot is bone dry, then gently rub the surface with a stiff brush or a scouring pad to knock them off cleanly.
Step 3: Firing and Finishing
-
Bisque fire:
Once the piece is bone dry, fire it in the kiln to bisque temperature (usually cone 04). This hardens the clay and prepares it for glazing. -
Clear glaze application:
Wipe the bisque-fired piece with a damp sponge to remove dust. Dip the entire cup into a clear matte glaze, or brush on a clear matte glaze if you prefer. Ensure the coating is even so it doesn’t cloud the carving. -
Final glaze fire:
Fire the piece again to the maturation temperature of your specific clay and glaze (often cone 5 or 6 for stoneware). -
Check the bottom:
After firing, check the bottom for any rough spots. If needed, sand the base lightly with wet-dry sandpaper to ensure it won’t scratch your desk.
Level Up: Inner Color
Glaze the interior with a glossy jet black or deep forest green. This hidden pop of dark color makes the exterior cream and terracotta tones feel even brighter.
Place your new sculptural organizer on your desk and enjoy the handmade texture every time you reach for a pen
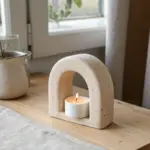
Faceted Geometric Pen Holder
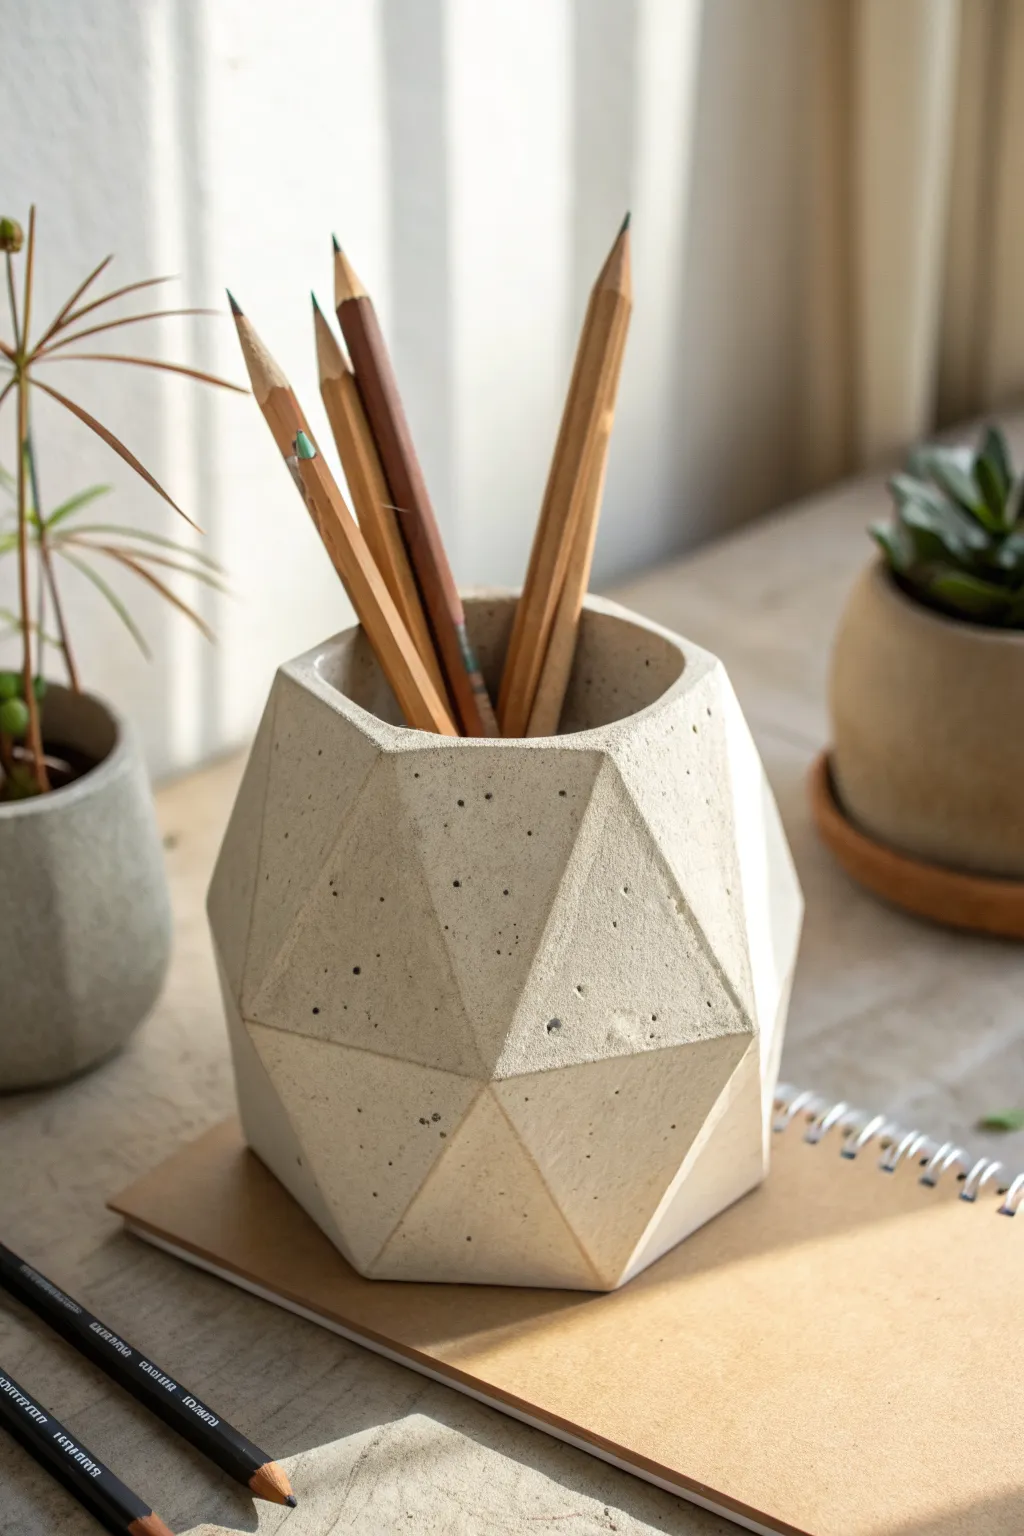
Bring a touch of architectural elegance to your desk with this faceted geometric pen holder. Its crisp angles and raw, speckled texture perfectly mimic modern concrete decor while offering a stylish home for your favorite writing tools.
How-To Guide
Materials
- Air-dry clay (white or light grey)
- Rolling pin
- Craft knife or scalpel
- Ruler
- Cardstock or thick paper (for templates)
- Pencil
- Sandpaper (fine and medium grit)
- Small sponge
- Water
- Black acrylic paint (optional, for speckling)
- Old toothbrush (optional)
- Clear matte varnish
Step 1: Preparation & Template
-
Design the faces:
Begin by drawing your geometric template on cardstock. You will need a strip of connected triangles to form the walls. Draw a row of alternating equilateral triangles (about 2-3 inches high) edge-to-edge. A strip of 6-8 triangles usually works well for a sturdy base. -
Cut the template:
carefully cut out your cardstock shape. This single long strip of triangles will act as your main guide. If you want a specific bottom shape (like a hexagon), trace that separately to fit the width of your assembled wall. -
Condition the clay:
Take a large chunk of air-dry clay and knead it until it’s pliable and warm. If it feels too dry or cracks when you bend it, work in a few drops of water with your fingers.
Problem: Cracks appearing?
Cracks often happen if clay dries too fast. Repair with a mix of slip and vinegar, then cover the pot with plastic wrap to slow the drying process.
Step 2: Shaping the Structure
-
Roll the slab:
Roll out the clay on a flat surface to an even thickness of about 1/4 inch (6mm). Using depth guides or two wooden rulers on either side can help you maintain a consistent thickness. -
Cut the clay:
Place your cardstock template onto the clay slab. Use your ruler and craft knife to cut around the template. Cut a second piece for the base of the holder. -
Score the edges:
Before assembling, take your craft knife and gently score (scratch cross-hatch patterns) onto the edges that will join together—specifically the two ends of your wall strip and the outer edge of the base. -
Apply slip:
Mix a tiny bit of clay with water to make a paste called ‘slip’. Apply this to all your scored areas to act as glue. -
Form the cylinder:
Stand the wall strip up and curve it around to meet end-to-end. Press the scored edges firmly together. Then, place this ring onto the scored base piece. -
Seal the seams:
Use a modeling tool or your finger to smooth the clay over the seams on the inside of the pot. This reinforcement is crucial so it doesn’t crack later.
Level Up: Faux Concrete
Mix a teaspoon of used coffee grounds or fine sand directly into your white clay before rolling. This adds instant gritty texture and speckling.
Step 3: Creating the Facets
-
Rough carving:
While the clay is leather-hard (firm but still carveable), use your craft knife to slice away angles from the exterior. Start at the top rim and slice diagonally downward to create triangular planes. -
Refining the angles:
Continue slicing facets around the body. Aim for a mix of upward and downward pointing triangles to create that tessellated, gem-like look shown in the image. Don’t worry about perfection; slight irregularity adds character. -
Smooth the planes:
Dip your finger in water and very lightly run it over the flat planes you just cut to remove any loose clay crumbs, but be careful not to round over the sharp edges you worked hard to create. -
Let it dry:
Allow the piece to dry completely. This usually takes 24-48 hours depending on humidity. I like to rotate it occasionally so the bottom gets air too.
Step 4: Finishing Touches
-
Sand for crispness:
Once fully dry, use medium-grit sandpaper on a flat block to sand the faceted planes. This sharpens the edges and enhances the geometric effect. -
Create the texture:
To mimic the concrete look in the photo, dip an old toothbrush into watered-down black acrylic paint. Run your thumb over the bristles to flick tiny specks of paint onto the white clay. -
Add faux pitting (optional):
If you want that authentic porous stone look, use a needle tool to gently poke a few random, shallow holes into the surface before sealing. -
Seal the piece:
Apply a coat of clear matte varnish. This mimics the raw finish of concrete while protecting the clay from moisture and dirt.
Place your newly crafted holder on your desk and enjoy the sharp, modern aesthetic you’ve created by hand

TRACK YOUR CERAMIC JOURNEY
Capture glaze tests, firing details, and creative progress—all in one simple printable. Make your projects easier to repeat and improve.
Hole-Punched Pen Block
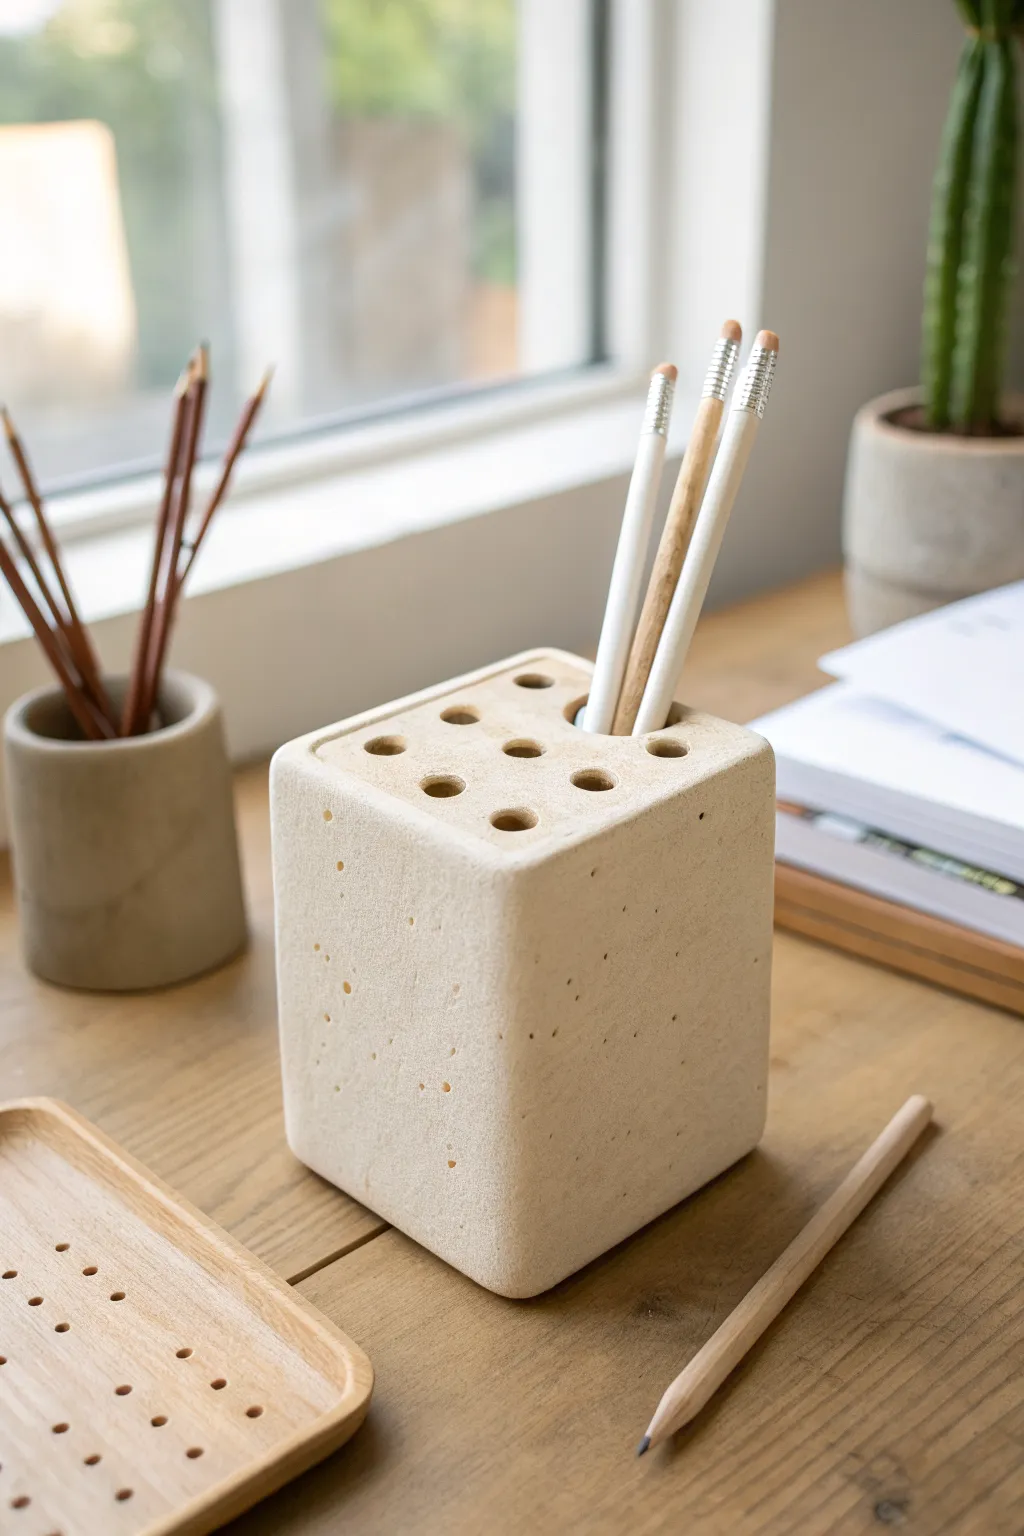
Achieve a minimalist, architectural look for your desk with this block-style pen holder that mimics the appearance of natural limestone. This simple yet striking project relies on a cleverly texturized clay surface and precise hole placement to create a functional piece of modern decor.
Step-by-Step Guide
Materials
- Air-dry clay (stone or white color)
- Square container or milk carton (for use as a mold/armature)
- Rolling pin
- Wooden dowel or thick marker (approx. 1/2 inch diameter)
- Ruler
- Coarse sandpaper
- Old toothbrush or stiff bristle brush
- Cutting wire or craft knife
- Clear matte sealant spray
- Sponge
Step 1: Shaping the Base Block
-
Prepare your clay:
Start by kneading a large block of air-dry clay until it is pliable but firm. If you want a solid block, you will need a significant amount of clay; alternatively, you can wrap slabs around a square armature. -
Form the initial cube:
Shape your clay into a rough cube. I find it easiest to drop the clay firmly onto a table from a short height on all six sides to naturally flatten the faces. -
Refine the edges:
Use a straight edge or a ruler to pat the sides of the cube, ensuring they are perfectly vertical and square relative to the base. -
Smooth the top surface:
Slice the top off with a cutting wire to create a pristine, flat surface. This will ensure your pens stand straight up later. -
Soften the corners:
Gently run a damp sponge along the sharp edges of the cube. You want a rounded, soft edge rather than a razor-sharp geometric one to mimic the look of tumbled stone.
Stone Effect
Mix a small amount of used coffee grounds or sand into your clay before shaping. This adds natural speckling and grit that looks incredibly realistic after sanding.
Step 2: Creating the Grid
-
Mark the grid:
Using a ruler, lightly score a 3×3 grid on the top surface. Ensure the spacing is even, leaving a comfortable margin around the outer edge. -
Select your boring tool:
Find a wooden dowel, a thick marker casing, or a dedicated clay hole cutter that comfortably fits the diameter of your favorite pencils. -
Punch the center hole:
Start with the very center mark. Press your tool straight down into the clay block, going about 2-3 inches deep. Twist the tool gently as you pull it out to avoid deforming the hole. -
Punch the remaining holes:
Proceed to punch the surrounding eight holes. Check your vertical alignment frequently so the holes don’t angle inward or outward. -
Clean the openings:
The punching process will create a small ridge of raised clay around each hole. Gently smooth this down with your finger or a damp sponge for a seamless transition.
Make it Heavy
Embed a clean rock or a heavy washer into the bottom center of the clay block while forming it. This adds weight and prevents tipping when holding heavy markers.
Step 3: Texturing and Finishing
-
Add surface texture:
To achieve that pitted, limestone look, take a stiff toothbrush or a crumpled ball of aluminum foil and press it randomly into the sides of the block. -
Create distinct pits:
Use a toothpick or a needle tool to poke deeper, individual holes scattered across the surface. Group a few small pricks together to simulate natural air pockets in stone. -
Allow to dry slowly:
Cover the block loosely with plastic wrap for the first 24 hours to prevent cracking, then uncover and let it dry completely for another 2-3 days. -
Initial sanding:
Once bone dry, use coarse sandpaper to scuff the entire surface. This enhances the stone effect and removes any fingerprints. -
Dust off debris:
Wipe the block down with a dry cloth or use a soft brush to remove all the clay dust from the sanding process. -
Seal the piece:
Spray the entire holder with a clear matte sealant. This protects the clay from moisture and graphite marks without adding unnatural shine.
Place your new organizer on your desk and enjoy the calm, organized vibe it brings to your workspace.
Sectioned Desk Caddy Pen Holder
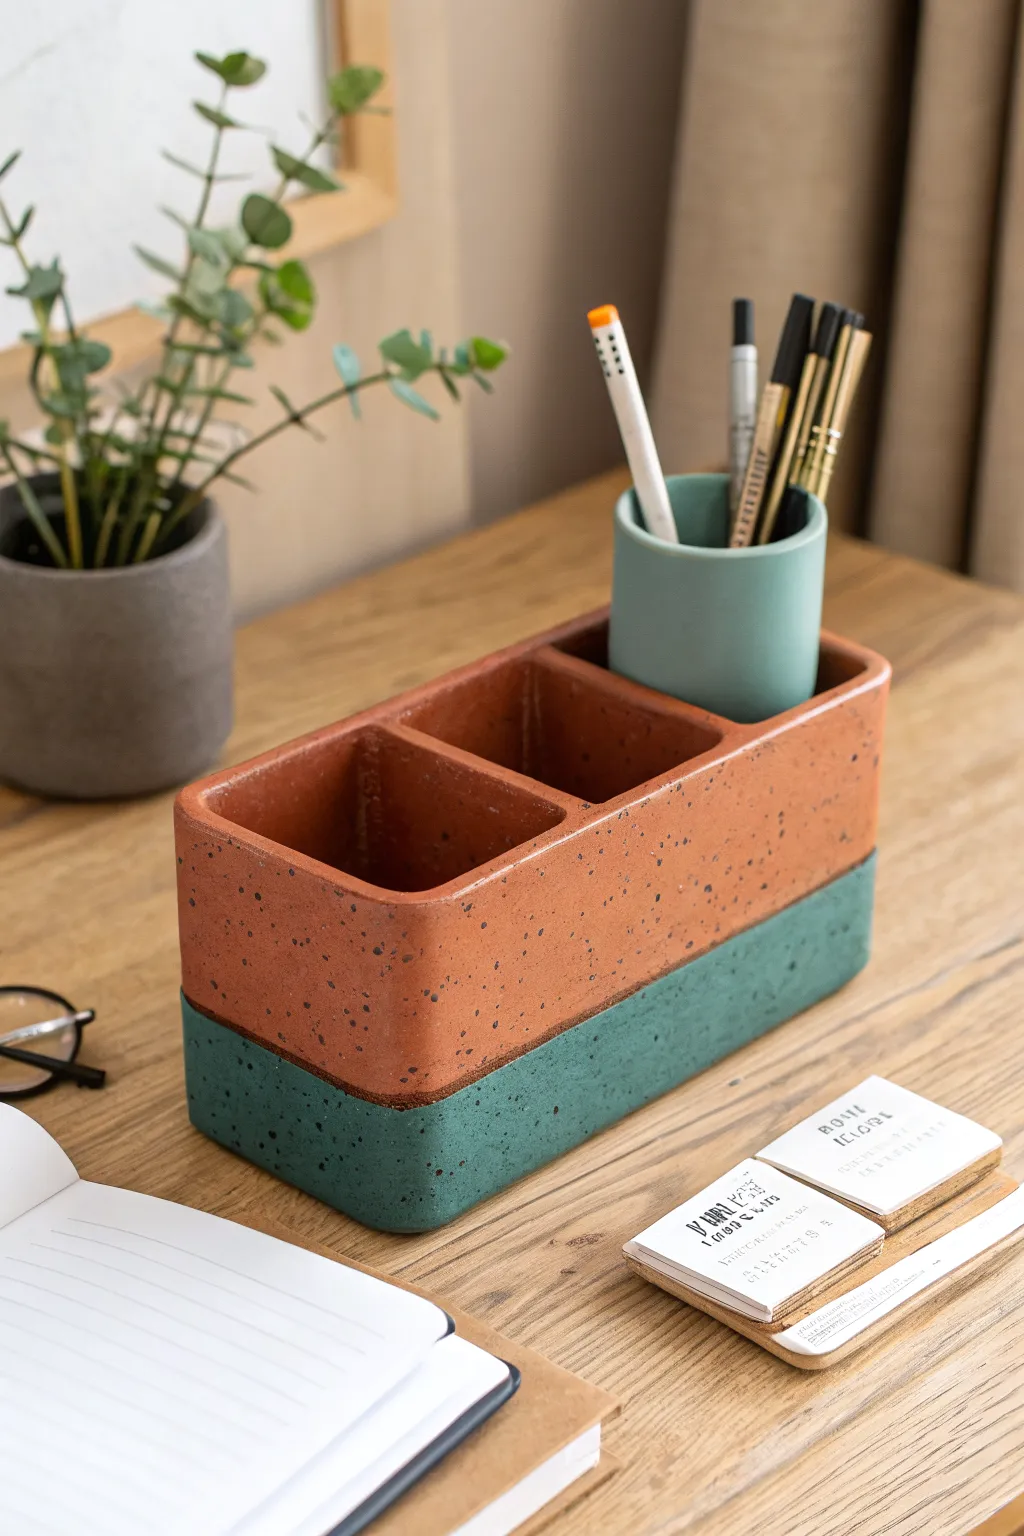
Bring organized charm to your workspace with this modern, sectioned desk caddy featuring a distinct two-tone design. The warm terracotta upper perfectly balances the cool teal base, while a subtle speckled finish adds a professional, ceramic-like texture without needing a kiln.
Step-by-Step
Materials
- Air-dry clay (terracotta color preferred, or white)
- Clay rolling pin
- Ruler and craft knife
- Slip (clay scraps mixed with water)
- Small cup of water
- Smooth work surface or clay mat
- Sandpaper (fine grit)
- Acrylic paints: warm terracotta/burnt orange, teal/forest green, and black
- Old toothbrush (for speckling)
- Painter’s tape
- Metric gloss sealant or varnish
- Clay sculpting tools (smoothing tool)
Step 1: Building the Base Structure
-
Roll out slabs:
Begin by conditioning your clay until it is pliable. Roll out a large, even slab approximately 1/4 inch thick. Uniform thickness is crucial here for structural integrity, so take your time rolling. -
Measure and cut components:
Using your ruler and craft knife, cut out a long base rectangle (about 8 inches by 3 inches). Next, cut two long side walls (8 inches long by 3.5 inches tall), two shorter end walls, and two interior divider walls (sized to match the width of your base). -
Score and slip the base:
Take your scoring tool or a needle tool and scratch up the perimeter of the base slab where the walls will attach. Apply a generous amount of slip to these roughened areas to act as glue. -
Assemble the outer walls:
Stand up the long side walls first, pressing them firmly onto the slipped base. Score the ends of these walls, then attach the two shorter end walls to create a rectangular box. Ensure the corners are square. -
Reinforce the seams:
Roll thin coils of clay (tiny snakes) and press them inside every seam where walls meet the floor or each other. Smooth these coils down with a modeling tool or your finger to create a strong, invisible watertight bond. -
Insert dividers:
Mark where you want your three compartments to be. Score the interior walls at these marks, slip the edges of your divider pieces, and slide them into place. Smooth the seams inside carefully so the compartments are seamless.
Warping Walls?
If your long clay walls start bowing inward while drying, temporarily prop them up with crumpled balls of newspaper or cut pieces of cardboard placed inside the compartments.
Step 2: Create the Removable Cup
-
Form the cylinder:
Roll a smaller slab for the cup. Cut a rectangle that, when curled, forms a cylinder slightly narrower than one of your caddy’s compartments. Join the ends by scoring and slipping. -
Add the bottom:
Place your cylinder on a spare piece of rolled clay and trace the bottom. Cut out this circle and attach it to the cylinder using the score-and-slip method. Smooth the outside seam so it disappears. -
Dry completely:
Let both the main caddy and the cup dry slowly away from direct heat or sunlight. This usually takes 24-48 hours. Turn the pieces occasionally if possible to ensure even drying and prevent warping.
Step 3: Sanding and Painting
-
Sand for smoothness:
Once fully dry and hard, use fine-grit sandpaper to smooth out any fingerprints, sharp edges, or uneven rims. Wipe away all dust with a slightly damp cloth or sponge. -
Paint the base color:
Paint the entire outside of the main caddy with your warm terracotta orange color. You might need two coats for full opacity. Let this base coat dry completely. -
Tape the horizon line:
Apply painter’s tape horizontally around the entire caddy, about one-third of the way up from the bottom. Press the tape edge down firmly to prevent paint bleed. -
Apply the teal bottom:
Paint the area below the tape with your deep teal green. Paint the bottom of the caddy as well. I like to carefully remove the tape while the paint is still slightly tacky to get a crisp clean line. -
Paint the cup:
Paint the small cylindrical cup a lighter, minty green or soft blue to contrast slightly with the main caddy, as seen in the inspiration piece. -
Add the speckles:
Dip an old toothbrush into slightly watered-down black paint. hold it over your project and run your thumb across the bristles to flick tiny specks of paint onto the surface. Practice on paper first to control the spray. -
Seal the project:
Finish by applying a matte varnish or sealant over the entire piece. This protects the paint from chipping and gives it that finished ceramic look.
Make it Weighted
Before attaching the bottom slab, you can embed heavy metal washers into the base clay. This adds legitimate heft, making the holder feel like expensive, heavy stoneware.
Place your new organizer on your desk and enjoy the satisfaction of a tidy, custom-made workspace
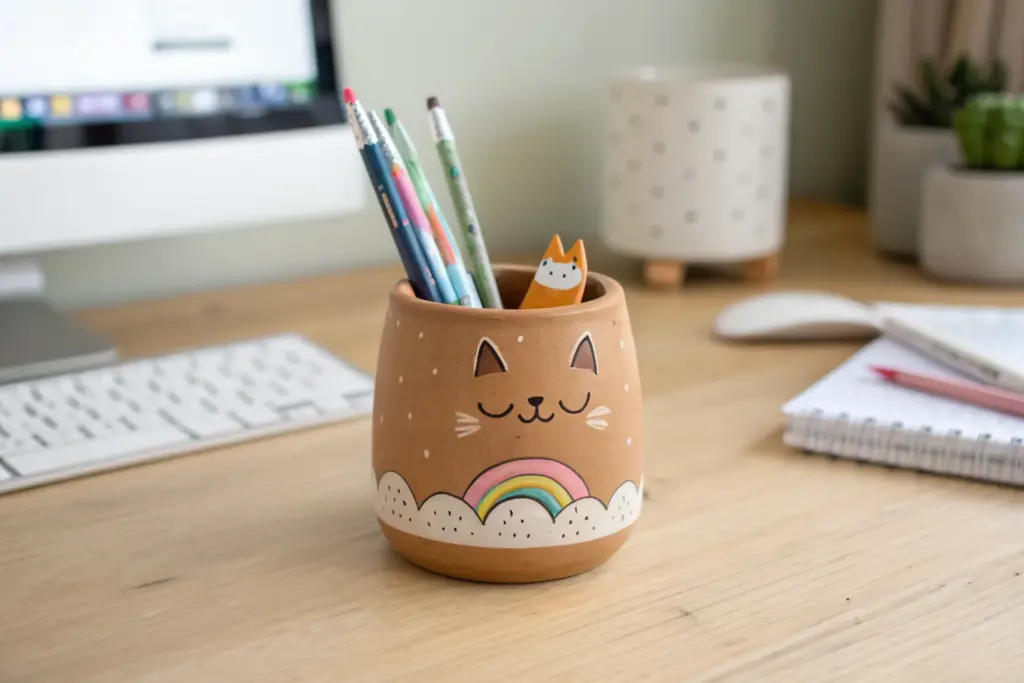
Smiley Face Character Pen Holder
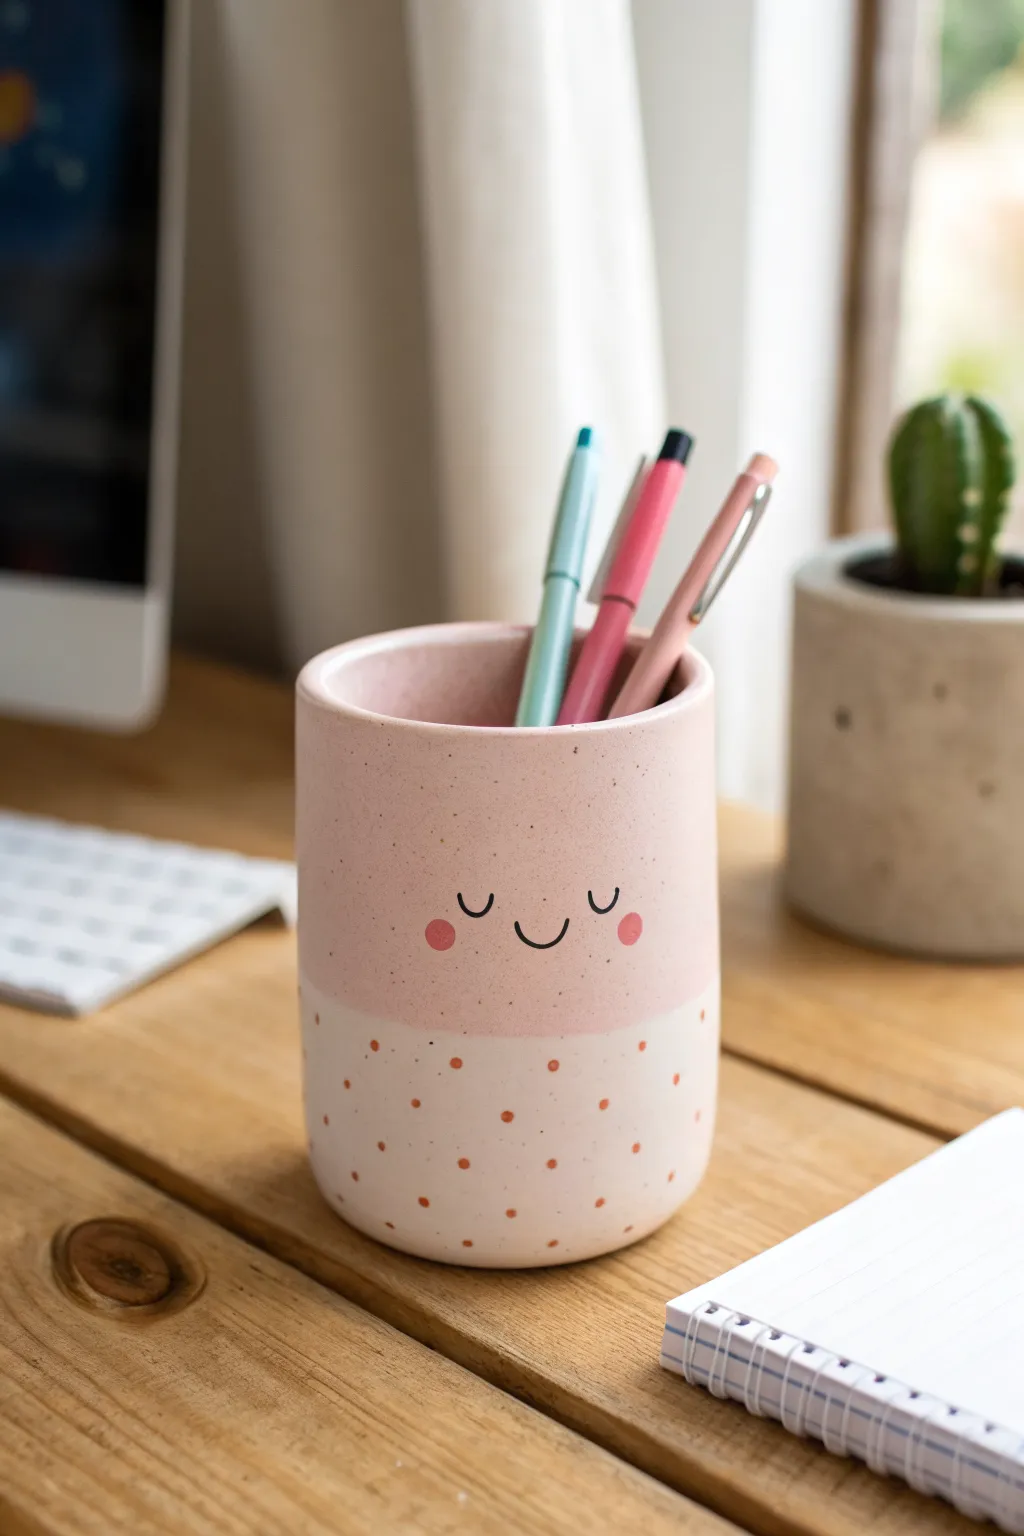
Bring a gentle warmth to your desk with this adorable two-tone pen holder featuring a sleepy, happy face. With its soft pink upper half and playful polka dot base, this clay project combines modern minimalism with sweet character design.
Detailed Instructions
Materials
- Air-dry clay or polymer clay (white)
- Rolling pin
- Clay knife or craft blade
- Cylindrical mold (like a glasses case or can wrapped in parchment)
- Slip (clay and water mix) and scoring tool
- Fine-grit sandpaper
- Acrylic paints (pastel pink, terracotta/rust, black)
- Small paintbrush
- Fine-tip black paint marker or detail brush
- Dotting tool or toothpick
- Matte sealant or varnish
Step 1: Building the Form
-
Roll the slab:
Start by rolling out your white clay onto a clean, flat surface until it is an even thickness of about 1/4 inch. Ensure the slab is large enough to wrap around your chosen cylindrical mold. -
Cut the rectangle:
Measure the height you want your pen holder to be (around 4-5 inches is standard). Cut a precise rectangle from your clay slab that is tall enough and long enough to wrap fully around your mold with a slight overlap. -
Prepare the base:
Cut a circle from the remaining clay slab that matches the diameter of your cylinder mold. This will serve as the bottom of your pot. -
Form the cylinder:
Wrap the rectangular clay slab around your mold. Where the ends meet, score the edges (scratch cross-hatch marks) and apply a little slip or water. -
Seal the seam:
Press the scored edges together firmly. Use a modeling tool or your finger to smooth the seam completely so it disappears, blending the clay until the cylinder looks seamless. -
Attach the base:
Score the bottom edge of your cylinder and the outer edge of the circular base. Apply slip, press them together, and smooth the clay from the walls down onto the base to create a strong seal. -
Refine the rim:
Before the clay hardens, smooth the top rim with a damp sponge or finger to ensure it is rounded and comfortable to the touch. Let the clay dry completely according to package instructions, which usually takes 24-48 hours.
Seamless Smoothness
Use a damp sponge to smooth your clay before it dries. This reduces sanding time later and creates a cleaner, more professional ‘fired ceramic’ surface texture.
Step 2: Sanding and Painting
-
Sand for smoothness:
Once fully dry, take your fine-grit sandpaper and gently sand the entire surface. Focus on the rim and any uneven spots on the body to get that smooth, ceramic-like finish. -
Mark the dividing line:
Lightly mark a horizontal line around the circumference of the pot, slightly below the halfway point. This will guide your two-tone painting. -
Paint the top pink:
Mix a soft, dusty pink acrylic paint. Apply this to the top section of the pot, painting down to your guide line. You may need two coats for a solid, opaque look. -
Paint the bottom cream:
Paint the bottom section a creamy off-white. I find adding a tiny drop of yellow or brown to white paint warms it up just enough to look like natural ceramic. -
Add the speckles:
To mimic stone texture, dip an old toothbrush or stiff brush into diluted brownish-grey paint and gently flick it over the entire pot for a subtle speckled effect.
Make It a Set
Create a shorter dish in reverse colors—white on top with pink dots on the bottom—to hold paperclips or erasers alongside your pen cup.
Step 3: Character Details
-
Draft the face:
Once the base coats are dry, lightly sketch the facial features with a pencil in the center of the pink section. Draw two small U-shapes for closed eyes and a slightly wider U for the smile. -
Draw the features:
Using a fine-tip black paint marker or a very thin detail brush with black paint, carefully trace over your pencil lines to create the sleeping eyes and happy mouth. -
Add rosy cheeks:
Using a darker pink or terracotta paint, dab two small circles on either side of the smile for the cheeks. A round sponge tool or the back of a paintbrush handle works perfectly for this. -
create the polka dots:
Using the same terracotta color, use a dotting tool to create evenly spaced dots on the bottom (white) half of the pot. Try to create a random but balanced pattern. -
Seal the project:
Finish by applying a coat of matte spray varnish or sealant. This protects the paint from chipping and gives the holder a professional, unified finish.
Pop your favorite pens inside and enjoy the cheerful vibe this little friend adds to your workspace
Animal Paws Wraparound Pen Holder
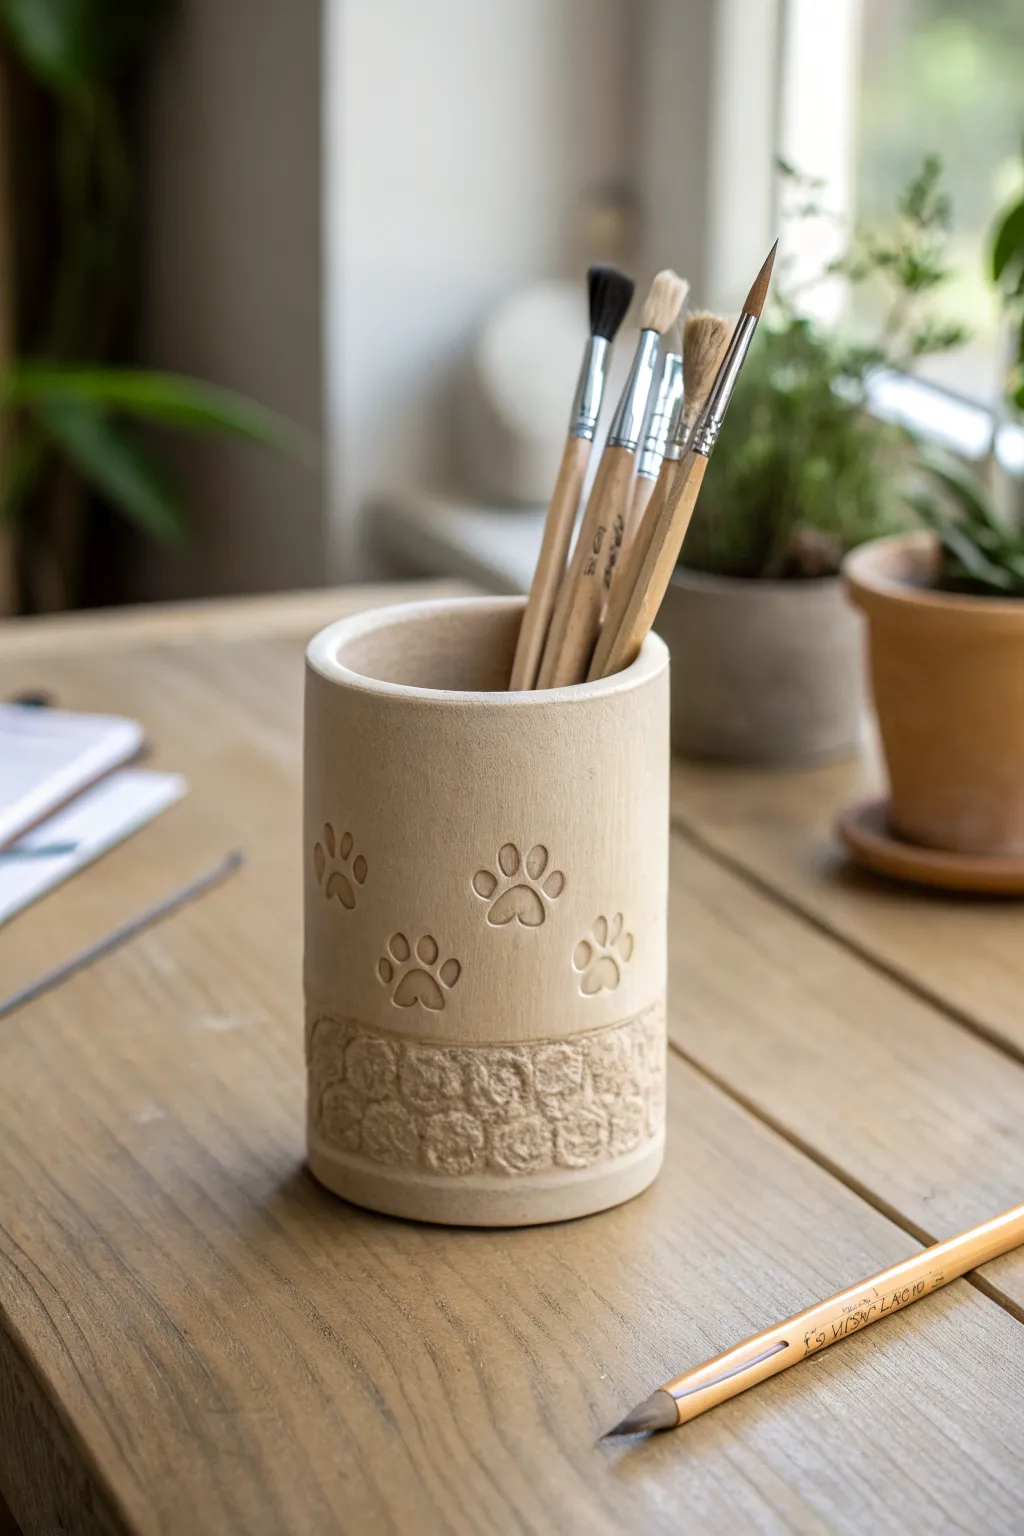
This charming, cylindrical pen holder combines a smooth, sandy finish with delightful texture play. Featuring stamped paw prints marching across the surface and a rugged cobblestone base, it’s the perfect cozy home for your favorite brushes and pencils.
Step-by-Step Tutorial
Materials
- Light beige or buff stoneware clay (approx. 1-1.5 lbs)
- Rolling pin with guide rings (1/4 inch thickness)
- Cylindrical form or mandrel (e.g., a PVC pipe or rolling pin covered in paper)
- Paw print stamp (rubber or 3D printed)
- Small carving tool or loop tool (for cobblestones)
- Needle tool
- Scoring tool (or fork)
- Slip (liquid clay)
- Sponge
- Ruler
- Canvas work surface
Step 1: Preparing the Slab
-
Wedge the clay:
Start by thoroughly wedging your clay to remove air bubbles and ensure an even consistency, which is crucial specifically for slab building. -
Roll the slab:
Place the clay on your canvas and roll it out into a long rectangle. Use 1/4-inch guide rings on your rolling pin to ensure the thickness is perfectly uniform. -
Measure and cut:
Determine the desired height of your holder (about 4-5 inches is standard). Use a ruler and needle tool to cut a clean rectangle. To find the length, wrap a piece of paper around your cylindrical form to measure the circumference, then add about 1/4 inch for overlap or joining.
Stamp Tip
If you don’t have a paw stamp, create your own by pressing the rounded end of a paintbrush handle into the clay for pads, using different sizes for the main pad and toes.
Step 2: Adding Texture & Stamping
-
Create the cobblestone zone:
Before assembling the cylinder, mark a light guideline about 1.5 inches from the bottom edge of your slab. This will define the textured base area. -
Carve the stones:
Using a small loop tool or a dull carving tool, press into the clay below your guideline to create irregular, rounded shapes that mimic stone paving. Leave thin raised lines between them for grout. -
Roughen the stones:
To give the stones a natural, eroded look, gently tap the carved area with a textured sponge or a crumpled ball of aluminum foil. This removes the ‘perfect’ tool marks. -
Position the paws:
Above the cobblestone line, plan where your paw prints will go. Staggering them at different heights creates a playful sense of movement. -
Stamp the pattern:
Firmly press your paw print stamp into the clay. Be careful not to press so hard that you warp the slab, but get deep enough for a clear impression. -
Smooth the edges:
Run a damp finger lightly over the edges of the stamps and carving to remove any sharp burrs of clay.
Troubleshooting Cracks
If the seam cracks while drying, the join wasn’t wet enough. Score deeply, apply generous slip, and compress hard. Wrap tightly in plastic for 2 days to rehydrate.
Step 3: Assembly
-
Prepare the form:
Wrap your PVC pipe or cylindrical form in a sheet of newspaper or paper towel. This prevents the clay from sticking to the mold later. -
Score the sides:
On your clay slab, score (scratch) and slip the two shorter vertical ends where they will join together. -
Form the cylinder:
Carefully lift the slab and wrap it around the form. Press the scored ends together firmly to create the seam. I usually blend the clay across the seam with a modeling tool to hide the join completely. -
Cut the base:
Roll a small piece of leftover clay into a slab. Place your cylinder on top of it and trace around the bottom with a needle tool to cut a perfect circle for the floor. -
Attach the base:
Score and slip the bottom edge of the cylinder and the outer edge of the base circle. Press them together firmly. -
Clean up the join:
Use a wooden tool to blend the seam where the base meets the wall, ensuring there are no gaps. A damp sponge helps smooth this transition.
Step 4: Finishing Touches
-
Refine the rim:
Check the top rim of the holder. If it’s uneven, trim it gently with a needle tool while rotating the form, then smooth it with a damp chamois or sponge. -
Dry slowly:
Loosely cover the piece with plastic for the first day to let the moisture even out, then uncover it to dry completely to the bone-dry stage. -
Bisque fire:
Fire the piece in a kiln to cone 04 (or according to your clay body’s instructions). -
Glaze application:
Apply a clear matte glaze to the inside for waterproofing. For the outside, you can leave the clay raw to keep that sandy texture, or apply a very thin wash of oxide to highlight the textures before wiping it back. -
Final firing:
Glaze fire the piece to the temperature required by your clay and glaze combination.
Once fired, fill your new holder with art supplies and enjoy the rustic charm on your desk
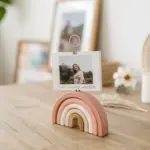
Stacked Ring Tower Pen Holder
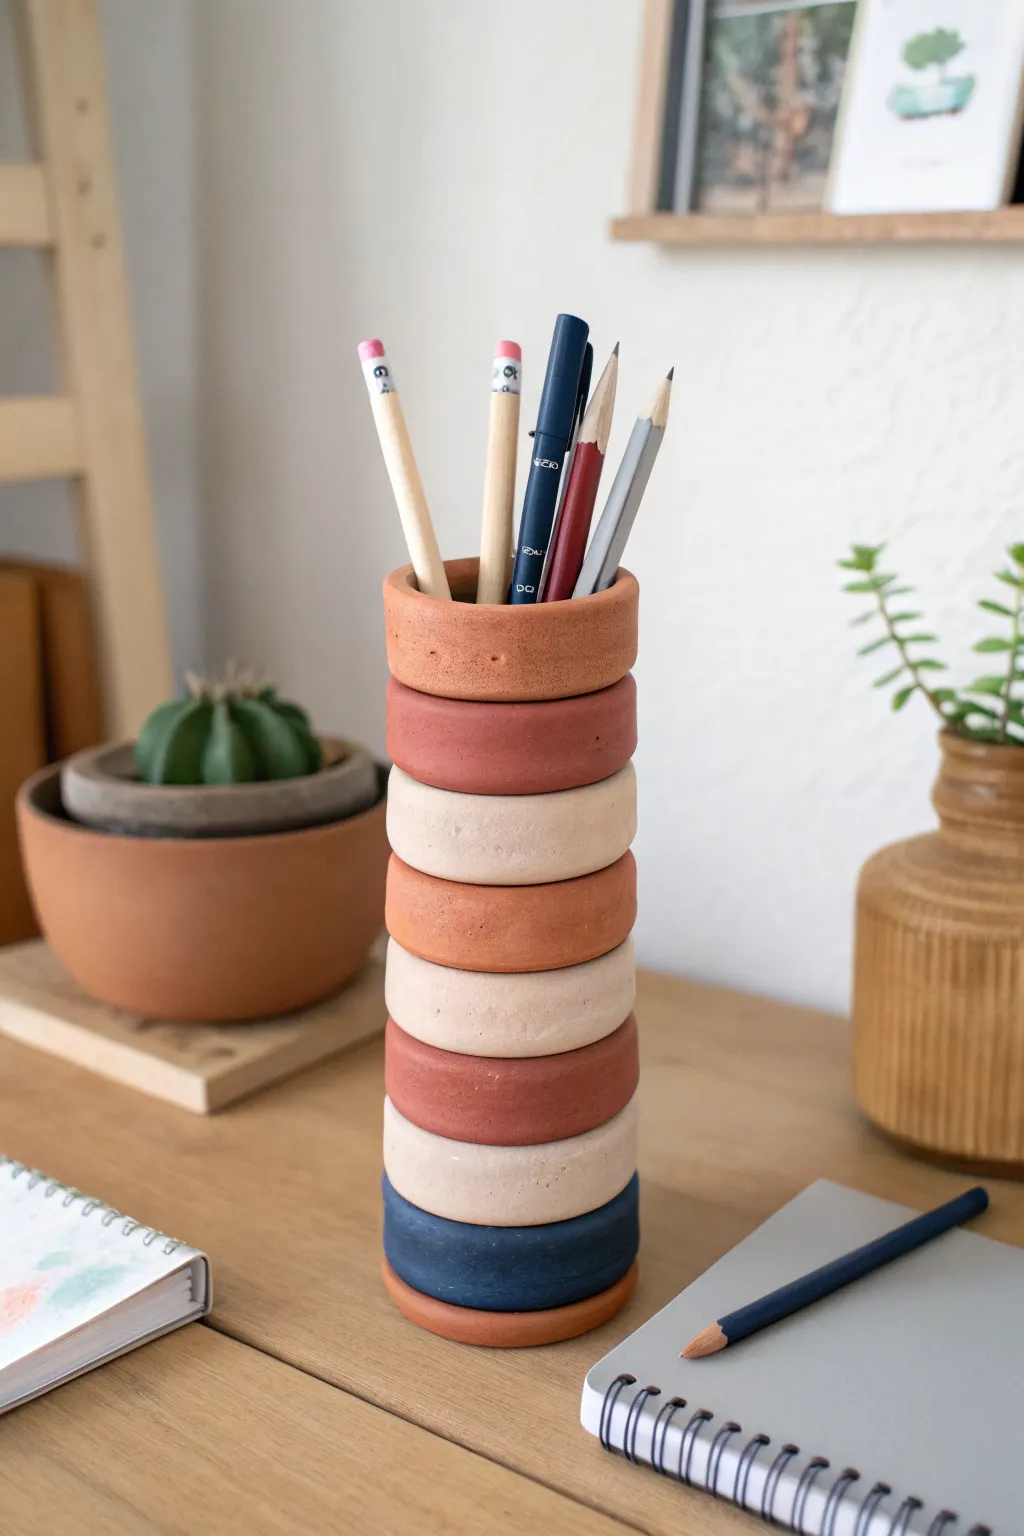
Elevate your desk organization with this architectural and modern stacked ring pencil holder. The design features alternating layers of earthy clay tones and deep blue, creating a sturdy column that looks more like a sculpture than office supply storage.
Step-by-Step Tutorial
Materials
- Polymer clay or air-dry clay (terracotta, beige/white, dark blue colors)
- A smooth rolling pin or acrylic roller
- Circle cutters (approximately 2.5 inch and 2 inch diameter)
- Clay sculpting tools or a butter knife
- Sandpaper (fine grit)
- Strong craft glue or slip (if using air-dry clay)
- Parchment paper or a silicone baking mat
- Ruler
- Matte spray varnish (optional)
Step 1: Preparing the Base
-
Condition the base clay:
Start by taking a chunk of the terracotta-colored clay and kneading it in your hands until it becomes soft, pliable, and free of cracks. -
Roll out the slab:
Place the clay on your parchment paper and roll it out until it is approximately 1/4 inch thick; you want a sturdy base that won’t warp. -
Cut the solid bottom:
Using your larger circle cutter (about 2.5 inches wide, or whatever size fits your pencils comfortably), press down firmly to cut a solid disc. -
Smooth the edges:
Gently run your finger along the cut edge of the circle to soften any sharp ridges left by the cutter, ensuring the bottom looks finished.
Seamless Stacking Tip
If using air-dry clay, you can stack the raw wet rings directly onto each other using ‘slip’ (liquid clay) as glue. This creates a fused, single piece without needing superglue later.
Step 2: Creating the Rings
-
Prepare the colors:
Condition the remaining clay colors. Looking at the reference, you’ll need portions of terracotta, a creamy beige, and a deep navy blue. -
Establish a consistent thickness:
Roll out slabs for each color. It is crucial to keep the thickness consistent for all slabs so your tower stands straight—using guide sticks on either side of your roller helps immensely here. -
Cut the outer circles:
Using the same large circle cutter from the base step, cut out 8 to 9 discs from your various colored slabs. -
Cut the inner holes:
Take the smaller circle cutter and finding the center of each disc, punch out the middle to create rings. Save the inner circles for another project or re-roll them. -
Refine the rings:
I like to gently pat the sides of each ring while they are flat on the table to ensure they stay perfectly round and don’t become oval during handling. -
Create texture (optional):
For a more organic look like the photo, you can lightly tap the surface of the rings with a stiff bristled brush or sandpaper to reduce the ‘plastic’ look of smooth clay.
Make It Modular
Instead of gluing the rings, embed small magnets into the top and bottom of each ring. This lets you rearrange the color pattern whenever you want a fresh look!
Step 3: Assembly and Finishing
-
Dry fit the stack:
Before gluing or baking, stack your rings on top of the base disc to plan your color pattern. The reference image uses a random but balanced mix of earth tones with a pop of blue near the bottom. -
Bake or dry the components:
Follow the instructions for your specific clay type. If using polymer clay, bake the individual rings and base separately on a lined baking sheet to prevent them from sagging under their own weight. -
Cool and sand:
Once fully cured and cooled, take a piece of fine-grit sandpaper and lightly sand the top and bottom surfaces of each ring to ensure they are perfectly flat for stacking. -
Begin gluing:
Apply a strong adhesive to the top rim of your solid base disc and press the first ring (the terracotta one in the photo) firmly onto it. -
Continue the stack:
Continue gluing ring by ring, checking alignment from all angles as you go to ensure the tower doesn’t lean. -
Secure the blue accent:
When you reach the blue ring (second from bottom in the design), ensure you wipe away any excess glue immediately so it doesn’t show against the dark color. -
Final dry time:
Let the entire tower sit undisturbed for several hours to allow the glue to cure completely. -
Seal the surface:
To protect the clay from pencil marks, spray a light coat of matte varnish over the finished piece.
Now you have a stylish, custom-made home for your favorite writing tools that brings a touch of modern art to your workspace