
Every year I’m amazed at how far a simple clay pot can go once you add a little paint and a few cozy Christmas details. If you’ve got a stack of terracotta pots and a holiday mood, these ideas will take you from classic to totally unexpected in the best way.
Santa Belt Clay Pot Gift Holder
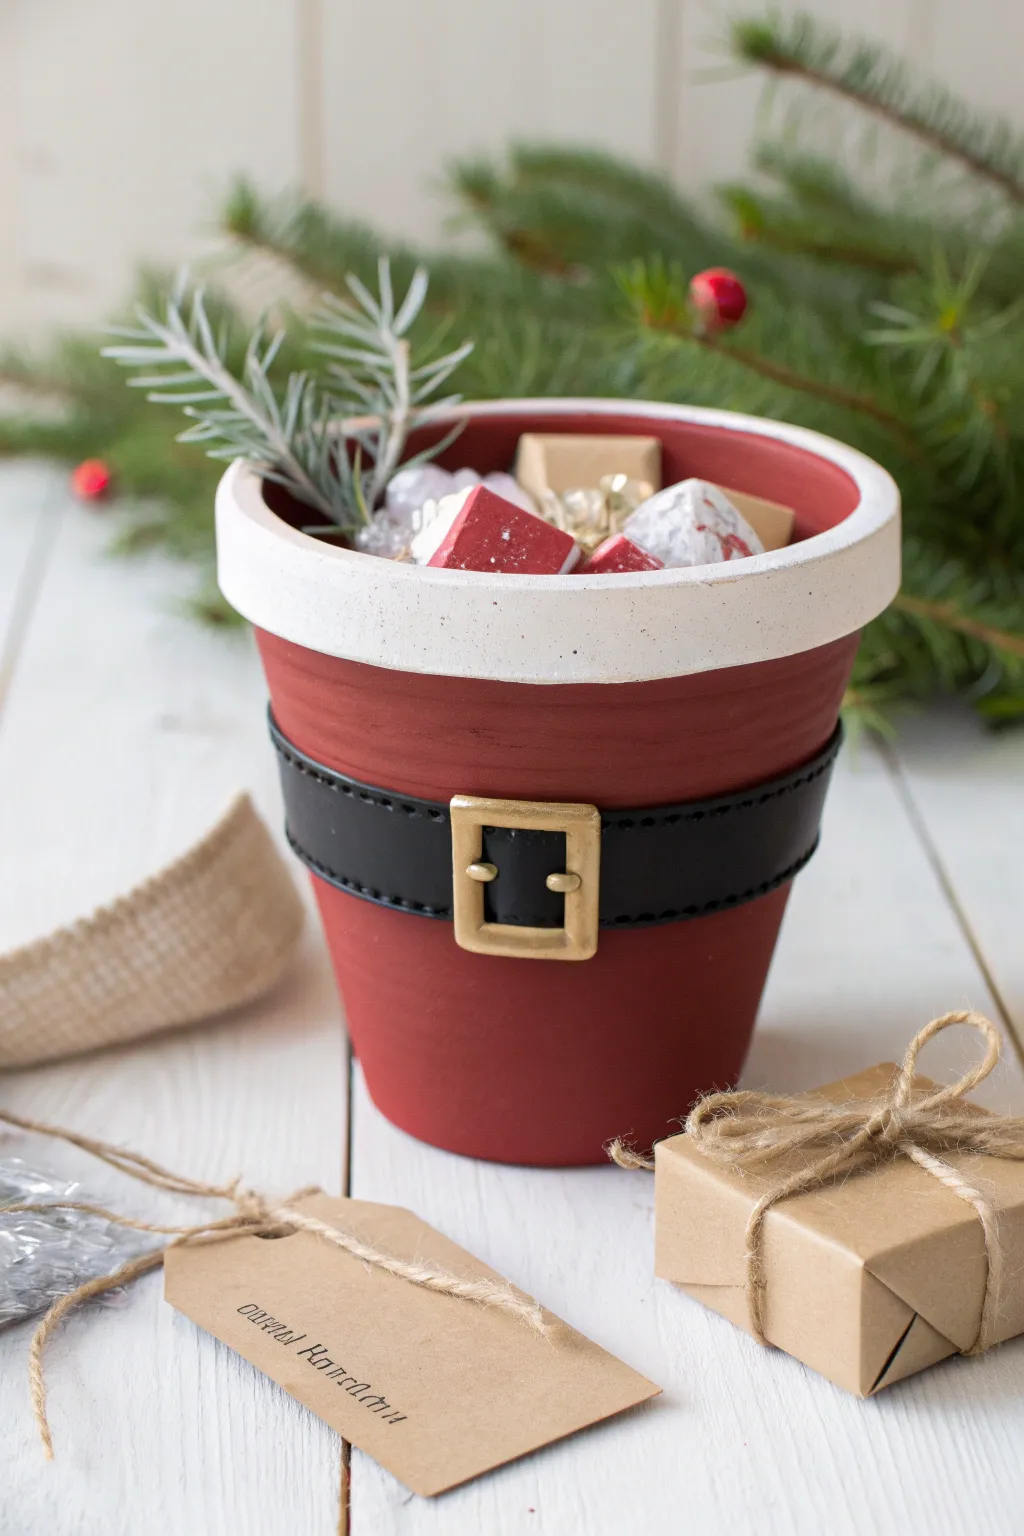
Transform a simple terracotta pot into Jolly Old Saint Nick’s signature look with just a little paint and creativity. This festive vessel makes the perfect holder for small wrapped gifts, treats, or holiday floral arrangements.
How-To Guide
Materials
- Terracotta clay pot (standard 4-6 inch size)
- Red acrylic craft paint (matte finish)
- White acrylic craft paint
- Black acrylic craft paint
- Gold acrylic craft paint or metallic gold paint pen
- Flat paint brushes (medium and small)
- Fine detail brush or stiff bristle brush
- Pencil
- Ruler or measuring tape
- Painter’s tape or masking tape
- Varnish or sealant (optional)
- Small wrapped gifts or filler material
Step 1: Painting the Base Layers
-
Clean surface:
Begin by wiping down your terracotta pot with a damp cloth to remove any dust or debris. Let it dry completely so the paint adheres properly. -
Paint the rim:
Using a flat brush, apply a generous coat of white acrylic paint to the entire rim of the pot. You will likely need 2-3 coats to fully cover the orange clay color. -
Paint the body:
While the rim dries, switch to a fresh brush and paint the main body of the pot with red acrylic paint. Apply this right up to the underside of the rim. -
Add second coats:
Allow the first layers to dry for about 15-20 minutes. Apply a second coat of both white and red to ensure a solid, opaque finish. I like to check for any streaks and smooth them out during this step. -
Create texture (Optional):
To mimic the fuzzy look of Santa’s hat trim shown in the image, lightly dab a stiff bristle brush or sponge with white paint onto the already drying white rim. This stippling effect adds nice dimension.
Step 2: Creating the Belt
-
Mark the belt:
Once the red paint is fully dry, use a ruler to measure about halfway down the pot’s body. Make light pencil marks around the circumference to guide your belt position. -
Tape the lines:
Apply two strips of painter’s tape horizontally around the pot, leaving a gap of about 1 to 1.5 inches between them. This gap will become the black belt. -
Paint the belt:
Fill in the space between the tape strips with black acrylic paint. Use horizontal strokes for a smooth leather-like appearance. -
Remove tape:
Carefully peel off the painter’s tape while the black paint is still slightly wet to ensure a crisp edge. Let the black band dry completely. -
Add stitching details:
Using a very fine detail brush or a black paint pen, add small dashed lines along the very top and bottom edges of the black belt. This mimics the stitching on a leather belt.
Textured Snow Rim
Mix a small amount of baking soda or white craft sand into your white paint for the rim. This creates a fluffy, faux-fur texture that feels just like Santa’s suit.
Step 3: The Gold Buckle
-
Draft the buckle:
Lightly sketch a square or rectangle in the center of the black belt using a pencil. Make sure it extends slightly above and below the black line onto the red area. -
Paint the buckle frame:
Use gold acrylic paint and a small flat brush to paint the square outline of the buckle. You want a thick, bold line. -
Add the prong:
Paint a small vertical line or rectangle on the right side of the buckle’s interior to represent the belt prong going through a hole. -
Detail the holes:
Using the handle end of a paintbrush dipped in black paint, dot two small holes on the black belt to the right of the buckle for extra realism. -
Highlighting:
Add a tiny touch of lighter gold or white to the corners of the buckle to make it look metallic and shiny. -
Seal the pot:
If you plan to use this outdoors or with real plants, apply a coat of clear matte sealant over the entire exterior once all paint is cured. -
Fill and enjoy:
Fill the pot with festive crinkle paper, small wrapped boxes, or holiday greenery to complete the look.
Uneven Belt Lines?
If paint bleeds under your tape, wait for it to dry completely. Then, use a small angled brush with the base red color to carefully touch up and straighten the line.
This charming pot is now ready to spread cheer on your mantel or serve as a unique gift basket for a friend


Reindeer Clay Pot Candy Pot
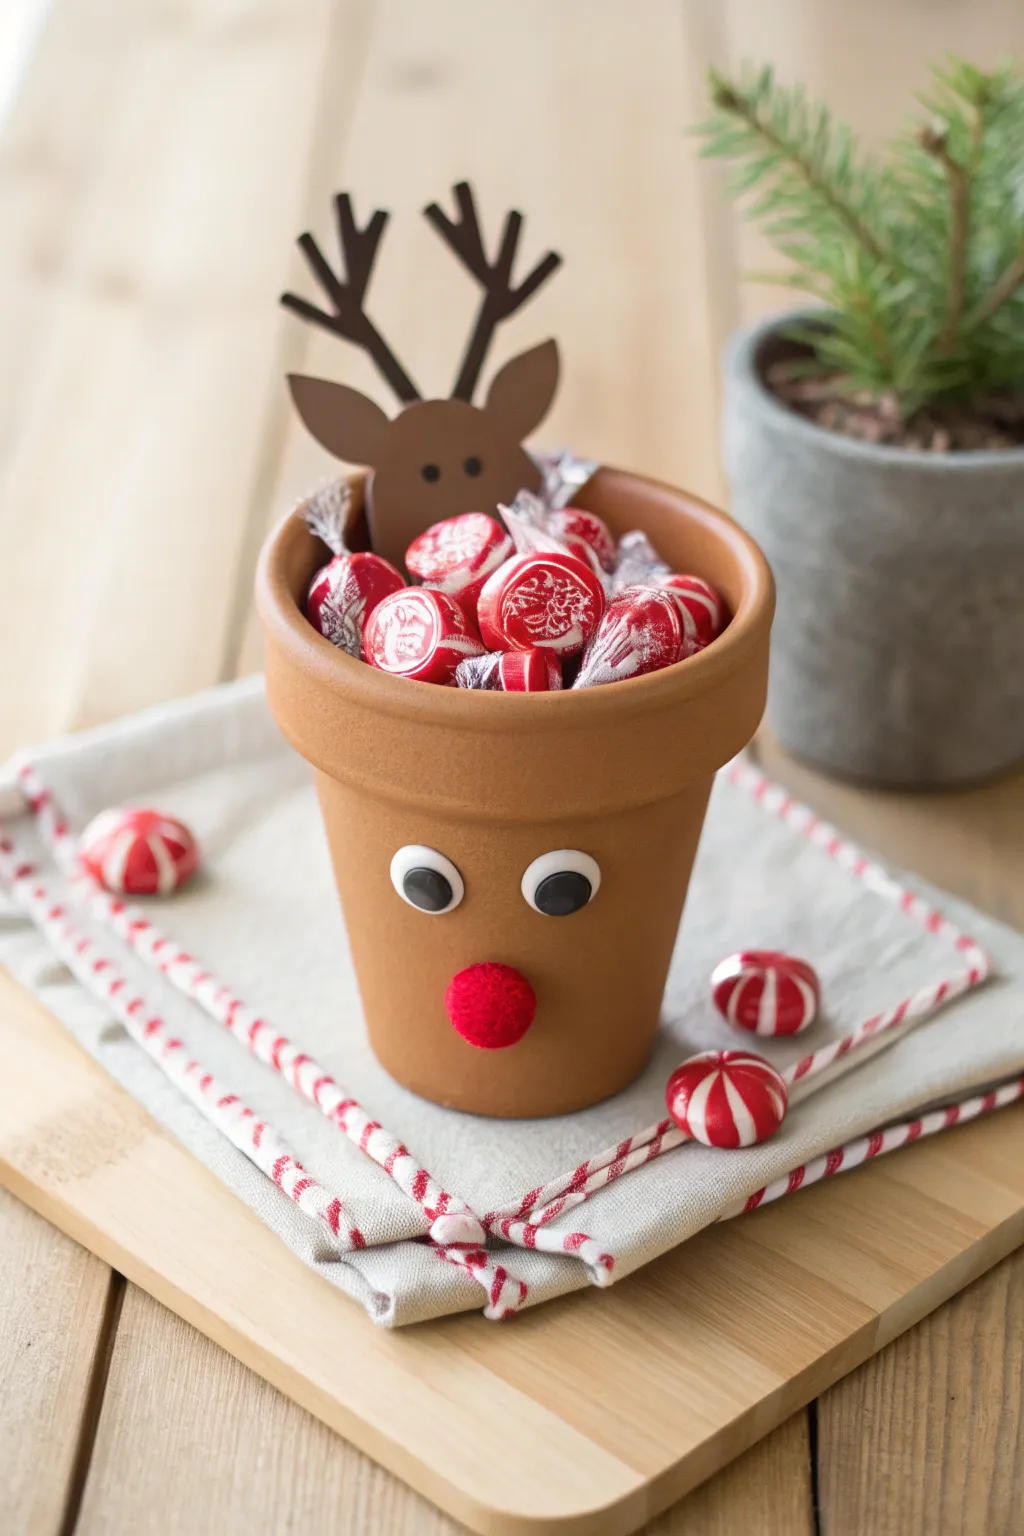
Transform a simple terracotta pot into an adorable reindeer treat holder that’s perfect for holiday gifting or festive decor. This easy craft combines basic painting with simple assembly to create a charming character bursting with red and white peppermint candies.
Step-by-Step
Materials
- Small terracotta clay pot (approx. 3-4 inches)
- Brown cardstock or construction paper
- Dark brown cardstock (for antlers)
- Black marker or pen
- Large googly eyes
- Red pom-pom (medium size)
- Hot glue gun and glue sticks
- Scissors
- Pencil
- Wrapped peppermint candies or other red treats
Step 1: Preparing the Reindeer Body
-
Clean the pot:
Start by wiping down your terracotta pot with a slightly damp cloth to remove any clay dust or debris. Let it dry completely so the adhesive sticks properly. -
Optional painting:
If your pot looks a bit chalky or uneven, you can brush on a light coat of watered-down brown acrylic paint. However, the natural terracotta color works perfectly for a reindeer, so leaving it raw is totally fine. -
Position the nose:
Take your red pom-pom and identify the center point on the front of the pot, roughly halfway down the main body section. Apply a dab of hot glue here. -
Attach the nose:
Press the red pom-pom firmly onto the glue dot. Hold it for a few seconds to ensure the fibers bond securely with the clay surface. -
Place the eyes:
Select two large googly eyes. Generally, placing them wider apart makes the character look cuter and more innocent. -
Glue the eyes:
Apply hot glue to the back of each eye and press them onto the pot, positioning them roughly an inch above the nose on the main body of the pot, not the rim.
Step 2: Crafting the Antlers
-
Draw the head shape:
On your lighter brown cardstock, sketch a simple oval or rounded triangle shape for the reindeer’s head. It needs to be small enough to tuck behind the candies later. -
Add ears:
Draw two leaf-shaped ears extending from the sides of your head shape. -
Cut the head:
Carefully cut out this unified head-and-ears shape using your scissors. -
Draw the antlers:
Switch to the darker brown cardstock. Sketch two branching antler shapes. I find drawing a ‘Y’ shape and adding extra prongs is the easiest method. -
Cut the antlers:
Cut out both antlers. Don’t worry if they aren’t perfectly symmetrical; nature rarely is. -
Assemble the head piece:
Glue the bottom stem of the dark antlers onto the back of the lighter brown head piece. -
Draw facial features:
Using a black marker, draw two small dots for eyes on the paper head piece. You don’t need a mouth since it will be tucked away. -
Secure the decoration:
Apply a line of glue to the bottom front of your paper reindeer head assembly and press it against the inside back rim of the pot so it peeks over the top.
Glue Gun Safety
Use a low-temp glue gun if kids are helping. It bonds paper and pom-poms just as well without the high risk of painful burns.
Step 3: Filling with Holiday Cheer
-
Line the bottom:
Place a crumpled piece of tissue paper or a few clear candy wrappers in the bottom of the pot to act as a filler. -
Add the candy:
Fill the rest of the pot with red and white peppermint candies. Arranging them so the wrappers flare upward adds nice volume. -
Final adjustment:
Adjust the candies so they help support the paper reindeer head from behind, keeping it upright and visible.
Floppy Antlers?
If the cardstock antlers are drooping, glue a toothpick or a sliver of popsicle stick to the back of each one for invisible structural support.
Now you have a festive little reindeer ready to spread sweetness across your holiday table


Stacked Clay Pot Christmas Tree
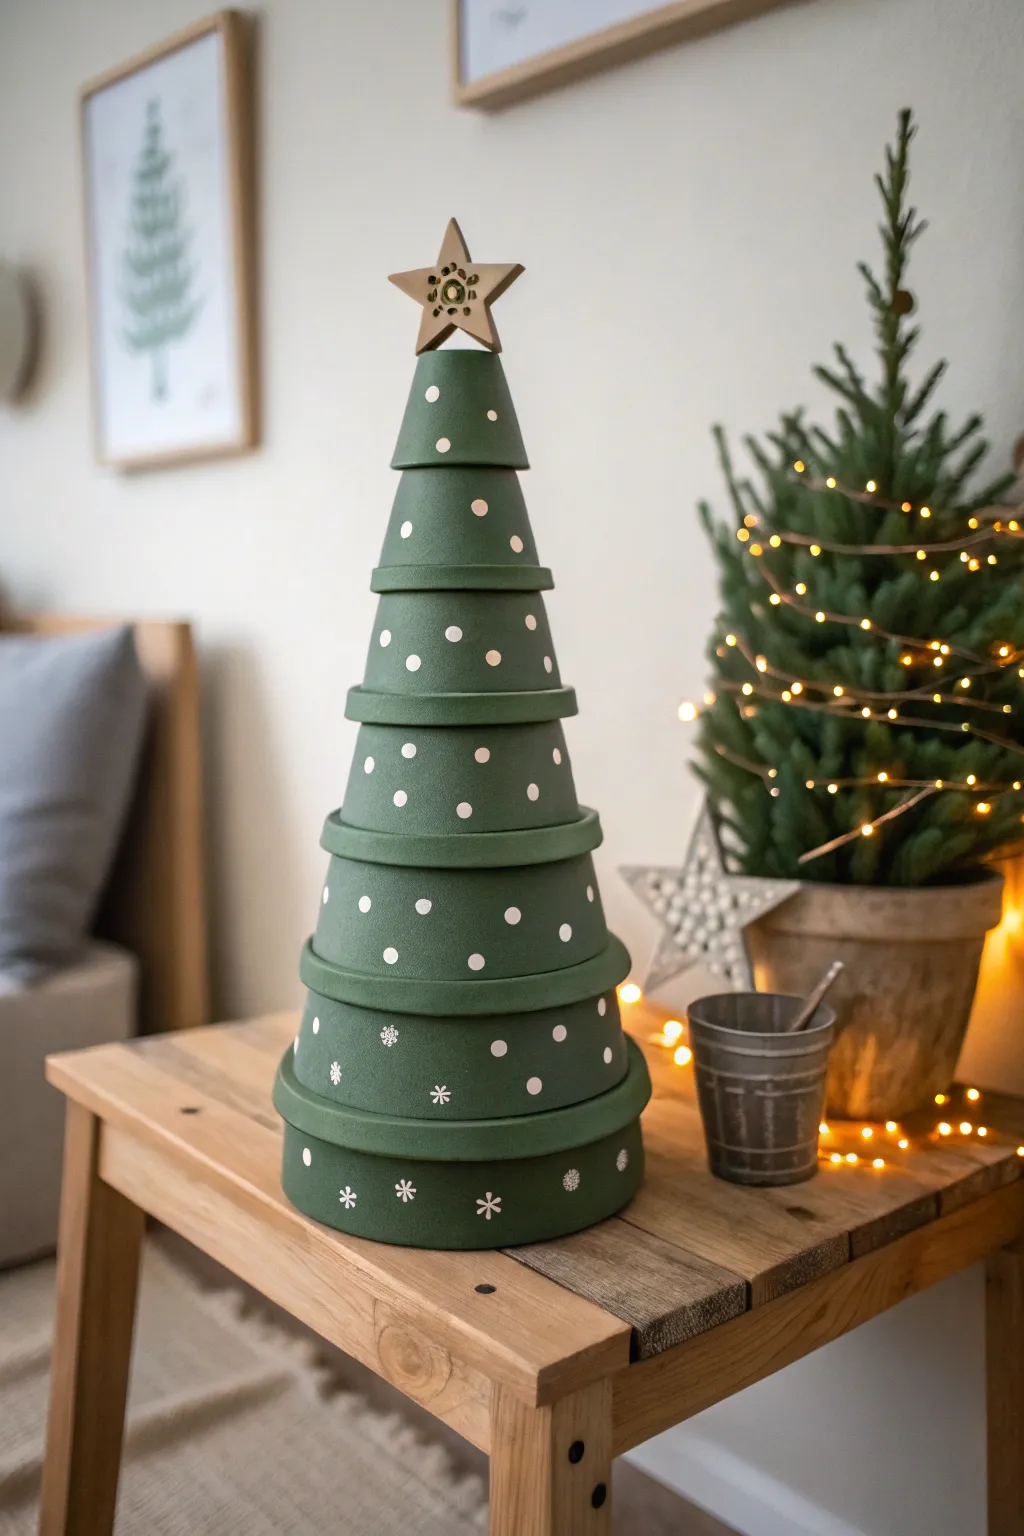
Transform ordinary terracotta pots into a charming holiday centerpiece with this tiered Christmas tree project. The smooth matte green finish and delicate white details give it a modern, minimalist look perfect for a mantel or side table.
Step-by-Step Tutorial
Materials
- 7-8 terracotta pots in graduating sizes (nesting set recommended)
- Matte forest green acrylic paint
- White acrylic paint or white paint pen (fine tip)
- Wooden star topper
- Strong craft glue (E6000 or hot glue gun)
- Flat paintbrush (medium width)
- Small round paintbrush or dotting tool
- Sea sponge or fine grit sandpaper (optional)
- Painter’s palette or paper plate
Step 1: Preparation & Base Coat
-
Clean the pots:
Before starting, wipe down all your terracotta pots with a damp cloth to remove any dust or manufacturing residue. Any lingering dust will prevent the paint from sticking smoothly. -
Dry fit the stack:
Stack your pots upside down from largest to smallest to ensure they sit steadily on top of each other. This is the time to decide if you want to use the matching saucers between layers for extra height, though the image shows just the pots stacked directly. -
Apply the first coat:
Using a flat brush and matte forest green acrylic paint, cover the exterior of each upturned pot. Don’t forget to paint the rim, as this part remains visible when stacked. -
Let it dry:
Allow the first coat to dry completely for about 20-30 minutes. Terracotta is porous and soaks up paint quickly, so be patient. -
Apply the second coat:
Add a second layer of green paint to achieve that solid, opaque finish seen in the photo. If you see brushstrokes, you can lightly dab a damp sea sponge over the wet paint for a more textured, stone-like appearance.
Step 2: Detailing
-
Test your pattern:
Before painting on the pots, practice your dot spacing on a piece of scrap paper. The design features evenly spaced polka dots on the upper tiers and snowflakes on the bottom two. -
Create the polka dots:
Starting with the smallest pot, use the handle end of a paintbrush, a dotting tool, or a paint pen to create white dots. I find a random scatter looks more organic, but you can measure for a grid pattern if you prefer precision. -
Work your way down:
Continue the dot pattern on the next few pots as you move down the size gradient. Keep the dots relatively consistent in size. -
Paint the snowflakes:
For the largest two pots at the base, switch to painting delicate snowflakes. Use a very fine brush or a white paint pen to draw an ‘X’, then a cross through it, adding small V-shapes to the ends of the lines. -
Mix details:
intersperse a few simple dots among the snowflakes on these bottom layers to tie the design together with the upper sections. -
Allow to cure:
Let all the white detailed work dry completely before handling the pots again to avoid smudging your crisp lines.
Uneven Stacking?
If a pot wobbles, roll a small snake of air-dry clay or use extra hot glue between the layers to act as a leveling shim before pressing them together.
Step 3: Assembly
-
Build the foundation:
Place the largest pot upside down on your workspace. Apply a ring of strong craft glue around the bottom edge (now the top) of the pot. -
Stack the layers:
Center the next largest pot on top of the glue ring. Press down firmly for moment to set. Repeat this process until all pots are stacked. -
Prepare the star:
If your wooden star is plain, you can leave it natural like in the photo or paint it gold. Ensure the bottom edge is flat enough to adhere to the top pot. -
Attach the topper:
Apply a dab of generous glue to the very top of the smallest pot and press the wooden star into place. Hold it steady until the glue begins to grab so it doesn’t tilt. -
Final touches:
Once the entire structure is stable and the glue is dry, check for any scuffs in the green paint and touch them up with a small brush if necessary.
Perfect Polka Dots
Use the eraser end of a fresh pencil dipped in paint as a stamp. It creates perfectly uniform round dots every time without needing special tools.
Place your festive tree near some twinkle lights to highlight the snowy details you’ve added


Elf Clay Pot Character Set
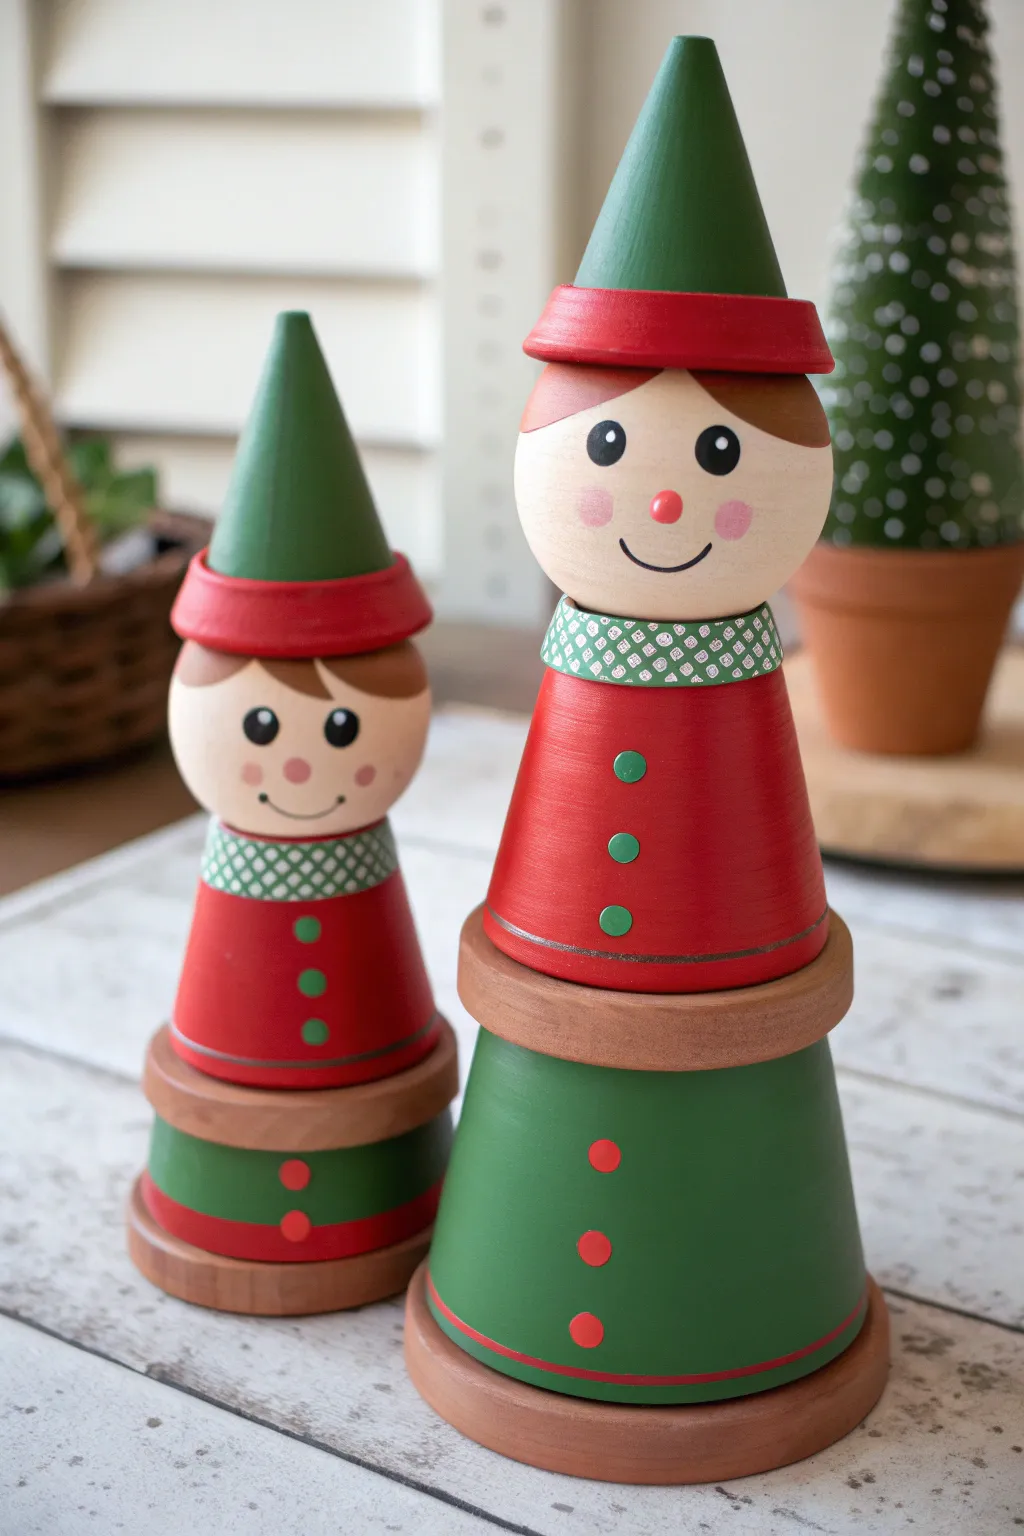
Transform humble garden materials into a pair of cheerful holiday elves with this clever stacking project. These festive figurines combine simple painting techniques with varied pot sizes to create adorable décor perfect for a mantle or entryway.
Step-by-Step Guide
Materials
- 2 Small terracotta pots (approx. 2-3 inch rim)
- 2 Medium terracotta pots (approx. 4-5 inch rim)
- 2 Large terracotta saucers (base)
- 2 Small terracotta saucers (neck ruffle/mid-section)
- 2 Wooden balls or doll heads (sized to fit the smaller pot rims)
- 2 Foam cones or wooden craft cones (sized to fit top of heads)
- Acrylic craft paint (bright red, forest green, flesh tone, brown, pink, white)
- Paintbrushes (flat shader, fine liner, and round brush)
- Strong craft glue or hot glue gun
- Pencil
- Washi tape or ribbon (green patterned)
- Sealer spray (matte or satin finish)
Step 1: Base Coat Painting
-
Prepare the Body Parts:
Begin by wiping down all terracotta pieces with a damp cloth to remove any dust. For the larger elf, you’ll need one medium pot (bottom) and one small pot (top). For the smaller elf, you might use a smaller scale combination or just stack them slightly differently. Paint the larger base pots forest green and the smaller torso pots bright red. -
Paint the Details:
Paint the large base saucers in their natural terracotta color if they aren’t already perfect, or give them a light brown wash. Paint the rims of your red torso pots to match the red body so the color is seamless. Let all coats dry completely, applying a second coat if the terracotta still shows through. -
Create the Hats:
Take your cones and paint them forest green. For the hat brim, paint the rim of the small saucers bright red. These saucers will eventually sit between the head and the cone to create that classic elf hat look.
Uneven Surfaces?
Terracotta can be rough. If your pots are very textured, give them a quick sanding with fine-grit sandpaper before painting for a smoother finish.
Step 2: Face Features
-
Paint the Skin Tone:
Paint the entire surface of the wooden balls with your chosen flesh tone acrylic paint. This usually takes 2-3 thin coats to get a smooth, non-streaky finish. Allow ample drying time between layers. -
Map the Hair:
Once the face base is dry, lightly sketch a hairline with a pencil. Paint the top portion brown, bringing it down into bangs on the forehead. I prefer using a round brush here to create soft curves for the hair. -
Add Eyes and Mouth:
Using the handle end of a paintbrush dipped in black paint, dot two eyes onto the face. Use a fine liner brush to paint a simple, curved smile. -
Blush and Nose:
Mix a tiny amount of red with your flesh tone (or use pink) and dab a small nose in the center. For the rosy cheeks, use a dry stencil brush or your finger to lightly smudge pink paint on either side of the smile. -
Add Life to the Eyes:
Dip the very tip of a toothpick or a pin into white paint and add a tiny sparkle dot to the upper right corner of each black eye. This immediately brings the character to life.
Festive Customization
Add real texture by gluing tiny actual buttons onto the pots instead of painting them, or glue a mini jingle bell to the very tip of the hat cone.
Step 3: Assembly and Detailing
-
Stack the Body:
Place the large green pot upside down on the large saucer. Glue it in place. Next, glue the smaller red pot upside down on top of the green one. You can use a small saucer between them as a separator if you wish, or stack them directly as shown in the larger elf. -
Attach the Head:
Apply a ring of strong glue to the bottom of the painted wooden head and secure it firmly onto the inverted red pot. -
Add the Collar:
Wrap a strip of green patterned washi tape or ribbon around the ‘neck’ area where the head meets the red pot. This creates a cute collar and hides the seam. -
Assemble the Hat:
Glue the small red-rimmed saucer onto the top of the wooden head. Then, glue the green cone on top of that saucer. The saucer acts as the brim of the elf hat. -
Paint Clothing Buttons:
Using the handle end of a medium paintbrush, dip it into green paint and stamp three vertical buttons down the front of the red shirt. Repeat with red buttons on the green pants (bottom pot). -
Seal the Project:
Once all paint is fully cured, take the elves outside and give them a light coat of clear matte sealer to protect the paint from chipping.
Display your charming duo on a shelf to watch over your holiday festivities

The Complete Guide to Pottery Troubleshooting
Uncover the most common ceramic mistakes—from cracking clay to failed glazes—and learn how to fix them fast.
Mini Clay Pot Christmas Bell Ornaments
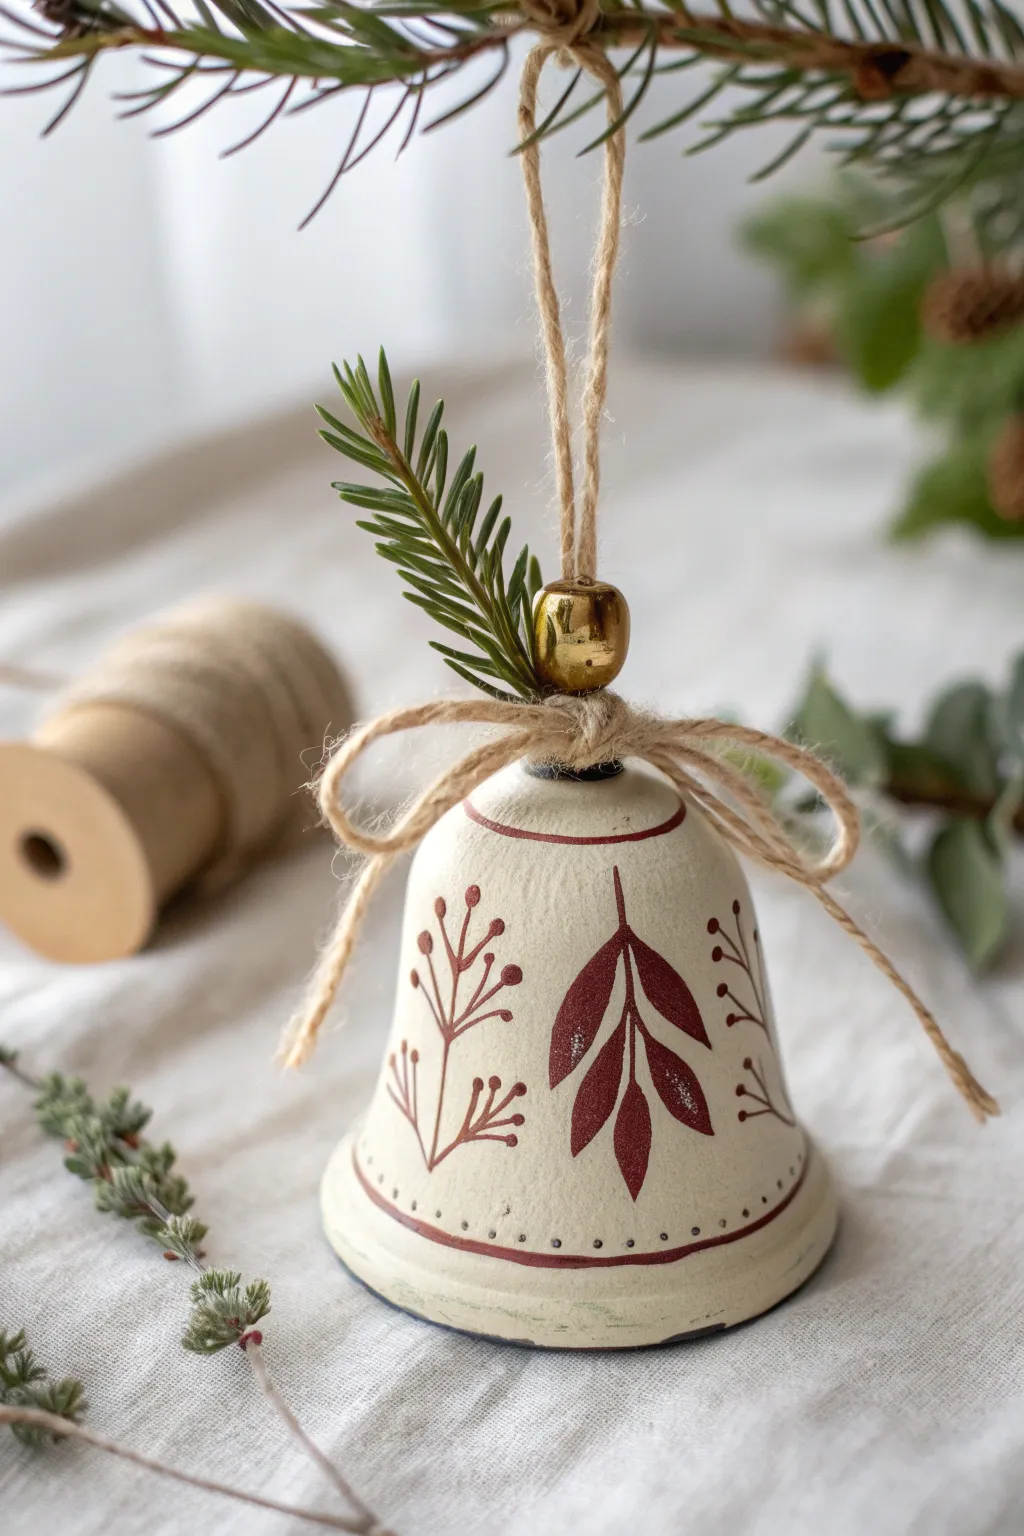
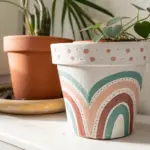
Transform a simple terracotta planter into a charming vintage-style bell ornament with just a bit of paint and twine. This project features delicate hand-painted botanical motifs in a warm russet tone against a creamy, aged background.
Detailed Instructions
Materials
- Mini terra cotta pot (approx. 2-3 inches)
- Acrylic paint (Cream/Off-White)
- Acrylic paint (Russet Red/Deep Terracotta)
- Small round paintbrush (Size 2 or 4)
- Fine liner paintbrush (Size 0 or 00)
- Jute twine
- Wooden bead or small jingle bell (for the clapper inside – optional)
- Gold bead (medium size, for top)
- Fresh or faux evergreen sprig
- Hot glue gun and glue sticks
- Scissors
Step 1: Base Preparation
-
Clean the pot:
Wipe down your mini terracotta pot with a damp cloth to remove any dust or oils, ensuring the paint adheres properly. -
Apply the base coat:
Using the cream acrylic paint and a medium brush, cover the entire outside of the pot. Don’t forget the rim. You can leave the inside raw or paint the bottom edge just inside the rim for a cleaner look. -
Let it dry:
Allow the first coat to dry completely. This usually takes about 15-20 minutes. -
Second coat:
Apply a second coat of cream paint to ensure solid, opaque coverage. If you want a more rustic look, you can leave slight streakiness.
Brush Tip
For the finest lines on the twigs, thin your acrylic paint slightly with a drop of water. This helps the paint flow smoothly off the liner brush without skipping.
Step 2: Painting the Design
-
Plan the layout:
Visualize where you want your main leaf motif. I usually center the largest leaf shape on what will be the ‘front’ of the bell. -
Paint the bottom stripes:
Using the fine liner brush and the russet red paint, carefully paint two thin horizontal lines near the bottom rim of the pot. Add tiny dots between the lines for detail. -
Paint the center leaf:
With the round brush, paint a central vertical stem starting from about halfway up the pot. Add elongated oval leaf shapes extending outwards from the stem. -
Add detail to the leaf:
While painting the leaves, leave a very thin line of the cream background visible down the center of each leaf for a vein effect, or paint solid and add a lighter highlight later. -
Paint the side sprigs:
Switch back to the fine liner brush. On either side of the main leaf, paint delicate twig shapes with tiny berries or buds at the tips of the branches. -
Dry the details:
Let the detail work dry completely before handling the pot further to avoid smudging your crisp lines.
Step 3: Assembly
-
Create the hanger loop:
Cut a length of jute twine (about 10 inches). Fold it in half to create a loop. -
Secure the hanger:
Thread the loop through the drainage hole of the pot from the inside out. Tie a large knot on the inside end so it can’t pull through. If you are adding a clapper, tie a bead or bell to the inside tail of the twine now. -
Add the gold bead:
Thread the gold bead onto the loop sticking out at the top of the bell. Slide it down until it sits flush against the bottom of the pot. -
Glue the bead:
Add a tiny dab of hot glue under the gold bead to secure it firmly to the terracotta surface. -
Tie the bow:
Cut another piece of twine and tie a simple shoelace bow. Pull the loops tight to make it neat and proportional to your mini pot. -
Prepare the greenery:
Snip a small piece of evergreen. If using fresh, choose a piece that is flat; if faux, trim the wire stem short. -
Attach the greenery:
Apply a dot of hot glue right next to the gold bead and press the stem of your evergreen sprig into it. -
Attach the bow:
Apply a final dot of hot glue over the end of the evergreen stem and press your twine bow firmly on top to cover the mechanics.
Uneven Lines?
If your horizontal stripes are shaky, rest your pinky finger on the table or the pot itself to stabilize your hand while rotating the bell, rather than moving the brush.
Hang your new handcrafted bell on the tree or use it as a festive package topper to delight a friend
Inverted Clay Pot Candle Pedestals

Transform a humble clay pot into an elegant centerpiece with this simple inversion technique. By flipping the pot and adding delicate botanical hand-painting, you create a charming, rustic-chic pedestal perfect for holding tapered candles.
Step-by-Step
Materials
- Small terracotta pot (approx. 4-inch diameter)
- White acrylic paint (matte or satin finish)
- Green acrylic paint (olive and forest shades)
- Red acrylic paint (deep berry or rust)
- Small flat paintbrush
- Fine liner paintbrush (size 0 or 00)
- Matte finish sealer spray or Mod Podge
- Taper candle
- Candle adhesive wax or mounting putty
Step 1: Preparation & Base Coat
-
Clean the pot:
Begin by thoroughly wiping down your terracotta pot with a damp cloth to remove any dust or loose clay particles. Let it dry completely. -
Invert and position:
Flip the pot upside down so the drainage hole is facing up. This flat bottom will become the top surface for your candle. -
Tape the rims (optional):
If you want crisp lines, apply painter’s tape over the top rim (originally the bottom) and the thick bottom rim (originally the top lip). Alternatively, you can paint freehand for a more organic look. -
Apply white base:
Using your flat brush, paint the main body of the pot white. Leave the top and bottom rims exposed as natural terracotta to frame the design. -
Layer for opacity:
Terracotta is porous and dark, so you will likely need 2-3 coats of white paint. Allow roughly 15-20 minutes of drying time between each coat until you achieve solid coverage.
Wobbly Candle?
If the drainage hole is too large, melt the bottom of the candle slightly with a lighter before pressing it in, or shave the candle base down if the hole is too small.
Step 2: Painting the Botanicals
-
Plan your spacing:
Visualize where your main foliage elements will go. Aim for a random, scattered pattern rather than perfect rows. -
Paint fern leaves:
Dip your fine liner brush into forest green paint. Paint a thin, curved central stem, then add short, feathery strokes outward on both sides to create a fern leaf. -
Add leafy sprigs:
Using an olive green shade, paint simple stems with small, oval-shaped leaves attached. Vary the direction these sprigs face to keep the pattern dynamic. -
Create berry clusters:
Switch to your red paint. Use the very tip of your liner brush or a dotting tool to add clusters of 3-4 small dots for berries. -
Paint starburst accents:
With the red paint, add small starburst or snowflake-like shapes. Paint a small cross, then add diagonal lines through the center for a festive winter flora touch. -
Fill empty spaces:
Look for large white gaps and fill them with tiny singular red dots or small green leaves to balance the composition. -
Dry and seal:
Allow the painted design to cure for at least an hour. Once dry, apply a coat of matte sealer to protect the paint from chipping.
Step 3: Assembly
-
Secure the candle:
Insert your taper candle into the drainage hole. Since holes vary in size, the candle might wiggle. -
Stabilize the fit:
If the fit is loose, wrap the base of the candle with a little masking tape or use candle adhesive wax (Stick-Um) inside the hole to keep it perfectly upright. -
Style the display:
Place your finished pedestal on a ceramic plate or wooden charger to catch any potential drips and complete the look.
Crisp Lines
For the cleanest edge between the white paint and the raw terracotta rim, use high-quality automotive detailing tape instead of standard masking tape.
Light your candle and enjoy the warm, handmade glow this holiday season


What Really Happens Inside the Kiln
Learn how time and temperature work together inside the kiln to transform clay into durable ceramic.
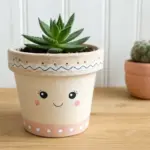
Snowman Face Mini Pot Party Favors
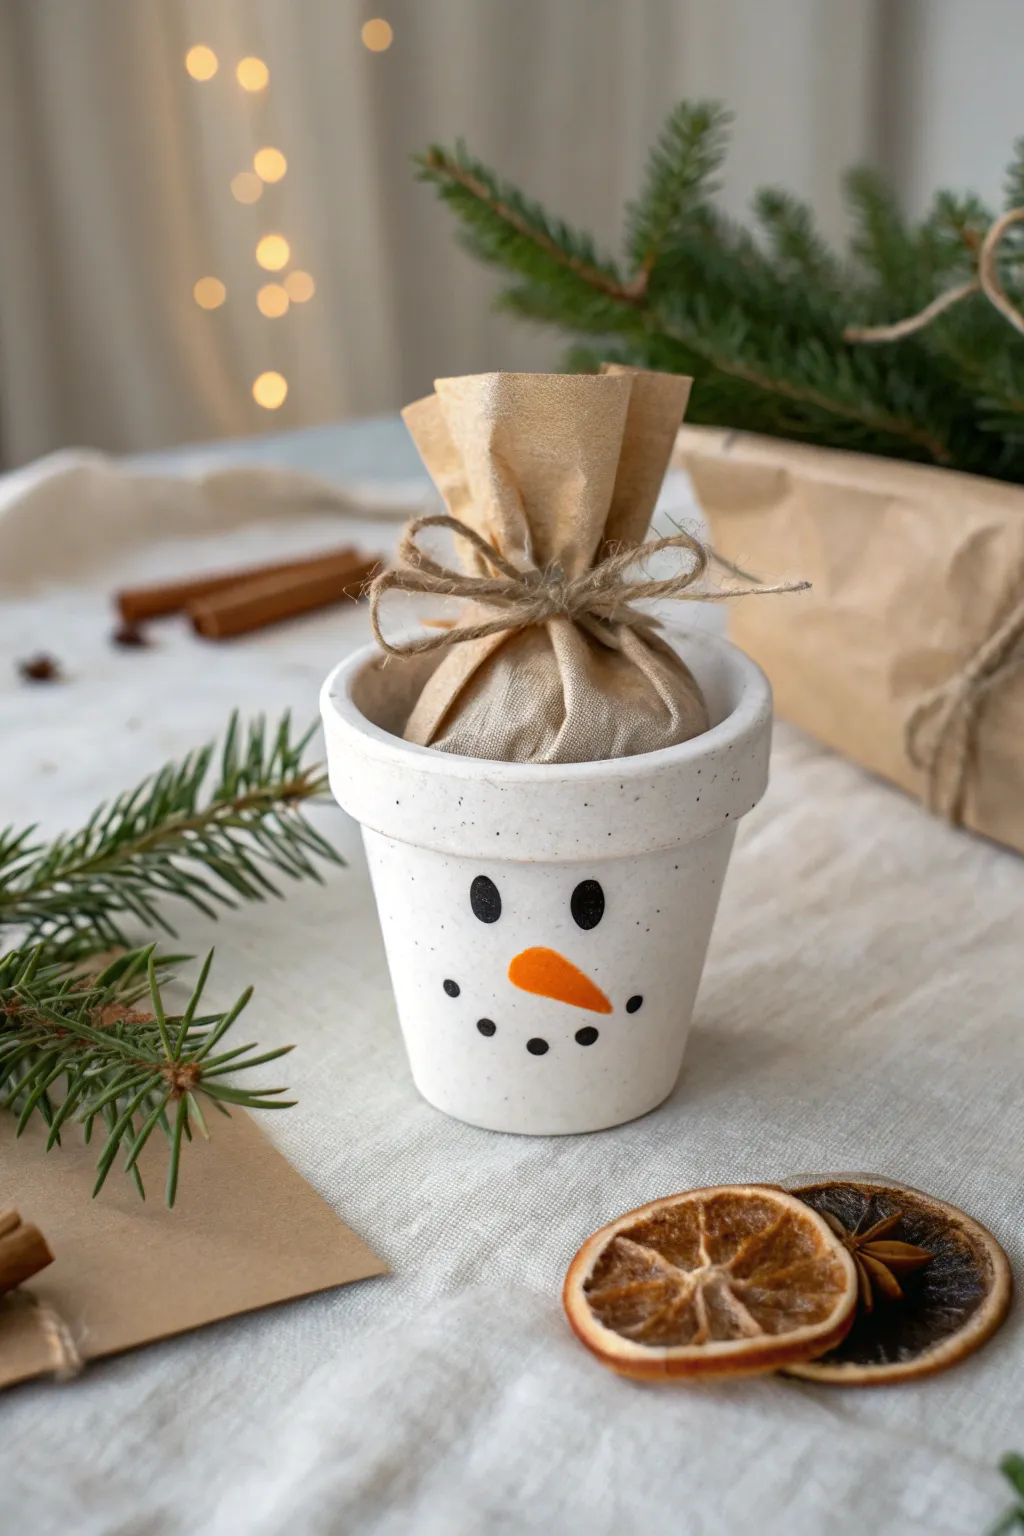
These adorable mini snowman pots are the perfect way to hand out holiday party favors or small gifts with a homemade touch. The speckled white finish mimics fresh snow, while the simple painted face adds a cheerful personality to these rustic terracotta transformations.
Detailed Instructions
Materials
- Mini terracotta pot (2-3 inch diameter)
- White acrylic paint (matte finish)
- Black acrylic paint
- Orange acrylic paint
- Sponge brush or dauber
- Small round detail brush (size 0 or 1)
- Old toothbrush (for speckling)
- Clear matte sealer spray (optional)
- Small brown paper bag or burlap fabric
- Jute twine
- Treats or small gifts for filling
Step 1: Creating the Snowy Base
-
Clean the pot:
Start with a clean, dry terracotta pot. Wipe away any dust with a damp cloth and let it dry completely to ensure the paint adheres properly. -
Apply the white base:
Using a sponge brush, dab specifically designed for ceramics or multi-surface white acrylic paint all over the exterior and the inner rim of the pot. Dabbing creates a textured look similar to packed snow. -
Let it dry:
Allow the first coat to dry for about 15-20 minutes. Terracotta is porous, so it soaks up paint quickly. -
Second coat coverage:
Apply a second coat of white paint using the same dabbing motion. This ensures the orange of the terracotta doesn’t peek through. -
Add the speckled effect:
To get that granite-like, snowy texture seen in the photo, dip an old toothbrush into a tiny bit of black paint diluted with a drop of water. Test on a scrap paper first. -
Flick the specks:
Hold the toothbrush near the pot and run your thumb across the bristles to flick tiny specks of black paint onto the white surface. Go easy—creates a subtle, speckled stone look rather than a polka-dot pattern.
Paint Splatter Control
If the toothbrush splatter feels risky, practice inside a cardboard box first. This contains the mess and helps you gauge how much pressure creates the perfect mist of dots.
Step 2: Painting the Face
-
Outline the eyes:
Once the base is visibly dry, dip your clean sponge dauber or a medium round brush into black paint. Stipple two vertical oval shapes for the eyes near the upper rim. -
Paint the carrot nose:
Using your small detail brush and bright orange paint, create a sideways teardrop shape between the eyes. I like to keep the rounded end near the center and point the tip out toward the right cheek. -
Add the coal mouth:
Dip the back end of your paintbrush handle into black paint. This makes a perfect dotting tool. -
Dot the smile:
Press the handle end onto the pot to create 5-6 dots forming a curved smile underneath the nose. -
Refine the details:
Check your shapes. If the orange nose needs a second coat to be vibrant against the white, add it now carefully. -
Seal the paint:
If these will be handled often, spray a light coat of matte clear sealer over the entire pot to protect the finish.
Step 3: Assembling the Favor
-
Prepare the filling:
Take your small treats or gift and place them inside a small square of brown kraft paper, a lunch bag corner, or a square of burlap fabric. -
Bundle the gift:
Gather the edges of the paper or fabric upwards to create a pouch shape, bunching it at the neck. -
Tie the bow:
Cut a length of jute twine and wrap it securely around the bunched neck of the pouch. Tie it into a simple shoelace bow. -
Insert into the pot:
Place the tied bundle inside your dry snowman pot. The ruffled top of the bag mimics a tuft of hair or a hat for your frosty friend.
Cozy Up The Look
Glue a strip of felt or festive ribbon around the rim of the pot to give your snowman a scarf, or glue two small twigs to the sides of the pot to serve as arms.
Line these charming little pots along a mantel or place one at every setting for a winter dinner greeting
Clay Pot “Snow Globe” Candy Topper
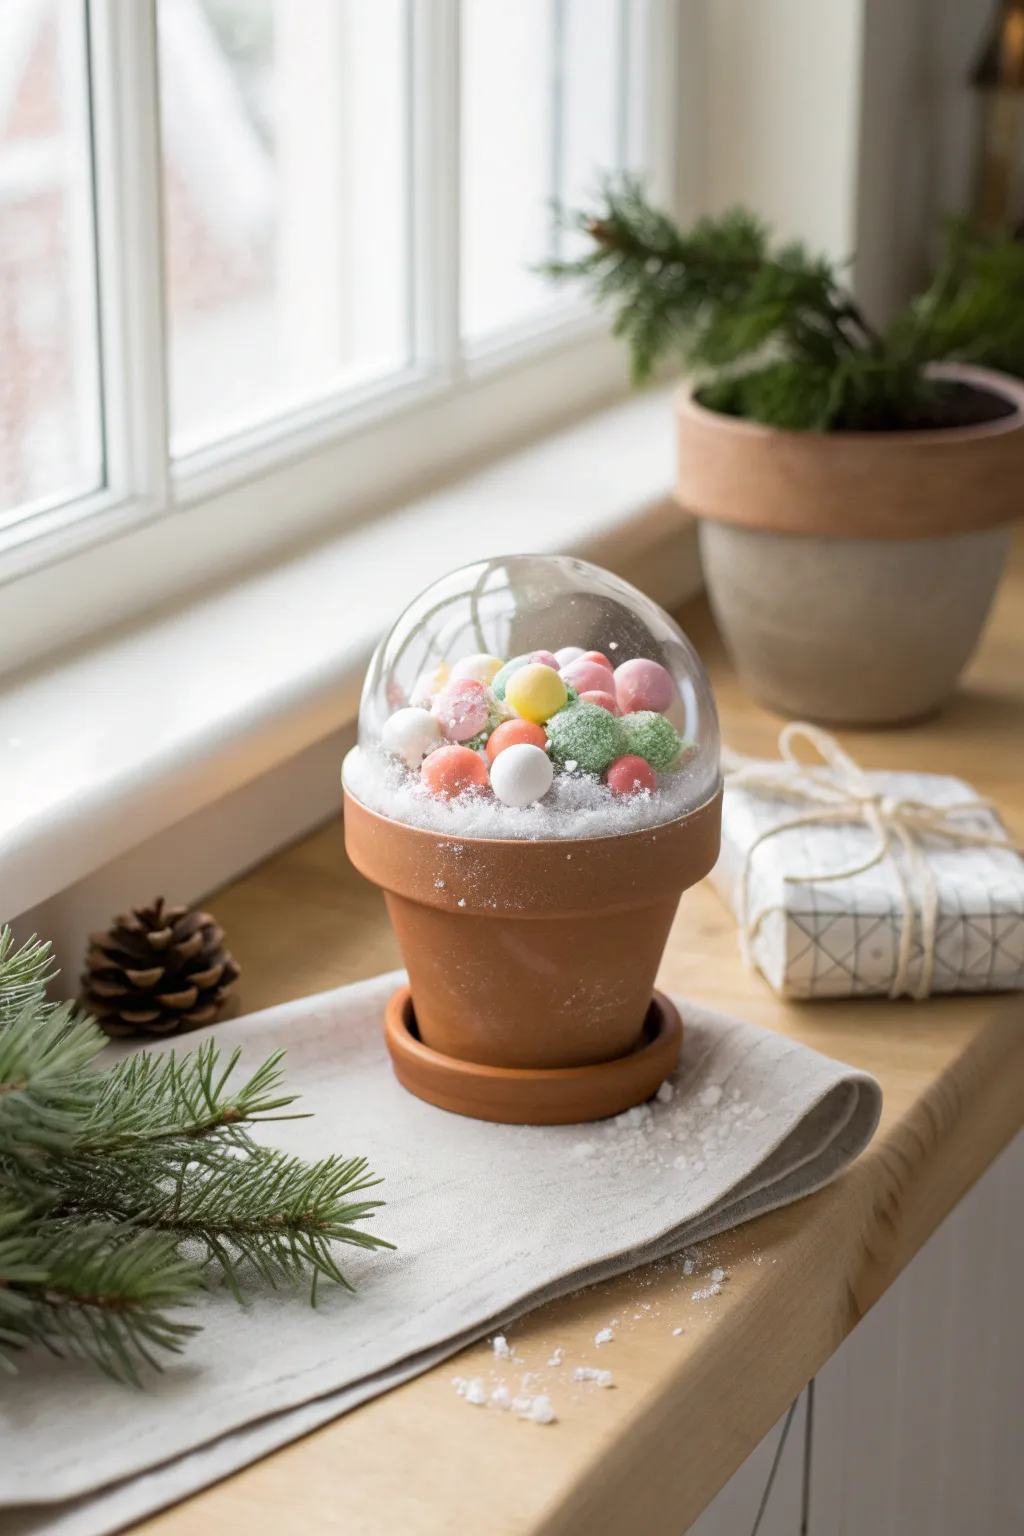
Transform a simple terra cotta planter into a whimsical winter display using the classic charm of a candy dish. This project combines a rustic clay base with a sugary-sweet dome of colorful gumdrops for a decoration that looks good enough to eat.
Step-by-Step Tutorial
Materials
- Small terra cotta pot (approx. 3-4 inches diameter)
- Matching terra cotta saucer
- Clear glass or plastic dome/cloche (sized to fit the pot rim)
- Styrofoam ball (sized to fit snugly inside the pot)
- White craft paint
- Faux snow spray (flocking spray)
- Loose faux snow or coarse glitter
- Hot glue gun and glue sticks
- Assorted gumdrops or sugar-coated candy balls (pastel colors)
- Toothpicks or crafting wire
- Small paintbrush
- Mod Podge or white craft glue
Step 1: Preparing the Base
-
Clean the pot:
Wipe down your terra cotta pot and saucer with a damp cloth to remove any dust or manufacturing residue. Let them air dry completely so adhesives will stick properly. -
Fit the foam structure:
Take your Styrofoam ball and test the fit inside the pot. It should sit just below the rim. If it’s too large, carefully slice off the bottom or sides with a craft knife until it wedges in securely. -
Apply the snow layer:
Paint the top surface of the Styrofoam ball with a generous layer of white craft paint. While the paint is still wet, sprinkle a heavy layer of loose faux snow on top to create a base texture that hides the foam. -
Frost the rim:
Brush a light layer of Mod Podge or white glue onto the very top edge of the terra cotta pot. Dip your finger in loose faux snow and tap it onto the glue to give the pot a chilly, frosted appearance.
Foggy Glass?
If using hot glue traps moisture inside and flogs the glass, leave a tiny, invisible gap in the glue line at the back for air to escape, or let the glue cool slightly before seating the specific dome.
Step 2: Arranging the Candy
-
Prepare the supports:
Cut toothpicks in half or into thirds. Insert the cut ends into the bottom of your gumdrops or candy balls. This will act as an anchor when you push them into the foam. -
Anchor the center:
Push the first gumdrop into the highest point of the Styrofoam mound. This establishes the height of your arrangement. -
Build the mound:
Work your way down from the center, inserting more candies around the first one. Vary the colors—mixing pinks, yellows, greens, and whites—to keep the arrangement visually interesting. -
Check the dome fit:
Periodically place your glass dome over the arrangement to ensure the candies aren’t touching the glass. If they are, push them deeper into the foam or trim the toothpicks. -
Fill the gaps:
Once the main candies are placed, look for any white gaps where the foam is visible. Use smaller candy pieces or simply add more glue and loose snow to these crevices.
Make It Sparkle
Mix iridescent glitter into your faux snow before sprinkling it. When sunlight hits the ‘sugar’ inside the globe, it will shimmer just like real frost on a winter morning.
Step 3: Assembly and Finishing Touches
-
Attach the dome:
Apply a thin, continuous bead of hot glue to the very rim of the pot. Carefully lower the glass dome onto the glue, ensuring it is centered and sealed. -
Seal the seam:
To hide the glue seam between the glass and the pot, brush a tiny bit more Mod Podge around the joint and sprinkle a final dusting of snow. -
Dust the exterior:
For that just-snowed-on look, take your faux snow spray and give the exterior of the glass dome a very quick, light spritz from a distance, focusing near the bottom edge. -
Attach the saucer:
Place the saucer underneath the pot. You can glue the pot to the saucer if you want it to be a permanent single piece, or leave it loose for easier storage. -
Final cleanup:
Gently blow away any excess loose snow that may have fallen on the terra cotta sides. Place your finished snow globe on a windowsill or mantle to catch the light.
This charming little snow globe brings a perfect touch of sweetness to your holiday decor without any of the calories

TRACK YOUR CERAMIC JOURNEY
Capture glaze tests, firing details, and creative progress—all in one simple printable. Make your projects easier to repeat and improve.
Candy Cane Stripe Clay Pot Planters
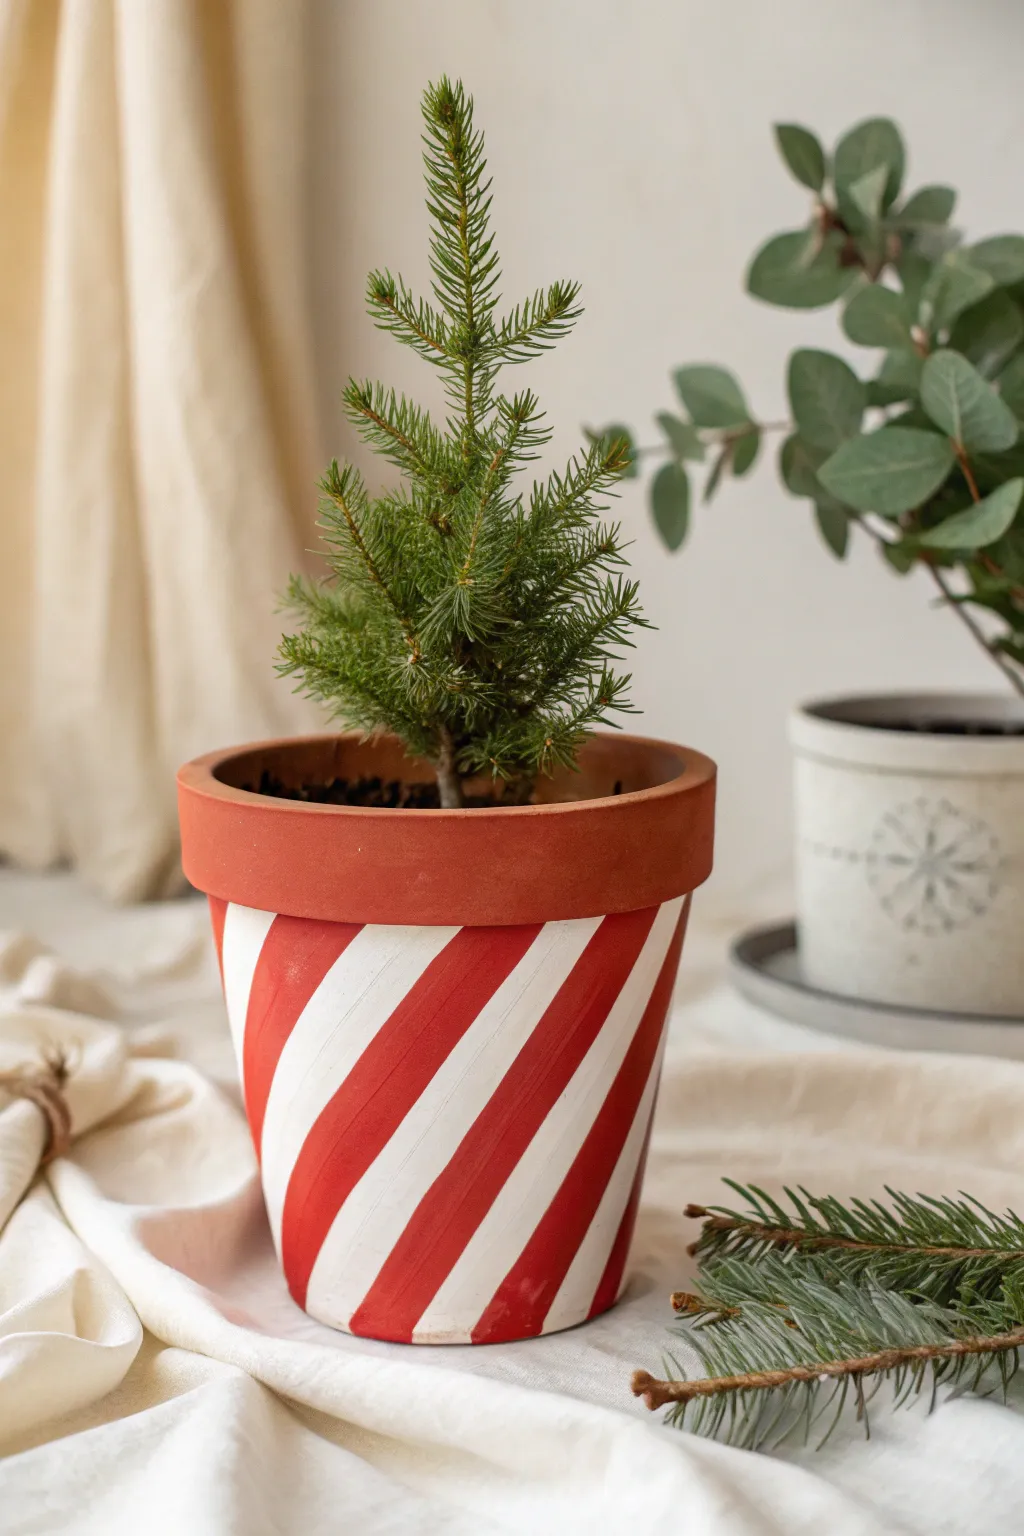
Transform a standard terracotta pot into a festive centerpiece with this classic candy cane design. The crisp diagonal stripes of red and white bring a playful holiday charm that perfectly complements miniature evergreens or seasonal florals.
Step-by-Step Guide
Materials
- Clean terracotta pot (6-8 inch)
- White acrylic craft paint (matte or satin finish)
- Bright red acrylic craft paint
- Painter’s tape or masking tape (1 inch wide)
- Flat paintbrush (1 inch width)
- Small angled shader brush
- Clear acrylic sealer spray (matte)
- Small evergreen sapling or holiday plant
- Potting soil
Step 1: Preparation & Base Coat
-
Clean surface:
Begin by wiping down your terracotta pot with a damp cloth to remove any dust or manufacturing residue. Let it dry completely so the paint adheres properly. -
Paint the base:
Apply a coat of white acrylic paint to the entire exterior of the pot, stopping just below the rim. Don’t worry about the rim itself yet; we’ll leave that natural. -
Check coverage:
Allow the first coat to dry for about 20 minutes. If the terracotta color is still peeking through significantly, add a second thin coat of white for a solid, opaque background. -
Dry thoroughly:
This is crucial: let the white base coat dry completely (at least an hour) before moving to the taping stage. Any dampness will cause the paint to peel off with the tape.
Step 2: Creating the Stripes
-
Start taping:
Tear off a long strip of painter’s tape. Apply it to the side of the pot at a clear diagonal angle, smoothing it down firmly with your thumb to seal the edges. -
Measure spacing:
Place a small scrap piece of tape next to your first strip to act as a spacer. This ensures your red and white stripes will be equal in width. -
Continue taping:
Apply the next long strip of tape after your spacer, maintaining the same diagonal angle. Repeat this process around the entire circumference of the pot. -
Define the rim:
Normally, I mask off the rim to keep it clean, but for this rustic look, carefully apply a strip of tape horizontally right where the rim meets the body of the pot to protect your white base. -
Seal the edges:
Run your fingernail or a credit card edge along the sides of every piece of tape. This prevents the red paint from bleeding under and keeps your lines crisp.
Bleeding Lines?
If paint bleeds under the tape, paint over the tape edge with your WHITE base color first. Let it dry, then paint the red. This creates a flawless seal.
Step 3: Painting & Finishing
-
Apply red paint:
Using your flat brush, paint the exposed diagonal areas with bright red acrylic paint. Brush away from the tape edges rather than into them to minimize bleed. -
Assess the red:
Depending on your paint quality, red can be a bit translucent. You might need a second coat after the first one is dry to the touch to get that deep, candy-apple color. -
Paint the rim:
While the stripes dry, mix a tiny bit of red and brown paint with water to create a terracotta-colored wash, or simply paint the rim a solid burnt orange/terracotta color if your pot was stained. The goal is a solid, warm band at the top. -
Remove tape:
Carefully peel off the tape while the final coat of red is still slightly tacky—not bone dry. Pull slower than you think necessary at a 45-degree angle. -
Touch ups:
Use your small angled shader brush and a bit of white paint to fix any spots where the red might have bled under the tape. -
Seal the work:
Once fully dry, take the pot to a well-ventilated area and spray it with a clear matte acrylic sealer. This protects the finish from water damage when you water your plant. -
Planting:
Fill the bottom of the pot with potting soil and gently place your small evergreen sapling inside, packing more soil around the roots to secure it.
Add Texture
For a rustic, snowy look, lightly sand the pot with fine-grit sandpaper after the paint dries to distress the stripes before sealing.
Now you have a charming holiday vessel ready to brighten up a windowsill or mantel
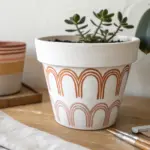
Holly and Berries Clay Pot Table Decor
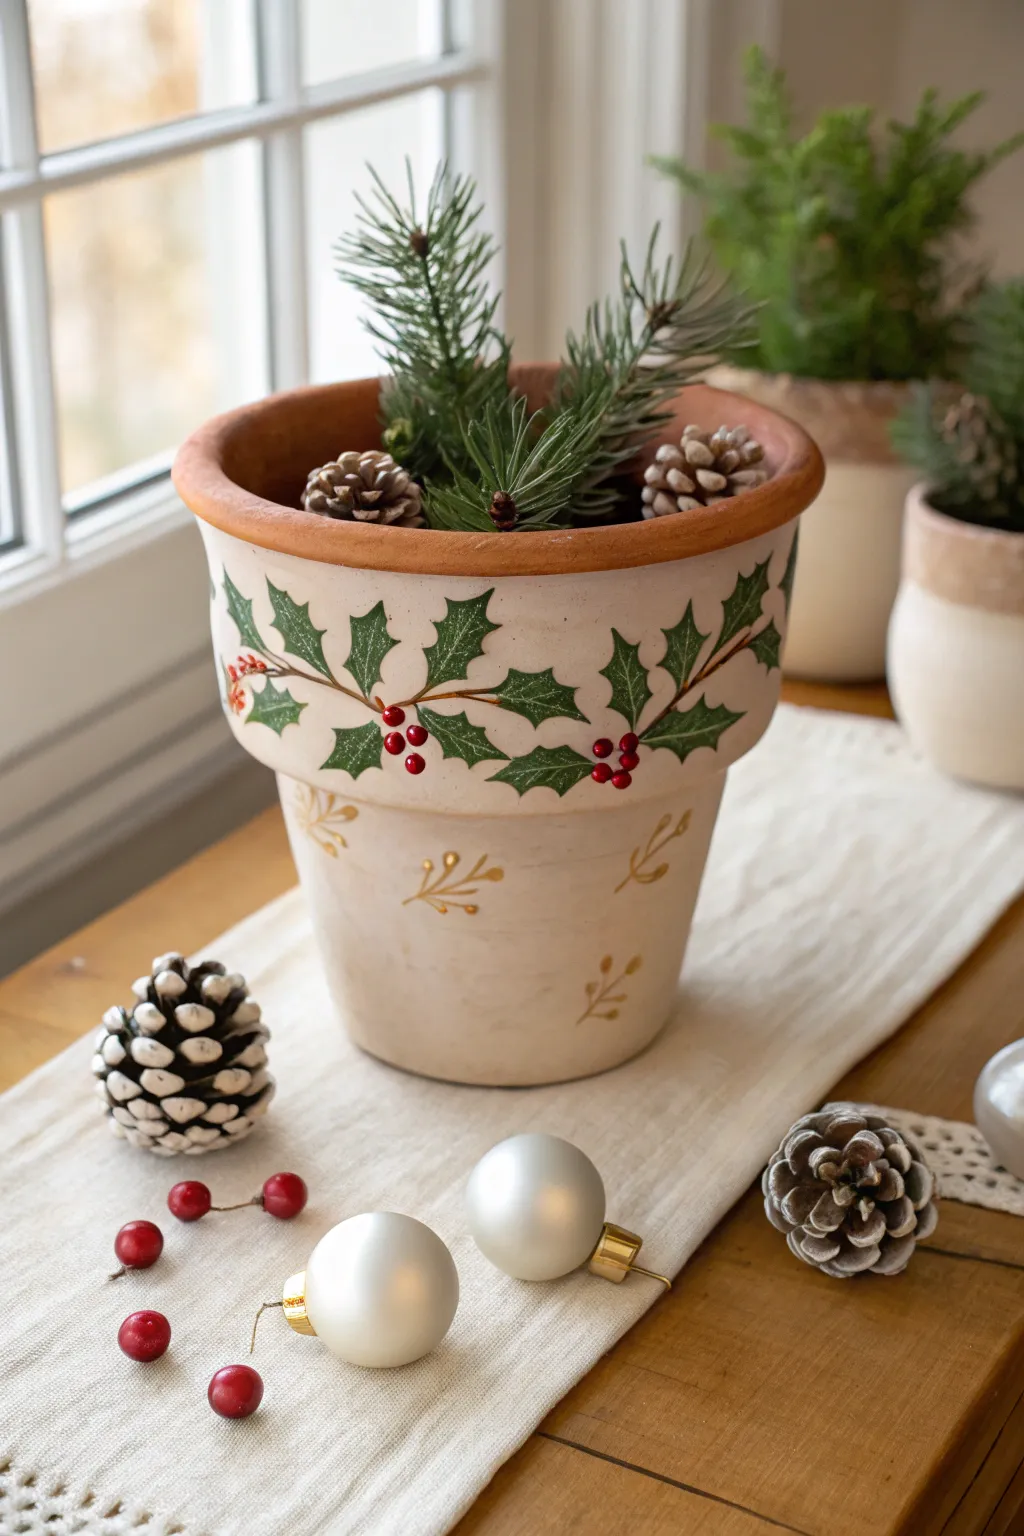
Transform a standard clay planter into a festive holiday centerpiece with this elegant hand-painted design. The creamy background sets off a classic band of holly leaves and berries, accented by delicate gold flourishes for a timeless Christmas look.
How-To Guide
Materials
- Terra cotta pot (standard azalea or standard pot shape)
- Acrylic craft paint: Cream/Off-White, Deep Green, Bright Red, Metallic Gold
- Paintbrushes: 1-inch flat brush, small round detail brush, liner brush
- Pencil
- Painter’s tape (optional)
- Clear matte or satin spray sealer
- Floral foam or styrofoam block (for inside)
- Faux pine branches
- Mini pinecones
Step 1: Base Preparation
-
Clean the surface:
Before starting, wipe down your terra cotta pot with a damp cloth to remove any dust or loose clay particles. Let it dry completely. -
Paint the rim:
Painting the top rim is optional; in the reference image, the natural clay rim is left exposed for rustic charm. If you prefer this look, you can skip painting the very top lip. -
Apply the base coat:
Using a 1-inch flat brush, apply the Cream/Off-White acrylic paint to the exterior of the pot, starting just under the rim. -
Feather the edges:
For a softer, vintage look like the example, don’t aim for perfect opacity. Let some of the brushstrokes show texture. -
Layer the paint:
Let the first coat dry for about 20 minutes. Apply a second coat if you want fuller coverage, but keep it light to maintain that hand-painted ceramic feel.
Step 2: Designing the Holly Band
-
Sketch the vines:
Lightly sketch a wavy horizontal line around the upper wider section of the pot using a pencil. This will be the main vine for your holly. -
Paint the leaves:
Using a small round brush and Deep Green paint, create the holly leaves along your vine line. Paint them with spiky edges—usually three points on each side and one at the tip. -
Connect the leaves:
Use a liner brush and brown or dark green paint to draw thin stems connecting your leaves to the main vine. -
Add dimension:
I like to mix a tiny drop of white into my green paint to add faint highlights on one side of each leaf, giving them a slight curve. -
Paint the berries:
Dip the back end of a paintbrush into Bright Red paint to dot clusters of berries where the leaves meet the stems. Group them in sets of two or three. -
Highlight the berries:
Once the red carries a tackiness, add a minuscule dot of white or light pink to each berry to simulate a shine reflection.
Pro Tip: Berry Perfect
For perfectly round berries without brush strokes, use the handle end of a paintbrush or a Q-tip dipped in red paint as a stamp.
Step 3: Gold Accents & Finishing
-
Plan the lower section:
On the lower, narrower part of the pot, visualize a staggered pattern for the gold sprigs. -
Paint gold sprigs:
Using a liner brush and Metallic Gold paint, paint simple, organic sprigs. Start with a curved central line and add 3-4 small leaves or loops branching off. -
Detail the sprigs:
Add tiny gold dots around the sprigs for extra shimmer and texture, spacing them randomly. -
Seal the work:
Allow all paint to cure for at least 2 hours. Spray the entire exterior with a clear matte or satin sealer to protect your design from moisture. -
Arrange the greenery:
Place a block of floral foam inside the pot. Insert faux pine branches until lush, and nestle a few natural pinecones on top to complete the look.
Level Up: Antique Finish
Mix a small amount of water with blown paint and lightly brush it over the dried cream base before sealing to create an aged, vintage patina.
This charming winter pot is now ready to hold your favorite seasonal greenery or bundled treats
Clay Pot Christmas Place Card Holders
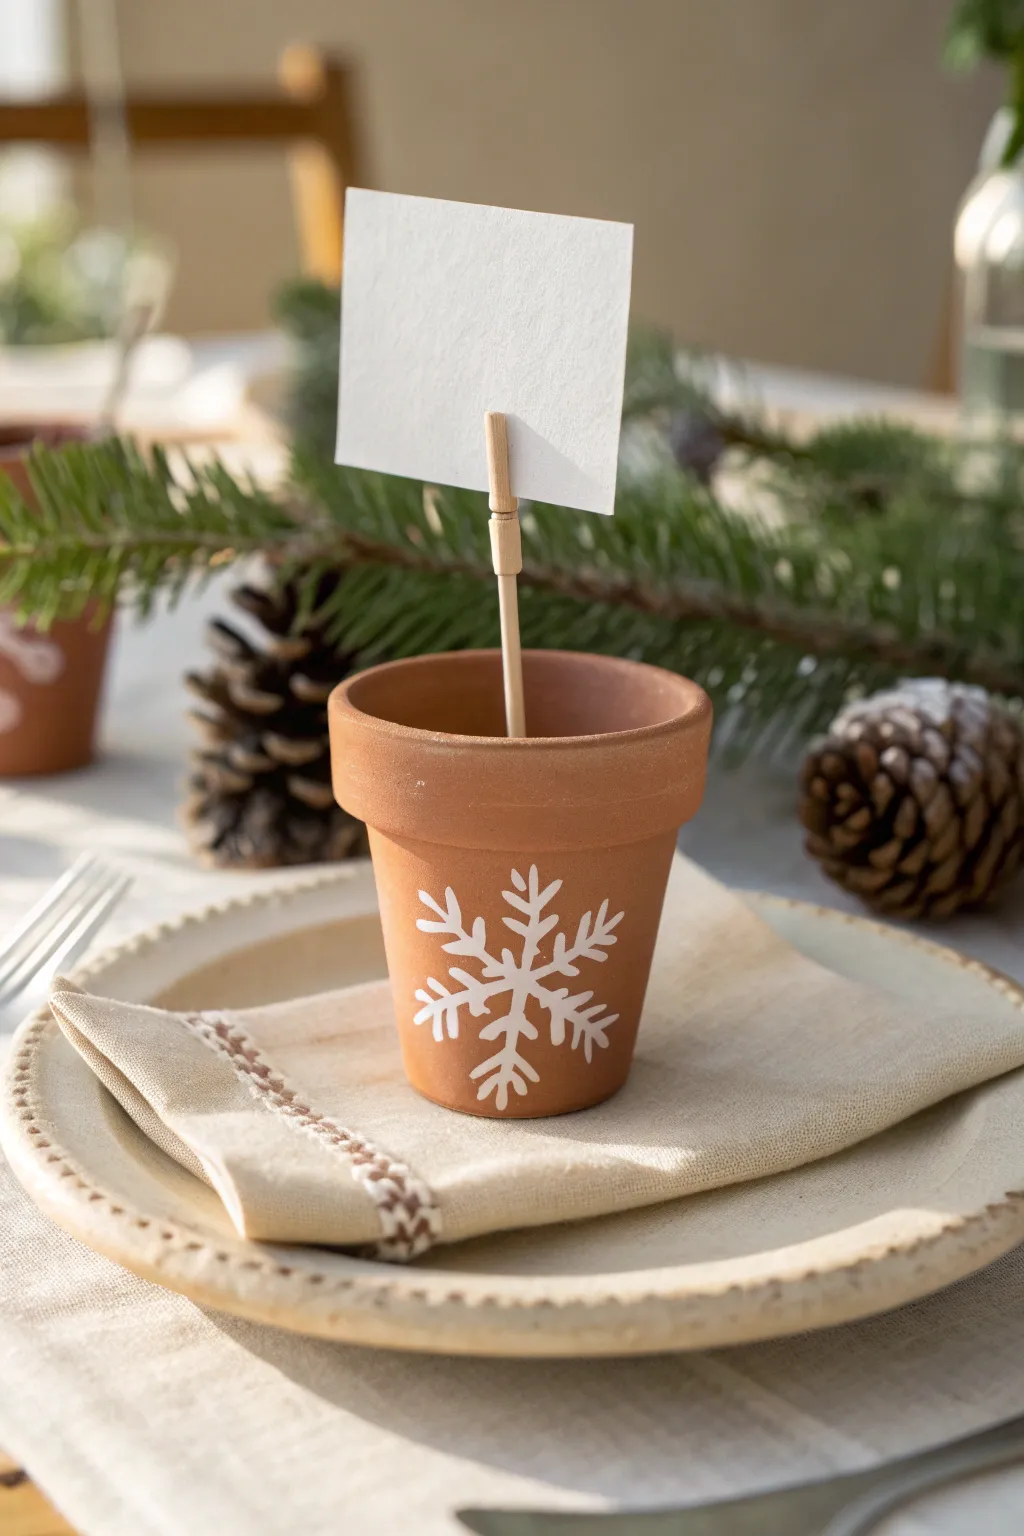
Add a charming rustic touch to your holiday table with these simple terracotta place card holders. Featuring a hand-painted snowflake design and a natural wood card clip, they perfectly blend cozy farmhouse aesthetics with festive cheer.
How-To Guide
Materials
- Mini terracotta clay pot (2-inch diameter)
- White acrylic craft paint or white paint pen (fine tip)
- Wooden dowel (1/8 inch diameter) or bbq skewer
- Instructions for wooden clothespin (miniature size)
- Hot glue gun and glue sticks
- Fine detail paintbrush (0 or 00 size) – optional if not using paint pen
- Cardstock (white or cream)
- Scissors or wire cutters (to cut dowel)
- Pencil
- Dry floral foam or air-dry clay (for filling the pot)
Step 1: Preparing the Pot
-
Clean surface:
Begin by wiping down your mini terracotta pot with a damp cloth to remove any clay dust or residue. Let it dry completely so the paint adheres properly. -
Draft the design:
Using a pencil, very lightly sketch a simple six-point snowflake design onto the front of the pot. Start with a vertical line, then cross it with an ‘X’ shape.
Step 2: Painting the Snowflake
-
Paint main lines:
Using your fine-tip white paint pen or a detail brush dipped in white acrylic paint, trace over your main pencil lines. -
Thicken central lines:
Go over the main lines a second time to make them bold and opaque against the terracotta background. -
Add the V details:
Near the tip of each of the six lines, paint a small ‘V’ shape pointing inward toward the center of the snowflake. -
Add inner details:
Paint a smaller ‘V’ shape further down each line, closer to the center point, mirroring the ones you just made. -
Refine the center:
Place a small dot of white paint right in the center where all lines intersect to clean up the junction. -
Let dry:
Allow the paint to dry fully for at least 30 minutes. I usually work on the card holders while waiting for this step.
Paint fix
If your snowflake lines look shaky or uneven, wait for the white paint to dry completely, then gently scrape away excess with a toothpick or craft knife edge.
Step 3: Creating the Card Holder
-
Measure the dowel:
Cut your thin wooden dowel or skewer to a length of about 4 to 5 inches using scissors or wire cutters. -
Prepare the clip:
Take a miniature wooden clothespin. If it has a metal spring, you can use it as is, or you can split a wooden peg style pin. -
Glue clip to dowel:
Apply a dab of hot glue to the top end of your dowel rod. -
Secure the clip:
Immediately press the bottom of the clothespin onto the glued dowel tip. Hold it straight for 30 seconds until the glue sets firmly.
Make it glitter
While the white paint is still wet, sprinkle a tiny pinch of extra-fine iridescent glitter over the snowflake to give it a frosty, sparkling finish.
Step 4: Assembly
-
Fill the pot:
Cut a small block of dry floral foam to fit snugly inside the mini pot. Alternatively, pack the inside with a small ball of air-dry clay. -
Mask the filler:
You want the filler to sit about half an inch below the rim so it isn’t visible from the side. -
Insert the holder:
Push the bottom end of your dowel stick straight down into the center of the foam or clay. -
Stabilize:
If using foam, add a ring of hot glue around the base of the dowel where it meets the foam to keep it from wobbling.
Step 5: Finishing Touches
-
Create the card:
Cut a rectangle of heavy white cardstock, measuring approximately 2 inches by 3 inches. -
Add names:
Write your guest’s name on the card using a nice pen or calligraphy marker. -
Attach card:
Simply slide the card into the slot of the clothespin or clip at the top of the dowel. -
Final check:
Place the pot on a flat surface to ensure the stick stands perfectly straight; adjust slightly if needed before the filler sets permanently.
Set these out at each place setting to give your guests a warm, handmade welcome to dinner