A simple clay pinch pot is basically the cutest blank canvas ever—you can turn that little bowl shape into animals, fruit, flowers, and tiny characters in one sitting. Here are my favorite cute clay pinch pot ideas that stay beginner-friendly but still look totally display-worthy.
Smiley Face Trinket Dish
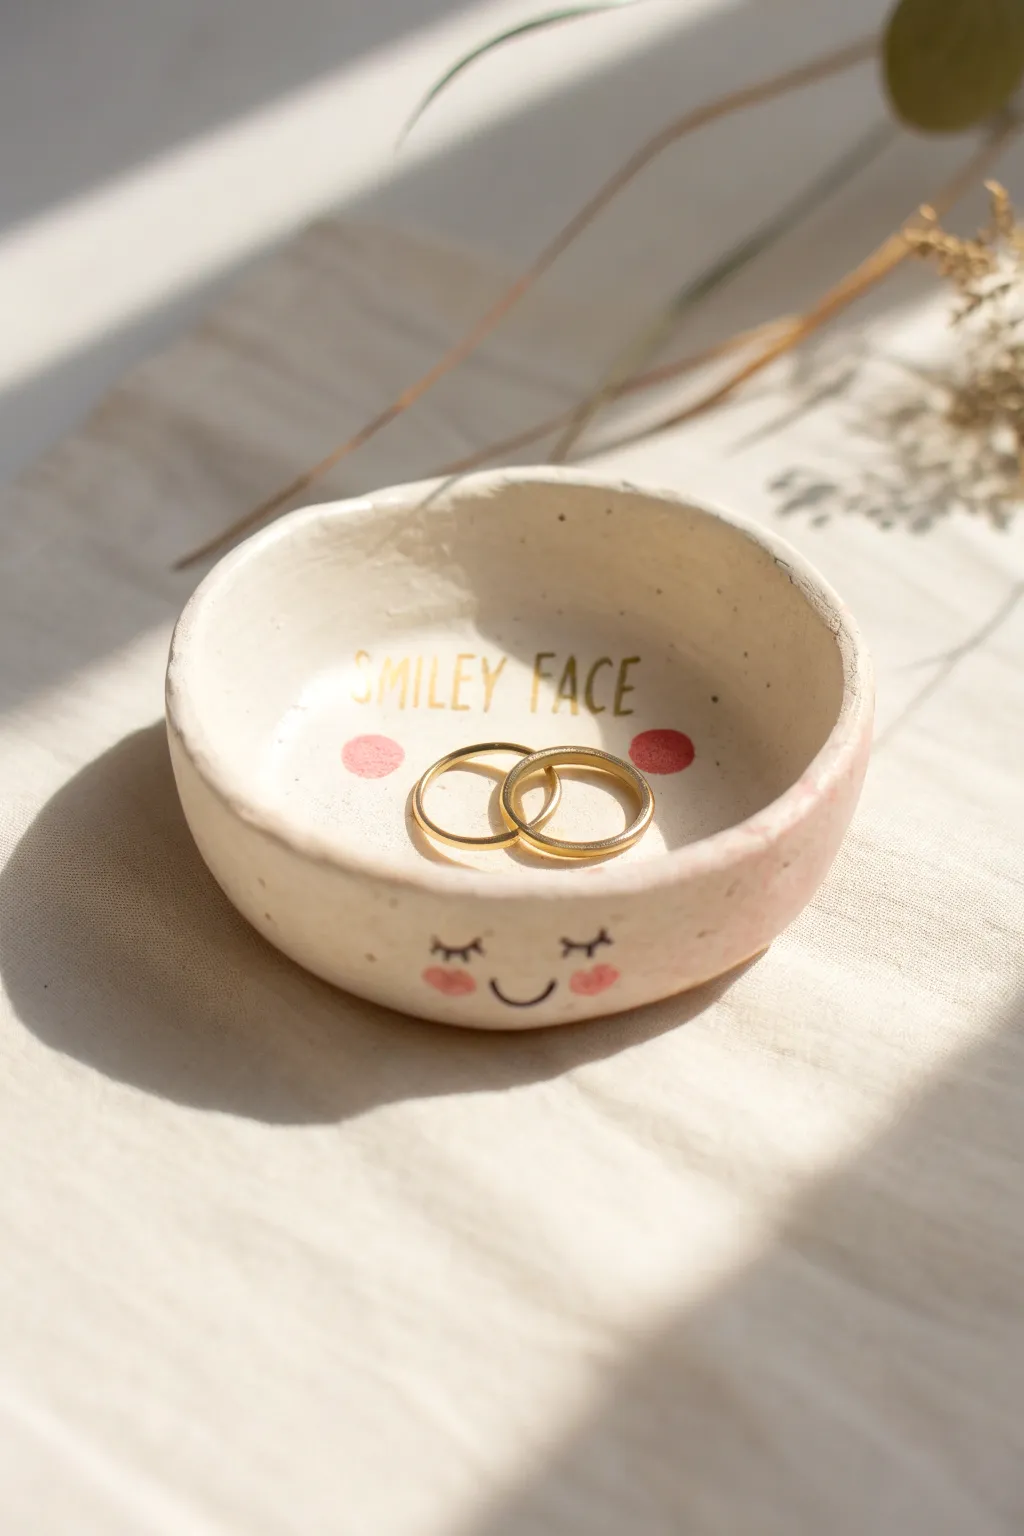
Brighten up your bedside table with this adorable little catch-all, perfect for keeping wedding rings or stud earrings safe. The sweet sleeping face painted on the side and the hidden message inside give it a whimsical, personal touch.
Step-by-Step Tutorial
Materials
- White stoneware clay or white air-dry clay
- Rolling pin
- Pottery sponge
- Damp cloth
- Water cups
- Fine grit sandpaper (for air dry) or fettling knife
- Gold enamel paint or gold luster (if firing)
- Black fine-liner brush or ceramic pen
- Pink acrylic paint or underglaze
- Clear varnish (for air dry) or clear glaze (for kiln)
- Small round brushes
Step 1: Shaping the Clay
-
Prepare your clay ball:
Start with a lump of white clay about the size of a golf ball or slightly larger. Knead it in your hands to warm it up and remove any trapped air bubbles, then roll it into a smooth, even sphere. -
Start the pinch:
Hold the sphere in your non-dominant hand. Press your thumb gently into the center of the ball, stopping about a quarter-inch from the bottom. This base thickness determines how sturdy your final dish will be. -
Form the walls:
Using your thumb on the inside and fingers on the outside, gently pinch and rotate the clay. Work completely around the circle, pressing firmly but evenly to thin out the walls and widen the opening. -
Refine the shape:
Continue pinching until the walls are roughly 1/4 inch thick. Aim for a shallow, wide bowl shape rather than a tall cup. Don’t worry if the rim is a bit uneven; that organic look adds to its charm. -
Smooth the surfaces:
Dip a pottery sponge or your finger into a little water. Gently smooth the inside and outside surfaces to remove deep fingerprints or cracks. Be careful not to use too much water, or the clay might become mushy and collapse. -
Flatten the base:
Set the pot down on your work surface and press lightly from the inside center to ensure the bottom is flat. This guarantees your smiley face dish won’t wobble when it’s holding your treasures.
Step 2: Refining and Drying
-
Let it dry leather-hard:
Allow the clay to dry until it is stiff but still cool to the touch (leather-hard). This usually takes a few hours depending on your room’s humidity. -
Clean up the rim:
Once firm, use a damp sponge or a fettling knife to smooth out the top rim further if you want a cleaner edge, though leaving a slight wave keeps the handmade aesthetic shown in the photo. -
Full drying:
Let the piece dry completely. If using air-dry clay, wait 24-48 hours until it’s bone dry and chalky white. If using kiln clay, follow your clay body’s firing instructions. -
Sand for smoothness:
For air-dry clay, gently sand any rough patches with fine-grit sandpaper, focusing on the rim and outside curve where the face will be painted. Wipe away all dust with a barely damp cloth.
Cracks while pinching?
If small cracks appear on the rim while shaping, your clay is likely too dry. Dip your finger in water and run it along the crack immediately to smooth it back together.
Step 3: Painting the Details
-
Draft your design:
Lightly sketch the sleeping face on the outer wall and the words ‘SMILEY FACE’ on the inside floor using a pencil. The pencil marks will either burn off in a kiln or can be erased gently later. -
Paint the cheeks:
Using a small round brush, dab two soft circles of pink paint on the inside bottom (for decoration) and two smaller pink circles on the outside walls for the rosy cheeks. -
Add facial features:
With a very fine liner brush and black paint (or a black ceramic marker), carefully draw the two closed eyelids with lashes and a simple U-shaped smile on the outside wall. -
Script the message:
Using your gold paint or luster, carefully letter the words ‘SMILEY FACE’ on the inside. I find steadiness improves if you rest your painting hand’s pinky finger against the rim of the bowl. -
Adding texture to text:
Depending on your photo reference, you can alternate colors for the text—perhaps doing ‘SMILEY’ in gold and ‘FACE’ in black, or keeping it all uniform. The example uses a mix for a playful look. -
Seal the piece:
Once all paint is fully dry, apply a coat of clear gloss varnish (for air-dry clay) to seal it and give it a ceramic-like sheen, or apply clear glaze and fire it again if using stoneware.
Steady those hands
For the tiny lettering, don’t use a brush! A gold paint pen or fine-tip marker works wonders on dried clay and gives you much more control than bristles.
Place your favorite rings inside and enjoy that sweet smile every morning

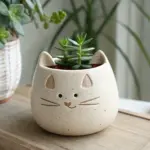

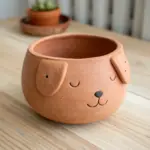
Kitty Cat Pinch Pot Bowl
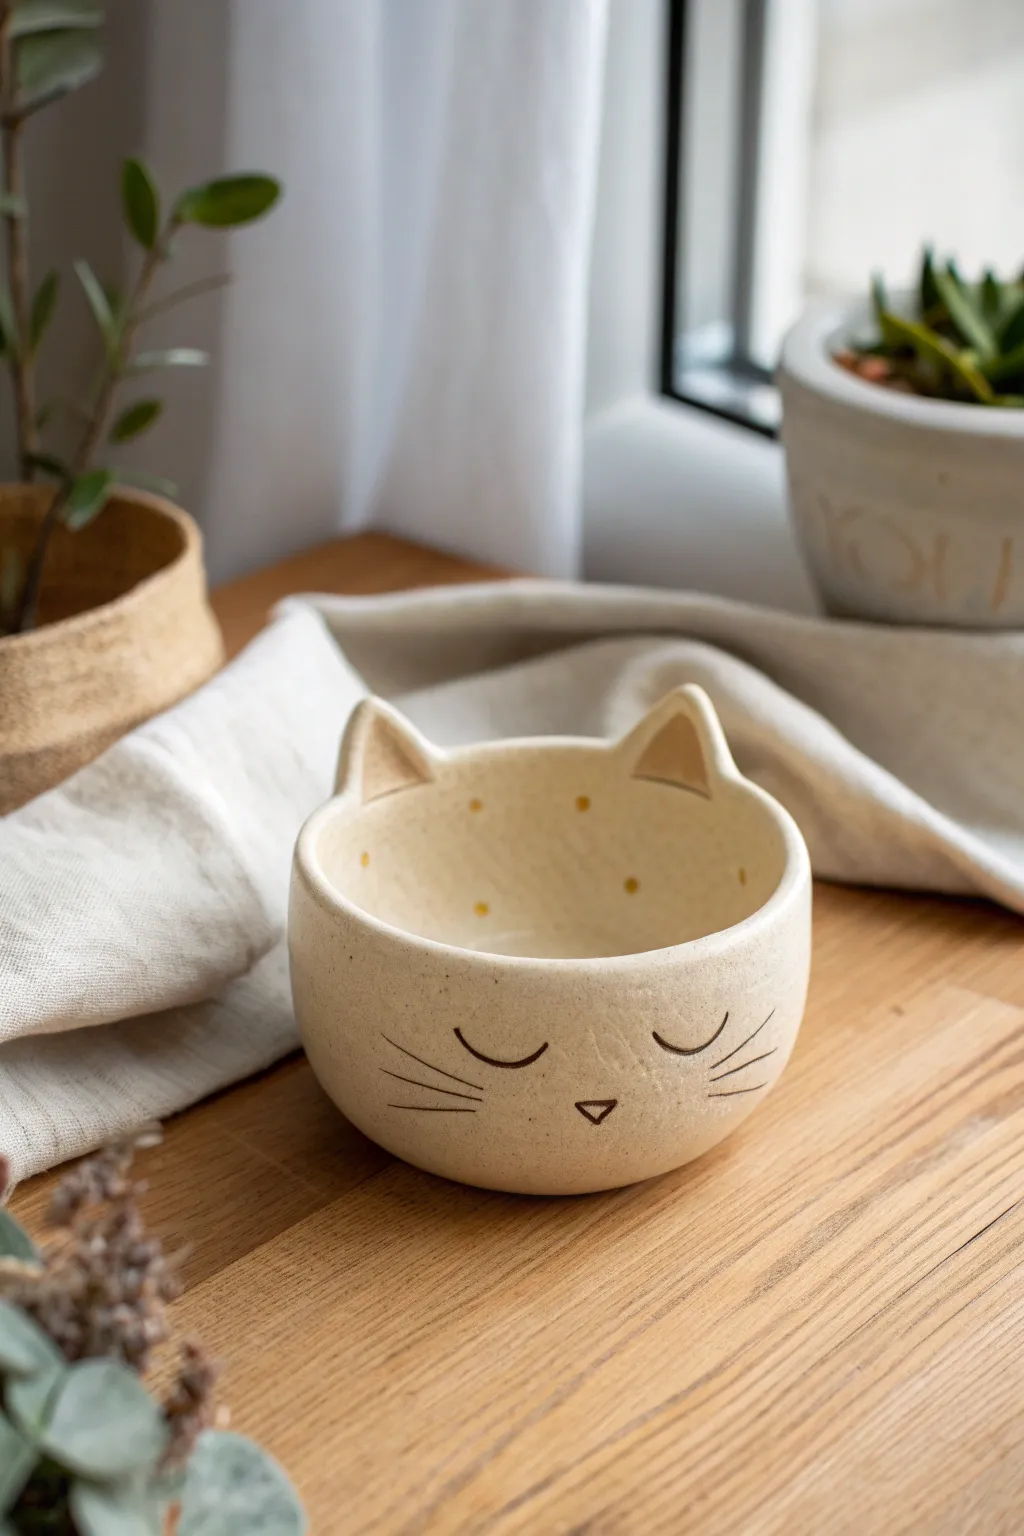
This adorable pinch pot transforms a simple ball of clay into a sleeping cat with a gentle, speckled finish. It features sweet hand-drawn details and tiny sculpted ears, making it a perfect vessel for jewelry or small treasures.
Step-by-Step Guide
Materials
- Speckled buff stoneware clay (or air-dry clay)
- Small bowl of water
- Basic wooden clay tool
- Needle tool
- Sponge
- Scoring tool (or an old fork)
- Black underglaze (or acrylic paint if using air-dry)
- Honey-yellow underglaze (or paint)
- Small round paintbrush
- Clear matte glaze (or varnish)
Step 1: Forming the Base
-
Create a sphere:
Start with a ball of clay roughly the size of a tennis ball. Roll it between your palms until it is perfectly round and smooth. -
Open the hole:
Hold the sphere in one hand and push your thumb into the center, stopping about a half-inch from the bottom. This establishes your base depth. -
Pinch the walls:
Rotate the ball slowly while gently pinching the clay between your thumb and fingers. Work from the bottom up to thin the walls evenly, aiming for about a quarter-inch thickness all around. -
Shape the rim:
As you pinch upward, slightly curve the walls inward near the top to create a rounded, enclosed feeling rather than a flaring bowl shape. Smooth the rim with your finger. -
Flatten the bottom:
Gently tap the pot on your worktable to create a small, flat surface on the bottom so the kitty sits stable without rocking.
Step 2: Adding Features
-
Form the ears:
Roll two small triangles of clay, slightly curving the bottom edge to fit the rim. Pinch them gently to thin the top points. -
Score and slip:
Rough up the attachment points on the bowl rim and the bottom of your ears with your scoring tool. Add a dab of water or slip to these areas. -
Attach the ears:
Press the ears firmly onto the rim. Use a wooden tool to blend the clay from the back and front of the ear seamlessly into the bowl body. -
Refine the shape:
Smooth out your blending marks with a damp sponge. Gently pinch the front of the ears to give them a slight forward curve, adding dimension. -
Smooth the surface:
Go over the entire bowl one last time with a barely damp sponge. This removes fingerprints and exposes the natural texture of the speckled clay.
Smooth Operator
Use the back of a spoon to burnish the clay when it’s leather hard. This compresses the surface and makes it incredibly smooth before painting.
Step 3: Decorating
-
Sketch the face:
Once the clay is leather-hard (firm but cool to the touch), lightly trace the sleeping eyes, nose triangle, and whiskers with a needle tool. Don’t dig deep; just mark the placement. -
Paint facial details:
Using a very fine brush and black underglaze, carefully paint over your traced lines. Create two ‘U’ shapes for sleeping eyes, three lines for whiskers on each side, and an inverted triangle for the nose. -
Add inner ear detail:
Dilute a tiny bit of honey-yellow or brown underglaze and paint a soft triangle inside the ears to suggest depth. -
Dot the interior:
Add small, random polka dots of yellow on the inside walls of the bowl for a surprising pop of color. -
Let it dry completely:
Allow the piece to dry slowly under loose plastic for a few days to prevent cracking. -
Bisque fire:
Fire the piece in a kiln to bisque temperature (usually Cone 04). If using air-dry clay, simply wait until bone dry. -
Glaze and finish:
Dip or brush the entire piece in a clear matte glaze to seal it while keeping the clay’s natural color visible. Perform the final glaze firing according to your clay’s instructions.
Make it a Planter
Poke a small drainage hole in the bottom center before drying. This turns your cute bowl into a perfect home for a tiny succulent.
Now you have a charming little feline friend ready to hold your favorite trinkets


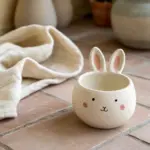
Bunny Pinch Pot With Perky Ears
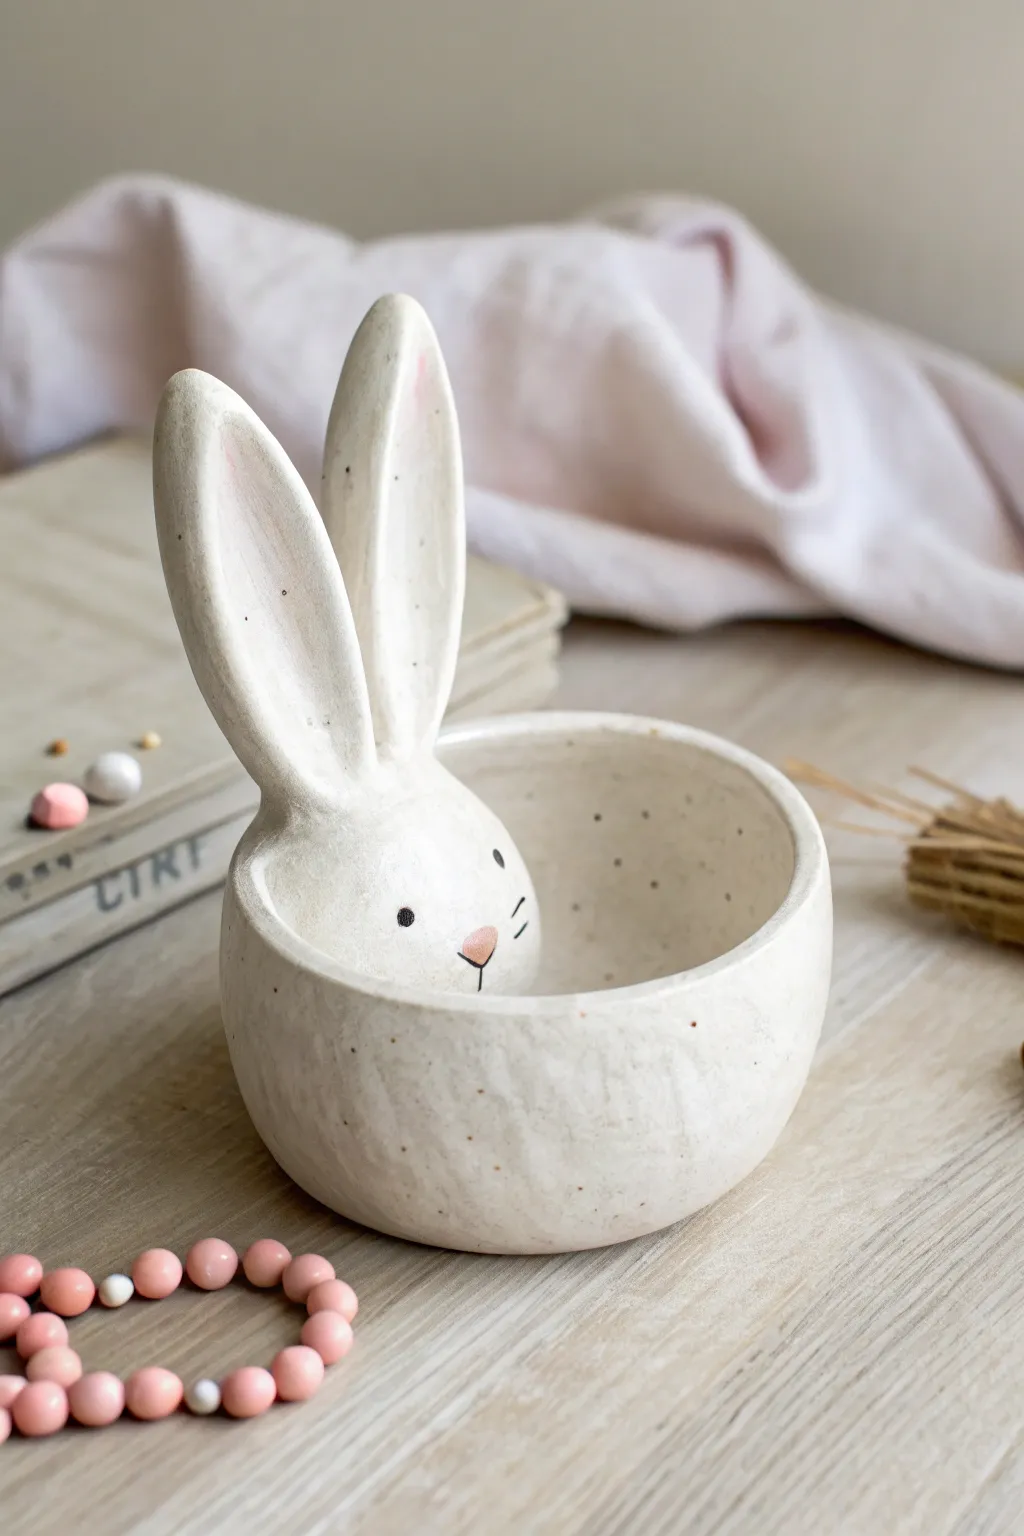
This adorable speckled pinch pot features a sweet rabbit face peering over the rim, complete with tall, expressive ears. It’s the perfect size for holding Easter candies, jewelry, or simply brightening up a shelf with its minimalist charm.
Detailed Instructions
Materials
- White air-dry clay or polymer clay
- Rolling pin
- Clay knife or needle tool
- Small bowl or cup (for molding)
- Slip (water mixed with clay)
- Sandpaper (fine grit)
- Acrylic paints (black, soft pink)
- Fine detail paintbrush
- Speckled clay varnish or toothbrush for splattering
- Clear matte sealer
Step 1: Forming the Base
-
Prepare the Clay:
Start by conditioning a ball of white clay about the size of a tennis ball until it is smooth, pliable, and free of cracks. -
Start the Pinch:
Push your thumb into the center of the ball, stopping about a half-inch from the bottom. This establishes the floor of your pot. -
Shape the Walls:
Gently pinch and turn the clay between your thumb and fingers, working your way up the sides to create an even bowl shape. Aim for a thickness of about 1/4 inch throughout. -
Smooth the Surface:
Place the pot on a flat surface and use a wet finger or a slightly damp sponge to smooth out any fingerprints or cracks on both the inside and outside.
Ears flopping over?
If the ears won’t stay upright while the clay is wet, prop them up from behind with small pieces of crumpled cardboard until the clay stiffens enough to hold its shape.
Step 2: Sculpting the Bunny
-
Roll the Head:
Roll a smaller ball of clay, roughly 1.5 inches in diameter, to serve as the bunny’s head. It should be proportional to nestle just inside the rim of your pot. -
Shape the Ears:
Create two elongated teardrop shapes for the ears. Flatten them slightly and use your thumb to create a shallow indentation running up the center of each ear. -
Attach the Ears:
Score the bottom of the ears and the top of the head where they will join. Apply a little slip or water and press the ears firmly onto the head, smoothing the seam until it’s invisible. -
Mount the Head:
Decide where you want the bunny to peek out. Score the back of the head and the corresponding inner rim of the bowl. Use slip to attach the head securely so it looks like the bunny is resting its chin on the edge. -
Blend the Seams:
Take extra care to blend the clay from the back of the head into the bowl wall so the attachment is strong and seamless. I find a small modeling tool helps get into the tight corners here.
Step 3: Finishing and Decorating
-
Dry Completely:
Allow your piece to dry completely. If using air-dry clay, this may take 24-48 hours. If using polymer, bake according to package instructions. -
Sand for Smoothness:
Once dry, gently sand the entire piece with fine-grit sandpaper to remove any rough texture, focusing on the rim and ear tips. -
Paint the Details:
Using a very fine brush and black acrylic paint, add two small dots for eyes, whiskers, and a tiny line for the mouth. -
Add Blushing Cheeks:
Dilute a tiny amount of pink paint and lightly brush the inside shading of the ears and a small nose. You can also dab faint pink cheeks if desired. -
Create the Speckles:
To mimic the stone-like texture in the photo, dip a toothbrush in diluted brown or grey paint. Run your thumb over the bristles to flick tiny speckles across the entire pot. -
Seal the piece:
Finish with a coat of clear matte sealer to protect the paint and give the bunny a professional, finished look.
Speckle Technique
Practice your splatter technique on a scrap piece of paper first. Varying the amount of water in your paint changes the size of the droplets significantly.
Now you have a charming little companion ready to hold your trinkets or sweet treats


Woodland Fox Pinch Pot
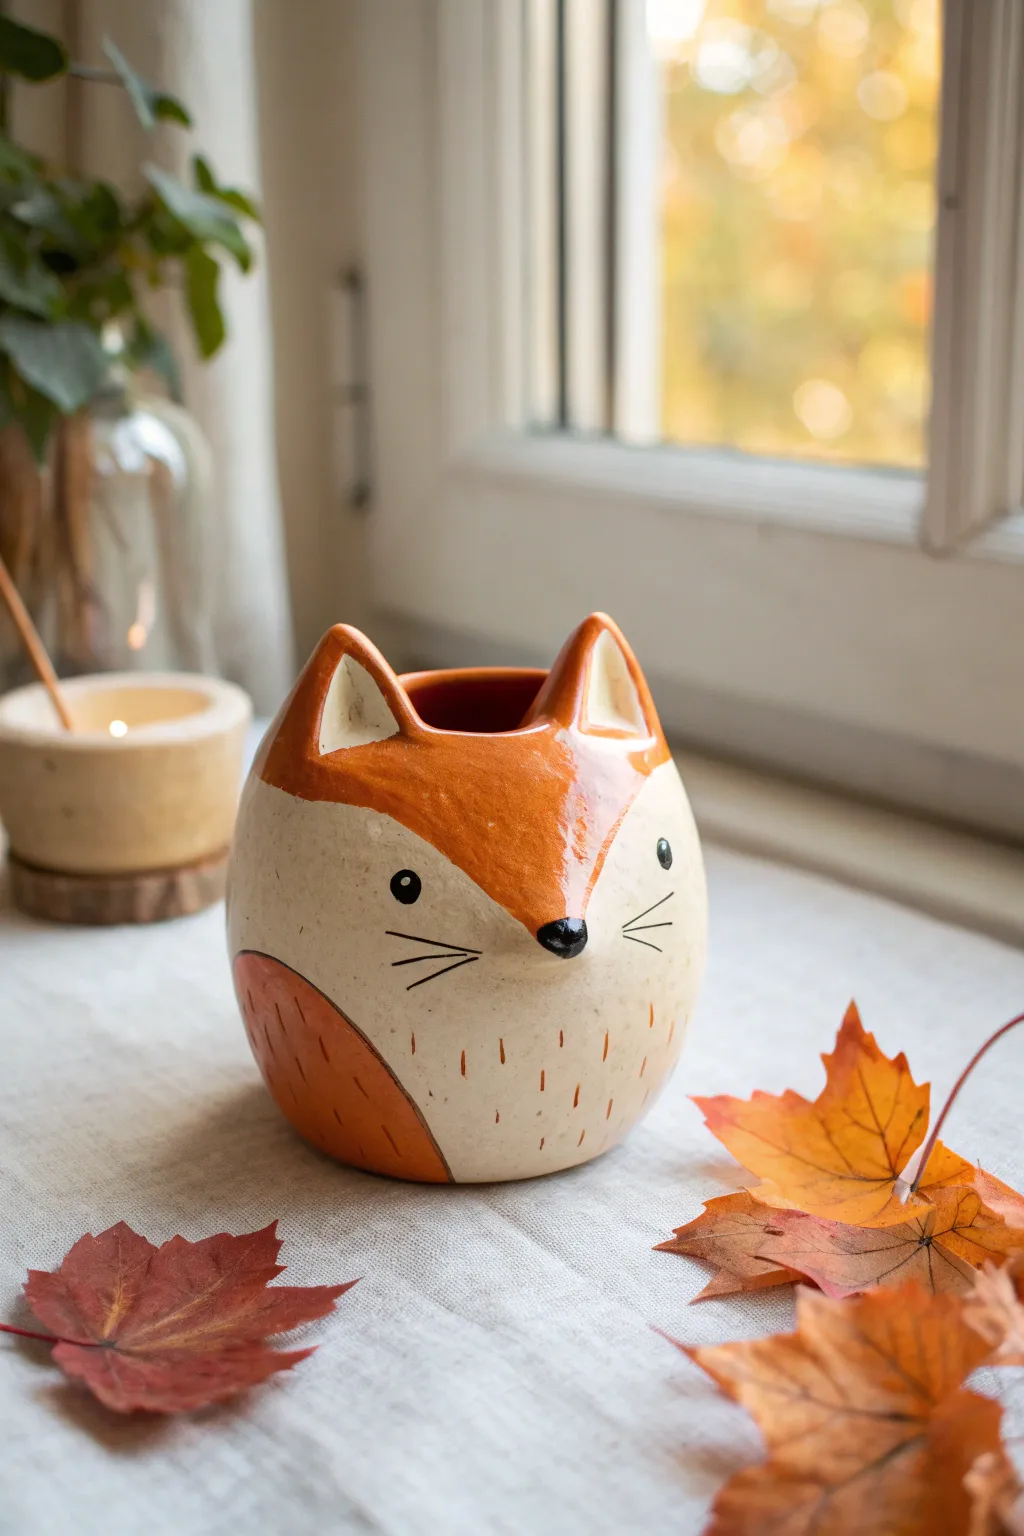
Capture the charm of autumn with this adorable woodland fox pinch pot. Its rounded, cozy shape and sweet, hand-painted details make it the perfect vessel for small succulents or desk treasures.
Step-by-Step Guide
Materials
- Air-dry clay or polymer clay (white or terracotta)
- Clay sculpting tools (needle tool, modeling tool)
- Small cup of water (for smoothing)
- Acrylic paints (burnt orange, cream/off-white, black)
- Fine detail paintbrushes
- Medium flat paintbrush
- Gloss varnish or clear sealant
- Rolling pin (optional)
- Sandpaper (fine grit)
Step 1: Shaping the Base Body
-
Form a ball:
Start with a baseball-sized lump of clay. Roll it firmly between your palms until it creates a smooth, crack-free sphere. -
Open the pot:
Hold the ball in one hand and press your thumb into the center. Gently pinch the clay between your thumb and fingers, rotating the ball as you go to open up the pot shape. -
Build the walls:
Continue pinching upwards to create walls of even thickness—aim for about a quarter-inch thick. I like to keep the overall form slightly rounded and bulbous rather than straight-sided. -
Smooth the surface:
Dip your finger in a little water and run it over the exterior and interior to smooth out any fingerprints or small cracks.
Smooth Seams
When attaching ears, use a wet paintbrush effectively as an eraser. Brushing water back and forth over the joined seam helps the added clay melt invisibly into the main body.
Step 2: Adding Fox Features
-
Create ears:
Pinch off two small triangles of extra clay. Shape them to be slightly curved, resembling fox ears. -
Attach the ears:
Score (scratch) the bottom of the ears and the top rim of the pot where you want them to sit. Apply a dab of water or slip, then press them firmly onto the rim. -
Blend the seams:
Use a modeling tool or your finger to smooth the clay from the back of the ears down into the pot body so they become one solid piece. -
Add the nose:
Roll a tiny, pea-sized ball of clay. Attach this to the front center of the pot, slightly below the midline, to create a protruding snoot. -
Dry the clay:
Allow your fox pot to dry completely. For air-dry clay, this usually takes 24–48 hours depending on humidity. Rotate it occasionally so the bottom dries too.
Cracking Clay?
If your clay starts cracking while you pinch, it’s too dry. Dip your fingers in water and work the moisture back into the surface immediately to heal the cracks.
Step 3: Painting and Finishing
-
Sand imperfections:
Once fully dry, gently use fine-grit sandpaper to buff away any rough bumps or sharp edges. -
Base coat the face:
Paint the bottom half of the pot and the face area in a creamy off-white color. Use two coats for solid coverage. -
Paint the orange fur:
Using burnt orange paint, carefully paint the top half of the head, painting around the cream face area in a curved ‘V’ shape that comes down to the nose. -
Define the ears:
Paint the back of the ears orange. On the front, leave a cream triangle in the center and outline the edges with orange. -
Add body details:
On the side or back of the pot, paint a curved orange patch to suggest a tail wrapped around the body. -
Paint facial features:
With a very fine brush and black paint, add two small round eyes, coat the protruding nose tip, and paint three thin whisker lines on each cheek. -
Add texture marks:
Use the very tip of your brush with diluted orange paint to add tiny vertical dash marks on the cream belly area to simulate fur texture. -
Seal the project:
Once the paint is totally dry, apply a coat of gloss varnish. This gives it that ceramic-like shine shown in the photo and protects the paint.
Now populate your little fox with a succulent or use it to hold your pencils for a cheerful desk companion

The Complete Guide to Pottery Troubleshooting
Uncover the most common ceramic mistakes—from cracking clay to failed glazes—and learn how to fix them fast.
Baby Owl Pinch Pot With Feather Texture

Transform a simple ball of clay into this adorable, wide-eyed owl planter complete with intricate feather textures. Its natural beige tone and subtle brown accents give it a rustic, handcrafted charm perfect for succulents or holding small treasures.
Detailed Instructions
Materials
- Light-colored stoneware or earthenware clay (speckled clay recommended)
- Small rolling pin
- Fettling knife or needle tool
- Loop tool (for carving feathers)
- Small sponge
- Scoring tool or old toothbrush
- Slip (clay mixed with water)
- Small paintbrush
- Brown underglaze or oxide wash
- Clear matte glaze (optional)
Step 1: Forming the Base
-
Start with a sphere:
Begin by wedging a softball-sized amount of clay to remove air bubbles. Roll it into a smooth, tight sphere in your hands. -
Open the pot:
Push your thumb gently into the center of the sphere, stopping about half an inch from the bottom to create the floor of your pot. -
Pinch the walls:
Slowly rotate the ball while pinching the clay between your thumb and fingers. Work from the bottom up, aiming for an even wall thickness of about a quarter-inch. -
Shape the owl body:
While pinching, encourage a rounded, bulbous shape. Gently curve the rim inward slightly at the top to give the owl a chubby, nested look.
Step 2: Adding Facial Features
-
Smooth the face area:
Identify the ‘front’ of your pot. Use a damp sponge or rib tool to smooth the upper third of this section perfectly flat, as this is where the face will sit. -
Create the eyes:
Use a needle tool to lightly trace two large, touching circles for the eyes. Then, carve a deep groove around these circles to make them pop out three-dimensionally. -
Add pupils:
Roll two very small balls of clay. Score and slip the center of the eye discs, then press these small balls firmly in place. Use the back of a paintbrush to indent the center of each pupil slightly. -
Form the beak:
Shape a small triangle of clay. Score the area between and slightly below the eyes, apply slip, and attach the beak, smoothing the edges into the face so it looks seamless.
Cracks Appearing?
If the rim starts cracking while shaping, your clay is too dry. Dab a little water on the cracks and compress the rim with a damp sponge immediately.
Step 3: creating the plumage
-
Mark the feather line:
Lightly draw a curved line that sweeps under the face area, separating the smooth face from the feathered body. -
Carve the first row:
Using a small loop tool or a rounded carving tool, start directly under the face line. Carve U-shaped scales to mimic feathers, pressing deeper at the top of the U and tapering out at the bottom. -
Layer the texture:
Work your way down the pot row by row. Offset each new row of feathers so the tip of the new feather sits between two feathers above it, like roof shingles. -
Detail the feathers:
For extra realism, I like to use a needle tool to add a single vertical line down the center of each carved feather. -
Clean up edges:
Once carving is complete, use a damp sponge to gently soften any sharp crumbs or jagged clay bits from the carving process.
Make it a Luminary
Before the clay dries, use a hole cutter to punch out the pupils completely and add holes in the back. Place a candle inside for a glowing owl lantern.
Step 4: Finishing and Firing
-
Apply oxide wash:
Once the clay is bone dry, carefully paint a brown oxide wash or underglaze into the deep grooves around the eyes and along the beak. Wipe away excess with a damp sponge so the color remains only in the recesses. -
Paint the pupils:
Use a small brush to paint the pupils solid black or dark brown for a striking gaze. -
Bisque fire:
Fire the piece in a kiln to cone 04 (or according to your clay body specifications) to harden it into bisque ware. -
Glaze (optional):
To match the reference, leave the exterior unglazed to show off the raw clay texture. You can apply a clear matte glaze to the interior to make it waterproof. -
Final firing:
Fire the piece a second time to the maturation temperature of your clay body.
Now you have a charming feathered friend ready to hold your favorite plant
Frog Buddy Pinch Pot
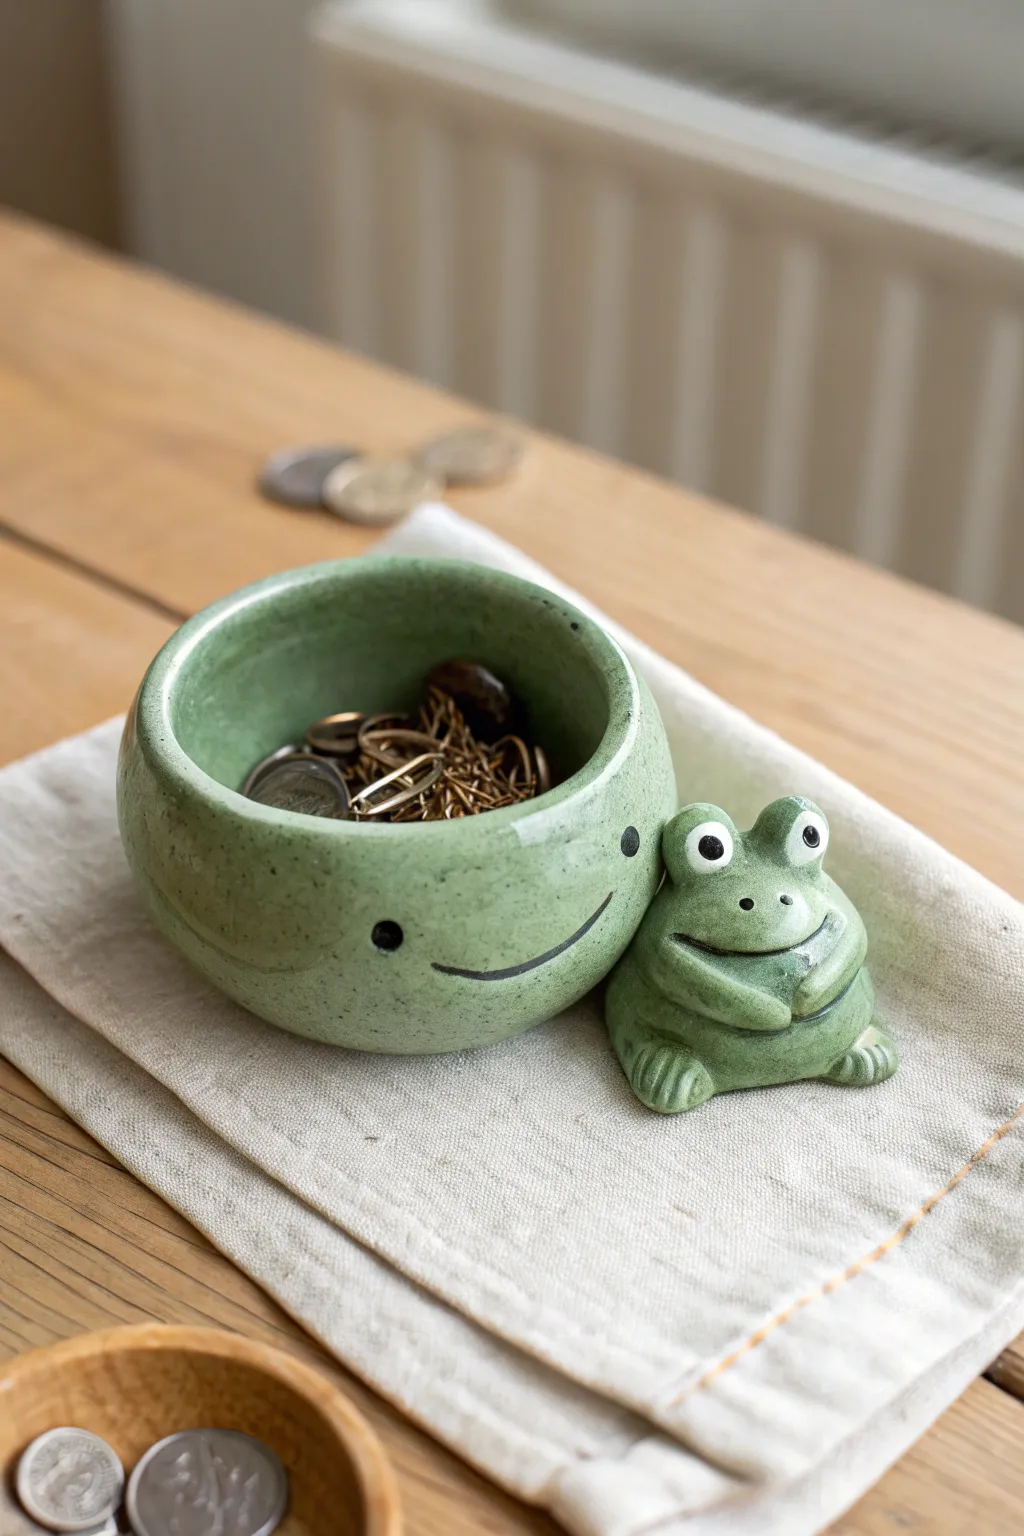
This adorable green ceramic dish features a classic pinch pot bowl with a sweet twist: a little frog sculpture hugging the side. The glossy speckled green glaze and simple smiley face details give it a charming, gentle personality perfect for holding trinkets or coins.
Step-by-Step Tutorial
Materials
- Air-dry clay or polymer clay (white or light grey)
- Clay sculpting tools (needle tool, smoothing tool)
- Small bowl of water (for slip)
- Speckled green acrylic paint or glaze (if firing)
- Black fine-liner paint pen or small detail brush
- Gloss varnish (if using air-dry clay)
- Rolling pin
- Sandpaper (fine grit)
Step 1: Forming the Bowl Base
-
Start the pinch pot:
Begin with a ball of clay roughly the size of a tennis ball. Insert your thumb into the center, pressing down until you are about half an inch from the bottom. -
Pinch the walls:
Gently pinch the clay between your thumb and fingers, rotating the ball as you go. Aim for walls that are even in thickness, roughly 1/4 inch thick throughout. -
Shape the curve:
Instead of flaring the walls out, gently curve them inward slightly at the top to create a rounded, enclosed shape rather than a wide open bowl. -
Flatten the bottom:
Tap the pot gently on your work surface to create a stable, flat base so it won’t rock. -
Refine the rim:
Run a damp finger along the rim to smooth out any cracks or uneven ridges. I like to make sure this top edge is nice and rounded for a softer look.
Step 2: Sculpting the Frog Companion
-
Form the frog’s body:
Roll a smaller ball of clay, about the size of a walnut. This will become the frog sitting next to the pot. -
Shape the torso:
Flatten the bottom of this smaller ball and taper the top slightly to suggest a head and body shape combined. -
Create the eyes:
Roll two tiny spheres of clay for the eyes. Score and slip the top of the frog’s head, then attach these spheres firmly. -
Add frog limbs:
Form two small sausage shapes for arms and two thicker ones for folded legs. Attach the legs at the base so the knees poke up. -
Sculpt the hands:
Attach the arms so they curve around the front of the frog’s belly, clasping together. Use a needle tool to impress tiny lines for fingers/toes. -
Attach frog to pot:
Score the side of your pinch pot and the side of the frog. Apply slip (watery clay) and press them firmly together so the frog looks like it is cuddling the bowl. -
Smooth the connection:
Use a modeling tool to blend the clay slightly at the contact points to ensure a strong bond that won’t separate later.
Don’t rush the drying
Turn the pot upside down halfway through the drying process. This ensures the bottom dries at the same rate as the walls, preventing cracks.
Step 3: Finishing Details
-
Refine the surface:
Once assembled, use a damp sponge or finger to smooth out any fingerprints or tool marks across both the pot and the frog. -
Drying:
Allow the piece to dry completely. If using air-dry clay, this may take 24-48 hours depending on humidity. -
Sanding:
Once bone dry, gently sand any rough spots with fine-grit sandpaper for a professional finish. -
Apply base color:
Paint the entire piece with a speckled green paint. If you don’t have speckled paint, use a sage green base and flick tiny dots of darker green/brown using a toothbrush. -
Add facial features:
Using a black paint pen or fine brush, draw a wide, simple smile and two dot eyes on the bowl itself. Add pupils and nostrils to the frog. -
Paint the eye whites:
carefully paint the raised eye spheres on the frog white, then add black pupils once dry for that wide-eyed look. -
Seal the piece:
Finish with a high-gloss varnish to mimic the glazed ceramic look in the photo and protect your paint.
Frog trying to escape?
If the frog keeps falling off the side while working, prop it up with a small crumpled piece of paper towel until the clay connection stiffens.
Now you have a charming little green friend to keep your desk organized and your small treasures safe


What Really Happens Inside the Kiln
Learn how time and temperature work together inside the kiln to transform clay into durable ceramic.
Friendly Monster Pinch Pot
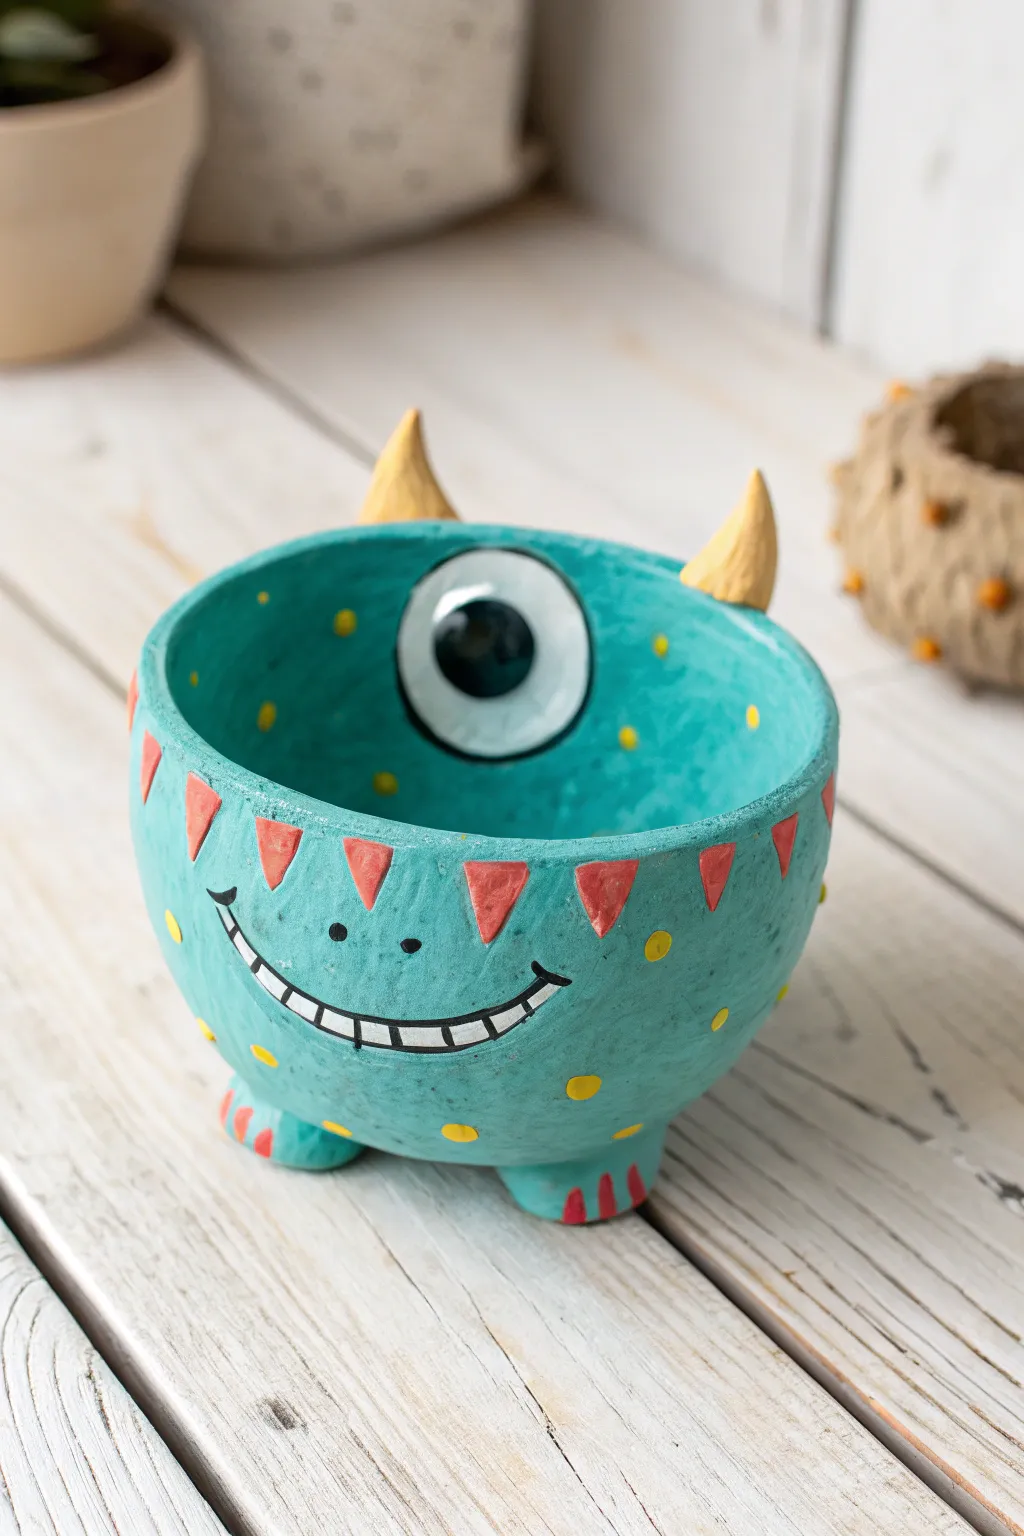
Bring a little whimsical charm to your shelf with this adorable one-eyed monster pinch pot. Featuring a vibrant teal body, a playful toothy grin, and a surprise eye peeking out from the inside rim, it’s the perfect home for a small succulent or trinkets.
How-To Guide
Materials
- Air-dry clay or polymer clay
- Acrylic paints (Teal, White, Black, Yellow, Red-Orange)
- Fine-point black permanent marker or detail paint brush
- Mod Podge or clear sealant (matte or satin)
- Clay sculpting tools (or a toothpick and spoon)
- Small bowl of water (for smoothing)
- Paintbrushes (flat and fine detail)
Step 1: Sculpting the Base
-
Form the pinch pot:
Start with a ball of clay about the size of a tennis ball. Insert your thumb into the center and gently pinch and turn the clay between your thumb and fingers to create a bowl shape with even walls. -
Smooth the surface:
Dip your finger in a little water and smooth out any cracks or fingerprints on both the inside and outside of the pot. A smooth surface will make painting much easier later. -
Shape the feet:
Roll two small balls of clay and slightly flatten them into ovals. Attach these to the bottom front of the pot to act as feet, blending the clay seams upwards so they are securely attached. -
Check balance:
Gently press the pot down onto a flat surface to ensure the feet lie flat and the pot stands unsupported without wobbling.
Cracked Clay?
If small cracks appear as the clay dries, mix a tiny bit of fresh clay with water to make a paste and fill them in before painting.
Step 2: Adding Monster Features
-
Create the horns:
Roll two small cones of clay for the horns. Score the bottom of the cones and the top rim of the pot where you want them to sit (scratching the surface helps adhesion), add a dab of water or slip, and press them firmly into place. -
Sculpt the eye base:
Roll a flat circle of clay about the size of a large coin. Attach this to the *inside* back wall of the pot, near the rim. This raised area will become the 3D eyeball. -
Dry the clay:
Let your monster dry completely. If using air-dry clay, this usually takes 24-48 hours. If using polymer clay, bake according to the package instructions.
Make it Functional
Make the pot slightly larger and poke a hole in the bottom before drying to turn this into a functional drainable planter for real plants.
Step 3: Painting the Monster
-
Base coat:
Paint the entire pot, including the feet, with a solid coat of teal acrylic paint. Avoid painting the horns and the raised eye circle inside to keep those colors clean. You may need two coats for full opacity. -
Paint the horns:
Carefully paint the two horns with a soft yellow or light gold color. -
Detail the eye:
Paint the raised circle on the inside rim completely white. Once dry, add a large black circle in the center for the pupil and a tiny white dot for a highlight. -
Outline the eye:
Use a fine liner brush or a black paint pen to draw a thick outline around the white of the eye to make it pop against the teal background.
Step 4: Adding Personality
-
Draw the smile:
On the front of the pot, paint a wide, curved white shape for the mouth. Outline it in black and draw vertical lines creates the grid of teeth. -
Paint the decorative triangles:
Using a red-orange paint, add a row of small, inverted triangles around the upper section of the pot, just below the rim. -
Add polka dots:
Dip the end of a paintbrush handle into yellow paint and dot it randomly around the empty teal spaces to create a spotted texture. -
Foot details:
Use the red-orange paint to add three small stripes on each foot to represent toes or claws. -
Final touches:
Add two small black dots above the smile for the nostrils and use a permanent marker to sharpen the smile’s outline if the paint edges look fuzzy. -
Seal the project:
Once all paint is visibly dry, coat the entire piece with a layer of Mod Podge or clear acrylic sealer to protect your monster and give it a finished sheen.
Your little monster is now ready to guard your desk or hold your favorite tiny treasures
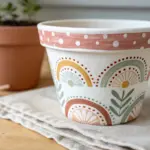
Strawberry Pinch Pot Berry Bowl
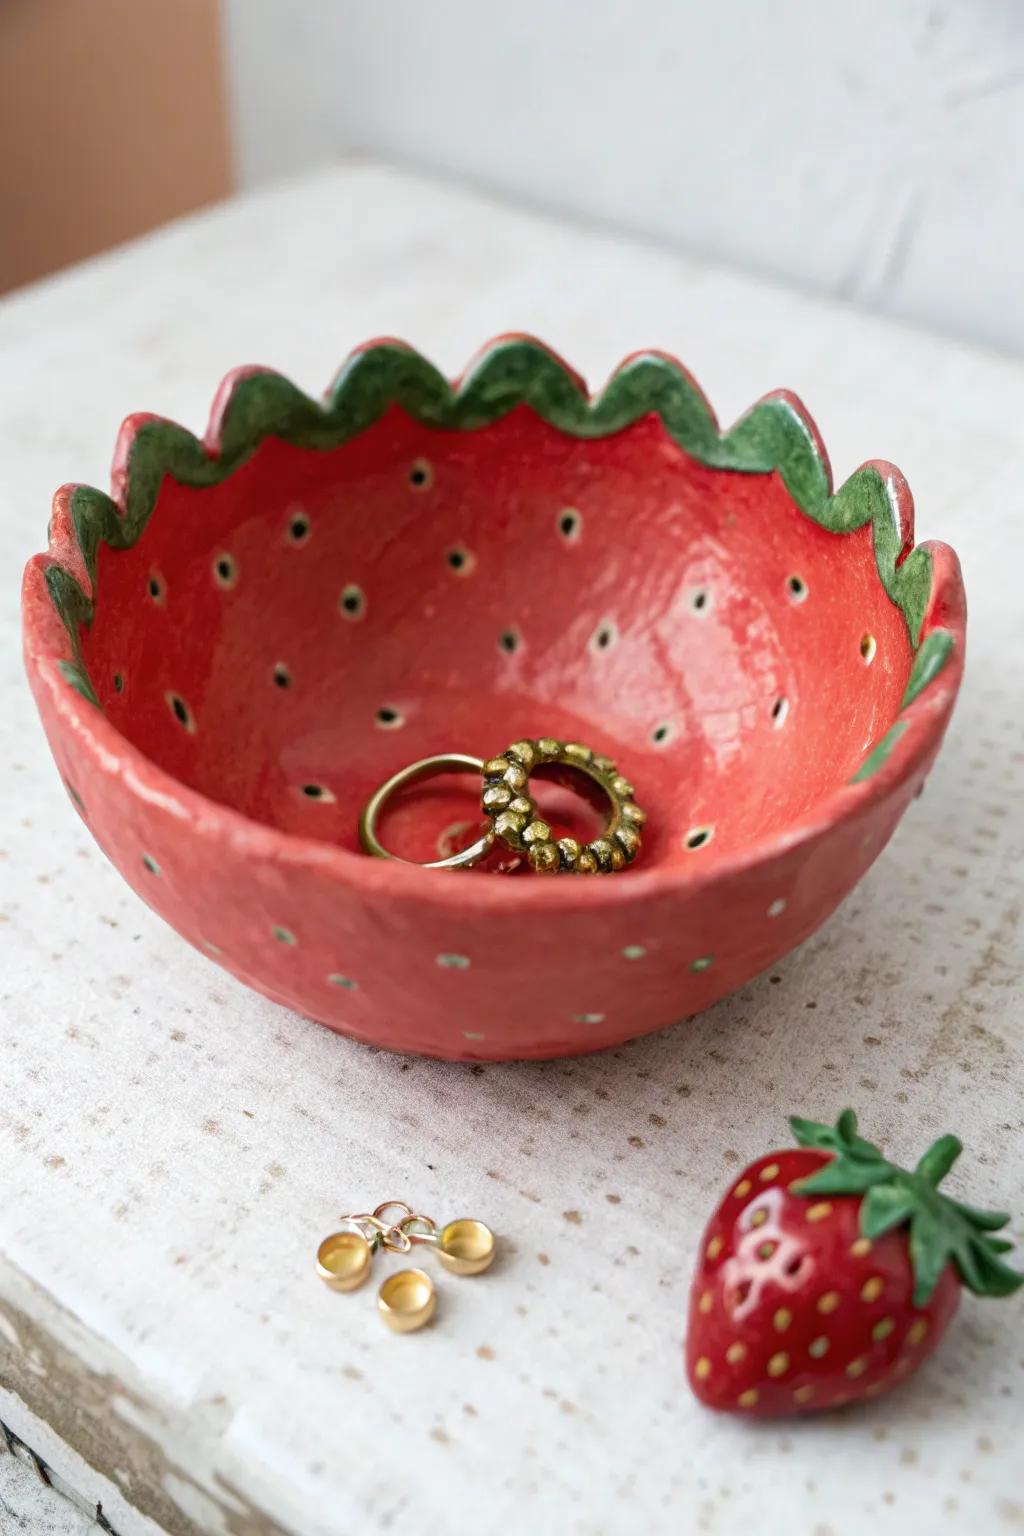
Transform a simple lump of clay into a delightfully fruity trinket dish that looks fresh from the garden. With its scalloped leafy rim and speckled seed details, this strawberry bowl is perfect for holding your favorite rings and studs.
Step-by-Step Guide
Materials
- Air-dry clay or polymer clay
- Acrylic paints (bright red, deep green, yellow ochre, black)
- Small paintbrush
- Fine-point detail brush
- Gloss varnish or sealant
- Sculpting tools or a toothpick
- Small bowl of water
- Rolling pin (optional)
Step 1: Shaping the Berry Base
-
Form the pinch pot:
Start by rolling a ball of clay about the size of a tennis ball. Press your thumb into the center and gently pinch the walls while rotating the ball to create an even, bowl-like shape. -
Refine the walls:
Work your way around the bowl, thinning the walls slightly until they are consistent. Don’t worry about making the rim perfectly flat; a little organic movement works well for a fruit shape. -
Create the scalloped rim:
Use your fingers to gently push and pinch the top edge of the bowl into a wavy, scalloped pattern. These waves will become the green leaves (sepals) of the strawberry later. -
Smooth the surface:
Dip your finger in a little water and smooth out any cracks or rough fingerprints on both the inside and outside of the bowl.
Step 2: Adding Texture and Details
-
Mark the seeds:
Take a sculpting tool or the blunt end of a toothpick and gently press small indentations all over the exterior and interior of the bowl to mimic strawberry seeds. -
Refine the leaf shapes:
Go back to your scalloped rim and slightly pinch the tips of the waves to make them a bit pointier, resembling the natural shape of strawberry leaves. -
Let it dry:
Allow your clay piece to dry completely according to the package instructions. This usually takes 24-48 hours for air-dry clay.
Cracked Clay?
If small cracks appear while drying, don’t panic. Mix a tiny bit of fresh clay with water to make a paste and fill them in before painting.
Step 3: Painting and Finishing
-
Paint the base coat:
Apply a bright red acrylic paint to the entire bowl, covering both the inside and outside. You may need two coats for full opacity. -
Add the leafy rim:
Using a smaller brush, carefully paint the scalloped rim with deep green paint. Extend the green slightly down the outside of the bowl to mimic the leafy calyx hugging the fruit. -
Paint the seeds:
Mix a tiny bit of black into yellow ochre to create a seed color. Use your finest detail brush to paint a small dot inside each indentation you made earlier. -
Add highlights (optional):
I prefer to add tiny white specks or lighter green highlights to the leaves to give them a bit of dimension and shine. -
Seal the piece:
Once the paint is fully dry, coat the entire bowl with a high-gloss varnish. This protects the paint and gives the strawberry that juicy, wet look.
Pro Tip: Depth of Color
Mix a tiny drop of brown into your red paint for the inside of the seed indentations before adding the yellow dot. It creates realistic shadow.
Now you have a charming little spot to keep your treasures safe and organized

TRACK YOUR CERAMIC JOURNEY
Capture glaze tests, firing details, and creative progress—all in one simple printable. Make your projects easier to repeat and improve.
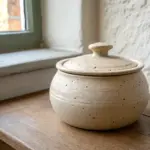
Pumpkin Pinch Pot Candy Dish
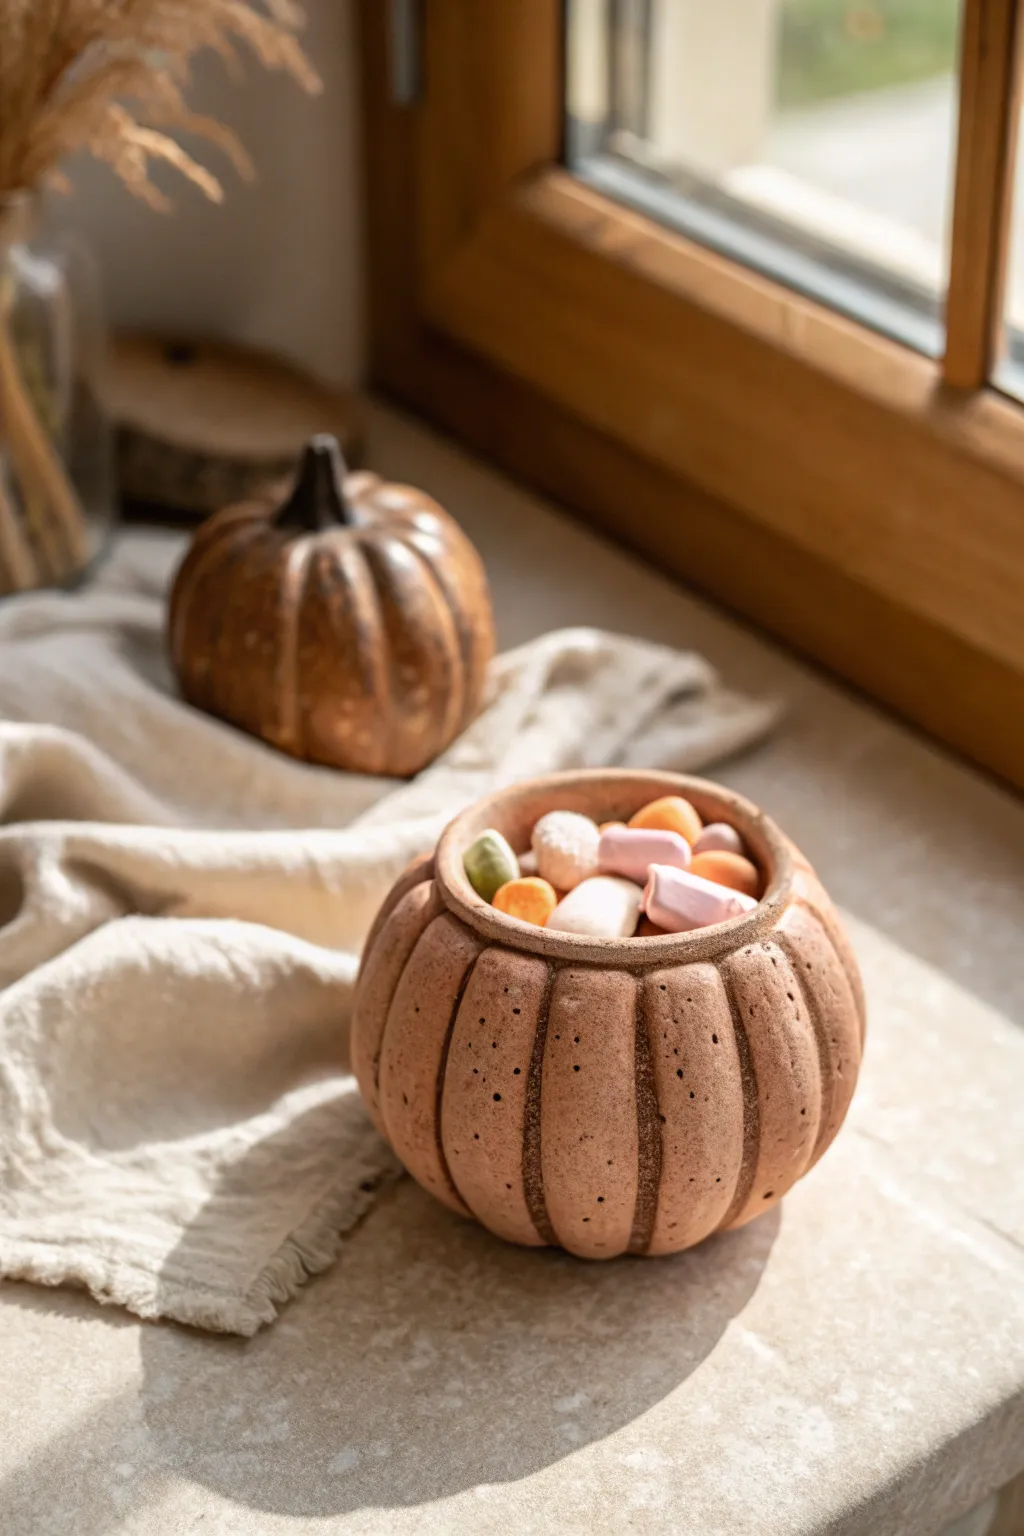
This charming autumn bowl captures the essence of the season with its warm terracotta tones and textured finish. Perfect for holding small candies or trinkets, this project transforms a simple ball of clay into a functional piece of harvest decor.
Step-by-Step Guide
Materials
- Air-dry clay (terracotta color)
- Clay sculpting tools (needle tool and modeling tool)
- Small bowl of water
- Sponge
- Stiff bristle brush (like a toothbrush)
- Acrylic paints (dark brown, burnt orange)
- Matte sealant or varnish
Step 1: Forming the Base
-
Prepare the clay:
Start with a ball of terracotta air-dry clay roughly the size of a large orange. Knead it well until it is pliable and smooth, ensuring there are no air bubbles trapped inside. -
Create the opening:
Hold the ball in one hand and gently press your thumb into the center tailored to how deep you want the bowl. Don’t push all the way through; leave about a half-inch of thickness at the bottom. -
Pinch the walls:
Begin pinching the clay between your thumb and fingers, rotating the ball as you go. Work your way from the bottom up to the rim, aiming for an even thickness of about a quarter-inch throughout the walls. -
Shape the pumpkin:
Since this is a pumpkin, you want a slightly squat, round shape. Gently tap the bottom on your work surface to flatten it slightly so it sits stable. Curve the rim inward just a little to mimic a pumpkin’s top edge before the stem would start. -
Smooth the surface:
Dip your finger in a little water and run it over any large cracks. I like to keep the surface slightly imperfect for a rustic look, but structural cracks should be smoothed out.
Cracking Up?
If hairline cracks appear while drying, mix a tiny bit of fresh clay with water to make a paste (slip) and fill them in with a brush.
Step 2: Adding Texture and Details
-
Mark the segments:
Using a needle tool or the flat edge of a modeling tool, lightly draw vertical lines from the bottom center to the rim. These will be your guides for the pumpkin’s ribs. -
Deepen the ribs:
Take a rounded modeling tool or just your finger and press into those guide lines to create deep vertical indentations. This gives the pot that distinct pumpkin puffiness between the lines. -
Define the rim:
At the top of each ‘puff’ or segment, round off the clay slightly so the rim looks undulating and organic, rather than a perfectly straight circle. -
Create the speckled texture:
This is the key to the specific look in the photo. Take a stiff bristle brush or an old toothbrush and firmly stipple (poke) the entire surface of the clay. This creates those realistic, porous dots. -
Add accent holes:
For deeper texture variance, take a needle tool and poke slightly larger, individualized holes randomly across the ribs. Don’t go all the way through the clay; these are just surface details. -
Refine the grooves:
Go back over your vertical rib lines one last time to ensure the texture hasn’t obscured the main shape. You might want to brush a tiny bit of water into the grooves to smooth them out compared to the rough pumpkin skin.
Make it a Set
Make a matching lid! Create a flat pinch pot disk slightly larger than the opening and add a twisted coil stem on top.
Step 3: Finishing Touches
-
Let it dry:
Allow the pot to dry completely. Depending on the humidity and clay brand, this usually takes 24 to 48 hours. The color will lighten significantly as it dries. -
Apply an antique wash:
Mix a small amount of dark brown acrylic paint with plenty of water to create a thin wash. Brush this over the entire pumpkin, making sure it gets into the deep grooves and textured holes. -
Wipe back:
Immediately use a damp sponge or paper towel to wipe the paint off the raised surfaces. The dark paint will stay in the crevices and texture points, emphasizing that rustic clay look. -
Dry brush highlights:
If you want to bring back some warmth, use a very dry brush with a tiny amount of burnt orange paint and lightly graze the tops of the ribs. -
Seal the piece:
Once the paint is fully dry, coat the pot with a matte varnish or sealant. This protects the clay and gives it a finished feel without making it unnaturally shiny.
Now you have a cozy little vessel ready to be filled with your favorite seasonal treats
Leaf-Pressed Botanical Pinch Pot
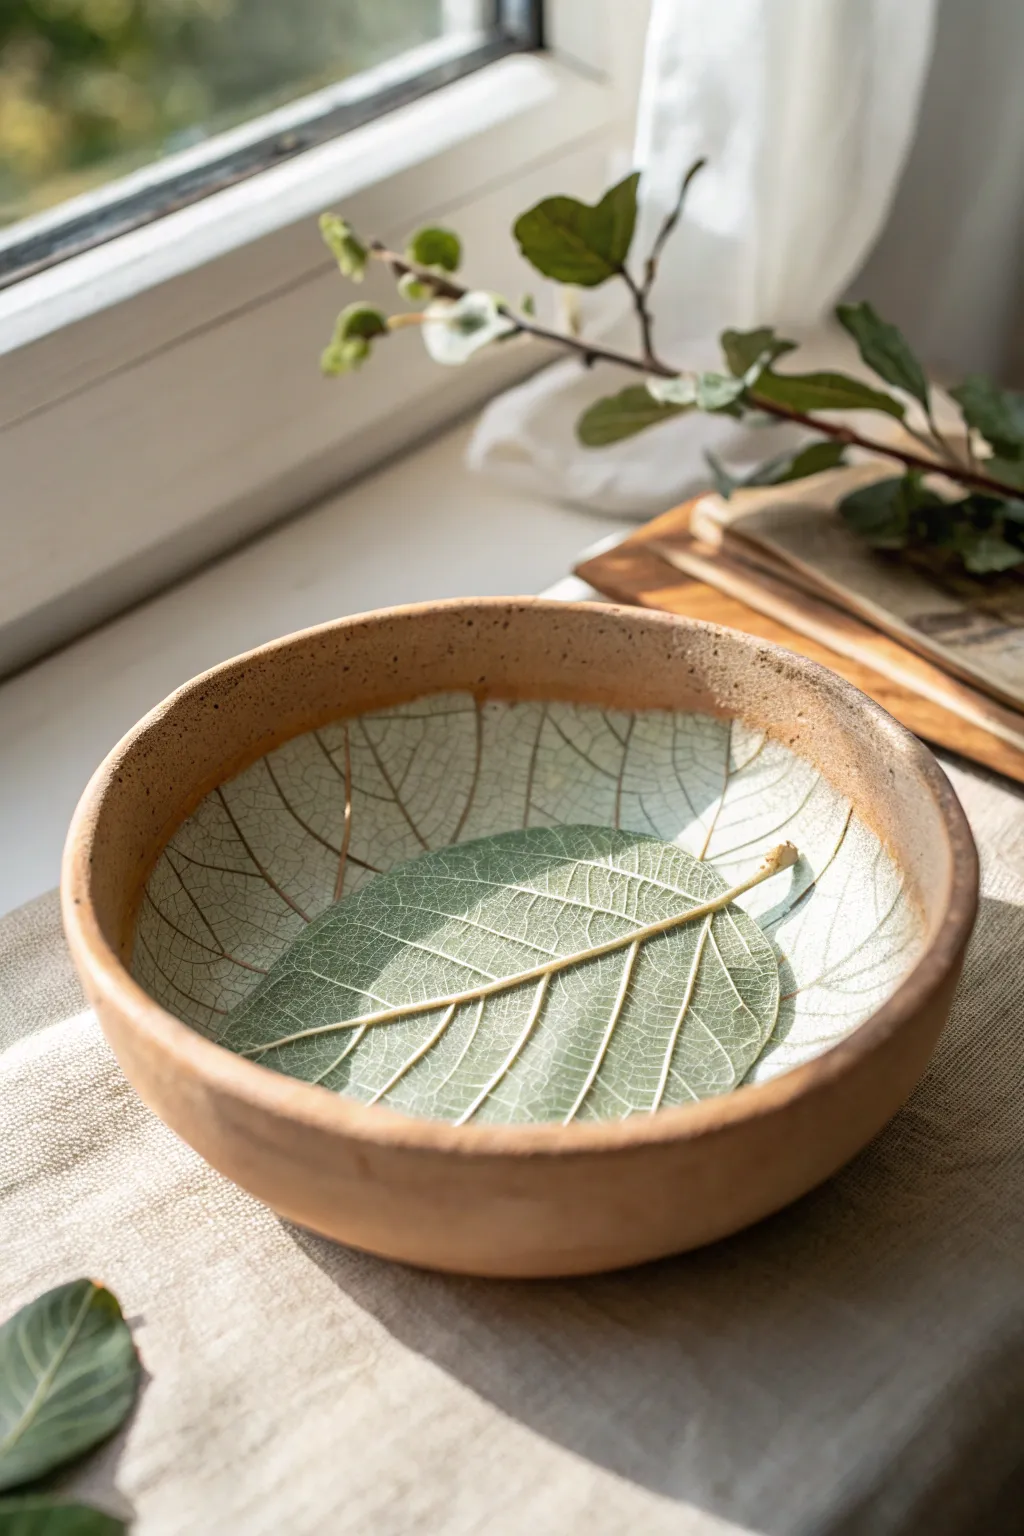
Capture the delicate veins of nature forever in this rustic, botanical clay bowl. By pressing a fresh leaf into soft clay and accentuating the impression with a soft wash, you create a functional piece of art that looks like a fossilized treasure.
How-To Guide
Materials
- Terracotta or stoneware clay (low-fire or air-dry)
- Fresh, deeply veined leaf (like Hydrangea or Fig)
- Rolling pin
- Canvas or heavy cloth (to prevent sticking)
- Small sponge
- Bowl mold (optional, for shaping)
- White underglaze or white acrylic paint (if using air-dry)
- Clear matte glaze or sealant
- Rib tool or old credit card
Step 1: Preparation & Construction
-
Prep your clay:
Start with a ball of clay roughly the size of a large orange. Wedge it well to remove air bubbles, then slam it onto your canvas workspace to flatten the bottom slightly. -
Open the form:
Press your thumb into the center of the ball, stopping about half an inch from the bottom. Begin pinching the walls, rotating the clay in your hand to ensure even thickness. -
Widen into a bowl:
Since we want a wide, open shape to display the leaf, gently pull the walls outward rather than just upward. Aim for a shallow, cereal-bowl shape. -
Smooth the interior:
Use a damp sponge or a flexible rib tool to smooth out the fingerprint marks on the inside surface. A smooth canvas is essential for a clean leaf print. -
Refine the rim:
The rim in the reference photo is delightfully rustic. You can leave it slightly uneven, but smooth any sharp edges with a damp finger. -
Leaf selection:
Choose a leaf that fits comfortably inside your bowl. The veins on the back of the leaf are usually more prominent, so plan to place the leaf vein-side down.
Step 2: Impression & Shaping
-
Position the botanical:
Place your leaf in the center of the bowl. Press it down gently with your fingers first to tack it into place so it doesn’t slide around. -
The crucial press:
Using your thumb or a small, smooth stone, firmly rub over the entire surface of the leaf. I like to start from the center stem and work outward to avoid trapping air bubbles. -
Check the edges:
Pay special attention to the very edges of the leaf and the stem, ensuring they are pressed deep enough to leave a mark. -
Peel and reveal:
Carefully find the stem or a tip of the leaf. Use a needle tool or tweezers if necessary to lift the edge, then slowly peel the leaf away to reveal the texture. -
Refine the shape:
The pressing might have distorted your bowl slightly. Cup your hands around the outside of the pot to gently bring it back to a round shape.
Stuck Leaf?
If the leaf tears while peeling it out, let the clay dry slightly for 20 minutes. As the clay shrinks, the leaf usually pops loose easily.
Step 3: Finishing & Glazing
-
Drying phase:
Allow the clay to dry to a ‘bone dry’ state. If you are using kiln-fire clay, this is where you would do your bisque fire. -
Apply the wash:
Dilute your white underglaze (or paint) with water until it’s a milky consistency. Brush it generously over the entire leaf impression. -
Wipe back:
Before the wash fully dries, take a barely damp sponge and wipe across the surface. The white pigment will stay stuck in the deep veins but wipe off the high points, creating contrast. -
Clean the rim:
Ensure the rim and the outside of the bowl remain natural clay color. If any white wash got on the rim, wipe it away cleanly for that nice framed effect. -
Final seal:
If firing, apply a clear matte glaze and fire to temperature. If using air-dry clay, seal the piece with a matte varnish to protect the surface.
Level Up
Try using colored slip instead of white for the vein wash. A dark green or oxide wash creates a moodier, forest-floor aesthetic.
Place your finished bowl near a window to let the light catch those beautiful organic textures
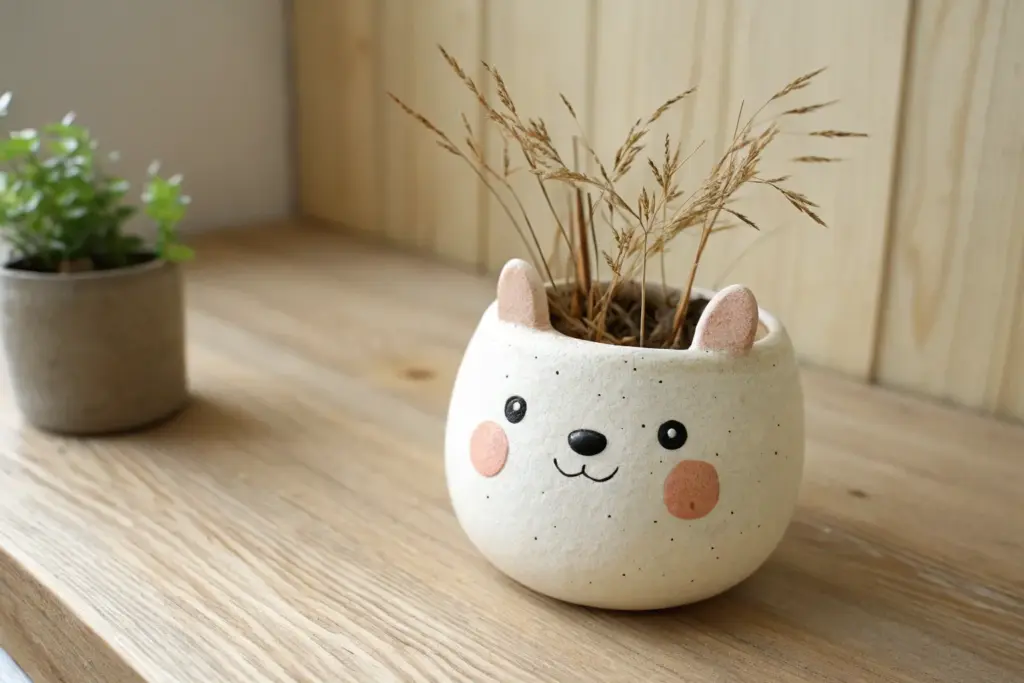
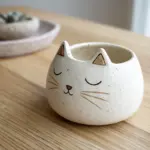
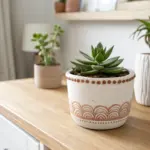
Mini Succulent Buddy Planter
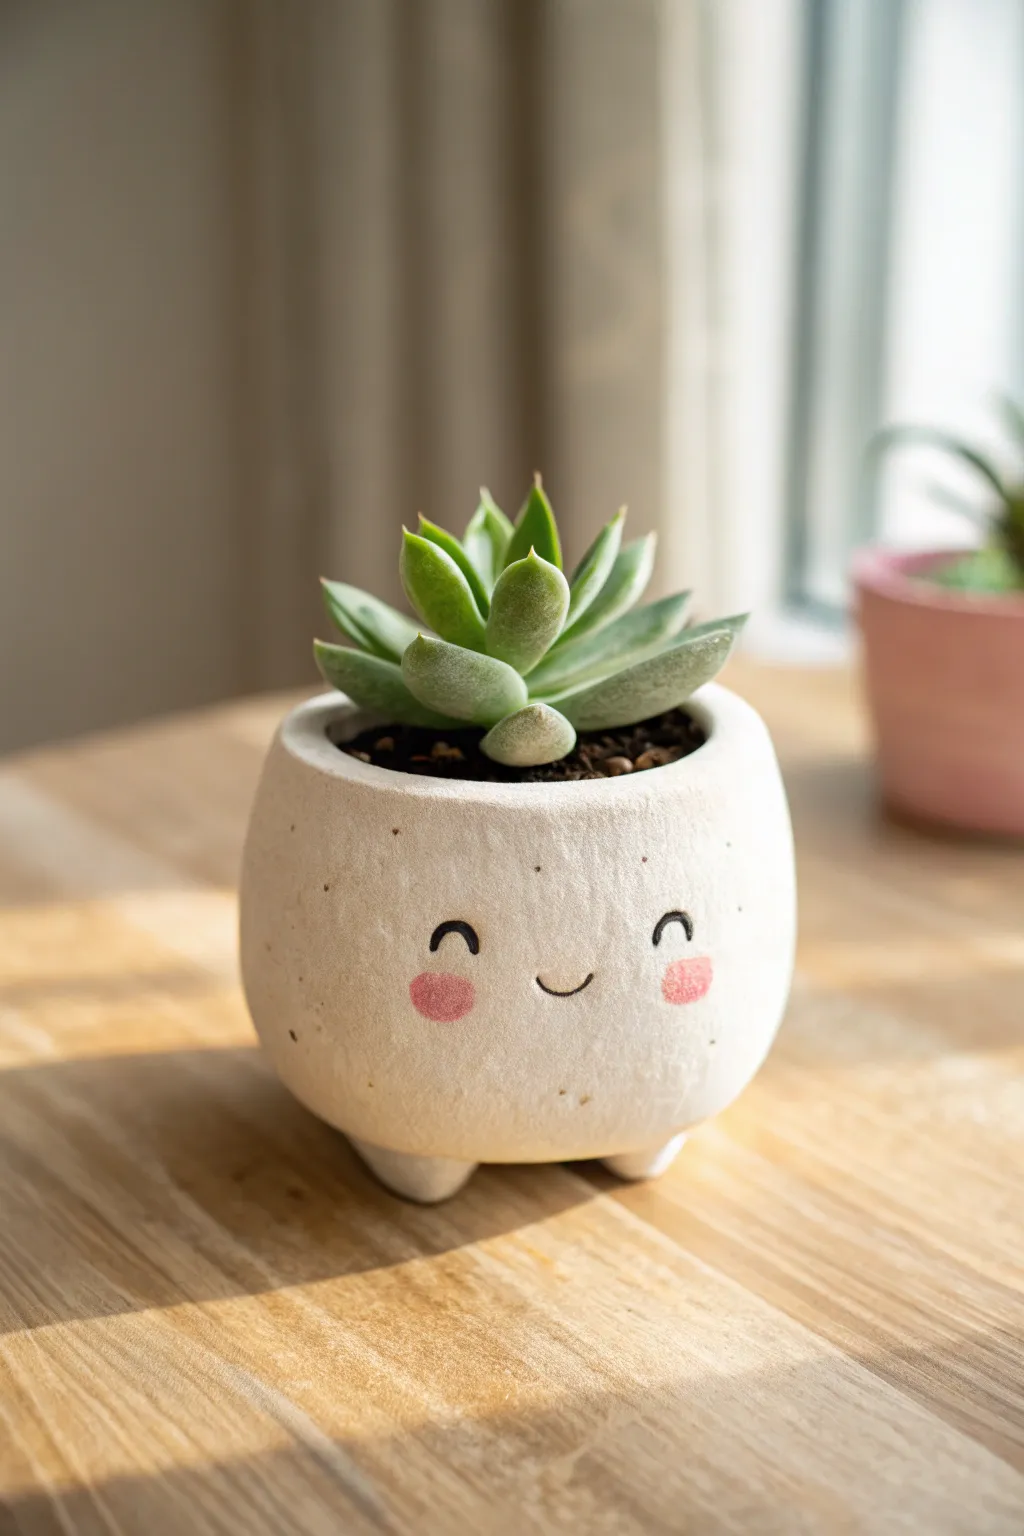
Brighten up your windowsill with this adorable anthropomorphic planter made from simple pinch pot techniques. This chunky little pot features a textured white finish and a sweetly painted smiling face that is sure to bring joy to your plant collection.
Step-by-Step Guide
Materials
- Air-dry clay or polymer clay (white)
- Small bowl of water
- Pointed sculpting tool or toothpick
- Fine-grit sandpaper
- Acrylic paints (black, pink, off-white/cream)
- Small round paintbrush
- Matte sealant spray or varnish
- Small succulent and potting soil
Step 1: Shaping the Base Pot
-
Create the Initial Sphere:
Start by taking a handful of clay, roughly the size of a tennis ball. Roll it firmly between your palms until you have a smooth, even sphere. -
Open the Pot:
Hold the sphere in one hand and gently press your thumb into the center, going about three-quarters of the way down. Be careful not to push all the way through the bottom. -
Pinch the Walls:
Using your thumb on the inside and fingers on the outside, gently pinch and rotate the clay. Work your way from the bottom up to thin out the walls evenly. -
Form the Rounded Belly:
Aim for a slightly bulbous shape. Instead of pulling the walls straight up, gently curve them inward slightly near the rim to create that cute, chubby silhouette seen in the photo. -
Smooth the Rim:
Once you have your desired thickness (about 1/4 inch is good for stability), dip your finger in water and run it along the rim to smooth out any cracks or sharp edges.
Step 2: Adding Feet and Texture
-
Form the Feet:
Roll three small balls of clay, each about the size of a marble. Flatten them slightly on one side to create a stable base for the feet. -
Attach the Feet:
Score the bottom of the pot and the flat side of each foot using your sculpting tool (make tic-tac-toe scratches). Add a dab of water or clay slip, then press the feet firmly onto the base in a triangle pattern. -
Blend the Seams:
Use your thumb or a tool to smooth the clay from the feet onto the pot, ensuring they are securely attached and look seamless. -
Check Stability:
Set the pot down on a flat surface to make sure it stands level. Gently press down on the rim to flatten the feet bottoms so it doesn’t wobble. -
Add Subtle Texture:
The pot in the image has a lovely organic texture. Instead of smoothing it perfectly, lightly dab the surface with a coarse sponge or a crumpled ball of foil to give it that stone-like, pitted look. -
Dry the Clay:
Let your pot dry completely according to the clay package instructions. This usually takes 24-48 hours. I like to rotate it occasionally so it dries evenly.
Uneven Drying?
If cracks appear while drying, create a ‘patch’ paste by mixing a tiny bit of clay with water and smooth creating a filler.
Step 3: Painting and Finishing
-
Sand Imperfections:
Once fully dry, lightly sand the rim or any sharp jagged bits with fine-grit sandpaper, but leave the body texture intact. -
Apply Base Coat:
Mix a tiny bit of brown or yellow into white acrylic paint to create a warm, creamy off-white shade. Paint the entire exterior and the inner rim. You may need two coats for opaque coverage. -
Speckle the Surface:
To mimic the ceramic speckles, dilute a tiny bit of brown paint with water. Load an old toothbrush or stiff brush and flick the bristles to spray tiny dots across the pot. -
Paint the Cheeks:
Mix a soft pink color. Dip a round brush into the paint, wipe most of it off on a paper towel, and gently stipple two round, rosy cheeks onto the lower half of the pot. -
Draw the Face:
Using a very fine brush and black paint, carefully paint two small upward-curving arches for the happy eyes directly above the cheeks. Add a tiny U-shape between them for the smile. -
Seal the Project:
Protect your paint job with a matte spray sealant or varnish. This is crucial if you plan to put a real plant inside, as moisture can damage air-dry clay.
Drainage Holes
For real succulents, poke a hole in the bottom center before drying, but ensure you use a waterproof saucer underneath.
Pop in your favorite little succulent and enjoy the happy vibes from your new handmade friend
Fairy Cottage Pinch Pot Holder
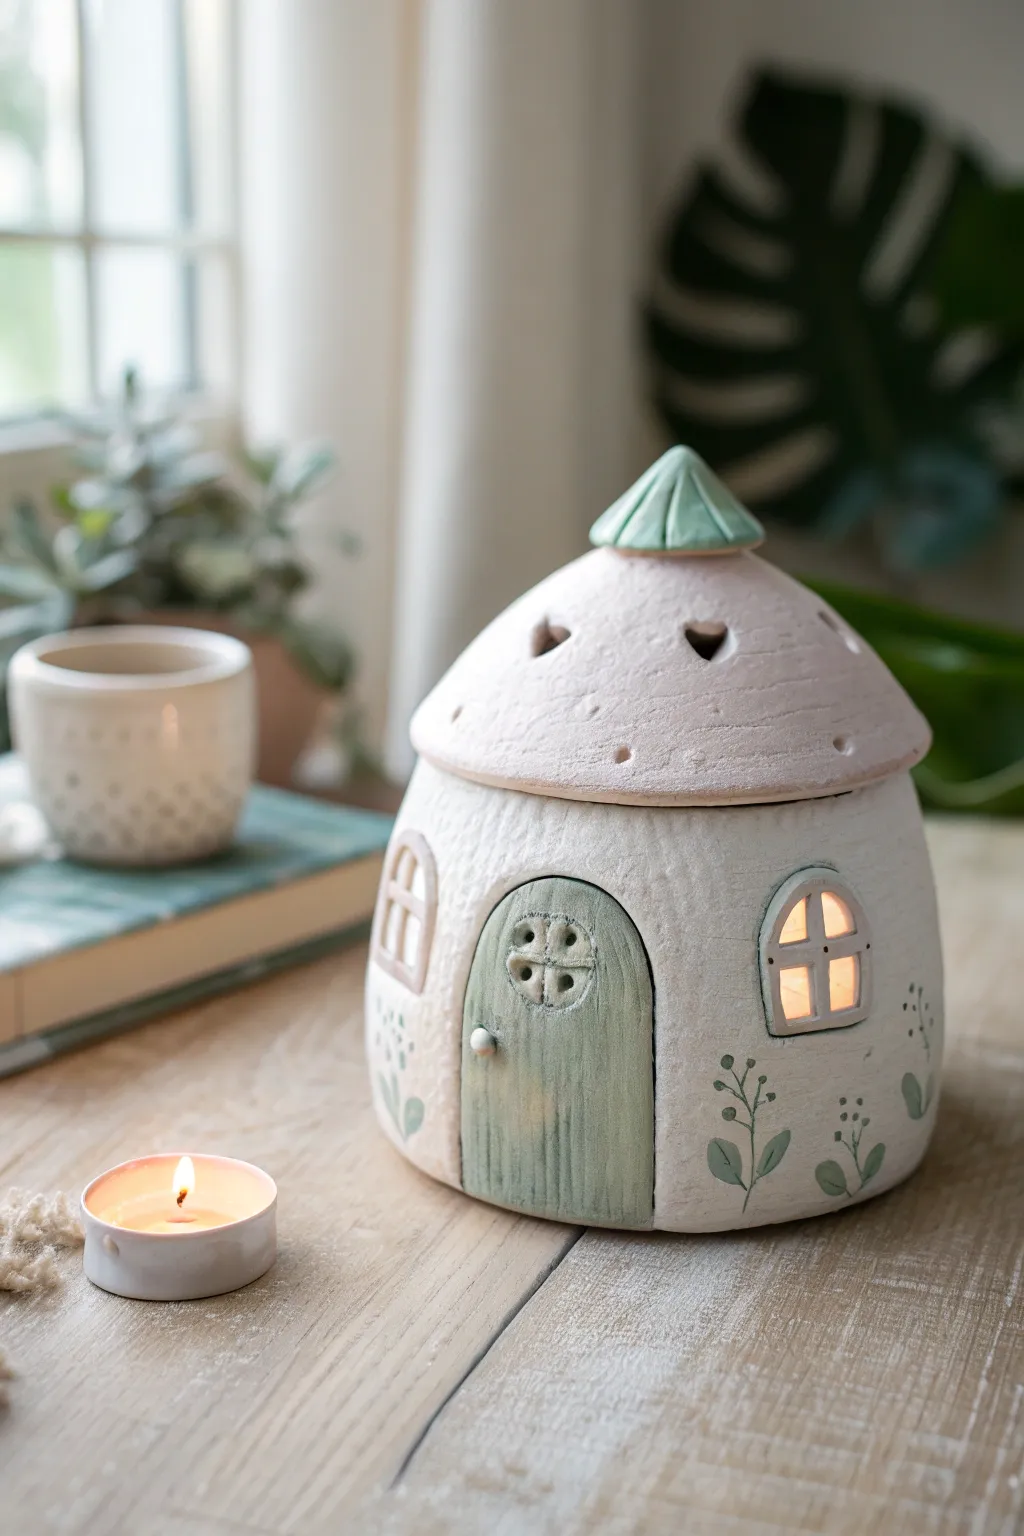
Bring a touch of enchantment to your space with this adorable fairy cottage pinch pot, perfect for housing a small tealight. With its gentle pastel accents and carved details, this project transforms simple clay into a cozy little home that glows from within.
Step-by-Step Tutorial
Materials
- Air-dry clay or polymer clay (white or light beige)
- Clay sculpting tools (needle tool, modeling tool, knife)
- Acrylic paints (ivory/off-white, sage green, grey)
- Fine grit sandpaper
- Rolling pin
- Small round cookie cutter (optional)
- Fine detail paintbrushes
- Clear matte varnish
- Battery-operated tealight
Step 1: Forming the Base
-
Pinch the main body:
Start with a ball of clay about the size of a large orange. Insert your thumb into the center and gently pinch around the sides, rotating the clay to form a deep, even bowl shape. Aim for walls about 1/4 inch thick to ensure stability. -
Shape the cottage walls:
Gently tap the bottom of your pinch pot on a flat surface to create a stable base. Then, work the sides upwards so they are slightly distinct from the rounded bottom, creating a more vertical ‘house’ silhouette rather than a perfect sphere. -
Smooth the exterior:
Dip your finger in a little water (if using air-dry clay) or baby oil (for polymer) and smooth out any fingerprints or cracks on the outside surface. A smooth canvas is essential for the later details.
Step 2: Crafting the Roof
-
Create the roof pinch pot:
Make a second, slightly smaller and shallower pinch pot. This will be the roof. Invert it and test the fit on top of your base; it should overhang slightly like eaves. -
Shape the peak:
Gently gently pull and pinch the center of the inverted bowl upwards to create a soft point or dome shape for the roof. -
Add the finial:
Roll a small cone of clay and score and slip (scratch and wet) the joining surfaces to attach it to the very top of the roof. Press vertical lines into this cone to give it a distinct texture. -
Ventilation holes:
Use a small round cutter or the back of a paintbrush to punch three or four small holes around the upper slope of the roof. I like to shape these into little hearts or teardrops to let the candlelight vent and shine through.
Uneven Roof Fit?
If the lid wobbles, add a small ‘flange’ or snake of clay to the underside of the roof while the clay is wet. This inner ring will sit inside the base rim.
Step 3: Detailing & Texturing
-
Carve the door:
Roll a flat slab of clay and cut out an arch shape. Attach this to the front of the cottage base. Use a needle tool to scratch vertical wood grain lines into the door. -
Add door details:
Press a small four-pane window design into the upper part of the door. Add a tiny ball of clay for the doorknob. -
Cut the windows:
Use a craft knife to carefully cut out arched window openings on the sides of the cottage. Roll very thin snakes of clay to criscross over the openings, creating window panes. -
Add general texture:
Take a stiff bristle brush or a crumpled ball of aluminum foil and gently press it all over the white cottage walls and roof to give it a rough, stucco-like stone texture. -
Drying:
Allow your piece to dry completely according to your clay manufacturer’s instructions. Air-dry clay may take 24-48 hours. If using polymer, bake as directed.
Make it Shine
Paste yellow tissue paper or translucent vellum inside the cottage behind the window cutouts. This diffuses the light and hides the battery candle.
Step 4: Painting & Finishing
-
Base coat:
Paint the entire cottage (except the door and roof finial) in a creamy off-white. This unifies the clay color and highlights the texture. -
Painting the door:
Mix a muted sage green paint. Carefully paint the door and the finial on top of the roof. For a weathered look, you can wipe some of the paint back with a paper towel before it dries completely. -
Roof tinting:
Water down a tiny bit of brownish-grey paint and wash it over the roof, wiping it away quickly so it only settles into the texturing, giving it an aged appearance. -
Floral vines:
Using your finest brush and the sage green paint, draw delicate vines climbing up the sides of the cottage. Add small leaves and tiny dots for berries or buds. -
Seal the project:
Once all paint is dry, apply a coat of matte varnish to protect the surface.
Place a battery-operated candle inside and watch your cottage come to life with a warm, welcoming glow
Cherry Twin Pinch Pots Joined Together
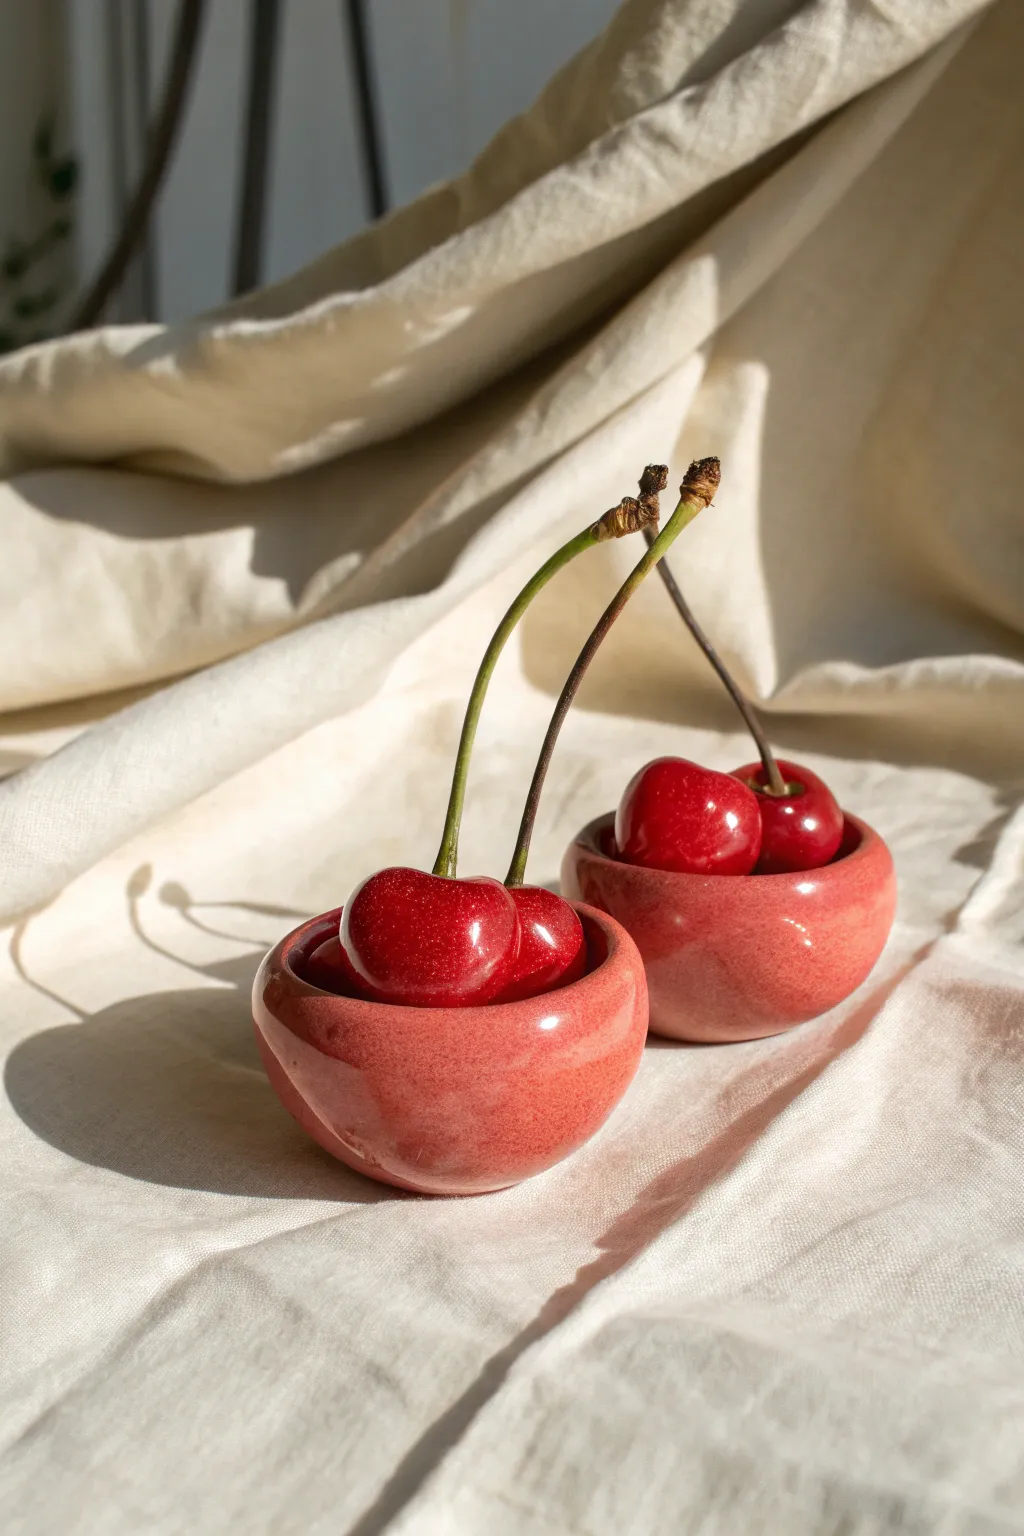
These adorable twin pinch pots are fused together to create a unique serving dish perfect for snacks like cherries or berries. The glossy, speckled pink glaze gives them a fresh, playful look that brightens up any table setting.
Step-by-Step
Materials
- White earthenware or stoneware clay
- Pottery sponge
- Needle tool
- Scoring tool (or fork)
- Slip (clay and water mixture)
- Rubber or wooden rib
- Loop tool for trimming
- Soft paintbrush
- Pink ceramic glaze (glossy finish)
- Clear glaze (optional, if pink is underglaze)
- Kiln access
Step 1: Shaping the Twin Pots
-
Form the clay balls:
Start with two evenly sized lumps of wet clay, roughly the size of a golf ball or a small lime. Roll them briskly between your palms until you have two smooth, crack-free spheres. -
Start the pinch:
Hold one sphere in your non-dominant hand. Press your thumb gently into the center, stopping about a quarter-inch from the bottom to ensure a sturdy base. -
Pinch the walls:
With your thumb inside and fingers supporting the outside, gently pinch and rotate the clay. Work from the bottom up to thin the walls evenly, aiming for a consistent thickness of about 1/4 inch. -
Finish the second pot:
Repeat the process with the second sphere. Compare them side-by-side frequently to ensure they remain roughly the same height and diameter. -
Flatten the connection point:
Identify where you want the two pots to join. Gently tap each pot against a flat surface on one side to create a small flat spot on the exterior wall; this increases the surface area for a strong bond.
Step 2: Joining and Refining
-
Score the surfaces:
Use your scoring tool or a fork to scratch up the flat spots you just created on both pots. You want a rough, cross-hatched texture. -
Apply slip:
Dab a generous amount of slip onto both scored areas. The slip acts as the glue, so don’t be shy with it. -
Press together:
Firmly press the two pots together at the slipped areas. Support the inner walls with your fingers so you don’t collapse the shapes while pressing. -
Blend the seam:
Using a small wooden tool or your finger, smear a little clay across the seam on both the inside and outside where the pots meet. This mechanical lock prevents them from popping apart during firing. -
Smooth the exterior:
Take a damp sponge or a soft rubber rib and smooth over the joined area to make the seam invisible. The goal is for the clay to look like one continuous unit. -
Refine the rims:
Check the rims of both pots. I like to run a slightly damp sponge over the lips to round them off, ensuring there are no sharp edges. -
Dry partially:
Let the piece dry to a leather-hard state. This usually takes a few hours depending on the humidity in your room.
Cracks at the seam?
If a crack appears at the join while drying, score it deeply, add fresh slip, and compress a tiny coil of soft clay into the gap to heal it.
Step 3: Finishing and Glazing
-
Trim the bottom:
If the pots feel heavy, use a loop tool to trim away excess clay from the bottom, creating a slight foot ring or just a clean, flat base. -
Bone dry and bisque:
Allow the piece to dry completely until it is bone dry. Fire it in the kiln for a bisque fire (Con 04 is typical for earthenware). -
Dust off debris:
Once fired and cooled, wipe the bisque ware with a damp sponge to remove any kiln dust or debris that could repel the glaze. -
Apply glaze:
Brush on 2-3 coats of your chosen pink glossy glaze. Be sure to let each coat dry to the touch before applying the next one for even coverage. -
Clean the foot:
Use a wet sponge to rigorously wipe all glaze off the very bottom of the pots where they will touch the kiln shelf. Any glaze left here will fuse your art to the shelf. -
Final firing:
Fire the piece a second time according to the glaze manufacturer’s instructions to achieve that glossy, finished surface.
Glaze Consistency
For that speckled look, choose a glaze with ‘particulate’ or speckles included, or tap a loaded brush of darker glaze over wet pink glaze.
Now you have a charming little vessel ready to hold your favorite tiny treats