When I want a fast win in the studio, I reach for easy bake clay because you can take your time shaping everything before it ever hits the oven. These ideas are all beginner-friendly, super doable, and made to give you that polished look with simple shapes and a little oven-bake clay magic.
Easy Geometric Polymer Clay Earrings
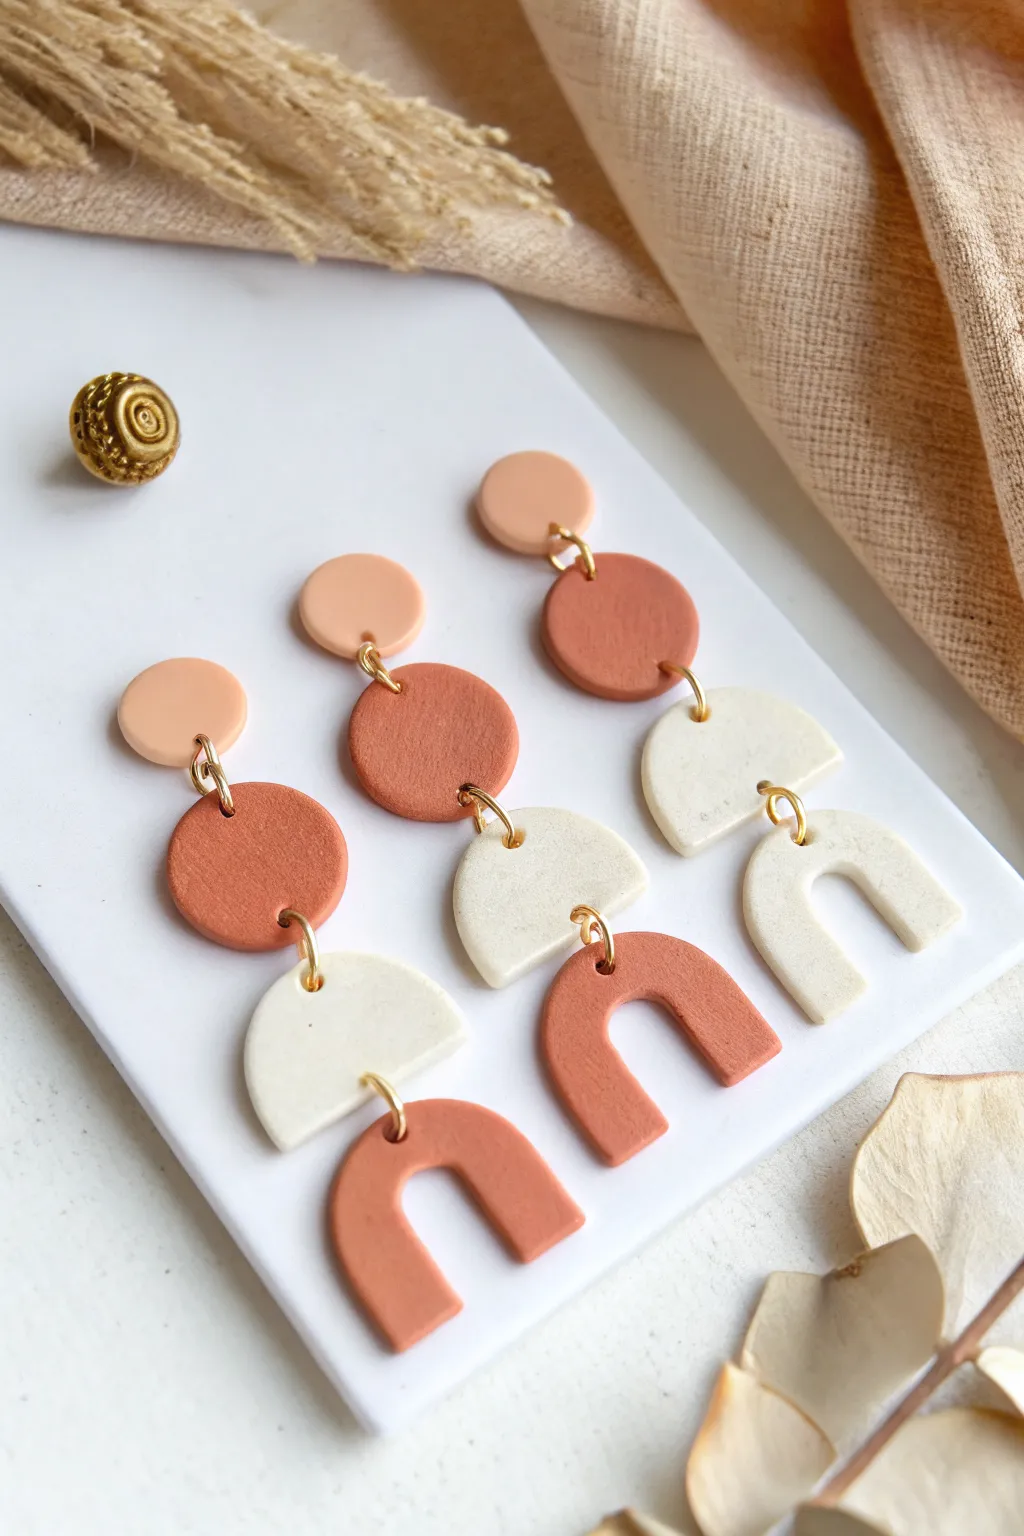
Embrace the warm, earthy tones of these geometric dangle earrings, perfect for adding a touch of modern bohemian style to any outfit. This project combines simple shapes like arches and circles with a soft, matte finish for a sophisticated look.
Step-by-Step
Materials
- Polymer clay in terracotta, peach/beige, and granite/speckled white
- Clay roller or pasta machine
- Circle cutters (approx. 10mm small and 20mm medium)
- Arch cutter or craft knife
- Clean ceramic tile or glass work surface
- Needle tool or toothpick
- Jump rings (gold, approx. 6mm)
- Earring studs and backs (gold)
- Jewelry pliers (flat nose and round nose)
- Oven for baking
Step 1: Conditioning and Cutting
-
Prep the colors:
Begin by conditioning each color of clay separately. Knead the terracotta, peach, and speckled white clay in your hands until they are soft, pliable, and free of cracks. -
Roll the slabs:
Using your acrylic roller or pasta machine, roll out each color into an even slab. Aim for a thickness of about 3mm (roughly 1/8 inch) for a sturdy yet lightweight earring. -
Cut the studs:
For the top post component, take the peach clay slab and use your smallest circle cutter to punch out two circles. Set these aside carefully on your baking tile. -
Cut the centers:
Next, use the medium-sized circle cutter on the terracotta clay slab to create the middle connector pieces. You’ll need two of these. -
Create the third style:
Notice the third earring in the image? It reverses the pattern. Cut a medium terracotta circle for the top, and a speckled white half-circle for the middle (cut a circle, then slice it in half with a blade). -
Cut the bottom arches:
For the dangly bottom pieces, use an arch cutter on the terracotta clay. If you don’t have a specific cutter, use a circle cutter to make the outer curve and a smaller one for the inner curve, then trim the legs straight with a blade. -
Cut the speckled arches:
Repeat the arch cutting process with your speckled white clay. You can mix and match shapes here, creating U-shapes for some and solid half-circles for others to match the variety in the photo.
Sticky Situation?
If your clay is sticking to the cutter or work surface, dust the clay lightly with cornstarch before cutting, or cover the clay with plastic wrap and cut through it.
Step 2: Assembly Prep and Baking
-
Pierce the holes:
Before baking, you need to create holes for the jump rings. Use a needle tool to poke a hole near the bottom edge of the top studs and near the top edge of the bottom pieces. -
Double check alignment:
For the middle connector pieces, you will need a hole at the very top and one at the very bottom. Ensure the holes are large enough for your jump rings to move freely but not too close to the edge that the clay might break. -
Smooth the edges:
I always take a moment here to gently smooth any rough edges or fingerprints with a finger dipped lightly in cornstarch or baby oil. -
Bake the clay:
Arrange all your pieces on the ceramic tile and bake according to the manufacturer’s instructions on your clay package. This is usually around 275°F (135°C) for 15-30 minutes. -
Allow to cool:
Once bakes, let the pieces cool partially in the oven or completely on the counter. Don’t try to flex them while they are still hot.
Step 3: Final Jewelry Assembly
-
Open jump rings:
Using two pairs of pliers, twist your gold jump rings open laterally. Never pull them apart outward, as this weakens the metal. -
Connect the tiers:
Thread an open jump ring through the hole of a bottom arch piece and the corresponding hole of the middle circle (or half-circle). Close the jump ring securely. -
Attach the tops:
Repeat the process to connect the middle piece to the top stud piece using another jump ring, creating a linear dangle. -
Affix the posts:
Turn the earrings over so the backs are facing up. Apply a tiny dot of strong jewelry glue or liquid clay to the back of the top circle stud. -
Secure and dry:
Press the flat pad of the earring post onto the glue. If using liquid clay, you will need to re-bake the pieces briefly to set the bond. If using superglue, simply let them dry undisturbed.
Pro Tip: Seamless Symmetry
To get perfectly matching earrings, cut both left and right shapes at the same time from the same part of the slab so the thickness is identical.
Wear your new geometric creations with pride or gift them to a friend who loves unique accessories


Marbled Oven-Bake Clay Pendant Charms
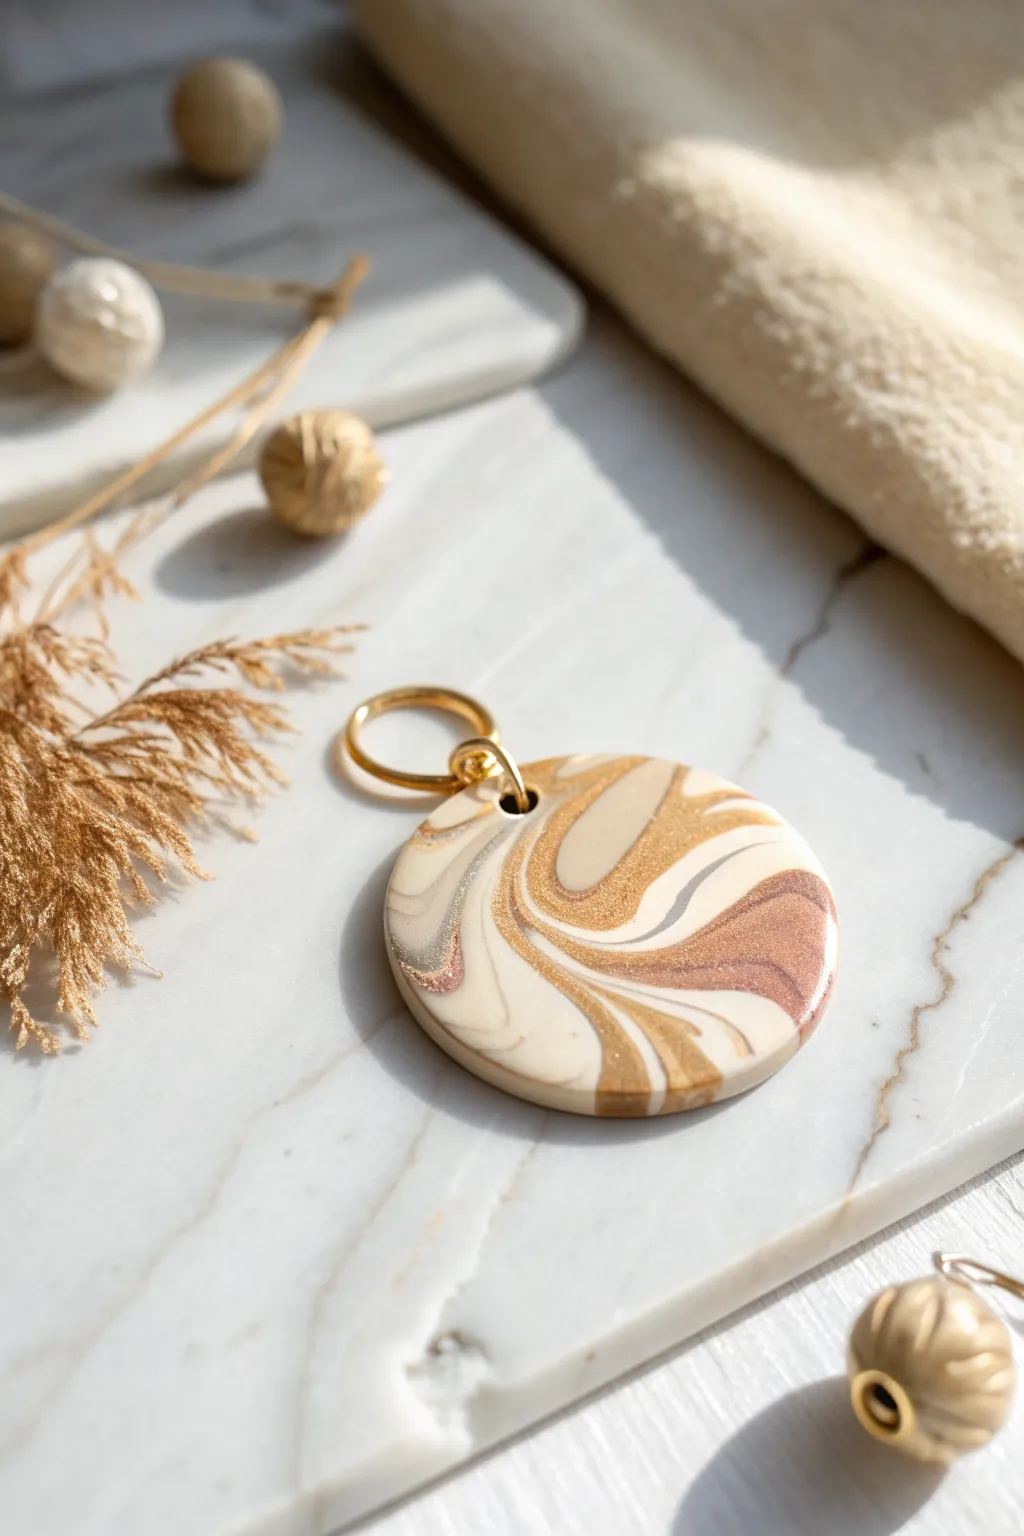
Capture the organic beauty of agate and natural stone with this surprisingly simple marbled clay technique. By twisting together strands of neutral and metallic polymer clay, you can create a one-of-a-kind pendant that looks like a high-end designer piece.
Detailed Instructions
Materials
- Polymer clay (colors: beige/ecru, white, metallic gold, metallic bronze, pearl silver)
- Clay roller or acrylic rolling pin
- Circle clay cutter (approx. 1.5 – 2 inches diameter)
- Clay blade or tissue blade
- Small straw or cocktail stick (for the hole)
- Parchment paper or glazed ceramic tile
- Oven (for baking)
- Gold jump ring (8mm or 10mm)
- Jewelry pliers
- Sandpaper (400-1000 grit, wet/dry)
- Polishing buffer or denim cloth (optional)
Step 1: Prepping and Mixing the Clay
-
Condition the clay:
Start by taking small amounts of each clay color—beige, white, gold, bronze, and silver. Knead each piece individually until it is soft, warm, and pliable. This conditioning step is crucial to prevent cracks later. -
Roll out snakes:
Roll each color into a long, thin rope or ‘snake’ shape, roughly 4-5 inches long and about 1/4 inch thick. You don’t need equal amounts of every color; use more of the beige and white if you want a lighter, neutral base. -
Bundle the colors:
Gather your clay snakes into a single bundle, pressing them gently together lengthwise so they stick to one another. -
Twist the bundle:
Holding one end of the bundle in each hand, twist in opposite directions. Keep twisting until the ropes are tightly wound together, looking almost like a candy cane. -
Fold and roll:
Fold the twisted rope in half, bringing the two ends together. Roll this doubled rope on your work surface to smooth it out into a single log again.
Clean Cut Pro-Tip
Before cutting your circle, lay a piece of cling wrap over the clay slab. Press the cutter down through the plastic. This creates a soft, domed pillow edge rather than a sharp, flat cut.
Step 2: Creating the Marbled Slab
-
Repeat the twist:
Twist this new log again just like before. Repeating the twist-and-fold process helps create finer, more intricate swirls. I usually stop after two or three rounds to keep the colors distinct rather than muddy. -
Form a ball:
Once you are happy with the complexity of the lines, smash the log into a loose ball shape, gathering all the ends together. -
Roll out the slab:
Place the clay ball on your parchment paper or tile. Using your acrylic roller, roll the clay flat into a slab about 1/4 inch thick. Roll in different directions to stretch the marble pattern organically. -
Select your pattern:
Look closely at your flattened slab. The marbling will look different in every spot. Use your circle cutter to frame the most pleasing section of the swirls. -
Cut the shape:
Press the circle cutter firmly down into the clay. Give it a tiny wiggle to ensure it cuts all the way through, then lift the cutter. Peel away the excess scrap clay surrounding the circle.
Step 3: Finishing Touches and Baking
-
Smooth the edges:
Gently run your finger around the edge of the cut circle to smooth out any harsh lines left by the cutter. -
Pierce the hole:
Use a small straw or a cocktail stick to create a hole near the top edge for the hardware. Make sure the hole is big enough for your jump ring but not so close to the edge that the clay might break. -
Bake the pendant:
Place the clay on a baking sheet lined with parchment paper. Bake according to your specific clay brand’s package instructions—typically around 275°F (135°C) for 15-30 minutes. -
Cool down:
Remove the tray from the oven and let the pendant cool completely before handling. Polymer clay is slightly soft when hot and hardens as it cools. -
Sand for perfection:
Dip a piece of wet/dry sandpaper in water and gently sand the edges and surface of the pendant. This removes fingerprints and creates a professional, stone-smooth finish. -
Attach hardware:
Using two pairs of jewelry pliers, twist the gold jump ring open sideways (never pull it apart). Slide it through the hole in the pendant and twist it closed securely.
Level Up: Glossy Finish
After baking and sanding, apply a thin layer of UV resin or polymer clay glaze. Cure it under UV light or let it dry to give your faux stone pendant a high-shine, polished ceramic look.
Now you have a stunning, swirling statement piece ready to hang on a simple chain or leather cord.


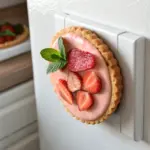
Tiny Pizza Slice Charms With Toppings
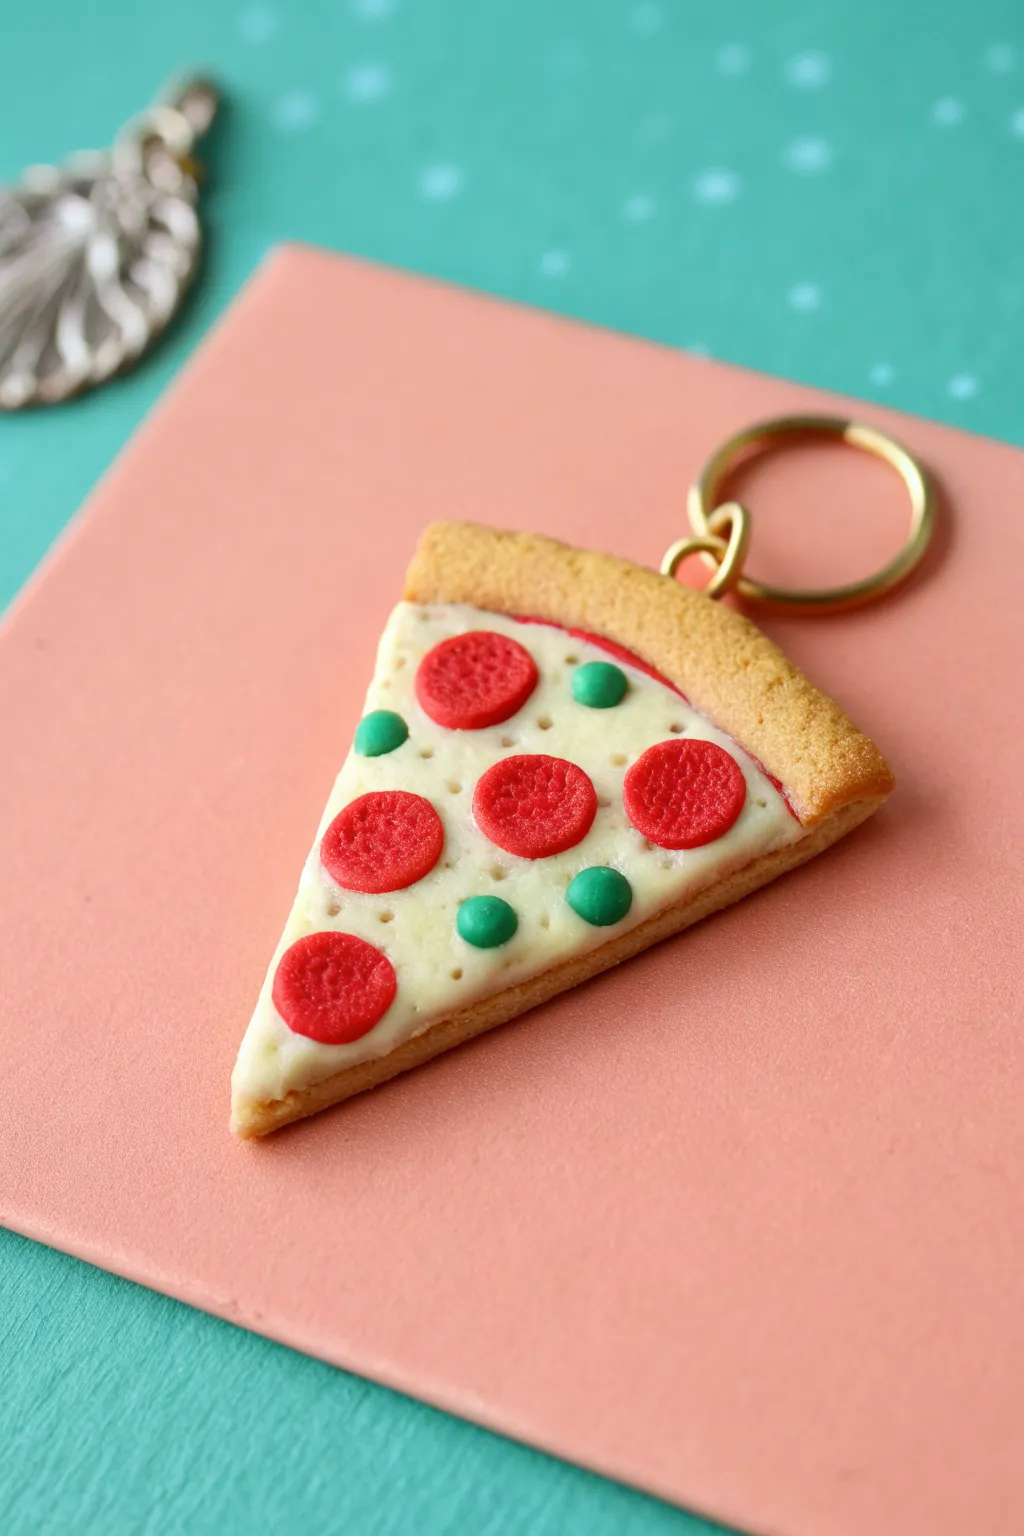
Carry a slice of everyone’s favorite comfort food wherever you go with this adorable pizza keychain. This realistic polymer clay charm features a textured golden crust, perfectly melted cheese, and customizable toppings.
Step-by-Step
Materials
- Polymer clay (dough/beige, white, translucent, red, green)
- Liquid polymer clay (translucent)
- Chalk pastels (orange, brown, yellow ochre)
- Detailing needle tool or toothpick
- Small roller or pasta machine
- Blade or X-Acto knife
- Soft paintbrush
- Toothbrush (for texturing)
- Gold screw eye pin
- Gold keyring w/ chain
- Pliers
- Gloss glaze (optional)
Step 1: Shaping the Slice
-
Mix the dough color:
Blend beige polymer clay with a tiny amount of white and translucent clay to achieve a realistic dough color that isn’t too opaque. -
Form the triangle:
Roll your mixed dough into a sheet about 1/4 inch thick. Cut out a triangular wedge shape using your blade, rounding the top edge slightly where the crust will be. -
Create the crust rim:
Roll a separate snake of the same dough color. Press this rope along the rounded top edge of your triangle, blending the seam on the back and sides so it looks like one cohesive piece of dough. -
Texture the dough:
Gently tap a clean toothbrush or crinkled aluminum foil over the entire crust area and the sides of the slice to mimic the texture of baked bread. -
Add the sauce layer:
Roll a very thin sheet of red clay. Cut a triangle slightly smaller than your dough base and press it onto the slice, tucking it just under the crust rim so a peek of red shows. -
Shade the crust:
Shave some orange, brown, and yellow ochre chalk pastels into dust. Use a soft brush to gently dust the outer crust rim to give it a convincing golden-baked look.
Realistic Grease
Mix a drop of liquid clay with orange chalk pastel shavings. Dab this ‘grease’ lightly onto the cheese around the pepperoni for an ultra-realistic detail.
Step 2: Adding the Cheese & Toppings
-
Mix the cheese cream:
Mix white polymer clay with translucent liquid clay (and a tiny dot of yellow solid clay) until you have a thick paste consistency similar to frosting. -
Spread the cheese:
Using a toothpick or small spatula, spread the cheese paste over the red sauce layer. Leave a thin rim of red visible near the crust for realism. -
Create texture details:
Take a needle tool and gently poke tiny, shallow holes all over the cheese surface to replicate the bubbly, porous texture of melted mozzarella. -
Make the pepperoni:
Roll out a thin sheet of red clay. Use a small round cutter or a straw to punch out circles. Texture the top of each circle by dabbing it with a stiff brush or sponge. -
Make the peppers:
Roll tiny balls of green clay, flatten them slightly, and cut them in half if you want flat peppers, or leave them as small spheres for diced peppers. -
Arrange the toppings:
Place your pepperoni slices and green peppers onto the wet cheese paste. Press them down gently so they look embedded in the melted cheese rather than floating on top.
Step 3: Assembly and Baking
-
Insert hardware:
Trim a gold screw eye pin to the right length. Dip the end in a little liquid clay and screw it securely into the top center of the crust. -
Bake:
Bake the charm according to your clay manufacturer’s instructions (usually 275°F/135°C for 15-30 minutes). I recommend tenting foil over it to prevent the white cheese from scorching. -
Cool and seal:
Let the piece cool completely. For an extra touch, you can add a thin coat of gloss glaze just to the pepperoni slices to make them look greasy and savory. -
Attach keyring:
Using pliers, open the jump ring on your gold keychain and attach it to the eye pin on your finished pizza slice.
Flavor Swap
Don’t stop at pepperoni! Use tiny bits of black clay for olives, brown clay for sausage crumbles, or white circles for fresh mozzarella slices.
Now you have a delicious slice of pizza art that looks good enough to eat

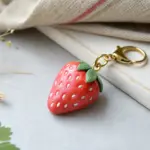


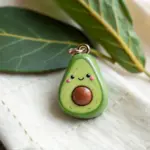
Kawaii Strawberry and Avocado Charms
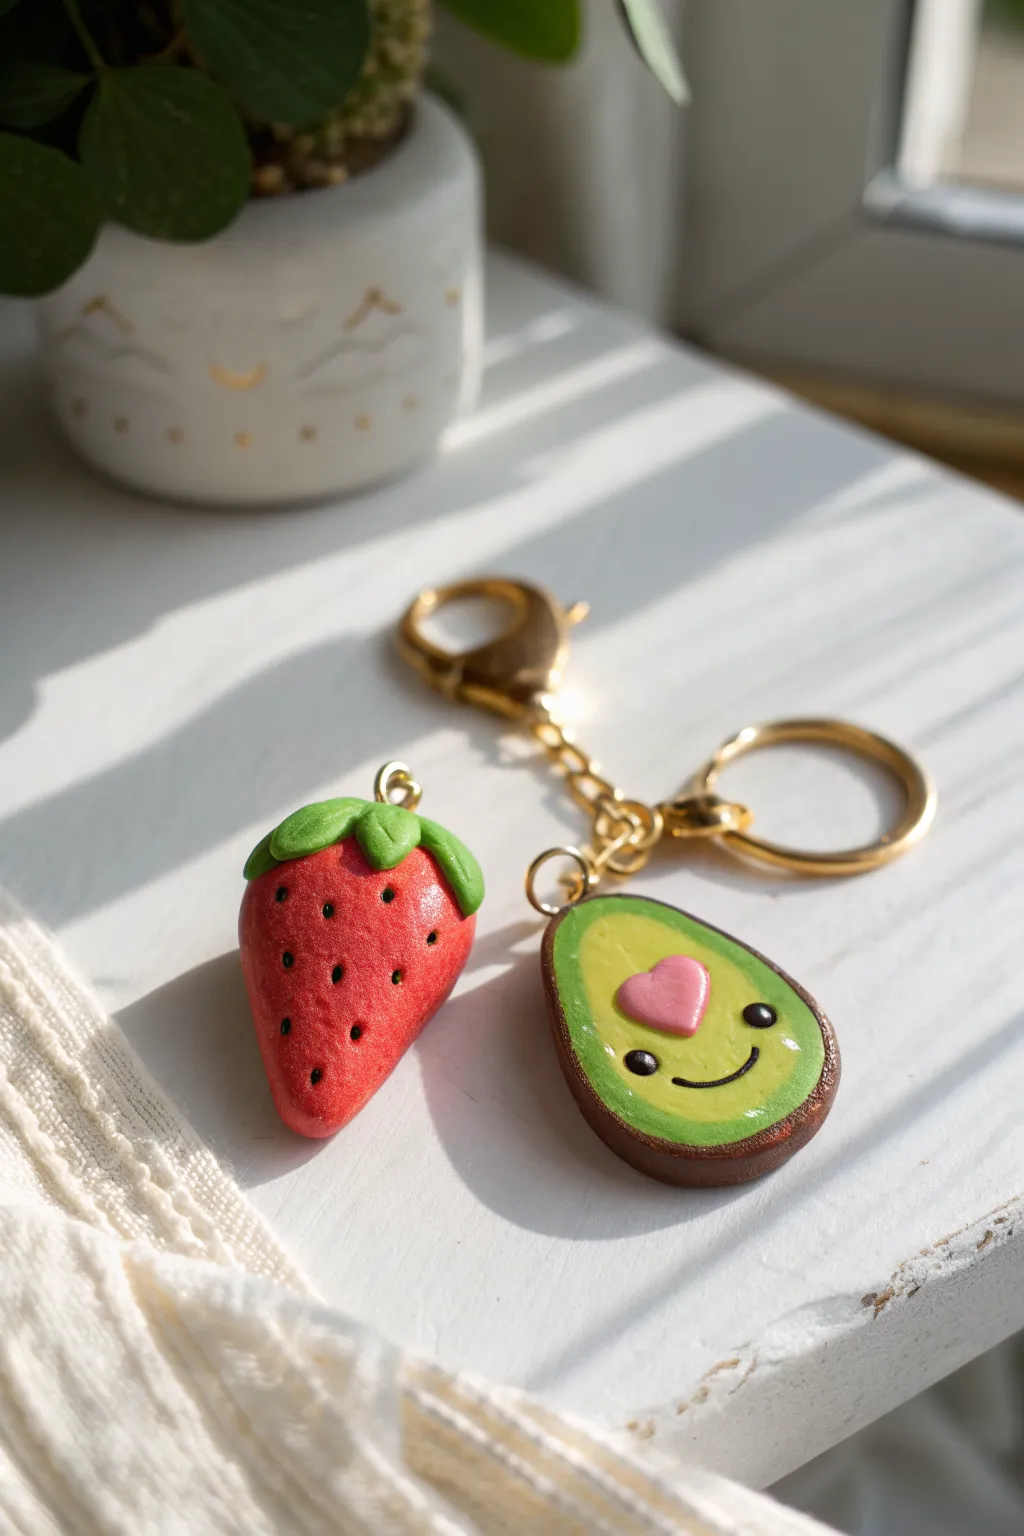
These adorable polymer clay charms are the perfect pair, featuring a realistic textured strawberry and a smiling avocado with a heart-shaped pit. With their glossy finishes and simple hardware, they make delightful keychains or bag accessories.
Step-by-Step Tutorial
Materials
- Polymer clay (Red, Green, Light Green, Brown/Dark Brown, Pink, Black)
- Gold screw eye pins (2 small)
- Gold keychain ring with lobster clasp and chain
- Jump rings (gold)
- Needle tool or toothpick
- Dotting tool or ball stylus
- Clay blade or craft knife
- Rolling pin
- High-gloss glaze or UV resin (for the avocado face and fruity shine)
- Small brush (for glazing)
- Oven for baking
Step 1: Sculpting the Strawberry
-
Shape the base:
Start with a ball of red clay about the size of a large marble. Gently roll it between your palms, tapering one end to form a soft cone shape that mimics a plump strawberry. -
Add texture:
Use a needle tool or the tip of a toothpick to poke small indentations all over the surface of the red cone. These will hold the ‘seeds’ later. Make them randomly spaced but fairly dense. -
Insert seed details:
For a detailed look, you can either paint tiny black dots inside each hole after baking, or for this specific look, take tiny specks of black clay, roll them into microscopic balls, and press them into the indentations before baking. -
Leaf crown:
Flatten a small piece of green clay. Use a blade to cut a rough star or flower shape, or mold 4-5 small teardrops and press them together at the top of the strawberry. Gently curve the tips downward. -
Add hardware:
Insert a gold screw eye pin into the center of the green leaves at the top. I find adding a drop of liquid clay or Bake & Bond on the screw threads helps it stay secure permanently.
Step 2: Crafting the Avocado
-
Create the halves:
Mix a light lime green color for the flesh. Roll it into an oval, then flatten it slightly so it’s about 1/4 inch thick. Pinch the top slightly to get that classic pear shape. -
Make the skin:
Roll a thin snake of dark brown clay. Wrap this strip around the entire perimeter of your light green avocado shape. Smooth the seam where the ends meet and gently blend the clay so the skin bonds to the flesh. -
Texture the skin:
Using an old toothbrush or a crumpled ball of foil, gently tap the dark brown exterior to give it a rough, peel-like texture while keeping the green face smooth. -
The heart pit:
Take a small pinch of pink clay and form a tiny heart. Press this gently into the upper-middle section of the avocado, flattening it so it sits flush with the surface but remains distinct. -
Face details:
Roll two miniscule balls of black clay for the eyes and press them on either side of the heart. Roll a very thin, short thread of black clay and curve it into a smile below the eyes. -
Highlights:
Add tiny white specks of clay or paint to the eyes for a ‘sparkle’ effect. Insert the second screw eye pin into the top of the avocado.
Sticky Fingerprints?
If you see fingerprints on your clay before baking, lightly brush the surface with a little baby oil or cornstarch to smooth them away without distorting the shape.
Step 3: Baking and Assembly
-
Bake:
Place both charms on a tile or baking sheet lined with parchment paper. Bake according to your specific brand of clay instructions (usually 275°F/130°C for 15-30 minutes). -
Cool down:
Let the pieces cool completely before handling. They will be slightly soft when hot but harden as they return to room temperature. -
Glaze:
Apply a coat of gloss glaze or UV resin to both charms to protect the fine details and give them that polished look seen in the photo. Cure or dry fully. -
Attach keychain:
Open a jump ring with pliers. Thread it through the eye pin on the avocado and attach it to the keychain chain. Repeat or attach the strawberry directly to the clasp mechanism using a jump ring.
Add Sparkle
Mix a tiny amount of ultrafine glitter into the glaze for the avocado pit or strawberry leaves to give your charms a magical, sparkling finish.
Clip these sweet, fruity friends onto your keys and enjoy your handmade accessory

The Complete Guide to Pottery Troubleshooting
Uncover the most common ceramic mistakes—from cracking clay to failed glazes—and learn how to fix them fast.
Simple Animal “Blob” Keychains
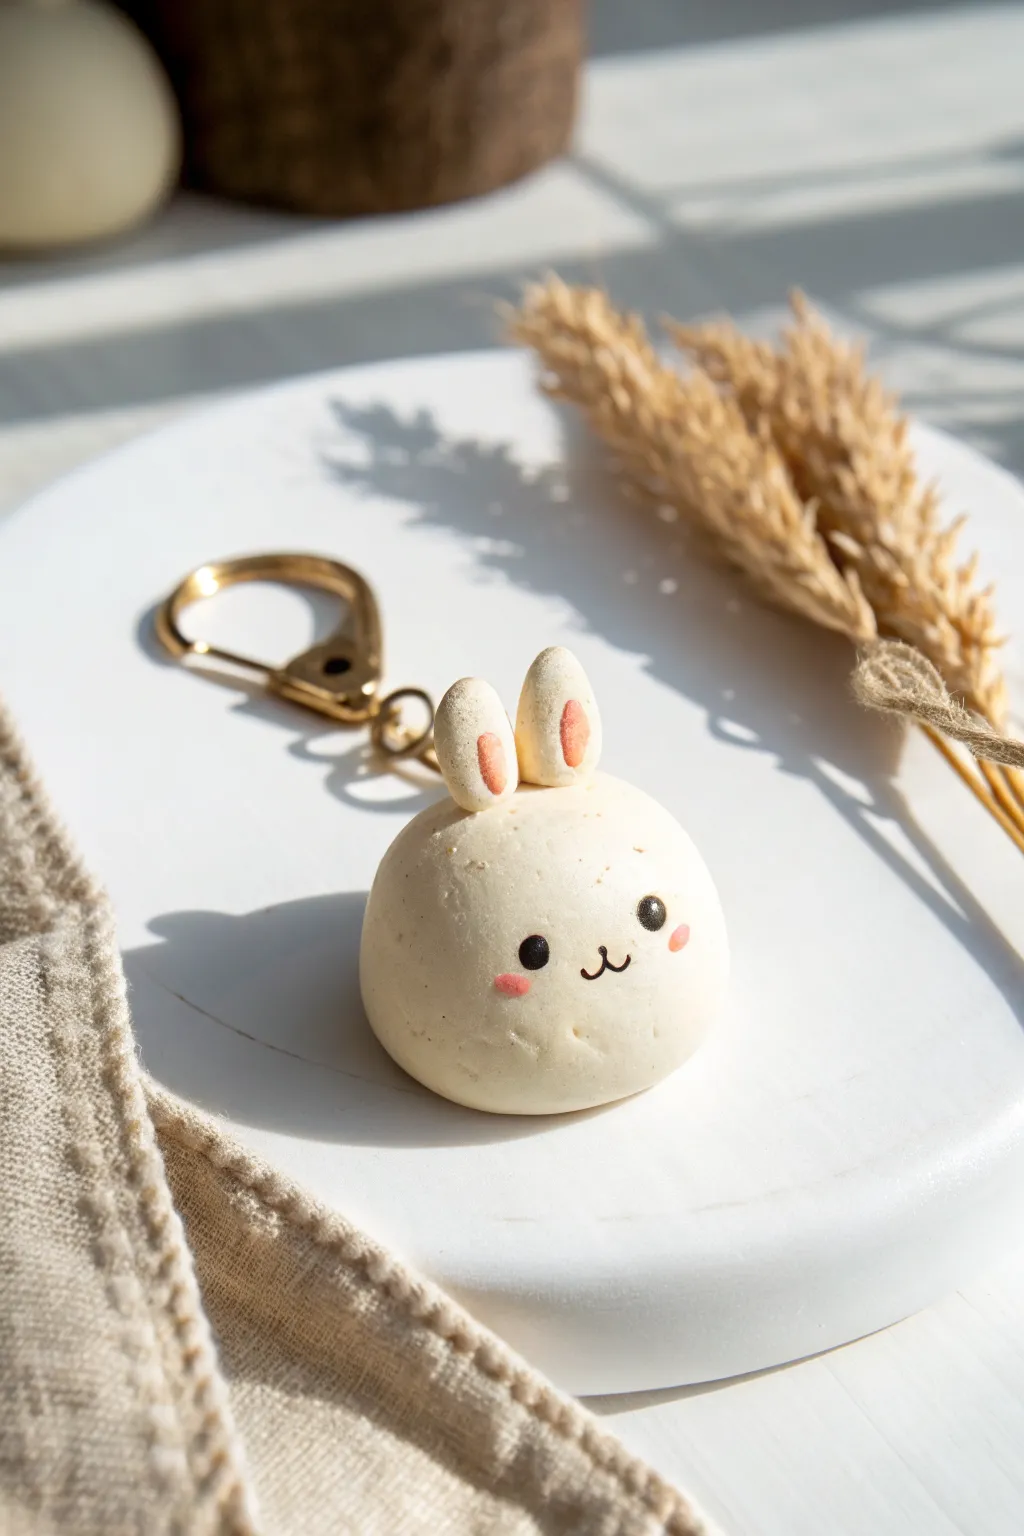
This adorable, chubby bunny keychain is the perfect beginner sculpting project because it relies on simple, round shapes. Its minimalist face and soft, matte finish give it a charming, modern look that’s sweet without being overly cartoonish.
How-To Guide
Materials
- White oven-bake polymer clay (e.g., Sculpey or Fimo)
- Soft pastel chalks (pink)
- Black acrylic paint
- Small paintbrush (for pastels)
- Very fine detail paintbrush or dotting tool
- Gold screw eye pin
- Gold keychain hardware with jump ring
- Pliers
- Baking sheet and parchment paper
- Gloss glaze (optional for eyes)
Step 1: Sculpting the Base
-
Condition the Clay:
Begin by taking a chunk of white polymer clay about the size of a walnut. Knead it thoroughly in your hands until it becomes warm, soft, and pliable to prevent cracks later. -
Form the Body:
Roll the conditioned clay into a smooth ball between your palms. Gently press it down onto your work surface to flatten the bottom slightly, creating a stable dome shape. -
Smooth the Surface:
Inspect the dome for any fingerprints or lint. You can gently rub the surface with a tiny bit of baby oil or cornstarch on your finger to make it perfectly smooth. -
Make the Ears:
Pinch off two very small pieces of white clay, roughly the size of apple seeds. Roll them into tiny balls first, then elongate them into teardrop shapes. -
Attach the Ears:
Place the two teardrops on top of the dome, narrow end pointing up. Press the wider bottom of the teardrops gently into the head to blend the seam so they don’t fall off. -
Add the Hook:
Take your gold screw eye pin. Carefully screw it into the center top of the head, right between the ears. I prefer to twist it in until only the loop is visible to ensure it holds tight.
Step 2: Adding Details & Baking
-
prepare the Blush:
Scrape a small amount of pink pastel chalk onto a piece of paper to create a fine powder. -
Apply Ear Color:
Dip a small dry brush into the pink powder. Gently dab this onto the center of the bunny’s ears to create a soft, gradient pink inner ear. -
Add Cheeks:
Using the same brush and powder, lightly dust two small circular areas on the cheeks. Start light; you can always add more pigment, but it’s hard to take away. -
Bake:
Place your bunny on a parchment-lined baking sheet. Bake according to your clay manufacturer’s instructions (usually around 275°F or 130°C for 15-20 minutes). -
Cool Down:
Let the piece cool completely before handling. The clay is fragile when hot and hardens as it cools.
Lint Trouble?
White clay shows every speck of dust. If lint gets stuck in your raw clay, use a cotton swab dipped in rubbing alcohol or acetone to gently wipe it away before baking.
Step 3: Painting & Assembly
-
Paint the Eyes:
Dip a dotting tool or the back of a paintbrush into black acrylic paint. Dot two small, wide-set eyes onto the face. -
Draw the Mouth:
Using your finest detail brush, carefully paint a tiny ‘w’ shape between the eyes for the nose and mouth. Keep the lines very thin for a delicate look. -
Seal (Optional):
If you want the eyes to shine, add a tiny drop of gloss glaze over the black paint once it is fully dry. Keep the rest of the body matte. -
Attach Hardware:
Open the jump ring on your keychain using two pairs of pliers (twist apart, don’t pull). Loop it through the eye pin on the bunny’s head. -
Secure the Ring:
Twist the jump ring closed again with your pliers until the ends meet perfectly flush.
Make it a Bear
Swap the long ears for two tiny half-circles on the sides of the head to turn this bunny into a polar bear. Painting the nose a soft grey adds extra cuteness.
Clip your new little friend onto your backpack or keys and enjoy your handmade accessory
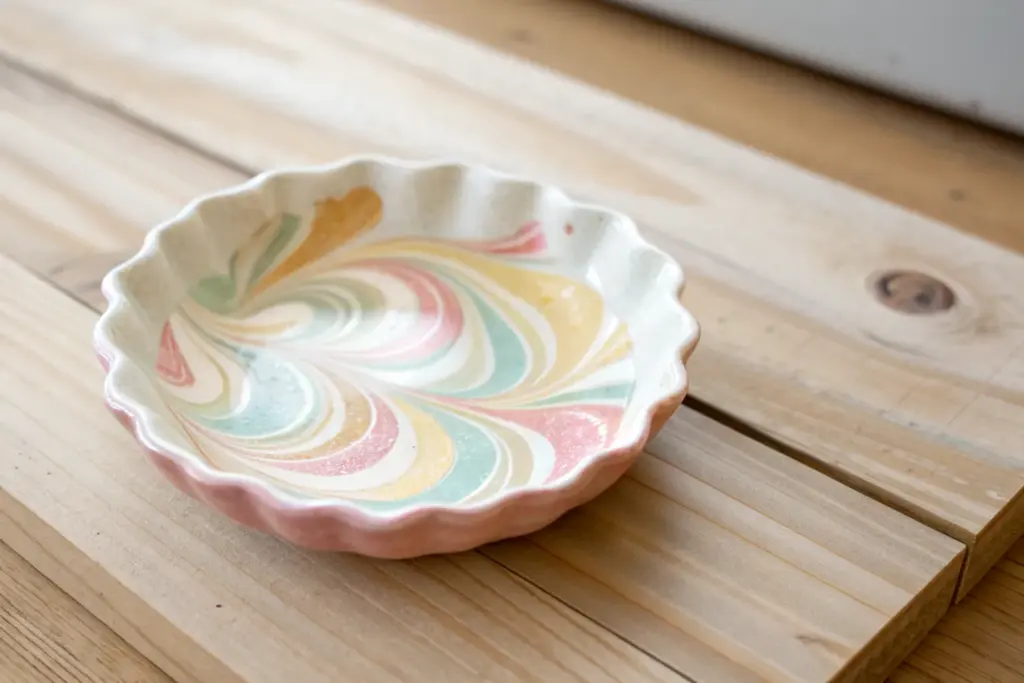
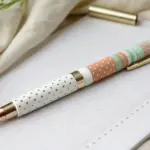
Pinch-Pot Ring Dishes That Actually Work
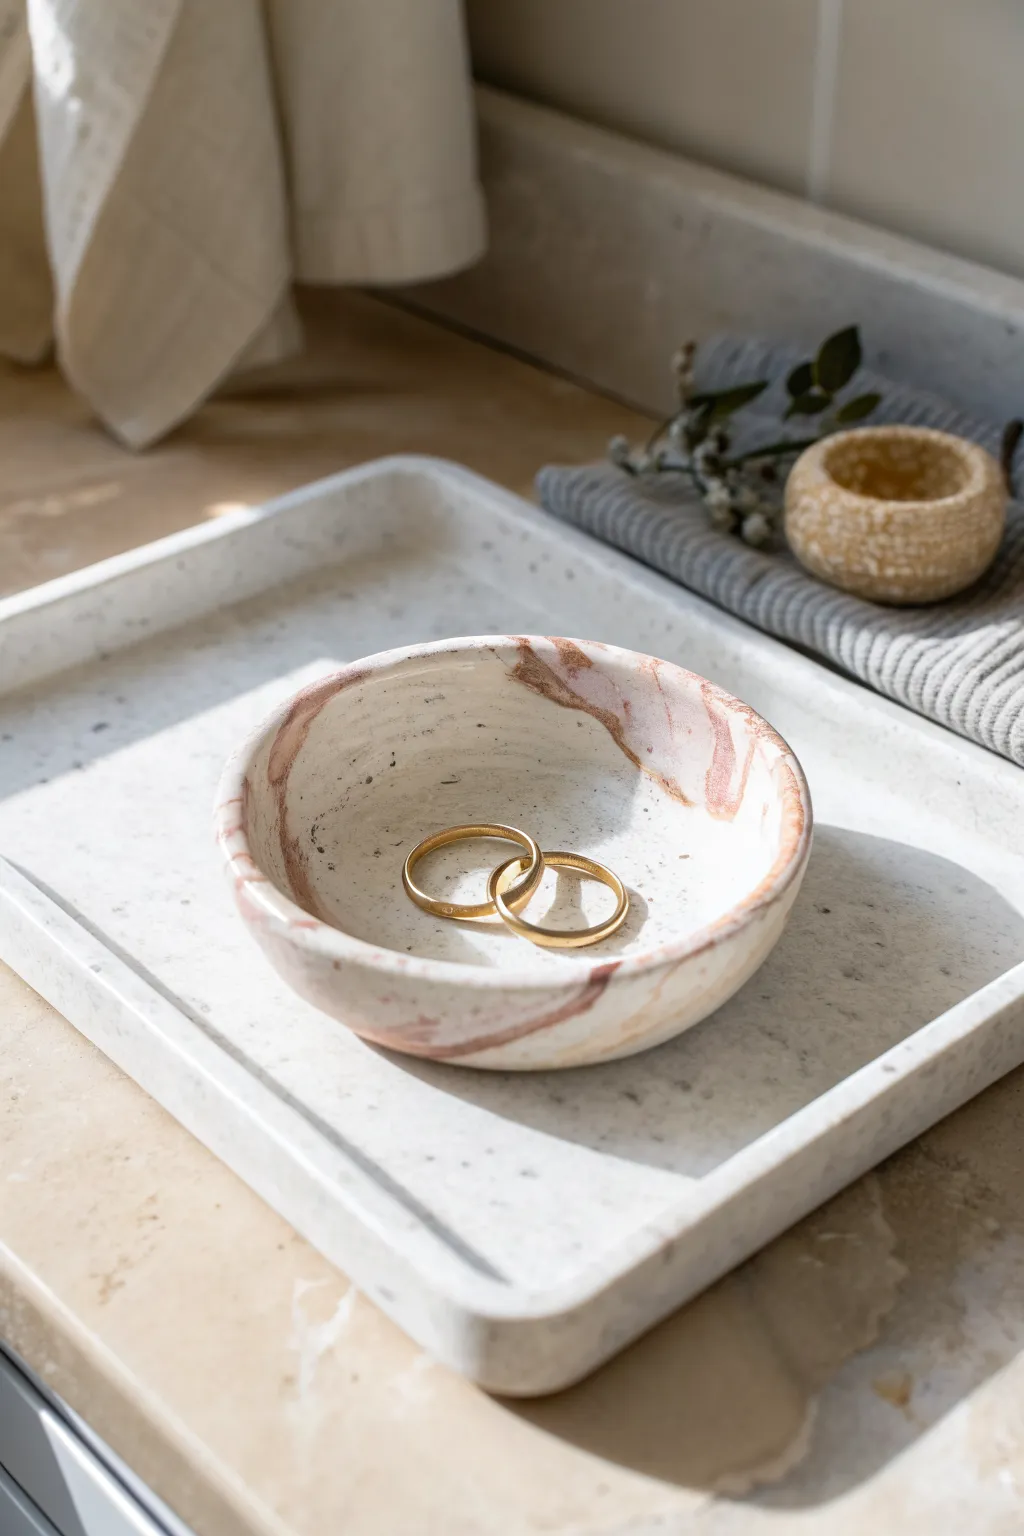
This elegant ring dish mimics richness of natural stone with soft, swirling veins of rose gold running through a speckled cream base. Using the simple pinch-pot technique, you can create a sophisticated catch-all that looks far more expensive than it is to make.
Detailed Instructions
Materials
- Polymer clay (granite or speckled white effect)
- Polymer clay (terracotta or muted rose pink)
- Acrylic rolling pin
- Circle cutter or a small bowl to trace
- Craft knife
- Fine-grit sandpaper (400 and 1000 grit)
- Matte glaze or sealant (optional)
- Ceramic tile or glass work surface
- Oven
Step 1: Preparing the Clay
-
Condition the base:
Start by taking a generous amount of the speckled white or granite-effect polymer clay. Knead it in your hands until it is warm, soft, and pliable. -
Prepare the accent color:
Take a much smaller piece of the terracotta or rose-colored clay—about 1/10th the volume of your base clay. Condition this piece until soft. -
Create snakes:
Roll both the base color and the accent color into long, thin snakes. The base snake should be significantly thicker than the accent snake. -
Combine for marbling:
Twist the two clay snakes together like a candy cane. Fold this twisted log in half and twist it again. -
Create the marble pattern:
Ball up the clay and roll it out into a snake again. Repeat the twisting and folding process 2-3 times, but be careful not to over-mix, or the colors will blend into a solid muddy pink instead of distinct veins.
Step 2: Shaping the Dish
-
Form the initial ball:
Once satisfied with the marble pattern, roll the clay into a smooth, tight ball in the palms of your hands, eliminating any visible seams. -
Begin the pinch:
Hold the ball in your non-dominant hand. Using your dominant thumb, press gently into the center of the ball, but don’t go all the way through to the bottom. -
Widen the bowl:
With your thumb still inside, use your fingers on the outside to gently pinch and rotate the clay. Work in a spiral from the bottom up, thinning the walls evenly. -
Flatten the base:
To ensure your ring dish sits steadily, gently press the bottom of your pinched form onto your flat work surface. I find giving it a little tap helps set the bottom flat. -
Smooth the interior:
Use the pad of your thumb to smooth out any fingerprints inside the bowl. If the clay is getting sticky, a tiny dab of cornstarch on your finger helps glide over the surface. -
Refine the rim:
Check the thickness of the rim. If it’s uneven, gently tap the rim upside down on your table to level it, or use a craft knife to trim away any high spots for a cleaner look.
Stone Texture Trick
Mix actual black pepper or dried tea leaves into plain white clay before marbling. It creates realistic speckles that look exactly like granite without buying special clay.
Step 3: Finishing Touches
-
Final smooth:
Before baking, give the piece a final inspection. Running a baby wipe or a finger dipped in baby oil over the surface can remove stubborn fingerprints and smooth the texture. -
Bake the clay:
Place your dish on a ceramic tile or baking sheet lined with parchment paper. Bake according to your specific clay brand’s package instructions (usually 275°F/135°C for 15-30 minutes). -
Cool down:
Allow the piece to cool completely in the oven with the door cracked, or remove it and let it sit undisturbed until it reaches room temperature. -
Sand the edges:
Once fully cool, wet your fine-grit sandpaper and gently sand the rim and any rough spots. Wet sanding prevents clay dust from becoming airborne and creates a polished feel. -
Seal (Optional):
For a finish closer to the matte stone look in the photo, leave the clay raw or apply a very thin layer of matte varnish to protect it from oils.
Gilded Edge Upgrade
After baking, paint the very top rim of the bowl with liquid gold leaf. The metallic line adds a luxurious contrast to the matte, stone-like texture of the clay.
Now you have a chic, boutique-worthy spot to keep your favorite rings safe


What Really Happens Inside the Kiln
Learn how time and temperature work together inside the kiln to transform clay into durable ceramic.
Little Photo Holders With a Clay Base
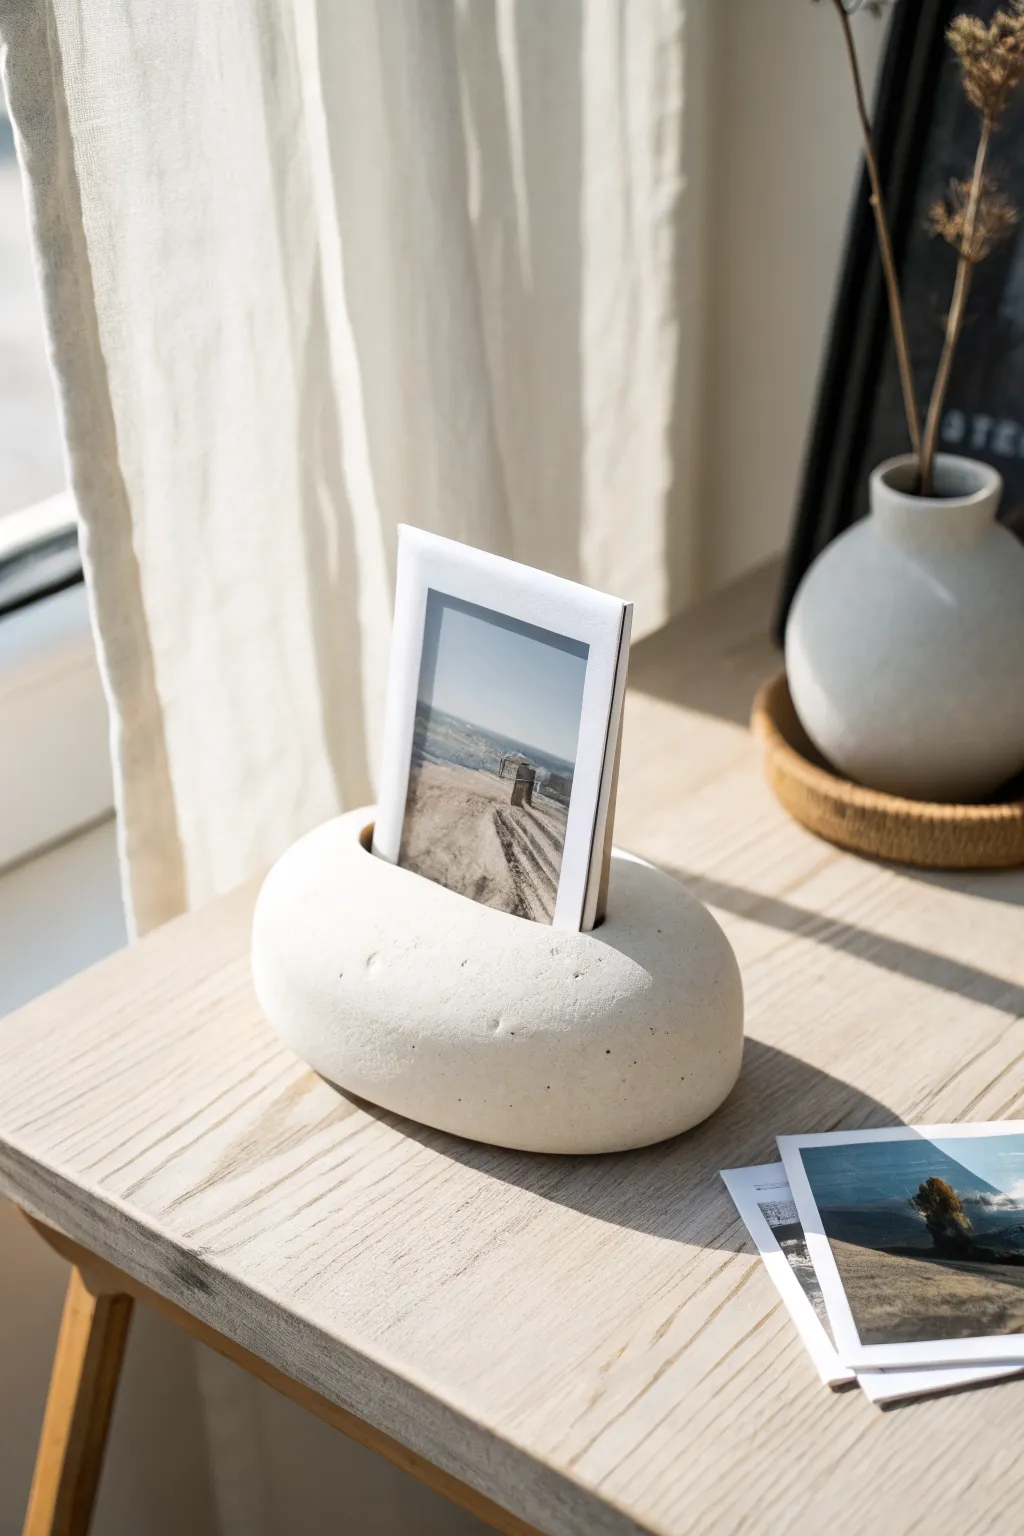
Embrace minimalist design with this sleek, organic photo holder that mimics the appearance of a smooth river stone. Its weight and simple form make it a perfect, unobtrusive way to display your favorite polaroids or postcards on a desk.
How-To Guide
Materials
- White polymer clay (oven-bake)
- Acrylic rolling pin
- Sandpaper (various grits: 200, 400, 800)
- Craft knife or thin metal blade
- Hobby oven or kitchen oven
- Baking sheet
- Parchment paper
- Old toothbrush or stiff bristle brush (optional for texture)
- White acrylic paint (optional)
- Old photo or cardstock (for sizing)
Step 1: Shaping the Clay
-
Condition the clay:
Start by kneading your white polymer clay in your hands for several minutes. You want it warm, soft, and completely pliable to prevent cracks later on. -
Form a ball:
Roll the conditioned clay into a smooth, tight sphere between your palms to eliminate any major air bubbles. -
Create the pebble shape:
Place the ball on your work surface and gently press down with the palm of your hand to flatten it slightly. You are aiming for a thick, rounded oval shape, not a flat pancake. -
Refine the edges:
Use your fingers to smooth and round off the edges. The goal is to make it look like a stone that has been tumbled in water, so avoid sharp corners or perfect symmetry. -
Add subtle texture:
For a realistic stone look, I like to gently tap the surface with an old toothbrush or lightly press distinct spots with a small rounded tool to create tiny pits and imperfections.
Clean Clay Code
White clay picks up dust instantly. Scrub your hands, work surface, and tools thoroughly before starting, and keep baby wipes nearby to clean your hands as you work.
Step 2: Creating the Slot
-
Measure the slot:
Take a piece of cardstock or an old photo roughly the thickness of what you intend to display. Press it gently into the top center to mark the length of your cut. -
Cut the groove:
Using a craft knife or a thin metal blade, slice directly downwards into the clay. Rock the blade gently back and forth to widen the cut slightly, ensuring it is deep enough to hold a photo upright—usually about half an inch. -
Test the fit:
Insert your test cardstock. It should slide in easily but stand firm. If the clay grabs it too tightly, widen the cut just a fraction more by wiggling the blade. -
Smooth the opening:
The cutting process might have raised jagged edges. Gently run your finger or a smoothing tool along the rim of the cut to soften it back down.
Terrazzo Twist
Before rolling your ball, chop up tiny bits of black, grey, or tan clay and mix them into the white base. Sanding later will reveal a beautiful granite-like terrazzo effect.
Step 3: Baking and Finishing
-
Prepare for baking:
Preheat your oven according to the manufacturer’s instructions on your clay package (usually around 275°F/135°C). -
Protect the shape:
Place the clay pebble on a baking sheet lined with parchment paper. To prevent a flat spot on the bottom, you can nestle it into a small bed of cornstarch or baking soda. -
Bake:
Bake the clay for about 30 minutes per ¼ inch of thickness. Since this is a thick piece, it may need closer to 45 minutes to cure completely. -
Cool down:
Turn off the oven and let the clay cool completely inside the oven with the door slightly ajar. Sudden cooling can sometimes cause cracking. -
Initial Sanding:
Once fully cool, take your 200-grit sandpaper and gently sand the entire surface to remove fingerprints or lint. You can do this under running water to keep dust down. -
Create a stonelike finish:
Move to the higher grit sandpapers (400, then 800) to buff the surface until it feels incredibly smooth and matte, just like a river rock. -
Clean and display:
Wipe away any sanding dust with a damp cloth. If you want a brighter white, you can apply a thin coat of matte white acrylic paint, but the raw sanded clay usually looks best.
Now you have a serene, modern display piece ready for your favorite memories
Terrazzo-Style Coasters With Confetti Bits
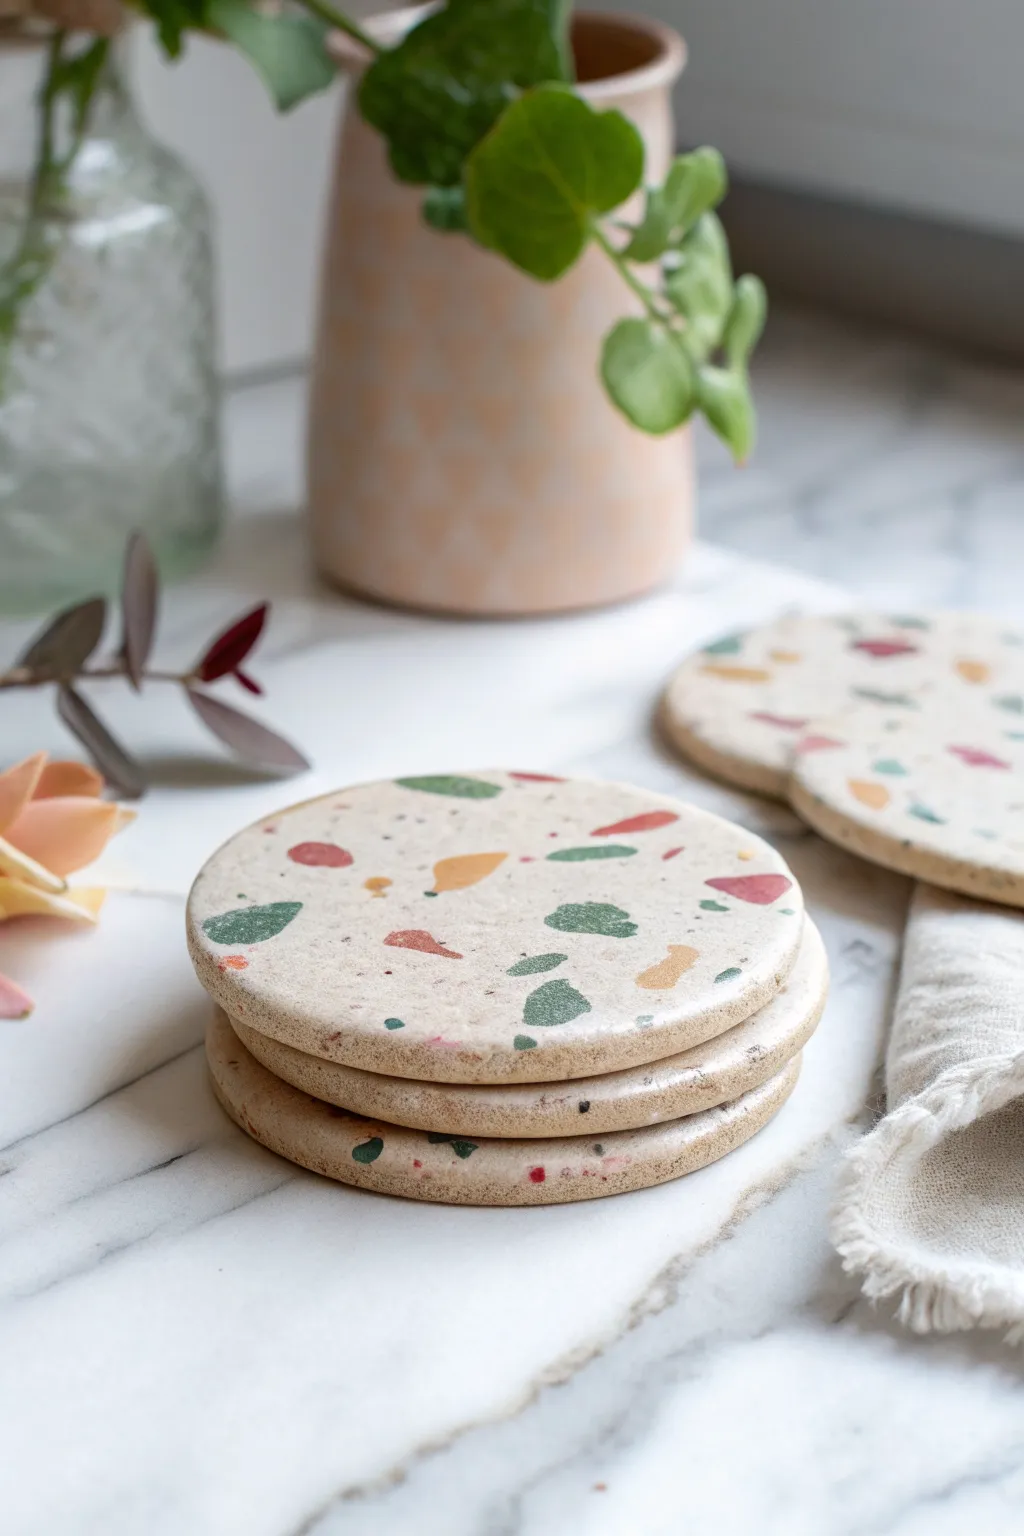
Recreate the trendy, upscale look of terrazzo stone right at home using simple oven-bake clay. These chic coasters feature a neutral base speckled with vibrant confetti chips, adding a playful yet sophisticated pop of color to your coffee table.
Step-by-Step
Materials
- Oven-bake polymer clay (Beige/Ecru for base)
- Oven-bake polymer clay (Deep Green, Terracotta, Mustard Yellow, Grey)
- Acrylic rolling pin
- Circle cookie cutter (approx. 3.5 – 4 inches)
- Parchment paper or baking mat
- Craft knife or clay blade
- Baking sheet
- Fine grit sandpaper (400-600 grit)
- Gloss or matte varnish (optional for sealing)
Step 1: Preparing the Confetti Chips
-
Condition the colors:
Start by conditioning your colored clays—green, terracotta, mustard yellow, and grey—by kneading them in your hands until they are soft and pliable. -
Roll thin sheets:
Roll each color out separately using your acrylic rolling pin. You want these sheets to be quite thin, roughly 1-2mm thick. -
Create the chips:
Using a craft knife or clay blade, chop these thin colored sheets into small, irregular fragments. Aim for a mix of sizes; some tiny specks and some larger, chunky geometric shapes will create a natural stone look. -
Separate and set aside:
Keep your piles of colored chips separate for now so you can control the distribution later.
Sticky Situation?
If your clay is sticking to the roller, lightly dust the surface with a tiny bit of cornstarch or baby powder before rolling. It brushes right off after baking.
Step 2: Forming the Base
-
Condition the base clay:
Take a large block of your beige or ecru clay. Condition it thoroughly until it’s warm and easy to work with. -
Roll the main slab:
Roll the base clay out into a thick slab, approximately 1/4 inch (6mm) thick. This thickness ensures your coaster feels substantial and durable. -
Scatter the confetti:
Sprinkle your prepared colored clay chips randomly over the surface of the beige slab. I like to drop them from a slight height to help them land naturally. -
Press gently:
Use your fingers to gently press the chips down so they adhere slightly to the base clay. -
Embed the pattern:
Cover the clay with a piece of parchment paper to prevent sticking, then roll over the slab again with your rolling pin. Roll until the surface is completely smooth and the colored chips are fully flush with the beige background.
Pro Tip: Stone Texture
Add a tiny pinch of ground black pepper or dried used coffee grounds into your beige base clay before rolling. This creates realistic grit and texture instantly.
Step 3: Cutting and Baking
-
Cut the shapes:
Place your circle cutter onto the patterned slab. Press down firmly to cut out your coaster shapes. If the clay sticks to the table, slide a thin blade underneath to release it. -
Smooth the edges:
Once cut, gently run your finger around the circumference of each circle to smooth out any sharp ridges or rough spots left by the cutter. -
Prepare for baking:
Transfer the raw coasters onto a baking sheet lined with parchment paper. -
Bake:
Bake the coasters according to the package instructions for your specific brand of polymer clay. Typically, this is around 275°F (135°C) for 15-30 minutes per 1/4 inch of thickness. -
Cool down:
Remove the tray from the oven and allow the coasters to cool completely on a flat surface. Do not try to move them while hot, as they are still fragile.
Step 4: Finishing Touches
-
Sand the surface:
For that professional stone-like finish, get a bowl of water and some wet/dry sandpaper. Sand the surface and edges under water to remove fingerprints and reveal the crisp edges of your terrazzo chips. -
Wash and dry:
Rinse off any milky residue from sanding and pat the coasters dry with a lint-free cloth. -
Seal (Optional):
If you want extra protection against spills, apply a thin layer of matte or gloss varnish suitable for polymer clay. Let it dry fully before use.
Stack your new creations on the table and enjoy the modern splash of color they bring to your living space

TRACK YOUR CERAMIC JOURNEY
Capture glaze tests, firing details, and creative progress—all in one simple printable. Make your projects easier to repeat and improve.
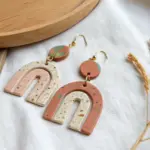
Plant Marker Stakes for Herb Pots
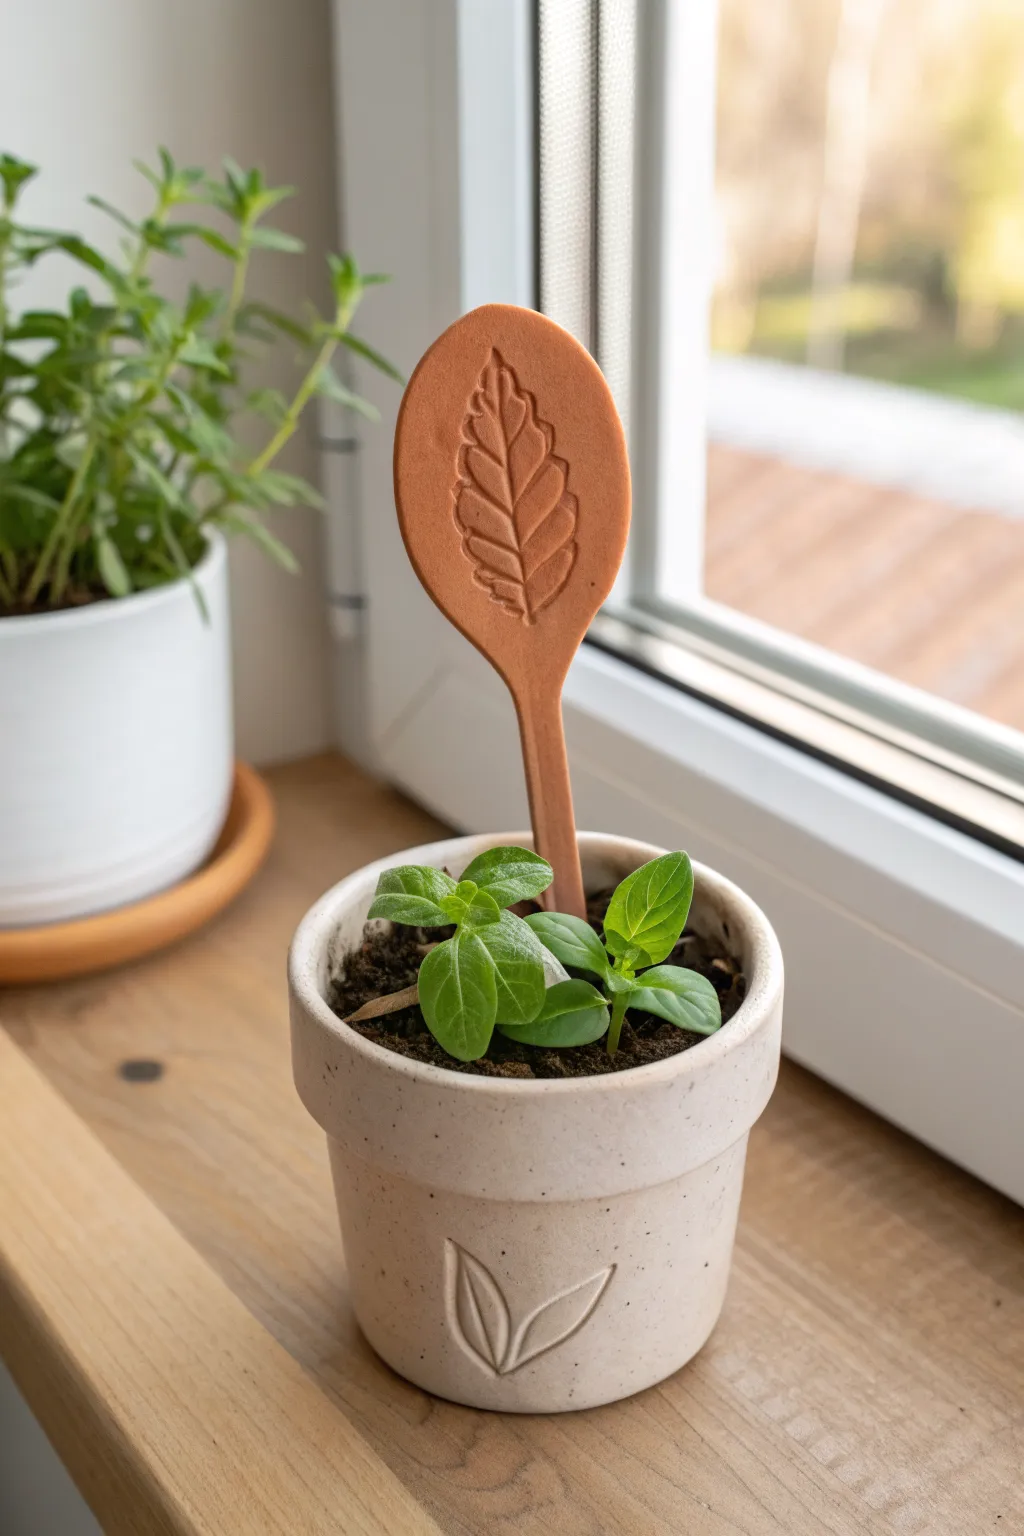
These charming, spoon-shaped plant stakes bring a touch of rustic warmth to your indoor garden. Made from terra cotta-colored polymer clay and featuring a delicate embossed leaf design, they are a functional and stylish way to label your herbs.
Step-by-Step Guide
Materials
- Terra cotta colored polymer clay (approx. 2oz per marker)
- Acrylic roller or rolling pin
- Parchment paper or silicone work mat
- Spoon-shaped template (hand-drawn on cardstock) or oval cutter
- Craft knife or clay blade
- Small real leaf with prominent veins (e.g., mint, basil, or sage) OR a leaf texture stamp
- Sandpaper (fine grit)
- Baking sheet
- Oven (assigned to clay baking)
Step 1: Shaping the Spoon Base
-
Condition the Clay:
Begin by warming the terra cotta clay in your hands. Knead and fold it repeatedly until it becomes soft, pliable, and free of cracks. -
Roll out a Slab:
Place the clay on parchment paper or your work mat. Use the acrylic roller to flatten it into an even slab, roughly 1/4 inch thick. Don’t go too thin, as the handle needs structural integrity. -
Cut the Shape:
Lay your oval cutter or spoon template onto the slab. If using a template, trace around it carefully with your craft knife to cut out the spoon shape, consisting of an oval head and a long, straight handle. -
Refine the Edges:
Gently run your finger along the cut edges of the clay to smooth out any sharpness or burrs left freely by the knife. You want a soft, rounded finish similar to the reference photo. -
Create the Spoon Bowl:
Pick up the clay shape and gently press your thumb into the center of the oval ‘head’ to create a slight indentation. It doesn’t need to be deep like a soup spoon, just slightly concave to give it dimension.
Clean Impressions
Dust the leaf very lightly with cornstarch or baby powder before pressing it into the clay. This acts as a release agent and prevents the leaf from sticking or tearing the clay upon removal.
Step 2: Embossing the Design
-
Select Your Texture:
Find a leaf that fits comfortably within the oval head of your spoon. A leaf with thick, raised veins on the back works best for a clear impression. -
Position the Leaf:
Place the leaf, vein-side down, into the center of the spoon’s indentation. Ensure it is centered vertically. -
Roll the Impression:
Gently roll over the leaf with the acrylic roller. Apply firm, even pressure to push the veins into the clay without distorting the overall spoon shape. -
Reveal the Design:
Carefully peel the leaf away from the clay. Use the tip of your craft knife to lift the stem if it’s stuck. You should be left with a crisp, negative relief of the leaf. -
Clean Up Details:
If the impression is faint in areas, you can manually deepen the central vein or side veins using a needle tool or a dull toothpick.
Natural Stain
After baking, rub a small amount of dark brown acrylic paint into the leaf crevices, then wipe the surface clean. This ‘antiquing’ makes the veins pop visually.
Step 3: Baking and Finishing
-
Prepare for Baking:
Transfer your clay spoon to a parchment-lined baking sheet. Ensure the handle is straight. -
Prop if Needed:
To maintain the slightly curved spoon shape during baking, you can rest the bowl of the spoon on a small ball of aluminum foil or a wad of polyester batting. -
Bake:
Bake the clay according to the manufacturer’s instructions on the package. Typically, this is around 275°F (135°C) for 15-30 minutes depending on thickness. -
Cool Down:
Allow the marker to cool completely inside the oven with the door slightly ajar. This gradual cooling helps prevent cracking. -
Sand the Edges:
Once fully cool and hardened, take your fine-grit sandpaper and lightly buff the edges of the handle and spoon bowl to ensure they are perfectly smooth. -
Test the Stake:
Insert the marker into dry soil first to ensure it stands up straight. I find it helpful to wiggle it slightly to create a path before pushing it all the way in.
Now you have a set of custom, durable markers ready to watch over your seedlings
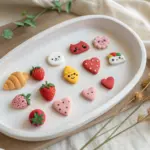
Faux Enamel Pin-Style Badges
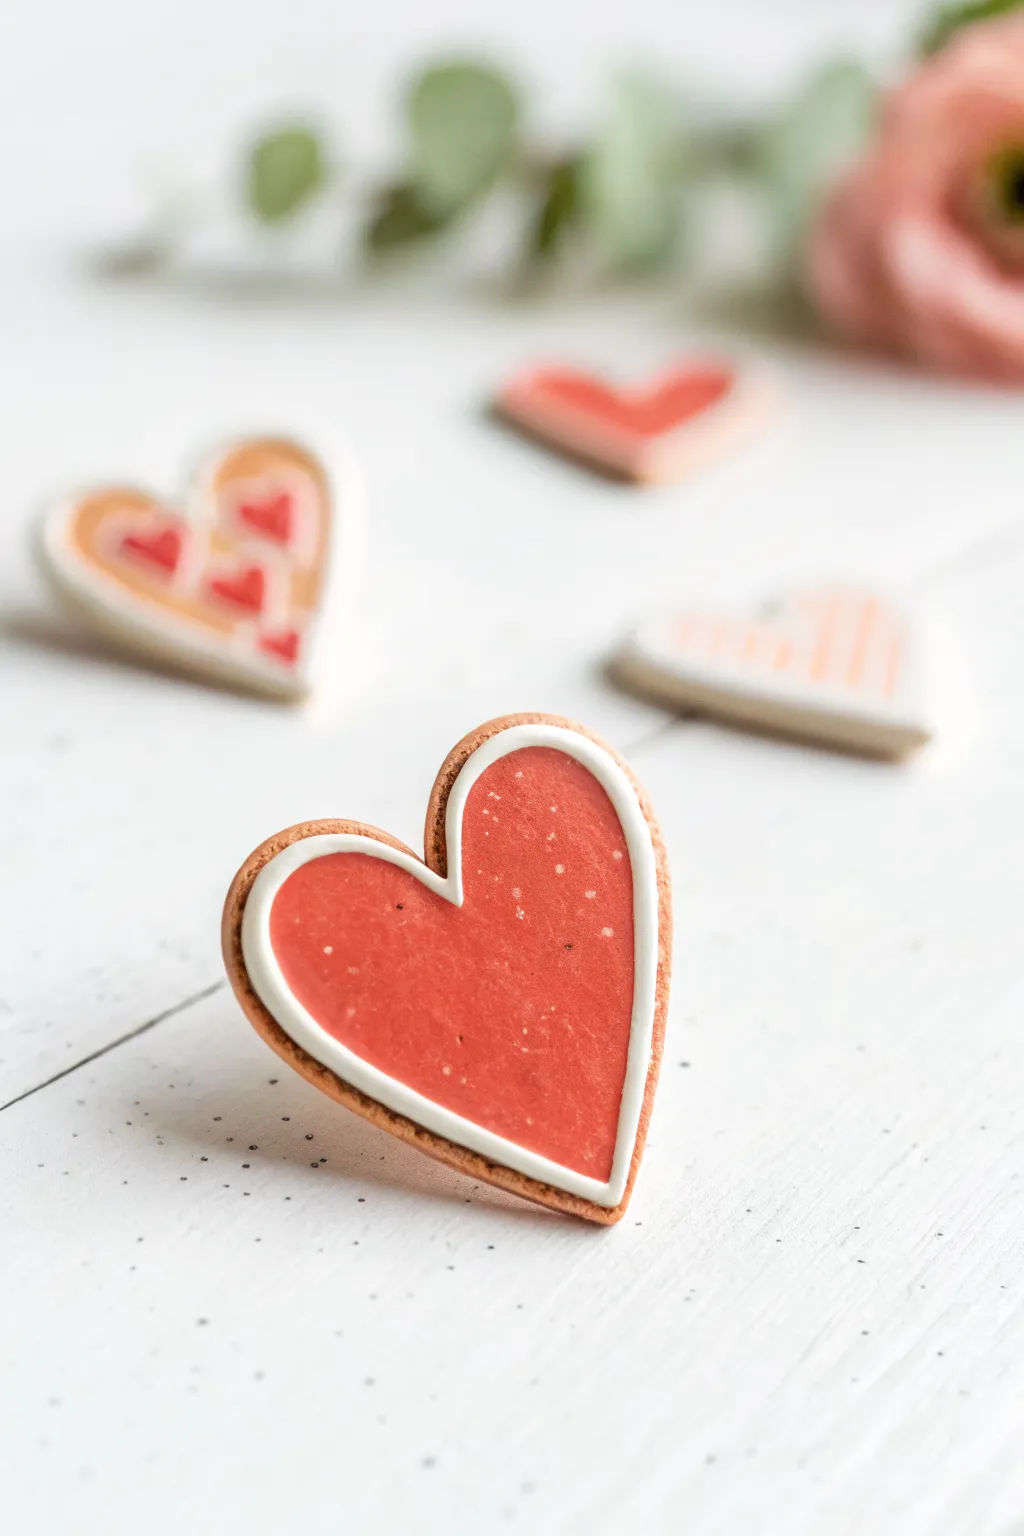
Create adorable heart-shaped badges that mimic the look of high-end enamel pins using simple oven-bake clay. These faux-cookie designs feature a realistic baked texture and a glossy, smooth finish that looks professional but is surprisingly easy to achieve.
Detailed Instructions
Materials
- Light brown or terracotta polymer clay (for the cookie base)
- White liquid polymer clay (or white clay softened with clay softener)
- Red liquid polymer clay (or red clay mixed with liquid gel)
- Heart-shaped cookie cutters (small sizes)
- Toothpicks or needle tool
- Rolling pin or pasta machine
- Parchment paper
- Baking sheet
- High-gloss glaze or UV resin
- Pin backs and superglue
Step 1: Creating the Base
-
Condition the Clay:
Begin by warming the light brown polymer clay in your hands until it becomes soft and malleable. This prevents cracking later on. -
Roll it Out:
Roll the clay into a smooth sheet approximately 3mm to 4mm thick. You want it substantial enough to hold the pin back but not too heavy. -
Cut the Shapes:
Use your heart-shaped cutter to punch out several hearts. If the edges are rough, gently smooth them with your fingertip. -
Add Texture:
To mimic the ‘cookie’ texture seen in the photo, gently tap the sides of the clay heart with a clean toothbrush or a ball of aluminum foil. This gives it a realistic baked look. -
Initial Bake:
Place your heart bases on parchment paper and bake according to your clay package instructions (usually 20 minutes at 275°F/130°C). Let them cool completely.
Clean Lines Secret
If your hand is shaky with the liquid clay bottle, rest your wrist on a steady book or block while piping the white outline for cleaner curves.
Step 2: Piping and Filling
-
Prep the Outline Material:
You need a stark white outline. Use white liquid polymer clay in a fine-tip squeeze bottle. If you don’t have liquid clay, you can extrude very thin snakes of soft white clay. -
Outline the Heart:
Carefully pipe or lay the white clay around the perimeter of the baked heart, leaving a small brown border visible on the outside edge. Create a solid ‘wall’ because this will hold the liquid filling. -
Check the Barrier:
Inspect your white outline closely. Ensure there are no gaps where the liquid filling could leak out. Seal any breaks with a needle tool. -
Prepare the Red Fill:
Squeeze a small amount of red liquid polymer clay onto a palette. If you want the speckled look from the photo, you can mix in a tiny pinch of white chalk pastel dust, but keep it subtle. -
Flood the Center:
Drip the red liquid clay into the center of the heart. Use a toothpick to guide the liquid all the way to the white edges. -
Pop Bubbles:
Look for tiny air bubbles in the red liquid. Pop them immediately with a needle tool or by quickly passing a lighter flame over the surface. -
Second Bake:
Bake the pieces again for roughly 15-20 minutes to set the liquid clay. Keep the temperature strictly according to the liquid clay instructions to avoid discoloration.
Glossy or Matte?
For a true ‘royal icing on a cookie’ look instead of enamel, skip the final resin coat. The baked liquid clay has a natural matte finish like dried icing.
Step 3: Finishing Touches
-
Cool Down:
Allow the pieces to cool fully. The liquid clay finishes matte, but we want that shiny enamel look. -
Apply Gloss:
Coat the red center (and the white rim if desired) with a layer of UV resin or a high-gloss water-based varnish. This creates the ‘glassy’ enamel effect. -
Clean Edges:
If any glaze dripped onto the brown ‘cookie’ edge, wipe it away quickly before curing to maintain the matte texture on the sides. -
Cure the Glaze:
Cure the resin under a UV light or let your varnish dry completely according to the bottle directions. -
Attach Hardware:
Flip the heart over and use a drop of superglue or E6000 to attach a metal pin back to the center.
Now you have a sweet set of faux-cookie pins ready to wear or gift to a friend