Anytime I’ve got a stack of terra cotta pots on my table, I can’t help but see a whole lineup of quick, cute makeovers. These easy clay pot ideas are beginner-friendly projects that turn basic pots into decor you’ll actually want to show off.
Classic Painted Terra Cotta Pot
Embrace the beauty of imperfection by recreating the look of a well-loved, weathered garden pot. This technique mimics natural mineral buildup and aging on a standard terra cotta planter for an instantly established feel.
Step-by-Step Guide
Materials
- Terra cotta pot with saucer
- White acrylic craft paint or lime wax
- Paper towels or a rag
- Small bowl of water
- Fine grit sandpaper (optional)
- Dry lint-free cloth
Step 1: Preparing the Pot
-
Clean the Surface:
Before easier application, wipe down your terra cotta pot with a damp cloth to remove any loose dust or retail stickers. -
Soak the Pot:
Briefly submerge the pot in water or run it under a faucet for a few seconds. Terra cotta is extremely porous, and dampening it prevents the paint from drying instantly upon contact.
Too Opaque?
If your white paint looks too solid, scrub the wet pot with a green scouring pad under running water. This removes the top layer, leaving paint only in the pores.
Step 2: Creating the Whitewash
-
Mix Your Wash:
In your small bowl, mix white acrylic paint with water. Aim for a ratio of about 1 part paint to 2 parts water. You want a very thin, milky consistency, not opaque coverage. -
Test Consistency:
Dip a corner of your paper towel into the mixture and dab it on the bottom of the pot to ensure it’s translucent enough for your taste.
Step 3: Applying the Aging Effect
-
Initial Application:
Dip a crumpled paper towel or rag into your watery paint mixture. Instead of painting it on, dab and wipe it randomly across the pot’s surface. -
Focus on Texture:
I like to concentrate a bit more whitewash around the rim and the base, where natural mineral deposits (efflorescence) would typically gather over time. -
Wipe Back:
Immediately use a dry section of your rag to wipe away the excess wet paint. You are effectively staining the clay rather than coating it. -
Layering Up:
If the effect is too subtle, let it dry for a minute and dab on a second layer in random patches. The goal is unevenness. -
Address the Saucer:
Don’t forget the saucer. Apply the same dabbing and wiping technique to the outer edge of the saucer so it matches the pot perfectly.
Mossy Green Level Up
Dab tiny spots of watered-down moss green paint into the crevices or under the rim before the white dries. It mimics real algae growth for an ancient garden look.
Step 4: Weathering and Finishing
-
Create Patina:
For a truly authentic aged look, dip a stiff brush or rough rag into undiluted white paint. Whisk it very lightly over just a few spots to create thicker ‘calcium’ deposits. -
Distressing:
Once the paint is dry to the touch, take fine-grit sandpaper and gently scuff some areas to reveal the raw orange clay underneath. -
Blurring Lines:
If any paint lines look too harsh, dampen your rag slightly and rub vigorously to blend the edges into the clay. -
Final Dry:
Let the pot sit until completely dry. The white color will often lighten and become more chalky-looking as moisture leaves the clay. -
Potting:
Fill the finished pot with suitable cactus soil and plant your succulent, making sure to firm the soil around the base.
Place your newly weathered pot on a sunny windowsill and enjoy that timeless, rustic charm


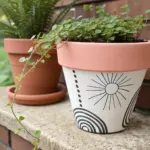
Simple Floral Clay Pot
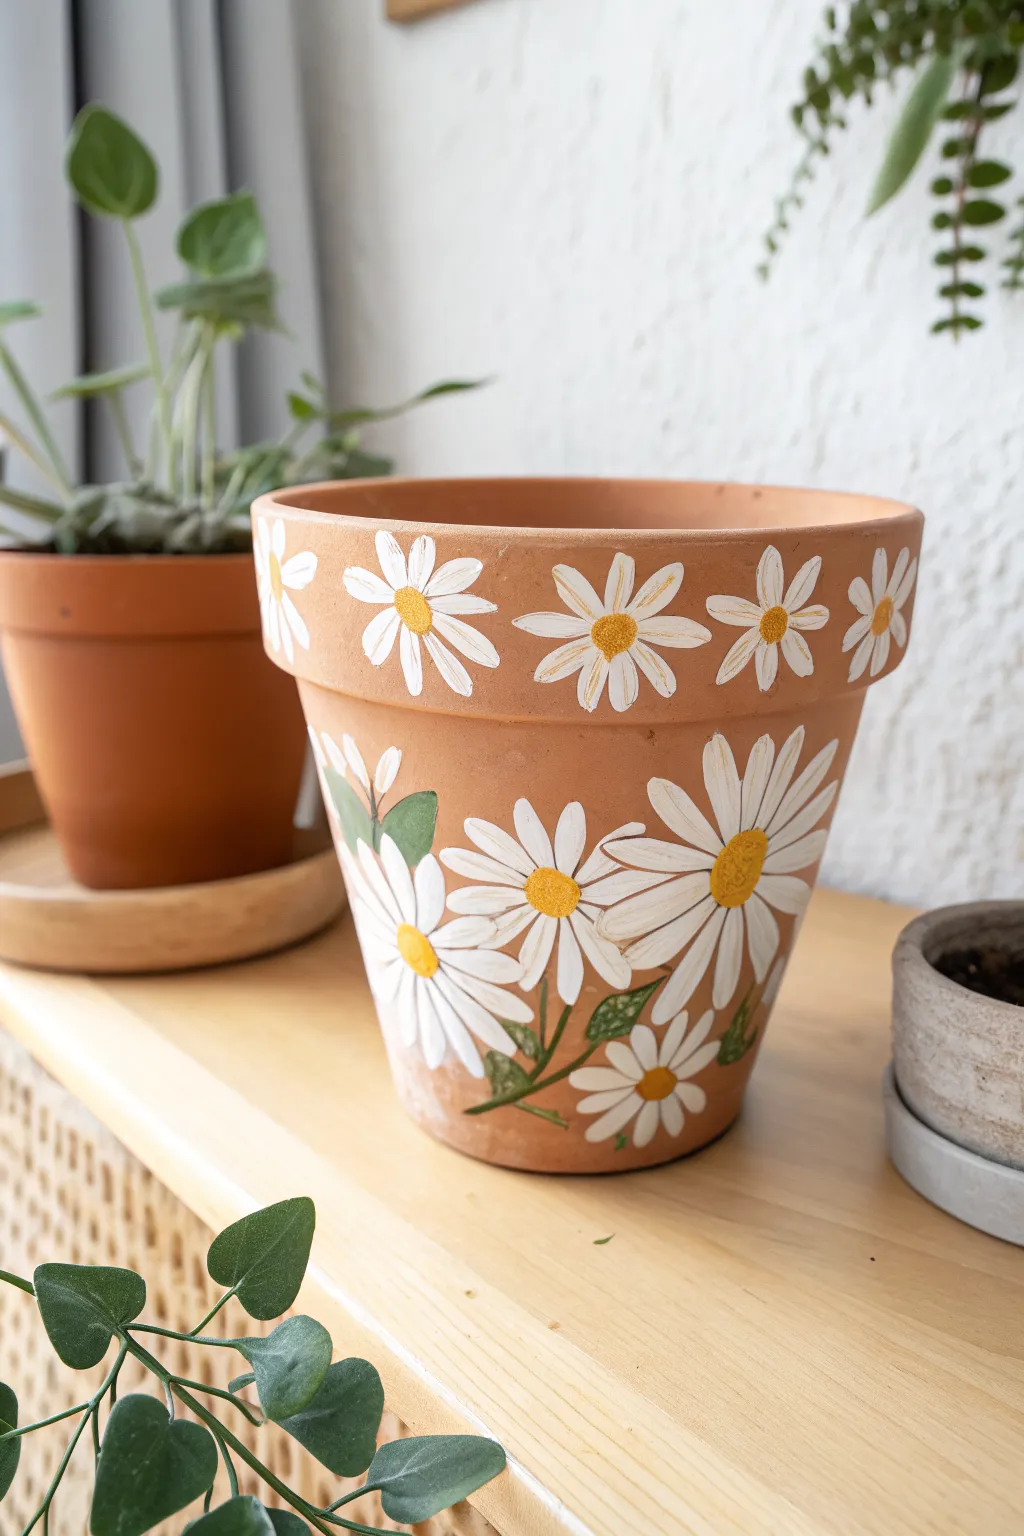
Transform a plain clay pot into a charming home for your plants with this cheerful daisy design. The pattern combines a neat repeating border on the rim with a natural, flowing arrangement of blooms on the base, perfect for brightening up any windowsill.
How-To Guide
Materials
- Terracotta pot (cleaned and dry)
- White acrylic paint
- Yellow/Ochre acrylic paint
- Green acrylic paint
- Small round paintbrush (size 2 or 4)
- Fine liner paintbrush (size 0 or 00)
- Pencil for sketching
- Palette or small plate
- Water cup and paper towels
- Matte clear acrylic sealer (spray or brush-on)
Step 1: Preparation & Rim Design
-
Clean surface:
Ensure your terracotta pot is completely clean and dry. If it’s an old pot, give it a good scrub to remove dirt and salts, then let it dry overnight. -
Sketch the rim:
Lightly sketch a series of circle centers around the middle of the pot’s rim using your pencil. Space them evenly to ensure the flowers will fit without overcrowding. -
Paint rim petals:
Using the small round brush and white acrylic paint, stroke outwards from the center points you marked. Create elongated oval shapes for petals. Aim for about 8-10 petals per flower. -
Refine the shape:
If the paint looks translucent, let the first coat dry for 10 minutes and apply a second coat for opaque, crisp white petals. -
Add centers:
Once the white petals are dry, dip your brush into the yellow-ochre paint. Dab a textured circle in the center of each rim flower using a stippling motion to mimic pollen.
Pro Tip: Petal Power
Load your round brush generously and press down firmly at the start of the stroke (center), then lift up as you pull outward. This naturally creates a tapered petal shape.
Step 2: Painting the Body
-
Plan the layout:
Lightly sketch the position of the larger flower heads on the main body of the pot. Arrange them in a loose cluster rather than a straight line to look more natural. -
Sketch stems:
Draw faint lines connecting the flower heads, curving them gently towards the bottom of the pot to anchor the design. -
Paint main petals:
Jumping back to your white paint and round brush, paint the petals for the large flowers. Make these petals longer and slightly wider than the ones on the rim. -
Layering petals:
To give the flowers depth, I like to paint the back petals first, let them dry slightly, and then paint the foreground petals that overlap them. -
Paint flower centers:
Apply the yellow centers to the main flowers using the same stippling technique. Make these circles slightly larger than the ones on the rim to match the scale. -
Add green stems:
Switch to green paint and use your fine liner brush. Carefully trace over your pencil lines to create thin, delicate stems connecting the flowers. -
Paint leaves:
Using the round brush with green paint, add simple, pointed oval leaves attached to the stems. Vary the sizes, placing some tucked behind the white petals.
Level Up: Bee friendly
Add tiny painted bumblebees buzzing around the daisies. Use a small yellow oval for the body, black stripes, and translucent white wings for a lively garden scene.
Step 3: Detailing & Sealing
-
Add highlights:
Mix a tiny amount of white into your yellow paint. Add a very small highlight dot to the top of each yellow center to make them look dimensional. -
Refine edges:
Check your petal edges. If any look messy or too transparent, use the fine liner brush with white paint to sharpen the outlines. -
Erase guidelines:
Once the paint is absolutely bone dry to the touch, gently erase any visible pencil marks that weren’t covered by paint. -
Apply sealer:
To protect your artwork from water damage when watering plants, apply a coat of matte clear acrylic sealer over the entire painted area. -
Final cure:
Allow the sealer to cure fully according to the bottle instructions (usually 24 hours) before potting any soil or plants.
Now you have a custom floral planter ready to showcase your favorite greenery
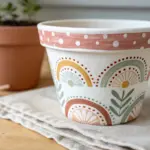


Cute Polka Dot Pot
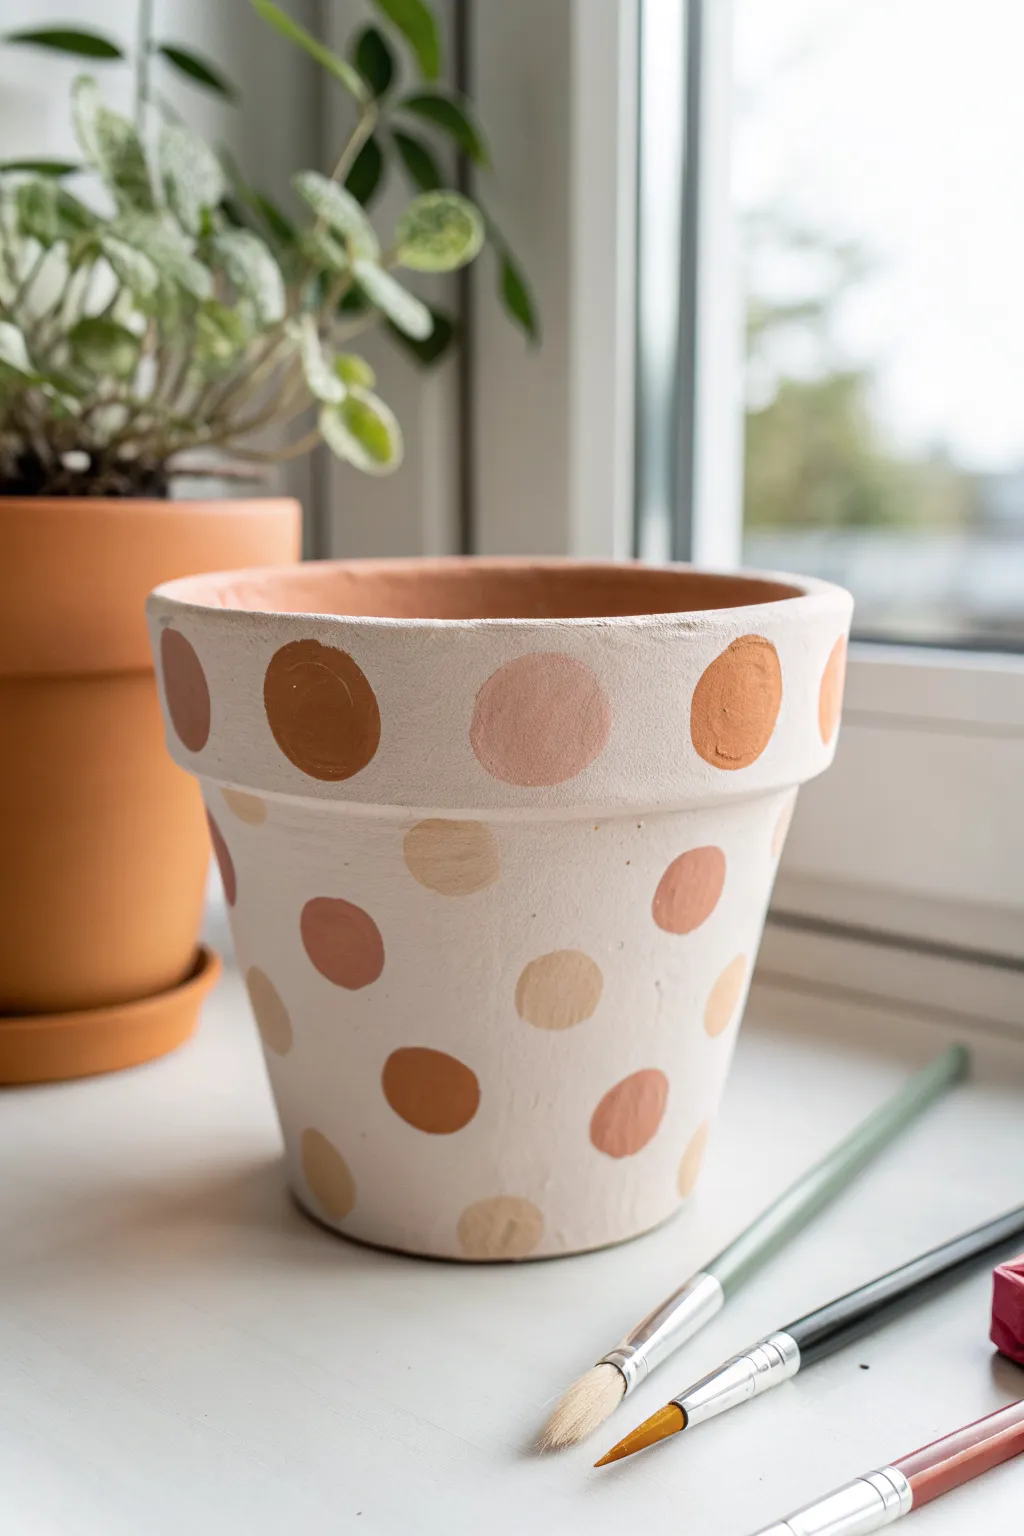
Give a simple terracotta pot a trendy, soft-toned makeover with this easy polka dot design. The mix of muted terracotta, tan, and cream circles creates a playful yet sophisticated look that fits perfectly in modern homes.
Step-by-Step Tutorial
Materials
- Terracotta pot (cleaned and dried)
- White or cream acrylic paint (for the base)
- Acrylic paints in 3-4 earth tones (terracotta, beige, tan, burnt sienna)
- Wide flat paintbrush
- Medium round brush or foam pouncer
- Paper plate or palette
- Cup of water
- Paper towels
- Clear acrylic sealer (spray or brush-on, matte finish)
Step 1: Base Coat Preparation
-
Clean the surface:
Before you start, wipe down your terracotta pot with a damp cloth to remove any dust or debris. Let it dry completely so the paint adheres properly. -
Load the base color:
Pour a generous amount of your white or cream acrylic paint onto your palette. I like to add just a tiny drop of beige to warm up the white so it isn’t too stark. -
Apply the first layer:
Using the wide flat paintbrush, apply a smooth, even coat of the base color over the entire exterior of the pot. Don’t forget to paint the top inch of the inside rim for a polished look. -
Let it dry:
Allow this first coat to dry for about 15-20 minutes. Terracotta is porous and soaks up paint quickly, so the first layer might look streaky. -
Add a second coat:
Apply a second layer of the base color to ensure opaque, solid coverage. Let this dry completely before moving on to the pattern.
Perfect Circle Trick
Struggling with freehand circles? Use a round foam pouncer or the eraser end of a pencil dipped in paint to stamp perfect dots instantly.
Step 2: Painting the Polka Dots
-
Prepare your dot colors:
Squeeze out small amounts of your earth-tone acrylic paints (terracotta, beige, tan, burnt sienna) onto your palette. You want a nice gradient of similar warm shades. -
Start with the darkest shade:
Dip your round brush into the darkest color (like the burnt sienna or dark terracotta). Paint freehand circles randomly around the pot. Aim for a relaxed, organic feel rather than perfect geometry. -
Switch to medium tones:
Rinse your brush thoroughly. Pick up a medium shade, such as a classic terracotta orange. Paint several more circles in empty spaces, keeping them roughly the same size as the first set. -
Layer in the light tones:
Move on to your beige or tan paint. Fill in remaining gaps with these lighter circles. It helps to designate specific ‘zones’ for colors to ensure they are evenly distributed around the pot. -
Paint the rim:
Don’t forget the rim of the pot! Add a few dots around the horizontal band of the rim, alternating your colors to tie the whole look together. -
Refine the edges:
Go back over your circles if needed. Since these are hand-painted, the edges don’t need to be razor-sharp, but you can smooth out any major wobbles with a clean brush. -
Second coat on dots:
Some lighter colors like the beige might need a quick second coat to look solid against the white background. Dab a little extra paint on them once the first layer is touch-dry.
Step 3: Finishing Touches
-
Check for gaps:
Rotate the pot and look for any large empty spaces that look unbalanced. Add a small dot in whatever color is least represented in that area. -
Allow full drying time:
Let the entire pot sit for at least an hour to ensure all layers of paint are fully cured. -
Apply sealer:
To protect your design from water damage when watering your plants, apply a coat of clear matte acrylic sealer over the entire painted surface.
Fixing Smudges
If you smudge a dot or make it too big, let it dry completely. Then, simply paint over the mistake with your base white color and try again.
Pop in your favorite leafy green plant and enjoy your new custom decor piece


Color-Dipped Pot With Metallic Band
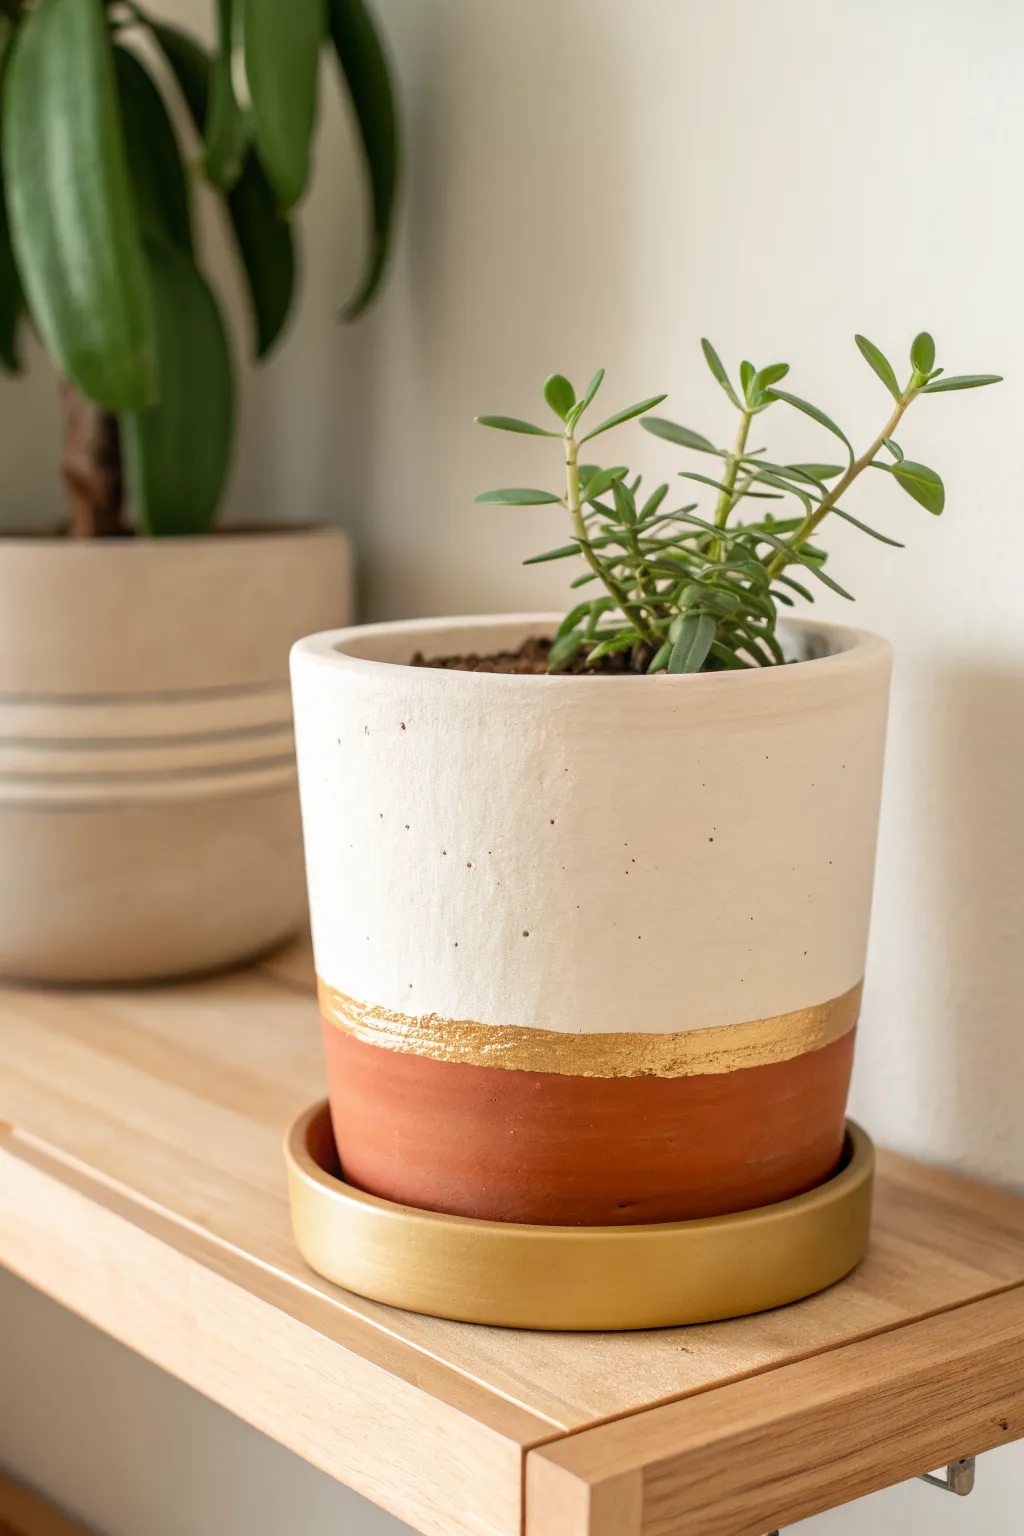
Transform a basic terracotta pot into a chic, modern home accent with this simple color-blocked design. The combination of matte white paint, raw earthen clay, and a flash of textured gold creates a sophisticated look that rivals expensive boutique planters.
Step-by-Step Guide
Materials
- Standard terracotta pot (cleaned and dried)
- Matching terracotta saucer
- Off-white or cream acrylic craft paint (matte finish)
- Metallic gold spray paint
- Gold leaf sizing (adhesive)
- Gold leaf sheets or metallic gold liquid leaf paint
- Painter’s tape
- Flat paintbrush (1-inch width)
- Small detail brush (optional)
- Clear matte sealant spray
- Newspaper or drop cloth
Step 1: Preparation & Saucer
-
Clean surface:
Begin by thoroughly wiping down your terracotta pot and saucer with a damp cloth to remove any warehouse dust or oils. Let them air dry completely, as moisture will trap under the paint and cause bubbling. -
Prep the saucer:
Take your terracotta saucer to a well-ventilated area or outdoors. Place it on your drop cloth or old newspaper. -
Spray the saucer:
Apply an even coat of metallic gold spray paint to the saucer. Hold the can about 8-10 inches away and use sweeping motions to avoid drips. I find two thin coats work better than one thick one. -
Dry time:
Allow the saucer to dry fully according to the can’s instructions while you work on the main pot.
Step 2: Painting the Base
-
Tape the line:
Decide where you want your color break to happen. For the look in the photo, place a strip of painter’s tape horizontally around the pot, leaving about the bottom third exposed as raw clay. -
Seal the tape edge:
Press the tape edge down firmly with your thumbnail to ensure a tight seal, which helps prevent paint bleed-under. -
Apply white base:
Using your flat paintbrush, apply the off-white acrylic paint to the area above the tape line. Don’t worry about the top rim yet; just focus on getting even coverage on the body. -
Paint the rim and inside:
Continue painting over the top rim and go about one to two inches down into the inside of the pot. This gives it a finished look even when soil is added. -
Second coat:
Let the first coat dry to the touch (usually 15-20 minutes). If the terracotta color is showing through significantly, apply a second coat of white for an opaque, matte finish. -
Remove tape:
While the second coat is still slightly tacky, carefully peel away the painter’s tape at a 45-degree angle. Removing it before the paint cures completely helps keep the line crisp.
Keep It Clean
Terracotta is porous. Before leafing, brush a tiny amount of sealer over the raw clay area where the gold will go so the sizing doesn’t soak in too fast.
Step 3: Adding the Metallic accent
-
Visualize the band:
Once the white paint is fully dry, visualize where the gold band will go. It should overlap the boundary between the white paint and the raw clay. -
Apply adhesive or sizing:
Use a small brush to apply gold leaf sizing (adhesive) along this seam. Create a rough, organic line about half an inch thick. I actually prefer a slightly jagged edge here rather than a perfect line, as it adds artisanal character. -
Tacky time:
Wait for the adhesive to become tacky. It usually turns clearly transparent when it’s ready for the leaf. -
Apply gold leaf:
Gently press sheets of gold leaf onto the tacky adhesive. Don’t worry if it wrinkles; the texture is desirable for this project. -
Buff away excess:
Using a dry, stiff brush, gently sweep away the excess gold leaf that didn’t stick to the adhesive. You’ll be left with a beautiful, rugged metallic stripe. -
Alternative method:
If painting instead of leafing, simply use a metallic liquid leaf paint and a small brush to paint a freehand stripe over the seam, keeping the edges loose and painterly.
Geometric Twist
Instead of a horizontal line, use tape to create diagonal color-blocking or geometric triangles for a more dynamic, Art Deco inspired pattern.
Step 4: Finishing Up
-
Seal the deal:
To protect your handiwork from water damage during watering, spray the entire exterior of the pot with a clear matte sealant. -
Final assembly:
Once everything is cured (give it 24 hours to be safe), place your pot into the golden saucer. -
Planting:
Pot your favorite sukulent or houseplant, ensuring you don’t pile soil higher than the painted interior line.
Place your new creation on a sunny shelf and enjoy the warm, modern glow it brings to the room

The Complete Guide to Pottery Troubleshooting
Uncover the most common ceramic mistakes—from cracking clay to failed glazes—and learn how to fix them fast.
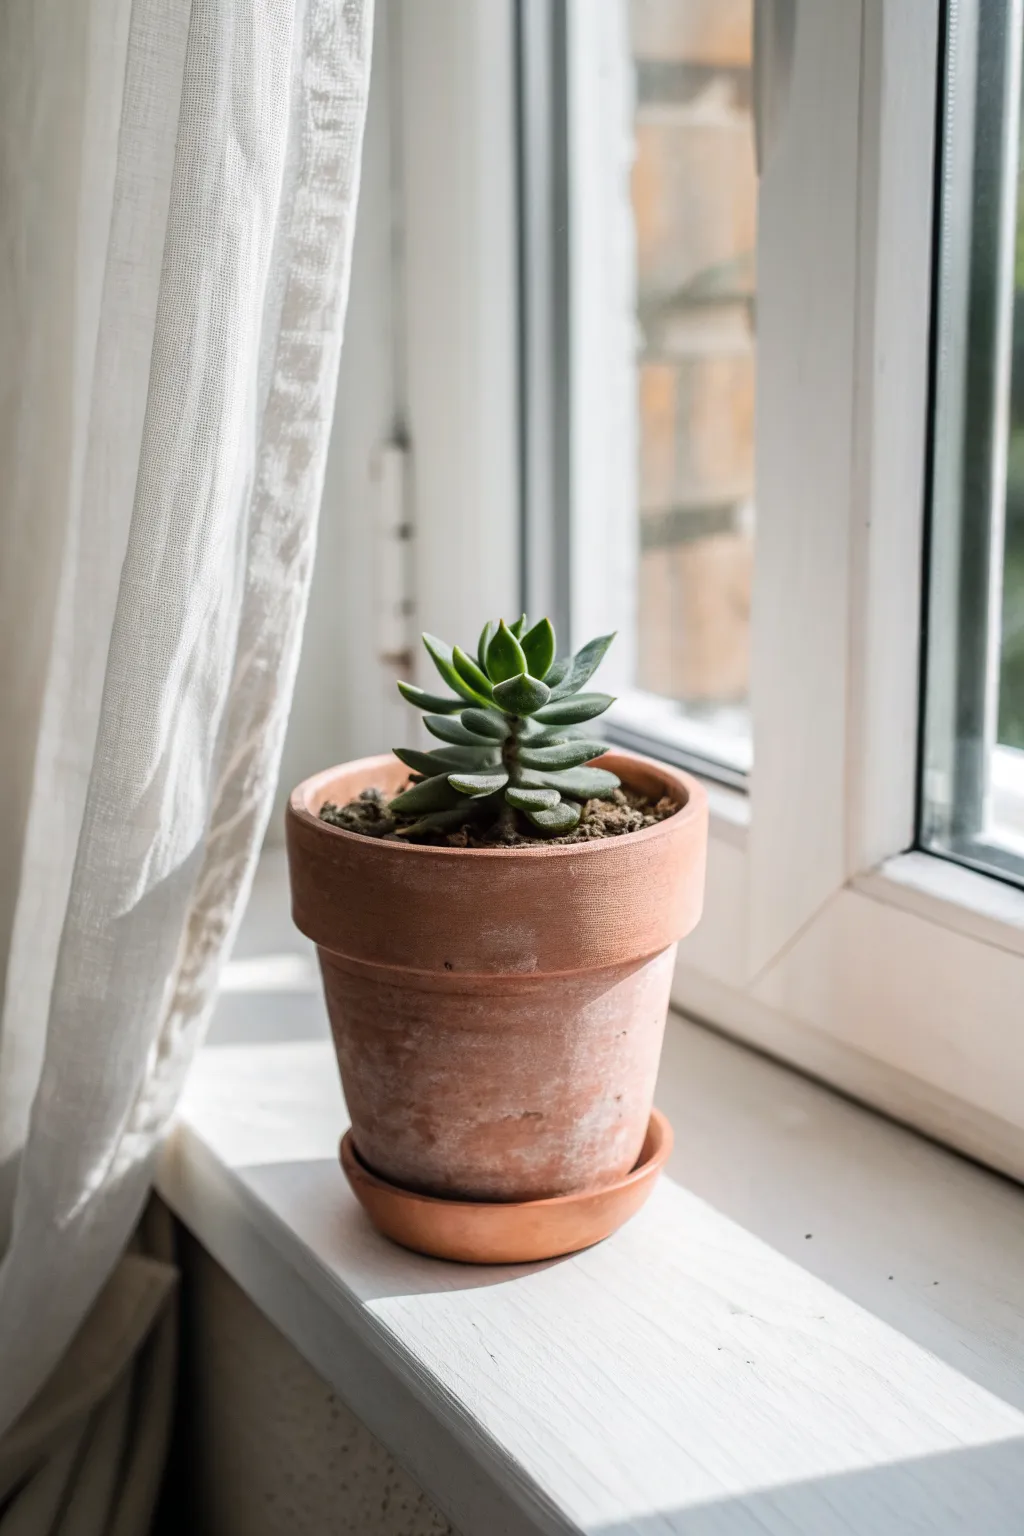
Soft Ombre Fade Pot
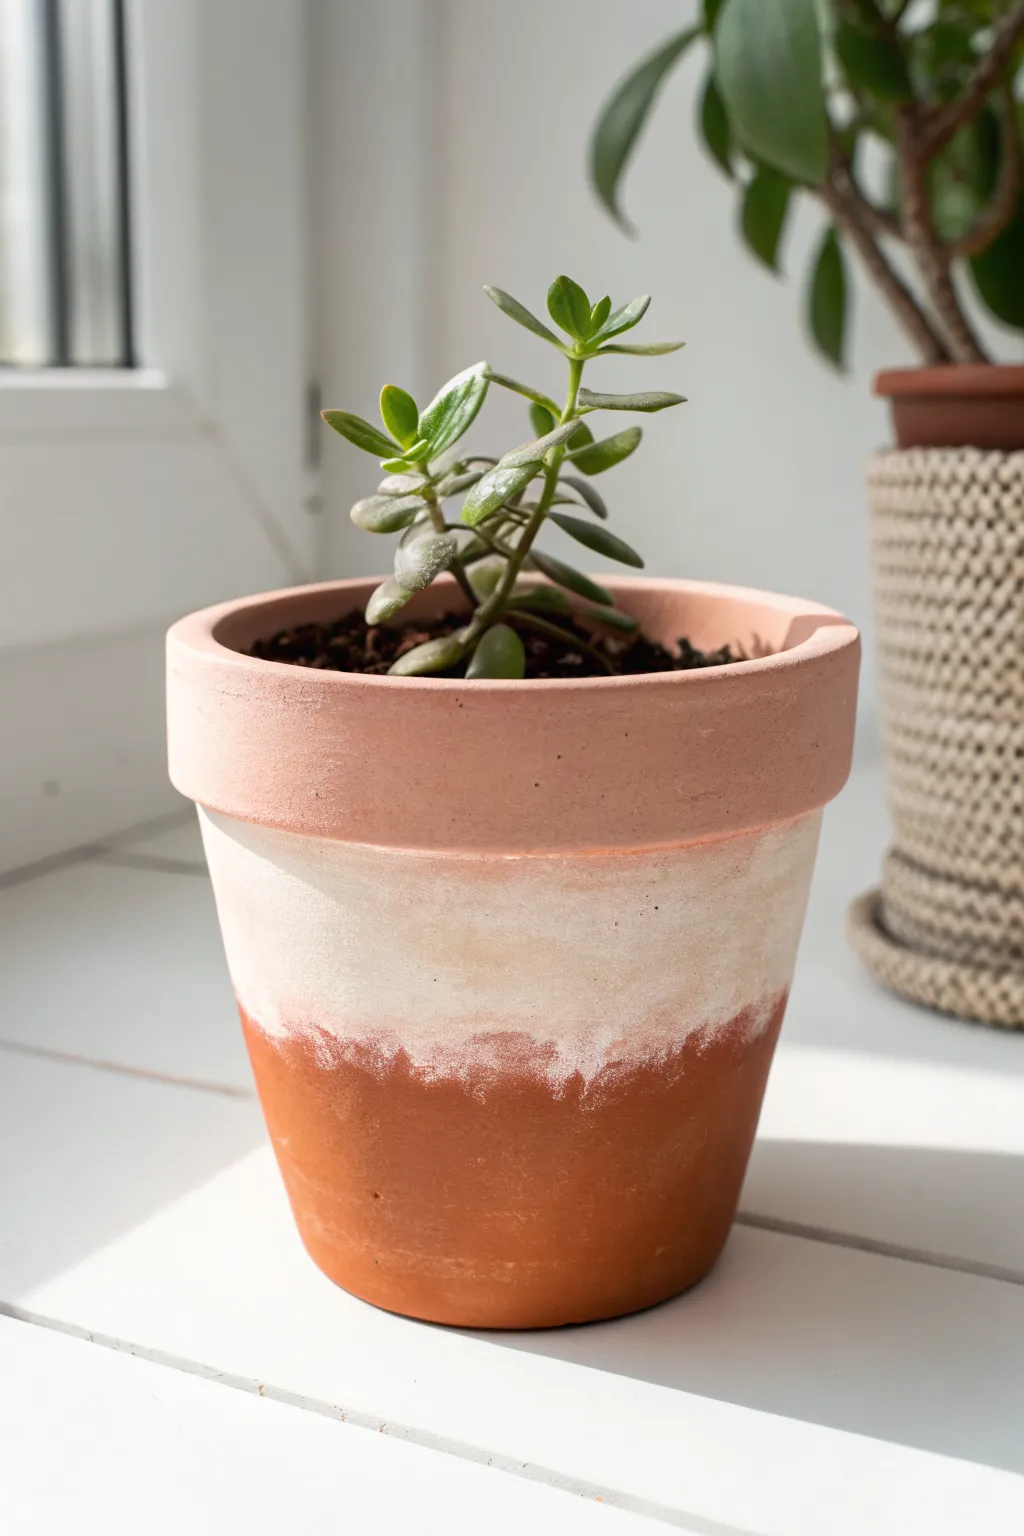
For a pot that looks like it has weathered gently in the Mediterranean sun, this technique uses dry brushing to create a soft, distressed band of white. The natural clay peeking through the paint adds warmth and texture, making it a perfect home for succulents.
Detailed Instructions
Materials
- Standard terra cotta pot (clean and dry)
- White acrylic craft paint (matte finish)
- Wide, flat bristled paintbrush (an old, stiffer brush works best)
- Paper towel or rag
- Paper plate or palette
- Small cup of water
Step 1: Preparation & First Layer
-
Clean surface:
Ensure your terra cotta pot is free of dust and stickers. If the pot was previously used, scrub it well and let it dry completely so the paint adheres properly to the clay pores. -
Load the brush:
Squeeze a dollop of white acrylic paint onto your paper plate. You won’t need much water for this step, as we want a textured look. -
Offload excess paint:
Dip your wide brush into the paint, then immediately brush most of it off onto a paper towel. The bristles should feel almost dry to the touch, holding only a small amount of pigment. -
Start the center band:
Position your brush in the vertical center of the pot’s body. Applying moderate pressure, paint a horizontal stroke around the circumference. This initial stroke will be the most opaque area. -
Build the opacity:
Reload your brush and repeat the offloading process. Go over the middle section again until you have a fairly solid white band, about two inches wide depending on your pot size.
Too Much Paint?
If you accidentally apply a heavy blob of white, don’t panic. Quickly wet a rag and wipe it away vigorously. The residue left behind actually adds to the weathered, vintage effect.
Step 2: Creating the Fade
-
Dry brush upwards:
Without adding new paint to your brush, use what remains on the bristles to drag pigment upward from your center white band toward the rim. -
Feather the edge:
Use quick, light, vertical flicking motions. You want the white to break up and gentle fade into the orange clay before it hits the thick rim at the top. -
Dry brush downwards:
Repeat this flicking motion downwards from the center band toward the base. Allow the texture of the clay to catch the paint unevenly. -
Soften the transition:
If the line between the white band and the fade looks too harsh, dampen your paper towel slightly and dab gently at the transition area to smudge it out. -
Evaluate the fade:
Step back and look at the pot. I often find that one side looks heavier than the other, so use an almost-dry brush to balance out the feathering.
Step 3: Finishing Touches
-
The rim technique:
For this specific look, we want the rim to remain largely natural. However, take a dirty paper towel (one with a little wet paint on it) and lightly wipe the rim to give it a dusty, cohesive feel without painting it solid. -
Add texture:
Dip just the tips of your dry brush into the white paint and stipple (tap vertically) a few spots in the center of the white band to create a crusty, aged texture. -
Final dry:
Let the pot sit for about 20 minutes. Acrylic dries darker on porous clay, so wait to see the final contrast before deciding if it needs another layer. -
Planting:
Once fully dry, fill with cactus soil and add your favorite jade plant or succulent to complete the organic look.
Use a Cheap Brush
Don’t use your best watercolor brushes here. A cheap, stiff chip brush from the hardware store creates the best ‘scratchy’ texture for dry brushing on rough clay.
Now you have a beautifully weathered pot that brings a calm, rustic vibe to your windowsill
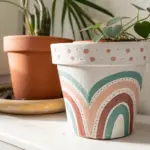
Messy-Pretty Pour-Painted Pot
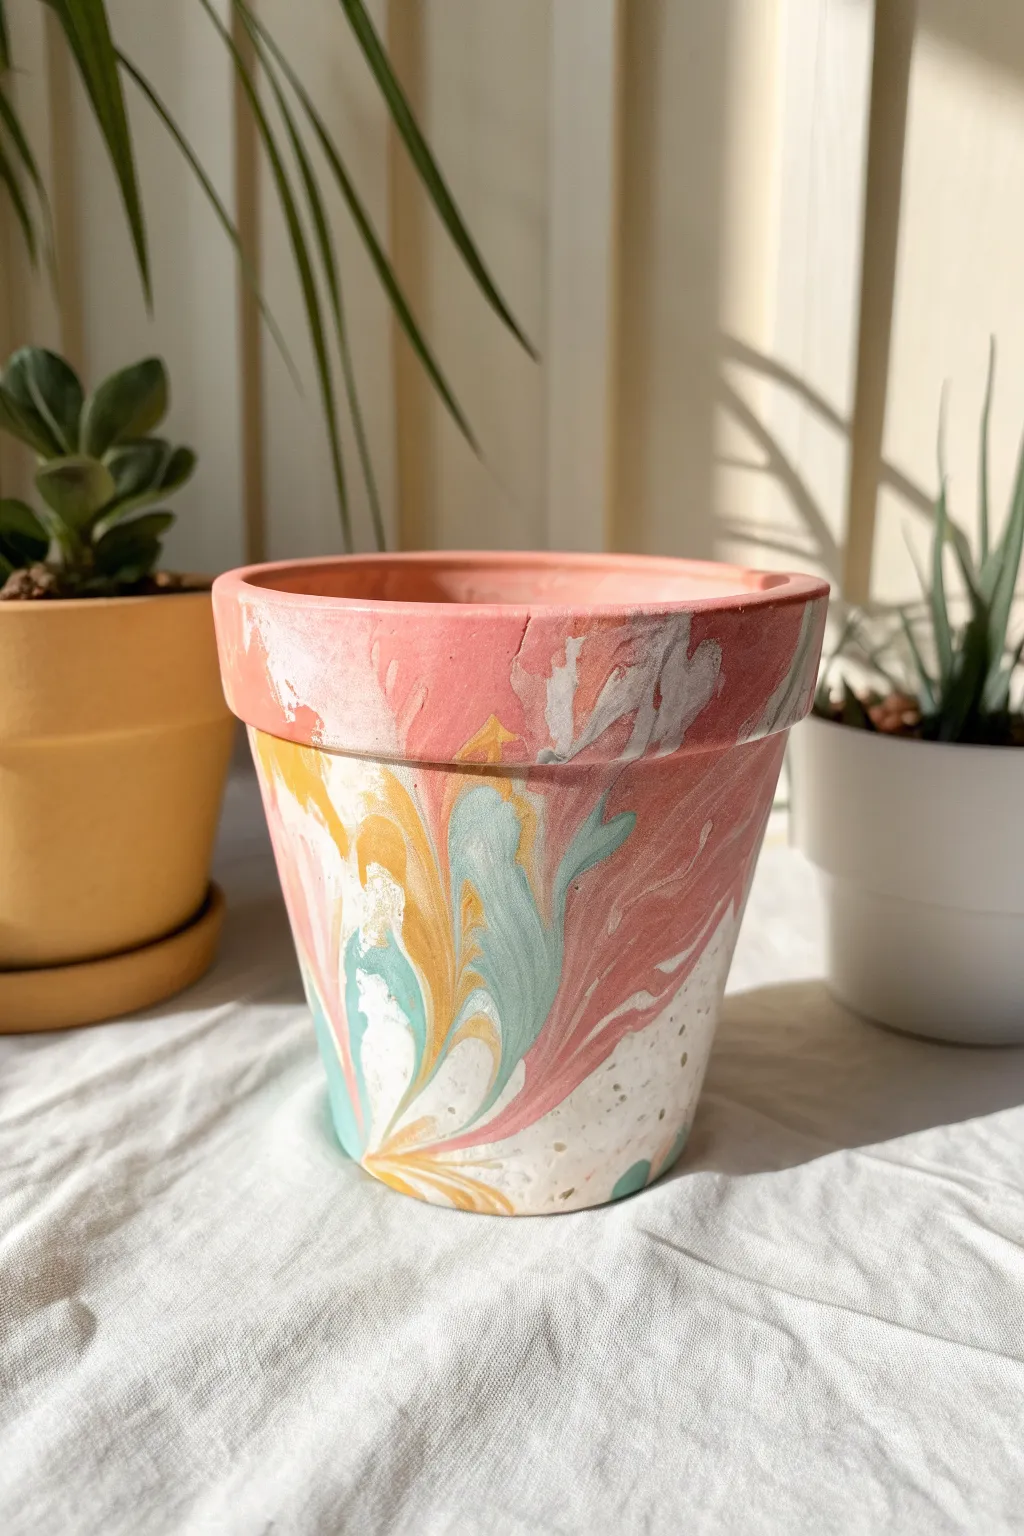
Transform a plain terracotta pot into a pastel dream with this mesmerizing pour-painting technique. The result is a soft, matte finish that mimics the look of high-end ceramic glazing using simple acrylics.
Step-by-Step Tutorial
Materials
- Clean terracotta pot (4-6 inch diameter)
- White primer or gesso
- Acrylic craft paints (coral pink, teal/mint, ochre yellow, white)
- Pouring medium
- Plastic cups (one per color + one for pouring)
- Popsicle sticks for stirring
- Elevated drying rig (an old jar or empty can)
- Drop cloth or cardboard (for drips)
- Matte spray sealer (optional)
Step 1: Preparation
-
Clean the surface:
Wipe down your terracotta pot with a damp cloth to remove any dust or nursery grime, allowing it to dry completely before starting. -
Prime the base:
Apply an even coat of white primer or gesso to the exterior of the pot. This stops the terracotta from absorbing your colorful paint too quickly and ensures the pastel colors pop. -
Protect the inside:
Tape off the inside rim if you want to keep the interior clean, though leaving it bare is fine for drainage. -
Set up your station:
Place your ‘drying rig’ (an old jar or can) in the center of your drop cloth. Balance the pot upside down on top of this rig so the rim is floating freely above the table surface.
Muddy Colors?
Avoid over-mixing inside the cup. Layer the paints gently and don’t stir them together. If colors are blending too much, thicken your mixture slightly with more paint.
Step 2: Mixing the Pour
-
Prepare individual colors:
In separate small cups, mix your acrylic paints with the pouring medium according to the bottle’s ratio instructions (usually 1:1). -
Check consistency:
Stir until the mixture flows like warm honey or heavy cream. If it’s too thick, add a drop or two of water; if too thin, add more paint. -
Create the dirty pour cup:
Take a clean, empty cup. Pour a generous amount of white into the bottom as your base. -
Layer the colors:
Slowly pour small amounts of the coral, teal, and ochre paint into the main cup, layering them one on top of the other without stirring. Repeat the layers until the cup is about half full.
Step 3: Pouring & Drying
-
Begin the pour:
Hold the layered cup over the center of the overturned pot. Start pouring slowly onto the bottom of the pot (which is currently facing up). -
Control the flow:
Move your hand in a slow circular motion as you pour, letting the paint cascade down the sides. You’ll see the marble pattern emerge naturally. -
Tilt for coverage:
If there are bare spots near the rim, gently pick up the pot from the inside using your fingers and tilt it slightly to encourage the paint to flow into those empty spaces. -
Watch the drips:
Let the paint drip off the rim for about 10–15 minutes. Use a popsicle stick to gently wipe away large droplets hanging from the rim to keep the edge clean. -
Let it cure:
Allow the pot to dry undisturbed for at least 24 hours. The thick layers of paint need time to harden completely. -
Seal the deal:
Once fully dry, spray the exterior with a clear matte sealer. This protects the finish from water damage when you water your future plant.
Pro Tip: Pop the Bubbles
Immediately after pouring, look closely for tiny air bubbles on the surface. Gently blow on them through a straw or pass a kitchen torch quickly over them to pop them for a smooth finish.
Now you have a chic, custom planter ready to house your favorite fern or succulent


What Really Happens Inside the Kiln
Learn how time and temperature work together inside the kiln to transform clay into durable ceramic.
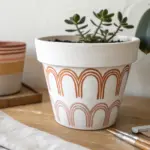
Clean-Line Geometric Tape Pot
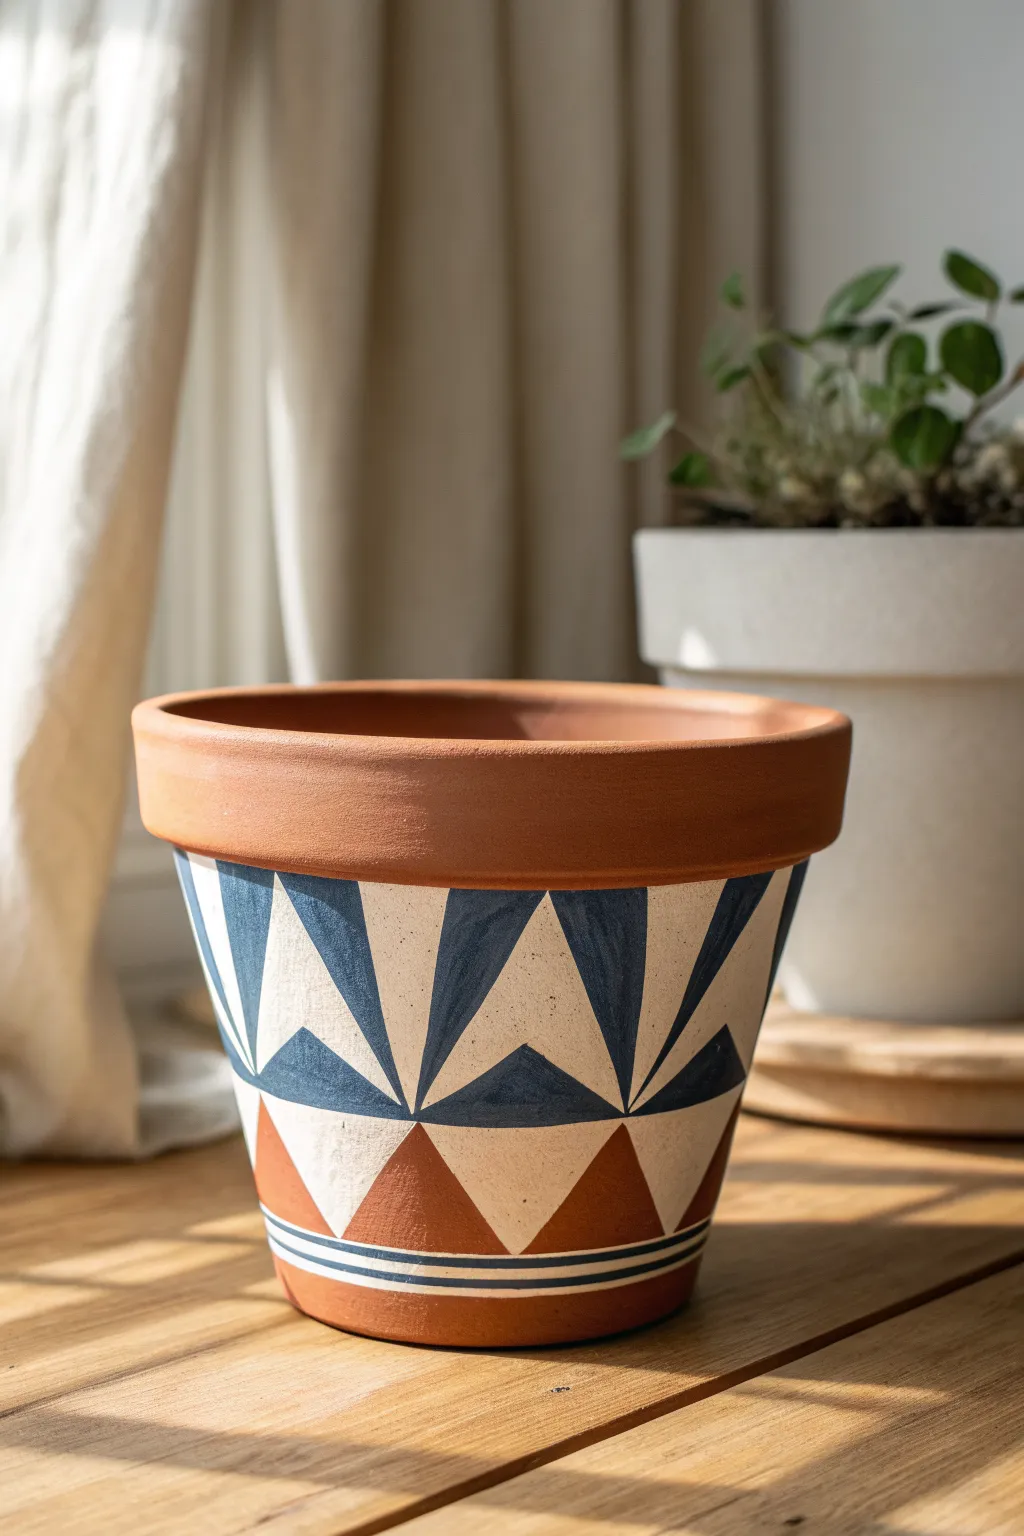
Transform a standard terracotta pot into a modern statement piece with clean lines and striking triangles. This project uses negative space and masking tape to create a crisp pattern of navy blue and warm rust tones against a creamy white background.
Detailed Instructions
Materials
- Standard terracotta pot (cleaned and dried)
- Cream or off-white acrylic paint
- Navy blue acrylic paint
- Rust or terracotta-colored acrylic paint (optional if you want to leave raw clay, but recommended for consistent texture)
- Painter’s tape (various widths)
- Small flat paintbrush
- Detail paintbrush
- Ruler
- Pencil
- Clear matte sealer/varnish
Step 1: Preparation and Base Coat
-
Clean surface:
Ensure your terracotta pot is completely clean and dry. Wipe it down with a damp cloth to remove any dust that might prevent the paint from adhering properly. -
Paint the background:
Using a flat paintbrush, apply a coat of cream or off-white acrylic paint to the main body of the pot. Leave the top rim unpainted to maintain that classic terracotta contrast. -
Apply second coat:
For a solid, opaque finish, apply a second coat of the cream paint once the first layer is touch-dry. I find that two coats usually give the best coverage. -
Let it cure:
Allow the base color to dry completely before applying any tape. If the paint is even slightly tacky, the tape might peel it off later.
Step 2: Creating the Geometric Pattern
-
Mark vertical guides:
Use a ruler and pencil to lightly mark even intervals around the circumference of the pot. These marks will determine the width of your triangles. -
Tape the top row:
Cut strips of painter’s tape and apply them diagonally to create a row of triangles pointing downwards from the rim. Creates a ‘zig-zag’ tape line. -
Seal tape edges:
Press down firmly on all tape edges with your fingernail or a credit card to prevent paint bleed. -
Paint navy triangles:
Fill in the triangles created by the tape with navy blue acrylic paint. Use a careful hand near the edges. -
Tape the middle section:
Once the blue paint is dry, carefuly remove the tape. Now, tape off a second row of triangles in the middle section. These should align with the points of the blue triangles above. -
Paint secondary triangles:
Paint this middle set of triangles using the same navy blue. Note that some designs, like the one shown, use split triangles where half is blue and half is white—you can achieve this with additional vertical taping. -
Create lower triangles:
Tape off the bottom row of triangles. These should sit right at the base of your design area. -
Apply rust color:
Paint these bottom triangles with your rust-colored paint. This color echoes the natural clay tone but gives a smoother finish.
Bleeding Lines?
If paint bleeds under the tape, don’t panic. Wait for it to dry completely, then use a tiny detail brush with the background color to ‘erase’ the mistake.
Step 3: Detailed Lines and Finish
-
Tape horizontal stripes:
Near the very bottom of the pot, below the rust triangles, apply two thin strips of painter’s tape horizontally around the circumference, leaving a small gap between them. -
Paint the stripes:
Fill the gap between the tape strips with navy blue paint to create a crisp, thin line. -
Add second stripe:
Repeat the process just below the first line to create a double stripe effect. -
Remove tape:
Peel off the tape while the paint is still slightly wet to ensure the cleanest possible lines. -
Touch up:
Use a very fine detail brush and your background cream color to clean up any spots where the darker paint might have bled under the tape. -
Seal the pot:
Once all paint is fully dry (wait at least 24 hours), apply a clear matte sealer over the painted areas to protect your design from water damage.
Crisp Edges
Apply a thin layer of the base color (cream) over the tape edges first. This seals the gap, so if any paint bleeds under, it matches the background.
Now your shelf has a custom piece of geometric art ready for your favorite succulent
Tiered Clay Pot Herb Tower
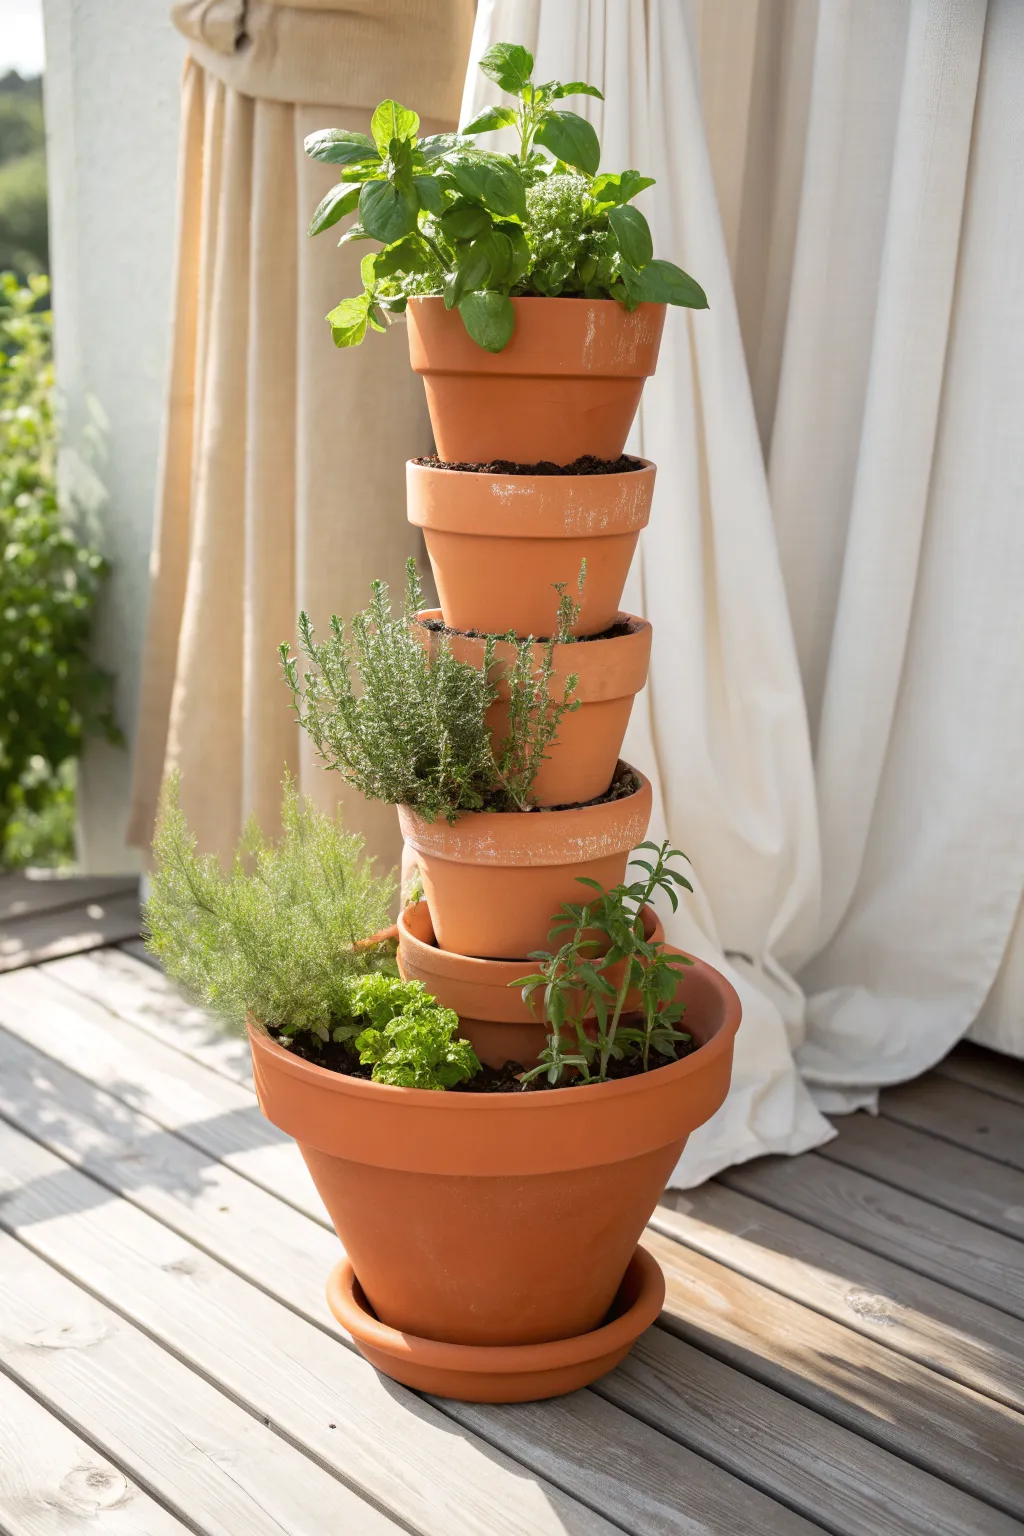
Transform a simple collection of terracotta pots into a sculptural, space-saving herb tower perfect for balconies or patios. This vertical design uses a rebar support to tilt smaller pots at jaunty angles, creating distinct pockets for a variety of fresh greens.
Step-by-Step
Materials
- One large 12-to-14 inch terracotta pot (base)
- Four 6-inch terracotta pots (standard shape)
- One 4-inch terracotta pot (optional, for spacing)
- One steel rebar rod or sturdy metal stake (approx. 3-4 feet long)
- Good quality potting soil
- Assorted herb plants (basil, thyme, dill, parsley, etc.)
- Rubber mallet or hammer
- Cardboard or coffee filters (for drainage holes)
- Watering can
- Gravel or small stones (optional)
Step 1: Base Assembly
-
Prepare the Location:
Since the finished tower will be quite heavy, choose your final display spot on the deck or patio before you begin assembly. It’s much easier to build it in place than to move it later. -
Position the Base Pot:
Set your largest pot (the 12-14 inch one) on a matching saucier if desired. Ensure it is sitting level on the ground surface. -
Insert the Rod:
Place the steel rebar rod directly into the center of the large pot. If the drainage hole is large, pass the rod through it into the ground below for extra stability, or stabilize it inside the pot with gravel. -
Secure the Rod:
While holding the rod straight up, fill the large base pot with potting soil. Pack the soil down firmly around the rod to ensure it stands completely vertical without assistance. Leave about two inches of space at the top rim.
Wobbly Pots?
If the pots slide too much, add a small 4-inch inverted clay pot (hidden inside) between layers as a spacer to keep the tilted pots higher and more secure.
Step 2: Stacking the Tower
-
Thread the First Pot:
Take one of the 6-inch pots and thread it onto the rebar through its drainage hole. Slide it all the way down until it rests on the soil of the base pot. -
Tilt to the Side:
Instead of setting it flat, tilt this first small pot so its rim rests against the rebar. This creates the first angled pocket. -
Add Soil to Pot 1:
Fill this tilted pot with soil. Be careful not to disturb the angle, but pack enough soil in to prepare it for the next layer. -
Thread the Second Pot:
Slide the next 6-inch pot down the rebar. Allow the bottom of this pot to rest on the soil inside the pot below it. -
Alternate the Angle:
Tilt this second pot in the opposite direction of the first one. It should nestle slightly into the soil of the pot below, locking against the rod for support. -
Continue Stacking:
I find it helpful to look at the tower from a distance occasionally to check the balance. Continue threading the remaining pots, alternating the tilt direction left and right as you go up. -
Top the Tower:
For the final pot at the very top, you don’t necessarily need the rod to extend all the way through depending on the height. Fill it with soil and set it straight or slightly centered to cap off the structure.
Step 3: Planting the Herbs
-
Select Your Plants:
Choose herbs based on their growth habits. Trailing plants like thyme or oregano look great in the middle tiers, while bushy basil works well at the top. -
Plant the Base:
In the large bottom pot, plant larger herbs or fillers around the central stack. In the photo, parsley and dill are used to fill out the wide base. -
Fill the Angle Pockets:
Gently transplant your smaller herb plugs into the exposed soil of the tilted pots. Ensure the root balls are covered and tuck them in securely. -
Top Plant:
Plant your sun-loving centerpiece, like the basil shown, in the highest pot. This spot gets the most drainage and light. -
Initial Watering:
Water the tower slowly, starting from the top. Let the water trickle down through the layers to settle the soil without washing it out.
Pro Tip: Moisture check
Terracotta dries out quickly! Soak your clay pots in a bucket of water for an hour before building. This prevents the planted clay from wicking moisture away from roots.
Now you have a stunning vertical garden that brings fresh flavors right to your kitchen door

TRACK YOUR CERAMIC JOURNEY
Capture glaze tests, firing details, and creative progress—all in one simple printable. Make your projects easier to repeat and improve.
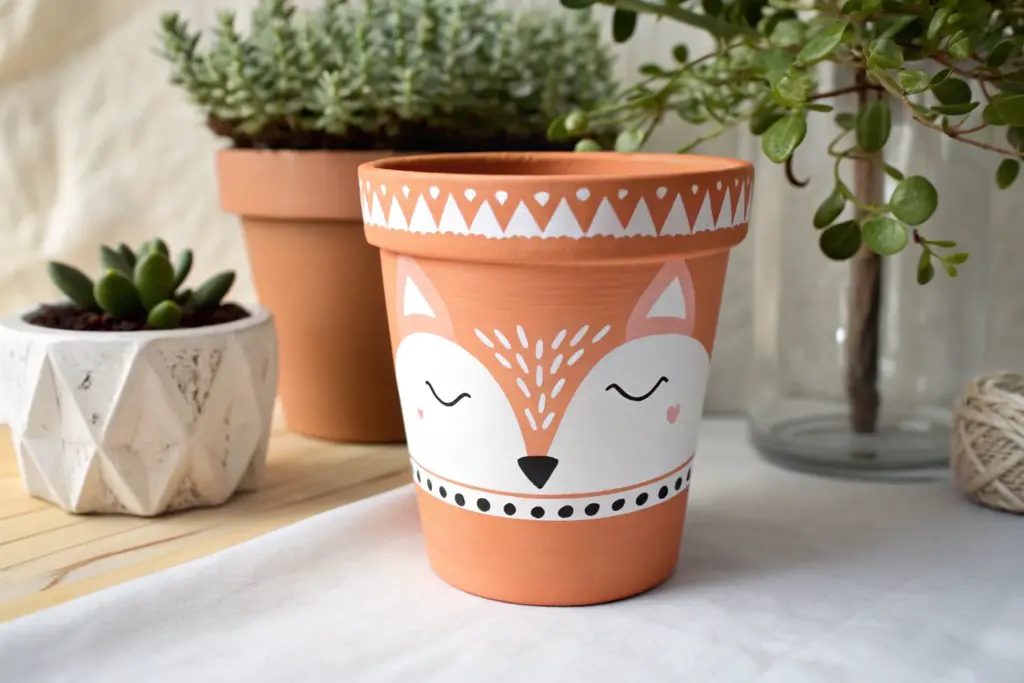
Face Planter With Succulent Hair
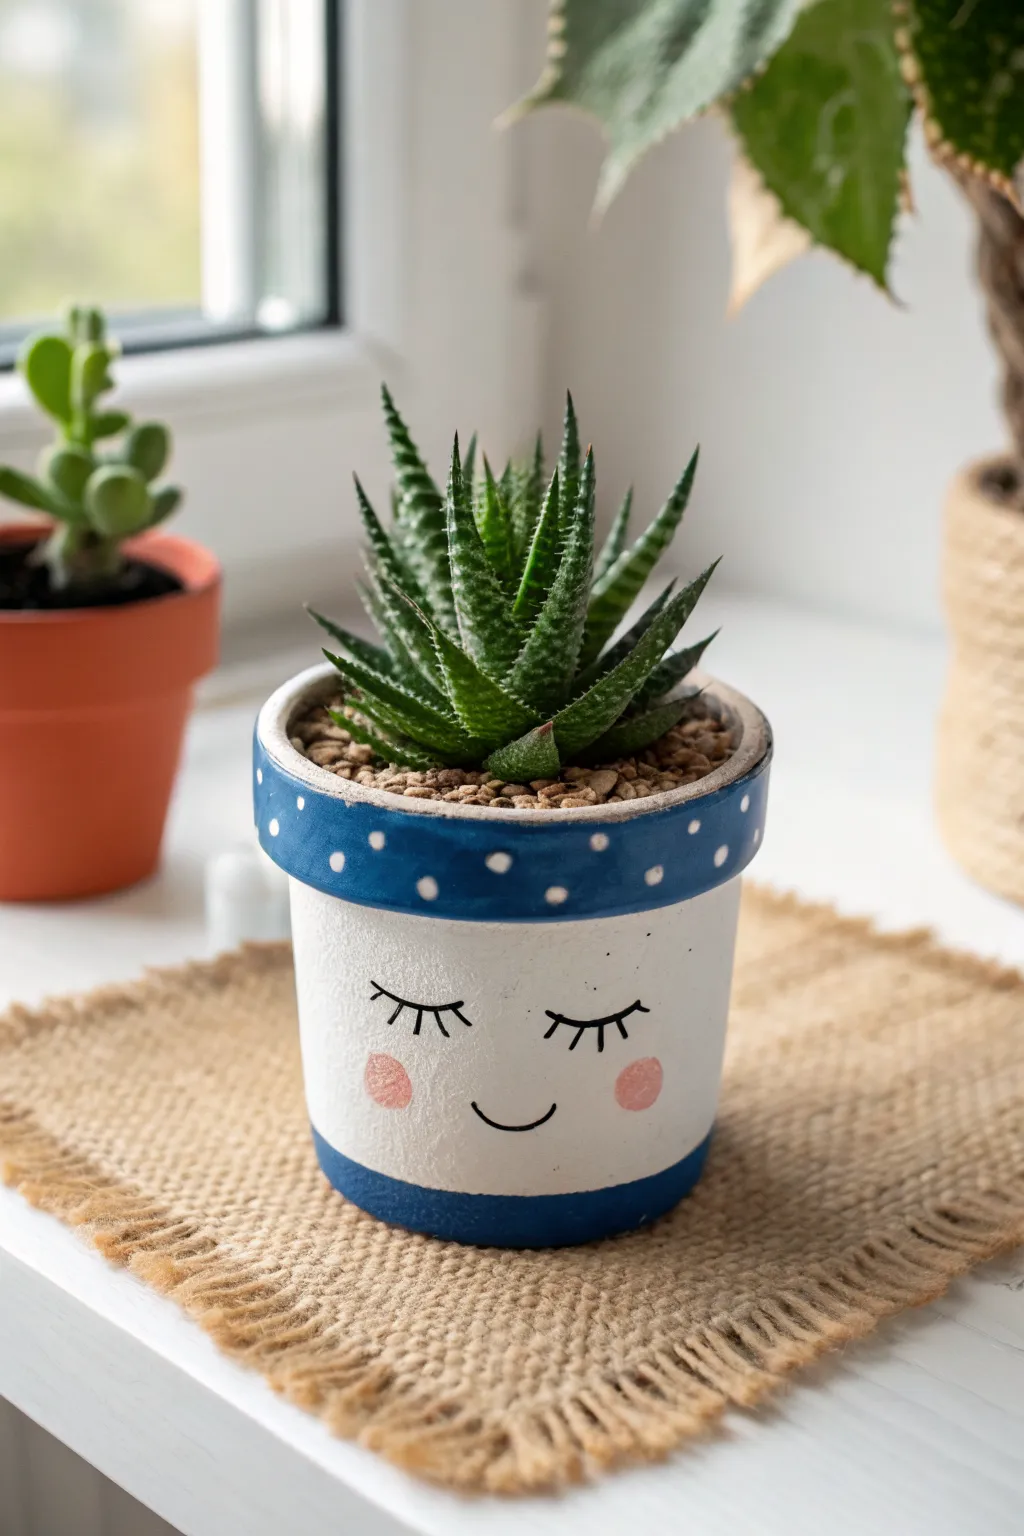
Transform a plain terracotta pot into an adorable, slumbering character with just a little paint and patience. This cheerful planter features a sweet sleeping face, rosy cheeks, and a lively polka-dot headband that perfectly complements the spiky “hair” of a succulent.
Step-by-Step Tutorial
Materials
- Small terracotta pot (clean and dry)
- White acrylic paint (outdoor/multi-surface preferred)
- Royal blue acrylic paint
- Light pink acrylic paint
- Black thin paint marker or fine liner brush with black acrylic paint
- Flat paintbrush (medium size)
- Small round paintbrush or dotting tool
- Succulent potting mix
- Small gravel or top dressing
- Haworthia or similar spiky succulent
- Clear matte sealer spray (optional)
Step 1: Base Painting
-
Prepare the surface:
Ensure your terracotta pot is completely clean and dry before starting. If it’s an old pot, scrub it well to remove any salts or dirt. -
Apply the white base:
Using a medium flat brush, paint the main body of the pot white. Include the area just under the rim, but you can leave the rim itself unpainted for now. -
Add a second coat:
Terracotta is porous and absorbs the first layer quickly. Once the first coat is dry to the touch, apply a second (and potentially third) coat of white to get a solid, opaque finish. -
Paint the rim:
Use your royal blue paint to cover the entire top rim of the pot. Be careful to keep a clean line where the rim meets the white body. -
Create the bottom stripe:
Paint a matching royal blue stripe around the very bottom edge of the pot. I find distinct sections help define the face area clearly.
Step 2: Adding the Face Details
-
Sketch the face:
Lightly pencil in the placement of the eyes, mouth, and cheeks. Aim for the center of the white section to keep the face balanced. -
Draw the eyelashes:
Using a black paint marker or a very fine liner brush, draw two downward-curved arcs for the closed eyes. Add three small, distinct lashes to each eye. -
Add the smile:
Draw a simple, small upward curve for the mouth, placed centrally below the eyes. -
Paint the cheeks:
Dip a small round brush or even your pinky finger into the light pink paint. Dab two soft circles on either side of the smile for the rosy cheeks. -
Add the polka dots:
Using the handle end of a paintbrush or a dotting tool dipped in white paint, create evenly spaced dots all around the blue rim. -
Seal the artwork:
Once all paint is completely dry (wait at least an hour), spray the pot with a clear matte sealer to protect the design from water damage.
Dotting Perfection
Don’t have a dotting tool? Use the flat head of a nail or the end of a chopstick dipped in paint. Test on paper first to check the size!
Step 3: Planting the ‘Hair’
-
Fill with soil:
Fill the pot about two-thirds full with specialized succulent potting mix. -
Position the plant:
Remove your succulent from its nursery pot and gently loosen the roots. Place it in the center so the leaves stick up like spiky hair. -
Top up and dress:
Fill in the gaps around the roots with more soil. Finally, cover the exposed soil with small gravel or grit for a finished, polished look.
Paint Peeling?
If paint peels off the terracotta, the pot might have been damp. Bake the empty pot in an oven at 200°F for 20 mins to dry it deeply before painting.
Now you have a charming little friend to brighten up your windowsill or desk
Easy Bug-Themed Clay Pots
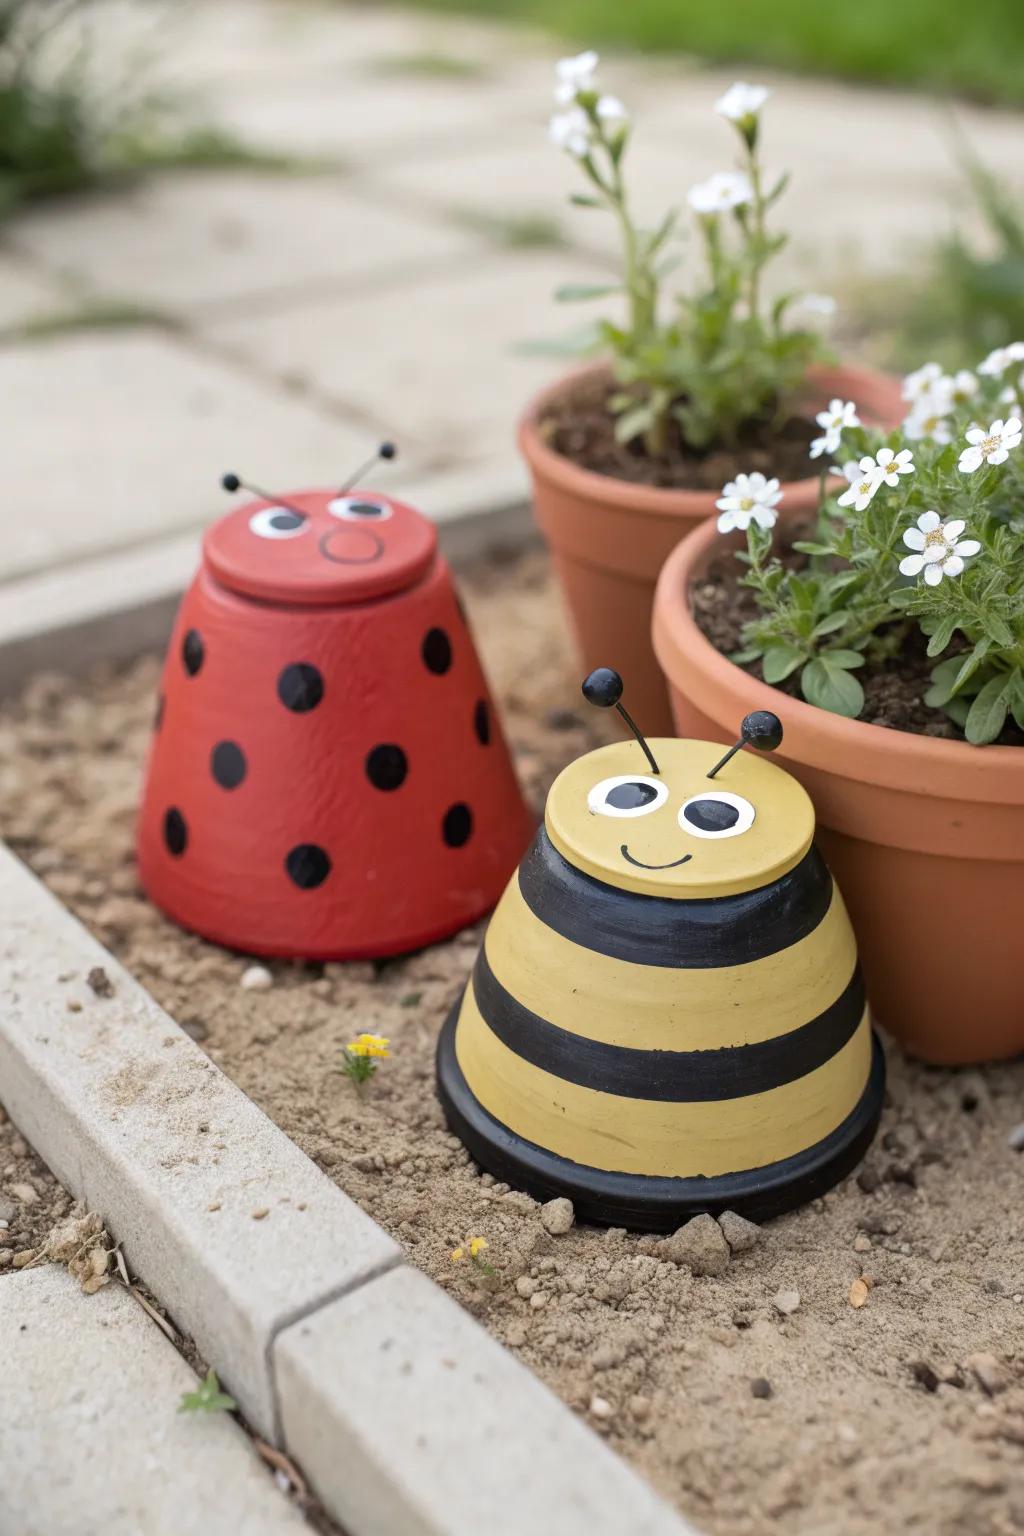
Transform ordinary terracotta pots into whimsical garden critters with just a splash of paint and some creative assembly. This adorable ladybug and bumblebee duo adds a bright pop of personality to your flower beds while keeping your plants company.
Step-by-Step Guide
Materials
- Two terracotta pots (approx. 4–6 inches)
- Two terracotta saucers (sized to fit inverted pot bottoms)
- Acrylic craft paint (red, yellow, black, white)
- Paintbrushes (foam brush for base coats, small detail brush)
- Heavy-duty outdoor glue or epoxy
- Four wooden beads (small-medium)
- Black craft wire or floral wire (16-18 gauge)
- Wire cutters
- Pencil
- Newsprint or drop cloth
Step 1: Painting the Bodies
-
Prep the surface:
Wipe down your terracotta pots and saucers with a damp cloth to remove any pottery dust or price tag residue. Let them dry completely before painting. -
Base coats:
Turn both pots upside down. Using a foam brush, paint one pot completely red for the ladybug and the other yellow for the bee. You’ll likely need 2-3 coats for opaque coverage, allowing 20 minutes of drying time between layers. -
Paint the heads:
Flip the saucers upside down so the flat bottom is facing up. Paint one red and one yellow to match their respective bodies. Don’t forget to paint the rims! -
Ladybug spots:
Once the red pot is dry, use a round sponge dauber or a medium brush to paint solid black circles randomly around the pot. Vary their placement so it looks natural from all angles. -
Bee stripes:
For the yellow pot, paint thick horizontal black stripes going around the circumference. I find it helpful to rest my hand on the table and rotate the pot to keep the lines relatively steady. -
Bee bottom:
Paint the thick rim of the yellow pot black as well to ground the design.
Uneven Stripes?
If painting straight lines on a tapered pot is tricky, place a thick rubber band around the pot as a guide. Paint along the edge of the band for a crisp, clean stripe.
Step 2: Creating the Faces
-
Adding eyes:
On the flat bottom of the painted saucers (what will be the top of the head), paint two white ovals for the eyes. Let the white paint dry fully. -
Pupils:
Paint smaller black circles inside the white ovals. You can place them looking sideways or cross-eyed for a sillier expression. -
Smiles:
Use your finest detail brush with black paint (or a black paint pen) to draw a simple curved smile below the eyes. -
Ladybug nose:
For the ladybug, you can add a simple oval outline for a nose between the eyes to give it extra character.
Step 3: Antennae and Assembly
-
Paint the hardware:
Paint the four wooden beads black. These will be the tips of the antennae. -
Cut the wire:
Cut two pieces of black wire, each about 4 inches long. If your wire is silver, quickly paint it black or use a permanent marker to darken it. -
Attach beads:
Place a dab of strong glue inside the hole of each bead and insert one end of the wire. Let this set until the beads are firmly attached. -
Curl the wire:
For a whimsical look, gently curl the wire lengths slightly using a pencil or your finger. -
Mount the antennae:
Glue the bottom ends of the wire directly onto the back rim area of the saucer heads. Use plenty of glue and prop them up until dry so they don’t slide off. -
Attach the heads:
Apply a generous ring of heavy-duty glue to the bottom (now top) of the inverted pots. Center the matching saucer on top and press down firmly. -
Final seal:
If these will live outdoors permanently, coat the entire project with a clear outdoor sealer spray to protect the paint from rain and sun.
Make Them Glow
Paint the white parts of the eyes with glow-in-the-dark acrylic paint. At night, your garden bugs will have spooky, glowing eyes watching over your plants!
Set your new little friends in the soil and enjoy the cheer they bring to your garden
Easy Animal Character Pots
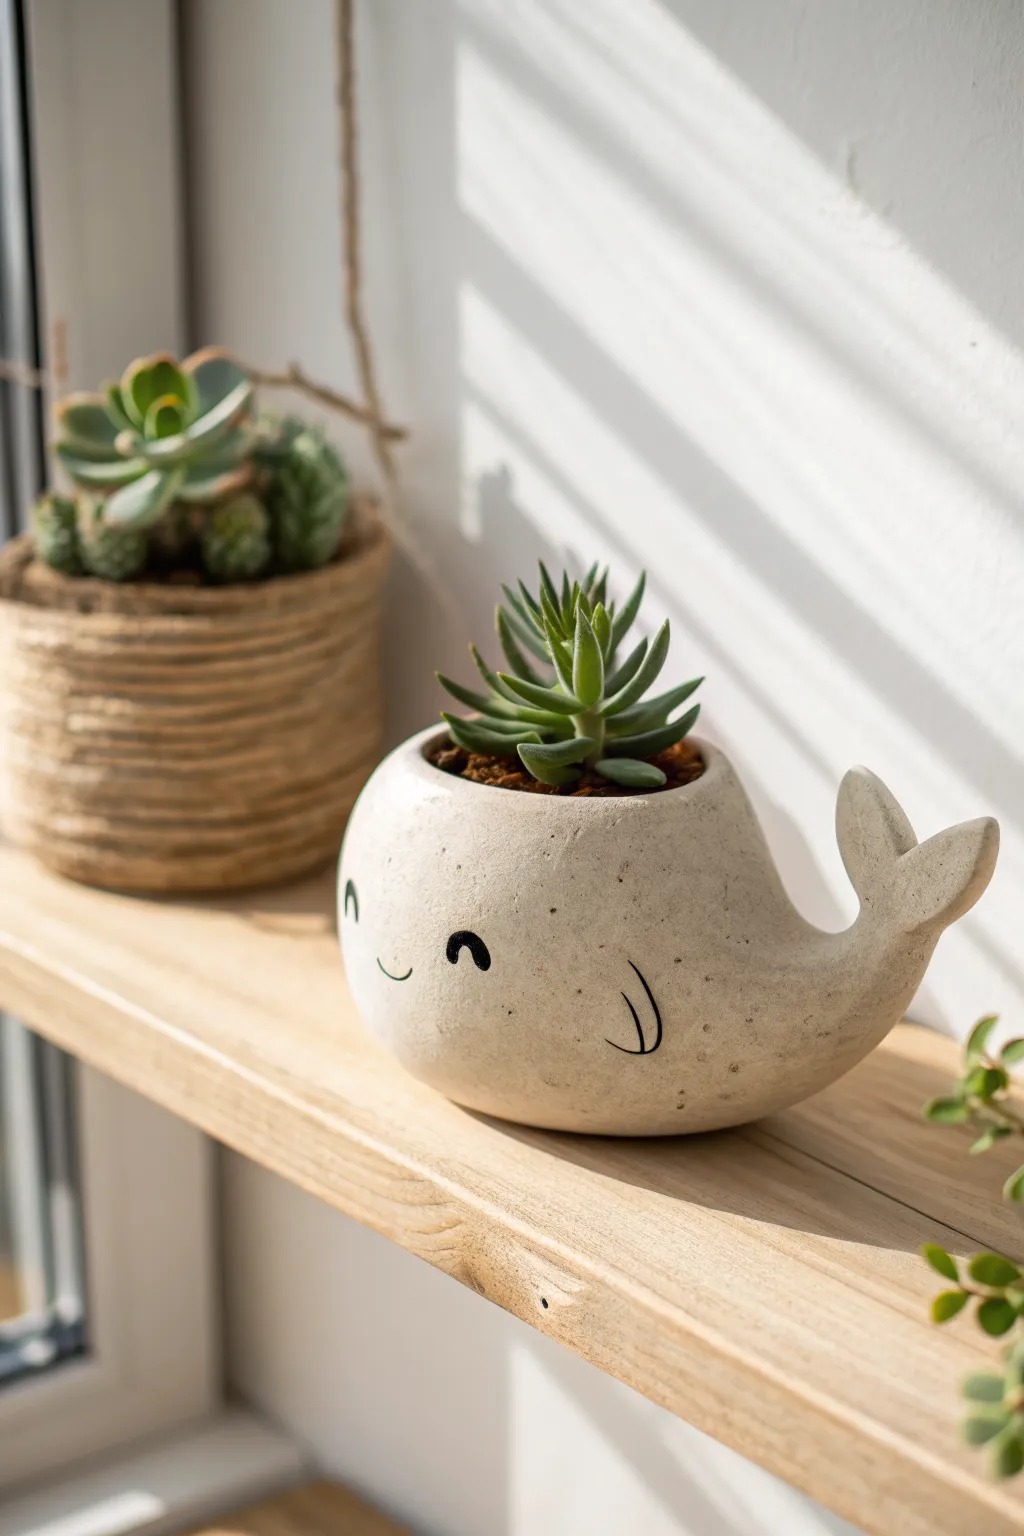
Bring the ocean to your windowsill with this adorable hand-sculpted whale planter. Using air-dry or oven-bake clay, you’ll craft a smooth, stone-like creature that’s perfect for holding your favorite miniature succulent.
Step-by-Step
Materials
- White or light grey air-dry clay (or polymer clay)
- Small rolling pin
- Modeling tools (or a butter knife and toothpick)
- Water in a small cup (for smoothing)
- Fine-grit sandpaper
- Black acrylic paint or fine-tip permanent marker
- Small fine-point paintbrush
- Clear matte sealant spray
- Small succulent and potting soil
Step 1: Sculpting the Body
-
Prepare the clay:
Start by conditioning a large handful of clay until it is soft and pliable. Roll it into a smooth, solid ball about the size of a large orange. -
Shape the base form:
Gently press the ball onto your work surface to flatten the bottom slightly so it will sit stable. Using your palms, elongate the ball slightly into an oval shape to create the whale’s body. -
Hollow out the planter:
Using your thumb or a loop tool, press into the top center of the oval. Create a deep cavity for the plant, leaving the walls about 1/4 inch thick to ensure structural integrity. -
Create the tail:
Take a separate smaller piece of clay and shape it into a majestic tail fin. It should look like a flattened ‘Y’ shape with rounded tips. -
Attach the tail:
Score the back of the whale’s body and the base of the tail with a needle tool or toothpick. Apply a dab of water (slip) to the scored areas and press the tail firmly onto the body, angled slightly upward. -
Refine the tail connection:
Use a modeling tool or your finger to blend the clay at the seam where the tail meets the body. Smooth it until the transition is seamless and invisible.
Pottery Pro Tip
Keep a damp sponge nearby while sculpting. Wiping the clay periodically prevents it from drying out too fast and cracking before you’re finished shaping.
Step 2: Refining and Detail
-
Smooth the surface:
Dip your finger in a little water and gently rub the entire surface of the whale. This removes fingerprints and creates that polished, stone-like texture evident in the photo. -
Add fin details:
You can either sculpt tiny side fins and attach them, or keep it sleek as shown in the inspiration image. If attaching fins, follow the same score-and-slip method used for the tail. -
Let it dry:
Allow your clay whale to dry completely. For air-dry clay, this usually takes 24-48 hours depending on thickness. I like to rotate it occasionally so the bottom dries evenly. -
Sand imperfections:
Once fully dry and hard, take a piece of fine-grit sandpaper and lightly buff away any bumps or rough patches to get a professional finish. -
Add the face:
Using a fine-tip black marker or a thin brush with black acrylic paint, draw a simple, happy face. Create two small arch shapes for eyes and a small curved smile. -
Draw the fin outline:
On the side of the body, draw a stylized fin shape using a curved line with a vertical line inside it, mimicking the illustration style shown in the project photo. -
Seal the piece:
Spray the entire planter with a clear matte sealant. This protects the clay from moisture when you water your plant. -
Plant your succulent:
Once the sealant is dry, add a small amount of potting soil and nestle your succulent inside the cavity.
Make it Splash
Before the clay dries, poke a hole using a straw through the very top of the whale’s head. When you water the plant, stick a tiny air plant in the hole to look like a water spout.
Now you have a charming aquatic friend to brighten up your desk or shelf
Sweet Fruit-Themed Clay Pots
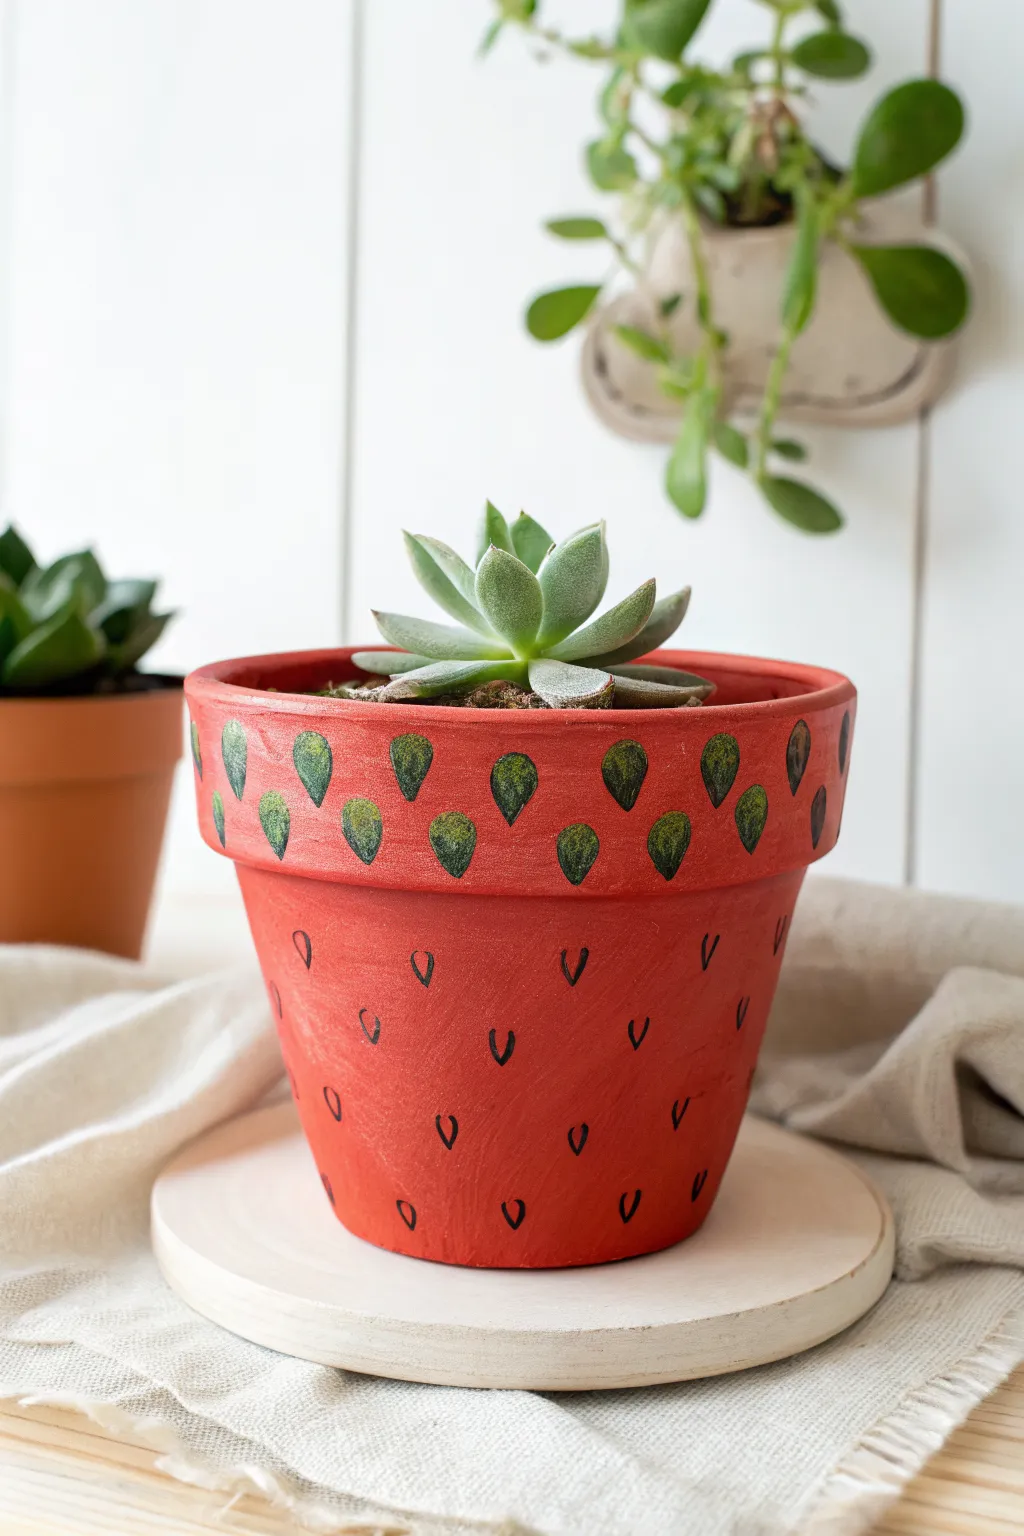
Transform a plain terracotta pot into a vibrant, juicy treat for your succulents with this adorable fruit-inspired design. The bold red base with whimsical seeds creates a cheerful strawberry look that instantly brightens up any windowsill.
Step-by-Step Guide
Materials
- Clean terracotta pot (standard size)
- Red acrylic craft paint (bright cardinal or primary red)
- Dark green acrylic craft paint
- Light green or lime acrylic craft paint
- Black acrylic craft paint or a black paint pen
- Flat paintbrush (medium size)
- Small round detail brush
- Clear acrylic sealer (matte or gloss spray)
- Paper plate or palette
- Water cup and paper towels
Step 1: Preparation and Base Coat
-
Prep the Surface:
Start by ensuring your terracotta pot is completely clean and dry. Use a damp cloth to wipe away any dust or debris, then let it air dry for about 30 minutes to ensure paint adhesion. -
First Red Layer:
Squeeze a generous amount of bright red acrylic paint onto your palette. Using the flat paintbrush, apply an even coat over the entire exterior of the pot, including the rim. -
Inside Rim Coverage:
Don’t forget to paint about an inch down into the inside of the top rim. This gives it a polished look when filled with soil. -
Let it Dry:
Allow the first coat to dry completely. Terracotta absorbs paint quickly, so this might check faster than you expect, usually around 20 minutes. -
Second Red Layer:
Apply a second coat of red paint to ensure solid, opaque coverage without any clay color showing through. Let this layer cure fully before moving to details.
Uneven Coverage?
If the terracotta absorbs the red paint unevenly, prime the pot with a layer of white acrylic paint first. This makes the top colors pop and requires fewer red coats.
Step 2: Painting the Greenery
-
Outline the Leaves:
Switch to your small round detail brush and the dark green paint. Along the thick top rim of the pot, paint small, teardrop-shaped leaves pointing downward. -
Spacing the Leaves:
Space these green teardrops evenly around the circumference of the rim. I like to paint one at the front, one at the back, and then fill in the gaps to keep the spacing consistent. -
Add Highlights:
While the dark green is still slightly tacky or just after it dries, dip your small brush into the light green or lime paint. -
Layering Color:
Gently paint a smaller teardrop shape inside each dark green leaf. This creates a two-tone effect that adds depth and texture to the ‘calyx’ of your strawberry. -
Touch Ups:
If your light green is too sheer, let it dry and add a second dab to make the color pop against the dark green background.
Make it Sparkle
For a sugar-coated fruit look, sprinkle extra fine clear glitter over the wet sealer, or use a gloss varnish to make the ‘fruit’ look freshly washed and shiny.
Step 3: Adding the Seeds
-
Plan the Pattern:
Visualize where your seeds will go on the main body of the pot. An alternating brick-lay pattern usually looks best. -
Paint the Seeds:
Using a very fine detail brush and black paint (or a black paint pen for easier control), draw small ‘V’ shapes or tiny teardrops. -
Consistent Direction:
Ensure the points of your ‘V’ shapes or teardrops are facing downward toward the bottom of the pot. -
Fill the Surface:
Continue the pattern all around the pot, keeping the spacing relatively loose to avoid a cluttered look. -
Rim Detail:
If you want extra detail, add a few tiny black seeds in the gaps between the green leaves on the upper rim, though this is optional.
Step 4: Finishing Touches
-
Final Drying:
Let all the paint work dry completely for at least an hour. If you used a paint pen, make sure the ink is set. -
Seal the Deal:
Take the pot to a well-ventilated area and spray it with a clear acrylic sealer. This protects the design from water damage when you water your plant. -
Potting:
Once the sealer is dry, fill your new fruit pot with succulent soil and add a cute rosette succulent to mimic the green top of a strawberry.
Now you have a refreshing pop of color ready to house your favorite small plant
Stacked Lighthouse Clay Pot Decor
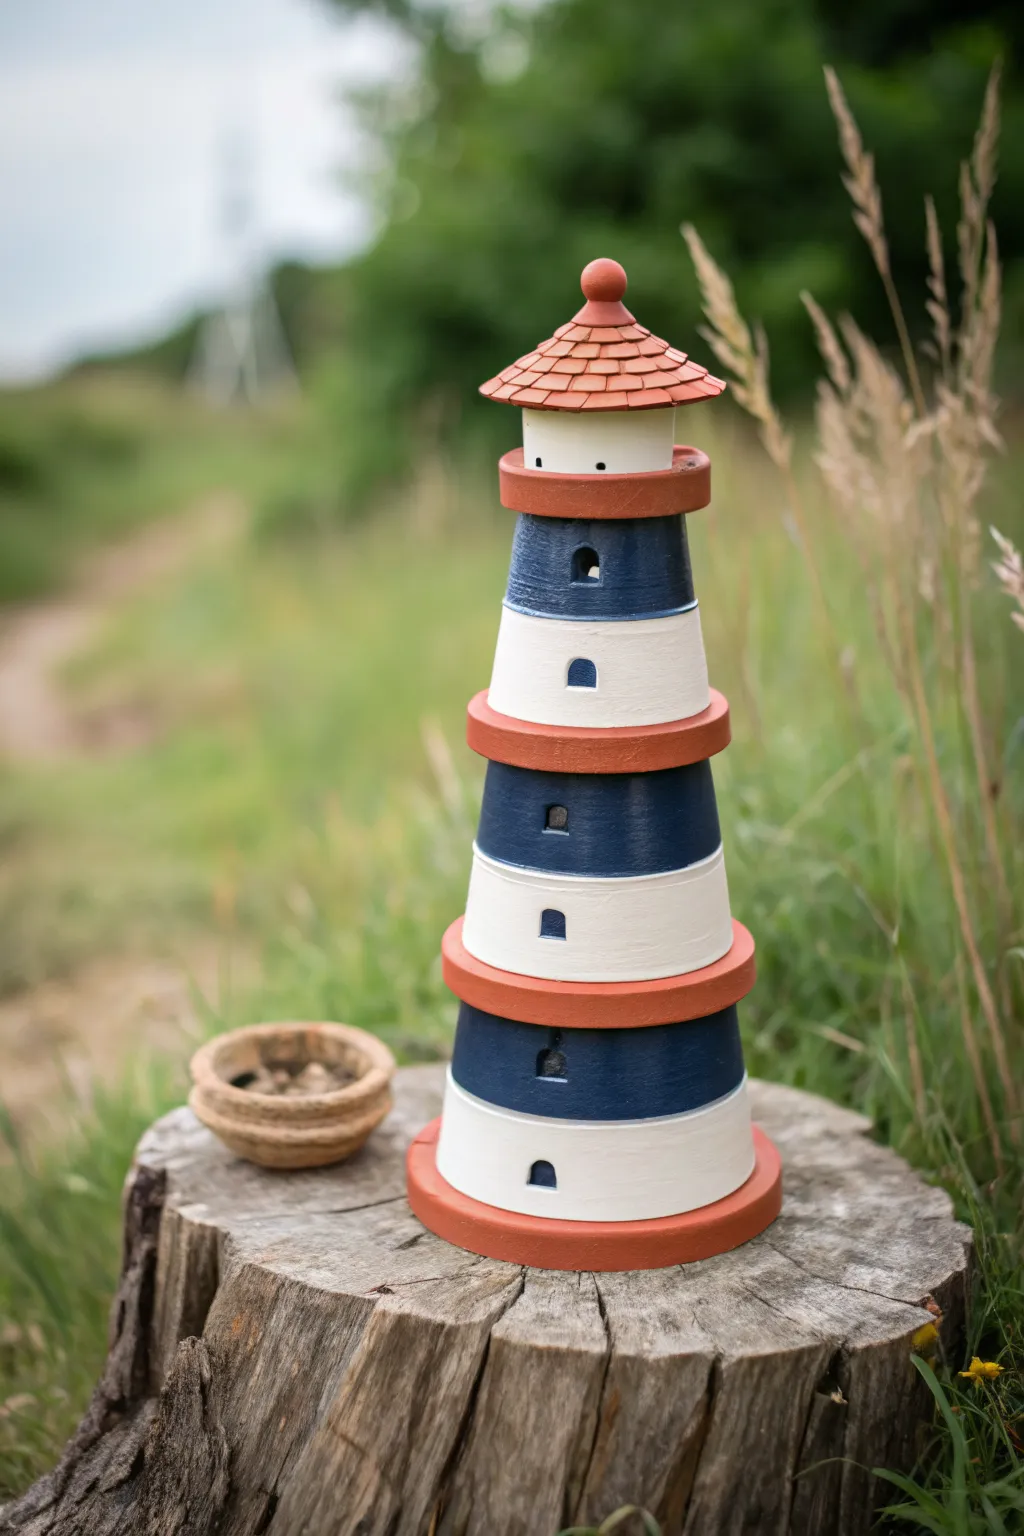
Bring a touch of coastal charm to your garden with this adorable DIY lighthouse made from simple terracotta pots. With its alternating nautical stripes and clever stacked design, this sturdy decoration looks perfect nestled among flower beds or resting on a tree stump.
Step-by-Step Tutorial
Materials
- 4 terra cotta pots in graduating sizes (e.g., 6″, 5″, 4″, 3″)
- 3 terra cotta saucers (sizes matching the largest three pots)
- Small terra cotta saucer (for the very top)
- Outdoor acrylic craft paint (Navy Blue, White, Burnt Orange/Terracotta Red)
- Strong outdoor adhesive (e.g., E6000) or construction adhesive
- Painter’s tape
- Foam brushes and small detail brushes
- Clear outdoor sealant spray (matte or satin)
- Small wooden knob or finial (optional, for the roof tip)
- Pencil
Step 1: Preparation and Base Coating
-
Clean the pots:
Before painting, ensure all your terracotta pots and saucers are completely free of dust and stickers. Wipe them down with a damp cloth and let them dry thoroughly so the paint adheres properly. -
Prime the surface:
Apply a base coat of white outdoor acrylic paint to the exterior of all four pots. This helps seal the porous clay and makes your top colors pop. You might need two coats for full coverage. -
Paint the saucers:
While the pots dry, paint all the saucers with your terracotta red or burnt orange color. These will act as the platforms and base of your lighthouse structure. -
Paint the bottom rim:
Take your largest pot (the base) and paint the thick rim at the top with the same terracotta red color to match the saucers. Do this for the rims of the other pots too, if you want them to match the platforms seamlessly.
Uneven Stacking?
If the pots wobble when stacked, the saucer bottoms might not be perfectly flat. Use a thick bead of E6000 or construction adhesive to bridge the gap and act as a leveling agent.
Step 2: Creating the Stripes and Detail
-
Tape off the stripes:
Once your white base coat is fully dry, use painter’s tape to mark off alternating sections. Look closely at the photo—the bottom pot has a blue top section and white bottom section. -
Apply navy blue:
Paint the exposed sections with your navy blue paint. For clean lines, press the tape down firmly before painting and peel it off gently while the paint is still slightly wet. -
Detail the second pot:
Repeat the taping process for the next size up. The pattern should alternate as the lighthouse rises, so if the previous section was blue, make the next one white. -
Paint windows:
Using a small detail brush and black or dark grey paint, create small arched windows on the front of each pot section. I find it helpful to sketch the arch lightly with a pencil first to center them. -
Add window sills:
Underneath each black window arch, paint a tiny horizontal white line or ledge to simulate a window sill. -
Create the roof texture:
For the smallest saucer that will act as the roof, use a fine brush to paint small, overlapping ‘U’ shapes or rectangles in a slightly lighter or darker red shade to mimic shingles.
Step 3: Assembly and Finishing
-
Glue the base:
Apply a generous ring of strong outdoor adhesive to the bottom of the largest saucer. Place the largest pot upside down onto this saucer to create a solid foundation. -
Stack the second level:
Apply glue to the bottom (now the top flat surface) of the largest upside-down pot. Place the second-largest saucer on it, then glue the second-largest pot upside down on top of that saucer. -
Continue stacking:
Repeat this pattern—saucer, then pot—decreasing in size as you go up. Ensure the windows are all aligned vertically before the glue sets. -
Assemble the lantern room:
For the very top section (the lantern room), use the smallest pot painted white. Glue the ‘shingled’ saucer on top of it as the roof. -
Add the finial:
If you have a small wooden knob or ball, paint it terracotta red and glue it to the very peak of the roof saucer for a finished look. -
Seal the project:
Once the entire structure is fully dry and cured (check your glue instructions), take it outside and spray it with several light coats of clear outdoor sealer to protect it from the elements.
Light It Up
Before gluing the very top pot (the lantern room), place a solar-powered garden light or a battery-operated LED candle inside it to make your lighthouse actually glow at night.
Place your charming new clay pot lighthouse in a garden bed or on a patio table to enjoy a bit of seaside flair throughout the season