When you want easy easy cute clay ideas, I’m all about tiny projects that start as simple balls, coils, and flat slabs—then instantly turn adorable with two dot eyes and a sweet little smile. These are my go-to beginner-friendly clay makes for quick wins that still look ridiculously cute on your shelf or keychain.
Mini Cat Head Charms
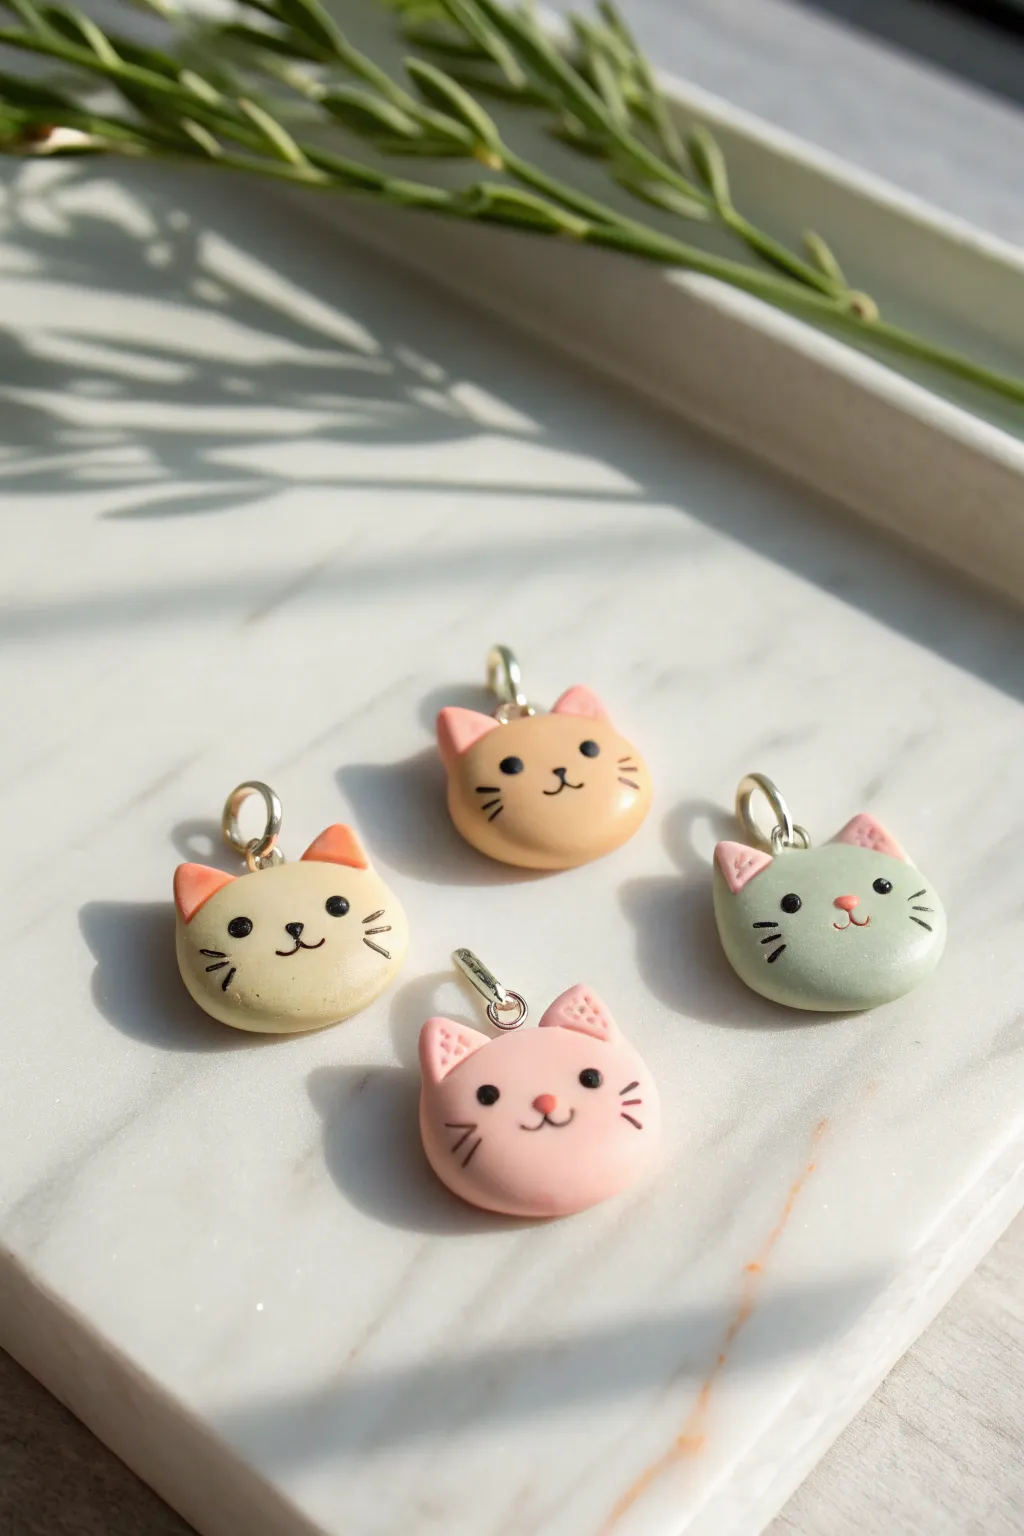
These adorable mini cat head charms are the perfect beginner project to practice shaping smooth curves and adding tiny details. With their sweet pastel palette and simple expressions, they make charming additions to bracelets, necklaces, or zipper pulls.
How-To Guide
Materials
- Polymer clay in pastel colors (cream, soft orange, sage green, blush pink)
- Polymer clay in black (for details)
- Polymer clay in darker pink (for inner ears/nose)
- Ceramic tile or glass work surface
- Pointed detailing tool or needle tool
- Ball stylus tool
- Metal screw eye pins (silver or gold)
- Small jump rings
- Gloss glaze (optional)
- Soft paintbrush
- Baking sheet and foil
- Oven
Step 1: Shaping the Base
-
Condition the Clay:
Begin by kneading your chosen pastel color of polymer clay until it is soft, pliable, and free of cracks. Warm clay is much easier to smooth. -
Form a Sphere:
Roll a small amount of clay, about the size of a large marble or a grape, into a perfect sphere between your palms. -
Flatten Slightly:
Place the sphere on your work surface and gently press down with your palm or a flat acrylic block to create a thick, rounded disc. You want it to look like a slightly puffed cookie, not a flat pancake. -
Smooth the Edges:
Run your finger around the circumference of the disc to soften any sharp edges created by flattening it. The shape should be organic and soft.
Step 2: Adding Features
-
Create Ear Triangles:
Take two tiny pinch of the darker pink clay (or the same base color if you prefer) and roll them into small balls. -
Shape the Ears:
Pinch these small balls into triangular shapes. Press these triangles gently onto the top left and right of the head. -
Blend the Ears:
Use a silicone tool or your finger to smooth the *back* seam of the ears onto the head so they are securely attached. Keep the front definition sharp. -
Inner Ear Detail:
If you used the base color for the ears, add a smaller triangle of pink clay to the front of each ear. You can add texture by gently poking the pink section with a needle tool. -
Insert Hardware:
Take a metal screw eye pin and carefully twist it into the center top of the head, between the ears. I find twisting it helps it grip the raw clay better than just pushing it in.
Sticky Situation
Is the clay getting too soft and sticky? Pop it in the fridge for 10 minutes. Cooler clay holds fine details much better and won’t distort when you handle it.
Step 3: Face Details
-
Make the Eyes:
Roll two microscopic balls of black clay. Place them on the face, spaced somewhat wide apart for a cute ‘kawaii’ look, and press them flat gently. -
Add the Nose:
Roll a tiny oval of pink clay and place it centrally below the eyes to form the nose. -
Create the Mouth:
Roll an extremely thin snake of black clay. Cut two tiny curved pieces and arrange them under the nose to create a ‘w’ shape mouth. -
Alternative Mouth Method:
If handling tiny clay snakes is too difficult, you can bake the charm without a mouth and draw it on later with a fine-tip permanent marker or acrylic paint. -
Add Whiskers:
Roll very thin threads of black clay. Cut short lengths and place three on each cheek area. Press them gently so they adhere without smashing the shape.
Pro Tip: Eye Shine
To make the eyes truly come alive, add a tiny dot of white acrylic paint to the upper corner of each black eye after baking. It adds an instant sparkle.
Step 4: Finishing
-
Check for Fingerprints:
Before baking, lightly brush the surface with a little baby oil or use a soft brush to smooth away any accidental fingerprints. -
Bake:
Place your charms on a foil-lined baking sheet. Bake according to your specific clay package instructions (usually 275°F/135°C for 15-30 minutes depending on thickness). -
Cool Down:
Allow the charms to cool completely in the oven or on a wire rack. They are fragile while hot. -
Secure the Eye Pin:
Once cool, gently unscrew the metal eye pin, add a drop of superglue to the threads, and screw it back in for a permanent hold. -
Glaze (Optional):
For a finished look, brush a coat of gloss glaze over the eyes and nose to make them shine, or coat the entire charm for durability. -
Add Jump Ring:
Using pliers, open a jump ring, loop it through the eye pin, and close it securely. Your charm is now ready for jewelry making.
Now you have a handful of sweet feline friends ready to be turned into gifts or accessories


Chubby Frog Figurines

These delightfully chubby frog figurines bring a touch of whimsy to any shelf with their soft pastel green bodies and sweet, simple expressions. Their smooth, stone-like texture and minimalist design make them an approachable project for beginners looking to create adorable desk companions.
Step-by-Step
Materials
- Air-dry clay (white or light grey)
- Acrylic paints (pastel green, white, black, pale pink)
- Fine grit sandpaper (220 or higher)
- Small cup of water
- Pointed sculpting tool or toothpick
- Fine liner paintbrush
- Small flat paintbrush
- Matte spray varnish or sealant
Step 1: Shaping the Base
-
Form the body:
Start with a ball of clay roughly the size of a tangerine. Roll it between your palms until it is completely smooth and free of cracks, then gently tap the bottom on your work surface to create a flat base so it stands upright. -
Taper the shape:
Using the sides of your hands, gently press and roll the upper third of the ball to narrow it slightly, creating a rounded pear shape that forms the frog’s head and body in one piece. -
Smooth the surface:
Dip your finger in a tiny bit of water and rub it over the clay to smooth out any fingerprints or minor imperfections. Getting the surface glassy smooth now saves sanding time later.
Water Control
Use water sparingly when smoothing clay. Too much water can make clay slimy and prone to cracking as it dries. A damp finger is usually enough.
Step 2: Adding Features
-
Create eye mounds:
Roll two small, pea-sized balls of clay. Place them on top of the head area, spacing them slightly apart. Blend the bottom edges of these balls into the main body using a modeling tool or your finger so there is no visible seam. -
Define the arms:
Roll two thin coils of clay, about an inch long each. Attach these vertically to the sides of the body, curving them slightly forward to suggest resting arms. -
Blend the limbs:
Carefully blend the upper and back edges of the arms into the body, leaving the front edge distinct to show the form. This makes the frog look like a solid, cohesive sculpture. -
Dry completely:
Set your frog aside to dry in a cool, dry place. Depending on the brand of clay and humidity, this can take 24 to 48 hours. The clay should feel room temperature, not cool, when it is fully dry.
Step 3: Refining & Painting
-
Sand for smoothness:
Once bone dry, take your fine-grit sandpaper and gently buff the entire surface. Focus on erasing any bumps or rough patches where you attached the limbs and eyes. -
Wipe clean:
Use a slightly damp cloth or a dry soft brush to remove all the sanding dust before you begin painting. -
Base coat:
Mix a soft pastel green using white and green acrylic paint. Apply an even coat over the entire frog. I find that applying two thin coats usually looks better than one thick one. -
Add the belly dots:
If you want the patterned frog, mix a very pale pink or cream color. Use the tip of a toothpick or a small dotting tool to gently stamp small dots across the lower belly area. -
Paint the eyes:
Using a fine liner brush and black paint, carefully paint the pupils onto the raised eye mounds. Add a tiny dot of white inside the black pupil for a lifelike sparkle. -
Draw the smile:
With the thinnest brush you have or a fine-tip black marker, draw a wide, shallow U-shape for the mouth. Add tiny vertical tick marks at the ends for dimples if desired. -
Apply blush:
Dilute a small amount of pink paint with water to make a glaze. Dab this lightly onto the cheeks with your finger or a dry brush to give a soft, diffused rosy look. -
Seal the work:
Finish by spraying or brushing on a matte varnish. This protects the paint and gives the frog that professional, finished ceramic look.
Cracks appeared?
Minor drying cracks happen! Makes a paste with a little fresh clay and water, fill the crack, let it dry, and sand it smooth again.
Enjoy finding the perfect spot for your new little green friends to sit.


Kawaii Fruit Slice Keychains
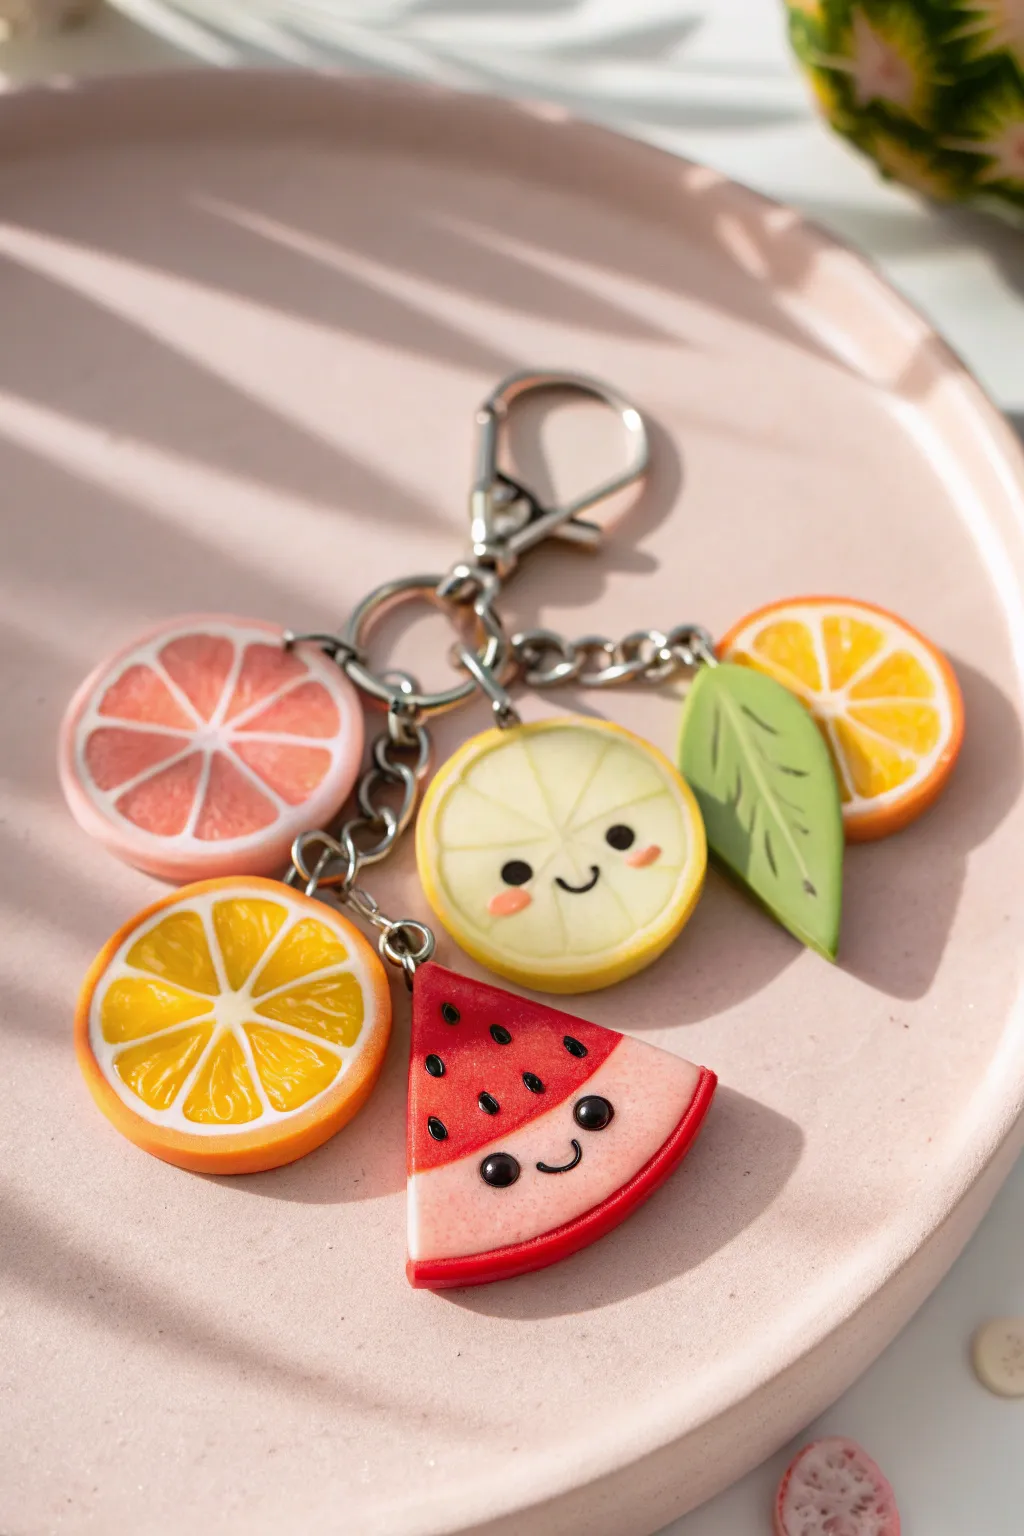
Brighten up your keys or backpack with this refreshing cluster of polymer clay fruit slices. Featuring both realistic citrus textures and adorable kawaii faces, this project is the perfect blend of sweet and sunny.
Detailed Instructions
Materials
- Polymer clay (white, translucent, yellow, orange, pink, red, green, black)
- Circle cutters (small/medium sizes)
- Blade or X-Acto knife
- Needle tool or toothpick
- Rolling pin or pasta machine
- Eyepins (silver)
- Jump rings and keychain clasp
- Gloss glaze or UV resin
- Black acrylic paint (optional for faces)
- Dotting tool
Step 1: Citrus Slices Base
-
Mix Translucent Colors:
Start by mixing translucent clay with very small amounts of yellow, orange, and pink clay separately. You want the colors to be vibrant but still retain that juicy, see-through quality characteristic of citrus flesh. -
Form the Segments:
Roll your colored translucent mixes into logs. Flatten each log slightly into a triangular manufacturing cane shape if you are familiar with canes, or simply shape individual small triangles for each segment by hand. -
Wrap and Assemble:
Roll a very thin sheet of opaque white clay. Wrap each triangular segment in this white clay to create the pith lines. Arrange these wrapped triangles in a circle to form a wheel shape—typically 8 segments work best. -
Add the Rind:
Wrap the entire wheel in a thicker layer of opaque white clay, followed by a final thin layer of the corresponding fruit skin color (yellow for lemon, orange for orange, pinkish-orange for grapefruit). -
Slice and Texture:
Carefully slice your cane into discs about 4-5mm thick. Use a needle tool to gently scratch tiny radial lines into the translucent segments to mimic juicy pulp texture.
Sticky Situation
If your white clay is getting stained by the bright colors, wash your hands and wipe your tools with baby wipes or rubbing alcohol between every color switch.
Step 2: Watermelon & Leaf
-
Shape the Watermelon:
Create a thick semi-circle of red clay. Wrap the curved edge first with a thin strip of white clay, then a strip of green clay to form the rind. -
Add Seeds:
For a kawaii look, you can embed tiny teardrops of black clay into the red flesh now, or paint them later. I prefer embedding them slightly so they stay flush. -
Sculpt the Leaf:
Flatten a ball of green clay into a teardrop shape. Use your needle tool to press a center vein and angled side veins to give it a realistic leaf texture.
Make It Sparkle
Mix a tiny pinch of white glitter into your translucent fruit flesh clay before shaping. The subtle sparkle mimics the glistening juice of real citrus fruit perfectly
Step 3: Kawaii Details & Assembly
-
Add Faces:
Select one or two slices (like the lemon and watermelon) to be characters. Roll tiny balls of black clay for eyes and press them onto the surface. Add tiny pink cheeks using small flattened discs of pink clay. -
Create Smiles:
Roll an incredibly thin snake of black clay to form a smile, or simply impress a smile shape with a small round tool. Place it centrally between the cheeks. -
Insert Hardware:
Trim your eyepins to size and insert them into the top of each fruit slice. Secure the pin by pushing some clay around the insertion point so it doesn’t pull out after baking. -
Bake:
Bake all pieces according to your clay manufacturer’s instructions. Usually, this is around 275°F (130°C) for 15-30 minutes depending on thickness. -
Glaze:
Once cooled, coat the fruit slices with a gloss glaze or UV resin. This is crucial as it makes the translucent clay look truly juicy and protects the tiny faces. -
Final Assembly:
Use jump rings to attach each fruit charm and the leaf to a main keychain ring. Vary the length of the chains slightly so the fruits cluster nicely without bunching up too much.
Enjoy carrying a little slice of summer with you wherever you go


Smiley Cloud Magnets
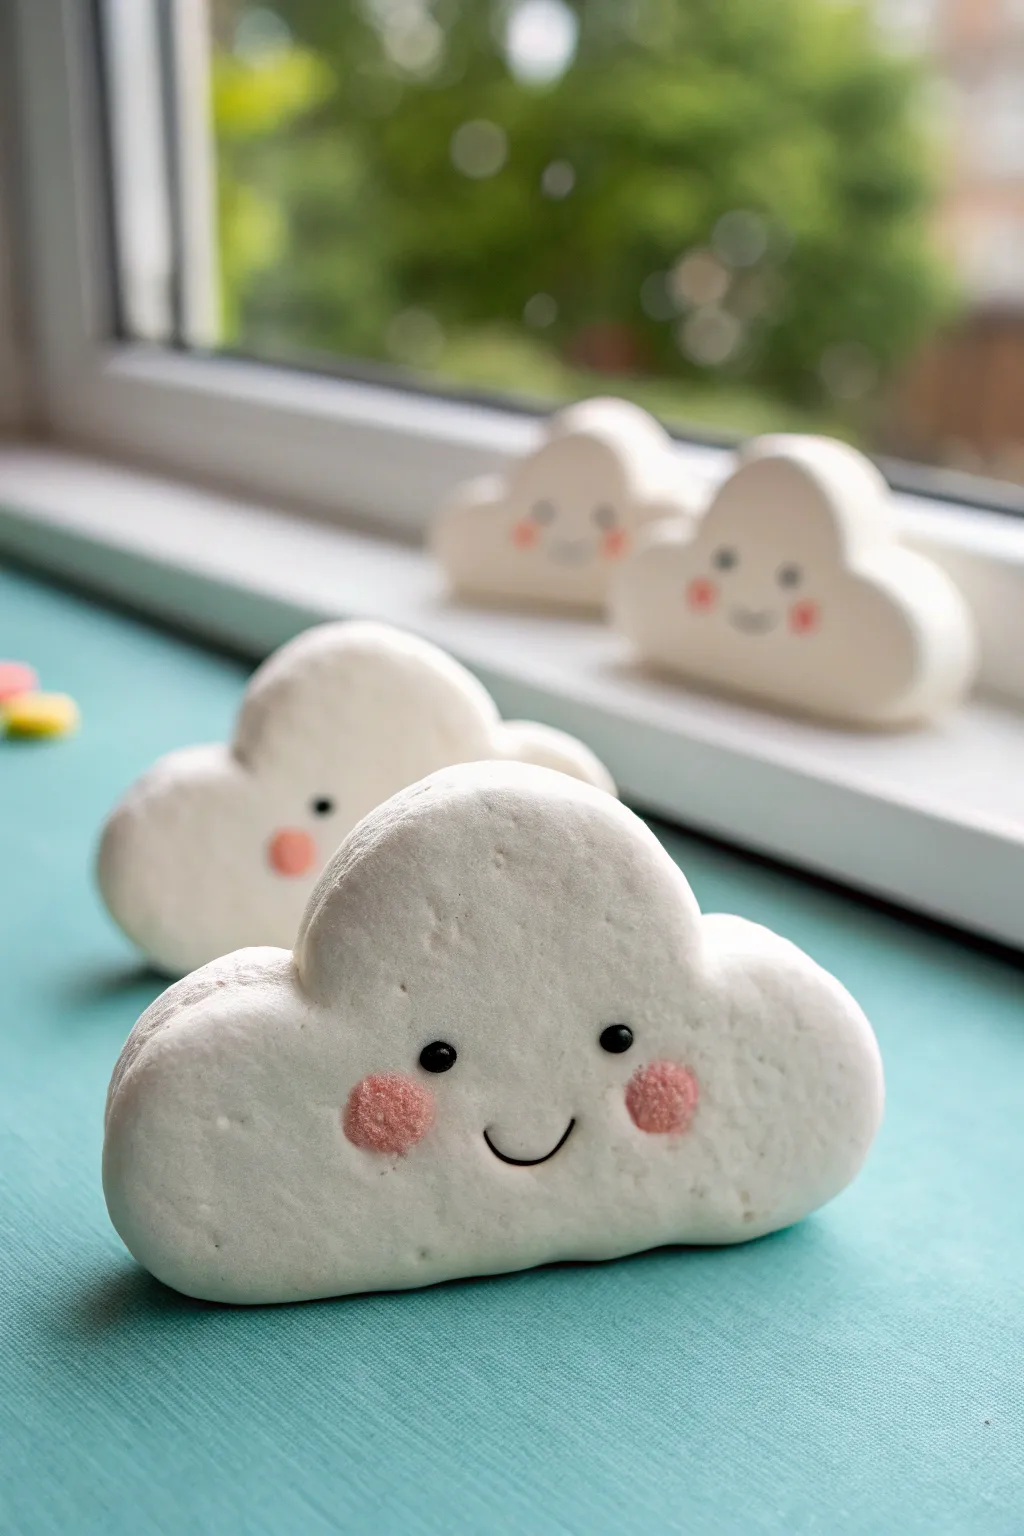
Brighten up your fridge or whiteboard with these adorable smiling cloud magnets made from smooth white clay. Their sweet expressions and simple shapes make them perfect for a relaxing afternoon craft session.
Step-by-Step Guide
Materials
- White polymer clay or air-dry clay
- Rolling pin
- Small cloud cookie cutter (optional)
- Black acrylic paint
- Pink soft pastel chalk or pink blush
- Small detail paintbrush
- Small dotting tool or toothpick
- Cotton swab or small soft brush
- Strong round magnets
- Superglue or E6000
- Matte varnish (optional)
Step 1: Shaping the Clouds
-
Condition the Clay:
Begin by taking a chunk of white clay and kneading it in your hands until it is soft, pliable, and free of cracks. If you are using polymer clay, the warmth of your hands will help condition it. -
Roll it Out:
Roll the clay into a smooth slab on a clean work surface. Aim for a thickness of about 1/4 inch (6mm) so the magnets will feel substantial but not too heavy. -
Create the Shape:
If you have a cloud cookie cutter, press it firmly into the clay. If not, shape a ball of clay by hand, flatten it slightly, and press in the edges with your finger to create rounded bumps. -
Smooth the Edges:
Gently rub your finger along the cut edges of the clay to smooth out any sharpness or roughness. Usually I dip my finger in a tiny bit of water (for air-dry) or baby oil (for polymer) to get it perfectly smooth. -
Add Texture (Optional):
For a more organic look like the original image, you can lightly tap the surface with a crumpled piece of aluminum foil or a toothbrush to give it a stone-like texture, or keep it perfectly smooth for a modern look.
Step 2: Adding the Face
-
Prepare the Cheeks:
Before baking or drying, create the blushing cheeks. Scrape a small amount of pink pastel chalk into a fine powder. -
Apply the Blush:
Dip a cotton swab or a soft dry brush into the pink powder. Gently dab two circular spots onto the raw clay where the cheeks should be. Apply it lightly at first and build up the color. -
Curing or Drying:
If using polymer clay, bake the clouds according to the package instructions (usually 275°F/135°C for 15-30 minutes). If using air-dry clay, let them sit in a dry spot for 24-48 hours until fully hardened. -
Paint the Eyes:
Once the cloud is cool and hard, dip a dotting tool or the back of a paintbrush into black acrylic paint. Dot two small, solid black eyes just above and between the pink cheeks. -
Highlight the Eyes:
Wait for the black paint to dry completely. Then, using a tiny needle tool or the very tip of a toothpick, add a microscopic dot of white paint to the upper corner of each black eye for a ‘sparkle’ effect. -
Draw the Smile:
Using your finest detail brush or a fine-tip black paint pen, draw a simple, small ‘U’ shape between the cheeks for the smile.
Smudged Cheeks?
If the pink pastel dust gets messy or goes too wide, use a cotton swab dipped in a tiny bit of rubbing alcohol (for polymer) or water (for air-dry) to gently wipe away the excess before baking.
Step 3: Finishing Touches
-
Seal the Face:
To protect the paint and pastel, apply a thin coat of matte varnish over the face area. Make sure the black paint is 100% dry so it doesn’t smear. -
Prep the Back:
Turn the cloud over. Determine the center point where the magnet will sit so the cloud hangs straight. -
Attach the Magnet:
Apply a dab of strong adhesive like E6000 or superglue to the back of the magnet. -
Secure and Dry:
Press the magnet firmly onto the back of the cloud. Let the glue cure undisturbed for several hours to ensure a permanent bond.
Make it a Stormy
Mix a tiny bit of black clay into your white to create a soft grey color. Give this ‘storm cloud’ a grumpy face or a little yellow lightning bolt accessory for variety.
Now your fridge has a little extra personality with these charming weather friends

The Complete Guide to Pottery Troubleshooting
Uncover the most common ceramic mistakes—from cracking clay to failed glazes—and learn how to fix them fast.
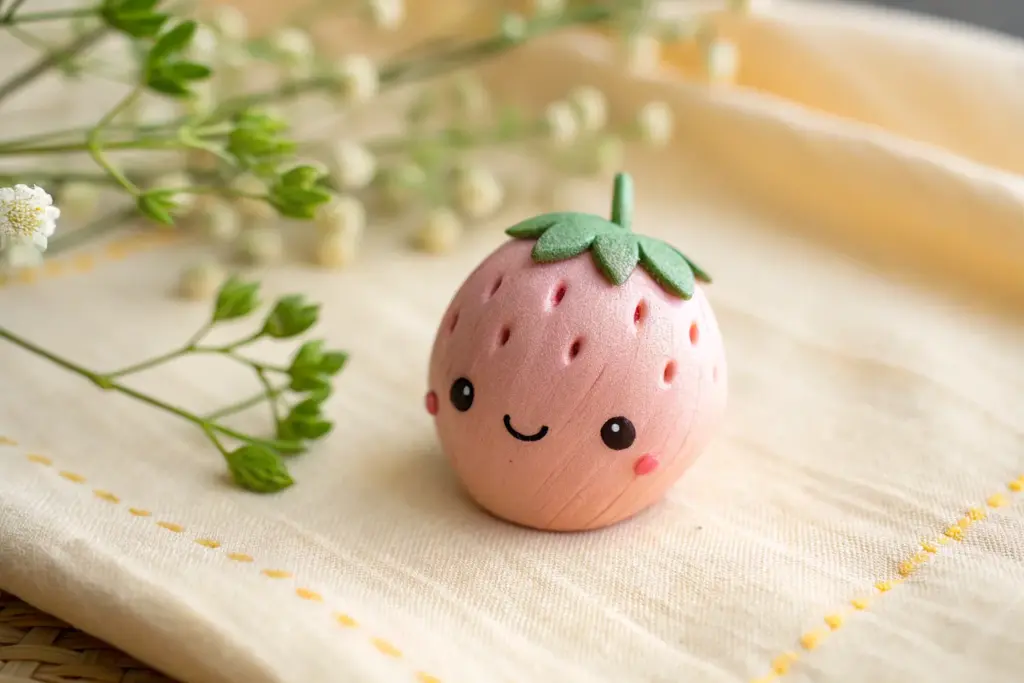
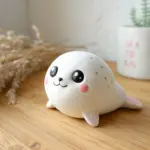
Tiny Axolotl Desk Buddy

Sculpt a delightfully round and cheerful axolotl to keep you company while you work. This beginner-friendly project uses soft pink clay and simple shapes to create an adorable amphibian friend with charmingly detailed gills.
Step-by-Step
Materials
- Pink polymer clay (soft pink color)
- Darker pink or rose polymer clay (for gills)
- Black polymer clay or black acrylic paint (for eyes)
- Fine glitter or mica powder (optional, for shimmer)
- Needle tool or toothpick
- Ball stylus tool
- Soft paintbrush
- Oven for baking (if using polymer clay)
Step 1: Shaping the Base Body
-
Condition the clay:
Start by kneading your main pink clay until it is soft, pliable, and free of air bubbles. If you want a subtle shimmer like the photo, mix in a very small pinch of fine glitter or mica powder during this stage. -
Form the main body:
Roll a large ball of the pink clay, about the size of a golf ball or slightly smaller. Gently press it into an oval or egg shape, keeping it quite round and plump to give it that cute, chubby look. -
Smooth the surface:
Use your thumb to smooth out any fingerprints. The surface should be matte and even. Lay it down on your work surface and gently tap the bottom so it sits totally flat without rolling away. -
Create the tail base:
Pinch the back end of the oval slightly to elongate it into a short, tapered nub. This serves as the connection point for the tail fin later.
Legs Won’t Stick?
If the tiny legs keep falling off, score the clay surfaces (scratch them up) where they join and add a drop of liquid polymer clay or ‘Bake and Bond’ as glue before pressing them together.
Step 2: Adding Fins and Legs
-
Sculpt the tail fin:
Take a smaller piece of pink clay and flatten it into a fan shape. Use your fingers to thin out the edges. Attach this directly to the tapered nub you made on the body. -
Detail the tail:
Using a needle tool or the back of a craft knife, gently press vertical lines into the tail fin to create ribbed texture. -
Form the tiny legs:
Roll four tiny balls of pink clay, identical in size. Roll them slightly into short cylinders or Tic-Tac shapes. -
Attach the limbs:
Press the four legs onto the underside of the body—two near the front and two near the back. Use a blending tool or your finger to smooth the seams where the clay joins so the legs don’t fall off.
Step 3: Creating the Signature Gills
-
Prepare the gill clay:
Take your darker pink or rose-colored clay. If the contrast is too sharp, I often mix a little of the body color into the dark pink to harmonize the shades. -
Shape the gill stalks:
Create six small, flattened triangle or leaf shapes. These should be slightly graduated in size—top ones smaller, bottom ones slightly larger. -
Add texture:
Use your needle tool to prick tiny texture holes or indentations onto these gill pieces to mimic a feathery look. -
Attach the gills:
Press three gill pieces onto the left side of the head and three onto the right, positioned just behind where the face will be. Flare them outward for a dynamic look.
Smooth Out Prints
Before baking, lightly brush your sculpture with a tiny amount of cornstarch or baby oil. This helps smooth out stubborn fingerprints and gives the finished piece a professional, soft-matte finish.
Step 4: Face and Finishing Touches
-
Set the eyes:
Roll two minuscule balls of black clay. Press them firmly into the face area, spacing them wide apart for maximum cuteness. Alternatively, create slight indentations now and paint the black eyes after baking. -
Carve the smile:
Use a needle tool or a curved blade to carefully press a wide, U-shaped smile between the eyes. Keep the line thin and delicate. -
Add freckles:
Roll extremely tiny specks of the darker pink clay and press them onto the forehead and cheeks, or use a tool to gently stipple small dots for texture. -
Final smooth check:
Do a once-over with a very minimal amount of baby oil on your finger to remove any dust or fingerprints before baking. -
Bake:
Bake the figurine according to your clay manufacturer’s instructions (usually around 275°F or 130°C for 15-30 minutes). Let it cool completely before handling.
Now you have a charming little pocket monster to brighten up your desk space
Simple Mushroom Pals
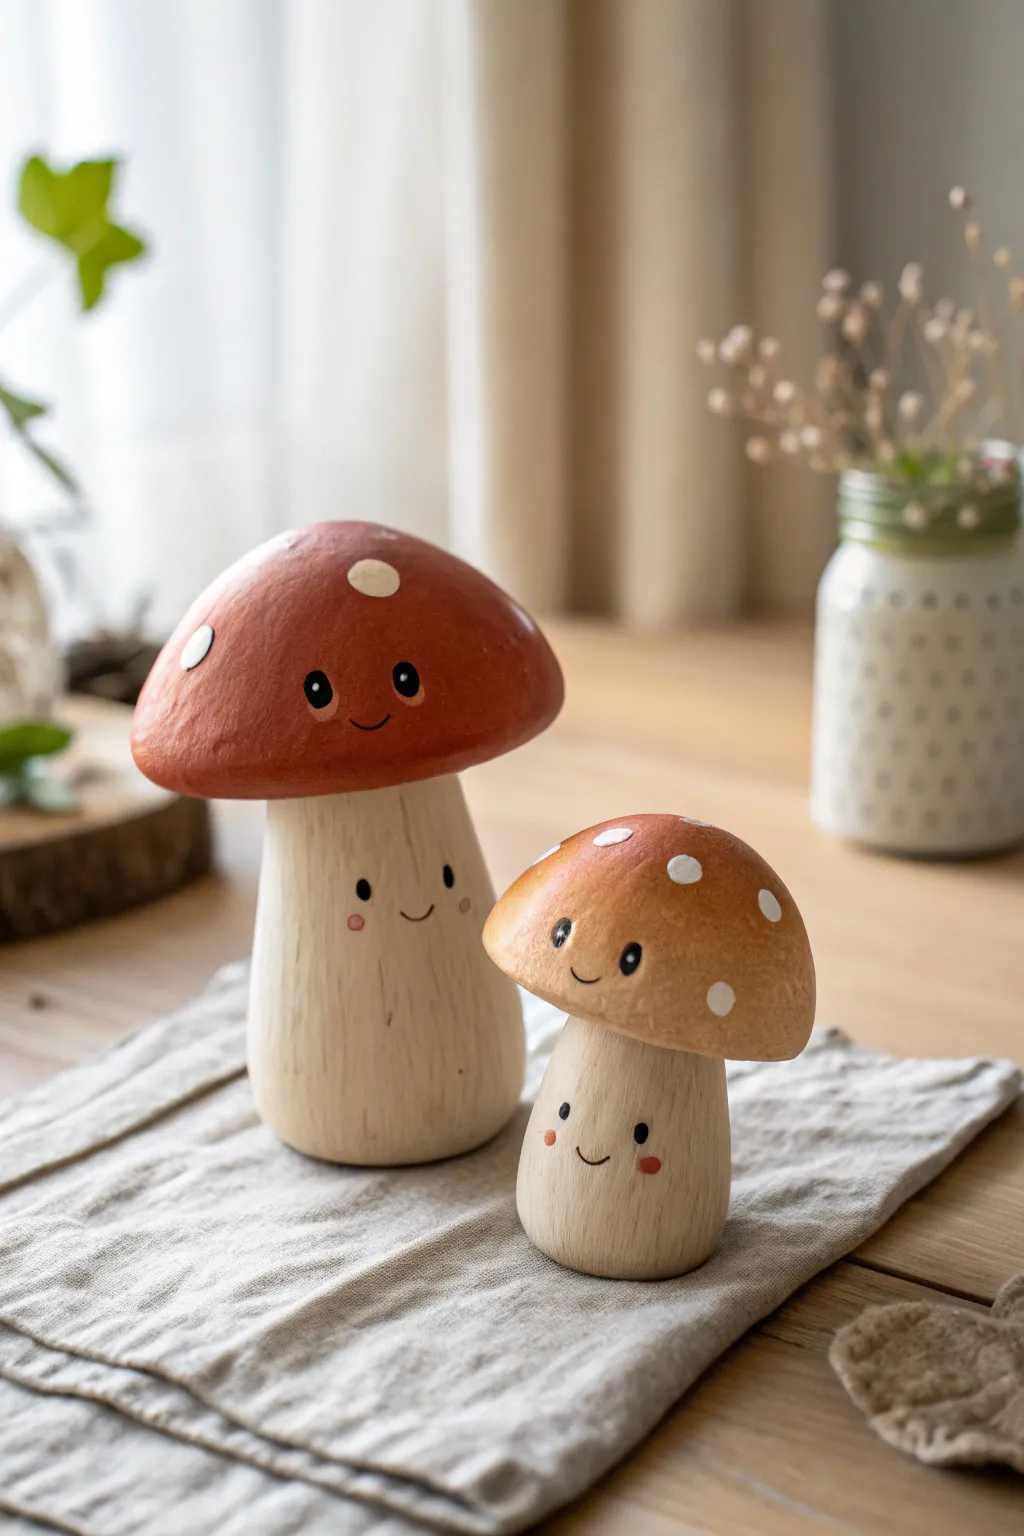
Create a pair of charming forest friends that mimic the warm, organic texture of turned wood using simple air-dry clay techniques. These adorable mushroom pals feature earthy red-brown caps, delightful little smiles, and a smooth, matte finish that fits perfectly with cottagecore decor.
Step-by-Step Tutorial
Materials
- Air-dry clay (white or natural)
- Aluminum foil
- Acrylic paints (rust red, burnt sienna, cream/off-white, black, pink)
- Fine grit sandpaper
- Sculpting tools (needle tool, smoothing tool)
- Paintbrushes (medium flat, fine detail liner)
- Water cup
- Matte sealant spray or varnish
Step 1: Sculpting the Shapes
-
Create the armatures:
Begin by crumpling aluminum foil into two distinct shapes for each mushroom: a thick, cylindrical stem and a separate wide, domed cap. This saves clay and keeps the figurines lightweight. -
Cover the stems:
Roll out a sheet of clay to about 1/4 inch thickness. Wrap it entirely around your foil stem armature, smoothing the seams together with a bit of water until the join is invisible. -
Shape the base:
Gently tap the bottom of the clay stem on your work surface to flatten it so the mushroom will stand upright without wobbling. -
Form the caps:
Cover the foil cap armatures with a similar sheet of clay. Smooth the clay over the dome, curling it slightly underneath to create a nice, rounded lip. -
Join the pieces:
Score the top of the stem and the underside of the cap with a needle tool. Apply a little water or liquid clay (slip) to these scratched areas and firmly press the cap onto the stem. -
Add wood grain texture:
While the clay is still soft, use a needle tool or a stiff brush to drag very faint vertical lines down the stem. I like to keep these subtle—just enough to suggest wood grain rather than deep grooves. -
Refine the surface:
Dip your finger in water and smooth out any fingerprints or harsh lumps on the cap, ensuring a nice round silhouette. -
Let them dry:
Allow your mushrooms to dry completely for 24-48 hours. Turn them occasionally to ensure air reaches the bottom.
Step 2: Painting and details
-
Smoothing the surface:
Once fully dry, essentially sand the entire surface with fine-grit sandpaper to remove any rough texture, mimicking the smoothness of polished wood. -
Base coat the stems:
Mix a cream or off-white paint with a tiny drop of brown to get a natural wood tone. Paint the entire stem, using vertical strokes to enhance the faux-grain effect. -
Paint the caps:
For the larger mushroom, paint the cap a deep rust red. For the smaller one, mix burnt sienna with a little yellow ochre for a lighter, golden-brown hue. Let these dry completely. -
Layering the wood look:
Using a dry brush technique with a slightly darker shade of your stem color, lightly whisk over the vertical texture on the stem to make the ‘wood grain’ pop. -
Adding cap spots:
Dip the handle end of a paintbrush into cream paint and dot it onto the caps. Create a few random white spots—some large, some small—to break up the solid color. -
Drawing the face (Part 1):
Using your finest detail brush and black paint, carefully paint two small oval eyes on the stem. For the larger mushroom, place the eyes on the cap rim instead for quirkiness. -
Drawing the face (Part 2):
Paint a very thin, curved line between the eyes for a smile. Add tiny white reflection dots inside the black eyes to bring them to life. -
Rosy cheeks:
Dilute pink paint with a lot of water to make a glaze, or use a dry brush with very little paint, and dab gentle blushing cheeks next to the smiles. -
Seal the work:
Finish by spraying the entire piece with a matte varnish. This protects the paint and unifies the sheen, completing the realistic wooden toy aesthetic.
Water Smoothing Limit
Don’t use too much water when smoothing air-dry clay, or it can crack as it dries. Just a damp finger is enough to blur seams.
Mossy Bottoms
Glue dried moss or small felt leaves around the base of the stems to make them look freshly plucked from the forest floor.
Set your new mushroom pals on a shelf or windowsill to bring a touch of woodland magic to your room


What Really Happens Inside the Kiln
Learn how time and temperature work together inside the kiln to transform clay into durable ceramic.
Heart Cheek Trinket Dish
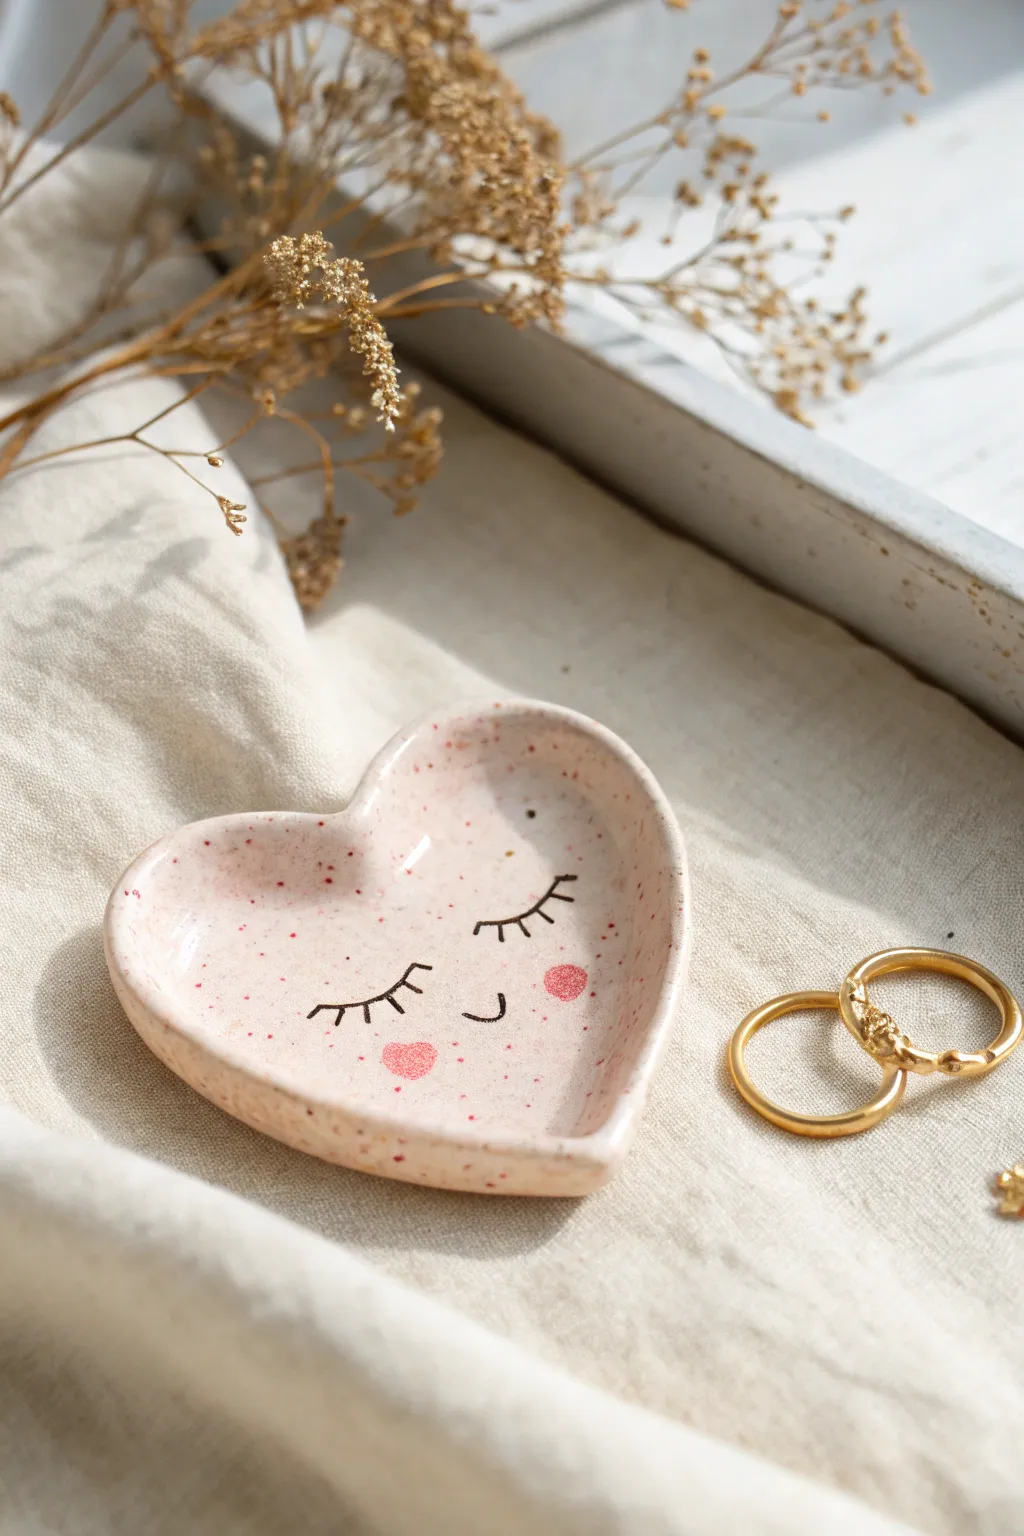
Capture sweetness in clay form with this adorable heart-shaped dish featuring a sleeping face and rosy cheeks. The speckled pink finish gives it a trendy ceramic look without needing a kiln, making it perfect for holding your favorite rings.
Step-by-Step Guide
Materials
- White air-dry clay or polymer clay
- Rolling pin
- Heart-shaped cookie cutter (approx. 3-4 inches wide)
- Small bowl of water
- Sandpaper (fine grit)
- Acrylic paints: pale pink, dark brown/black, reddish-pink, coral
- Toothbrush or stiff bristle brush
- Fine detail paintbrush (size 0 or 00)
- Glossy varnish or sealant
- Sponge or foam dauber
Step 1: Shaping the Base
-
Prepare the Clay:
Begin by conditioning your clay. Knead a ball of white clay in your hands until it becomes soft, pliable, and free of cracks. If you are using polymer clay, warm it up well. -
Roll it Out:
On a smooth surface, roll the clay out to an even thickness of about 1/4 inch. Try to keep the thickness consistent so the dish dries evenly. -
Cut the Shape:
Press your heart-shaped cookie cutter firmly into the clay. Lift away the excess clay from the outside before removing the cutter to keep the edges sharp. -
Create the Curve:
Gently lift your clay heart and place it in the palm of your hand. Using your thumb, softly press into the center and gently curve the edges upward to create a shallow bowl shape. -
Smooth the Edges:
Dip your finger in a little water and run it along the rim of the heart. This smooths out any harsh lines left by the cutter and prevents rough edges later. -
Dry Completely:
Set the dish aside to dry. If using air-dry clay, let it sit for 24-48 hours until bone dry. For polymer clay, bake according to the manufacturer’s instructions.
Step 2: Painting the Design
-
Sand for Smoothness:
Once fully cured or dry, inspect your dish. Use fine-grit sandpaper to gently buff away any bumps or fingerprints, wiping away the dust with a damp cloth afterward. -
Base Coat:
Mix a very pale pink acrylic paint. Apply a smooth, even bloats to the entire dish, including the sides and back. You may need two coats for full opacity; let each layer dry fully. -
Create the Speckles:
Dilute a small amount of reddish-pink paint with water until it is fluid. Dip an old toothbrush into this mixture. -
Splatter Technique:
Hold the toothbrush over the dish and run your thumb across the bristles to flick tiny specks of paint onto the surface. Practice on a paper towel first to control the spray density. -
Sketch the Face:
I highly recommend lightly sketching the facial features with a pencil first to ensure the eyes are symmetrical and centered before committing with paint. -
Paint the Lashes:
Using your finest detail brush and dark brown or black paint, carefully trace over your pencil lines. Create two downward curves for closed eyes, adding three small lashes to each outer corner. -
Add the Smile:
Paint a tiny, simple ‘u’ shape in the center below the eyes for the mouth. Keep the line thin and delicate. -
Apply Rosy Cheeks:
Dip a small round sponge dauber or brush into coral pink paint. Dab one round cheek on the right side. On the left side, hand-paint a small heart shape for a whimsical asymmetrical look.
Fixing Smudges
Make a mistake while painting the eyelashes? Use a slightly damp cotton swab or Q-tip to gently lift the wet paint immediately without ruining the base pink layer.
Step 3: Finishing Touches
-
Seal the Work:
Wait for all paint details to be completely dry to the touch. Apply a coat of glossy varnish or sealant over the entire dish. -
Protect the Base:
Don’t forget to seal the bottom of the dish as well once the top is dry. This protects surfaces and gives the piece a professional, finished feel.
Smooth Curves
To get a perfectly even curve without fingerprints, dry your clay heart inside a larger spoon or a small rounded bowl lined with plastic wrap.
Place this charming dish on your nightstand to keep your jewelry safe and add a touch of joy to your room
Mini Bear Face Ring Dish
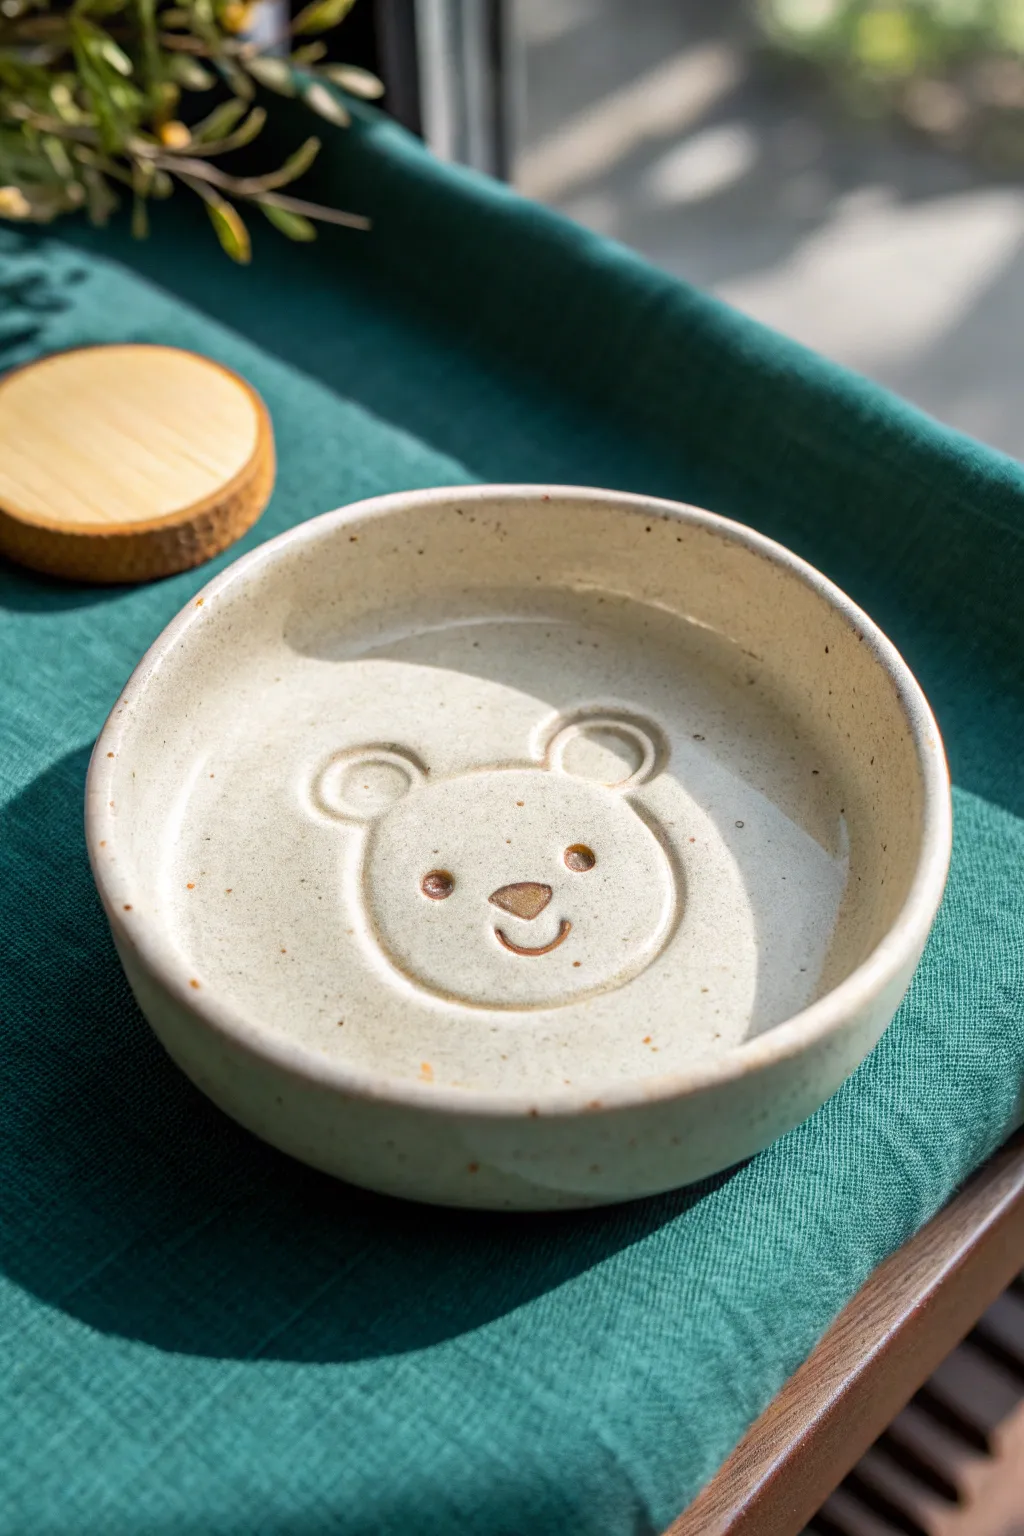
This charming little catch-all dish features a sweet bear face debossed directly into the surface, perfect for holding rings or small trinkets. The final piece has a warm, speckled cream finish with raw clay details that give it an organic, handmade feel.
Step-by-Step
Materials
- Light-colored stoneware clay (speckled variety recommended)
- Small rolling pin
- Circle cutter (approx. 4-5 inches)
- Sponge
- Small bowl or slump mold
- Needle tool
- Small ball stylus tool
- Small round cutter (for ears)
- Brown underglaze
- Clear or transparent cream glaze
- Paintbrush
Step 1: Forming the Base
-
Roll the slab:
Begin by wedging your clay to remove air bubbles, then roll it out into an even slab about 1/4 inch thick on a canvas or cloth surface. -
Smooth the surface:
Before cutting, take a damp sponge or a pottery rib and gently compress the surface of the slab to remove any canvas texture or rolling marks. -
Cut the circle:
Use your large circle cutter or trace around a bowl with a needle tool to cut out the main disk for your dish. -
Soften the rim:
Run a damp finger or a piece of plastic wrap along the cut edge to round it off slightly, ensuring the rim won’t be sharp after firing. -
Lift the edges:
Gently lift the edges of your clay circle. You can shape it by hand to create a shallow curve or press it gently into a slump mold or small bowl to establish the dish shape.
Fixing Cracks
If you see tiny cracks forming on the rim while drying, dip your finger in vinegar (magic for clay) and gently compress the crack until it disappears
Step 2: Creating the Bear Design
-
Outline the head:
Find the center of your dish. lightly press a smaller circular object or cutter into the clay just enough to leave a faint impression for the bear’s head. -
Add the ears:
Use the very small round cutter to press two semi-circles at the top of the head outline. Press deeply enough to create a distinct groove, but don’t cut all the way through. -
Detail the inner ears:
Using a smaller tool handle or a ball stylus, press gently inside the ear outlines to create the inner ear definition. -
Depress the eyes:
Take your ball stylus tool and press two small, even circles into the clay for the eyes. Wiggle the tool slightly to make them perfectly round and neat. -
Sculpt the nose:
For the nose, press a small, triangular shape just below the eyes. I find a small sculpting tool works best here to get that cute inverted triangle look. -
Carve the mouth:
Use a needle tool or the edge of a small loop tool to carve a simple ‘U’ shape for the smile. Keep the lines clean and free of clay crumbs. -
Clean up:
Use a soft, dry brush to sweep away any little clay burrs or crumbs created during the carving process.
Clean Lines
When carving the mouth, wait until the clay is ‘leather hard.’ If it’s too wet, the lines will be messy; too dry, and it might chip
Step 3: Finishing and Glazing
-
Dry slowly:
Cover the dish loosely with plastic and let it dry slowly to the bone-dry stage. This prevents warping, especially around the rim. -
Bisque fire:
Fire the piece in the kiln to cone 04 (or according to your clay’s instructions) to prepare it for glazing. -
Apply underglaze washes:
Mix a little water with brown underglaze. carefully paint inside the recessed eyes, nose, and mouth lines. -
Wipe back excess:
Use a damp sponge to wipe the surface around the features. The color should remain trapped in the depressed areas while the raised surface stays clean. -
Wax the face (optional):
if you want the bear face to remain unglazed like in the photo, apply a wax resist carefully over the bear outline. -
Apply main glaze:
Dip or brush your transparent cream glaze over the entire dish. If you waxed the face, the glaze will bead off the bear. -
Final wipe:
Regardless of waxing, ensure the foot (bottom) of the dish is completely wiped clean of glaze before the final firing. -
Glaze fire:
Fire the piece to the final temperature required for your specific glaze and clay body combination.
Once cooled from the kiln, your adorable bear dish is ready to be a sweet home for your favorite rings

TRACK YOUR CERAMIC JOURNEY
Capture glaze tests, firing details, and creative progress—all in one simple printable. Make your projects easier to repeat and improve.
Happy Avocado Couples
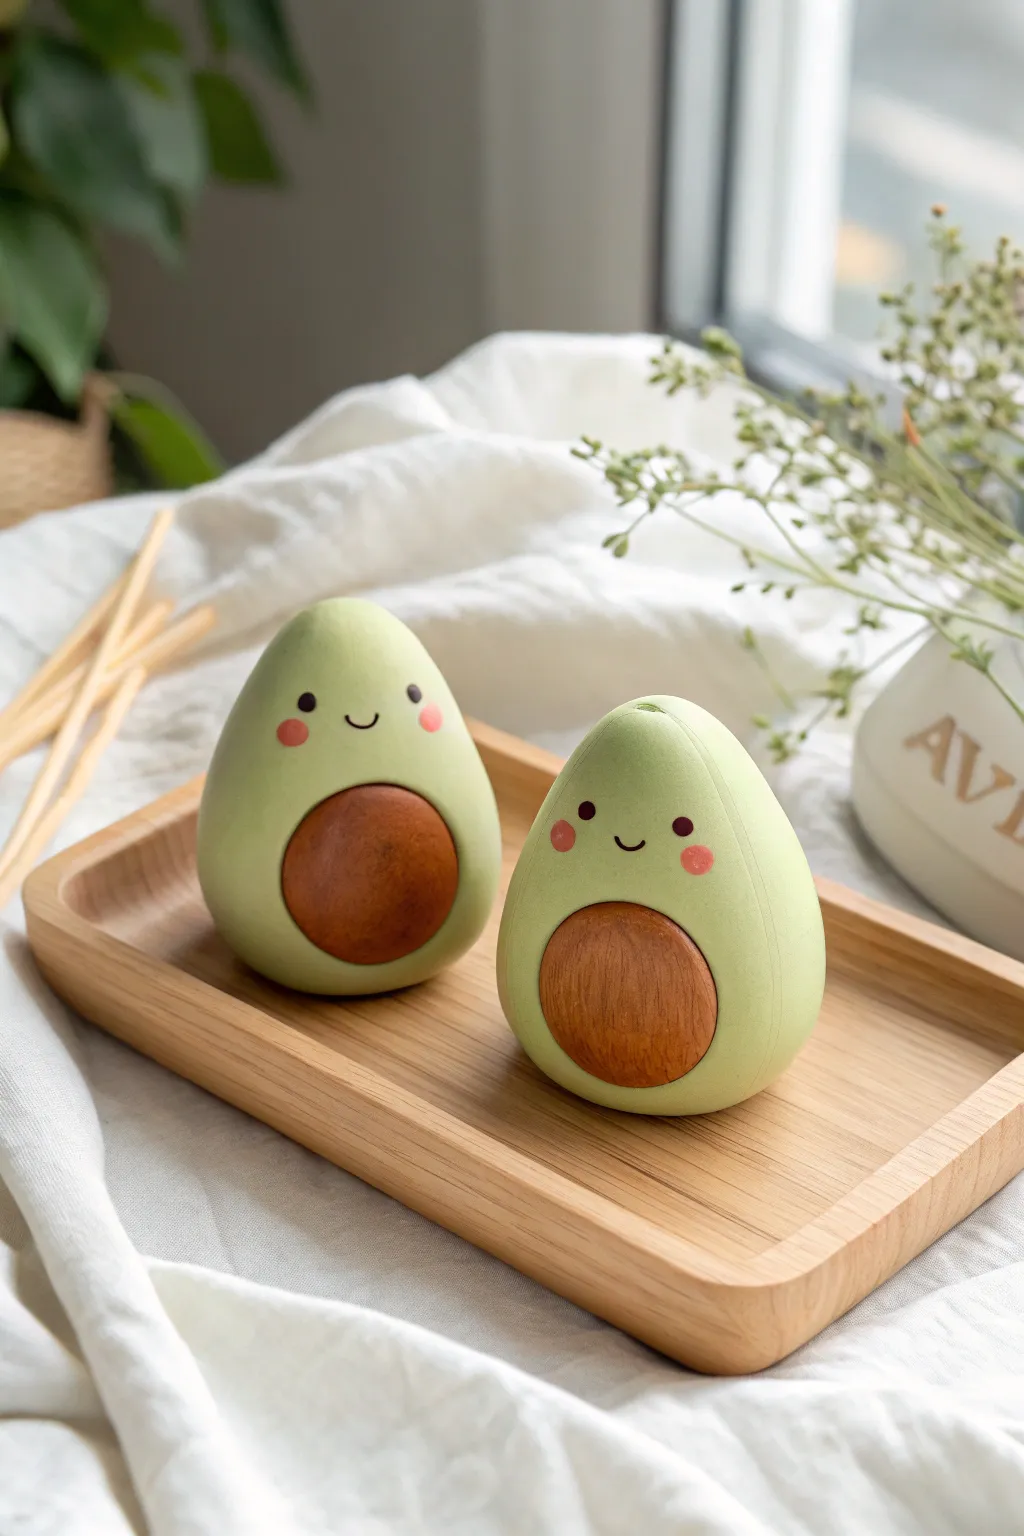
Create a charming pair of smiling avocados that bring a touch of whimsy to any windowsill or shelf. With their smooth matte finish and warm wood-tone bellies, this project perfectly mimics the look of high-end wooden decor using accessible polymer clay.
Step-by-Step Tutorial
Materials
- Light green polymer clay
- Brown polymer clay (wood tone)
- Black acrylic paint
- Pink acrylic paint or soft pastel
- Fine-grit sandpaper (400 and 800 grit)
- Detail paintbrush or dotting tool
- Circle cutter (small size)
- Acrylic roller
- Oven for baking
Step 1: Shaping the Bodies
-
Condition the clay:
Start by warming up your light green polymer clay in your hands until it becomes soft and pliable. Condition the brown clay separately to avoid color transfer. -
Form the base shapes:
Take a large portion of the green clay and roll it into a smooth ball. Slowly taper the top third of the ball to create a classic pear or egg shape. -
Refine the silhouette:
Gently press the bottom of the pear shape against your work surface to flatten it slightly so the avocado stands up on its own without wobbling. -
Smooth the surface:
Use your finger to gently rub away any fingerprints. For a truly seamless look, you can lightly roll the shape against the table to smooth the sides. -
Repeat for the partner:
Make a second avocado body, perhaps slightly smaller or simpler in shape than the first, to create a cute variation between the pair.
Uneven Standing?
If your avocado wobbles after baking, adhere a piece of sandpaper to a flat surface and rub the bottom of the figure against it in a circular motion until perfectly flat.
Step 2: Adding the Pit
-
Prepare the brown clay:
Roll out a sheet of brown clay to about 3mm thickness. Ensure the thickness is even. -
Cut the circles:
Use a small circle cutter to punch out two perfect discs. If you don’t have a cutter, trace a coin and cut it out with a craft knife. -
Texture the pit (optional):
For a wood-grain effect, lightly scratch the surface of the brown discs with sandpaper or a toothbrush. I find this creates a nice organic contrast against the smooth green body. -
Attach the pits:
Press a brown disc firmly onto the lower center of each green avocado body. You want it to look embedded, so press just enough to merge the clays without deforming the avocado.
Make it Functional
Before baking, slice a vertical slit into the rounded top of the avocado to turn these cute figures into functional photo or place card holders.
Step 3: Baking and Finishing
-
Bake the figures:
Place your avocados on a baking sheet lined with parchment paper. Bake according to your clay manufacturer’s instructions (usually 275°F/135°C for 15-30 minutes). -
Cool down:
Let the figures cool completely inside the oven or on a wire rack. The clay hardens fully as it cools. -
Sand for matte finish:
Once cool, lightly wet-sand the green areas with fine-grit sandpaper only if you see fingerprints. This gives it that professional, soft-touch matte look seen in the photo.
Step 4: Painting the Faces
-
Dot the eyes:
Dip a small dotting tool or the back of a paintbrush into black acrylic paint. Place two small dots wide apart on the upper green section of the avocado. -
Draw the smile:
Using your finest detail brush, paint a tiny, thin ‘U’ shape between the eyes for the mouth. -
Add rosy cheeks:
Dip a Q-tip into pink pastel dust or use very thinned-down pink paint. Dab gently underneath the eyes to create soft, blushing cheeks. -
Seal the work:
Apply a thin layer of matte varnish over the painted face area to protect it from scratching off, keeping the rest of the body natural for a tactile feel.
Now you have an adorable duo ready to brighten up your desk space
Yin-Yang Cat Besties
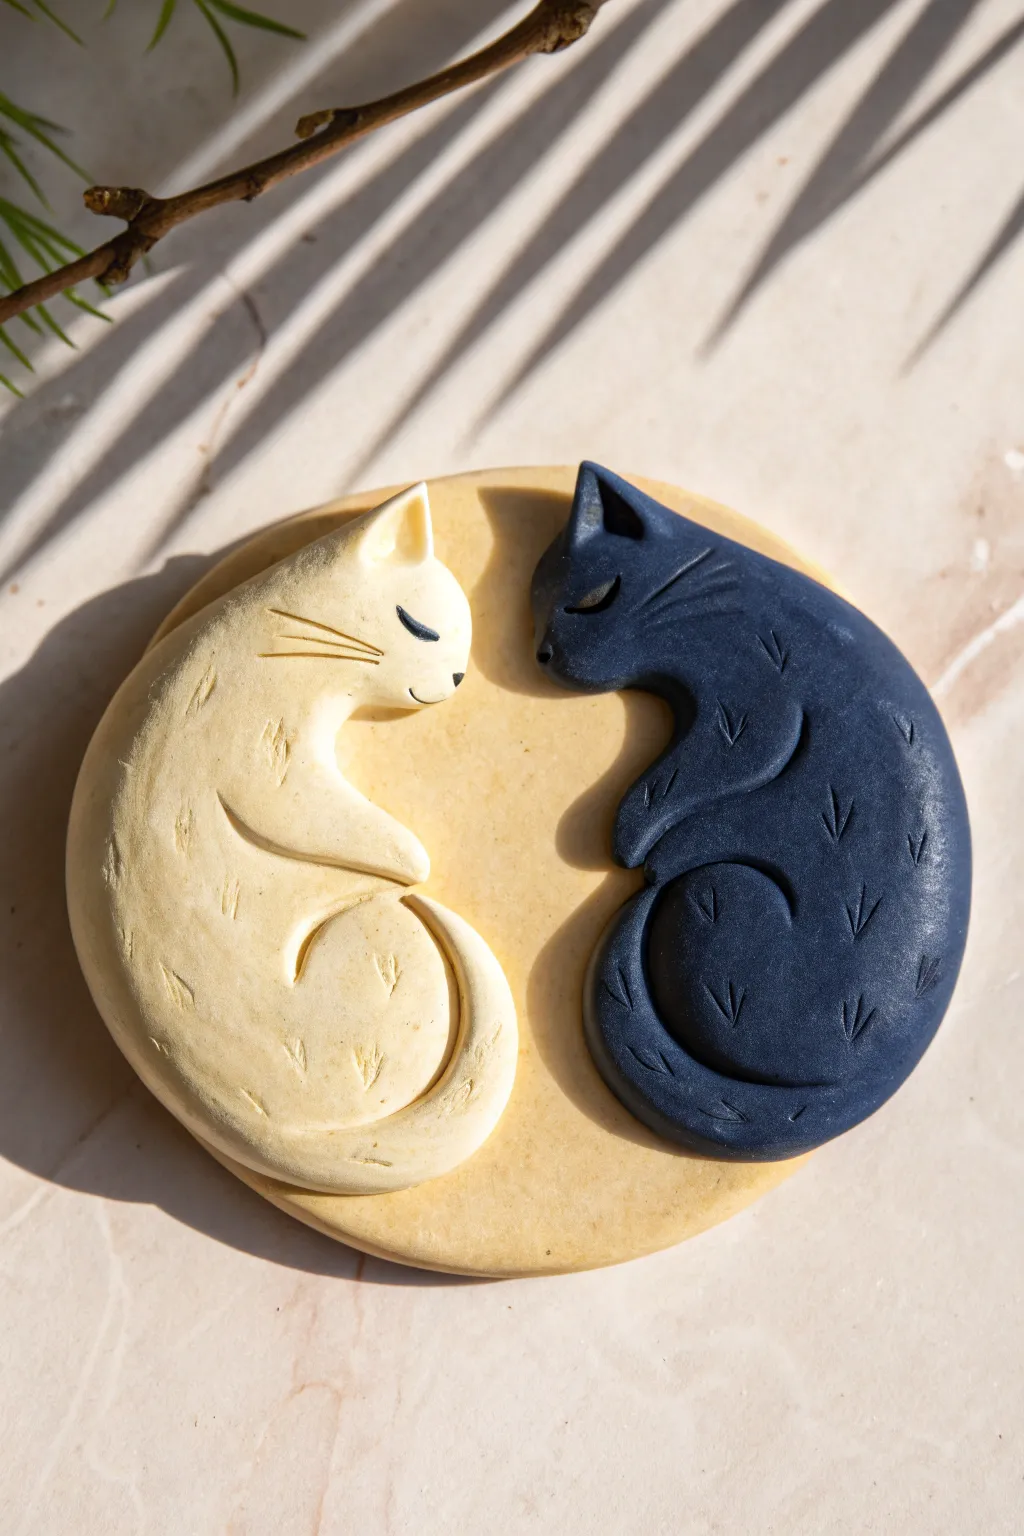
Create a harmonious balance with this charming clay project featuring two cats curled together in a classic yin-yang formation. The finished piece combines smooth curves with delicate fur textures, making it a perfect decorative tile or unique coaster.
Detailed Instructions
Materials
- Polymer clay or air-dry clay (Cream/Beige, Dark Navy/Black)
- Rolling pin or clay roller
- Round cookie cutter (approx. 4 inches) or a bowl to trace
- x-acto knife or clay blade
- Needle tool or toothpick
- Clay sculpting tools (smoothing tool, small ball tool)
- Parchment paper or silicone mat
- Fine grit sandpaper (optional)
Step 1: Base Preparation
-
Condition the Clay:
Begin by thoroughly conditioning your cream-colored clay until it is soft and pliable. This prevents cracks later on. -
Roll out the Base:
Roll the cream clay into a smooth, even slab about 1/4 inch thick. Aim for uniform thickness so your final piece sits flat. -
Cut the Circle:
Use your large round cutter or trace around a bowl to cut out a perfect circle. This will serve as the foundation for your cats.
Use a Template
Sketch the yin-yang shape on paper first and cut it out. Use these paper pieces as stencils to cut your clay shapes for a perfect fit.
Step 2: Sculpting the Cats
-
Shape the Light Cat:
Take a portion of cream clay and roll it into a thick teardrop shape, then curve the tapered end to form a comma shape. This will be the body of the left cat. -
Position the Light Cat:
Place this comma shape on the left side of your base circle, aligning the outer curve with the edge of the circle. Gently press it down to adhere. -
Form the Head:
Roll a smaller ball of cream clay, slightly flatten it, and pinch two small triangles at the top for ears. Attach this to the wider part of the comma shape to create the head. -
Shape the Dark Cat:
Repeat the process with your dark navy or black clay. Create a mirror-image comma shape for the right side. -
Nest Them Together:
Place the dark cat on the base, interlocking it with the cream cat. Their curves should nestle perfectly against each other like a puzzle. -
Refine the Connection:
Use your smoothing tool to gently blend the seams where the heads attach to the bodies and ensure the cats are snugly fitted without gaps.
Step 3: Adding Details
-
Sculpt the Tails:
For each cat, define a curled tail shape at the bottom of their bodies. You can carve a line to separate the tail from the body to give it dimension. -
Add Fur Texture:
Take your needle tool or a small blade and gently press small ‘v’ shapes or tick marks scattered across both cats’ bodies to simulate fur texture. -
Create Facial Features:
Use the needle tool to carefully incise closed eyes—two curved lines for a peaceful, sleeping expression. Add a tiny nose and whiskers. -
Define the Paws:
Carve a small curved line near the chest area of each cat to suggest a front paw tucked underneath them. -
Clean Up Edges:
Inspect the outer rim of your circle. Smooth out any rough spots or fingerprints with your finger or a little water if using air-dry clay.
Make it a Magnet
Make the project smaller and glue a strong magnet to the back after baking for adorable fridge decor.
Step 4: Finishing
-
Final Surface Check:
Look over the piece for any unwanted lint or dust. I find a piece of masking tape works wonders to lift dust off unbaked polymer clay. -
Drying or Baking:
Bake according to your polymer clay package instructions, or let air-dry clay sit for 24-48 hours until fully hardened. -
Sanding (Optional):
Once fully cured and cooled, you can lightly sand the edges with fine-grit sandpaper for a professional finish.
Now you have a serene piece of art celebrating feline friendship to gift or keep
Cactus Ring Holder With a Smile
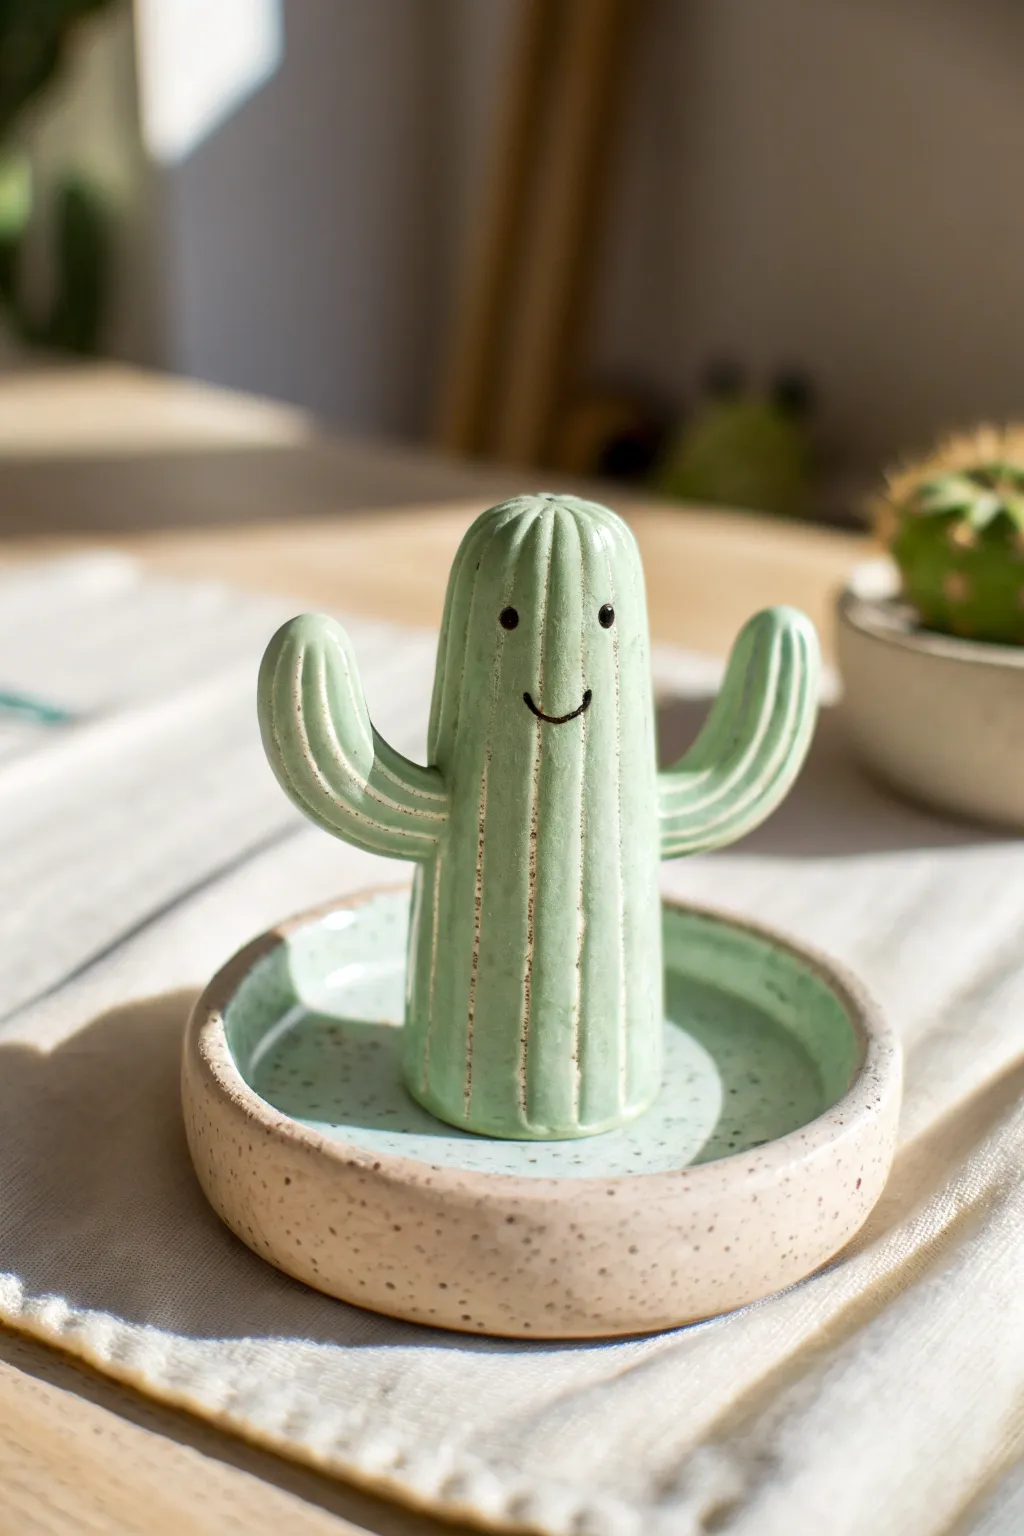
This adorable ring holder features a cheerful cactus standing tall in the center of a speckled dish, ready to catch your favorite jewelry. With its glossy, translucent green glaze and simple smiley face, it brings a touch of desert charm to any vanity or bedside table.
Step-by-Step
Materials
- White or light-colored polymer clay or air-dry clay (ceramic clay if firing)
- Small rolling pin
- Round cookie cutter (approx. 3-4 inches)
- Needle tool or toothpick
- Slip (clay slurry) or liquid clay adhesive
- Modeling tool or popsicle stick
- Translucent celadon or light green glaze (or acrylic paint)
- Black fine-point marker or paint pen (for the face)
- Speckled clay or speckled paint effect (optional)
- Gloss varnish (if using air-dry or polymer clay)
Step 1: Shaping the Base
-
Roll the foundation:
Begin by conditioning your clay, then roll out a slab to about 1/4 inch thickness. Use your round cookie cutter to stamp out a perfect circle. -
Create the rim:
Roll a long, thin snake of clay, ensuring it’s long enough to wrap around the circumference of your base circle. Flatten it slightly with your finger. -
Attach the wall:
Score and slip (or apply liquid adhesive) along the edge of the base circle. Place the flattened snake on top to create a raised rim, blending the seams on the inside and outside until smooth. -
Smooth the surfaces:
Use a damp sponge or your finger to smooth out any fingerprints or join lines on the dish. I like to make sure the rim is slightly rounded for a softer look.
Leaning Tower of Cactus?
If your cactus keeps tilting while the clay is wet, insert a toothpick into the center of the body and push it down into the base for an internal ‘skeleton’ support.
Step 2: Sculpting the Cactus
-
Form the main body:
Roll a cylinder of clay roughly 2 to 2.5 inches tall. Round off the top to create a dome shape for the cactus head. -
Make the arms:
Roll two smaller cylinders for the arms. Bend them slightly into an ‘L’ shape or a gentle curve upward. -
Attach the arms:
Score the sides of the main body and the ends of the arms. Apply adhesive and press them firmly together, blending the clay where they meet so they don’t fall off. -
Add texture lines:
Using a needle tool, carefully draw vertical lines down the length of the cactus body and arms to mimic ribs. Press deep enough to see the lines but not so deep that you cut through. -
Mount the cactus:
Score the center of your dish and the bottom of the cactus. Press the cactus firmly into the center of the dish, blending the bottom edge of the cactus into the floor of the dish for a seamless connection.
Step 3: Finishing Touches
-
Final smooth:
Check over the entire piece one last time. Smooth out any accidental nicks with a little water or baby oil (for polymer clay). -
Dry or Bake:
If using air-dry clay, let it dry completely for 24-48 hours. If using polymer clay, bake according to the package instructions. -
Painting the base:
Paint the dish base and the cactus with a light, translucent green. If you want that speckled pottery look, flick a toothbrush with brown paint lightly over the wet green paint. -
Detailing the ribs:
To highlight the texture, you can wipe away some paint from the raised areas or dry brush a lighter cream color along the vertical ribs. -
Adding the face:
Once the base paint is fully dry, simple draw two small dots for eyes and a small ‘u’ shape for a smile using a fine-point black marker or paint pen right between the arms. -
Seal and gloss:
Finish by applying a high-gloss varnish over the entire piece to mimic the look of glazed ceramic. This also protects your paint job.
Blooming Beauty
Add a tiny pop of color by sculpting a small pink or yellow flower and attaching it to the very top of the cactus head or on one of the arms before drying.
Now you have a happy little desert friend to keep your rings safe and organized
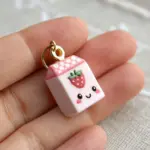
Mini Donut Studs
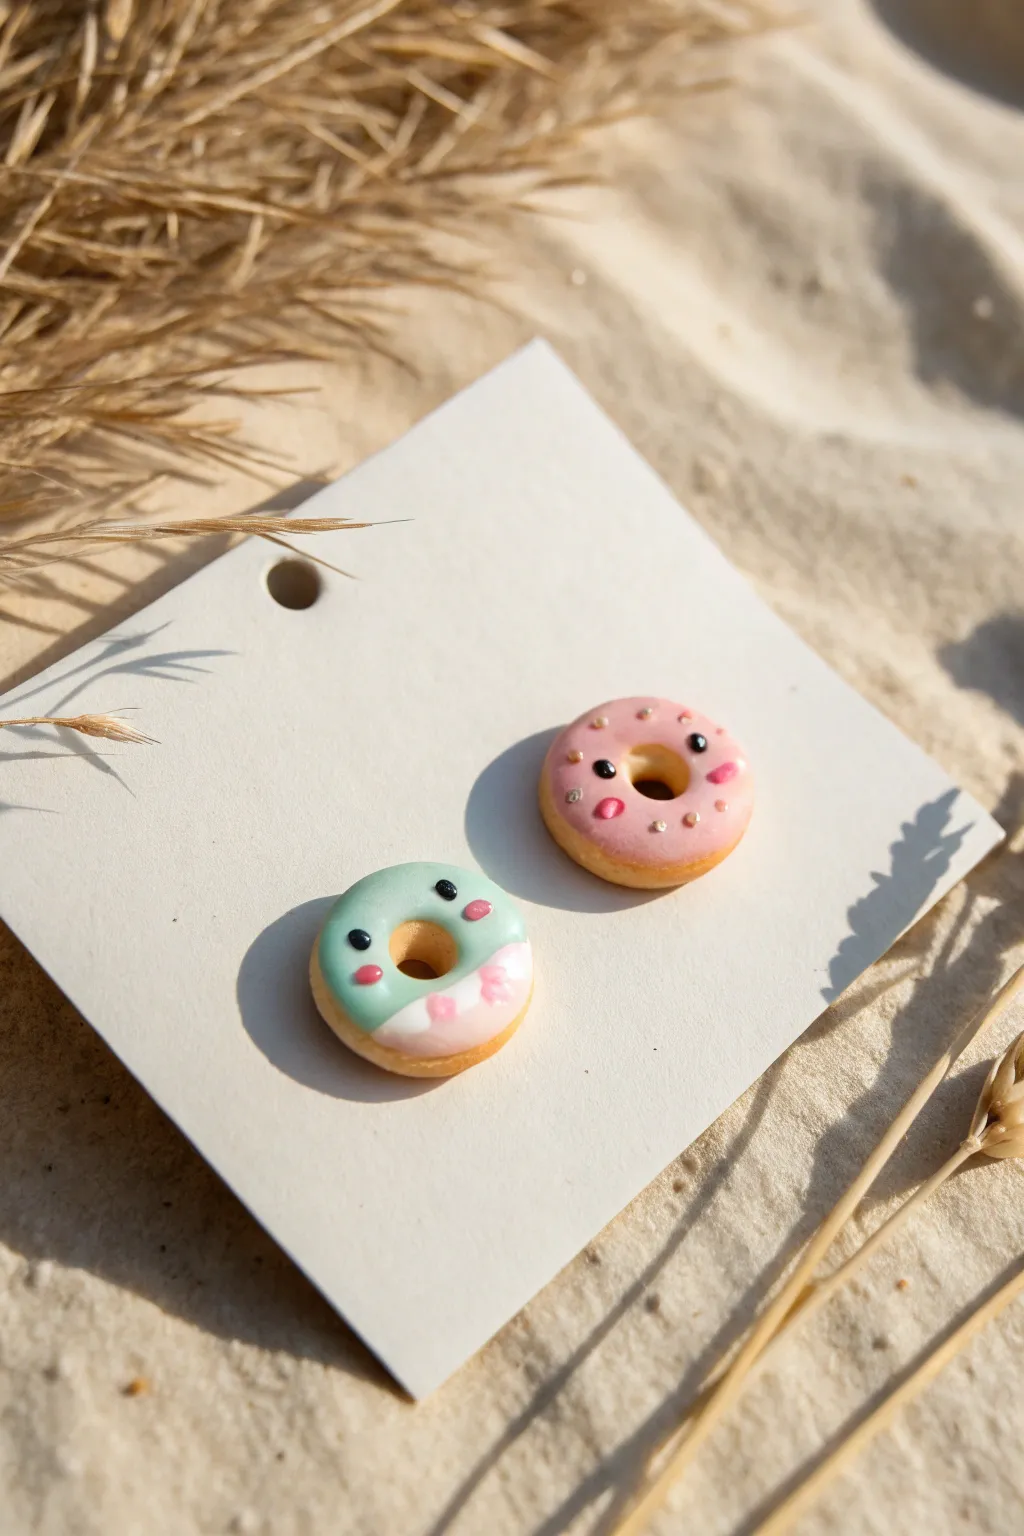
These miniature donut earrings are a delightful way to add sweetness to your style, featuring tiny whimsical faces and pastel icing. They are the perfect beginner polymer clay project, requiring just a few simple shaping techniques to create something truly charming.
Step-by-Step Guide
Materials
- Polymer clay (beige/tan, pastel pink, mint green, white, black)
- Liquid polymer clay (Translucent or white)
- Needle tool or toothpick
- Ball stylus tool (small)
- Small circle cutter (approx. 1cm diameter)
- Tiny circle cutter or straw (approx. 2-3mm diameter)
- Earring stud posts and backs
- Super glue or E6000
- Gloss glaze (optional)
Step 1: Shaping the Base
-
Condition the Clay:
Begin by thoroughly conditioning your beige or tan clay until it is soft and pliable. This prevents cracks during baking. -
Form the Doughnut Shape:
Roll two small balls of tan clay, each about the size of a large pea. Flatten them gently into thick discs to form the donut base. -
Create the Holes:
Use a ball stylus or the back of a thin paintbrush to press an indentation into the center of each disc, then poke all the way through to create the classic donut hole. Smooth the edges so they look naturally baked.
Fingerprint Woes?
If you see fingerprints on your clay, lightly brush the unbaked surface with a little baby oil or cornstarch to smooth them out instantly.
Step 2: Adding the Icing
-
Prepare the Pink Icing:
Roll out a very thin sheet of pastel pink clay. Use your small circle cutter to cut a shape, then use your fingers to gently stretch and ruffle the edges to look like dripping glaze. -
Apply Pink Glaze:
Place the pink clay shape onto one of your tan donut bases. Use your tool to re-pierce the center hole, blending the pink clay slightly downward into the opening. -
Create Mint Icing:
For the second donut, repeat the process with mint green clay, but cut a slightly smaller piece or cut it in half to cover only the top portion. -
Add the Dipped Effect:
To mimic the dipped look on the green donut, add a tiny sliver of white or pale pink clay to the bottom section, blending the seam where it meets the green carefully with your finger.
Step 3: Face Details & Sprinkles
-
Position the Eyes:
Take microscopic bits of black clay and roll them into tiny balls. Place two on each donut for eyes, spacing them widely for that cute kawaii look. -
Add Cheeks:
Roll equally tiny bits of pink clay and press them just below and outside the eyes to create blushing cheeks. -
Sprinkle the Pink Donut:
Roll extremely thin snakes of white and darker pink clay. Cut tiny segments and gently press them onto the pink icing for sprinkles. -
Detail the Green Donut:
For the green donut embellishment, you can add tiny dots of white clay near the ‘dipped’ section to create a soft, patterned look.
Make it a Set
Create a matching necklace pendant by making a slightly larger donut and inserting a screw eye pin into the top before baking.
Step 4: Baking & Assembly
-
Bake:
Place your donuts on a ceramic tile or baking sheet lined with parchment paper. Bake according to your clay manufacturer’s specific instructions (usually 275°F/135°C for 15-30 minutes). -
Cool Down:
Allow the pieces to cool completely before handling. I like to let them sit for at least an hour to ensure they harden fully. -
Attach Posts:
Apply a small dot of strong glue (like E6000) to the flat pad of an earring post. -
Secure the Backs:
Press the glued post firmly onto the back of the clay donut. Let the glue cure for the recommended time (typically 24 hours for maximum strength). -
Optional Glaze:
If you want a shiny, fresh-baked look, brush a thin layer of gloss glaze over the icing parts, avoiding the tan dough areas for realistic texture.
Now your ears have a sweet little treat to wear every day
Sleepy Star Pocket Tokens
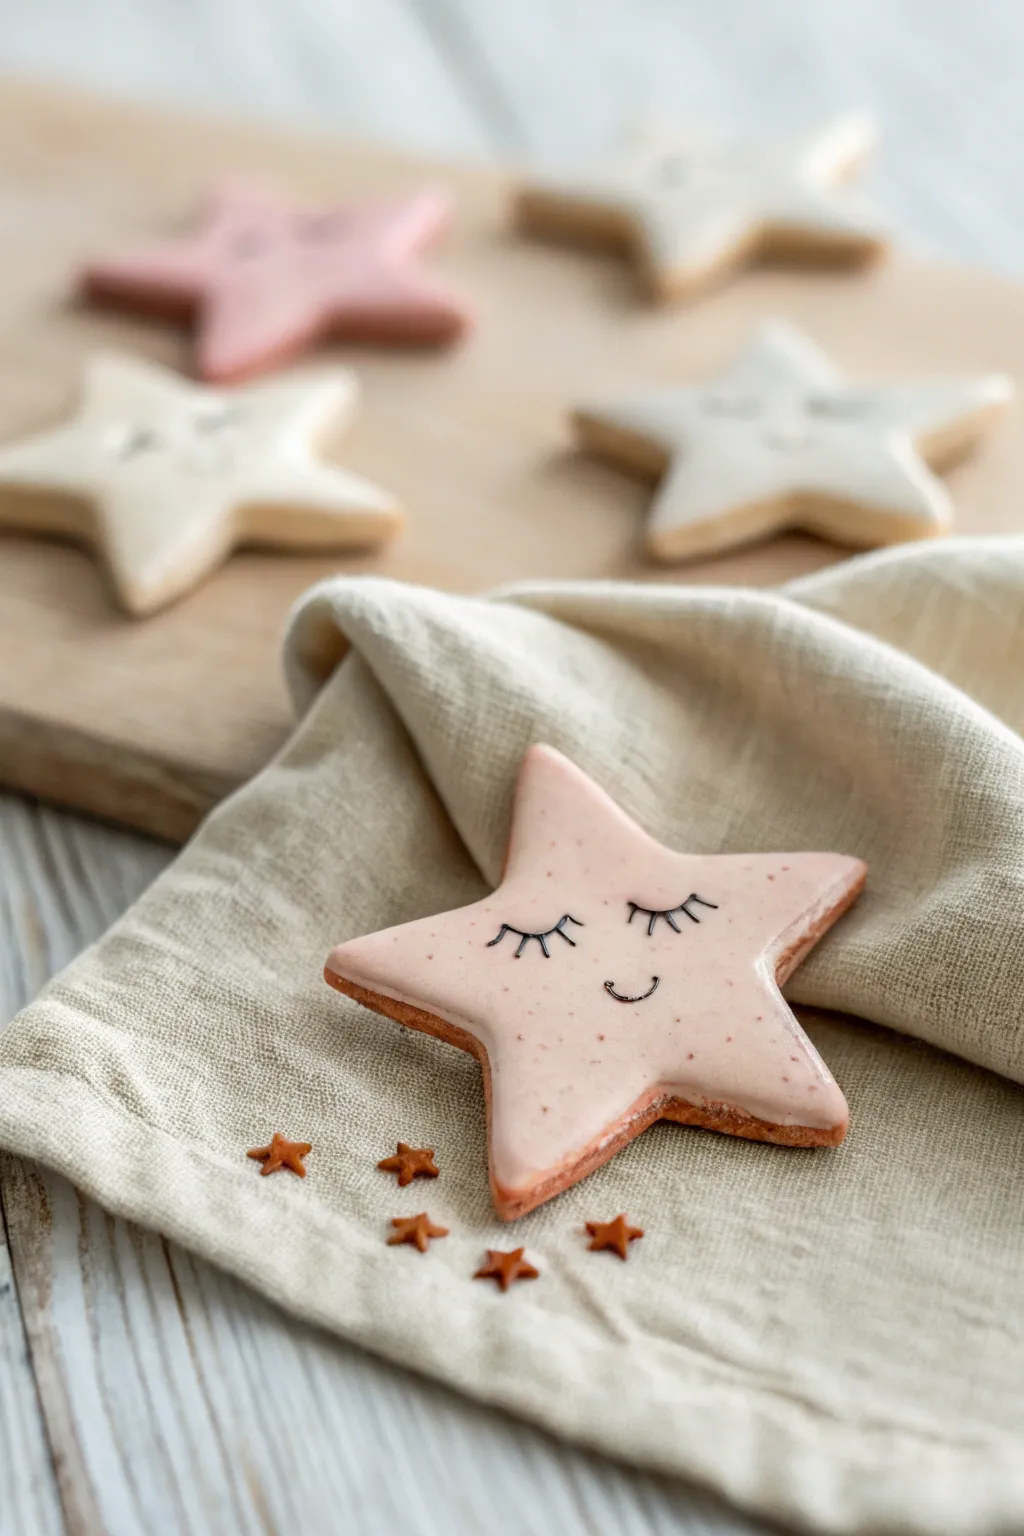
Create a soothing pocket companion or a sweet gift adornment with these adorable sleepy star tokens. Made from air-dry or polymer clay and finished with a glossy pastel glaze, they feature charming hand-drawn expressions that inspire peaceful dreams.
Step-by-Step
Materials
- White air-dry clay or polymer clay
- Star-shaped cookie cutter (medium size)
- Acrylic rolling pin
- Sandpaper (fine grit)
- Pale pink and white acrylic paint
- Gloss varnish or resin (for the ‘icing’ look)
- Fine-point permanent black marker or black fine-liner paint pen
- Tiny star sprinkles or brown glitter (optional)
- Small paintbrush
- Toothpick
Step 1: Shaping the Stars
-
Condition the Clay:
Begin by kneading a ball of white clay until it is soft, pliable, and free of cracks. This ensures the edges of your star won’t split when cut. -
Roll it Out:
Roll the clay out on a smooth surface to an even thickness of about 1/4 inch (6mm). You want them sturdy enough to handle but not too chunky. -
Cut the Shape:
Press your star-shaped cutter firmly into the clay. Give it a tiny wiggle before lifting to get a clean cut, then gently push the clay shape out. -
Smooth the Edges:
Dip your finger in a little water (if using air-dry clay) or baby oil (for polymer) and run it along the cut edges to smooth out any sharpness or burrs. -
Dry or Bake:
Follow the instructions for your specific clay type. If baking, place on parchment paper. If air-drying, flip the stars occasionally so they dry flat without curling. -
Sand for Perfection:
Once fully cured, use fine-grit sandpaper to buff the surface and edges gently. A smooth base is crucial for getting that flawless cookie-icing look later.
Step 2: Decorating the Face
-
Mix the ‘Icing’ Color:
Mix white acrylic paint with a tiny drop of pale pink to create a soft, milky blush color. It should look like strawberry milk. -
Apply the Base Layer:
Paint the top surface of the star, leaving a small, unpainted border around the very edge. This mimics the way royal icing sits on top of a sugar cookie. -
Add Texture (Optional):
While the pink paint is still wet, sprinkle a tiny pinch of brown glitter or speckles to simulate vanilla bean flecks or cookie crumbs. -
Gloss it Up:
Once the paint is completely dry, apply a thick coat of high-gloss varnish or UV resin over the pink area only. This creates the wet, shiny ‘royal icing’ effect shown in the photo. -
Let it Set:
Wait for the gloss layer to cure completely. It must be hard to the touch before you draw on it to prevent smudging.
Fixing Smudges
If you make a mistake with the marker, quickly wipe it away with a damp Q-tip before it dries. If it stains, paint a tiny bit of the pink mix over the error and try again.
Step 3: Adding the Expression
-
Sketch the Eyes:
Using a fine-point black marker, draw two downward-curving arcs for the closed eyes. Position them slightly lower than the center line for a cuter look. -
Draw the Lashes:
Add three tiny, vertical dashes to the top of each arc to create sleepy eyelashes. Keep your hand steady and light. -
Add the Smile:
Draw a small, simple ‘U’ shape right between the eyes for the mouth. It should be quite small to maintain the delicate aesthetic. -
Add Decorative Stars:
If you have tiny star sprinkles or clay bits, glue 3-5 of them near the bottom points of the main star to create a little cluster. -
Final Seal:
Coat the entire piece with a final thin layer of matte varnish if you want to protect the marker, or leave as-is if your marker is permanent and waterproof.
Make it a Magnet
Glue a strong round magnet to the back of the finished star. It makes adorable fridge decor to hold up photos or important sleepy-time reminders.
Now you have a handful of dreamy stars to keep in your pocket or gift to a friend who needs a little calm.
Tiny Ghost Shelf Buddy
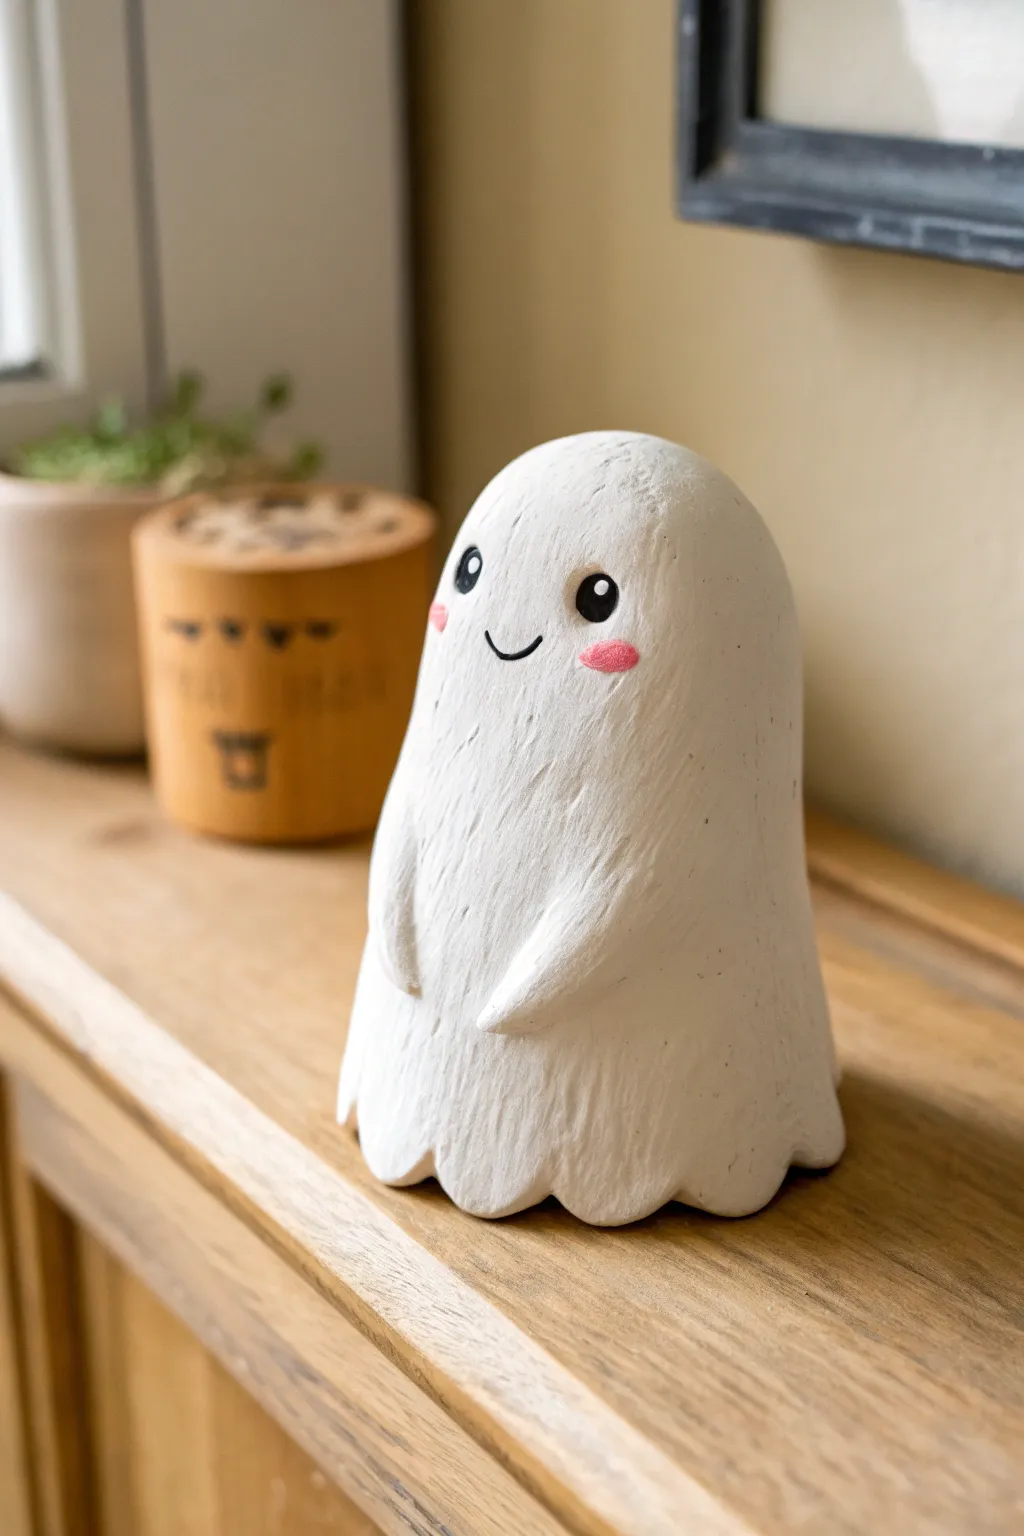
This adorable little ghost brings a spooky yet sweet vibe to any shelf or desk setup. Created with simple clay shapes and a unique textured finish, he manages to look soft and fuzzy despite being solid clay.
How-To Guide
Materials
- White polymer clay or air-dry clay (approx. 2-3 oz)
- Aluminum foil (for armature)
- Clay sculpting tools (needle tool, small ball stylus)
- Stiff bristle toothbrush or wire texture brush
- Soft pastel chalks in pink or blush
- Black acrylic paint
- Fine detail paintbrush or toothpick
- Matte varnish (optional)
Step 1: Core Structure and Basic Shape
-
Form the aluminum core:
Crumple a small piece of aluminum foil into a tight, elongated gumdrop shape. This reduces clay usage and keeps the figure lightweight. Press it firmly so there are no sharp points sticking out. -
Condition the clay:
Knead your white clay thoroughly until it is warm, soft, and pliable. If the clay feels too stiff, keep working it enhancing elasticity to prevent cracks later. -
Cover the core:
Flatten a portion of your clay into a pancake and wrap it completely around the foil armature. Roll the shape between your palms to smooth out any seams, creating a solid, rounded cone shape. -
Refine the silhouette:
Stand the ghost up on your work surface. Gently tap the base to flatten it so it sits stable. Smooth the top into a rounded dome, ensuring the overall shape looks like a classic sheet ghost.
Step 2: Sculpting Details and Texture
-
Create the arms:
Roll two small, identical sausage shapes of white clay, about 3/4 inch long. Taper one end of each piece slightly to form tiny “hands.” -
Attach the arms:
Press the arms onto the front of the body, starting about halfway up. Curve them gently inward so the tiny hands almost touch in the center of the ghost’s belly, creating a shy pose. -
Blend the seams:
Using a silicone tool or your finger, gently smooth the top shoulders of the arms into the main body so they look seamless, but leave the bottom edges defined. -
Add the bottom ruffles:
Use your thumb or a modeling tool to gently press indentations around the very bottom edge of the ghost. This creates the wavy, fabric-like ‘sheet’ effect pooling on the floor. -
Create the signature texture:
This is the most important step for the look. Take a stiff bristle brush or a wire texture tool and drag it vertically from the top of the head down to the base. Repeat this all over the entire ghost to create vertical striations. -
Refine the texture:
Make sure you texture tiny scratches over the arms as well. If the brushing flattens any detailed areas, gently reshape them with your fingers and re-texture lightly.
Don’t rush the brush
Clean your texture brush often while scratching the clay. If clay builds up in the bristles, you’ll get clumps instead of fine, hair-like lines.
Step 3: Face and Finishing
-
Indent eye sockets:
Use a medium ball stylus to firmly press two shallow indentations where the eyes will go. Placing them slightly wide apart increases the cute factor. -
Apply blush before baking:
Shave a tiny bit of pink soft pastel chalk into a powder. Use a soft, dry brush to dust this powder onto the cheek area, right below the eye indentations. It’s easier to bond the pigment now than after it’s hard. -
Bake or dry:
If using polymer clay, bake according to package directions (usually 275°F for 15-30 minutes). If using air-dry clay, allow it to dry fully for 24-48 hours until hard. -
Paint the eyes:
Once cool/dry, dip a small ball tool or the back of a paintbrush into black acrylic paint. Dot the paint into the eye sockets you created earlier. -
Add eye highlights:
Wait for the black paint to dry completely. Then, using a tiny needlepoint or toothpick, add a minuscule white dot to the upper right corner of each eye for a spark of life. -
Paint the smile:
With an ultra-fine detail brush and thinned black paint, carefully draw a small, U-shaped mouth centered between the eyes. -
Seal the piece:
Apply a thin coat of matte varnish to protect the clay and the paint, especially if you used air-dry clay. Avoid glossy finishes as they might ruin the soft, textured look.
Glow Up Idea
Mix glow-in-the-dark powder into your white clay (or use glow clay) so your little shelf buddy actually haunts your room when the lights go out.
Now you have a charming little companion ready to keep watch over your books and trinkets
Cute Blob Animal Pencil Topper
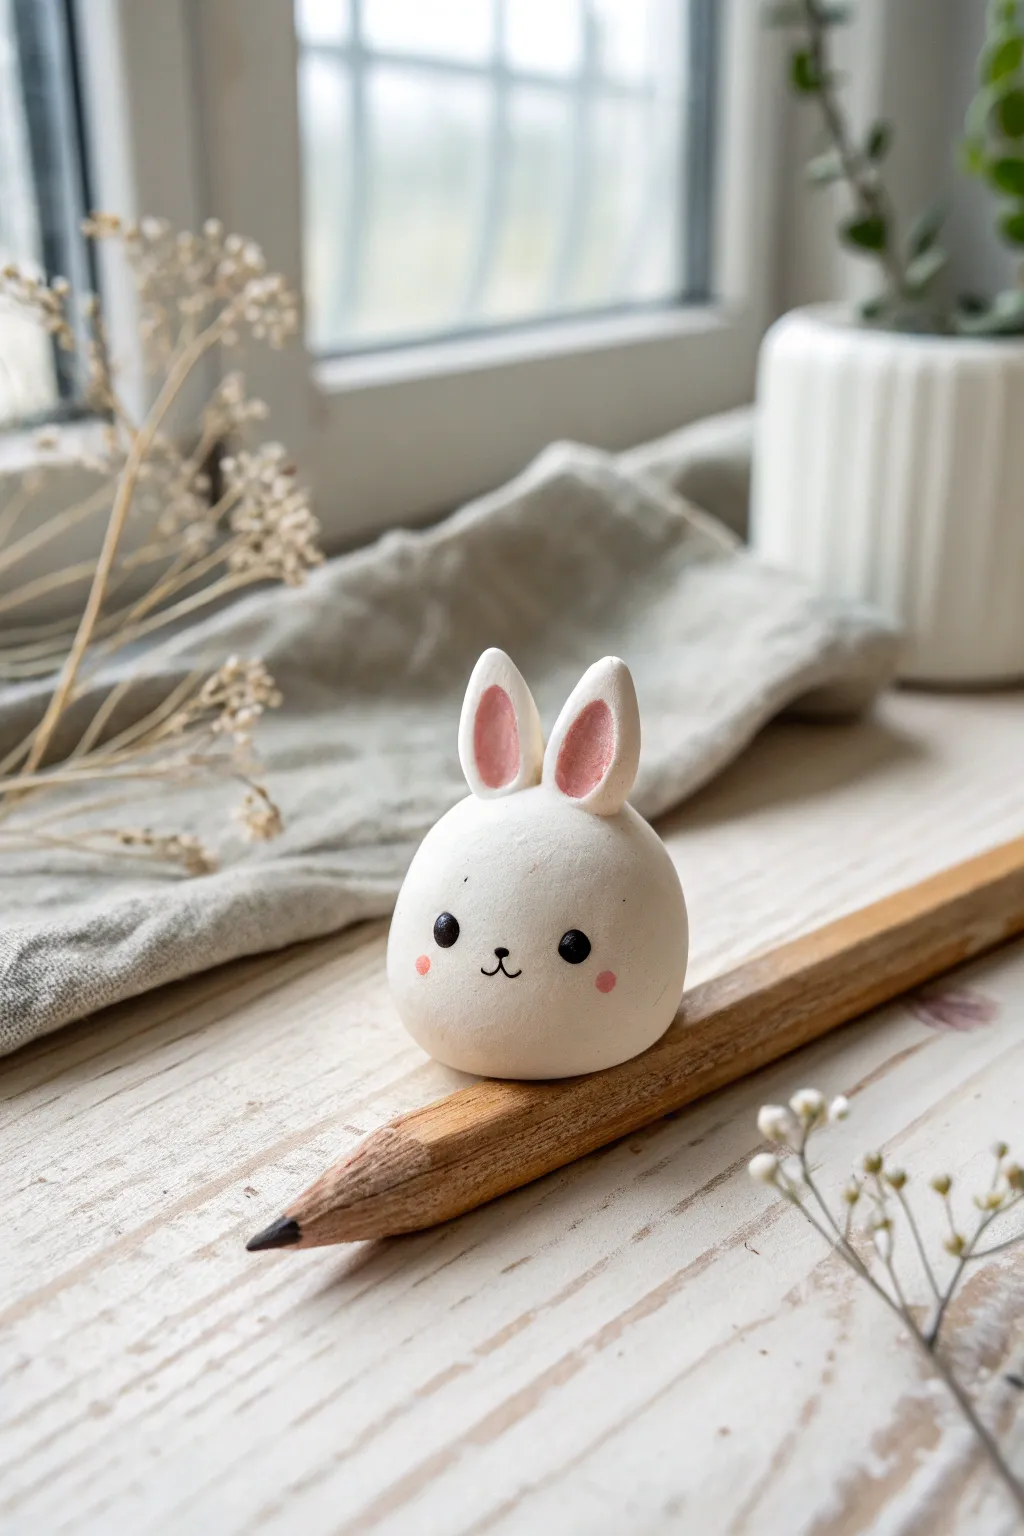
Transform a plain pencil into the cutest writing companion with this simple round bunny topper. Its smooth, marshmallow-like shape and tiny pink ears make it an adorable and beginner-friendly project that brightens up any desk.
Step-by-Step
Materials
- White polymer clay (or air-dry clay)
- Pink polymer clay (soft pastel shade)
- Black acrylic paint
- Pink acrylic paint (or pink chalk pastel)
- Standard wooden pencil
- Dotting tool or toothpick
- Fine detail paintbrush
- Oven (if using polymer clay)
- Glaze (optional, matte or satin)
Step 1: Shaping the Base
-
Condition the clay:
Start by taking a chunk of white clay about the size of a large grape. Knead it in your hands until it’s warm, soft, and pliable to prevent cracking later. -
Roll a sphere:
Roll the clay between your palms to create a perfectly smooth ball. Check for any fingerprints or lint and smooth them away gently. -
Create the pencil hole:
Hold the ball in one hand and gently press the eraser end of your pencil into the bottom center of the sphere. Twist slightly as you insert it to create a snug fit, going about halfway into the ball. -
Refine the shape:
With the pencil still inserted, gently reshape the ball if it got slightly squished. You want a rounded, slightly bottom-heavy ‘blob’ shape that sits securely on the wood. -
Remove the pencil:
Carefully twist and pull the pencil out before baking or drying. Clay shrinks slightly, so doing this now prevents the pencil from getting permanently stuck or cracking the clay.
Loose Fit Correction
If the hole is too big after baking, wrap a small layer of masking tape around the pencil top before gluing to create a snugger fit.
Step 2: Adding Ears
-
Form the ears:
Take two small pea-sized pieces of white clay. Roll them into balls, then elongate them into teardrop or oval shapes. -
Flatten the ears:
Gently flatten the teardrops slightly between your fingers so they look like petals. -
Add the inner ear color:
Take extremely tiny pieces of pink clay. Roll them into smaller teardrops and press them into the center of your white ear shapes. -
Attach the ears:
Press the bottom wider part of the ears onto the top of the white bunny head. Use a blending tool or your finger to smooth the seam where the ear meets the head so they don’t fall off. -
Final smooth:
Give the whole piece one last check for fingerprints. I like to use a tiny bit of baby oil on my finger to smooth out any stubborn imperfections.
Make it a Bear
Swap the long ears for two small semi-circles to turn this blob base into a polar bear, or use brown clay for a grizzly.
Step 3: Baking and Painting
-
Bake or dry:
If using polymer clay, bake according to package instructions (usually 275°F/135°C for 15-20 minutes). If using air-dry clay, let it sit for 24 hours until fully hardened. -
Cool down:
Allow the clay to cool completely before painting. Painting on hot clay can make the paint tacky and uneven. -
Paint the eyes:
Dip a dotting tool or the non-brush end of a paintbrush into black acrylic paint. Dot two wide-set eyes onto the face. -
Add the nose:
Using a very fine detail brush or a toothpick, paint a classic ‘Y’ shape or a tiny triangle with a vertical line to make the bunny mouth between the eyes. -
Apply blush:
Dip a Q-tip or small brush into pink paint (or pink chalk dust for a softer look) and dab small circles underneath the eyes for rosy cheeks. -
Reattach to pencil:
Once dry, play a small drop of superglue inside the hole and insert your pencil for a permanent hold.
Now you have a sweet little study buddy to keep you company while you work