I’m always amazed how a few simple shapes can turn into kawaii cute clay characters once you add tiny eyes, a little mouth, and blushy cheeks. These ideas are all about quick, beginner-friendly wins you can make with polymer clay or air dry clay without needing fancy tools.
Kawaii Fruit Slice Charms
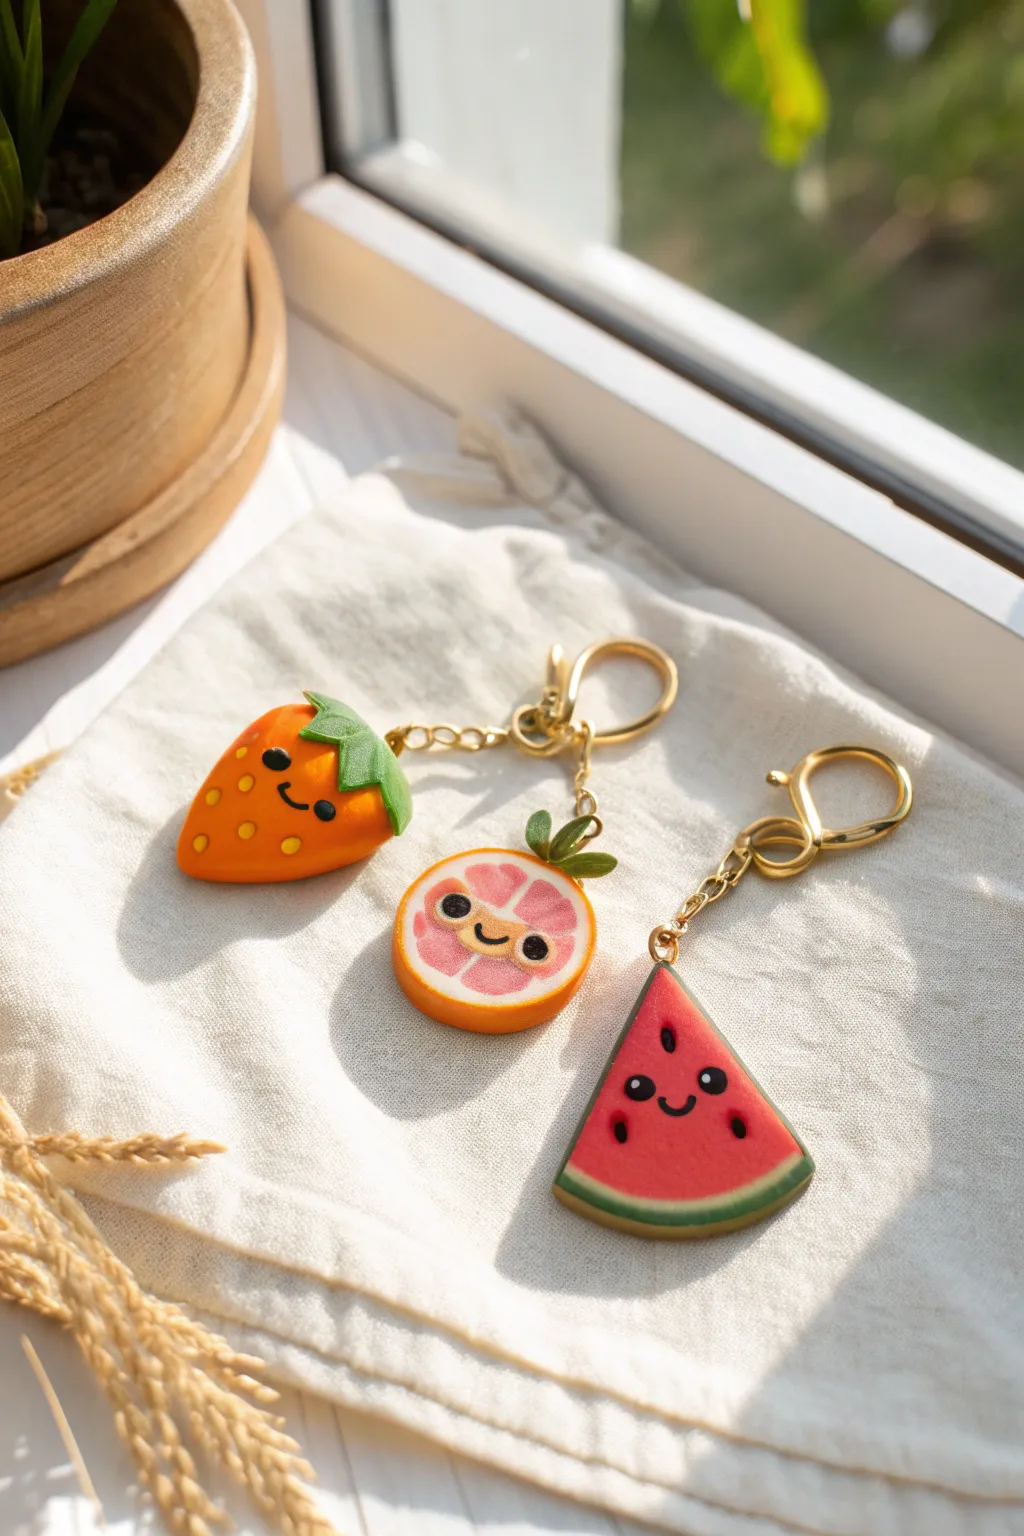
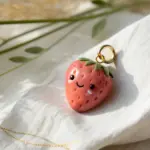
Brighten up your keychain collection with this trio of adorable polymer clay fruit slices. Featuring a strawberry, a grapefruit slice, and a watermelon wedge, each charm smiles back with a tiny, cheerful face that’s impossible to resist.
Step-by-Step Guide
Materials
- Polymer clay (orange, pink, red, green, dark green, white, black)
- Gold rolling pin or acrylic roller
- Clay cutting blade or X-Acto knife
- Needle tool or toothpick
- Small circle cutter (approx. 1 inch)
- Eye screws (gold)
- Gold jump rings and keychain clasps
- Gloss glaze or UV resin (optional for shine)
- Oven for baking clay
Step 1: The Sweet Orange Strawberry
-
Shape the base:
Condition a piece of bright orange clay and roll it into a smooth ball. Gently flatten it and pinch the bottom to create a rounded triangle or teardrop shape for the strawberry body. -
Add texture:
Using a needle tool, press tiny indentations all over the surface to mimic seeds. Don’t press too deep; just enough to catch the light. -
Create the leaves:
Flatten a small piece of green clay. Cut out a jagged, star-like shape for the calyx. Place this firmly onto the top, wide part of your strawberry. -
Add the stem:
Roll a tiny log of green clay and attach it to the center of the leaves, blending the seam slightly so it stays put.
Step 2: The Cheerful Grapefruit Slice
-
Prepare the segments:
Take pink clay and roll it into a thick log. Wrap a thin sheet of white clay around this log. Reduce the cane by rolling it until it’s smaller, then slice it into small wedges. -
Assemble the slice:
Arrange the wedges in a circle to form the fruit sections. Fill the gaps with thin lines of white clay. -
Wrap the rind:
Wrap the entire circle of segments with a thicker strip of orange clay to create the peel. -
Cut the slab:
Slice a neat cross-section from your cane to get a perfect round slice. Alternatively, for a simpler method, press a pink circle onto a slightly larger white circle, then onto a larger orange circle. -
Top it off:
Fashion two small green leaves and a tiny stem, attaching them to the top of the rind.
Hardware Loose? No Worries
If an eye screw feels loose after baking, unscrew it, add a drop of superglue or E6000 to the threads, and screw it back in for a permanent hold.
Step 3: The Smiley Watermelon Wedge
-
Layer the colors:
Stack a thick block of red clay, a thin sheet of white clay, and a thin sheet of dark green clay. Compress them gently together. -
Cut the wedge:
Slice a triangular wedge from your stack. Smooth the edges with your finger so the layers blend seamlessly without losing their straight lines. -
Seed details:
Roll tiny teardrops of black clay and press two or three onto the red section to look like seeds.
Add Some Sparkle
Coat the fruit flesh (but not the rind) with glossy UV resin or glaze after baking. This makes the fruit look juicy and fresh.
Step 4: Bringing Them to Life
-
Sculpt the faces:
For all three fruits, roll two tiny balls of black clay for eyes and a very thin snake of black clay for the smile. I find using a needle tool helps position these tiny pieces accurately. -
Final assembly:
Insert a gold eye screw into the top center of each charm. If the clay is soft enough, screw it directly in; otherwise, poke a pilot hole first. -
Bake:
Bake the charms according to your clay package instructions (usually 275°F/135°C for 15-30 minutes). Let them cool completely. -
Attach hardware:
Once cool, open a jump ring with pliers, loop it through the eye screw, and attach the keychain clasp. Close the jump ring securely.
Now you have a set of adorable vitamin-packed accessories to keep or share
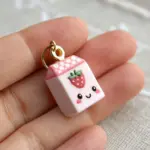


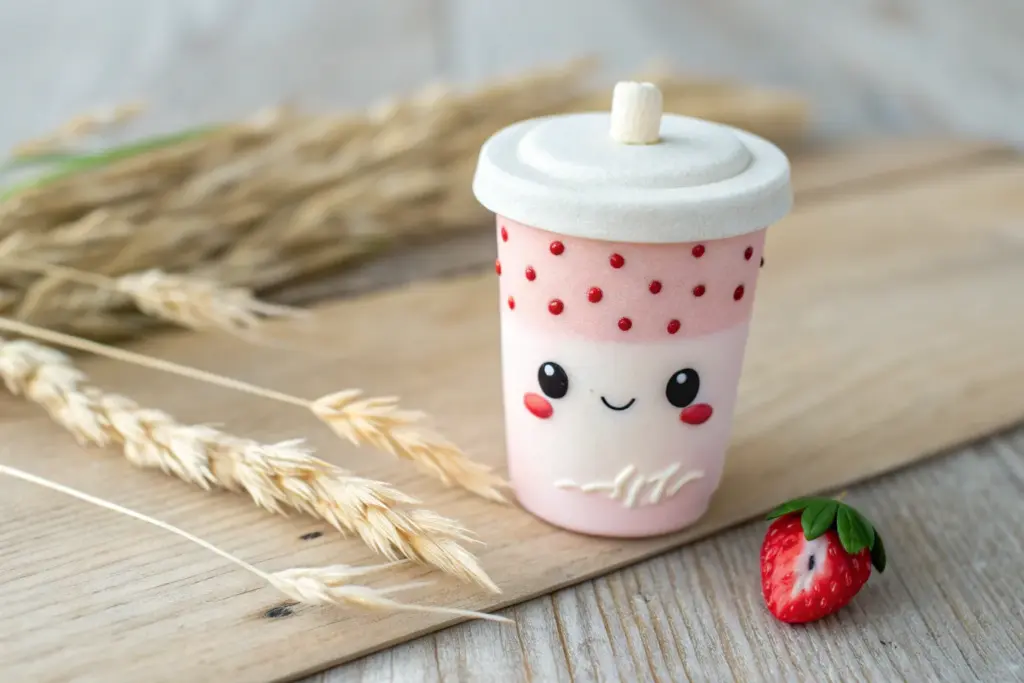
Cute Bubble Tea Keychains
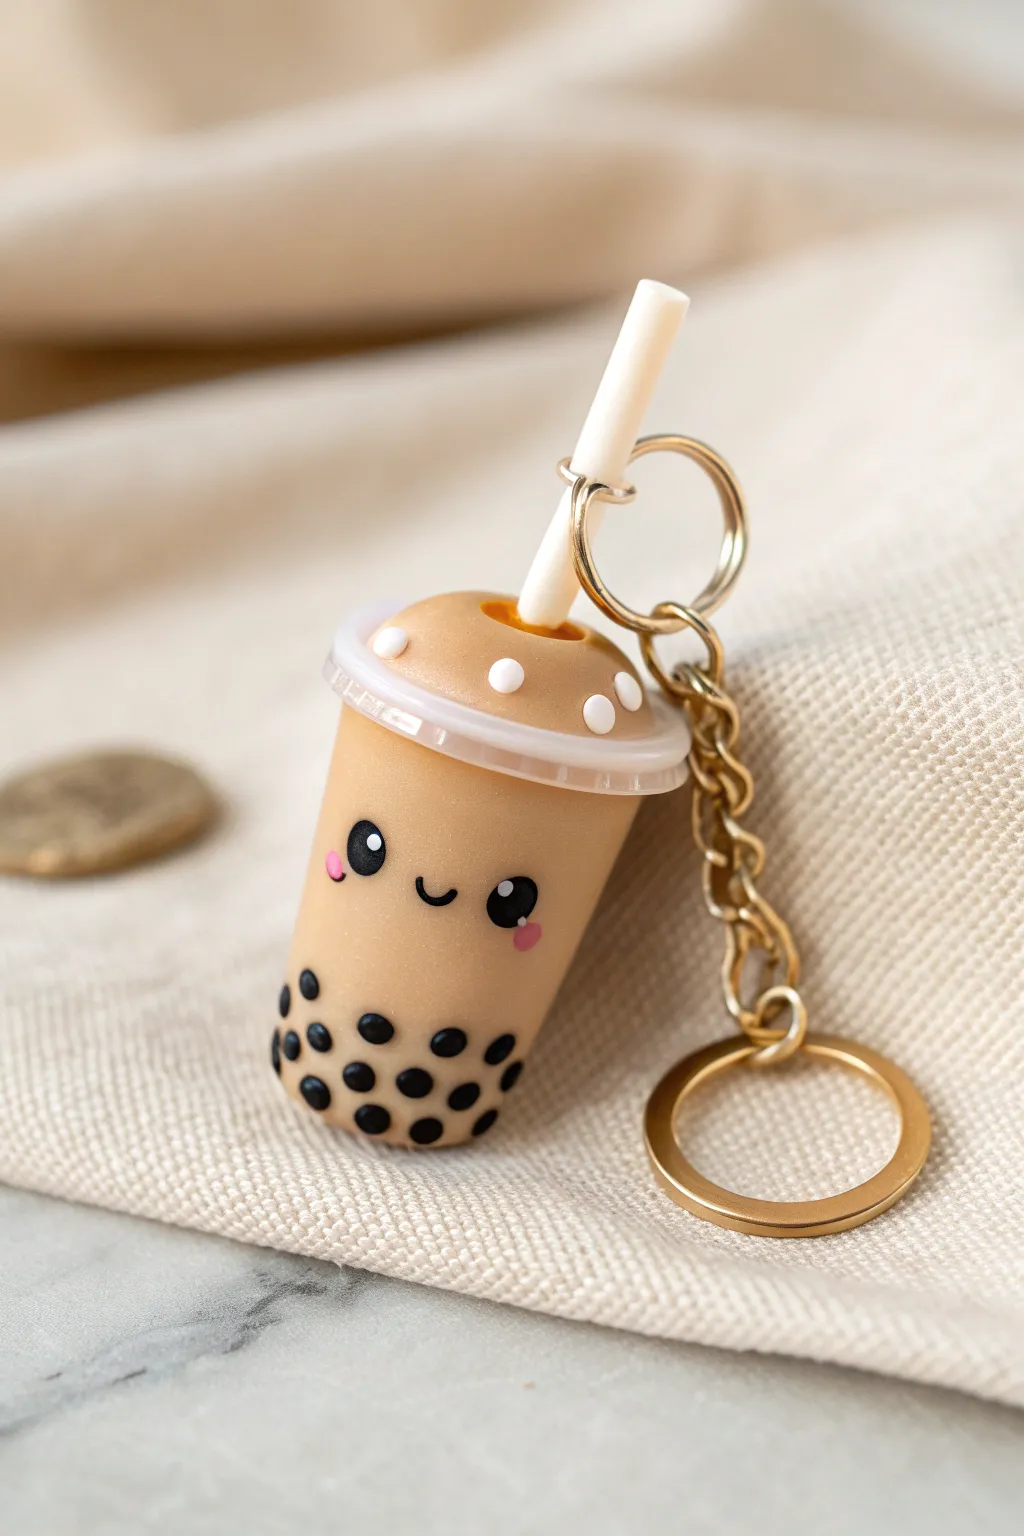
Capture the sweetness of your favorite drink with this adorable miniature bubble tea keychain. It features a chubby cup shape, a happy kawaii face, and tiny tapioca pearls nestled at the bottom.
Detailed Instructions
Materials
- Polymer clay (light tan/beige, white, black, pink)
- Translucent liquid polymer clay (optional but recommended for “drink” effect)
- Small circle cutter or punch
- Rolling pin or pasta machine
- Ball tool or dotting tool
- Craft knife or flexible blade
- Keychain hardware with a small screw eye pin
- Gloss glaze or UV resin
- Oven for baking
Step 1: Sculpting the Cup Base
-
Mix the Tea Color:
Start by conditioning your light tan or beige clay until it is soft and pliable. If the color is too dark, mix in a significant amount of white clay to get that creamy milk tea shade. -
Form the Cup Body:
Roll a smooth ball of the tan clay, roughly the size of a large grape. Gently roll it into a cylinder shape, tapering the bottom slightly so it looks like a standard takeout cup. -
create the Pearls:
Take a tiny amount of black clay and roll it into a very thin snake. Cut off minuscule segments and roll each one into a tiny ball to create the tapioca pearls. -
Attach the Boba:
Press the black pearls onto the lower third of your cup body. Arrange them randomly, ensuring some are slightly higher than others for a natural floating look. -
Smooth the Surface:
Gently roll the cup on your work surface or between your palms just enough to flatten the pearls slightly so they become embedded in the cup rather than sticking out too much.
Step 2: Adding the Lid & Straw
-
Make the Lid Base:
Roll a small amount of the same tan clay into a ball, flatten it slightly into a dome shape, and attach it to the top of your cup cylinder to form the liquid surface. -
Create the Rim:
Roll a thin snake of white translucent or frosted clear clay. Wrap it around the top edge of the cup where the dome meets the cylinder to mimic the plastic rim of a lid. -
Add Foam Bubbles:
Make very tiny balls of white clay and press them gently onto the top dome to represent the foam bubbles found in shaken tea. -
Sculpt the Straw:
Roll a small cylinder of white clay. I usually insert a piece of wire or toothpick inside it for stability before pressing it into the center of the dome lid. -
Insert Hardware:
While the clay is still uncured, carefully screw the eye pin into the top of the dome, near the straw but not touching it.
Fixing Smudges
Work with lighter colors first. If black clay smudges your tan cup, use a cotton swab dipped in a tiny bit of rubbing alcohol or baby oil to gently wipe the stain away before baking.
Step 3: Bringing it to Life
-
Add the Eyes:
For that kawaii look, place two small flattened discs of black clay on the upper half of the cup. Add tiny specks of white clay to the top corners of the eyes for a sparkle effect. -
Create the Smile:
Roll an incredibly thin thread of black clay and shape it into a small ‘U’. Gently press this between the eyes using a needle tool. -
Blush the Cheeks:
Add two tiny ovals of pink clay directly under the eyes to give your boba buddy rosy cheeks. -
Bake:
Bake the piece according to your clay manufacturer’s instructions, typically between 230°F and 275°F for 15-30 minutes. -
Glaze and Assemble:
Once cool, coat the entire piece (except the hardware) with a gloss glaze or UV resin to make it look shiny and plastic-like. Attach the keychain ring to the eye pin.
Secure That Pin
For extra durability, remove the eye pin after baking, add a drop of super glue to the hole, and screw it back in. This ensures your keychain won’t fall apart during daily use.
Now you have a sweet little companion to keep your keys safe and stylish


Chibi Cat Blob Figures
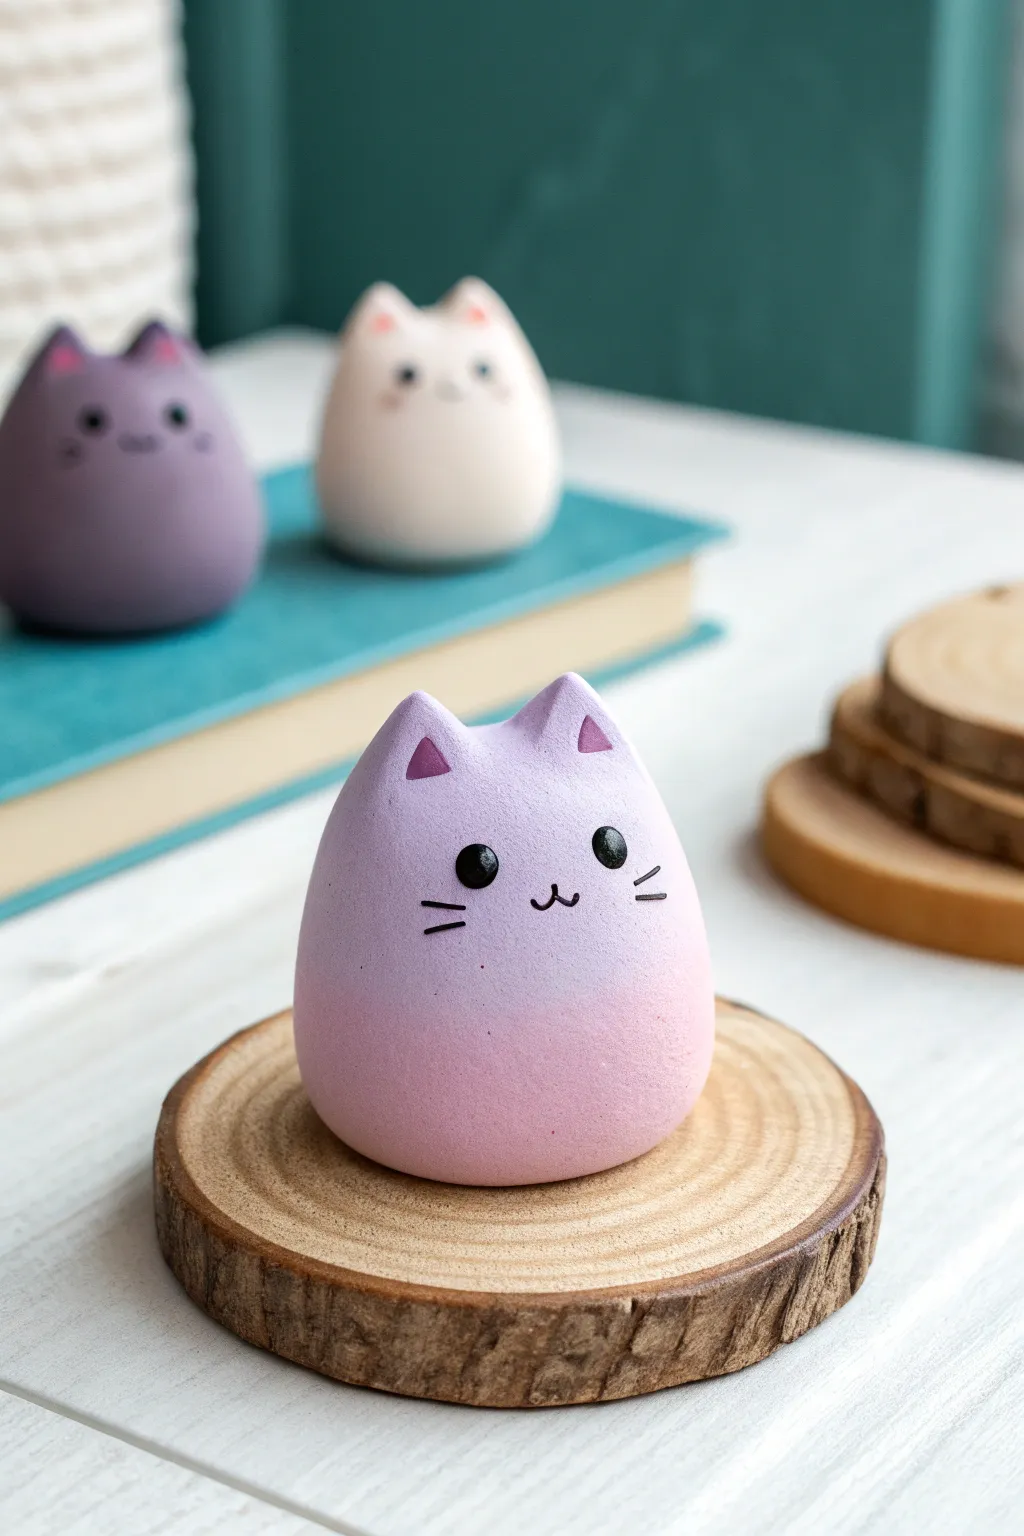
These delightfully chunky chibi kittens feature a satisfyingly smooth, rounded shape that fits perfectly in the palm of your hand. The standout detail is the seamless ombré effect, blending soft lavender into pale pink for a dreamy, kawaii aesthetic.
How-To Guide
Materials
- White air-dry clay (or polymer clay)
- Acrylic paints (lavender, pastel pink, black)
- Makeup sponge or soft foam wedge
- Fine grit sandpaper (e.g., 400-600 grit)
- Small geometric triangle cutter (optional)
- Detail paintbrush (00 or 000 size)
- Stylus tool or toothpick
- Matte varnish or sealant
- Bowl of water (for smoothing)
- Wood slice coaster (for display)
Step 1: Shaping the Base Form
-
Roll the main body:
Start by conditioning a golf-ball-sized amount of white clay until it is pliable and crack-free. Roll it into a perfect sphere between your palms to smooth out any initial lines. -
Create the teardrop shape:
Gently gently roll the top half of the sphere to taper it slightly, creating a very subtle egg or rounded teardrop shape. You want the bottom to remain heavy and wide so the figure sits stably. -
Flatten the base:
Press the bottom of your clay egg onto your work surface firmly. Tap the clay down until creates a flat base that allows the cat to stand upright without wobbling. -
Form the ears:
Pinch two small triangles of clay from your leftover supply. Alternatively, shape a small log and cut two equal triangles for consistency. -
Attach the ears:
Score the bottom of the ears and the top of the head where they will sit. Add a tiny dab of water (or liquid clay if using polymer) and press the ears firmly into place. -
Blend the seams:
Using a modeling tool or your finger, drag the clay from the base of the ears down onto the head to erase the seam. Smooth the connection until the ears look like they grew naturally from the body. -
Final smoothing:
Dip your finger in a little water and buff the entire surface of the cat. Remove any fingerprints or small dings now, as they become harder to fix once dry. -
Dry completely:
Allow the figure to dry fully. For air-dry clay, this usually takes 24-48 hours depending on thickness. I like to flip it over halfway through so the bottom dries evenly.
Step 2: Painting the Ombré Effect
-
Sand for perfection:
Once fully dry, lightly sand the figure with fine-grit sandpaper. This creates that ultra-smooth, porcelain-like finish visible in the photo. -
Apply the base coat:
Paint the entire upper half of the cat with a pastel lavender acrylic paint. You may need two coats for opaque coverage. -
Apply the bottom color:
Paint the bottom third of the cat with loose strokes of pastel pink acrylic paint. -
Create the gradient:
While the pink is still wet, dip a slightly damp makeup sponge into the pink paint. Dab gently upward where the pink meets the lavender to blend the transition softly. -
Refine the fade:
Clean the sponge or use a fresh side, dip it lightly into the lavender, and dab downward into the pink area. Repeat this back-and-forth dabbing until the gradient is seamless and blurry.
Sponge Dabbing Secret
When sponging the gradient, dab the sponge on a paper towel first to remove excess paint. This prevents globs and creates a much smoother, airbrushed look.
Step 3: Adding the Kawaii Face
-
Paint the ear details:
Using a darker purple or pink paint, carefully fill in small triangles inside the sculpted ears to give them depth. -
Dot the eyes:
Dip the back end of a paintbrush or a large ball stylus into black acrylic paint. Stamp two wide-set eyes onto the face, ensuring they are level with each other. -
Add the shine:
Wait for the black eye paint to dry completely. Then, using a toothpick dipped in white paint, add a tiny glistening highlight dot to the upper right corner of each eye. -
Draw the mouth:
Use your finest detail brush (size 000) or a fine-tip black paint pen to draw a tiny ‘w’ shape for the mouth, centered between the eyes. -
Whiskers and finish:
Paint two short, horizontal lines on each cheek for whiskers. Once all paint is dry, seal the figurine with a matte varnish to protect that soft, velvety look.
Create a Trio
Make a set of three cats in different colorways—try mint green fading to teal, or peach fading to orange—and display them together on stacked books.
Place your finished kitty on a small wood slice for an adorable desk companion that brings a sense of calm


Bunny Dango Trio
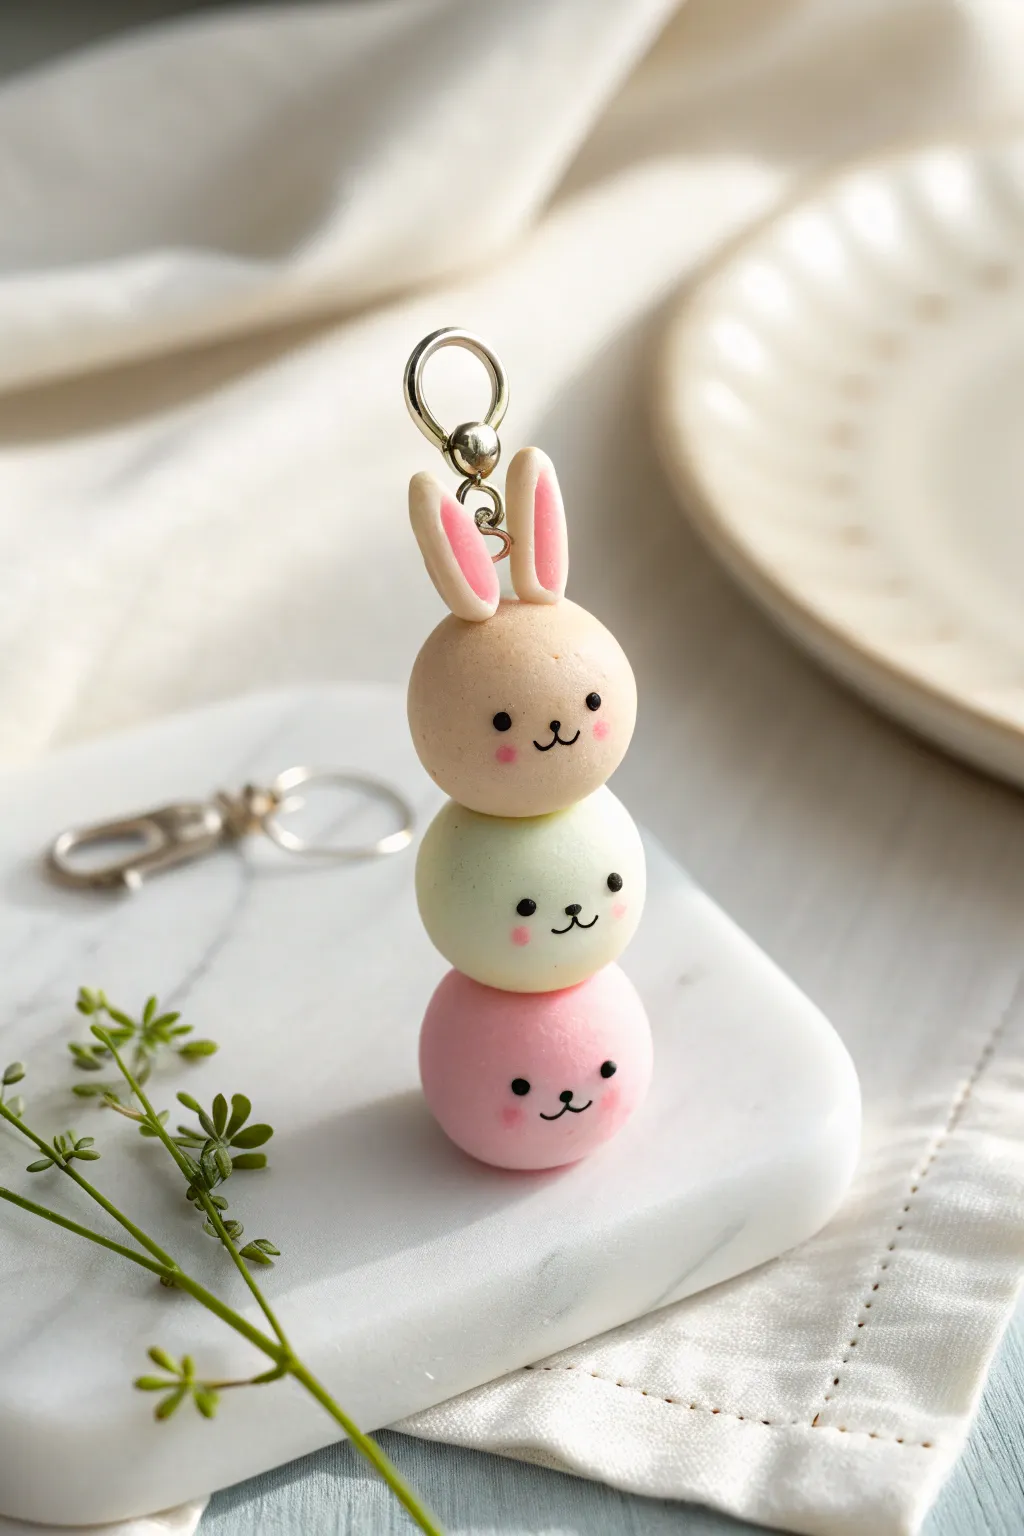
This adorable charm features a trio of pastel-colored dango buddies stacked high, topped with bunny ears for extra cuteness. With their soft matte finish and simple kawaii expressions, they make for a perfect keychain or bag accessory.
Step-by-Step Tutorial
Materials
- Polymer clay (beige/tan, pale mint green, pastel pink, white)
- Black acrylic paint or a fine-tip permanent marker
- Pink chalk pastel or blush
- Eye pin or head pin
- Jump rings and keychain hardware
- Needle tool or toothpick
- Dotting tool or ball stylus
- Soft paintbrush
- Liquid polymer clay (optional, for bonding)
- Matt glaze or varnish (optional)
Step 1: Shaping the Dango Base
-
Mix your colors:
Condition your clay until it is soft and pliable. You’ll need three equal-sized portions: one in beige, one in mint green, and one in pink. I prefer mixing a lot of white into standard colors to get those soft pastel tones. -
Roll the spheres:
Roll each portion of clay into a perfectly smooth ball. Check for any lint or fingerprints and gently smooth them out with your finger. -
Check the sizing:
Place the balls next to each other to ensure they are uniform in size. They should be roughly similar to large marbles. -
Stack and Pierce:
Stack the balls vertically: pink on the bottom, green in the middle, and beige on top. Press them together gently so they stick but don’t deform. -
Insert the pin:
Take a long eye pin and carefully push it down through the center of all three balls, starting from the top of the beige one. If the pin is too long, trim the bottom with wire cutters before insertion.
Step 2: Adding Bunny Details
-
Form the ears:
Take two small pieces of beige clay and roll them into teardrop shapes. Flatten them slightly to create bunny ears. -
Add inner ear color:
Take tiny bits of pink clay, roll them into smaller teardrops, and press them into the center of the beige ears. -
Attach the ears:
Place the ears on top of the beige head, right next to the eye pin loop. Use a silicone tool or your finger to blend the seams at the base so they are secure. -
Secure the bond:
If you are worried about pieces falling off, a tiny dab of liquid polymer clay between the stacked balls and under the ears works as a strong glue.
Lint Magnet Warning
Pastel clay shows dust easily! Keep a wet wipe nearby to clean your hands and tools often. Use a piece of scotch tape to lift stray dust off the raw clay before baking.
Step 3: Baking and Face Painting
-
Bake the clay:
Bake your creation according to the manufacturer’s instructions on your clay package. Use an oven thermometer to ensure the temperature isn’t too high, so the light colors don’t scorch. -
Cool down completely:
Let the piece cool fully before adding painted details. The paint will dry too fast and strip if the clay is still warm. -
Paint the eyes:
Dip a small dotting tool or the head of a pin into black acrylic paint. Carefully dot two wider-set eyes onto each of the three faces. -
Draw the mouths:
Using a very fine detail brush or a fine-tip marker, draw a small ‘w’ shape between the eyes for the nose and mouth. -
Add rosy cheeks:
Scrape a little pink chalk pastel into powder. Use a dry, soft brush to gently dab pink circles under the eyes for a blushing effect. -
Seal (Optional):
If you want extra durability, coat the piece in a matte varnish. Avoid glossy finishes if you want to keep that soft marshmallow look. -
Assemble hardware:
Open a jump ring with pliers, loop it through the eye pin on top of the bunny’s head, and attach your keychain clasp.
Sturdy Stacking
For a straighter stack, pre-poke holes in each individual ball with a needle tool before threading them onto the main eye pin. It prevents squishing the shapes.
Now you have a sweet stack of bunny dango to brighten up your keys or backpack

The Complete Guide to Pottery Troubleshooting
Uncover the most common ceramic mistakes—from cracking clay to failed glazes—and learn how to fix them fast.
Pastel Ice Cream Cone Charms
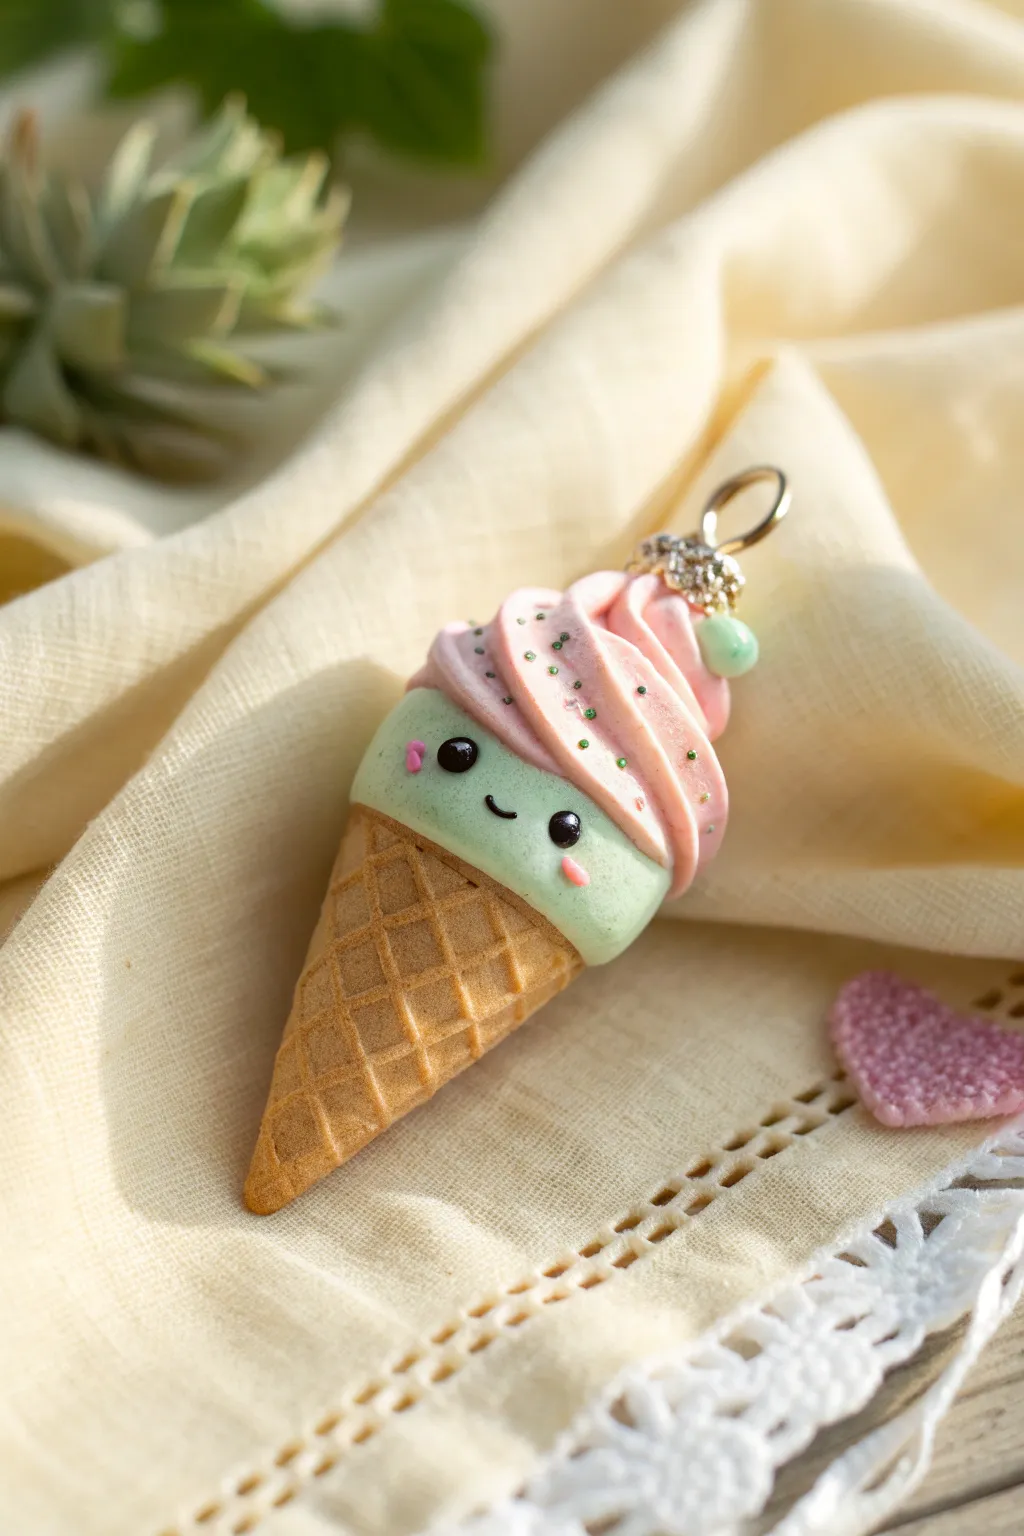
This adorable mint and pink ice cream charm captures the essence of summer sweetness in a tiny, durable package. With its realistic waffle texture and cheerful facial expression, it makes for a perfect necklace pendant or keychain accessory.
Step-by-Step Guide
Materials
- Polymer clay (Tan/light brown, Mint Green, Pastel Pink, Black, bright Pink)
- Fimo liquid gel or bake-and-bond
- Texturing tool or needle tool
- Metal ruler or blade
- Eye screw pin
- Green glitter or micro-beads
- Ball stylus tool
- Oven for baking
- Gloss glaze (optional)
Step 1: Shaping the Cone
-
Prepare the dough:
Start by conditioning a small ball of tan or light brown polymer clay until it is soft and pliable. -
Form the cone:
Roll the ball into a smooth cone shape, flattening the top slightly where the ice cream will sit. -
Create the waffle grid:
Using the back of a blade or a blunt knife tool, gently press diagonal lines across the surface of the cone in one direction. -
Cross-hatch pattern:
Press diagonal lines in the opposite direction to create the classic waffle diamond pattern. Be careful not to squash the cone shape while doing this.
Step 2: Adding the Ice Cream
-
Form the base scoop:
Roll a ball of mint green clay slightly larger than the top of your cone. -
Attach the scoop:
Press the mint ball onto the waffle cone. I like to smooth the edges down slightly so it looks like the ice cream is snugly packed inside. -
Flatten the top:
Gently flatten the very top of the mint scoop to create a platform for the swirled topping.
Clean Clay Pro-Tip
Keep baby wipes nearby to clean your hands/tools between colors. Mint green and pink can easily get dirtied by the black clay used for the eyes.
Step 3: The Kawaii Face
-
Indent eye sockets:
Use a medium ball stylus to make two small indents on the mint section for the eyes. This helps them sit flush. -
Add the eyes:
Roll two tiny specks of black clay into balls and press them firmly into the sockets. -
Create the smile:
Roll a microscopically thin snake of black clay and curve it into a ‘U’ shape. Press it gently between the eyes with a needle tool. -
Apply blush:
Take two tiny bits of bright pink clay, flatten them into ovals, and press one under each eye for cheeks.
Fixing Fingerprints
If you notice fingerprints on the smooth mint section before baking, brush it lightly with a little baby oil or clay softener to smooth them away.
Step 4: Topping and Finishing
-
Prepare the swirl:
Roll out a long, tapered snake of pastel pink clay. It should be thicker at one end and get progressively thinner. -
Coil the topping:
Starting with the thick end, coil the pink snake on top of the mint scoop, winding upward to a soft peak. -
Add texture:
Use a needle tool to gently scratch fine lines into the pink swirl to mimic the texture of piped frosting. -
Insert hardware:
Twist a metal eye screw into the top of the pink swirl. Ensure it goes deep enough to be secure. -
Sprinkle placement:
Apply a tiny amount of liquid clay to the pink swirl and carefully place green micro-beads or glitter flakes using tweezers. -
Bake:
Bake the charm according to your clay package instructions (usually 230°F – 275°F for 15-30 minutes). -
Optional glaze:
Once cool, brush a coat of gloss glaze over the eyes and the pink swirl to make them shine.
Now you have a sweet little charm ready to hang on a necklace or gift to a friend
Happy Toast and Jam Friends
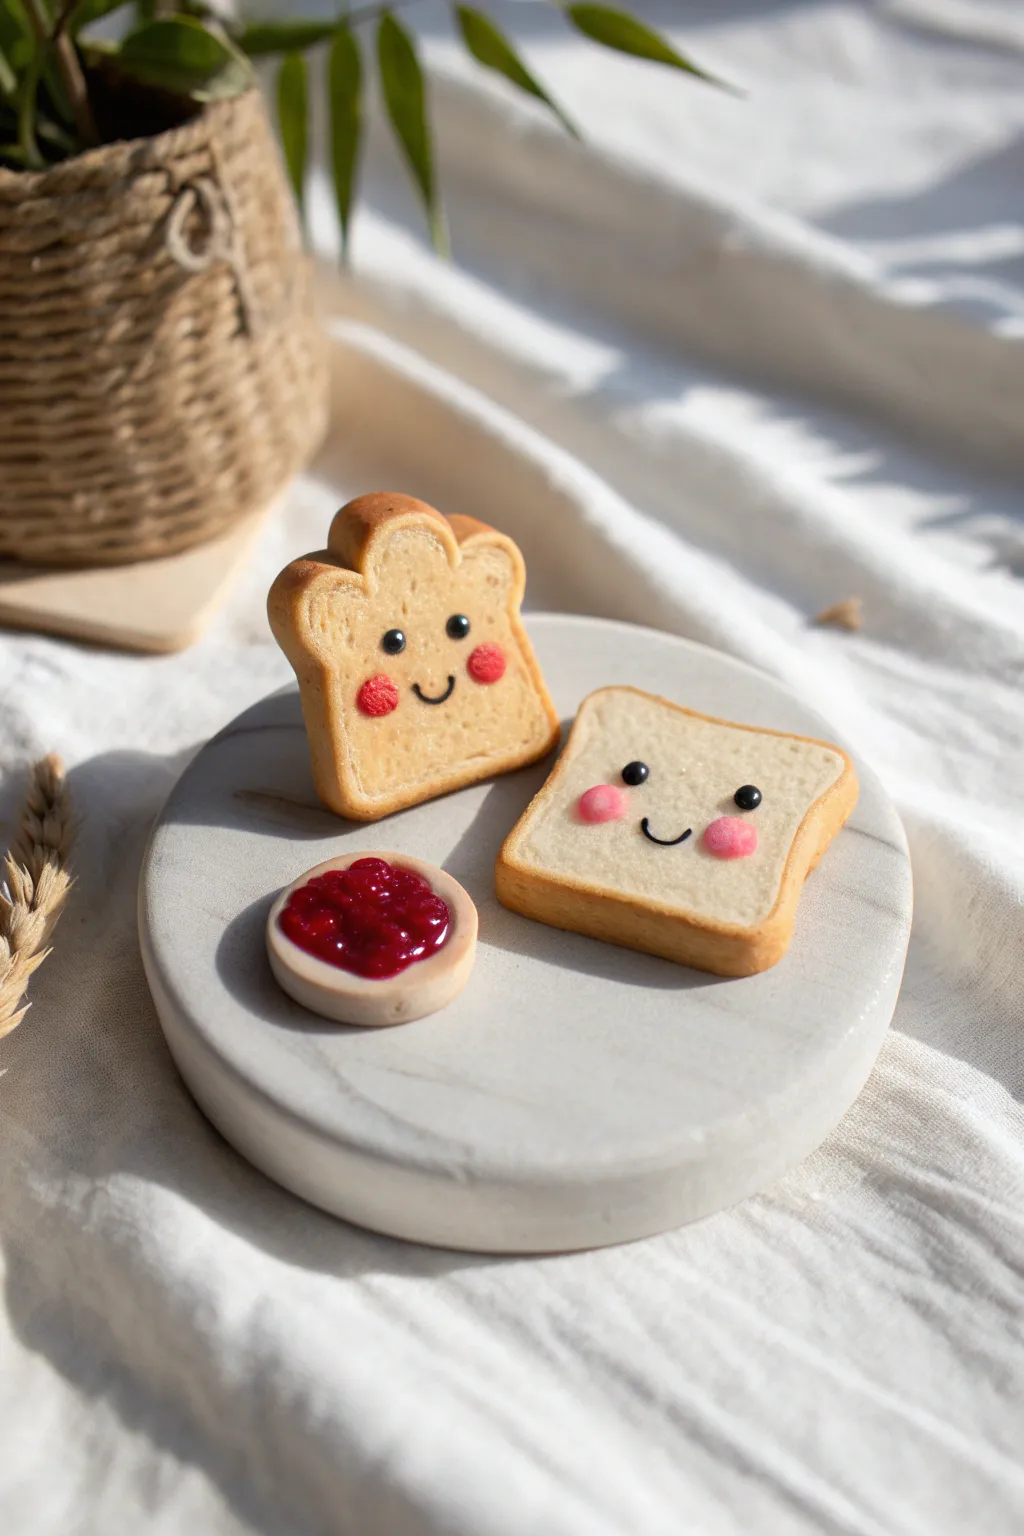
Start your crafting day right with this adorable pair of breakfast buddies made from polymer clay. This project features two slices of happy toast—one classic and one split-top—served alongside a tiny pot of glossy jam, perfect for brightening up any miniature collection.
Step-by-Step
Materials
- Polymer clay (white, beige/light brown, translucent)
- Soft pastels (yellow ochre, orange, reddish-brown)
- UV resin or gloss glaze
- Liquid polymer clay (red and translucent)
- Black polymer clay or black acrylic paint
- Pink polymer clay or acrylic paint
- Ball tool or dotting tool
- Needle tool or toothbrush (for texturing)
- Small paintbrush
- Cutting blade
- Sandpaper (optional)
Step 1: Shaping the Bread
-
Mix the Dough Color:
Start by mixing white polymer clay with a tiny amount of translucent and yellow ochre to achieve a realistic, unbaked dough color. It should look creamy but natural. -
Form the Square Slice:
Take a portion of your mixed clay and flatten it into a thick square shape, slightly rounding the corners to mimic a classic slice of sandwich bread. Keep the edges smooth. -
Create the Split-Top Slice:
For the second friend, shape another piece of clay similarly but create a distinctive ‘muffin top’ or cloud shape on the upper edge to resemble a split-top loaf. -
Add Texture:
Using a clean toothbrush or a crumpled ball of aluminum foil, gently tap the front surface of both slices to create that authentic, porous bread texture.
Realism Pro Tip
Brush the pastel shading heavily on the very edges and corners, fading inward. This exact gradient mimics how real toasters brown bread unevenly.
Step 2: Adding the Crust
-
Prepare the Crust Tone:
Take a small amount of beige or light brown clay and roll it into a very thin, long snake. -
Wrap the Square Slice:
Carefully wrap the thin brown snake around the perimeter of the square slice, flattening it slightly so it merges seamlessly with the white bread. I find smoothing the seam with a silicone tool helps hide the join. -
Wrap the Split-Top Slice:
Repeat the process for the cloud-shaped slice, ensuring the brown crust follows every curve of the top edge. -
Shade with Pastels:
Use a paintbrush to dust shaved soft pastels (yellow ochre and orange-brown) onto the crust edges and lightly onto the face of the bread for a ‘toasted’ effect.
Step 3: The Jam Pot
-
Form the Dish:
Make a small, flat disc from light beige or grey clay to serve as the little jam ramekin. Create a slight depression in the center using a ball tool. -
Mix the Jam:
Combine translucent liquid clay with a drop of red liquid clay (or red alcohol ink). Alternatively, mix solid translucent clay with red clay and chop it finely. -
Fill the Pot:
Fill the depression in the ramekin with your jam mixture. If using solid clay bits, texture them to look like crushed fruit.
Make them Magnets
Before baking, press a small round magnet into the back of each piece. Remove it, bake the clay, then glue the magnet back into the indentation for strong fridge decor.
Step 4: Kawaii Details
-
Add Cheeks:
Take tiny amounts of pink clay (or red for the split-top toast) and flatten them into small ovals. Place them on the bread slices as blushing cheeks. -
Create Eyes:
Roll two minuscule balls of black clay for each slice and press them gently onto the face. Spacing them widely apart increases the ‘cute’ factor. -
Draw the Smiles:
Roll an incredibly thin thread of black clay and shape it into a ‘U’. Apply this between the cheeks for a happy smile. -
Baking:
Bake your creations according to your clay manufacturer’s instructions (usually 275°F/130°C for 15-30 minutes). Let them cool completely. -
Glazing the Jam:
Once cool, apply a coat of UV resin or high-gloss varnish over the red jam area only to make it look wet and sticky.
Display your delightful breakfast trio on a desk or turn them into charming magnets to brighten someone’s morning


What Really Happens Inside the Kiln
Learn how time and temperature work together inside the kiln to transform clay into durable ceramic.
Kawaii Cloud Pins
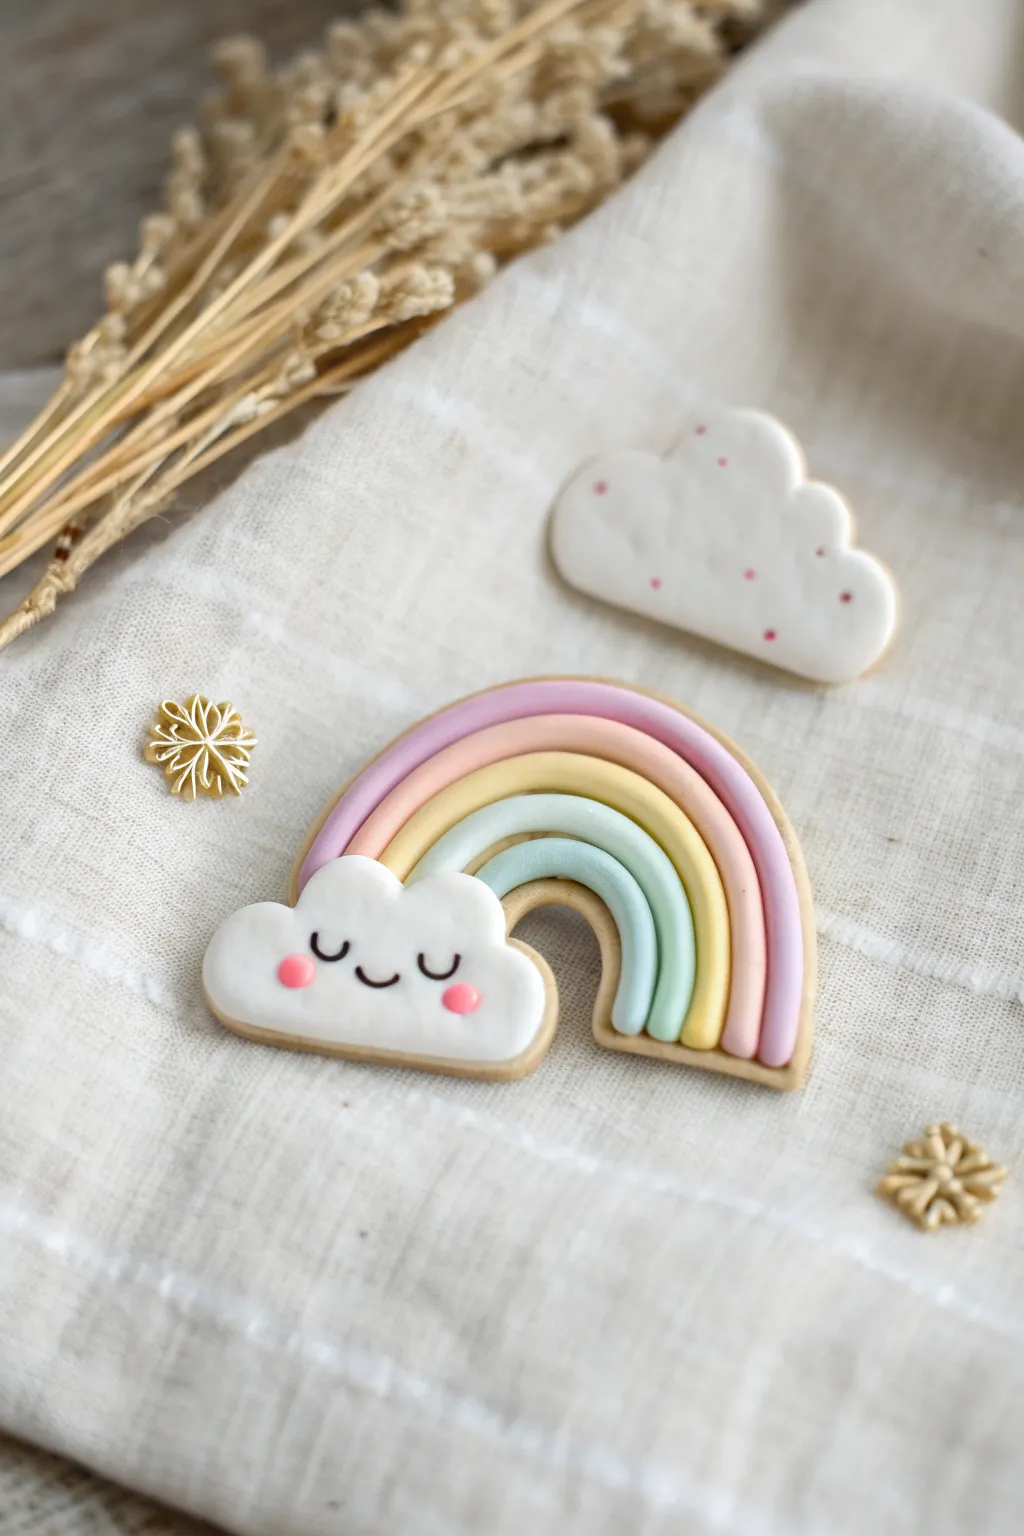
Brighten up your bag or jacket with this adorable duo of kawaii clay pins. Featuring a smiling rainbow with soft pastel arches and a simple speckled companion cloud, this project is perfect for beginners looking to practice clean lines and cute faces.
Detailed Instructions
Materials
- Polymer clay (white, pastel pink, pastel purple, soft yellow, mint green)
- Clay rolling pin or acrylic roller
- X-acto knife or craft blade
- Oval or circle cookie cutters (various sizes) or a specific rainbow cutter
- Sandpaper (fine grit)
- Liquid polymer clay (optional, for bonding)
- Oven for baking
- Pin backs
- Superglue or heavy-duty craft glue
- Needle tool or toothpick
- Black acrylic paint
- Fine detail paintbrush
- Gloss or matte glaze (optional)
Step 1: Shaping the Base
-
Prepare the base cookie shape:
Start by conditioning a chunk of white polymer clay until it’s pliable. Roll it out to a uniform thickness of about 1/4 inch (6mm). This will serve as the backing for your rainbow. -
Cut the rainbow form:
If you have a customized rainbow cookie cutter similar to the shape in the image, press it firmly into the clay. If not, use a large circle cutter to create an arch, then use a knife to manually cut out the inner arch and attach a hand-shaped cloud blob to the bottom left side. -
Create the simple cloud:
For the second pin, roll out another piece of white clay. Use a cloud-shaped cutter or freehand a fluffy cloud shape with your craft knife. Smooth the edges with your finger to soften any sharp cuts. -
Smooth the edges:
Gently tap and rub the edges of both clay bases to ensure they are rounded and neat. A smooth foundation makes the final product look much more professional.
Uneven Snakes?
If your clay ropes are lumpy, use a flat acrylic block to gently roll over them while they are on the table. This evens out fluctuations better than hand-rolling alone.
Step 2: Adding the Rainbow Arches
-
Roll clay snakes:
Condition your pastel colored clays: pink, pale orange, yellow, mint, and lavender. Roll each color into a long, thin snake or rope. Try to keep them all the exact same thickness for a uniform look. -
Arrange the colors:
Lay the ropes next to each other on a flat surface to check their width. You want them to fit perfectly onto the arch section of your white base. -
Attach the first arch:
Apply a tiny amount of liquid clay to the rainbow arch area of your base. Carefully place the innermost color (mint green) along the bottom curve. -
Building the rainbow:
Working outward, place the yellow, then orange, then pink, and finally the lavender rope. Gently press them down so they adhere to the base and to each other without flattening the rounded tops of the ropes. -
Trim the excess:
Use your craft blade to slice off the ends of the clay ropes cleanly where they meet the bottom edge of the pin and where they meet the cloud shape on the left.
Step 3: Details & Baking
-
Add the cloud face cheeks:
Roll two tiny balls of bright pink clay. Press them gently onto the cloud portion of the rainbow pin to serve as rosy cheeks. Flatten them slightly. -
Decorate the simple cloud:
For the second cloud pin, take tiny bits of the same pink clay, roll them into microscopic balls, and press them randomly onto the surface to create a speckled pattern. -
Bake the clay:
Place your pieces on a baking sheet lined with parchment paper. Bake according to your clay manufacturer’s instructions (usually 275°F/135°C for 15-30 minutes). Let them cool completely before handling. -
Sand for perfection:
Once cool, use a fine-grit sandpaper to gently smooth out any fingerprints or rough edges on the sides or back of the pins.
Keep it Clean
White clay picks up dust instantly. Keep baby wipes or a scrap of sticky tape nearby to clean your hands and work surface thoroughly before switching back to white clay.
Step 4: The Finishing Touches
-
Paint the face:
Using a very fine detail brush and black acrylic paint, carefully draw two U-shaped closed eyes and a small smile between the pink cheeks on the rainbow cloud. -
Seal the tiny details:
I like to add a tiny drop of glaze just over the painted eyes to protect them from scratching off later. -
Attach pin backs:
Flip your creations over. Apply a strong dab of superglue or heavy-duty craft glue to the flat side of a pin back and press it firmly onto the center of your clay piece. -
Final cure time:
Allow the glue to cure fully (usually 24 hours) to ensure the pin back is secure before you try to wear it.
Pin these sweet accessories to your denim jacket and enjoy the handmade charm
Tiny Octopus Buddies
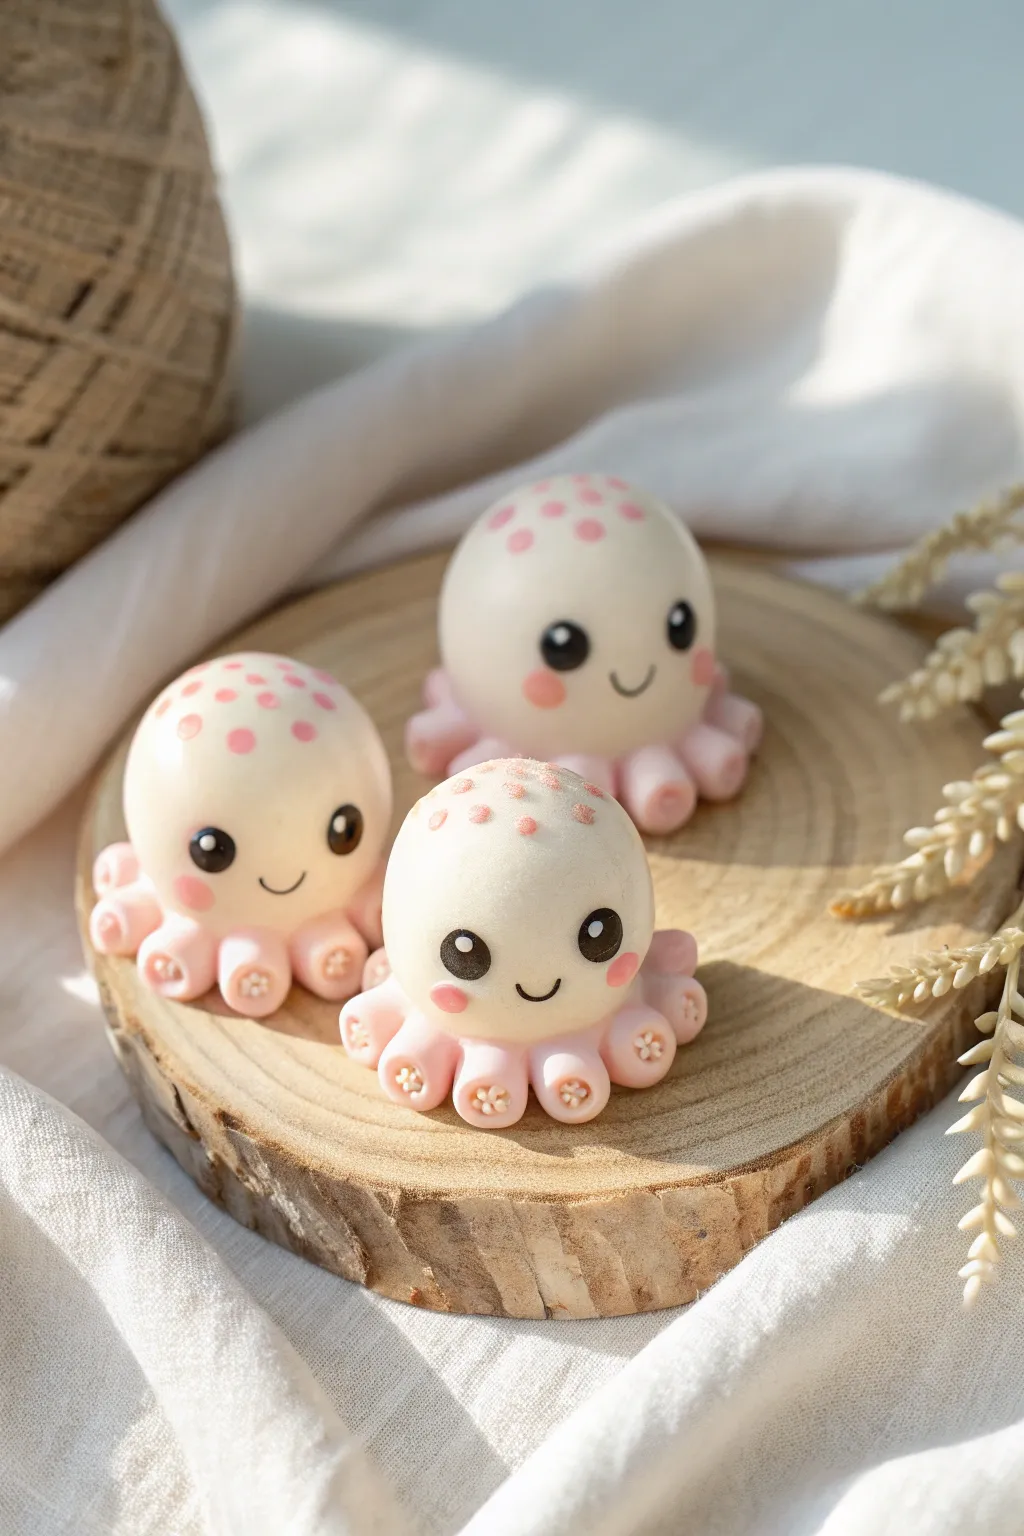
These utterly charming little octopus buddies are smooth, round, and incredibly easy to shape, making them a perfect beginner project. With their soft pink accents and glistening eyes, they look almost like sweet confectionary treats sitting on a display.
Step-by-Step Tutorial
Materials
- White polymer clay
- Light pink polymer clay
- Black polymer clay
- Ball stylus tools (various sizes)
- Small needle tool or toothpick
- Pink soft pastel chalk (for blush)
- Small soft paintbrush
- Gloss glaze or UV resin (optional)
- Clean work surface (tile or glass mat)
- Oven (for baking polymer clay)
Step 1: Shaping the Body
-
Condition the Clay:
Start by kneading your white polymer clay until it is soft and free of cracks. Warm hands make this process much faster. -
Form the Head:
Roll a ping-pong ball sized amount of white clay into a very smooth sphere. This will be the main body and head of your octopus. -
Check for Smoothness:
Examine the sphere closely for fingerprints. Gently roll it between your palms using a light touch to buff away any imperfections.
Clean Clay Tip
White clay picks up dust easily! Keep baby wipes nearby to clean your hands and tools often. Wipe your work surface down with rubbing alcohol before starting the white body.
Step 2: Creating the Tentacles
-
Prepare Pink Clay:
Take a small amount of light pink clay and condition it well. This will serve as the base for the tentacles. -
Make Tentacle Balls:
Roll eight small, equal-sized balls of the pink clay. They should be tiny, roughly the size of a dried pea. -
Attach the Tentacles:
Arrange the eight pink balls in a circle underneath the white body sphere. Press the white sphere down gently so it adheres to the ring of pink balls. -
Secure the Seams:
Using a silicon tool or your finger, gently blend the underside of the pink balls slightly if needed to ensure they stick, though the main connection happens just by pressing the body down. -
Detail the Suction Cups:
Take a flower-shaped tool or a very small star piping tip (or just a toothpick) and press an indentation into the center of each pink tentacle ball to mimic the suction texture.
Step 3: Adding the Face
-
Create Eye Sockets:
Use a medium-sized ball stylus to press two indentations into the front of the white face where you want the eyes to sit. This helps the eyes look embedded rather than bulging. -
Insert the Eyes:
Roll two tiny balls of black clay. Press them firmly into the sockets you just created. Flatten them slightly so they look like large, cute buttons. -
Add Eye Highlights:
Roll extremely tiny specks of white clay. Place one white speck on the upper right side of each black eye pupil to give them that sparkling ‘alive’ look. -
Carve the Smile:
Use a needle tool or small clay knife to gently impress a small ‘U’ shape between the eyes for a happy smile. -
Fill the Smile:
Roll a microscopic snake of black clay and carefully lay it into the smile indentation, or simply leave it as an impression. -
Apply Blush:
Scrape a little pink pastel chalk into a powder. Use a soft brush to gently dust rosy cheeks right under the eyes.
Make it a Charm
Before baking, screw a small metal eye pin into the top center of the head. Once baked and cooled, you can attach jump rings to turn these cuties into keychains or jewelry.
Step 4: Finishing Touches
-
Prepare Pink Spots:
Roll out several tiny, flat circles of pink clay in varying sizes. -
Decorate the Head:
Gently press these pink spots onto the top of the white head in a scattered pattern. I like to concentrate them near the top center and have them spread out as they go down. -
Final Smooth:
Lightly roll the top of the head with your finger to ensure the spots are flush with the white surface. -
Bake:
Bake the figures according to your clay package instructions (usually 275°F/135°C for 15-30 minutes). -
Glaze:
Once cooled, you can apply a coat of gloss glaze to the eyes or the spots to make them shine.
Group your little sea creatures together for the most adorable oceanic display

TRACK YOUR CERAMIC JOURNEY
Capture glaze tests, firing details, and creative progress—all in one simple printable. Make your projects easier to repeat and improve.
Kawaii Frog Toothbrush Holder
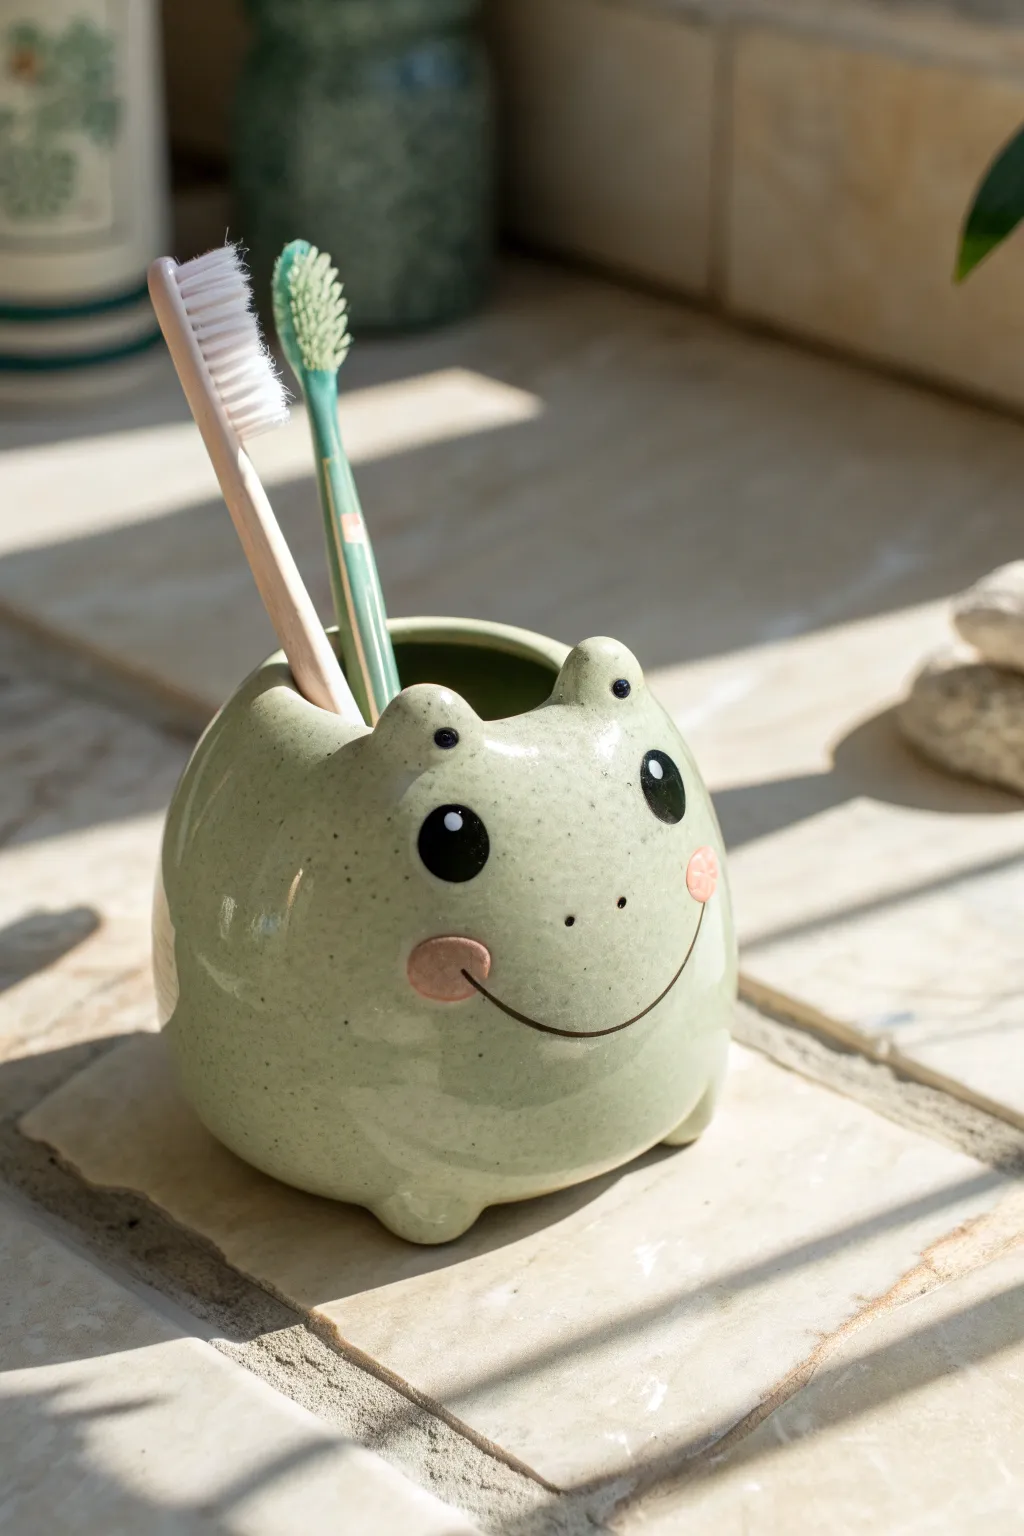
Start your day with a smile by grabbing your toothbrush from this adorable, round-bellied amphibian. This kawaii frog holder features a glossy, speckled green finish and a sweet, simple face that brings instant cheer to any bathroom sink.
Step-by-Step Guide
Materials
- Air-dry clay (white) or polymer clay
- Acrylic paints (sage green, dark green, black, soft pink)
- High-gloss varnish or resin
- Rolling pin
- Clay sculpting tools (needle tool, ball tool)
- Water and sponge (for smoothing)
- Old toothbrush (for speckling)
- Small paintbrush
- Sandpaper (fine grit)
Step 1: Sculpting the Base
-
Form the main body:
Start with a large ball of clay, roughly the size of a grapefruit. Roll it between your palms until it is perfectly smooth and round. -
Create the hollow:
Gently push your thumb into the center of the ball to start opening it up. Use a pinching motion to widen the opening and thin out the walls, aiming for a consistent thickness of about 1/4 inch. -
Shape the rim:
As you hollow it out, ensure the opening at the top is wide enough to hold multiple toothbrushes but slightly narrower than the belly to maintain that cute, pudgy shape. Smooth the rim with a wet finger. -
Flatten the bottom:
Tap the base of your sphere gently on your work surface. This creates a small flat spot so your frog sits stably without wobbling.
Step 2: Adding Features
-
Add the feet:
Roll two small balls of clay and slightly flatten them. Attach them to the bottom front of the holder to act as little nubby feet. Score and slip the clay (scratch the surface and add water) to ensure they stick well. -
Sculpt the eye bumps:
Make two medium-sized balls of clay. Attach them to the top rim of the opening, spacing them slightly apart. Blend the seams downward into the main body so they look like natural bumps on the frog’s head. -
Refine the surface:
Dip a sponge in water and gently wipe over the entire sculpture to remove fingerprints and crate a super smooth finish. I like to take extra time here, as a smooth surface mimics ceramic best. -
Let it dry:
Allow your clay to dry completely according to the package instructions. For air-dry clay, this might take 24-48 hours. Rotate it occasionally for even drying.
Shiny like Porcelain
For a true faux-ceramic look, use UV resin as your topcoat. It creates a thick, glass-like layer that regular varnish can’t quite match.
Step 3: Painting and Finishing
-
Sand imperfections:
Once fully dry, use fine-grit sandpaper to buff away any remaining roughness or sharp edges, particularly around the rim. -
Base coat:
Paint the entire frog, inside and out, with a soft sage green acrylic paint. You may need two coats for full opacity. -
Add speckles:
Dilute a darker green paint slightly with water. Dip an old toothbrush into this mix and flick the bristles with your thumb to spray fine speckles over the frog’s body for a stone-like texture. -
Paint the eyes:
Using a small detail brush, paint large black circles on the front of the eye bumps. Add a tiny white dot in each black circle to make the eyes sparkle with life. -
Add rosy cheeks:
Mix a soft pink color and paint two small ovals below the eyes. This gives him that classic kawaii blushing look. -
Draw the smile:
With a very fine liner brush or a black paint pen, draw a thin, wide smile connecting the two cheeks. Curve it gently to match the contour of the round belly. -
Seal the deal:
To make it waterproof and give it that ceramic shine, apply 2-3 coats of high-gloss varnish or a layer of resin. Let this cure completely before using it in the bathroom.
Drainage Hole
Poke a small hole in the bottom center before drying. This prevents water from pooling inside if wet toothbrushes drip, keeping it hygienic.
Now your bathroom has a cheerful green guardian ready to hold your brushes.
Smiling Mushroom Planter Toppers
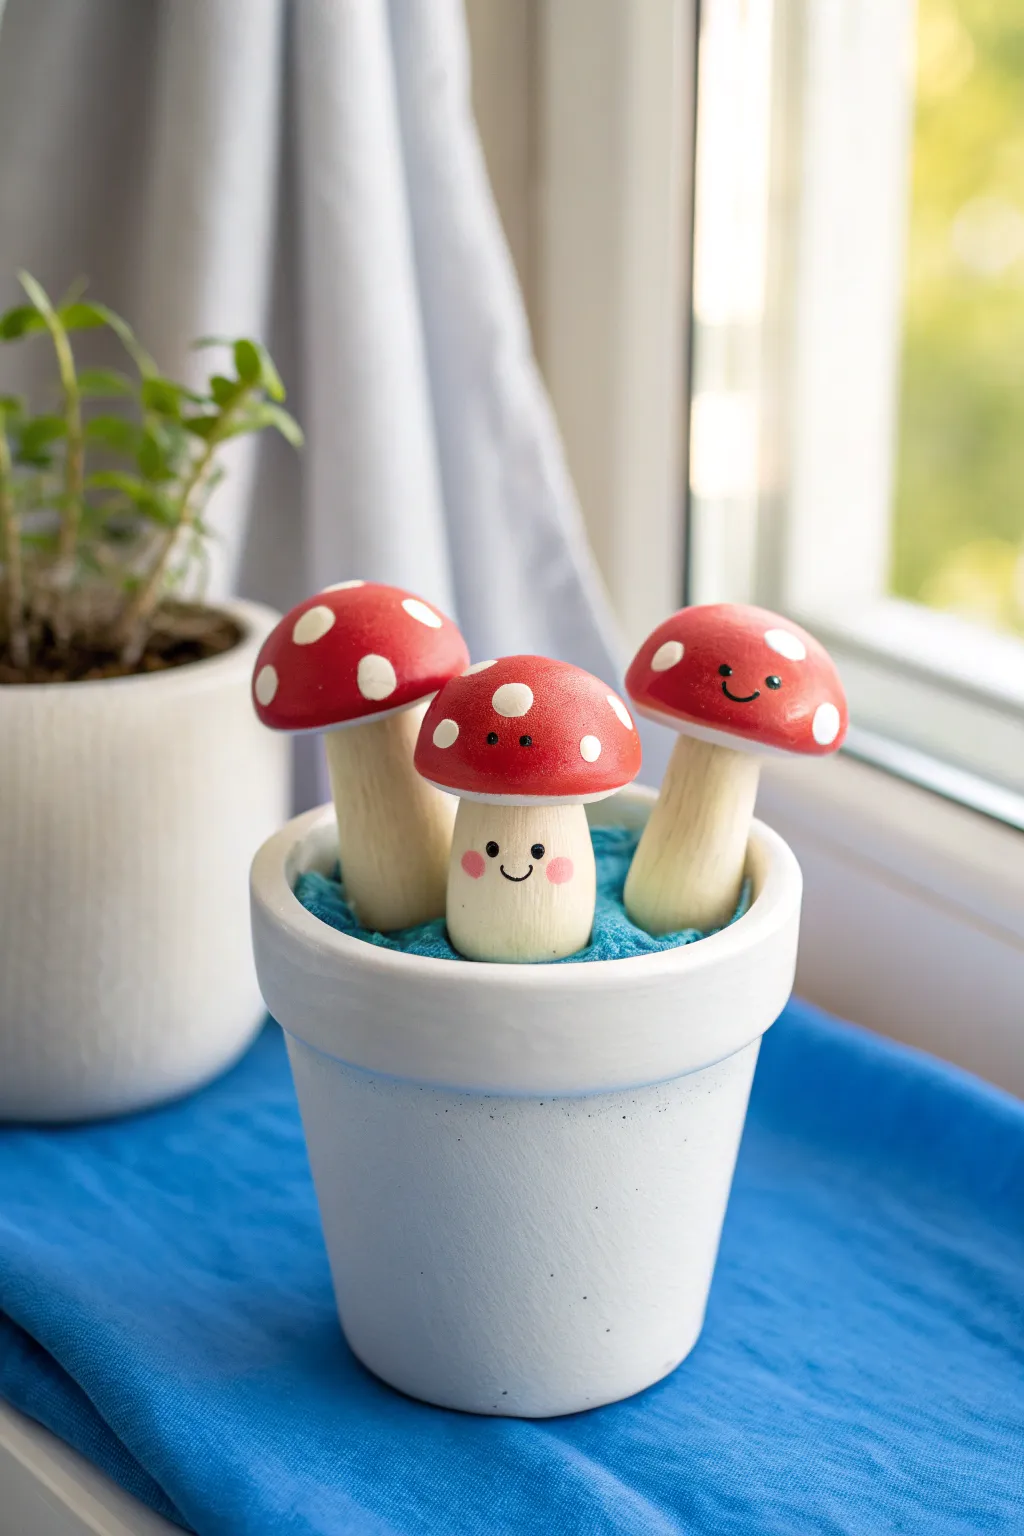
Bring a little woodland magic to your potted plants with these adorable, smiling mushroom friends. This project uses polymer clay to create three distinct characters—one tall, one short and chubby, and one wide-capped—all nestled together in a cozy planter display.
How-To Guide
Materials
- White or beige polymer clay (for stems)
- Red polymer clay (for caps)
- White polymer clay (for spots)
- Acrylic paints (Black, Pink)
- Small dotting tool or toothpick
- Fine detail paintbrush
- Aluminum foil (optional, for armature)
- Gloss varnish or glaze (optional)
- Small terracotta or ceramic pot (approx. 3-4 inches)
- Blue fabric or felt (for the ‘water’ base)
Step 1: Sculpting the Stems
-
Condition the Stem Clay:
Start by warming up your beige or white clay in your hands until it’s soft and pliable. This step is crucial to prevent cracking later on. -
Shape the Tall Stem:
Roll a cylinder of clay approximately 2 inches long. Gradually thin it out towards the top so it has a slight taper, resembling a natural mushroom stalk. Flatten the bottom so it stands upright on its own. -
Shape the Wide Stem:
Create a second cylinder similar to the first, but perhaps make this one slightly thicker or leaning a bit to give it personality. This will hold the wider, flatter cap. -
Create the Chubby Stem:
For the center mushroom, roll a shorter, stouter cylinder, about 1-1.5 inches tall. Make sure it’s nice and round—I find this shape creates the cutest ‘baby’ mushroom character. -
Smooth the Surfaces:
Gently rub out any fingerprints on all three stems. A tiny drop of baby oil on your finger works wonders here for getting a porcelain-smooth finish.
Wobbly Mushroom Fix
If your heads are heavy and make the mushrooms tip over, insert a piece of toothpick or wire into the stem and cap before baking to act as a sturdy internal spine.
Step 2: Forming the Caps
-
Prepare the Red Clay:
Clean your hands thoroughly before switching to red clay to avoid color transfer. Condition a good amount of red clay until soft. -
Shape the Standard Cap:
Roll a ball of red clay and press your thumb into the center to create a dome shape. Refine the edges so they are smooth and rounded. Test fit it onto the first tall stem. -
Shape the Wide Cap:
For the second mushroom, make a similar dome but flatten it out gently into a wider, more umbrella-like canopy. Curve the edges downward slightly. -
Shape the Button Cap:
Create a smaller, deeper dome for the short middle mushroom. This cap should look like a little beanie hat sitting snugly on top. -
Attach Caps to Stems:
Press each red cap firmly onto its corresponding stem. You can use a little liquid translucent clay (Bake & Bond) between the pieces if you want an extra secure hold.
Make It A Garden
Instead of blue fabric, fill the pot with dried moss or tiny pebbles. You can even sculpt a tiny clay snail or ladybug to glue onto one of the mushroom caps.
Step 3: Adding Details & Baking
-
Add White Spots:
Roll tiny balls of white clay in varying sizes. Flatten them into thin discs and press them randomly onto the red caps. Don’t be too symmetrical; irregularity looks more natural. -
Bake the Figures:
Arrange your mushrooms on a baking sheet lined with parchment paper. Bake according to your brand of polymer clay instructions (usually around 275°F/130°C for 15-30 minutes). Let them cool completely. -
Paint the Faces:
Using a dotting tool or the end of a paintbrush dipped in black acrylic paint, add two small eyes to the stems. For the middle one, place the eyes lower down for a cuter look. -
Add Mouths:
With an ultra-fine detail brush, carefully paint a tiny ‘U’ shape for a smile between the eyes. On the right-hand mushroom, you can paint the face directly onto the red cap rim instead of the stem for variety, as seen in the photo. -
Rosy Cheeks:
Dip a toothpick into pink paint and dab small oval cheeks under the eyes. This brings the kawaii expression to life. -
Optional Glaze:
Once the paint is fully dry, you can coat the red caps with a glossy varnish to make them look wet and shiny.
Step 4: Final Assembly
-
Prepare the Pot:
Take your small white pot and stuff the bottom with some paper or filler so you don’t use too much fabric. -
Create the Blue Base:
Crumple a piece of blue fabric or felt and tuck it neatly into the top of the pot to simulate a soft bed or water. -
Position the Mushrooms:
Nestle your three finished mushrooms into the fabric. Adjust the folds of the cloth to hold them securely upright.
Place your happy mushroom trio on a sunny windowsill where their smiles can brighten up your morning coffee routine
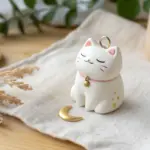
Cute Star and Moon Trinket Dish
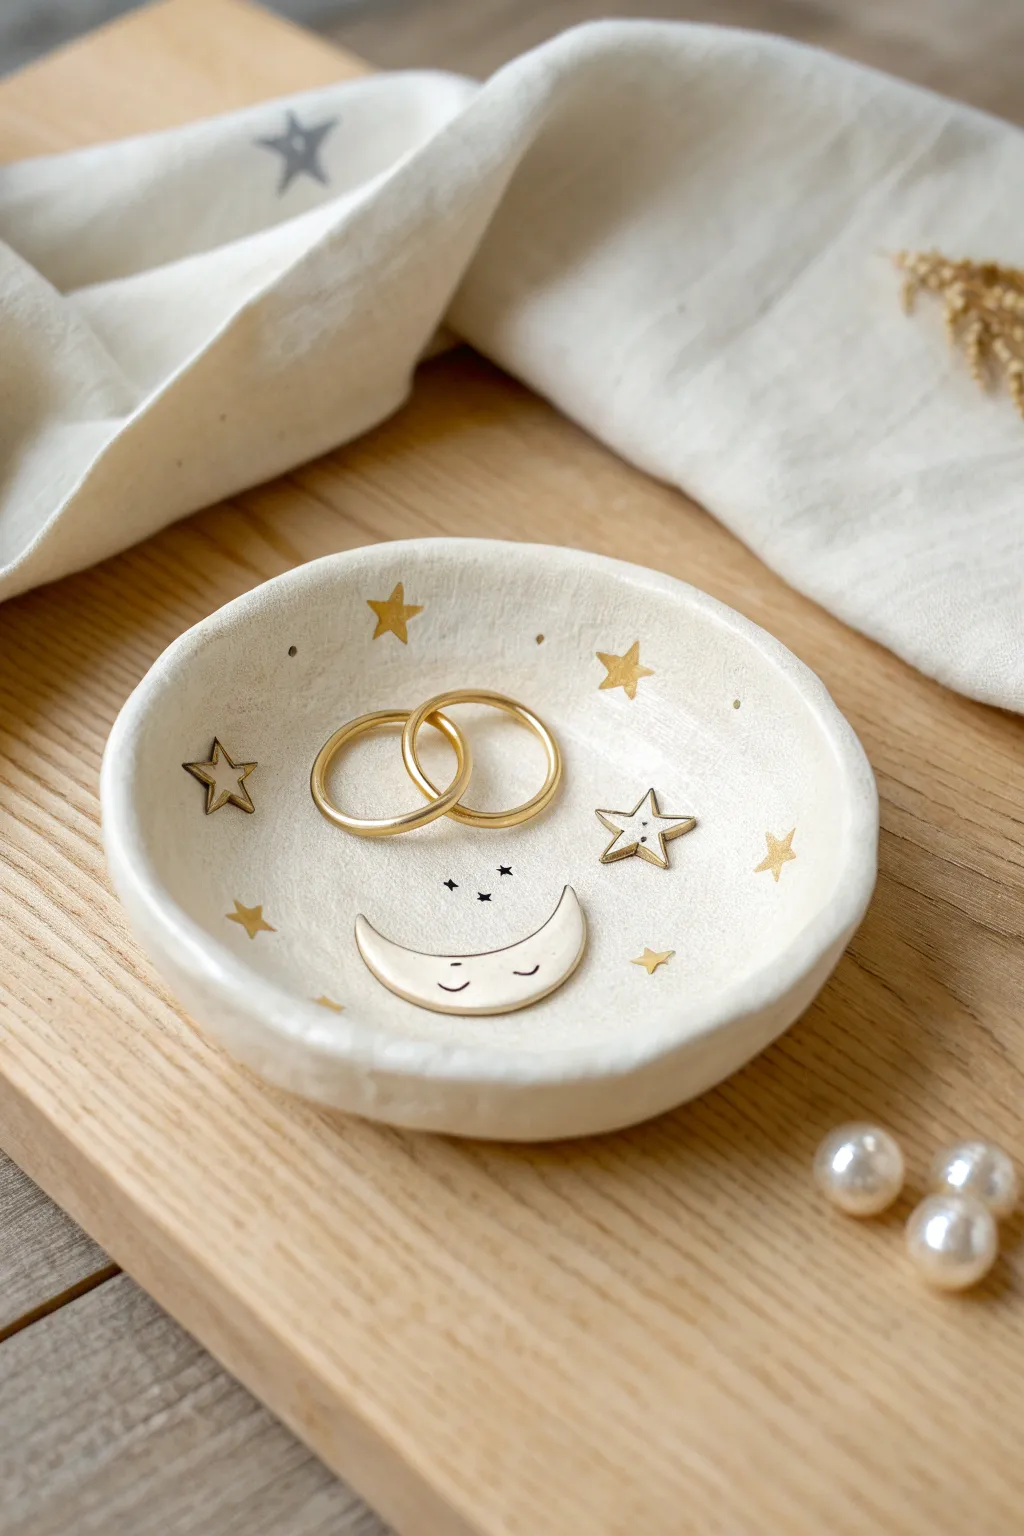
Capture the magic of the night sky with this charming, handmade trinket dish, perfect for holding your most precious rings. Featuring a sleepy crescent moon and glittering golden stars, this clay piece adds a touch of whimsy to any bedside table.
Step-by-Step Guide
Materials
- White or cream air-dry clay (or polymer clay)
- Small rolling pin
- Bowl or circular cutter (approx. 4 inches diameter)
- Small knife or clay cutting tool
- Sponge or sandpaper (fine grit)
- Gold acrylic paint or gold leaf pen
- Fine-point black permanent marker or black acrylic paint
- Small paintbrush
- Varnish or gloss glaze (optional)
Step 1: Shaping the Dish
-
Prepare the clay:
Begin by kneading a ball of white or cream clay until it is soft, pliable, and free of cracks. I find warming it in my hands for a few minutes makes a big difference in preventing cracks later. -
Roll out the base:
Use your rolling pin to flatten the clay into a smooth slab, aiming for a consistent thickness of about 1/4 inch. -
Cut the circle:
Place your circular cutter or bowl upside down on the clay slab and cut around it with a knife to create a perfect circle. -
Form the rim:
Gently lift the edges of the circle upwards to create a shallow bowl shape. Use your thumbs to press the inner curve and your fingers to support the outside, smoothing out any harsh creases. -
Soften the edges:
Dip your finger in a tiny bit of water and run it along the rim to smooth it out. The goal is an organic, slightly uneven look, so don’t worry about machine-perfect symmetry.
Smooth Surface Secret
Use a damp sponge to smooth the clay before drying. This reduces sanding time later and creates a creamy texture.
Step 2: Creating Celestial Details
-
Make the moon:
Roll a small snake of clay and taper the ends. Curve it into a crescent shape and flatten it slightly. It should be small enough to fit comfortably in the bottom third of your dish. -
Add the stars:
Cut out two or three tiny stars from your leftover rolled clay. You can use a tiny clay cutter or carefully cut them freehand with your knife. -
Attach the features:
Score the back of the moon and stars (make tiny scratches) and add a drop of water or liquid clay. Press them gently but firmly onto the inside surface of the dish. -
Sculpt the face:
Using a needle tool or the very tip of your knife, gently impress a curved line for a smile and two sleepy U-shapes for eyes onto the moon piece. -
Dry completely:
Set the dish aside to dry. If using air-dry clay, this will take 24-48 hours. Turn it over halfway through to ensure the bottom dries evenly.
Clay Shrinkage?
If the clay curls while drying, weigh the center down with a small bag of rice or beans to keep the base flat.
Step 3: Painting and Finishing
-
Smooth the surface:
Once fully dry, check for any rough spots. Gently sand the edges or surface with fine-grit sandpaper for a professional finish. -
Paint the embellishments:
Using a small brush, carefully paint the raised moon a soft cream (if different from the base) and paint the raised stars with gold acrylic paint. -
Add flat details:
Paint additional flat gold stars directly onto the dish surface to fill in the empty spaces. Vary the sizes for a starry night effect. -
Define the outlines:
With a fine-point black marker or a very thin brush and black paint, outline the raised stars and the moon. Add tiny dots in the background for distant stardust. -
Draw the face:
Carefully trace over the indented eyes and mouth on the moon with the black marker to make the expression pop. -
Seal the piece:
Apply a coat of varnish or gloss glaze over the entire dish. This protects the paint and gives it a lovely ceramic-like sheen.
Now you have a sweet little spot to keep your jewelry safe while you drift off to sleep
Kawaii Dumpling Chopstick Rest
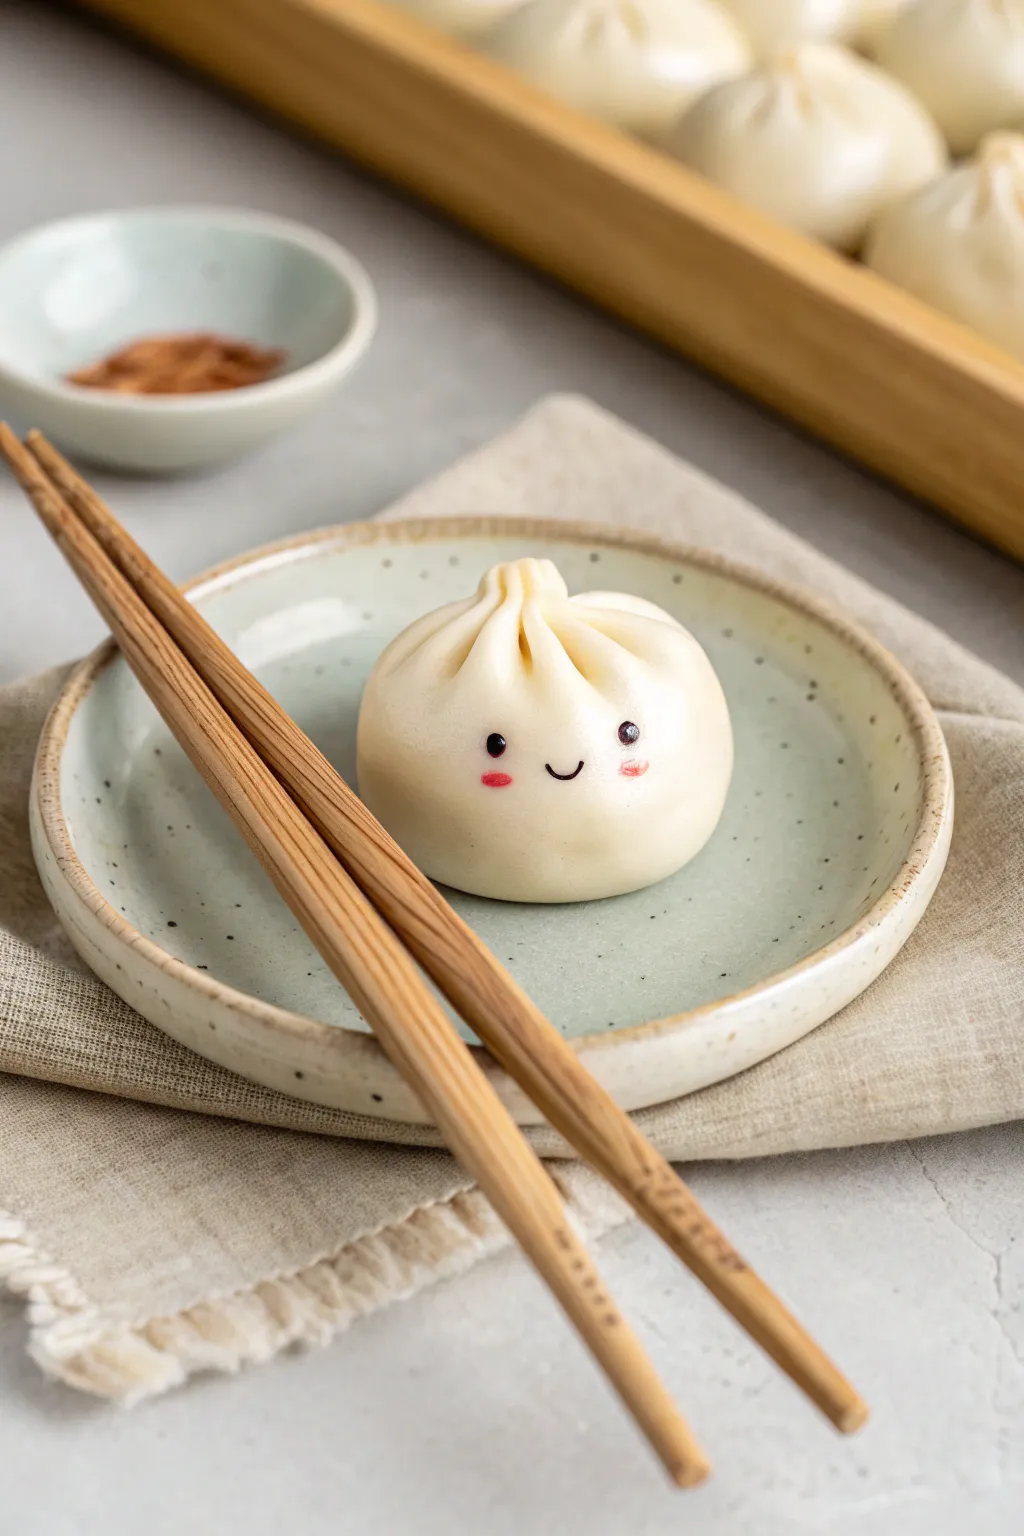
Bring a touch of dim sum delight to your dining table with this adorable little dumpling figure. Smooth white clay mimics the soft dough of a real bao bun, complete with a tiny, hand-painted smiling face that adds irresistible charm.
Step-by-Step
Materials
- White polymer clay (or air-dry clay)
- Black acrylic paint
- Pink acrylic paint or soft pastel chalk
- Fine detail paintbrush (00 or 000 size)
- Dotting tool or toothpick
- Gloss glaze or polyurethane varnish
- Clay sculpting tools (needle tool and smooth modeling tool)
- Aluminum foil (for core, optional)
- Work surface (ceramic tile or silicone mat)
Step 1: Sculpting the Dumpling Body
-
Condition the clay:
Start by taking a chunk of white polymer clay about the size of a walnut. Knead it thoroughly in your hands until it becomes soft, warm, and pliable to prevent cracks later. -
Form the base sphere:
Roll the conditioned clay between your palms to create a smooth, seamless ball. If you see any air bubbles or lines, keep rolling and smoothing until the surface is pristine. -
Flatten the bottom:
Gently press the ball onto your work surface to create a flat base. You want it stable enough to sit on a plate but still rounded enough to look plump and delicious. -
Refine the shape:
Shape the sides slightly so the dumpling looks a bit wider at the bottom, mimicking the gravity-settled look of a soft steamed bun.
Fixing Fingerprints
If you see fingerprints on your raw clay, lightly brush them with a little baby oil or cornstarch before baking to smooth them out completely.
Step 2: Creating the Delicate Folds
-
Pinch the center top:
Gently pinch the very top center of your sphere to create a small peak. This will be the gathering point for all your pleats. -
Create the first pleat:
Using a modeling tool or the side of a toothpick, press an indentation running from the top peak partway down the side of the bun to simulate a fold. -
Add radiating folds:
Continue pressing these indentations all around the top peak, spacing them somewhat evenly. The goal is to make it look like dough that has been gathered and twisted. -
Twist the peak:
Once your pleat lines are pressed in, give the very top peak a tiny, gentle twist. This creates that authentic pinched dough effect found on handmade dumplings. -
Smooth the transitions:
Use your finger or a soft silicone tool to gently smooth the bottom edges of your pleat lines so they fade naturally into the round body of the dumpling.
Step 3: Baking and Painting Details
-
Bake the clay:
Follow the manufacturer’s instructions for your specific brand of polymer clay. Typically, bake at 275°F (135°C) for about 15-20 minutes. Let it cool completely before painting. -
Prepare the face area:
Identify the smoothest side of your dumpling to be the ‘front.’ This is where the personality will shine. -
Paint the eyes:
Dip a dotting tool or the end of a toothpick into black acrylic paint. Carefully place two small dots for eyes, spacing them wider apart for a cuter ‘kawaii’ proportion. -
Add eye highlights:
Once the black paint is barely dry, use a much smaller tool (like a needle tip) to add a microscopic dot of white paint inside the black dots to bring the eyes to life. -
Draw the smile:
Using your finest detail brush with slightly thinned black paint, draw a tiny, simple ‘U’ shape exactly between the eyes. I find resting my pinky on the table helps steady my hand. -
Apply blushing cheeks:
For the rosy cheeks, you can paint two small pink ovals under the eyes. Alternatively, brush on a tiny bit of pink pastel dust for a softer, airbrushed look.
Realistic Texture
For an ultra-realistic matte texture on the bun skin, skip the all-over gloss. Only gloss the eyes and mouth to make them pop.
Step 4: Finishing Touches
-
Let paint dry:
Allow all the painted details to dry completely. Acrylics dry fast, but giving it 10-15 minutes ensures you won’t smudge your work during glazing. -
Apply gloss glaze:
Brush a coat of gloss glaze or polyurethane varnish over the entire dumpling. This not only protects the paint but gives the clay that slightly moist, steamed look of real food.
Now you have a charming little companion to hold your chopsticks or simply brighten up your desk space
Tiny Milk Carton Desk Buddy
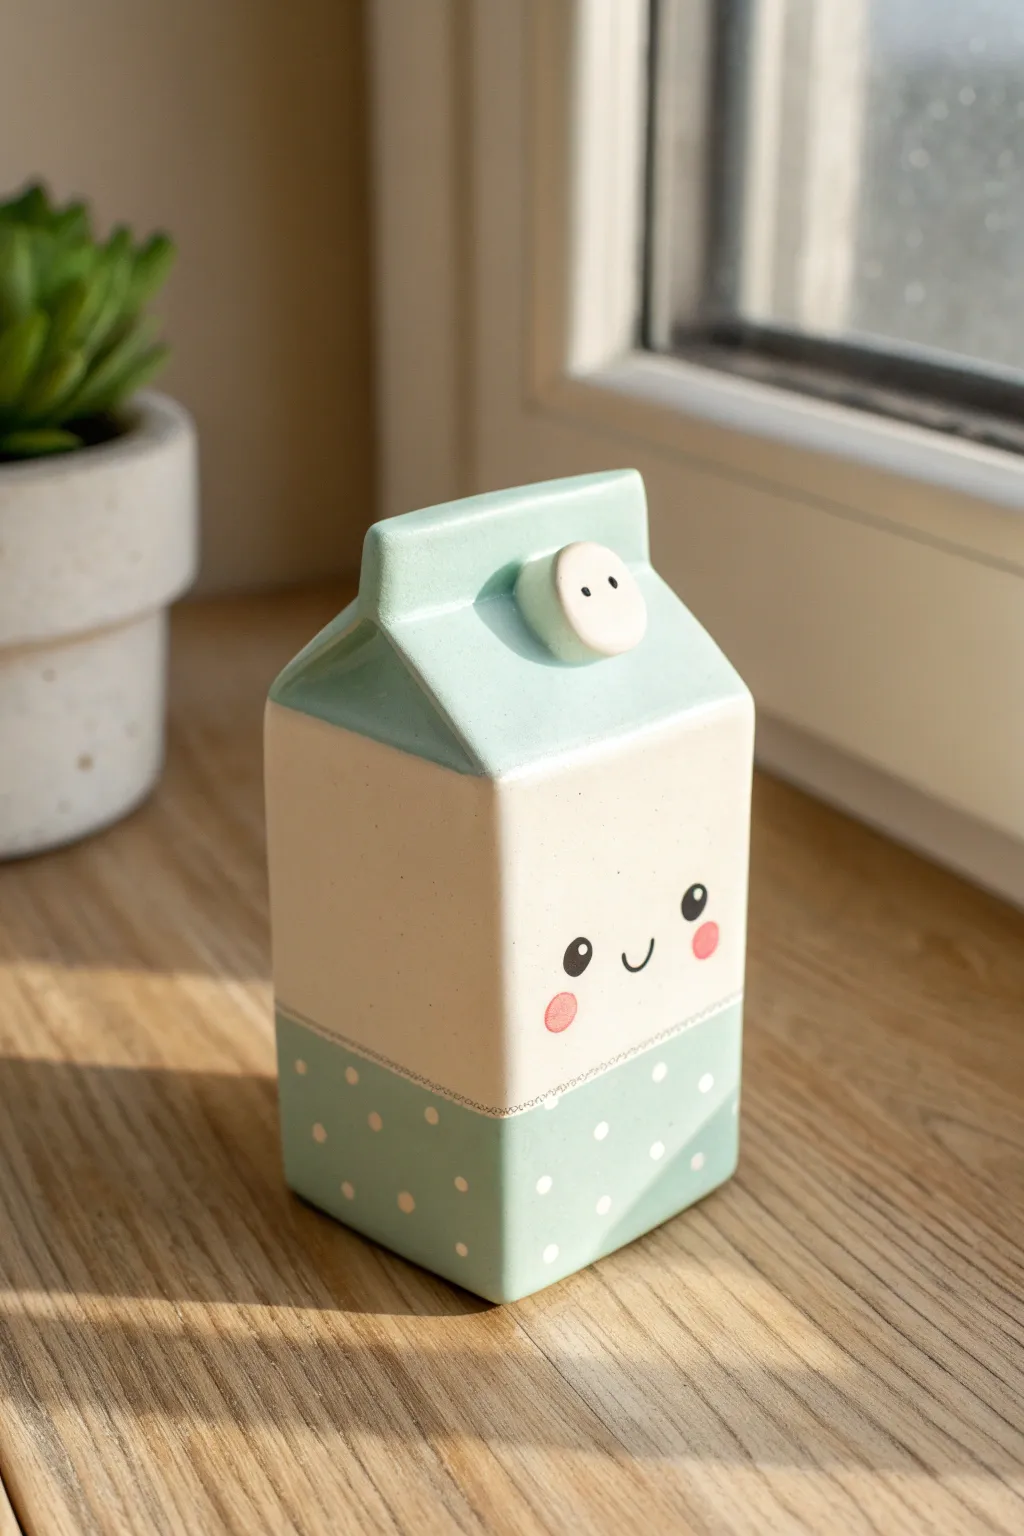
Brighten up your workspace with this adorable milk carton buddy, featuring a soothing mint and cream color palette. Its sweet kawaii expression and tiny polka dots make it the perfect little figurine to keep you company during study sessions.
How-To Guide
Materials
- White polymer clay
- Mint green polymer clay (or white clay mixed with a tiny bit of teal and yellow)
- Black acrylic paint
- Pink soft pastel chalk or pink acrylic paint
- Needle tool or hobby knife
- Dotting tool or toothpick
- Rolling pin
- Gloss glaze or polyurethane varnish
- Small fine-tipped paintbrush
Step 1: Shaping the Base
-
Create the main block:
Start by conditioning a large block of white clay. Roll it into a smooth ball first to remove air bubbles, then shape it into a rectangular prism with defined corners. It should stand tall, resembling the body of a milk carton. -
Prepare the mint accent:
Roll out your mint green clay into a flat, even sheet, roughly 2-3mm thick. Use your rolling pin to ensure it’s smooth. -
Add the bottom band:
Cut a strip of the mint clay sheet that is wide enough to cover the bottom third of your white block. Wrap this strip around the base of the white rectangle, smoothing the seam at the back so it blends invisibly. -
Smooth the transition:
Gently press the mint clay onto the white clay so they bond nicely. You don’t want a huge ledge where the colors meet, so I like to lightly roll over the seam to flatten it slightly.
Sticky Situation?
If fingerprints are showing up on your smooth clay, lightly brush the surface with a little baby oil or cornstarch before baking to smooth them out perfectly.
Step 2: Forming the Top
-
Cut the roof piece:
Cut a square of the rolled-out mint clay that is slightly larger than the top of your white block. This will form the angled roof of the carton. -
Shape the roof angle:
Place the mint square on top. Pinch the center line upwards to create a triangular peak, mimicking the classic folded top of a milk carton. Smooth the sides down onto the white body. -
Refine the edges:
Use your fingers or a flat tool to sharpen the peak of the ‘roof’ and ensure the overhangs are neat and straight. -
Create the spout:
Roll a small ball of white clay and flatten it slightly into a thick disk. This will be the bottle cap or spout. -
Attach the spout:
Press the white disk onto the sloped side of the mint roof. Use a needle tool to poke two tiny holes in the center of the disk to make it look like a cute button.
Step 3: Adding Details
-
Apply polka dots:
Roll many tiny, consistent balls of white clay. Gently press these flat onto the mint green band at the bottom creating a random polka dot pattern. -
Flatten the dots:
Roll the handle of a paintbrush or your rolling pin gently over the dots to make them flush with the mint surface. -
Bake the clay:
Bake your piece according to the instructions on your specific brand of polymer clay. Let it cool completely before painting.
Tiny Face Tip
Don’t trust your steady hand with a brush? Use a fine-point permanent marker or a Posca paint pen for the eyes and mouth instead for more control.
Step 4: Painting the Face
-
Paint the eyes:
Using a very fine paintbrush or a dotting tool dipped in black acrylic paint, create two oval eyes on the upper part of the white section. Add tiny white specks inside the black ovals for that twinkling look. -
Draw the smile:
Paint a small, U-shaped mouth right between the eyes using your finest brush. -
Add blush:
Scrape a little pink pastel chalk into dust. Use a soft brush or cotton swab to gently apply two rosy circles underneath the eyes for cheeks. -
Glaze vertically:
Finally, apply a coat of gloss glaze to the entire piece to protect the paint and give it a shiny, ceramic-like finish.
Place your little carton on a sunny windowsill and enjoy the cuteness
Blushing Heart Locket Charm
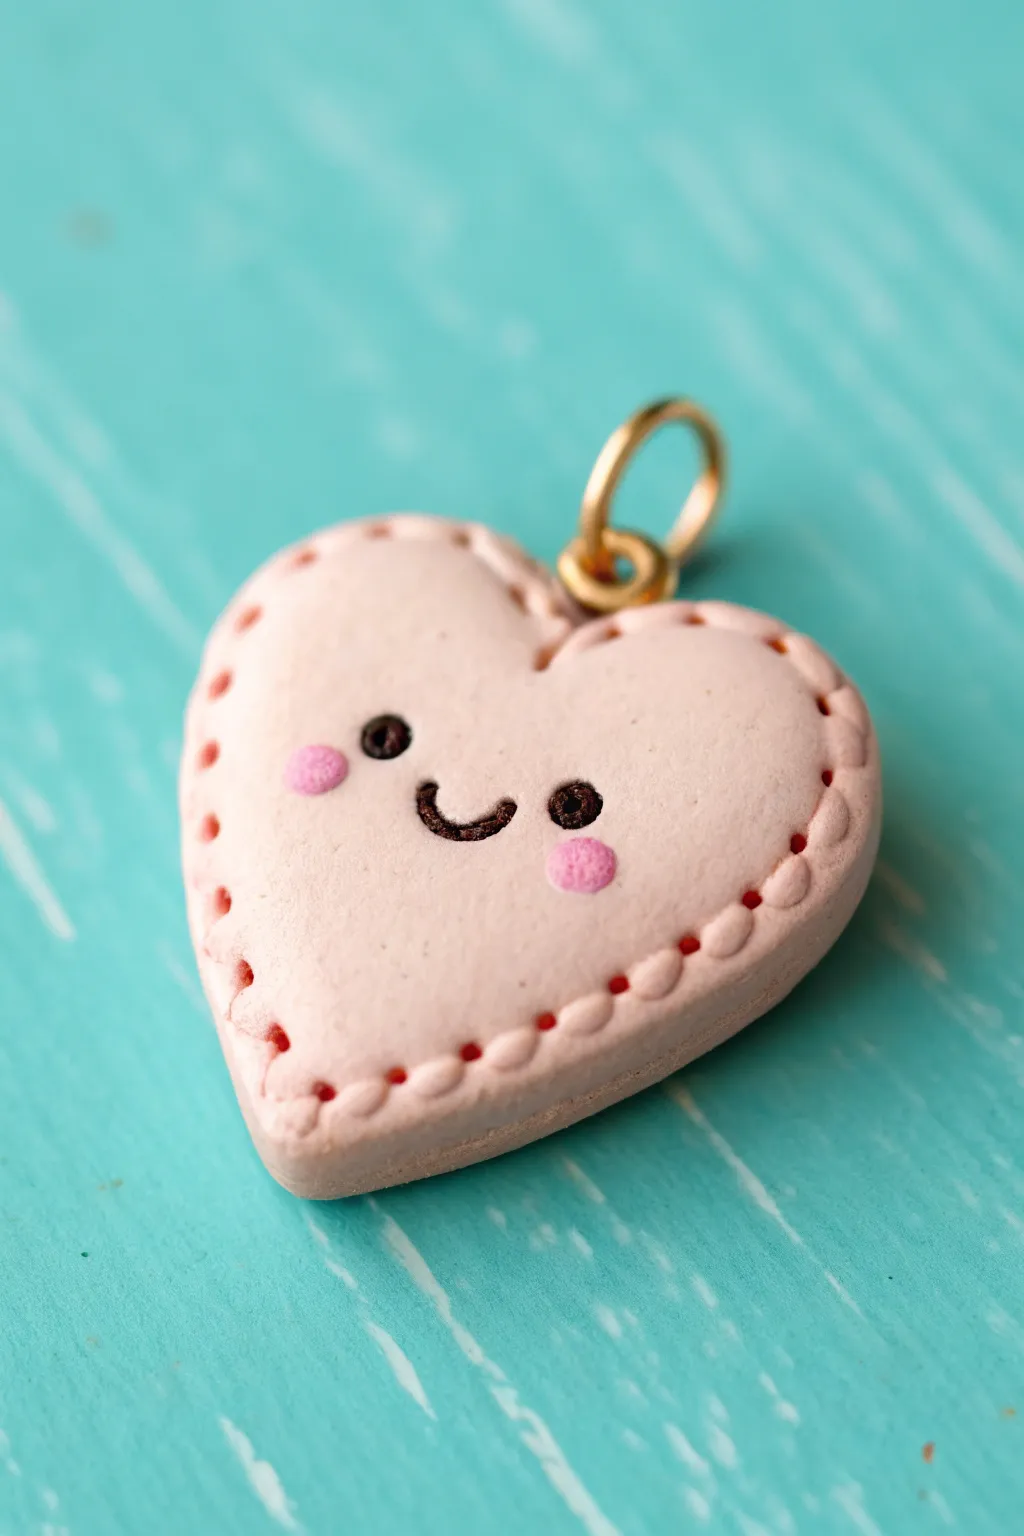
Create a sweet, biscuit-style heart charm that looks like it has been lovingly stitched together with tiny thread details. This kawaii clay piece features a simple smiling face and soft pink cheeks, perfect for a necklace or keychain.
Detailed Instructions
Materials
- Light pink polymer clay
- Dark pink or magenta soft pastel chalk (shaved into dust)
- Black acrylic paint
- Fine detail paintbrush or dotting tool
- Heart-shaped clay cutter (medium size)
- Needle tool or toothpick
- Small gold screw eye pin
- Gold jump ring
- Gloss glaze (optional)
- Small soft brush for blush application
- Ceramic tile or baking surface
- Oven (for baking according to clay instructions)
Step 1: Shaping the Heart Base
-
Condition the Clay:
Begin by kneading your light pink polymer clay until it is soft, pliable, and free of air bubbles. If the clay feels too sticky, you can leach it slightly on white paper for a few minutes. -
Roll the Sheet:
Roll the clay out into a smooth, even sheet. Aim for a thickness of about 4mm to 5mm; you want it thick enough to hold the eye pin securely without bulging. -
Cut the Shape:
Press your heart-shaped cutter firmly into the clay. Give it a tiny wiggle before lifting to ensure a clean cut, then gently push the clay heart out of the cutter. -
Soften the Edges:
Use your fingertip to very gently smooth the sharp top edges left by the cutter. This gives the heart a softer, more pillowy ‘cookie’ look rather than a harsh geometric feel.
Sticky Situation?
If your clay gets too warm and sticky while adding details, pop it in the fridge for 10 minutes. This firms it up, making the tiny stitching marks much cleaner.
Step 2: Adding Texture and Hardware
-
Create the Stitching Holes:
Using a needle tool, poke a series of evenly spaced holes around the entire perimeter of the heart. Leave about 2mm of space between the hole and the edge of the charm. -
Complete the ‘Stitch’ Look:
This is a fun trick: carefully press the needle tool horizontally between each hole to create a small indentation. This connects the dots and mimics the look of thread pulling the fabric tight. -
Insert the Eye Pin:
Take your small screw eye pin and gently twist it into the center of the heart’s top cleft. Ensure it goes in straight and doesn’t poke through the front or back faces.
Pro Design Tip
For a ‘filled’ stitch look, roll tiny snakes of darker pink clay and press them into the faux-stitching indentations before baking to look like actual embroidery thread.
Step 3: Face and Finishing Details
-
Indent the Eyes:
Using a small ball tool or the rounded end of a paintbrush handle, make two small, shallow indentations where the eyes will go. This helps guide your painting later. -
Initial Bake:
Place the charm on a ceramic tile and bake it according to the manufacturer’s instructions for your specific brand of clay. Let it cool completely before painting. -
Paint the Eyes:
With a fine detail brush or a dotting tool, carefully fill the eye indentations with black acrylic paint. A single dot for each eye creates that classic kawaii look. -
Draw the Mouth:
Using the very tip of your finest brush, paint a tiny ‘U’ shape between the eyes for the smile. Keep the line thin and delicate. -
Prepare the Blush:
Shave a small amount of dark pink or magenta soft pastel chalk into a fine powder on a piece of scrap paper. -
Apply Rosy Cheeks:
Dip a dry, soft brush into the pastel dust. Tap off the excess, then gently dab circular spots of pink right under the outer corners of the eyes. Build the color slowly rather than applying too much at once. -
Seal the Charm:
If you want extra durability, apply a thin coat of matte or gloss glaze over the charm, being careful not to smudge the pastel blush. I prefer matte to keep it looking soft. -
Attach the Jump Ring:
Once everything is dry, use pliers to open your gold jump ring, loop it through the eye pin, and close it securely.
Now you have an adorable heart charm ready to wear or gift to a friend
Kawaii Emotion Face Tokens
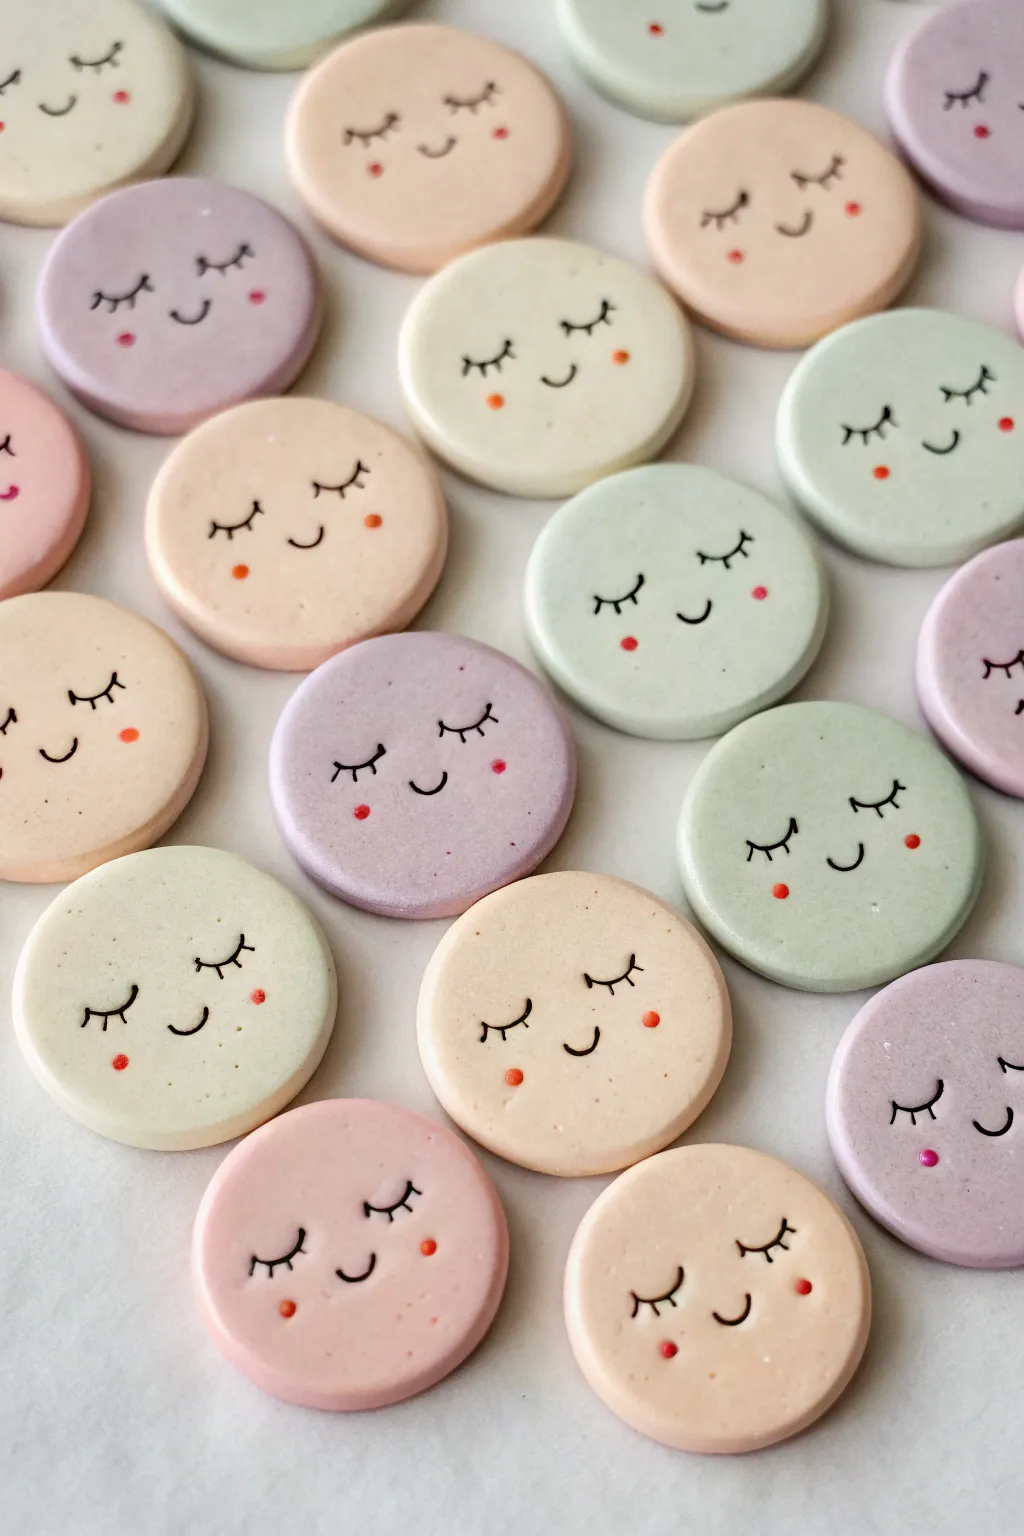
Create a soothing collection of sleepy moon-face tokens that bring a touch of calm to any space. These gentle pastel discs feature simple, hand-painted expressions and rose-tinted cheeks that capture the essence of kawaii minimalism.
Step-by-Step Tutorial
Materials
- Polymer clay (white, plus small amounts of red, yellow, purple, and green)
- Acrylic rolling pin or clay machine
- Round circle cutter (approx. 1.5 inch)
- Parchment paper or baking tile
- Fine-point black permanent marker or black acrylic paint with a 0000 brush
- Red or pink acrylic paint
- Dotting tool or toothpick
- Sandpaper (fine grit, optional)
- Matte varnish (optional)
Step 1: Creating the Pastel Bases
-
Prepare your palette:
Begin with a large block of white clay as your base. Divide this white clay into four equal portions to create your pastel color variants. -
Mix the peach tone:
Take the first portion of white clay and add a tiny speck of orange (mix red and yellow) to create a soft, warm peach color. Knead thoroughly until the color is uniform. -
Mix the lavender tone:
For the second portion, mix in a very small amount of purple clay. The goal is a whisper of color, so start with less than you think you need. -
Mix the mint tone:
Create the mint green shade by adding a tiny pinch of green clay to the third white portion. Keep kneading until no streaks remain. -
Mix the cream tone:
For the final portion, add the tiniest speck of yellow or leave it off-white for a natural cream color. -
Roll out the clay:
Roll each color out into a sheet approximately 1/4 inch thick. I like to use depth guides on my rolling pin to ensure every token is exactly the same thickness. -
Cut the shapes:
Use your round circle cutter to punch out discs from each color sheet. If the clay sticks to the cutter, dip the cutter in cornstarch first. -
Smooth the edges:
Gently rub the edges of each cut circle with your finger to soften the sharp cut line and create a nice, rounded bevel. -
Bake the discs:
Place your circles on a parchment-lined baking sheet or ceramic tile. Bake according to your specific polymer clay manufacturer’s instructions (usually around 275°F/135°C for 15-30 minutes). -
Cool down:
Allow the clay discs to cool completely before moving on to decoration. They must be room temperature for the paint or ink to adhere properly.
Clean Clay Tip
Keep baby wipes nearby to clean your hands and tools between colors. Lint loves sticking to white clay, so wipe surfaces down before rolling.
Step 2: Adding the Kawaii Faces
-
Refine the surface:
If you notice any fingerprints or lint after baking, lightly buff the surface with fine-grit sandpaper for a flawless canvas. -
Draw the sleeping eyes:
Using a fine-point black marker or a tiny detail brush with black paint, draw two small arched curves near the center line of the disc for closed, sleeping eyes. -
Add eyelashes:
Carefully draw three tiny lashes on the outer curve of each eye. Keep these strokes short and delicate. -
The smiling mouth:
Directly centered below the eyes, draw a small, simple ‘U’ shape to form a serene smile. -
Prepare cheek color:
Squeeze a small dot of pink or red acrylic paint onto a palette or scrap piece of paper. -
Apply the cheeks:
Dip a dotting tool or the blunt end of a toothpick into the paint. Gently press a small dot on the outer edge of each eye level to create rosy cheeks. -
Seal the work:
Once the ink and paint are fully dry, apply a thin coat of matte varnish to protect the faces from rubbing off over time.
Magnetize It
Glue strong ceramic magnets to the back of these tokens to turn your fridge into a mood board of sleepy, happy emotions.
Now you have a handful of peaceful expressions ready to brighten your day