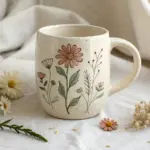
If you’ve been craving a project that feels equal parts chill and magical, flower clay tiles are it—tiny little garden scenes you can hang, frame, or group into a bigger statement. I love how you can keep it super simple with botanical impressions or go full dreamy with layered bas-relief flowers that practically pop off the surface.
Stamped Daisy Tiles

Capture the charm of vintage kitchen tiles with these creamy white squares featuring raised daisy motifs and sunny yellow centers. The glossy finish gives them a high-end ceramic look perfect for coasters or decorative accents.
Step-by-Step Tutorial
Materials
- White or cream-colored polymer clay (or air-dry clay)
- Square cookie cutter (approx. 3-4 inches)
- Acrylic rolling pin
- Daisy plunger cutters (assorted sizes: large, medium, small)
- Yellow acrylic paint or ceramic glaze
- Clear high-gloss varnish or polyurethane
- Small round paintbrush
- Detailing tool or toothpick
- Canvas mat or parchment paper
- Sandpaper (fine grit)
Step 1: Base Preparation
-
Condition the Clay:
Begin by thoroughly kneading your white or cream clay until it is soft, pliable, and free of cracks. Warm clay is much easier to stamp cleanly. -
Roll the Slabs:
Roll out the clay on a non-stick surface to a uniform thickness of about 1/4 inch. Using depth guides on your rolling pin ensures every tile is exactly the same height. -
Cut the Squares:
Press your square cutter firmly into the clay slab. Create four separate squares, peeling away the excess clay from the edges carefully so you don’t distort the shape. -
Smooth the Edges:
Dip your finger in a little water (for air-dry clay) or baby oil (for polymer clay) and gently run it along the cut edges to soften any sharp ridges left by the cutter.
Step 2: Applying the Daisy Relief
-
Cut Daisy Shapes:
Roll a thinner sheet of clay, roughly 1/8 inch thick. Use your daisy plunger cutters to punch out several flowers in varying sizes—one large, one medium, and two small for each tile is a balanced arrangement. -
Arrange the Composition:
Place the cut daisies onto the square base without pressing down yet. I like to position the largest flower slightly off-center for a dynamic look, filling the empty spaces with the smaller blooms. -
Adhere the Flowers:
Once happy with the layout, gently lift each flower. Apply a tiny dab of liquid clay (for polymer) or slip (for air-dry) to the back, then press it firmly onto the tile. Use just enough pressure to bond them without smashing the petal details. -
Create the Centers:
Roll tiny balls of clay for the flower centers. Flatten them slightly and press them into the middle of each daisy. -
Refine Details:
Use a detailing tool or toothpick to re-define the lines between petals if they got squished during application, ensuring each petal looks distinct and rounded.
Stamp Cleanly
Dust your daisy cutters with cornstarch (or dip in water) before cutting. This released the clay instantly and prevents petals from tearing or getting stuck inside the tool.
Step 3: Finishing Touches
-
Bake or Dry:
If using polymer clay, bake according to the package instructions (usually 275°F for 15-30 minutes). If using air-dry clay, allow the tiles to dry completely for 24-48 hours until hard. -
Sand for Perfection:
Once fully cured or dry, lightly sand the edges of the square base with fine-grit sandpaper to remove any lint or rough spots. -
Paint the Centers:
Using a small round brush, carefully paint the raised center circles of the daisies with yellow acrylic paint. You may need two thin coats for full opacity. -
Apply the Glaze:
To mimic the ceramic look in the photo, apply a thick coat of high-gloss varnish over the entire top surface. Let the varnish pool slightly around the raised flowers to create depth. -
Speckle Effect (Optional):
For that authentic pottery look, you can flick a tiny amount of diluted brown paint onto the wet varnish with a stiff brush before it dries, creating subtle speckles. -
Final Cure:
Allow the varnish to dry completely in a dust-free area. Several thin coats are better than one thick one to avoid cloudiness.
Fixing Gaps
If the daisy petals don’t sit flush against the tile base, use a rubber-tipped sculpting tool to gently smooth the underside of the petals down onto the square surface.
Arranged together, these cheerful tiles bring a permanent splash of spring to your table decor
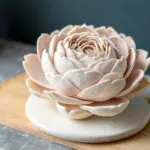
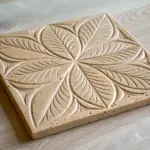
Sunflower Bas-Relief Centerpieces
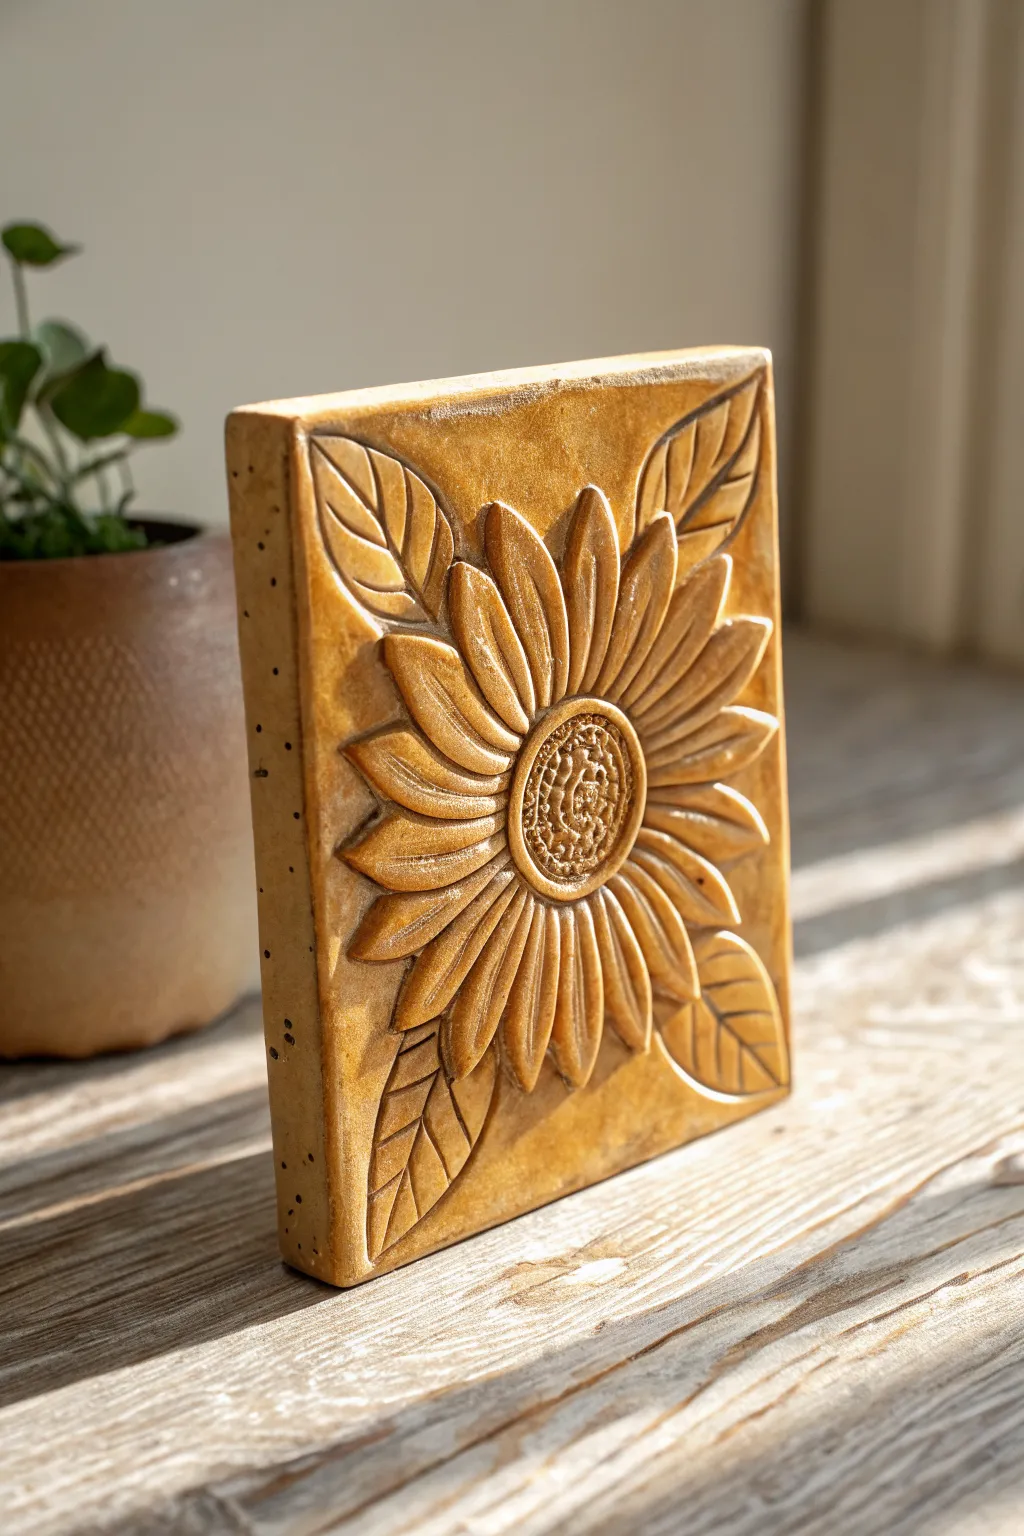
Capture the warmth of a late summer afternoon with this deeply carved sunflower relief tile. Using simple carving tools and a stunning amber glaze, you’ll create a piece that glows with rustic charm and textural depth.
Detailed Instructions
Materials
- Stoneware clay body (buff or terracotta works well)
- Rolling pin with guide strips (1/2 inch to 3/4 inch thickness)
- Square tile cutter or ruler and needle tool
- Carving tools: Wire loop tool, modeling tool, needle tool
- Sponge and water
- Ribs (metal and wooden)
- Amber or honey-colored transparent glaze
- Pencil and paper for sketching
- Banding wheel or turntable (optional)
Step 1: Slab Preparation
-
Roll out the slab:
Begin by rolling out your clay slab to a generous thickness, at least 3/4 of an inch. We need this extra depth to allow for the deep relief carving without making the tile fragile. -
Compress the clay:
Use a rubber or metal rib to compress the clay surface on both sides. This aligns the clay particles, reducing the chance of warping later, and creates a smooth canvas for your design. -
Cut the shape:
Measure and cut a precise square. If you want a 4-inch finished tile, cut it slightly larger (about 4.5 inches) to account for shrinkage during firing. -
Smooth the edges:
Run a damp finger or sponge along the cut edges to soften the sharp corners. I prefer to leave the sides slightly textured for that handmade feel evident in the photo.
Warping Worries?
Tiles curl if they dry unevenly. Dry them slowly on a wire rack or sandwich them between drywall boards. Flip the tile daily during drying.
Step 2: Sculpting the Design
-
Sketch the layout:
Lightly scratch your design onto the leather-hard clay surface with a needle tool. Place the flower center slightly off-center or dead center, arranging four large leaves in the corners to frame the bloom. -
Define the perimeter:
Using a V-gouge or a needle tool held at an angle, carve deeply around the outline of the entire flower and the leaves. This separates the subject from the background. -
Lower the background:
Use a wire loop tool to shave away the clay in the negative spaces (the areas between the leaves/petals and the tile edge). You want the flower to stand proud, so remove about 1/4 inch of background material. -
Carve the petals:
Sculpt the individual petals. Use a modeling tool to round them over, making them convex. Carve deep grooves between each petal to ensure the glaze will pool there later. -
Establish the leaves:
Model the four corner leaves similarly to the petals. Carve a central vein down each leaf, creating a distinct channel. -
Detail the center:
For the seed head, press a small, round tool or the end of a paintbrush repeatedly into the center circle to create a stippled, seed-like texture. Keep this area slightly recessed compared to the petals. -
Refine the surface:
Once the main carving is done, use a soft brush or a damp sponge to smooth out any harsh tool marks or clay burrs. The smoother the high points, the better the glaze will break over them.
Step 3: Finishing and Glazing
-
Slow drying:
Place the tile between two boards or loosely cover it with plastic to let it dry very slowly. Tiles are prone to warping, so even drying is crucial. -
Bisque fire:
Fire the bone-dry tile to cone 04 (or your clay body’s specifications). Ensure the tile is flat on the kiln shelf. -
Apply the glaze:
Select a breaking transparent glaze in amber, honey, or ochre. Dip or brush the glaze onto the tile. You want a relatively thick application so it colors the flat surfaces but settles darkly into the deep crevices. -
Wipe back (optional):
If your glaze is very opaque, gently wipe the highest points of the relief with a damp sponge. This reveals the clay body slightly and accentuates the depth. -
Clean the back:
Ensure the back and the bottom edges of the tile are completely free of glaze before firing to prevent sticking to the kiln shelf. -
Glaze fire:
Fire to the maturation temperature of your glaze (likely Cone 5 or 6 for stoneware). The heat will cause the glaze to flow into the petal grooves, creating that beautiful contrast seen in the inspiration image.
Double Sided
Carve a different botanical design on the back before drying. This creates a reversible trivet or a freestanding art piece visible from both sides.
Once fired, display your sunflower tile on a stand to let the light play across the rich, amber textures


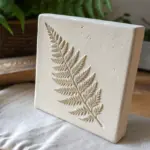
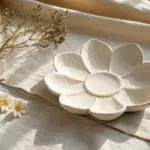
Pressed Wildflower Imprint Tiles
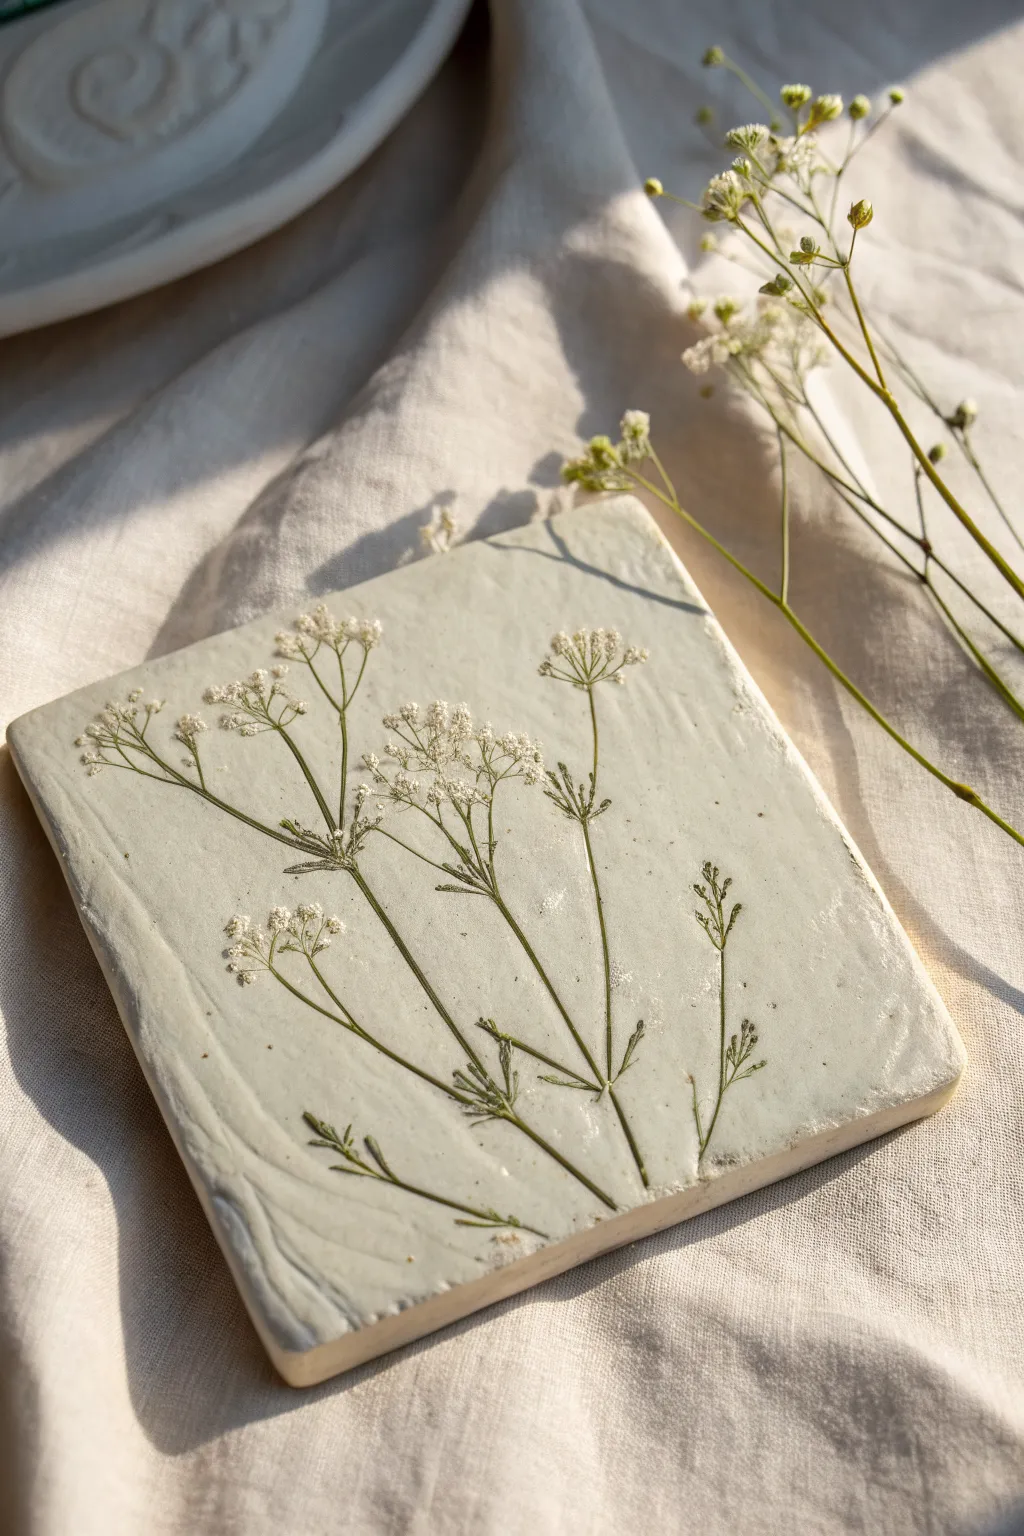
Capture the fleeting beauty of a summer meadow with this delicate clay imprint project. By pressing fresh wildflowers directly into soft clay, you create a rustic, fossil-like relief that preserves the finest details of stems and blooms forever.
Detailed Instructions
Materials
- Air-dry clay (white or light grey)
- Rolling pin
- Fresh wildflowers (Queen Anne’s Lace or cow parsley work best)
- Two wooden guide strips (approx. 1/4 inch thick)
- Square cookie cutter or sharp knife
- Wax paper or parchment map
- Small rolling tool or brayer (optional)
- Fine-grit sandpaper
- Acrylic sealer (matte finish)
Step 1: Preparing the Clay Base
-
Prepare your workspace:
Lay down a piece of parchment or wax paper to protect your table and prevent sticking. This also allows you to move the tile later without distorting it while it’s still soft. -
Knead the clay:
Take a handful of air-dry clay and knead it gently in your hands to warm it up. You want it pliable and smooth, free of any air bubbles or dry cracks. -
Set up thickness guides:
Place your wooden guide strips on either side of your clay ball. These will ensure your rolling pin stays level, giving you a perfectly uniform slab. -
Roll out the slab:
Roll the clay out until the rolling pin rests on the guide strips. If you notice any surface imperfections, smooth them out gently with a damp finger before proceeding. -
Cut the shape:
Using a square cutter or a knife and ruler, cut your tile shape. The example image uses a relaxed square, roughly 4×4 inches. Remove the excess clay from around the edges.
Sticky Situation?
If the clay is sticking to the flower as you pull it up, let the clay dry for about 10-15 minutes with the flower still pressed in before peeling it off.
Step 2: Creating the Botanical Impression
-
Select your arrangement:
Choose a fresh sprig of wildflowers. Queen Anne’s Lace is ideal because its flat umbels impress easily. Lay the stem diagonally across the clay to create a dynamic composition. -
Begin the press:
start by gently pressing the thickest part of the stem into the clay with your fingertips to tack it in place. Make sure the flower heads are spread out naturally. -
Roll the flowers:
Take your rolling pin or a small brayer and roll directly over the plant material with firm, even pressure. You want to push the plant flush with the clay surface, but not bury it completely. -
Check the depth:
Look closely to ensure the tiny florets have made contact. I find that pressing individual flower heads lightly with a thumb helps capture the finest textures. -
Remove the botanical:
Carefully find the end of the stem and slowly peel the plant away from the clay. Pull upwards and backwards to avoid tearing the delicate edges of the impression. -
Clean up edges:
The process may have distorted the square slightly. Use your fingertips to gently smooth the outer edges of the tile for a softer, handmade look rather than a sharp manufactured edge.
Make it Hang
Before the clay dries, use a straw to poke a neat hole near the top center. Once dry, thread rustic twine or a velvet ribbon through for instant wall art.
Step 3: Finishing Touches
-
Initial dry time:
Let the tile sit undisturbed in a cool, dry place for at least 24 hours. Flipping it over halfway through helps prevent curling. -
Enhance the imprint (optional tinting):
If you want the green tint seen in the photo, mixing a tiny drop of green watercolor into the clay before rolling, or rubbing fresh chlorophyll from leaves into the raw clay grooves creates that subtle staining. -
Sand the surface:
Once fully cured and hard, use fine-grit sandpaper to smooth any rough spots on the sides or back. Be careful not to sand over the delicate flower impression itself. -
Seal the piece:
Apply a thin coat of matte acrylic sealer to protect the clay from humidity and dust without adding an artificial shine.
Now you have a permanent botanical record to bring a touch of nature indoors

Painted Folk-Style Flower Tiles
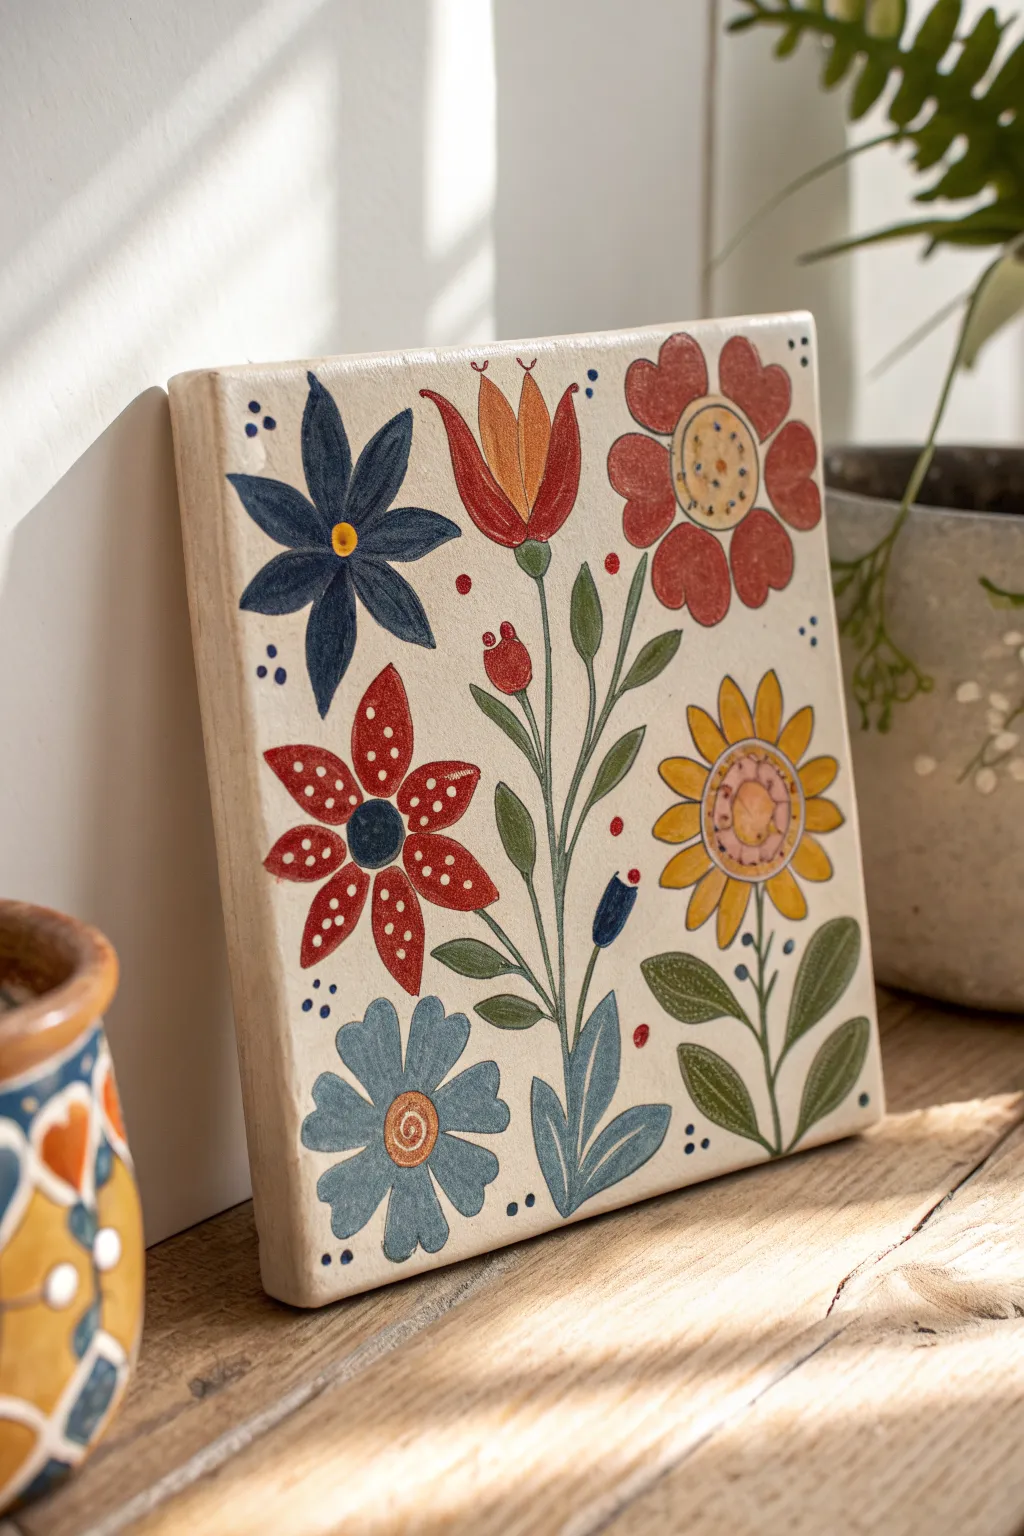
Capture the charm of traditional folk art with this delightful hand-painted tile project. Featuring a harmonious bouquet of red, blue, and yellow blooms on a creamy ceramic base, this piece brings a touch of handmade warmth to any shelf or mantelpiece.
Step-by-Step
Materials
- Square ceramic bisque tile (approx. 6×6 inches)
- Acrylic paints (Cream, Deep Red, Navy Blue, Sunflower Yellow, Sage Green, Rusty Orange, Light Blue)
- Small round paintbrushes (sizes 0, 2, and 4)
- Fine-tip liner brush (size 00 or 000)
- Pencil and eraser
- Palette for mixing
- Matte or satin clear sealant (spray or brush-on)
- Cup of water and paper towels
Step 1: Base Preparation & Sketching
-
Prime the surface:
Begin by painting the entire face and edges of your bisque tile with a creamy, off-white acrylic paint. You may need two coats to ensure full, opaque coverage, letting the first coat dry completely before applying the second. -
Map the layout:
Once the base is bone dry, lightly sketch the central stem first. Draw a vertical, slightly curving line right up the middle to act as the spine of your bouquet. -
Sketch the main flowers:
Position your large blooms: a six-petal star flower in the top left, a tulip-shape in the top center, a four-petal round flower top right, a dotted daisy bottom left, a sunflower bottom right, and a smaller blue flower tucked in the bottom left corner. -
Add foliage details:
Draw in the supporting leaves and stems connecting everything to the center. Include the distinct pair of large, veined leaves at the bottom right and the blue leafy sprig at the very bottom center.
Clean Lines Pro Tip
If your hand feels shaky doing fine lines, rest your pinky finger on a dry part of the tile while you paint to stabilize your hand movement.
Step 2: Blocking in Color
-
Paint the red blooms:
Using your size 4 brush, fill in the petals of the bottom-left daisy and the top-right round flower with a deep, earthy red. Apply paint smoothly to minimize brushstrokes. -
Add the blue elements:
Switch to navy blue for the top-left star flower and the center of the red daisy. Use a lighter, dusty blue for the bottom-left corner flower and the leafy sprig at the base of the stem. -
Brighten with yellow and orange:
Paint the sunflower petals on the bottom right with sunflower yellow. Use a rusty orange for the central tulip shape and the center of the light blue flower. -
Fill in the greenery:
Using sage green, carefully paint the central stem, the small bud near the center, and the large leaves on the right side. I find a liner brush helps keep these thin stems crisp.
Display Idea
Glue a sawtooth hanger to the back to hang it on a wall, or use a small plate stand to display it on a bookshelf for instant cottage charm.
Step 3: Adding Folk Details
-
Detail the red daisy:
Once the red paint is dry, use a small brush or the back of a paintbrush handle to dot white spots onto the red petals. Add small white dots around the blue center as well. -
Embellish the top flowers:
For the top-left blue flower, paint a small yellow center. For the top-right red flower, paint a cream circle in the center, let it dry, then add tiny blue dots and specific orange details inside it. -
Define the sunflower:
Paint a pale pink or peach circle in the center of the yellow sunflower. Once dry, outline the inner circle with reddish-brown scallops and add a small dot in the very middle. -
Enhance the tulip:
Add definition to the orange tulip by painting a thin red outline around the petals and adding a central red vertical line to separate the petals visually. -
Line work and veins:
Using your finest liner brush and thinned dark green or black paint, carefully draw the center veins on the green leaves and the light blue leaves at the bottom. -
Final decorative accents:
Add the whimsical floating dots around the bouquet using blue and red paint. Place three blue dots in corners and scattered red dots near the center for that classic folk art fill. -
Seal the artwork:
Allow the entire painting to cure for at least 24 hours. Finish by applying a matte or satin clear coat to protect your work and give it a finished, ceramic-glaze execution.
Your beautiful folk-art tile is now ready to add a splash of color and tradition to your home

The Complete Guide to Pottery Troubleshooting
Uncover the most common ceramic mistakes—from cracking clay to failed glazes—and learn how to fix them fast.
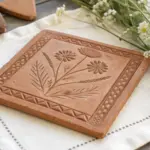
Simple Tulip Row Tiles
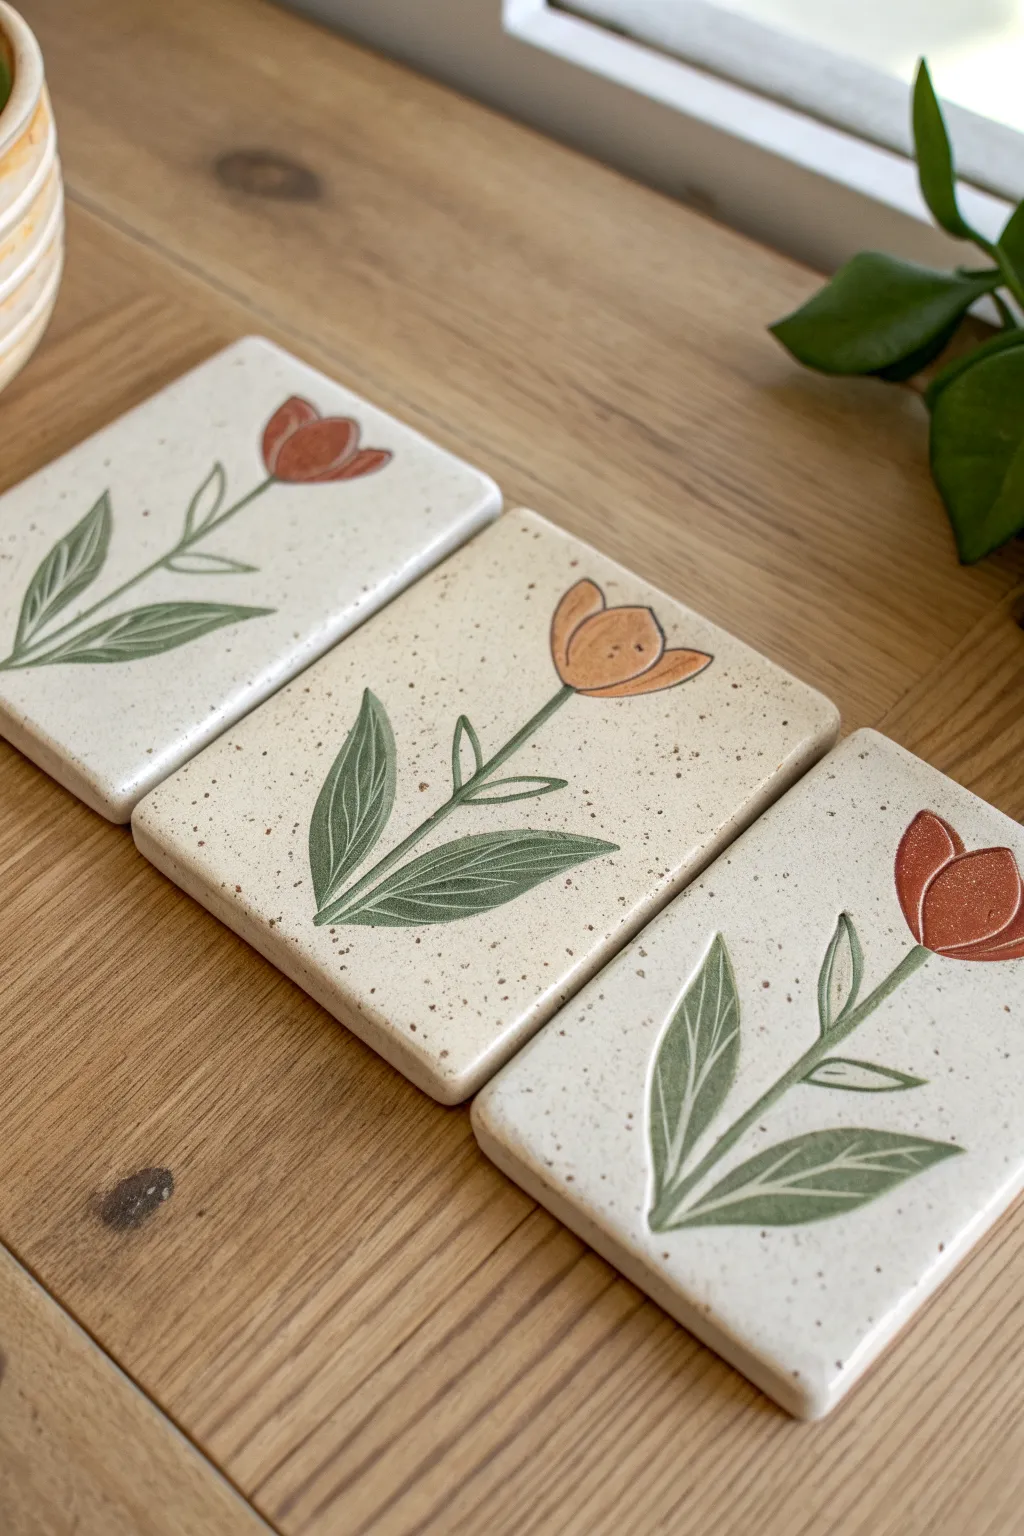
Create a charming set of ceramic tiles featuring stylized tulips carved into speckled clay. These rectangular pieces combine earthy glaze tones with crisp sgrafitto-like lines for a timeless, handcrafted floral accent.
Step-by-Step Tutorial
Materials
- Speckled buff stoneware clay
- Rolling pin
- Two wooden guide strips (1/4 inch thick)
- Rectangular clay cutter or ruler and knife
- Carving tool (needle tool or small loop tool)
- Small sponge
- Underglazes (Sage Green, Burnt Orange, Deep Red per tile)
- Clear or translucent glossy glaze
- Fine paintbrush
- Kiln access
Step 1: Slab Preparation
-
Roll the clay:
Begin by wedging your speckled buff clay to remove air bubbles. Place it between your two wooden guide strips on a canvas surface and roll it out with a rolling pin until the slab is perfectly even. -
Cut the shapes:
Using a rectangular cutter or a ruler and fettling knife, cut out three identical rectangles. Aim for approximately 4×6 inches, keeping in mind the clay will shrink during firing. -
Smooth the edges:
Take a slightly damp sponge and run it gently along the sharp edges and corners of each rectangle to soften them. This prevents sharp, fragile edges after the final firing. -
Dry to leather hard:
Lay the tiles flat on a piece of drywall or canvas to dry slowly. Cover them strictly with plastic for striations, then uncover until they reach a ‘leather hard’ state—stiff enough to carve without deforming, but still cool to the touch.
Clean Lines
For crisper carvings, wait until dragging your finger across the clay doesn’t leave a smudge. If the clay is too wet, the lines will be messy.
Step 2: Design & Carving
-
Sketch the outline:
Lightly sketch a simple tulip design onto the leather-hard clay using a dull pencil or very light touch with a needle tool. Draw a single stem curving slightly, two large leaves near the base, and a cup-shaped flower head. -
Carve the main lines:
Using your carving tool, firmly trace over your sketched lines to create deep grooves. I like to keep the pressure consistent so the depth of the line remains uniform. -
Add leaf details:
Inside the leaf outlines, carve 3-4 gentle, parallel lines following the curve of the leaf to mimic veins. This texture adds beautiful dimension to the flat surface. -
Detail the flower:
Add a simple curved line or two inside the tulip head to suggest petals overlapping. -
Clean up burrs:
Once the carving is done, let the tiles dry slightly more. Then, gently brush away any ‘clay burrs’ or crumbs created by the carving tool with a soft, dry paintbrush.
Make Them Hangable
Before drying, poke two small holes in the top corners or add a clay loop on the back so you can easily hang the finished tiles on a wall.
Step 3: Glazing & Finishing
-
Bisque fire:
Check that the tiles are bone dry, then load them into the kiln for a bisque firing (usually Cone 04). This hardens the clay and prepares it for glazing. -
Paint the leaves:
Using a fine brush, apply sage green underglaze carefully inside the carved leaf shapes. It’s okay if it settles into the carved grooves, as this emphasizes the design. -
Paint the stems:
Continue with the green underglaze, painting a thin line for the stem connecting the leaves to the flower head. -
Color the tulips:
Choose a different warm tone for each tile’s flower—burnt orange for one, a deeper red for another, and perhaps a reddish-brown for the third. Apply 2-3 coats for solid opacity. -
Apply clear glaze:
Once the underglaze is dry, dip or brush the entire face of the tile with a clear, glossy glaze. This will make the speckles in the clay body pop and seal the surface. -
Wipe the back:
Ensure the bottom or back of the tile is completely free of glaze so it doesn’t fuse to the kiln shelf. -
Final fire:
Fire the tiles again to the maturation temperature of your specific clay and glaze (typically Cone 5 or 6 for stoneware).
Display your trio of tiles together on a shelf or table to bring a permanent spring garden into your home
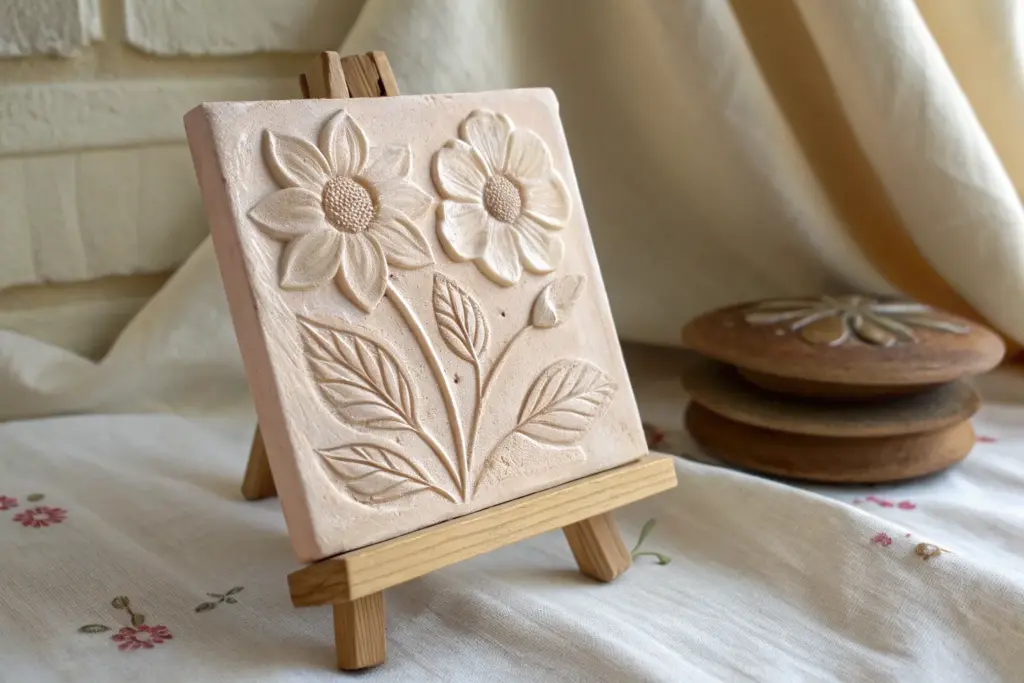
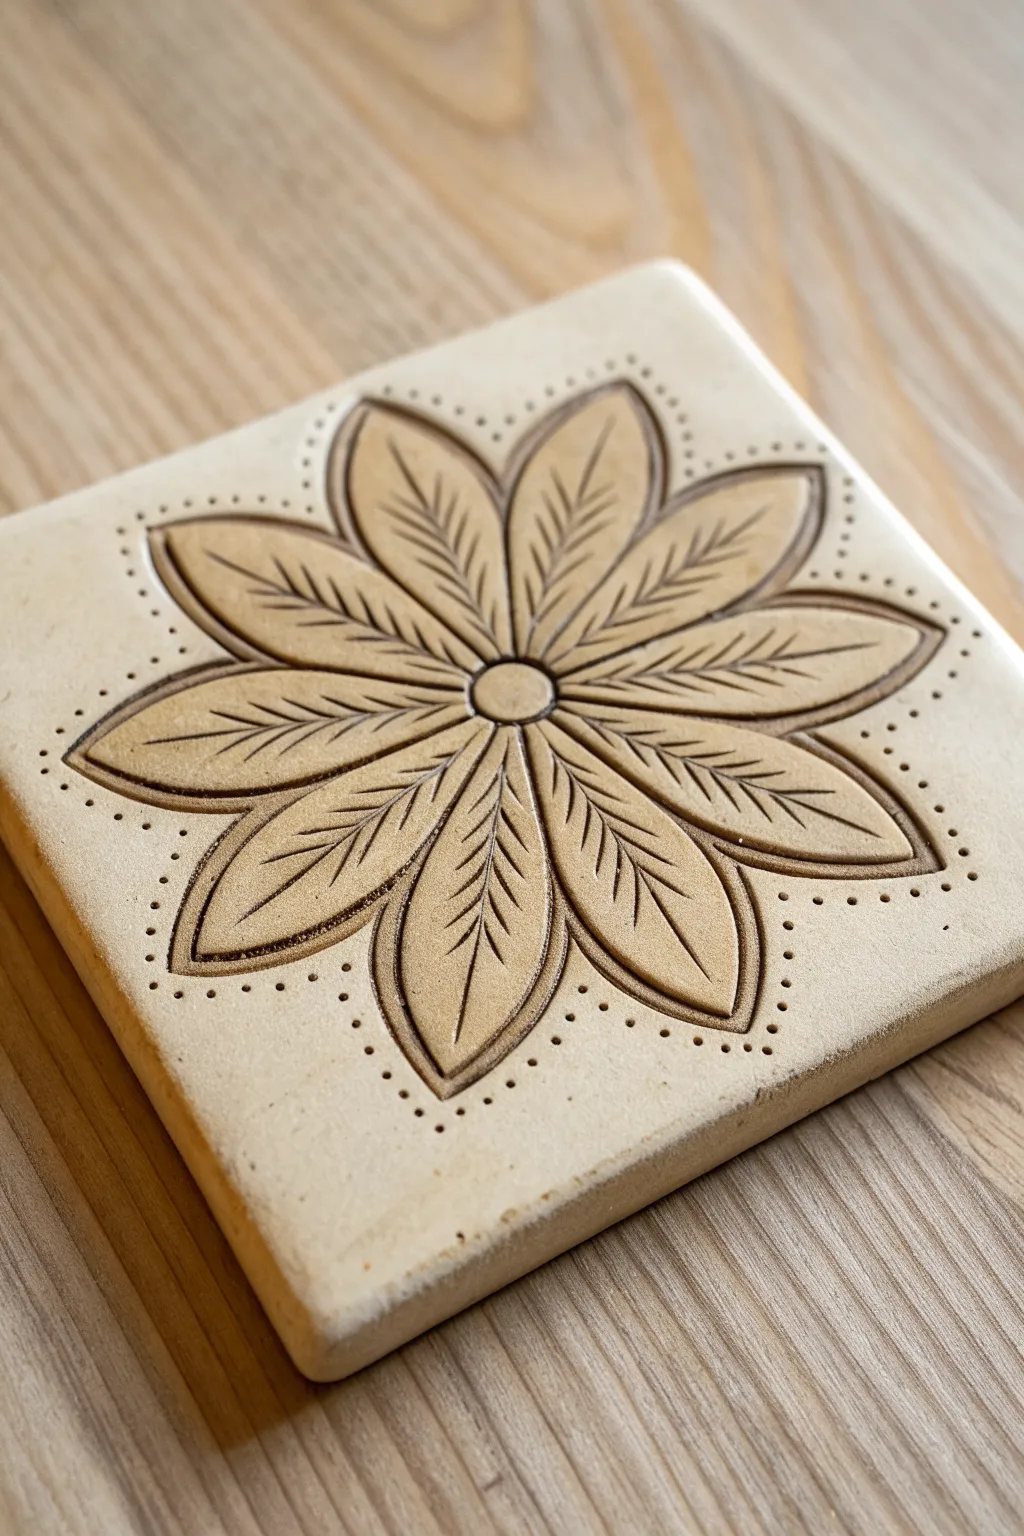
Botanical Border Frame Tiles
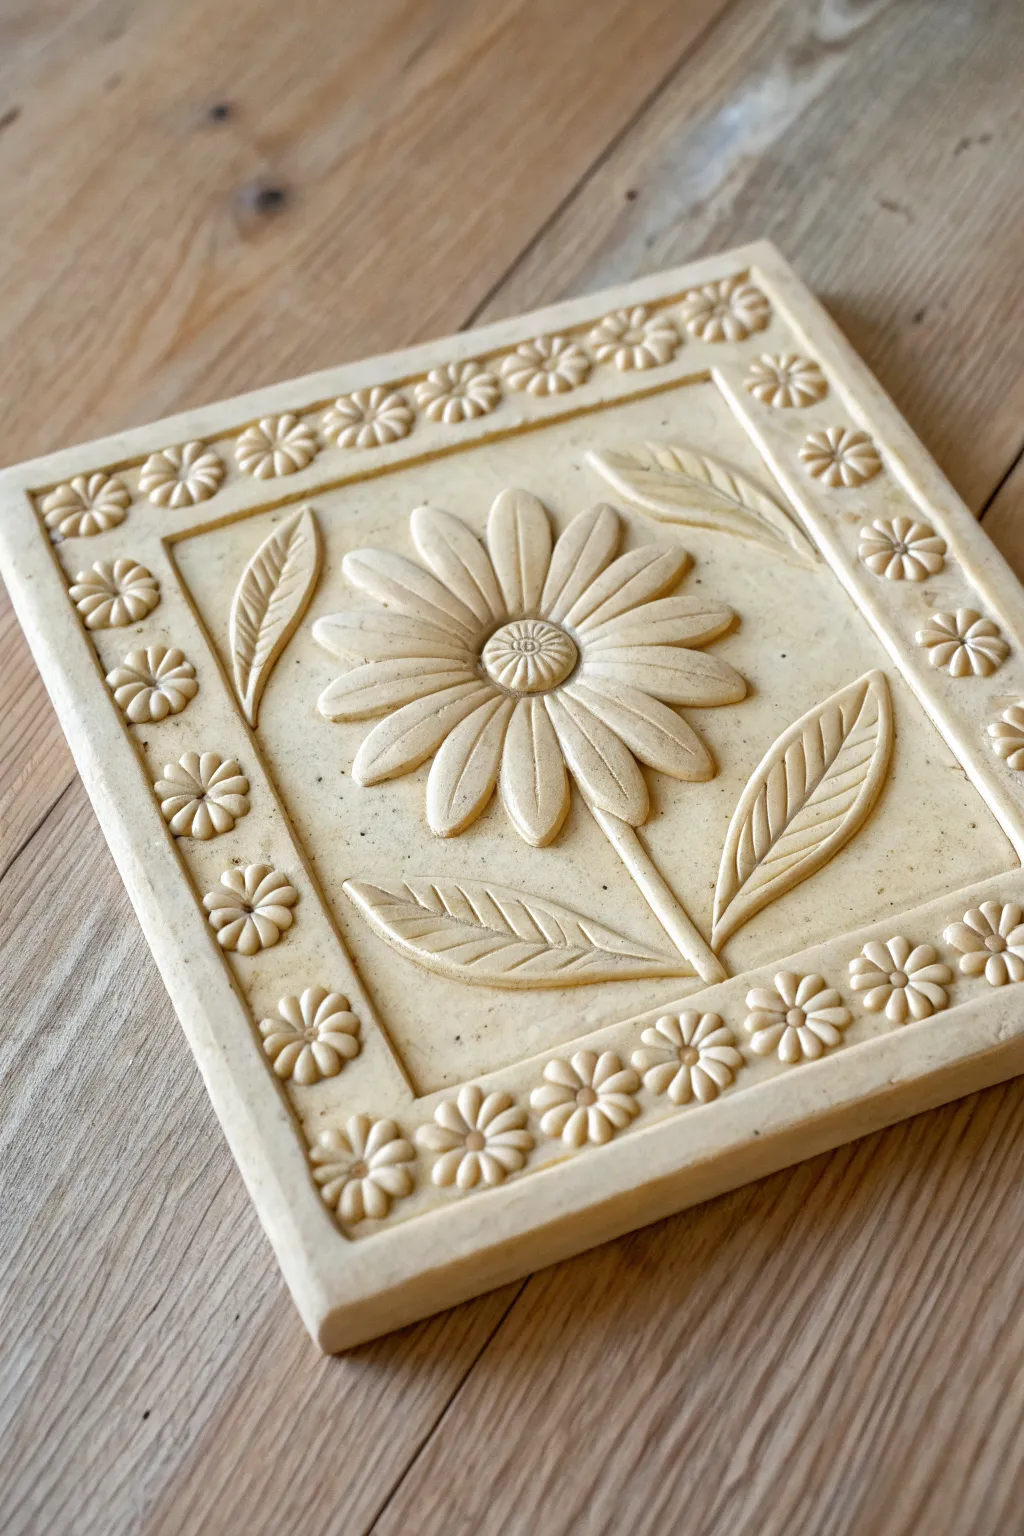
Bring the charm of an English garden indoors with this elegant relief-sculpted clay tile. Featuring a central daisy motif surrounded by a delicate floral border, the finished piece has the timeless look of carved stonework or classic ceramic.
Detailed Instructions
Materials
- White or cream-colored air-dry clay (or polymer clay)
- Square rolling guides (approx. 1/2 inch thick)
- Acrylic rolling pin
- Clay carving tools (needle tool, small loop tool)
- Ruler
- Small circle cutter or piping tip
- Water and a small sponge (for smoothing)
- Clay knife or craft blade
- Fine-grit sandpaper
- Matte spray varnish (optional)
Step 1: Base Preparation
-
Roll the slab:
Begin by conditioning your clay until it is soft and pliable. Place the clay between two rolling guides to ensure an even thickness and roll it out with your rolling pin until smooth. -
Cut the square:
Using a ruler and a sharp clay knife, cut a precise square slab. A 6×6 inch square is a good manageable size for this level of detail. Smooth the cut sides with a damp finger to remove any jagged edges. -
Mark the border:
Use your ruler to very lightly impress a square frame inside the slab, about 3/4 of an inch from the outer edge. This guideline will separate your central flower from the decorative border.
Step 2: Creating the Border
-
Form small spheres:
Roll dozens of tiny, pea-sized balls of clay. These will become the small flowers on the border. Try to keep them as consistent in size as possible. -
Position border flowers:
Place these small balls along the outer frame you marked earlier, spacing them evenly. Use a drop of water or liquid clay (slip) to adhere each one securely to the base. -
Flatten and shape:
Gently press each ball flat. Using a small needle tool or knife, press indented lines radiating from the center of each flattened circle to create petals. -
Detail the centers:
Use a small, round tool—like the end of a paintbrush handle—to press a tiny dot into the center of each border flower, completing the daisy chain look.
Fixing Cracks
If hairline cracks appear while drying, mix a tiny amount of clay with water to make a paste (slip). Fill the crack, smooth it over, and let it dry again.
Step 3: Sculpting the Centerpiece
-
Draft the central layout:
Lightly sketch the position of the main flower stem and the center of the flower head in the middle of the tile using a needle tool. This sketch will be covered later. -
Add the stem:
Roll a thin coil of clay for the main stem. Attach it vertically, slightly off-center, leading up to where the flower head will sit. Flatten it slightly onto the background. -
Shape the petals:
Form teardrop shapes for the main flower petals. I find it easiest to make about 12-14 petals of nearly equal size before attaching them. -
Attach the petals:
Arrange the petals in a circle around your central point. Overlap them slightly if needed to fit them all, adhering them with slip or water. Press them down gently so they bond with the base slab. -
Create the flower center:
Roll a larger ball of clay, slightly flatten it, and place it in the middle of the petals. Texture this center by stippling it with a needle tool or pressing a textured object against it to mimic seeds. -
Detail the main petals:
Use a modeling tool to carve a shallow, central vein line down the middle of each large petal, giving the flower dimension and realism.
Antique Wash
Mix brown acrylic paint with water (1:5 ratio). Brush over the dried tile, then immediately wipe off the surface with a cloth. The brown stays in the crevices.
Step 4: Adding Foliage
-
Form the leaves:
Create four large, elongated leaf shapes from remaining clay. You want these to fill the negative space around the central flower. -
Position the leaves:
Attach two leaves near the bottom of the stem and two floating in the upper corners, angled inward. Press them firmly onto the backing. -
Carve leaf veins:
Using your needle tool or knife, carve a strong central vein in each leaf, followed by diagonal veins branching out toward the edges.
Step 5: Finishing Touches
-
Refine the surface:
Inspect the tile for any fingerprints or rough spots. Dip a small brush or your finger in water and gently smooth these imperfections away. -
Dry slowly:
Place the tile on a wire rack or flat board covered with paper. Let it dry slowly away from direct heat to prevent warping. Turn it over occasionally if possible. -
Sand and Seal:
Once bone dry, use fine-grit sandpaper to smooth the edges. Finish with a matte spray varnish to protect the surface without adding unwanted gloss.
Display your botanical relief tile on a small easel or mount it in a shadow box for a sophisticated handcrafted accent


What Really Happens Inside the Kiln
Learn how time and temperature work together inside the kiln to transform clay into durable ceramic.
Repeating Mini Blossom Pattern Tiles
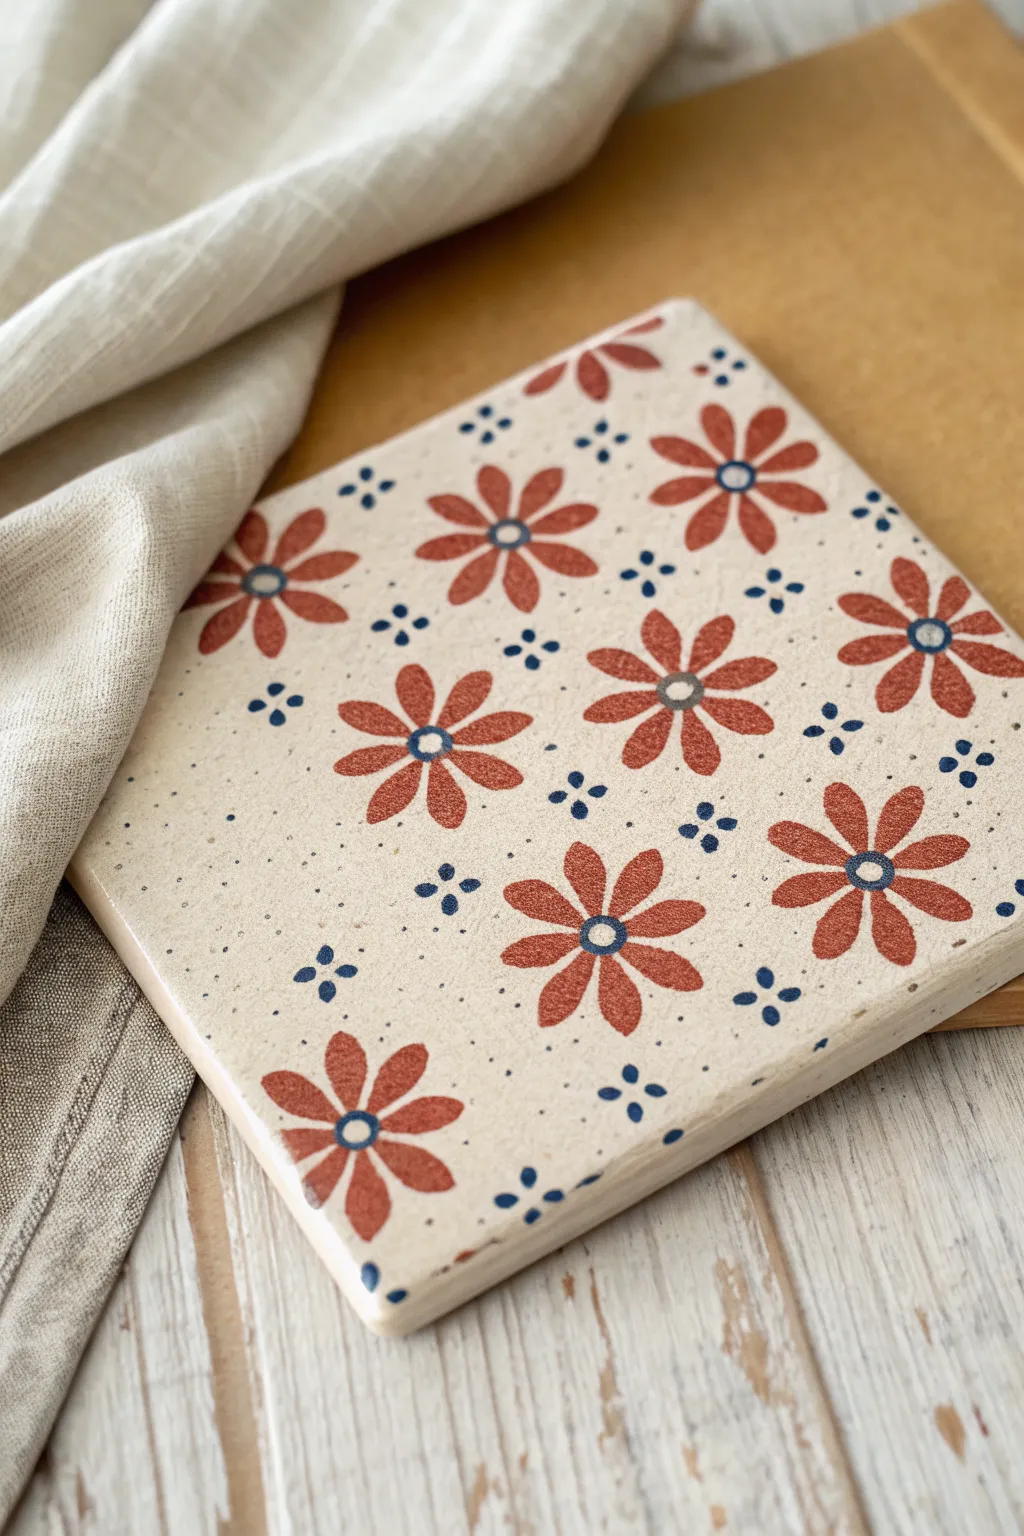
Bring a touch of rustic charm to your decor with this hand-painted clay tile featuring a repeating mini blossom pattern. The warm terracotta petals paired with deep indigo accents create a timeless look that feels both vintage and fresh.
Step-by-Step Tutorial
Materials
- Square bisque ceramic tile or air-dry clay slab (approx. 4×4 or 6×6 inches)
- Acrylic paints: Terracotta/Rust Red, Dark Navy Blue, Cream/Off-White
- Small round paintbrush (size 2 or 3)
- Fine detail paintbrush (size 0 or 00)
- Dotting tool or toothpick
- Pencil
- Ruler
- Matte or satin varying varnish
Step 1: Preparation
-
Base Coat:
Begin by painting your entire tile with a cream or off-white acrylic paint. This provides a clean, neutral background that mimics the look of natural stoneware. Let this base coat dry completely before proceeding. -
Map the Grid:
Using a ruler and a pencil with a very light hand, mark a grid of small X’s or dots where the center of each flower will sit. Staggering the rows creates a pleasing, organic rhythm rather than a rigid grid.
Uneven Petals?
If your petals look lopsided, try painting the top, bottom, left, and right petals first (12, 6, 9, and 3 o’clock positions). Then, simply fill in the diagonal gaps with the remaining four petals.
Step 2: Painting the Blossoms
-
Flower Centers:
Mix a small amount of your cream paint with a tiny drop of blue to create a very pale, cool tone for the absolute center of the flowers. -
Placing Centers:
With your small round brush, paint a small circle at each of your marked grid points using this pale mixture. -
Petal Practice:
Load your size 2 or 3 brush with the terracotta paint. To get the petal shape right, press the belly of the brush down near the flower center and lift as you pull outward. -
First Flower:
Paint eight petals around one center point. Aim for them to be roughly equal in length, radiating outward like the spokes of a wheel. Don’t worry if they aren’t identical; variation adds handmade charm. -
Repeat the Pattern:
Continue painting eight-petal flowers at every marked location across the tile. I find it helpful to rotate the tile as I work to keep my hand angle consistent. -
Partial Blossoms:
For the edges of the tile, paint partial flowers—just two or three petals coming in from the side—to create the illusion that the pattern continues beyond the border.
Vintage Look
Create an aged aesthetic by lightly sanding the painted surface with high-grit sandpaper before sealing. This wears down the paint slightly for a distressed, old-world ceramic feel.
Step 3: Adding Details
-
Center Rings:
Switch to your fine detail brush (size 0) and load it with the dark navy blue paint. Carefully paint a thin ring around the pale center of each terracotta flower. -
Dot Accents:
Dip a dotting tool or the non-brush end of a paintbrush into the dark navy blue paint. -
Cluster Creation:
In the empty spaces between the flowers, add clusters of four small dots arranged in a diamond or cross shape. -
Micro Texture:
To mimic the speckled look of raw ceramic, you can dilute a tiny bit of grey or brown paint with water. Dip a stiff brush (like an old toothbrush) in it and lightly flick speckles across the surface. Test on paper first to control the spray.
Step 4: Finishing
-
Draft Erasure:
Once you are absolutely certain the paint is bone dry, gently erase any visible pencil marks from your initial grid. -
Sealing:
Apply a coat of matte or satin varnish over the entire tile. This protects your artwork from scratches and moisture, especially if used as a coaster. -
Drying:
Allow the varnish to cure according to the manufacturer’s instructions, usually 24 hours, before using or displaying your tile.
Your finished tile now radiates a warm, handcrafted elegance perfect for brightening up any table setting or wall display
Bouquet Cluster Floral Tiles
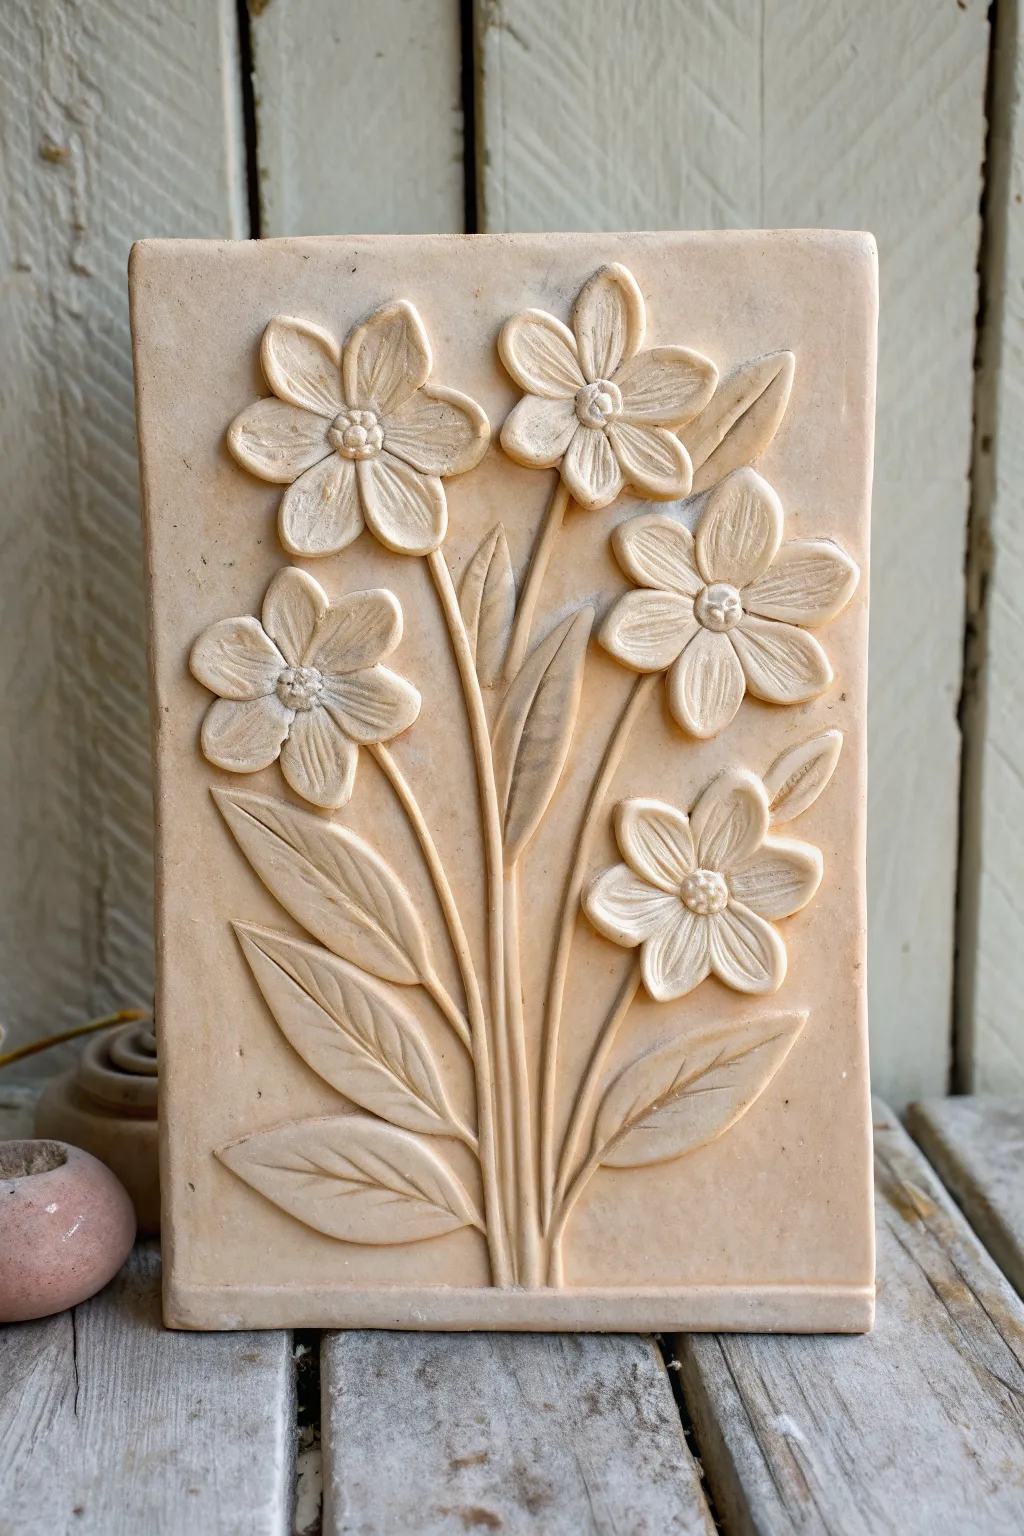
This elegant relief tile captures the timeless beauty of a floral cluster with clean lines and subtle textures. The natural, monochromatic finish highlights the sculptural details of the five-petal blooms and sweeping leaves.
How-To Guide
Materials
- Rolled slab of sculpting clay (earthenware or polymer)
- Damp sponge
- Rolling pin
- Needle tool or clay knife
- Loop tool (small)
- Modeling tool (ball-ended and flat)
- Slip (liquid clay) for joining
- Texture stamp or small brush handle (for flower centers)
- Ruler or straight edge
Step 1: Base Preparation
-
Roll the slab:
Start by rolling out your clay on a flat, non-stick surface to a uniform thickness of about 1/2 inch. Ensure it is smooth and free of air bubbles. -
Cut the rectangle:
Using a ruler and a knife or needle tool, cut precise straight lines to form a clean vertical rectangle. This will be the canvas for your relief. -
Create the border:
Gently press a straight edge or modeling tool near the very bottom of the rectangle to create a slight indentation or ‘ledge’ line. This grounds the composition. -
Smooth the edges:
Run a damp finger or sponge along the sharp cut edges of the rectangle to soften them slightly, giving the tile a finished, professional look.
Step 2: Drawing the Design
-
Sketch the stems:
With a needle tool held lightly, very faintly sketch five curved lines radiating from the bottom center. These guidelines will determine where your flowers sit. -
Mark flower positions:
Draw faint circles at the end of each stem line to visualize spacing. Aim for a cluster of three higher blooms and two slightly lower ones on the sides.
Depth Perception
Make the flowers closest to the center slightly thicker and more raised than the background leaves. This physical variance creates realistic 3D depth and shadows.
Step 3: Sculpting the Flowers
-
Form the petals:
Create small teardrop shapes from fresh clay. You will need five petals for each of the five flowers. Flatten them slightly between your fingers. -
Attach the petals:
Score the back of each petal and the spot on the tile where it will go. Apply a dab of slip and press the petals onto your sketched circles, arranging them in a star shape. -
Detail the petals:
Use a modeling tool to press a central indentation down the length of each petal. This creates a vein and gives the flower dimension. -
Add the centers:
Roll small balls of clay and press them into the center of each flower. Use a texture stamp or the textured end of a tool to stipple the surface, mimicking pollen. -
Refine the edges:
I like to go back with a small loop tool or knife to undercut the petal edges slightly, making them look like they are lifting off the background.
Antique Wash
After firing, brush a watered-down brown acrylic or oxide wash over the tile and wipe it back with a sponge. The dark color will stay in the grooves, highlighting your detailed carving.
Step 4: Adding Leaves and Stems
-
Build the stems:
Roll very thin coils of clay (snakes) and lay them over your initial stem sketches. Press them firmly onto the background clay so they merge but stay raised. -
Shape the leaves:
Hand-shape larger, elongated pointed ovals for the leaves. You’ll want large ones near the base and smaller ones tucked between flower stems. -
Attach and blend:
Score, slip, and attach the leaves. Smooth the bottom of the leaves where they meet the stems so they appear to grow naturally from the cluster. -
Carve leaf veins:
Using a sharp needle tool or knife, carve a deep central line down each leaf, followed by angled diagonal veins branching outward. -
Final clean-up:
Check for any crumbs of clay or rough tool marks. Use a soft, slightly damp brush to smooth over the entire piece without losing your carved details. -
Dry and finish:
Allow the clay to dry slowly under plastic to prevent warping. Once bone dry, fire according to your clay type (or bake if using polymer), leaving it unglazed for a natural stone look.
This sculptural piece brings a permanent, stone-like garden into your home regardless of the season

TRACK YOUR CERAMIC JOURNEY
Capture glaze tests, firing details, and creative progress—all in one simple printable. Make your projects easier to repeat and improve.
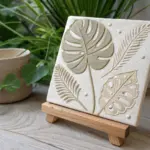
Four-Tile Flower Mural Set
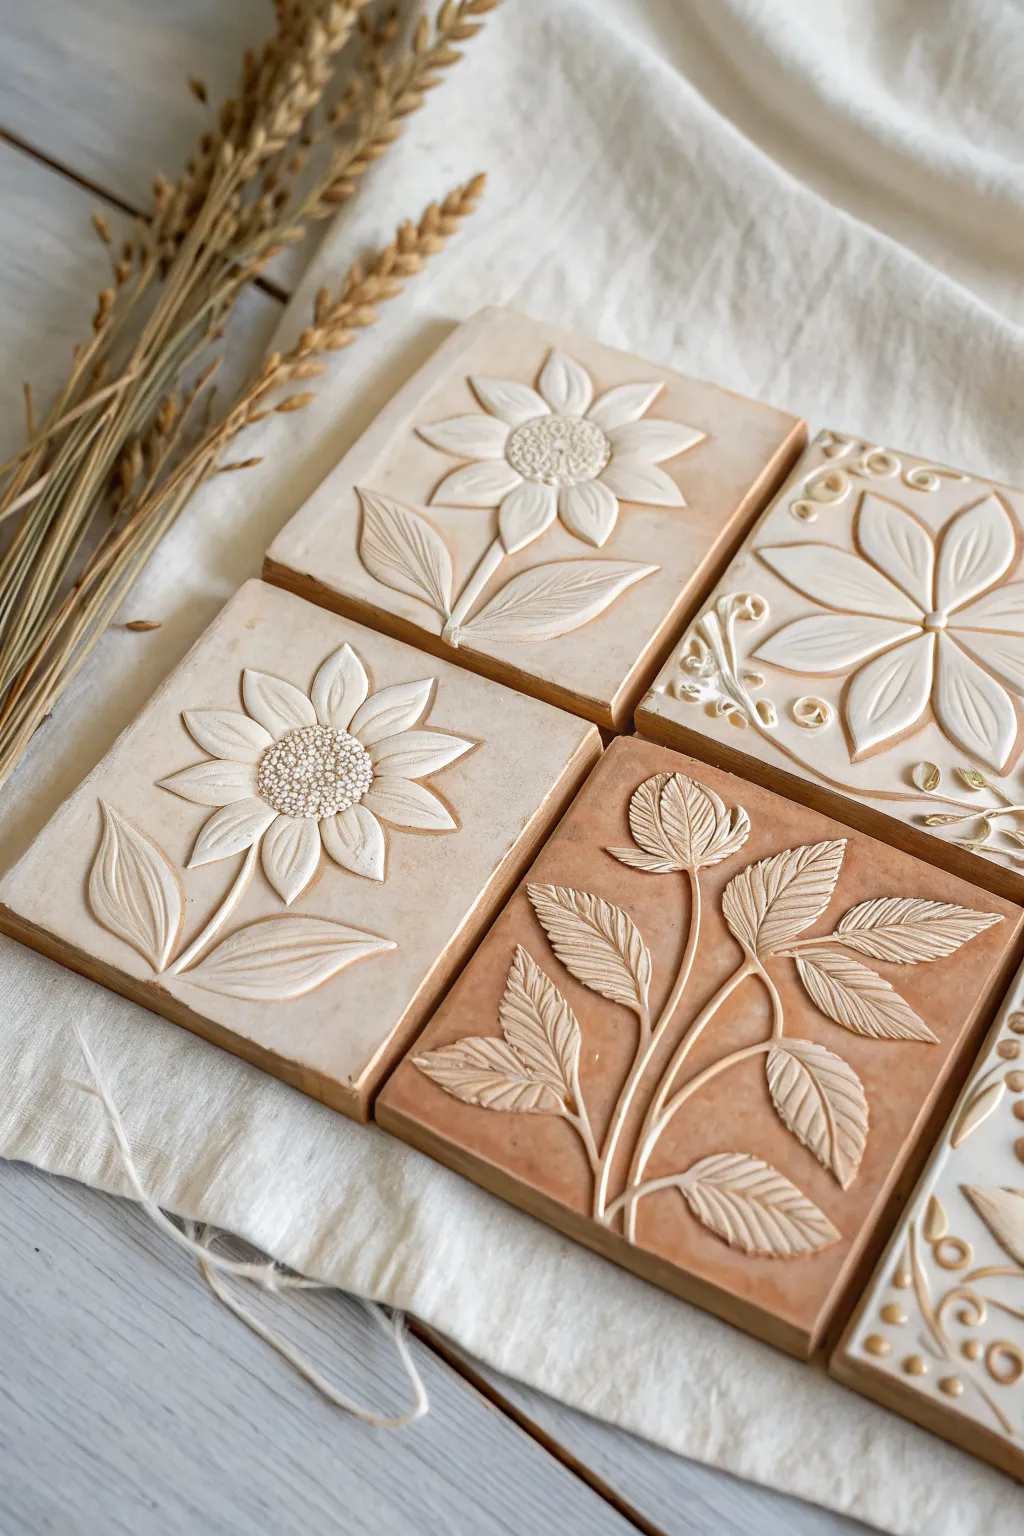
Bring the serene beauty of the harvest season into your home with this set of four handcrafted floral relief tiles. Featuring sunflowers, leaf sprays, and stylized blooms, this project combines the tactile joy of clay sculpting with a warm, natural aesthetic.
Step-by-Step
Materials
- White or terracotta air-dry clay (or polymer clay)
- Square tile cutters or a ruler and craft knife
- Rolling pin with depth guides (about 1/4 inch)
- Small sculpting tools (ball stylus, needle tool, rubber shapers)
- Modeling knife or X-Acto blade
- Slip (clay mixed with water) for attaching pieces
- Fine-grit sandpaper
- Acrylic paints (warm white, beige, light brown)
- Matte spray sealant
- Canvas or parchment paper (work surface)
Step 1: Base Preparation
-
Roll the Slabs:
Begin by conditioning your clay until it is soft and pliable. Roll it out on a non-stick surface to a uniform thickness of about 1/4 inch. Using depth guides here ensures all your tiles are perfectly even. -
Cut the Squares:
Using a square cutter or measuring with a ruler and cutting with a craft knife, create four identical squares. A 4×4-inch size works well for this level of detail. Smooth the cut edges with a damp finger to remove any sharp ridges. -
Initial Drying (Optional):
I like to let the squares firm up for about 30 minutes before adding details. This prevents the base from warping while you press down on it later.
Step 2: Sculpting the Sunflower Tiles
-
Create Petals:
For the two sunflower designs (top left and bottom left), roll small teardrop shapes of clay. Flatten them slightly with your thumb to form petals. -
Attach Petals:
Score the center of the tile and apply a tiny dab of slip. Arrange the petals in a circle, layering them slightly if desired for extra dimension. -
Add the Center:
Roll a small ball of clay, flattening it into a disc for the flower center. Press the ball stylus repeatedly into this disc create a textured, seeded look. -
Leaves and Stems:
Roll thin coils for stems and larger teardrops for leaves. Attach these below the flower head using slip. Use a needle tool to carve classic leaf veins into the surface.
Clay Bonding Tip
Always scratch (score) both surfaces and add slip before joining clay pieces. This ensures they don’t pop off once the clay shrinks during drying.
Step 3: Sculpting the Complementary Florals
-
Stylized Bloom (Top Right):
For the stylized flower, create large, pointed petals. Use a rubber shaper to press a deep central groove down the middle of each petal. Add small clay coils curled into swirls at the corners for decorative flair. -
Leaf Spray (Bottom Right):
Roll a long, thin coil to serve as the main stem branching upwards. Attach it diagonally across the tile. -
Detailed Foliage:
Form numerous small, textured leaves. Press a leaf-veining tool or use your needle tool to create heavy, ribbed texture on each one before attaching them along the branches. -
Surface Refining:
Once all sculpted elements are attached, go over the edges with a small damp brush. This smooths out any visible seams where the relief meets the base tile.
Try an Antique Wash
After painting, apply a documented brown water-based stain and wipe it off immediately. The dark pigment will settle in the grooves, making the details pop.
Step 4: Finishing Touches
-
Full Drying:
Allow the tiles to dry completely. For air-dry clay, this usually takes 24-48 hours. Flip them occasionally to ensure even drying and prevent curling. -
Sanding:
Gently sand the edges and any rough spots on the surface using fine-grit sandpaper. Wipe away the dust with a barely damp cloth or dry brush. -
Painting the Base:
Paint the background of the sunflower and stylized flower tiles in a limestone or warm white color. For the leafy spray tile, use a warm terracotta or light brown wash to mimic the reference image’s variation. -
Highlighting:
Using a dry-brushing technique with a lighter shade (like cream or white), graze the tops of the raised petals and leaves. This emphasizes the 3D relief texture. -
Sealing:
Protect your artwork with a light coat of matte spray sealant to preserve the finish.
Arranging these tiles together on a wall or shelf creates a lovely, textured focal point for any room
Hexagon Floral Mosaic Illusion
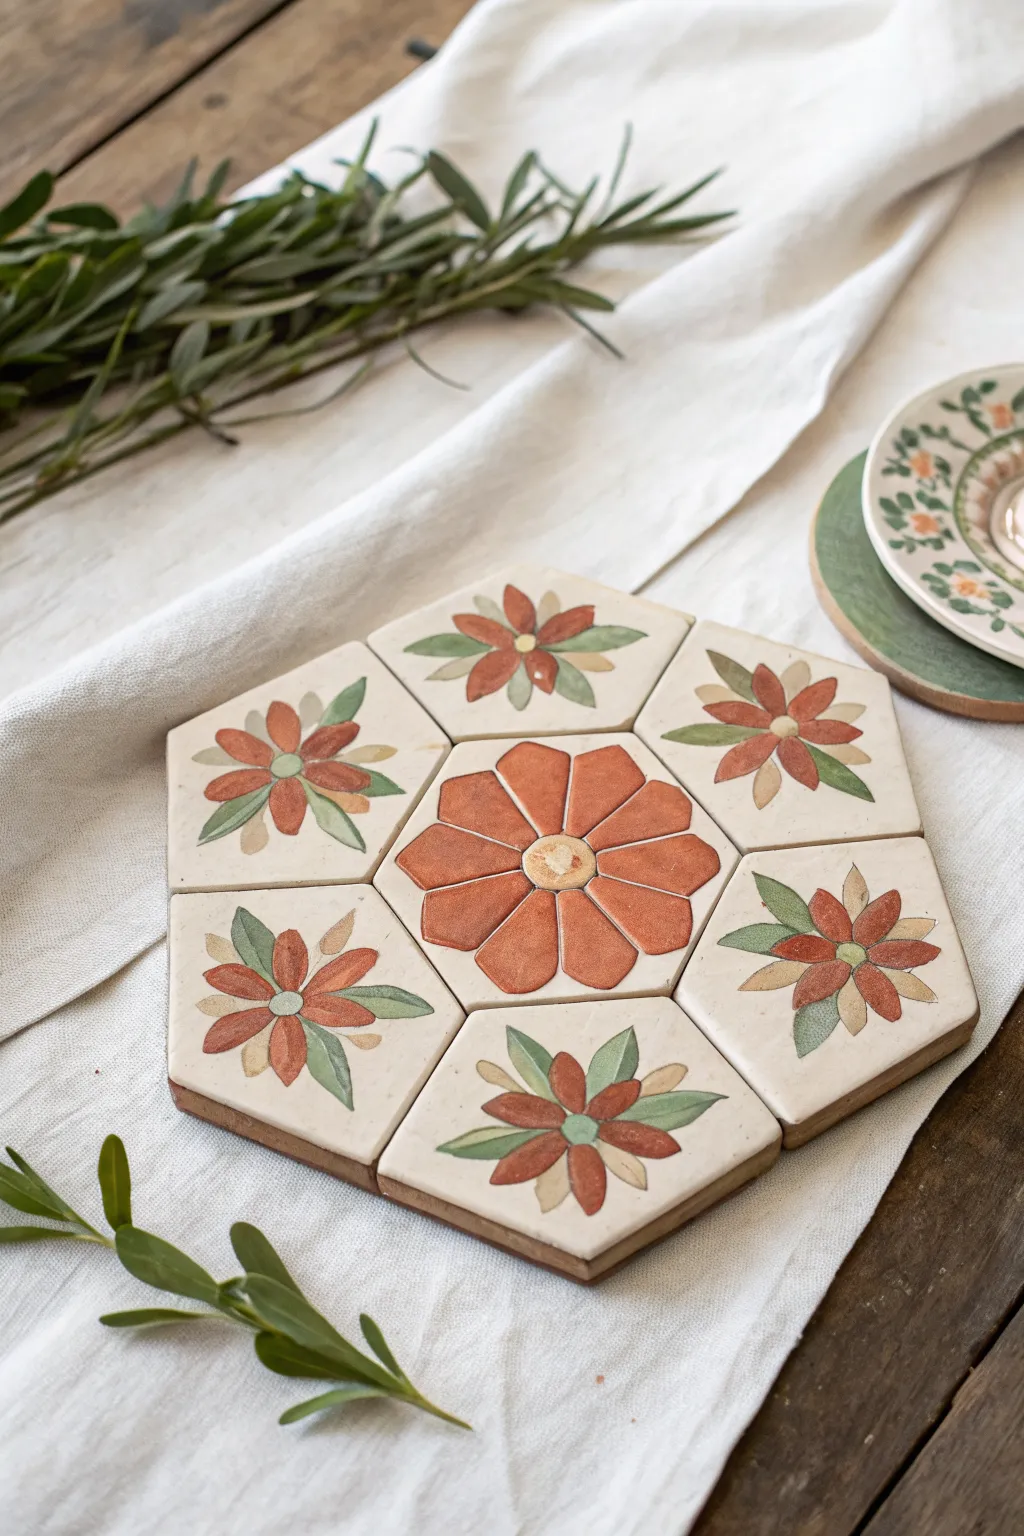
Bring a touch of earthy charm to your table with this handmade clay trivet composed of seven interlocking hexagon tiles. The design features a central bloom surrounded by a garden of smaller floral motifs, all painted in warm terracotta, sage green, and creamy ochre tones.
Step-by-Step Tutorial
Materials
- Air-dry clay or polymer clay (white or cream)
- Hexagon cookie cutter (approx. 3-4 inches)
- Rolling pin
- Parchment paper or canvas mat
- Modelling tools or stylus
- Acrylic paints (terracotta/burnt orange, sage green, light ochre/beige)
- Fine detail paintbrushes
- Matte or satin varnish/sealant
- Strong craft glue or ceramic adhesive
- Piece of felt or cork sheet (for backing)
- Sandpaper (fine grit)
Step 1: Shaping the Base Tiles
-
Roll out the clay:
Begin by working your white clay until it is pliable. Roll it out on parchment paper or a canvas mat to a uniform thickness of about 1/4 inch. Use guides or rulers on the sides if you struggle with even thickness. -
Cut the hexagons:
Using your hexagon cutter, punch out seven identical tiles. If you don’t have a cutter, you can create a paper template and carefully cut around it with a craft knife. -
Smooth the edges:
Dip your finger in a little bit of water and gently run it along the cut edges of each hexagon to smooth out any roughness or sharp corners. -
Dry the tiles:
Lay the tiles flat on a drying rack or a sheet of paper. Let them dry completely according to the clay manufacturer’s instructions, flipping them occasionally to prevent warping.
Warping Woes?
If you notice tiles curling while drying, place a lightweight book on them once they are semi-dry to gently force them flat.
Step 2: Designing the Motif
-
Sanding and prep:
Once bone dry, lightly sand the surfaces and edges with fine-grit sandpaper to ensure a perfect canvas for your painting. Wipe away any dust with a slightly damp cloth. -
Sketch the center flower:
Select one tile to be the center. Lightly sketch a large, eight-petal flower that fills most of the hexagon using a pencil. Draw a small circle in the very center. -
Sketch the surrounding flowers:
On the remaining six tiles, sketch a smaller six-petal flower near the center of each. Add two to three pointed leaves extending outward from the flower, oriented so they will visually flow when the tiles are arranged. -
Arrange and check:
Briefly arrange the tiles—center piece in the middle, others surrounding it—to ensure your sketch lines up pleasantly and the pattern feels cohesive.
Step 3: Painting the Design
-
Base coat the central petals:
Using a terracotta or burnt orange acrylic paint, fill in the large petals of the central tile. Keep the paint application somewhat organic to mimic glazed ceramic. -
Paint the central core:
Fill the small center circle of the main flower with a light ochre or cream color. You can dab the brush slightly to create texture. -
Paint the surrounding petals:
For the six outer tiles, paint the flower petals in alternating colors: use the terracotta for the main petals and the ochre/cream for accent petals. -
Add the greenery:
Using sage green paint, fill in the leaves on the outer tiles. Use a fine liner brush to get crisp points on the leaves. -
Outline and detail:
If you want a more defined look, use a very thin brush with watered-down brown paint to outline the shapes, though the example image relies on clean blocks of color. -
Antiquing (Optional):
I sometimes like to mix a very watery wash of brown paint and brush it quickly over the dried tiles, wiping it back immediately with a paper towel. This settles into crevices and gives an aged look. -
Seal the tiles:
Once the paint is fully dry, apply two coats of matte or satin varnish to protect the artwork from moisture and scratches.
Grout for Realism
For a true mosaic look, leave small gaps between tiles and fill them with premixed grout instead of just gluing them side-by-side.
Step 4: Assembly
-
Prepare the backing:
Arrangement the tiles face down in their final honeycomb shape. Trace the entire outline onto a piece of thick felt or cork sheet and cut this shape out. -
Glue the center:
Apply strong craft glue to the back of the central tile and press it firmly onto the center of your backing material. -
Attach outer tiles:
Glue the remaining six tiles around the center one, keeping the gaps between them tight and consistent. -
Final press:
Place a heavy book on top of the assembled trivet for at least an hour to ensure a flat, secure bond while the glue cures.
This charming floral mosaic is now ready to protect your surfaces with handmade elegance
Negative Space Flower Silhouette Tiles
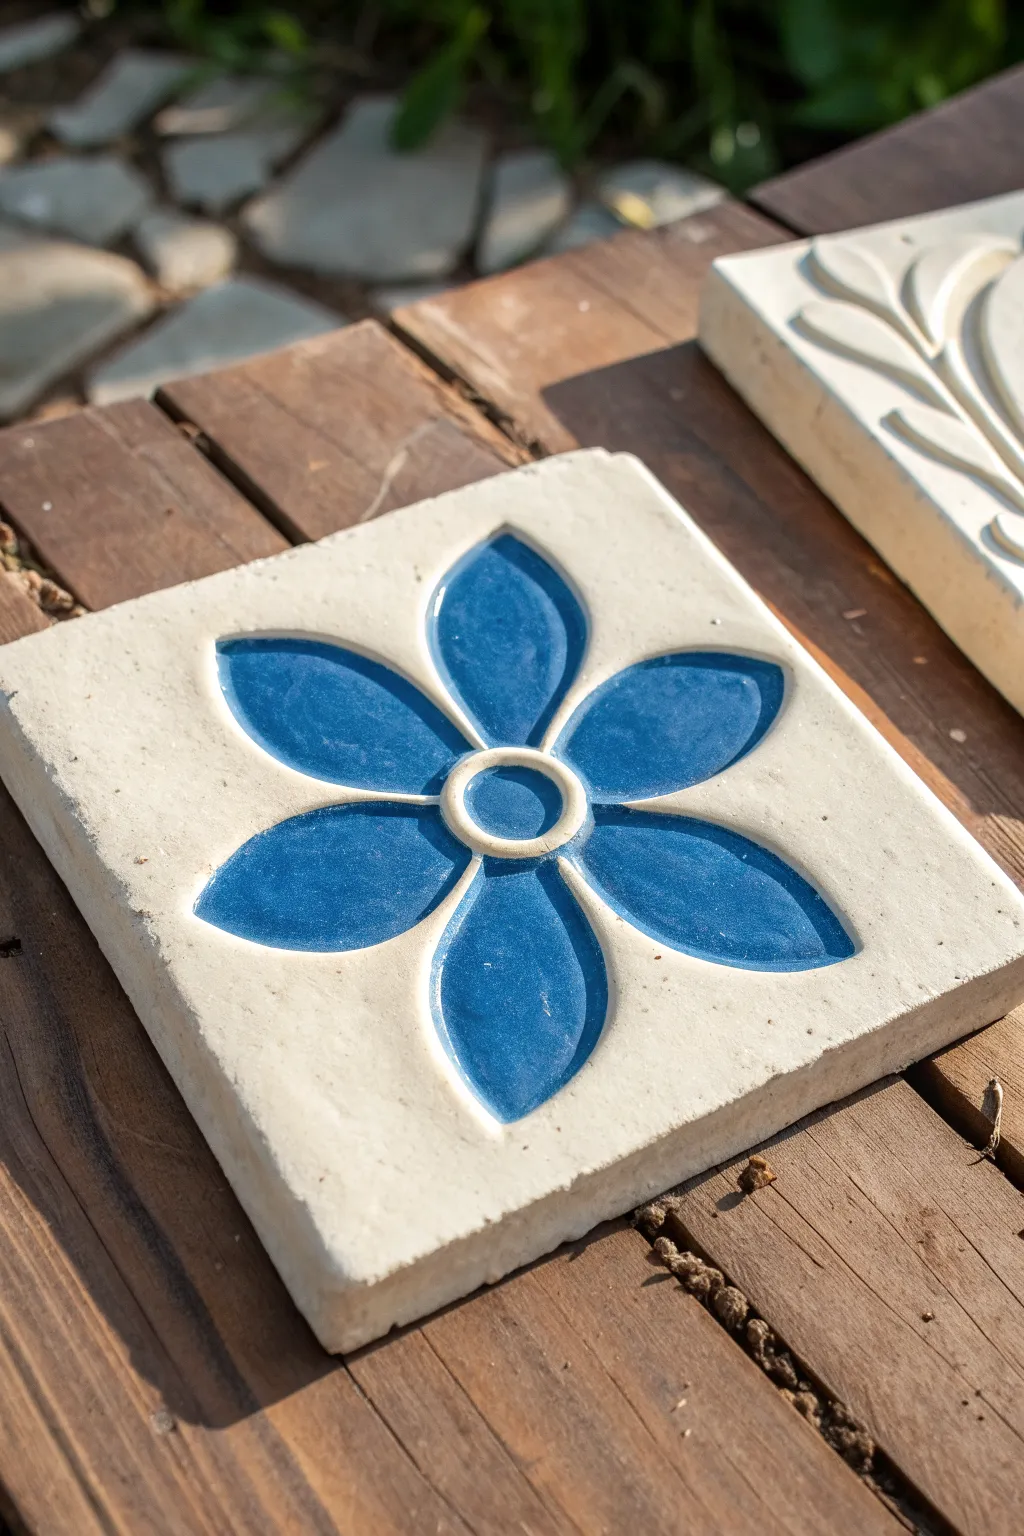
Capture the elegance of classic architectural ceramics with this sunken relief tile project. Using a creamy white base and a striking glossy blue inlay creates a high-contrast piece that feels both rustic and refined.
Step-by-Step Guide
Materials
- Air-dry clay (stone or white finish) or white cement mix
- Square silicone soap mold or wood box frame (approx. 6×6 inches)
- Small carving loop tools
- Circle cutter or small bottle cap
- Sandpaper (medium and fine grit)
- Glossy blue epoxy resin or high-gloss ceramic paint
- Clear varnish (matte)
- Small paintbrush
- Ruler
- Pencil
Step 1: Forming the Base
-
Prepare the mold:
Ensure your square mold is clean and dry. If using a wooden frame, line it with plastic wrap to prevent sticking. -
Fill with medium:
Press your air-dry clay firmly into the mold, ensuring it reaches all corners. If using cement, pour it in and tap the sides vigorously to release air bubbles. -
Level the surface:
Use a ruler or a straight edge to screed across the top of the mold, creating a perfectly flat, smooth surface. -
Initial drying:
Allow the tile to set until it is leather-hard—firm to the touch but still carveable. This usually takes about 24 hours for thick clay pieces.
Step 2: Carving the Design
-
Find the center:
Lightly mark the exact center of the tile with a pencil using your ruler. -
Draft the flower:
Sketch a six-petal flower radiating from the center point. Alternatively, create a paper stencil of the flower shape and trace it onto the slightly damp surface. -
Carve the center ring:
Using a circle cutter or a small carving tool, create a sunken ring in the center, leaving a raised dot in the very middle. -
Outline the petals:
Use a fine-point tool to incise the outline of each petal deeply, defining the separation between the flower and the background. -
Excavate the petals:
Switch to a loop tool to scoop out the clay inside each petal outline. Aim for a depth of about 3-5mm. -
Smooth the recesses:
Use your finger or a slightly damp brush to smooth the bottom and walls of the carved areas, removing any crumbly bits. -
Full cure:
Let the tile dry completely. I prefer to wait an extra day to ensure there is absolutely no moisture left deep inside the slab.
Clean Lines Tip
Use a syringe or a fine-tip squeeze bottle to apply the blue resin or paint. This gives you exact control and prevents drips on the white upper surface.
Step 3: Refining and Coloring
-
Sand the surface:
Gently sand the top face of the tile with fine-grit sandpaper to achieve a stone-like finish. -
Seal the base:
Apply a coat of matte varnish over the entire tile, including the carved recesses. This prevents the colorant from bleeding into the porous white material. -
Prepare the blue fill:
Mix a small batch of epoxy resin with blue pigment until opaque. Alternatively, use a thick, high-gloss blue ceramic paint. -
Fill the recesses:
Carefully pour or paint the blue medium into the carved petal areas. The indentation acts as a barrier, keeping the color contained. -
Fill the center ring:
Add a drop of the blue medium to the outer ring of the center circle, keeping the very center dot white. -
Pop bubbles:
If using resin, quickly pass a heat gun or lighter over the surface to pop any micro-bubbles for a glass-like finish. -
Final cure:
Place the tile on a level surface covered with a dust cover and allow the blue inlay to cure completely according to the manufacturer’s instructions.
Uneven Color Fix
If the blue paint looks streaky or translucent after drying, apply a second thin layer. Resin usually self-levels perfectly in one thick coat.
Display your finished tile on a stand or use it as a striking coaster for your garden table
Texture-Contrast Floral Relief Tiles
Capture the raw beauty of natural clay with this textured relief tile featuring a simple, charming daisy motif. The project emphasizes the contrast between the smooth, raised petals and the speckled, stony surface of the background.
Step-by-Step
Materials
- Speckled buff stoneware clay (or polymer clay mixed with cracked pepper/sand)
- Square cookie cutter (approx. 4×4 inches) or metal ruler and knife
- Rolling pin
- Two wooden guide strips (approx. 1/4 inch thick)
- Small needle tool or toothpick
- Rib tool or old credit card
- Scoring tool (or serrated kidney)
- Slip (clay mixed with water to a yogurt consistency)
- Modeling tool with a rounded or spoon-shaped end
- Canvas or heavy fabric work surface
Step 1: Preparing the Base
-
Prepare your workspace:
Lay down your canvas or heavy fabric to prevent the clay from sticking to your table. If using polymer clay, a silicone mat works best. -
Roll the slab:
Take a generous ball of speckled clay and place it between your two wooden guide strips. Roll the clay out until the rolling pin rides on the strips, ensuring a perfectly even thickness. -
Smooth the surface:
Before cutting, run a rib tool or credit card gently over the clay surface to compress the particles and remove any canvas texture. This is key for that smooth, professional finish. -
Cut the square:
Using your square cutter or a ruler and knife, cut out your tile shape. Be careful to hold the blade vertically so the edges are crisp and not beveled.
Warping Woes?
If your tile corners curl up while drying, flip the tile onto a piece of drywall or wooden board and weigh down the corners gently with small sandbags.
Step 2: Sculpting the Relief Flower
-
Create a template (optional):
Lightly sketch a circle in the center of your tile with a needle tool to guide your flower placement, but don’t dig too deep. -
Cut petal shapes:
Roll out a second, slightly thinner slab of clay. Freehand cut or use a teardrop cutter to create eight identical petal shapes and one small circle for the center. -
Round the edges:
Take each cut petal and gently tap the sharp cut edges with your finger to soften them. We want the petals to look organic and pillowy, not sharp. -
Score the attachment points:
Use your scoring tool to scratch up the back of each petal and the corresponding area on the tile base where they will sit. Roughing the surface ensures a permanent bond. -
Apply slip:
Dab a small amount of slip onto the scored areas of the tile base. It acts as the glue for your relief work. -
Attach the petals:
Press the petals firmly onto the tile in a radial pattern. I find it helpful to place the top, bottom, left, and right petals first, then fill in the diagonals to keep it symmetrical. -
Add the center:
Score, slip, and attach the central circular disk right in the middle of your petal arrangement.
Step 3: Refining and Detailing
-
Define the center:
Use a rounded or spoon-shaped tool to press an indentation into the center disk, leaving a raised rim like a button. This adds dimension and creates a shadow line. -
Shape the petals:
Using the same tool or your thumb, gently press the inner part of each petal (near the center) to create a slight concave dip, giving the flower movement. -
Clean up seams:
Check where the clay meets the tile base. Use a small brush with a tiny bit of water to clean up any oozing slip, but keep the seam distinct to maintain the relief look. -
Enhance texture:
If your clay handling smoothed out the natural speckles, use a dry sponge or stiff brush to gently stipple the background area around the flower, bringing that gritty texture back. -
Dry slowly:
Place a piece of plastic loosely over the tile. Because the flower is thicker than the edges, slow drying prevents the tile from curling or cracking. -
Final finish:
Once bone dry, fire the piece according to your clay’s instructions. For this specific look, leave it unglazed to highlight the stony, raw finish.
Make It Grit
If you don’t have speckled clay, wedge some coarse sand, used coffee grounds, or cracked black pepper (if not firing) into standard white clay.
Display your finished tile on a stand or use it as a striking coaster to bring a touch of earthy calm to your room
Sgraffito Line-Art Flower Tiles
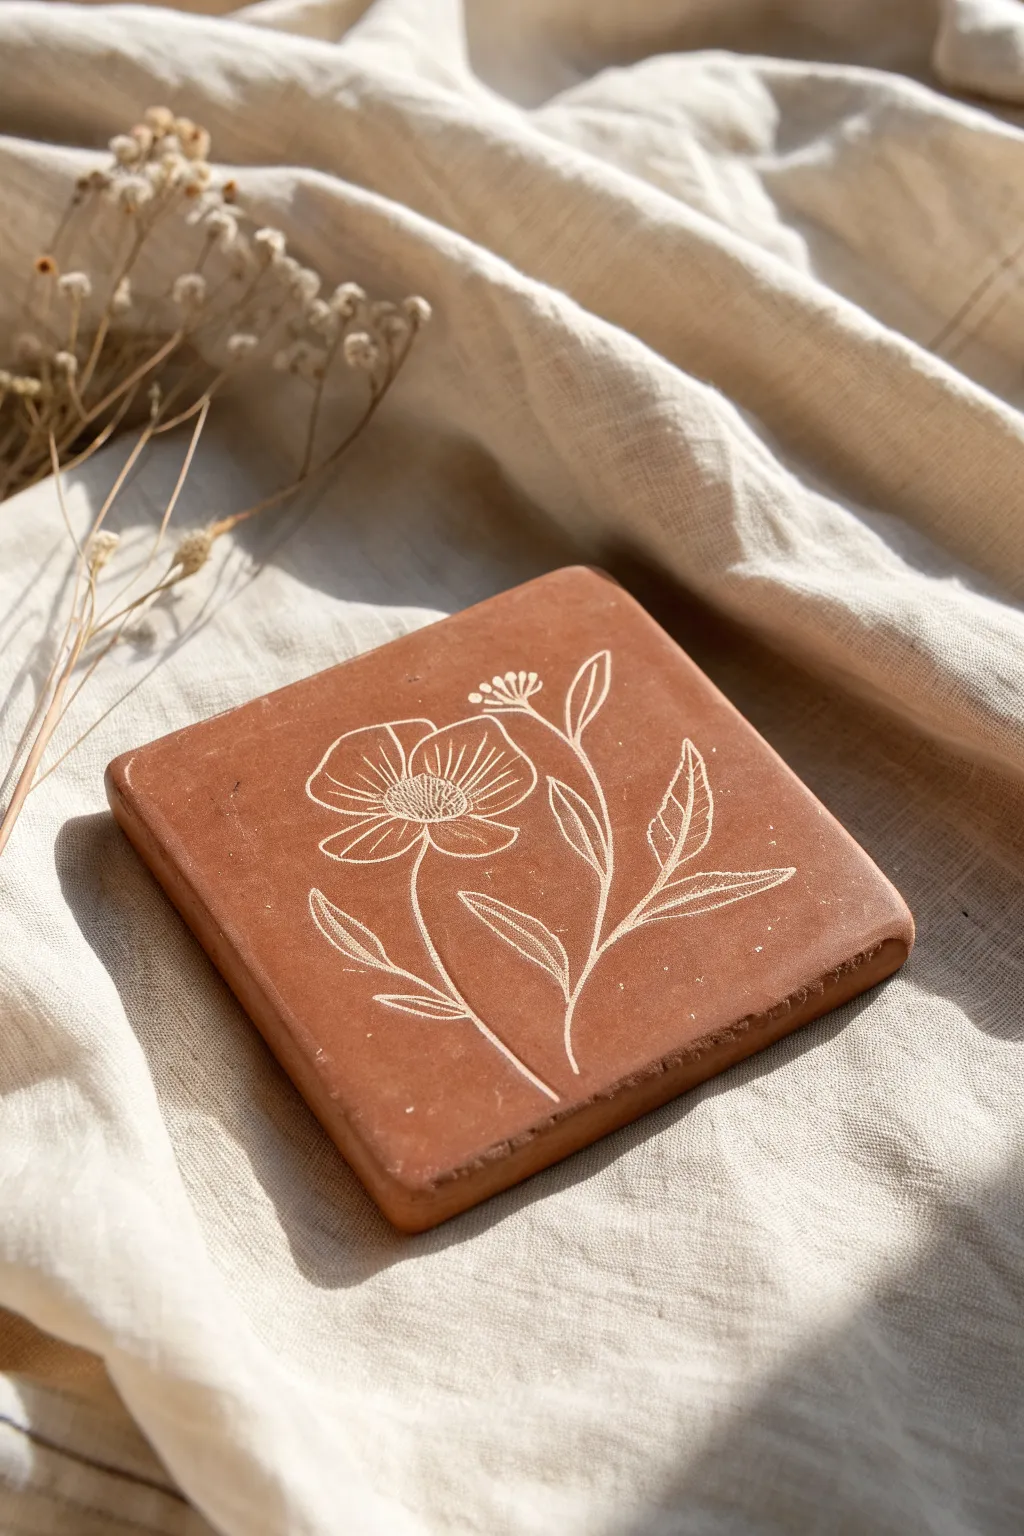
Capture the rustic warmth of terracotta with this elegant line-art coaster, featuring a delicate floral motif carved directly into the surface. This project uses the sgraffito technique to create a striking contrast between the rich clay body and the fine white inlaid lines.
How-To Guide
Materials
- Terracotta air-dry clay or polymer clay (oven-bake)
- Square cookie cutter (approx. 4×4 inches) or craft knife/ruler
- Rolling pin
- Two wooden guide strips (approx. 1/4 inch thick)
- White acrylic paint or white underglaze (if using kiln clay)
- Needle tool or fine-point carving tool
- Sandpaper (fine grit)
- Matte spray varnish or sealant
- Soft sponge or damp cloth
- Small paintbrush
- Paper and pencil for sketching
Step 1: Shaping the Base
-
Condition the Clay:
Begin by kneading your terracotta clay until it is soft, pliable, and free of air bubbles. If using polymer clay, warm it in your hands until it’s easy to work with. -
Roll the Slab:
Place your clay between two wooden guide strips or depth guides on your work surface. Roll the clay out until the rolling pin rests on the guides, ensuring a perfectly even thickness of about 1/4 inch. -
Cut the Square:
Using your square cookie cutter or a sharp craft knife and ruler, cut out a clean square tile. If using a knife, try to keep the blade vertical to avoid beveled edges. -
Smooth the Edges:
Dip your finger in a little water (for air-dry clay) or baby oil (for polymer) and gently run it along the cut edges to soften any sharpness or burrs. The edges should look slightly rounded and organic, like the reference image.
Clean Lines Only
If clay crumbs keep sticking to your needle tool while carving, the clay is too wet. Let it sit for another 30 minutes to firm up before continuing.
Step 2: Designing and Carving
-
Dry to Leather Hard:
Allow the tile to dry slightly until it reaches a ‘leather-hard’ state. It should be firm to the touch but still able to be dented with a fingernail. This is the perfect texture for crisp carving. -
Draft Your Design:
Lightly sketch your floral design onto the clay surface using a very soft pencil or a dull toothpick. Focus on a central stem with two main branches and a singular open bloom at the top left. -
Carve the Outline:
Take your needle tool or fine-point carving tool and begin tracing over your sketch. Apply steady, moderate pressure to create a distinct groove. I find it easiest to pull the tool toward me rather than pushing it away. -
Add Petal Details:
Inside the main flower head, carve the delicate internal lines of the petals radiating from the center. Keep these lines slightly thinner than the main outline for visual variety. -
Texture the Center:
Use the very tip of your tool to stipple or cross-hatch the center of the flower, giving it that pollen-heavy texture. -
Detail the Leaves:
Carve the veins into the leaves. Use a central vein line and quick, angled strokes for the smaller veins to suggest organic growth. -
Refine the Grooves:
Check your lines for any ‘crumbs’ of clay. Use a soft, dry brush to gently sweep away loose debris from the carved channels.
Step 3: Finishing and Inlay
-
Full Cure:
Let the tile dry completely (24-48 hours for air-dry) or bake specifically according to your polymer clay package instructions. The clay must be fully hard before the next step. -
Apply the White Fill:
Dilute your white acrylic paint slightly with water. Brush it generously over the entire carved design, ensuring the paint gets deep into all the grooves. -
Wipe the Surface:
Wait about 30-60 seconds for the paint to settle into the crevices, then take a barely damp sponge or cloth and wipe across the surface. You want to remove the paint from the top flat surface but leave it trapped in the carved lines. -
Touch Ups:
If you wipe away too much paint from a line, simply re-apply a dab of paint and wipe again. Repeat until the illustration stands out clearly in white against the terracotta. -
Final Sanding:
Once the paint is totally dry, give the surface a very light pass with fine-grit sandpaper if there is any hazy paint residue left on the clay face. -
Seal the Artwork:
Finish by spraying the tile with a matte varnish. This seals the porous clay and protects the white inlay without making the rustic tile look plasticky or shiny.
Sharper Contrast
For a brighter white line, use heavy-body white acrylic paint instead of standard craft paint. It settles into the grooves more opaquely.
Now you have a beautifully handcrafted botanical tile ready to display on a shelf or use as a unique coaster.
Mishima-Inlay Petal Details
This elegant ceramic tile combines precise carving with the ancient Korean technique of mishima inlay to create a striking floral motif. The warm, toasted clay body contrasts beautifully with the dark underglaze slip, highlighting the delicate leaf-vein details within each petal.
Detailed Instructions
Materials
- Leather-hard stoneware clay slab (approx. 5×5 inches, 3/8 inch thick)
- Black or dark brown underglaze
- Wax resist (emulsion)
- Small loop tool or carving stylus
- Needle tool
- Rib tool (metal or rubber)
- Sponge
- Fine paintbrush
- Template or compass (optional)
Step 1: Preparing the Canvas
-
Roll out the slab:
Begin by rolling out your clay to an even thickness of about 3/8 inch. Cut out a perfect square, roughly 5 by 5 inches, or your preferred coaster size. Having a consistent thickness is key to preventing warping later. -
Reach leather-hard stage:
Allow the clay to dry slowly until it reaches a sturdy leather-hard state. It should be firm enough to handle without bending but still contain enough moisture to be carved smoothly without chipping. -
Apply wax resist:
Brush a smooth, even coat of wax resist over the entire top surface of the tile. Let this dry completely until it’s no longer tacky to the touch. This wax layer will protect the top surface from staining during the inlay process.
Step 2: Drawing and Carving
-
Mark the center:
Using a needle tool, lightly mark the center point of the tile. You can gently sketch a small circle for the flower’s center, scratching right through the wax layer to expose the clay. -
Outline the petals:
Sketch the outline of eight graceful petals radiating from the center. I find it helpful to mark the cardinal directions (12, 3, 6, 9 o’clock) first to keep the spacing even, then fill in the diagonal petals between them. -
Carve the petal shapes:
Use a small loop tool or a sharp stylus to carve out the main outlines of the petals. You want to cut through the wax and remove a small amount of clay, creating a shallow channel or groove. -
Detail the veins:
Switch to a finer carving tool or needle tool to scratch in the delicate veins. Draw a central spine down each petal, followed by chevron-shaped veins branching outward. Keep these lines clean and deliberate. -
Create the heavy outline:
Go back over the outer perimeter of the entire flower shape to slightly deepen and widen the boundary line. This creates a bold separation between the flower and the negative space. -
Add the dotted border:
Using the tip of a small round tool or a blunt needle, press a series of evenly spaced dots into the clay around the flower. Follow the scalloped shape of the petals to frame the design.
Clean Lines Pro Tip
When wiping off the excess underglaze, dampen your sponge but wring it out maximally. A too-wet sponge will drip water into the grooves and wash out your hard-earned inlay lines.
Step 3: The Mishima Inlay
-
Apply the underglaze:
Generously brush black or dark brown underglaze over the entire carved area. You want the liquid to settle deep into every carved line, dot, and groove. Don’t worry about being messy; the wax resist will do its job. -
Let it set:
Allow the underglaze to dry until it turns matte. It doesn’t need to be bone dry, but it shouldn’t be wet enough to smear easily when you touch it. -
Wipe away excess:
Take a clean, slightly damp sponge and wipe across the surface of the tile. The sponge will remove the underglaze sitting on top of the wax, but leave the color trapped inside the carved lines. -
Clean the surface:
Continue wiping with clean sections of the sponge until the uncarved clay surface is clean and the design contrasts sharply. Be careful not to scrub too hard, or you might pull pigment out of the shallow veins. -
Clean up the edges:
Smooth the outer edges of the tile with a damp sponge or finger to remove any stray marks or sharp burrs left from the cutting process. -
Initial firing:
Once the tile is fully bone dry, bisque fire it according to your clay body’s specifications (usually Cone 06 or 04).
Level Up: Colored Petals
Instead of just dark lines, try filling the petal interiors with a transparent celadon or amber glaze before the final firing. This adds a soft pop of color while keeping the inlay visible.
Step 4: Finishing
-
Clear glaze application:
After the bisque fire, apply a coat of clear transparent glaze if you want a glossy finish, or leave the raw clay for a more rustic texture. If using glaze, ensure it is compatible with your underglaze so it doesn’t cause running. -
Final wipe down:
Wipe the bottom of the tile perfectly clean to prevent it from sticking to the kiln shelf. -
Glaze firing:
Fire the tile a second time to the maturity temperature of your clay and glaze combination.
Once fired, you will have a durable, beautifully detailed tile ready for use as a coaster or decorative accent
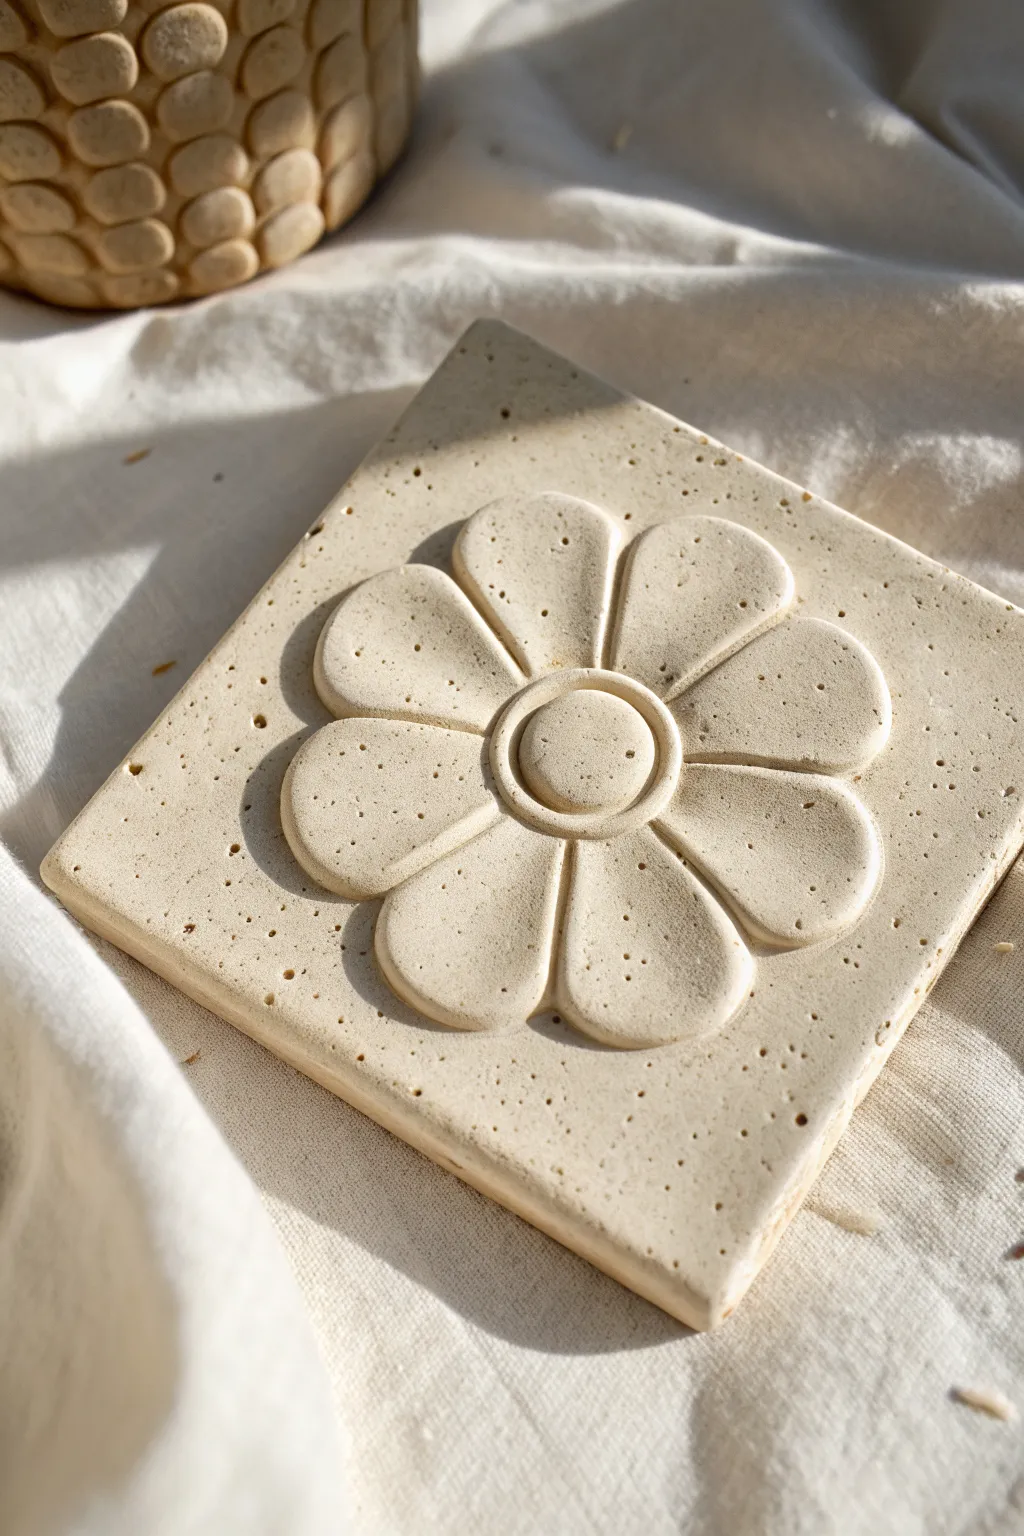
Raised 3D Petal Edge Tiles
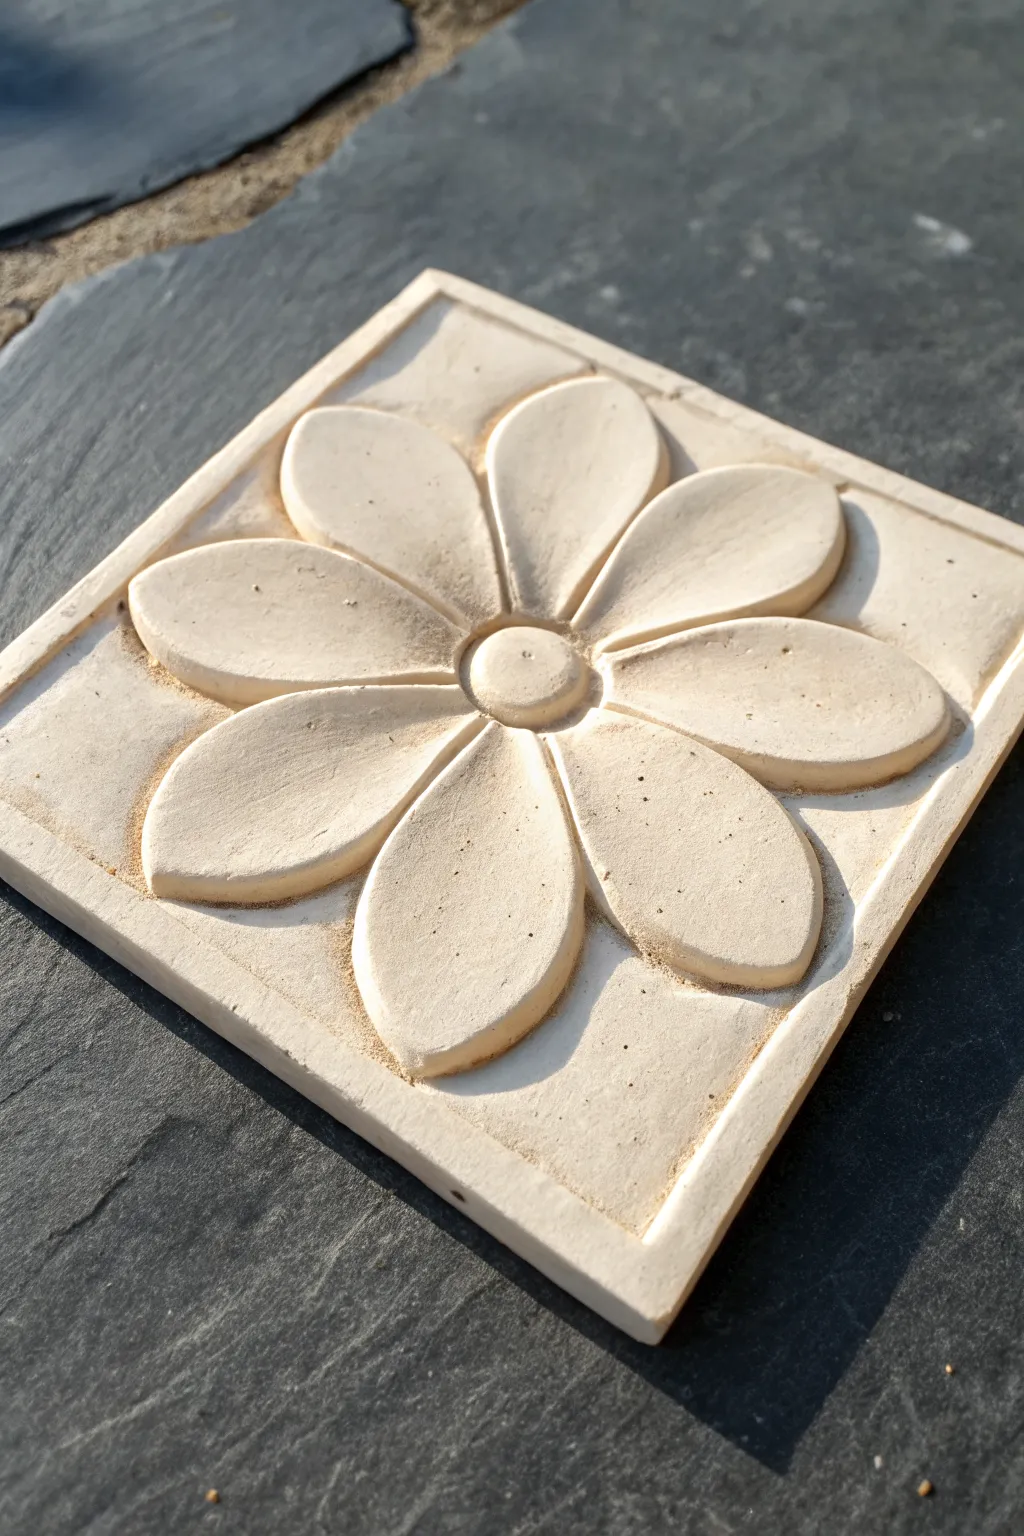
This elegant relief tile captures the timeless beauty of a simple daisy with striking 3D petals that seem to rise from the surface. The project combines smooth sculpting with a sandy, unfinished texture to create a piece that feels both rustic and refined.
Step-by-Step Guide
Materials
- Air-dry clay or polymer clay (white or cream)
- Square tile cutter or ruler and knife
- Rolling pin with depth guides (about 1/4 inch)
- Small circle cutter (for the center)
- Teardrop cutter (large) or cardstock template
- Sculpting tools (needle tool, modeling tool, rubber shaper)
- Fine-grit sandpaper or sanding sponge
- Slip (clay mixed with water) or scoring tool
- Canvas or non-stick work surface
Step 1: Base Construction
-
Prepare the slab:
Begin by conditioning your clay until it is soft and pliable. Roll it out into an even slab about 1/4 to 1/3 inch thick using depth guides to ensure a completely flat surface. -
Cut the square:
Using a square cutter or a ruler and sharp knife, cut a precise square base. Four inches by four inches works well for this design. -
Create the border:
Measure about 1/8 inch in from the edge of your square. Lightly impress a continuous line all around to create a dedicated border frame, but don’t cut all the way through. -
Add texture (optional):
I like to gently tap the surface inside the frame with a dry sponge or stiff brush. This gives the background that lovely stone-like grit seen in the reference photo.
Step 2: Sculpting the Flower
-
Establish the center:
Find the exact center of your square. Mark it lightly with a needle tool to guide your flower placement. -
Form the petals:
Roll out a second, slightly thinner slab of clay. Use a teardrop cutter to punch out eight identical petal shapes. If you don’t have a cutter, cut a template from cardstock and trace it with a knife. -
Smooth the edges:
Take each clay petal and gently run your finger or a damp sponge along the cut edges to round them off, removing that sharp ‘cookie-cutter’ look. -
Attach the first petals:
Score the back of a petal and the tile surface. Apply a dab of slip. Place the first four petals in a compass arrangement (North, South, East, West) radiating from the center mark. -
Fill the gaps:
Place the remaining four petals in the spaces between the first four, ensuring they are spaced evenly. The tips should reach just inside your border line. -
Create the center button:
Roll a small ball of clay, flatten it slightly into a dome, and adhere it securely to the very center where all petals meet. -
Define the center:
Using a small, round tool, press a tiny indentation into the middle of the center button for extra detail.
Stone Texture Trick
Mix a small amount of fine sand or coffee grounds into your clay body before sculpting to achieve authentic speckling and grit throughout the tile.
Step 3: Refining and Finish
-
Bevel the petals:
Use a rubber shaping tool or your thumb to gently slope the petals downward toward the center. This gives the flower that dynamic, cupped 3D effect rather than looking flat. -
Check the connections:
Run a thin modeling tool around the base of the center circle and underneath the petal edges slightly to ensure everything is bonded tight without smearing the shapes. -
Cleanup:
Inspect the project for stray clay crumbs or fingerprints. Use a soft brush dipped in a tiny amount of water (or baby oil if using polymer clay) to smooth them away. -
Drying:
Allow the tile to dry slowly on a porous surface like wood or drywall board to prevent curling. If using polymer clay, bake according to the manufacturer’s temperature instructions. -
Sanding the finish:
Once fully cured or dry, gently sand the edges and the top of the petals with fine-grit sandpaper. This mimics the soft, matte texture of natural sandstone.
Make a Mosaic
Create 9 tiles and paint them in gradient shades of sage or terracotta, then mount them together in a wooden frame for wall art.
Once mounted or displayed on a stand, the light catching the ridges of your relief tile will bring a calm, organic atmosphere to any room