Halloween is basically the perfect excuse to make a bunch of tiny, adorable things out of clay. I love how a few simple shapes can turn into spooky-cute Halloween minis you can gift, display, or turn into charms.
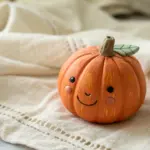
Classic Jack-o’-Lantern Minis
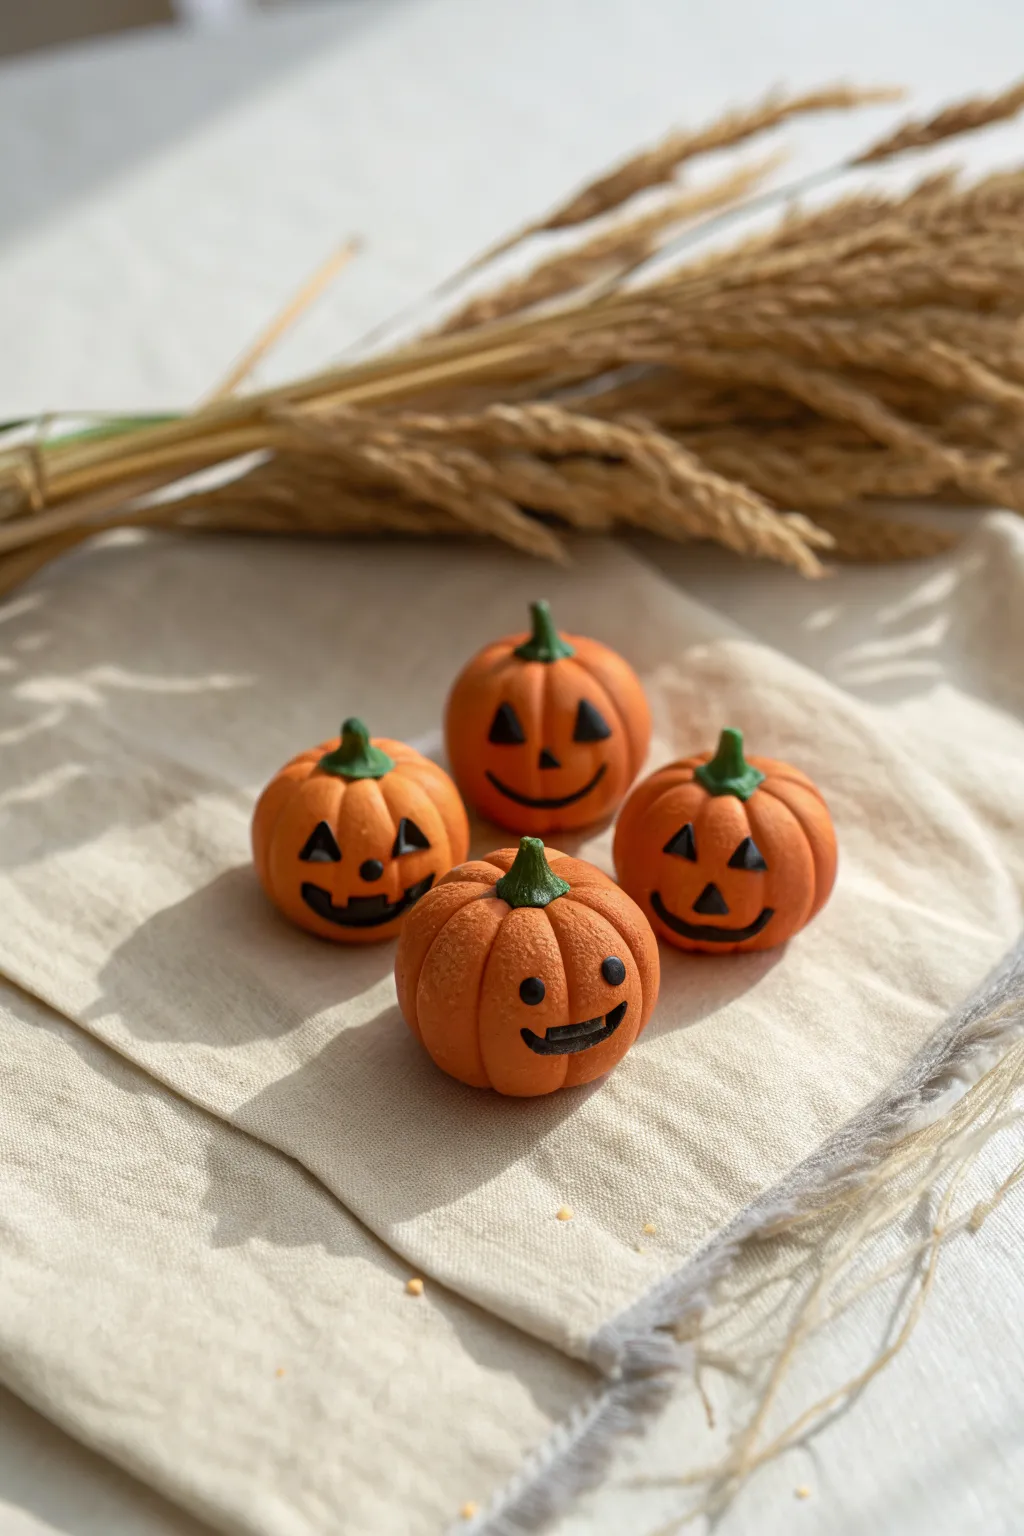
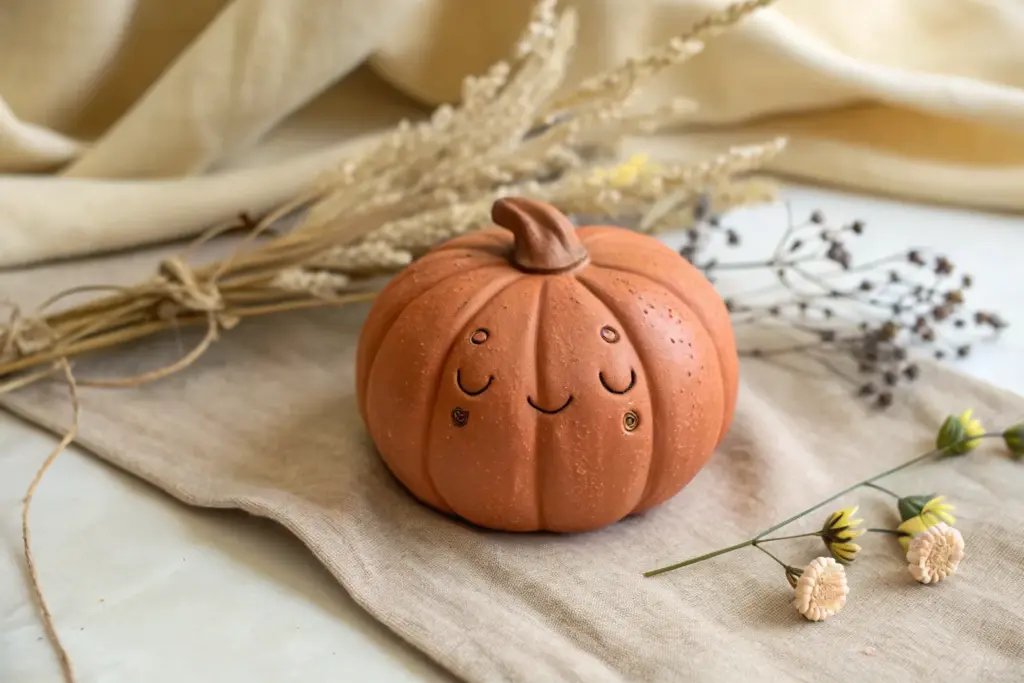
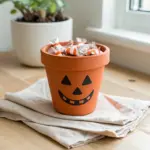
Create this charming set of miniature jack-o’-lanterns to add a touch of handcrafted whimsy to your Halloween decor. These tiny pumpkins feature expressive faces carved or painted onto vibrant orange clay, complete with realistic green stems.
How-To Guide
Materials
- Orange polymer clay or air-dry clay
- Green polymer clay or air-dry clay
- Black polymer clay or black acrylic paint
- Fine-point sculpting tool or toothpick
- Small ball tool
- Parchment paper or smooth work surface
- Oven (if using polymer clay)
Step 1: Shaping the Pumpkins
-
Portion the Clay:
Start by dividing your orange clay into four equal portions. Roll each piece between your palms until you have smooth, crack-free spheres about the size of a large gum ball. -
Flatten Slightly:
Gently press each sphere down onto your work surface to create a flat base so they sit without rolling away. Press slightly on the top as well to give them a squat, pumpkin shape. -
Create Ribs:
Using the side of a toothpick or a dull sculpting tool, press vertical indentations around the outside of each sphere perfectly spaced to mimic pumpkin ribs. Start from the center top and curve down to the base. -
Smooth the Lines:
Gently soften the edges of your indentation lines with your fingertip. You want the groves to look organic and plump rather than like sharp cuts. -
Make the Top Indent:
Press a small hole into the center top of each pumpkin using a ball tool or the end of a paintbrush. This depression will eventually house the stem.
Step 2: Adding the Faces
-
Design Variation:
Decide on your expressions. As seen in the photo, vary them: try classic triangles for eyes on some, and simple round dots for others. -
Create Eye Sockets:
For the triangle eyes, gently press a small triangular tool or shape the clay with a craft knife tip to make shallow indentations. For round eyes, use a small ball tool to press circular divots. -
Carve the Smiles:
Use a curved tool or a toothpick to carefully carve out the mouth shapes. Create wide grins, some with a single square tooth left in relief, or simple curved smiles. -
Fill with Black:
Take tiny, almost microscopic bits of black clay and press them into your carved features to fill them flush with the surface. Alternatively, bake the pumpkins first and paint the features with black acrylic later for sharpness. -
Refine Features:
If using the clay-fill method, smooth the black clay so it sits seamlessly within the orange indentations, ensuring no black creates smudges on the bright orange skin.
Smudge Patrol
Black clay stains easily! Clean your hands or tools thoroughly with a baby wipe or rubbing alcohol before touching the orange clay again to keep colors bright.
Step 3: Stems & Finish
-
Form the Stems:
Roll small snakes of green clay. Taper one end to a point and leave the base slightly wider to mimic a cut vine. -
Attach Stems:
Press the wider base of the green stem into the indentation you made earlier at the top of the pumpkin. I like to twist the green clay slightly as I attach it to ensure a strong bond. -
Texture the Stems:
Use a needle tool or toothpick to scratch tiny vertical lines into the green clay, giving it a woody, fibrous texture. -
Bake or Dry:
Follow the manufacturer’s instructions for your specific clay. If using polymer, bake on a foil-lined sheet. If using air-dry, leave them in a dry, safe spot for 24-48 hours. -
Final Touches:
Once fully cured or dry, assess your faces. If you painted them, you can seal the paint with a matte varnish to protect your spooky little creations.
Texture Trick
Before baking, lightly tap the orange surfaces with an old toothbrush or stiff bristle brush. This creates a realistic skin texture instead of a plastic-smooth look.
Now you have a festive little pumpkin family ready to greet the season


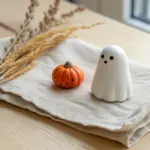
Chubby Sheet Ghost Figurines
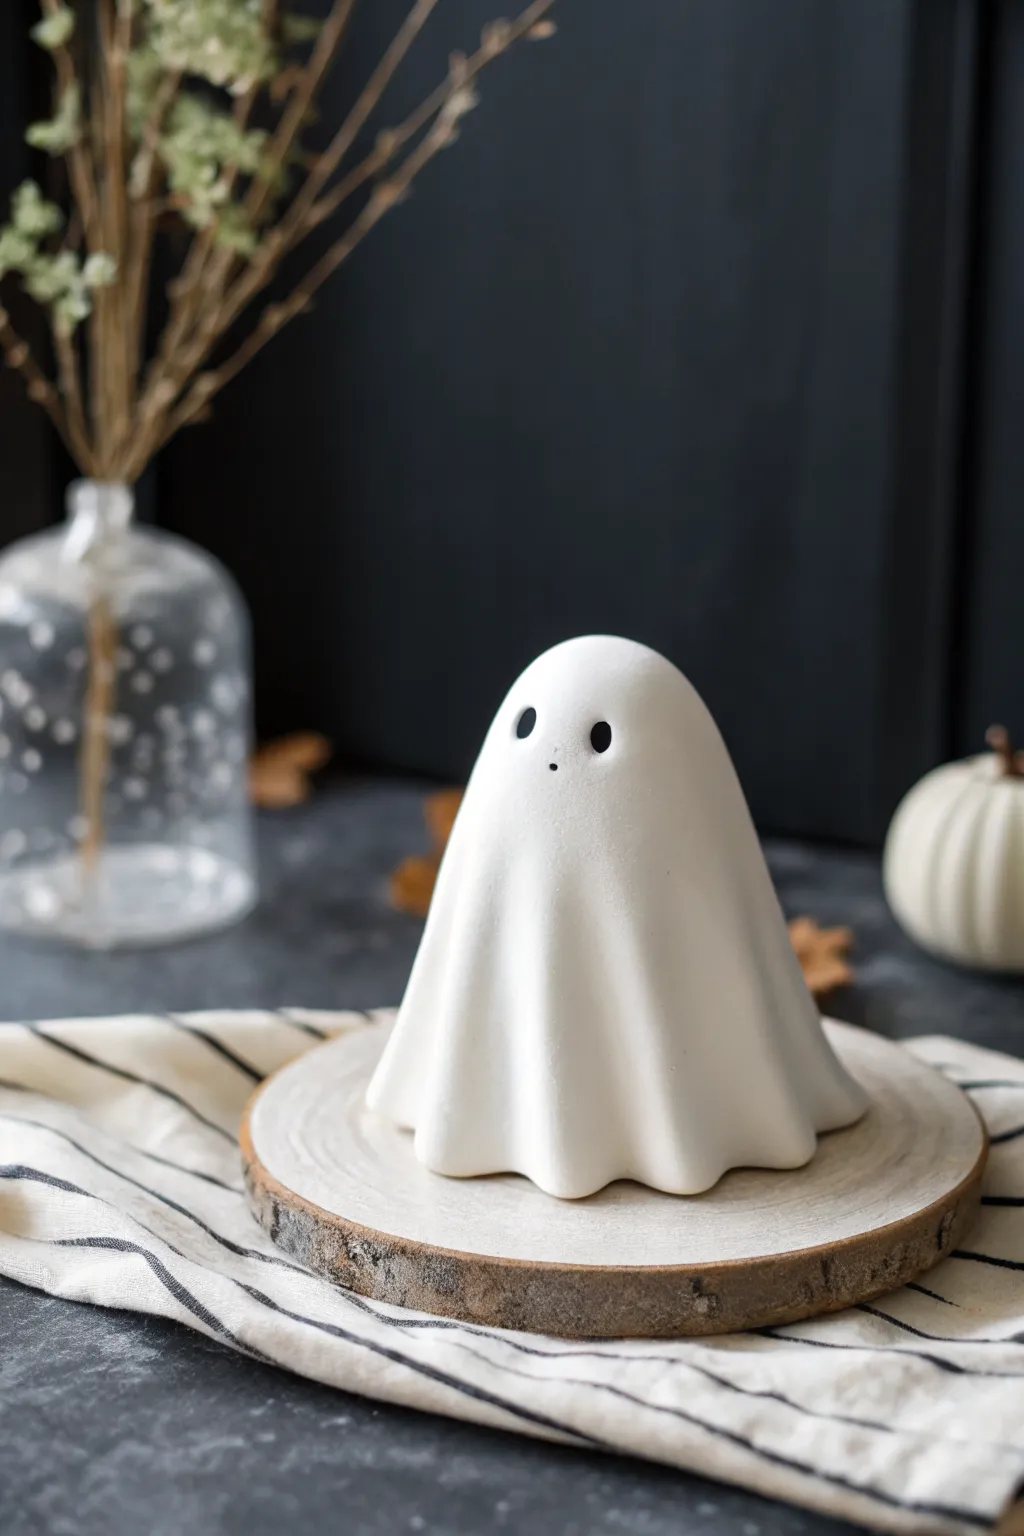
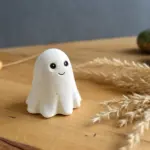
Capture the essence of a classic Halloween spirit with this sleek, charmingly chubby ceramic-look figurine. By draping a simple sheet of clay over a core, you’ll achieve those delightfully fluid folds that make this ghost look like it’s floating effortlessly.
Step-by-Step
Materials
- White air-dry clay (or polymer clay)
- Aluminum foil
- Rolling pin
- Smooth work surface or silicone mat
- Ball stylus tool (medium size)
- Small round cutter or drinking straw (optional)
- Needle tool or toothpick
- Fine-grit sandpaper
- Water container (for smoothing)
- Acrylic sealer (matte)
Step 1: Building the Core
-
Crumple the armature:
Start by taking a sheet of aluminum foil and crumbling it into a tight ball. This will be the head of your ghost. Add a second, slightly larger piece of foil and mold it into a tapering cone shape for the body. -
Combine the parts:
Press the foil ball firmly onto the top of the cone shape. Squeeze and mold them together until they form a solid, united armature that somewhat resembles a simple pawn from a chess set or a bowling pin shape. -
Check stability:
Stand the foil armature on your work surface. Press down firmly to flatten the bottom so it stands completely stable without wobbling. This base dictates the ghost’s final posture.
Keep the Folds Open
Insert small rolls of paper towel inside the bottom folds while the clay dries. This supports the weight and prevents the ‘fabric’ from collapsing inward.
Step 2: Creating the Sheet
-
Condition the clay:
Take a generous handful of white air-dry clay. Knead it in your warm hands for a few minutes until it is pliable and free of cracks. I usually add a tiny drop of water if it feels too stiff. -
Roll it out:
Using your rolling pin, flatten the clay into a large circle. Aim for a thickness of about 1/4 inch (approx. 5-6mm). You want it thick enough to hold the fold shapes but thin enough to drape naturally. -
Smooth the surface:
Before lifting the clay, dip your finger in water and gently run it over the surface of the circle to remove any fingerprints or canvas textures from your workspace.
Step 3: Draping and Shaping
-
Position the drape:
Carefully lift your clay circle and center it over the top of your foil armature. Let gravity do the initial work as the sides fall down around the body. -
Form the main folds:
Using your fingers, gently pinch and guide the clay to create deep, vertical folds. Encourage the clay to flare out slightly at the bottom, creating that ‘skirt’ effect. -
Refine the silhouette:
Smooth the clay over the rounded head area so it is perfectly seamless. Work your way down, ensuring the clay isn’t clinging too tightly to the foil; you want soft, fabric-like billows, not a skin-tight suit. -
Trim the excess:
If the clay is too long and pooling messily at the base, use your needle tool to trim the bottom edge. Create a wavy, undulating line rather than a straight cut to mimic the hem of a sheet. -
Create the face:
While the clay is still soft, use a medium-sized ball stylus tool to press two oval indentations for the eyes. Press deep enough to create a distinct shadow. -
Add the mouth:
Use a smaller stylus or the blunt end of a toothpick to create a tiny, circular mouth just below and between the eyes. This gives it that surprised, inquisitive expression. -
Final smoothing:
Wet your finger or a soft paintbrush and go over the entire sculpture one last time. Pay special attention to the bottom raw edge, rounding it off so it doesn’t look sharp or cut.
Cracks While Drying?
If small hairline cracks appear as the clay shrinks, mix a tiny bit of fresh clay with water to make a paste (slip). Fill the crack, smooth it over, and let it dry again.
Step 4: Finishing Touches
-
Allow to dry:
Set the ghost in a safe, dry place away from direct heat. Let it dry for at least 24 to 48 hours. The clay will turn from greyish to stark white as it dries. -
Sand for perfection:
Once fully cured, inspect the surface. If there are any rough spots or fingerprints remaining, gently buff them away with fine-grit sandpaper until the ghost feels silky smooth. -
Painting the features:
Using a tiny detail brush and black acrylic paint, carefully fill in the indented eyes and mouth. The indentation helps keep the paint contained for crisp edges. -
Seal the piece:
To protect your figurine and give it a finished ceramic look, apply a coat of matte acrylic sealer. A matte finish looks more like fabric or bisque ware than a glossy one would.
Now you have a timeless little spectre ready to haunt your shelves with adorable spookiness


Simple Black Bat Wall Dots
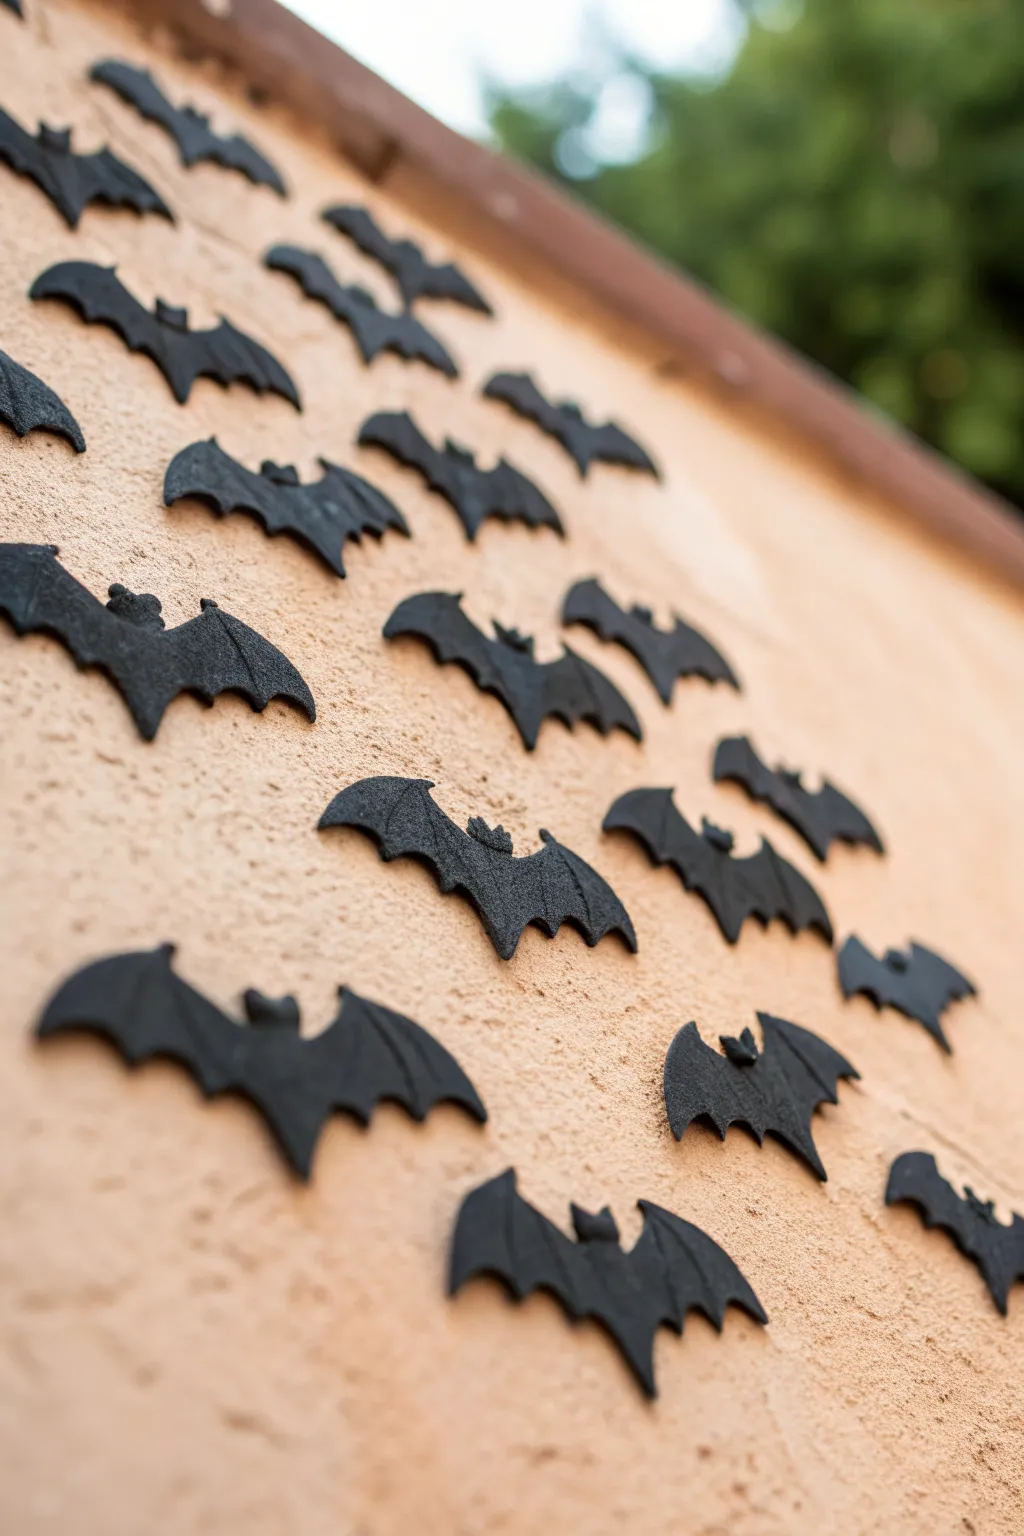
Transform a plain wall into a haunted scene with this swarm of textured clay bats. These simple yet effective decorations have a delightful rough finish that catches the light and adds dimension to your Halloween decor.
Step-by-Step Tutorial
Materials
- Black air-dry modeling clay (or polymer clay)
- Bat cookie cutter (small size)
- Parchment paper or non-stick craft mat
- Rolling pin
- Old toothbrush or stipple sponge (for texturing)
- Craft knife or plastic clay tool
- Double-sided removable mounting tape or adhesive glue dots
Step 1: Preparing the Clay
-
Condition the clay:
Start by taking a generous chunk of your black modeling clay and kneading it in your hands. You want it warm and pliable so it won’t crack when you roll it out. -
Roll it out flat:
Place the clay onto your parchment paper or non-stick mat. Use the rolling pin to flatten the clay into an even sheet. -
Check the thickness:
Aim for a thickness of about 1/8 to 1/4 inch. If it’s too thin, the wings might snap; too thick, and they become heavy for the wall tape.
Step 2: Cutting and Texturing
-
Add texture first:
Before cutting, give the surface that signature rough look seen in the photo. Take an old toothbrush or a stipple sponge and firmly dab it all over texturing the top of the clay sheet. -
Review the surface:
Ensure the texture is uniform. This distinct bubbly surface is what makes them look matte and high-quality rather than just flat plastic. -
Position the cutter:
Press your bat-shaped cookie cutter firmly into the textured clay sheet. Try to fit as many shapes as possible to minimize waste. -
Cut the shapes:
Wiggle the cutter slightly to ensure a clean separation from the surrounding clay, then lift the cutter. If the clay sticks inside, gently push it out from the top. -
Clean up edges:
Use your craft knife or a plastic tool to carefully smooth any jagged bits on the wing tips or ears without squashing the texture you just created.
Variation Tip
Mix a tiny pinch of grey clay into the black just before rolling. Don’t blend fully; this creates a subtle marbled effect that mimics stone or slate texture.
Step 3: Shaping and Drying
-
Lift carefully:
Use a spatula or blade to lift the cutout bats off the work surface to prevent distortion. -
Create distinct poses:
I like to vary their look by gently bending the wings on some bats inward or upward slightly. This makes the flock look like they are in mid-flight rather than flat stickers. -
Detail the ears:
Pinch the ears just barely to make them pointier and more distinct, matching the sharp silhouette shown in the example. -
Let them cure:
Place your finished bats on a flat surface lined with clean parchment paper. Let them air dry for at least 24 hours (or bake according to package instructions if using polymer clay). -
Check for dryness:
The clay should feel hard and room temperature, not cool to the touch. If they feel cold, they still have moisture inside.
Sticky Situation?
If the clay sticks to your work surface or cutter, lightly dust the surface and your tools with a bit of cornstarch or baby powder before rolling.
Step 4: Installation
-
Prepare the adhesive:
Cut small squares of double-sided mounting tape or peel off adhesive glue dots. Ensure the adhesive is strong enough to hold text but safe for your wall paint. -
Apply to bats:
Stick the adhesive to the center of the back of each bat body. Avoid putting tape on the wing tips if you bent them, as they won’t touch the wall anyway. -
Plan the flight path:
Start applying them to your wall. Arrange them in a diagonal stream or a scattered cloud formation to mimic a swarm flying upward. -
Secure them:
Press the center of each bat firmly against the wall for a few seconds to ensure a secure bond.
Step back and admire your swarm of bats as they take over your wall with spooky style


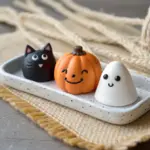
Cute Black Cat Halloween Minis
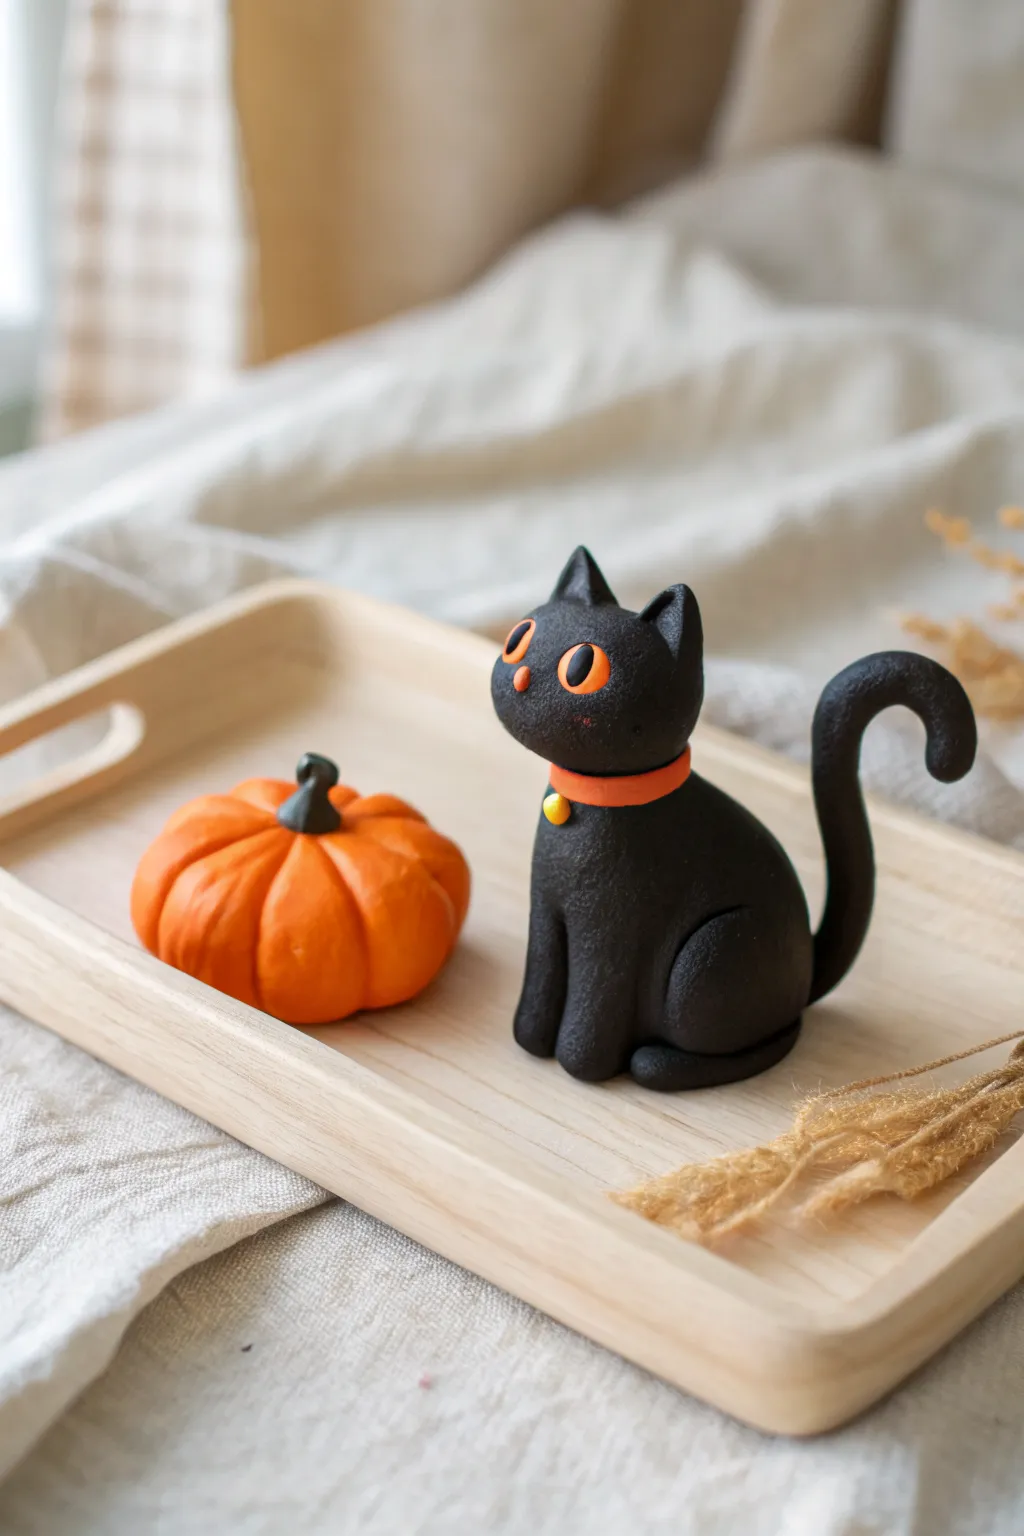
This adorable clay duo features a wide-eyed black cat and its pint-sized pumpkin companion, perfect for adding a touch of whimsy to your Halloween decor. The textured, matte finish gives the figures a charming, handcrafted feel that sits beautifully on any mantle or display tray.
How-To Guide
Materials
- Black polymer or air-dry clay
- Orange polymer or air-dry clay
- Green or brown clay (for stems)
- Yellow clay (for the bell)
- Texturing tool (old toothbrush or stiffness stippling brush)
- Small ball tool
- Needle tool or toothpick
- Basic sculpting tools
- Matte varnish (optional)
Step 1: Sculpting the Cat’s Body
-
Shape the torso:
Begin with a golf-ball-sized piece of black clay. Roll it into a smooth teardrop shape, flattening the bottom slightly so it sits securely on your work surface. -
Form the hind legs:
Roll two smaller balls of black clay. Press them gently against the sides of the teardrop body near the bottom to create the haunches. -
Blend the seams:
Using a smoothing tool or your finger, carefully blend the clay of the haunches into the main body so they look like one seamless piece. -
Add front paws:
Score two vertical lines into the front of the chest to suggest straight front legs, or add two thin logs of clay to build them out for more dimension. -
Create the signature texture:
Before assembling the head, gently tap the entire surface of the body with a stiff toothbrush or a texturing sponge. This creates that lovely matte, fuzzy cast-iron look seen in the photo.
Fixing Cracks
If your clay cracks while drying or baking, mix a tiny bit of fresh clay with water (or liquid clay for polymer) to make a paste. Fill the crack and smooth it over.
Step 2: Creating the Head & Tail
-
Shape the head:
Roll a slightly smaller ball for the head. Pinch the top gently to suggest ear locations, but keep the overall shape round and friendly. -
Add ears:
Form two small triangles of black clay. Attach them firmly to the top of the head, blending the back seams smooth. -
Attach the head:
Insert a small piece of toothpick or wire into the neck area of the body for support, then press the head down onto it. I find this creates a much stronger bond than clay alone. -
Texture the head:
Continue your stippling texture over the head and ears, being careful not to distort the shape. -
Form the tail:
Roll a snake of black clay. Curl it into a distinct ‘S’ or question mark shape and attach it to the back of the body, curving it upward playfully.
Step 3: Adding Details & Accessories
-
Make the eyes:
Roll two tiny balls of orange clay and flatten them into ovals. Press them onto the face. Add tiny vertical black slits for pupils using a needle tool or a scrap of black clay. -
Create the collar:
Roll a thin strip of orange clay. Wrap it around the neck where the head meets the body and press it flat. -
Add the bell:
Roll a tiny ball of yellow clay. Using your needle tool, poke a small hole in the center to mimic a bell and attach it to the front of the orange collar. -
Sculpt the pumpkin:
Take a walnut-sized ball of orange clay. Press it down slightly to flatten it into a pumpkin shape. -
Carve the ribs:
Use a modeling tool or the side of a toothpick to press vertical grooves all around the orange ball, creating the classic pumpkin ridges. -
Add the stem:
Form a small cone from black, dark green, or brown clay. Curve the tip slightly and press it into the center indentation of your pumpkin. -
Final finish:
If using polymer clay, bake according to package directions. If using air-dry clay, allow 24-48 hours to dry completely before handling.
Glow Up
Make the eyes glow in the dark! Use glow-in-the-dark clay for the eyes, or paint over the finished orange eyes with a phosphorescent medium for extra spookiness.
Now you have a charming little Halloween mascot to guard your desk or bookshelf this season

The Complete Guide to Pottery Troubleshooting
Uncover the most common ceramic mistakes—from cracking clay to failed glazes—and learn how to fix them fast.
Witch Hat Toppers and Charms
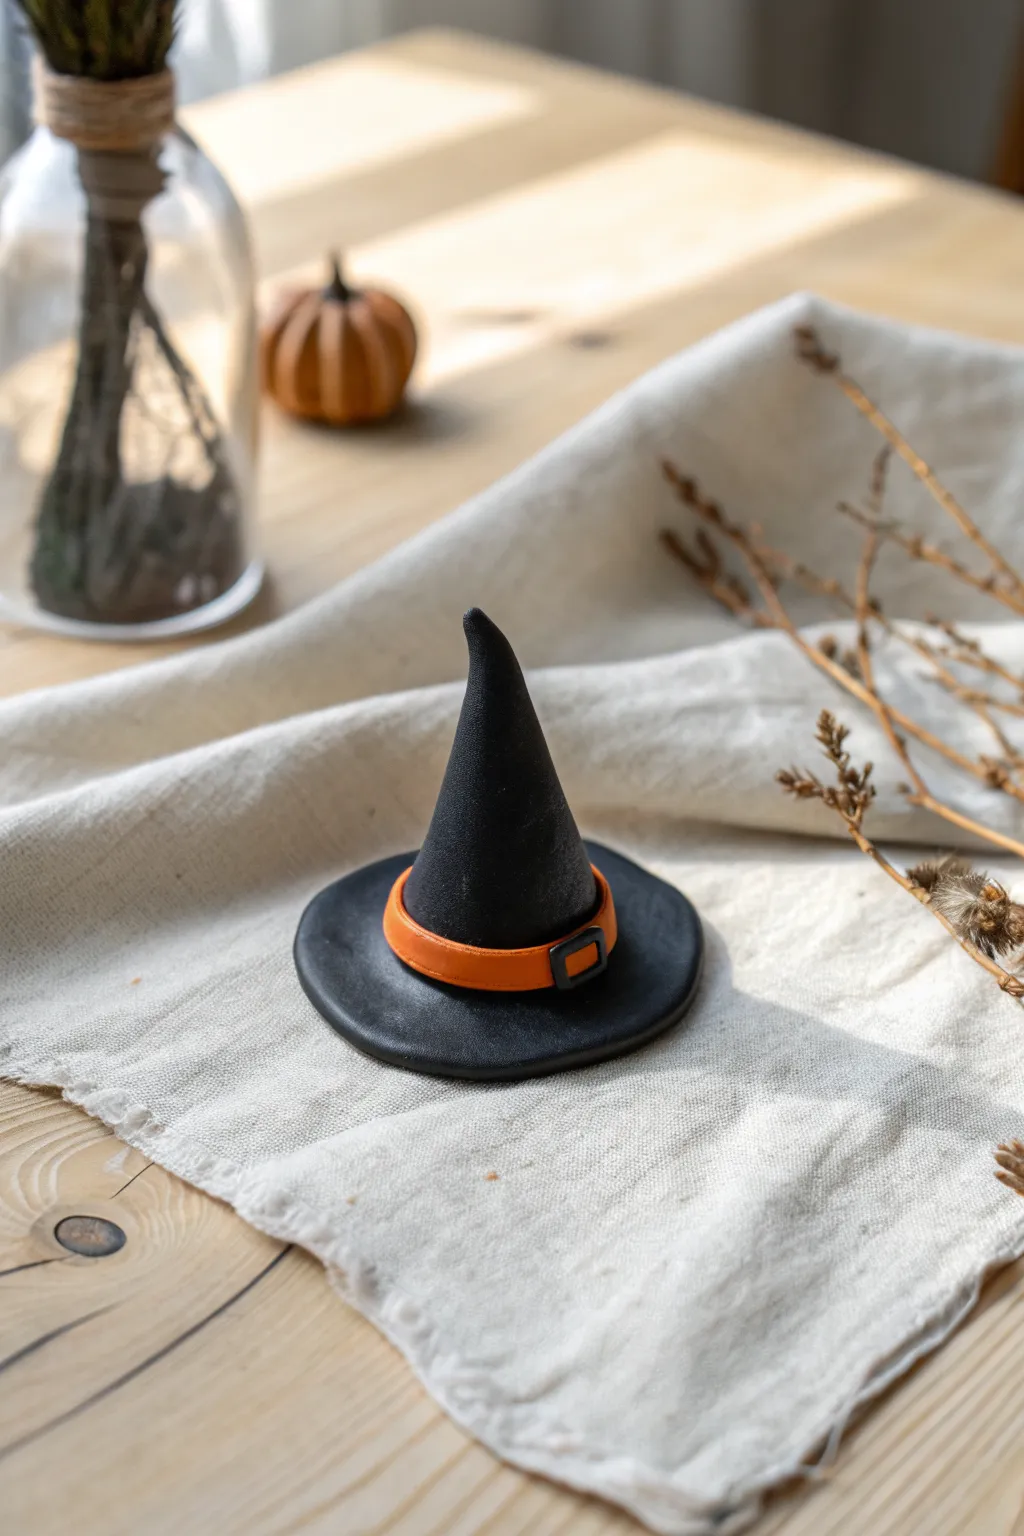
This tiny black witch hat makes a perfect, spooky-cute topper for cupcakes or a charming trinket for your Halloween décor. Its matte black finish and vibrant orange belt buckle create a classic, unmistakable silhouette.
Step-by-Step Tutorial
Materials
- Black polymer clay
- Orange polymer clay
- Basic clay sculpting tools (or a toothpick)
- Small rolling pin
- Craft knife or clay blade
- Baking sheet
- Parchment paper
- Oven (for curing)
Step 1: Forming the Base
-
Prepare the workspace:
Begin by cleaning your work surface thoroughly. Dust shows up easily on black clay, so wiping down your mat and washing your hands is a crucial first step. -
Condition the black clay:
Take a chunk of black polymer clay and knead it in your hands until it becomes soft, warm, and pliable. This prevents cracking later on. -
Create the brim ball:
Pinch off a piece of the conditioned black clay about the size of a large marble. Roll it between your palms to create a smooth, crack-free sphere. -
Flatten the brim:
Place the ball on your work surface and gently press it down with your thumb. Use a small rolling pin to flatten it further into a uniform circle, roughly 1/8 inch thick. -
Smooth the edges:
Inspect the edges of your flattened circle. If they are rough, gently tap and smooth them with your finger to create a neat, round disc.
Step 2: Sculpting the Cone
-
Form the cone shape:
Condition a second piece of black clay, slightly smaller than the amount used for the brim. Roll it into a ball first, then roll one side against your palm to taper it into a cone shape. -
Adjust the height:
Compare the cone to your brim. You wan the cone to be tall enough to look witchy but stable. Gently pull the tip upwards to elongate it if necessary. -
Add a characteristic curve:
Witch hats are rarely perfectly straight. I like to give the very tip a tiny nude to the side, creating a slightly crooked, whimsical character. -
Attach to the brim:
Place the cone in the center of your flat black disc. Press down firmly but gently to adhere the two pieces. You can drag a tiny bit of clay from the bottom of the cone onto the brim with a tool to blend the seam slightly seamlessly.
Keep it Clean
Black clay stains everything! Use baby wipes or hand sanitizer between colors to ensure your orange band stays bright.
Step 3: Adding the Details
-
Prepare the orange clay:
Clean your hands thoroughly to avoid getting black smudges on the orange clay. Condition a small amount of orange clay until soft. -
Roll the hat band:
Roll the orange clay into a very thin snake or long log. Use your rolling pin to flatten this snake into a thin, ribbon-like strip. -
Trim the band:
Use your craft knife to cut a straight, clean strip from the flattened orange clay. It should be wide enough to look like a belt but proportional to the hat. -
Attach the band:
Wrap the orange strip around the base of the cone where it meets the brim. Trim any excess where the ends meet and gently press the seam together at the back. -
Create the buckle:
Roll a extremely thin snake of black clay. Cut four tiny segments to form a small square or rectangle shape. -
Place the buckle:
Carefully arrange the black clay segments onto the front center of the orange band to look like a buckle. Press them gently so they stick without squishing the shape.
Floppy Hat Tip
If the cone tip keeps drooping too much before baking, insert a small piece of toothpick inside the cone for internal structure.
Step 4: Finishing Up
-
Check for fingerprints:
Before baking, give your hat one last inspection. If you see fingerprints, lightly brush them away with a tiny drop of baby oil or a soft brush. -
Bake the project:
Preheat your oven according to the manufacturer’s instructions on your specific package of clay. Place the hat on a parchment-lined baking sheet. -
Cool down:
Once the baking time is up, remove the tray and let the clay cool completely before handling. It creates a durable finish ready for display.
Now you have a bewitching little accessory ready to add magic to your seasonal crafts
Frankenstein-Inspired Mini Heads
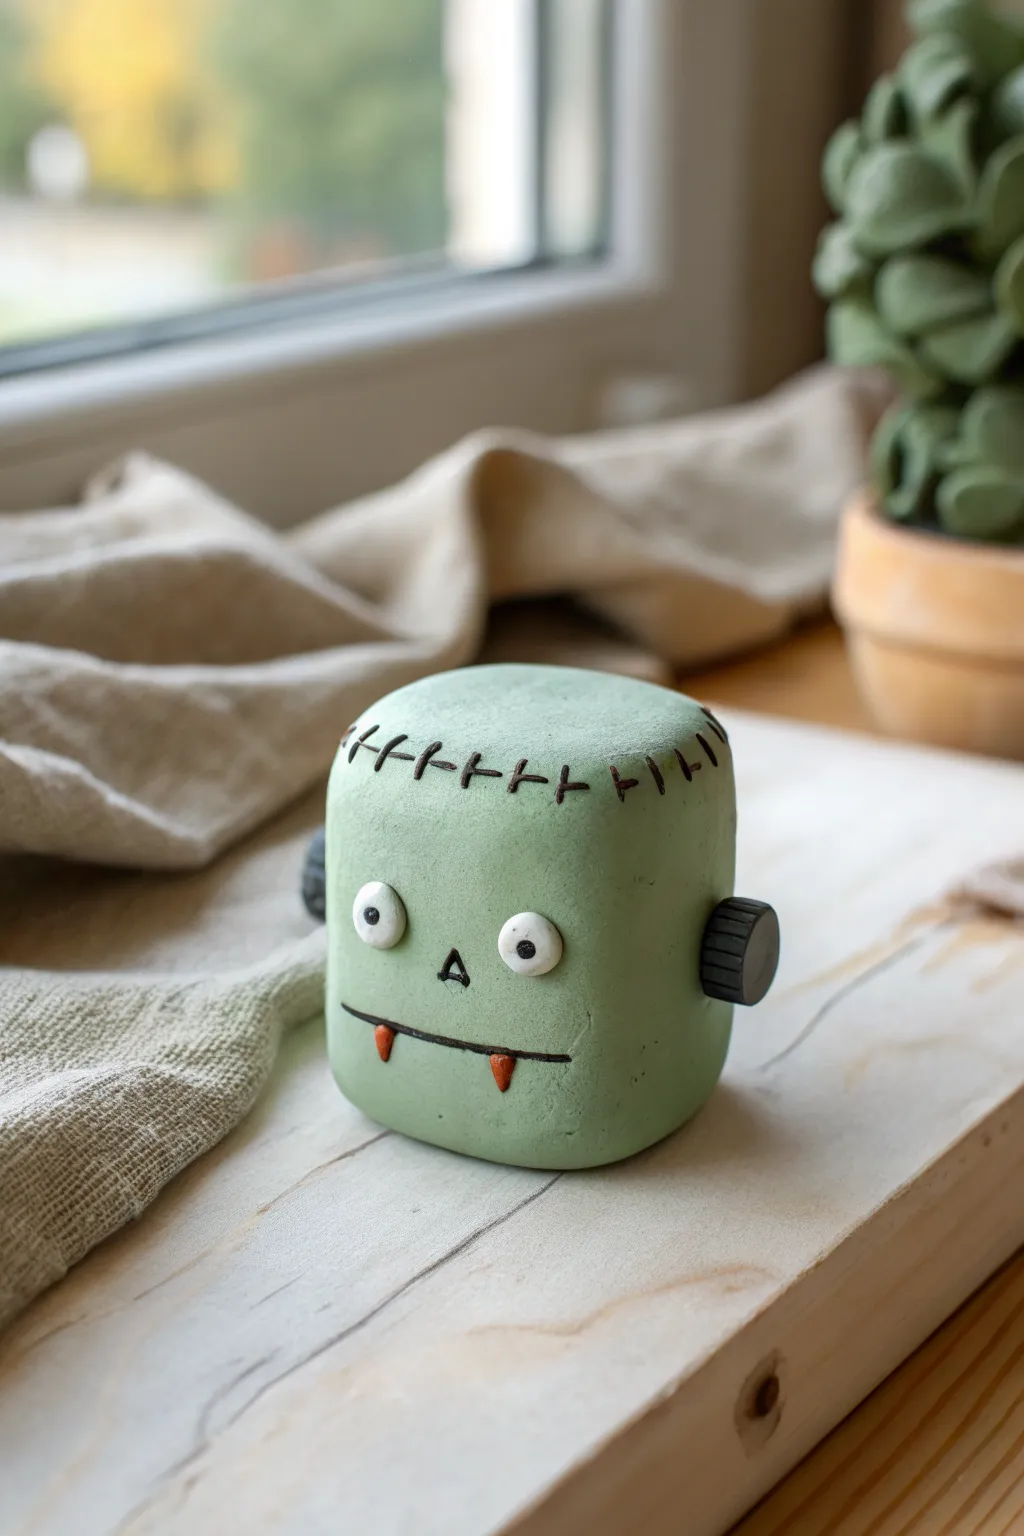
This chunky, friendly little monster head is a perfect beginner project that captures the classic Frankenstein look with minimal fuss. With its squarish shape, stitched forehead, and lovable bolted neck, it makes for an adorable Halloween desk companion.
Detailed Instructions
Materials
- Light green polymer clay or air-dry clay
- Black polymer clay
- White polymer clay
- Orange polymer clay
- Clay sculpting tools (needle tool and bladed tool)
- Small rolling pin (optional)
- Baking sheet and foil (if using polymer clay)
Step 1: Shaping the Head
-
Form the base:
Start with a generous ball of light green clay, about the size of a golf ball or a large plum. -
Square it off:
Gently press the ball onto your work surface to flatten the bottom so it stands independently. Then, flatten the top slightly to begin creating a cube-like shape. -
Refine the sides:
Use your palms or a flat acrylic block to gently press against the sides, front, and back. You want a rounded cube shape—distinct corners but soft, not sharp, edges. -
Smooth the surface:
Rub your finger lightly over the clay to remove any fingerprints or cracks. The smoother the green base, the deeper the stitched details will look later.
Keep it Clean
Keep baby wipes handy. Wiping your hands between handling black and green clay prevents dark smudges from ruining that nice monster skin tone.
Step 2: Adding Facial Features
-
Create the eyes:
Roll two small balls of white clay. Flatten them into discs and press them onto the face, spacing them apart slightly for a goofy look. -
Add pupils:
Roll tiny specks of black clay and press them into the center of the white discs. I like to press these in firmly so they sit flush with the white. -
Make the nose:
Take a very small piece of black clay and roll it into a tiny triangle. Press this into the center of the face, just below the eyes. -
Carve the mouth:
Using a needle tool or a thin blade, gently impress a straight, horizontal line across the lower face for the mouth. -
Shape the fangs:
Form two tiny cones from orange clay. Press them onto the mouth line pointing downward, one on each side, to act as cute little teeth.
Step 3: Stitching and Bolts
-
Mark the hairline:
With a thin tool, lightly score a curved line across the very top edge of the forehead where you want the stitches to go. -
Create the main stitch line:
Roll an extremely thin snake of black clay. Lay it into the scored line across the forehead, pressing specifically to make it stick. -
Add cross-stitches:
Roll more tiny black snakes and cut them into short segments. Lay these perpendicularly across the main line to create the classic sewn-on look. -
Form the bolts:
Create two small cylinders of black clay. They should be thick enough to look like heavy hardware. -
Detail the bolts:
Use a knife tool or blade to gently press ridges around the circumference of the black cylinders to give them a screw-thread texture. -
Attach the hardware:
Press one bolt firmly into each side of the green head, roughly at ear height. If the clay is dry, a dab of liquid clay or water helps adhesion.
Glow Up
Swap the standard green clay for a glow-in-the-dark polymer clay. Your monster’s head will hauntingly illuminate once the lights go out.
Step 4: Finishing
-
Final check:
Look over your monster to ensure all attached pieces are secure. Smooth out any accidental indents. -
Cure or dry:
If using polymer clay, bake according to the package instructions (usually 275°F/135°C for 15-30 minutes). If using air-dry clay, leave it in a dry spot for 24-48 hours.
Once cooled or dried, your little monster is ready to spook up your shelf


What Really Happens Inside the Kiln
Learn how time and temperature work together inside the kiln to transform clay into durable ceramic.
Friendly Mummy Wrap Figures
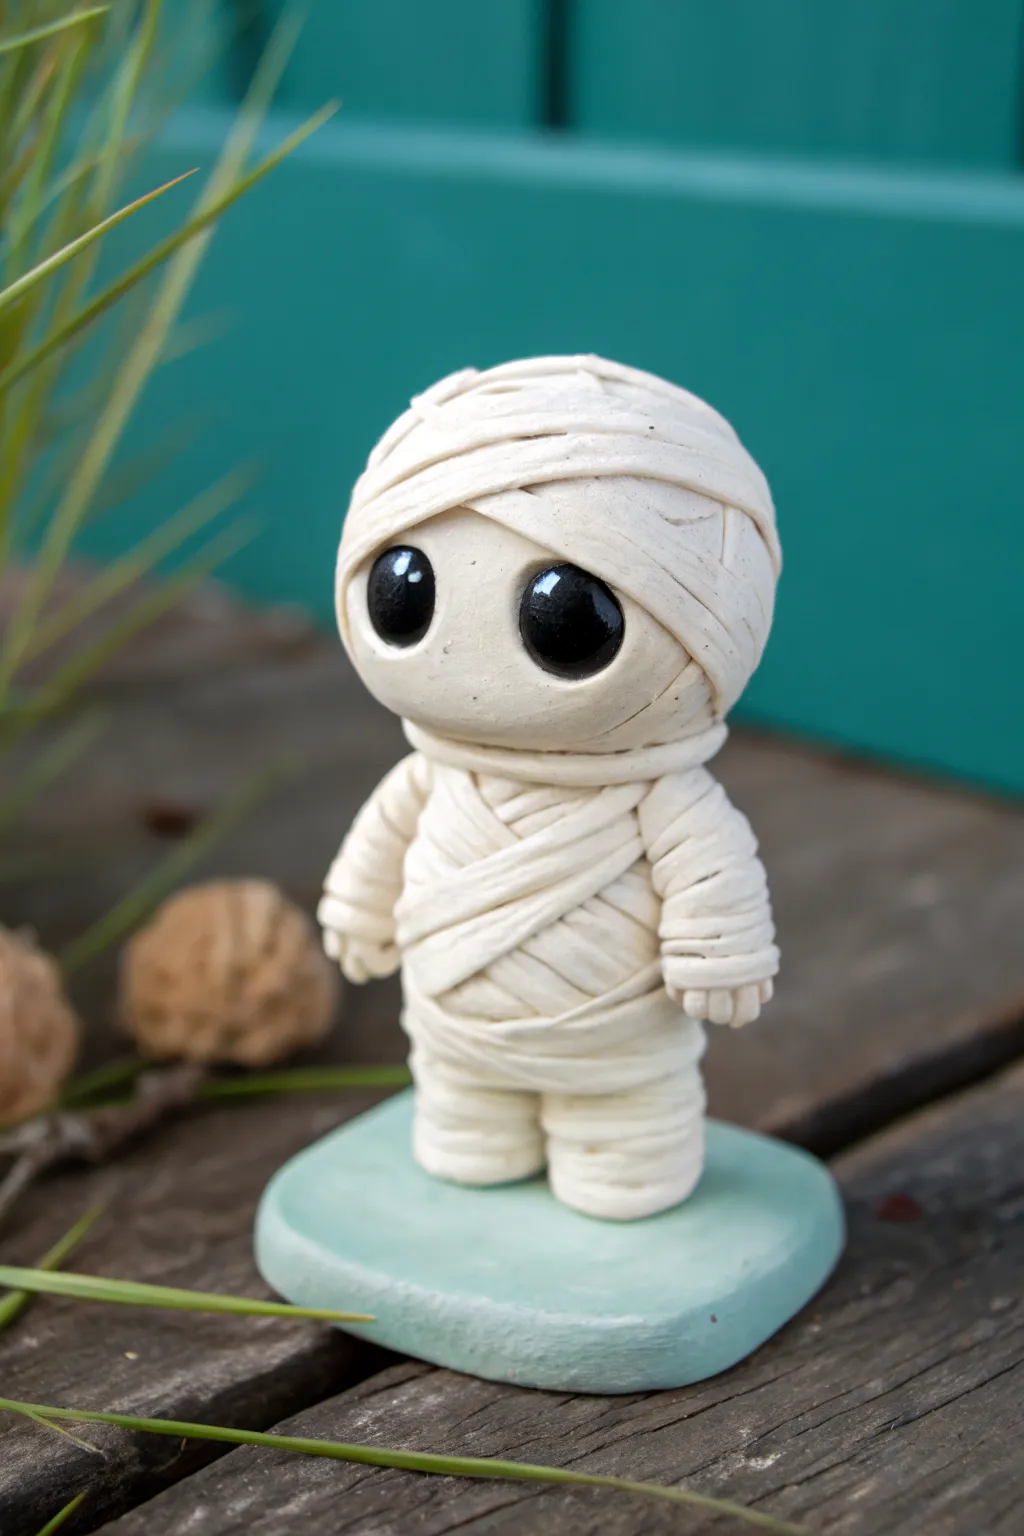
This adorable mummy figure ditches the spooky vibes for pure charm, featuring big glossy eyes and textured wrappings. It stands on a simple teal base, making it a perfect little guardian for your desk or Halloween mantle display.
Step-by-Step Guide
Materials
- White polymer clay (or air-dry clay)
- Black polymer clay (small amount)
- Teal or light blue clay (for base)
- Gloss glaze or UV resin
- Sculpting tools (needle tool, flat modeling tool)
- Rolling pin or clay pasta machine
- Aluminum foil (optional, for armature)
- Toothpick or small wire (for internal stability)
Step 1: Forming the Base Structure
-
Create the core shapes:
Start by conditioning your white clay until it is soft and pliable. Roll a large ball for the head—slightly flattened into an oval—and a smaller, somewhat rectangular log shape for the body. -
Connect head and body:
Insert a toothpick or a small piece of wire halfway into the body piece. Push the head onto the exposed wire to join them securely. I like to smooth the clay at the neck seam slightly so they bond well. -
Shape the limbs:
Roll two small sausages for the arms and two shorter, thicker stumps for the legs. Attach the legs to the bottom of the body and the arms to the sides, blending the seams so they stick. -
Prepare the eyes:
Before adding wrappings, use a ball tool or your thumb to press two distinct indentations into the face where the eyes will go. This helps them sit naturally inside the bandages later.
Clean Clay Pro-Tip
White clay picks up everything! Wipe your hands and work surface with a baby wipe or alcohol before starting, and keep a scrap piece of ‘garbage clay’ nearby to roll in your hands to pick up dust.
Step 2: Applying the Bandages
-
Create clay strips:
Roll out a sheet of white clay very thinly. Use a craft knife or a pizza cutter to slice long, narrow strips. These should be rough and uneven widths to look like ancient cloth. -
Wrap the legs:
Begin at the bottom. Take a strip and wind it around one leg, overlapping the clay slightly as you move up. Repeat for the second leg. -
Wrap the torso:
Continue wrapping upward onto the body. Create a crisscross pattern across the chest area to add visual interest and texture, rather than just simple horizontal lines. -
Wrap the arms:
Wrap each arm individually. Leave the very tips of the arms exposed just slightly to suggest hands, creating small indentations with a needle tool to mimic fingers. -
Wrap the head:
Apply strips around the head, being careful to leave the eye sockets open. Drape layers diagonally across the forehead and chin, building up a rounded, wrapped look. -
Add surface texture:
Use a needle tool or a stiff brush to gently scratch faint lines into the bandages. This mimics the weave of fabric so the clay doesn’t look too smooth and plastic.
Step 3: Finishing Details
-
Insert the eyes:
Roll two balls of black clay that fit perfectly into the sockets you saved. Press them in gently so they bulge slightly outward. -
Make the base:
Condition the teal clay and form it into a soft, rounded square or rectangle shape, roughly half an inch thick. Press gently on the top to flatten it. -
Mount the figure:
Place your mummy onto the center of the teal base. Press firmly so the feet bond with the base, ensuring the figure stands upright without tipping. -
Bake or dry:
Follow your specific clay manufacturer’s instructions for baking (if using polymer) or drying time (if using air-dry clay). Ensure the oven doesn’t spike in temperature to prevent scorching firmly white clay. -
Glaze the eyes:
Once the figure is completely cool (or dry), carefully apply a thick drop of gloss glaze or UV resin only to the black eyes. This gives them that lifelike, wet shine.
Level Up: Ancient Wash
Mix a tiny drop of brown acrylic paint with lots of water. Brush it over the baked mummy and quickly wipe it off with a paper towel. The dark paint will stay in the cracks, making it look ancient.
Now you have a charming little mummy companion that’s sweet enough to keep on display all year round
Tiny Skull Beads (Cute, Not Creepy)
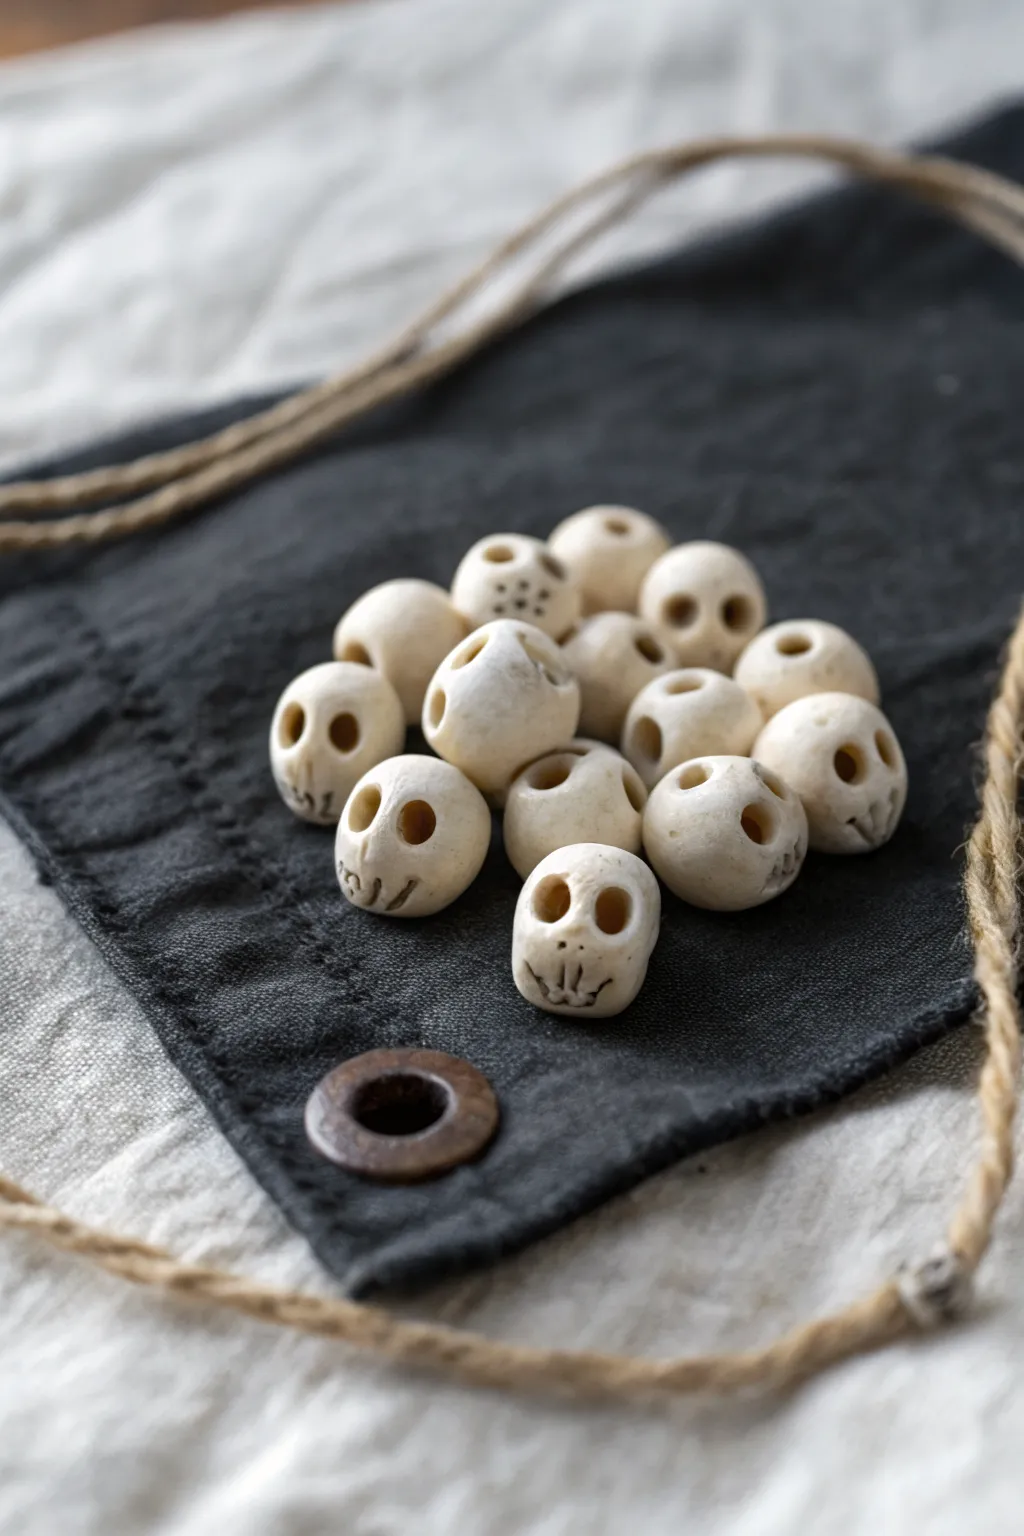
These miniature skull beads strike the perfect balance between spooky and sweet, featuring hollowed eyes and tiny stitched smiles. Their matte, bone-like finish makes them an ideal addition to rustic Halloween jewelry or primitive doll accessories.
Detailed Instructions
Materials
- White polymer clay (or air-dry clay)
- Small amount of translucent polymer clay (optional, for realism)
- Black acrylic paint
- Water
- Paper towels
- Ball stylus tool (small and medium sizes)
- Needle tool or toothpick
- Bead piercing pin or thick wire
- Baking sheet or drying rack
- Sandpaper (fine grit)
Step 1: Shaping the Beads
-
Prepare the clay mix:
Begin by conditioning your white clay until it is soft and pliable. For a more organic, bone-like appearance, I like to mix in a tiny bit of translucent clay or a speck of beige to take the bright white edge off. -
Roll spheres:
Pinch off small pieces of clay, roughly the size of a pea or a small marble. -
Smooth the surface:
Roll each piece between your palms to create a smooth, perfect sphere without any cracks. -
Indent the eyes:
Take a medium-sized ball stylus and press two deep indentations into the front of the sphere to form the eye sockets. Place them slightly lower than the center line for a ‘cute’ proportion. -
Refine the sockets:
Wiggle the tool slightly to widen the sockets, ensuring they are deep enough to hold the dark wash later. -
Mark the nose:
Using a smaller stylus or the tip of a toothpick, press two tiny dots between and slightly below the eyes to suggest nasal cavities. -
Create the mouth:
Use a needle tool to gently score a short horizontal line for the mouth just below the nose area. -
Stitch the grin:
Press small vertical ticks along the mouth line using the needle tool to create the classic ‘stitched’ skeleton teeth look. -
Pierce the bead hole:
Carefully insert your bead piercing pin or thick wire through the side of the skull. Rotate the pin gently as you push through to avoid squashing the face.
Step 2: Finishing and Antiquing
-
Cure the clay:
Bake the beads according to your polymer clay package instructions (usually 275°F/135°C for 15-30 minutes). If using air-dry clay, let them dry completely for 24 hours. -
Cool down:
Allow the beads to cool completely before handling them; they are fragile while hot. -
Prepare a wash:
Mix a small drop of black acrylic paint with plenty of water to create a thin, watery wash. -
Apply the wash:
Brush the black wash over the entire bead, ensuring it gets into the deep eye sockets, nose holes, and mouth lines. -
Wipe away excess:
Immediately wipe the surface of the bead with a damp paper towel. You want the paint to remain only in the recessed areas (eyes, mouth) and leave the high points white. -
Adjust the shading:
If the bead looks too clean, smudge a little of the dirty wash back onto the forehead or cheeks for an aged, excavated look. -
Dry the paint:
Let the paint dry fully. Because it’s a thin wash, this should only take a few minutes. -
Matte finish:
These look best with a matte texture, but if you want to protect the paint, apply a purely matte varnish. Avoid glossy sealers as they ruin the bone effect.
Bone Texture Trick
Before baking, lightly roll the finished skull over a piece of coarse sandpaper or denim fabric. This imitates the porous texture of real bone.
Distortion Disaster?
If the face squishes while making the bead hole, let the clay rest for 20 minutes to firm up (leaching out oils) before piercing.
String these little skulls onto hemp cord or jute to complete your primitive Halloween aesthetic

TRACK YOUR CERAMIC JOURNEY
Capture glaze tests, firing details, and creative progress—all in one simple printable. Make your projects easier to repeat and improve.
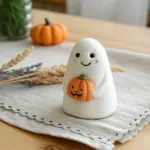
Pumpkin-and-Ghost Combos
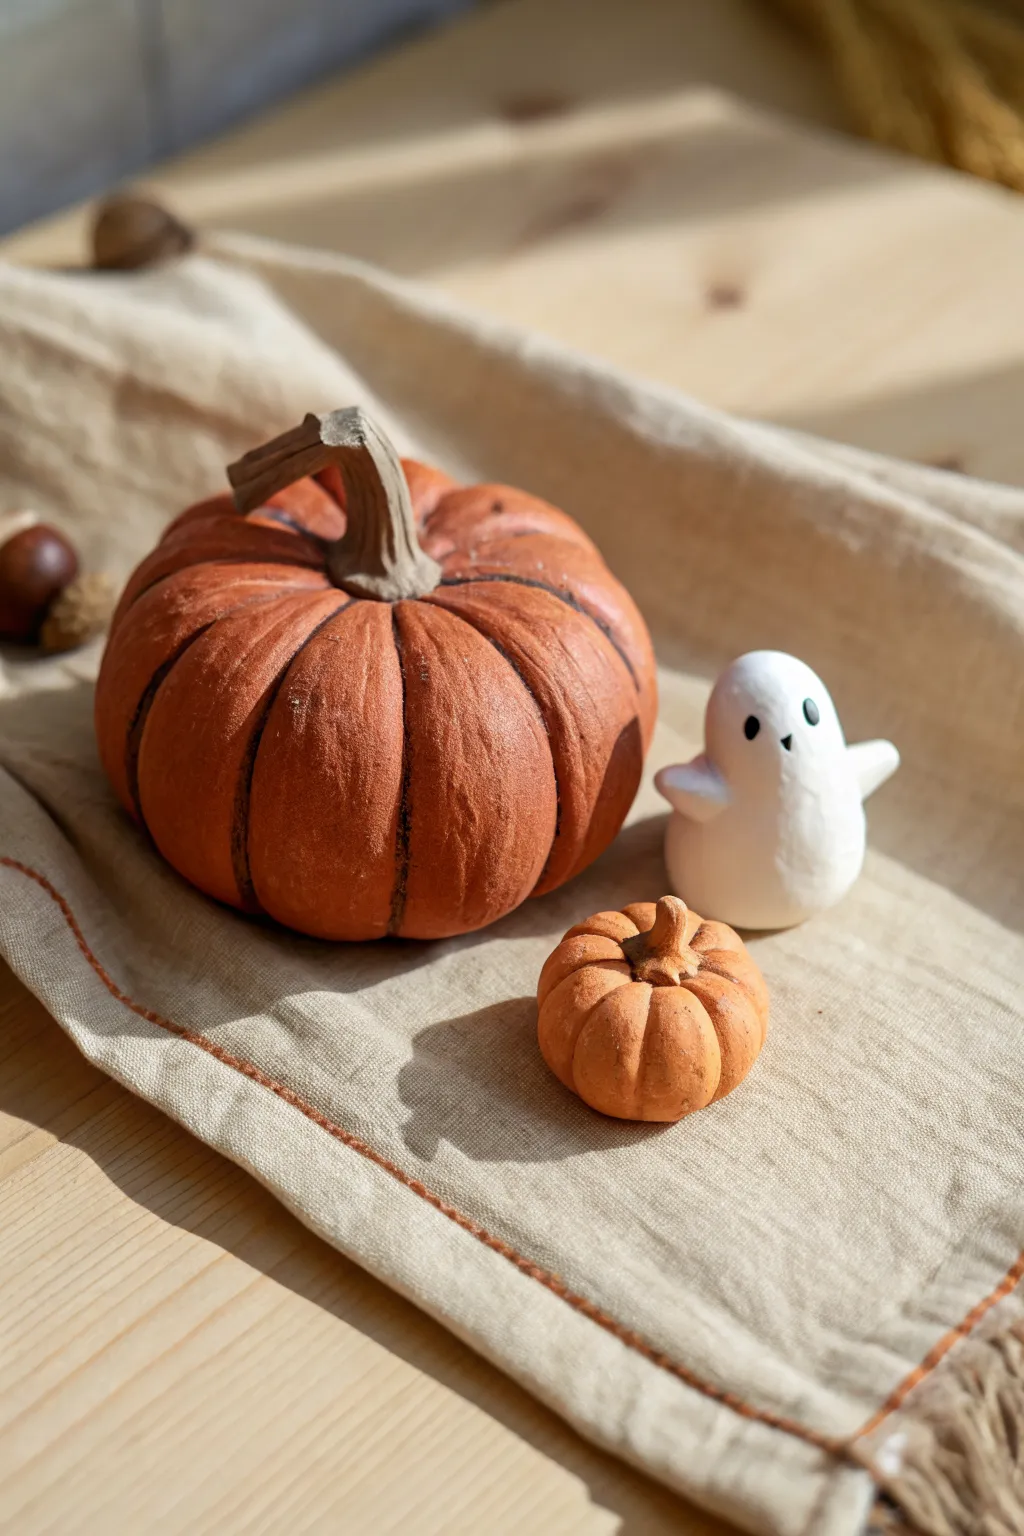
These charming clay figures bring a rustic, handmade touch to your Halloween decor, featuring a textured main pumpkin, a bite-sized mini pumpkin, and a smooth, friendly ghost. The mix of rough, realistic textures on the pumpkins contrasting with the sleek white specter creates a delightful autumnal scene.
How-To Guide
Materials
- Air-dry clay or polymer clay (terracotta/orange and white)
- Acrylic paints (if using white clay: burnt orange, dark brown, cream, black)
- Sculpting tools (needle tool, ball stylus, or a toothpick)
- Small paintbrush
- Aluminum foil (for the core of the large pumpkin)
- Matte varnish or sealant
- Textured sponge or old toothbrush
Step 1: Sculpting the Large Pumpkin
-
Form the core:
Crumple a piece of aluminum foil into a tight ball about the size of a tangerine. This saves clay and keeps the sculpture lightweight while preventing cracking during drying. -
Cover the core:
Roll out a sheet of terracotta or orange clay to about 1/4 inch thickness. Wrap it completely around your foil ball, smoothing out any seams with your fingers until you have a seamless sphere. -
Shape the segments:
Use the side of a needle tool or a dull knife to press vertical indentations from the top center to the bottom center. Create 6-8 deep grooves to define the pumpkin’s ribs, pressing firmly to give it a plump look. -
Add texture:
Take a textured sponge or an old toothbrush and gently dab the surface of the pumpkin. This stippling effect mimics the rough skin of a real squash and removes fingerprints. -
Create the stem:
Roll a small coil of brown or greenish-brown clay. Flatten one end slightly and press the other end onto the center top of the pumpkin. Twist the stem slightly for a natural, withered vine appearance.
Natural Textures
For realistic pumpkin skin, gently roll the unhardened clay ball over a piece of canvas fabric or denim before adding the creases.
Step 2: Crafting the Companions
-
Form the mini pumpkin:
Roll a small ball of orange clay about the size of a walnut. Flatten it slightly so it sits stable on your work surface. -
Detail the mini pumpkin:
Just like the larger version, use your needle tool to press deep grooves around the sides. Add a tiny, stubby stem to the top to finish it off. -
Shape the ghost’s body:
For the ghost, roll white clay into a smooth egg shape, slightly wider at the bottom for stability. I like to tap the base gently on the table to flatten it so it stands upright easily. -
Add ghostly arms:
Pinch two small nubs on the sides of the ghost’s body and gently pull them outward to create little arms. Smooth the connection points so they look like part of the sheet.
Step 3: Painting & Finishing Details
-
Dry the clay:
Allow your pieces to dry completely according to your clay package instructions. This usually takes 24-48 hours for air-dry clay. -
Enhance the pumpkin grooves:
Mix a small amount of dark brown or black paint with water to create a thin wash. Paint this into the deep creases of both pumpkins. -
Wipe back the wash:
Before the dark paint dries completely, use a damp paper towel or cloth to wipe the surface. The dark color will stay in the crevices, highlighting the segments, while the raised areas remain orange. -
Dry brush highlights:
Dip a dry brush into a tiny amount of lighter orange or cream paint. Lightly whisk it over the textured surface of the large pumpkin to catch the raised bumps and add dimension. -
Paint the ghost’s face:
Use a fine-tip brush or a small dotting tool dipped in black paint to add two oval eyes. Place them slightly wide apart for a cute expression, and add a tiny triangular mouth if desired. -
Seal the set:
Once all paint is visibly dry, apply a coat of matte varnish to protect your figures. A matte finish looks best here to maintain the rustic, earthen vibe of the pumpkins.
Spooky Variations
Make the ghost glow-in-the-dark by mixing phosphorescent powder into your white clay or using a specialty glow paint for the final coat.
Arranging your trio together on a linen cloth creates an instant vignette of fall charm for your shelf or mantel
Spooky Spider Rings and Minis
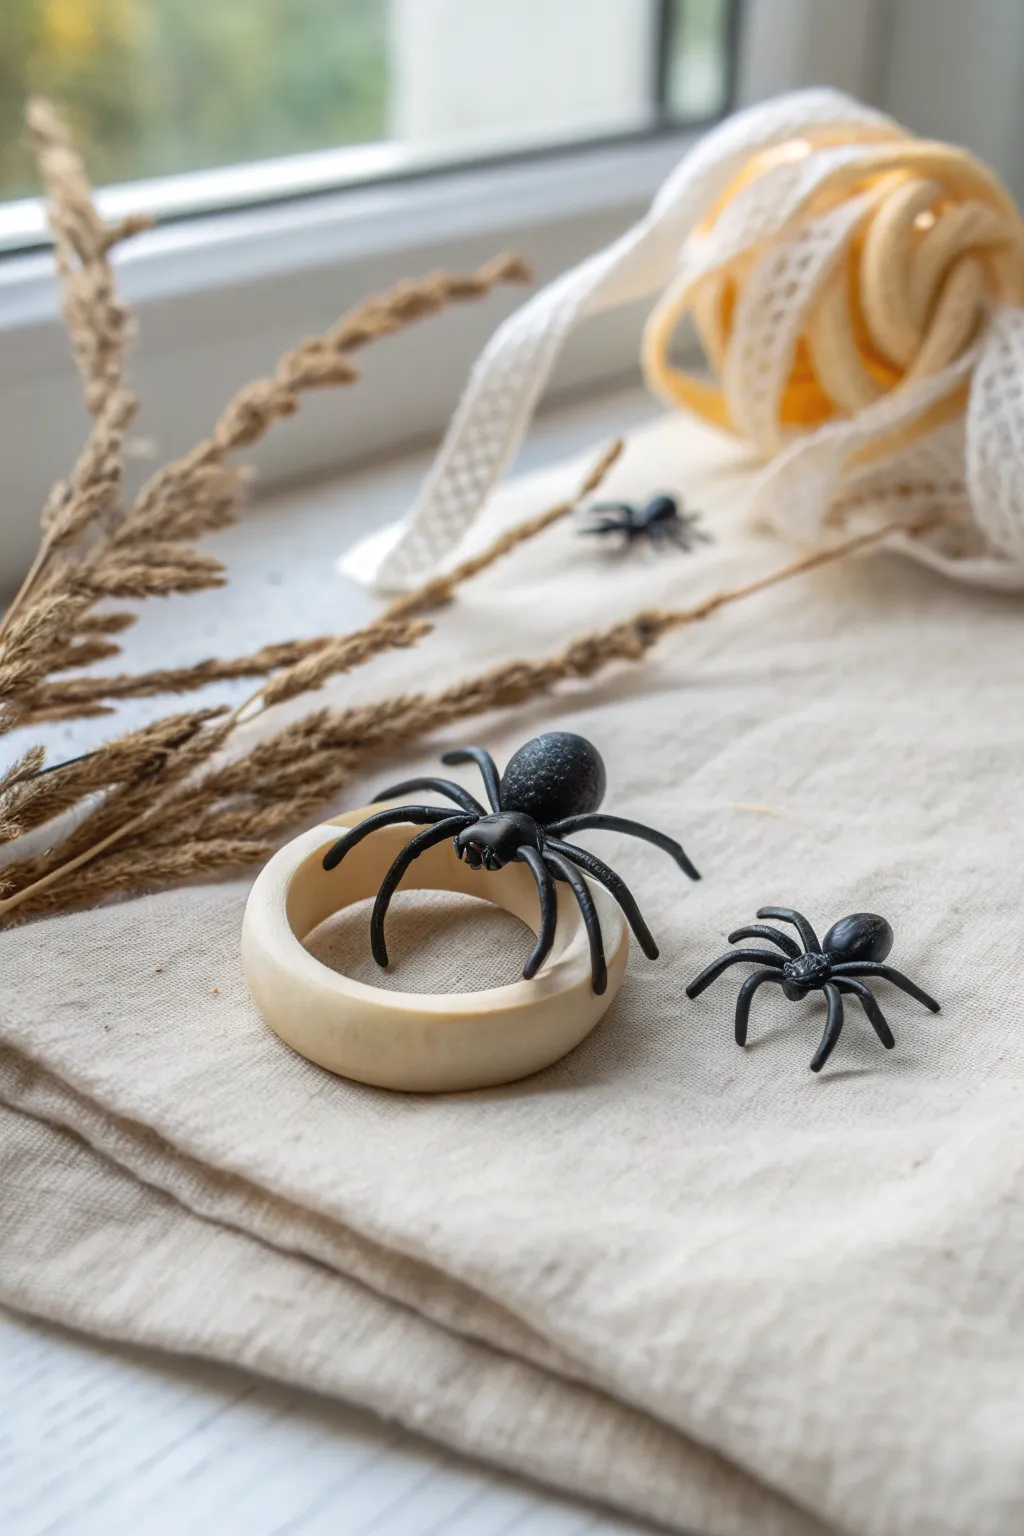
These delightfully spooky spider accessories are the perfect way to add a subtle gothic touch to your Halloween ensemble. Using dark modeling clay, you can craft intricate, realistic black widows perched on smooth, comfortable ring bands.
Step-by-Step
Materials
- Black polymer clay or air-dry clay
- Beige or white polymer/air-dry clay (for the ring base)
- Clay sculpting tools (needle tool, small ball stylus)
- Ring mandrel or a dowel sized to your finger
- Rolling pin
- Black acrylic paint (optional, for finish)
- Gloss or matte varnish
- Craft knife or scalpel
- Fine-grit sandpaper
- Strong craft glue (if baking/drying parts separately)
Step 1: Sculpting the Ring Base
-
Condition the light clay:
Begin by warming up a small chunk of your beige or white clay in your hands until it is soft, pliable, and free of cracks. This ensures the ring will be durable. -
Measure the band:
Roll the clay into a thick snake, then flatten it slightly with a rolling pin to create a band approximately 1cm wide and 3-4mm thick. -
Form the ring shape:
Wrap the flattened strip around your ring mandrel or dowel at the correct size mark. Carefully trim the excess clay with a craft knife. -
Seamless join:
Gently push the two cut ends together and smooth the seam with your finger or a clay tool until the join is invisible. I like to rotate it on the mandrel to ensure it stays circular. -
Smooth the edges:
Run a damp finger along the top and bottom edges of the band to soften any sharp angles, giving it a comfortable, pebble-smooth look like the one in the photo. -
Initial bake or dry:
For polymer clay, bake this base according to package instructions now so it’s a solid foundation. If using air-dry clay, let it firm up for a few hours.
Wire Reinforcement Tip
For stronger legs that won’t snap off, insert tiny pieces of sculpting wire into the legs before baking. This acts like a skeleton.
Step 2: Creating the Spider Body
-
Form the abdomen:
Take a piece of black clay about the size of a blueberry bean and roll it into a smooth, slightly oval ball. This will be the main body (abdomen) of the spider. -
Texture the abdomen:
Using a needle tool or a stiff brush, gently tap the surface of the black clay to give it a convincing, slightly pitted skin texture rather than leaving it perfectly smooth. -
Create the cephalothorax:
Roll a smaller ball of black clay, about half the size of the first, and press it firmly against the front of the abdomen to form the head and chest section. -
Attach to base:
If your ring base is already hard, use a dab of liquid clay or strong glue to mount the spider body onto the top of the ring. Press down gently to secure it.
Step 3: Legs and Details
-
Roll the legs:
Roll out a very thin snake of black clay. Cut this into eight equal segments, each about 1.5cm long. -
Shape the joints:
Bend each leg segment in the middle to create the ‘knee’ joint. Pinch the joint slightly to make it look articulated. -
Attach front legs:
Attach the first two pairs of legs to the cephalothorax, angling them forward. Use a needle tool to blend the clay of the leg into the body for a strong bond. -
Attach rear legs:
Attach the remaining two pairs of legs, angling them backward towards the abdomen. Keep the feet lifted slightly or resting on the ring band depending on the pose you want. -
Add miniatures:
To make the loose mini spiders shown in the scene, simply repeat the body and leg steps without the ring base, ensuring the legs support the body weight. -
Final cure:
Bake or dry the entire assembly according to your clay’s specific instructions. If baking, tent with foil to prevent the light ring base from scorching. -
Finishing touches:
Once cool and hard, sand any rough edges on the ring band. You can brush a matte varnish over the spider to give it a realistic, satin sheen.
Legs Won’t Stick?
If the legs keep falling off during assembly, use ‘Bake & Bond’ or liquid polymer clay as an adhesive before curing.
Slip on your spooky new accessory and enjoy the creepy elegance it brings to your outfit
Eyeball Charms With Glossy Finish
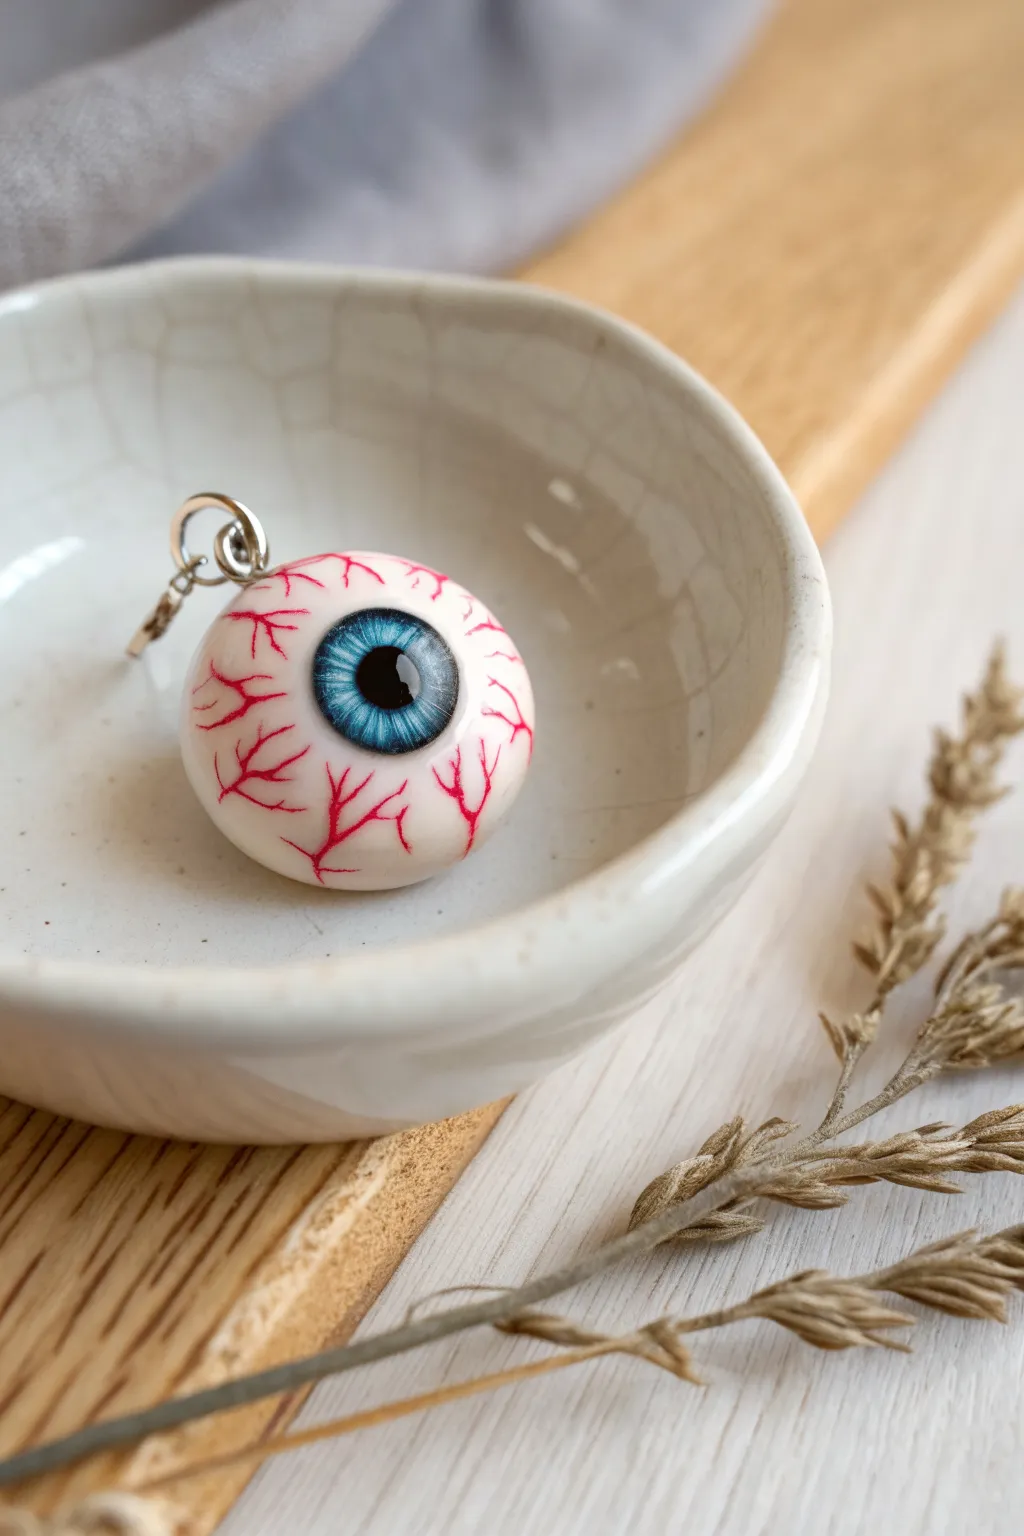
Capture the eerie beauty of Halloween with this strikingly realistic eyeball charm. Made from polymer clay and finished with a high-gloss resin, it features intricate red veining and a piercing blue iris that seems to stare right back at you.
How-To Guide
Materials
- White or translucent white polymer clay
- Light blue, dark blue, and black polymer clay
- Liquid polymer clay (translucent)
- Red acrylic paint
- Fine detail paintbrush (size 000)
- Small eye screw pin
- UV resin or high-gloss polyurethane varnish
- UV lamp (if using resin)
- Ball stylus tool or rounded sculpting tool
- Tissue blade or craft knife
- Oven for baking
Step 1: Sculpting the Base
-
Condition the white clay:
Start by conditioning your white polymer clay until it is soft and pliable. If you want a more organic, fleshy look, you can mix a tiny speck of translucent clay into the white. -
Form the sphere:
Roll the clay into a smooth ball, approximately 1 inch in diameter. Ensure there are no fingerprints or cracks; rolling it gently between your palms helps smooth these out. -
Flatten slightly:
Gently press the ball onto your work surface to create a slightly flattened bottom. This helps the charm sit nicely if used as a pendant, though it should still retain a mostly spherical shape. -
Create the iris socket:
Using a large ball stylus or the back of a rounded tool, press an indentation into the center of the sphere where the eye will be. This creates a seat for the colored iris.
Needle Tool Trick
Drag a needle tool through wet red paint to create ultra-thin, capillary veins that are too small for a paintbrush.
Step 2: Creating the Iris and Pupil
-
Mix the iris color:
Take a small amount of light blue clay. Flatten it into a very thin disk that fits perfectly inside the indentation you made earlier. -
Add depth:
Take an even smaller piece of darker blue clay and place it in the center of the light blue disk. Blend the edges outward slightly to create a natural gradient. -
Use the ‘cane’ technique (optional):
For extreme realism, create a tiny ‘bullseye’ cane with dark blue wrapped around light blue, then slice a thin wafer for the iris. Otherwise, simply layering the clay works well. -
Detail the iris texture:
Use a needle tool or sharp blade to scratch tiny radial lines moving from the center of the iris outward. This mimics the fibrous muscle texture of a real eye. -
Insert the pupil:
Roll a tiny speck of black clay into a ball, flatten it, and press it firmly into the absolute center of the blue iris. -
Add the corneal dome:
Place a drop of translucent liquid polymer clay over the iris and pupil to create a raised, glassy lens effect. Alternatively, shape a thin disk of solid translucent clay and blend the edges onto the white part.
Resin Dripping?
If UV resin drips off the side before curing, apply it in two thin coats rather than one thick gloppy layer.
Step 3: Hardware and Baking
-
Insert the attachment:
Screw a small eye pin into the top of the eyeball. If the clay distorts, gently reshape it with your fingers. -
Bake the piece:
Bake the charm according to your clay manufacturer’s instructions. Usually, this is around 275°F (130°C) for 15-20 minutes. I prefer to tent foil over the charm to prevent the white clay from scorching. -
Cool down:
Let the clay cool completely before moving to the painting stage. Painting on warm clay may cause the paint to dry too quickly or clump.
Step 4: Detailing and Glazing
-
Paint the veins:
Dip a fine detail brush into red acrylic paint. Wipe off most of the paint so the brush is nearly dry. Paint wiggly, branching lines starting from the back/sides of the eye and reaching toward the iris. -
Feather the edges:
The veins should be thicker at the base and taper off to almost nothing near the iris. Vary the pressure on your brush to get thin, organic lines. -
Let the paint dry:
Allow the acrylic paint to dry fully. This usually takes only a few minutes. -
Apply resin coating:
Coat the entire eyeball with a layer of UV resin. This is the secret to getting that wet, biological look shown in the photo. -
Spread evenly:
Use a toothpick to guide the resin to the edges, ensuring the eye pin is not clogged. The resin also magnifies the iris details beautifully. -
Cure the finish:
Place the charm under a UV lamp for 2-4 minutes until the surface is hard and non-tacky. If using polyurethane varnish, apply two coats and let dry overnight.
String this on a necklace or attach it to a keychain for a spooky accessory that watches your every move
Mini Potion Bottles With Halloween Labels
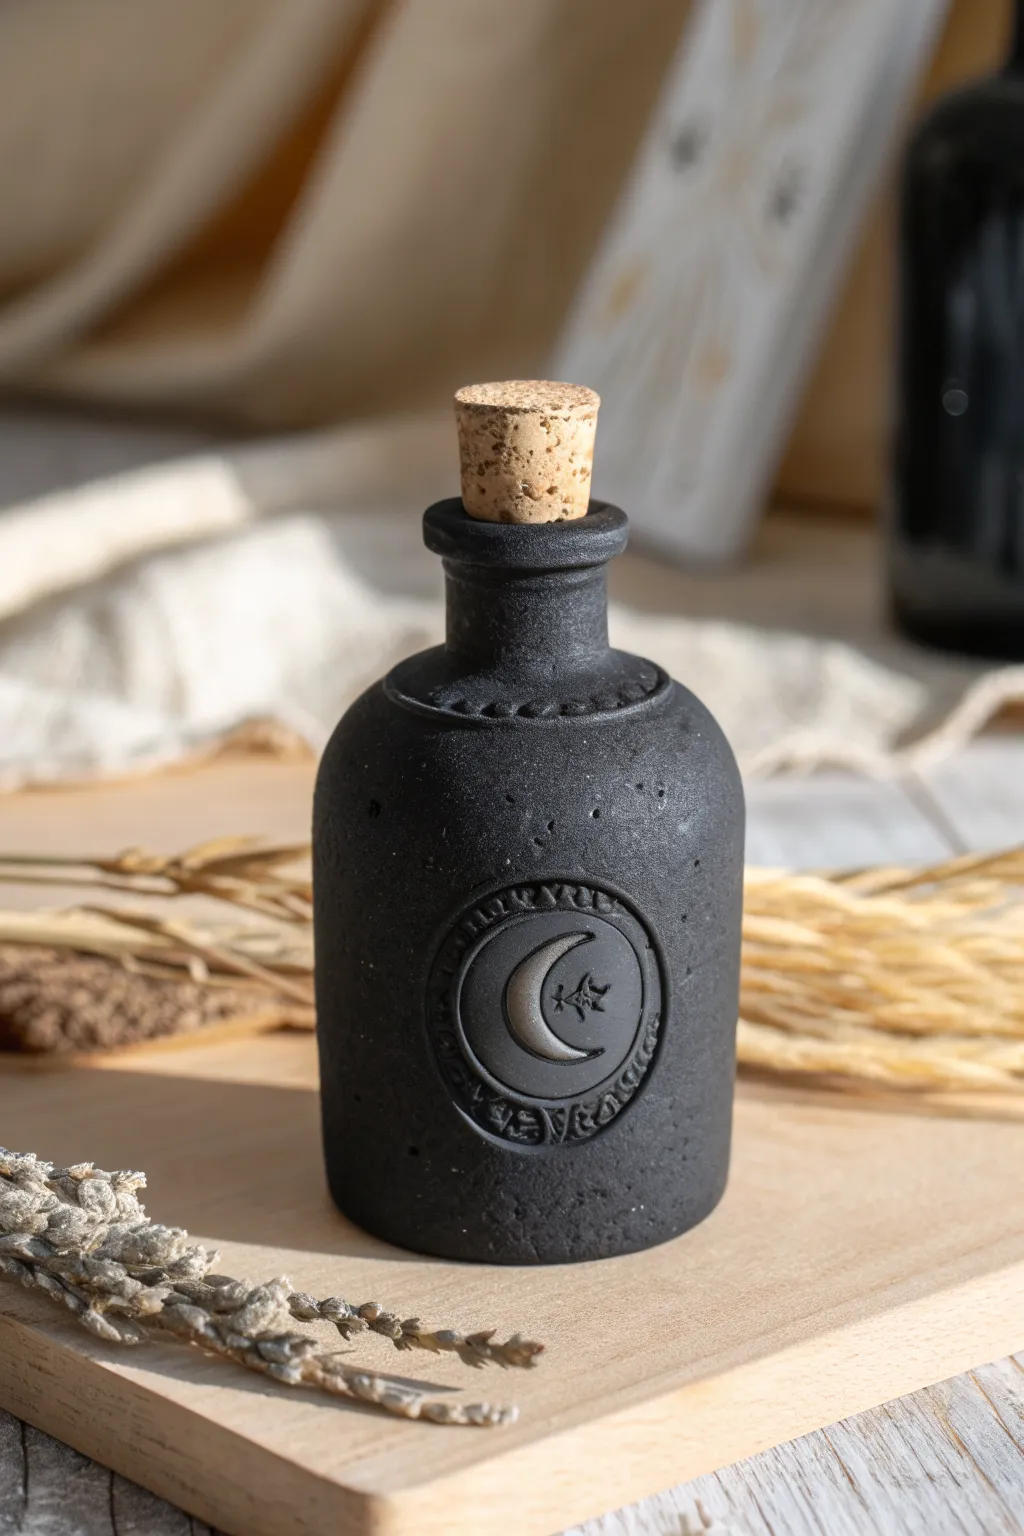
Transform a plain glass bottle into an ancient-looking apothecary vessel with this textured clay technique. The matte black finish and raised lunar emblem give it a mysterious, witchy vibe perfect for Halloween displays.
Step-by-Step Guide
Materials
- Small glass bottle with cork stopper
- Air-dry modeling clay (black or white)
- Rolling pin
- Clay sculpting tools (needle tool, small ball stylus)
- Circle cutters (two sizes)
- A smooth surface or craft mat
- Black acrylic paint (matte)
- Silver metallic wax or acrylic paint
- Fine grit sandpaper
- Mod Podge or craft glue
- Paintbrushes (flat shader and fine detail)
Step 1: Preparing the Base
-
Clean the glass:
Start by thoroughly cleaning your glass bottle with rubbing alcohol or soapy water to remove any oils. This ensures the clay hangs on tight. -
Roll the clay sheet:
Take a large chunk of air-dry clay and condition it in your hands until it is pliable. Roll it out into a flat, even sheet, roughly 3-4mm thick. -
Wrap the bottle:
Apply a thin layer of craft glue to the exterior of the glass bottle. Carefully wrap the sheet of clay around the bottle, pressing it firmly against the glass to remove air pockets. -
Trim and clear:
Use a craft knife or needle tool to trim the excess clay at the bottom and top. Ensure the opening of the bottle remains clear so the cork will still fit later. -
Smooth the seams:
Where the clay edges meet, use a little water on your finger to blend and smooth the seam until it disappears completely. The surface should look like one continuous piece.
Sticky Situation
Does the clay keep sliding off the glass? Wrap the glass in masking tape first. The texture of the tape gives the glue and clay something much better to grip onto.
Step 2: Sculpting the Emblem
-
Create the emblem base:
Roll out a fresh, slightly thinner piece of clay. Use a medium-sized circle cutter to stamp out a disc that fits comfortably on the front of your bottle. -
Form the rim:
Roll a very thin snake of clay. Lay this snake around the outer edge of your circular disc to create a raised rim. Blend the outside edge of the snake into the disc base for stability. -
Add runic details:
Using a needle tool or small stamp, gently press runic symbols or abstract patterns into the rim you just created. I like to keep these random to make it look like an ancient language. -
Shape the moon:
Cut a smaller circle from your clay sheet. Use that same cutter to take a ‘bite’ out of the circle, leaving you with a perfect crescent moon shape. Soften the sharp edges with your fingertip. -
Build the center piece:
Apply a dab of water or slip to the center of the main disc. Place your crescent moon there. Add a tiny star or burst shape next to it using a very small bit of clay. -
Attach to bottle:
Score the back of your finished emblem and the front of the clay-covered bottle. Add a little water and press the emblem firmly onto the bottle’s surface.
Cracked Clay?
If small cracks appear as the clay dries, mix a tiny bit of fresh clay with water to make a paste. Fill the cracks, smooth it out, and let it dry again before painting.
Step 3: Finishing Touches
-
Add neck detail:
Roll another thin snake of clay and wrap it around the neck of the bottle, right where it starts to curve. Use a ball stylus to press decorative dots around this ring. -
Create texture:
To mimic stone, take an old toothbrush or a ball of aluminum foil and gently tap it all over the clay surface. This gives it that pitted, weathered stone look. -
Dry completely:
Let the bottle sit undisturbed for at least 24-48 hours. Air-dry clay shrinks slightly as it dries, which will help it grip the glass tightly. -
Base coat painting:
Once fully dry, paint the entire bottle with matte black acrylic paint. You want a solid, opaque coat. Let this dry properly. -
Speckle effect:
Dilute a tiny drop of white or grey paint. Dip a toothbrush in it and flick the bristles to create a very subtle spray of specks over the black surface like a starry night sky. -
Highlight the moon:
Using a small detail brush, paint the crescent moon and the tiny star with silver metallic paint. Keep the edges crisp against the black background. -
Insert cork:
Finally, pop your cork stopper in the top to complete your mysterious potion bottle.
Place this dark vessel on your mantel piece and enjoy the spooky atmosphere it creates
Glow-Style Ghosts and Stars
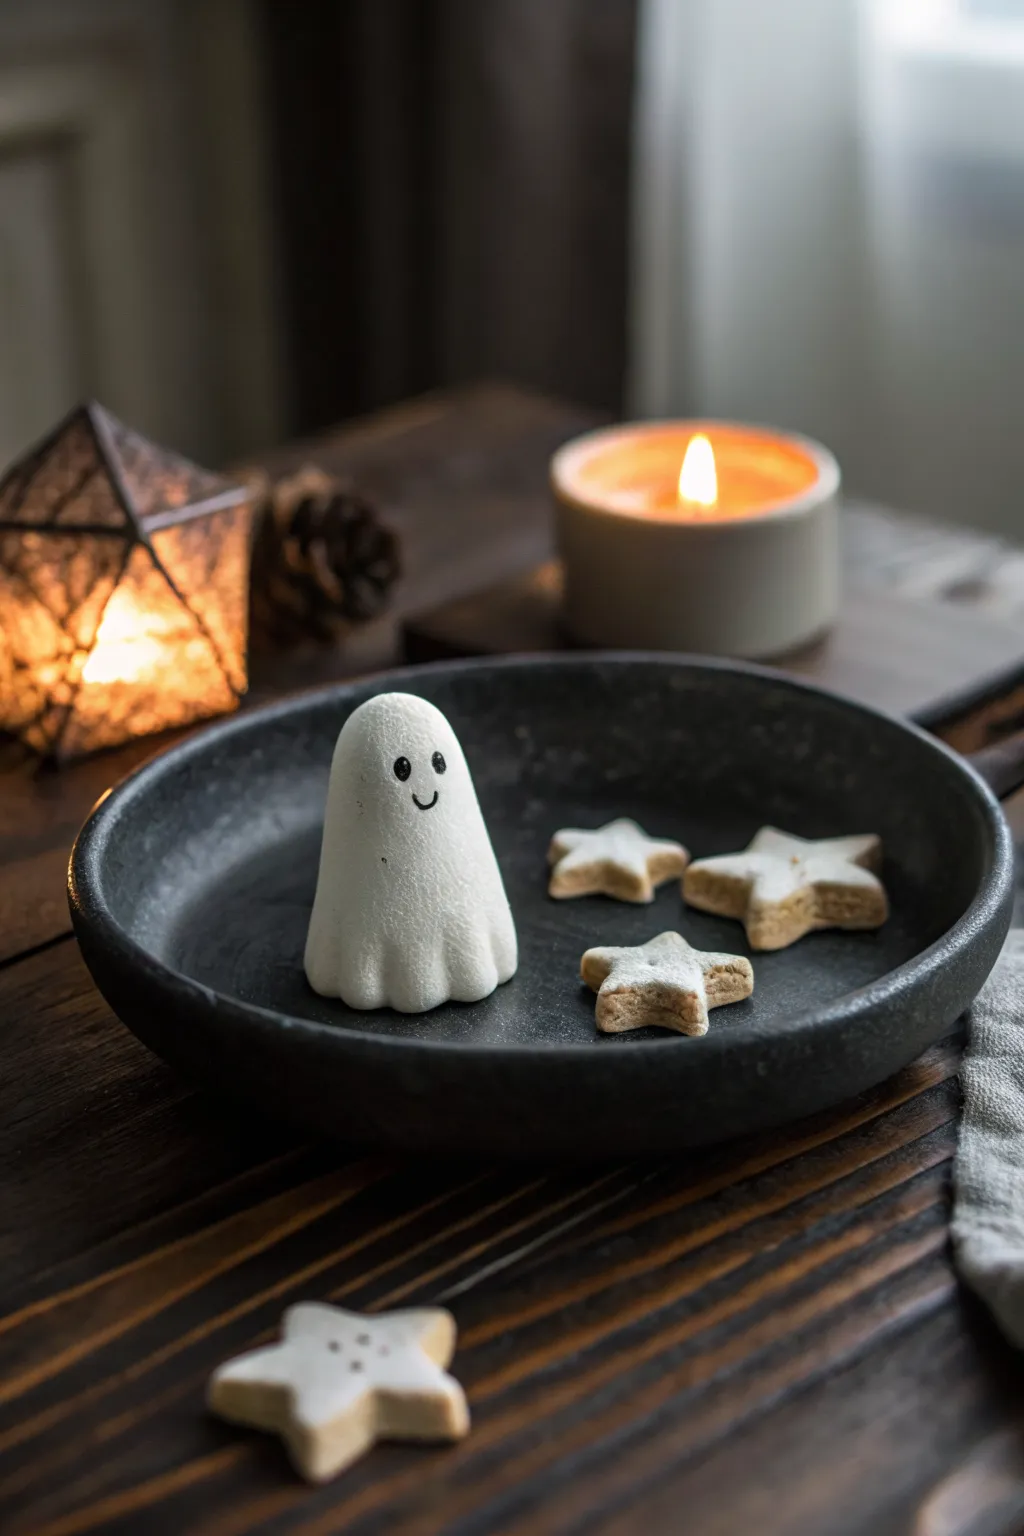
Create a hauntingly cute centerpiece with this simple modeling clay ghost and accompanying celestial stars. The smooth, matte finish gives the ghost a friendly presence, while the stars add a touch of magic to your Halloween decor.
How-To Guide
Materials
- White air-dry clay or polymer clay
- Light tan or beige polymer clay (for star bases)
- Black acrylic paint or fine-tip permanent marker
- Small round sculpting tool or toothpick
- Small star-shaped cookie cutter (approx. 1 inch)
- Rolling pin
- Parchment paper or silicone mat
- Fine-grit sandpaper (optional)
- Matte spray varnish (optional)
Step 1: Sculpting the Friendly Ghost
-
Prepare the base:
Start with a walnut-sized ball of white clay. Knead it well until it is soft and pliable to prevent cracking later. -
Form the cylinder:
Roll the ball into a smooth, thick cylinder, slightly tapering the top to create a rounded, dome-like head shape. -
Shape the body:
Stand the cylinder upright on your work surface. Gently press down on the top to flatten the base and ensure it stands straight without wobbling. -
Create the signature folds:
Using your thumb and forefinger, or a round tool handle, gently press indentations around the bottom edge of the ghost. -
Refine the wavy hem:
Pinch the clay between the indentations outwards slightly to exaggerate the ‘sheet’ folds. You want a ruffled, wavy look along the bottom rim. -
Smooth the surface:
Dip your finger in a tiny bit of water (for air-dry clay) or baby oil (for polymer) and smooth out any fingerprints or bumps on the ghost’s body.
Smoother Surfaces
Work on a piece of glass or a ceramic tile. These super-smooth surfaces prevent texture transfer to the bottom of your ghost, keeping the hem perfectly wavy and flat.
Step 2: Crafting the Celestial Stars
-
Roll the tan clay:
Taking your tan or beige clay, roll it out on parchment paper until it is about 1/4 inch thick. This mimics the ‘cookie’ base look. -
Cut the shapes:
Use your small star cutter to punch out three stars. If the edges are ragged, gently pat them smooth with your fingertip. -
Create the white layer:
Roll out a very thin layer of white clay, thinner than the tan base. -
Cut matching white stars:
Using the same cutter, punch out three white stars. -
Layer the stars:
Carefully place a white clay star directly on top of a tan clay star. Press gently so they adhere without squishing the shape. -
Texturize the top:
I like to gently pat the white top with a piece of sandpaper or a texture sponge to give it a sugary, frosted appearance.
Fixing Cracks
If you see tiny hairline cracks appearing while air-dry clay dries, mix a tiny bit of fresh clay with water to make a paste and fill them in immediately.
Step 3: Finishing Touches
-
Drying or baking:
If using air-dry clay, let the pieces sit for 24-48 hours. If using polymer clay, bake according to the package instructions (usually 275°F/135°C for 15-30 minutes). -
Cooling down:
Let all pieces cool completely before painting. Painting warm clay can make the paint bubble or streak. -
Painting the eyes:
Using a fine-tip brush and black paint, add two small oval dots for the eyes about a third of the way down the ghost’s head. -
Adding the smile:
Draw a tiny, thin ‘u’ shape directly between and slightly below the eyes for a sweet, minimal smile. -
Add star details:
Optional: For the star on the table, use a toothpick to poke three small holes in the center of the white layer for a decorative button look. -
Sealing the work:
Lightly mist the ghost with a matte varnish spray to protect the paint without making it shiny.
Arrange your little ghost in a dark bowl with the stars scattered around for a cozy autumn display
Haunted House Mini Facades
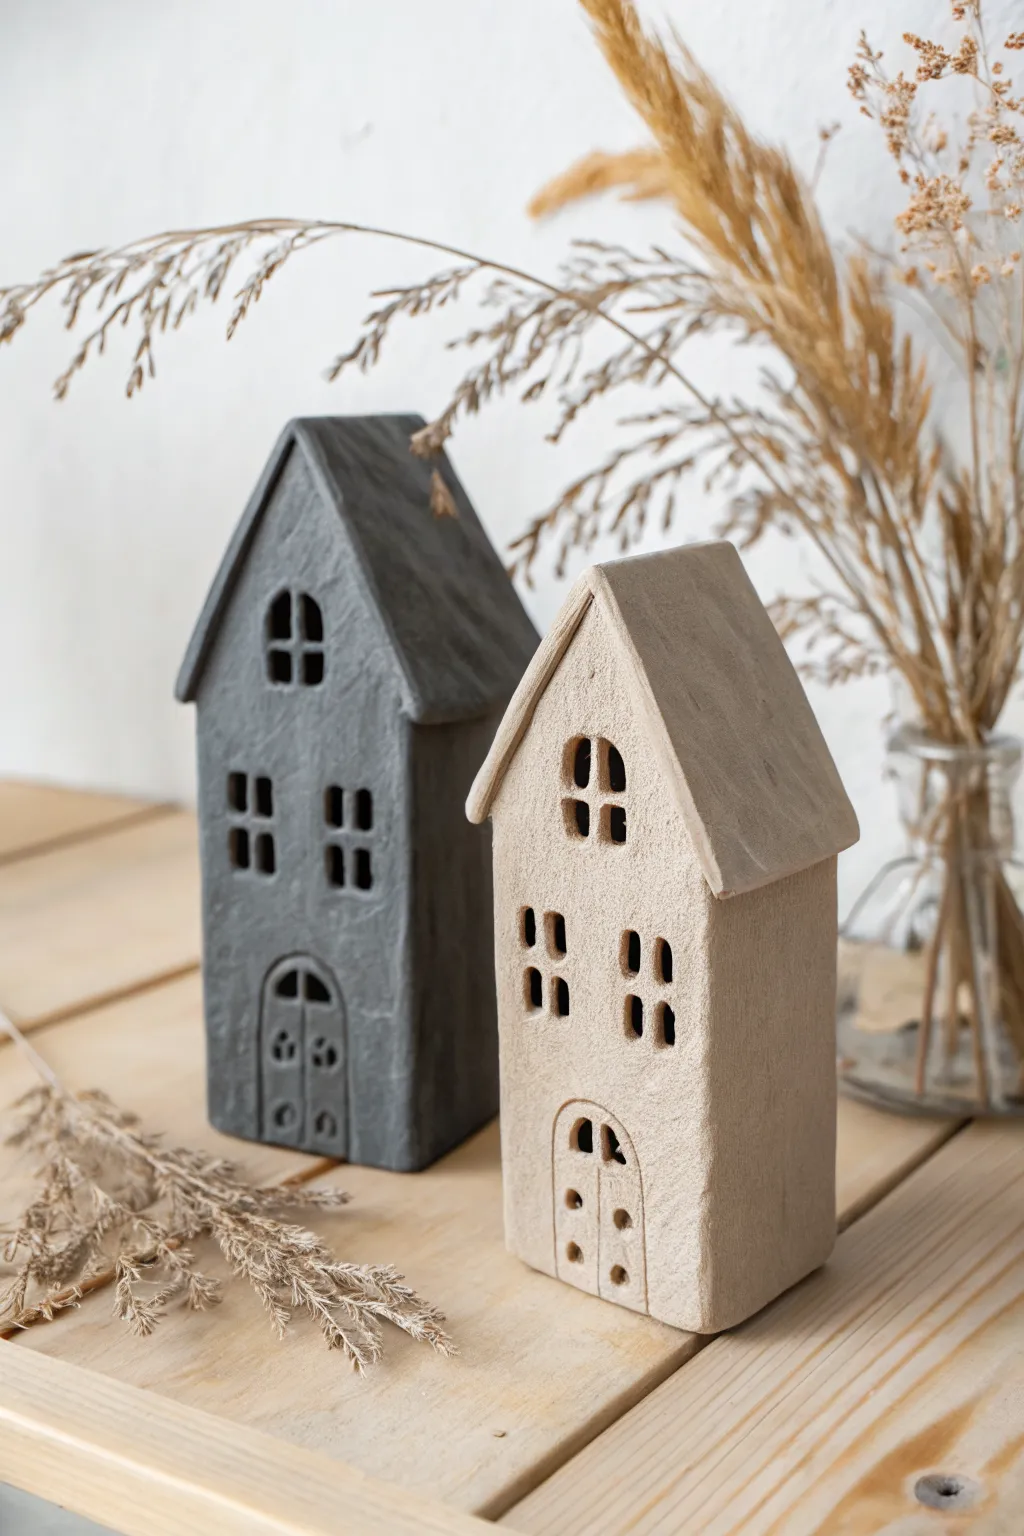
These charming, understated haunted house facades bring a sophisticated touch to Halloween decor with their textured, ceramic-like finish. The design features tall, narrow proportions and cutout windows that allow candlelight to flicker beautifully from within.
Step-by-Step Tutorial
Materials
- Air-dry clay (stone or concrete color for the grey house, natural or white for the beige)
- Rolling pin
- Sharp craft knife or scalpel
- Ruler
- Cardboard or cardstock (for templates)
- Small sculpting tools or toothpicks
- Texture sponge or stiff brush
- Water in a small cup
- Fine-grit sandpaper
- Acrylic paint (optional tone wash)
- Matte varnish
Step 1: Drafting and Cutting Walls
-
Create templates:
Start by cutting your cardboard templates. You will need a tall rectangle for the front and back facade, topped with a steep triangle for the roofline. Design narrower rectangles for the side walls that match the facade’s height before the roof slant begins. -
Prepare the workspace:
Lay down a piece of parchment paper or a silicone mat. This prevents the clay from sticking and makes it easier to move the pieces later without warping them. -
Roll out the clay:
Take a substantial chunk of air-dry clay and knead it briefly to remove air bubbles. Roll it out to an even thickness of about 1/4 inch (5-6mm). If the slab is too thin, the walls might buckle as they dry. -
Cut the shapes:
Place your cardboard templates onto the clay slab. Using your craft knife, carefully trace around the templates to cut out two front/back pieces, two side walls, and two roof rectangular panels. -
Add texture:
Before assembling, I like to gently dab the surface of the clay with a dry sponge or a stiff-bristled brush. This creates that lovely, rustic stony texture seen in the photo rather than a perfectly smooth, plastic-looking finish.
Keep it Straight
Walls sagging? Temporarily support the inside of the house structure with a small cardboard box or blocks of spare foam while the clay sets to leather-hard.
Step 2: Carving Details
-
Mark window placement:
On the front facade piece, use a needle tool or toothpick to lightly sketch the positions of the windows and door. For the ‘haunted’ look, aim for arched tops or slightly elongated shapes. -
Cut out windows:
Carefully slice through the clay to remove the window panes. Clean up any ragged edges with a slightly damp brush. -
Create the windowsills:
Instead of removing the clay entirely for every pane, you can leave a central crossbar to create a mullion effect, or simply carve a deep recess without punching all the way through if you prefer a solid sculpture. -
Sculpt the door:
For the door, outline an arch at the bottom. Use a sculpting tool to impress vertical lines for wood planks and poke small holes for doorknobs or decorative ironwork details.
Step 3: Assembly and Finishing
-
Score and slip:
To join the walls, create cross-hatch scratches (scoring) on the edges that will touch. Apply a small amount of water or liquid clay (slip) to these scratched areas. -
Construct the box:
Stand the side walls up against the back of the front facade. Press the seams together firmly from the inside. Repeat with the back wall to form a hollow rectangular tube. -
Attach the roof:
Score the angled top edges of your front and back facades. Place your roof panels on top, joining them at the peak. Smooth the seam at the apex of the roof so it looks like one continuous piece. -
Blend the seams:
Use a modeling tool or your finger dipped in water to smooth over all the outer join lines. The corners should look solid and seamless. -
Initial drying phase:
Let the house stand until it is ‘leather hard’—dry enough to hold its shape firmly but still cool to the touch. This usually takes a few hours. -
Refining the texture:
Once leather hard, re-examine your texture. If smoothing the seams erased the stone effect, dab those areas again with your sponge. Ensure the door details are deep enough. -
Full cure:
Allow the house to dry completely for 24-48 hours. Keep it away from direct heat sources to prevent cracking. -
Sanding and sealing:
Gently sand any sharp edges or rough burrs on the bottom. Finish with a coat of matte varnish to protect the clay while maintaining that natural, unglazed pottery look.
Make it Glow
Leave the bottom open or cut a hole in the back wall. This lets you safely insert a battery-operated LED tea light for a spooky, warm Halloween glow.
Group several houses of varying heights together on a mantle to create your own miniature ghost town
Costumed Animals for Halloween
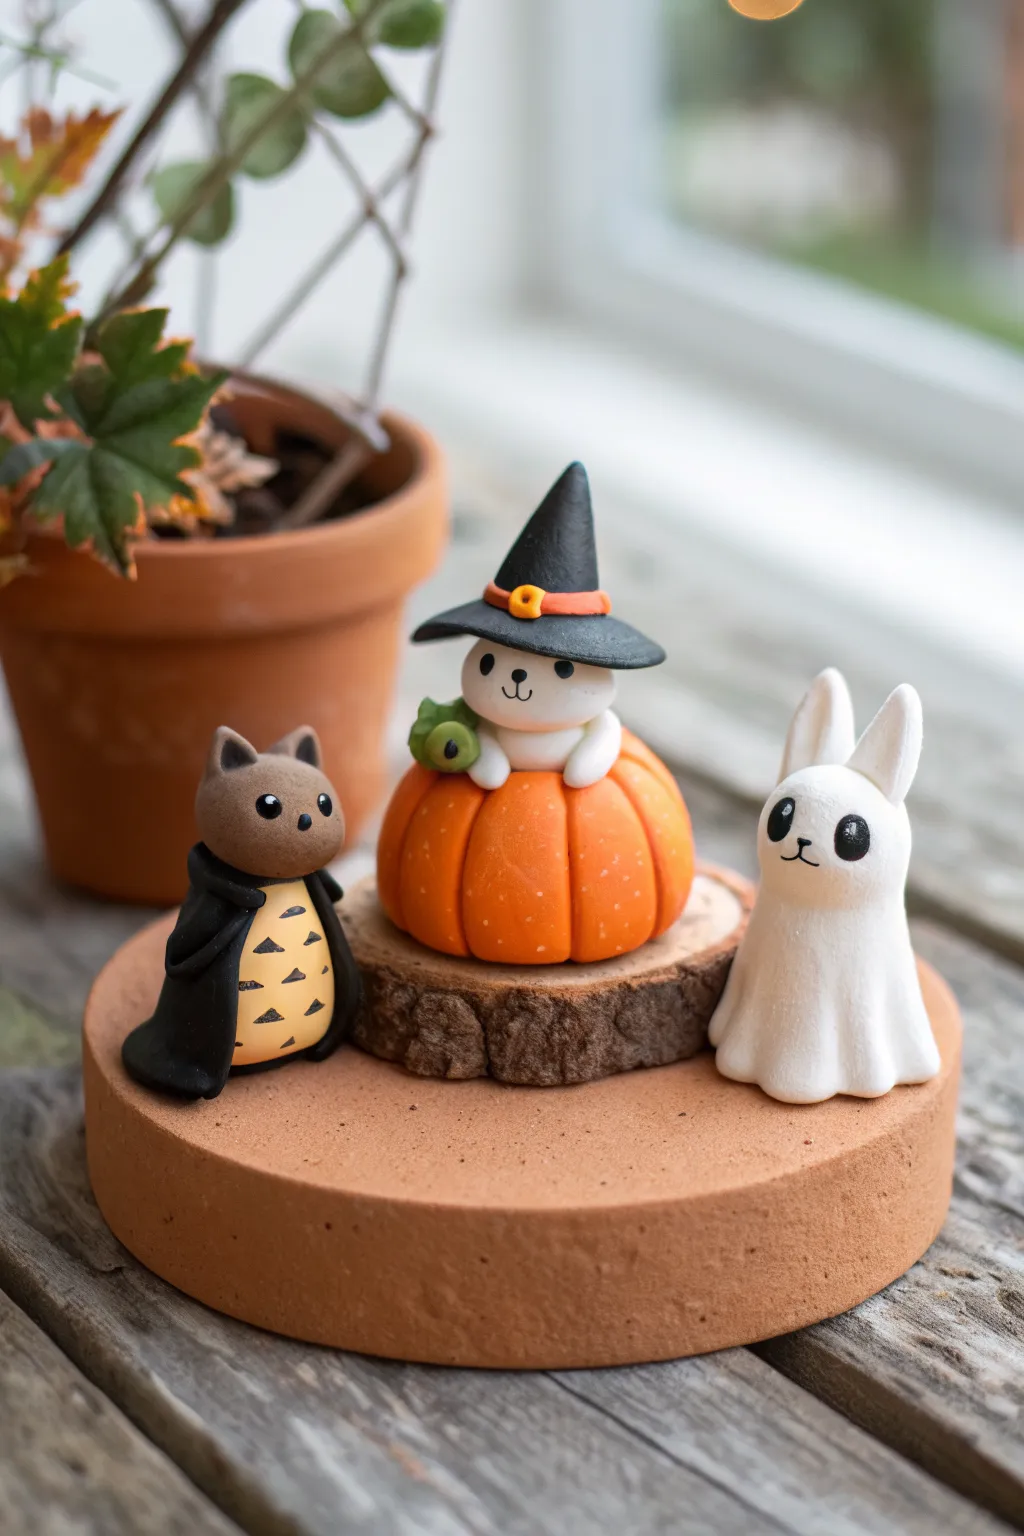
This adorable set features three distinct characters ready for trick-or-treating: a caped forest spirit, a pumpkin-dwelling witch kitty, and a spooky ghost bunny. The finished piece sits on a rustic clay base, making it a perfect miniature display for your Halloween decor.
Step-by-Step
Materials
- Polymer clay (white, black, orange, brown, dark green, yellow)
- Small circular wood slice (for the pumpkin base)
- Large circular clay base or coaster
- Clay sculpting tools (needle tool, ball stylus)
- Acrylic paint (black, white) for details
- Fine detail paintbrush
- Oven for baking
- Gloss glaze (optional)
Step 1: The Pumpkin Witch
-
Form the Pumpkin:
Start by rolling a ball of orange clay about the size of a walnut. Use a needle tool to press vertical indentations all around the sphere to create the pumpkin’s segments. -
Hollow the Top:
Use a large ball tool or your thumb to create a deep indentation in the top of the pumpkin where the character will sit. -
Sculpt the Character:
Roll a smaller ball of white clay for the head and place it into the pumpkin hollow. Add two small triangles for ears and two small white ovals for paws resting on the pumpkin’s edge. -
Craft the Witch Hat:
Flatten a small circle of black clay for the brim. Form a cone for the top and attach them. Add a thin orange strip for the band and a tiny yellow buckle, then place the hat on the white head. -
Add the Familiar:
Roll a tiny speck of dark green clay into a blob shape and place it in the character’s left paw, adding tiny black dot eyes if desired.
Clean Clay Tip
Work with the white clay first (the ghost and witch head) before handling dark colors like black or brown to avoid accidental color transfer and smudging.
Step 2: The Caped Forest Spirit
-
Body Shape:
Mix brown clay to get a soft taupe color. Roll a chubby oval shape, slightly wider at the bottom for stability. -
Tummy Details:
Flatten a thin oval of lighter tan or yellow clay and press it onto the belly area. Use a needle tool or black paint later to add the iconic triangular chest markings. -
Ears and Face:
Pinch two pointed ears at the top of the head. Indent eye sockets slightly with a small ball tool. -
The Cape:
Roll out a thin sheet of black clay. Cut a semi-circle and wrap it around the figure’s back, bringing the corners to meet at the neck like a fastened cloak.
Fixing Dust Specks
If dust gets stuck on your white clay, use a cotton swab dipped in rubbing alcohol or nail polish remover to gently wipe the surface clean before baking.
Step 3: The Ghost Bunny
-
Ghost Form:
Roll a cylinder of white clay. Gently pull and flare the bottom edges to create the wavy, draped look of a sheet. -
Bunny Ears:
Form two long, teardrop shapes from white clay. Attach them to the top of the head, blending the seams so they look like part of the costume. -
Smooth the Surface:
I like to gently rub the clay with a finger dipped in a little baby oil/cornstarch to remove fingerprints before baking.
Step 4: Assembly and Finish
-
Prepare the Base:
Place your large circular base down. Glue or press a small wooden slice in the center to elevate the pumpkin figure. -
Position Figures:
Arrange the pumpkin witch on the center wood slice, the forest spirit on the left, and the ghost bunny on the right. -
Bake:
Bake the entire assembly according to your clay manufacturer’s instructions (usually 275°F/135°C for 15-30 minutes depending on thickness). -
Paint Details:
Once cool, use a fine brush and acrylic paint to add the black eyes and mouths to all three figures. Add white highlights to the eyes for extra cuteness.
Once painted and dried, your miniature Halloween party is ready to charm visitors on a windowsill or shelf.
Mixed Mini Halloween Charm Set
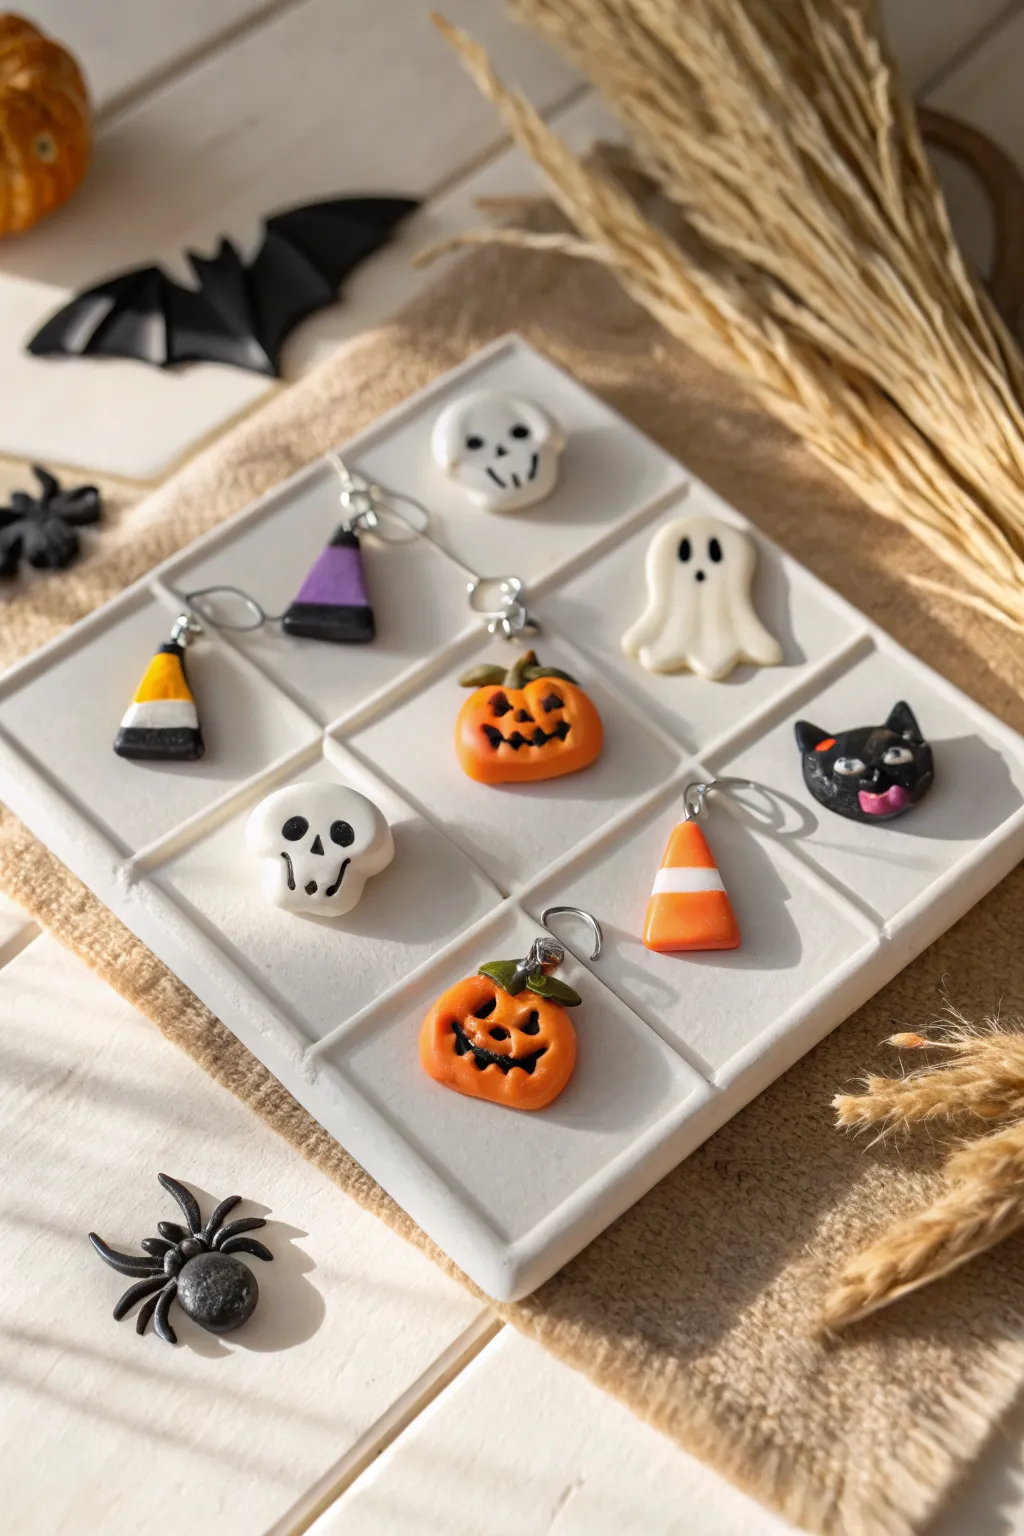
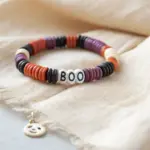
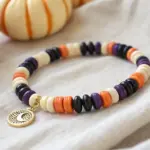
These adorable miniature Halloween icons are perfect for creating custom jewelry or festive trinkets. The set features a classic mix of pumpkins, skulls, ghosts, and candy corn, all modeled with simple shapes and finished as durable charms.
How-To Guide
Materials
- Polymer clay (Orange, White, Black, Purple, Green, Yellow)
- Clay sculpting tools (needle tool, ball stylus)
- Acrylic rolling pin
- Metal screw eye pins (silver tone)
- Gloss glaze or polyurethane varnish
- Small fine-point paintbrush
- Craft knife or clay blade
- Oven (if using polymer clay) or air-drying space
- Clean work surface (ceramic tile or glass mat)
Step 1: Preparation & Base Charms
-
Condition the clay:
Begin by kneading each color of clay separately until soft and pliable. Wash your hands between colors to avoid smudging, especially before handling the white clay. -
Form the Skull bases:
Roll two small balls of white clay, roughly the size of a blueberry. Gently flatten the bottom half slightly to create a jaw shape, keeping the top rounded for the cranium. -
Sculpt the Jack-o’-Lanterns:
create two orange oblate spheres. Use a needle tool to press vertical indentations around the sides to mimic pumpkin ribs. Add a tiny green stem on top and press it firmly into place. -
Shape the Ghost:
Roll a piece of white clay into a teardrop shape. Flatten it gently and use your finger to curve the bottom edge into a wavy, floating hemline.
Step 2: Candy Corn & Witchy Details
-
Assemble the Candy Corn:
Create three small pancakes of clay: yellow on bottom, orange in the middle, and white on top. Stack them and slice a triangle shape with your blade. Gently smooth the edges to round them off. -
Make the Witch Hat:
Form a small black cone and a separate flat black disc for the brim. Press the cone onto the disc. Roll a tiny snake of purple clay and wrap it around the base of the cone for a hatband. -
Sculpt the Black Cat:
Roll a black ball for the head and pinch two small triangles at the top for ears. I like to press the center of the face slightly to create a muzzle area. -
Insert hardware:
Before baking or drying, carefully screw a metal eye pin into the top of each charm. If using polymer clay, adding a dab of liquid clay on the screw threads helps it bond permanently.
Sticky Situation?
If clay gets too soft and sticky, pop it in the fridge for 10 minutes. This firms it up, making tiny details like the cat ears and pumpkin stems much easier to handle without distortion.
Step 3: Adding Faces & Finishing
-
Detail the Skulls:
Use a small ball stylus to press two deep eye sockets into the white skulls. Use a needle tool to etch vertical lines for teeth and an upside-down ‘V’ for the nose cavity. Fill the sockets with a tiny bit of black clay or paint them after baking. -
Carve Pumpkin Faces:
Roll tiny triangles of black clay for the pumpkin eyes and a jagged mouth strip. Press these onto the pumpkins gently. Alternatively, you can carve the shapes out and fill the negative space with black paint later. -
Give the Ghost Life:
Press two oval indentations for eyes and one for a mouth using your ball tool. Insert tiny balls of black clay into these hollows and flatten them flush with the surface. -
Animate the Cat:
Add tiny yellow or green balls for eyes with black slit pupils. Add a tiny pink triangle for a nose and a small pink tongue sticking out for a playful expression. -
Bake or Cure:
Follow the manufacturer’s instructions for your specific clay. Ensure they are fully cured before handling to prevent breakage. -
Glazing:
Once cool and hard, apply a thin coat of gloss glaze to select areas like the pumpkin eyes, the candy corn, or the cat’s nose to make them pop.
Make it Jewelry
Attach jump rings to the eye pins once baked. You can now string these onto earring hooks, a charm bracelet chain, or even use them as stitch markers for knitting projects.
Display your miniature spooky collection on a tray or turn them into seasonal accessories to wear all October long