If you’re craving a quick, satisfying project, little clay magnets are my favorite “tiny-but-mighty” make. You can batch a whole set in one cozy session and end up with mini art that makes your fridge feel like a happy little gallery.
Tiny Donuts With Sprinkles
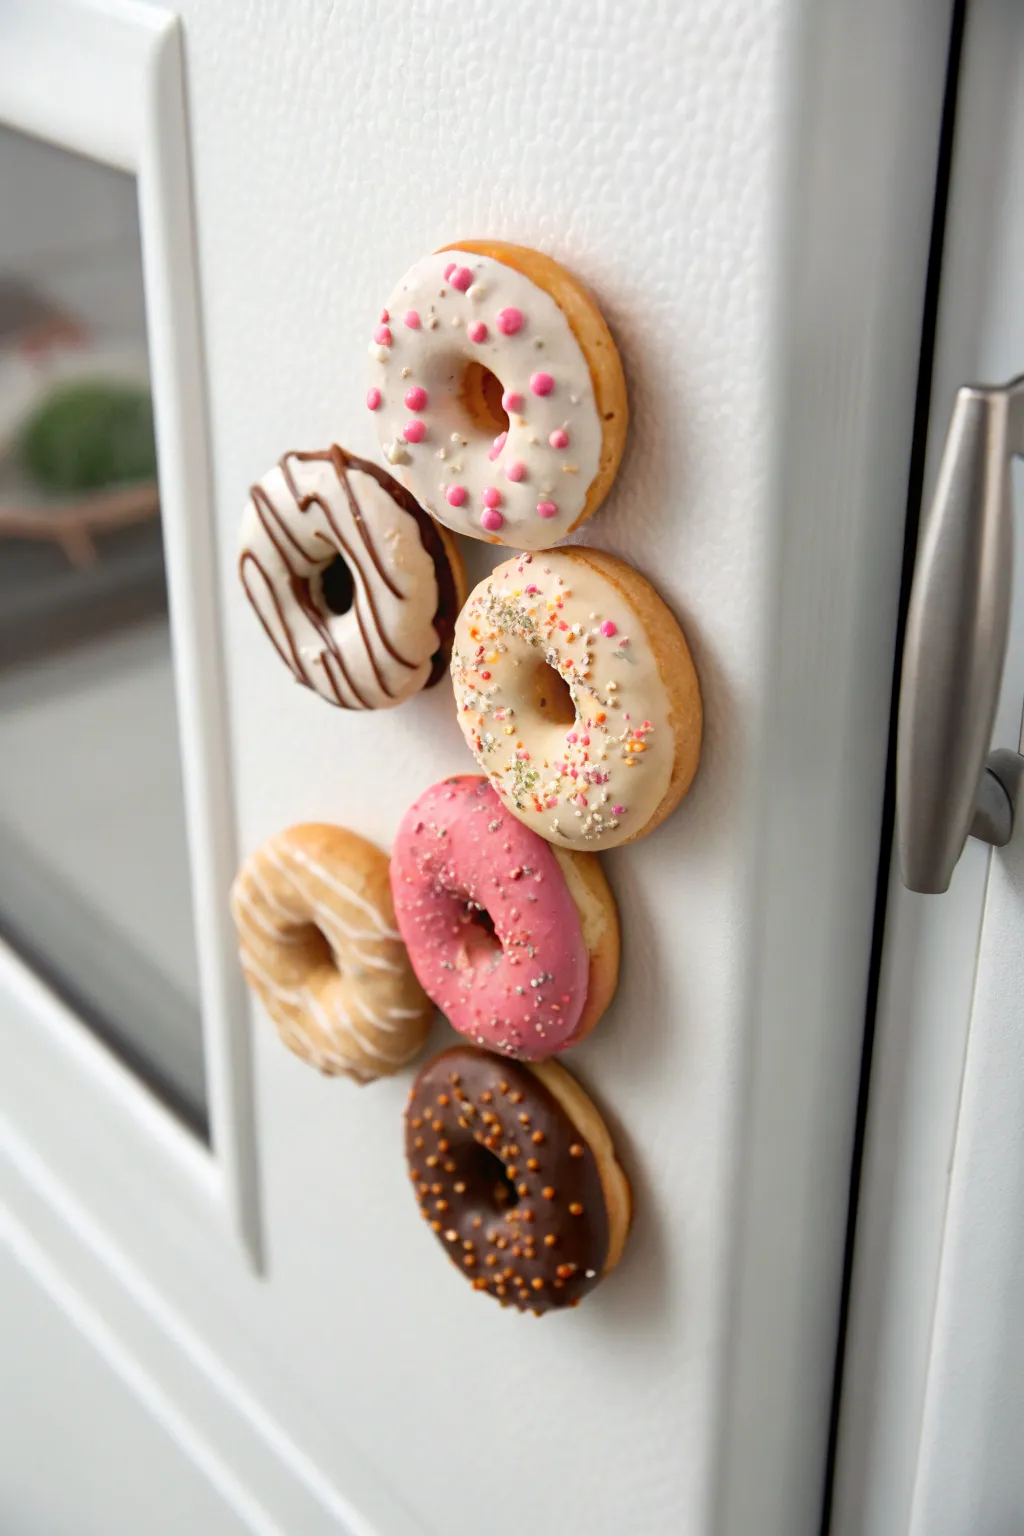
Transform your refrigerator door into a bakery display with these hyper-realistic polymer clay donut magnets. The key to their charm lies in the assortment of glazes—from classic chocolate to strawberry pink—and the tiny, textured details that make them look good enough to eat.
Step-by-Step Guide
Materials
- Polymer clay (dough color/beige, white, dark brown, pink, tan)
- Small round magnets (neodymium recommended)
- Translucent liquid polymer clay (TLS)
- Chalk pastels (orange, brown, yellow)
- Soft paintbrush for shading
- Various tools: toothbrush, needle tool, small ball tool
- Circle cutters (one approx. 1 inch, one very small for the hole)
- Gloss glaze (urethane or water-based)
- E6000 glue or super glue gel
- Baking sheet and parchment paper
Step 1: Baking the Base
-
Mix the dough color:
Start by conditioning your beige or ‘dough’ colored clay. If you don’t have a premixed beige, combine white with a tiny amount of translucent, brown, and yellow clay until you get a warm, pastry-like shade. -
Shape the donuts:
Roll the clay into a thick sheet, about 1/2 inch high. Use your larger circle cutter to punch out rounds, then use the tiny cutter to remove the center hole. Alternatively, roll a snake of clay and join the ends to form a ring, smoothing the seam invisible. -
Soften the edges:
Since real donuts are puffy, not sharp-edged, use your finger to gently smooth and round off the harsh edges left by the cutters on both the top and bottom. -
Texturing:
Creating texture is crucial for realism. Take an old toothbrush and gently tap the entire surface of the raw clay donut to mimic the porous texture of fried dough. Run a needle tool gently around the center equator to create a ‘fry line’ where the texture is smoother. -
Shading for a baked look:
Scrape some electric orange, brown, and yellow chalk pastel into dust. Using a soft dry brush, dust the top and bottom of the donuts, focusing the darkest brown on the edges to simulate that golden-fried finish. Keep the center ‘fry line’ lighter.
Step 2: Glazing and Decorating
-
Prepare the icing:
In a small container or on a palette, mix liquid polymer clay with small bits of solid clay to create your icing colors: white (for vanilla), dark brown (for chocolate), and pink (for strawberry). Mix until it has the consistency of thick heavy cream. -
Apply the glaze:
Using a needle tool or a small scoop, carefully drip the colored liquid clay onto the tops of your donuts. Guide it near the edges and let it naturally flow down the sides slightly, just like real melted icing. -
Create the drizzled look:
For the vanilla donut with chocolate drizzle shown in the image, apply a base of white liquid clay first. Then, take a tiny amount of brown liquid clay on a needle tool and drag it back and forth across the top in quick, zigzag motions. -
Add sprinkles:
Before the liquid clay sets, add your sprinkles. You can use pre-baked tiny snakes of clay chopped into bits for ‘jimmies’ or tiny non-pareil seed beads. Gently press them into the wet icing so they adhere. -
Detailing the striped donut:
For the beige donut with white stripes, skip the full icing dip. Instead, pipe extremely thin lines of white liquid clay across the textured surface using a fine-tip applicator bottle or a needle tool.
Sprinkle Hack
Make realistic sugar sprinkles by chopping up cured clay scraps into tiny bits. For round non-pareils, use micro-marbles or nail art beads.
Step 3: Baking and Assembly
-
The bake:
Place your decorated donuts on a parchment-lined baking sheet. Bake according to your brand of clay’s instructions—usually 275°F (135°C) for about 15-20 minutes. Keep an eye on the white icing so it doesn’t brown. -
Cool down:
Allow the donuts to cool completely on the baking sheet. The liquid clay icing will solidify and become durable during this process. -
Glossy finish:
Though optional, applying a coat of gloss glaze strictly to the icing (not the dough part) makes the frosting look sticky and sweet. I prefer to use a very fine brush for this to keep the matte ‘fried’ texture intact. -
Attaching the magnet:
Flip the donuts over. Apply a small dot of E6000 or super glue gel to the center of the little round magnet and press it firmly onto the back of the donut. -
Final dry:
Let the glue cure for at least 24 hours before sticking them to your fridge to ensure the magnets stay securely attached when you pull on them.
Crumb Texture
For a bitten donut look, tear a chunk of raw clay off before baking. Use a needle tool to pick at the exposed ‘inside’ to create fluffy bread texture.
Enjoy arranging your bakery-fresh collection on the fridge for a zero-calorie snack display


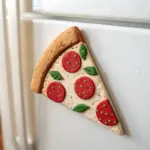
Mini Pizza Slice Magnets

Transform a dab of clay into a mouth-watering slice of pepperoni pizza that looks good enough to eat right off your fridge door. This project focuses on realistic textures, from the bubbly, toasted cheese to the perfectly risen crust edge.
Detailed Instructions
Materials
- Polymer clay (beige/tan, translucent white, red, green)
- Liquid polymer clay (translucent)
- Chalk pastels (yellow ochre, burnt sienna, orange)
- Soft paintbrush for shading
- Ball stylus tool
- Needle tool or toothpick
- Old toothbrush or sandpaper (for texturing)
- X-acto knife or craft blade
- Small round magnets
- Strong craft glue (E6000 or superglue)
Step 1: Forming the Dough Base
-
Mix the Dough Color:
Start by mixing beige clay with a tiny amount of translucent white. This gives the crust a slightly baked, realistic dough appearance rather than a flat, opaque plastic look. -
Shape the Triangle:
Roll a small ball of your mixed dough color and flatten it slightly. Using your fingers, press it into a long triangle shape, keeping the top (crust) end wider and thicker than the pointy tip. -
Define the Crust:
Pinch and roll the wider end of the triangle upwards to create a raised rim. This mimics the ‘cornicione’ or outer crust of a real pizza. -
Texturize the Bread:
Take an old toothbrush or a piece of crumpled aluminum foil and press it gently all over the crust and the back of the slice. This creates those distinct bread pores so it doesn’t look smooth. -
Pre-shading the Crust:
Scrape some yellow ochre and burnt sienna chalk pastel into fine dust. With a dry soft brush, dust the raised crust rim lightly to simulate baking.
Step 2: Adding Sauce and Cheese
-
Create the Sauce Layer:
Mix liquid polymer clay with a tiny scraping of red chalk pastel or a drop of red acrylic paint. It should be a vivid tomato red. -
Apply the Sauce:
Spread a thin, uneven layer of your red liquid clay mixture onto the flat triangular area, stopping right before the raised crust edge. -
Mix the Cheese:
Combine translucent clay with a very small amount of white and the tiniest speck of yellow. Chop this mixture into fine crumbles using your blade. -
Melt the Cheese:
Mix these cheese crumbles with plain translucent liquid clay to create a textured paste. Spread this over the red sauce, letting bits of red peek through near the edges. -
Texture the Top:
Use a needle tool to drag and disturb the cheese layer slightly, swirling it to look like melted mozzarella.
Fixing “Raw” Looking Cheese
If the cheese looks too white after baking, brush a thin glaze of translucent liquid clay mixed with yellow-brown oil paint over it, then bake again briefly.
Step 3: Toppings and Baking
-
Make Pepperoni Canes:
Roll a very thin snake of dark red clay. For extra realism, I also like to roll a slightly lighter red snake and combine them to create marbling. -
Slice the Pepperoni:
Let the red cane rest or chill briefly so it gets firm, then use your blade to slice paper-thin rounds. They don’t need to be perfect circles. -
Place Toppings:
Press three or four pepperoni slices into the wet liquid clay cheese. Use a ball tool to indent the center of each pepperoni slightly so the edges curl up like they’ve been cooked. -
Add Basil Garnish:
Flatten a tiny bit of green clay until it is translucent-thin. Cut out small teardrop shapes and gently curve them before placing them continuously on top of the cheese. -
Final Shading:
Dust a little more orange and brown chalk pastel over the cheese and pepperoni edges to give it that golden, oven-broiled finish. -
Bake the Clay:
Bake your pizza slice according to your clay manufacturer’s instructions, usually around 275°F (130°C) for 15-20 minutes.
Spice It Up
For an ‘oregano’ effect, grate tiny specks of dark green baked clay or dried tea leaves directly onto the liquid cheese layer before baking.
Step 4: Finishing Up
-
Cool Down:
Allow the clay to cool completely. The translucent parts of the cheese will become clearer as the clay hardens and returns to room temperature. -
Attach the Magnet:
Flip the pizza slice over. Apply a strong dab of E6000 or superglue to the back. -
Secure and Dry:
Press the magnet firmly into the glue. Let it cure flat for at least 24 hours to ensure the magnet never pops off when you open the fridge.
Now your fridge has a delicious slice of art that will make everyone crave an Italian dinner

Cute Sushi Roll Magnet Set
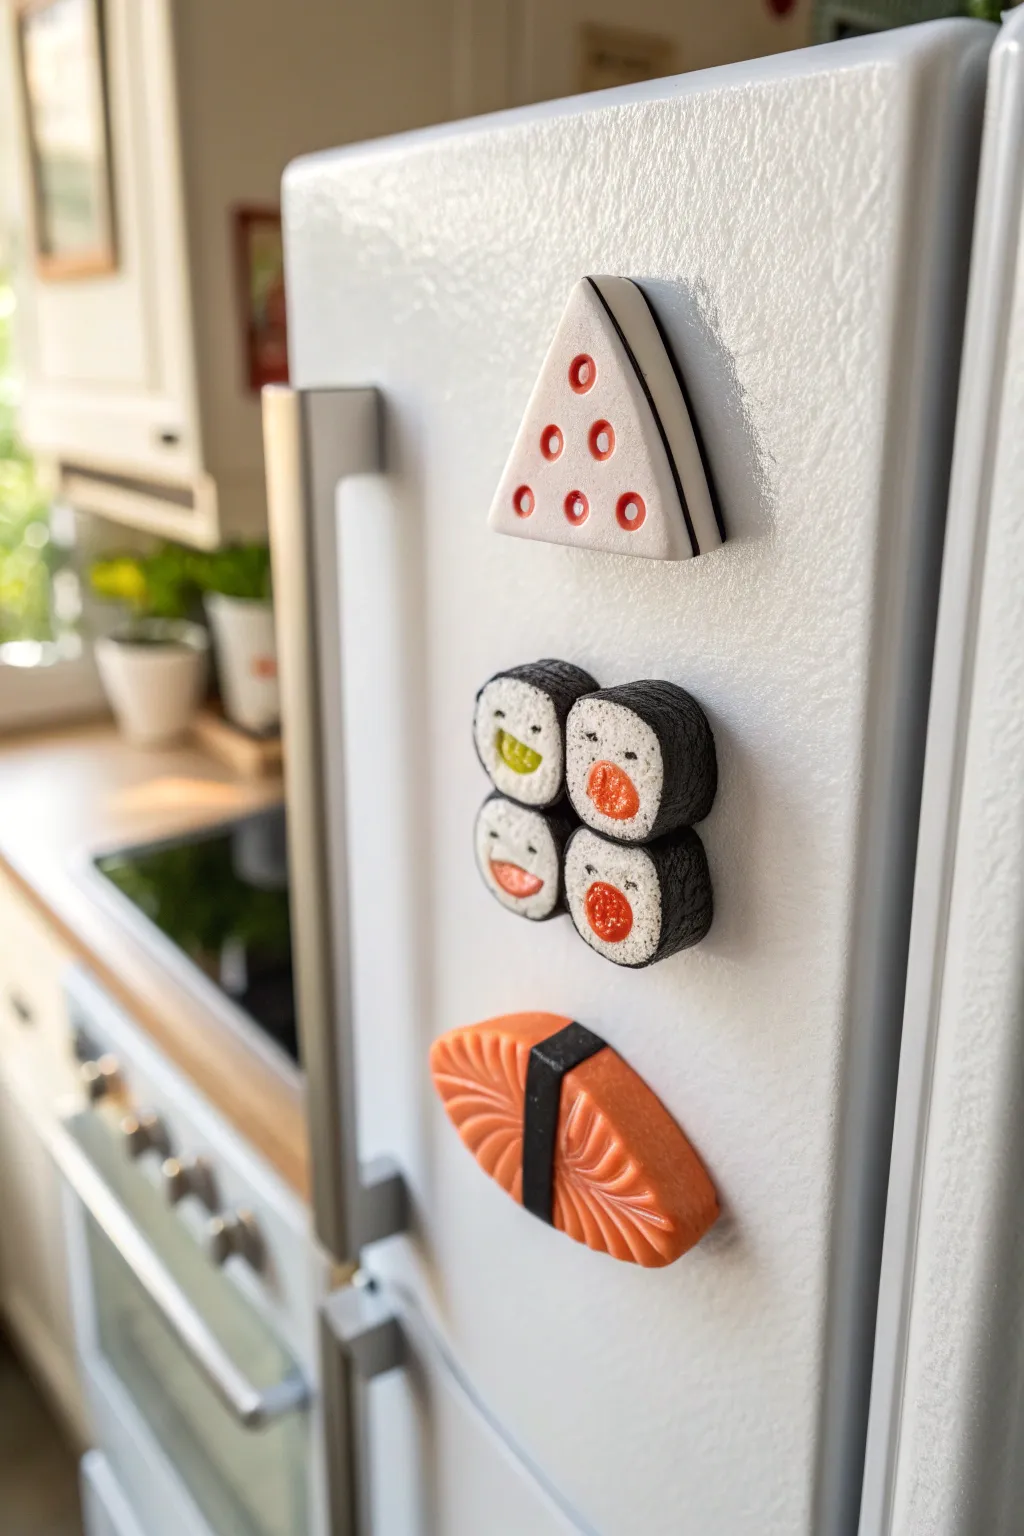
Bring a smile to your kitchen with this adorable trio of polymer clay sushi magnets. Featuring a cheeky onigiri, a cheerful set of maki rolls, and a classic nigiri piece, these easy-to-make accessories add a touch of kawaii charm to any magnetic surface.
Step-by-Step Guide
Materials
- White polymer clay
- Black polymer clay
- Orange or salmon-colored polymer clay
- Translucent liquid clay (optional)
- Small round magnets (neodymium recommended)
- Clay roller or pasta machine
- Needle tool or toothpick
- Craft knife
- Basic sculpting tools
- Gloss glaze (optional for a shiny finish)
- Strong craft glue (E6000 or similar)
Step 1: The Maki Roll Friends
-
Core Preparation:
Start by rolling four equal-sized balls of white clay, roughly the size of a large marble. These will be the rice centers for your maki rolls. -
Adding Fillings:
For two of the rolls, press a small divot into the center. Roll tiny balls of orange clay for ‘roe’ or salmon and press them into the divots so they sit flush. -
Wrapping the Nori:
Roll out a thin sheet of black clay using a roller or pasta machine. Cut four strips that are just wide enough to cover the height of your white balls. -
Assembly:
Wrap a black strip around the circumference of each white ball, smoothing the seam at the back. Gently squeeze to shape them into slightly rounded cylinders. -
Making Faces:
Using a needle tool, carefully indent tiny eyes and smiling mouths into the white clay. Fill the indentations with tiny bits of black clay for eyes and orange or pink for mouths, or paint them after baking. -
Grouping:
Press the four rolls together in a 2×2 square formation. Add a touch of liquid clay between them to ensure they bond securely while baking.
Step 2: The Onigiri Triangle
-
Shaping the Rice:
Form a larger piece of white clay into a soft triangular shape with rounded corners. It should be roughly 1.5 inches tall and fairly uniform in thickness. -
Adding Texture:
If you want a rice-like texture, gently tap the surface with a toothbrush or crumpled foil, avoiding the edges. -
The Seaweed Strip:
Roll out a thick strip of black clay. Position it vertically along the right edge of the triangle to mimic the nori wrapper often found on convenience store onigiri. -
Plum Details:
Roll six tiny balls of red or dark pink clay. Press them flat onto the face of the triangle in a triangular pattern (1-2-3) to represent seasoning or umeboshi bits. Use a small ball tool to indent the centers slightly.
Clean Clay Tip
Work with the lightest colors (white) first before moving to black or red. Keep baby wipes handy to clean your hands and tools between colors to avoid staining your white rice.
Step 3: The Salmon Nigiri
-
Base Construction:
Shape a piece of white clay into an oval mound for the rice base. Flatten the bottom so it will sit flush against the magnet later. -
Creating the Fish:
Shape a piece of orange or salmon-colored clay into a slightly larger oval that drapes over the white rice. I like to curve the edges downward to hug the rice. -
Adding Fat Lines:
Use a needle tool to score gentle, curved lines across the orange clay to mimic the fat striations of salmon sashimi. -
The Nori Belt:
Referencing the image, roll a thin, narrow strip of black clay. Wrap it vertically around the center of the nigiri to bind the fish to the rice.
Texture Level Up
Mix translucent clay with the white clay for the ‘rice’ portions. After shaping, texture heavily with a stiff toothbrush to make it look like individual grains of sticky rice.
Step 4: Finishing Up
-
Baking:
Place all three pieces on a ceramic tile or baking sheet. Bake according to your clay manufacturer’s instructions (usually 275°F/130°C for 15-30 minutes). -
Cooling and Glazing:
Let the pieces cool completely. If you want a fresh-fish shine, apply a coat of gloss glaze to the orange salmon and the red dots on the onigiri. -
Attaching Magnets:
Flip the pieces over. Apply a dab of strong craft glue to the back of each piece and firmly press a magnet into the glue. Let dry overnight.
Pop these onto your fridge and enjoy your zero-calorie sushi feast every time you reach for a snack


Breakfast Trio: Egg, Bacon, Toast
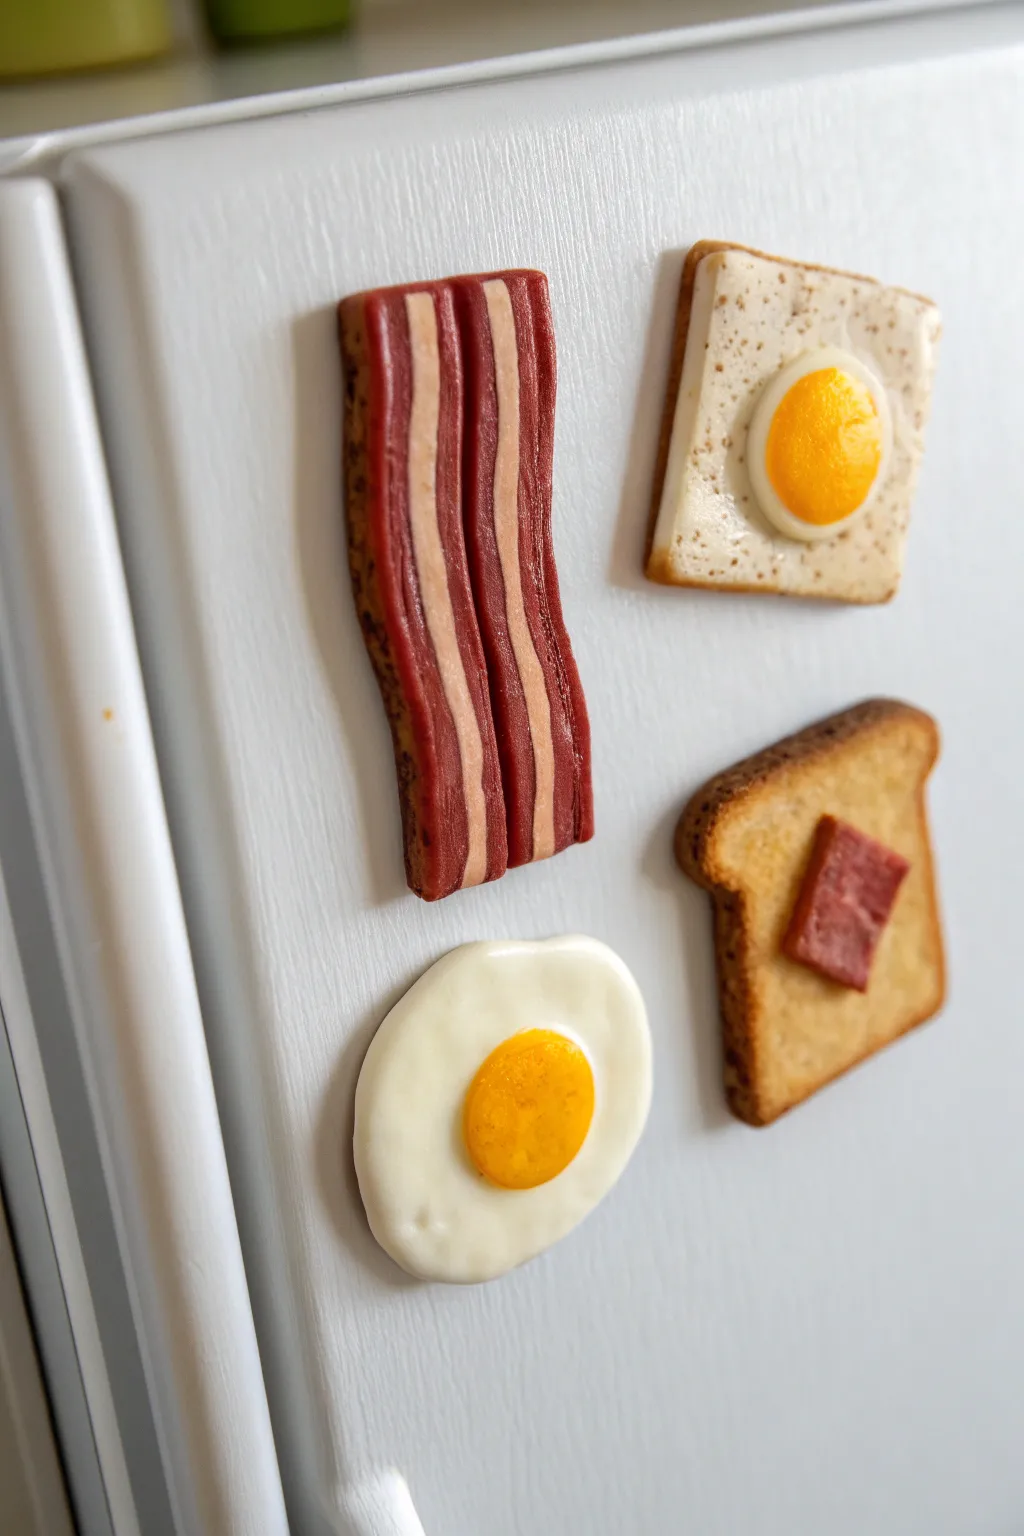
Brighten up your fridge with this charming set of breakfast-themed magnets sculpted from polymer clay. This project features realistic textures for crispy bacon, sunny-side-up eggs, and perfectly browned toast.
Step-by-Step
Materials
- Polymer clay (white, beige, translucent, yellow, dark red, brown)
- Small round magnets
- Liquid polymer clay or TLS (Translucent Liquid Sculpey)
- Pastel chalks (brown, orange, yellow ochre)
- Soft paintbrush for shading
- Texture tools (needle tool, toothbrush, or crinkled aluminum foil)
- Blade or craft knife
- Rolling pin or pasta machine
- Gloss glaze (optional)
Step 1: Sculpting the Bacon
-
Mix your meat colors:
Blend dark red clay with a tiny touch of brown to get a realistic cured meat color. For the fat, mix translucent clay with a small amount of white to achieve a fatty, semi-opaque look. -
Stack the strips:
Roll both colors into thin sheets of equal thickness. Cut them into strips and stack them in an alternating pattern: red, white, red, white, red. Five layers usually creates a nice width. -
Create the wave:
Cut a thin slice from your stack to reveal the stripes. Gently stretch it lengthwise to elongate the strip. Lay it flat and use your fingers to push the sides in slightly to create a wavy, cooked appearance. -
Add texture:
Use a toothbrush or a ball of crinkled aluminum foil to tap texture onto the meat sections for a cooked look. I like to leave the fat strips smoother for contrast.
Chef’s Secret
Mix translucent clay into your yellow yolk color. This gives the yolk a realistic depth rather than looking like opaque plastic.
Step 2: Toast and Jam
-
Form the bread shape:
Mix beige and white clay to get a light bread dough color. Roll it out to about 5mm thick and cut out a classic bread slice shape with a curved top and flat bottom. -
Texture the bread:
Texture the surface aggressively with a stiff toothbrush or needle tool to simulate air pockets in the bread crumb. Do this on the front and sides. -
Crust shading:
Using a soft brush, apply shaved brown pastel chalk around the edges to create a crust. Dust a little yellow ochre in the center for a toasted effect. -
Add the topping:
Cut a small square of dark red clay (or the bacon meat mix) for a slice of ham or jam. Place it centrally on the toast and texture it slightly.
Make it a Menu
Expand the set by sculpting tiny clay avocado slices, a dollop of ketchup, or a mini coffee mug to create a full brunch spread.
Step 3: Sunny-Side Up Egg
-
Make the white:
Flatten a ball of plain white clay into an organic, uneven oval shape. Keep the edges rounded and organic rather than sharp. -
Form the yolk:
Roll a small ball of yellow clay mixed with a tiny bit of orange for a rich yolk color. Press this gently onto the center of your white base, flattening it slightly into a dome. -
Gloss the yolk:
If you want a wet look before baking, add a drop of liquid polymer clay over the yolk, but be careful not to let it run too much.
Step 4: Egg-in-a-Hole Toast
-
Prepare the base:
Create another slice of toast exactly as you did in the previous phase, including the texturing. -
Add the egg white:
Instead of cutting a hole, simply layer a thin, irregular patch of white clay onto the center of the toast to look like the egg white has spread over the bread. -
Place the yolk:
Add your yellow yolk dome in the center of the white patch. Ensure the edges of the white clay blend slightly downward onto the bread texture. -
Specific shading:
Shade the crusts with brown pastels, but also lightly dust the white of the egg with very faint brown spots to simulate pepper or browned butter.
Step 5: Finishing Touches
-
Bake the pieces:
Arrange all your food items on a tile or baking sheet. Bake according to your clay manufacturer’s instructions, typically at 275°F (130°C) for 15-30 minutes depending on thickness. -
Attach the magnets:
Once fully cooled, use a strong superglue or E6000 to attach a magnet to the back of each piece. Press firmly and let the glue cure completely. -
Final glaze:
For extra realism, brush a gloss glaze only on the egg yolks and the ‘fatty’ strips of the bacon to make them look greasy and fresh.
Your savory breakfast set is now ready to hold up your grocery lists and photos

The Complete Guide to Pottery Troubleshooting
Uncover the most common ceramic mistakes—from cracking clay to failed glazes—and learn how to fix them fast.
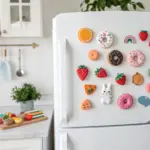
Ice Cream Cone Mini Magnets
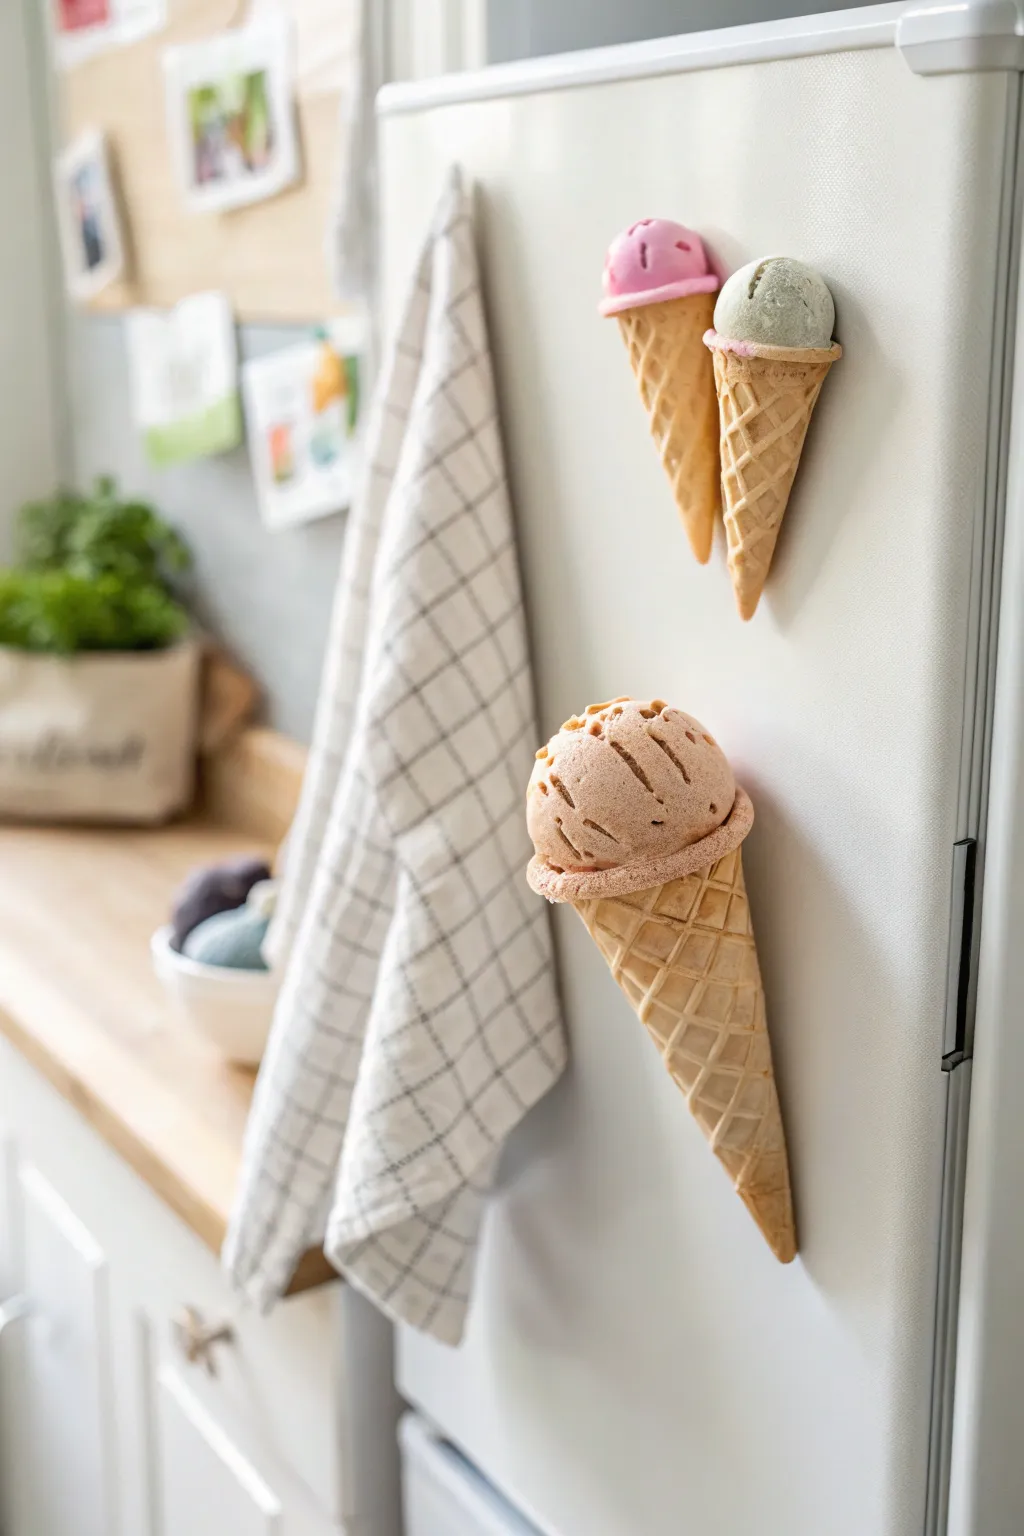
These delightful mini ice cream cone magnets are so realistic you might be tempted to take a bite. With their textured waffle cones and perfectly scooped, slightly melting ice cream tops, they add a sweet, playful touch to any refrigerator door.
Step-by-Step Guide
Materials
- Polymer clay (tan/beige for cones, pink, mint green, and light peach for scoops)
- Liquid polymer clay (translucent or matching scoop colors)
- Texturing tools (needle tool, small ball tool)
- Old toothbrush or stiff bristle brush
- Aluminum foil (for armature)
- X-acto knife or craft blade
- Rolling pin or pasta machine
- Small round strong magnets (neodymium recommended)
- Super glue (cyanoacrylate)
- Soft pastels (browns and oranges for shading)
- Small fluffy paintbrush
- Sculpting mat or glass tile
Step 1: Shaping the Waffle Cones
-
Prepare the clay:
Begin by conditioning your tan or beige polymer clay until it is soft and pliable. Roll it out into a flat sheet about 3mm thick. -
Create the waffle texture:
Before cutting, gently press a clean, fine mesh or a specific waffle-texture mold into the clay sheet to create the grid pattern. Alternatively, you can carefully score diagonal cross-hatch lines using the back of a craft knife for that classic waffle look. -
Form the cone shape:
Cut a triangular wedge from your textured clay sheet. Gently roll this wedge around itself to form a cone shape, being careful not to smudge your beautiful waffle texture too much. -
Refine the seam:
Where the clay overlaps at the back, gently press the seam together. You can use a needle tool to re-score the lines across the seam so it blends in invisibly. -
Hollow and trim:
Trim the top opening of the cone so it’s even. Use a ball tool to slightly hollow out the top interior, creating a little cup where the ice cream scoop will eventually sit. -
Add baked richness:
Shave some brown and orange soft pastels into a fine powder. Use a soft brush to dust this powder onto the textured cone, focusing on the grooves to mimic a perfectly baked, golden-brown cracker finish.
Step 2: Sculpting the Scoops
-
Form the armature:
Take a small piece of aluminum foil and crush it into a tight ball. This saves clay and keeps the magnet lightweight. Cover this ball with a layer of your chosen ice cream colored clay (pink, green, or peach). -
Texture the ice cream:
Now for the fun part: take an old toothbrush and firmly tap it all over the rounded clay ball. This creates that distinctively aerated, frozen dairy texture. -
The ‘feet’ of the scoop:
Roll a small, thin snake of the same colored clay. Wrap this around the bottom of your scoop where it will meet the cone. Use a needle tool to drag this clay upward into the scoop and downward slightly, creating the ruffled ‘skirt’ of ice cream that happens when it’s pressed into a cone. -
Add scoop marks:
For the larger peach scoop, I like to use a curved tool or the side of a needle tool to create deep, smooth drag marks across the top, mimicking where the metal scoop pulled through the ice cream. -
Assembly:
Place the finished scoop onto your prepared cone. Press them together gently to ensure a good bond.
Slumping Scoops?
If your ice cream scoop is too heavy and tipping the cone over before baking, prop the cone up in a small dish of baking soda or cornstarch. This supports the shape in the oven without leaving shiny spots.
Step 3: Baking and Finishing
-
Embed the magnet:
Turn the assembled cone over to find the flattest side that will rest against the fridge. Press your magnet firmly into the clay to create an indentation, then carefully pry it back out before baking (magnets can lose strength in the heat). -
Clean up:
Give the piece a final inspection. Smooth out any accidental fingerprints with a drop of baby oil on your finger. -
Baking:
Bake the clay cones according to the manufacturer’s instructions on your clay package. Use an oven thermometer to ensure the temperature is accurate to prevent scorching your light colors. -
Cooling:
Allow the cones to cool completely in the oven with the door cracked open. This gradual cooling helps prevent cracking. -
Attach the magnet:
Once fully cooled, place a drop of super glue into the indentation you made earlier and press the magnet back in. Hold for a few seconds until secure. -
Optional glaze:
If you want a ‘melting’ look, mix a tiny bit of liquid polymer clay with your scoop color and drip it carefully down the side. Note that this would require a second, short bake to set.
Flavor Swirls
To create a marble or ripple effect, partially mix translucent clay into your main color. Stop mixing before it’s uniform for realistic icy swirls!
Stick these sweet treats on your fridge and enjoy the summer vibes all year round.
Mini Cookie And Biscuit Magnets
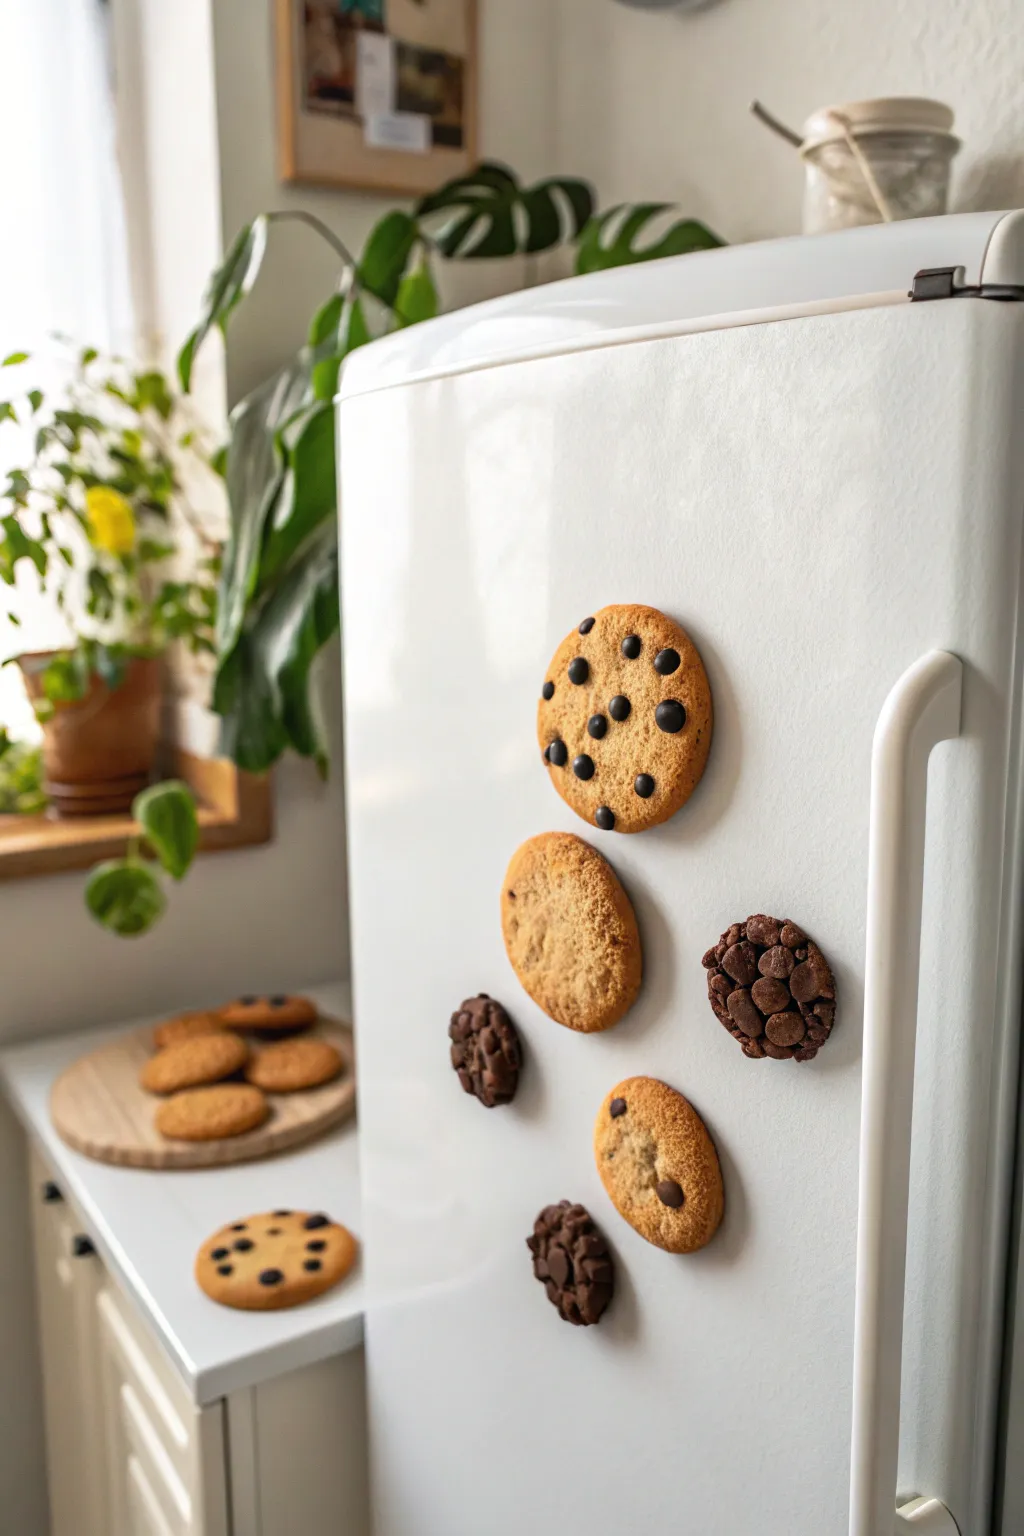
Transform your fridge into a bakery display with these hyper-realistic cookie magnets that look good enough to eat. Using polymer clay and some simple texturing techniques, you can recreate the crumbly texture of chocolate chip, oatmeal, and double chocolate treats.
How-To Guide
Materials
- Polymer clay (beige/tan, dark brown, translucent white)
- Small round cookie cutter (approx. 1.5 – 2 inches)
- Toothbrush or stiff bristle aesthetic brush
- Pointed tool or toothpick
- Ball stylus tool
- Soft pastel chalks (golden yellow, orange, brown)
- Paintbrush for shading
- Liquid polymer clay (optional but helpful)
- Strong round magnets
- Super glue or E6000
- Baking sheet and parchment paper
- Old sandpaper or aluminum foil ball
Step 1: Mixing the Dough
-
Create the base color:
Start by mixing beige or tan polymer clay with a small amount of translucent clay. This gives the ‘dough’ a realistic depth rather than looking like flat plastic. -
Add texture inclusions:
For the oatmeal or sugar cookie look, shave off tiny bits of white and slightly darker tan clay and mix them into your main ball, but don’t blend fully. You want tiny specks to remain visible. -
Form the chocolate chips:
Roll your dark brown clay into a thin snake. Cut tiny segments and roll them into small, imperfect spheres. Flatten the bottom slightly to make chocolate chips. Make more than you think you need. -
Create the heavy chocolate base:
For the dark double-chocolate cookies shown, mix dark brown clay with a touch of black. Create a separate batch of ‘chunks’ for these by chopping a flattened sheet of chocolate clay into irregular squares.
Sticky Textures?
If the toothbrush texture raises sharp little plastic-looking peaks, gently pat them down with a finger dusted in cornstarch to soften the look.
Step 2: Shaping and Texturing
-
Roll and cut:
Roll out your dough to about 1/4 inch thickness. Use your round cutter to stamp out circles. Don’t worry if the edges are too sharp right now. -
Soften the edges:
Gently press the edges of your cut circles inward with your finger to round them off, giving that baked, spread-out look. -
Initial texturing:
Take a clean toothbrush and vigorously tap it all over the surface of the unbaked clay cookies. This creates the primary porous texture of a baked good. -
Deepen the cracks:
Use a ball of crumpled aluminum foil or rough sandpaper to press deeper, uneven textures into the surface. I find rolling the foil across the top prevents it from looking too uniform. -
Simulate baking cracks:
Use a needle tool to gently tease open small cracks on the surface, especially near the edges, just like real cookies crack when they expand.
Step 3: Topping and Baking
-
Embed the chips:
Press your pre-made chocolate chips or chunks firmly into the soft clay. Push some deeply so they look baked-in, and leave others resting on top. -
Secure the toppings:
If the chips feel loose, add a tiny dot of liquid polymer clay under them to act as a bonding agent. -
Shade with pastels:
Scrape your brown and golden yellow pastels into a powder. Using a soft brush, dust the edges and high points of the ‘dough’ to simulate browning in the oven. -
Detail the chocolate:
For the chocolate chips, you can leave them slightly shiny or dust them very lightly with white powder if you want a ‘bloom’ look. -
Bake the clay:
Place your creations on parchment paper and bake according to your clay package instructions (usually 275°F for 15-30 minutes).
Pro Tip: Glossy Chips
After baking, paint ONLY the chocolate chips with a tiny bit of satin or gloss varnish. The contrast against the matte cookie creates realistic depth.
Step 4: Assembly
-
Cool down:
Let the cookies cool completely. They are fragile while hot. -
Check the backs:
If the backs aren’t perfectly flat, sand them slightly so the magnet will adhere well. -
Attach the magnet:
Apply a strong dab of E6000 or super glue to the back of the cookie. Press the magnet firmly into place. -
Final cure:
Allow the glue to cure undisturbed for at least 24 hours before sticking them to your fridge.
Enjoy arranging these sweet little trompe l’oeil treats on your refrigerator door


What Really Happens Inside the Kiln
Learn how time and temperature work together inside the kiln to transform clay into durable ceramic.
Tiny Mushroom Cluster Magnets
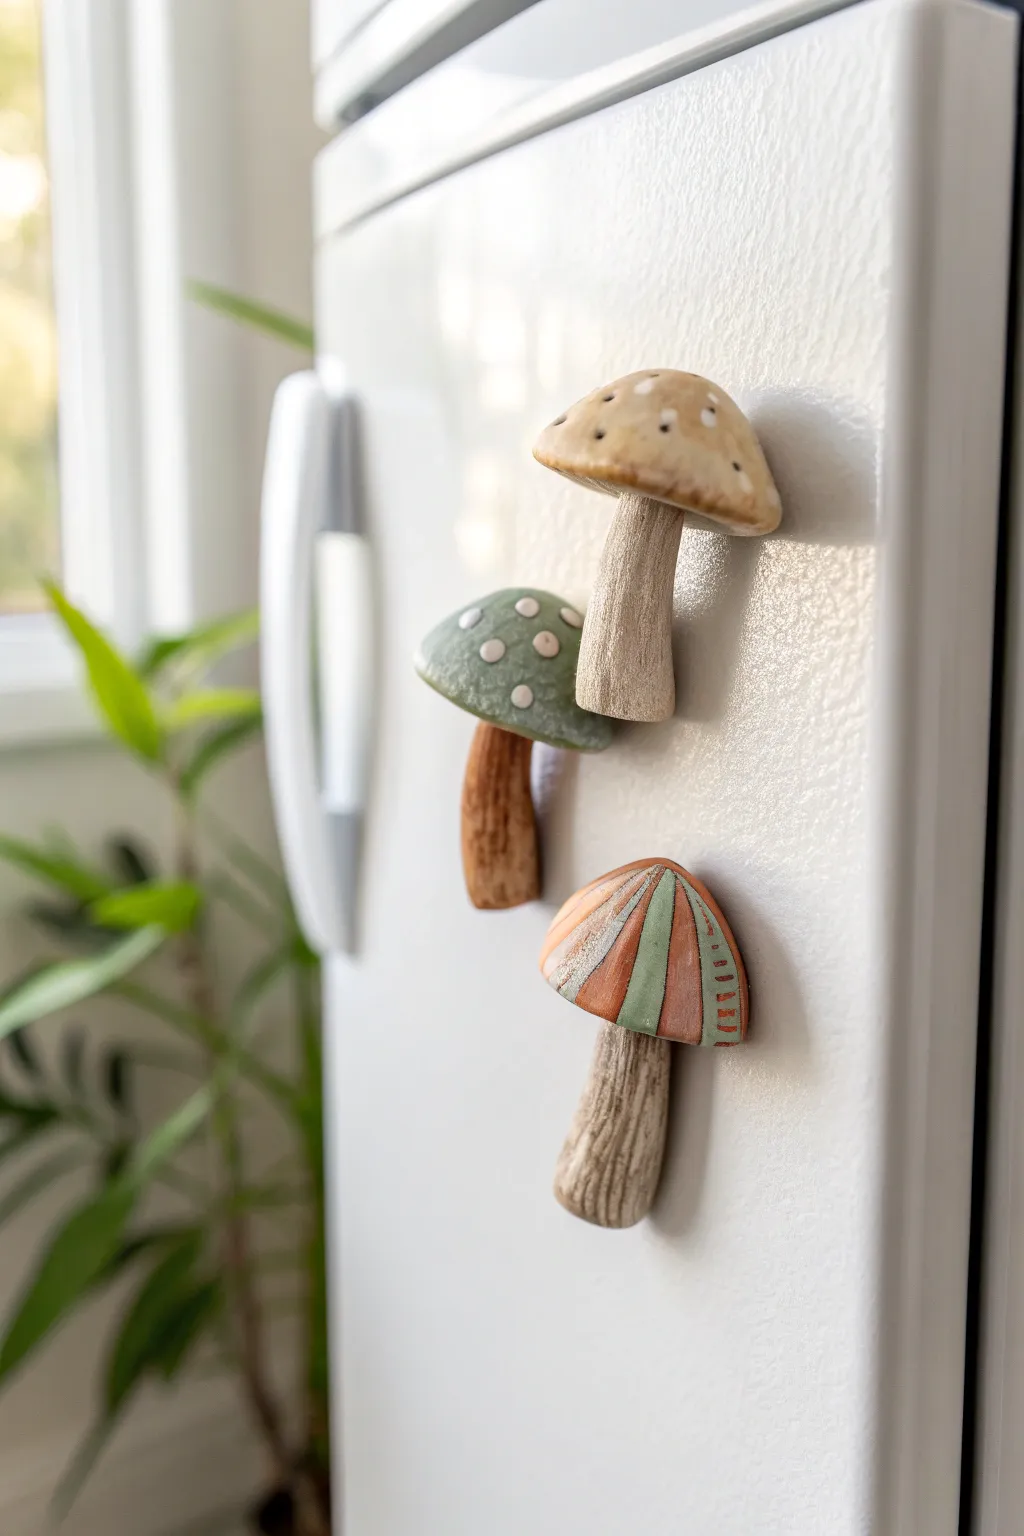
Bring the charm of the forest floor into your kitchen with this set of three distinct mushroom magnets. Crafted from polymer clay, these tiny fungi feature varied textures and hand-painted details that look delightful against any refrigerator door.
Step-by-Step Guide
Materials
- Polymer clay (white, beige, or scrap clay for core)
- Acrylic paints (olive green, terracotta, cream, muted orange, teal, brown)
- Fine detail paintbrush
- Small round magnets (neodymium or strong ceramic)
- Super glue or E6000 adhesive
- Sculpting tools (needle tool, small ball stylus)
- Aluminum foil
- Glaze or matte varnish (optional)
- Toothbrush or sandpaper (for texturing)
Step 1: Sculpting the Shapes
-
Prepare the stems:
Start by conditioning your clay until it is soft and pliable. Roll three small logs of clay for the stems. Shape two of them to be thicker at the base and slightly tapered at the top, and make one slightly curved for variety. -
Texture the stems:
Using a needle tool, score vertical lines down the length of each stem to mimic the fibrous texture of real mushrooms. Vary the depth of the lines for a natural look. -
Form the caps:
Roll three balls of clay slightly larger than your stem tops. Flatten them gently into domes. You want three distinct shapes: one standard cap, one slightly flatter cap, and one more conical cap. -
Refine the cap edges:
Smooth the edges of your domes with your finger so they aren’t sharp. For the bottom mushroom, lightly pinch the rim to give it a slightly uneven, organic feel. -
Texturing the top mushroom:
Take the standard dome cap and use a small ball stylus to press tiny indents primarily around the top center, creating little dimples. -
Embellishing the green mushroom:
For the middle cap, roll tiny, almost microscopic balls of clay. Press them flat onto the surface of the green cap to create raised polka dots. -
Detailing the striped mushroom:
Leave the third cap smooth for now; the striped details will be painted on later. Just ensure the surface is clean and free of fingerprints. -
Connect pieces:
Score the top of each stem and the underside of each cap. Press them firmly together. You can blend the clay slightly at the connection point for strength, but keep the distinction clear. -
Embed the magnet:
Press a magnet firmly into the back of each mushroom while the clay is still soft to create a perfect indentation. Remove the magnet before baking so it doesn’t lose its magnetism from the heat. -
Bake:
Bake your pieces according to the clay manufacturer’s instructions, usually around 275°F (135°C) for 15-30 minutes depending on thickness. Let them cool completely.
Step 2: Painting and Assembly
-
Base coat the stems:
Once cool, mix a wash of brown paint and water. Brush it over the textured stems, getting into the crevices. Wipe away the excess on the surface with a paper towel or rag, leaving the dark paint in the grooves to highlight the texture. -
Paint the top mushroom:
Paint the entire cap a warm, creamy beige. Once dry, use a very fine brush to add white dots into the dimples you created earlier. Add tiny brown specks for an earthy look. -
Paint the middle mushroom:
Paint this cap a muted olive green. Carefully paint the raised clay dots a bright, clean white. Ensure the darker stem color contrasts nicely with the green cap. -
Paint the striped mushroom:
This is the most detailed one. Paint alternating vertical sections in muted orange and soft teal. Leave thin lines of the raw clay color between the sections if possible, or paint thin divider lines in cream. -
Add stripe details:
On the orange sections of the striped mushroom, use your finest brush or a toothpick to add tiny horizontal hatch marks in a darker rust color. -
Dry brush highlights:
I like to take a dry brush with a tiny bit of white or cream paint and very lightly dust the tops of all three caps to give them a sun-bleached, matte finish. -
Seal (Optional):
If you want extra durability, apply a coat of matte varnish. Avoid glossy finishes as these look better with a natural, earthy texture. -
Attach magnets:
Place a dab of super glue or E6000 into the indentation you made earlier on the back. Press the magnet in and let it cure fully before sticking it to your fridge.
Needle Tool Secret
Don’t have a needle tool? A crumpled ball of aluminum foil rolled over the clay creates excellent organic ‘mushroom skin’ texture instantly.
Magnet Won’t Stick?
If the magnet indentation is too shallow, use a craft knife or Dremel tool to carefully carve out a deeper pocket after the clay has been baked.
Now you have a charming little patch of fungi growing right in your kitchen
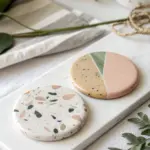
Mini Succulent Pot Magnets
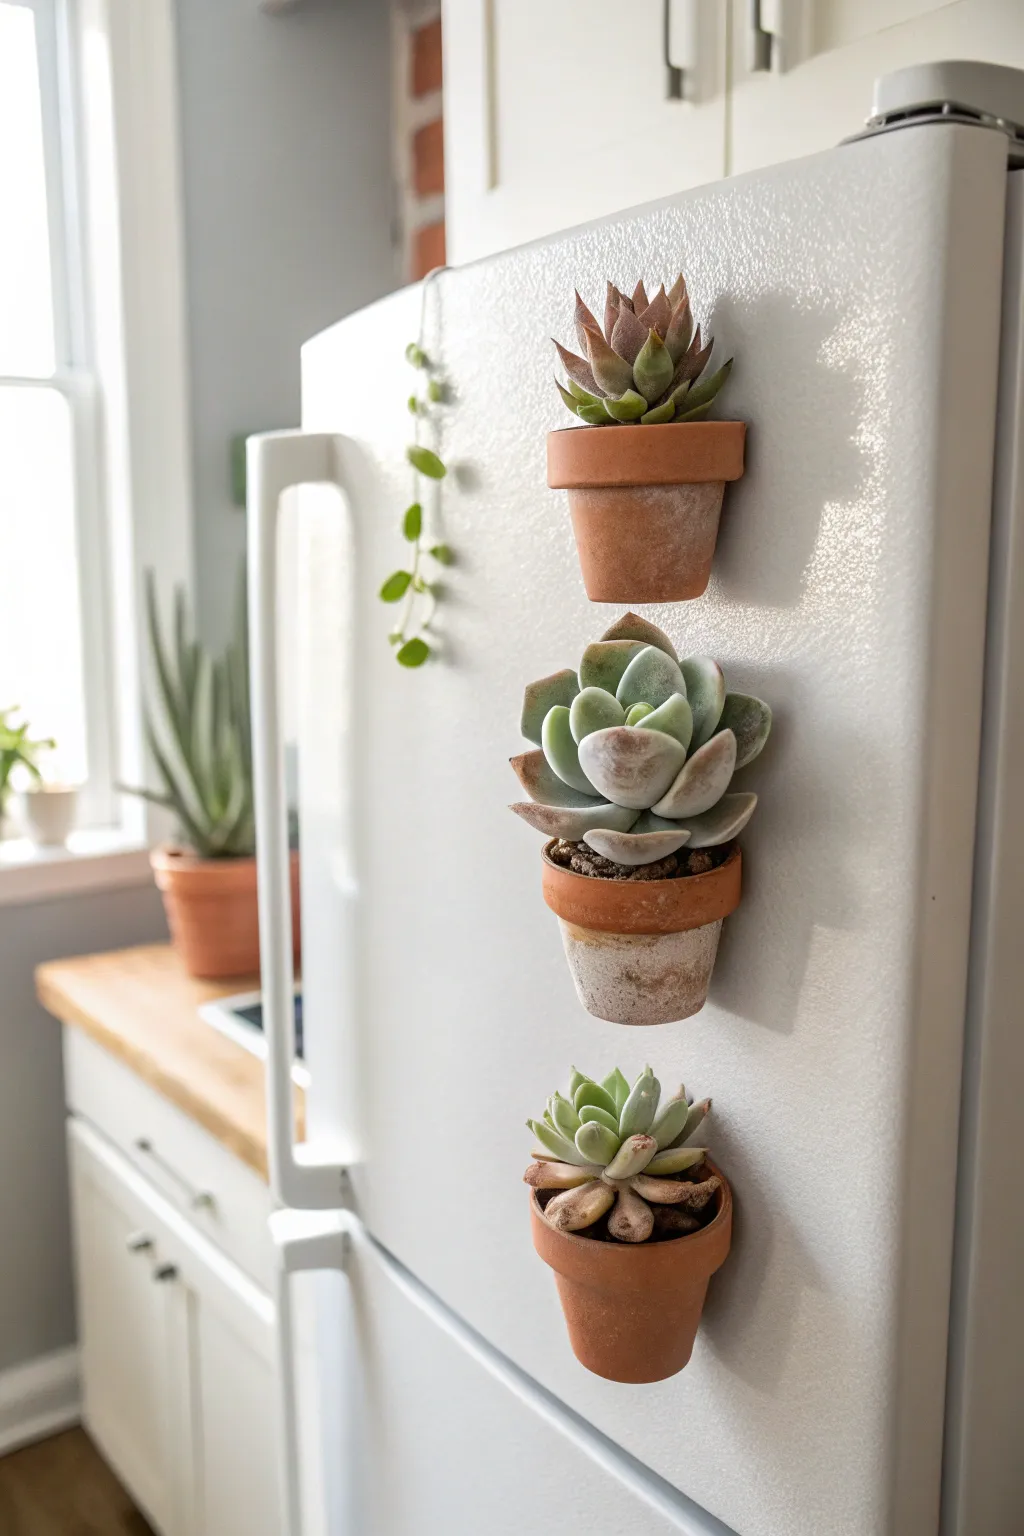
Transform your refrigerator into a living wall with these adorable magnetic planters. Using tiny terracotta pots and strong magnets, you can display your favorite miniature succulents right at eye level.
How-To Guide
Materials
- Mini terracotta pots (1.5 – 2 inch diameter)
- Neodymium magnets (heavy duty, round)
- E6000 adhesive or strong epoxy
- Small succulents (real or high-quality faux)
- Succulent potting soil (cactus mix)
- Small gravel or pebbles
- A sanding sponge or sandpaper (optional)
- White or grey acrylic paint (optional for aging)
- Paper towel
- Clean cloth
Step 1: Preparing the Pots
-
Clean and Dry:
Start by wiping down your mini terracotta pots with a damp cloth to remove any dust or manufacturing residue. Let them air dry completely, as any moisture will prevent the glue from adhering properly. -
Create a Flat Surface:
If your pots have a raised rim or a curved back, take a sanding sponge and gently sand one side of the pot’s exterior to create a slightly flatter surface. This increases the contact area for the magnet, though it’s not strictly necessary if you have strong enough glue. -
Optional Aging:
To achieve the rustic, weathered look seen in the photo, dry brush a tiny amount of diluted white or grey paint onto the pots. Wipe most of it off immediately with a paper towel, leaving just a hint of ‘age’ in the standard clay texture.
Step 2: Attaching the Magnets
-
Select Your Magnets:
Use high-strength neodymium magnets. Standard craft magnets are too weak to hold the weight of wet soil and a plant. You want a magnet that fits nicely on the flat side of the pot without hanging over the edge. -
Apply Adhesive:
Squeeze a generous dot of E6000 or mix a small batch of epoxy. Apply it to the center of your magnet. I prefer E6000 for its flexibility, which helps absorb the shock of the fridge door closing. -
Affix to Pot:
Press the magnet firmly against the side of the pot, ideally just below the rim where the pot is widest. This balance point helps prevent the pot from tipping forward once filled. -
Cure Completely:
This is the hardest part: waiting. Lay the pots face down so the magnet is facing up and let the glue cure for at least 24 hours. Do not rush this step, or your pots might slide off the fridge later.
Sliding Down?
If the filled pot slides down the fridge, the magnet isn’t strong enough. Glue a second magnet directly on top of the first one to double the strength without restarting.
Step 3: Planting
-
Add Drainage Layer:
Since these pots are tiny and might not drain freely on a fridge, place a small layer of pea gravel or pebbles at the very bottom of each pot. -
Prepare the Soil:
Fill the pot about halfway with specific cactus or succulent potting mix. It needs to be loose and fast-draining. -
Plant the Succulent:
Gently remove your mini succulent from its nursery container. Shake off excess old soil from the roots. -
Position and Fill:
Nestle the succulent into the pot. Add more cactus soil around the edges, using a small spoon or your fingers to gently tamp it down. -
Clean Up:
Brush off any stray soil from the rim of the pot and leaves of the plant using a soft, dry paintbrush.
Watering Hack
Take the magnets off the fridge to water them in the sink. Let them drain completely on a paper towel for an hour before sticking them back up to keep your fridge clean.
Step 4: Installation
-
Test the Magnet:
Before putting it on the fridge, test the magnet on a flat metal surface to ensure the hold is strong enough for the filled pot. -
Water Sparely:
Use a pipette or dropper to water the soil directly at the base of the plant. Avoid soaking the soil right before hanging, as the water adds significant weight. -
Arrange on Fridge:
Place your new planters on the refrigerator door. Space them vertically for a clean, modern look.
Now you have a charming vertical garden that brings a touch of greenery to your kitchen

TRACK YOUR CERAMIC JOURNEY
Capture glaze tests, firing details, and creative progress—all in one simple printable. Make your projects easier to repeat and improve.
Tiny Animal Face Magnets
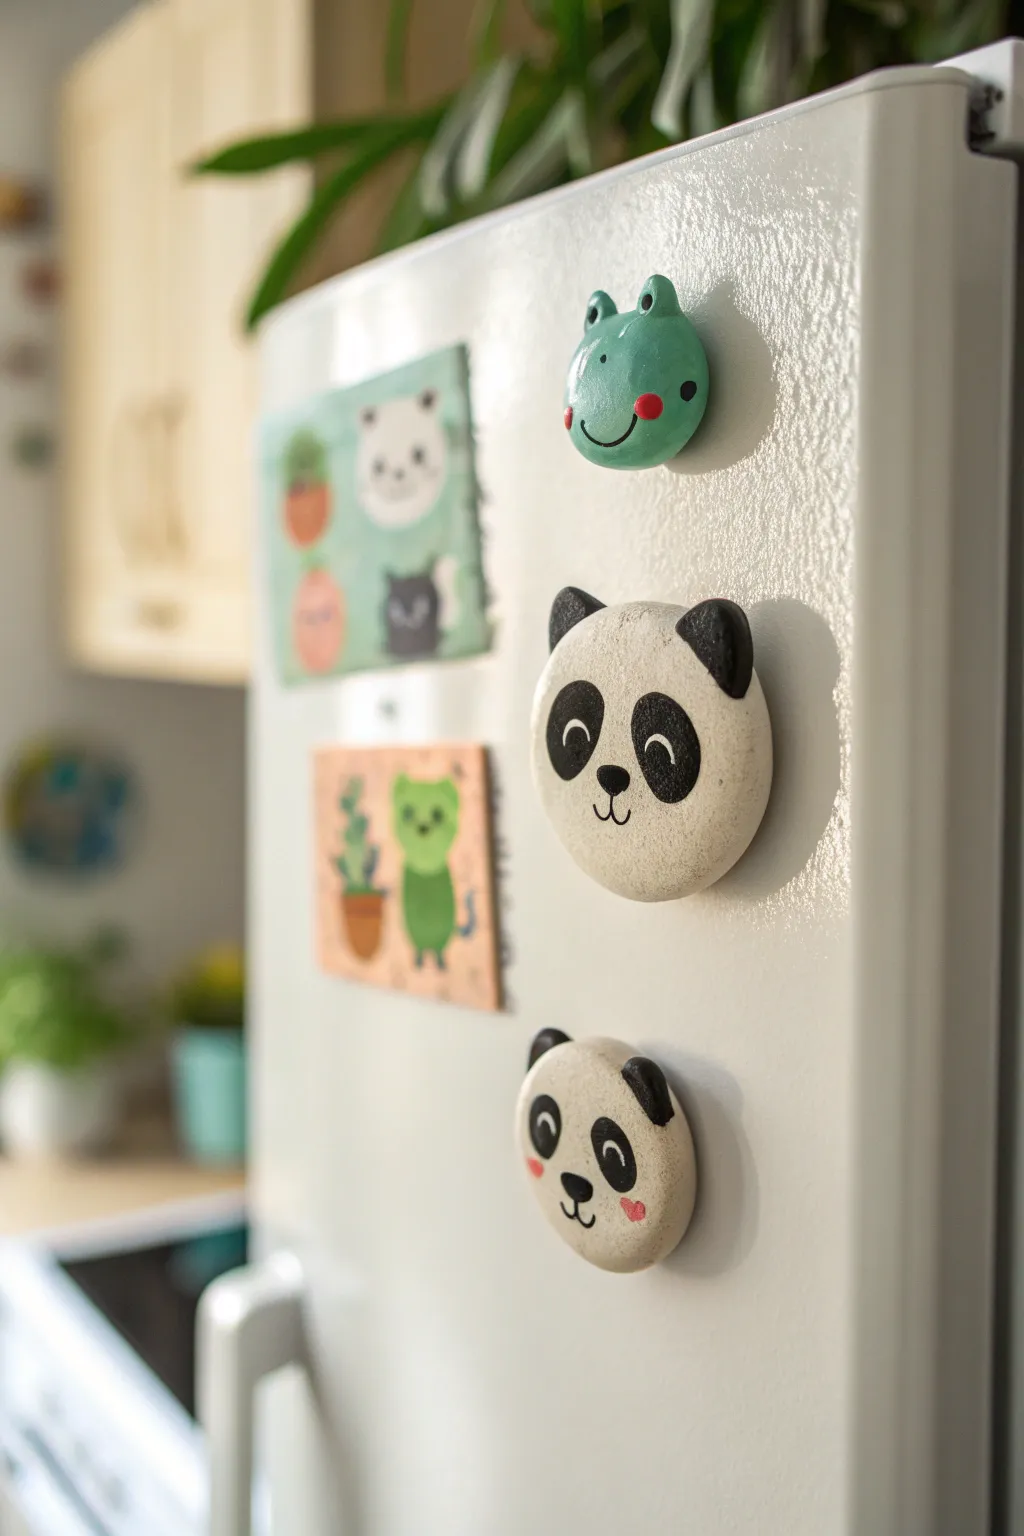
Brighten up your kitchen with these adorable, sculpted animal face magnets. Using air-dry or polymer clay, you can craft smooth, rounded panda and frog faces that add a touch of whimsy to any magnetic surface.
Detailed Instructions
Materials
- White or light-colored air-dry clay (or polymer clay)
- Acrylic paints (White, Black, Teal/Green, Pink/Red)
- High-gloss varnish or sealant
- Round ceramic magnets
- Strong craft glue (E6000 or super glue)
- Fine-grit sandpaper
- Small bowl of water (for smoothing)
- Fine detail paintbrush
- Medium flat paintbrush
- Dotting tool or toothpick
Step 1: Sculpting the Bases
-
Form the main shapes:
Start by rolling three balls of clay. Make two white balls for the pandas (one slightly larger than the other) and one for the frog. Flatten them gently onto your work surface until they form thick, smooth domes. -
Add frog details:
For the green frog, roll two very tiny balls of clay for eyes. Attach these to the top edge of one dome, blending the clay at the back with a little water so they attach seamlessly without falling off. -
Create panda ears:
For the pandas, roll pairs of small balls for ears. Press them onto the top sides of the white domes. Use a sculpting tool or your finger to smooth the seam where the ear meets the head. -
Smooth the surface:
Dip your finger in water and gently rub the surface of all three shapes to remove fingerprints or cracks. The smoother the clay now, the better the paint will look later. -
Let them dry:
Allow the clay pieces to dry completely according to the package instructions. Air-dry clay often needs 24-48 hours. Rotate them occasionally to ensure the backs dry evenly.
Cracking Up?
If you see small cracks as the clay dries, mix a tiny bit of fresh clay with water to make a paste perfectly suited for filling gaps.
Step 2: Painting and Details
-
Sand for perfection:
Once fully dry, lightly sand any rough edges or uneven spots with fine-grit sandpaper. Wipe away the dust with a slightly damp cloth. -
Base coat the frog:
Paint the frog shape entirely with a bright teal or green acrylic paint. You may need two thin coats for full coverage. -
Base coat the pandas:
Paint the panda shapes with a creamy white or off-white acrylic. Even if the clay is white, paint gives it a uniform finish. -
Paint panda patches:
Using black paint and a fine brush, carefully paint the ears black. Then, paint two large oval patches for the eyes on the face, slightly angled outward. -
Add panda noses:
Paint a small, rounded triangle for the nose in roughly the center of the face. For the mouth, paint a tiny anchor shape or simple ‘w’ extending down from the nose. -
Detail the eyes:
Once the black eye patches are dry, use a dotting tool or the back of a paintbrush to add white dots for the eyes. For the smaller panda, you might add black pupils inside the white dots; for the larger one, curved white crescents look cute. -
Paint the frog face:
On the dry green base, paint small white circles on the protruding eye bumps. Add tiny black dots for pupils. Paint a thin, wide ‘U’ shape for a smile and two red or pink dots for cheeks. -
Add panda blush:
For the smaller panda, mix a dab of red with white to make pink. Paint tiny heart shapes or ovals on the cheeks for a blushing effect.
Stone Effect
For a natural look, skip the white base coat on the pandas and use white clay with speckled inclusions or a ‘granite’ effect clay.
Step 3: Finishing Up
-
Apply varnish:
Coat the front and sides of each animal face with a high-gloss varnish. This protects the paint and gives them that polished, ceramic look. -
Attach the magnets:
Flip the dry pieces over. Apply a strong dab of glue to the center of the back and press a round ceramic magnet firmly into place. -
Final dry:
Let the glue set for several hours before sticking your new friends onto the fridge.
Now you have a trio of charming faces ready to hold up your grocery lists and photos
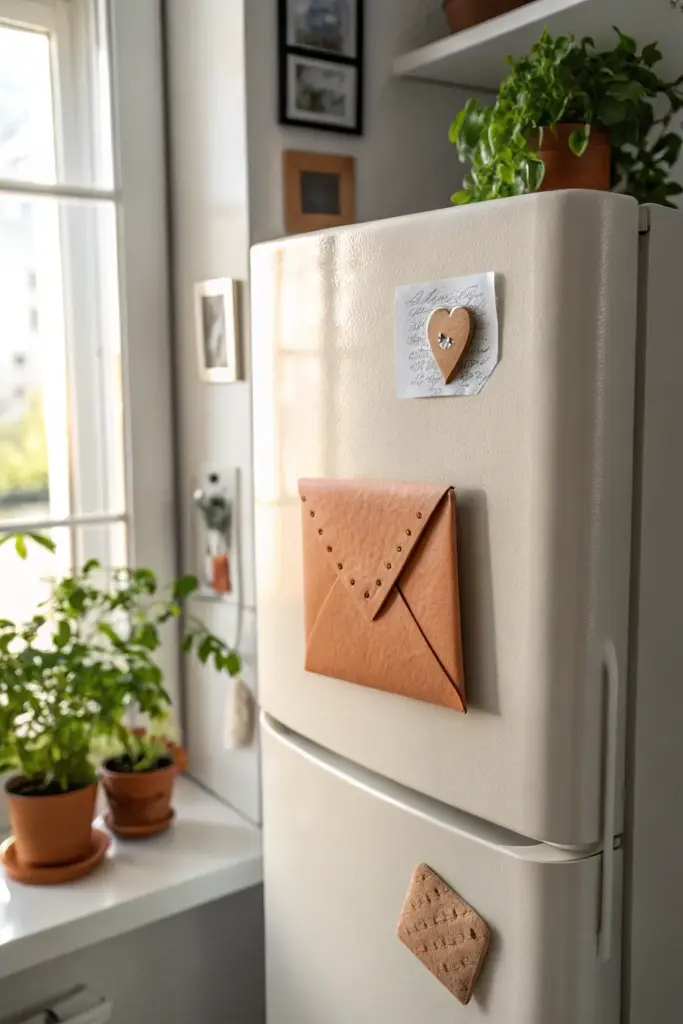
Mini Envelope And Love Note Magnets

Transform your fridge into a charming message center with these realistic faux-leather clay magnets. This set features a distinctive envelope pocket with stitched detailing and a sweet heart tack that looks perfect holding up handwritten notes.
Step-by-Step Guide
Materials
- Polymer clay (terracotta or leather-effect color)
- Rolling pin or clay roller
- Sharp craft knife or scalpel
- Ruler
- Needle tool or toothpick
- Strong round magnets
- Super glue or E6000
- Textured paper or sponge (optional for texturing)
- Small piece of scrap paper for templates
- Stitch marking wheel (optional)
- Oven and baking tray
Step 1: Shaping the Envelope
-
Prepare the Clay:
Begin by conditioning your terracotta-colored polymer clay until it is soft and pliable. If you want a leather effect, you can gently press a piece of textured paper or a sponge onto the surface after rolling it out. -
Roll Flat:
Roll the clay out into a large, even sheet about 3mm thick. It needs to be sturdy enough to hold its shape but not too heavy for a magnet. -
Cut the Base Shape:
Using a ruler and craft knife, cut out a large rectangle. For the envelope shown, aim for approximately 3 inches wide by 4 inches tall to start. -
Create the Flaps:
To form the envelope look without folding (which can crack thick clay), you will layer pieces. Cut two triangles that fit perfectly over the bottom half of your rectangle to mimic the folded side flaps. -
Add the Bottom Flap:
Cut a larger triangle for the bottom flap. Gently press these triangle pieces onto the base rectangle. I like to blend the seams very slightly at the edges so they look like a single folded unit. -
Form the Top Flap:
Cut a final triangle for the top closing flap. Place this over the top section of your rectangle, overlapping the bottom triangles substantially to create that classic envelope point. -
Detail the Edges:
Using your needle tool, poke a series of evenly spaced holes along the edges of the top triangular flap. This mimics the stitching detail seen in the reference image.
Step 2: Crafting the Heart Magnet
-
Cut the Shape:
Roll out a fresh piece of clay, slightly thicker than the envelope (about 4-5mm). Use a small heart cutter or freehand cut a heart shape with your craft knife. -
Smooth the Form:
Gently tap the edges of the heart with your finger to round them off, removing any sharp cut marks for a softer look. -
Create the Tack Look:
Roll a tiny ball of silver-colored clay (or use a real metal tack head if you plan to bake it safely). Press this firmly into the center of the heart to simulate a fastener.
Glue Not Holding?
If magnets pop off, score the clay back in a crosshatch pattern with a knife before gluing. The extra texture gives the adhesive something to grip onto.
Step 3: Baking and Assembly
-
Bake the Pieces:
Place your clay envelope and heart on a baking sheet lined with parchment paper. Bake according to your clay manufacturer’s instructions, usually around 275°F (130°C) for 15-30 minutes. -
Cool Down:
Allow the pieces to cool completely on the tray. Moving them while hot can cause warping. -
Prepare Adhesion Sites:
Lightly sand the back of both the envelope and the heart where the magnets will go. This rough texture helps the glue bond better. -
Attach Magnets:
Apply a dab of strong glue to the back of the envelope. Depending on its weight, you might need two magnets—one near the top and one near the bottom. Glue a single strong magnet to the back of the heart. -
Final Cure:
Let the glue cure fully for 24 hours before sticking them to your fridge. -
Create the Note:
Grab a scrap of parchment or decorative paper. Write a note in cursive or draw scribbles to mimic the look in the photo, tear the edges for a rustic feel, and place it under your new heart magnet.
Leather Look Hack
Before baking, gently roll a ball of aluminum foil over the clay surface. This imitates the pebbled texture of real leather perfectly.
Now you have a stylish spot to showcase your grocery lists or tiny love notes