When I need quick, cute wins in the studio, I reach for modelling clay and make tiny projects that look adorable from every angle. These kawaii clay ideas are all about simple shapes, sweet faces, and that photo-ready finish you can totally pull off in a weekend.
Kawaii Chubby Cat Figurines
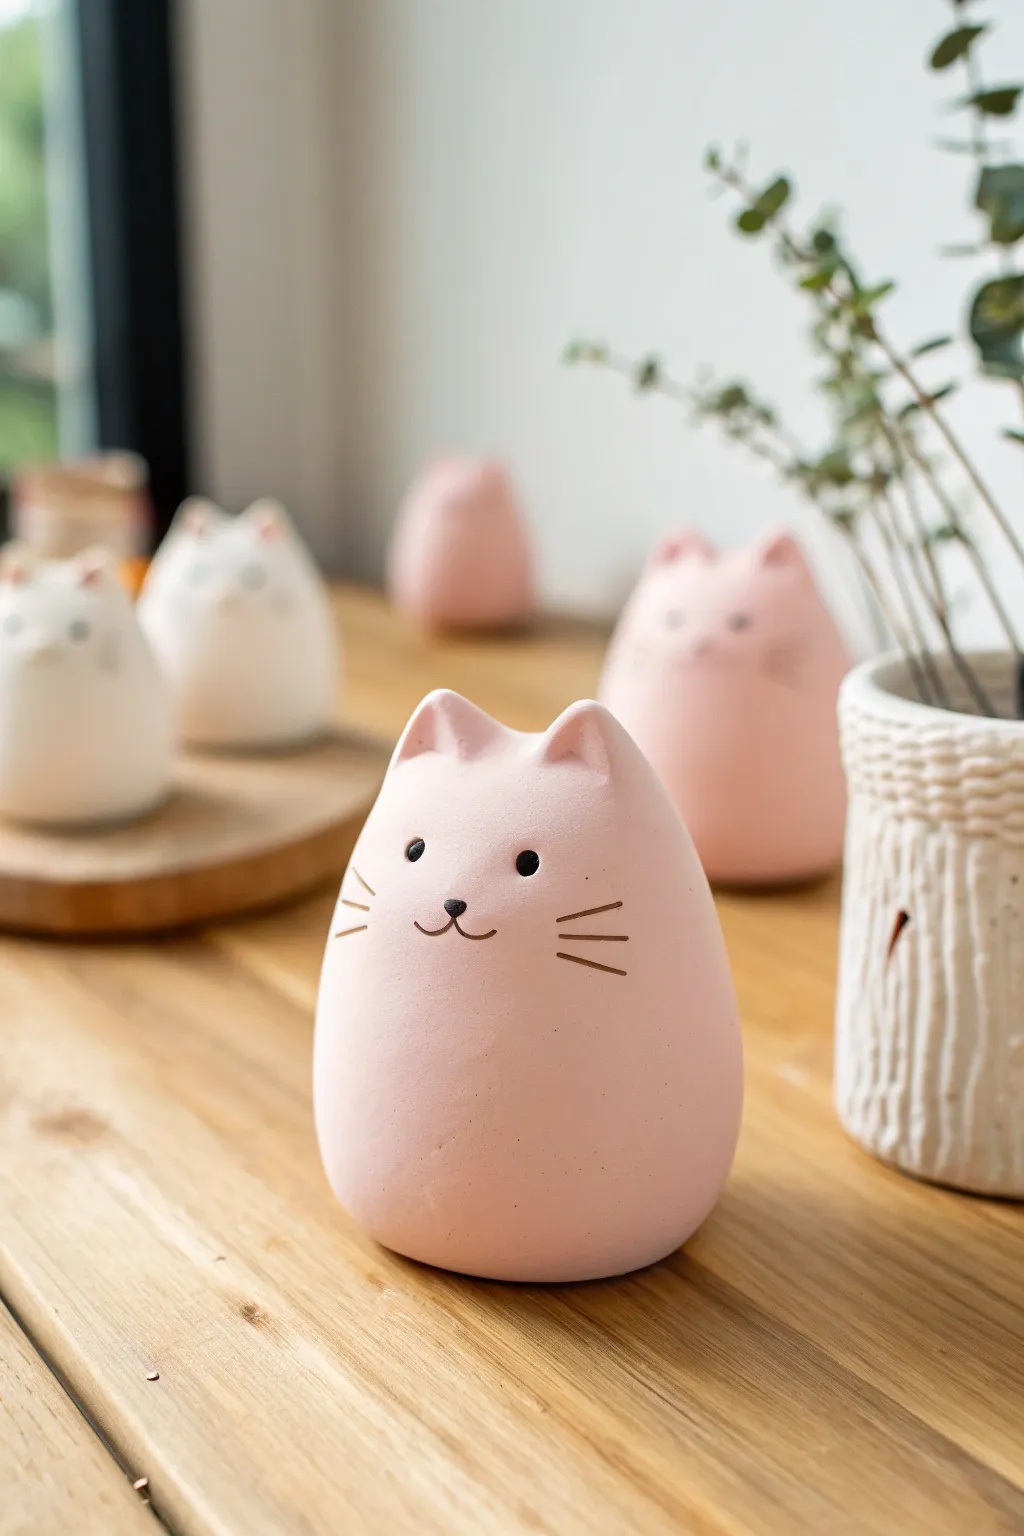
These delightfully round clay cats are the epitome of minimalism and cuteness, featuring a smooth, egg-shaped body and delicate painted details. Their sturdy, chubby form makes them perfect desk buddies or charming little paperweights.
Step-by-Step Tutorial
Materials
- Light pink polymer clay (soft finish)
- Black acrylic paint
- Fine-point detail brush or toothpick
- Needle tool or clay sculpting tool
- Rolling pin (acrylic or wooden)
- Smooth work surface (ceramic tile or glass)
- Wet wipes for smoothing
- Oven (if using polymer clay)
Step 1: Shaping the Base
-
Condition the clay:
Begin by taking a generous amount of light pink clay and kneading it thoroughly in your hands until it becomes soft, pliable, and free of air bubbles. -
Form the main sphere:
Roll the conditioned clay into a very smooth, tight ball between your palms to ensure there are no cracks or seams. -
Create the egg shape:
Place the ball on your work surface and gently roll it back and forth while applying slightly more pressure to the top half. -
Flatten the base:
To ensure your cat stands upright securely, gently tap the wide bottom of the egg shape against your work surface to create a flat, stable bottom. -
Round the body:
Use your fingers to smooth out any harsh angles created by flattening the base, maintaining that chubby, puffed look.
Unwanted Fingerprints?
If you can’t smooth out fingerprints, try brushing the raw clay lightly with a little cornstarch or baby oil before that final bake.
Step 2: Sculpting Features
-
Pinch the ears:
At the narrower top of the egg shape, gently pinch two sections of clay upwards to form the ears. -
Refine ear shape:
Use your thumb and forefinger to smooth the pinched clay into soft triangles, ensuring the tips are slightly rounded rather than dangerously sharp. -
Indent the inner ears:
Take a rounded sculpting tool or the back of a small paintbrush and press gently into the front of each ear to create a shallow hollow. -
Smooth the transition:
I like to use a tiny bit of water or clay softener on my fingertip to rub the area where the ears meet the head, making the transition seamless. -
Polish the surface:
Before curing, do a final pass with a baby wipe or your finger to remove any stray fingerprints or lint specks from the smooth pink body. -
Cure the clay:
Bake the figurine according to your specific clay manufacturer’s instructions, then let it cool completely before painting.
Make a Family
Create different sizes using white, grey, or calico-patterned clay to build a whole collection of chubby cats for your shelf.
Step 3: Painting Details
-
Position the face:
Visualize where the features will go; the eyes should sit roughly halfway down the height of the figure for maximum cuteness. -
Paint the eyes:
Dip your fine-point tool or back of a toothpick into black acrylic paint and dot two small, widely spaced eyes onto the face. -
Draw the nose:
Directly between and slightly below the eyes, paint a tiny, soft triangle or oval for the nose. -
Add the mouth:
Using your finest brush, carefully extend two small curved lines outward from the bottom of the nose to create a ‘w’ shape smile. -
Add whiskers:
Paint two or three short, horizontal floating lines on each cheek area, keeping them thin and delicate. -
Seal the work:
Once the paint is fully dry, apply a matte varnish to protect the clay and paint without adding too much shine.
Enjoy the calming presence of your new little clay friend on your desk


Mini Frog Friends With Blush Cheeks
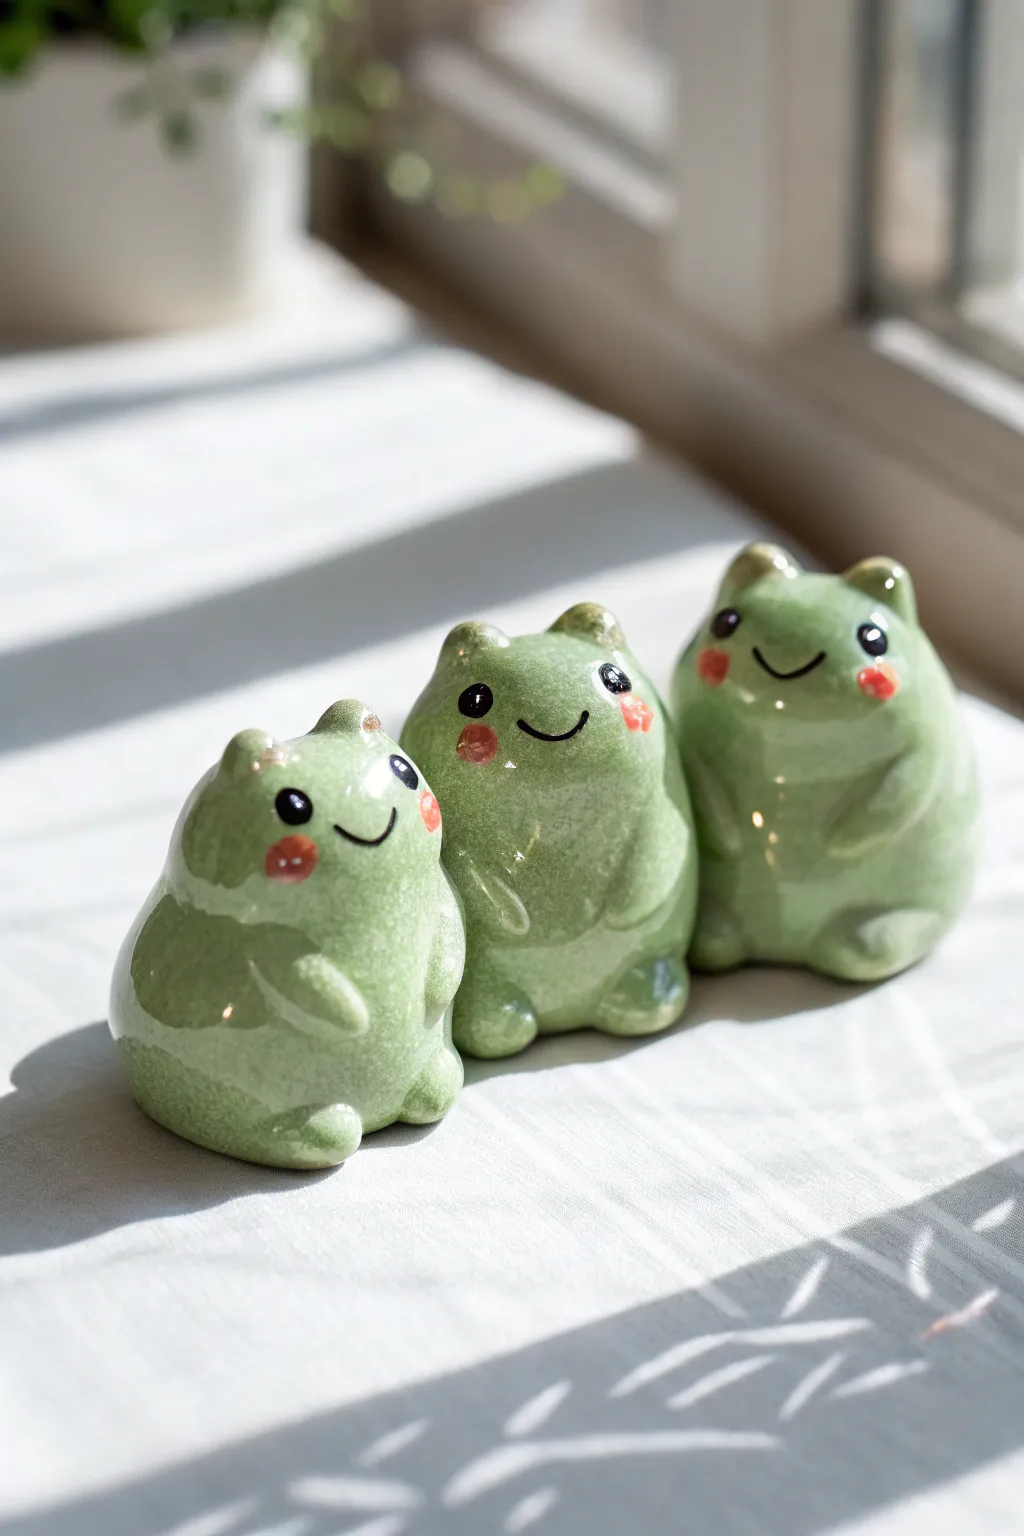
These adorable little frog friends bring a cheerful presence to any windowsill with their high-gloss finish and rosy cheeks. Their simplified, rounded shapes make them perfect for beginners looking to practice basic sculpting and glazing techniques.
How-To Guide
Materials
- Polymer clay (white or light green)
- Acrylic paints (leaf green, black, coral/pink)
- High-gloss polyurethane varnish or UV resin
- Sculpting tools (needle tool, ball stylus)
- Aluminum foil (for armature)
- Soft paintbrush
- Oven for baking
Step 1: Sculpting the Base Form
-
Prepare the foil core:
Crumple a small piece of aluminum foil into a rough egg shape about the size of a walnut. This saves clay and makes the frog lighter. -
Condition the clay:
Take a portion of clay and knead it until it’s warm and pliable. If you’re using white clay to paint later, ensure your hands are clean to keep it pristine. -
Cover the core:
Flatten the clay into a pancake and wrap it completely around your foil egg. Roll it gently between your palms until the surface is perfectly smooth and egg-shaped, slightly wider at the bottom. -
Form the head shape:
Gently pinch the top area to distinguish a slight head section, but keep the overall silhouette very round and chubby. The transition should be subtle.
Step 2: Adding Features
-
Create the eyes:
Roll two very small balls of clay for the eyes. Place them on top of the head, spaced slightly apart, and blend the bottom seams downward into the head using a modeling tool so they look integrated, not just stuck on. -
Add the arms:
Roll two small sausage shapes for the arms. Press them onto the belly area, curving them slightly inward as if the frog is holding its tummy. -
Attach the legs:
Make two slightly larger tear-drop shapes for the feet. Press these onto the bottom front of the body, flattening them slightly so the frog sits stable. -
Sculpt the mouth:
Use a needle tool or a small curved blade to gently press a smile into the clay between the eyes. Pressing in ensures the smile stays defined after painting. -
Smooth everything:
Dip your finger in a little baby oil or water (depending on clay type) and gently smooth out any fingerprints or rough seams. -
Bake the clay:
Bake the figures according to your clay manufacturer’s instructions. Usually, this is around 275°F (135°C) for 15-30 minutes. Let them cool completely.
Ceramic Look Hack
To mimic the speckled look of fired ceramic glaze, use a toothbrush to flick tiny, almost invisible specks of darker green or brown paint onto the frog before varnishing.
Step 3: Painting and Glazing
-
Base coat:
Painting the entire frog with a light leaf green acrylic paint. You may need two thin coats for full coverage. Let this dry fully. -
Paint the face:
Using a very fine detail brush or a larger ball stylus, dot two black circles onto the eye bumps. Carefully trace the indented smile line with black paint. -
Add the blush:
Mix a coral or soft pink color. Dip a Q-tip or a small dry brush into the paint, dab most of it off on a paper towel, and gently stipple rosy cheeks right under the eyes. -
Add eye highlights:
I like to use a toothpick to place a tiny white dot in the upper corner of each black eye. This ‘catchlight’ brings the character to life. -
Apply the glaze:
Once the paint is bone dry, apply a thick coat of high-gloss polyurethane varnish or UV resin. This gives that ‘ceramic’ look shown in the photo. -
Curtain call:
Allow the glaze to cure completely (using a UV lamp if you chose resin) before handling your shiny new friends.
Sticky Glaze?
If your varnish feels tacky after drying, you may have applied it too thickly or in high humidity. Apply a thin coat of clear water-based sealer over it to fix the stickiness.
Now you have a trio of glossy companions ready to brighten up your desk or shelf


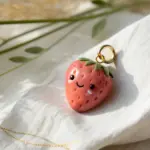
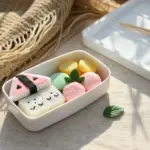
Food With Faces Charm Set
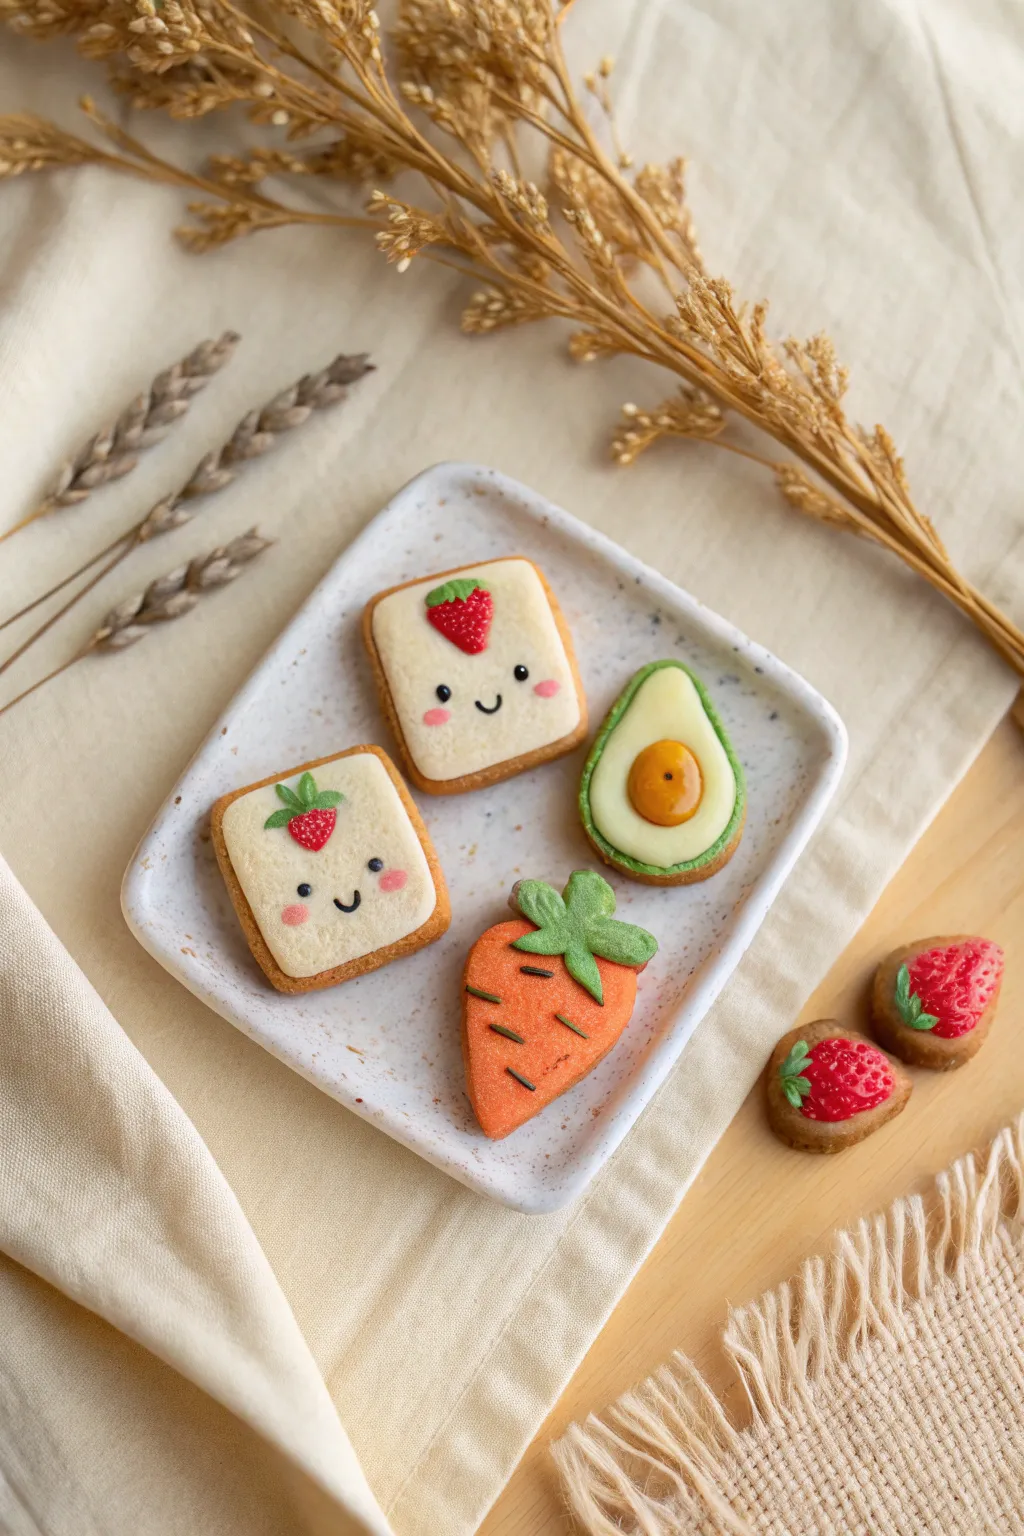
These adorable miniature clay cookies look almost good enough to eat, featuring sweet smiling faces and realistic textures. You will create a set comprising strawberry toast squares, a fresh avocado half, and a cute carrot, all resting on a handmade speckle-clay plate.
Step-by-Step Tutorial
Materials
- Polymer clay (white, translucent, tan/ochre, orange, red, green, black, yellow, pink)
- Liquid polymer clay (white and translucent)
- Chalk pastels (brown, orange, red)
- Needle tool and dotting tool
- Soft paintbrush
- Texture tool (toothbrush or stiff brush)
- Cookie cutters (small square, teardrop)
- Gloss glaze or UV resin
- Sandpaper or nail file
Step 1: Toast Squares & Strawberries
-
Mixing the dough color:
Start by mixing white clay with a small amount of tan and translucent clay to create a realistic ‘dough’ color. Roll it out to about 1/4 inch thickness. -
Cutting and texturing:
Use a small square cutter to punch out two toast shapes. Gently soften the sharp edges with your finger, then texture the surface and sides firmly with a toothbrush to simulate a baked crumb. -
Shading the crust:
Scrape some brown and orange chalk pastel into a fine powder. Use a soft brush to dust the edges of the squares, building up a golden-brown toasted effect. -
Making the ‘cream cheese’:
Mix a tiny bit of liquid clay with white clay to make a spreadable paste, or roll a very thin square of white clay with softened edges. Apply this to the center of your toast. -
Creating strawberries:
Form tiny teardrops from red clay. Use a needle tool to poke small indentations all over for seeds. Add tiny green clay leaves to the top and place one strawberry on the center of each toast. -
Adding faces:
Roll two minuscule balls of black clay for eyes and a tiny thin snake for a mouth. Carefully adhere them to the toast. Add soft pink chalk pastel cheeks with a dry brush.
Realistic Texture
For the best ‘baked’ look, texture your clay before shading with pastels. The powder will settle into the tiny nooks, creating instant depth and realism.
Step 2: Avocado & Carrot Friends
-
Forming the avocado:
Roll a ball of light yellow-green clay and flatten it slightly into a teardrop shape. Wrap a thin strip of darker green clay around the edge for the skin, blending the seam. Texture the skin with a toothbrush. -
The pit:
Press a small indentation into the center of the avocado. Create a ball of golden-brown clay (mix orange and brown) and place it in the hollow. Shade the pit slightly with brown pastel. -
The carrot shape:
Roll orange clay into a teardrop shape and flatten it. Use a blade to make horizontal indentations across the surface for carrot texture. -
Carrot greens:
Fashion three small, leafy shapes from green clay and attach them to the top of the carrot. Add texture to the leaves with a needle tool. -
Finishing touches:
If desired, add tiny black clay seeds to the carrot or a face to the avocado following the same method used for the toast.
Step 3: The Speckled Plate
-
Plate creates:
Roll out white clay. Mix in tiny flecks of black clay or coarse black pepper to create a speckled ceramic look. -
Shaping:
Cut a rounded square shape. Gently curve the edges upward to form a shallow rim. -
Baking:
Arrange all your pieces on a tile. Bake according to your clay manufacturer’s instructions (usually 275°F/135°C for 15-30 minutes). -
Glazing:
Once cool, apply a coat of gloss glaze or UV resin to the strawberry fruit and the avocado pit to make them look juicy and fresh.
Sticky Fingerprints?
If you get fingerprints on your smooth clay (like the avocado pit), brush it lightly with a little baby oil or cornstarch before baking to smooth it out.
Display your new charming food friends on a shelf or attach eye pins to turn them into the sweetest jewelry set


Cute Mushroom Buddy Sculptures
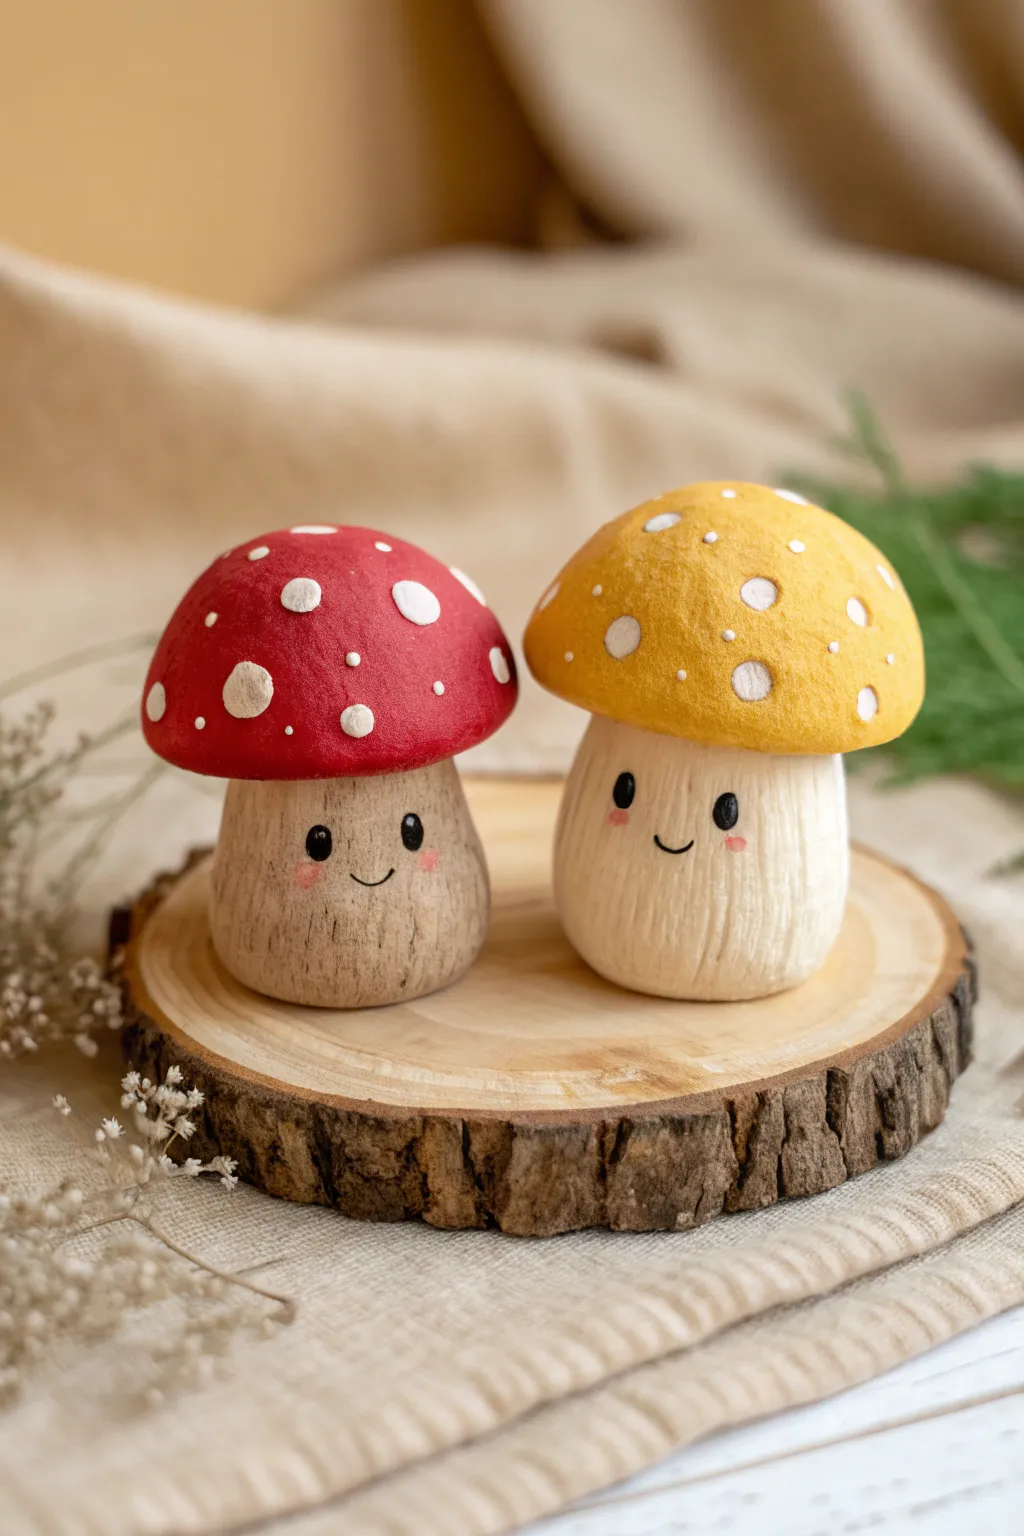
Create a charming pair of woodland friends with these textured clay mushroom sculptures. Featuring rustic wood-grain stems and dotted caps in warm autumn hues, these smiling figures make for delightful desk companions or shelf decor.
Detailed Instructions
Materials
- Air-dry clay (white or natural)
- Acrylic paints (red, ochre yellow, creamy beige, white, black, pink)
- Sculpting tools (needle tool, ball stylus)
- Small paintbrush (flat and detail sizes)
- Old toothbrush or stiff bristle brush
- Aluminum foil (for core)
- Matte varnish or sealant
Step 1: Forming the Shapes
-
Create the armatures:
Crumple two small pieces of aluminum foil into rough mushroom shapes—one slightly taller for the yellow mushroom and a shorter, wider one for the red. This saves clay and keeps them lightweight. -
Cover the stems:
Roll out a thick sheet of clay and wrap it around the foil stems. Smooth the seams with a bit of water on your finger so the base is completely seamless. -
Shape the stems:
Gently roll the stems on your work surface to make them cylindrical but slightly organic. I like to flare the bases out just a tiny bit so they stand sturdily. -
Form the caps:
Take two balls of clay, flatten the bottoms against the table, and round the tops into domes. The red one should be rounder, while the yellow one can be slightly flatter on top. -
Attach the caps:
Score (scratch) the top of the stems and the bottom of the caps. Add a dab of water or liquid clay (slip) and press the parts together firmly.
Cracks Appearing?
If small cracks form while drying, mix a tiny bit of clay with water to make a paste and fill them in. Smooth with a damp finger before painting.
Step 2: Texturing and Details
-
Texturing the stems:
Use a needle tool or a stiff craft knife to drag vertical lines down the stems. Vary the pressure to create a bark-like, wood-grain texture, keeping the front face slightly smoother for the face. -
Texturing the caps:
Take an old toothbrush or a stiff stipple brush and dab it all over the mushroom caps. This creates a porous, organic texture rather than a perfectly smooth plastic look. -
Refining the connection:
Ensure the clay underneath the cap blends slightly into the stem, or create a distinct ‘gills’ line if you prefer. -
Drying:
Let the mushrooms dry completely for 24-48 hours. They should feel room temperature (not cool) when fully dry.
Step 3: Painting the Personalities
-
Base coat the stems:
Paint the stems in a creamy beige or warm off-white. For the textured areas, you can water down a slightly darker brown wash to settle into the grooves, enhancing the wood effect. -
Dry brush highlights:
Once the wash is dry, lightly dry-brush the original cream color over the raised ridges of the stem texture to make the details pop. -
Paint the caps:
Paint the rounder cap a vibrant red and the flatter one a golden ochre yellow. It may take two coats to get solid, opaque coverage. -
Add the spots:
Using a small round brush, paint irregular white circles on the caps. Vary the sizes—some large, some tiny dots—to make it look natural. -
Paint the faces:
Use your smallest detail brush or a dotting tool to add two black oval eyes wide apart on the smooth part of the stem. -
Draw the smiles:
With a steady hand and thin black paint (or a fine-tip black marker), draw a simple ‘u’ shape for the smile between the eyes. -
Blush details:
Mix a tiny amount of pink paint with water to make a glaze. Dab this lightly under the eyes for rosy cheeks. -
Eye sparkles:
Add a tiny white dot to the upper corner of each black eye to bring the characters to life. -
Sealing:
Finish with a coat of matte varnish to protect the paint and eliminate any unwanted glossiness.
Make a Scene
Glue dried moss, tiny pebbles, or real acorn caps to the base of your mushrooms to create a permanent mini-forest floor display.
Place your new smiling friends on a wood slice for the perfect rustic finish

The Complete Guide to Pottery Troubleshooting
Uncover the most common ceramic mistakes—from cracking clay to failed glazes—and learn how to fix them fast.
Tiny Bee and Ladybug Minis
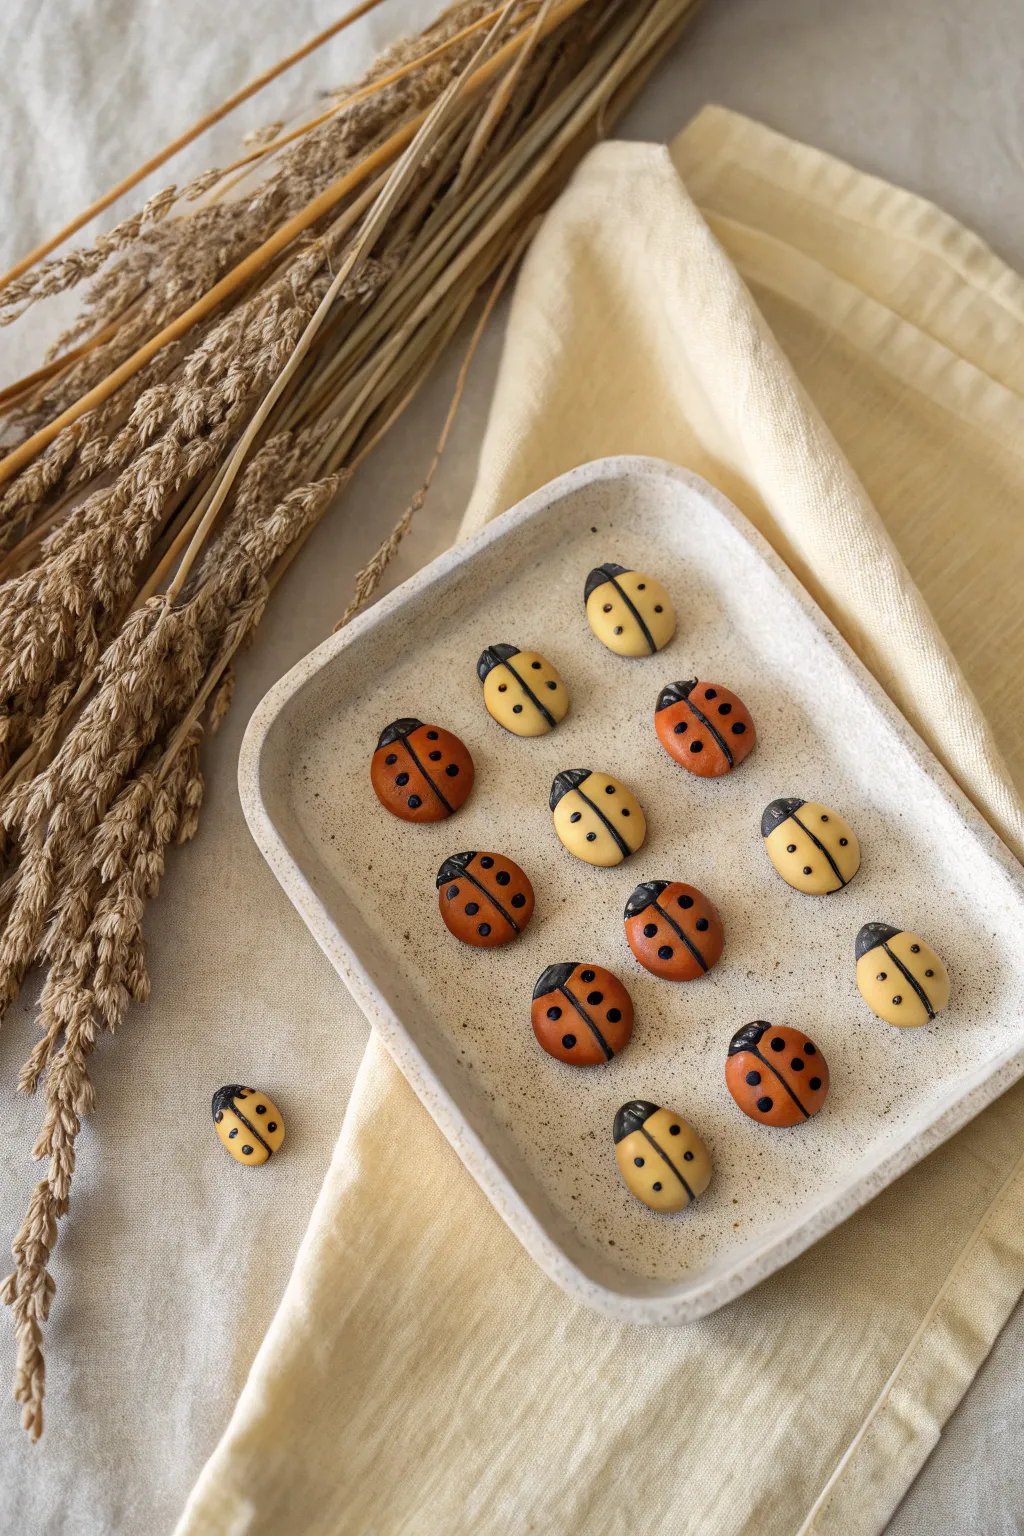
These adorable, bite-sized critters bring a touch of whimsy to any desk or shelf, featuring a mix of classic red ladybugs and sunny yellow beetles. Their smooth, matte finish and simple geometric details make them a perfect beginner project for clay enthusiasts looking to create a tiny insect army.
Step-by-Step Tutorial
Materials
- Polymer clay (Yellow/Cream, Burnt Orange/Terracotta, Black)
- Small ball tool or dotting tool
- Modeling tool or dull knife
- Clean ceramic tile or baking sheet
- Wet wipes (essential for switching colors)
- Oven for baking (if using polymer clay)
Step 1: Shaping the Bodies
-
Prepare the clay:
Begin by conditioning your clay. Warm the yellow and burnt orange clay in your hands until it becomes soft and pliable, ensuring there are no cracks when you flatten it. -
Form the base shapes:
Roll small balls of yellow and orange clay, roughly the size of a large pea or a marble. Aim for consistency in size for a uniform set. -
Flatten the domes:
Gently press each ball down onto your work surface to create a dome shape. The bottom should be flat, while the top remains rounded like half a sphere. -
Smooth the edges:
Run your finger lightly around the edges of each dome to smooth out any fingerprints or sharp ridges, ensuring a nice organic curve.
Clean Hands Pro-Tip
Keep a scrap piece of white clay nearby. Roll it in your hands before handling the yellow clay to pull off any hidden dust or dark pigments from your fingers.
Step 2: Adding the Heads
-
Prepare black clay:
Clean your hands thoroughly with a wet wipe before handling the black clay to avoid staining the lighter colors. Roll tiny amounts of black clay into very small spheres. -
Create the head shape:
Take a black sphere and press it slightly to flatten it, then shape it into a semi-circle or crescent moon shape. -
Attach the head:
Press the black semi-circle firmly against one side of a colored dome. You can use a modeling tool to gently blend the seam underneath so it stays attached. -
Refine the connection:
Smooth the transition point on top slightly so the head looks like it’s naturally emerging from the shell, rather than just stuck on.
Step 3: Detailing the Wings
-
Mark the center line:
Using a dull knife or a thin modeling tool, carefully press a straight line down the center of the colored back, starting from the black head and going all the way to the rear. -
Deepen the groove:
Go over the line a second time with slightly more pressure to ensure the ‘wings’ look separated, but be careful not to cut all the way through the clay. -
Make the spots:
Roll incredibly tiny balls of black clay. You’ll need about 4-6 for each insect. -
Place the spots:
Pick up the tiny black balls with a dotting tool or needle and press them onto the wings. Flatten them so they become flush with the body surface. -
Roll to integrate:
This is my favorite trick: gently roll the entire bug between your palms or lightly on the table just for a second. This presses the spots into the body without deforming the shape, making the surface smooth.
Level Up: Glossy Shells
For a realistic beetle shine, apply a coat of UV resin or glossy water-based polyurethane varnish to just the colored ‘shell’ area after baking.
Step 4: Finishing Up
-
Re-define the line:
If rolling the bug softened your center line too much, gently re-press the groove with your tool. -
Final check:
Inspect each bug for lint or dust. Remove any specks with a tiny bit of rubbing alcohol on a brush or your finger. -
Bake:
Place your finished insects on a ceramic tile or baking sheet. Bake according to your polymer clay package instructions (usually around 275°F/135°C for 15-30 minutes). -
Cool down:
Allow them to cool completely before handling, as the clay is fragile when hot.
Arrange your new tiny friends in a garden pot or on a decorative tray for permanent cheer
Pastel Chunky Clay Rings
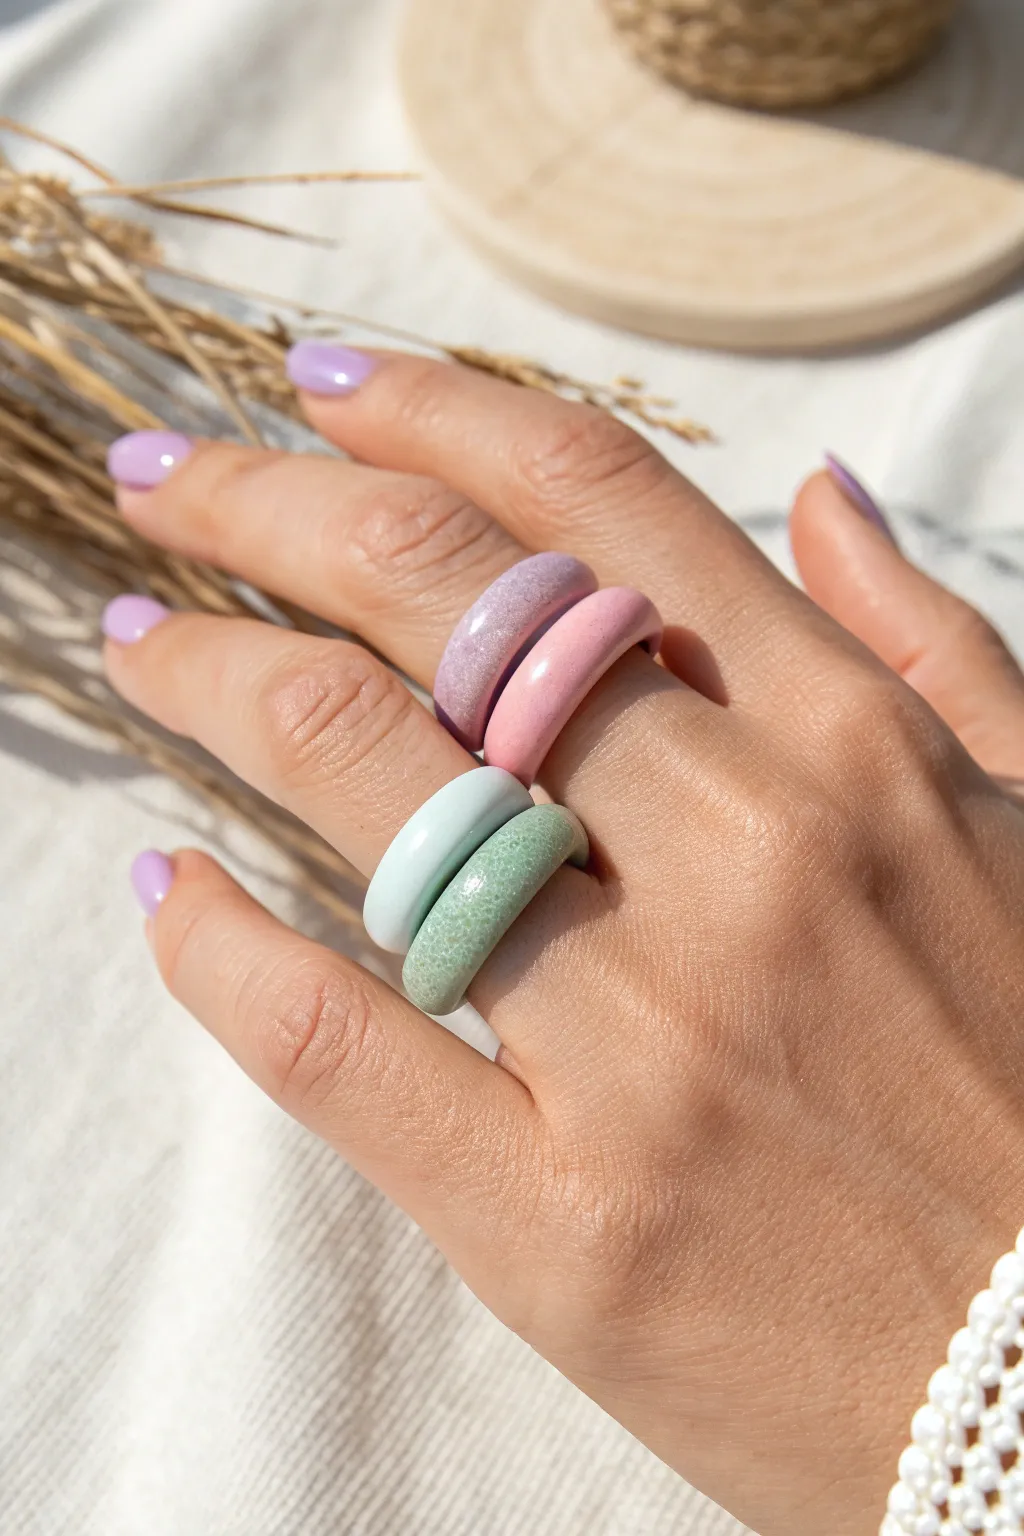
Embrace the ’90s-style chunky jewelry trend with these delightfully smooth and minimalist clay rings. The soft pastel palette and rounded edges give them a candy-like finish that looks professional yet is surprisingly easy to sculpt at home.
Detailed Instructions
Materials
- Polymer clay (white, pastel pink, lilac, mint green)
- Acrylic rolling pin or glass jar
- X-acto knife or clay blade
- Ring sizing mandrel (or a lipstick tube/marker of the right width)
- Fine-grit sandpaper (400-1000 grit)
- Gloss or matte polyurethane varnish (optional)
- Baking sheet
- Parchment paper
- Small soft brush
Step 1: Preparing the Clay
-
Condition the clay:
Start by warming up a small chunk of your first colored clay in your hands. Knead detailedly until it is soft, pliable, and free of any cracks. -
Mix custom shades:
If your clay colors are too vibrant, mix in a significant amount of white clay. I usually aim for a 2:1 ratio of white to color to achieve those dreamy, milky pastel hues seen in the photo. -
Roll a snake:
Place your conditioned ball of clay on a clean, flat surface. Using the palms of your hands, roll it back and forth to create a snake or log shape. -
Check thickness:
Aim for a uniform thickness of about 4-6mm depending on how chunky you want your ring. Ensure the snake is consistent from end to end.
Sticky Situation?
If clay sticks to your surface or rolling pin, lightly dust your workspace with cornstarch or baby powder. It prevents sticking and washes off easily after baking.
Step 2: Shaping the Ring
-
Size the band:
Take your clay snake and wrap it around your ring mandrel or improvised sizing tool (like a marker cap) to determine the length needed. -
Cut to length:
Cut the clay snake, leaving just a tiny bit of overlap. You want the ends to meet flush, not stack on top of each other. -
Join the seam:
Gently press the two cut ends together. Use your finger or a silicone tool to smooth the seam until the line disappears completely and forms a seamless circle. -
Flatten slightly:
For the specific look in the photo, gently press the ring against a flat surface to create a flatter interior side, while keeping the exterior rounded and domed. -
Create the texture:
Notice some rings in the photo have a subtle speckle or stone texture. To achieve this, mix in cracked black pepper or faux granite embossing powder before rolling your snake. -
Final smoothing:
Dip your finger in a tiny bit of baby oil or cornstarch and rub it over the clay to remove any fingerprints before baking. This saves sanding time later.
Level Up: Stone Effect
To get the speckled ‘stone’ look on the green ring, mix translucent clay with a tiny pinch of dried spices or fine glitter before sculpting.
Step 3: Baking and Finishing
-
Prep for baking:
Place your rings on a baking sheet lined with parchment paper. If you are worried about flat spots forming on the bottom, bake them directly on a paper mandrel or a bed of cornstarch. -
Bake the clay:
Bake according to your polymer clay package instructions. This is usually around 265°F (130°C) for 15-30 minutes. -
Cool down:
Let the rings cool completely inside the oven or on the tray. Do not try to move them while hot, as the clay is still slightly soft. -
Sand the edges:
Once hardened, use fine-grit sandpaper wet with water to buff out any rough spots or lingering fingerprints. -
Seal the finish:
For a glassy look, apply a thin coat of gloss glaze. For the matte finish seen on the green and purple rings, leave them raw or use a matte varnish.
Stack your new pastel rings together or wear them individually for a subtle pop of color


What Really Happens Inside the Kiln
Learn how time and temperature work together inside the kiln to transform clay into durable ceramic.
Sprinkle Donut Earrings
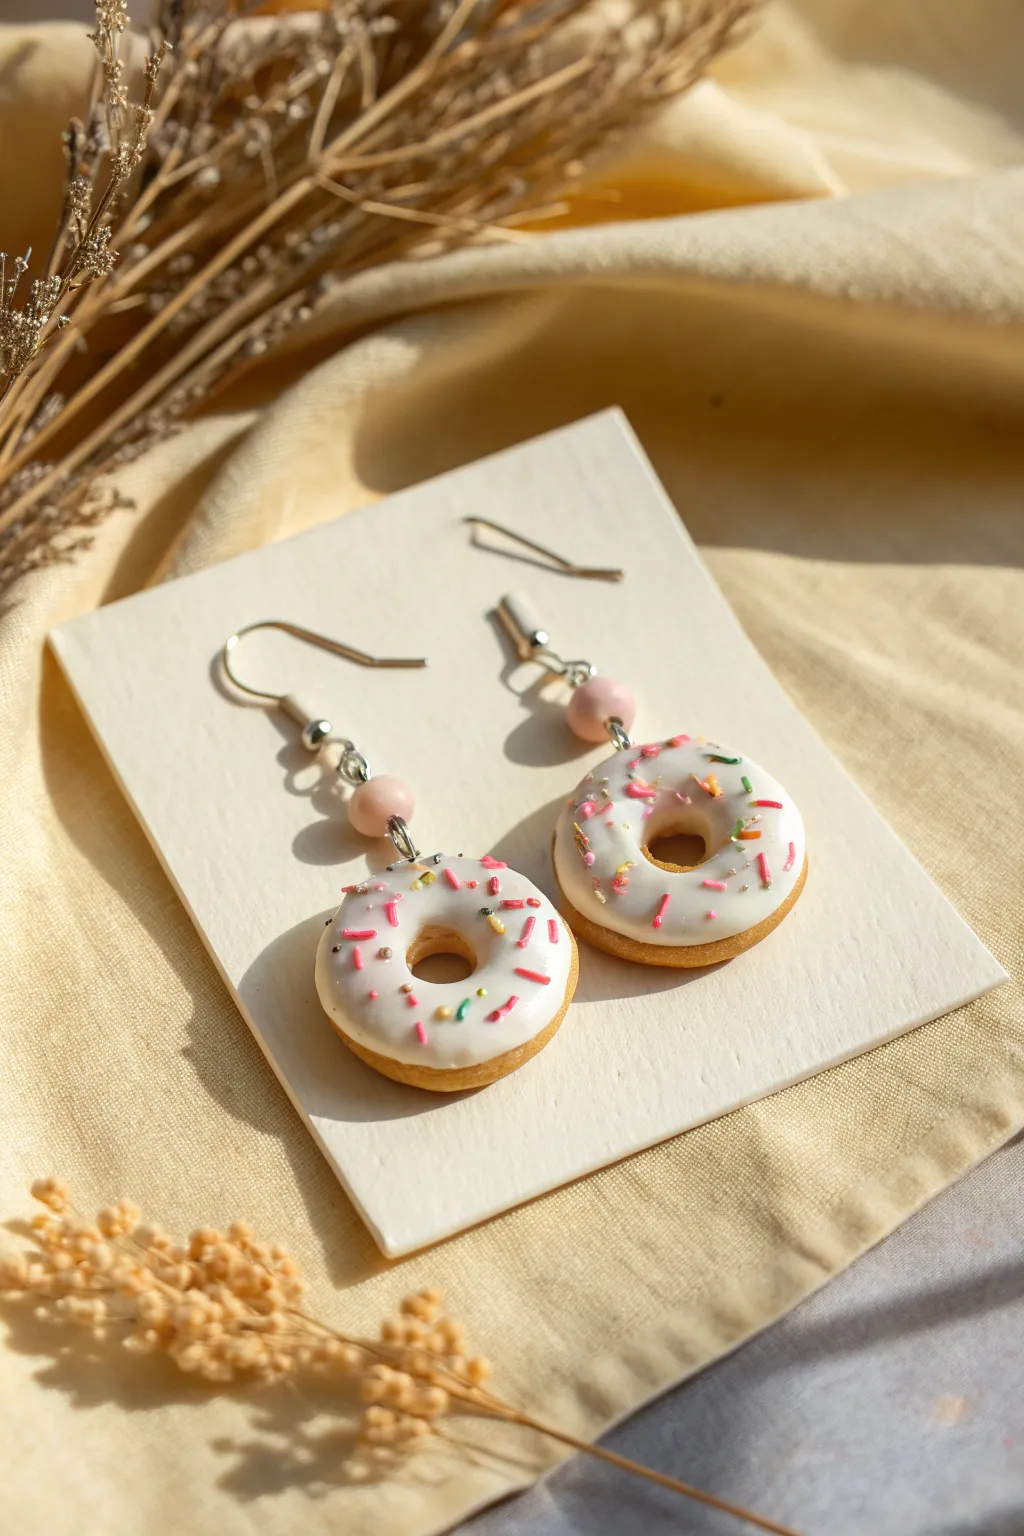
Tiny, wearable desserts are a whimsical way to add personality to your jewelry collection. These realistic donut earrings feature golden-brown dough, glossy white icing, and a colorful confetti of sprinkles, all dangling from delicate bead connectors.
Step-by-Step
Materials
- Polymer clay (dough/tan color and white)
- Liquid polymer clay (translucent or white)
- Soft artist pastels (yellow ochre, burnt sienna)
- Polymer clay sprinkles (pre-made or homemade)
- Two pink round beads (approx. 6mm)
- Two silver eye pins
- Two silver fishhook earring findings
- Gloss glaze or UV resin
- Small paintbrush
- Needle tool or toothpick
- Round cutter (approx. 1 inch)
- Smaller round cutter or straw (for donut hole)
- Jewelry pliers (round nose and flat nose)
- Aluminum foil or ceramic tile for baking
Step 1: Shaping the Dough base
-
Condition the clay:
Begin by kneading your tan or ‘dough’ colored polymer clay until it is soft and pliable. If you don’t have a pre-mixed dough color, mixing white with a tiny amount of transcluent and yellow ochre creates a lovely base. -
Form the donuts:
Roll two equal-sized balls of clay, then flatten them slightly into thick discs using your thumb or a roller. Aim for about 1/4 inch thickness so they look substantial but aren’t too heavy. -
Cut the hole:
Use a very small round cutter, a straw, or the back of a paintbrush to punch a hole directly in the center of each disc. Smooth the edges of the cut with your finger to remove sharp lines. -
Texture the surface:
Gently tap a clean toothbrush or a ball of crinkled aluminum foil over the surface of the clay. This creates a realistic cake-like texture rather than shiny, smooth plastic. -
Shade the dough:
Scrape some yellow ochre and burnt sienna pastels into a powder. With a dry paintbrush, dust the ‘baked’ edges of the donut—around the outer rim and the inner hole—to simulate a golden-brown oven finish.
Realism Hack
Don’t just paint the pastel chalk on; apply it heavier on the bottom of the donut than the top to mimic how pastries darken on the baking sheet.
Step 2: Icing and Decorating
-
Prepare the icing:
Mix a small amount of white polymer clay with liquid clay in a small cup or on a tile. Continue mixing until you achieve a consistency similar to heavy cream or thick frosting. -
Apply the glaze:
Carefully dab the liquid clay mixture onto the top of your donuts using a tool or small brush. Let it naturally drip slightly down the sides to mimic gravity, just like real glaze. -
Add the hardware:
Before baking, trim an eye pin to size. Insert the straight end into the top of the donut so the loop sits just above the icing. I usually like to add a tiny dab of liquid clay on the wire for extra grip. -
Sprinkle time:
While the icing is still wet, gently drop your polymer clay sprinkles onto the white surface. Use tweezers to place specific colors if you want an even distribution of pinks, yellows, and greens. -
Bake the clay:
Place your donuts on a ceramic tile or foil-lined tray. Bake according to your specific clay brand’s instructions (usually 275°F/135°C for 15-30 minutes). Let them cool completely before handling.
Sticky Situation
If your white icing is too runny and dripping off the donut entirely, let the mixture sit open for 15 minutes to thicken slightly before applying.
Step 3: Assembly and Finish
-
Glaze for shine:
Once cool, apply distinct finishes to enhance realism. Use a water-based satin or matte varnish on the ‘dough’ parts, and a high-gloss glaze or UV resin exclusively on the icing to make it look wet and sugary. -
Prepare the connector:
Take a new eye pin and thread your pink bead onto it. Using round-nose pliers, carefully bend the remaining wire on the other side into a loop to create a connector link. -
Attach to donut:
Open the bottom loop of your bead connector using flat-nose pliers by twisting sideways (never pull apart). Hook it onto the eye pin embedded in the donut, then close the loop. -
Add the hook:
Open the loop on your fishhook earring finding. Attach it to the top loop of the bead connector. -
Final check:
Ensure all wire loops are closed tightly so pieces don’t slip out. Repeat the assembly process for the second earring to complete your sweet set.
Now you have a charming accessory perfect for brunch dates or adding a pop of fun to a casual outfit
Tiny Fruit Slice Studs
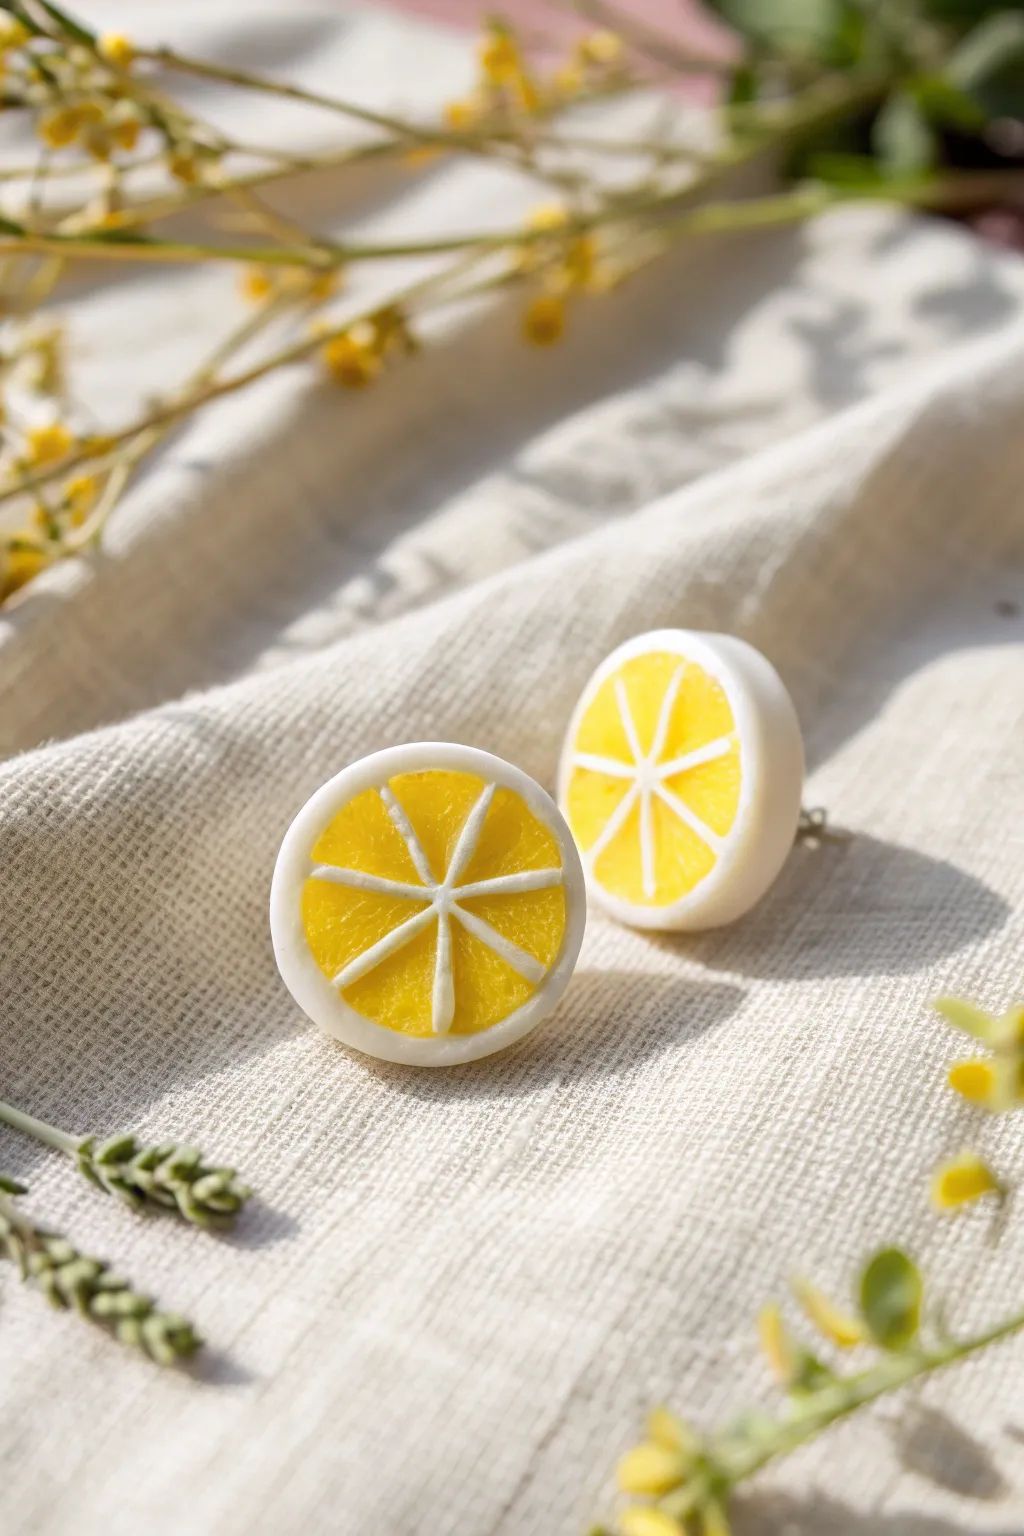
Brighten up your jewelry collection with these adorable, miniature lemon slice earrings made from polymer clay. The finish is remarkably realistic, featuring a translucent, juicy texture for the fruit pulp surrounded by a crisp white pith and outer rind.
Step-by-Step Tutorial
Materials
- Translucent yellow polymer clay
- Opaque white polymer clay
- Rolling pin or pasta machine
- Small circular cutter (approx. 1cm diameter)
- X-Acto knife or tissue blade
- Needle tool or toothpick
- Earring posts and backs
- Super glue or jewelry adhesive
- Sandpaper (optional)
- Glaze or UV resin (optional for shine)
Step 1: Creating the Lemon Segments
-
Condition the Clay:
Begin by conditioning the translucent yellow clay until it is soft and pliable. Do the same for the opaque white clay. Warm clay is much easier to work with and less prone to cracking. -
Form the Pulp Log:
Roll the yellow clay into a thick, short cylinder or log, roughly 1.5 cm in diameter. This will form the juicy inside of the lemon. -
Prepare the Pith Sheets:
Roll out the white clay into a very thin, even sheet. You want this sheet to be thin enough to represent the delicate membranes between fruit segments without overpowering the yellow. -
Divide the Yellow Log:
Using your tissue blade, slice the yellow log lengthwise into 8 equal, wedge-shaped segments. Try to make these cuts as clean and straight as possible. -
Wrap the Wedges:
Place a piece of the thin white sheet between each yellow wedge as you reassemble the log. I like to lay the white sheet on one flat side of a wedge, trim it, and then press the next wedge against it. -
Reassemble the Cane:
Once all 8 wedges are separated by thin layers of white clay, press them back together firmly to reform the cylinder shape. This is now a simple lemon cane.
Squished Slices?
If your cane squashes when cutting, chill it in the fridge for 15-20 minutes first. Cold clay is firmer and slices cleanly without distorting the pattern.
Step 2: Adding the Rind and Shaping
-
Wrap the Outer Pith:
Wrap the entire reassembled cylinder in a sheet of the same thin white clay. Smooth the seam gently with your finger so it blends invisibly. -
Reduce the Cane:
Gently squeeze and roll the cane on your work surface to reduce its diameter. Aim for the size you want your final earrings to be, roughly 1-1.2 cm thick. -
Slice the Discs:
Using a very sharp blade, slice two discs from the cane. Aim for a thickness of about 3-4mm. If the clay squishes slightly, reshape it gently back into a perfect circle. -
Texture the Pulp:
Take a needle tool and gently rough up the surface of the yellow segments only. Use small picking motions to mimic the texture of citrus vesicles. -
Smooth the Edges:
Inspect the sides of your slices. Use your finger to gently soften the sharp edge where the slice was cut, giving it a more organic, slightly rounded look.
Level Up: Pink Lemonade
Switch the translucent yellow clay for a translucent pink to create pink lemonade lemons, or use orange or lime green for a full citrus salad set.
Step 3: Bakign and Assembly
-
Bake the Pieces:
Place your clay lemon slices on a ceramic tile or baking sheet lined with parchment paper. Bake according to your brand of clay’s specific temperature and time instructions. -
Cool Down:
Allow the pieces to cool completely before handling. Polymer clay is still slightly soft when hot and hardens fully as it cools. -
Sand the Backs:
If the back of your slice isn’t perfectly flat, gently rub it against a piece of fine-grit sandpaper. A flat surface ensures a strong bond with the earring post. -
Attach the Posts:
Apply a small dot of strong jewelry glue to the flat pad of an earring post. Press it firmly onto the center of the back of the lemon slice. -
Secure the Post:
For extra durability, you can place a tiny ball of white clay over the earring post pad (before baking, embedding the post) or add a dab of UV resin over the glue pad after baking. -
Final Polish:
If you want a wet, fresh-cut look, apply a thin layer of gloss glaze or UV resin to the front face of the lemon slice and cure it.
Enjoy wearing your fresh and zesty handmade accessories all summer long

TRACK YOUR CERAMIC JOURNEY
Capture glaze tests, firing details, and creative progress—all in one simple printable. Make your projects easier to repeat and improve.
Animal Trinket Dishes

Keep your favorite rings and small treasures safe in this adorable bear-shaped dish. Sculpted from clay with a charming speckled finish and delicate painted details, it adds a touch of sweetness to any bedside table.
How-To Guide
Materials
- White polymer clay (preferably speckled, or add black pepper/speckles)
- Acrylic rolling pin
- Circle cutter (approx. 3.5 – 4 inches)
- Small ball tool or round-tipped embossing tool
- X-acto knife or craft blade
- Pink acrylic paint or soft pastry pastel
- Black acrylic paint
- Fine detail paintbrush (size 000)
- Water-based gloss varnish or polyurethane sealant
- Oven (for baking polymer clay) or air-drying time
- Sandpaper (fine grit)
Step 1: Shaping the Base
-
Prepare the Clay:
Condition your white clay by kneading it warm in your hands until it’s soft and pliable. If you want that stone-like speckled effect seen in the photo and don’t have speckled clay, mix in a tiny pinch of coarse black pepper or black glitter before rolling. -
Roll It Out:
Use your acrylic roller to flatten the clay into an even slab, aiming for a thickness of about 1/4 inch. Keep the thickness consistent to prevent cracking later. -
Cut the Circle:
Press your large circle cutter firmly into the clay slab to create the main face shape. If you don’t have a cutter, trace around a wide mug or bowl and cut carefully with your craft knife. -
Smooth the Edges:
Dip your finger in a little bit of water (or baby oil for polymer clay) and run it along the cut edge to soften any sharpness or cutting burrs.
Uneven Bowl Shape?
To get a perfect curve, bake the clay piece while it’s resting inside an oven-safe glass bowl or on a curved lightbulb.
Step 2: Sculpting the Features
-
Form the Ears:
Roll two small balls of clay, roughly the size of marbles. Flatten them slightly into thick discs. -
Attach the Ears:
Place the discs at the top of the circle, spacing them apart generously. Blend the clay at the seam where the ear meets the head, smoothing downwards onto the back and front so they become one solid piece. -
Create the Ear Indents:
Using a large ball tool or just the tip of your pinky finger, gently press into the center of each ear to create a soft concave hollow. -
Curve the Dish:
Pick up the clay piece and gently pinch the edges upwards all around to create a shallow bowl shape. Smooth out the interior curve with your thumb so it transitions seamlessly.
Make it a Set
Create a smaller matching dish shaped like a cub, or make a fox version by pointing the ears and painting it orange.
Step 3: Adding Details & Baking
-
Blushing Cheeks:
Before baking, you can create soft pink shading. Scrape a little pink pastel chalk into a powder and brush it onto the inner ears and cheek area with a soft, dry brush. Alternatively, you can paint this later. -
Bake or Dry:
Place your dish on a baking sheet lined with parchment paper. If using polymer clay, bake according to the package directions (usually 275°F for 15-30 mins). If using air-dry clay, let it sit undisturbed for 24-48 hours. -
Sand for Perfection:
Once fully cured and cooled, check the edges. I find that a quick pass with fine-grit sandpaper makes the rim look professionally finished.
Step 4: Finishing Touches
-
Painting the Face:
Using black acrylic paint and your finest detail brush, carefully paint two closed curved eyes with lashes. Add a small rounded triangle nose and a little anchor shape for the mouth. -
Pink Accents:
If you didn’t use pastel earlier, dilute a tiny drop of pink acrylic paint with water to make a glaze. Dab it into the ear hollows and paint two soft circles for cheesy cheeks. -
Gloss the Ears:
For that wet, ceramic look specifically inside the ears, apply a thick drop of gloss varnish just to the pink inner ear sections. -
Seal the Dish:
Coat the entire dish with a layer of satin or gloss varnish to protect the paint and give it a finished shine. Let it dry completely before placing any jewelry inside.
Now you have a sweet little guardian for your everyday jewelry pieces
Smiley Face Mini Succulent Pots
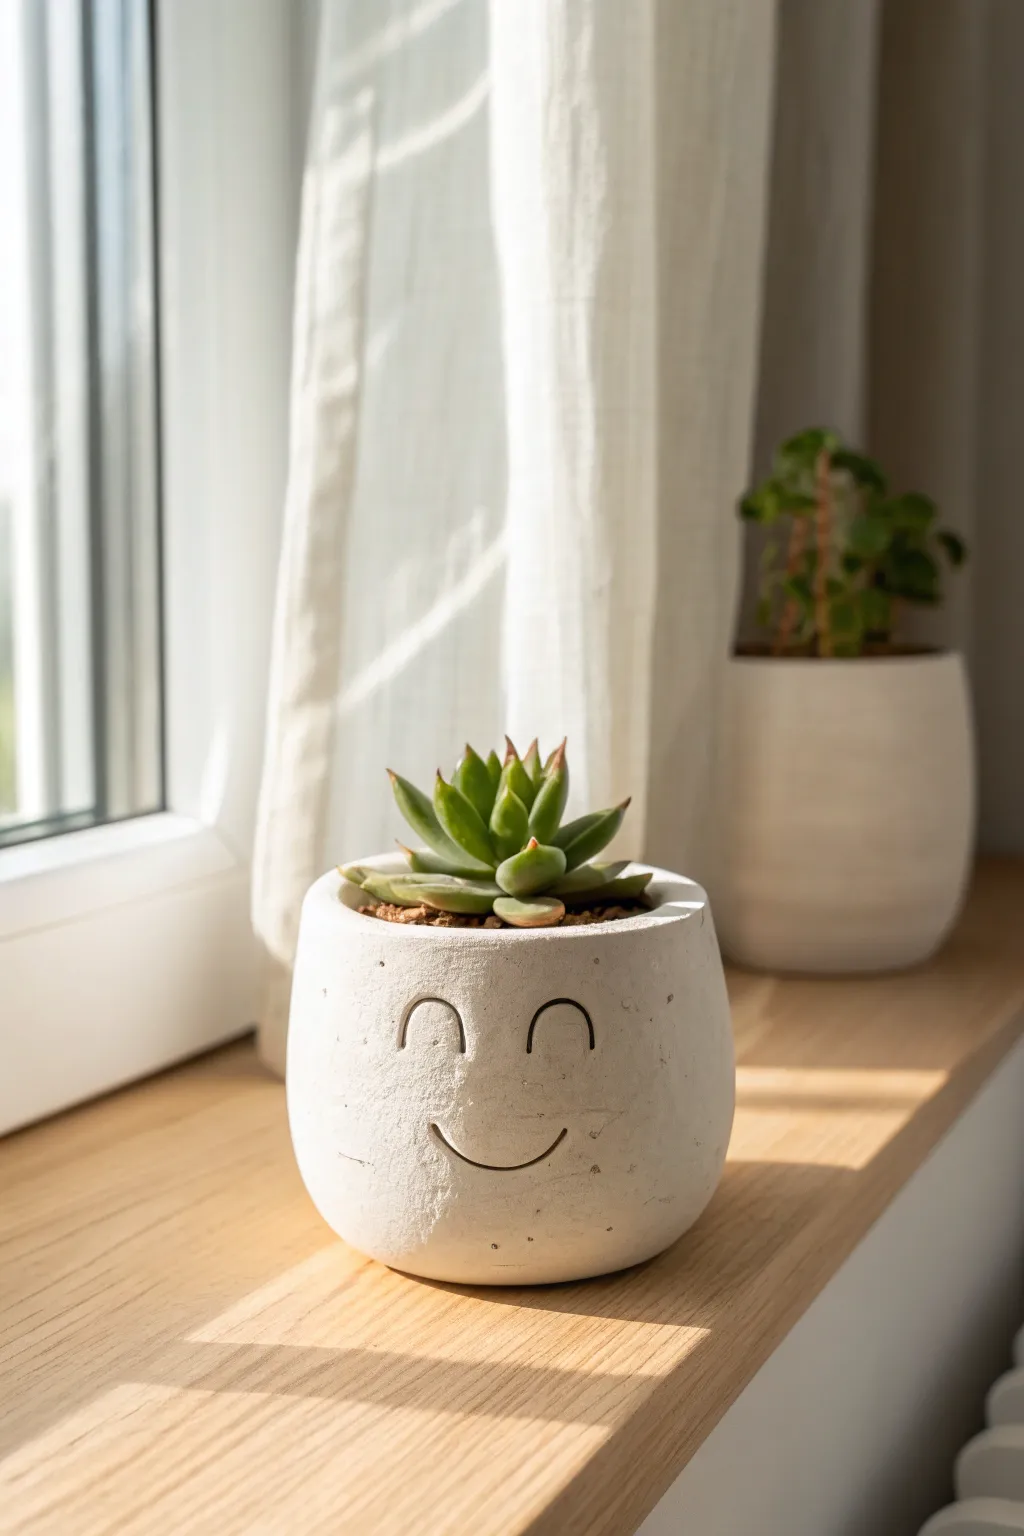
Brighten up any windowsill with this minimalist and cheerful mini succulent pot. Using air-dry clay, you can mimic the trendy look of cast concrete while creating a sweet, textured home for your favorite little plant.
Step-by-Step Tutorial
Materials
- White or light gray air-dry clay
- Rolling pin
- Craft knife or clay tool
- Small bowl or cup (to use as a mold)
- Plastic wrap
- Water and a sponge
- Sandpaper (fine grit)
- A dull pencil or rounded sculpting tool (for the face)
- Matte acrylic sealant or varnish
- Succulent potting soil
Step 1: Shaping the Base
-
Prepare the Mold:
Find a small, handle-less cup or a ramekin that is the size you want your finished pot to be. Wrap the outside of this form entirely in plastic wrap to prevent the clay from sticking later. -
Roll the Slab:
Take a large handful of clay and knead it until soft. Roll it out on a flat surface to a uniform thickness of about 1/4 inch. If you want that sturdy ‘stone’ look, don’t go too thin. -
Cut the Base:
Place your wrapped mold upside down on the rolled clay and trace around the rim with your craft knife. Cut out this circle; this will serve as the bottom of your pot. -
Create the Wall:
Measure the height and circumference of your mold. Cut a long rectangular strip of clay that is slightly longer than the circumference and as tall as you want the pot to be. -
Assemble the Pot:
Wrap the rectangular strip around the plastic-covered mold. Where the ends meet, score the edges (scratch them up a bit), add a drop of water, and press them firmly together to create a seam. -
Attach the Bottom:
Place the clay cylinder (still on the mold) onto the circular base you cut earlier. Score and slip the edges where the wall meets the base, smoothing the clay downward to seal the joint completely.
Pro Tip: Concrete Texture
Mix a teaspoon of used coffee grounds or fine sand into your white clay before rolling it out. This creates natural speckles that mimic real stone without painting.
Step 2: Adding the Personality
-
Smooth the Surface:
Dip your sponge lightly in water and run it over the entire outside of the pot. This smooths out fingerprints but also leaves a slight natural texture similar to the photo. -
Plan the Face:
Before carving, identify where your ‘front’ will be. I like to choose the side opposite the back seam so the face looks seamless and clean. -
Carve the Eyes:
Using a dull pencil or a loop tool, gently press two arched shapes into the upper half of the pot for the eyes. Don’t drag the tool; press and rock it to get a clean indentation without jagged edges. -
Carve the Smile:
Centered below the eyes, press a wider, gentle curve to create the smile. Aim for a simple, symmetrical line to capture that serene expression. -
Initial Drying:
Let the clay sit on the mold for about 2-3 hours until it is leather-hard—firm enough to hold its shape but not fully dry. -
Remove the Mold:
Carefully slide the interior mold out. If it sticks, gently tug on the plastic wrap. Peel away the plastic wrap from the inside of the clay pot. -
Refine the Rim:
Now that the mold is gone, you can smooth the top rim of the pot with a damp finger to round off any sharp edges created during cutting.
Level Up: Drainage Hole
While the clay is still wet, use a straw to punch a hole in the center of the bottom. This ensures your succulent’s roots won’t rot from standing water.
Step 3: Finishing Touches
-
Full Cure:
Allow the pot to dry completely in a well-ventilated area. This usually takes 24-48 hours depending on humidity. The clay will turn a lighter, chalky white when dry. -
Sand for Texture:
Once fully dry, lightly sand the exterior. While you want it smooth, leaving a few tiny pits or scratches adds to that realistic concrete aesthetic. -
Create the Stone Effect:
If your clay is too uniform, stipple on a very watered-down gray or off-white paint with an old toothbrush to add subtle speckles. -
Seal the Pot:
This is crucial for planters. Apply 2-3 coats of matte acrylic sealant to the inside and outside to protect the clay from moisture. -
Planting:
Once the sealer is cured, fill with succulent soil and nestle your little plant inside.
Place your happy new pot in a sunny spot and enjoy the smile it brings to your space
Kawaii Plant Stakes and Pot Buddies
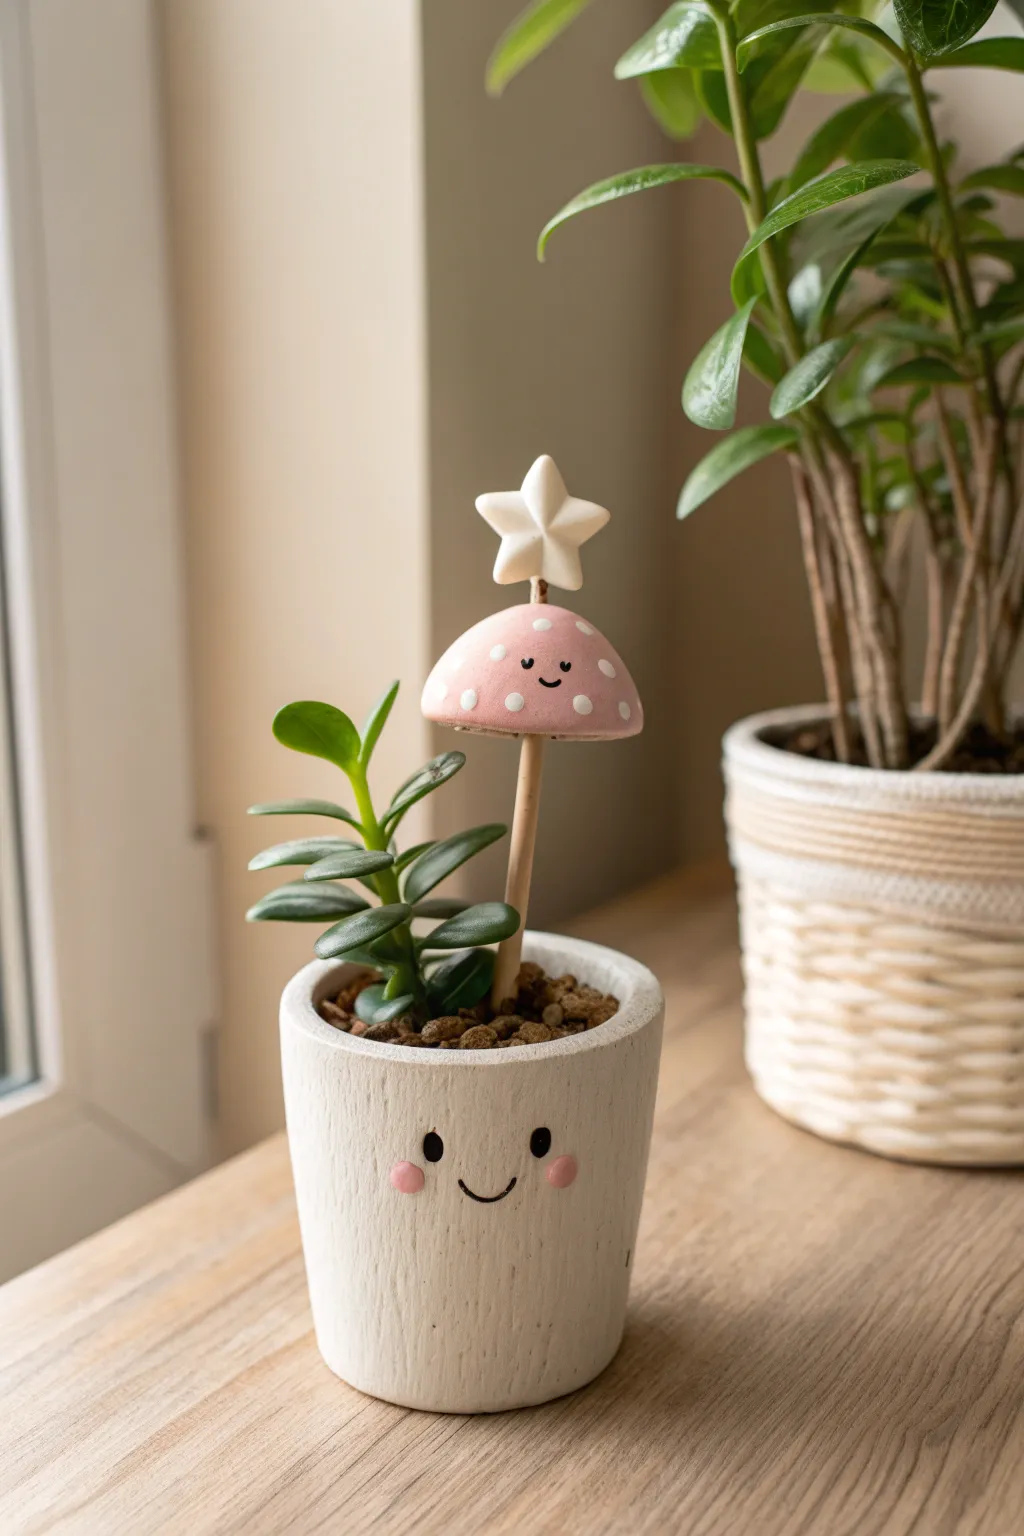
Bring a touch of magic to your houseplants with this adorable kawaii mushroom stake and matching smiling pot. This polymer clay project combines soft pastels with simple shapes to create a charming little guardian for your succulents.
Step-by-Step Guide
Materials
- Polymer clay (white, baby pink, black)
- Wooden skewer or dowel
- Rolling pin or smooth glass jar
- Clay sculpting tools (specifically a dotting tool)
- Liquid polymer clay (Bake & Bond)
- Small white ceramic pot
- Black acrylic paint
- Pink acrylic paint
- Fine detail paintbrush
- Mod Podge or glaze (matte or satin finish)
- Oven for baking
Step 1: Sculpting the Mushroom Cap
-
Shape the base:
Start with a ball of baby pink polymer clay about the size of a walnut. Allow it to warm up in your hands until pliable. -
Form the dome:
Gently press the ball onto your work surface to flatten the bottom, then smooth the top into a rounded dome shape. It should look like a classic mushroom cap. -
Prepare the connection:
Create a small indentation in the center of the flat bottom side where the wooden stick will eventually go. -
Add the spots:
Roll tiny balls of white clay. Flatten them into small discs and press them randomly all over the pink dome. Make sure they are flush with the surface.
Sticky Situation?
If your white clay picks up dust or lint, use a cotton swab dipped in rubbing alcohol or baby oil to gently wipe the unbaked clay clean before putting it in the oven.
Step 2: Creating the Star Topper
-
Form a star:
Take a small amount of white clay and shape it into a thick five-pointed star. You can do this by hand or use a small star cutter if you have one. -
Soften edges:
Your star should look pillowy rather than sharp. Gently tap the points to round them off slightly for that soft, kawaii look. -
Attach to cap:
Apply a tiny drop of liquid clay to the very top of your pink mushroom cap. Press the white star firmly onto the center.
Step 3: Assembly and Baking
-
Prepare the stake:
Cut your wooden skewer to the desired height. Remember to account for the part that will be buried in the soil. -
Connect the pieces:
If your skewer is oven-safe (most wood is at low temps), insert it into the indentation you made earlier. Secure with a dab of liquid clay. If not, make the hole large enough to glue it in after baking. -
Create the stem:
Take a rope of beige or white clay and wrap it around the top of the skewer, right under the cap, smoothing it to create a seamless transition. -
Bake carefully:
Bake the clay piece according to your package instructions—usually around 230°F to 265°F (110°C to 130°C) for 15-30 minutes. Use an oven thermometer to ensure you don’t scorch the white clay.
Glow Up
Use glow-in-the-dark polymer clay for the star topper or the mushroom spots. It will charge up during the day and make your plant buddy a glowing nightlight at night!
Step 4: Adding the Kawaii Faces
-
Cool down:
Allow your clay piece to cool completely before painting. I like to let this rest for an hour to ensure the paint adheres properly. -
Paint the mushroom face:
Using a fine detail brush and black acrylic paint, add two small dots for eyes and a tiny ‘u’ shape for a smile on the pink cap. -
Customize the pot:
On your white ceramic pot, paint a larger corresponding face. Two widely spaced black eyes and a simple smile in the center. -
Add rosy cheeks:
Dip the end of a paintbrush handle or a dotting tool into pink paint. Dab rosey cheeks onto both the mushroom and the pot face. -
Seal the deal:
Once the paint is fully dry, coat the clay mushroom with a matte or satin varnish to protect it from moisture in the plant soil.
Pop your new friend into the soil and enjoy the instant cuteness upgrade to your plant shelf
Cute Character Fridge Magnets

These adorable magnets bring a splash of sweetness to your kitchen with their cheerful faces and soft matte finish. Featuring smiling clouds and juicy fruit slices, this project is perfect for beginners looking to practice shaping and simple detailing.
Detailed Instructions
Materials
- Polymer clay (white, baby blue, light green, orange, red, pink, black)
- Circle cutter and cloud cutter (or craft knife)
- Needle tool or toothpick
- Ball tool (small)
- Acrylic rolling pin
- Parchment paper
- Small magnets
- Strong craft glue (E6000 or similar)
- Oven (for baking polymer clay)
Step 1: Shaping the Happy Clouds
-
Roll the base:
Start by conditioning your white and baby blue clay until soft. Roll each color out on parchment paper to an even thickness of about 4-5mm. -
Cut the shapes:
Use a cloud-shaped cutter to punch out one white and one blue cloud. If you don’t have a cutter, trace a shape lightly with a needle tool and carefully cut it out with a craft knife. -
Soften the edges:
Gently tap the raw edges with your finger to round them off so the cloud looks puffy rather than sharp. -
Add cheeks:
Roll tiny balls of pink clay, flatten them slightly, and press them onto the cloud cheeks. Use a needle tool to poke small indentations into the cheeks for texture. -
Create the faces:
For the white cloud, make larger eyes by flattening black clay balls and adding tiny white highlights. For the blue cloud, roll simple black balls. Use a needle tool to gently impress a U-shaped smile between the cheeks.
Step 2: Crafting the Fruit Friends
-
Form the strawberry:
Shape a piece of red clay into a rounded triangle. Press it slightly flat but keep it plump. -
Strawberry details:
Poke small seeds all over the surface using a needle tool. Top it with three small leaves made from green clay, textured with a central vein. -
Make the green pea:
Roll light green clay into a flat circle. Add a wide smile using a needle tool and press in two tiny black eyes wide apart for that cute look. -
Build the watermelon:
Cut a triangle from red clay. Create a rind by wrapping a thin strip of white clay around the bottom edge, followed by a thicker strip of green clay. Texture the green rind with vertical lines using a knife. -
Watermelon seeds:
Press tiny, teardrop-shaped bits of black clay into the red flesh to mimic seeds. -
Construct the orange slice:
Make a circle of orange clay. Create a rim by wrapping a thin snake of matching orange clay around the outside to define the peel. -
Orange segments:
Using a needle tool, press lines radiating from the center to create 8 segments. Inside each segment, gently scratch the surface to mimic the fibrous texture of citrus fruit.
Sticky Fingerprints?
If you see fingerprints on your raw clay, lightly brush the surface with baby oil or cornstarch before baking to smooth them out completely.
Step 3: Baking and Assembly
-
Bake carefully:
Place all your pieces on a parchment-lined baking sheet. Bake according to your clay package instructions (usually 230°F/110°C for 15-30 minutes). Watch closely so the light colors don’t scorch. -
Cool down:
Let the pieces cool completely on the tray. They serve as a great canvas for any final paint touch-ups if you prefer painting faces instead of using clay. -
Attach magnets:
Flip the cool charms over. Apply a dab of strong glue to the back of each and press a magnet firmly into place. Let the glue set fully before sticking them to your fridge.
Add Some Sparkle
Before baking, lightly brush gold mica powder or tiny star-shaped glitters onto the cheeks or background of the clouds for a magical effect.
Now your magnetic friends are ready to hold up your grocery lists and photos with a smile
Bag Charm Keychains With Mini Friends
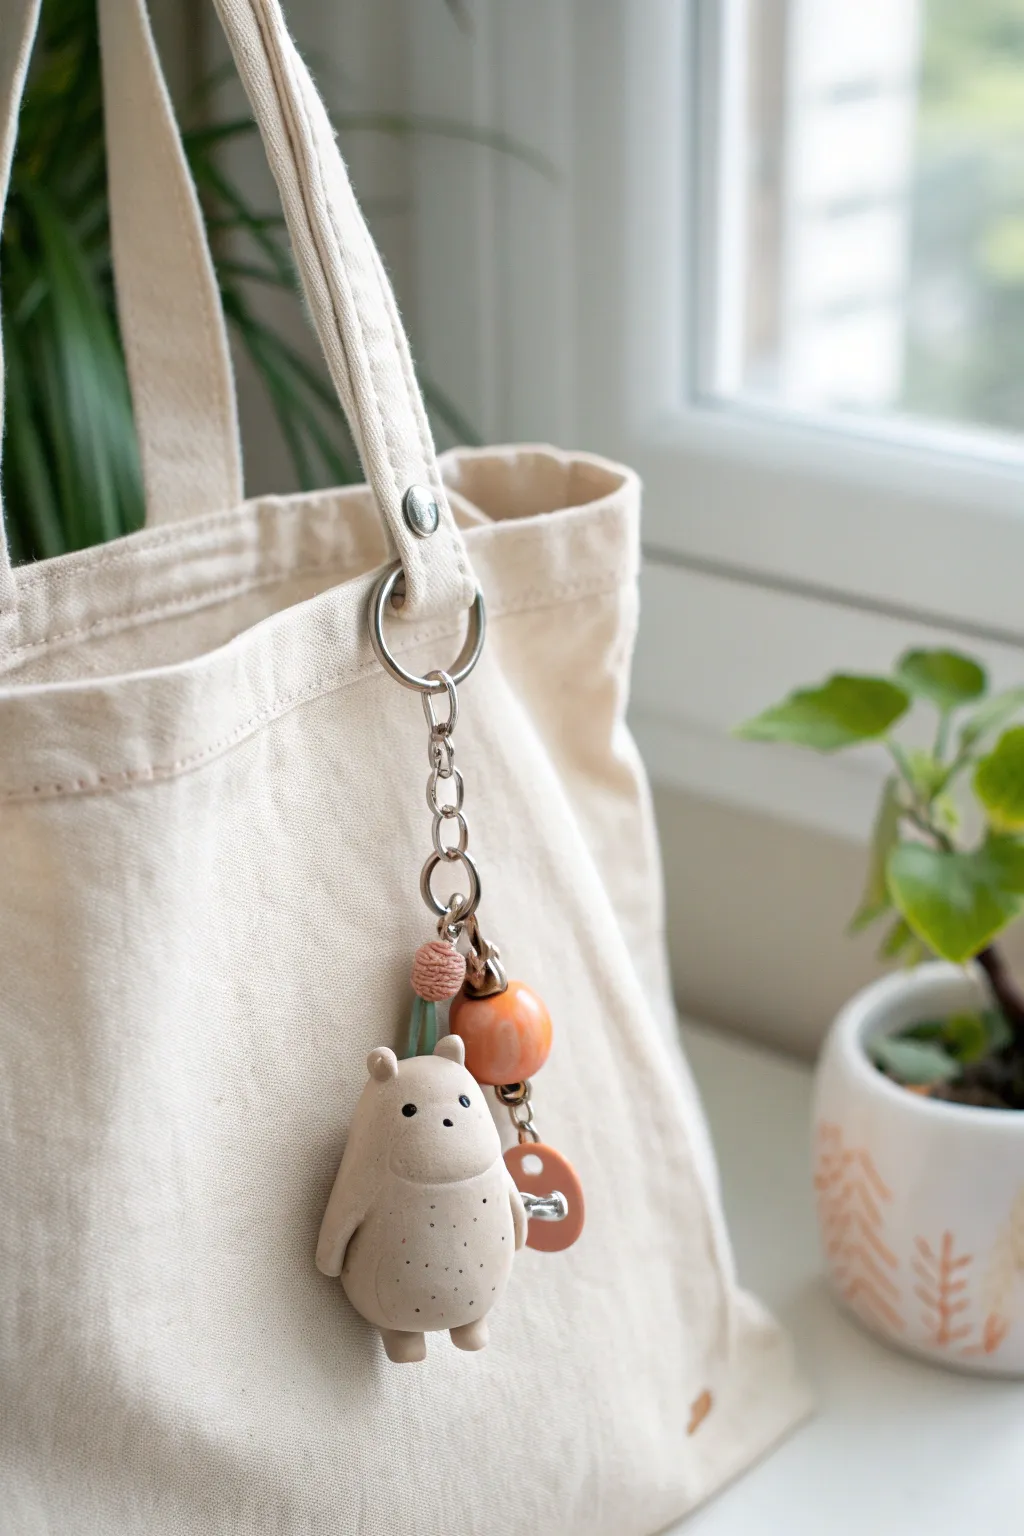
Add a touch of whimsy to your everyday tote with this adorable, minimalist clay creature. This speckled beige bear charm features a smooth, rounded form and pairs perfectly with earthy beads for a natural, handcrafted look.
How-To Guide
Materials
- Polymer clay (light beige or ‘granite’ effect)
- Black acrylic paint or glass beads (for eyes)
- Eye pin
- Silver keychain ring and chain
- Jump rings
- Large ceramic or wooden bead (orange/terracotta)
- Small decorative washer or clay disc
- Needle tool or toothpick
- Clear matte varnish (optional)
- Jewelry pliers
- Oven for baking
Step 1: Sculpting the Body
-
Condition the Clay:
Start by kneading a golf-ball-sized amount of beige polymer clay in your hands until it becomes soft and pliable. If you want the speckled look shown, mix in a tiny pinch of black pepper or use a pre-mixed ‘granite’ effect clay. -
Form the Base Shape:
Roll the clay into a smooth ball, then gently roll one end against your work surface to create a slight teardrop or pear shape. The bottom should be wider and flatter so the creature looks pleasantly chubby. -
Shape the Head:
Gently press the top of the pear shape to round it off for the head. It shouldn’t be a separate ball, but rather a seamless continuation of the body. -
Add the Ears:
Pinch two very small pieces of clay into tiny triangles. Attach these to the top of the head, blending the clay downwards with a smoothing tool or your finger so there are no visible seams. -
Attach the Arms:
Roll two small sausage shapes for the arms. Press them onto the sides of the body, angling them slightly forward as if the creature is resting its hands on its belly. Smooth the connection points carefully. -
Create the Legs:
Form two small, stubby ovals for the feet. Attach them to the bottom of the body, ensuring they are positioned so the figure can’t quite stand on its own but looks like it’s dangling when held up.
Clean Fingerprints
Before baking, brush your raw clay lightly with a little bit of baby oil or cornstarch. This smooths out accidental fingerprints and lint.
Step 2: Adding Details
-
Insert the Eye Pin:
Take a metal eye pin and trim it if it’s too long. Push it straight down into the center of the head until only the loop is visible. I usually add a dab of liquid clay or craft glue to the shaft to ensure it stays put after baking. -
Make the Face:
Use a needle tool to mark two tiny indentations for the eyes. You can either press tiny black glass beads into these holes now or wait to paint them after baking. Use the needle tool to add a tiny horizontal dash for the nose/mouth area. -
Add Texture:
To mimic the speckled look in the photo, take an old toothbrush or a stiff bristled brush and very lightly tap the surface of the clay. This gives it a matte, stone-like skin rather than perfectly smooth plastic. -
Bake the Clay:
Place your figure on a baking sheet lined with parchment paper. Bake according to your polymer clay package instructions—usually around 275°F (135°C) for 15-30 minutes depending on thickness.
Step 3: Assembly
-
Painting Details:
Once cool, if you didn’t use beads, use a fine-point paintbrush or toothpick to dot black acrylic paint into the eye sockets. Let this dry completely. -
Seal the Charm:
Apply a coat of matte varnish to protect the clay and give it a professional finish. Avoid glossy glaze if you want to keep that natural, earthy aesthetic. -
Prepare the Accents:
Thread your large terracotta/orange bead onto a separate headpin and create a loop at the top with your round-nose pliers. Do the same for any other small decorative discs or washers you want to add. -
Link the Chain:
Open a jump ring with your pliers. Slide on the loop from your clay creature’s head and the bottom link of your keychain chain. Close the jump ring securely. -
Add the Bead Charms:
Using additional jump rings, attach your accent bead and washer to the chain, placing them slightly higher up than the clay figure so they cluster attractively without obscuring the little bear. -
Final Attachment:
Attach the main keyring clasp to the top of the chain. Clip it onto the strap hardware of your favorite canvas tote bag.
Loose Eye Pin?
If the metal pin pulls out after baking, don’t panic. Put a drop of superglue on the pin shaft and slide it back into the hole for a permanent hold.
Now you have a charming little companion ready to follow you on all your daily adventures
Tiny Heart Locket Boxes
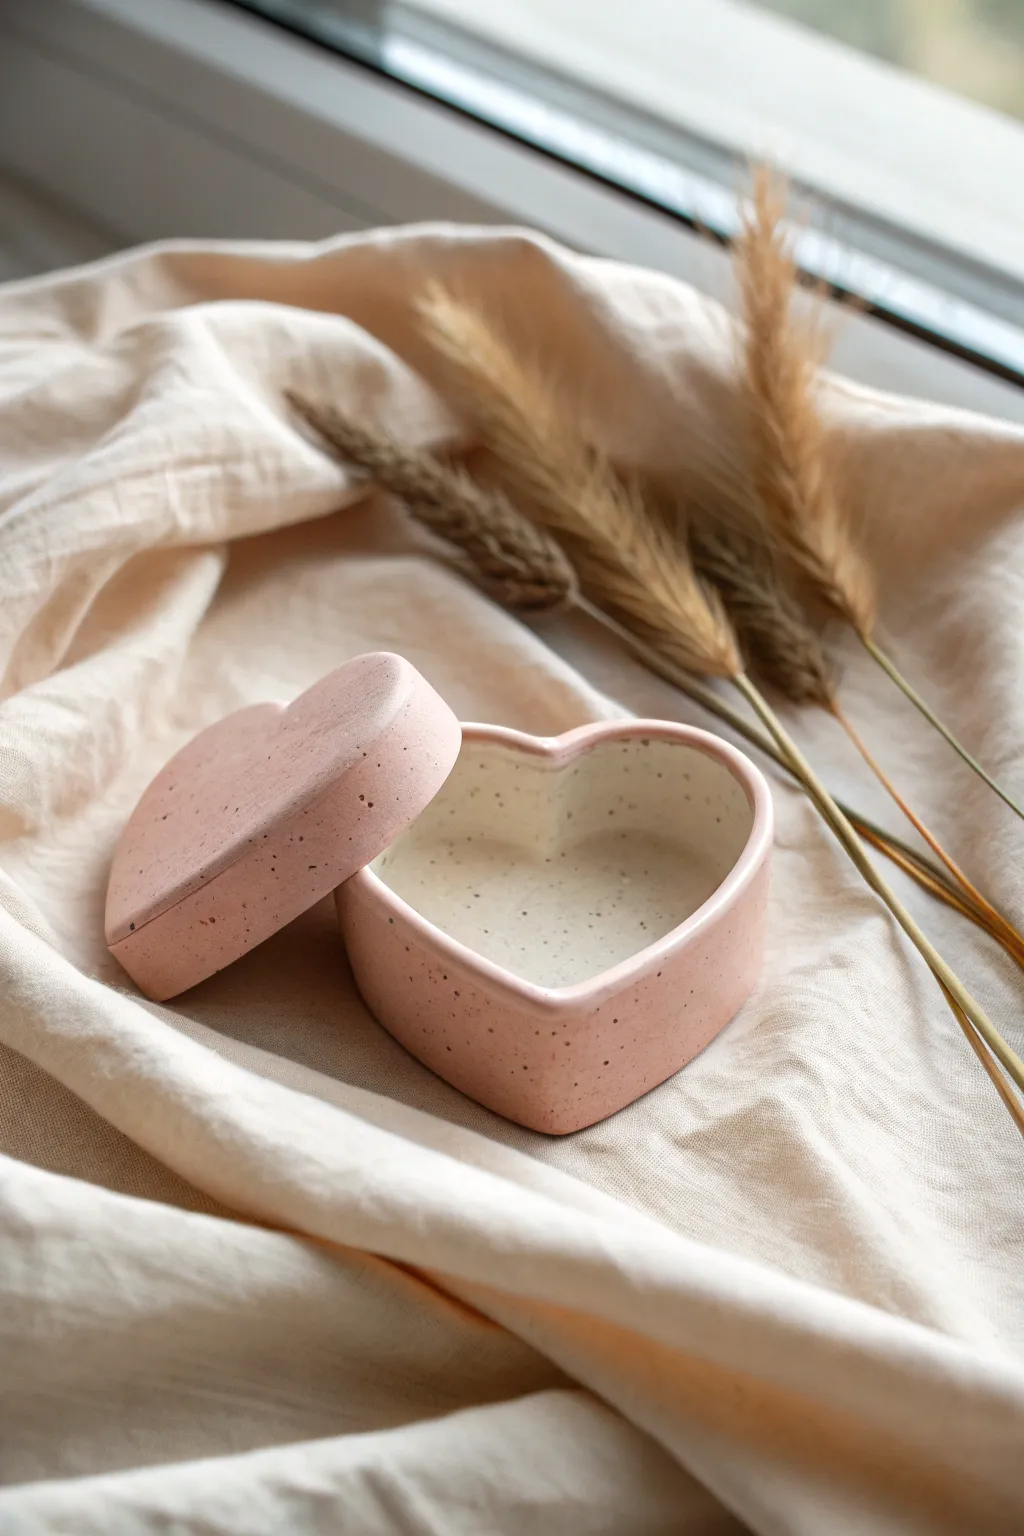
Recreate the charm of ceramic stoneware using polymer clay with this adorable heart-shaped trinket box. The matte dusty pink finish and faux-stone speckles give it a modern, minimalist aesthetic perfect for holding small treasures.
Step-by-Step
Materials
- Light pink polymer clay (dusty rose shade)
- Granite or translucent clay (for speckle effect)
- Black pepper or dried coffee grounds (optional for texture)
- Heart-shaped cookie cutter (medium size)
- Acrylic rolling pin
- Craft knife or scalpel
- Cornstarch or baby powder (release agent)
- Smoothing tool or clay shaper
- Liquid polymer clay (optional)
- Fine-grit sandpaper (400 and 800 grit)
- Matte varnish
Step 1: Preparing the Clay
-
Mix the Base Color:
Start by conditioning your pink polymer clay until it is soft and pliable. If the pink is too bright, mix in a tiny amount of beige or white to achieve that muted, dusty rose tone seen in the photo. -
Create the Speckles:
To get the faux-stone look, you have two options. You can mix in a small amount of pre-made ‘granite’ effect clay, or for a more organic texture, knead in a pinch of ground black pepper or dried coffee grounds directly into the pink clay. -
Roll the Slab:
Flatten the mixed clay using your acrylic roller. Aim for a thickness of about 4-5mm. This thickness is crucial because if it’s too thin, the box walls won’t stack properly. -
Prevent Sticking:
Lightly dust your work surface and the clay slab with a little cornstarch. This ensures the clay releases easily from the cutter.
Cracks during baking?
If small cracks appear after baking, fill them with a mix of liquid clay and regular clay putty, smooth over, and rebake for 10 minutes to seal.
Step 2: Constructing the Base
-
Cut the Base Shape:
Use your heart-shaped cookie cutter to punch out the bottom of the box. Gently push it out of the cutter and set it aside on your baking tile. -
Cut the Lid:
Using the same cutter, punch out a second heart for the lid. Set this aside separately. -
Create the Walls:
Roll out a long strip of clay from your remaining slab. Use a ruler and craft knife to trim this into a neat ribbon, approximately 2cm wide. The length needs to be enough to wrap around the entire perimeter of the heart. -
Prepare the Join:
Score the edges of the heart base and the bottom edge of your clay ribbon. Apply a thin layer of liquid polymer clay if you have it, as it acts as a strong adhesive. -
Attach the Walls:
Carefully wrap the clay ribbon around the edge of the heart base. I prefer to start the seam at the bottom point of the heart for better concealment. -
Seal the Seams:
Where the ribbon ends meet at the point of the heart, slice through both overlapping layers with a craft knife for a perfect butt joint. Use a smoothing tool to blend the seam on both the outside and inside so it becomes invisible.
Step 3: Making the Lid Fit
-
Add an Inner Lip:
To ensure the lid stays on, you need a locking mechanism. Roll a narrower strip of clay (about 1cm wide) and attach it to the underside of the lid piece, indented about 3mm from the edge. -
Test the Fit:
Gently place the lid upside down to ensure the inner lip isn’t too wide. It needs to fit snugly inside the box walls you just built, but not so tight that it gets stuck. -
Smooth Everything:
Go over the entire piece with your finger or a soft silicone tool. Smooth out any fingerprints and soften the sharp edges on the rim to mimic the soft, rounded look of ceramic glaze.
Pro Tip: Seamless Texture
Use an old toothbrush to gently tap the surface of the unbaked clay. This removes fingerprints and adds a authentic stone-like porosity.
Step 4: Refining and Finish
-
Bake:
Bake the pieces according to your clay manufacturer’s instructions. Usually, this is around 275°F (130°C) for 30 minutes provided the clay isn’t too thick. -
Sand for Texture:
Once fully cooled, wet-sand the box under running water using 400 grit sandpaper. This removes any bumps and exposes the speckles/pepper beautifully. -
Final Polish:
Finish with 800 grit sandpaper for a silky smooth feel. Rinse and dry thoroughly. -
Varnish:
Apply a coat of ultra-matte varnish to seal the piece and protect the speckles without adding an unnatural shine, preserving that stoneware appearance.
Now you have a charming, stone-effect keepsake box ready to be filled with jewelry or gifted to someone special
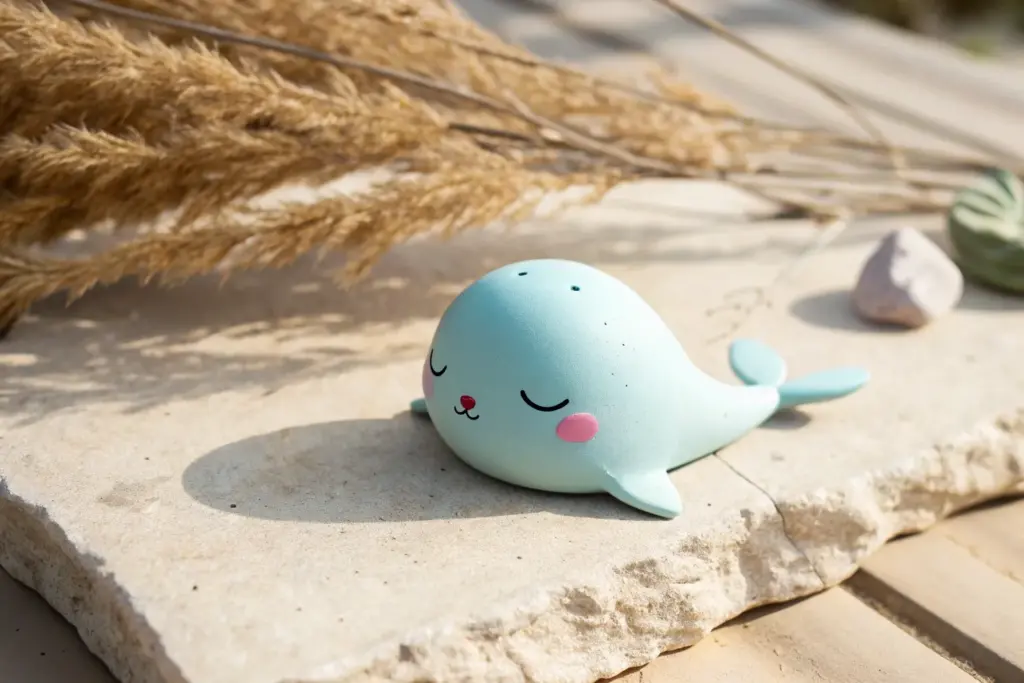
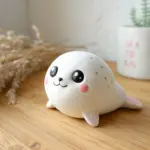
Mini Desk Buddy Mood Blobs

Create a soothing set of desktop friends with this minimalist modelling clay project. These smooth, round mood blobs feature sweet, sleepy expressions and soft cheeks that bring a sense of calm to any workspace.
Detailed Instructions
Materials
- White polymer clay or air-dry clay
- Soft pink polymer clay (optional, or mix red + white)
- Black acrylic paint or fine-tip permanent marker
- Pink chalk pastel or blush
- Small paintbrush (soft bristle)
- Fine detail brush or dotting tool
- Rolling pin (acrylic or glass)
- Smooth work surface (ceramic tile or silicone mat)
- Oven (if using polymer clay) or drying rack
- Matte varnish (optional)
Step 1: Shaping the Base
-
Prepare the Clay:
Start by conditioning your white clay. Knead it thoroughly in your hands until it becomes soft, pliable, and warm. This prevents cracking later on. -
Divide Portions:
Pull off five equal-sized chunks of white clay. If you want a pink buddy like in the photo, dye one chunk with a tiny bit of red clay or use pre-colored pink clay. -
Roll Spheres:
Roll each chunk between your palms to create a perfect sphere. Use a light touch to ensure there are no seams or fold lines visible. -
Flatten Slightly:
Place the spheres on your work surface. Gently press down on the top of each sphere with your palm or a flat tool just enough to create a stable base so they don’t roll away. -
Smooth Imperfections:
Inspect each dome closely. If you see fingerprints, gently buff them out by lightly stroking the surface with your finger dipped in a tiny bit of baby oil (for polymer) or water (for air-dry).
Step 2: Adding Facial Details
-
Prepare the Cheeks:
Before baking or drying, we add the blush. Scrape a little bit of pink chalk pastel into a fine dust using a craft knife or sandpaper. -
Apply Blush:
Dip a soft, dry paintbrush into the pastel dust. Gently dab two soft circles onto the clay where the cheeks will go. Build the color up slowly rather than applying too much at once. -
Bake or Dry:
If using polymer clay, bake according to the package instructions (usually 275°F/135°C for 15-30 minutes). If using air-dry clay, leave them in a draft-free spot for 24-48 hours until fully hardened. -
Cool Down:
Allow the clay pieces to cool completely before moving to the painting step. Painting on warm clay can ruin the finish.
Sticky Fingerprints?
If fingerprints are stubborn, lightly dust your fingers with cornstarch before the final smoothing. It acts as a buffer and buffs away easily before baking.
Step 3: Painting Expressions
-
Plan the Faces:
Decide on your expressions. The classic look involves two U-shaped closed eyes and a tiny U-shaped smile. You can vary the eye shape slightly for different moods. -
Paint the Eyes:
Using a very fine detail brush and black acrylic paint, or a fine-tip marker, carefully draw the closed eyelids just above the blushed cheeks. Steady your hand by resting your pinky on the table. -
Add the Mouth:
Paint a tiny, simple curve between the cheeks for the mouth. Keep the lines thin and delicate to maintain the cute aesthetic. -
Add Eye Details (Optional):
If you want an open-eyed look, simple black dots or small circles work well. For the sleepy look, stick to the curved lines. -
Seal the Project:
Once the paint is completely dry, apply a thin coat of matte varnish. This protects the pastel blush and paint from rubbing off over time.
Make Them Functional
Before baking, press a strong magnet into the back or a paperclip into the top to turn these cute blobs into fridge magnets or photo holders.
Arrange your little clay friends on a small tray or scatter them across your desk for a touch of serenity
Tiny Pond Diorama Scenes
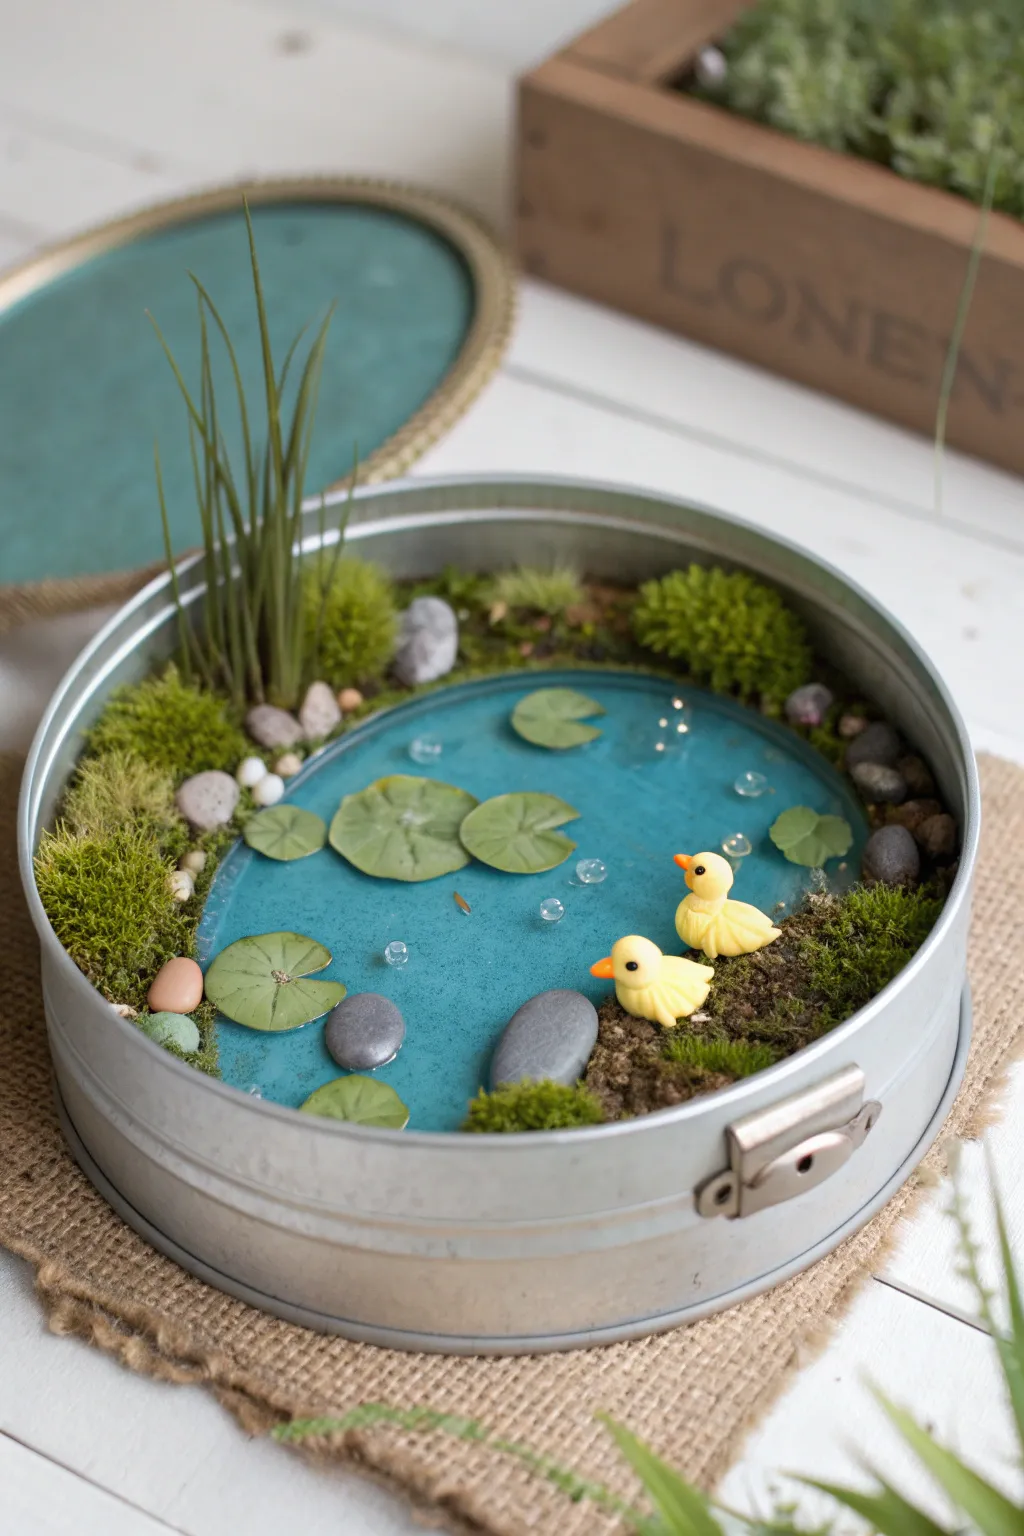
Transform a simple metal tin into a serene aquatic world with this charming diorama. Featuring sparkling resin water, tiny polymer clay ducks, and lush mossy banks, this project creates a peaceful slice of nature small enough to hold in your hand.
Step-by-Step Guide
Materials
- Round metal tin or springform pan ring (approx. 6-8 inches)
- Blue-tinted epoxy resin or clear resin with blue dye
- Yellow polymer clay
- Orange polymer clay
- Green paper or thin cardstock
- Preserved reindeer moss (various green shades)
- Small pebbles and river rocks
- Artificial tall grass stems
- Brown air-dry clay or floral foam (for base structure)
- Strong craft glue or hot glue gun
- Small beads (transparent or iridescent)
- Scissors and fine-tip marker
- Toothpicks or sculpting tools
Step 1: Sculpting the Ducks
-
Form the bodies:
Start by conditioning a small amount of yellow polymer clay. Roll two balls about the size of a hazelnut for the bodies, slightly tapering one end to form a tail shape. -
Add the heads:
Roll two smaller spheres for the heads and gently press them onto the rounded front of the bodies. Smooth the seam with a sculpting tool or your fingertip to join them securely. -
Detail the faces:
Take a tiny speck of orange clay and shape it into a flat, rounded triangle for the beak. Press this onto the center of the face. Use a needle tool to poke small eye holes and insert tiny black beads or use black paint after baking. -
Create wings:
Flatten two tiny teardrop shapes of yellow clay for wings and attach them to the sides of the body. Use a tool to impress subtle feather lines intended to satisfy the eye. -
Bake the clay:
Bake your duck figures according to the clay manufacturer’s instructions (usually 275°F for 15-30 minutes). Let them cool completely.
Leak Prevention
If using a springform pan, seal the bottom seam with a layer of heavy-duty tape or hot glue before pouring resin. Low-viscosity resin loves to find tiny escape routes!
Step 2: Preparing the Landscape
-
Build the banks:
Inside your metal tin, use brown air-dry clay or carved floral foam to create raised banks along the curved edges. Leave the center completely flat and empty for the water. -
Create texture:
While the clay is soft, press small pebbles into the shoreline area to create a natural transition between land and water. Let the base dry fully. -
Plant the grass:
Stick stems of artificial tall grass into the softer clay bank near the back edge. You want them to stand upright to add vertical interest. -
Moss layer:
Apply glue generously over the exposed clay banks. Press clumps of preserved moss into the glue, mixing light and dark greens for a realistic, textured look.
Step 3: Pouring the Water
-
Mix the resin:
Prepare your epoxy resin according to package directions. Mix in a drop of blue alcohol ink or resin dye until you achieve a clear, teal-blue water color. -
First pour:
Pour the resin carefully into the center depression. Fill it until it reaches the ‘shoreline’ created by your pebbles and clay. -
Surface tension:
Watch for bubbles and pop them with a heat gun or by blowing through a straw. Let this layer cure until it is tacky but thick.
Depth Trick
Paint the bottom of the tin a dark blue or black before pouring the resin. This creates an illusion of much deeper water without needing layers and layers of expensive resin.
Step 4: Finishing Touches
-
Make the lily pads:
Cut small, imperfect circles from green paper or cardstock. Cut a tiny wedge out of each circle to create the classic lily pad shape. Draw faint veins with a fine-tip marker. -
Place the floating elements:
Gently place your lily pads onto the tacky resin surface. Arrange a few clear beads around them to mimic water bubbles. -
Position the ducks:
Set your baked clay ducks onto the resin surface or perch one partly on a rock. Since the resin is tacky, they will adhere as it fully cures. -
Final cure:
Allow the entire diorama to sit undisturbed for 24-48 hours until the resin is rock hard and crystal clear.
Place your finished pond on a desk or shelf where it can catch the light and bring a moment of calm to your day
Arched Niche Mini Room Dioramas
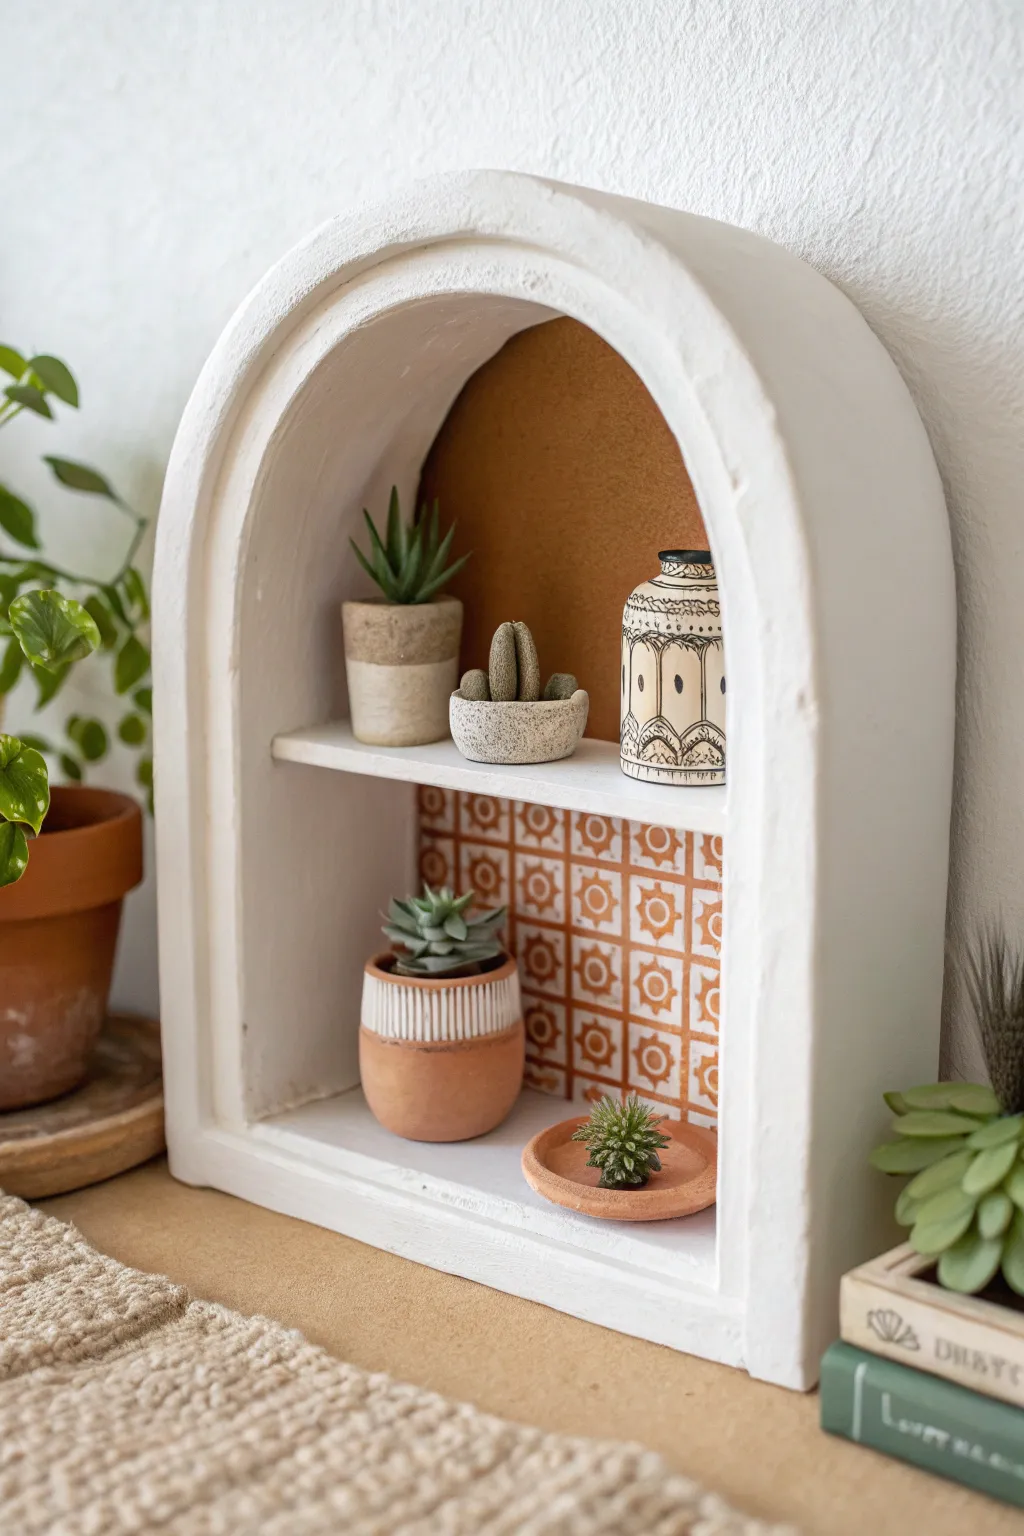
Create your own slice of Mediterranean tranquility with this adorable arched clay niche. Featuring textured white walls, miniature succulents, and mixed-media backdrops, this diorama brings a touch of boho charm to any shelf.
How-To Guide
Materials
- Air-dry modeling clay (white)
- Cardboard or foam board (for the structure)
- Craft knife and cutting mat
- Rolling pin
- Water and small sponge
- Decorative paper (terracotta tile pattern)
- Thin cork sheet
- White acrylic paint (matte)
- Small terracotta pots (miniature size)
- Faux succulent bits or polymer clay to make them
- Strong craft glue or hot glue gun
- Sandpaper (fine grit)
Step 1: Building the Skeleton
-
Cut the Base Shape:
Start by sketching an arch shape onto sturdy cardboard or foam board. You will need three identical pieces: one for the back wall, and two strictly for the outline to measure your side walls against. -
Cut the Wall Strips:
Cut long strips of cardboard approximately 3 inches wide. These will form the depth of your niche. -
Form the Arch:
Bend the cardboard strip carefully to follow the curve of your arch shape. If using foam board, score the back lightly to help it bend without snapping. -
Assemble the Box:
Glue the curved strip to the back arch panel. Then, cut a flat piece for the bottom floor and glue it in place to create a standing shadow ox structure. -
Install the Shelf:
Measure and cut a piece of cardboard for the middle shelf. Glue it horizontally across the center of the niche, ensuring it is level.
Smooth Seams
Dip your finger in water to smooth clay joints. If cracks appear while drying, fill them with a ‘slip’ made of clay mixed with water.
Step 2: Clay Modeling
-
Prepare the Clay:
Knead your air-dry clay until it is soft and pliable. Roll it out into thin sheets, about 1/4 inch thick. -
Cover the Exterior:
Apply the clay sheets over the outside of your cardboard structure. Smooth the seams with a little water on your finger. -
Line the Interior:
Carefully press clay into the interior walls, floor, and the top and bottom of the shelf. I find using a flat modeling tool helps get crisp corners here. -
Create the Front Facade:
Roll a slightly thicker snake of clay and press it onto the front edge of the arch to create a rounded, finished rim. Smooth this into the side walls for a seamless look. -
Add Texture:
Instead of smoothing everything perfectly, dab the wet clay lightly with a sponge or crumpled foil to give it that authentic, stucco-like plaster texture. -
Let it Dry:
Allow the structure to dry completely. This usually takes 24-48 hours depending on humidity. Rotate it occasionally so all sides get air.
Go Boho
Add a tiny macramé hanging from the top of the arch using embroidery floss for extra texture.
Step 3: Finishing Touches
-
Sand and Paint:
Once dry, lightly sand any sharp or unwanted jagged edges. Paint the entire white clay surface with matte white acrylic paint to unify the color and seal the clay. -
Add the Cork Backing:
While the paint dries, cut a piece of cork sheet to fit the upper back wall of the niche. Glue it securely in place. -
Add the Tile Backing:
Cut your decorative tile-patterned paper to fit the lower back wall beneath the shelf. Glue this in carefully, smoothing out bubbles. -
Create Mini Planters:
If you aren’t using pre-made minis, shape tiny pots out of leftover clay. Paint them terracotta or cream once dry. -
Plant the Succulents:
Glue small faux succulent sprigs into your miniature pots. Arrange them on the shelves to your liking. -
Final Styling:
Place your tiny pots and any other miniature decor, like the small vase shown, into the niche to complete the scene.
Now step back and admire your chic miniature display that looks like it came straight from a Mediterranean villa