Whenever I set up a playdough station, I’m basically creating a tiny studio where kids can sculpt, squish, and build while naturally strengthening fine motor skills. These ideas start with the tried-and-true setups everyone loves, then roll into more themed, creative stations once your basics feel easy.
Low Table With Defined Work Mats
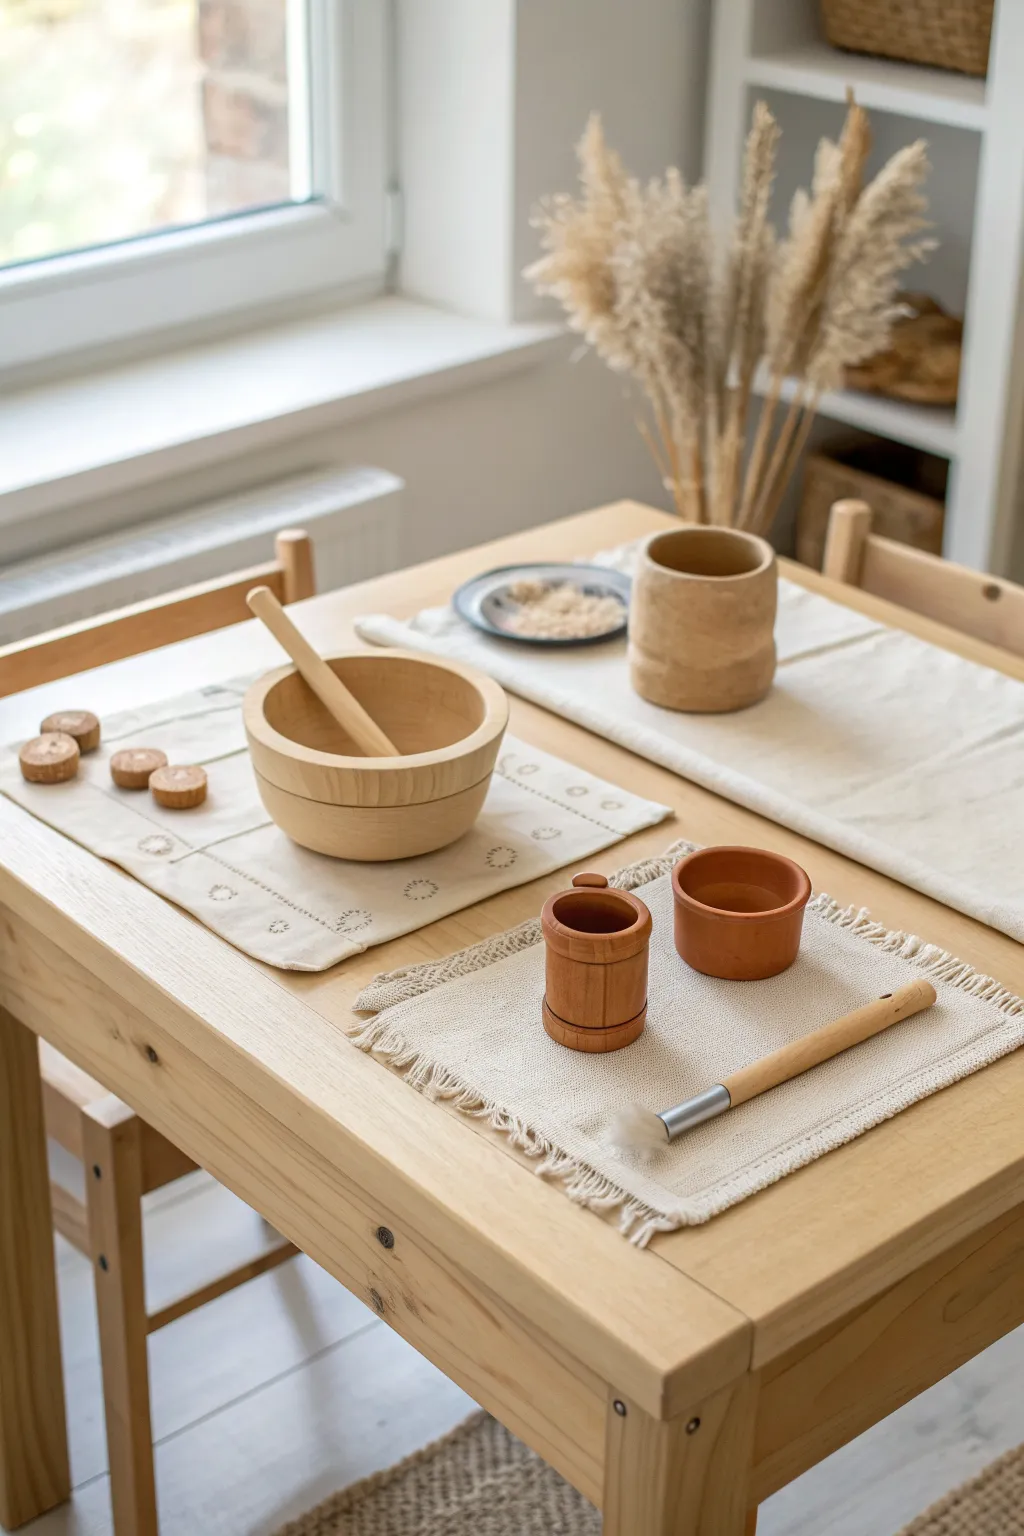
Create a calming, Montessori-inspired playdough area featuring handmade textured work mats that define personal creative spaces. This natural wood table setup encourages focused play using simple, meaningful materials.
Step-by-Step Guide
Materials
- Light-colored solid wood children’s table
- Small wooden accent chair or stool
- Heavyweight unbleached cotton canvas or linen fabric (for the placemat)
- Textured woven cotton fabric with a loose weave (for the fringe mat)
- Fabric ink or permanent fabric markers (brown or dark grey)
- Circular stamping tool (cork, bottle cap, or foam pouncer)
- Fabric scissors
- Fray check liquid (optional)
- Wooden sensory bowls (one large, one small lidded)
- Small terracotta pot or pinch bowl
- Wooden sensory tools (spoon, pastry brush)
- Small wooden discs or buttons for loose parts
Step 1: Creating the Stamped Canvas Mat
-
Measure and Cut:
Begin by measuring a rectangle of your heavyweight canvas fabric, approximately 12×18 inches. Cut cleanly along the grain to ensure a straight rectangle. -
Fray the Edges:
Create a subtle texture by manually pulling a few threads from each of the four sides. You want a very short, neat fringe here, just enough to soften the hard cut edge. -
Secure the Corners:
If you are concerned about unraveling over time, apply a tiny drop of fray check liquid to the very corners of the mat and let it dry completely. -
Plan the Design:
Lay the canvas flat on a protected surface. Visualize a simple grid or border pattern. -
Prepare the Stamp:
Use a round object like a wine cork, bottle cap, or a small foam pouncer. Dip it lightly into brown fabric ink; tap off any excess on a scrap piece of paper so the print isn’t gloopy. -
Stamp the Grid:
Press the stamp firmly onto the fabric to create a series of dotted circles. Create two parallel lines of dots or a simple grid pattern as shown in the inspiration image. -
Set the Ink:
Allow the ink to dry fully according to the manufacturer’s instructions. I usually run a hot iron over the back of the fabric to heat-set the design once it’s dry.
Stamp Smudging?
If your stamped circles look blurry, your fabric might be too textured. Place a piece of smooth cardboard underneath the fabric while stamping to create a firm, flat surface.
Step 2: Crafting the Fringe Texture Mat
-
Select Texture Fabric:
Choose a woven cotton fabric that has a slightly coarser, visible weave, distinct from the smooth canvas used for the first mat. -
Cut to Size:
Cut a square or small rectangle, slightly smaller than your main placemat, perhaps 10×12 inches. -
Create Deep Fringe:
For this mat, pull threads aggressively from all four sides. Continue pulling until you have a lush, decorative fringe about 0.5 to 1 inch deep. -
Reinforce the Fringe Base:
To stop the fraying from continuing past your intended point, you can sew a simple straight stitch around the perimeter of the solid fabric, just inside where the fringe begins.
Step 3: Assembling the Station
-
Arrange the Table:
Position the children’s table near a natural light source like a window to enhance the warm wood tones. -
Place the Mats:
Set your newly created mats on the table. Place the stamped canvas mat on one side and the textured fringe mat on the other to define two distinct work zones. -
Add Wooden Bowls:
Place a large, shallow wooden bowl on the stamped mat. This will serve as the main mixing or holding vessel for dough. -
Incorporate Detail Bowls:
On the textured mat, arrange the small terracotta pinch bowl and the lidded wooden canister. These are perfect for holding smaller loose parts. -
Style the Tools:
Place a wooden spoon inside the large bowl and lay a sensory brush diagonally across the textured mat. The brush is great for clearing away dry dough crumbs later. -
Add Natural Elements:
Finish by placing a small collection of wooden discs or buttons on the stamped mat to suggest immediate play possibilities.
Wood Finish Tip
Rub a small amount of beeswax polish or food-safe mineral oil onto the wooden bowls and tools. It deepens the color and protects them from drying out during play.
Now you have a serene, inviting workspace ready for open-ended creative play


Self-Serve Shelf With Labeled Bins
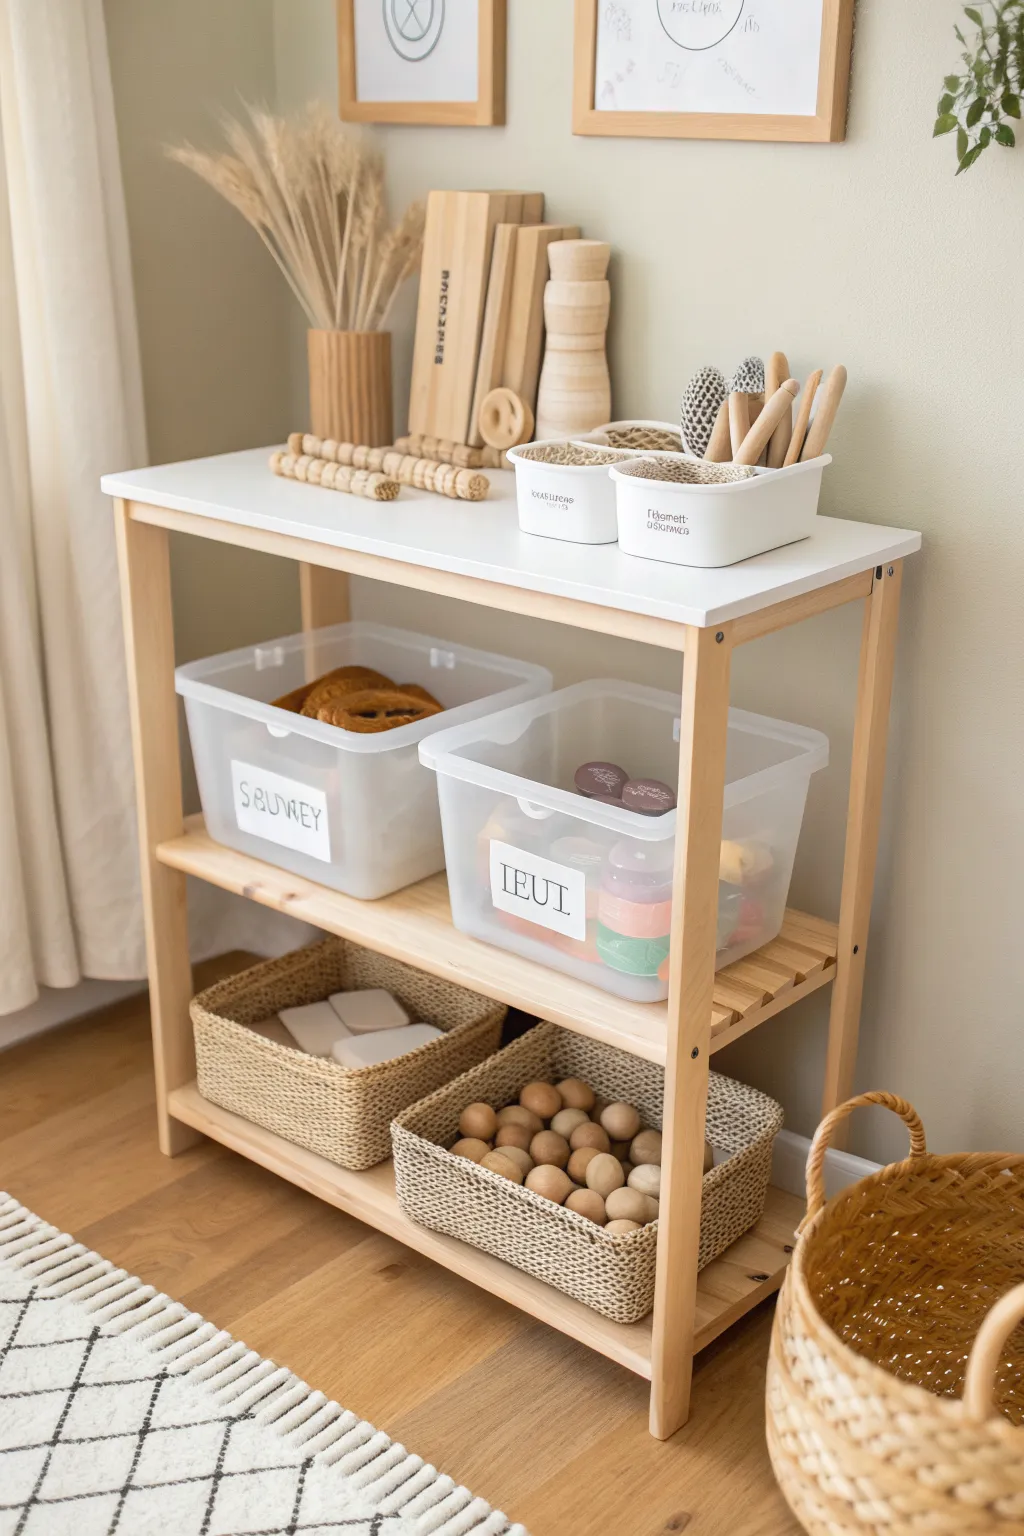
Transform a simple utility shelf into an inviting self-serve playdough station that encourages independence and creativity. This organized setup uses clear bins, natural textures, and accessible tools to make clean-up just as fun as play.
Step-by-Step Tutorial
Materials
- Light wood 3-tier shelving unit (approx. 30″ high)
- Two large clear plastic bins (shoebox size)
- Two smaller white organizing bins
- Two woven storage baskets (to fit bottom shelf)
- Adhesive labels or printable sticker paper
- Permanent marker or printer
- Assorted playdough tools (rolling pins, wooden stamps)
- Playdough in various colors
- Wooden containers or bowls for loose parts
- Dried decorative grasses (optional)
Step 1: Setting the Foundation
-
Select the right shelf:
Begin with a shelving unit that is child-height. The one shown here features a clean white top tier and light wood legs, perfect for a modern, airy look. Ensure it is sturdy and won’t tip over. -
Prepare the workspace surface:
Wipe down the top white shelf thoroughly. This surface will double as both storage and a potential rolling area, so it needs to be clean and smooth. -
Clean all containers:
Before filling them, wash and dry your clear plastic bins and white containers to remove any manufacturing dust or sticker residue.
Label Clarity
Combine text with small icons on your labels. This helps pre-readers identify where items belong and supports early literacy skills during cleanup time.
Step 2: Creating the Playdough Zones
-
Design your labels:
Create simple, clear labels for your main bins. You can print these using a large serif font like the one pictured (‘SBUWEY’ or ‘IEUT’ in the reference, though you’ll likely want to write ‘DOUGH’ or ‘TOOLS’), or hand-letter them for a personal touch. -
Apply labels to bins:
Center your labels on the front face of the two clear plastic bins. I find using a ruler help ensure they are applied perfectly straight. -
Fill the ‘Dough’ bin:
Place your playdough containers into the left-hand labeled bin. Keeping them in their own airtight tubs inside this larger bin adds double protection against drying out. -
Fill the ‘Tools’ bin:
In the second clear bin, organize your cutters, stampers, and molds. Using a clear bin here helps children see exactly what creative tools are available without dumping everything out. -
Position the main bins:
Place these two large clear bins side-by-side on the middle shelf. Ensure there is enough clearance above them so a child can slide them out easily.
Level Up: Texture Table
Line the bottom of the woven baskets with linen fabric scraps to prevent small loose parts from falling through the weave and to add a soft tactile element.
Step 3: Organizing the Loose Parts
-
Set up the bottom shelf:
Place your two woven baskets on the bottom shelf. The texture contrast adds warmth to the station. -
Fill the left basket:
Use the left basket for larger flat items, such as playdough mats or flat wooden rolling boards. -
Fill the right basket:
Dedicate the right basket to loose parts like wooden eggs, spheres, or large stones. These open-ended materials encourage imaginative play. -
Arrange the top tier:
On the top white surface, place your two smaller white organizing bins. These are for high-frequency tools. -
Add detail tools:
Fill these top white bins with wooden sculpting tools, small rolling pins, and texture tools. Keep handles pointing up for easy grabbing. -
Incorporate vertical storage:
Lean larger wooden boards or rolling pins against the wall or back of the shelf. This utilizes vertical space and displays the beautiful wood grain.
Step 4: Styling and Finishing
-
Add decorative elements:
Place a vase with dried grasses or wheat on the top left corner. This connects the station to nature and softens the look of the plastic bins. -
Final check:
Step back and ensure everything is accessible. The goal is independence, so items should not be stacked too high or tightly packed. -
Safety inspection:
Double-check that heavier items are on the bottom shelf (like the wooden spheres) to keep the unit’s center of gravity low.
Now you have a beautifully organized station that invites hours of creative, independent play


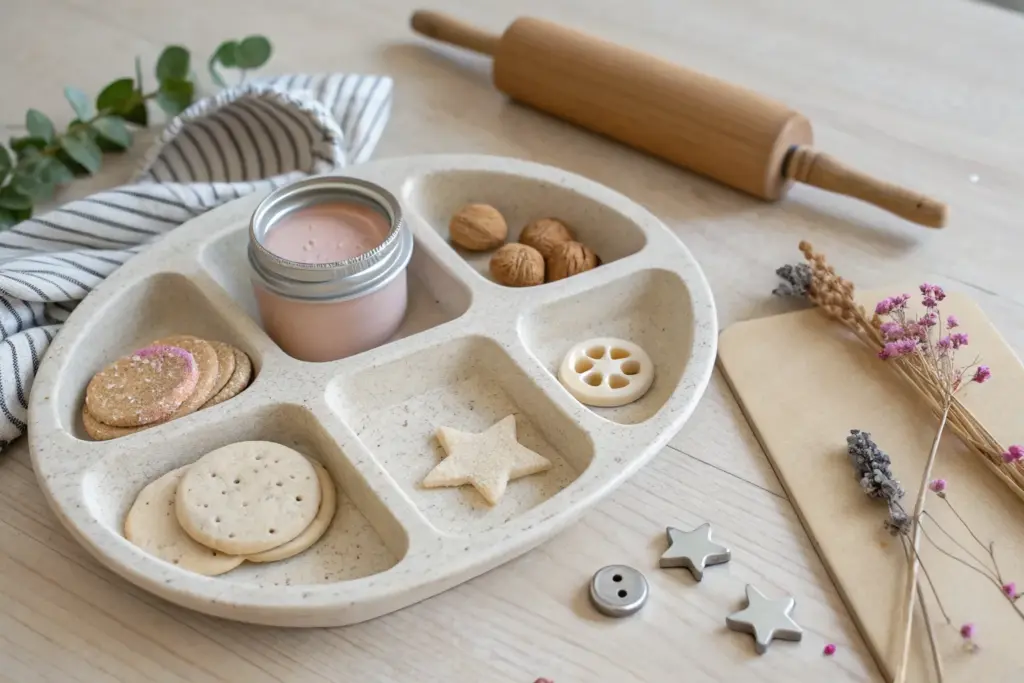
Tray-Based Portable Playdough Station
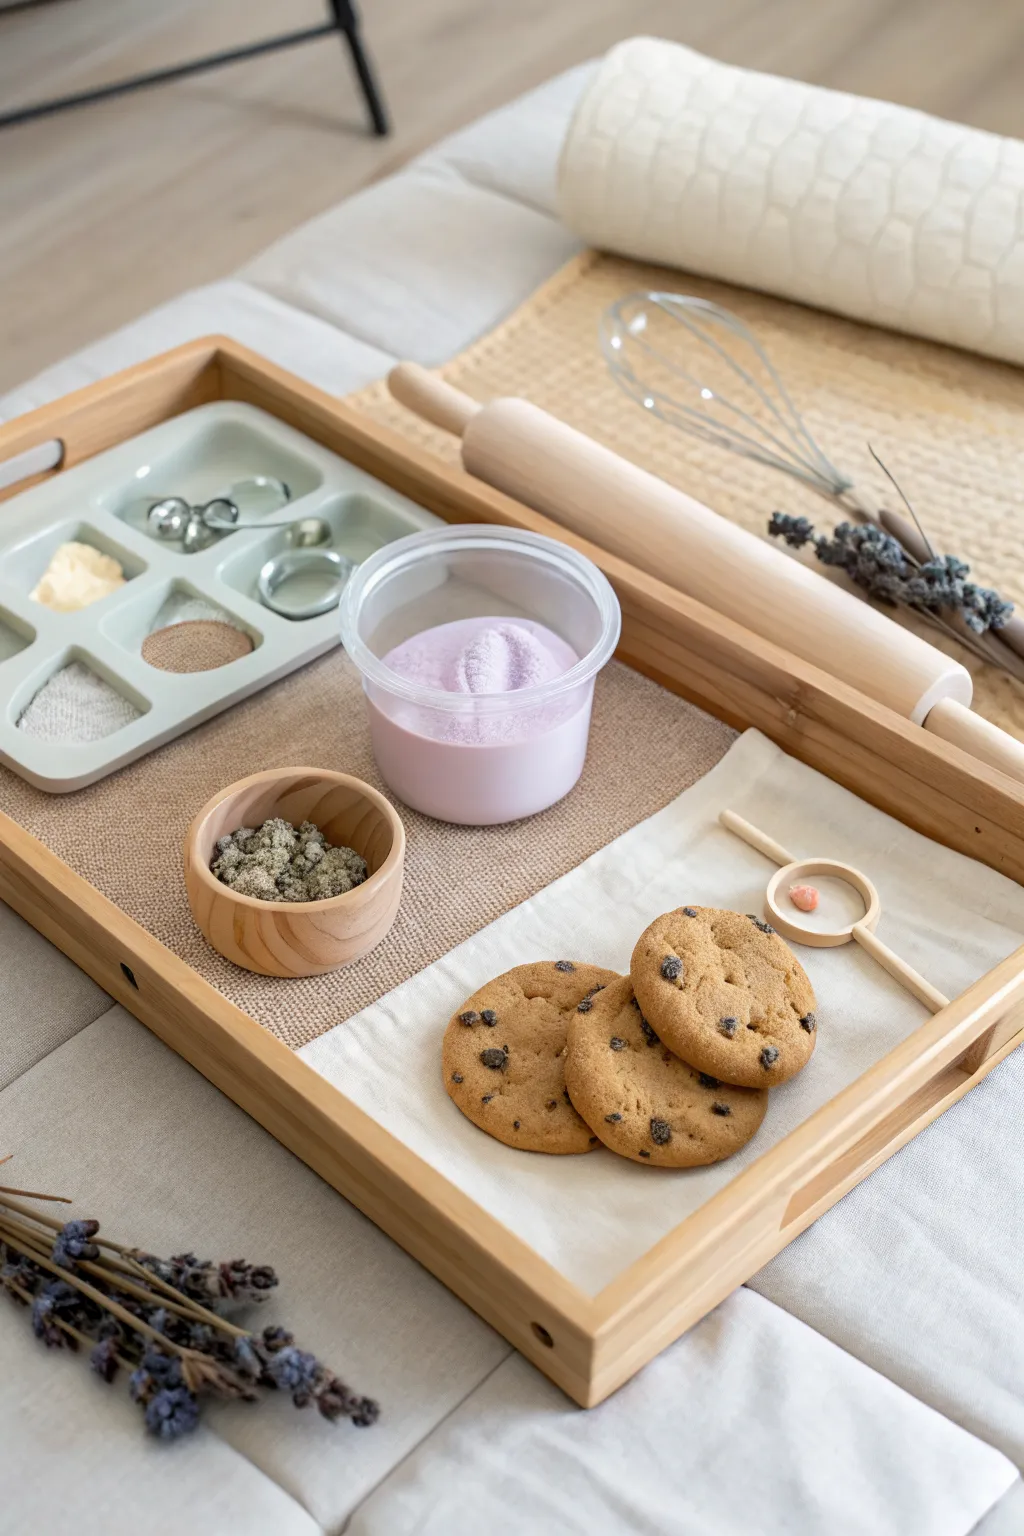
Transform a simple wooden tray into an inviting “bakery” play scene using scented dough and natural textures. This setup combines the calming aroma of lavender with tactile elements like seeds and realistic faux cookies for hours of imaginative play.
Step-by-Step Guide
Materials
- Large bamboo or light wood serving tray with handles
- Small clear plastic tub with lid
- Homemade or store-bought lavender-colored playdough
- 3 Realistic play cookies (chocolate chip style)
- Small wooden condiment bowl
- Dried green lentils or mung beans
- Small divided sorting tray (ceramic or plastic)
- Mini rolling pin
- Wire whisk
- Dried lavender sprigs
- Small wooden scoop or spoon
- Scrap of cream-colored linen or cotton fabric
- Beige textured fabric or burlap scrap (to line the tray)
- Assorted loose parts (glitter, sand, small stones) for the sorting tray
Step 1: Setting the Foundation
-
Prepare the Base:
Begin by cleaning your main bamboo tray to ensure it’s free of dust. Cut a piece of beige textured fabric or burlap to fit the left side of the tray interior. This adds a nice visual break and soft texture underneath the sorting components. -
Create the ‘Baking Sheet’:
Cut a smaller rectangular piece of cream-colored cotton or linen fabric. Fold it neatly and place it on the right side of the tray. This will act as the ‘parchment paper’ area where the finished cookies will be displayed.
Dough Too Sticky?
If your homemade lavender dough is sticking to the rolling pin, dust the wood lightly with flour or cornstarch before placing it on the tray.
Step 2: Arranging the Ingredients
-
Fill the Dough Tub:
Take your lavender-colored playdough and pack it into the clear plastic tub. Use a spoon to create a little swirl or peak in the center so it looks like fresh frosting or soft dough. Place this centrally on the tray, bridging the gap between the two fabric liners. -
Prepare the Sprinkle Bowl:
Fill the small wooden condiment bowl with dried lentils, mung beans, or gray sensory stones. These earth-toned bits will act as pretend ‘nuts’ or ‘chocolate chips’ for the baking play. Nestle the bowl onto the left side of track, on top of the beige fabric. -
Curate the Sorting Tray:
In the small divided sorting tray, fill each compartment with different sensory textures. Examples include a pinch of kinetic sand, a small smooth stone, glitter, or dried herbs. Place this tray in the upper-left corner.
Scent Boost
Add a few drops of lavender essential oil to the wooden bowl or the dough itself to strengthen the calming sensory experience during play.
Step 3: Adding Tools and Decor
-
Position the Whisk:
Lay the wire whisk diagonally across the top right of the tray. If your tray is set on a larger surface like a mat (as seen in the photo), you can also place the whisk just outside the tray to expand the play area. -
Place the Rolling Pin:
Set the wooden rolling pin along the top edge of the tray or resting partially on the rim. The wood tone should coordinate with the tray for a cohesive look. -
Arrange the Lavender:
Take a small bundle of dried lavender sprigs. Tie them loosely or simply lay them together near the rolling pin or whisk. This provides a visual cue for the scent and adds a beautiful natural element.
Step 4: The Final Flourish
-
Display the Cookies:
Arrange the three realistic play cookies on the cream-colored fabric ‘baking sheet’ in the bottom right corner. Overlap them slightly to make them look freshly baked and inviting. -
Add Fine Details:
Place a small wooden scoop or spoon near the cookies or the sprinkle bowl. I find that adding a tiny, specific tool like this encourages children to practice fine motor pouring and scooping. -
Assemble the Exterior:
Finally, arrange a larger bundle of dried lavender outside the tray on the bottom left to frame the scene. If you have a rolled towel or mat, place it at the top to create a boundary for the play space.
Now your playdough station is ready to inspire some calm, creative baking fun


Cookie Sheet Containment Setup
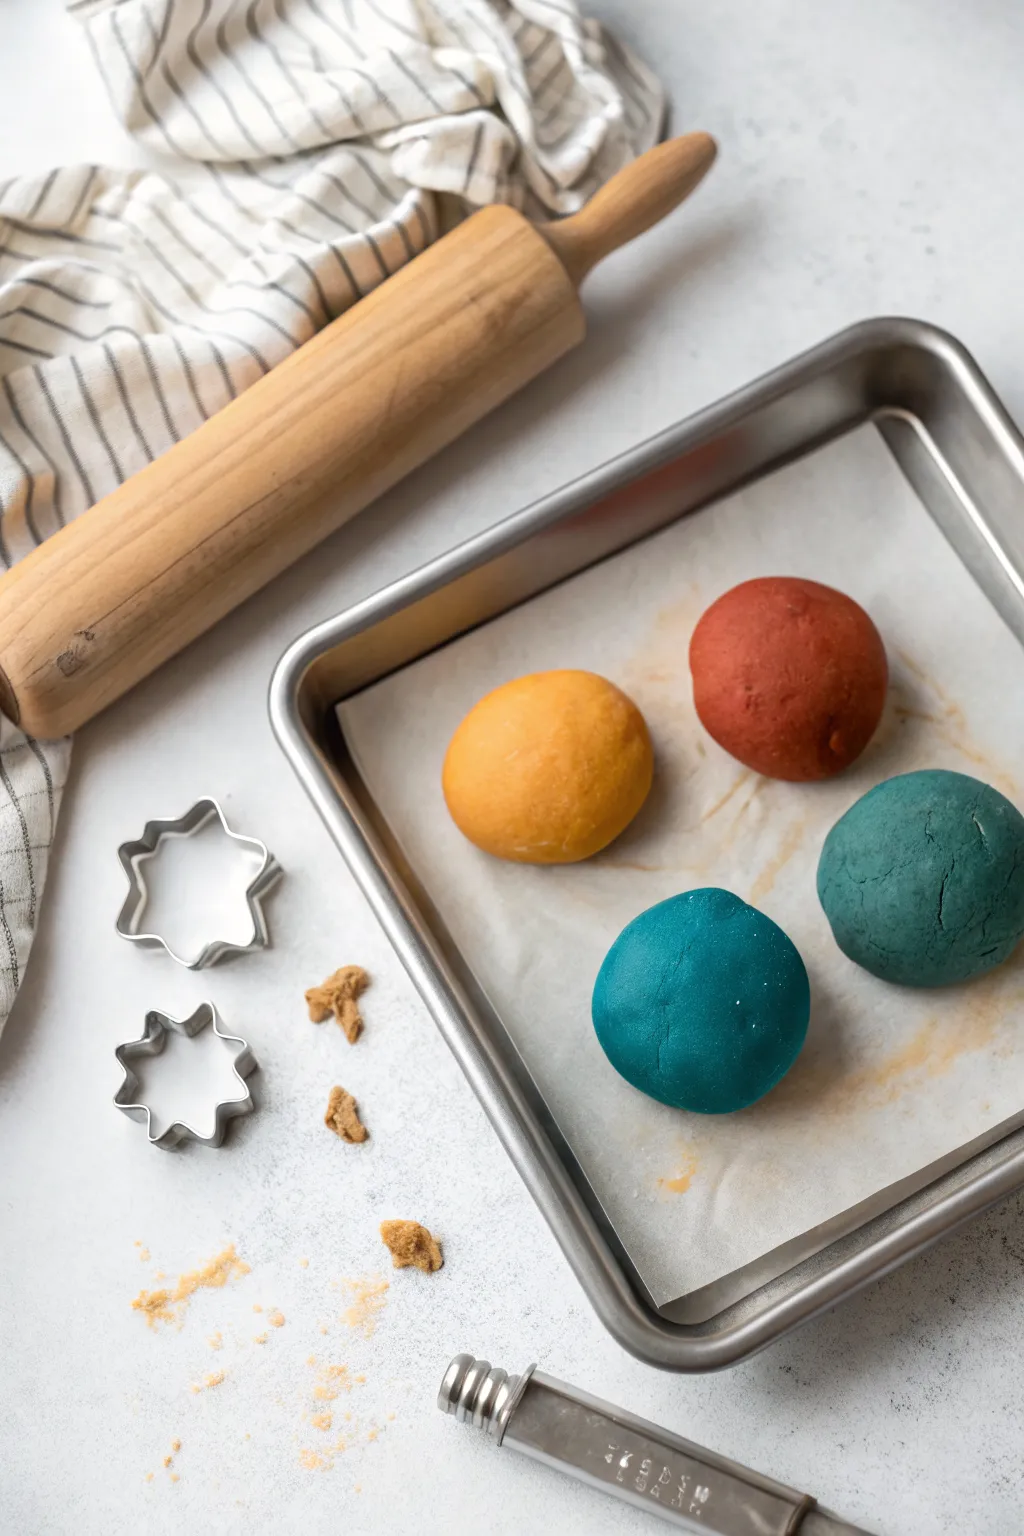
Transform simple ingredients into vibrant, squishable sensory spheres ready for creative play. This setup features four distinct, rich colors arranged neatly on a parchment-lined tray, inviting little hands to roll and shape.
Step-by-Step Tutorial
Materials
- All-purpose flour
- Salt
- Cream of tartar
- Vegetable oil
- Water
- Gel food coloring (Orange, Red, Teal/Turquoise, Blue)
- Small baking sheet/Quarter sheet pan
- Parchment paper
- Wooden rolling pin
- Star-shaped cookie cutters
- Striped kitchen towel for styling
Step 1: Cooking the Dough Base
-
Mix dry ingredients:
In a large saucepan, whisk together 2 cups of flour, 1/2 cup of salt, and 2 tablespoons of cream of tartar until fully combined. -
Add wet ingredients:
Pour in 2 tablespoons of vegetable oil and 1.5 cups of boiling water. Stir vigorously with a wooden spoon. -
Cook the dough:
Place the pan over medium heat and stir constantly. The mixture will look lumpy at first, but keep stirring. -
Check consistency:
Continue cooking until the dough forms a ball and pulls away cleanly from the sides of the pan. It should feel tacky, not sticky. -
Cool slightly:
Remove the dough from the pan and place it on a clean counter or silicone mat. Let it cool for 5-10 minutes until it’s safe to handle. -
Divide the batch:
Cut the warm dough ball into four equal sections. This allows you to create the distinct color palette shown in the image.
Vivid Color Secret
Use gel food coloring paste instead of liquid drops. It provides the intense, opaque colors seen here without making the dough too sticky or wet.
Step 2: The Coloring Process
-
Create the Golden Yellow:
Take the first section of dough. Press a deep thumbprint into the center and add generous drops of yellow gel food coloring with a tiny dot of orange. -
Knead the Yellow:
Fold the dough over the dye (I suggest wearing gloves here to save your hands) and knead thoroughly until the color is a uniform, warm golden-orange hue. -
Mix the Classic Red:
For the second ball, use red gel coloring. Be generous with the drops to achieve that deep, matte reddish-brown tone rather than a bright pink. -
Blend the Deep Teal:
On the third ball, mix blue coloring with a significant amount of green. You want a dark, stormy ocean color, so keep adding dye until saturated. -
Create the Bright Blue:
For the final ball, use a bright turquoise or sky blue gel color. Knead until smooth and vibrant. -
Smooth the shapes:
Roll each colored section between your palms to create perfect, smooth spheres with no cracks.
Scented Dough Upgrade
Add a few drops of essential oils (like lemon for yellow or peppermint for blue) during the kneading phase for a multi-sensory experience.
Step 3: Station Assembly
-
Prepare the tray:
Take a small metal baking sheet or quarter sheet pan and cut a piece of parchment paper to fit the interior perfectly. -
Arrange the dough:
Place the four colored balls onto the parchment paper. Space them out evenly—two in the back, two in the front. -
Add the cutters:
Place two metal star-shaped cookie cutters on the surface to the left of the tray for immediate play access. -
Style the crumbs:
Keep a tiny pinch of the golden dough off to the side. Crumble it into small, uneven bits near the cookie cutters to suggest play has already begun. -
Position the tools:
Lay a wooden rolling pin diagonally across the top left corner. Place a folded, striped kitchen towel underneath the rolling pin for a cozy, texture-rich background.
Your colorful playdough station is now set for hours of imaginative shaping and cutting

The Complete Guide to Pottery Troubleshooting
Uncover the most common ceramic mistakes—from cracking clay to failed glazes—and learn how to fix them fast.
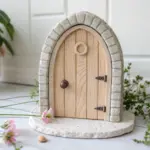
Picture Rules and Cleanup Corner
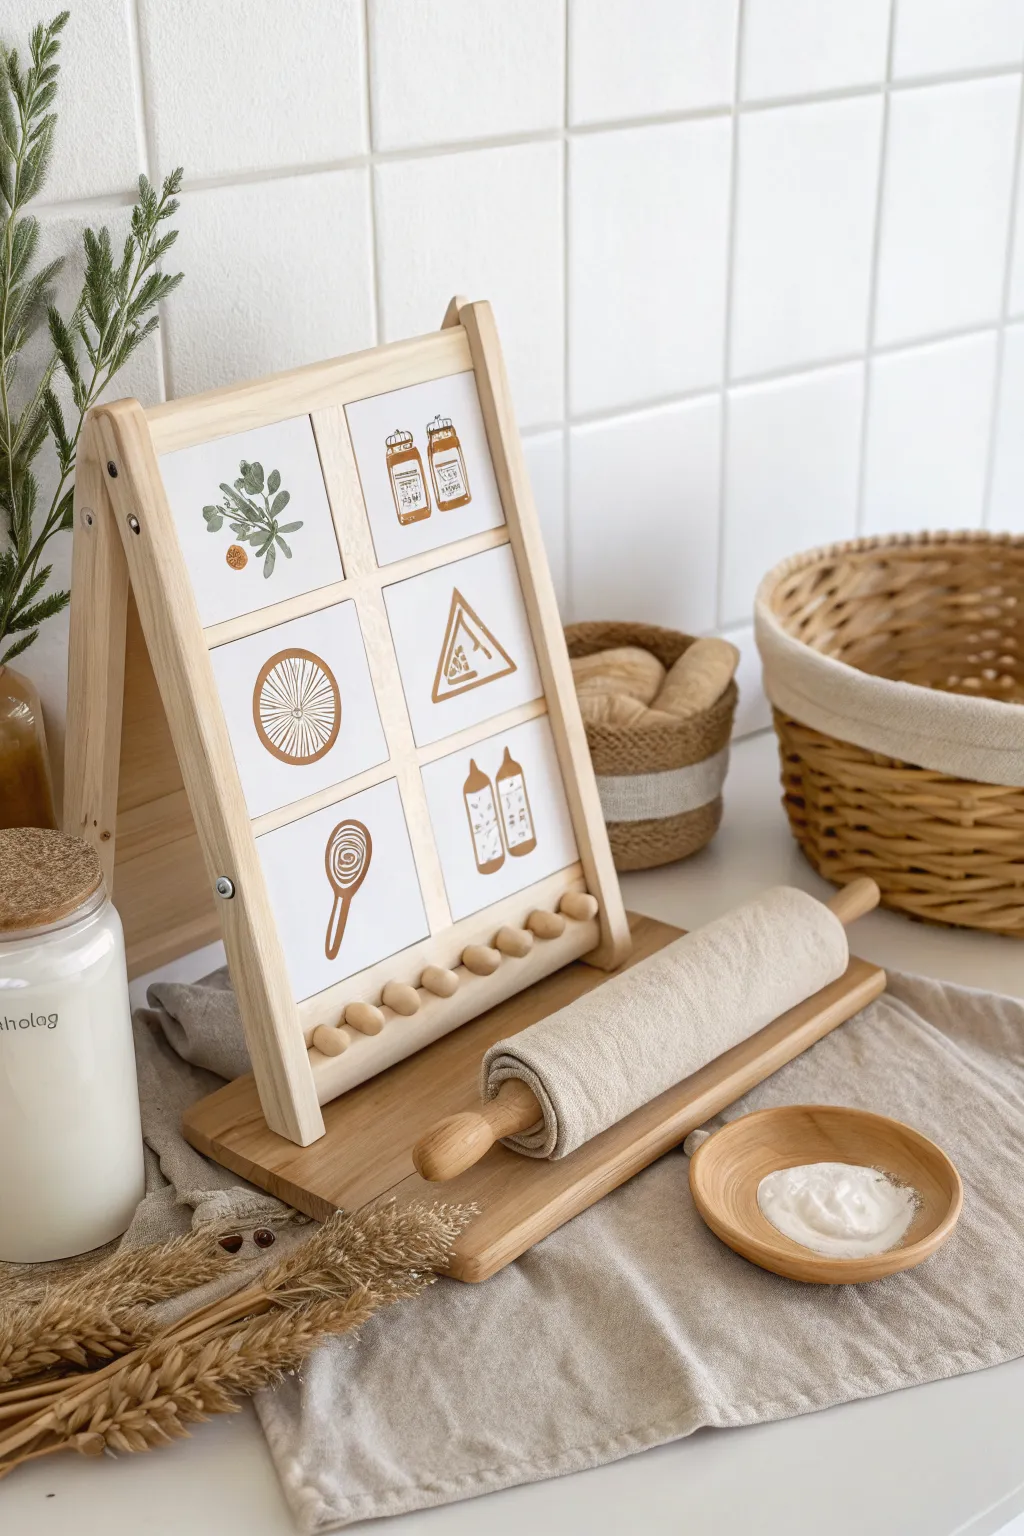
This charming, Montessori-inspired visual guide helps little ones understand the steps of creating with playdough through simple, nature-toned illustrations. The standing wooden frame features interchangeable tiles that can serve as activity prompts or cleanup reminders for your sensory station.
Step-by-Step
Materials
- Unfinished wooden A-frame tabletop easel (approx. 12×15 inches)
- Balsam wood sheets or thin plywood (1/8 inch thick)
- Wooden dowel (1/4 inch diameter)
- Wooden beads (assorted sizes, natural finish)
- Fine-grit sandpaper (220 grit)
- Wood glue
- Pencil and ruler
- Paint pens or acrylic paint (burnt sienna, sage green, dark brown, white)
- Fine-tip detail brush
- Matte spray sealant
- Small drill with bit matching the dowel size
- Cotton twine or thin wire (optional for hanging mechanism)
Step 1: Building the Frame Structure
-
Prepare the A-frame:
Start with a pre-made unfinished wooden tabletop easel. If you are building from scratch, cut two identical rectangles of wood for the front and back panels, joining them at the top with small hinges. -
Create the grid overlay:
Visualize a grid of six squares on the front panel. Depending on your easel style, you may need to glue thin strips of balsa wood horizontally and vertically to create the distinct ‘window pane’ effect that separates the tiles. -
Drill the abacus holes:
At the very bottom of the front frame legs, measure and mark two spots on the inside edges. Drill a shallow hole halfway through the wood on each side to hold the dowel. -
Assemble the bead counter:
Cut your wooden dowel to fit snugly between the legs. Thread 8-10 wooden beads onto the dowel. -
Secure the dowel:
Apply a dab of wood glue into the holes you drilled. Flex the frame slightly to pop the dowel ends into the holes, ensuring the beads are captured in the middle. Clamp or hold until the glue sets.
Keep it Simple
Don’t worry about perfect realism for the icons. Simple line drawings with one or two accent colors are often clearer for children to interpret.
Step 2: Creating the Illustrated Tiles
-
Cut the tiles:
Measure the openings in your grid. Cut six square tiles from your thin plywood or balsa sheet that fit perfectly within these spaces. Sand the edges until smooth. -
Prime the surface:
Paint the front face of each tile with a solid coat of white acrylic paint. This provides a clean, bright background for your illustrations. Let this dry completely before adding a second coat if needed. -
Draft the designs:
Using a light pencil collecting, sketch your six symbols. Aim for: a botanical sprig, two jars, a circle texture, a triangle tool, a wooden spoon, and two bottles. Keep the lines simple and graphic. -
Paint the botanical tile:
For the top left tile, use sage green for the leaves and a burnt orange for the small round fruit or flower. Keep the brushstrokes loose to mimic a watercolor style. -
Illustrate the tools:
For the remaining tiles, use a burnt sienna or cognac-colored paint pen. Outline the geometric shapes (circle, triangle) and the tools (spoon, bottles). Fill in select areas, like the bowl of the spoon, to add weight to the design. -
Add fine details:
Switch to a very fine dark brown pen or liner brush. Add the textural details: the lines inside the circle slice, the labels on the bottles, the swirl on the spoon, and the wood grain lines. -
Seal the tiles:
Once the artwork is fully dry, spray each tile with a matte clear coat. I prefer doing this outside to avoid fumes. This protects the art from flour and doughy fingers.
Bleeding Lines?
If your markers bleed on the wood, prep the surface first with clear gesso or a matte medium. This seals the wood grain and keeps lines crisp.
Step 3: Final Assembly
-
Attach the tiles:
Apply wood glue to the back of each painted tile and press them firmly into their designated spots on the easel frame. -
Weight it down:
Place a heavy book over the tiles while the glue dries to ensure they adhere flat against the backing board without curling. -
Smooth the wood:
Give the exposed wooden parts of the frame one final pass with fine sandpaper to ensure it is soft to the touch for children.
Place your finished guide near the dough station to inspire independent play and tidy habits
Dough and Tool Rotation Basket
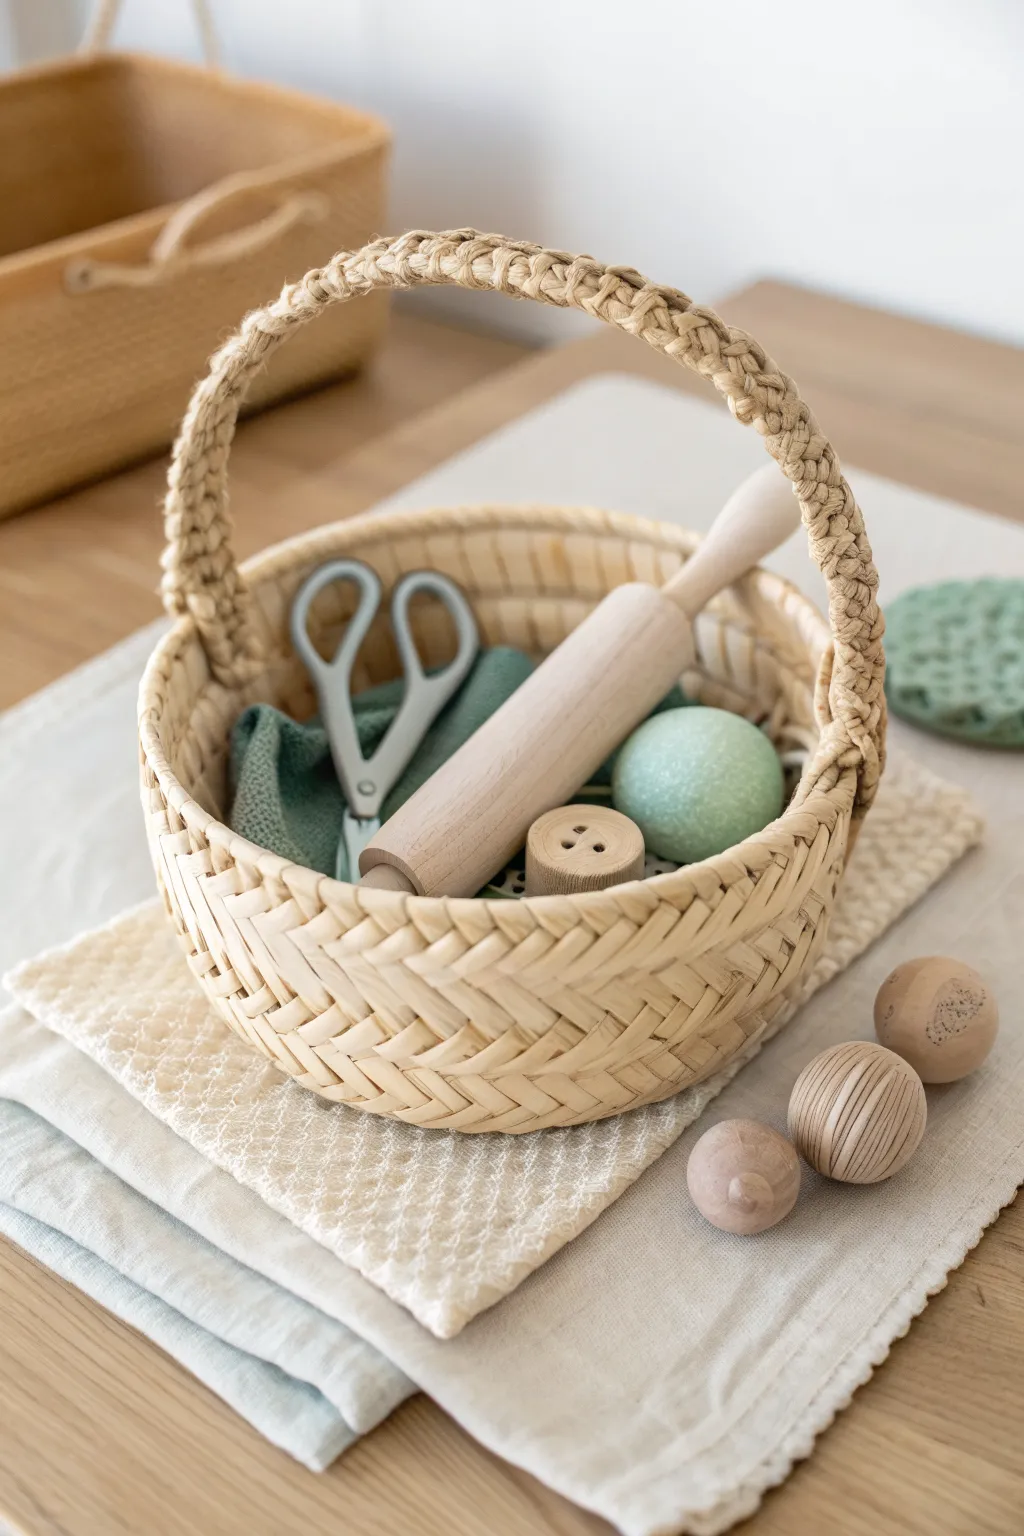
This charming, portable station keeps playdough tools organized and inviting while introducing a natural aesthetic to your child’s play area. By curating a small selection of wooden and tactile items in a woven carrier, you create a focused and calm creative inviation.
Step-by-Step Guide
Materials
- Small round woven basket with handle (approx. 8-10 inches diameter)
- Wooden rolling pin (child-sized)
- Safety scissors (grey or neutral handles)
- Sage green linen or cotton scrap fabric
- Textured teal or mint playdough ball
- Wooden loose parts (spheres, large button shapes)
- Textured woven washcloth or placemat (cream)
- Soft green muslin cloth
- Light beige linen cloth
Step 1: Setting the Foundation
-
Layer the Base Cloths:
Begin by selecting a flat surface like a low table or play mat. Lay down your light beige linen cloth first, ensuring it is smooth but slightly relaxed. Place the soft green muslin cloth on top, folding it casually so the edges peek out from underneath the next layer. -
Add Texture:
Top the stack with the textured woven washcloth or placemat. This provides a designated workspace that defines the play area and catches small crumbs of dough. -
Position the Basket:
Place the small woven basket directly in the center of your layered fabrics. Ensure the handle is upright and accessible.
Step 2: Curating the Contents
-
Line the Interior:
Take the sage green scrap fabric and nestle it into the bottom of the basket. Let it bunch naturally to create a soft bed for the tools, rather than folding it perfectly flat. -
Insert the Rolling Pin:
Place the wooden rolling pin into the basket diagonally. I like to let the handle rest on the rim of the basket so it’s the first thing a child wants to grab. -
Add the Cutting Tool:
Tuck the safety scissors into the fabric lining alongside the rolling pin. Position them handle-up for safety and ease of grasping. -
Place the Dough:
Form your teal or mint playdough into a smooth, round sphere. Set this gently next to the tools inside the basket, using the fabric to separate it slightly from the wood if the dough is sticky. -
Include a Stamper:
Add a single wooden button or flat wooden disc with holes inside the basket. This serves as a texture stamper for the dough.
Sticky Dough Prevention
If using homemade dough, lightly dust the linen liner with flour or wrap the dough ball in beeswax wrap before placing it in the basket.
Step 3: Styling the Invitations
-
Arrange Exterior Loose Parts:
Select three wooden spheres or turned wood shapes of varying sizes. Arrange them in a small cluster on the placemat outside the basket, to the right side. -
Incorporate Texture Tools:
If you have a textured crochet coaster or scrubbing pad, place it near the back right corner. This offers a different tactile experience for pressing into the dough. -
Final Check:
Step back and view the setup at your child’s eye level. Adjust the items in the basket so that every tool is visible and looks easy to remove without disrupting the others.
Scented Experience
Add a few drops of lavender or eucalyptus essential oil to the playdough ball to engage the sense of smell along with touch.
Now you have a beautifully organized invitation to play that looks lovely on the shelf


What Really Happens Inside the Kiln
Learn how time and temperature work together inside the kiln to transform clay into durable ceramic.
Name and Word Mat Playdough Center
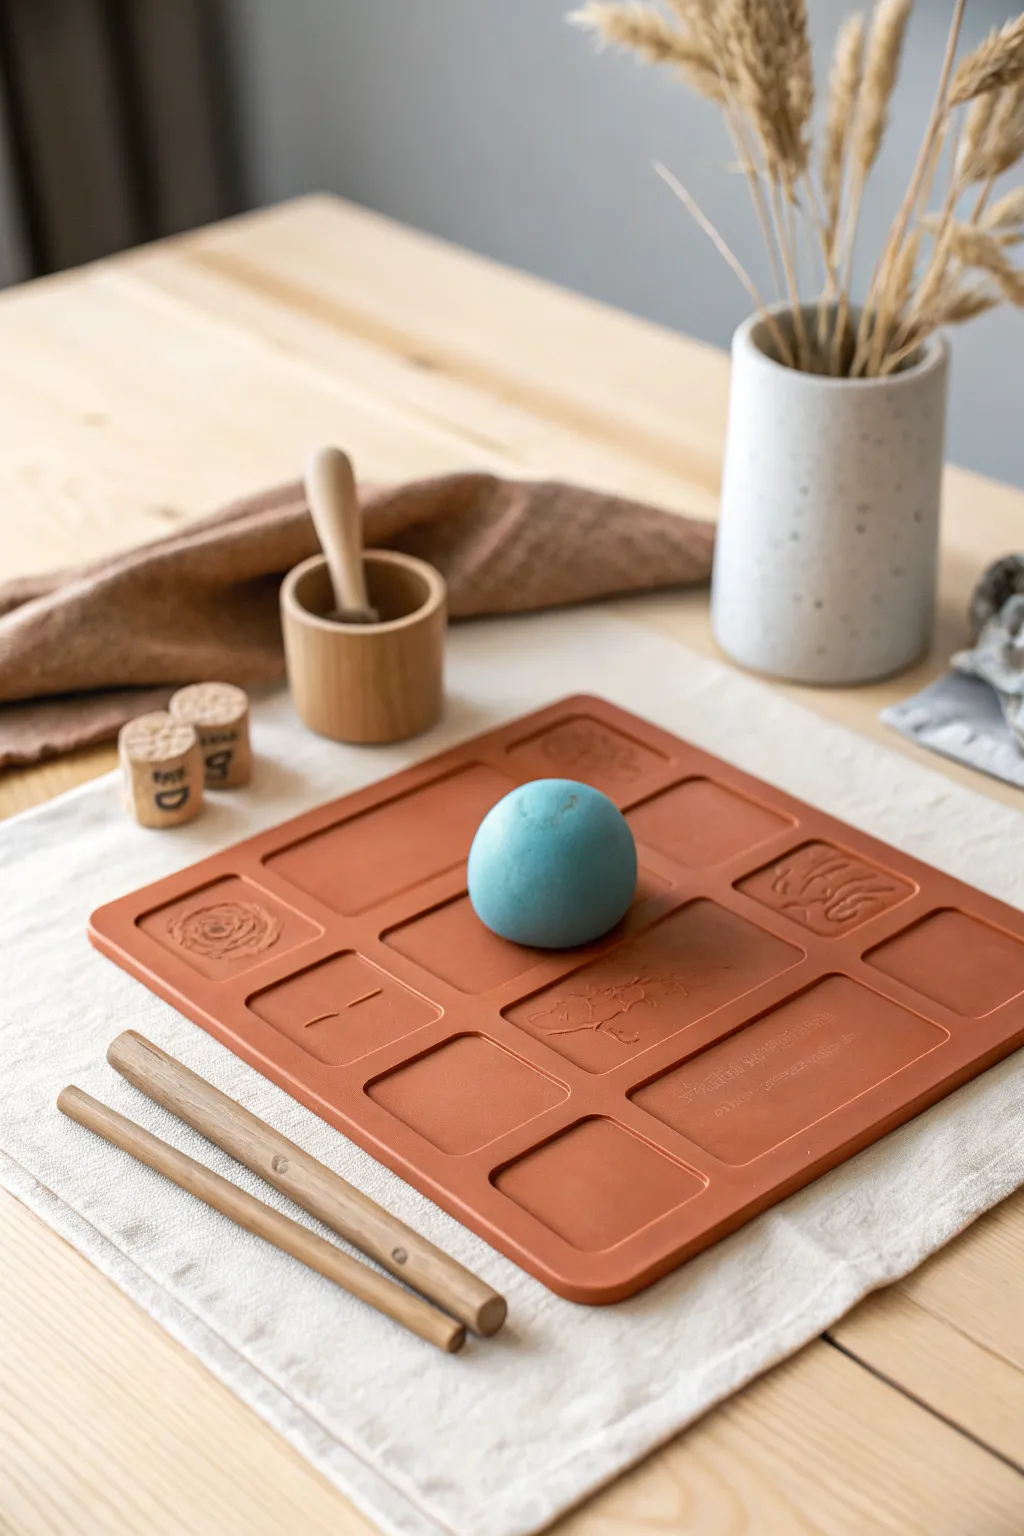
This project guides you through creating a custom silicone playdough mat with a warm terracotta finish and embedded texture zones. The result is a smooth, durable, and wipeable surface perfect for sensory play and letter practice.
Detailed Instructions
Materials
- Two-part silicone mold making kit (food-grade if desired)
- Terracotta pigment or silicone-safe dye
- Large flat waterproof tray or mold housing (at least 12×12 inches)
- Clean, smooth objects for texture impressions (leaves, alphabet stamps, geometric blocks)
- Mixing bucket and stir stick
- Release agent (petroleum jelly or commercial mold release)
- Scale for measuring
- Small wooden dowels for tools
- Sandpaper
Step 1: Mold Preparation
-
Select your base:
Choose a flat, non-porous tray or build a simple rectangular frame on a smooth board to serve as your mold housing. Ensure the sides are at least 0.5 inches high to contain the silicone. -
Plan the layout:
Before mixing anything, lay out your texture objects within the frame. You want to create distinct zones—some open areas for free play and specific spots for sensory impressions. -
Secure the impressions:
Once you like the layout, lightly adhere your impression objects (leaves, coins, foam letters) to the base of the mold using a tiny dot of hot glue or double-sided tape so they don’t float during pouring. -
Apply release agent:
Coat the entire interior of your mold frame and the adhered objects with a thin layer of mold release agent. This ensures your finished mat pops out easily without tearing.
Step 2: Mixing and Pouring
-
Measure the silicone:
Following the manufacturer’s instructions for your specific silicone kit, measure out equal parts of Part A and Part B by weight or volume. -
Add the color:
Before mixing the two parts together, add your terracotta pigment to Part A. Mix thoroughly until you achieve a rich, consistent brick-red hue. -
Combine the mixture:
Pour Part B into Part A and mix slowly but thoroughly. Scrape the sides and bottom of your bucket to ensure no unmixed material remains, which can cause soft spots. -
The pour:
Hold your bucket high and pour the silicone in a thin stream into one corner of the mold. Let the material flow naturally over your objects to minimize trapped air bubbles. -
Level it out:
Ensure the silicone covers all your texture objects by at least a quarter inch. If needed, gently tilt the tray to level surface. -
Remove bubbles:
Tap the sides of the mold firmly against the table several times to encourage air bubbles to rise to the surface. I like to pop stubborn surface bubbles with a toothpick.
Air Bubble Hack
For a flawless surface without a vacuum chamber, pour the silicone from a high height in a very thin stream. This stretches the bubbles and pops them before they hit the mold.
Step 3: Curing and Finishing
-
Let it cure:
Place the mold in a dust-free area and allow it to cure for the time specified on your silicone kit instructions, usually 12 to 24 hours. -
Demold the mat:
Once fully cured, gently peel back the edges of the mold. Slowly pull the silicone mat away from the base, revealing your reverse indentations. -
Clean up edges:
If there is any flashing or uneven edges from the mold frame, trim them carefully with sharp scissors or a craft knife for a clean, square border. -
Craft the tools:
Cut two lengths of wooden dowel, roughly 8 inches long. Sand the ends until they are completely smooth and rounded to prevent splinters. -
Finish the tools:
Rub a small amount of food-safe oil or beeswax onto the wooden dowels to seal the wood and give them a warm, finished look matching the natural vibe. -
Set the scene:
Place your new terracotta mat on the table, add a ball of homemade playdough to the center, and arrange your wooden tools alongside for an inviting play invitation.
Add Hidden Details
Embed small magnets into the silicone while pouring (on the back side) so the mat can stick to magnetic trays or fridges for vertical play sessions.
Your durable, sensory-rich playdough mat is now ready for endless creative sessions
Fine Motor Tool Buffet
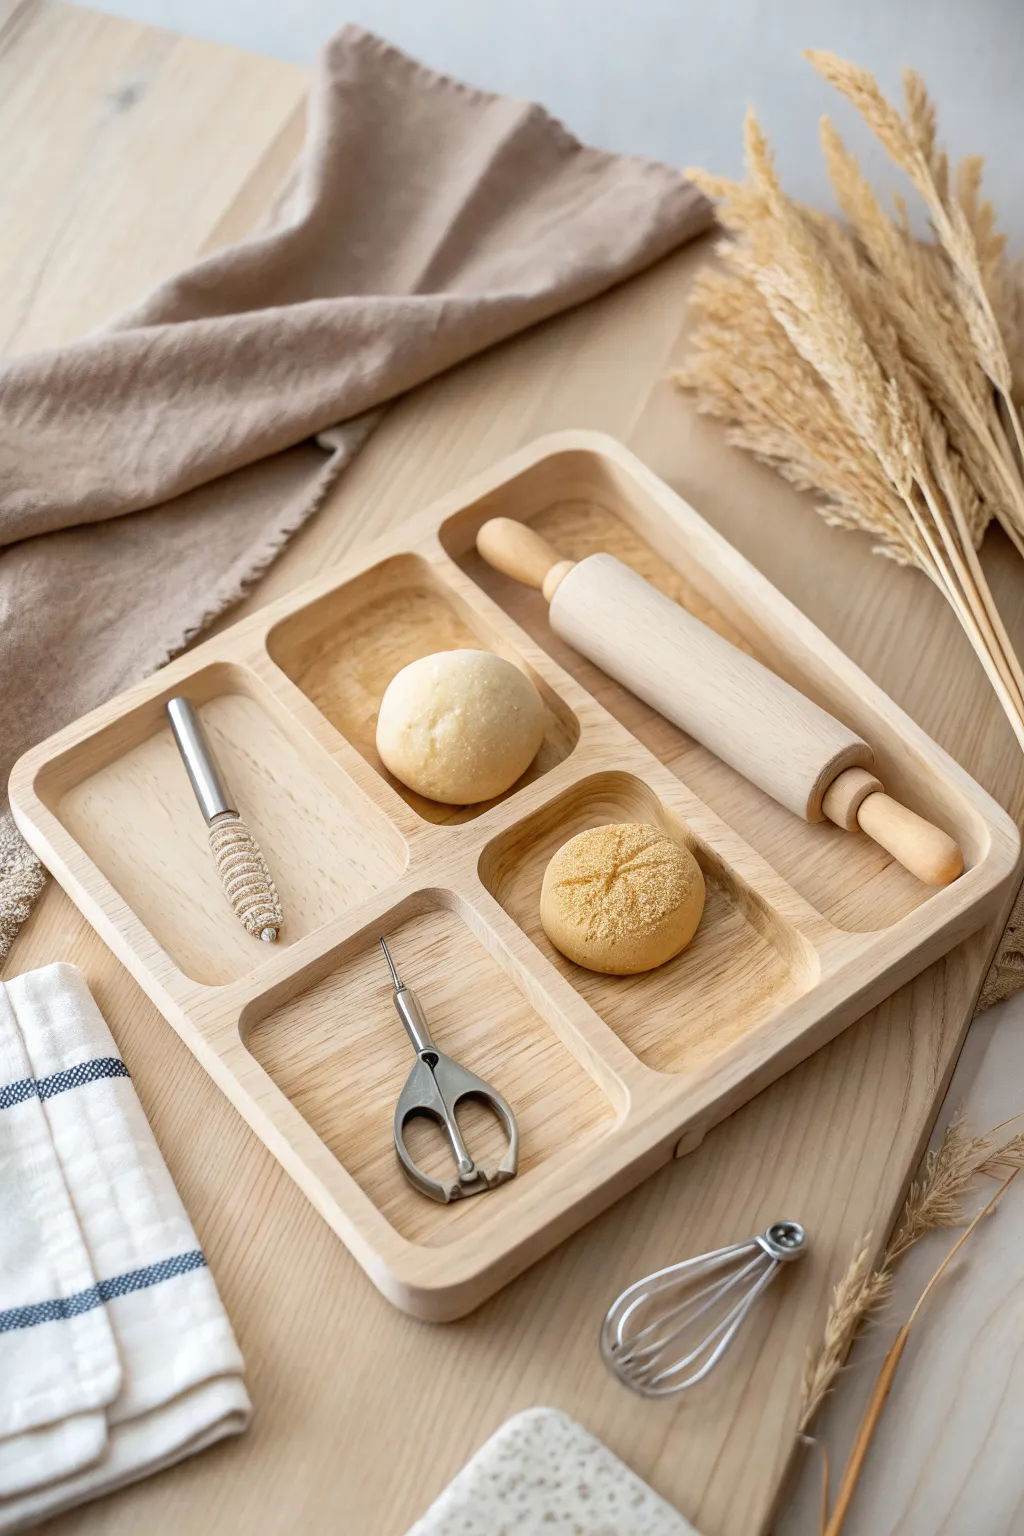
Create an inviting and tactile sensory experience with this curated playdough station, arranged neatly in a sectioned wooden tray. The combination of natural textures, smooth wooden tools, and soft dough creates a calming environment perfect for fine motor skill development.
How-To Guide
Materials
- Rectangular wooden compartment tray (5 sections)
- Small wooden rolling pin
- Soft playdough (cream and light tan colors)
- Small metal scissors (blunt tip or embroidery style)
- Wooden dowel texturing tool (or makeshift twine-wrapped bolt)
- Miniature wire whisk
- Dried wheat stalks or pampas grass for decoration
- Beige or oatmeal-colored linen napkin
- Fine glitter (gold or champagne color)
Step 1: Setting the Stage
-
Prepare the base:
Begin by selecting a smooth, light wood surface or table to serve as your backdrop. This matches the airy, minimal aesthetic of the tray. -
Lay the linens:
Fold a beige linen napkin loosely and drape it in the upper left corner. Aim for soft, natural wrinkles rather than crisp folds to keep the look organic. -
arrange the botanicals:
Place a bundle of dried wheat stalks or pampas grass in the upper right corner so the feathery heads point toward the center. This adds height and texture to your setup. -
Position the tray:
Set your five-compartment wooden tray in the center of the styling space, angling it slightly diagonally for a dynamic visual presentation.
Sticky Dough?
If your homemade dough is sticking to the wooden tray, lightly dust the compartment bottoms with a tiny pinch of flour or cornstarch before placing the dough balls.
Step 2: Curating the Tools
-
Place the rolling pin:
Take your small wooden rolling pin and place it in the long, rectangular compartment on the right side of the tray. -
Add the scissors:
Set the small metal scissors in the bottom-left square compartment. Orient them so the handle loops are facing the bottom edge for easy grabbing. -
Insert the texture tool:
Place the texturing stick—essentially a metal rod or bolt wrapped in textured material—into the top-left rectangular slot. -
Position the whisk:
Lay the miniature wire whisk on the table surface just outside the bottom right corner of the tray, suggesting readiness for play.
Step 3: Dough Preparation & Styling
-
Form the basic ball:
Roll a portion of cream-colored playdough into a smooth, tight sphere. Ensure there are no cracks for a polished look. -
Place the plain dough:
Set this smooth cream ball into the top-center square compartment of the tray. -
Create the textured bun:
Take a second portion of light tan dough and shape it into a slightly flattened bun shape. -
Add surface detail:
Using a dull knife or sculpting tool, gently score a cross or ‘X’ into the top of the tan bun. -
Apply glitter dust:
I like to lightly brush the top of this textured bun with fine gold or champagne glitter to mimic sugar or flour dusting. -
Final placement:
Place the textured, glitter-dusted bun into the bottom-center square compartment. -
Review and refine:
Step back and check the spacing. Ensure the tools fit comfortably in their slots without looking cluttered, adjusting the angles if necessary.
Texture Swap
Make your own unique texture tool by tightly wrapping thick jute twine around a small wooden dowel or a clean metal bolt and securing it with glue.
Now you have a beautifully organized invitation to play that looks just as good as it feels to use

TRACK YOUR CERAMIC JOURNEY
Capture glaze tests, firing details, and creative progress—all in one simple printable. Make your projects easier to repeat and improve.
Texture Stamp and Pattern Station
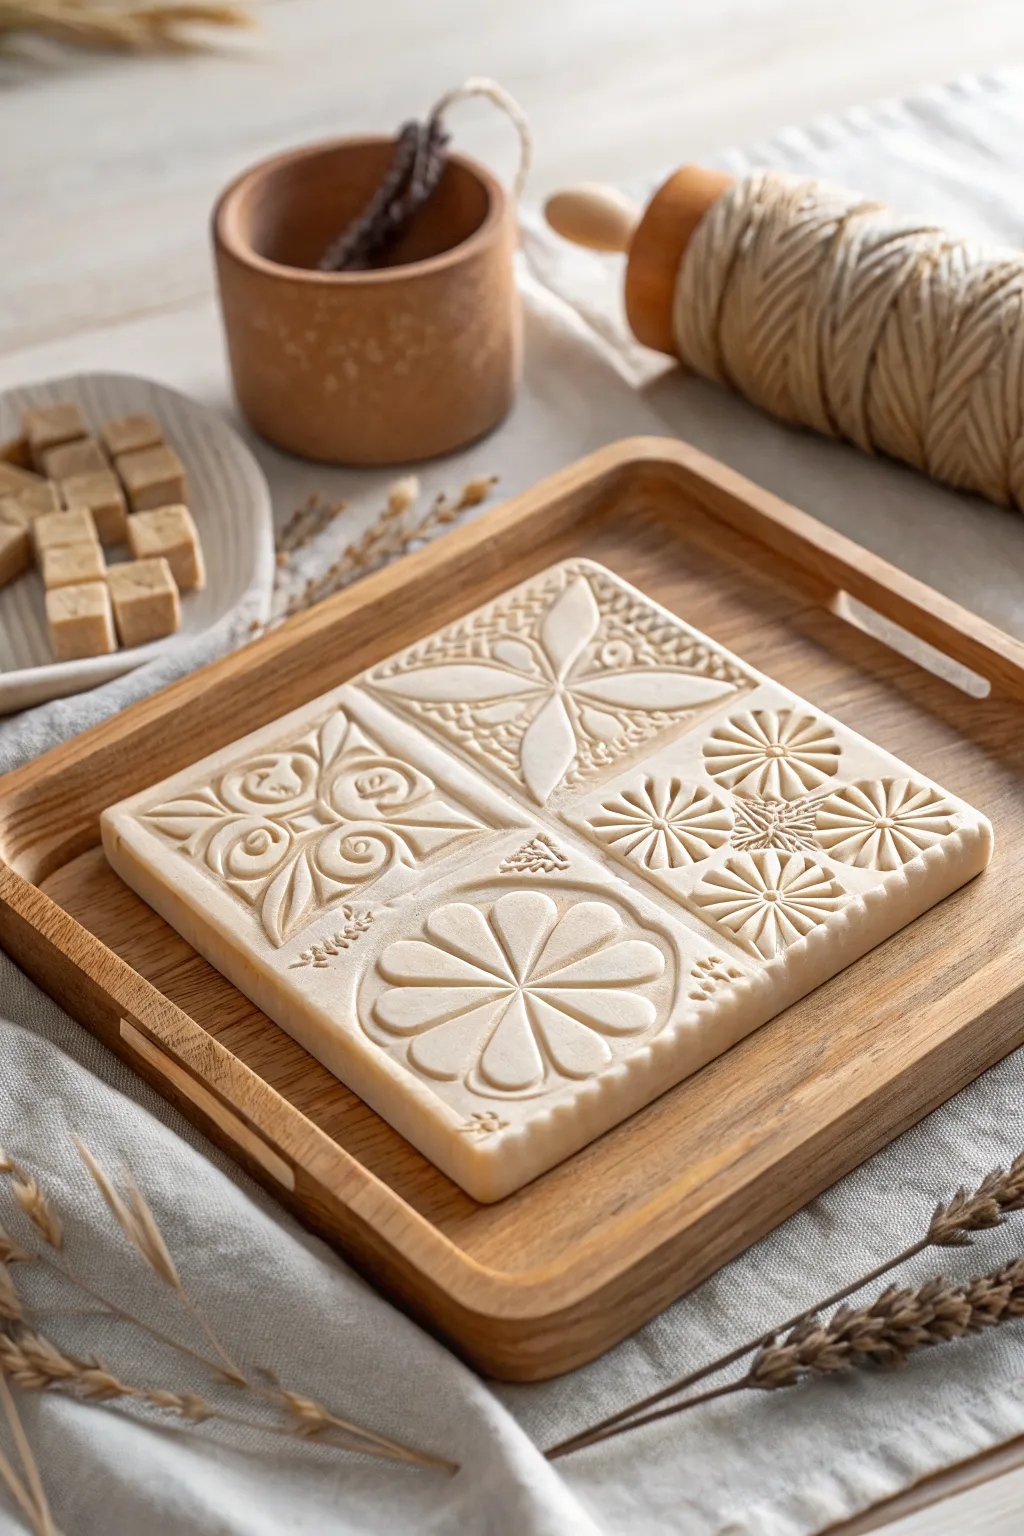
These beautifully detailed texture tiles transform simple playdough into works of art using pattern play and intricate stamping. The soft cream color highlights the deep relief of the floral and geometric designs, creating an engaging sensory experience for little hands.
Step-by-Step
Materials
- Homemade ivory-colored playdough or air-dry clay
- Square wooden tray or serving board
- Small wooden rolling pin (textured or smooth)
- Set of ornate wooden stamps (floral and geometric motifs)
- Plastic knife or dough cutter
- Natural dried wheat stems or lavender (optional garnish)
- Small wooden bowl for storage
Step 1: Preparing the Dough Base
-
Mix and knead:
Begin by pulling a large handful of your homemade ivory playdough from your supply. Knead it thoroughly in your hands for about 30 seconds to warm it up and ensure it is perfectly smooth and pliable. -
Roll it out:
Place the dough directly onto the center of your wooden tray. Using a smooth rolling pin, roll the dough out until you have a thick, varying slab. Aim for a thickness of about 3/4 inch to allow for deep impressions. -
Shape the square:
Using a dough cutter or a plastic knife, trim the irregular edges of your rolled slab to form a clean, perfect square. It should be roughly 6×6 inches, sitting centered on the tray. -
Smooth the surface:
Dip your finger in a tiny bit of water or oil and gently run it over the surface of the square to erase any rolling pin lines or cracks. A pristine surface is key for crisp prints.
Stamps sticking?
If the dough pulls up with the stamp, lightly dust the stamp face with cornstarch or flour before pressing. This acts as a release agent for crisp lines.
Step 2: Stamping the Grid
-
Mark the quadrants:
Take the back of your butter knife or a ruler and very lightly press a cross shape into the dough to divide your square into four equal quadrants. These guide lines will help you center your designs. -
Select your stamps:
Choose four different wooden stamps with distinct patterns. I prefer selecting a mix of geometric lines and organic floral shapes to create visual contrast. -
First impression: The geometric flower:
Take your first stamp—perhaps a geometric pedal design—and center it perfectly over the top-left quadrant. Press down firmly and evenly, ensuring the entire face of the stamp makes contact. -
Release the stamp:
Gently wiggle the handle slightly to break the suction, then lift the stamp straight up. Check the impression depth; if it’s too shallow, re-align carefully and press harder. -
Second impression: The swirl motif:
Move to the bottom-left quadrant. using a swirling floral stamp. Press into the dough, focusing on the corners to ensure the pattern reaches the edges of the quadrant. -
Third impression: Radiating lines:
For the bottom-right quadrant, use a stamp with strong radiating lines or a sunburst pattern. This adds a lovely brightness to the composition. -
Fourth impression: The intricate floral:
Finish the top-right quadrant with your most detailed floral stamp. This complex pattern balances the simpler lines of the other sections.
Make it Permanent
Use air-dry clay instead of playdough. Once dry, lightly brush raised areas with watered-down brown acrylic paint, then wipe off for an antique look.
Step 3: Finishing Details
-
Clean the borders:
Using the flat side of your knife, gently press against the outer vertical edges of the square block to straighten them up if the stamping caused the dough to bulge outward. -
Add detail accents:
If you have tiny detail stamps or a textured tool, add very small impressions along the dividing lines of the quadrants to act as a border or ‘grout’ line between the tiles. -
Texture the edges:
For a finished look, you can gently press the side of a fork or a textured roller against the vertical side walls of the dough block. -
Arrange the station:
Clean any stray crumbs off the wooden tray. Arrange the tools, extra dough cubes, and dried wheat stems artistically around the finished tile to invite play.
Now you have a stunning tactile surface ready for sensory exploration
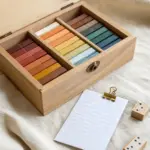
Scent and Color Dough Bar

Transform simple homemade playdough into a sensory experience with soft pastel hues and calming scents. This inviting setup features three custom dough varieties stored in elegant glass jars, accompanied by natural textural elements for open-ended play.
Detailed Instructions
Materials
- 3 cups all-purpose flour
- 1.5 cups salt
- 3 cups water
- 3 tablespoons vegetable oil
- 3 teaspoons cream of tartar
- Gel food coloring (pink, green, orange/peach)
- Essential oils (rose, mint, citrus)
- 3 glass jars with glass lids (approx. 16oz size)
- Small ceramic pinch bowls
- Dried lavender buds
- Sea salt or colored sensory sand
- Fresh or dried rosemary sprigs
- Pine needles or dried botanicals
- Rectangular white ceramic tray
- Jute twine
- Large clear jar for lavender bouquet
Step 1: Creating the Base Dough
-
Whisk dry ingredients:
Note: You will need to make three separate batches for the three colors, or make one massive batch and divide it before cooking, though cooking separately ensures better color consistency. I prefer cooking three smaller batches to get the colors just right. For one batch (one color), mix 1 cup flour, 1/2 cup salt, and 1 teaspoon cream of tartar in a large saucepan. -
Add wet ingredients:
Stir in 1 cup of water and 1 tablespoon of vegetable oil. Stir vigorously to remove any lumps before turning on the heat. -
Cook the dough:
Place the saucepan over medium-low heat. Stir constantly with a sturdy wooden spoon. The mixture will thicken and begin to clump together. -
Check consistency:
Keep stirring until the dough pulls away from the sides of the pan and forms a ball. It should no longer look wet. -
Cool down:
Remove the dough from the pan and place it on wax paper or a counter to cool slightly until it is safe to handle.
Sticky Dough Fix
If your dough feels too sticky after cooling, don’t worry. Simply knead in a tablespoon of extra flour at a time until it reaches a smooth, non-tacky consistency.
Step 2: Coloring and Scenting
-
Knead the pink batch:
Take your first batch of warm dough. Create a small well in the center. Add 2-3 drops of pink gel food coloring and 3-4 drops of rose or floral essential oil. -
Work the color in:
Fold the dough over the color and knead thoroughly. Wear gloves if you want to avoid stained hands. Keep kneading until the pastel pink is uniform. -
Create the mint green batch:
Repeat the cooking process for the second batch. Once cooled slightly, add a tiny amount of green gel coloring and peppermint essential oil. Knead until smooth and soft green. -
Mix the peach orange batch:
Cook the final batch. Add a drop of orange and a tiny smidge of pink coloring to achieve a peach tone, along with sweet orange or citrus essential oil. Knead well.
Level Up: Texture
Mix dried flower petals directly into the pink dough during the kneading stage. It adds beautiful speckles and visual interest that matches the floral scent.
Step 3: Assembly and Styling
-
Fill the jars:
Roll each colored dough into a smooth cylinder or ball that fits snugly into your glass jars. Press them down gently so they fill the space nicely without large air gaps. Place the glass lids on top. -
Arrange the tray:
Place the three filled jars in a line on a rectangular white ceramic tray. This keeps the station organized and protects your table. -
Prepare the botanical bowls:
Fill one small ceramic pinch bowl with mixed dried herbs or pine needles and small stones. This offers a ‘forest’ texture for play. -
Prepare the texture bowl:
Fill a second small bowl with coarse purple salt or dried lavender buds mixed with seeds. This provides a crunchy texture to kneed into the dough. -
Bundle the rosemary:
Gather a few sprigs of fresh rosemary. Tie them together securely with a piece of natural jute twine and place them on the linen napkin next to the bowls. -
Set the scene:
Lay down a soft grey linen napkin underneath the small bowls and rosemary bundle to soften the look. -
Add vertical interest:
In the background, place a large clear jar filled generously with dried lavender stalks to complete the aromatherapy theme.
Now you have a serene, beautifully scented playscape ready for creative exploration.
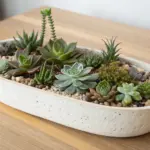
Small World Landscape Tray Station
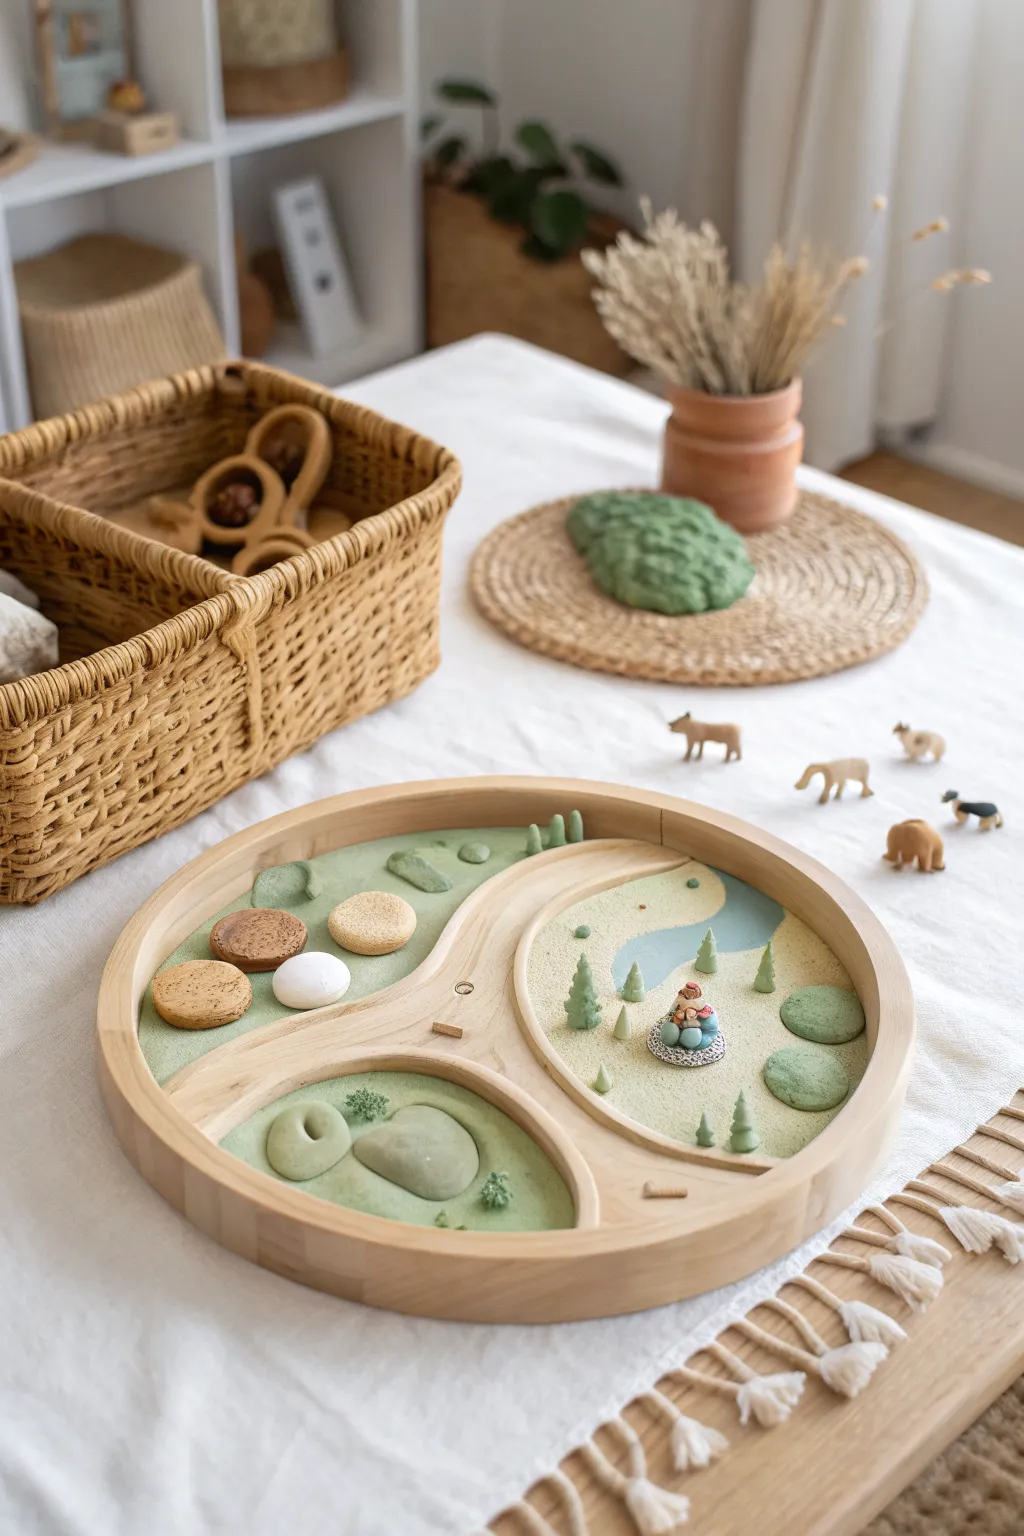
Transform a simple divided wooden tray into an enchanting miniature world perfect for open-ended play. This project combines smooth playdough bases with textured elements like wooden cookies, felt trees, and tiny figurines to create a calming, nature-inspired landscape.
Step-by-Step Tutorial
Materials
- Large round wooden tray with divided compartments (Yin-yang style or similar flowing pattern)
- Homemade or store-bought playdough (Sage green, Light Sand, and Pale Blue)
- Small rolling pin
- Dough knife or plastic spatula
- Small wooden slices or ‘cookies’ (various sizes)
- White smooth river stone
- Miniature wooden trees or bottle brush trees (greens)
- Small animal figurines (bears, wolves, horses)
- Dried moss or textured sponge bits
- Fine sand or textured dough stamp (optional for ground effect)
Step 1: Preparing the Terrain Base
-
Clean the Tray:
Begin with a clean, dry wooden tray. If your tray is raw wood, I like to give it a quick wipe with a dry cloth to ensure no dust interferes with the dough sticking. -
Create the Grassy Zones:
Take a generous ball of sage green playdough. Press it firmly into the left-hand compartment and the bottom curve of the tray using your thumbs to spread it out. -
Smooth the Surface:
Use a small rolling pin or the back of a spoon to smooth the green dough until it sits relatively flat against the wood base, filling the corners of the compartment. -
Layer the Sandy Ground:
For the right-hand compartment, use the light sand-colored dough. Press this into the main area, leaving a winding channel empty for the water feature. -
Form the Riverbed:
Roll a snake of pale blue dough. Lay it carefully into the empty channel you left in the sand section, flattening it gently to connect the ‘shores’ on either side.
Dough Longevity Secret
Add a few drops of glycerin to your homemade playdough recipe. It adds a silky shine and prevents the landscape from cracking if left out for a few hours.
Step 2: Sculpting Land Features
-
Form Rolling Hills:
In the bottom green section, add extra lumps of green dough to create raised mounds. Smooth the edges down to make them look like soft, rolling hills. -
Indent a Cave:
On one of your green hills, use your thumb or a round tool to press a deep indentation, creating a small den or cave entrance for an animal. -
Add Texture:
Lightly tap the surface of the sandy dough with a stiff brush or a textured sponge to give it a grainy, realistic earth look compared to the smooth water. -
Place Stepping Stones:
Press the wooden slices (cookies) firmly into the green dough on the left side. Arrange them in a stepping-stone pattern or stack two slightly to create elevation. -
Set the Boulder:
Nestle the smooth white river stone into the dough near the wooden slices. Push it down enough so it stays put during play but can still be removed.
Step 3: Planting the Forest
-
Plant the Trees:
Take your miniature trees and press their bases into the sand and green dough. Vary the sizes, placing taller ones in the back and smaller shrubs near the front. -
Create Mossy Patches:
Pinch off tiny bits of darker green dough or use dried moss. Press these into the ‘hill’ area to simulate shrubbery or dense undergrowth. -
Detail the Riverbank:
Add tiny pebbles or very small balls of grey dough along the edge where the blue water meets the sand to define the riverbank. -
Add the Inhabitants:
Position your animal figurines around the landscape. Place a bear near the cave entrance and grazing animals like horses or sheep in the open grassy areas. -
Final Flourishes:
If you have a campsite miniature or tiny logs, place them near the river for a storytelling element. Ensure all items are securely pressed into the dough bases.
River Colors Bleeding?
If the blue dough stains the sand dough, let the blue river section air dry for about 15 minutes before pressing it directly against the lighter sand color.
Now you have a serene, tactile landscape ready for hours of imaginative storytelling
Standing-Height Pallet-Style Workbench
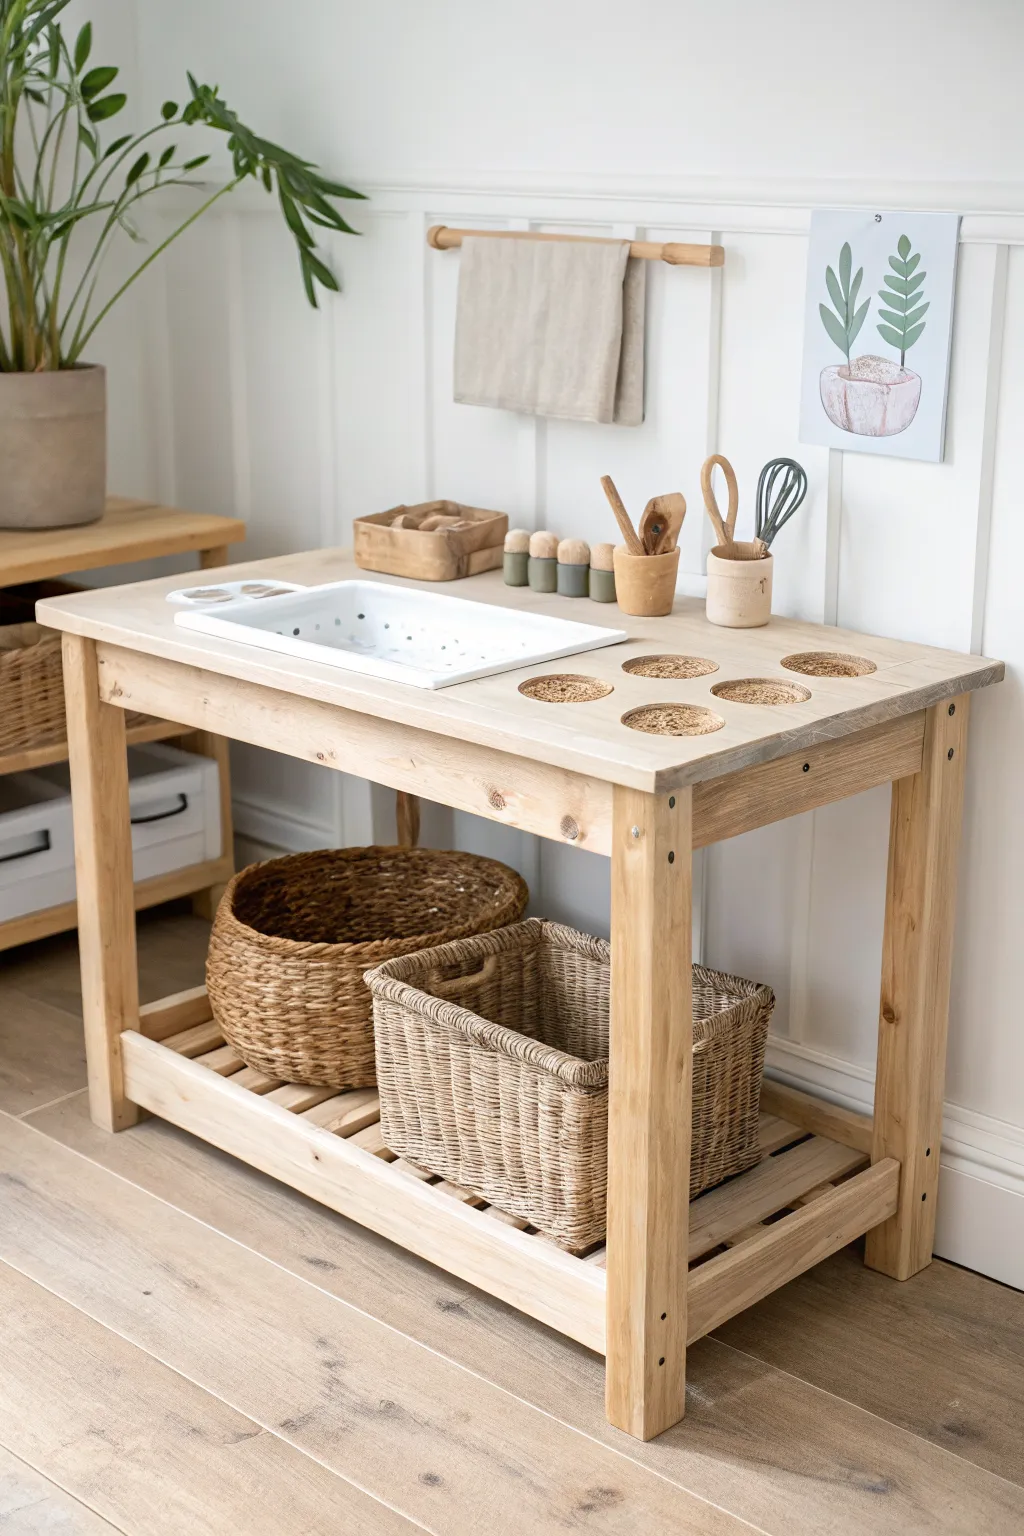
Transform simple lumber into this charming, functional play station that invites hours of creative kneading and shaping. With its integrated sink basin, specialized cutouts for playdough pots, and ample storage below, this standing-height workbench mimics a real kitchen island while keeping the mess contained.
How-To Guide
Materials
- Untreated pine lumber (2x4s for frame, 1x4s or 1x6s for tabletop)
- Rectangular white plastic or enamel bin (for the sink)
- Four empty playdough containers (for sizing)
- Wooden dowel (approx. 1 inch diameter)
- Sanding block and sandpaper (120 and 220 grit)
- Wood screws (2.5 inch and 1.5 inch)
- Pocket hole jig and screws (optional but recommended)
- Drill with driver bits
- Jigsaw
- Hole saw drill bit (sized to match playdough cups)
- Clear matte wood sealer or beeswax finish
- Wood glue
- Tape measure and pencil
Step 1: Building the Frame
-
Determine dimensions:
Measure your child’s standing height to determine the ideal table height, usually between 22-26 inches for toddlers. Cut four 2×4 legs to this length. -
Cut the aprons:
Cut four shorter lengths of 2×4 lumber to create the apron (the frame connecting the legs). Two long pieces for the front/back (approx. 36 inches) and two shorter pieces for the sides (approx. 16 inches) works well for a standard station. -
Assemble the side frames:
Attach two legs to a short side apron piece using wood glue and screws. Using pocket holes here creates a cleaner exterior look, but drilling standard pilot holes from the outside works too. -
Connect the sides:
Join the two side leg assemblies together by attaching the long front and back apron pieces. Ensure the frame is square by measuring diagonally from corner to corner. -
Install the bottom rail:
Measure about 4 inches up from the bottom of the legs. Install horizontal support beams connecting the legs on all four sides to support the bottom shelf.
Sink Stability Tip
If the sink bin feels loose, run a thin bead of clear silicone caulking under the rim before dropping it in. This prevents wiggling during vigorous playdough mixing.
Step 2: Creating the Work Surface
-
Prepare the tabletop planks:
Cut your 1×6 or 1×4 planks to match the length of the table frame, adding about an inch of overhang on each side. Lay them out on top of the frame to check the fit. -
Mark the sink cutout:
Place your rectangular sink basin upside down on the planks where you want it positioned—usually off to the left side. Trace the outline, then draw a second line about 1/2 inch inside that perimeter so the lip of the bin will rest on the wood. -
Cut the sink opening:
Drill a pilot hole inside your marked sink area, then insert your jigsaw blade and carefully cut along the inner line. Test fit the bin to ensure it drops in snugly. -
Mark playdough pot spots:
On the right side of the tabletop, mark the center points for four recessed circles where your playdough materials will go. -
Drill the holder recesses:
Use a large hole saw attachment that matches your playdough containers to bore these holes. If you don’t want them to drop all the way through, you can adhere a thin piece of backing wood underneath these holes later. -
Attach the top:
Secure the tabletop planks to the frame using wood glue and screws, drilling up through the apron into the planks to hide the screw heads.
Step 3: Shelving and Finishing Details
-
Build the bottom shelf:
Cut slats of wood to span across the bottom rails you installed earlier. Space them out slightly for a slatted look, screwing them directly into the side rails. -
Construct the hanging rail:
Mount a wooden dowel to the wall behind the station or attach vertical risers to the back of the table to hold the dowel. This is perfect for hanging little towels. -
Sand everything down:
I always spend extra time here—thoroughly sand the entire piece, starting with 120 grit and finishing with 220 grit. Pay special attention to the cutout edges and corners to prevent splinters. -
Apply protection:
Wipe away all sawdust. Apply a child-safe clear matte sealer or a natural beeswax finish to protect the wood from sticky dough while keeping that raw, natural look. -
Final assembly:
Drop the white basin into the sink hole. Place small baskets on the bottom shelf for tools and accessories.
Uneven Leg Wobble?
If the table rocks on a hard floor, don’t recut the legs yet. Attach screw-in adjustable furniture glides to the bottom of each leg to level it perfectly.
Now you have a dedicated zone that keeps creative messes contained and looks beautiful in your home
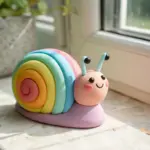
Mini Challenge Card Playdough Station
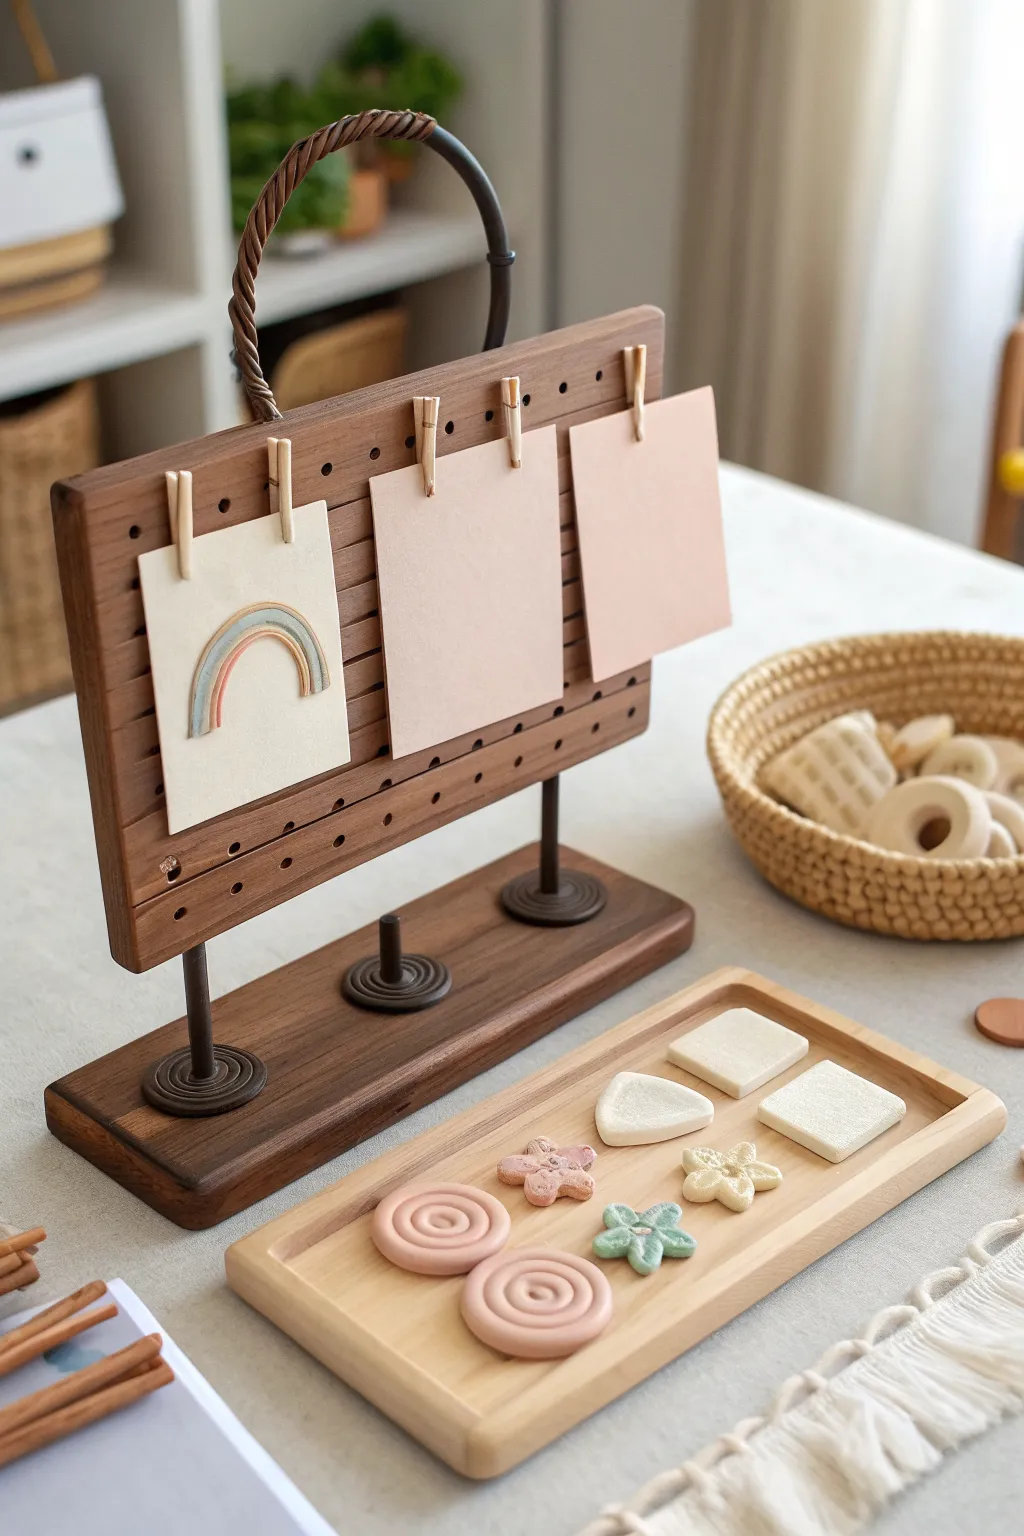
Encourage little creators with this darling wooden challenge card station. This project combines a simple tabletop pegboard display with handmade playdough prompt cards to inspire open-ended play.
Step-by-Step Guide
Materials
- Small wooden board (approx. 10×6 inches)
- Wooden dowel rod (1/4 inch diameter)
- Small round wooden bases (coaster size) or rectangular wood scrap for base
- Drill with bit matching dowel size
- Wood stain (walnut or dark oak)
- Mini wooden clothespins
- Heavy cardstock or watercolor paper
- Air-dry clay or polymer clay (for the playdough ‘examples’)
- Actual playdough (for the tray)
- Wood glue
- Sandpaper (fine grit)
- Small wire (optional for handle)
Step 1: Building the Pegboard Stand
-
Prepare the main board:
Start by cutting a piece of smooth hardwood or plywood to approximately 10 inches by 6 inches. Sand all edges until they are soft and rounded to ensure they are safe for little hands. -
Mark the drill holes:
Using a pencil and ruler, mark a grid of small dots across the face of the board. Space them evenly, about 1 inch apart, creating rows that run horizontally. -
Drill the decorative holes:
Carefully drill shallow holes at each mark. You don’t need to go all the way through; these are primarily for the aesthetic of a pegboard look, though you can drill through if you prefer that style. -
Create the base connection:
Drill two deeper holes into the bottom edge of your main board to accept the support dowels. Try to keep the drill perfectly vertical to ensure the stand sits straight. -
Assemble the base:
Prepare a rectangular wooden base piece slightly longer than your main board. Drill two corresponding holes into the top of this base to match the spacing of the holes in the main board. -
Connect with dowels:
Cut two lengths of dowel, roughly 3-4 inches long. Apply a drop of wood glue into the holes of the main board and the base, then insert the dowels to connect the two pieces. -
Add decorative rings:
For a polished look, I like to slide small wooden craft rings or washers down the dowels before the glue dries, letting them rest on the base as decorative collars. -
Stain the wood:
Once the glue is fully cured, stain the entire structure with a walnut or dark oak wood stain. Wipe off excess stain with a rag and let it dry completely according to the can’s instructions. -
Attach the handle:
Twist two strands of thick wire together to form a rustic handle. Drill two tiny pilot holes on the top edge of the board and insert the wire ends, securing with a dot of super glue.
Step 2: Creating the Challenge Cards
-
Cut the cards:
Cut three rectangular pieces of heavy cream cardstock or watercolor paper. They should be sized to fit comfortably on your board without overlapping, roughly 3×4 inches. -
Form clay rainbows:
Take small amounts of polymer or air-dry clay in muted pastel tones (blue, peach, terra cotta). Roll them into very thin snakes. -
Assemble the relief art:
On one of the cards, gently press the clay snakes into an arch shape to form a rainbow. Since this is a permanent prompt card, flatten them slightly so they adhere well. -
Hardening the design:
If using polymer clay, bake the card (provided the paper is oven-safe at low temps) or bake the clay separately and glue it on. If using air-dry clay, simply let it sit overnight until rigid. -
Attach clips:
Glue a mini wooden clothespin to the top center of each card spot on the board, or simply clip the cards onto the top edge if your board is thin enough. The setup shown uses clips glued to the board face.
Don’t Have a Drill?
Skip the pegboard holes! Just stain a smooth board and glue clothespins directly to it. It still looks great and functions perfectly for holding cards.
Step 3: Setting up the Tray
-
Prepare the playdough:
Whip up a batch of homemade playdough in soft, natural colors like blush pink, sage green, and cream. -
Create starter shapes:
Pre-make several shapes to invite play. Roll spirals, cut small squares, and use stamps to make flower shapes. Arrange these neatly on a wooden tray below the stand. -
Final arrangement:
Place the stand on a table, clip the rainbow card and blank cards up, and set the tray of shapes in front. The blank cards serve as space for kids to ‘post’ their own creations.
Level Up: Texture
Add texture to your playdough ‘starter shapes’ by pressing lace or fabric into the dough before placing them on the tray.
Now you have a beautiful, Montessori-inspired invitation to play that looks lovely even when not in use.