When I’m making polymer clay projects for the guys in my life, I always start with pieces that feel useful, sturdy, and easy to wear or carry. These ideas lean into functional accessories, hobby-inspired details, and rugged finishes like faux metal and faux stone—without getting fussy.
Textured Key Fob in Matte Black
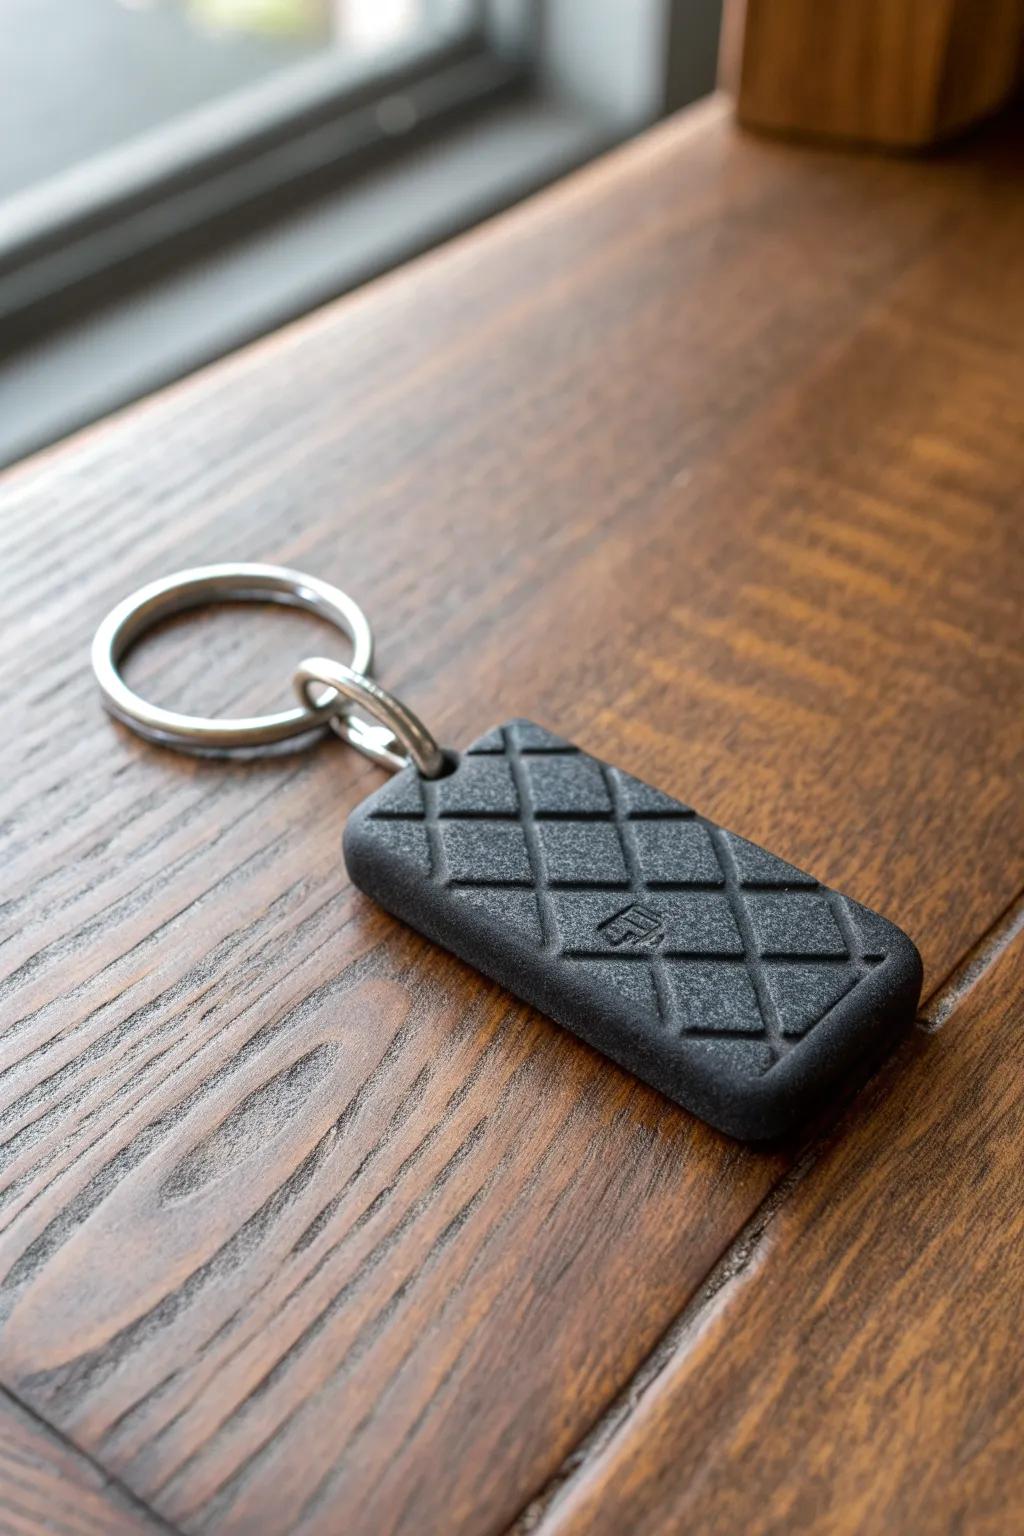
This rugged, understated keychain mimics the look of high-end textured rubber or leather but is made entirely from polymer clay. The matte black finish and diamond pattern give it a sophisticated, masculine edge perfect or keeping keys organized.
Step-by-Step Tutorial
Materials
- Black polymer clay (Premo or Fimo Professional recommended)
- Acrylic rolling pin
- Tissue blade or sharp clay knife
- Metal ruler
- Credit card or quilting ruler (for texture)
- Coarse grit sandpaper (100-150 grit) or stiff stippling sponge
- Small metal eye pin or screw eye
- Metal key ring and jump ring
- Needle tool or small custom stamp (optional for logo)
- Oven for curing
Step 1: Preparation & Base Form
-
Condition the clay:
Begin by thoroughly conditioning your black polymer clay until it is soft and pliable. Black clay often shows fingerprints easily, so ensure your hands and work surface are clean before starting. -
Create a slab:
Roll the clay out into a thick, even slab. For a sturdy keychain that won’t snap in a pocket, aim for a thickness of about 4mm to 5mm (approximately 3/16 inch). -
Add surface texture:
Before cutting the final shape, add the micro-texture. Take a piece of coarse sandpaper or a stiff stippling sponge and press it firmly across the entire surface of the clay slab. This creates that desirable matte, stony finish seen in the photo. -
Repeat texture on back:
Flip the slab over and texturize the back side as well. This ensures the keychain looks finished from every angle.
Fixing Fingerprints
Black clay loves fingerprints. If you smudge your texture while cutting, lightly pat the area with a toothbrush or coarse sponge to restore the matte grit before baking.
Step 2: Creating the Quilt Pattern
-
Mark diagonal lines:
Use the edge of a credit card or a ruler to gently press diagonal lines into the clay. Don’t cut through; just create an indentation. Space these lines about 1cm apart. -
Create the cross-hatch:
Rotate your tool to create the opposing diagonal lines, forming a classic diamond or ‘quilted’ grid pattern across the textured surface. -
Deepen the grooves:
Go back over your indented lines with the tool edge to deepen them slightly, ensuring they are clean and distinct against the rough surface texture. -
Add a personal mark:
If you have a small metal stamp or want to freehand a logo like the ‘F’ shown in the example, press it into one of the lower diamonds near the center now.
Level Up: Faux Leather
Before baking, lightly brush the cured surface with cornstarch. After baking and cooling, wipe it off. It settles into the grooves, giving an authentic aged leather look.
Step 3: Cutting and Assembly
-
Cut the rectangle:
Using your sharp tissue blade and a ruler for guidance, cut a clean rectangle out of your patterned slab. An ideal size is roughly 1.5 inches by 3 inches. -
Round the corners:
The example has soft, clear corners rather than sharp points. Gently use your finger or a small circle cutter to round off the four corners of your rectangle. -
Smooth the edges:
Rub your finger lightly along the cut sides of the rectangle to remove any sharp ridges from the blade and to carry a bit of the texture over the edge. -
Insert hardware:
Take a metal eye pin (or screw eye) and trim the stem to about half an inch. Insert this firmly into the center of the top edge of the rectangle. I find adding a tiny drop of liquid clay or Bake & Bond on the threads helps it hold securely.
Step 4: Curing and Finishing
-
Bake carefully:
Place the piece on a ceramic tile or baking sheet lined with cardstock. Bake according to your clay manufacturer’s specific time and temperature instructions. Since it is black clay, watch closely to prevent scorching, though the dark color hides minor over-baking well. -
Cool down:
Allow the clay to cool completely inside the oven or on the counter. The clay is strongest once it has fully returned to room temperature. -
Verify hardware stability:
Gently tug the eye pin. If it feels loose after baking, pull it out, add a dab of superglue, and reinsert it immediately. -
Attach the ring:
Use pliers to open a sturdy jump ring. Thread it through the eye pin and attach your main split-ring key holder. Close the jump ring securely so there is no gap.
Slide your keys onto the ring and enjoy a modern, durable accessory that fits any style
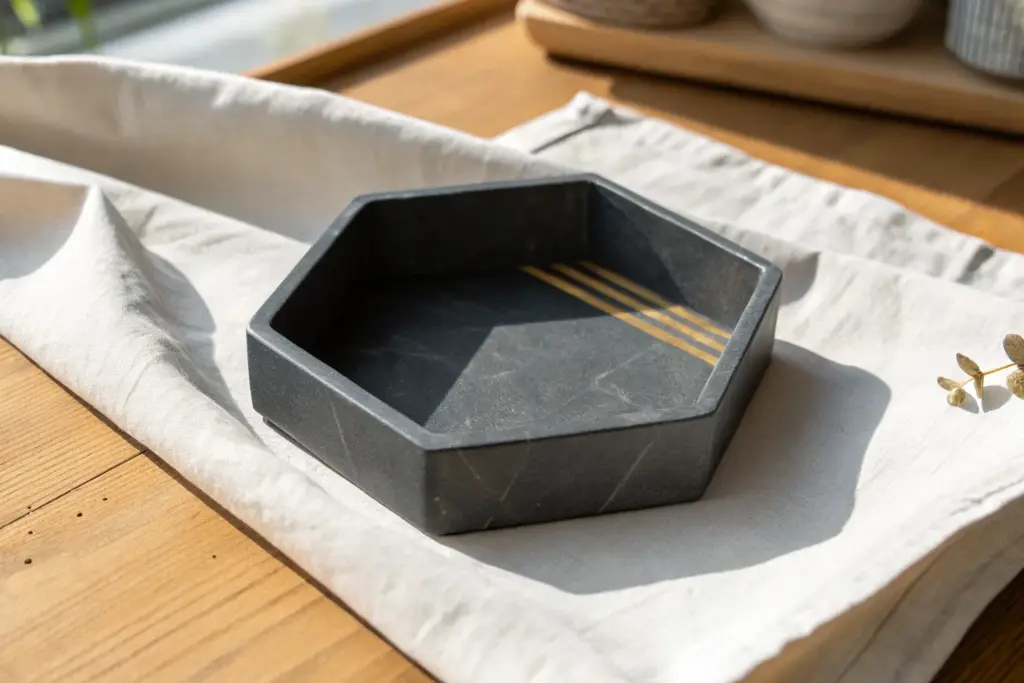
Valet Tray for Keys and Coins
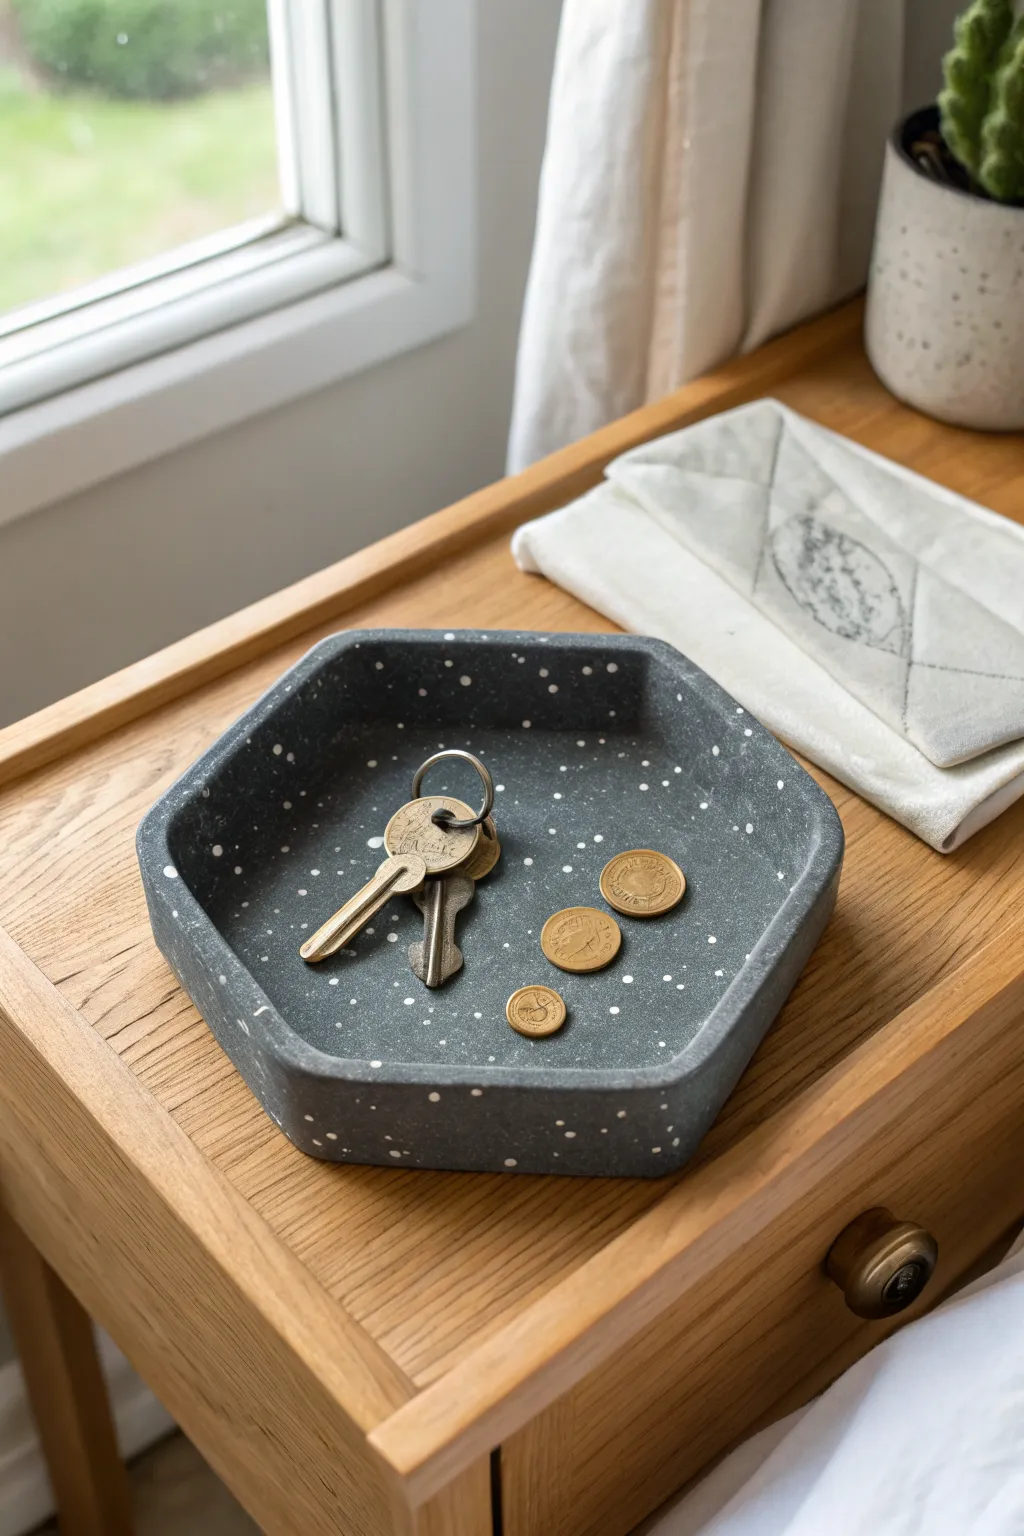
This sleek, masculine valet tray mimics the weight and texture of dark granite without the need for heavy stone-cutting tools. Its geometric hexagonal shape and speckled finish make it the perfect minimalist catch-all for keys, coins, and everyday carry essentials.
Step-by-Step
Materials
- Black polymer clay (approx. 4-6 oz)
- White or light grey polymer clay (small scrap amount)
- Acrylic rolling pin or pasta machine
- Hexagon template (printed paper or cardstock)
- Craft knife or tissue blade
- Clay extruder (optional)
- Sandpaper (grit 400 to 1000)
- Matte varnish or liquid polymer clay (optional for sealing)
- Baking sheet and parchment paper
- Ruler
Step 1: Preparing the Faux-Granite Clay
-
Condition the base:
Start by thoroughly conditioning your black polymer clay until it is soft and pliable. Warm clay is much less likely to crack during forming. -
Create the speckles:
Take a very small amount of white or light grey clay and chop it into tiny, irregular crumbs using your craft knife. You want these to be like grains of salt or sand, not large chunks. -
Mix the colors:
Sprinkle the white crumbs over your flattened black clay. Fold the black clay over to trap the crumbs inside. -
Distribute the pattern:
Roll the clay out, fold it, and roll it again repeatedly. Continue this process until the white flecks are evenly distributed throughout the black base, resembling natural stone.
Stone Effect Pro Tip
Add a pinch of translucent clay to your heavy black base mix. When baked and sanded, it gives the ‘stone’ actual visual depth rather than just flat color.
Step 2: Forming the Base
-
Roll the slab:
Roll your speckled clay out into a uniform slab approximately 1/4 inch (6mm) thick. A thicker base gives the final piece a quality, heavy feel. -
Cut the hexagon:
Place your paper hexagon template onto the clay slab. Using a sharp craft knife, cut vertically along the edges of the template to create the tray’s floor. Remove excess clay but save it for the walls. -
Smooth the edges:
Gently run your finger along the cut edges of the hexagon base to soften any sharp corners created by the knife.
Sagging Walls?
If your clay is too soft and the walls won’t stand straight, chill the clay in the fridge for 15 minutes before assembling. Heavy cardstock can also prop up walls while baking.
Step 3: Constructing the Walls
-
Prepare the wall strip:
Gather your remaining clay scraps and re-roll them into a long strip. You want this strip to be the same thickness as your base (1/4 inch) and about 1 inch tall. -
Measure the sides:
Measure one side of your hexagon base accurately. Cut your long clay strip into rectangular segments that match this length exactly. You will need six segments. -
Angle the joints (Optional):
For a seamless fit, you can bevel the short ends of your wall segments at a 30-degree angle, but simply butt-jointing them and smoothing works well too. -
Attach the first wall:
Place one wall segment on top of the hexagon base’s edge (sitting on top, not against the side). Press firmly to adhere the raw clay together. -
Complete the perimeter:
Continue placing the wall segments around the hexagon. Ensure the corners where the walls meet are pressed together tightly to eliminate gaps. -
Blend the seams:
Use a clay modeling tool or your finger to smooth the seams on the inside and outside of the tray. I find a gentle upward sweeping motion helps blend the clay invisibly.
Step 4: Refining and Baking
-
Check symmetry:
Look at the tray from above and adjust the walls to ensure the hexagon shape remains sharp and symmetrical. The walls should stand straight up, perpendicular to the base. -
Texture the surface:
To enhance the stone look, lightly pat the surface with a piece of coarse sandpaper or a toothbrush to remove fingerprints and add a matte texture. -
Bake the tray:
Place the tray on a parchment-lined baking sheet. Bake according to your polymer clay manufacturer’s instructions (usually 275°F/135°C) for at least 45 minutes to ensure strength. -
Cool down:
Allow the tray to cool completely in the oven with the door slightly ajar. Sudden temperature changes can sometimes cause warping. -
Sand for finish:
Once cool, wet-sand the edges and flat surfaces with 400 grit, then 800 grit sandpaper under running water. This reveals the white speckles beautifully. -
Final polish:
Dry the tray thoroughly. You can leave it matte for a natural stone look or buff it with a soft cloth for a slight sheen.
Now you have a durable, stylish organizer that looks high-end but was made right at your kitchen table


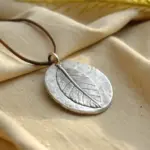
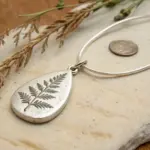
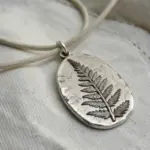
Dog Tag Pendant with Stamped Initials
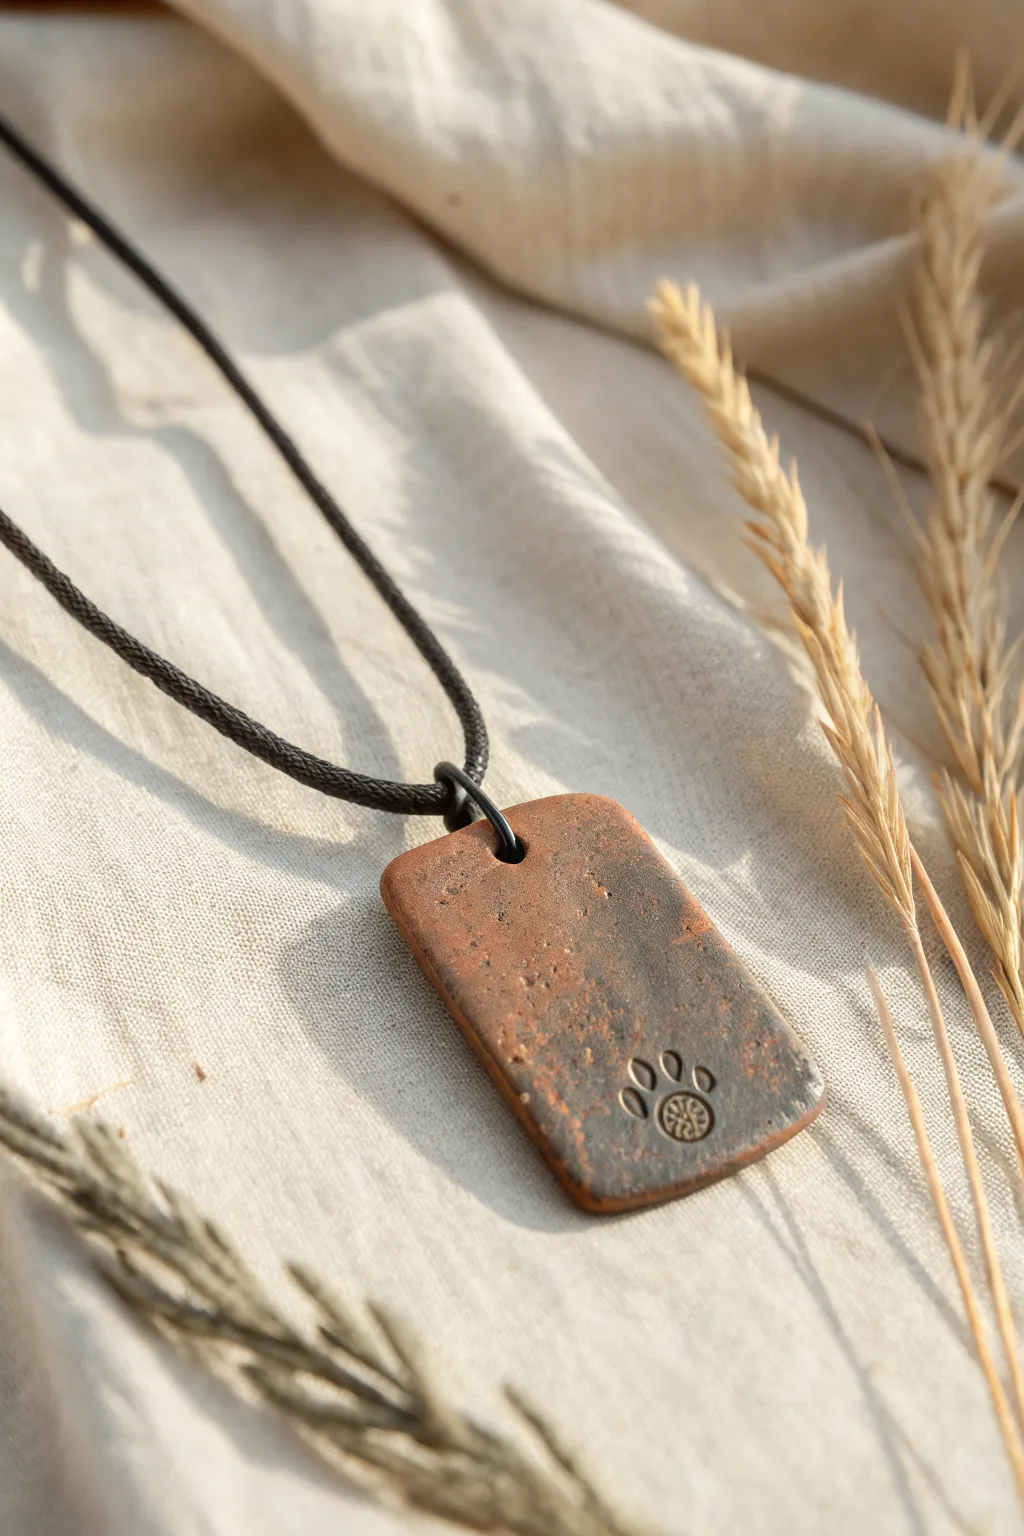
This masculine pendant captures the rugged appeal of rusted metal and weathered stone using simple polymer clay techniques. It features a classic dog tag shape with a distressed surface texture and a subtle, nature-inspired paw print stamp.
Step-by-Step Tutorial
Materials
- Terracotta or brown polymer clay
- Gray or black polymer clay (small amount for marbling)
- Black acrylic paint
- Coarse sandpaper (80-100 grit) or a stiff bristle brush
- Old toothbrush
- Rectangular clay cutter or craft knife
- Small paw print stamp (metal or rubber)
- Drinking straw or small round cutter (for the hole)
- Black waxed cotton cord
- Paper towels
- Matte varnish (optional)
Step 1: Preparing the Clay Base
-
Condition the Clay:
Begin by thoroughly conditioning your main terracotta or brown clay until it becomes soft and pliable. Warm clay results in a smoother finish and fewer cracks. -
Add Subtle Marbling:
Take a tiny pinch of black or dark gray clay and tear it into small shreds. Mix these into your brown clay, but don’t over-blend; you want streaks or specks to remain visible. -
Roll the Sheet:
Roll the clay out into a sheet approximately 3mm to 4mm thick. I find a thicker slab gives the pendant a more substantial, stone-like weight suitable for men’s jewelry. -
Texture the Surface:
Before cutting the shape, press a stiff toothbrush or coarse sandpaper firmly into the clay sheet. Repeat this across the surface to create a pitted, worn texture.
Step 2: Shaping and Stamping
-
Cut the Dog Tag:
Use a rectangular cutter or a craft knife to cut a rectangle approximately 1.5 inches by 2.5 inches. If using a knife, use a ruler to ensure straight edges. -
Round the Corners:
Gently tap the four sharp corners of your rectangle with your finger or a tool to round them off, mimicking the classic military dog tag silhouette. -
Refine the Edges:
Smooth the cut edges with your fingertip to remove any burrs or sharp distinct lines from the cutting process. -
Create the Hole:
Use a drinking straw or a small round cutter to punch a hole centered near the top edge. Ensure the hole is large enough to accommodate your cord doubled over. -
Add the Stamp:
Position your paw print stamp in the lower right corner. Press firmly enough to leave a clear impression, but be careful not to distort the overall shape of the pendant. -
Bake the Piece:
Place the pendant on a ceramic tile or paper-lined baking sheet. Bake according to your specific clay brand’s manufacturer instructions (usually around 275°F/135°C for 15-30 minutes).
Texture Tip
Press actual rock salt or coarse sand into the raw clay and bake it. After baking, soak the piece in water to dissolve the salt, leaving deep, realistic pits.
Step 3: The Antiquing Finish
-
Cool Down:
Allow the piece to cool completely after baking. The clay hardens fully only after it returns to room temperature. -
Apply the Wash:
Dilute a small dollop of black acrylic paint with a few drops of water. Brush this mixture over the entire surface, ensuring it gets down into the texturing and the stamped impression. -
Wipe Back:
Immediately wipe the surface with a damp paper towel. The goal is to remove the paint from the high points while leaving it trapped in the pits, texture, and stamp for contrast. -
Add Speckling (Optional):
For extra grit, dip an old toothbrush in undiluted black paint and flick the bristles with your thumb to spray tiny speckles over the piece. -
Seal the Surface:
Once the paint is bone dry, apply a very thin coat of matte varnish if you want to protect the finish, though leaving it unvarnished maintains the rough stone look. -
Attach the Cord:
Cut a length of black waxed cotton cord. Fold it in half, push the loop through the pendant hole, and pull the loose ends through the loop to create a lark’s head knot.
Make it Personal
Instead of a generic paw print, create a custom stamp using your own pet’s actual paw impression, or use letter stamps to add initials or a significant date.
Now you have a rugged, personalized accessory that looks like an ancient artifact


Western-Style Bolo Tie Slide
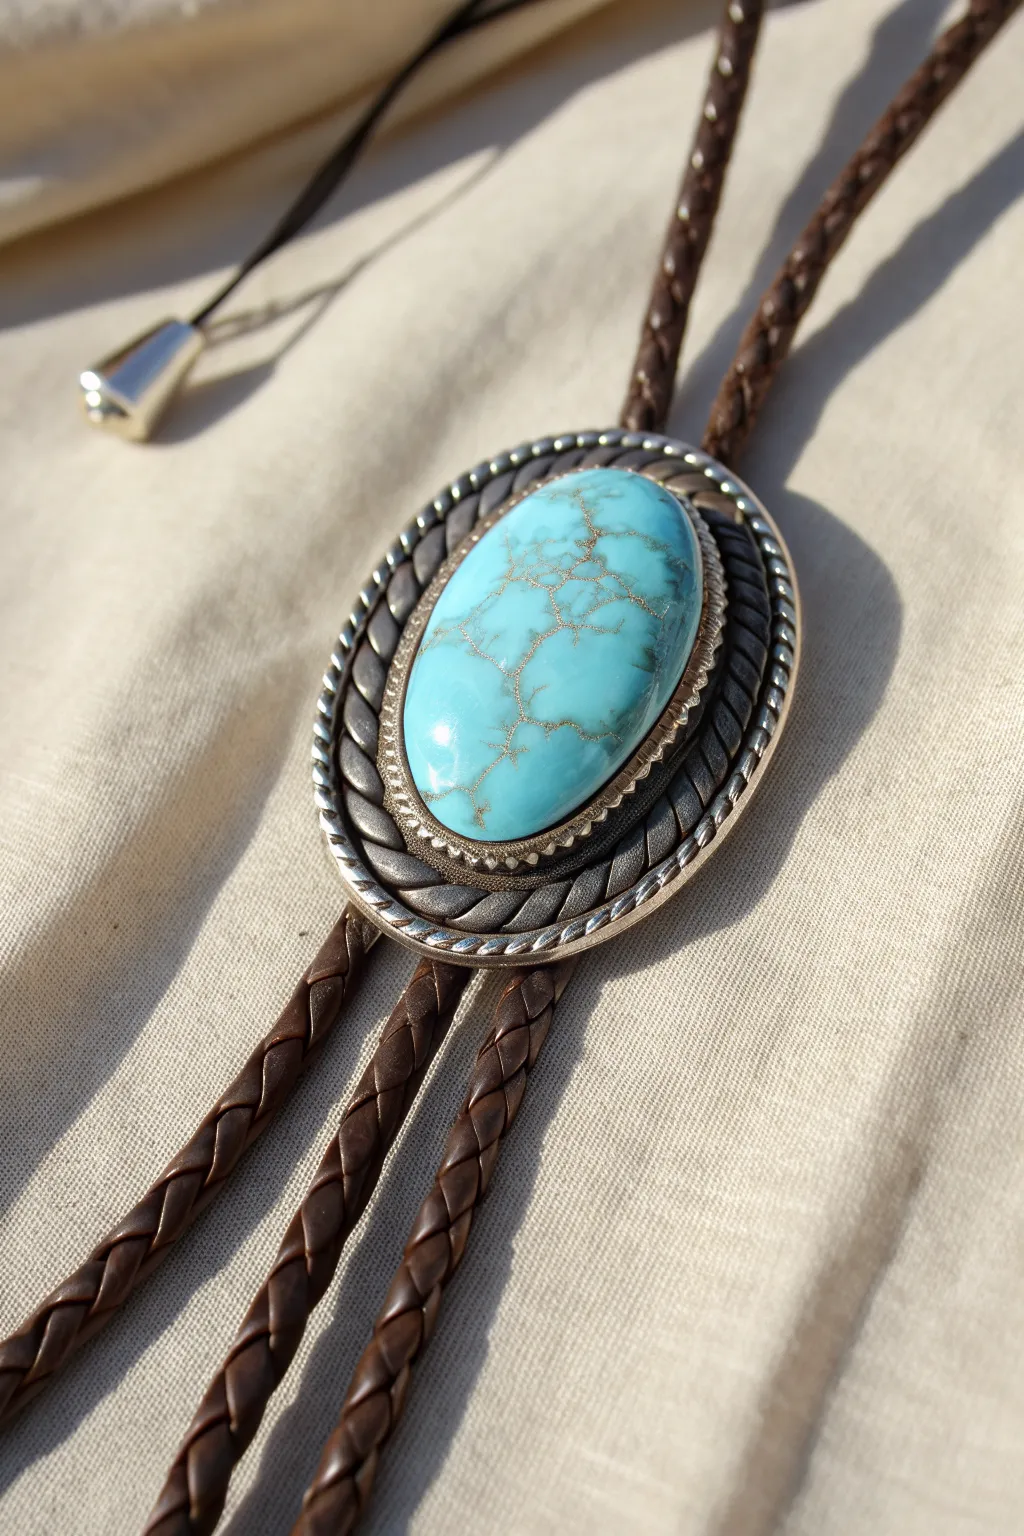
Capture the rugged elegance of the American Southwest with a polymer clay bolo tie that mimics real turquoise and silver. This project focuses on realistic stone effects and creating a convincing metallic bezel and braided setting entirely from clay.
Detailed Instructions
Materials
- Polymer clay: Turquoise (or blue mixed with green/white), translucent, black, white, and silver/grey
- Liquid polymer clay (translucent)
- Gold or bronze acrylic paint (for matrix veining)
- Silver metallic powder or mica powder
- Black acrylic paint (for antiquing)
- Gloss varnish or UV resin
- Bolo tie hardware (cord, tips, and slide clip)
- Clay extruder (optional but helpful)
- Texture tools (needle tool, toothbrush)
- Oval clay cutter
- Superglue or heavy-duty jewelry adhesive
- Sandpaper (various grits)
Step 1: Creating the Faux Turquoise Stone
-
Mix the Base Colors:
Begin by creating your turquoise hue. Mix a bright blue with a touch of green and a generous amount of white. To add depth, incorporate a small amount of translucent clay into the mix. You want a vibrant, slightly waxy finish, not a flat opaque color. -
Prepare the Matrix Material:
Chop up some black or dark brown clay into very fine, uneven crumbs. Alternatively, you can use dried black acrylic paint skins chopped finely. This will become the intricate ‘matrix’ or webbing inside the stone. -
Assemble the Stone Block:
Roughly chop your turquoise mixture into small, irregular chunks. Coat these chunks lightly with gold or bronze acrylic paint and let it dry slightly until tacky. I like to dust a little black chalk pastel here for extra depth. -
Compress and Form:
Pack the painted chunks and the dark crumbs together into a tight ball. Compress it firmly to remove air gaps, but don’t over-knead, or you will muddy the distinct veining lines. -
Shape the Cabochon:
Flatten the ball slightly and use an oval cutter to shape the stone. Smooth the top into a nice dome shape (cabochon) with your fingers. Check the pattern; if you don’t like the surface, slice off a thin layer to reveal the pattern inside. -
Bake the Stone:
Bake the stone piece alone first according to your clay package instructions. This ensures the stone stays hard while you build the frame around it later.
Step 2: Building the Silver Bezel & Frame
-
Prepare the Backing:
Roll out a sheet of silver or grey clay to a medium thickness. Place your baked turquoise stone in the center and trim the grey clay so it is just slightly larger than the stone. -
Create the Bezel Strip:
Roll a thin snake of silver clay and flatten it into a narrow ribbon. Wrap this around the base of the baked stone. Use a needle tool to create tiny vertical indentations all around the strip to mimic a serrated metal bezel cup. -
Twist the Rope Border:
Create two long, thin snakes of silver clay. Twist them together tightly to form a rope. Wrap this twisted rope around the serrated bezel strip you just applied, pressing it gently onto the backing layer. -
Add the Outer Rim:
For the wider outer rim seen in the photo, flatten a thicker snake of silver clay and wrap it around the twisted rope. Use a tool to texture it with diagonal slash marks, mimicking a heavy metal braiding or stamped pattern. -
Add the Final Border:
Create one last, very thin twisted rope (just like the inner one) and wrap it around the very outside edge to finish the frame. -
Apply Metallic Finish:
Brush the entire raw clay frame with silver mica powder. Rub it in well with your finger or a soft brush to make the grey clay look like real sterling silver. -
Final Bake:
Bake the entire piece again. Since the stone is already baked, you are just curing the frame. Follow the clay manufacturer’s temperature guidelines.
Loose Veining?
If your gold paint layers are causing the clay chunks to separate after baking, use a tiny amount of translucent liquid clay as ‘mortar’ between the chunks while forming the raw block.
Step 3: Finishing Touches
-
Antique the Metal:
Once cool, wash black acrylic paint over the silver frame, getting into all the crevices of the twists and textures. Quickly wipe away the excess on the raised areas with a damp paper towel. This creates the dark, oxidized look of vintage silver. -
Polish the Stone:
Sand the turquoise stone (avoiding the painted frame) with increasingly fine grit wet-dry sandpaper (400 to 2000 grit) until it is silky smooth. -
Seal and Shine:
Apply a coat of gloss varnish or UV resin just to the turquoise stone to make it shine like a polished gem. Apply a matte or satin varnish to the silver frame to protect the mica powder without making it look like plastic. -
Attach Hardware:
Glue the bolo tie slide mechanism to the back of the pendant using heavy-duty jewelry adhesive. Let it cure fully (usually 24 hours) before threading your braided cord through.
Crack the Code
To make the stone look ancient, deliberately bake the turquoise piece for 5 minutes, remove it, and plunge it into ice water. This thermal shock creates realistic micro-fissures inside the stone.
Now you have a striking, custom accessory that brings a touch of the frontier to any outfit

What Really Happens Inside the Kiln
Learn how time and temperature work together inside the kiln to transform clay into durable ceramic.
Topo-Style Coasters for Outdoorsy Guys
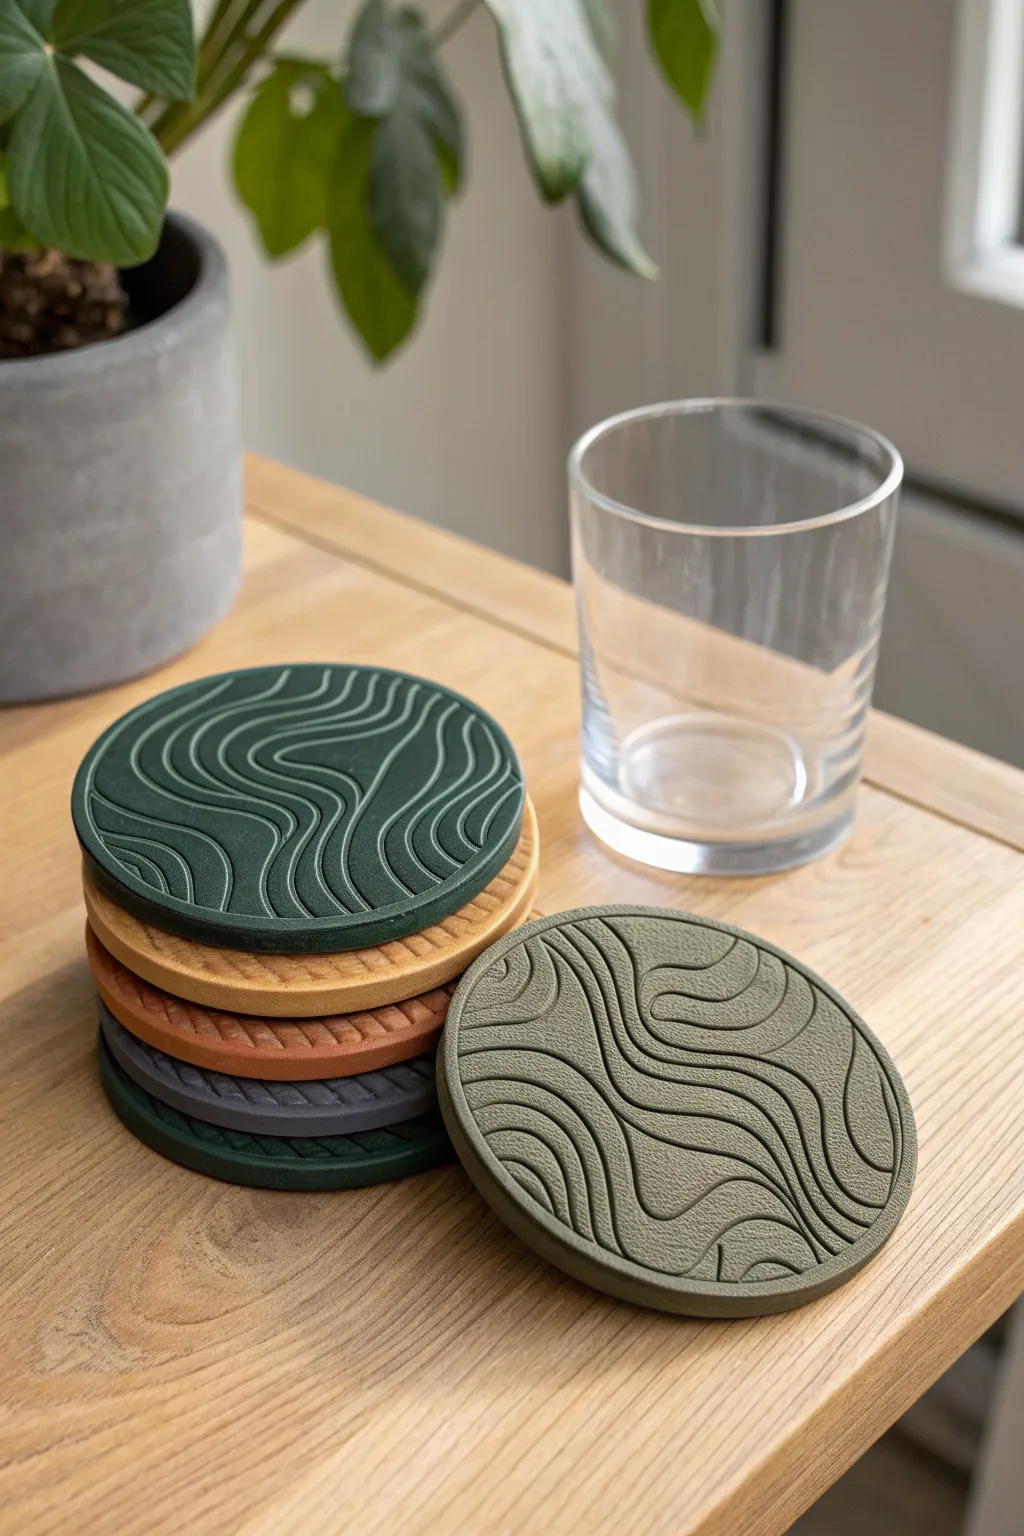
Bring the rugged beauty of topographic maps to your coffee table with these tactile, earth-toned coasters. Featuring etched contour lines and a unique stone-like finish, this project is perfect for the outdoorsy guy who appreciates functional art.
Step-by-Step Guide
Materials
- Polymer clay in earth tones (forest green, ochre, terracotta, charcoal, sage)
- Acrylic roller or pasta machine
- Round cookie cutter (approx. 3.5 – 4 inches)
- Fine-point stylus tool or dotting tool (small size)
- Texture sponge or coarse sandpaper
- Cornstarch or baby powder (as release agent)
- Standard oven and baking sheet
- Parchment paper
- Fine-grit sandpaper (optional for finishing)
- Clear matte varnish (optional)
Step 1: Clay Preparation
-
Conditioning:
Start by thoroughly conditioning your first color of polymer clay. Work it in your hands until it becomes soft, pliable, and free of cracks. -
Rolling out:
Roll the clay into a slab that is approximately 1/4 inch thick. You want these to have some heft so they feel substantial on a table. Using guide rails or playing cards stacked on either side of your roller can ensure an even thickness. -
Surface texturing:
Before cutting the shape, add a subtle stone texture. Lightly dust the clay surface with a tiny amount of cornstarch. -
Stippling:
Press a coarse texture sponge or a piece of rough sandpaper firmly onto the clay slab to imprint a pebbled, leather-like surface.
Map It Out
Look at real topographic maps of your favorite hiking spots or national parks online. Use these real-world contours as a direct reference for your line patterns to make them authentic.
Step 2: Shaping the Design
-
Cutting:
Use your round cookie cutter to punch out a clean circle. If the clay sticks to the cutter, dip the cutter in cornstarch first. -
Smoothing edges:
Gently run your finger around the cut edge to smooth down any sharpness or irregularities caused by the cutter. -
Drawing the lines:
Take your fine-point stylus tool. Apply steady, moderate pressure to draw organic, wavy lines across the surface to mimic topographic elevation lines. -
Varying the pattern:
Keep your lines roughly parallel but allow them to pinch together and spread apart naturally. Avoid straight lines; think of how water flows or how hills look on a map. -
Deepening the grooves:
Go over your lines a second time to ensure the grooves are deep enough to remain visible after baking, but be careful not to slice all the way through the slab. -
Refining texture:
I like to gently tap the textured sponge over the lines one last time to soften any raised burrs created by the stylus, blending the grooves into the surface.
Step 3: Baking and Finishing
-
Repeat process:
Repeat the rolling and texturing steps with your other clay colors to create a full set. Try to vary the line patterns on each one so no two coasters are identical. -
Baking setup:
Place your finished rounds on a parchment-lined baking sheet. Ensure they are laying perfectly flat to prevent warping. -
Oven time:
Bake according to your specific clay manufacturer’s instructions (usually 275°F for 15-30 minutes per 1/4 inch of thickness). Since these are thick, don’t rush the baking time. -
Cooling:
Allow the coasters to cool completely in the oven with the door slightly ajar. This gradual cooling helps strengthen the clay. -
Sanding:
Once fully cool, inspect the edges. If there are any rough spots, lightly sand them with fine-grit sandpaper under running water. -
Sealing (Optional):
For extra durability against drink condensation, apply a thin coat of clear matte varnish. Avoid glossy finishes to maintain that natural, earthy aesthetic.
Warped Coasters?
If your coaster wobbles after baking, it likely trapped air underneath or wasn’t on a flat surface. Bake on a ceramic tile instead of a metal sheet to help maintain even heat and flatness.
Now you have a rugged, custom set of coasters ready for your next beverage break
Pocket Knife Lanyard Bead with Rugged Texture
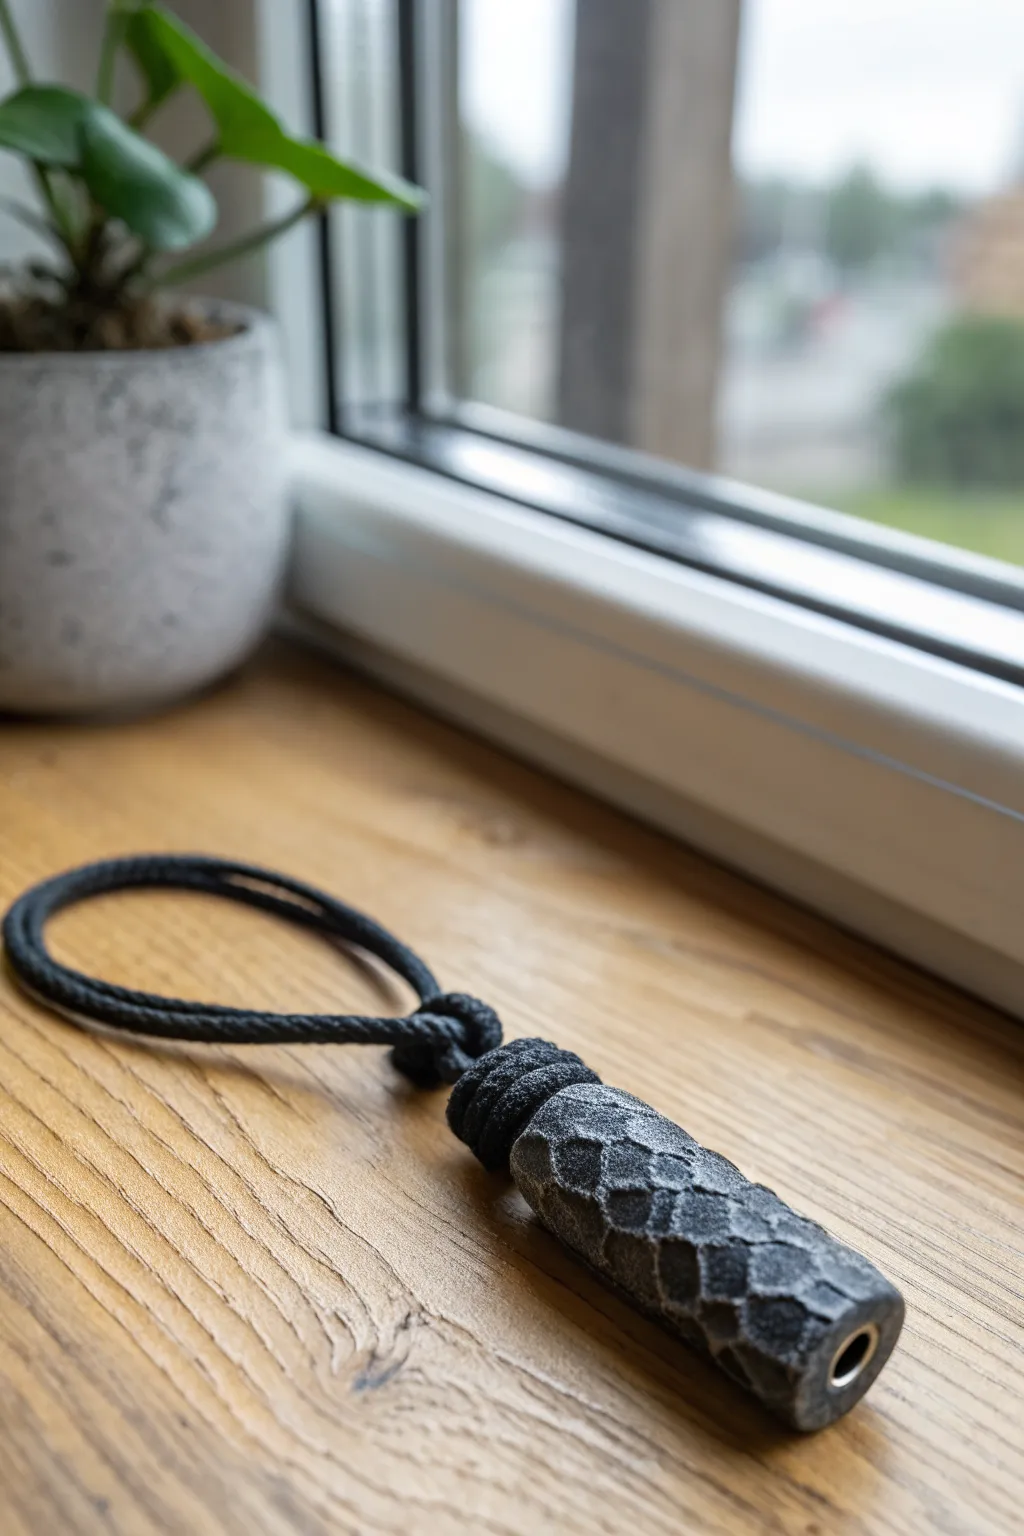
Upgrade your EDC gear with this robust, hammered-effect lanyard bead that looks like forged iron but is crafted entirely from polymer clay. The gritty, weathered texture makes it a perfect masculine accessory for pocket knives, flashlights, or keychains.
Detailed Instructions
Materials
- Black polymer clay (firm consistency recommended)
- Silver or gunmetal mica powder
- Small ball-ended stylus or dotting tool
- Metal tubing or bead coring tool (approx. 4-6mm diameter)
- Small eyelet or grommet (optional, for lining the hole)
- Blade or craft knife
- Basic sculpting tools
- Black paracord
- Sandpaper (various grits)
- Oven for baking
Step 1: Shaping the Base
-
Condition the clay:
Start by thoroughly conditioning your black polymer clay until it is pliable but firm. Using a firmer brand here helps the bead hold its shape during the texturing process. -
Form the cylinder:
Roll a chunk of clay into a smooth cylinder. It should be approximately 1.5 inches long and roughly 1/2 inch thick, though you can adjust this based on the size of the gear you’re accessorizing. -
Create the core channel:
Carefully push your metal tubing or coring tool through the center of the cylinder lengthwise. Keep the tube inside the clay while you work; this prevents the bead from squishing or warping while you apply the heavy texture. -
Smooth the ends:
Trim any excess clay from the ends of the tube to ensure they are flat and flush. A clean cut now saves sanding time later.
Core Stability
Bake the bead directly on the metal tubing. This ensures the hole stays perfectly straight and the bead doesn’t slump during the curing process.
Step 2: Creating the Hammered Texture
-
Select your tool:
Choose a ball stylus or a tool with a rounded, smooth end. The size of the ball will determine the size of the ‘hammer marks’ on the finished piece. -
Start imprinting:
Press the ball tool into the clay surface to create a shallow, concave divot. Don’t press too deep; you just want to displace functionality surface level clay. -
Create the pattern:
Continue making impressions right next to each other. Overlap the edges of the divots slightly. Aim for a honeycomb-like arrangement where the ridges between the divots form a raised network. -
Cover the surface:
Work your way around the entire circumference and length of the bead. Inspect it from all angles to ensure no smooth original surface remains visible. -
Distress the edges:
I like to gently tap the rims of the bead (where the hole is) with the tool to soften the sharp edge, giving it a worn, tumbled appearance.
Too Much Shimmer?
If you applied too much mica powder and lost the black depth, wipe the surface gently with a baby wipe before baking to remove excess from the high points.
Step 3: The Metallic Finish
-
Prepare the mica:
Pour a small amount of silver or gunmetal mica powder onto a piece of paper or a lid. -
Apply the highlight:
Dip your finger or a dry sponger applicator into the powder. Gently rub it over the *surface* of the bead. The goal is to catch the raised ridges between the dents, leaving the deep recesses black. -
Check the effect:
Rotate the bead in the light. It should look like beaten metal with natural shadows in the pits. Add more powder sparingly if needed, but don’t over-saturate.
Step 4: Baking and Assembly
-
Bake the bead:
Place the bead (still on the metal tube if possible/oven-safe) into your oven. Bake according to the manufacturer’s directions for your specific brand of clay, usually around 275°F (135°C) for 30-45 minutes. -
Cool down:
Allow the bead to cool completely before handling. If you baked it on a metal tube, twist the tube gently to break the seal and slide the bead off. -
Adding grommets (optional):
If you want a polished look, superglue a small metal grommet into the hole on either end. This protects the clay from friction against the paracord. -
Thread the paracord:
Cut a length of black paracord. Fold it in loop and thread the two cut ends through the bead. -
Tie the stopper:
Tie a simple overhand knot or a snake knot at the bottom of the bead to secure it in place. -
Secure the top:
Tie the loop end onto your knife or keychain using a cow hitch knot, creating that finished, tactical look seen in the photo.
This rugged bead adds instant character to your gear and serves as a durable, functional piece of pocket art you can use every day