When I’m craving a project that’s quick, colorful, and actually lasts, I reach for polymer oven-bake clay every time. Here are my favorite oven-bake polymer clay ideas—from cute mini makes to polished home details you’ll be proud to leave out on display.
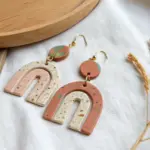
Simple Statement Earrings
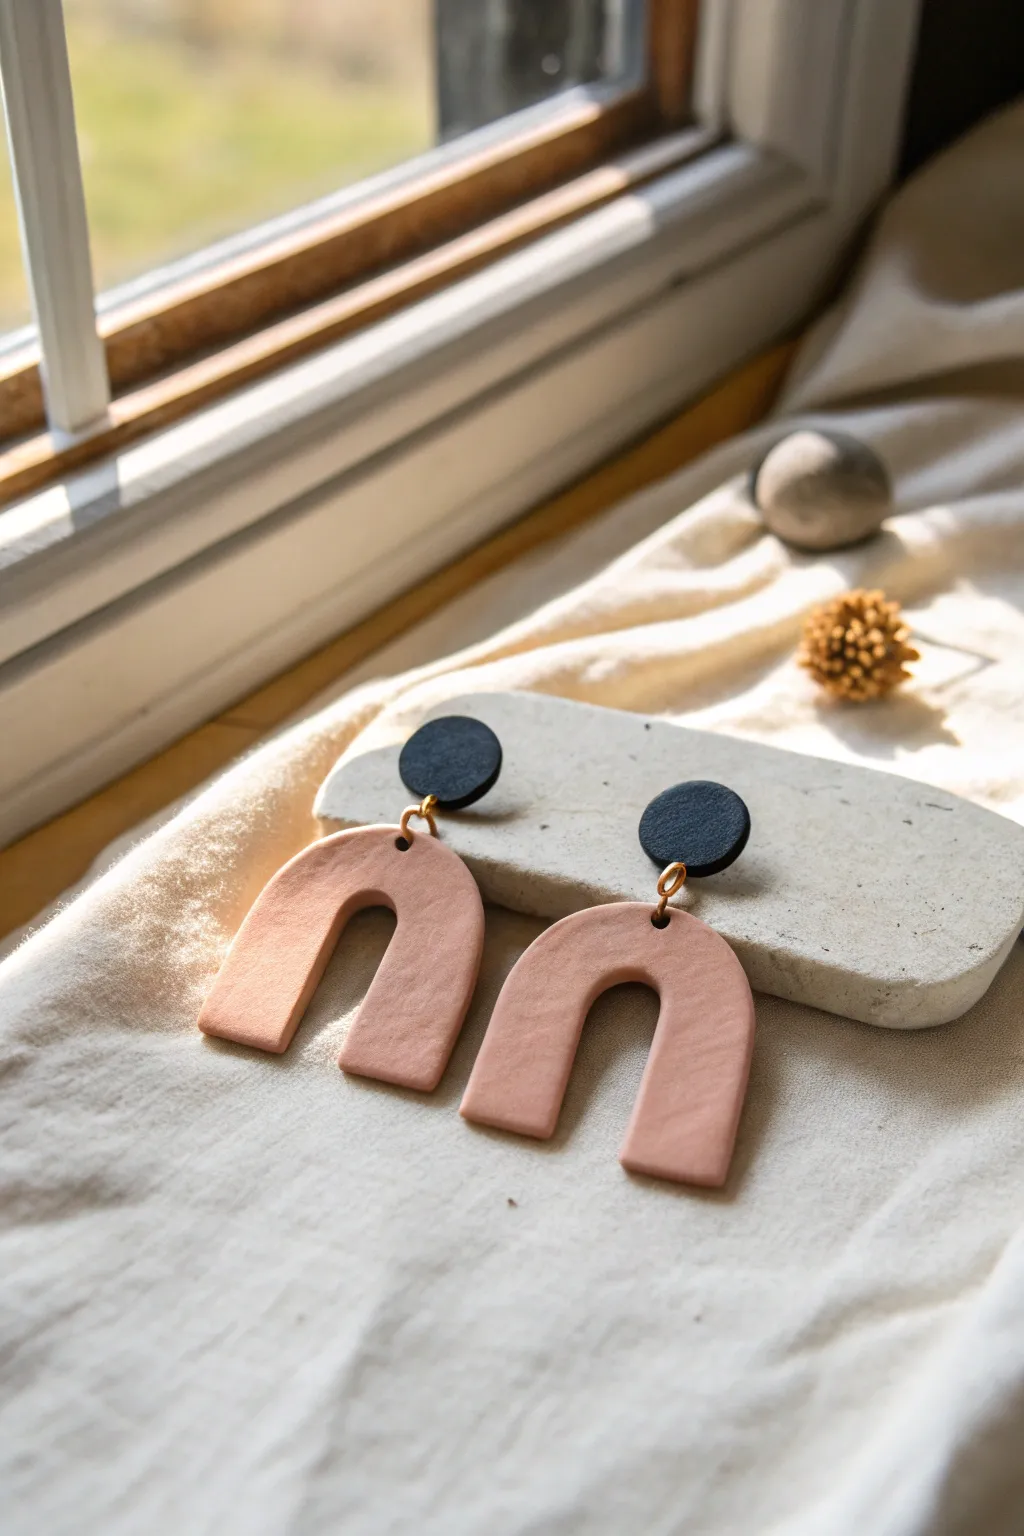
These elegant polymer dangling earrings feature a minimalist black stud and a soft terracotta arch, creating a perfect balance of bold and subtle tones. With their organic texture and modern U-shape, they offer a sophisticated, handmade look that pairs beautifully with everyday outfits.
How-To Guide
Materials
- Polymer clay in black and muted terracotta/peach
- Acrylic rolling pin or pasta machine
- Small circle clay cutter (approx. 10mm)
- Arch or U-shape clay cutter (approx. 30mm height)
- Texture sponge or fine-grit sandpaper
- Clay slicer or tissue blade
- Hand drill or needle tool
- 4 Gold jump rings (6-8mm)
- 2 Earring posts
- Superglue or heavy-duty jewelry adhesive
- Flat nose jewelry pliers
- Parchment paper-lined baking sheet
- Oven
Step 1: Preparing and Cutting the Clay
-
Condition the Clay:
Begin by warming up your terracotta-colored clay in your hands, kneading it until it is soft and pliable to prevent cracking later. -
Roll the Sheets:
Using an acrylic roller or pasta machine, roll the terracotta clay into an even sheet, roughly 3mm thick for a sturdy feel. -
Add Texture:
Before cutting, gently press a texture sponge or a piece of fine-grit sandpaper onto the surface of the clay sheet to achieve that stone-like, matte finish. -
Cut the Arches:
Press your U-shaped cutter firmly into the terracotta sheet to create two identical arch shapes. -
Refine Edges:
Gently smooth the sides of the cut shapes with your finger to remove any sharp ridges left by the cutter. -
Prepare Black Clay:
Repeat the conditioning and rolling process with the black polymer clay, aiming for a slightly thinner sheet, around 2mm. -
Texturize and Cut Circles:
Apply the same texture to the black clay, then use your small circle cutter to punch out two discs for the top studs.
Step 2: Drilling and Baking
-
Create Holes:
Use a needle tool to poke a hole at the very top center of each terracotta arch and near the bottom edge of each black circle. -
Verify Alignment:
Double-check that your holes are centered and large enough for your jump rings to move freely. -
Bake:
Place all four pieces on a parchment-lined baking sheet and bake according to your clay manufacturer’s instructions—usually around 275°F (130°C) for 30 minutes. -
Cool Down:
Allow the pieces to cool completely inside the oven or on a wire rack before handling them, as warm clay is fragile. -
Sand (Optional):
If the edges feel rough after baking, I like to lightly sand them with high-grit sandpaper under running water for a polished look.
Stone Effect Tip
Mix a tiny pinch of translucent clay and black pepper into the terracotta color before rolling to create realistic granite speckles.
Step 3: Assembly
-
Attach Earring Posts:
Apply a small dot of strong jewelry glue to the back of the black circles (ensure the drilled hole is at the bottom) and press the earring posts firmly in place. -
Wait for Glue to Set:
Let the glue dry completely per the manufacturer’s timeframe to ensure durability. -
Open Jump Rings:
Using two pairs of pliers, twist two gold jump rings open sideways rather than pulling them apart to maintain their circle shape. -
Connect Pieces:
Slide the open jump ring through the hole in the terracotta arch and the hole in the black stud. -
Close Jump Rings:
Twist the jump rings back into a closed position, ensuring the gap is tight so the pieces don’t slip out. -
Final Check:
Gently tug on the connection to ensure everything is secure and the arch hangs nicely below the stud.
Make it Shine
Brush a thin layer of UV resin or gloss varnish onto just the black top circle for a sleek, contrasting mixed-finish look.
Now you have a stunning pair of boutique-style earrings ready to wear or gift.


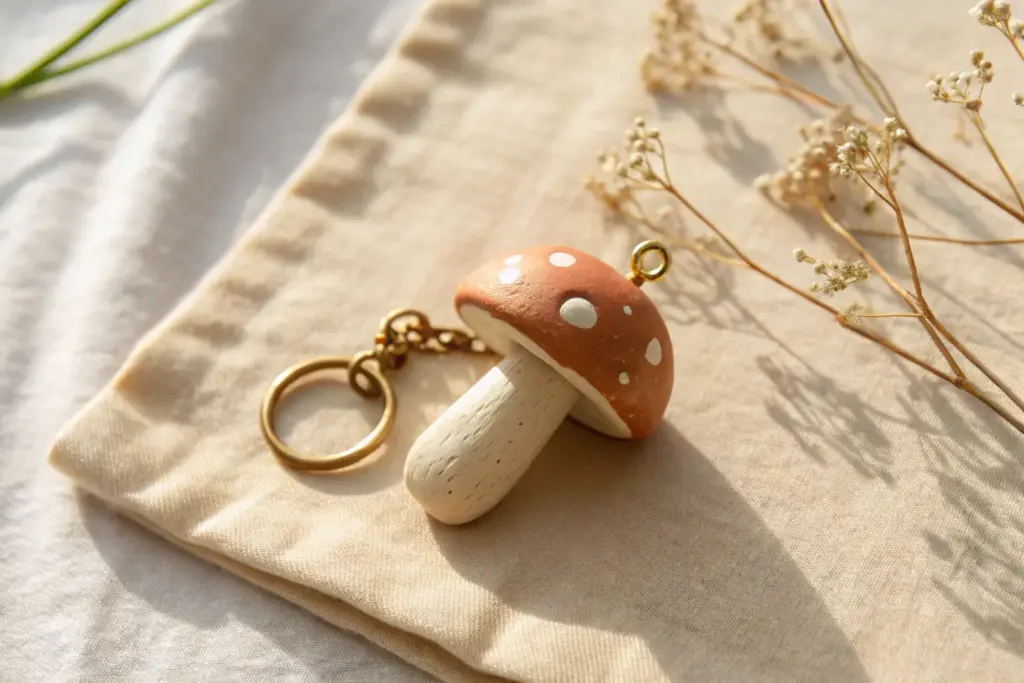
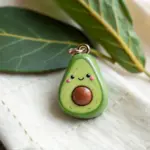
Cute Mini Food Charms
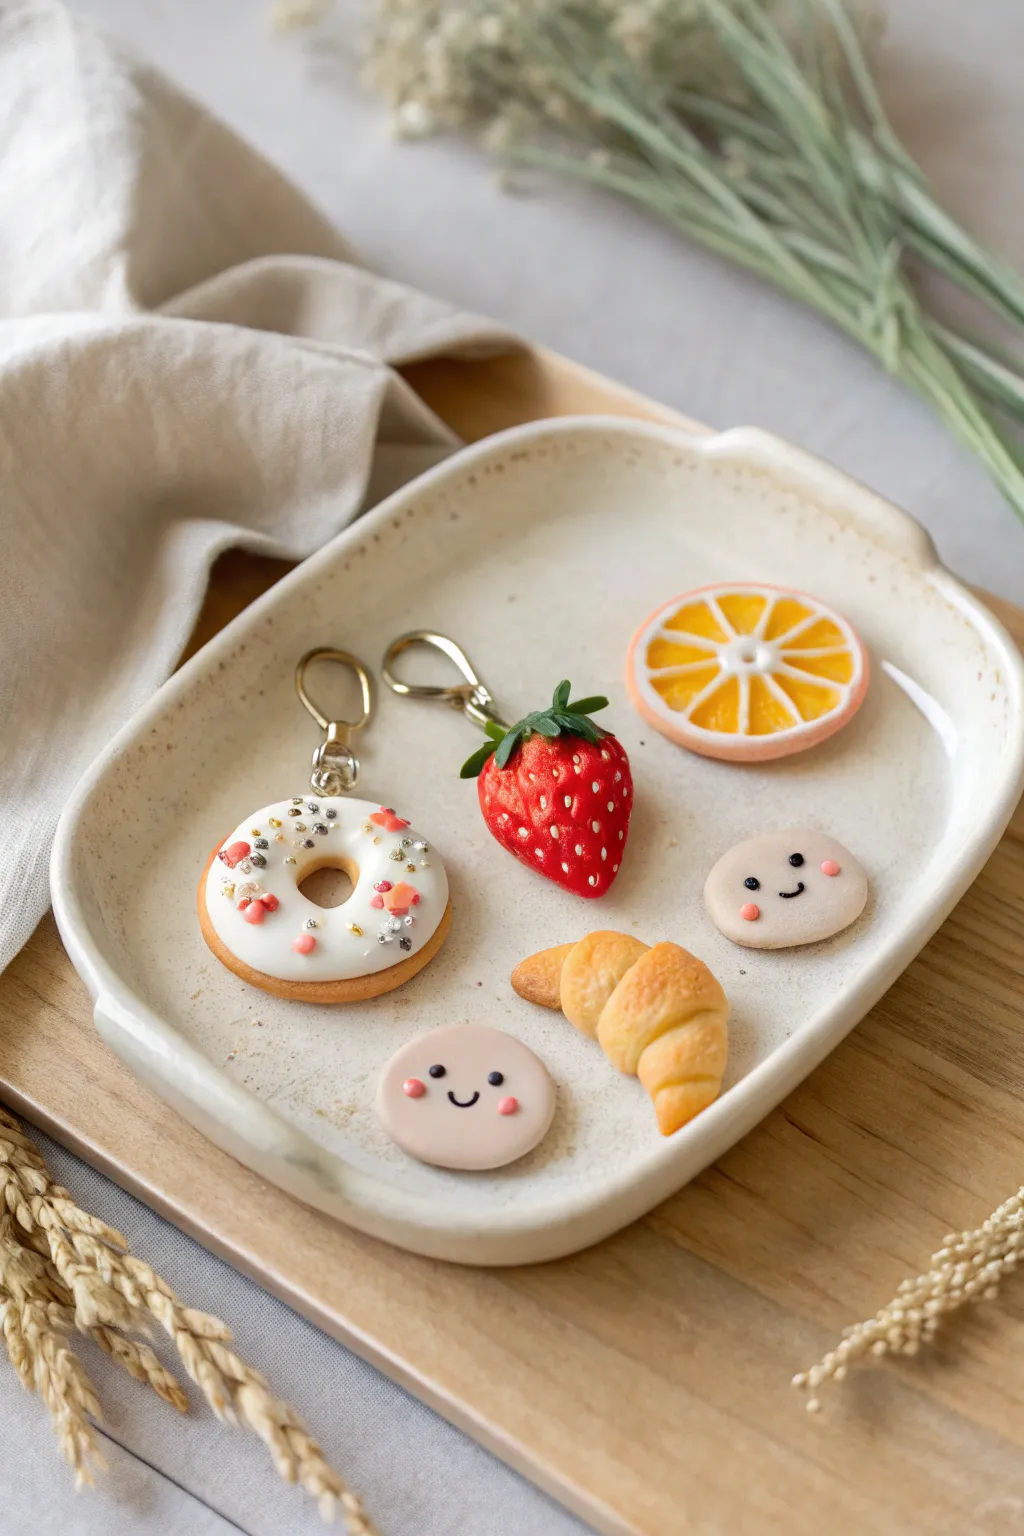
These miniature food charms are a delightful way to practice detailed sculpting techniques, featuring six distinct items ranging from a juicy strawberry to a warm croissant. This collection perfectly balances realistic texture with kawaii cuteness, making them ideal for keychains or jewelry.
Step-by-Step Guide
Materials
- Polymer clay (white, beige/tan, red, orange, translucent, green, black, pink)
- Liquid polymer clay (white and translucent)
- Chalk pastels (orange, brown, yellow) for shaving
- Soft paintbrushes
- Needle tool or toothpick
- Ball tool (small)
- Texture tool (toothbrush or ball of foil)
- X-acto knife or clay blade
- Jump rings and lobster clasps (gold)
- Gloss glaze or UV resin
- Microbeads or glitter (silver/gold mix)
Step 1: The Sprinkled Donut
-
Shape the base:
Mix beige clay with a tiny bit of yellow for a ‘baked dough’ color. Roll a sphere, flatten it slightly into a disc, and use a dotting tool to punch a hole through the center, smoothing the edges. -
Add shading:
Shave brown and orange chalk pastels into a powder. Dust the edges and bottom of the donut using a soft brush to mimic a golden-baked finish. -
Glaze the top:
Mix white liquid clay with a drop of white solid clay to thicken it slightly. Carefully spread this ‘icing’ over the top of the donut, letting it drip naturally over the sides without covering the bottom. -
Decorate:
While the icing is wet, sprinkle on tiny silver microbeads and place small, hand-rolled specks of pink and coral clay to act as sugar sprinkles. Insert a screw eye pin at the top before baking.
Realistic Pastry Texture
For the croissant and cookies, gently tap the unbaked clay with a clean toothbrush or crumpled aluminum foil before shading. This removes fingerprints and mimics baked flour.
Step 2: The Juicy Strawberry
-
Form the berry:
Roll bright red clay into a teardrop shape, flattening the top slightly where the stem will go. -
Create seeds:
Using a needle tool, gently poke small indentations all over the surface. Roll tiny, almost microscopic logs of pale yellow or white clay and press one into each indentation. -
Add the leaves:
Take dark green clay and cut out a small star shape or individual teardrops. Press these onto the top of the strawberry. Use a needle tool to drag lines down the center of each leaf for texture. -
Attach hardware:
Insert your metal screw eye into the center of the leaves securely.
Step 3: The Citrus Slice
-
Build the cane:
Create a ‘cane’ by wrapping a log of translucent orange clay in a thin sheet of white clay. Cut this log into 8 triangular wedges. -
Assemble the wheel:
Arrange the 8 wedges in a circle with the points meeting in the center. Wrap the entire circle in a thicker strip of white clay (the pith) and then a final thin layer of orange clay (the rind). -
Slice and texture:
Slice a thin cross-section of your cane. Use a needle tool to gently rough up the translucent orange sections to look like juice sacs.
Level Up: Scented Clay
Mix a tiny drop of essential oil or candle scent into the clay before sculpting (strawberry for the berry, vanilla for the donut) to make scratch-and-sniff charms.
Step 4: The Kawaii Cookies & Croissant
-
Shape the croissant:
Roll tan clay into a snake, tapering both ends to sharp points. Roll the center flat, then roll it up starting from the middle, curving the ends inward to form a crescent moon shape. -
Texture the pastry:
Shade the ridges of the croissant heavily with orange and brown chalk pastel dust to give it that flaky, buttery oven-baked look. -
Form the happy cookies:
Flatten balls of pale beige clay into smooth, round discs. I find using an acrylic block helps keep the thickness even here. -
Add faces:
Roll tiny spheres of black clay for eyes and very thin snakes for smiles. Press them gently onto the cookies. Add tiny pink cheeks using either clay or a dab of pastel dust.
Step 5: Final Touches
-
Bake:
Bake all pieces according to your clay manufacturer’s instructions, typically around 275°F (130°C) for 15-20 minutes. -
Finish:
Once cool, coat the strawberry and the fruit part of the orange slice with a high-gloss glaze to make them look juicy. Leave the cookies and croissant matte for realism. -
Assemble:
Attach jump rings and lobster clasps to the eye pins on the donut and strawberry to complete the charms.
Now you have a whole bakery’s worth of adorable accessories ready to wear or gift


Pocket-Sized Animal Figurines
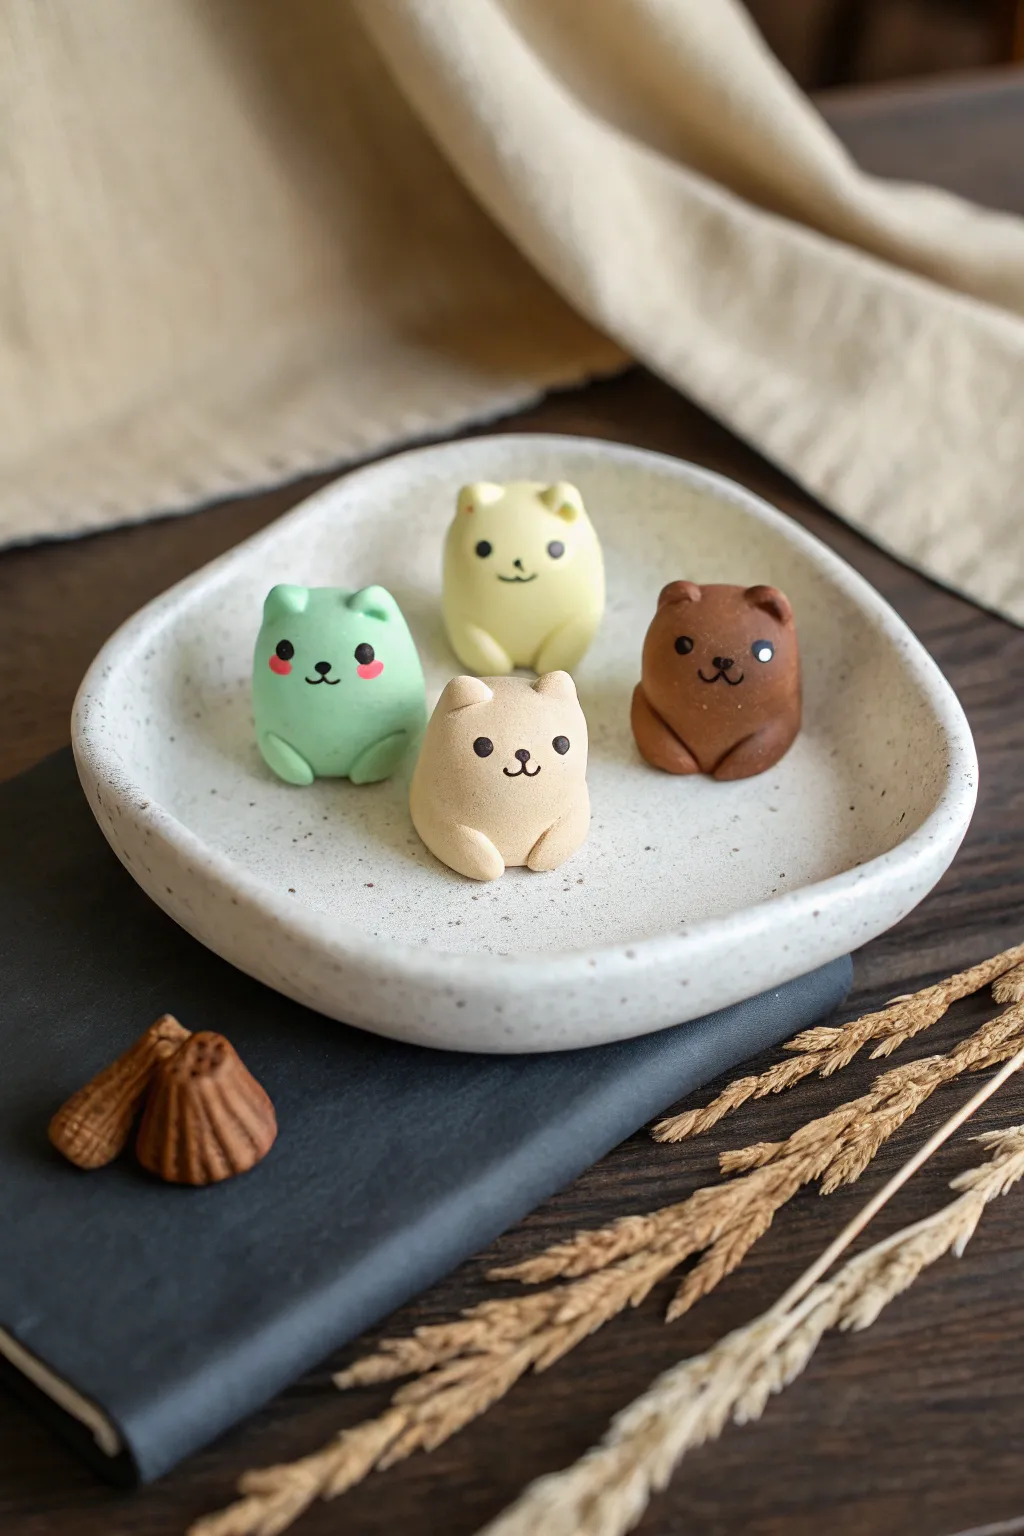
These utterly charming miniature bears are crafted from polymer clay in a soft, matte palette of mint, cream, beige, and cocoa. Their simple, rounded shapes and tiny faces make them an adorable beginner project perfect for decorating desks or gifting.
Step-by-Step
Materials
- Polymer clay (mint green, pale yellow, beige, chocolate brown, black, dark pink)
- Clean ceramic tile or glass work surface
- Basic sculpting tools (needle tool, ball stylus)
- Smooth rolling pin or acrylic roller
- Baking sheet and parchment paper
- Wet wipes (for cleaning hands between colors)
- Oven (for curing)
Step 1: Shaping the Bodies
-
Condition the clay:
Start by warming up your clay in your hands. Knead the beige, mint, yellow, and brown clays individually until they are soft and pliable. It’s crucial to wash your hands or use a baby wipe between colors, especially before handling the lighter shades, to avoid color transfer. -
Form the base shape:
Pinch off a piece of clay about the size of a large grape for the first bear. Roll it into a smooth, crack-free ball between your palms. -
Create the taper:
Gently gently roll just the top portion of the ball to create a slight egg shape, narrower at the top for the head and wider at the bottom for stability. Flatten the bottom lightly on your work surface so the figure sits upright without wobbling. -
Repeat for the group:
Repeat this process for the other three colors so you have four matching body shapes standing ready.
Dust Magnets
Polymer clay loves dust. If your clay picks up lint, wipe it gently with a small amount of rubbing alcohol or baby oil on a cotton swab before baking to clean it up.
Step 2: Adding Details
-
Make the ears:
For each bear, take two tiny balls of matching clay—smaller than a peppercorn. Press them gently onto the top of the head on the left and right sides. -
Blend the ears:
I like to use a small silicone tool or just my finger to smooth the seam where the ear meets the head, ensuring they are firmly attached and look integral to the shape rather than just stuck on. -
Create arms:
Roll two small, elongated teardrop shapes for the arms. They should be chubby but tapered at one end. -
Attach the limbs:
Press the wider part of the teardrops against the lower sides of the body, curving them inward slightly so they look like they are resting on the bear’s tummy. -
Add the feet:
Form two tiny flattened ovals and attach them to the very bottom front of the bear, just poking out from under the belly, to suggest sitting paws.
Needle Tool Trick
For the tiny eyes, instead of using your fingers, pick up the clay micro-balls with the tip of a needle tool and press them directly into position on the face.
Step 3: Completing the Faces
-
Form the snout:
Take a very small ball of the main body color (or a slightly lighter shade if you want contrast) and flatten it into a tiny oval. Press this into the center of the face area. -
Add the nose:
Using the tiniest speck of black clay, roll a micro-ball and press it onto the top center of the snout area. Ensure it’s centered. -
Draw the mouth:
Take a needle tool or a very sharp toothpick. Carefully impress an inverted ‘Y’ shape under the nose to create the classic bear smile. -
Place the eyes:
Roll two minuscule balls of black clay. Position them evenly above the snout. Press them in gently so they don’t bulge out too much. -
Add cheek color:
For the mint bear (or others if desired), take extremely tiny specks of dark pink clay. Flatten them paper-thin and press them onto the cheeks for a blushing effect. -
Final smooth out:
Give the entire figure a once-over with your finger to smooth out any accidental fingerprints. Use a light touch to avoid squashing your details.
Step 4: Baking and Finishing
-
Prepare for baking:
Place your bear squad on a baking sheet lined with parchment paper. Leave a little space between each figurine. -
Bake:
Bake according to your specific brand of polymer clay instructions (usually around 275°F/135°C for 15-20 minutes). Do not overbake or the light colors will yellow. -
Cool down:
Let the bears cool completely in the oven with the door cracked open. This gradual cooling prevents cracking. -
Optional texture:
If you want the super-matte, stone-like finish seen in the image, lightly sand the surface with very fine grit sandpaper after baking, or simply leave the unglazed clay as is.
Arranging these little friends on a shelf adds an instant touch of whimsy to your room


Minimal Incense Holders
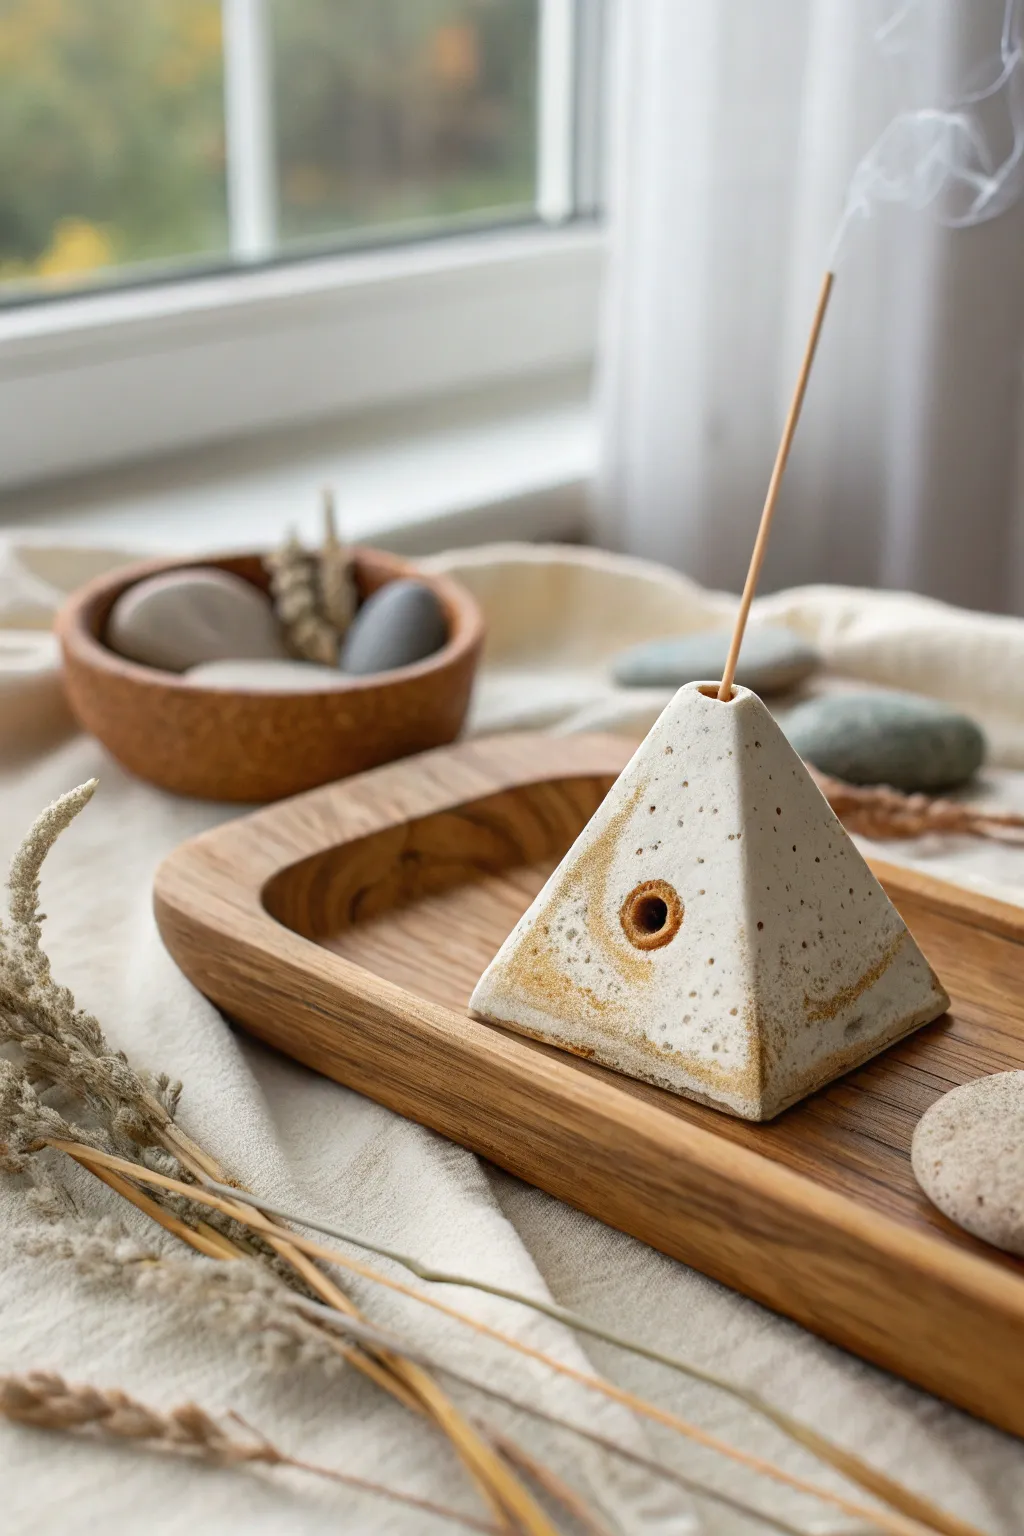
This minimalist incense holder mimics the raw, organic look of speckled ceramic or granite with a simple geometric twist. Its pyramid shape and natural sandy tones bring a serene, grounding presence to any meditation corner or coffee table.
Detailed Instructions
Materials
- White or translucent polymer clay
- Granite-effect polymer clay (or black pepper/dried tea leaves for DIY speckling)
- Gold mica powder or gold acrylic paint
- Rolling pin or clay machine
- Sharp clay blade or X-Acto knife
- Ruler
- Incense stick (for sizing)
- Small circular cutter or straw
- Sandpaper (various grits)
- Liquid polymer clay (optional)
- Oven
Step 1: Preparing the Faux Stone Clay
-
Mix your base:
Start by conditioning your white polymer clay until it is soft and pliable. If you have a translucent clay, mixing it 50/50 with white creates a lovely depth that mimics real stone. -
Add texture:
If you aren’t using pre-mixed granite clay, create your own speckles. Knead in a very small amount of black polymer clay, or for a more organic look, I like to sprinkle in ground black pepper or dried tea leaves. -
Marbling technique:
To achieve the sandy, weathered patches seen in the photo, take a small pinch of beige or gold-tinted clay and roughly mix it into your white base. Don’t over-blend; you want streaks and swirls. -
Roll it out:
Roll your marbled clay into a sheet approximately 1/4 inch thick. A thicker slab gives the final piece more weight and stability.
Stone Texture Trick
Mix coarse sand or baking soda into the raw clay. It creates a gritty, realistic stone texture that looks amazing after baking.
Step 2: Shaping the Pyramid
-
Create a template:
Draw an equilateral triangle on a piece of paper (about 2.5 to 3 inches per side) to serve as your cutting guide. -
Cut the sides:
Using your paper template and a sharp blade, cut out four identical triangles from your clay slab. Keep your cuts clean and 90-degree vertical for easier joining. -
Bevel the edges:
For a seamless pyramid join, carefully slice a 45-degree angle along the two long sides of each triangle (leave the bottom edge flat). This allows them to fit together snugly. -
Assembly:
Stand the triangles up and press the beveled edges together to form the four-sided pyramid. Use your finger to smooth the seams on the inside first to secure the structure. -
Smooth the outside:
Gently rub the exterior seams until they disappear. You can use a tiny bit of liquid clay as ‘glue’ if the clay feels too dry to bond on its own.
Step 3: Adding Details & Baking
-
Drill the top vent:
Use a tool or the incense stick itself to poke a vertical hole right through the apex of the pyramid. Make sure it goes deep enough to hold the stick securely upright. -
Create the front detail:
Using a small circular cutter or a straw, remove a circle from the center of one face. This aesthetic detail mimics modern ceramic geometric designs. -
Reinforce the opening:
Take a tiny snake of your gold-tinted or darker clay and create a grommet-like ring around the circular hole you just cut, pressing it firmly into the main body. -
Add gold accents:
Dip your finger or a brush into gold mica powder and rub it sporadically near the base and around the central hole to enhance the ‘weathered artifact’ vibe. -
Texture the surface:
Before baking, tap the surface lightly with a toothbrush or crumbled foil to remove any fingerprints and add to the stone effect. -
Bake:
Bake according to your clay manufacturer’s instructions, usually at 275°F (135°C) for about 30 minutes. Let it cool completely in the oven to prevent cracking. -
Sanding:
Once cool, wet sand the edges lightly to sharpen the geometric facets.
Make It Backflow
Drill the top hole all the way into the main chamber. When using backflow cones, smoke will spill out of the front circle like a waterfall.
Now you have a serene, handcrafted piece ready to fill your space with calming scents

What Really Happens Inside the Kiln
Learn how time and temperature work together inside the kiln to transform clay into durable ceramic.
Tabletop Tic-Tac-Toe Set
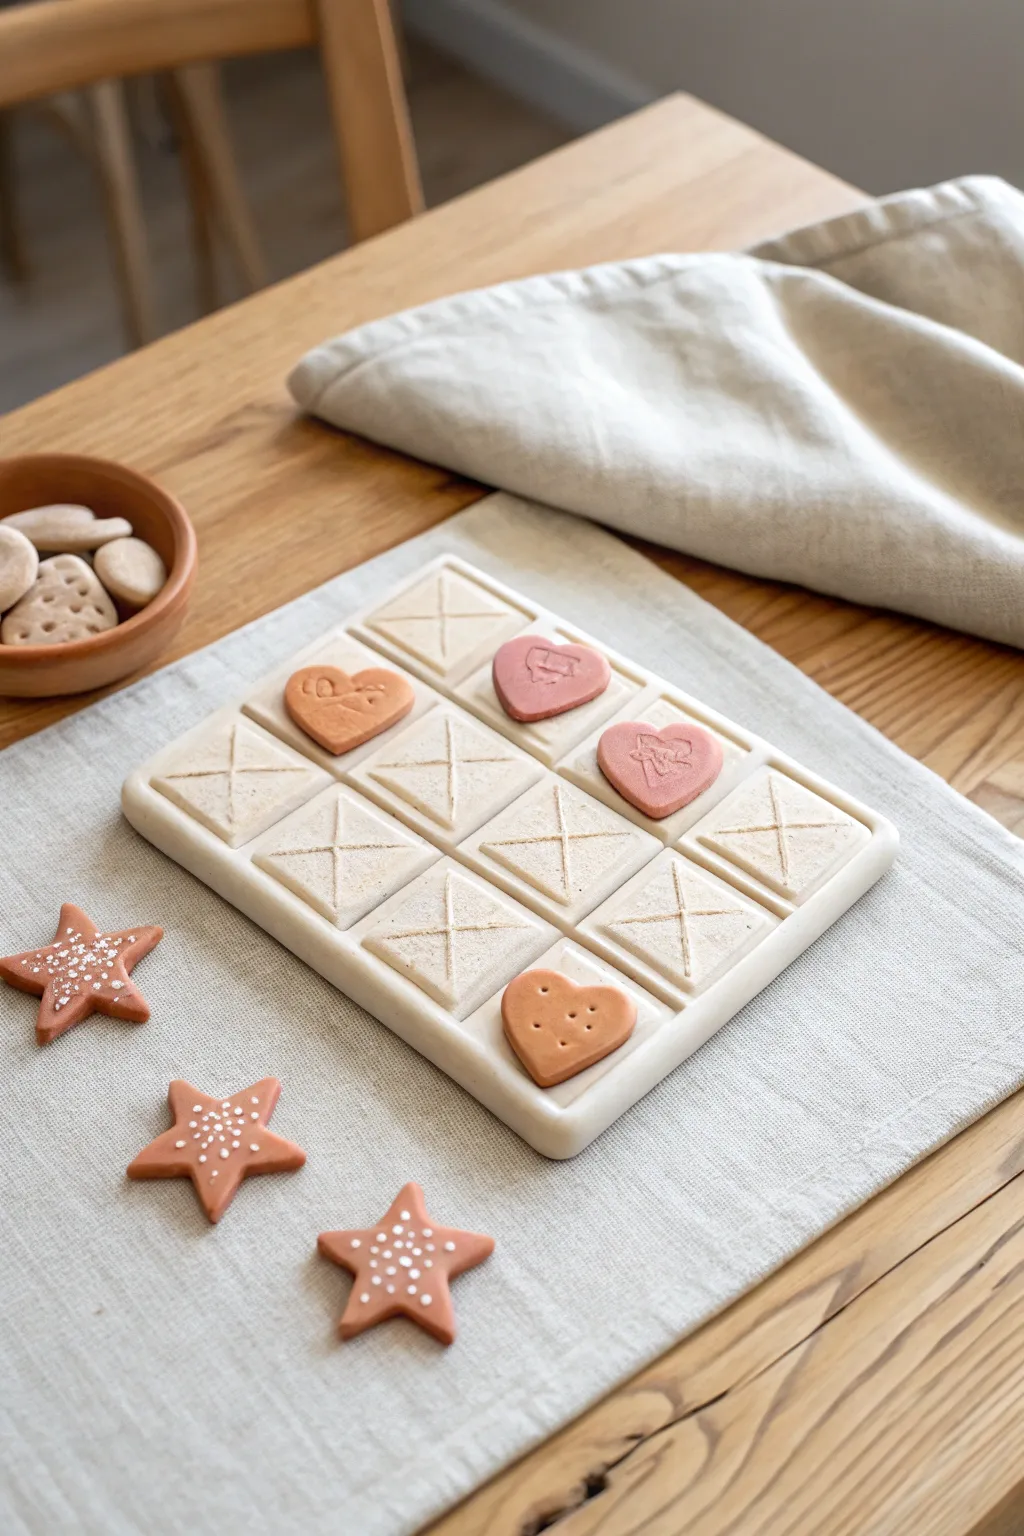
Transform game night with this adorable, bakery-inspired Tic-Tac-Toe set that looks good enough to eat. Crafted from polymer clay to resemble sugar cookies and frosting, this durable game board features recessed squares and charming heart and star playing pieces.
Step-by-Step
Materials
- White or beige polymer clay (for the board base)
- Tan/Light Brown polymer clay (for cookie color)
- Pink and terracota polymer clay (for heart accents)
- White liquid polymer clay (for icing details)
- Square cookie cutter or blade
- Small heart and star cookie cutters
- Rolling pin or clay machine
- Needle tool or toothpick
- Texture sponge or sandpaper (optional)
- Baking sheet and parchment paper
- Ruler
Step 1: Creating the Game Board Base
-
Prepare the base slab:
Condition a large block of white or beige clay until soft. Roll it out into a thick, even square slab, approximately 6×6 inches and about 1/2 inch thick. -
Mark the grid:
Use a ruler to lightly mark a 3×3 grid on the surface of your square slab. Leave a uniform border around the outside edge. -
Create the recessed squares:
Instead of cutting holes, you want to press indentations. Use a square cutter slightly smaller than your grid lines, or a flat square object, to firmly press nine distinct square indentations into the slab. -
Add texture:
For a stone or baked look, gently dab the surface of the raised grid lines and borders with a texture sponge or a crumpled ball of aluminum foil. -
Scribe the X marks:
Take a needle tool or a sharp blade. Inside every single recessed square, score a large ‘X’ corner to corner. This adds a classic tic-tac-toe graphic element permanently to the board. -
Smooth the edges:
Run your finger along the outer perimeter of the board to soften the sharp cut edges, giving it a more finished, ceramic-like appearance.
Texturing Tip
Use an old toothbrush to gently stipple the surface of the ‘cookie’ pieces before baking. This removes fingerprints and creates a realistic baked texture.
Step 2: Crafting the Playing Pieces
-
Mix the cookie dough color:
Blend tan clay with a tiny bit of white and translucent clay to achieve a realistic sugar cookie dough color. -
Roll the dough:
Roll this mixture out to about 1/4 inch thickness. I find using guides keeps the thickness perfectly consistent for all pieces. -
Cut the shapes:
Cut out at least five heart shapes and five star shapes. You need five of each to complete a full game of Tic-Tac-Toe. -
Detail the stars:
On the star pieces, use a needle tool to create tiny dots representing white sugar sprinkles. You can fill these indentations with white liquid clay later or leave them textured. -
Detail the hearts:
For the heart pieces, create variation. Leave some plain tan, and for others, press a thin layer of pink or terracotta clay on top to look like fondant icing. -
Add fine details:
Using a very fine needle tool, prick small holes into the surface of the plain cookie hearts to mimic the docking holes often seen on shortbread. -
Create stamped motifs:
If you have tiny stamps, gently press a subtle design, like a bird or flower, into the center of the pink ‘frosted’ hearts for extra charm.
Make it Magnetic
Embed small magnets into the bottom of the pieces and the center of the board squares before baking to make this a travel-friendly set.
Step 3: Baking and Finishing
-
Pre-bake preparation:
Place the heavy board and all playing pieces on a baking sheet lined with parchment paper. Ensure the board is on a perfectly flat surface to prevent warping. -
Bake the project:
Bake according to your specific brand of clay’s instructions. A lower temperature for a longer time is often safer for thick pieces like the board to prevent cracking. -
Cool down:
Let the board cool completely in the oven with the door slightly ajar. Sudden temperature changes can cause thermal shock in large clay slabs. -
Add white accents (optional):
Once cool, use a tiny amount of white liquid clay or white acrylic paint to fill the dot indentations on the star cookies to make the ‘sprinkles’ pop.
Invite a friend over and enjoy your first match on your custom handmade board