If you’ve ever made a little clay gnome and thought, “Cute… but I want more personality,” you’re in the right place. These pottery clay gnome ideas are the kind you can actually pull off at your table, with room to add your own twist.
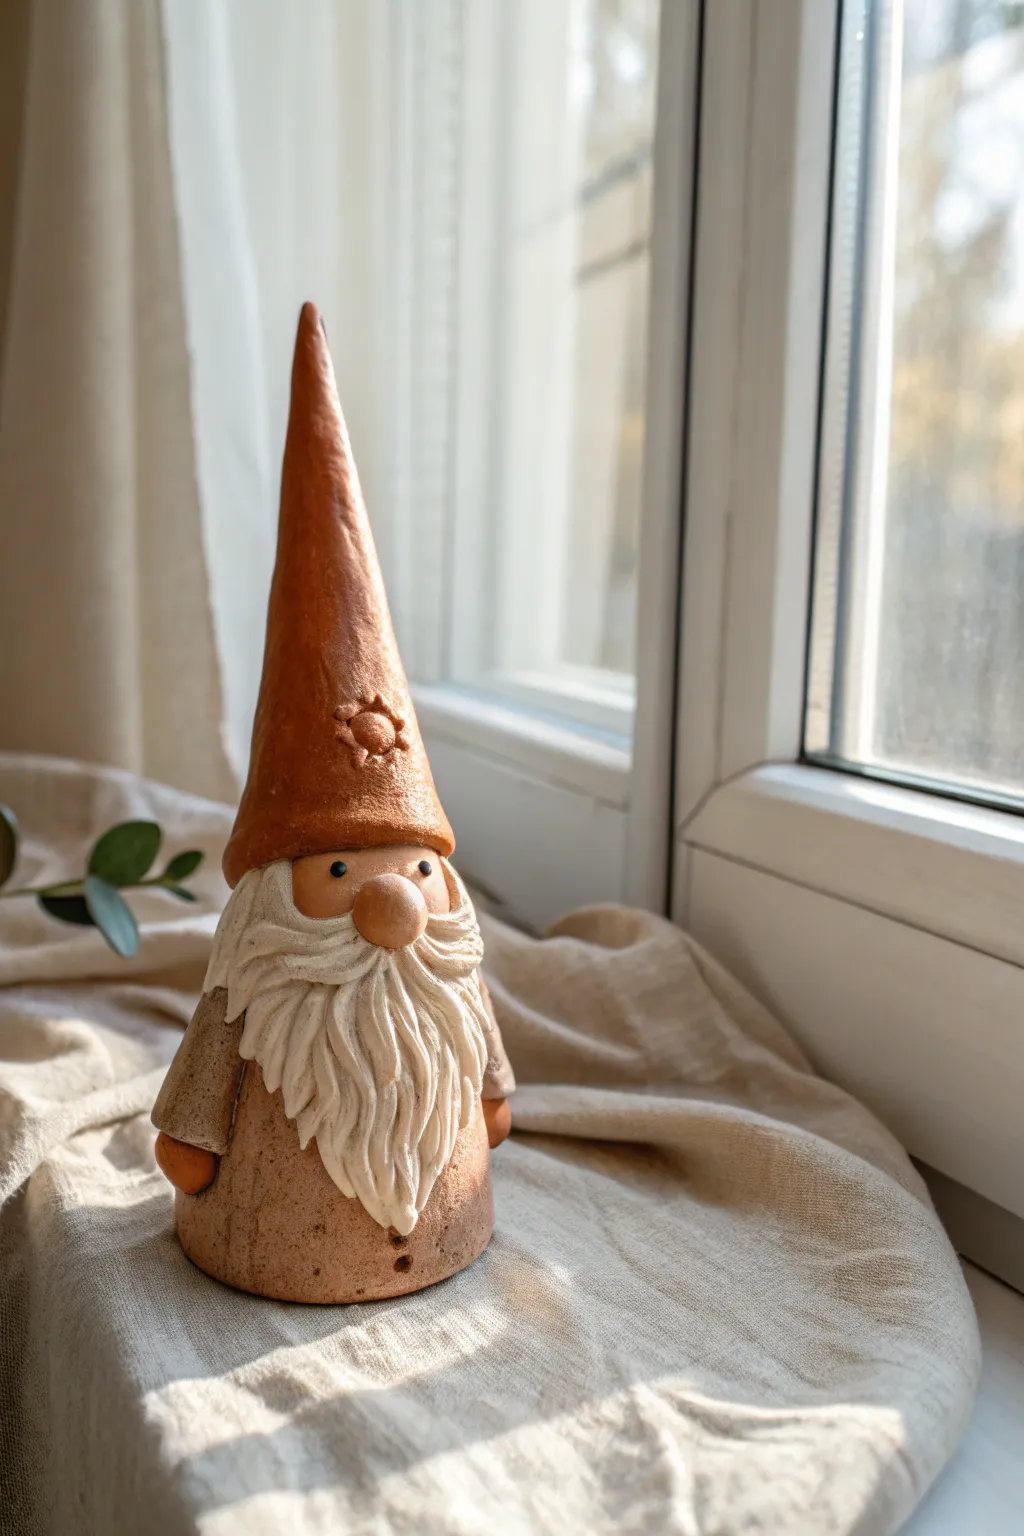
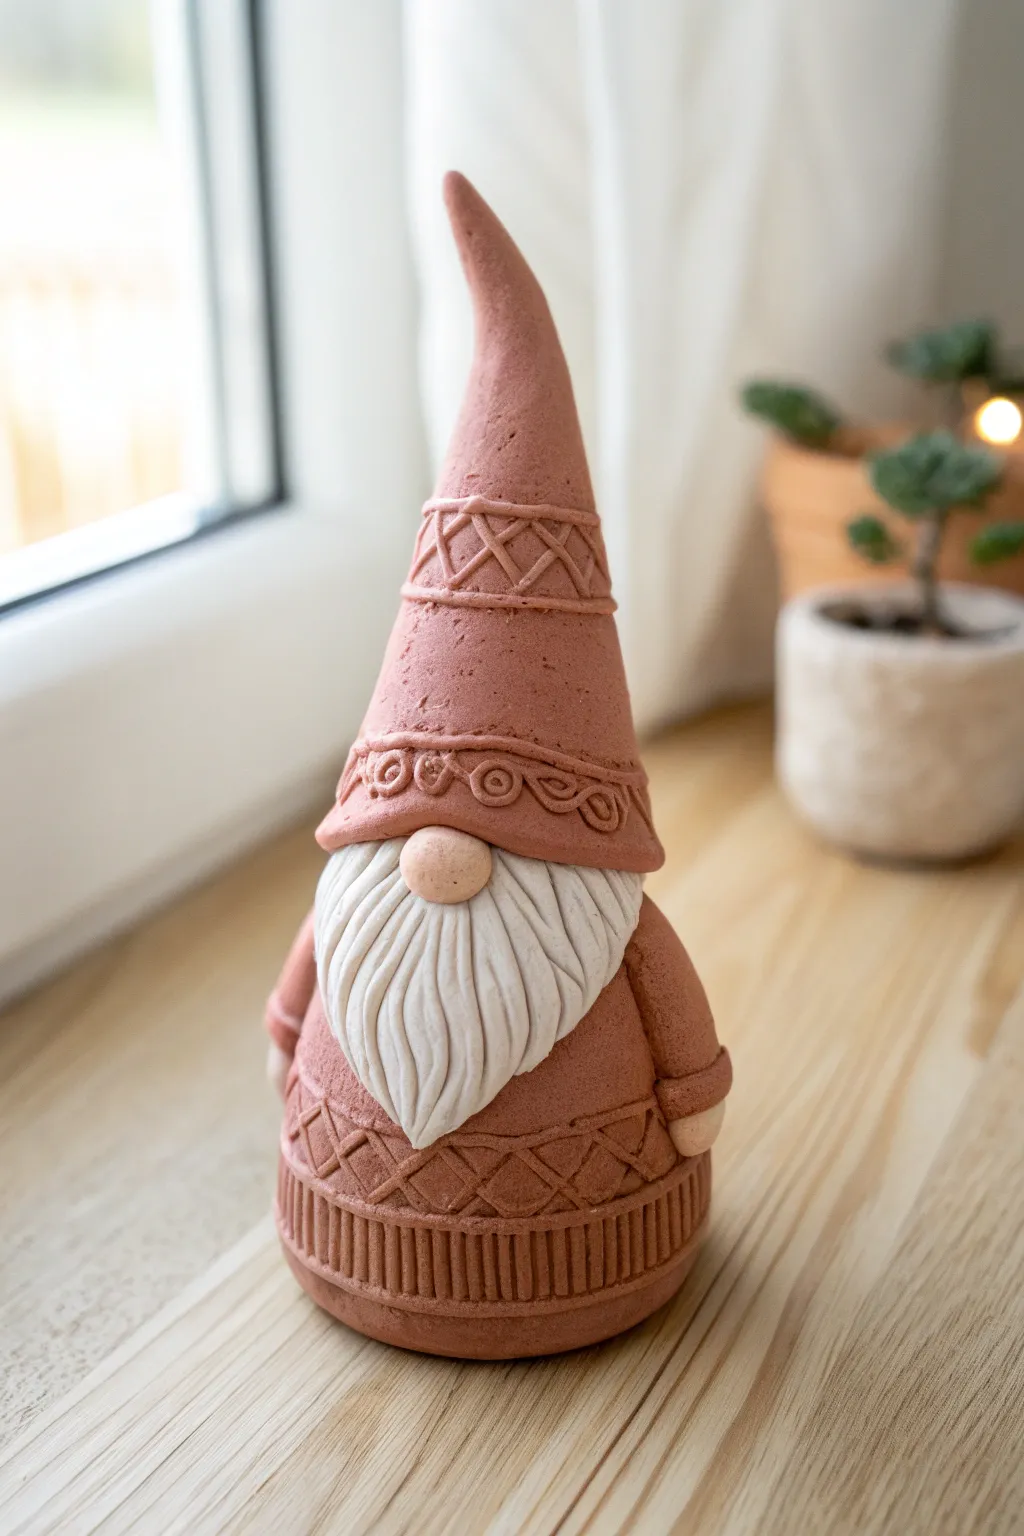
Classic Cone-Hat Garden Gnome
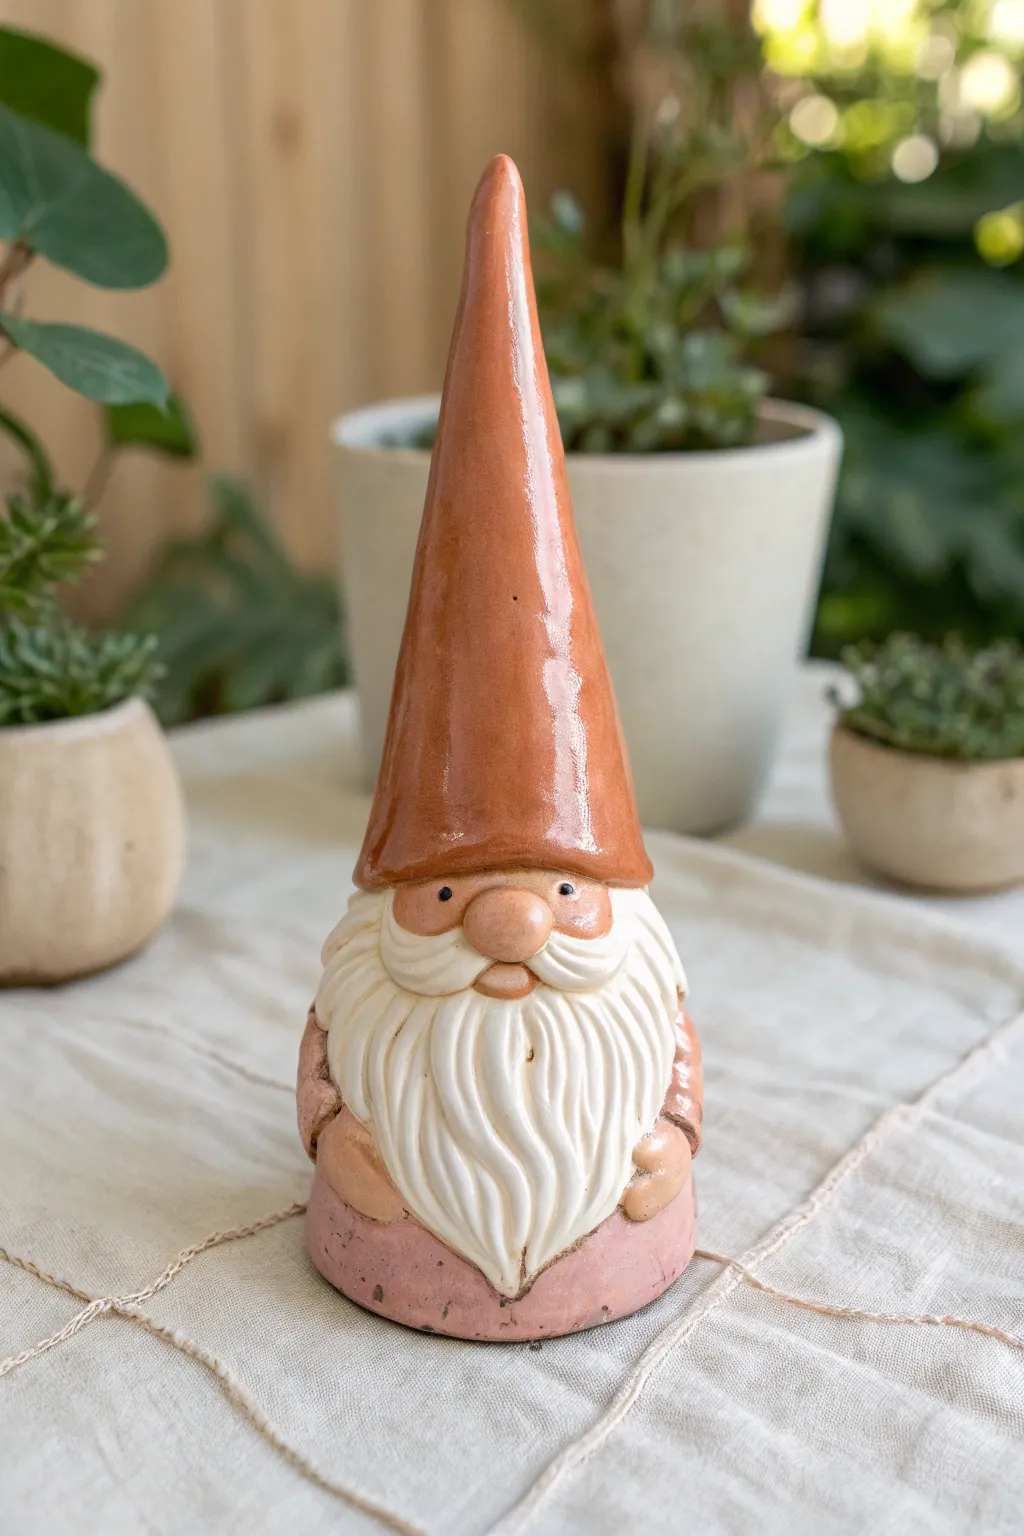
This charming ceramic gnome features a distinctive elongated hat and an intricately textured beard that brings him to life. The high-gloss glaze on the hat contrasts beautifully with the softer matte finish of the beard, making him a perfect whimsical addition to any potted plant arrangement.
Step-by-Step Guide
Materials
- Earthenware or stoneware clay (white or buff)
- Pottery tools (needle tool, modeling tool)
- Rolling pin
- Slip and scoring tool (or serrated rib)
- Sponge
- Underglazes: Terra cotta/orange-brown, peach/flesh tone, white, black, dusty pink
- Clear glossy glaze
- Kiln
- Small paintbrushes
Step 1: Forming the Base Structure
-
Prepare the clay:
Begin with a well-wedged ball of clay about the size of a grapefruit to ensure there are no air bubbles. -
Shape the body:
Pinch off about one-third of the clay for the hat and set it aside. I prefer to shape the remaining larger portion into a stout cylinder or rounded cone for the body, keeping the bottom flat for stability. -
Create the hat code:
Take the reserved clay and roll it into a long, tapered cone. This will be the gnome’s signature tall hat. Aim for a height that is roughly equal to or slightly taller than the body. -
Hollow the forms:
Carefully hollow out the body from the bottom using a loop tool if the clay is thick. For the cone hat, push your thumb into the base to create a hollow cavity, ensuring walls are an even thickness.
Air Escape Route
Don’t forget to poke a small, hidden hole in the bottom or back of the hollowed body. This allows expanding air to escape during firing and prevents explosions.
Step 2: Assembly and Features
-
Attach the hat:
Score the top of the body and the rim of the hat base. Apply slip generously and press the pieces together firmly. Smooth the seam completely with a modeling tool or your finger so it looks like one continuous piece before the details are added. -
Add the nose:
Roll a small ball of clay for the nose. Score and slip the area just below the hat brim and press the nose into place. -
Sculpt the beard base:
Using a flattened coil or slab piece, shape a bib-like form for the beard that sits under the nose and drapes over the belly. -
Detail the beard texture:
Using a needle tool or a fine modeling tool, carve deep, flowing lines into the beard clay. Start from the nose and curve outward and down to mimic hair strands. -
Add the mustache:
Create two small teardrop shapes of clay. Attach them under the nose, curling the tips upward slightly. Texture these to match the beard. -
Refine the face:
Smooth the area around the nose to define the cheeks. Use the end of a paintbrush to make tiny indentations for the eyes just above the nose line. -
Arms and hands:
Roll two small sausage shapes for arms and attach them to the sides of the body, blending the shoulders into the form. Add tiny balls of clay at the ends for hands, resting them on his belly.
Step 3: Glazing and Finishing
-
Bisque fire:
Allow the gnome to dry slowly and completely. Once bone dry, fire it in the kiln to the appropriate bisque temperature for your clay body. -
Paint the hat:
Apply three coats of a terra cotta or orange-brown underglaze to the entire hat. -
Detail the face and hands:
Paint the nose, cheeks, and hands with a flesh-toned underglaze. Use a tiny dot of black for the eyes. -
Whiten the beard:
Carefully paint the beard and mustache with white underglaze. If the clay is already white, you can skip this, or apply a white wash to highlight the texture. -
Color the outfit:
Paint the lower body tunic in a dusty pink or light mauve underglaze. -
Apply clear glaze:
I usually coat the entire hat with a clear glossy glaze to give it that shiny ceramic look. Leave the beard matte or apply a matte clear glaze to create texture contrast. -
Final firing:
Fire the piece again to the glaze temperature recommended for your specific glazes and clay.
Customize the Curve
Before the clay hardens, gently bend the very tip of the hat slightly to the side or add a little curl. It gives the gnome more personality and movement.
Place your finished gnome among your succulents for a delightful handmade touch


Pinch Pot Belly Gnome
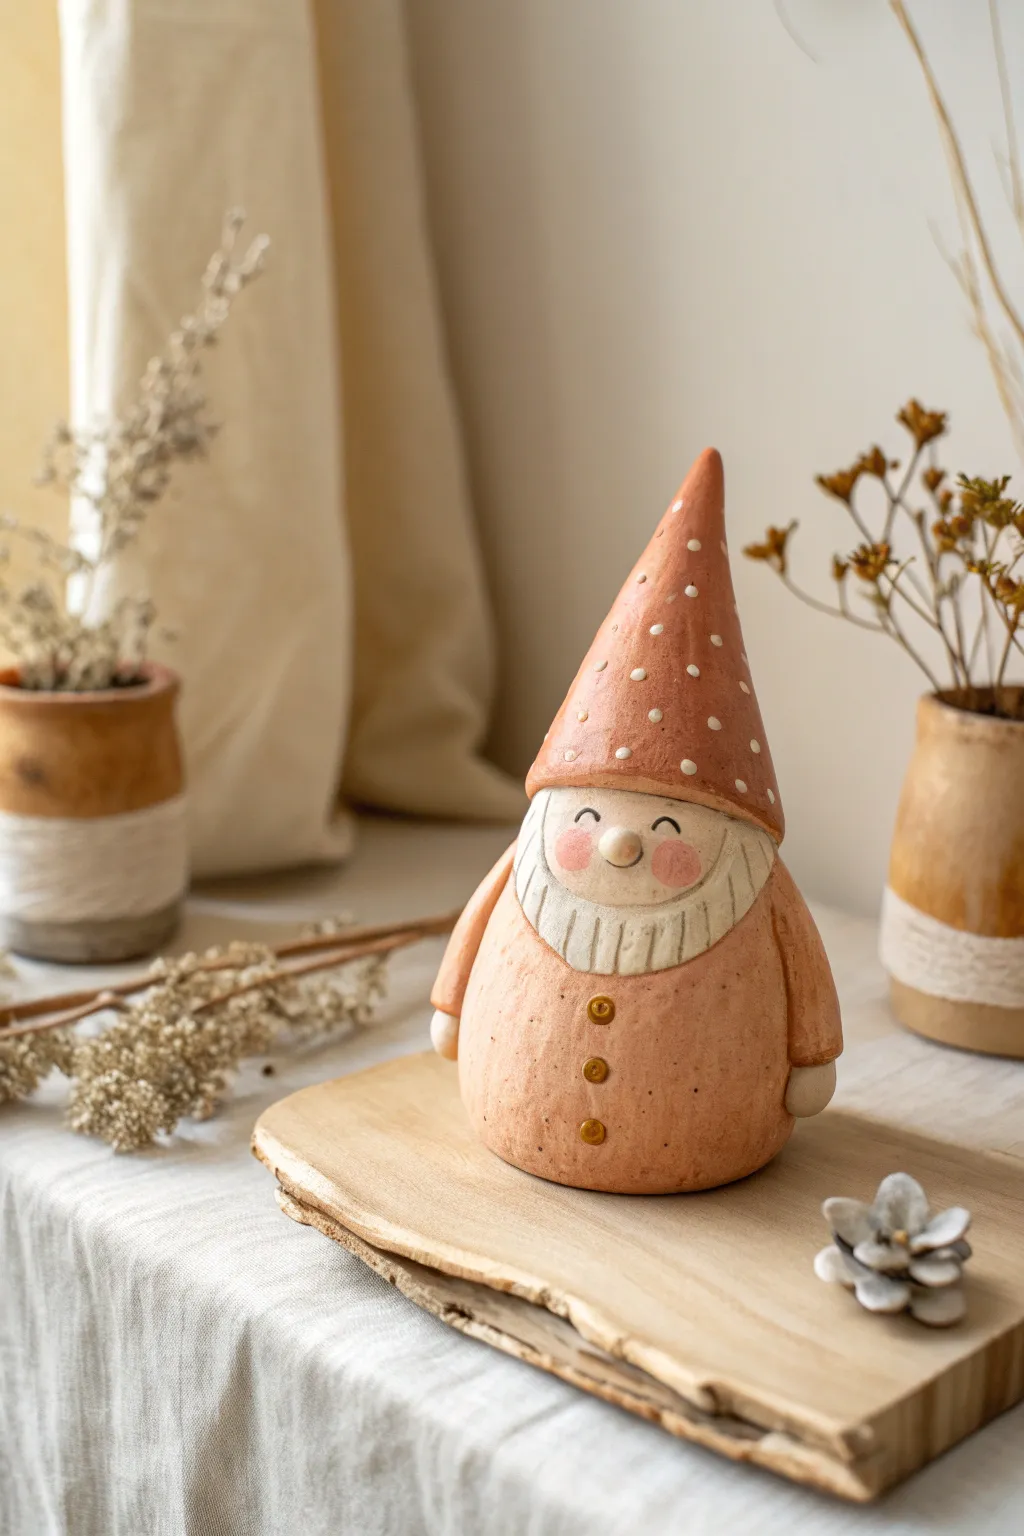
This charming ceramic gnome features a delightfully round tummy and a classic pointed hat dotted with whimsy. Its warm terracotta tones and simple facial features make it a perfect beginner-friendly project that radiates cozy cottagecore vibes.
Detailed Instructions
Materials
- Terracotta or earthenware clay
- Slip (clay and water mixture)
- Scoring tool or fork
- Wooden modeling tool or popsicle stick
- Small sponge
- Needle tool
- Underglazes (white, pink, black/dark brown)
- Fine detail brush
- Matte clear glaze
Step 1: Fashining the Base
-
Create the body pinch pot:
Start with a ball of clay roughly the size of a large orange. Push your thumb into the center, stopping before you break through the bottom, and gently pinch the walls while rotating the ball to create an even, cup-like shape. -
Close the form:
Unlike a bowl, continue pinching the rim inward to close the top slightly, creating a closed egg or teardrop shape. Ensure the bottom is flattened just enough so the gnome stands sturdily on its own. -
Shape the arms:
Roll two small coils of clay for the arms. They should be slightly tapered at one end where they will attach to the shoulders. Keep them simple and tube-like, resting naturally against the rounded belly. -
Make the hands:
Roll two tiny spheres of clay and attach them to the bottom ends of the arm coils. Smooth the seam so the hand looks like it’s emerging from a sleeve. -
Attach the limbs:
Score the sides of the body and the back of the arms. Apply slip to the scored areas and press the arms firmly onto the body. I like to blend the clay at the shoulder connection completely smooth so they don’t pop off.
Air Pocket Alert
Since you closed up the body form, remember to poke a tiny pinhole in the bottom or hidden under an arm. This lets expanding air escape during firing so your gnome doesn’t explode.
Step 2: Sculpting the Head & Hat
-
Form the hat cone:
Take a second ball of clay, slightly smaller than the body. Roll it into a cone shape. Insert your thumb into the base and pinch the walls to hollow it out, keeping the point sharp and the walls even. -
Create the beard:
Roll a flat slab of clay and cut out a crescent or semi-circle shape. Use a needle tool to scratch vertical lines into it to mimic hair texture. Attach this to the upper part of the body where the face will go. -
Connect the hat:
Score and slip the rim of the hat and the top of the body/beard area. Press the hat down firmly. The hat should sit low, covering the top edge of the beard. -
Add facial features:
Roll a small ball for the nose and attach it right at the brim of the hat, overlapping the beard slightly. The eyes and cheeks will be painted on later, so keep the face smooth for now. -
Refine the details:
Add three tiny, flattened buttons down the center of the belly. Use a needle tool to poke four small holes into each button for realism. -
Texture the hat:
Using the back of a small paintbrush or a dotting tool, gently press random divots into the hat’s surface to create the polka-dot texture.
Beard Texture Pro Tip
Vary the depth of your lines when texturing the beard. Deeper lines will hold more antique wash or glaze later, creating better contrast and making the beard pop.
Step 3: Finishing Touches
-
Dry and Bisque Fire:
Allow the gnome to dry slowly under plastic for a few days to prevent cracking, then let it air dry completely before bisque firing to cone 04. -
Apply base wash:
Once bisqued, water down some terracotta-colored underglaze (if your clay body isn’t already this color) and apply a wash, wiping back the excess to highlight the textures. -
Paint the beard and dots:
Use a creamy white underglaze to paint the beard area and fill in the indented dots on the hat. You may need two coats for opaque coverage. -
Paint the face:
Mix a skin tone suitable for your clay body. Paint the nose and the small area of face visible between the hat and beard. Dot pink blush on the cheeks and use a fine liner brush with black for the smiling eye arches. -
Final Glaze:
Apply a clear matte glaze over the entire piece. Avoid glossy glazes, as the matte finish preserves the rustic, earthy look of the original design. Fire to the final temperature required by your clay and glaze.
Your whimsical garden guardian is now ready to bring a touch of earthy charm to your shelf or table


Slumped Hat Sleepy Gnome
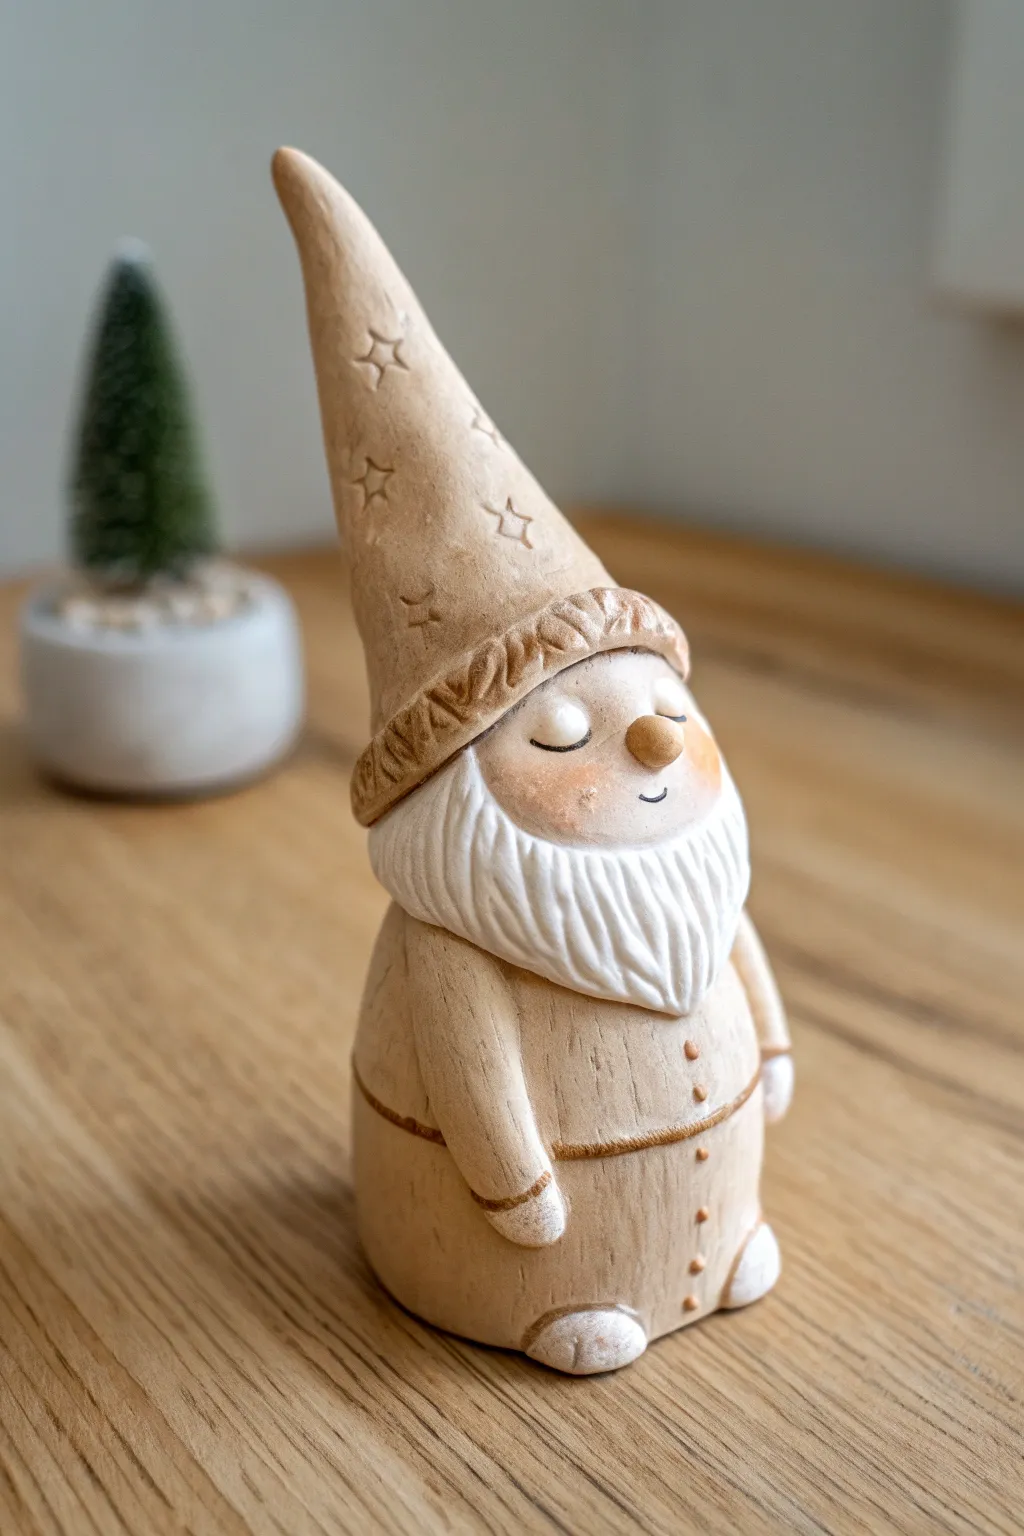
This charming ceramic figure features a soothing, minimalist design with a textured wood-grain effect and a tall, gently slumping hat. The unglazed, matte finish gives it a natural, organic feel perfect for rustic holiday decor.
Step-by-Step Tutorial
Materials
- Stoneware clay (buff or light brown)
- White underglaze or white slip
- Pottery tools (needle tool, rib, scoring tool)
- Small carving loop or texturing tool like a toothbrush
- Sponge
- Paintbrush (fine tip and small flat)
- Small star stamp (optional)
- Clear matte glaze (optional, if a sealed finish is desired)
- Iron oxide wash (optional for antiquing)
Step 1: Forming the Body and Head
-
Shape the Base:
Start with a ball of clay about the size of a large orange. Gently roll and pinch it into a stout cylinder shape, keeping the bottom flat so it stands securely. This will be the gnome’s robe. -
Refine the Head Shape:
Slightly taper the top third of your cylinder to define a neck area, then round out the very top to form the head. The head should flow seamlessly into the body, not look like a separate ball attached later. -
Smooth the Surface:
Use a damp sponge or a flexible rib to smooth out any fingerprints. For this specific look, you want a clean, matte surface, but keep a tiny bit of texture to mimic the ‘wood’ look later.
Hat Tip Slumping?
If the hat tip droops too much while wet, prop it up with a small piece of sponge or crumpled newspaper until the clay stiffens.
Step 2: Sculpting the Hat
-
Create the Cone:
Roll a separate coil of clay into a long, tapered cone. This piece needs to be quite tall—roughly 1.5 times the height of the body. -
Hollow the Cone:
Carefully hollow out the bottom third of the cone using your thumb or a loop tool so it can sit atop the head without being too heavy. -
Attach the Hat:
Score and slip the top of the head and the inside of the hat rim. Press the hat firmly onto the head, pulling the clay down slightly to merge the seam. -
Create the Slump:
Gently bend the tip of the hat backward or to the side. I like to do this slowly to avoid cracking the clay. -
Add the Hat Rim:
Roll a small snake of clay and wrap it around the base of the hat where it meets the head. Flatten it slightly. -
Texture the Rim:
Use a modeling tool to press angled notches into the hat rim, giving it a woven or knit appearance.
Natural Wood Look
After bisque firing, rub a thin dark oxide wash over the textured robe and wipe it back with a damp sponge to highlight the ‘grain’.
Step 3: Adding Details & Beard
-
Attach the Nose:
Roll a small ball of clay for the nose. Score and slip the center of the face area, just below the hat rim, and attach the nose securely. -
Form the Beard:
Flatten a piece of clay into a bib shape. Attach this under the nose, wrapping it around the sides of the face. -
Texture the Beard:
Use a needle tool or a fine carving tool to draw deep, flowing lines into the beard clay to simulate hair strands. -
Add the Arms:
Roll two small sausage shapes for arms. Attach them to the sides of the body, blending the shoulders into the robe. -
Make the Hands:
Add tiny balls of clay at the end of the sleeves for mittens/hands. Use a tool to define the cuff line where the sleeve meets the hand. -
Sculpt the Feet:
Create two small rounded shapes for feet and attach them peeking out from the bottom front of the robe.
Step 4: Decoration & Finishing
-
Stamp the Stars:
If you have a small star stamp, press it randomly into the hat surface. Alternatively, use a needle tool to gently etch simple star shapes. -
Create the Wood Texture:
Lightly drag a wire brush or a serrated rib vertically down the robe and hat (avoiding the beard and face) to create a subtle wood-grain texture. -
Define the Robe:
Use a needle tool to draw a horizontal line around the waist for a belt, and add small dots down the center of the robe for buttons. -
Face Details:
Carve two small, curved semicircles for the closed sleepy eyes and a tiny curved line for the smile. -
Apply White Slip:
Using a small brush, paint white decorative slip or underglaze onto the beard, the cuffs, the feet, and the hat rim. Leave the rest of the clay natural. -
Add Cheeks:
Dab a very watered-down bit of red iron oxide or pink underglaze on the cheeks for a rosy glow. -
Bisque and Fire:
Allow the piece to dry slowly to prevent the tall hat from cracking. Bisque fire, and then fire to temperature. To keep the matte look in the image, do not apply a glossy glaze over the entire piece.
Place your sleepy gnome on a shelf or mantle for a peaceful handcrafted touch


Twisted Hat Whimsy Gnome
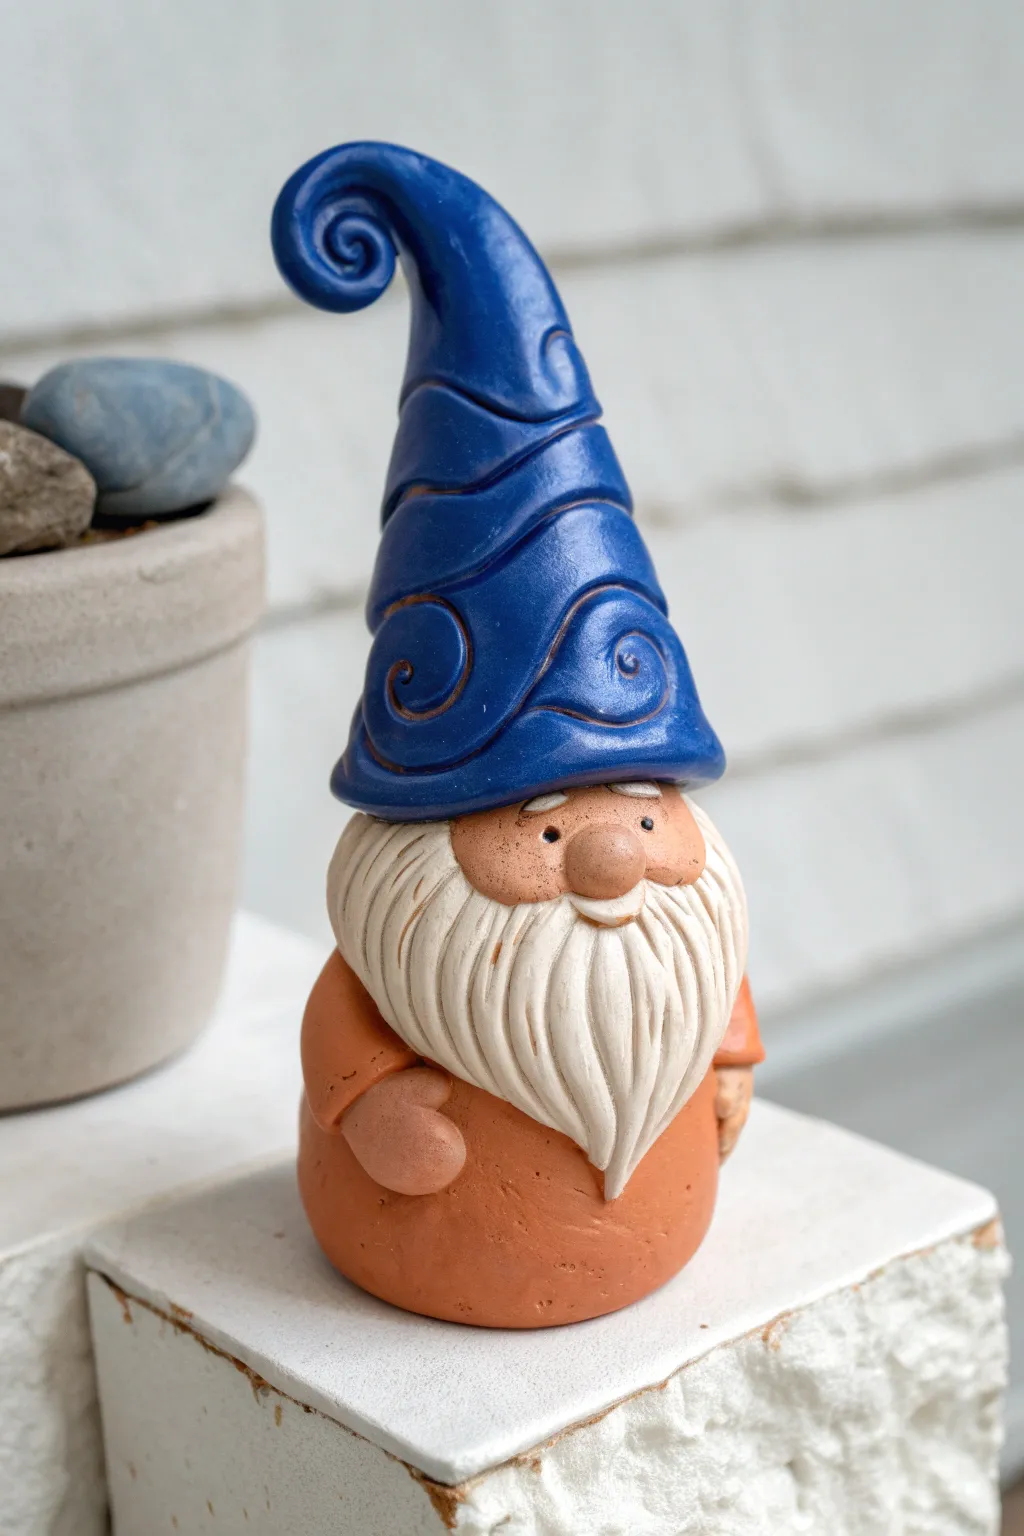
Standing at attention with a distinctively spiraled blue hat, this charming clay gnome adds a touch of playful whimsy to any garden corner or shelf. Its simple, rounded body and textured beard make it an approachable sculpting project with a delightful, professional-looking finish.
Detailed Instructions
Materials
- Earthenware or stoneware clay (terracotta or cone 6 buff)
- Small rolling pin
- Fettling knife or clay cutter
- Needle tool
- Scoring tool or serrated kidney
- Slip (clay and water mixture)
- Wooden sculpting tool (for the beard)
- Small loop tool
- Sponge
- Underglaze (Cobalt Blue, Orange/Terracotta, White, Black)
- Clear transparent glaze (optional, based on desired finish)
- Small paintbrushes (detail and shader)
Step 1: Forming the Body and Head
-
Create the base:
Begin with a ball of clay roughly the size of a large orange. Gently tap it on your work surface to create a flat bottom tailored to help it stand securely. -
Shape the torso:
Roll the ball slightly between your palms to elongate it into a stout, rounded egg shape. This will serve as the gnome’s combined body and head structure. -
Hollow the form:
Whether you are pinching a pot or working solid and hollowing later, ensure the walls are even (about 1/4 to 1/2 inch thick). If working solid, use a loop tool to carve out the interior from the bottom now. -
Attach the nose:
Roll a small marble-sized ball of clay for the nose. Score and slip the center of the ‘face’ area on your egg form, then press the nose firmly into place, smoothing the edges slightly to secure it.
Clean Lines Pro Tip
After carving the swirls in the hat, run a damp brush (not a sponge) through the grooves. This smooths the jagged clay crumbs without erasing the deep definition needed for the glaze.
Step 2: Sculpting the Twisted Hat
-
Roll a cone:
Roll a substantial coil of clay into a tall cone shape. It should be wide enough at the base to fit over the top of the gnome’s head. -
Hollow the hat:
Use your thumb or a tool to open up the base of the cone, hollowing it out so it fits snugly like a cap. -
Create the twist:
Gently grasp the tip of the cone and twist the clay while pulling slightly upward. Curl the very tip into a tight, whimsical spiral loop. -
Carve the relief details:
Using a needle tool or small loop tool, carve deep, swirling grooves that follow the twist of the hat from the brim up to the tip. These grooves will catch the glaze later. -
Attach the hat:
Score and slip the top of the head and the inside rim of the hat. Press the hat down firmly so it sits just above the nose, covering the forehead area.
Level Up: Antiquing
Apply a dark wash (black oxide or dark stain) over the blue hat before glazing, then sponge most of it off. The dark color will stay in the carved swirls, making the pattern pop.
Step 3: Adding Details and Appendages
-
Form the beard:
Roll a flat, triangular slab of clay. Attach it below the nose, wrapping it around the sides of the face. -
Texture the beard:
Using a pointed wooden tool or needle tool, draw deep, flowing lines vertically down the beard to simulate hair. I like to curve the lines outward near the bottom for a fuller look. -
Add the mustache:
Make two small teardrop shapes and attach them directly under the nose, blending them into the beard. Add texture lines to these as well. -
Attach the arms:
Roll two small sausage shapes for arms. Attach them to the sides of the body, blending the clay at the shoulder connection point. -
Shape the hands:
Form small mitten-like shapes at the ends of the arms. Position one hand resting comfortably on the belly.
Step 4: Finishing and Glazing
-
Smooth the surface:
Use a slightly damp sponge to wipe down the smooth areas of the hat and body, removing any fingerprints or rough burrs. -
Bisque fire:
Allow the piece to dry slowly and completely before bisque firing it according to your clay’s specifications. -
Apply face and body color:
Paint the face and hands with a flesh-tone underglaze (or leave raw if using terracotta). Paint the body tunic in a warm terracotta or orange hue. -
Glaze the hat:
Apply 2-3 coats of deep cobalt blue underglaze to the hat. Ensure you get the color into the recessed swirl lines. -
Highlight the eyes:
Use a fine detail brush to add two tiny black dots for eyes just above the nose, dipping a toothpick in white for a tiny reflection dot if desired. -
White wash the beard:
Apply white underglaze to the beard and mustache. If you want more customized depth, wipe back slightly with a sponge to let the clay texture show through.
Once fired for the final time, your spiraled gnome is ready to stand guard over your potted plants or windowsill

The Complete Guide to Pottery Troubleshooting
Uncover the most common ceramic mistakes—from cracking clay to failed glazes—and learn how to fix them fast.
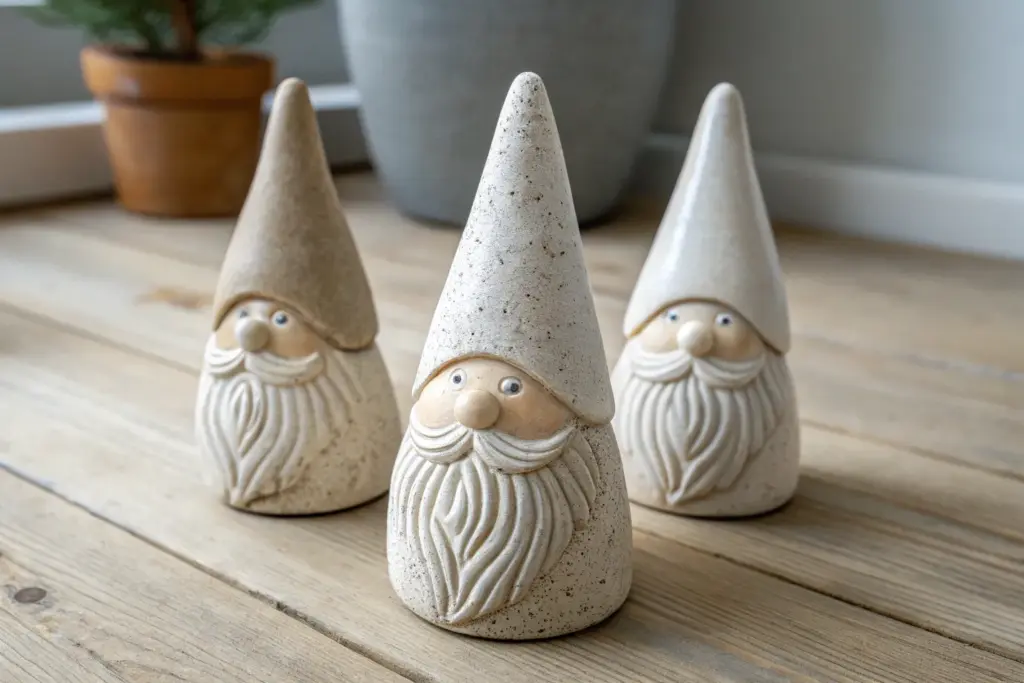
Big Beard Texture Gnome
This charming ceramic gnome features a simple conical silhouette brought to life with deep, flowing textures in the beard and mustache. The speckled finish gives it a delightful faux-stone appearance perfect for garden decor or a cozy shelf.
Step-by-Step
Materials
- Speckled stoneware clay (or standard buff clay)
- Needle tool
- Loop tool (small)
- Kidney rib (flexible metal or rubber)
- Slip and scoring tool
- Sponge
- Rolling pin
- Clear matte glaze or transparent wash
- Canvas work surface
Step 1: Forming the Base Structure
-
Roll the main cone:
Start with a solid cone of wedged clay, roughly 8-10 inches tall. You can either hand-build this by coiling and smoothing, or throw a hollow cone on the wheel. If working solid, engage in ‘hollow out’ sculpture techniques later to prevent explosions in the kiln. -
Refine the shape:
Using a kidney rib, smooth the surface of your cone. The bottom half should be slightly bulbous for the body, tapering smoothly into a long, slender point for the hat. -
Establish the hat brim:
About halfway up the cone, use your needle tool to lightly mark where the hat brim will sit. Roll a small coil of clay, flatten it slightly, and attach it along this line to create a distinct, raised rim for the hat. -
Add the nose:
Roll a sphere of clay about the size of a large malted milk ball. Score and slip the area just below the hat brim, then press the nose firmly into place. Smooth the edges where it meets the face so it looks integrated, not just stuck on.
Step 2: Sculpting the Features
-
Create the mustache:
Roll two tear-drop shaped pieces of clay. Attach them under the nose, curving them upwards slightly at the tips. Imagine a handlebar shape that hugs the roundness of the cheeks. -
Define the beard mass:
Add a slab or thick layer of clay starting right under the mustache and flowing down to the base of the gnome. This doesn’t need detail yet; just build up the volume so the beard sits proud of the body. -
Add arms (optional):
If you want the subtle arms shown in the image, attach two small flattened ovals to the sides of the body, just peeking out from under the beard edge. Blend the top seams into the ‘cloak’ area. -
Smooth everything:
Before texturing, use a slightly damp sponge to go over all your added features. Remove any sharp clay crumbs or rough attachment marks.
Uneven Drying?
If the hat tip dries faster than the thick body, it might crack. Drape a damp paper towel just over the tip while the rest dries to even out the moisture loss.
Step 3: Adding Texture and Detail
-
Carve the mustache hair:
Using a needle tool or a very fine loop tool, carve sweeping lines into the mustache sections. Follow the curve of the clay, starting deep near the nose and tapering out to the tips. -
Carve the beard strands:
This is the most critical step. Start carving long, wavy vertical lines down the beard mass. I prefer to vary the depth of these cuts—some deep heavy lines for separation, and lighter scratches for individual hairs. -
Refine the beard shape:
Ensure the lines converge slightly at the bottom point of the beard. The texture should look fluid, like a waterfall. -
Add eye details:
Just above the mustache and tucked under the hat brim, press two small indentations for eye sockets. Add tiny clay balls for pupils and use a pin to create a ‘spark’ indentation. -
Texturize the hat:
To enhance the stone look, poke random, widely spaced holes or indentations all over the hat and body with a needle tool. This mimics porous rock.
Pro Tip: Beard Flow
When carving the beard, don’t just draw straight lines. Make ‘S’ curves. Mimic gravity pulling the hair down for a more organic, softer look.
Step 4: Finishing and Firing
-
Hollow out base:
If you built this solid, flip the gnome over once it’s leather hard. Carefully scoop out the interior, leaving walls about 1/2 inch thick. Pierce a small hole in the bottom hidden area to let air escape. -
Bisque fire:
Allow the piece to dry slowly under plastic for a few days before uncovering. Once bone dry, bisque fire to your clay body’s recommended cone (usually cone 04). -
Apply finish:
To maintain the raw texture, avoid thick opaque glazes. A clear matte glaze works best on speckled clay. Alternatively, apply a dark oxide wash (like iron oxide), wipe it back so it stays only in the crevices, and fire again.
Place your finished gnome among some potted plants to let him feel right at home with nature
Coil-Beard Storybook Gnome
Create a charming storybook character with this textured clay gnome, featuring a distinctively tall, tapered hat and a flowing, coil-built beard. The natural clay finish and subtle white accents on the facial hair give it a timeless, rustic appeal perfect for a windowsill display.
Detailed Instructions
Materials
- Earthenware or stoneware clay (terracotta or buff color recommended)
- Fettling knife
- Pin tool or needle tool
- Modelling tools (wooden rib, spoon-shaped tool)
- Slip and scoring tool (or serrated kidney)
- Small rolling pin
- Water cup and sponge
- White underglaze or slip (for the beard/hair)
- Clear matte or satin glaze
- Kiln (or air-dry clay alternatives if not firing)
Step 1: Forming the Body and Head
-
Shape the base:
Start with a medium ball of clay, roughly the size of an orange. Gently pound it on your work surface to create a flat bottom, then taper the sides upwards to form a solid cone or bell shape for the gnome’s body. -
Define the head:
Using your thumb and fingers, slightly pinch in the clay about two-thirds of the way up the cone to distinguish the head area from the torso. Smooth the transition so it looks natural. -
Add arms:
Roll two small sausage shapes of clay for the arms. Flatten one end of each slightly where it will attach to the body. -
Attach the arms:
Score and slip the sides of the body and the flat ends of the arms. Press them firmly into place, smoothing the clay seams so they disappear. The arms should rest naturally at the sides. -
Create hands:
Form two tiny balls for hands. Attach these to the bottom of the sleeves (arms) using slip. No need for detailed fingers; simple rounded mittens work best for this style. -
Add button details:
Roll two extremely small spheres of clay. Press them onto the center of the chest/stomach area to mimic buttons on a coat.
Clean Seams
When attaching the tall hat, use a soft modeling tool to really blend the interior clay seam where the hat meets the head. This ensures the hat won’t pop off during firing.
Step 2: Sculpting the Face and Beard
-
Form the nose:
Roll a marble-sized ball of clay for the nose. Score and slip the center of the face area and press the nose on firmly. It should be prominent and round. -
Create the beard base:
Roll out a thin sheet of clay and cut a bib-shape that fits under the nose and drapes over the chest. Attach this securely; this serves as the foundation for the textured strands. -
Make beard coils:
Roll many thin, worm-like coils of clay. Vary their lengths slightly to create a layered, organic look. -
Attach the beard strands:
Starting from the bottom of the ‘bib’ and working upwards, attach the coils using a little slip. Gently twist or wave some strands to give the beard flow and movement. -
Add the mustache:
Create two shorter, slightly thicker tapered coils. Attach them directly under the nose, sweeping outward to neatly cover the top of the beard connection points. -
Detail the eyes:
Use a small, round tool or the back of a paintbrush to gently indent two eye sockets above the nose. Roll tiny specs of black clay (or stain later) and place them in the sockets for eyes.
Step 3: Creating the Hat
-
Roll the cone:
Roll a larger slab of clay and cut a tall triangle, or hand-model a long, tall solid cone if you prefer a heavier piece. The hat should be quite tall—almost as tall as the body itself. -
Hollow the hat (optional):
If modeling solid, I usually like to hollow out the base of the hat with a loop tool to reduce weight and prevent air pockets. If you used a slab, roll it into a cone and join the seam. -
Attach the hat:
Score and slip the top of the gnome’s head and the bottom rim of the hat. Press the hat down firmly so it rests just above the nose and eyes. -
Make the sun emblem:
Roll a tiny ball and flatten it into a disc. Attach it to the center of the hat. Use a needle tool to scratch radiating lines around it to look like a sun or flower.
Level Up: Texture
Before attaching the hat, gently roll the clay cone over a piece of canvas or burlap. This imitates the look of woven fabric on the gnome’s cap.
Step 4: Finishing Touches
-
Apply white accent:
Paint white underglaze or slip specifically onto the beard and mustache coils. Only coat the raised areas to let the natural clay color show in the crevices for depth. -
Clean up texture:
Use a sponge to gently wipe away any rough crumbs or sharp edges on the hat and body, keeping the smooth, matte texture of the coat intact. -
Dry and fire:
Allow the gnome to dry slowly under plastic for several days to prevent cracking. Bisque fire, then apply a clear matte glaze if desired, and glaze fire according to your clay’s temperature.
Place your finished gnome near a sunny window to let the light catch the texture of his beard


What Really Happens Inside the Kiln
Learn how time and temperature work together inside the kiln to transform clay into durable ceramic.
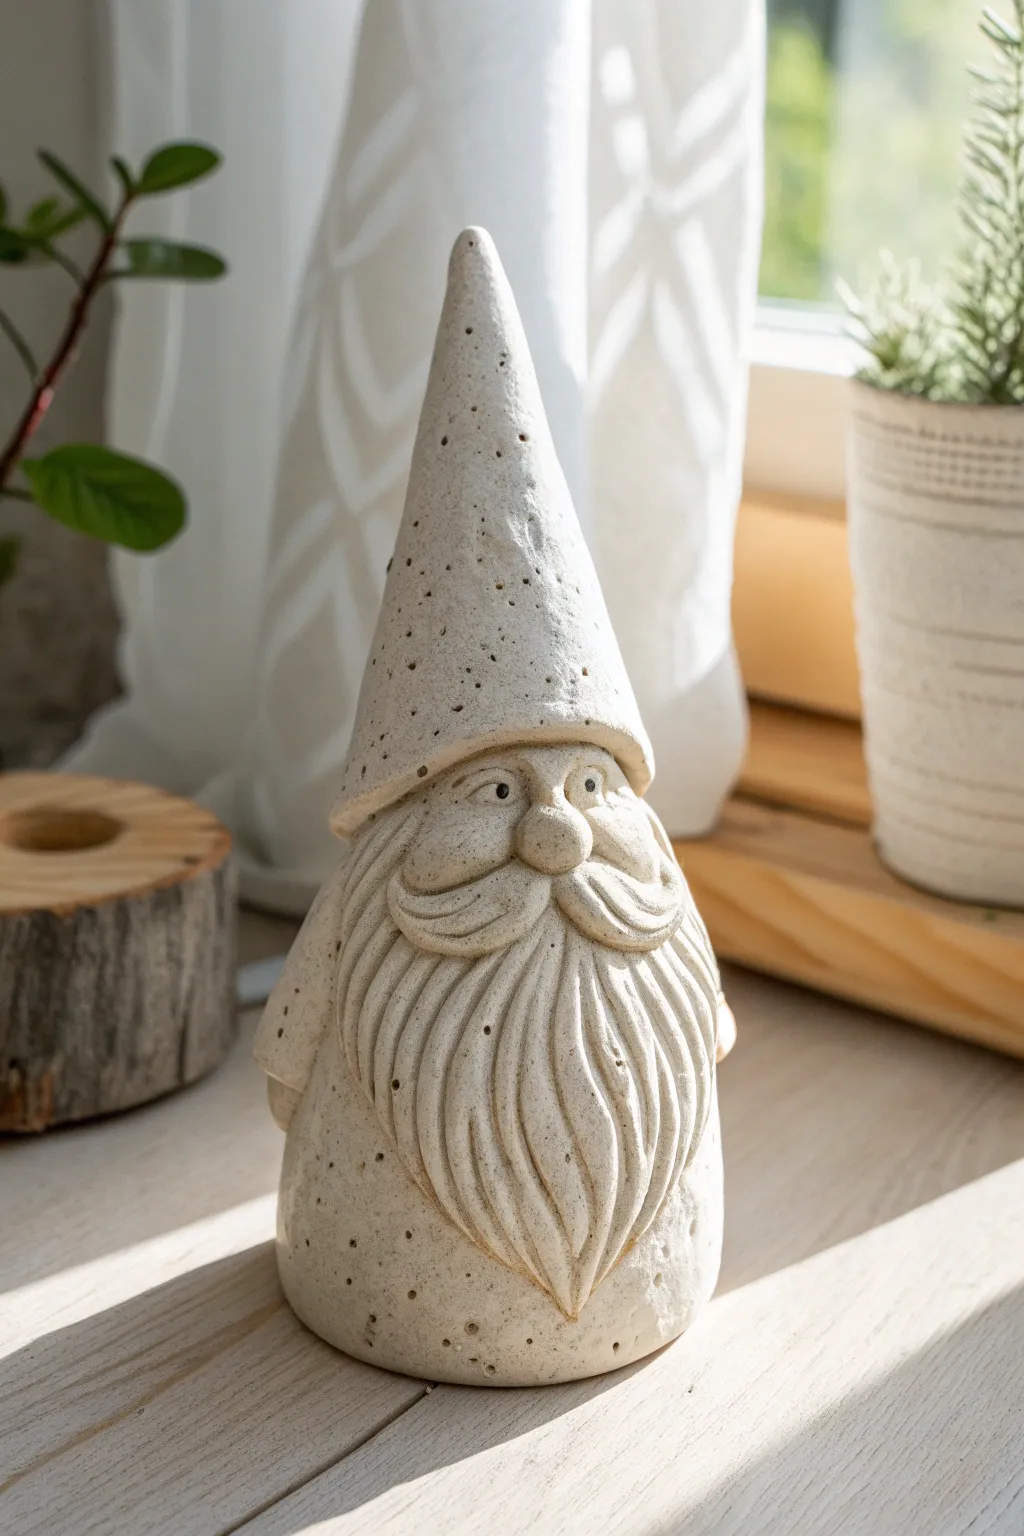
Minimal Face No-Eyes Gnome
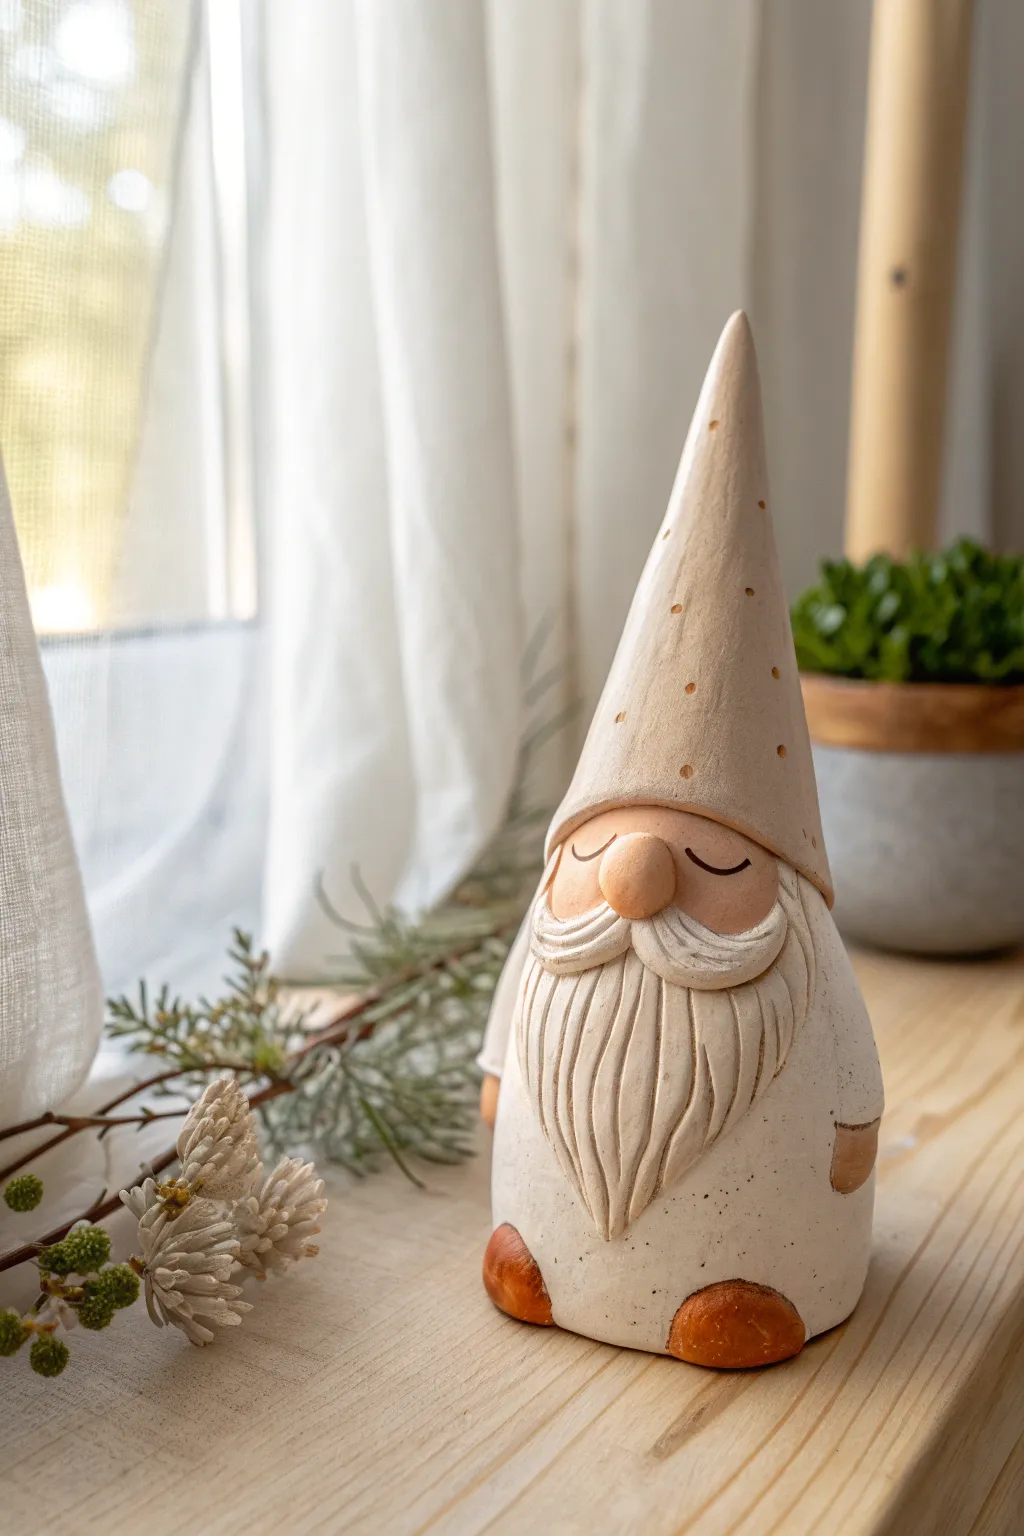
This charming ceramic gnome features a delightfully minimal face with a tall, perforated hat and textured beard. Its earthy tones and simple, closed-eye expression make it a perfect rustic decoration for any windowsill.
How-To Guide
Materials
- Light-colored speckled stoneware clay or white earthenware
- Rolling pin
- Needle tool
- Scoring tool (or serrated rib)
- Slip (clay mixed with water)
- Sponge
- Small loop tool or carving tool
- Terracotta or brown underglaze
- Clear matte glaze (optional)
- Small paintbrush
- Wooden modeling tool
Step 1: Forming the Body and Hat
-
Roll the main cone:
Start with a softball-sized lump of clay. Roll it into a smooth, solid cone shape about 6-8 inches tall. The base should be wide and flat for stability. -
Hollow out the form:
If you are making this solid, ensure it isn’t too thick, or use a loop tool to hollow out the base carefully, leaving walls about 1/4 inch thick. This prevents cracking during firing. -
Refine the hat shape:
Gently pull and elongate the top half of the cone to form the tall, pointy hat. Curve the tip slightly if you want a playful look, though the example is quite straight. -
Define the hat brim:
Using a wooden tool or your thumb, press a slight indentation around the middle of the cone to distinguish where the hat ends and the body begins. The hat should look like it’s pulled down low.
Nose Falling Off?
If small additions like the nose detach during drying, your clay was likely too dry when joining. Always score deeply and use plenty of slip.
Step 2: Sculpting the Face and Features
-
Add the nose:
Roll a small ball of clay for the nose. Score both the spot under the hat brim and the back of the nose, apply slip, and press firmly into place. -
Attach the beard:
Create a flat, teardrop-shaped slab of clay for the beard. Score and slip it onto the body just under the nose, blending the edges at the sides but leaving the bottom loose. -
Texture the beard:
Use a needle tool or knife to carve deep, flowing vertical lines into the beard slab to simulate hair strands. Curve them slightly outward for a natural flow. -
Add the mustache:
Roll two small tapered coils. Attach them starting from the center of the nose, curling outward to form a handlebar mustache. Texturize these similarly to the beard. -
Sculpt the expression:
With a very fine needle tool or a small carving blade, carve two simple “U” shapes directly onto the face area above the mustache to create the sleepy, closed eyes. -
Add the arms and hands:
The body is minimal, but you can add small clay ‘mitten’ shapes or just little round hands peeking out from the side of the beard area. Score and slip them securely. -
Create the shoes:
Form two small oval mounds for feet. Attach them to the very bottom front of the gnome so they poke out from under the robe. -
Detail the hat:
Using a small tool, poke random tiny holes or indentations scattered across the hat surface for texture. Do not go all the way through unless you want light to pass through.
Step 3: Finishing and Glazing
-
Slow drying:
Loosely cover your gnome with plastic and let it dry slowly over several days to the bone-dry stage. This is crucial to prevent the nose or mustache from popping off. -
Bisque fire:
Fire the piece in a kiln to cone 04 (or according to your clay’s specifications) to prepare it for glazing. -
Apply accent color:
Paint the nose, hands, and shoes with a terracotta-colored underglaze. You can also wash a very thinned-down brown underglaze over the hat and wipe it back to highlight the poke textures. -
Final glaze application:
Dip or brush a clear matte glaze over the entire piece if you want a sealed finish, or leave the white clay raw on the beard for a rustic contrast. -
Final firing:
Fire the kiln again to the maturity temperature of your clay and glaze (e.g., cone 5 or 6 for stoneware).
Seasonal Switch
Before firing, carve a small hole in one hand. This lets you swap out tiny seasonal props like a wire flower, a mini flag to match the holiday.
Place your finished gnome near some greenery or on a mantle to enjoy its quiet, cheerful presence
Stamped Pattern Hat Gnome
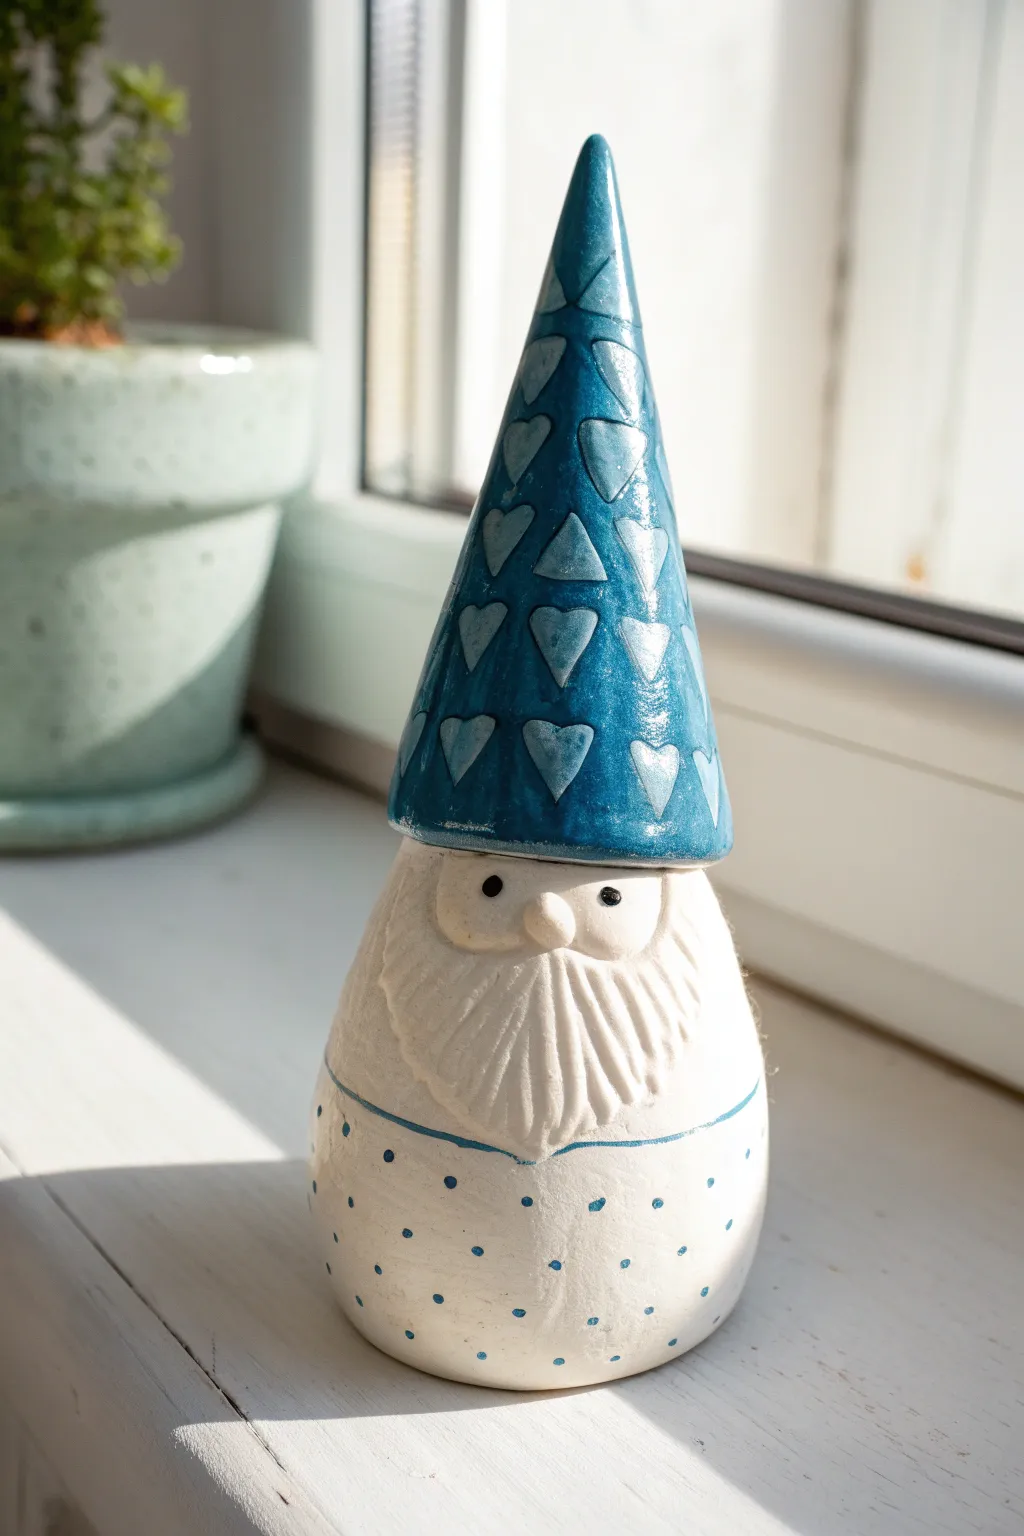
This charming pottery project features a tall, conical hat adorned with repeating heart stamps and a lovable, texture-rich beard. The contrast between the glossy blue glaze on the hat and the matte, speckled finish on the body gives it a delightful rustic appeal.
Step-by-Step
Materials
- White stoneware or earthenware clay
- Rolling pin
- Canvas or slab mat
- Needle tool
- Fettling knife
- Slip and scoring tool
- Small heart-shaped stamp (or carving tool)
- Modeling tool for beard texture
- Underglaze (Cobalt Blue)
- Clear glaze (or glossy blue glaze)
- Small round paintbrush
- Sponge
Step 1: Forming the Body
-
Prepare the Clay:
Start by wedging a softball-sized piece of white clay to remove air bubbles. This ensures your gnome won’t crack during firing. -
Pinch Pot Base:
Divide the clay, using the larger portion for the body. Form a ball and use your thumb to open the center, pinching the walls evenly as you rotate it to create a closed, hollow egg shape. -
Shape the Form:
Gently paddle the outside of the pinched form to smooth it. You want a bulbous bottom that tapers slightly toward the top where the hat will sit. Flat the bottom so it stands securely.
Step 2: Creating the Hat
-
Roll a Slab:
Roll out the remaining clay into a slab regarding 1/4 inch thick. Wait for it to stiffen slightly to leather-hard so it holds its shape. -
Cut the Cone:
Cut a wedge shape (like a piece of pie with a curved bottom) from the slab. Wrap this around your finger or a cone form to test the size against the body. -
Stamp the Pattern:
Before assembling the cone, lay the clay flat. Press your small heart stamp firmly into the clay in alternating rows. I like to let the spacing be a little organic rather than perfectly grid-like. -
Assemble the Hat:
Score and slip the straight edges of your wedge. Roll it into a cone shape and press the seam firmly together from the inside. Smooth the outside seam gently so you don’t erase your stamps.
Stamp Getting Stuck?
If your stamp sticks to the soft clay, dust the stamp face lightly with cornstarch before pressing it into the slab. This acts as a release agent and burns off in the kiln.
Step 3: Assembly and Details
-
Attach Hat to Body:
Score the top of the body and the bottom rim of the hat. Apply slip and press the hat down firmly. The hat should cover the top third of the body. -
Add the Nose:
Roll a small pea-sized ball of clay. Score a spot just under the hat brim and attach the nose. -
Sculpt the Beard:
Add a thin slab or coil under the nose for the beard area. Using a modeling tool or needle, carve deep vertical lines flowing downward to create hair texture. -
Refine the Face:
Use a small tool to poke two tiny holes for eyes just above the nose but below the hat brim and define a mustache shape if desired. -
Poke Air Hole:
Don’t forget to poke a hidden hole in the bottom of the gnome to allow hot air to escape during firing. -
Bisque Fire:
Allow the gnome to dry completely (bone dry) before bisque firing it in the kiln according to your clay body’s specifications.
Enhancing Texture
For better definition, apply a dark wash (watered down underglaze) over the beard after bisque firing, then sponge it off. The dark color will stay in the crevices.
Step 4: Glazing and Finishing
-
Glaze the Hat:
Brush three coats of a glossy blue glaze onto the hat. If you want the hearts to pop, you can wipe the surface back slightly with a sponge so the glaze stays thicker in the depressed heart shapes. -
Detail the Body:
Leave the beard and face unglazed if you want a raw, matte texture, or use a clear matte glaze. For the polka dots on the body, use the back of a paintbrush dipped in blue underglaze to dot the pattern. -
Define the Eyes:
Use a tiny drop of black underglaze or glaze to fill in the eye impressions carefully. -
Final Fire:
Load the kiln carefully, making sure the glazed hat doesn’t touch other pots. Fire to the maturity temperature of your glaze.
Place your finished gnome on a sunny windowsill where the light can catch the glossy hat texture

TRACK YOUR CERAMIC JOURNEY
Capture glaze tests, firing details, and creative progress—all in one simple printable. Make your projects easier to repeat and improve.
Carved Knit Sweater Gnome
This charming project combines the rustic warmth of terracotta clay with intricate textures that mimic a cozy cable-knit sweater. The contrasting white beard brings the character to life, making it a perfect decorative piece for a windowsill or shelf.
Detailed Instructions
Materials
- Red-brown or terracotta stoneware clay
- White stoneware or porcelain slip (for the beard)
- Pottery wire cutter
- Needle tool
- Loop tool (small)
- Modeling tool (rounded tip)
- Sponge
- Water
- Score and slip tool (or serrated kidney)
- Rolling pin
- Small coil extruder (optional, for decorative trim)
Step 1: Forming the Gnome Body
-
Shape the base:
Start with a ball of terracotta clay roughly the size of a large orange. Gently roll and tap it on your work surface to create a rounded, slightly tapered cone shape for the body. The bottom needs to be flat and stable. -
Hollow the form:
If you are planning to fire this piece, carefully hollow out the base using a loop tool. Keep the walls about 1/4 inch thick to ensure even drying and prevent heavy, solid clay from cracking during firing. -
Create the hat cone:
Roll a second cone of clay for the hat. This should be tall and slender, curving slightly at the tip for that classic whimsical gnome look. Hollow the bottom of the hat so it can sit securely over the body piece. -
Establish the sweater division:
Using your needle tool, lighting etch a broad horizontal line around the body where the ‘sweater’ pattern will end and the ribbing will begin. This usually looks best about an inch from the bottom.
Clay Shrinkage
Red and white clays may shrink at different rates. Use a ‘joiner’ slip made of 50/50 mixed clay to help them bond securely without cracking.
Step 2: Adding the Knit Textures
-
Carve the bottom ribbing:
On the bottom inch of the gnome, use a flat-edged modeling tool or the side of a needle tool to press in vertical, parallel lines. Space them evenly to mimic the elastic ribbing of a sweater cuff. -
Separate the sections:
Roll a very thin coil of clay and attach it horizontally just above your ribbing using the score and slip method. This creates a finished border between the different knit patterns. -
Detail the crossover pattern:
For the main body section, use a needle tool to lightly draw a diamond or ‘X’ pattern. Then, press a small round tool into the center of each diamond to create texture. You can create the illusion of yarn strands by carving tiny, shallow lines within the crisscross shapes. -
Detail the hat band:
Repeat a similar sweater pattern on the hat. Create a brim by adding a thick coil around the base of the hat cone. Decorate this band with spirals or small drilled divots using the back of a drill bit or a small loop tool. -
Attach the arms:
Roll two small sausage shapes for arms. Attach them to the sides of the body, blending the clay at the shoulder. At the ends of the arms, add small cuffs of clay and texture them with vertical ribbing lines like the bottom of the sweater. -
Add the hands:
Form two tiny balls of clay for the mittens or hands. Slip and score them into the cuffs of the sleeves. Keep them simple and round to match the gnome aesthetic.
Step 3: The Beard and Finishing Touches
-
Form the beard:
Take a piece of white clay or porcelain. Shape it into a flat, teardrop-like bib shape. This contrasting clay is key to the look, so keep your hands clean to avoid staining it with the red clay. -
Attach the beard:
Score the chest area of your gnome and the back of the white clay beard. Apply slip and press the beard firmly onto the upper front of the body, just below where the hat will sit. -
Texture the facial hair:
Using a needle tool or a fine wire loop, carve deep, flowing vertical lines into the white clay to resemble hair strands. Varying the depth of these cuts adds realism and shadow. -
Position the nose:
Roll a small ball of the naked terracotta clay for the nose. I like to make it slightly oval. Place it centered near the top of the beard, nesting it slightly into the white clay. -
Assemble the hat:
Score and slip the top of the body/beard assembly and place the hat on top. The hat brim should rest right on top of the nose, covering the gnome’s imaginary eyes. -
Final smoothing:
Use a slightly damp sponge to smooth out any rough fingerprints on the plain terracotta areas, being careful not to smudge your carved sweater textures. -
Drying:
Cover the gnome loosely with plastic to let it dry slowly. Because you are combining two types of clay (red and white), slow drying prevents them from shrinking at different rates and cracking apart.
Clean Lines
For sharper ‘knit’ textures, try carving the details when the clay is leather hard rather than fully plastic. The lines will be much crispier.
Once fired, the contrast between the warm terracotta and the cool white beard makes this little guy truly standout regardless of where you display him
Appliqué Heart Pocket Gnome
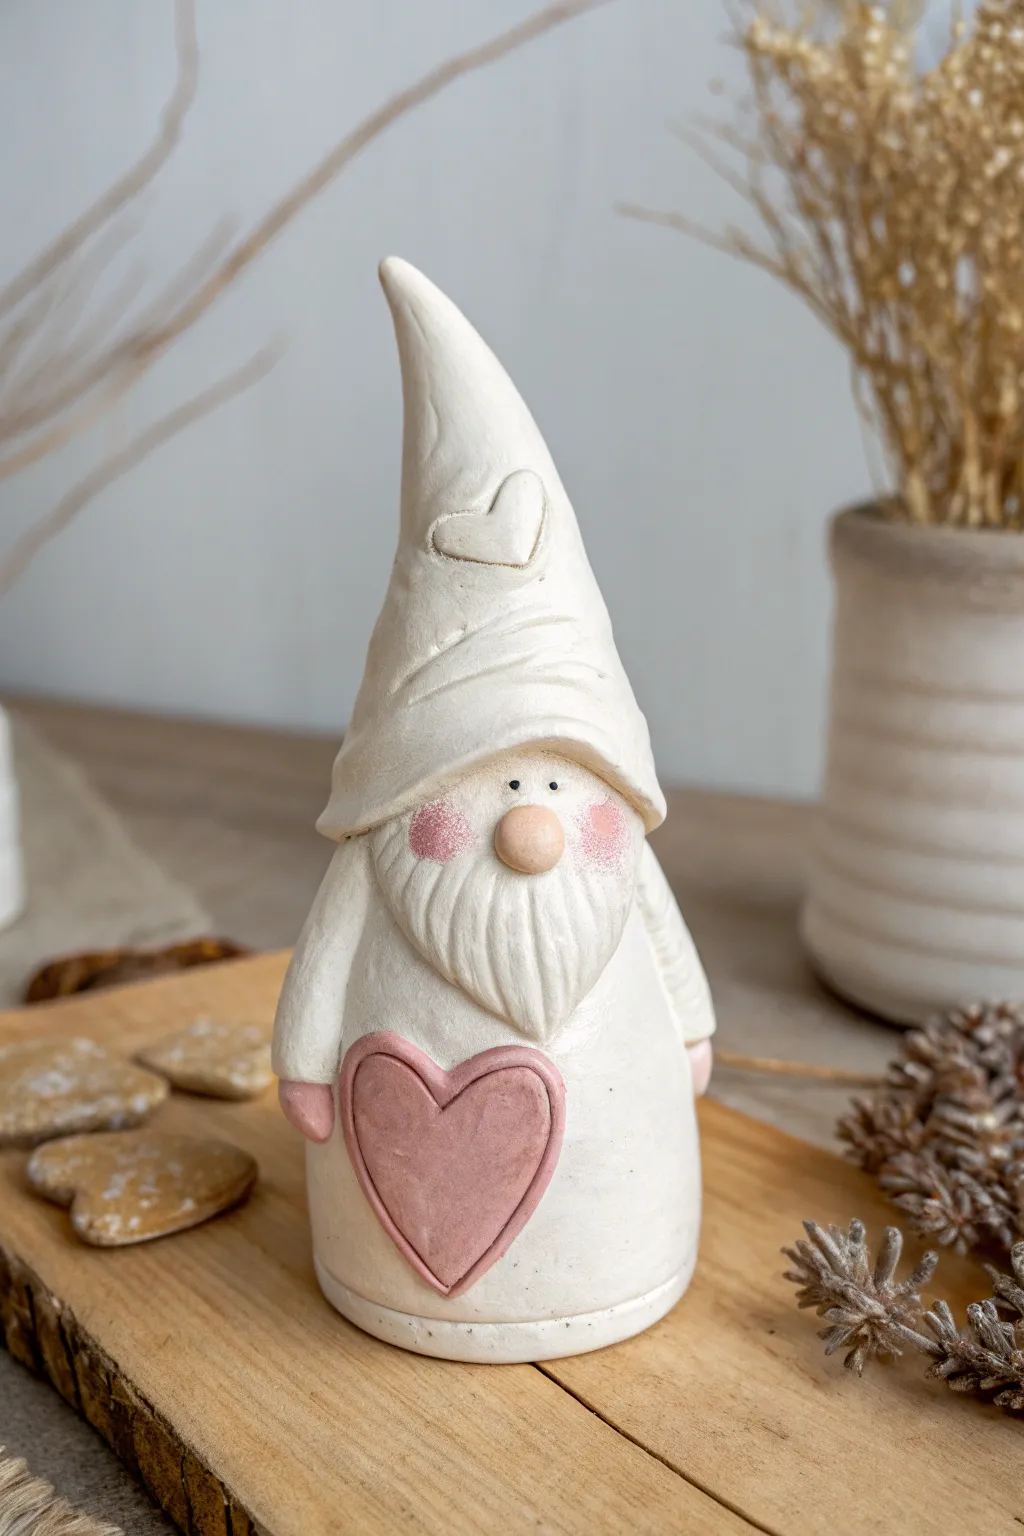
This charming ceramic gnome features a minimalist white glaze finish highlighted by soft pink accents on the cheeks and a large heart held in its hands. The simple conical shape and sweet appliqué details make it a perfect project for hand-building enthusiasts looking to spread a little love.
Step-by-Step Guide
Materials
- White stoneware or earthenware clay
- Rolling pin and guide sticks
- Scoring tool and slip
- Modeling tools (wooden knife, needle tool)
- Small round cutter or ball tool (for nose/cheeks)
- Heart-shaped cookie cutter (optional)
- White matte glaze
- Pink underglaze or oxide wash
- Clear glaze (optional for shiny spots)
- Sponge and water
Step 1: Forming the Body and Hat
-
Roll the slab:
Begin by rolling out a slab of white clay to an even thickness of about 1/4 inch. Ensure the surface is smooth and free of air bubbles. -
Cut the cone shape:
Cut a large wedge shape from the slab (like a piece of pie). The size depends on how tall you want your gnome, but a 6-inch height is a good starting point. -
Assemble the cone:
Roll the wedge into a cone shape to form the main body. Score and slip the vertical seam thoroughly, pressing it together firmly from the inside and outside to ensure a strong bond. -
Shape the hat:
Pinch and pull the top third of the cone to elongate it into a hat. Gently curve the tip slightly to the side for a whimsical, slouchy look. -
Create the heavy rim:
Roll a thin coil of clay and flatten it slightly. Attach this around the cone about two-thirds of the way up to simulate the brim of the hat pulled low over the gnome’s face. Smooth the top edge of this coil into the hat, but leave the bottom edge distinct.
Step 2: Adding Facial Features
-
Attach the nose:
Roll a small ball of clay for the nose. Score and slip the area just below the hat brim and press the nose firmly into place. -
Sculpt the beard:
Roll a small, flat triangle of clay for the beard base. Attach it below the nose. Using a needle tool or a modeling tool, carve deep, vertical lines into the clay to create hair texture, flowing downward from the nose. -
Create the cheeks:
Rather than adding clay, define the cheek area by gently pressing or smoothing the clay on either side of the beard and nose to create a slightly rounded surface area ready for painting later. -
Detail the eyes:
Use a small needle tool to poke two tiny holes right above the nose, tucked just under the shadow of the hat brim.
Hat Texture Tip
Before attaching the hat brim, gently pinch the main cone randomly to create uneven dimples. This makes the hat look like soft, worn fabric.
Step 3: Appliqué Details
-
Form the arms:
Roll two thick, short coils for arms. Attach them to the sides of the body, curving them forward as if they are ready to hold something against the belly. -
Cut the hearts:
Cut out a large heart shape from your remaining slab for the chest, and a smaller heart outline (like a cookie cutter impression or a thin clay outline) for the hat. -
Attach the main heart:
Score the belly area and the back of the large heart. Attach it securely between the arms, then overlap the ends of the arms (and add little round balls for hands) slightly over the heart’s edge to make it look like he is holding it. -
Decoration on the hat:
Attach the smaller heart outline to the front of the hat using a dab of slip. Press it down gently so it becomes part of the surface without losing its shape.
Make it a Luminary
Cut the bottom out and punch star-shaped holes in the back of the hat. Place an LED tea light inside to make the hat glow warm and cozy.
Step 4: Finishing and Glazing
-
Smooth the surface:
Once the clay is leather-hard, use a slightly damp sponge to smooth out any rough fingerprints on the hat and body, being careful not to erase the beard texture. -
Bisque fire:
Allow the gnome to dry completely (slowly, to prevent cracking) and fire it to bisque temperature according to your clay body’s specifications. -
Apply pink accents:
I like to start with the color. Paint a soft pink underglaze onto the large heart, the small hands, the nose, and dab faint circles on the cheeks. You can wipe back the cheek color slightly with a sponge for a blush effect. -
Glaze the body:
Dip or brush the entire gnome (avoiding the bottom) in a matte white or satin white glaze. If you want the pink areas to pop, you can wax resist them before dipping, or use a translucent white glaze over everything. -
Final firing:
Fire the piece a final time to the glaze temperature appropriate for your materials.
Place your finished gnome on a mantel or among holiday greenery to enjoy his sweet, handcrafted expression
Mushroom Hat Forest Gnome
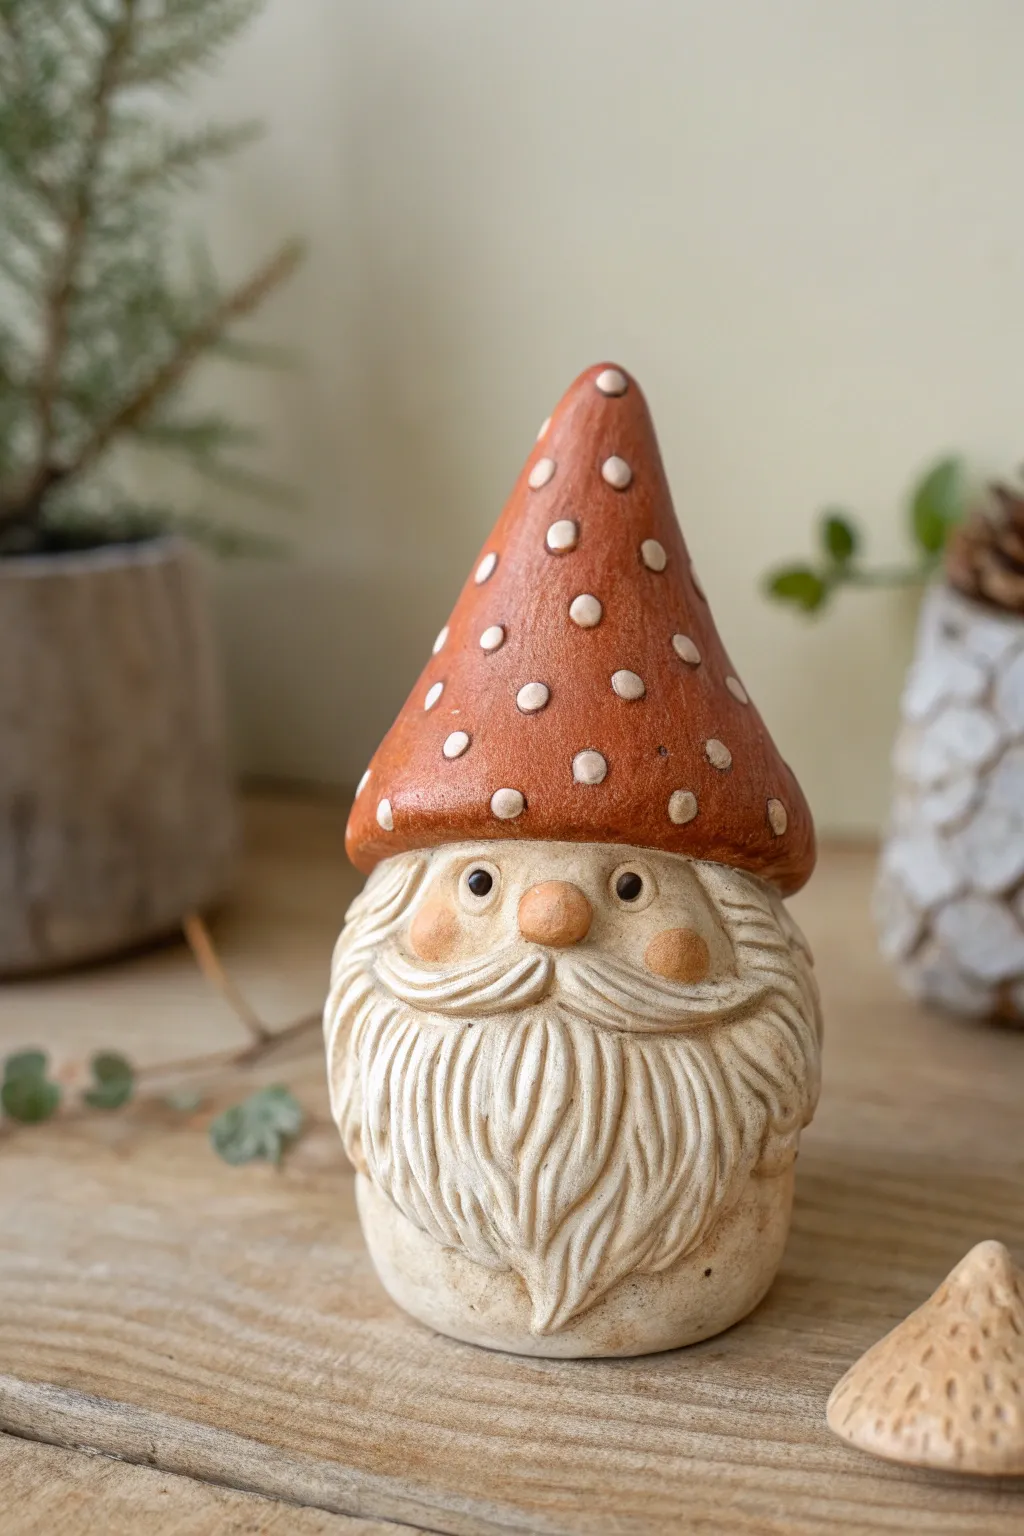
Embrace the magic of the woodlands with this charming mushroom-hatted fellow, perfect for adding a touch of fairytale wonder to your shelves. This project combines simple pinch pot techniques with detailed texture work to create a sweet, spirited garden guardian.
Step-by-Step Tutorial
Materials
- Stoneware or earthenware clay (white or light buff body)
- Clay scoring tool or fork
- Slip (liquid clay)
- Wooden sculpting tools
- Pointed needle tool
- Sponge
- Small loop tool
- Underglazes (terracotta/rust red, black, white, pink/blush)
- Matte clear glaze
- Fine-grit sandpaper (for bisque stage)
- Paintbrushes (detail and broad)
Step 1: Forming the Body Base
-
Create a pinch pot:
Start with a ball of well-wedged clay roughly the size of a tennis ball. Insert your thumb into the center and gently pinch outwards while rotating to create a thick-walled hollow cup shape. -
Shape the torso:
Turn the pinch pot upside down so the opening faces the work surface. Gently tap it on the table to flatten the bottom for stability, then smooth out the exterior walls into a rounded, slightly squat cylinder. -
Establish the head area:
The head and body are one continuous piece here. Gently squeeze the upper third of the form to define where the hat will eventually rest, keeping the top rounded.
Hollow Core Tip
Before sealing the hat, poke a hole from the hollow body up into the hollow hat. This connects the air pockets so air can escape the entire piece through a single vent hole in the base.
Step 2: Sculpting the Hat
-
Form the cone:
Roll a separate coil of clay into a thick cone shape for the hat. Hollow out the underside with your thumb or a loop tool to reduce weight and prevent explosions during firing. -
Attach the hat:
Score the top of the body and the underside of the hat thoroughly. Apply slip generously and press the hat firmly onto the head, smoothing the seam on the inside if possible, or blending the clay downwards on the outside. -
Refine the brim:
Use your fingers to pull the bottom edge of the hat slightly outwards and downwards, creating a distinct overhang that will shadow the gnome’s eyes. -
Smooth the surface:
Use a damp sponge to smooth the hat into a soft, organic cone shape, removing any rough finger marks.
Step 3: Facial Features & texture
-
Add the nose:
Roll a small ball of clay for the nose. Score and slip the center of the face area just below the hat brim, then press the nose on. I prefer to press it slightly flat so it looks embedded rather than just stuck on. -
Define the cheeks:
Add two smaller, flattened discs of clay on either side of the nose for chubby cheeks, blending the edges smoothly into the main body. -
Carve the eyes:
Using the back of a small paintbrush or a rounded tool, press two deep indentations above the cheeks for the eye sockets. Place tiny balls of clay inside for the eyeballs. -
Map out the beard:
Using a needle tool, lightly sketch the outline of the beard flowing from under the nose and cheeks, down to the base of the gnome. -
Sculpt the beard strands:
Roll tiny, thin worms of clay. Attach them one by one to the beard area, layering them slightly. -
Texture the hair:
Use a wooden tool to carve deep distinct lines into the attached clay strands to simulate flowing hair. Create a sweeping mustache shape that curls out from under the nose. -
Add hat details:
Press small, uneven indentations all over the hat cone to prepare spots for the white dots later, or add tiny flat clay discs for a raised texture.
Keep it Clean
If red underglaze from the hat smudges onto the raw white beard, sand it off gently after the underglaze dries but before the clear glaze application. Red pigment is notorious for staining.
Step 4: Finishing & Glazing
-
Bisque fire:
Allow the gnome to dry slowly under plastic for several days, then bisque fire to cone 04 (or your clay’s specification). -
Apply base colors:
Paint the hat with 2-3 coats of rust-red underglaze. Leave the white dots unpainted if you used white clay, or paint them with white underglaze. -
Paint the face:
Leave the beard natural (raw clay) or apply a white wash. Use a light pink blush underglaze for the cheeks and nose tip. Use a fine brush to dot the eyes black with a tiny white reflection speck. -
Antique the beard:
To bring out the texture, apply a watered-down brown or grey wash over the beard, then immediately wipe away the surface with a sponge, leaving darkness only in the crevices. -
Final glaze fire:
Coat the entire piece in a matte clear glaze to seal it without making it too shiny, preserving the woodland aesthetic. Fire to maturity.
Place your finished gnome among your house plants for a delightful hidden surprise
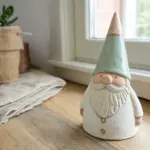
Leafy Beard Woodland Gnome
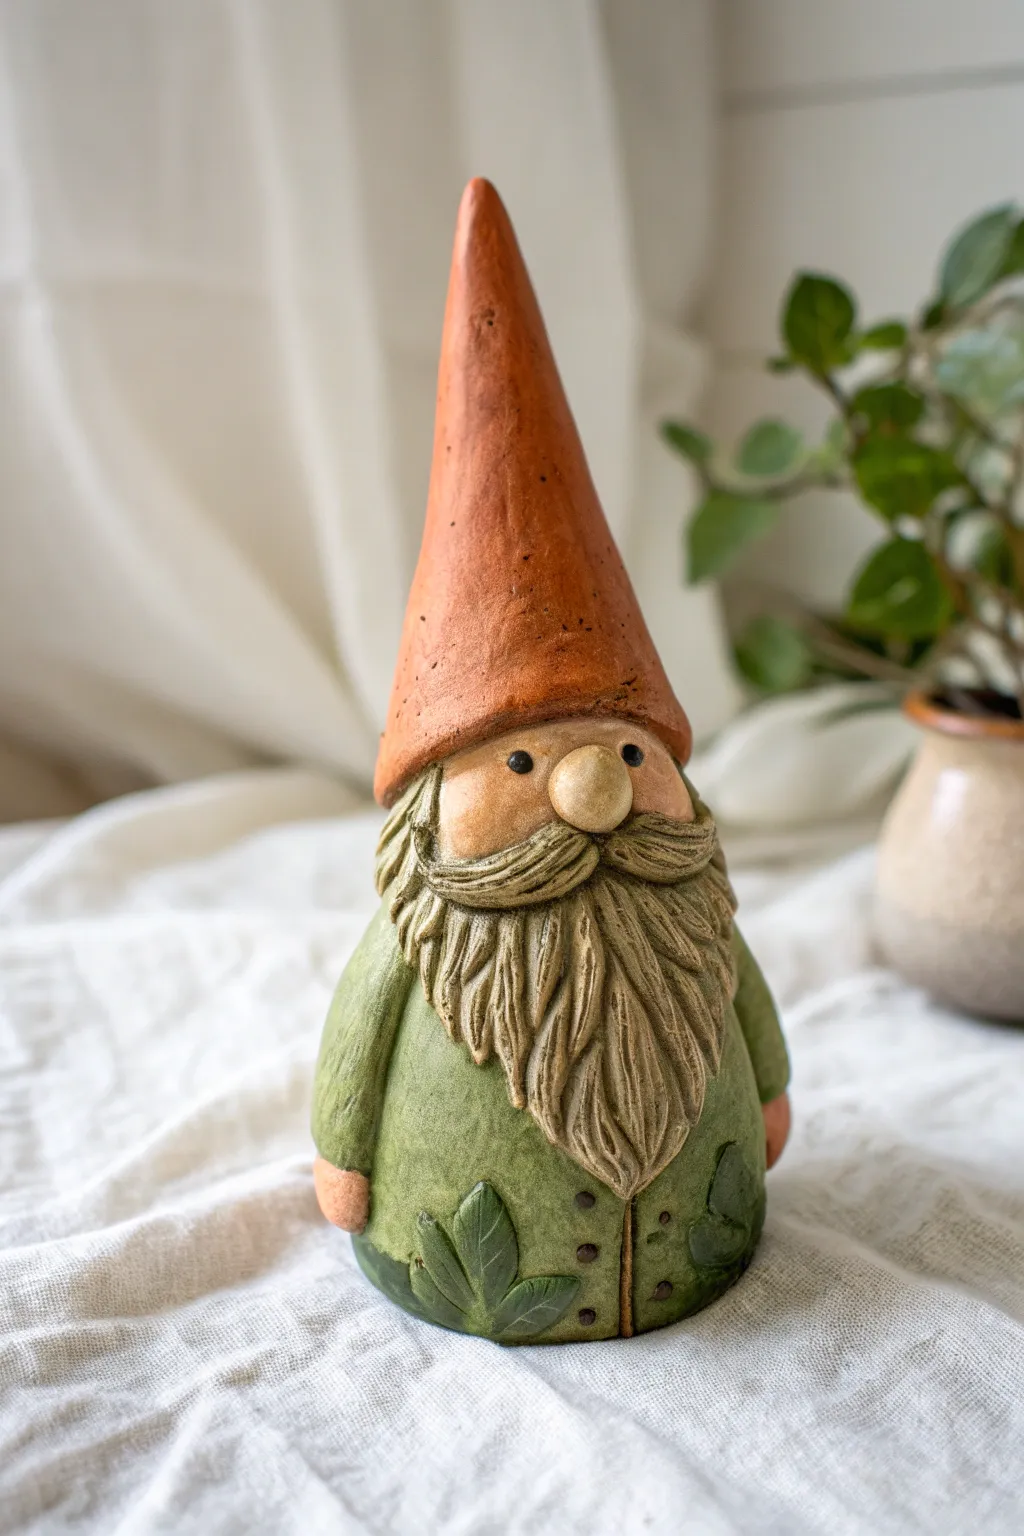
Bring a touch of the enchanted forest into your home with this charming clay gnome, defined by his tall, earthy hat and stylized leafy details. The design features a wonderfully textured beard and a natural finish that mimics the look of aged stone and mossy greens.
How-To Guide
Materials
- Pottery clay (stoneware or earthenware)
- Clay sculpting tools (needle tool, modeling tool)
- Texture tools (toothbrush, wire brush)
- Slip and score tool
- Rolling pin
- Sponge
- Underglazes (terracotta orange, moss green, beige, brown)
- Clear matte glaze (optional)
- Small paintbrush
Step 1: Forming the Base Body
-
Shape the core:
Begin with a fist-sized ball of clay. Gently roll and tap it on your work surface to create a rounded cone shape that is slightly wider at the bottom for stability. This forms the gnome’s body. -
Hollow the form:
If your piece is solid and thick, carefully hollow out the bottom using a loop tool to ensure even drying and prevent cracking during firing. Aim for a wall thickness of about a quarter-inch. -
Texture the coat:
Before adding details, gently press a stiff brush or a textured fabric against the green body area to give the coat a woven, organic appearance.
Preventing trapped air
Any part thicker than your thumb MUST be hollowed out or pierced with a needle tool from the bottom/back. Trapped air pockets can cause the gnome to explode.
Step 2: Sculpting the Head and Hat
-
Roll the hat cone:
Roll a separate piece of clay into a long, tall carrot shape. This will be the signature tall hat. Hollow the base of the cone so it can sit atop the body. -
Attach the hat:
Score and slip the top of the body and the bottom rim of the hat inside. Join them firmly, blending the clay where they meet if you want a seamless look, or leaving a slight overhang for the hat rim. -
Refine the hat shape:
Smooth the hat upwards to a sharp point. You can add subtle pockmarks or scratches with a needle tool to simulate an aged terracotta texture. -
Add the nose:
Roll a small ball of clay for the nose. Score and slip the area just under the hat rim and press the nose firmly into place, creating the center point for the face.
Step 3: Adding Facial Details
-
Attach the beard:
Form a flat, shield-like shape of clay for the beard. Attach it below the nose, draping it over the body. It should look thick and substantial. -
Carve the hair:
Use a needle tool or knife to carve deep, flowing vertical lines into the beard clay. Group the strands together to create separation and volume. -
Sculpt the mustache:
Create two smaller tear-drop shapes. Attach them horizontally directly under the nose, sweeping outward. Carve fine lines into these to match the beard texture. -
Define the face:
Under the hat rim, smooth small patches of clay for the visible cheeks. Use the end of a paintbrush to indent two small holes for the eyes.
Seasonal swap
Make the leaf appliqués seasonal! Use holly leaves for winter, flowers for spring, or oak leaves for autumn to create a year-round collection.
Step 4: Clothing and Finishes
-
Add sleeves and hands:
Make two small coils for arms and attach them to the sides of the body. Add tiny rounded nubs at the ends for hands, tucking them slightly towards the beard. -
Create leaf accents:
Roll out a thin slab of clay and cut out three or four simple leaf shapes. Use a needle tool to draw veins on them. -
Attach the leaves:
Score and slip the leaves onto the bottom hem of the coat, overlapping them slightly for a natural, fallen-leaf look. -
Add buttons:
Roll tiny balls of clay and press them down the center front of the coat, below the beard, to create a line of rustic buttons.
Step 5: Color and Glaze
-
Bisque fire:
Allow the gnome to dry slowly and completely before the initial bisque firing in the kiln. -
Apply base colors:
Paint the hat with a terracotta or burnt orange underglaze. Use a mossy green underglaze for the coat and leaves. I prefer thinning the paint slightly so the texture shows through. -
Paint facial features:
Use a flesh-toned underglaze for the nose and cheeks, and a beige or cream color for the beard. Dab a tiny dot of black glaze into the eye indentations. -
Antique the finish:
Once the base colors are dry, wipe a watered-down brown oxide or dark wash over the beard and coat, then sponge it off the high points. This highlights the carved textures. -
Final fire:
Apply a clear matte glaze if desired, or leave the underglaze raw for a rougher stone look, and fire the piece one last time.
Place your finished gnome among your houseplants or on a windowsill to watch over your indoor garden
Flower Crown Gnome
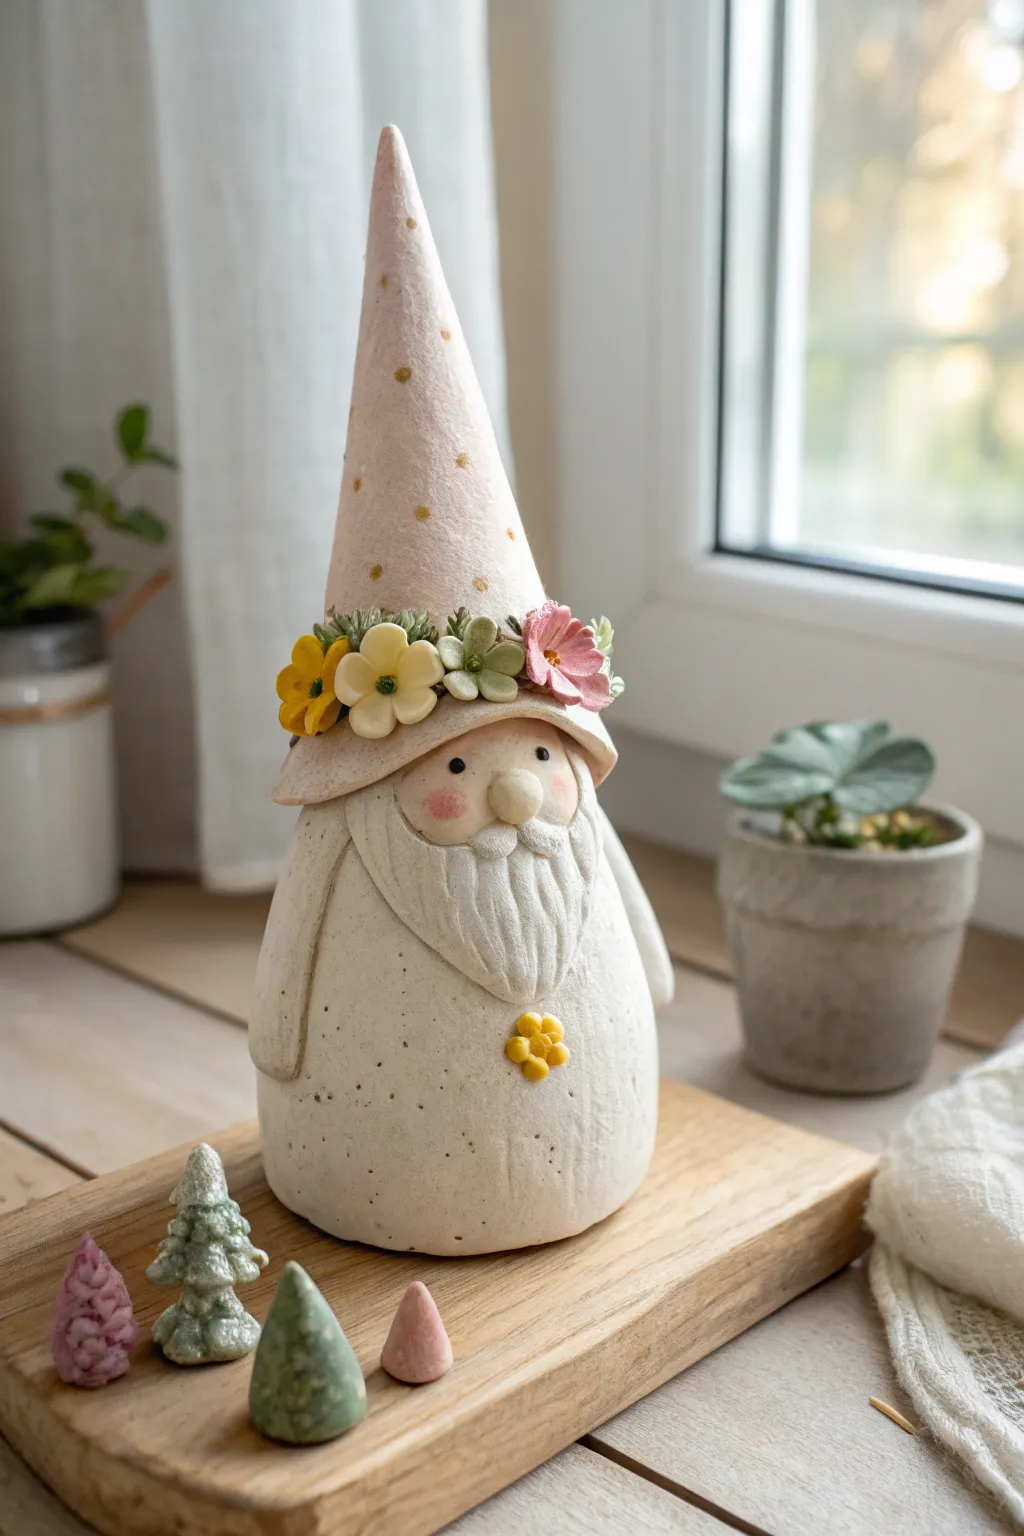
Bring a touch of springtime magic into your home with this adorable pottery gnome, featuring a speckled tall hat and a delicate crown of hand-sculpted blossoms. This project combines simple pinching and coil techniques with detailed finishing touches for a truly charming result.
Detailed Instructions
Materials
- White or speckled stoneware clay
- Rolling pin and canvas mat
- Clay sculpting tools (needle tool, modeling tool, scoring tool)
- Slip (clay and water mixture)
- Small flower cookie cutters (optional)
- Underglazes: Pale pink, yellow, green, black, white
- Clear matte glaze
- Gold luster or gold acrylic paint (for post-firing)
- Sponge and water
- Small paintbrushes
Step 1: Sculpting the Base Form
-
Form the body:
Start with a softball-sized lump of clay. Roll it into a smooth ball, then gently elongate it slightly into an egg shape with a flattened bottom so it stands sturdily. -
Hollow the form:
If your piece is solid and thick, slice the bottom off and carefully hollow out the interior with a loop tool to ensure even drying, then reattach the bottom or leave it open (punch a hole for air release). -
Shape the hat cone:
Roll out a slab of clay to about 1/4 inch thickness. Cut a large triangle or pie-slice shape and roll it into a tall, slender cone. Smooth the seam completely on both the inside and outside. -
Fit the hat:
Place the cone onto the body to check the fit. The hat should sit low, covering the top third of the egg shape. I often trim the bottom edge of the hat at an angle so it dips lower in the back. -
Attach the hat:
Score and slip the contact points where the hat meets the body. Press firmly to join them and smooth the clay at the seam, or leave a slight overhang for the hat brim.
Clean Beards
When carving the beard texture, wait until the clay is leather-hard. Soft clay creates messy ‘burrs’ when carved, but leather-hard clay yields crisp, clean hair lines.
Step 2: Adding Details & Personality
-
Create the nose:
Roll a small ball of clay for the nose. Score and slip it right under the brim of the hat, pressing it on securely so it peeks out. -
sculpt the beard:
Roll a thin slab or flat teardrop shape for the beard. Attach it under the nose. Use a needle tool or a fine modeling tool to carve deep, flowing vertical lines into the clay to simulate hair texture. -
Add the arms:
Form two long, thin sausage shapes for arms. Attach them to the sides of the body, blending the shoulders into the main form, letting the hands rest naturally against the sides. -
Sculpt the flowers:
Hand-roll tiny balls and press them flat to make petals, assembling them into small blooms (daisies, forget-me-nots). Alternatively, use tiny cutters. Make various sizes for visual interest. -
Assemble the crown:
Score and slip the band area of the hat where it meets the brim. Individually attach your clay flowers and small leaves, overlapping them slightly to create a lush, full crown. -
Final clay details:
Add a single small flower button to the gnome’s belly area. Smooth out any unwanted fingerprints with a slightly damp sponge.
Step 3: Glazing and Finishing
-
Bisque fire:
Allow the gnome to dry slowly and completely before firing it to a bisque temperature suitable for your clay body. -
Apply base color:
Apply a wash of white underglaze to the beard to highlight the texture. Keep the body natural or paint it a soft off-white. -
Paint the details:
Use precision brushes to paint the hat a soft pastel pink. Paint the flower crown with yellows, greens, and pinks. Use black for tiny dots for eyes above the nose, and blush the cheeks with diluted pink. -
Glaze fire:
Apply a coat of clear matte glaze over the entire piece to seal it without making it too shiny. Fire again to your clay’s maturity temperature. -
Add gold accents:
Once fully fired and cooled, use gold luster (requires a third low-fire) or gold acrylic paint to add small polka dots to the hat for a festive sparkle.
Seasonal Switch
Make the flower crown removable! Instead of scoring them onto the hat, sculpt the flowers onto a separate clay ring that fits over the hat cone.
Display your charming gnome near a window or with potted plants to let his floral personality shine
Hanging Ornament Gnome
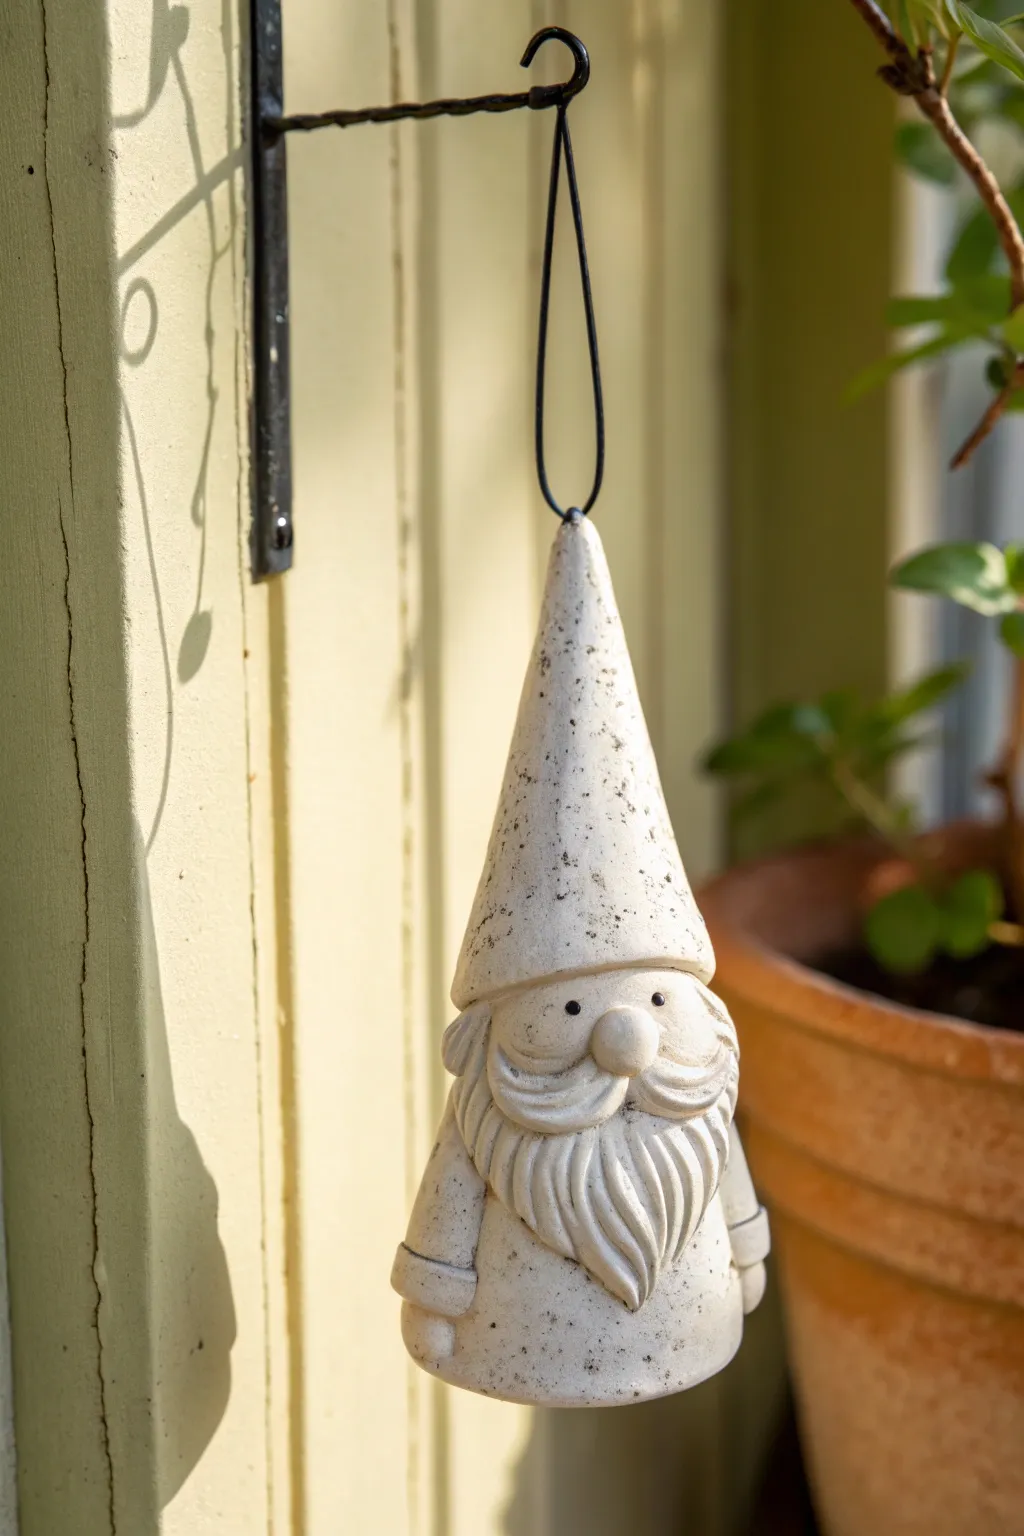
Create a charming, rustic hanging ornament that mimics the look of speckled stone using pottery clay. This simple yet character-filled gnome features a tall conical hat, a textural beard, and a sturdy wire loop for easy display.
Step-by-Step
Materials
- White pottery clay (earthenware or stoneware)
- Black speckled clay or grog (optional mix-in)
- Black underglaze or oxide wash
- Rolling pin
- Clay knife or needle tool
- Slip and scoring tool
- High-temperature wire (kanthal or nichrome)
- Small sponge
- Clear matte glaze
Step 1: Forming the Body and Hat
-
Prepare the clay:
Start with a ball of white clay about the size of a tennis ball. If you want that natural speckled look straight from the kiln, knead in some black grog or use a pre-speckled clay body. -
Roll a cone:
Roll the clay into a smooth cone shape. This single piece will serve as both the body and the hat. Make the top quite tall and tapered, extending roughly 5-6 inches high. -
Define the brim:
About halfway down the cone, use your thumb or a modeling tool to gently press an indentation around the circumference. This visual break separates the hat from the face area. -
Smooth the surface:
Using a slightly damp sponge, wipe down the entire cone to remove fingerprints. The texture should feel smooth like a river stone.
Wire Woes?
If the wire loop feels loose after shrinking during drying, remove it carefully. After bisque firing, glue it back in with strong epoxy before the final glaze application.
Step 2: Sculpting Facial Features
-
Add the nose:
Roll a small marble-sized ball of clay. Score the center of the ‘face’ area and the back of the ball, apply slip, and press the nose firmly into place just under the hat line. -
Create the mustache:
Roll two small tapered coils for the mustache. Flatten them slightly and attach one on each side of the nose, curling the ends upward just a bit. -
Texture the mustache:
Use a needle tool or knife to draw horizontal lines across the mustache coils to simulate hair strands. -
Form the beard:
Roll a flat, triangular slab of clay for the beard. Attach it below the nose and mustache, wrapping it slightly around the sides of the cone. -
Detail the beard:
Carve deep, vertical wavy lines into the beard slab. Vary the depth of the cuts to create shadows and volume, making the beard look full and flowing. -
Add arms:
Roll two small sausage shapes for arms. Attach them to the sides of the body, just peeking out from under the beard. Add a small cuff detail at the wrist. -
Create the eyes:
Use the blunt end of a small paintbrush or large needle tool to plunge two small, deep holes just above the nose for eyes.
Step 3: Finishing and Firing
-
Insert the hanging wire:
Cut a 3-inch piece of high-temp wire and bend it into a U-shape. Insert the ends deep into the very tip of the hat, leaving a loop exposed. Pinch the clay around the wire to secure it. -
Dry partially:
Let the gnome dry to a leather-hard stage. This makes it easier to clean up any rough edges without deforming the shape. -
Bisque fire:
Fire the piece to cone 04 (or according to your clay’s specifications) for the bisque firing. -
Apply the speckle effect:
If you didn’t use speckled clay, mix a thin wash of black underglaze or oxide. Dilute it heavily with water. -
Splatter technician:
Dip a stiff toothbrush into the black wash. Run your thumb over the bristles to flick tiny specks onto the white bisque surface. I find less is more here—aim for a random, organic distribution. -
Paint the eyes:
Use a tiny dot of undiluted black underglaze inside the eye holes to make them pop. -
Glaze and final fire:
Dip the entire ornament into a clear matte glaze. Fire again to the maturity temperature of your clay (likely cone 06 or cone 6).
Seasonal Switch
Before firing, carve a small hole in the hollow base. This allows you to insert a small LED tea light or string light, turning your ornament into a glowing lantern.
Hang this stoic little guardian in your garden or on a holiday tree for a touch of handmade magic
Tea Light Lantern Gnome
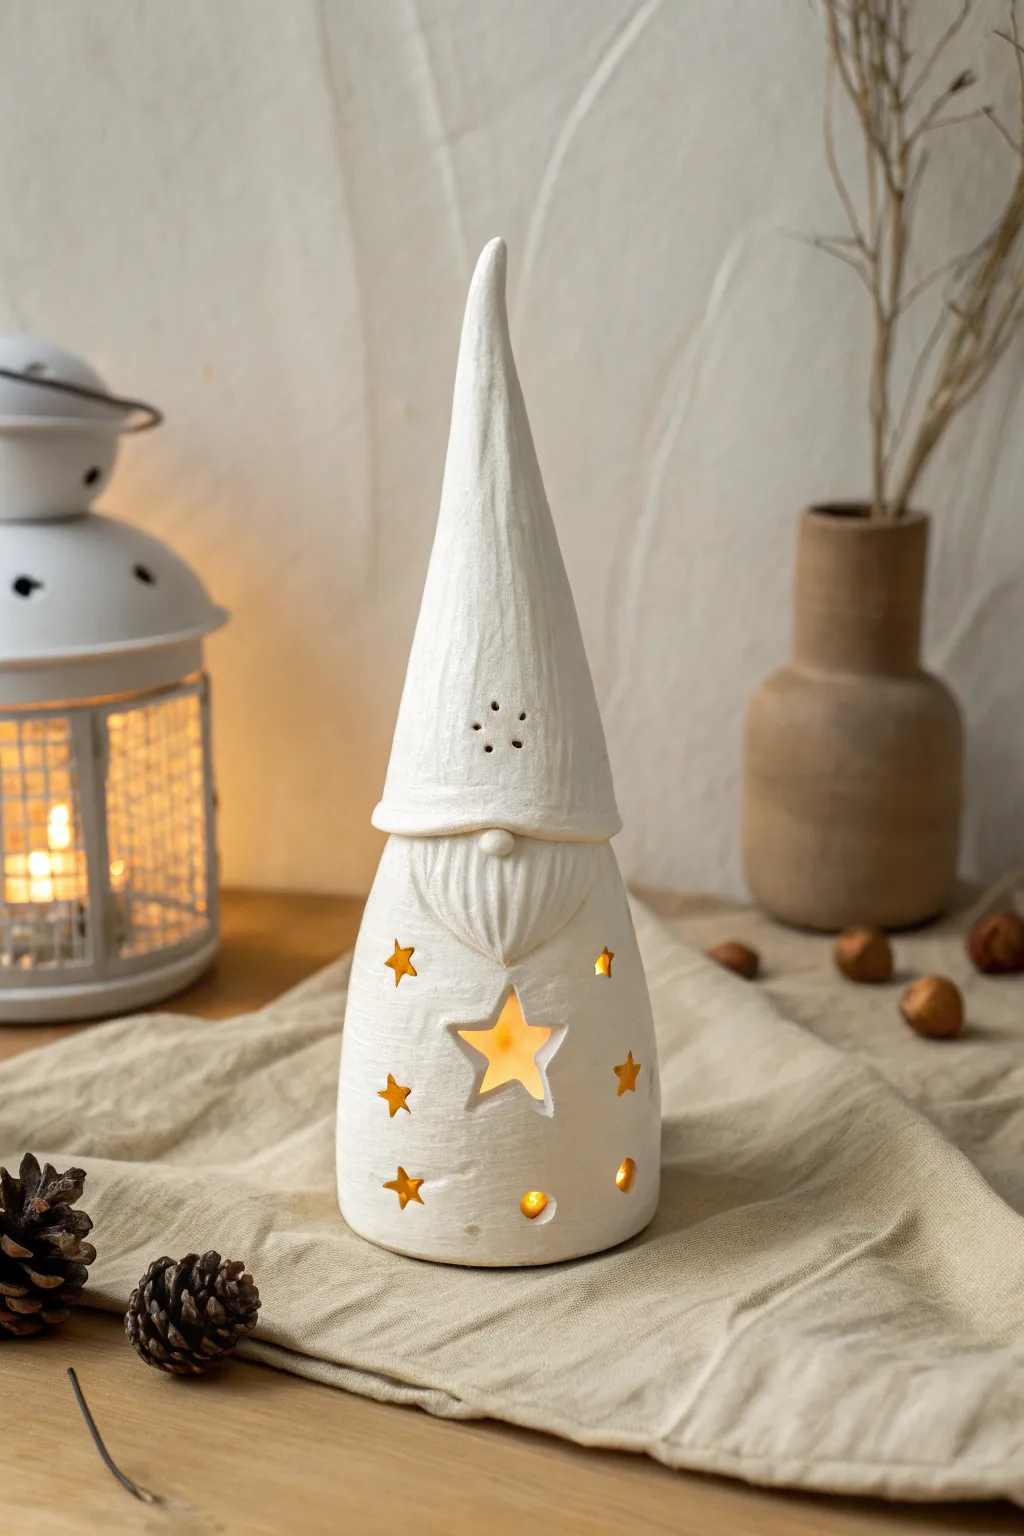
This charming ceramic gnome features a tall, textured hat and a hollow body illuminated by warm candlelight peeking through star-shaped cutouts. The matte white glaze gives it a clean, modern Scandinavian feel that fits perfectly with cozy winter decor.
Step-by-Step Guide
Materials
- White stoneware or earthenware clay
- Rolling pin with guide sticks (approx. 1/4 inch)
- Needle tool
- Fettling knife
- Star-shaped cookie cutters (small and medium)
- Slip and scoring tool (or serrated rib)
- Sponge
- Small loop tool or carving tool
- Cone-shaped form (cardboard or commercial mold)
- Matte white glaze
- Tea light candle
Step 1: Forming the Body
-
Roll the clay slab:
Begin by wedging your white clay to remove air bubbles, then roll out a smooth slab approximately 1/4 inch thick. Ensuring an even thickness here is crucial for the lantern to stand straight. -
Cut the cone shape:
Using a needle tool, cut a large semi-circle wedge shape from the slab. This will be rolled to form the main body of the gnome. -
Assemble the cone:
Score the straight edges of your clay wedge and apply slip. Bring the edges together to form a tall cone, overlapping slightly, and press firmly to seal. Smooth the seam inside and out so it disappears. -
Shape the base:
Verify the cone stands level on the table. If it wobbles, gently tap the base against the table surface or trim any unevenness with your fettling knife.
Clean Cuts
Wait until the clay is true leather-hard before cutting the stars. If the clay is too soft, the cutter will warp the cone shape; too dry, and it will crack.
Step 2: Adding Character Details
-
Separate hat and body:
Visually divide your cone into two sections: the top two-thirds will be the hat, and the bottom third is the body. You can lightly mark this line with a needle tool. -
Add the rim:
Roll a thin coil of clay and flatten it slightly. Attach this strip around the cone where the hat meets the body to create the brim of the hat. -
Sculpt the nose:
Roll a small ball of clay for the nose. Score and slip the area right underneath the hat brim, then press the nose on firmly. Blending the clay behind the nose ensures it won’t pop off during firing. -
Carve the beard:
Using a small loop tool or a modeling tool, carve vertical texture lines directly into the cone surface below the nose to simulate a beard flowing down. -
Texture the hat:
I like to use a serrated rib or a stiff brush to drag vertical lines up the hat portion. This subtle texture mimics fabric or felt and adds visual interest to the plain white surface.
Step 3: Creating the Lantern Features
-
Cut the stars:
Once the clay is leather hard (stiff but not dry), use your star cutters to punch holes in the lower body section. Support the clay from the inside with your hand to prevent the wall from collapsing. -
Refine the cutouts:
Use a damp sponge or a small brush to clean up any rough edges or clay burrs around the star openings. Sharp, clean edges look best for this project. -
Create vent holes:
Using your needle tool or a small drill bit, poke a few small ventilation holes near the top of the hat. This allows heat from the candle to escape safely. -
Allow to dry:
Let the gnome dry very slowly under loose plastic to prevent the thin areas around the stars from cracking. Once bone dry, bisque fire the piece according to your clay’s specifications.
Make it Sparkle
For extra magic, punch tiny pinholes around the larger stars using a needle tool. These micro-dots of light create a ‘stardust’ effect when the candle is lit.
Step 4: Glazing and Finishing
-
Apply glaze:
Dip the projected into a matte white glaze, or brush on three even coats. Make sure the glaze doesn’t pool too thickly in the beard texture or it will obscure the details. -
Clean the foot:
Wipe the bottom rim of the lantern completely clean of glaze with a damp sponge to prevent it from sticking to the kiln shelf. -
Final firing:
Glaze fire the piece to the appropriate cone temperature for your stoneware. Once cool, place a tea light inside to see your gnome glow.
Now you have a cozy luminary to brighten up your shelves
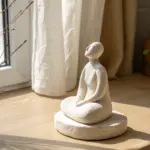
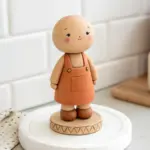
Planter Pot Gnome Buddy
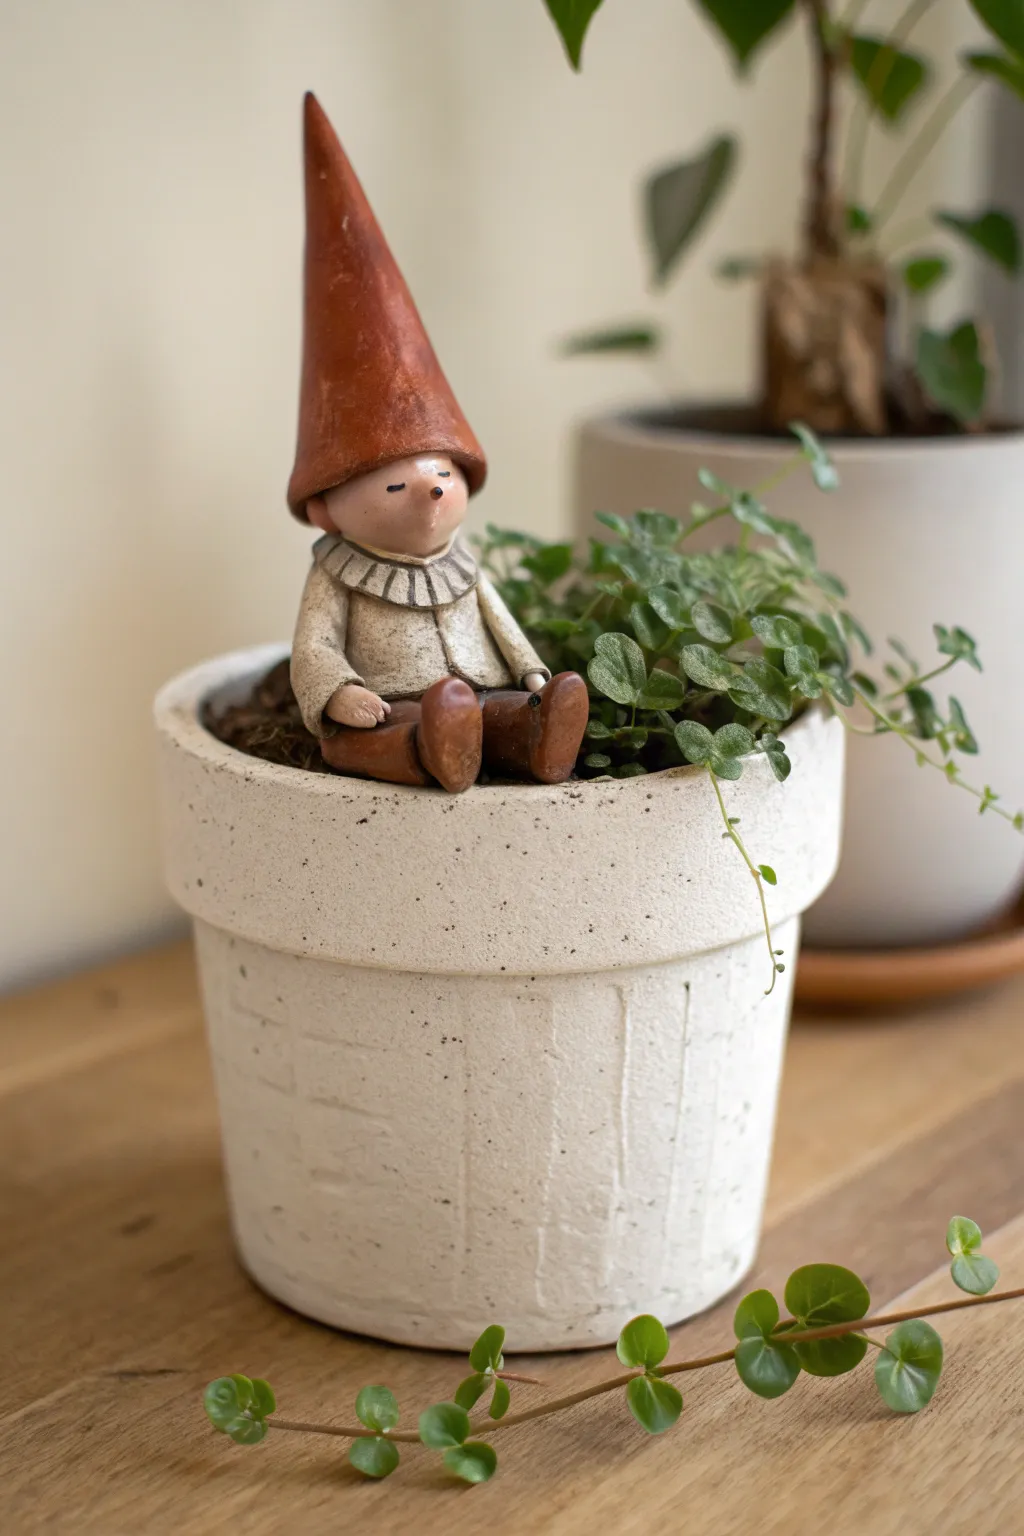
This charming little ceramic gnome is the perfect companion for your indoor plants, designed to sit comfortably on the soil peering out from under a tall, pointed hat. With his textured tunic and relaxed posture, he brings a touch of whimsical calm to any potted arrangement.
Detailed Instructions
Materials
- Polymer clay or air-dry clay (white or beige)
- Small rolling pin
- Clay sculpting tools (needle tool, small ball stylus)
- Aluminum foil (for armature)
- Acrylic paints (terracotta/rust red, cream/beige, dark brown, black)
- Matte varnish or sealant
- Fine grit sandpaper
- Small paintbrushes
- Water cup and paper towels
- Texture tool (or a piece of rough fabric/sandpaper)
Step 1: Sculpting the Body and Head
-
Form the core:
Start by creating a small, compact ball of aluminum foil about the size of a walnut. This will be the core of the body to save clay and keep it lightweight. -
Cover the body:
Roll out a sheet of clay and wrap it around your foil ball, smoothing the seams until you have a solid egg shape. Flatten the bottom slightly so it sits stability. -
Create the head:
Roll a smaller ball of clay (about 1/3 the size of the body) for the head. Attach this to the top of the body, blending the clay at the neck join so it’s secure. -
Shape the face:
Refine the head shape to be slightly round but chubby. Add a tiny, tear-drop shaped piece of clay to the center for a cute, upturned nose.
Step 2: Dressing the Gnome
-
Make the tunic:
Roll a thin sheet of clay. Cut a strip long enough to wrap around the body like a jacket. Apply it, leaving a small gap at the front center to suggest an open coat. -
Add texture:
Gently press a texture tool, rough fabric, or sandpaper against the tunic clay to give it a woven, fabric-like appearance. -
Create the collar:
Roll a small snake of clay and flatten it. Use a needle tool to press vertical lines all along the strip, creating a ribbed ruff effect. Wrap this around the neck area. -
Sculpt the arms:
Roll two small sausages of clay for arms. Attach them to the sides of the body, bending them slightly so they rest on his lap. Add tiny balls of clay at the ends for hands. -
Form the legs and boots:
Create two short logs for legs and shape rectangular blocks for feet/boots. Attach these to the lower front of the body so they stick out straight, as if he is sitting with legs extended.
Hat Tip
If the tall hat keeps sagging while you sculpt, insert a toothpick or a crumpled cone of foil into the center for internal support until the clay hardens.
Step 3: The Magnificent Hat
-
Shape the cone:
This is the gnome’s defining feature. Roll a large cone of clay. It should be tall—almost as tall as the body and head combined. -
Hollow it out:
Use your thumb or a tool to hollow out the base of the cone so it fits snugly over the top of the head. -
Attach and refine:
Place the hat on the head. I like to tilt it back just slightly. Blend the inside rim of the hat onto the head securely, but leave a distinct brim line visible on the outside. -
Final details:
Use a needle tool to add a tiny line for the mouth and two small slits for sleepy, closed eyes. Smooth any fingerprints with a clearer brush or a bit of water. -
Bake or dry:
If using polymer clay, bake according to package instructions. If using air-dry clay, let it dry completely (24-48 hours) away from direct heat.
Make Him Shine
To mimic the look of glazed ceramic, use a high-gloss varnish instead of matte on just the hat and the boots, leaving the tunic matte for fabric contrast.
Step 4: Painting and Finishing
-
Base coat the hat:
Paint the hat with a terracotta or rust-red acrylic paint. Apply two thin coats for even coverage, letting it dry between layers. -
Paint the outfit:
Use a cream or beige color for the tunic. Once dry, you can do a very light wash of brown (paint diluted with water) and wipe it off quickly to highlight the texture we made earlier. -
Boots and skin:
Paint the boots and legs a solid dark brown. Use a flesh tone suitable for your preference for the face and hands. -
Facial features:
Using a very fine brush or a toothpick, paint the eye slits black. Add a tiny dot of black or dark brown to the tip of the nose for contrast. -
Seal the piece:
Once all paint is fully dry, apply a coat of matte varnish. This protects the paint from moisture in the planter pot.
Now your sleepy friend is ready to take his post guarding your favorite houseplant
Crackle Glaze Hat Gnome
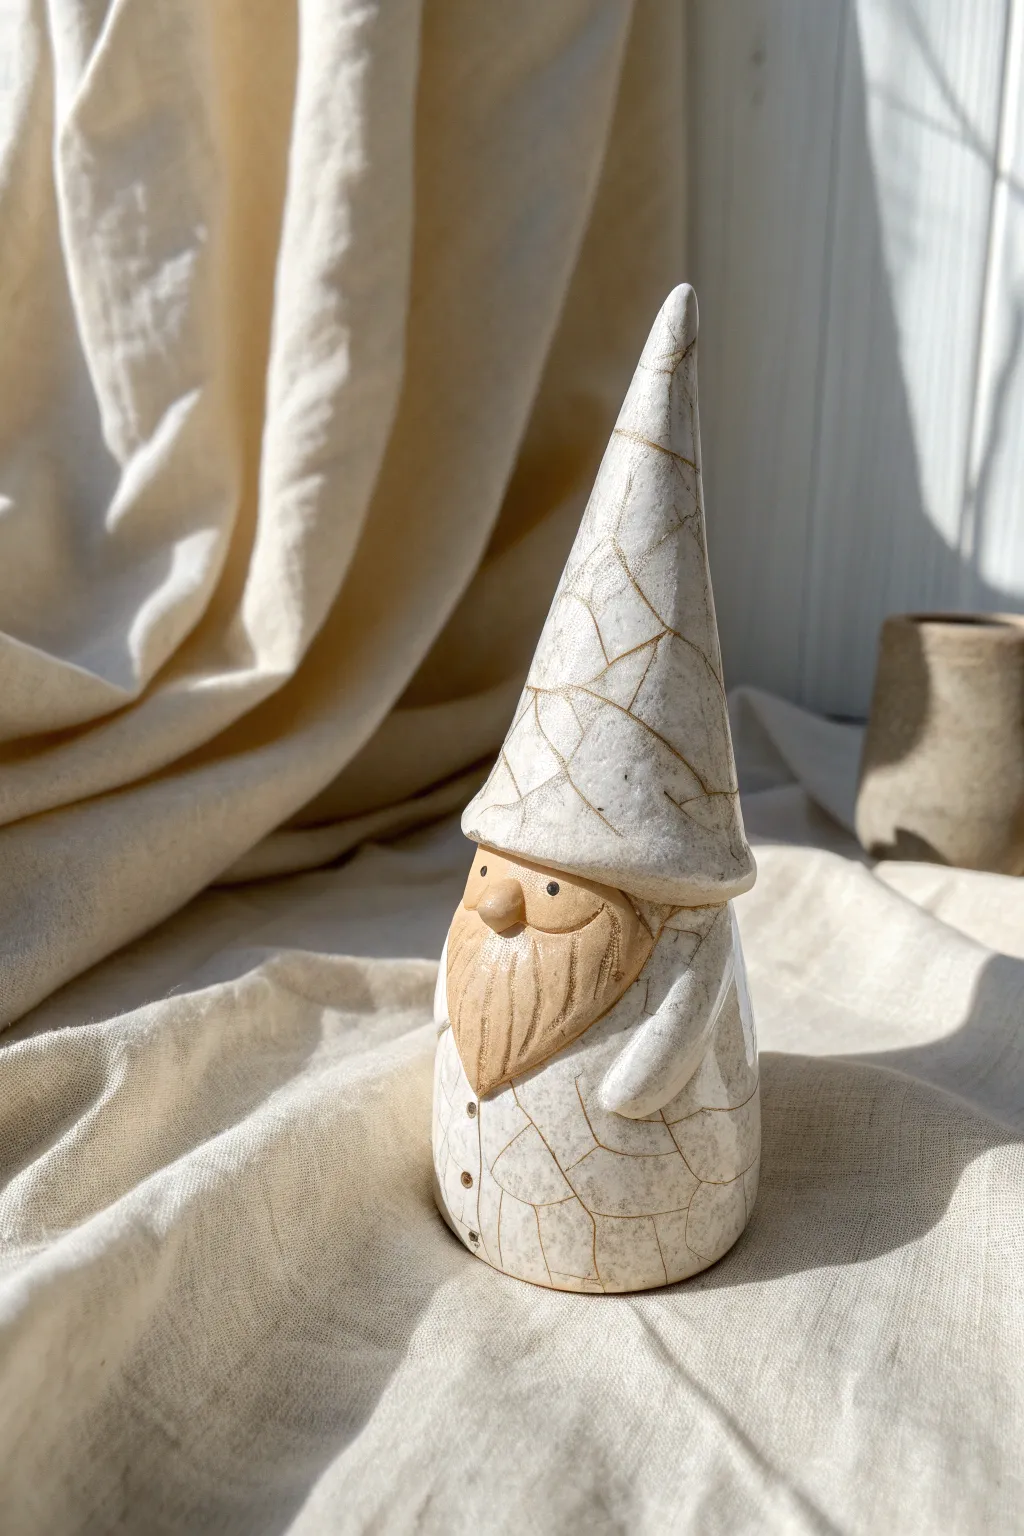
Embrace the beauty of imperfection with this charming ceramic gnome, featuring a distinctive crackle glaze that gives him a timeless, antique appearance. The contrast between the glossy, fractured white surface and the matte, natural clay face creates a wonderful textural balance.
Detailed Instructions
Materials
- Light-colored stoneware or earthenware clay
- Rolling pin and guide sticks (approx. 1/4 inch)
- Needle tool
- Scoring tool (or serrated rib)
- Slip (clay mixed with water)
- Crackle white glaze (commercial or custom recipe)
- Iron oxide wash (optional, for enhancing crackles)
- Small sponge
- Modeling tools (wooden or metal)
- Underglaze (black for eyes)
- Kiln
Step 1: Building the Form
-
Prepare the clay:
Begin by wedging your clay thoroughly to remove air bubbles. Roll it out into a slab that is roughly 1/4 inch thick, keeping the thickness consistent for even drying. -
Cut the body cone:
Cut a semi-circle or a wide pie-slice shape from the slab. Roll this into a cone shape to form the main body of the gnome. Score the edges, apply slip, and press them firmly together to create a seam. -
Close the form:
If you want a hollow closed form (which is easier to handle), attach a circular slab to the bottom. Otherwise, simply smooth the bottom edge so it sits flat on the table. -
Elongate the hat:
Gently pinch and pull the clay upward to extend the cone into a tall, pointed hat. The hat should take up about two-thirds of the total height. Curve the tip slightly if you like a whimsical look. -
Create the brim definition:
About halfway down the cone, where the ‘hat’ meets the ‘face’, add a small coil of clay around the circumference or simply press an indentation to suggest the brim of the hat resting over the eyes. -
Add the nose:
Roll a small ball of clay for the nose. Score the spot just under the hat brim and slip the nose into place. Smooth the edges onto the body so it doesn’t pop off during firing. -
Sculpt the beard:
Attach a thin, flat piece of clay under the nose for the beard, or carve the beard area directly into the body form. Use a needle tool or a modeling tool to carve deep, vertical lines simulating hair texture. -
Add the arms:
Roll two small sausage shapes for arms. Attach them to the sides of the body, blending the shoulders into the form so they look seamless.
Ink It Up
If you don’t use high-fire iron oxide, rub India ink into the cracks *after* the final firing. It makes the white glaze pattern pop instantly.
Step 2: Refining and Bisque Firing
-
Carve details:
Once the clay is leather hard, refine the beard texture and add small details like buttons down the front of the robe using a small loop tool or stamp. -
Smooth the surface:
Use a damp sponge to smooth out the hat and robe areas completely. A smooth surface is crucial for the crackle glaze to look its best. -
Drying:
Allow the gnome to dry slowly and completely. Since the tip of the hat is thin, cover it loosely with plastic so it doesn’t dry too fast compared to the thicker base. -
Bisque fire:
Load the bone-dry piece into your kiln and fire to cone 04 (or your clay’s specific bisque temperature).
Make It a Luminary
Cut shapes out of the hat and leave the bottom open before firing. Place a tea light underneath to let light shine through the crackle finish.
Step 3: Glazing the Crackle Effect
-
Wax resist application:
Use wax resist specifically on the nose, face, and beard area. We want these parts to remain unglazed to show the natural clay texture. -
Apply the glaze:
Dip the gnome or brush on your white crackle glaze. Ensure a somewhat thick, even application on the hat and robe; if the application is too thin, the crackle network won’t develop properly. -
Clean up:
If any glaze got onto the waxed face or beard, wipe it away cleanly with a damp sponge. -
Paint the eyes:
Using a tiny detail brush, add two small dots of black underglaze for the eyes just under the hat brim. -
Glaze fire:
Fire the piece to the temperature required by your specific crackle glaze (usually Cone 06 or Cone 6, check the bottle). -
Highlight the crackles (Optional):
I usually like to emphasize the cracks after firing. Mix a wash of black acrylic paint or India ink. Brush it over the fired glaze, let it sit for a moment, and then wipe the surface clean, leaving dark pigment inside the fractures.
Place your finished gnome on a shelf where the light can catch those beautiful, fractured glaze lines
Wax Resist Pattern Gnome
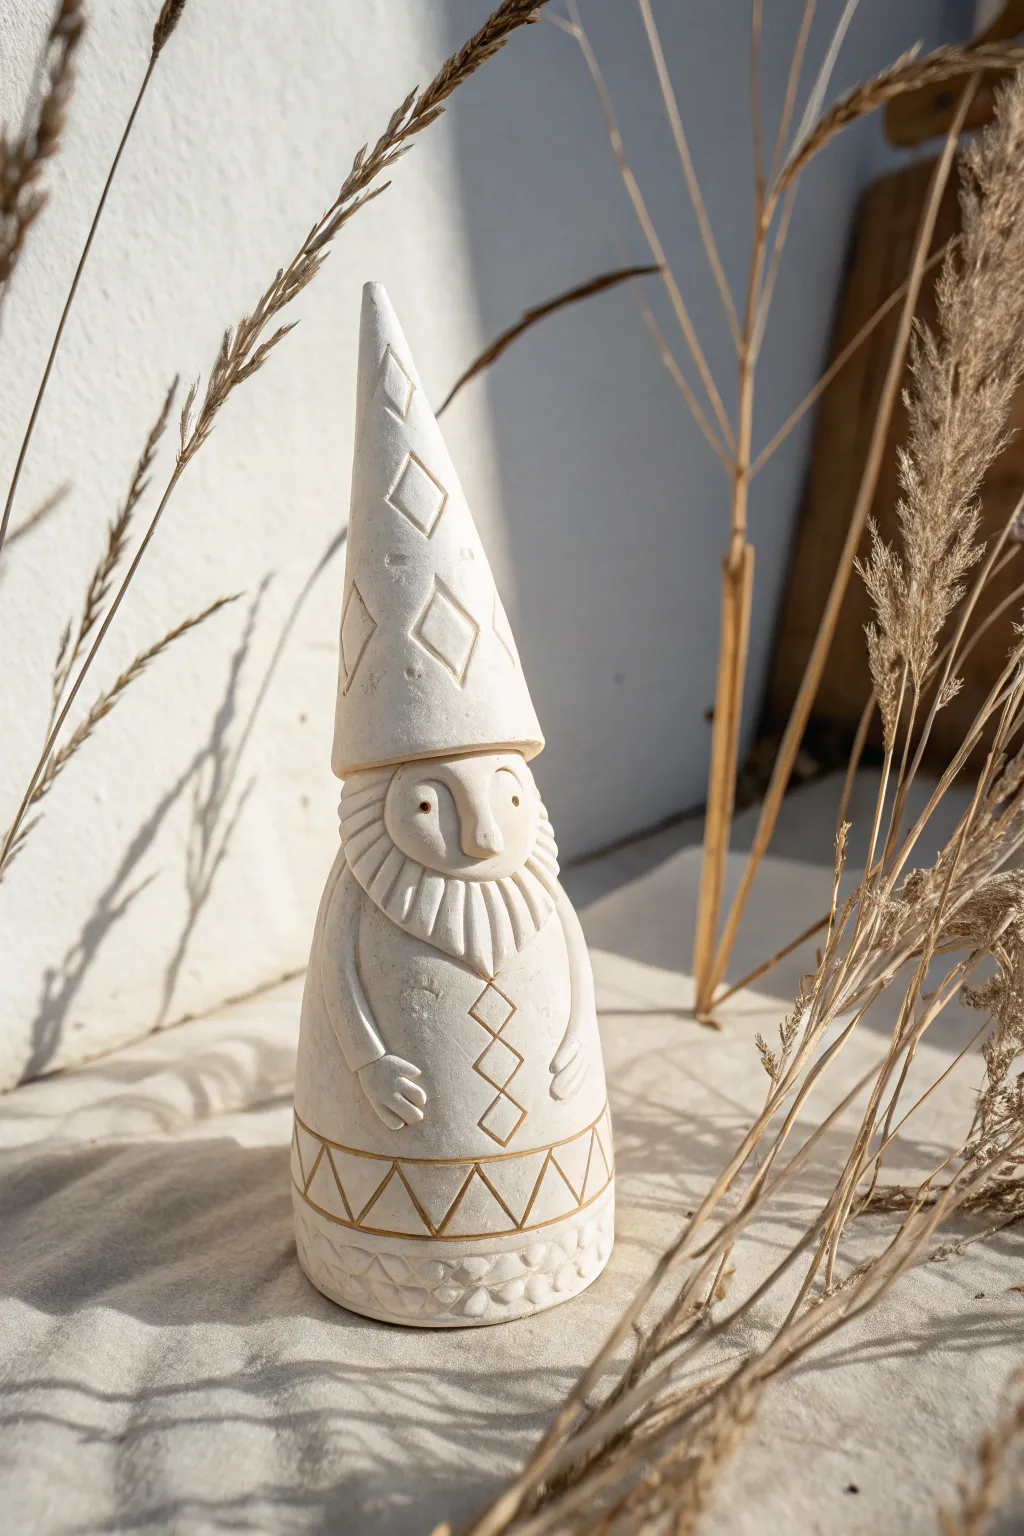
This charming ceramic gnome features clean lines, geometric patterns, and a lovely matte finish that highlights the raw clay texture. By utilizing wax resist techniques, you can achieve crisp, unglazed details that pop against a subtle wash or clear glaze.
How-To Guide
Materials
- White stoneware or porcelain clay body
- Pin tool or needle tool
- Wax resist (liquid wax emulsion)
- Small tapered paintbrush
- Modeling tool (wooden or rubber)
- Sponge
- Rolling pin
- Slip and scoring tool
- Iron oxide wash or clear matte glaze (optional)
Step 1: Forming the Base Structure
-
Roll the clay:
Begin by wedging your white clay thoroughly to remove air bubbles. Roll out a slab approximately 1/4 inch thick for the body and hat. -
Construct the body cone:
Cut a large semi-circle from your slab. Form it into a tall, slightly rounded cone shape to serve as the gnome’s body. Score and slip the edges where they meet, smoothing the seam completely on both the inside and outside. -
Shape the hat:
Create a second, sharper cone for the hat. This should be slightly wider than the top of the body cone so it can sit comfortably over the ‘head’ area. Test the fit before attaching. -
Close the forms:
Add a circular slab base to the bottom of the body cone and seal it well. If you are making this hollow, remember to poke a tiny hidden vent hole in the base to let air escape during firing.
Steady Hand Trick
When applying wax to thin lines, rest your pinky finger on the table or the sculpture itself to stabilize your brush hand. Use a very fine liner brush for the diamonds.
Step 2: Sculpting the Features
-
Attach the hat:
Score and slip the hat onto the top of the body cone. Blending the clay isn’t strictly necessary if you want a distinct separation line, but ensure a strong bond. -
Add the nose:
Roll a small ball of clay into an oval pinch. Attach this right under the rim of the hat to form a prominent nose. Smooth the upper edge into the face area so it looks integrated. -
Carve the beard:
Add a flattened, crescent-shaped piece of clay under the nose for the beard. Use your customized modeling tool to carve deep, vertical grooves to simulate hair texture. -
Sculpt the face:
Using a small loop tool or modeling stick, gently carve out two eye sockets on either side of the nose. Add tiny pupils by making small indentations. -
Add the arms:
Roll two thin coils for arms. Attach them so they curve from the side of the body towards the center belly. Flatten the ends slightly and use a knife to cut simple finger details.
Step 3: Adding Geometric Details
-
Scribe the patterns:
With a needle tool, lightly sketch your geometric designs. Draw diamond shapes on the hat, a vertical diamond chain down the chest, and a zigzag band near the bottom hem. -
Carve the relief:
Trace over your sketched lines with a little more pressure to create clean, incised channels. I find a sharp ribbon tool works best here to remove just a tiny ribbon of clay. -
Texture the base:
At the very bottom trim, create a different texture. Use the rounded end of a tool to press a honeycomb or scale pattern into the clay for contrast against the sharp geometric lines above.
Level Up: Sgraffito Style
Instead of wax, paint the whole gnome with black underglaze at leather hard stage, then carve your patterns through the black to reveal the white clay beneath for high contrast.
Step 4: Waxing and Finishing
-
Bisque fire:
Allow the gnome to dry slowly and completely before bisque firing to cone 04 (or your clay’s specific temperature). -
Apply wax resist:
Once bisque fired, carefully paint liquid wax resist into the incised lines of the diamonds, zigzags, and facial features. The wax prevents glaze or oxide from sticking to these specific areas. -
Apply the wash:
Brush a diluted iron oxide wash or a very light tan stain over the entire piece. The wax will repel the wash in the lines, keeping the raw white clay visible in the grooves while staining the surrounding surfaces. -
Wipe back:
Using a damp sponge, gently wipe away the excess wash from the high points of the clay. The color should remain mostly in the textured areas and recesses, but the waxed lines will stay crisp and white. -
Final fire:
Fire the piece again to the maturation temperature of your clay body to set the stain and vitrify the clay.
This sophisticated little guardian is now ready to add a touch of modern folklore to your shelf
Abstract Geometric Modern Gnome
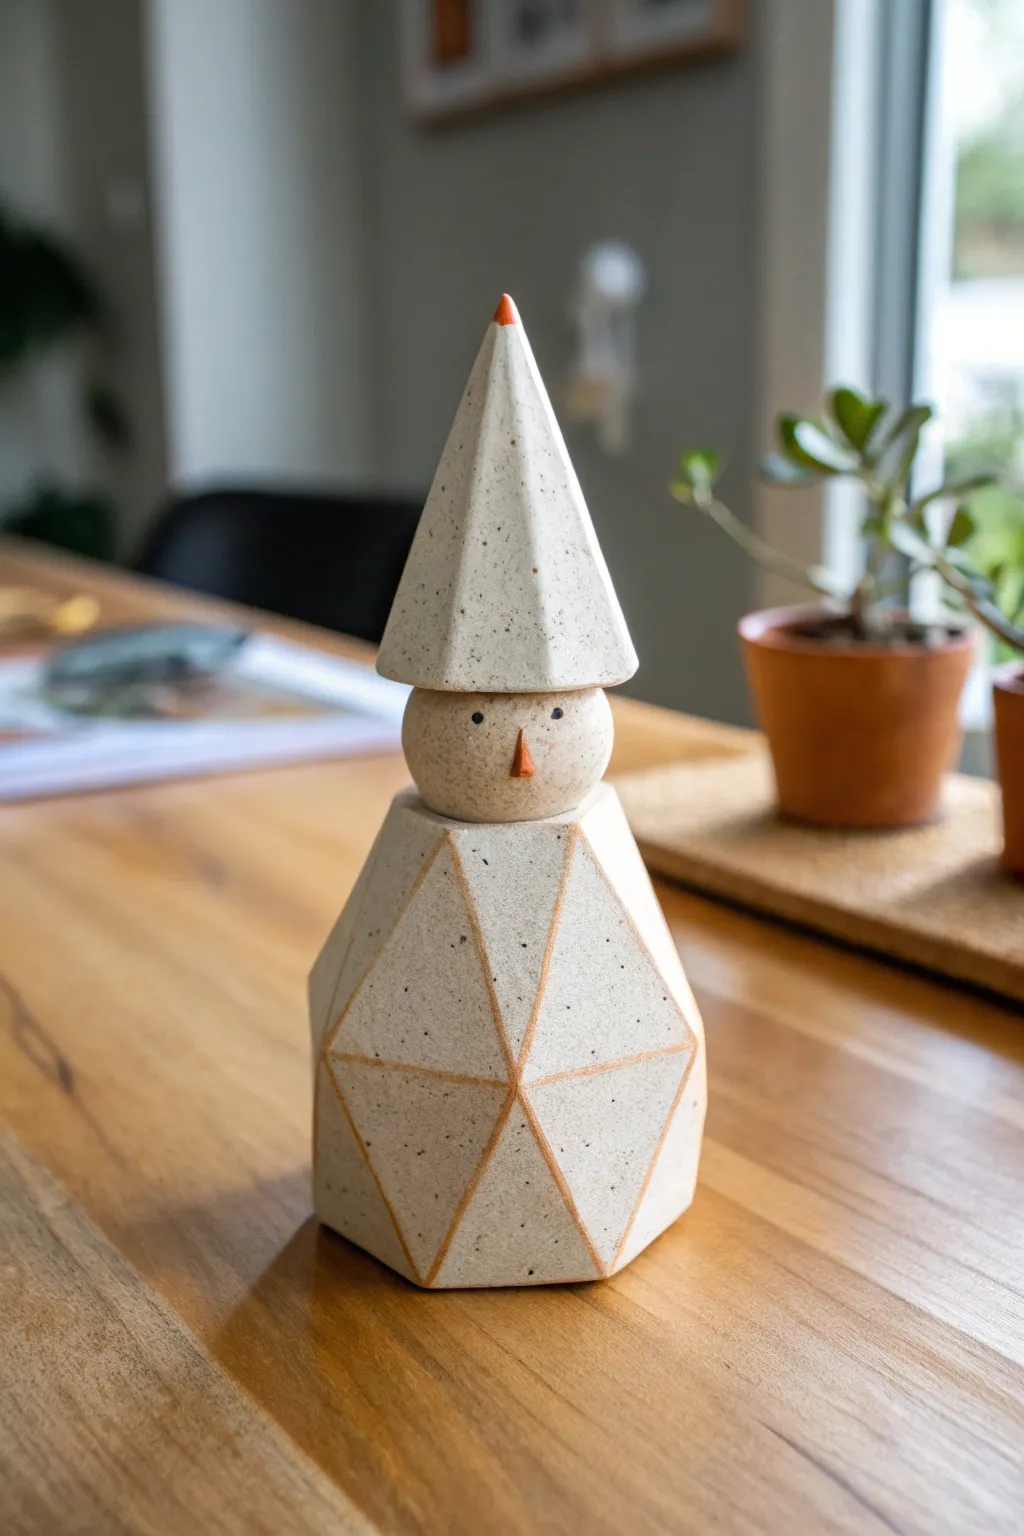
Move away from traditional garden kitsch with this sleek, minimalist gnome featuring faceted geometric shapes and crisp lines. Its raw, speckled clay finish paired with subtle orange accents creates a warm, modern aesthetic perfect for a contemporary shelf or desk.
Step-by-Step Guide
Materials
- Speckled stoneware clay (mid-fire)
- Pottery wheel (optional, for the head/base forms, but hand-building works too)
- Fettling knife or wire clay cutter
- Pin tool
- Rolling pin and canvas
- Slip and scoring tool
- Orange underglaze
- Black underglaze (for eyes)
- Fine detail brush
- Clear matte or satin glaze
- Sponge and water
- Pottery ruler or straight edge
Step 1: Shaping the Geometric Body
-
Form the base block:
Start by wedging a substantial ball of speckled clay. Form it into a thick, tall cylinder or block roughly 4-5 inches high. You can throw a thick cylinder on the wheel and let it leather-harden, or hand-build a solid block. -
Create the facets:
Once the clay is leather hard (firm but carvable), use a straight edge to mark out triangles around the circumference. Use a sharp fettling knife or wire cutter to slice off planes of clay, creating the faceted diamond pattern seen in the image. Aim for sharp, crisp edges. -
Smooth the planes:
After cutting the facets, check the surface texture. If the cutting left drag marks, use a slightly damp sponge to smooth the flat planes without rounding off your sharp geometric corners. -
Carve the accent grooves:
Using a ruler and a carving tool or the back of a knife, carefully score deep straight lines along the edges where your geometric facets meet. These grooves will later hold the orange inlaid color. -
Hollow the base:
Carefully turn the body over. If it’s a solid block, use a loop tool to hollow out the interior to ensure even drying and prevent explosions in the kiln. Leave the walls about 1/4 to 1/2 inch thick.
Step 2: Crafting the Head and Hat
-
Create the head sphere:
Roll a smooth, perfect sphere of clay for the head. It should be proportional to the body—about 1.5 inches in diameter. I like to roll it gently on a table to remove fingerprints. -
Make the nose:
Cut a very small, sharp triangle from a scrap slab of clay. Attach this to the center of the face using a dab of slip and scoring the surface. Ensure the edges are clean and sharp. -
Form the hat cone:
Create a tall cone shape. You can do this by rolling a slab and cutting a triangle to roll up, or by pinching a solid cone from a coil. The hat should be quite tall and slender. -
Facet the hat:
just like the body, wait until the hat is leather hard. Use your knife to slice flat planes vertically up the cone, giving it a polygonal, geometric appearance matching the base. -
Hollow the hat:
If you made a solid cone, use a small loop tool or drill bit to hollow out the inside of the hat from the bottom to reduce weight and wall thickness.
Clean Lines Tip
When carving facets, use a cheese cutter wire pulled taut. It creates much smoother planes than a knife and doesn’t compress the clay as much.
Step 3: Assembly and Decoration
-
Attach the components:
Score and slip the top of the body and the bottom of the head, pressing them firmly together. Repeat the process to attach the hat to the top of the head. Clean up any oozing slip with a stiff brush. -
Prepare for bisque:
Allow the fully assembled gnome to dry slowly under plastic for a few days to equalize moisture, then uncover to bone dry. Fire to bisque temperature (usually Cone 04). -
Inlay the grooves:
Once bisqued, paint orange underglaze into the carved grooves on the body and the tiny triangle nose. Also paint the very tip of the hat orange. -
Clean the inlay:
Let the underglaze dry, then take a clean, damp sponge and wipe the surface of the body. This will remove the orange from the flat faces but leave it trapped in the carved recessed lines. -
Paint the eyes:
Using a fine detail brush and black underglaze, dot two small eyes just above the nose. Keep them symmetrical and minimal. -
Glaze and fire:
Dip or brush the entire piece in a clear matte or satin glaze. This seals the clay while letting the natural speckles show through. Fire to the maturity temperature of your clay (likely Cone 5 or 6).
Scale It Up
Create a trio of these gnomes in varying heights. Try swapping the body shape for a cube or cylinder for the other two to create a geometric family.
Place your finished geometric gnome near a window where the light can catch its faceted angles