There’s something ridiculously fun about turning a “scary” sea creature into a sweet little clay buddy you can hold in your palm. Here are my favorite shark clay ideas—starting with the classic cute minis and drifting into more playful, unexpected projects.
Classic Cute Mini Shark
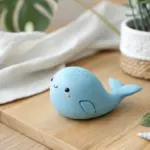
This adorable mini shark features a smooth slate-blue body and a contrasting white belly speckled with tiny dots. Its rounded, friendly shape makes it a perfect beginner project for polymer clay enthusiasts looking to create a charming desk companion.
Step-by-Step Guide
Materials
- Slate blue polymer clay
- White polymer clay
- Black polymer clay (tiny amount)
- Clay sculpting tools (needle tool, blending tool)
- Acrylic roller
- Small ball tool
- Black acrylic paint (optional, for dots)
- Fine detail paintbrush or toothpick
- Oven for baking
Step 1: Body Formation
-
Mix the perfect blue:
Start with your slate blue clay. If you don’t have this exact shade, mix a standard blue with a touch of grey and a tiny bit of white to get that muted, matte ocean tone. Condition the clay until it’s soft and pliable. -
Shape the main form:
Roll the blue clay into a smooth ball about the size of a golf ball. Then, gently roll one side against your work surface to elongate it into a teardrop shape. -
Refine the silhouette:
Flatten the wider end slightly to create the shark’s head, and taper the tail end so it lifts slightly. The overall shape should look like a fat, rounded comma.
Fixing Bumps
If you smudge the white belly with blue clay while blending, use a q-tip dipped in rubbing alcohol or nail polish remover to gently wipe the white surface clean before baking.
Step 2: Adding the Belly
-
Prepare the white patch:
Roll a smaller ball of white clay and flatten it into an oval sheet using your acrylic roller. It should be thin but opaque enough not to show the blue underneath. -
Attach the belly:
Place the white oval onto the underside of the shark’s body, stretching it gently up the sides. Press it down firmly to remove air bubbles. -
Blend the seam:
Using a blending tool or your finger, carefully smooth the edges where the white meets the blue. You want a distinct line, but the clays should be fused together seamlessly.
Beach Vibes
Make a tiny clay surfboard or life preserver to accompany your shark. You can even create a simple sand-colored base to display your ocean friend.
Step 3: Fins and Flippers
-
Create the pectoral fins:
Form two small, equal-sized triangles from the blue clay. Flatten them slightly and curve the tips backward to look like shark fins. -
Attach the side fins:
Press one fin onto each side of the body, just behind where the head section would end. Blend the attachment point into the body so they don’t fall off during baking. -
Form the tail flukes:
Make two smaller flattened triangles for the tail. I find it easiest to attach these to the tapered end of the body, angling one up and one down to form the classic shark tail silhouette. -
Add the dorsal fin:
Create a classic curved shark fin for the back. Attach it centered along the top spine of the shark, blending the base smoothly.
Step 4: Face Details
-
Carve the mouth:
Use a needle tool or a thin blade to carefully press a curved line horizontally across the front of the face. Curve the ends upward slightly for a happy smile. -
Create eye sockets:
Use a small ball tool to make two small indentations where the eyes will go. Place them wide apart for maximum cuteness. -
Insert the eyes:
Roll tiny balls of white clay and press them into the sockets. Top each with a minuscule dot of black clay for the pupil. -
Add gills:
On the blue side of the body, just behind the eyes, use a needle tool to gently impress three curved vertical lines for gills. -
Nostril details:
Poke two very tiny holes just above the mouth line for nostrils.
Step 5: Finishing and Texturing
-
Smooth everything out:
Check the entire piece for fingerprints. Lightly brush over the surface with a tiny bit of baby oil or clay softener to smooth imperfections. -
Bake the shark:
Bake in your oven according to your clay manufacturer’s instructions. Usually, this is around 275°F (130°C) for 15-30 minutes depending on thickness. -
Paint the speckles:
Once cooled, mix a watery black acrylic paint or use a fine-tip marker. Add tiny random dots all over the white belly area to give it a stone-like texture. -
Seal the piece:
Finish with a thin coat of matte varnish to protect the paint and give the shark a finished, ceramic look.
Now your charming little shark is ready to swim across your shelf or brighten up a potted plant with its friendly grin

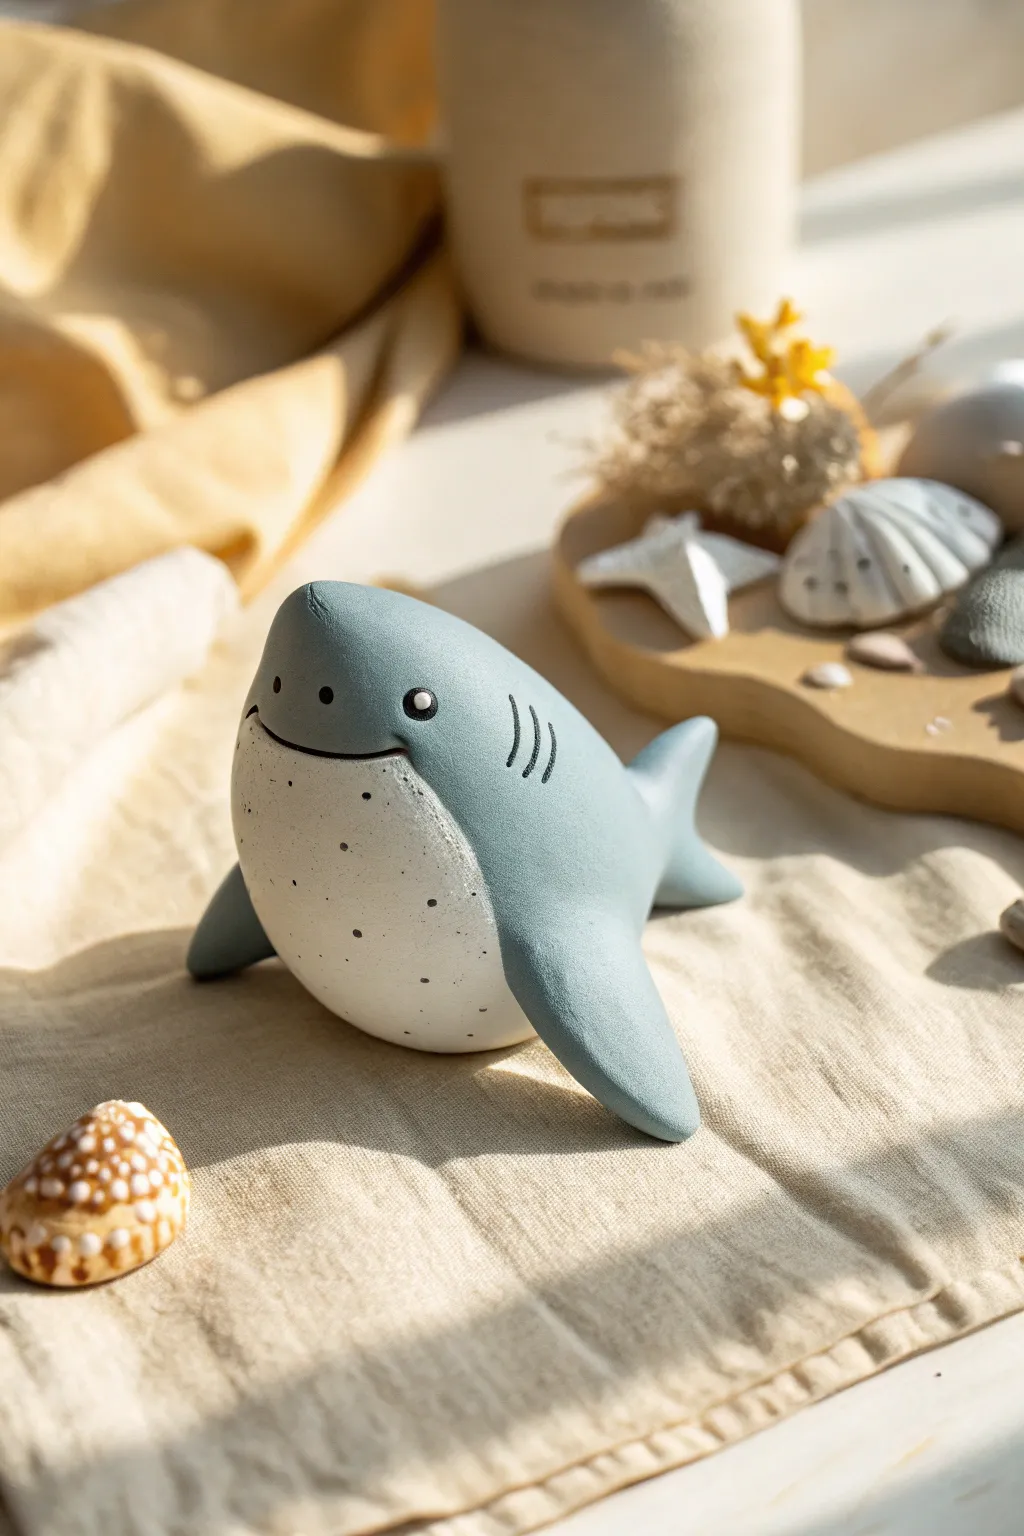
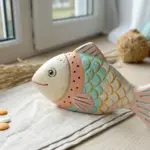
Kawaii Shark With Blush Cheeks
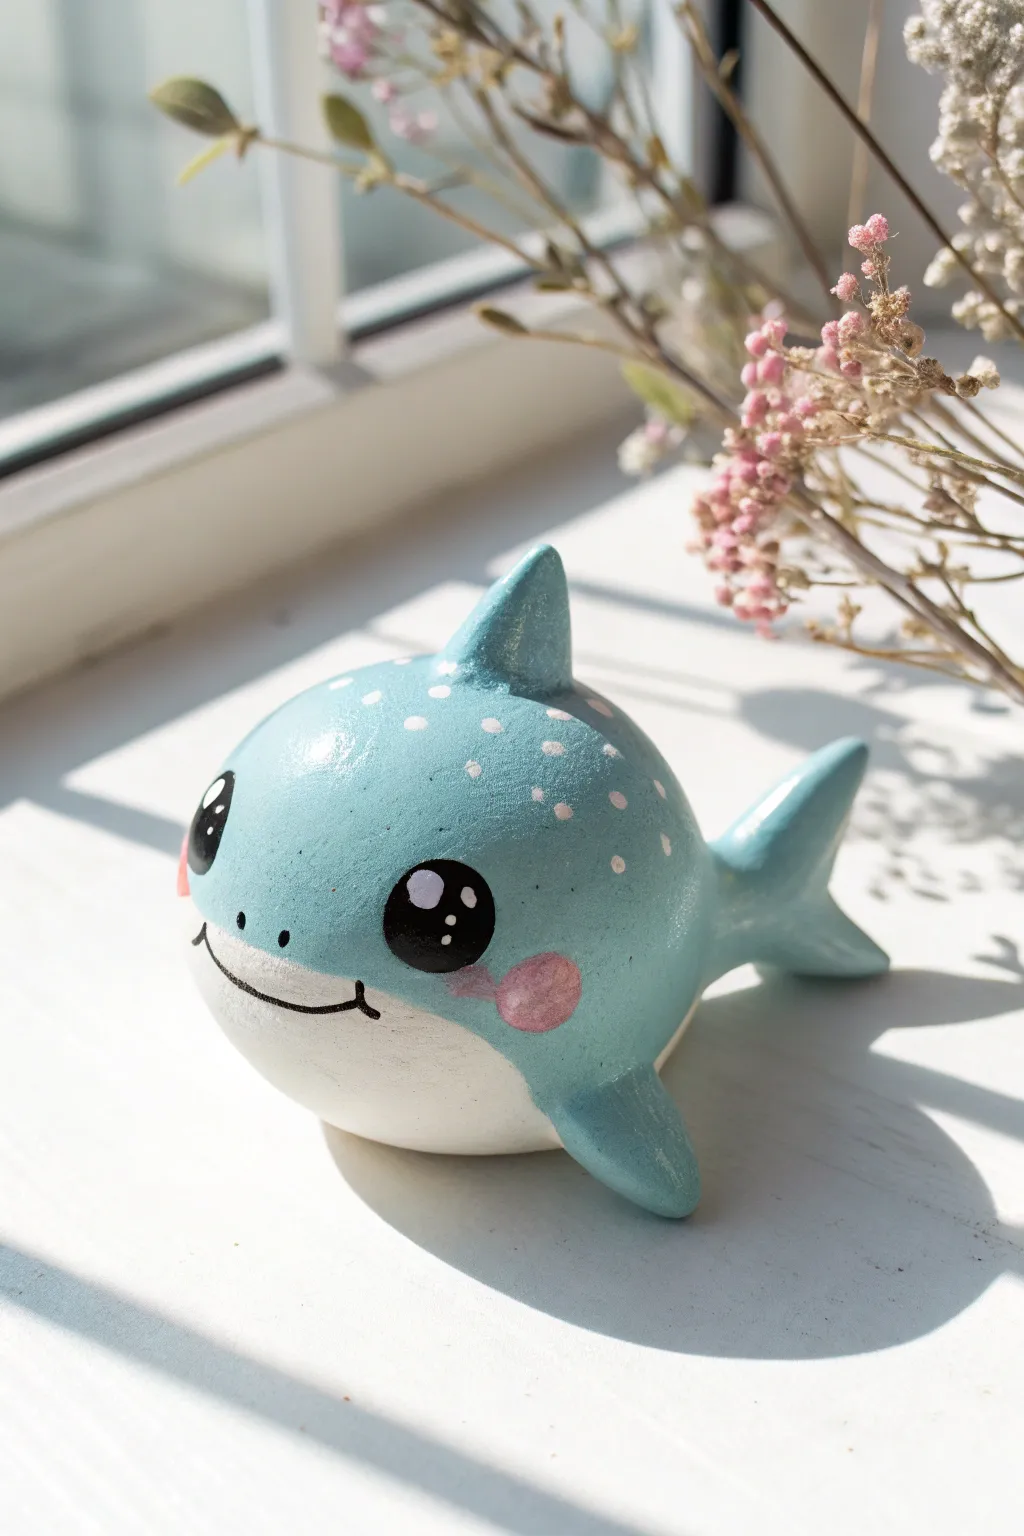
This adorable kawaii shark captures hearts with its perfectly round body, oversized sparkling eyes, and sweet rosy cheeks. The smooth finish and pastel blue color give it a soft, friendly look perfect for brightening up any desk or shelf.
Step-by-Step Tutorial
Materials
- White air-dry clay or polymer clay
- Acrylic paints (pastel blue, white, black, pale pink)
- Gloss varnish or glaze
- Sculpting tools (needle tool, smoothing tool)
- Fine detail paintbrushes
- Dotting tool or toothpick
- Water cup (for smoothing)
- Aluminum foil (optional for core)
Step 1: Sculpting the Base
-
Form the body:
Start with a ball of clay about the size of a tangerine. Roll it between your palms until it is perfectly smooth, then gently press it into a slight teardrop shape, keeping the front very round and bulbous. -
Shape the tail:
Pinch the tapered end of your teardrop to form the tail stock. Flatten the very end slightly and use a tool to split it, pulling the clay up and down to create the iconic shark tail fins. -
Attach the dorsal fin:
Shape a small triangle of clay for the dorsal fin on the back. Score the bottom of the fin and the attachment point on the back, add a dab of water (or liquid clay), and press it on firmly. -
Add pectoral fins:
Create two smaller, curved triangles for the side fins. Attach these low on the body’s sides using the same scoring method, angling them slightly backward for a swimming motion. -
Smooth the seams:
Using a smoothing tool or your finger dipped in a little water, blend the clay at all connection points (fins to body) until the seams disappear completely and the surface is uniform.
Smooth Operator
Use a bit of water on your finger to constantly smooth the clay while sculpting. This prevents cracking later and creates that seamless, polished look.
Step 2: Painting the Details
-
Apply base coat:
Once the clay is fully dry (24-48 hours for air-dry clay), paint the entire upper body in a soft pastel blue. Leave the belly area unpainted or paint it white. -
Paint the belly:
Carefully paint the underside and lower jaw area with white paint. Create a gentle, curved line where the white meets the blue to mimic a real shark’s countershading. -
Draft the face:
I find it helpful to lightly sketch the eye placement and mouth with a pencil before committing to paint, ensuring the expression is symmetrical. -
Paint the eyes:
Using black paint and a fine brush, paint two large, solid black circles wide apart on the face. Let this layer dry completely. -
Add eye sparkles:
Dip a dotting tool or the back of a brush in white paint. Add two white dots to each black eye—one larger highlight near the top and a smaller one near the bottom for that kawaii twinkle. -
Draw the smile:
With your finest brush or a black paint pen, draw a thin, simple curved line connecting the cheeks for the mouth, adding tiny vertical ticks at the corners. -
Apply blush:
Mix a soft pink color and paint oval blush marks right under the eyes. For a softer look, you can dab the paint with your finger to diffuse the edges slightly. -
Create the spots:
Using a small dotting tool or toothpick dipped in light pink or white, add scattered polka dots across the blue upper body to give it texture and character.
Step 3: Finishing Touches
-
Seal the piece:
Protect your paint job by applying a coat of gloss varnish. This not only seals the clay but gives the shark a wet, aquatic shine that makes the colors pop. -
Final dry:
Allow the varnish to cure completely in a dust-free area before handling or displaying your new friend.
Make it a Charm
Before drying, insert a metal eye screw into the top of the dorsal fin. Once dry and varnished, you can attach a keychain or ribbon to carry it with you.
Now you have a charming little sea creature ready to swim into your collection
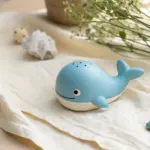

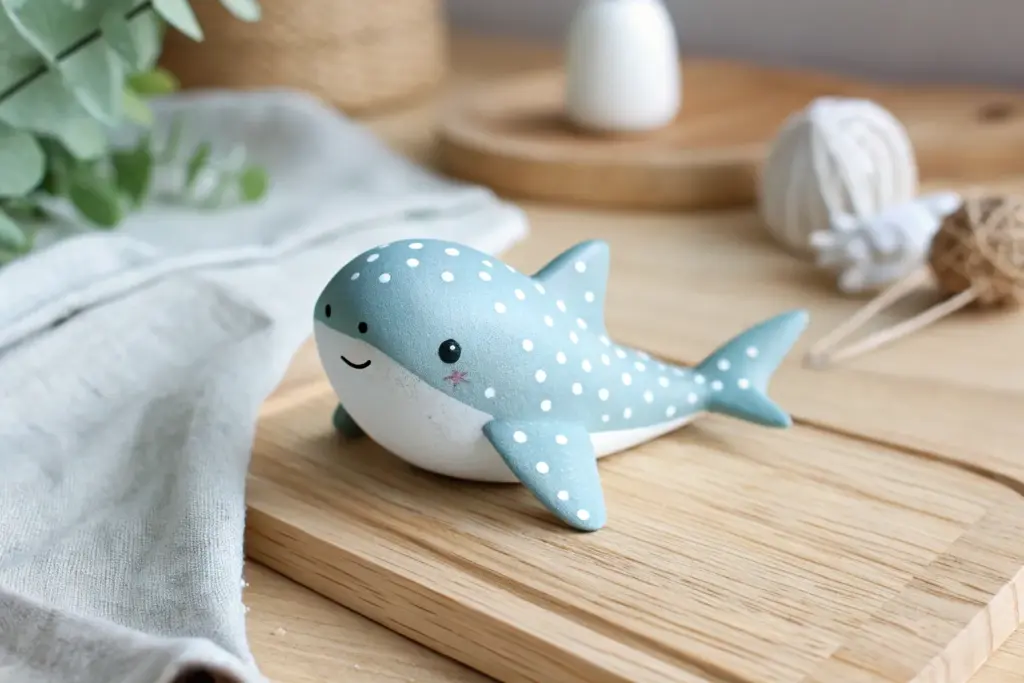
Whale Shark With Polka Dots
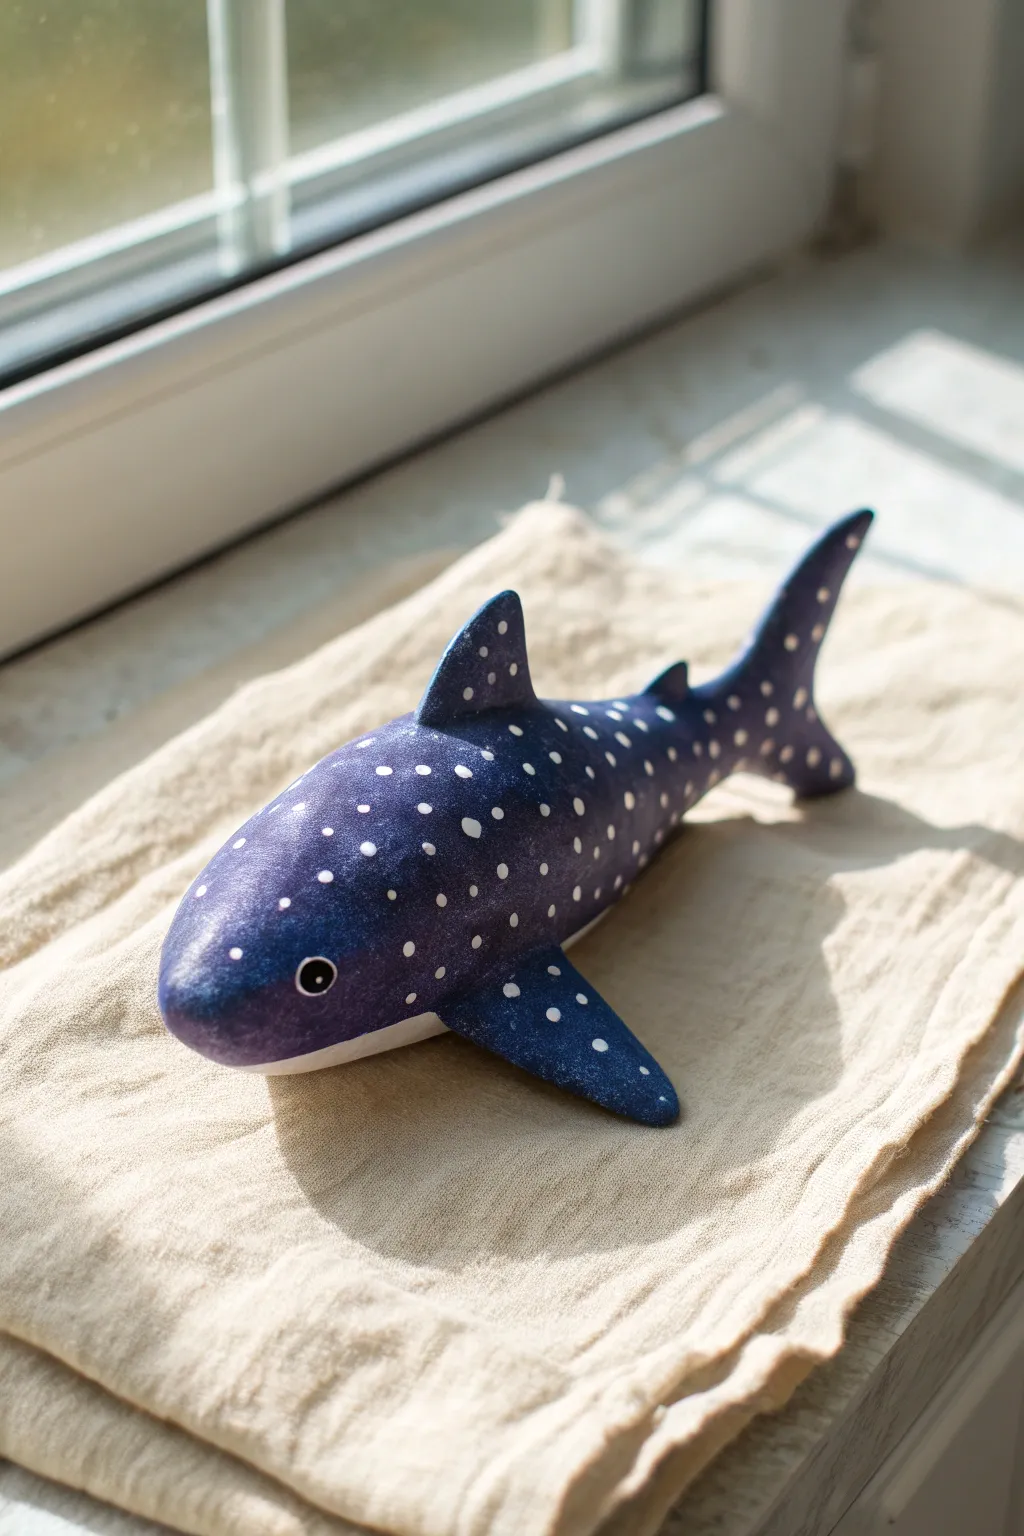
This charming whale shark sculpture captures the gentle giant’s iconic look with a whimsical polka-dot pattern. The deep indigo clay body contrasts beautifully with the crisp white spots, making it a perfect desk companion or shelf decoration.
Detailed Instructions
Materials
- Air-dry clay or polymer clay (white or light grey)
- Acrylic paints (Deep indigo/navy blue, white, black)
- Fine-grit sandpaper
- Sculpting tools (specifically a smoothing tool)
- Detail paintbrush (00 or 0 size)
- Flat paintbrush
- Water cup and paper towels
- Gloss or matte varnish (optional)
Step 1: Sculpting the Body
-
Form the base shape:
Start with a large ball of clay about the size of a lemon. Roll it between your palms to elongate it into a teardrop shape that is thicker at the front (head) and tapers down to a point at the tail. -
Flatten the head:
Gently press down on the wider end of the teardrop to flatten the head slightly, giving it that characteristic wide, whale shark snout. Keep the bottom relatively flat so the figure rests stably. -
Create the tail fin:
Pinch a separate piece of clay into a crescent moon shape. Attach this to the tapered end of the body, blending the clay seams thoroughly with your fingers or a smoothing tool so the connection is invisible. -
Add dorsal fin:
Shape a small triangle of clay for the iconic dorsal fin. Place it on the center of the back, slightly closer to the head than the tail. Smooth the base of the fin into the body to secure it. -
Attach pectoral fins:
Create two matching flat, triangular shapes for the side fins. Attach these low on the body, just behind the head area, angling them slightly backward like wings. -
Add the smaller rear fin:
Don’t forget the tiny second dorsal fin! Make a very small triangle and attach it further down the back, near the tail base. -
Refine and smooth:
Dip your finger in a little water (if using air-dry clay) or baby oil (if using polymer) and run it over the entire sculpture to remove fingerprints and bumps. -
Dry or bake:
Follow the instructions for your specific clay type. If using air-dry clay, let it sit for 24-48 hours. If polymer, bake according to the package directions.
Step 2: Painting and Details
-
Sand for smoothness:
Once fully cured and dry, use fine-grit sandpaper to gently buff away any remaining rough patches or sharp edges. Wipe away the dust with a damp cloth. -
Apply the base coat:
Mix a deep indigo or navy blue acrylic paint. Using your flat brush, coat the entire top and sides of the shark. I find specifically leaving the belly unpainted or painting it a creamy white adds realism. -
Define the belly line:
Carefully paint a clean line where the dark blue meets the white underbelly. This line should curve gently along the side of the shark. -
Add the eyes:
Paint two small black circles on either side of the wide head. Once the black is dry, add a tiny white rim around them or a small white highlight dot for life. -
Paint the polka dots:
Using your smallest detail brush or a dotting tool, dip into pure white paint. Start adding dots across the dark blue back. Vary the sizes slightly—some tiny specks, some larger distinct spots. -
Refine the pattern:
Try to arrange the dots relatively randomly, but ensure they cover the dorsal fin and tail evenly. The contrast is key here, so make sure the white is opaque. -
Seal the piece:
Once all paint is completely dry, apply a coat of varnish. A gloss finish makes it look wet and aquatic, while matte looks more modern.
Uneven dots?
If your paintbrush makes messy dots, use the handle end of the brush instead. Dip the stick end into paint and stamp it for perfect circles.
Galaxy Shark
Swap the white dots for metallic gold or silver paint, and sponge on some purple hues over the blue base for a cosmic ‘galaxy’ shark look.
Now you have a serene little ocean friend to keep you company on your desk


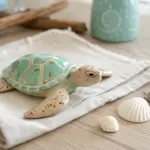
Baby Shark Family Set
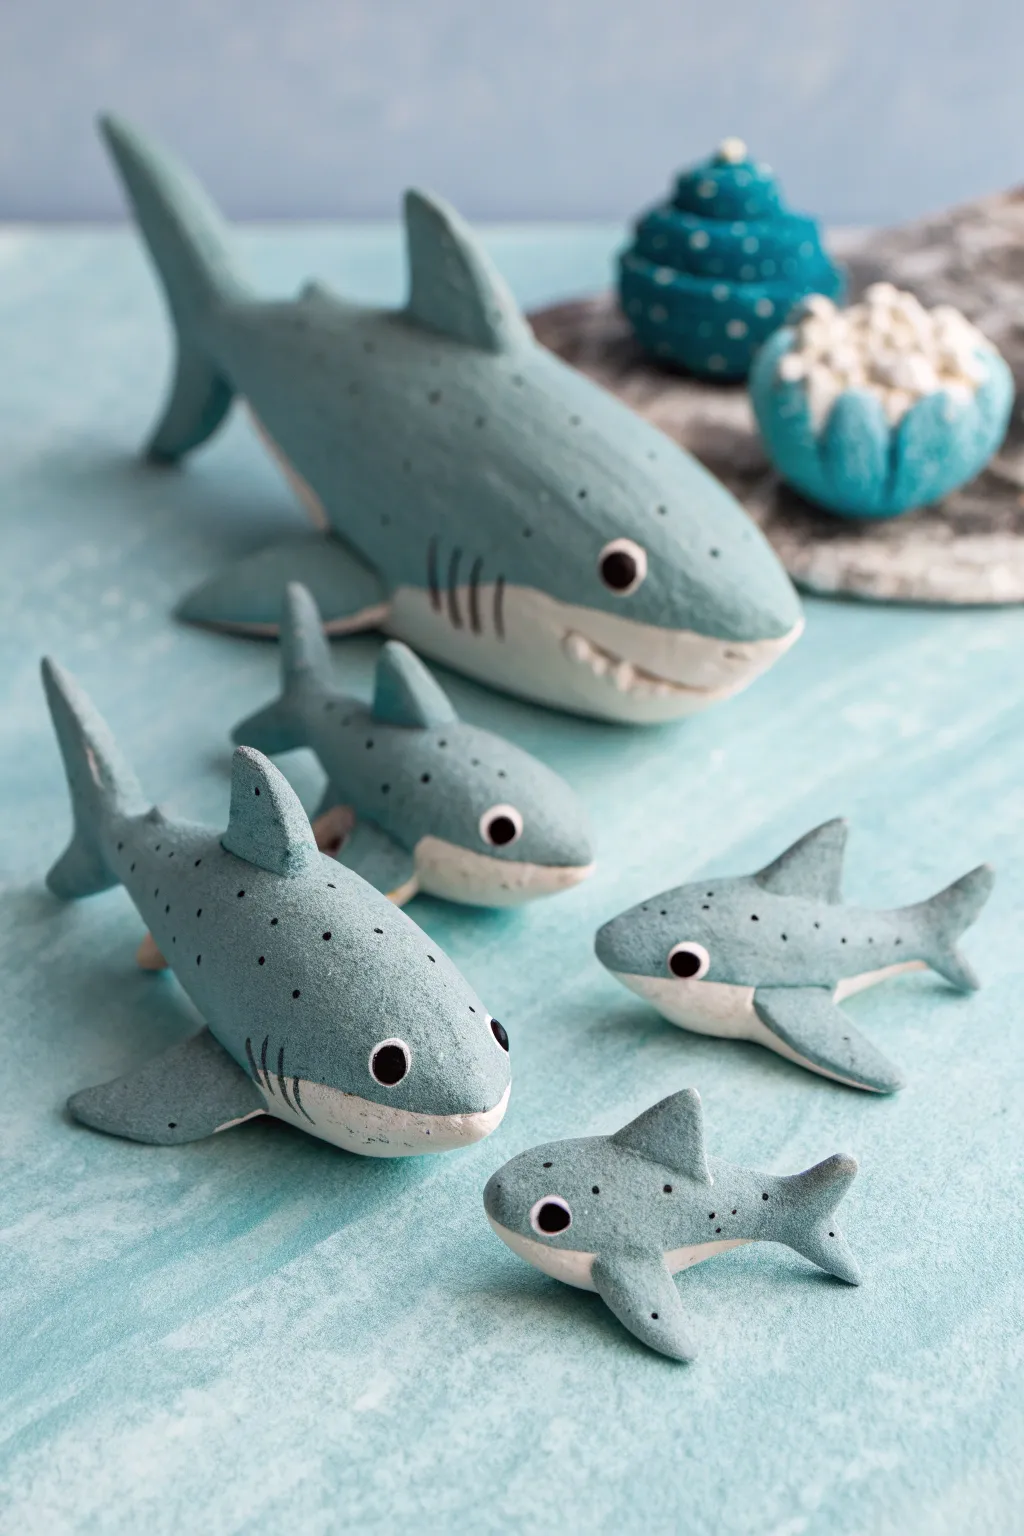
Create your own ocean nursery with this adorable set of clay sharks, ranging from a large parent shark to a tiny pup. These figures feature a charming, hand-sculpted texture and a soft teal-grey finish that gives them a lovely, rustic folk-art appeal.
Step-by-Step Guide
Materials
- Air-dry clay (stone or white)
- Acrylic paints (teal, grey, white, black)
- Clay sculpting tools (knife, sphere tool)
- Fine-grit sandpaper
- Water cup and sponge
- Paintbrushes (flat shade and fine detail)
- Matte varnish or sealant
- Aluminum foil (for armature)
Step 1: Sculpting the Parent Shark
-
Core construction:
For the largest shark, start by crumpling a piece of aluminum foil into a rough torpedo shape. This saves clay and keeps the figure lightweight. Roll out a slab of clay and wrap it fully around the foil core, smoothing the seams together with a bit of water. -
Body shaping:
Roll the clay-covered form on your surface to taper the tail end. Gently flatten the bottom slightly so the shark will sit flat without rolling over. Pinch the front to create a rounded, blunt nose typical of these stylized sharks. -
Adding fins:
Fashion a triangular dorsal fin from a fresh piece of clay. Score (scratch) the bottom of the fin and the attachment point on the shark’s back. Apply a dab of water or slip, press the fin on, and smooth the edges down with a sculpting tool until the seam disappears. -
Side and tail fins:
Repeat the process for the two pectoral fins on the sides and the vertical tail fin. For the tail, you might want to attach it separately or pinch it out from the main body mass if your clay is soft enough. -
Facial details:
Use a knife tool or a needle to gently carve a curved line for the mouth. For the large shark, you can press small indentations along the mouth line to suggest teeth. Use a sphere tool to press deep sockets where the eyes will go.
Cracking Fins?
If fins crack while drying, mix a small amount of clay with water to make a paste (slip). Fill the crack generously, smooth it over, and let it dry again before sanding.
Step 2: Creating the Pups
-
Scaling down:
For the smaller sharks, you won’t need a foil core. Simply roll solid balls of clay into tapered logs. Make them in graduating sizes to create a true ‘family’ effect. -
Dynamic poses:
Give each pup a slightly different personality. Curve one tail to the left and another to the right to simulate swimming motion. Attach their fins using the same scoring and slipping method as the parent. -
Drying time:
Set the whole family aside to dry. This usually takes 24-48 hours depending on humidity. I like to rotate them occasionally so the undersides dry evenly.
Deep Sea Decor
Create a display base! Use a flat piece of wood or slate painted grey. Glue down real seashells or small white rocks to mimic the ocean floor scene in the photo.
Step 3: Painting and Finishing
-
Sanding:
Once fully dry, lightly sand any rough fingerprints or sharp edges. The goal isn’t a factory-smooth finish—a little texture adds character—but you want to remove obvious flaws. -
Base coat mixing:
Mix a custom color using teal, grey, and a lot of white. Aim for a soft, muted ‘sea glass’ blue-grey. Paint the entire top half of each shark, bringing the color down the sides. -
Underbelly:
Paint the bottom stomach area and the underside of the fins with pure white or an off-white cream. Blend the edge where the blue meets the white while the paint is still slightly wet for a soft transition, rather than a hard line. -
Adding the eyes:
Paint the inside of the eye sockets black. If you want a more distinct eye, you can glue in a small black bead or paint a black circle with a tiny white reflection dot. -
Texture details:
Using a very fine brush or a toothpick dip, add three small vertical lines for gills behind the head. You can also add speckling by flicking a toothbrush with diluted dark grey paint, or manually painting tiny dots for a spotted shark look. -
Sealing:
Protect your family with a coat of matte varnish. Avoid glossy finishes if you want to maintain that natural, earthy clay aesthetic shown in the photo.
Arrange your finished shark family on a shelf or desk for a delightful splash of ocean charm

The Complete Guide to Pottery Troubleshooting
Uncover the most common ceramic mistakes—from cracking clay to failed glazes—and learn how to fix them fast.
Shark Charm With Eye Pin Loop
Dive into crafting with this adorable, matte-finish shark keychain made from polymer clay. Its clean lines, simple two-tone design, and sweet expression make it a perfect beginner project that looks professionally done.
Step-by-Step
Materials
- Polymer clay in slate blue (or grey)
- Polymer clay in white
- Small black glass beads or black clay for eyes
- Eye pin (silver tone)
- Lobster clasp keychain hardware
- Jump rings
- Clay sculpting tools (needle tool, smooth blending tool)
- Extruder or small round cutter (optional for symmetrical dots)
- Oven for baking
- Pliers (round nose and flat nose)
Step 1: Shaping the Body
-
Prepare the slate blue clay:
Begin by conditioning your slate blue or grey clay until it’s soft and pliable. Roll it into a smooth ball about the size of a large grape to remove any air bubbles. -
Form the torpedo shape:
Gently roll the ball between your palms, applying slightly more pressure on one side to elongate it into a teardrop or torpedo shape. One end should be rounded and blunt for the head, tapering down to a thinner tail section. -
Create the white belly:
Roll a smaller piece of white clay into a ball, then flatten it into an oval pancake. This needs to be thin but not translucent. Gently press this onto the underside of your blue shark body. -
Blend the seam:
Using your thumb or a soft silicone tool, carefully smooth the connection point where the white clay meets the blue. You want a seamless transition so the belly looks integrated, not just stuck on.
Step 2: Adding Fins and Tail
-
Sculpt the dorsal fin:
Take a small pea-sized amount of blue clay and shape it into a triangle. Press this onto the top center of the shark’s back. Use a modeling tool to smooth the base of the fin into the body for a strong bond. -
Form the pectoral fins:
Create two smaller flattened triangles for the side fins. Attach these to the sides of the body, just slightly back from where the head section ends. Angle them slightly downwards and backwards. -
Craft the tail fin:
Shape a larger piece of blue clay into a crescent or boomerang shape. Attach the center of this crescent to the tapered tail end of the body. Blend the seams thoroughly so the tail is secure.
Eye Pin Security
For extra strength, bend the hidden end of your eye pin into a zigzag or ‘L’ shape before inserting it into the clay. This creates an anchor so it can’t be pulled out straight after baking.
Step 3: Detailing and Assembly
-
Add the gills:
Using a needle tool or a very thin blade, carefully impress three small, curved vertical lines behind the pectoral fins on both sides to represent gills. -
Position the eyes:
Use a ball tool to make small indentations on either side of the head. Press a small black glass bead or a tiny ball of black clay into each socket. If using clay eyes, add a micro-dot of white for a highlight if desired. -
Create the snout freckles:
Using a needle tool, poke six small, shallow dots on the top of the snout in a triangle pattern (three pairs) for that distinct cartoon shark look. -
Refine the surface:
Before baking, give the entire piece a once-over. Smooth out any fingerprints using a tiny bit of baby oil or clay softener on your finger. I find this extra step crucial for that matte, professional finish. -
Insert the eye pin:
Trim an eye pin to about half an inch. Insert it into the center of the shark’s back, just in front of the dorsal fin. Twist it slightly as you push it in to help it grip the raw clay. -
Bake the charm:
Bake the shark according to your polymer clay package instructions (usually around 275°F/135°C for 15-30 minutes). Let it cool completely before handling. -
Attach hardware:
Once cool and hard, open a jump ring with your pliers. Loop it through the eye pin on the shark and connect it to your lobster clasp keychain assembly. Close the jump ring securely.
Pro Tip: Clean Seams
If blending colors smears the white onto the blue, clean it up gently with a Q-tip dipped in rubbing alcohol before baking. This keeps the belly crisp and white.
Now you have a trusty ocean friend to guard your keys wherever you go
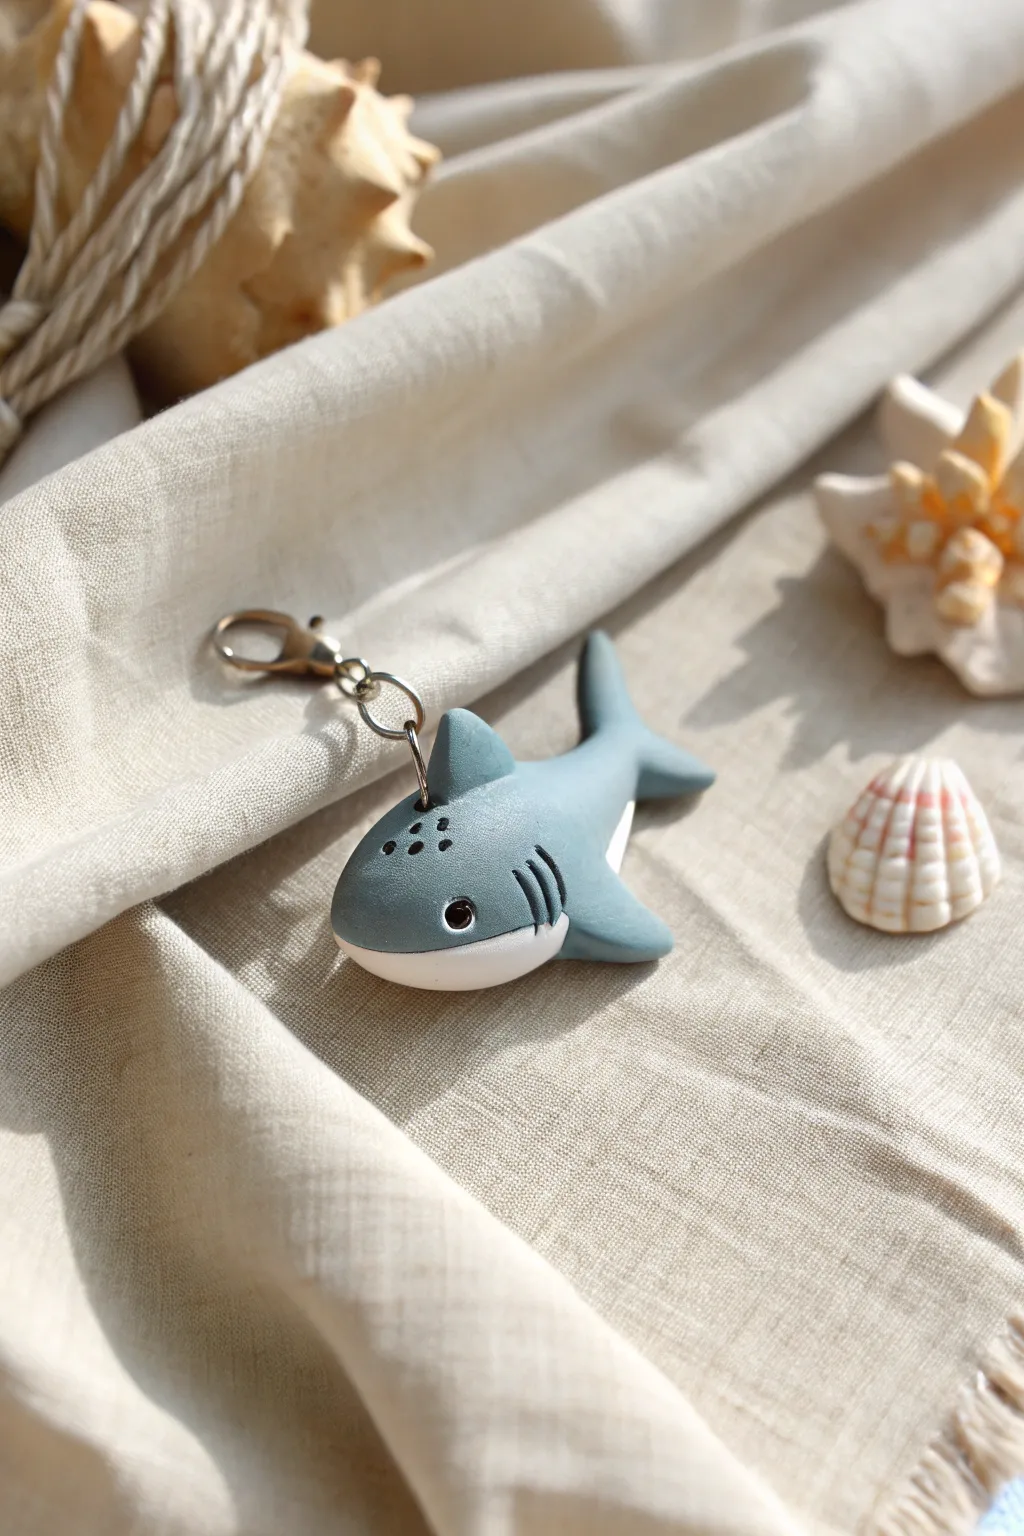
Shark Keychain Tag With Name Plate
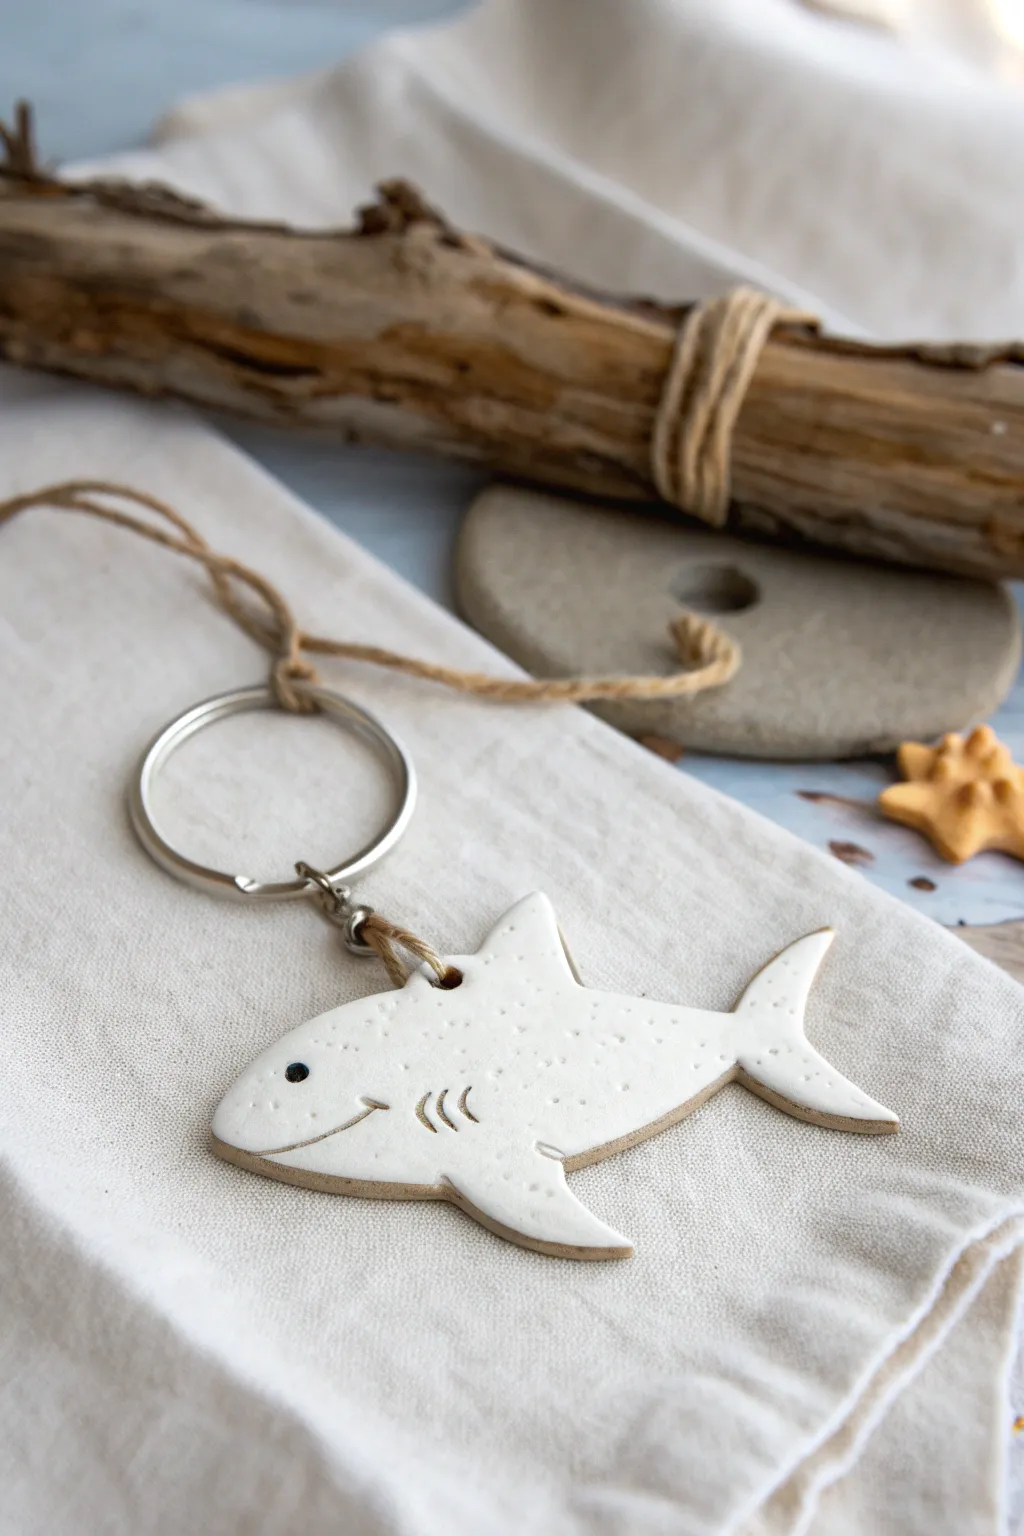
This minimalist coastal shark keychain captures the serene vibe of the ocean with its simple silhouette and textured finish. Crafted from white clay and finished with rustic twine, it makes a charming gift or a personal accessory for your beach bag.
Step-by-Step Tutorial
Materials
- White polymer clay or air-dry clay
- Rolling pin or acrylic roller
- Shark-shaped cookie cutter (approx. 2-3 inches)
- Needle tool or toothpick
- Small round tool or ball stylus (for the eye)
- Small straw or drill bit (for the hole)
- Black acrylic paint
- Fine-grit sandpaper
- Clear matte varnish or sealant
- Metal keyring
- Jute twine or hemp cord
Step 1: Shaping the Shark
-
Condition the clay:
Begin by taking a chunk of your white clay and kneading it in your hands until it becomes soft, pliable, and free of cracks. Warm clay is much easier to work with and results in a smoother finish. -
Roll out the slab:
Place the clay on a clean, flat surface. Use your rolling pin to flatten it into an even sheet, aiming for a thickness of about 1/4 inch (6mm). This thickness ensures the keychain is sturdy enough to withstand daily use. -
Cut the shape:
Press your shark-shaped cookie cutter firmly into the clay slab. If you don’t have a cutter, you can print a shark silhouette on paper, cut it out, place it on the clay, and trace around it carefully with your needle tool. -
Smooth the edges:
After removing the excess clay, gently run your finger along the cut edges of the shark to soften any sharp corners or burrs left by the cutter. Using a touch of water on your finger can help smooth air-dry clay perfectly. -
Create the hanging hole:
Use a small straw or a tool to punch a clean hole near the top of the dorsal fin or the upper back. Make sure the hole isn’t too close to the edge to prevent breakage later.
Step 2: Adding Details
-
Indent the gills:
Using a curved tool or the side of a small spoon handle, press three crescent-shaped indentations into the side of the shark to create the gills. Do not cut all the way through; imply the shape with gentle pressure. -
Carve the mouth:
Take your needle tool and carefully carve a long, slightly curved line for the mouth. Adding a tiny upward tick at the end gives the shark a subtle, friendly smile. -
Form the eye socket:
Press a small ball stylus or the round end of a paintbrush handle into the head area to create a distinct, circular indentation for the eye. -
Add skin texture:
To mimic the speckled look in the photo, gently prick the surface of the clay randomly with a needle tool or an old toothbrush. Keep the texture light so it looks like natural skin rather than holes.
Clay cracked?
If air-dry clay cracks while drying, mix a tiny bit of fresh clay with water to make a paste (slip) and fill in the cracks, then smooth it over.
Step 3: Finishing Touches
-
Dry or bake:
If using polymer clay, bake according to the manufacturer’s instructions on the package. If using air-dry clay, set it aside in a safe place to dry completely for 24-48 hours, flipping it occasionally for even drying. -
Sand edges:
Once fully cured and hard, check the edges one last time. If there are any rough spots, lightly buff them away with fine-grit sandpaper for a professional feel. -
Paint the eye:
Dip the tip of a toothpick into black acrylic paint and carefully dab it into the eye indentation. I find this method gives you much more control than using a brush for such a tiny spot. -
Seal the piece:
Apply a coat of clear matte varnish or sealant over the entire shark to protect it from dirt and moisture. Let this coat dry completely. -
Attach the hardware:
Cut a short length of jute twine. Fold it in half and push the loop through the hole in the shark. -
Secure the ring:
Thread the loose ends of the twine through the loop and pull tight to create a lark’s head knot. Then, tie the loose ends securely onto the metal keyring, trimming any excess twine.
Make it sparkly
For a magical ocean effect, lightly brush mica powder or pearlescent eyeshadow over the textured surface before baking or sealing.
Now you have a durable, ocean-inspired accessory ready to accompany you on your next adventure


What Really Happens Inside the Kiln
Learn how time and temperature work together inside the kiln to transform clay into durable ceramic.
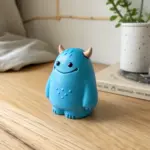
Shark Desk Buddy With Big Fin

This charming, upright shark figurine serves as the perfect whimsical companion for your workspace, featuring a textured blue-grey finish and dainty gold star accents. Its unique standing posture and stitched details give it a cozy, handmade felt plush look despite being sculpted from sturdy clay.
Detailed Instructions
Materials
- Air-dry clay or polymer clay (white)
- Acrylic paints: Blue-grey, titanium white, black, pale pink, gold
- Sculpting tools: Needle tool, smoothing tool, rolling pin
- Aluminum foil (for armature core)
- Fine grit sandpaper
- Small paintbrushes: Flat shader, fine liner
- Matte varnish or sealant
Step 1: Sculpting the Base Form
-
Prepare the core:
Crumple aluminum foil into a elongated, slightly curved cylinder shape. This will act as the core for the shark’s body, saving clay and reducing weight. The bottom should be wider to support the standing pose. -
Cover the armature:
Roll out a sheet of clay to about 1/4 inch thickness. Wrap this around your foil core, trimming excess and smoothing the seams together with a little water or slip until they disappear. -
Shape the head and tail:
Taper the top of the cylinder into a rounded bullet shape for the snout. At the bottom, flatten the base so it stands perfectly upright, then flare out the clay slightly at the back to form the tail fluke resting on the ground for stability. -
Add the pectoral fins:
Shape two triangular fins from fresh clay. Attach one to each side of the body, about halfway down. Blend the seams smoothly into the body using a sculpting tool so they look integrated, not just stuck on. -
Refine the surface:
Go over the entire sculpture with a slightly damp sponge or finger to remove fingerprints. Ensure the belly area is relatively flat to make painting the separation line easier later.
Step 2: Adding Details and Drying
-
Carve the gills:
Using a needle tool or a small loop tool, gently crave three curved lines on each side of the head, just above the pectoral fins, to represent the gills. -
Create the mouth:
Incise a deeply curved smile line below the snout. Use a small ball tool or the rounded end of a paintbrush to create a small indentation at the corner of the mouth for extra character. -
Dry completely:
Let the sculpture dry fully. For air-dry clay, this may take 24-48 hours depending on thickness. I like to rotate it occasionally so the bottom dries evenly. -
Sand for smoothness:
Once bone dry, use fine-grit sandpaper to gently smooth out any rough bumps or unevenness on the surface, wiping away the dust with a barely damp cloth.
Texturing Tip
Before the clay dries, gently press a clean toothbrush against the surface. This creates a subtle stippled texture that mimics the look of felt fabric once painted.
Step 3: Painting and Finishing
-
Paint the base coat:
Mix a muted blue-grey acrylic paint. Cover the entire back, fins, and sides of the shark. Bring the color slightly around to the front, creating a clean curved line where the belly will start. -
Paint the belly:
Fill in the front belly area with titanium white paint. Apply two coats if necessary to get an opaque, solid finish that contrasts well with the grey. -
Add stitched details:
Using a very fine liner brush and dark grey or black paint, create small dashed lines along the border where the white belly meets the grey body. This mimics the look of fabric stitching. -
Detail the face:
Paint two large, solid black circles for eyes. Add a small white highlight dot in each eye to bring them to life. Paint a tiny pink tongue inside the mouth indentation. -
Apply star accents:
Dip a fine brush or a toothpick into gold paint. scatter tiny stars or simple cross-shapes across the blue-grey parts of the body and fins for a magical touch. -
Dry brush texture:
To enhance the ‘felt’ look, very lightly dry brush a tiny amount of white paint over the blue-grey areas, especially on the fins and back. -
Seal the piece:
Finish by applying a coat of matte varnish over the entire sculpture to protect the paint and give it a uniform, professional sheen.
Level Up: Accessories
Sculpt a tiny clay sailor hat or a life preserver to sit at the shark’s base. You can even paint the base to look like a sandy beach or ocean waves.
Place your friendly shark on your desk to guard your pens and keep you company while you work
Shark Pencil Topper
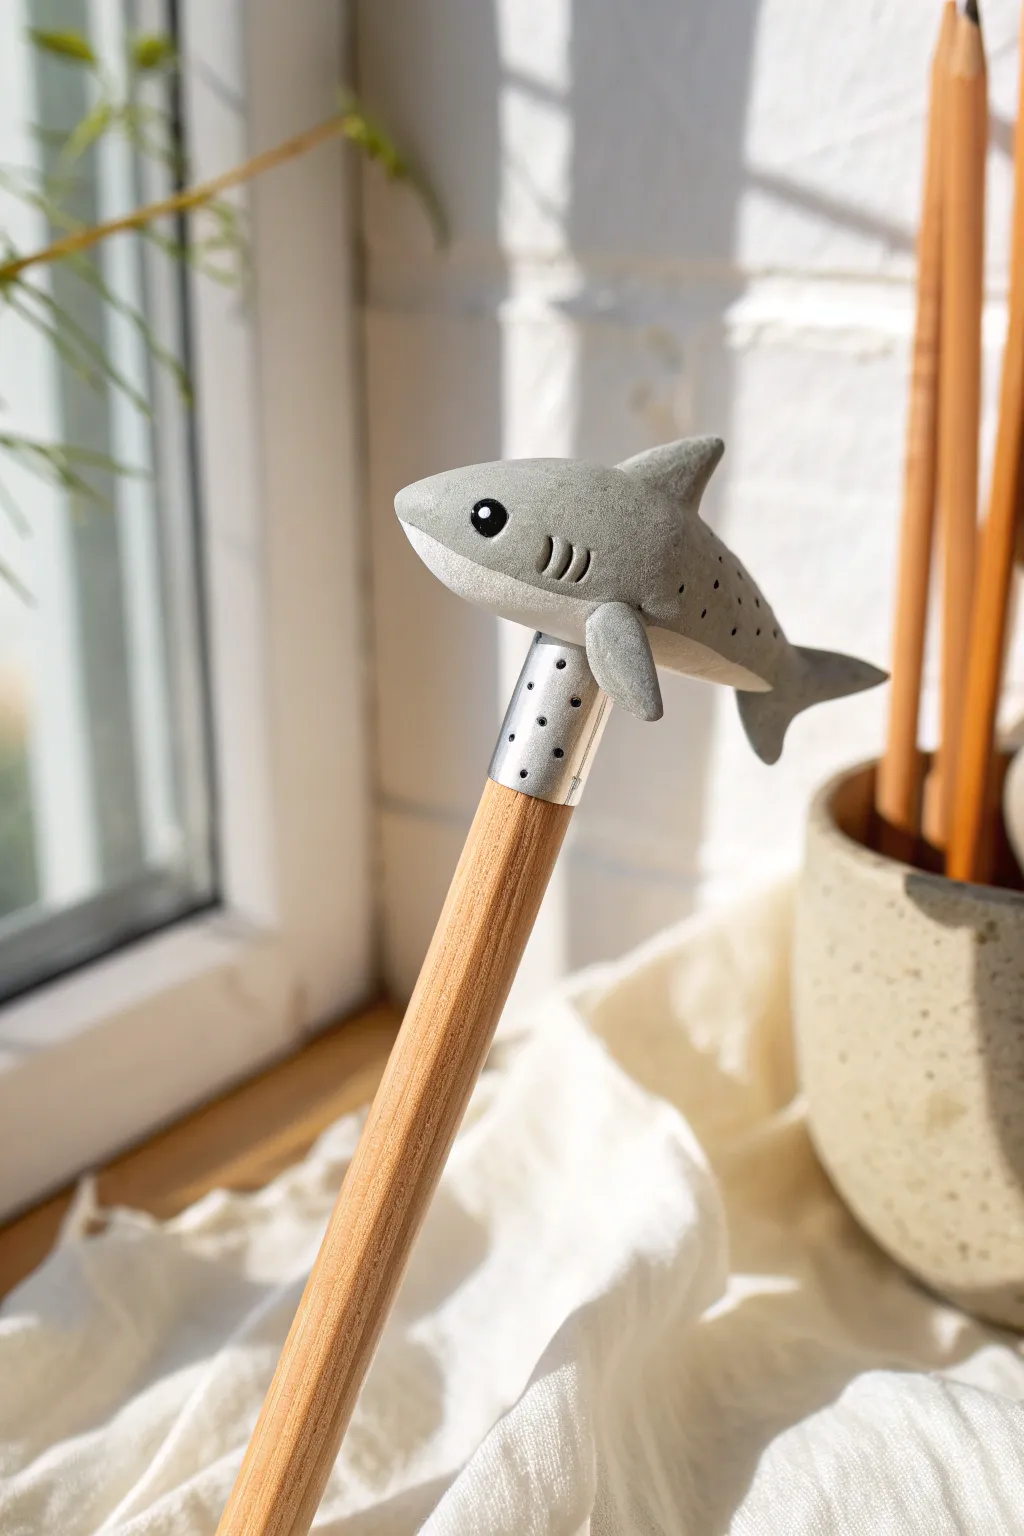
Transform a standard pencil into an underwater adventure with this sleek grey shark topper. This project features a clever two-tone design with tiny gills and fins, turning the metal ferrule of the pencil into the perfect mounting point.
Step-by-Step Guide
Materials
- Polymer clay (light grey, white, and a tiny scrap of black)
- Standard wooden pencil with metal ferrule (eraser removed if necessary)
- Basic sculpting tools (needle tool, small ball tool)
- Blade or craft knife
- Liquid polymer clay or bake-and-bond
- Silver acrylic paint (optional, for touch-ups)
- Oven for baking
Step 1: Creating the Base
-
Prep the pencil:
Start by removing the eraser from your pencil if it has one. The metal ferrule (the silver band) will serve as the connection point for your shark, so ensure it is clean and dry. -
Form the body shape:
Condition a piece of light grey polymer clay until it’s soft and pliable. Roll it into a smooth teardrop shape about 1.5 inches long, slightly thicker at what will be the head end. -
Create the belly:
Take a smaller amount of white clay and flatten it into a thin, elongated oval. This will become the shark’s underbelly. -
Attach the belly:
Gently press the white oval onto the underside of the grey teardrop. Use your fingers to smooth the seams where the grey and white meet, blending them slightly for a natural transition.
Shark won’t stay put?
If the clay slips off the metal ferrule while sculpting, apply a thin layer of Bake and Bond or liquid clay to the metal before pressing the shark onto it
Step 2: Sculpting Details
-
Shape the snout:
Gently pinch and round off the thicker end of the teardrop to form a classic, slightly pointed shark snout. The nose should overhang the mouth area slightly. -
Mount the body:
Press the underside of the shark firmly onto the metal ferrule of your pencil. The body should sit perpendicular to the pencil shaft. You may need to create a slight indentation in the clay belly first to help it sit securely. -
Add dorsal fin:
Shape a small triangle of grey clay for the dorsal fin. Attach this to the top center of the shark’s back, blending the base into the body so it stands up straight. -
Attach side fins:
Create two smaller grey triangles for the pectoral fins. Attach one to each side of the body, just behind where the head section ends. Angle them slightly downward and backward. -
Form the tail:
The tail needs a classic shark silhouette. Flatten the rear tip of the teardrop and shape it into two lobes—the top lobe should be larger than the bottom one. You can snip the tip with scissors and reshape it to get sharp points.
Step 3: Adding Character
-
Make the eyes:
Use a small ball tool or the end of a paintbrush to make indentations for the eyes on either side of the head. Roll two tiny balls of black clay and press them into these sockets. -
Add the gleam:
For a bit of life, add a microscopic speck of white clay to the black eye bead to create a reflection highlight. -
Carve the gills:
Using a needle tool or a sharp blade edge, carefully press three vertical lines behind the eye area on each side of the body to represent the gills. -
Texture the side:
If desired, use a needle tool to add very light, tiny dots along the side of the body in a horizontal line for extra texture, as seen in the reference. -
Detail the ferrule:
I like to add a tiny strip of silver clay or paint small dots on the metal ferrule attachment point to make the transition look intentional and mechanical. -
Bake carefully:
Bake the entire pencil with the clay attached according to your clay manufacturer’s instructions. Wooden pencils are generally safe in the oven at low polymer clay temperatures (around 275°F/135°C).
Ocean Glitter
Mix a small amount of translucent clay or fine silver glitter into your grey clay before sculpting to give the shark’s skin a wet, shimmering ocean effect.
Now you have a fierce little companion to help you attack your homework or sketches

TRACK YOUR CERAMIC JOURNEY
Capture glaze tests, firing details, and creative progress—all in one simple printable. Make your projects easier to repeat and improve.
Shark Trinket Dish With Bite Edge
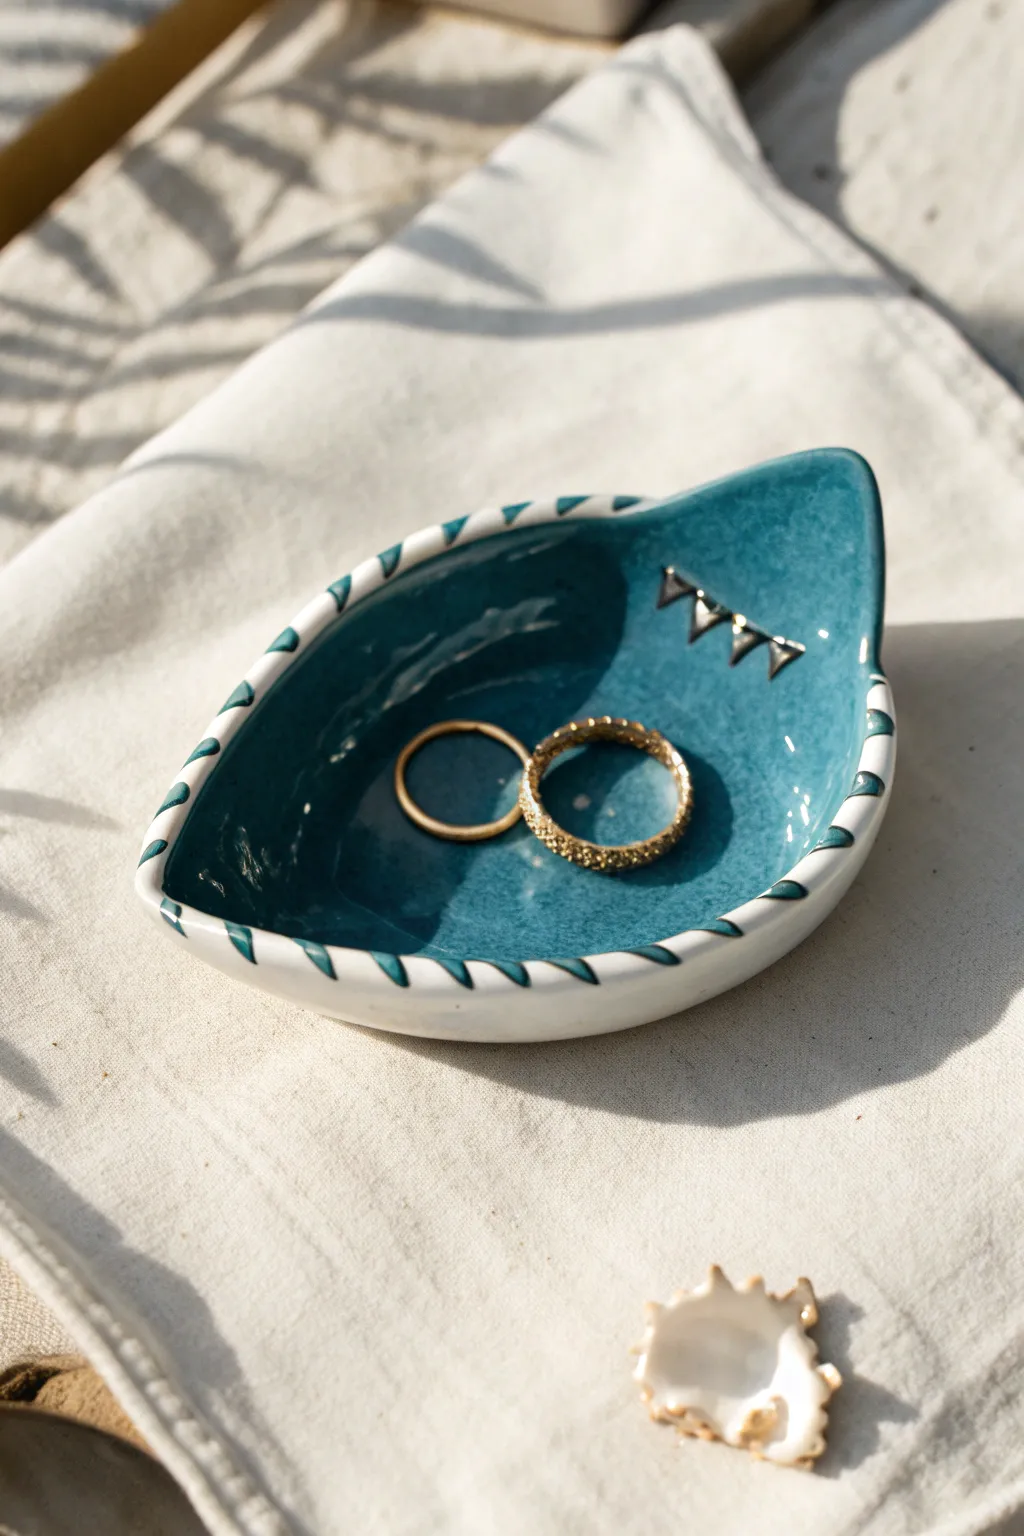
This clever little trinket dish takes the shape of a shark’s fin or tooth, featuring a striking bite-mark edge and deep oceanic teal glaze. It’s the perfect size for holding your favorite rings while adding a touch of seaside charm to your dresser.
Detailed Instructions
Materials
- Air-dry clay or polymer clay (white)
- Rolling pin
- Shark tooth or leaf-shaped paper template
- Craft knife or scalpel
- Small hooked carving tool or straw
- Sponge and water
- Acrylic paints (Teal/Deep Turquoise and White)
- High-gloss varnish or resin
- Small detail brush
- Sandpaper (fine grit)
Step 1: Shaping the Clay
-
Roll out the slab:
Start by conditioning your clay until it is soft and pliable. Roll it out on a non-stick surface to a uniform thickness of about 1/4 inch. -
Cut the basic shape:
Place your teardrop or shark-tooth shaped template onto the clay. Use your craft knife to trace around the paper, cutting out the base silhouette cleanly. -
Create the curved form:
Gently lift the clay cutout and place it into a shallow bowl or a curved drying form. Press the center down lightly so the edges curl upward, creating a dish shape that will hold jewelry. -
Smooth the edges:
Dip your finger or a small sponge in water and run it along the cut rim to soften any sharp angles from the knife.
Fixing Wobbly Rims
If the clay slumps too much while drying, prop up the edges with crumpled aluminum foil or paper towels to maintain the curved bowl shape until it hardens.
Step 2: Adding the Details
-
Carve the bite marks:
Using a small carving tool, press diagonal notches along the entire rim of the dish. I like to angle these cuts inward to mimic the serrated look of a shark’s tooth or bite. -
Add texture accents:
Near the pointed tip of the dish, use a triangular stamp or the tip of your knife to press in three or four small triangles in a row for extra decoration. -
Initial drying:
Allow the clay to dry according to the package instructions. If using air-dry clay, let it sit for 24-48 hours until fully hardened. -
Sand for smoothness:
Once fully dry (and before painting), use fine-grit sandpaper to gently smooth out any rough patches on the surface or rim.
Step 3: Painting and Glazing
-
Base coat the interior:
Paint the inside of the dish with a rich teal or deep turquoise acrylic paint. You may need two thin coats for full opacity. -
Clean the rim:
Leave the very edge of the rim (where the notches are) white. If you accidentally got teal paint there, gently wipe it off or paint over it with white acrylic later. -
Highlight the notches:
Take a very fine detail brush with the teal paint and carefully paint inside the carved notches on the rim. This creates the striped ‘bite’ effect against the white clay. -
Paint the triangles:
Use metallic silver or black paint to fill in the small triangle impressons near the tip of the dish to make them pop. -
Seal the piece:
Apply a thick coat of high-gloss varnish or clear resin over the entire inside of the dish. This gives it that wet, ceramic-like shine and protects the paint.
Resin Finish
For a true ceramic look without a kiln, use UV resin for your top coat. It creates a glassy, waterproof surface that makes the teal color look much deeper.
Place your new shark dish on your vanity to keep your small treasures safe and stylish
Shark Tea Light Holder
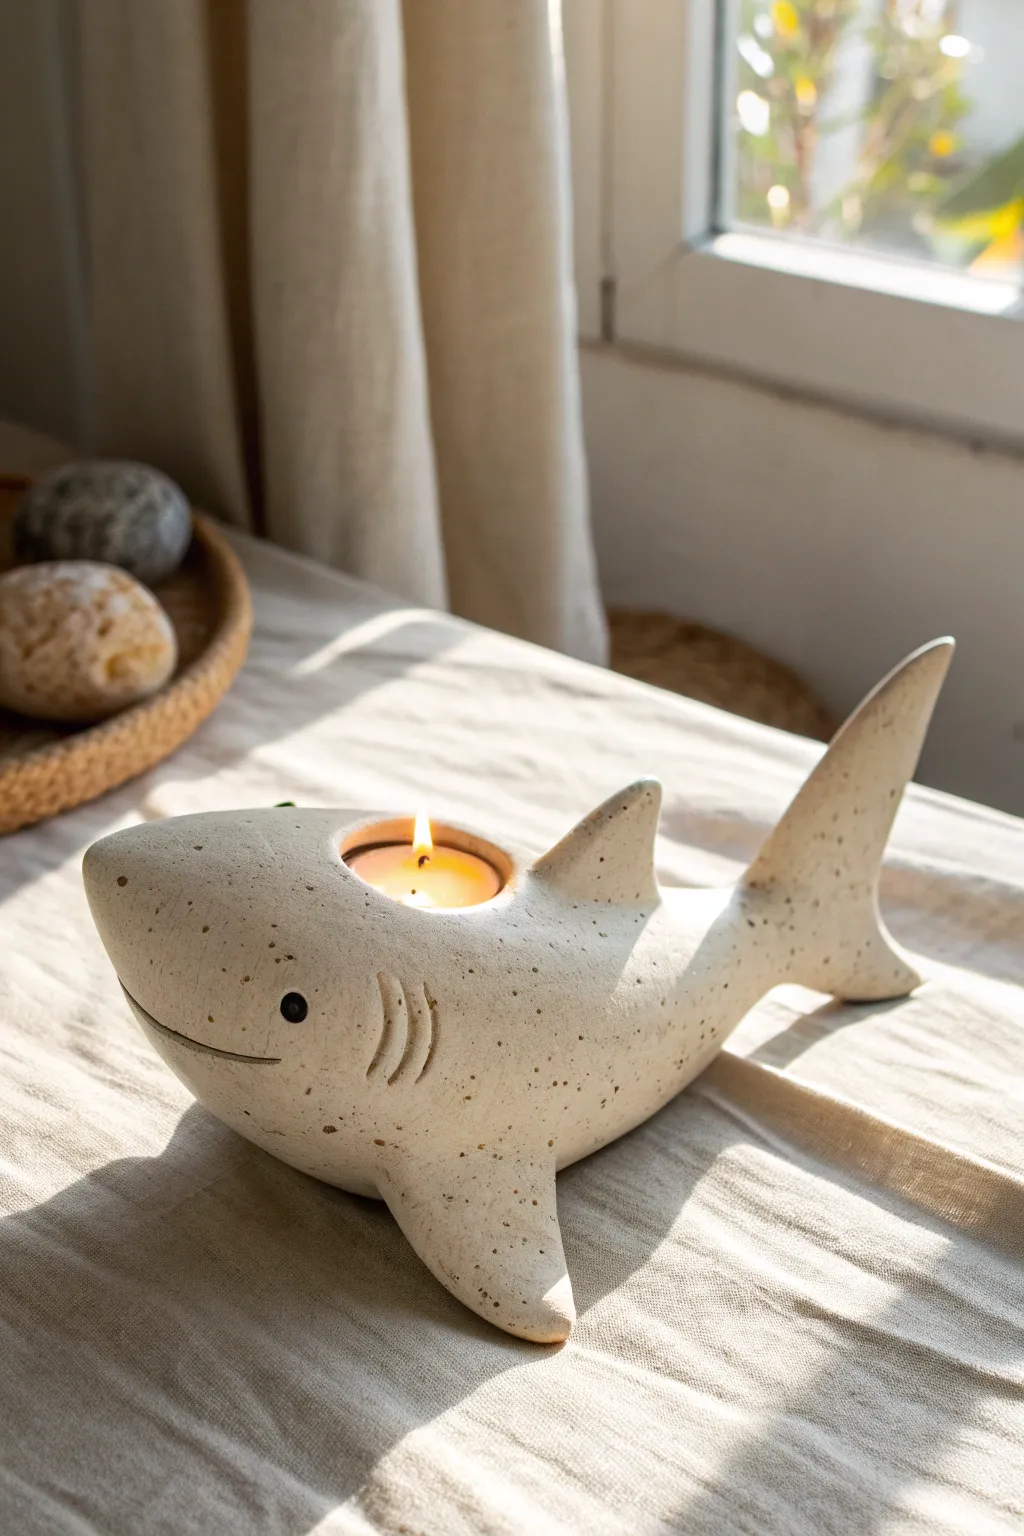
Brighten up your space with this charming ceramic shark that doubles as a functional tea light holder. Its sandy, speckled finish and friendly carved features give it a minimalist yet playful aesthetic perfect for coastal decor.
Step-by-Step
Materials
- Speckled stoneware clay (e.g., buff clay with manganese speckles)
- Tea light candle (for sizing)
- Small rolling pin
- Fettling knife or needle tool
- Loop tool (for hollowing, optional)
- Scoring tool or serrated rib
- Slip (clay and water mixture)
- Small black bead or black underglaze (for eyes)
- Sponge
- Clear matte glaze (optional, if you want a sealed finish)
Step 1: Shaping the Body
-
Prepare the Clay:
Begin with a fist-sized ball of speckled stoneware clay. Wedging it thoroughly is crucial to remove air bubbles and distribute moisture evenly. -
Form the Torso:
Roll the ball into a thick, elongated oval or torpedo shape. One end should be slightly blunter for the head, tapering gently towards the tail. Smooth out any bumps with your palms. -
Create the Base:
Gently tap the bottom of the shark body against your work surface to create a flattened area. This ensures the shark sits stable and won’t roll over once finished. -
Size the Candle Hole:
Take your actual tea light candle and press it gently onto the top center of the shark’s back to mark the diameter. Remove the candle. -
Carve the Opening:
Using a loop tool or a spoon, carefully scoop out the clay within your marked circle. Test the fit frequently with your candle; you want a snug fit, but remember clay shrinks when firing, so make the hole about 10-15% larger than the candle.
Shrinkage Check
Tea lights are standard sized, but clay shrinks! Measure your clay’s shrinkage rate (usually 10-14%) and cut the candle hole larger to compensate.
Step 2: Adding Fins and Tail
-
Cut the Fins:
Roll out a slab of remaining clay to about 1/4 inch thickness. Cut out one dorsal fin (triangle shape), two pectoral fins (curved triangles), and one tail fin (tall curved shape). -
Attach the Tail:
Score the tapered back end of the body and the base of the tail fin. Apply a dab of slip and press them firmly together. Blend the seams thoroughly with a modeling tool so it looks like one continuous piece. -
Attach the Dorsal Fin:
Score the top of the shark, just behind the candle, and the bottom of the dorsal fin. Slip and attach. Use a small coil of clay around the seam if needed to reinforce the join. -
Add Pectoral Fins:
Attach the two side fins near the bottom front of the body using the same score-and-slip method. I like to angle them slightly backward to simulate swimming motion. -
Smooth Everything:
Use a slightly damp sponge to wipe down the entire piece, smoothing out any fingerprints and softening the edges of the fins.
Glow Up
Use a small drill bit or needle tool to poke holes through the gill slats. When the candle is lit, light will gently flicker out through the sides as well.
Step 3: Detailing and Finishing
-
Carve the Gills:
Use a needle tool or small loop tool to carve three curved vertical lines on each side of the shark’s neck area for the gills. -
Make the Smile:
Carve a long, gentle curve starting near the front of the nose and extending back along the cheek to create a friendly smile. -
Add the Eyes:
Press a small round indent where the eye should be. You can insert a small ball of black clay here, or paint a black dot with underglaze later. Ensure the placement gives it a ‘cute’ expression. -
Refine the Polish:
Give the piece a final check. Smooth any sharp edges that might be created by the carving tools. -
Drying:
Let the shark dry slowly under loose plastic for a day or two to prevent the fins from cracking, then uncover to bone dry. -
Bisque Fire:
Fire the piece to bisque temperature (usually cone 04) based on your clay specifications. -
Finishing Touch:
Since speckled clay is decorative on its own, you can leave the outside raw. If you prefer a slight sheen, brush on a clear matte glaze before the final glaze firing.
Once fired and cooled, pop in a scented candle and enjoy the warm glow of your aquatic friend
Shark Incense Holder With Tail Groove
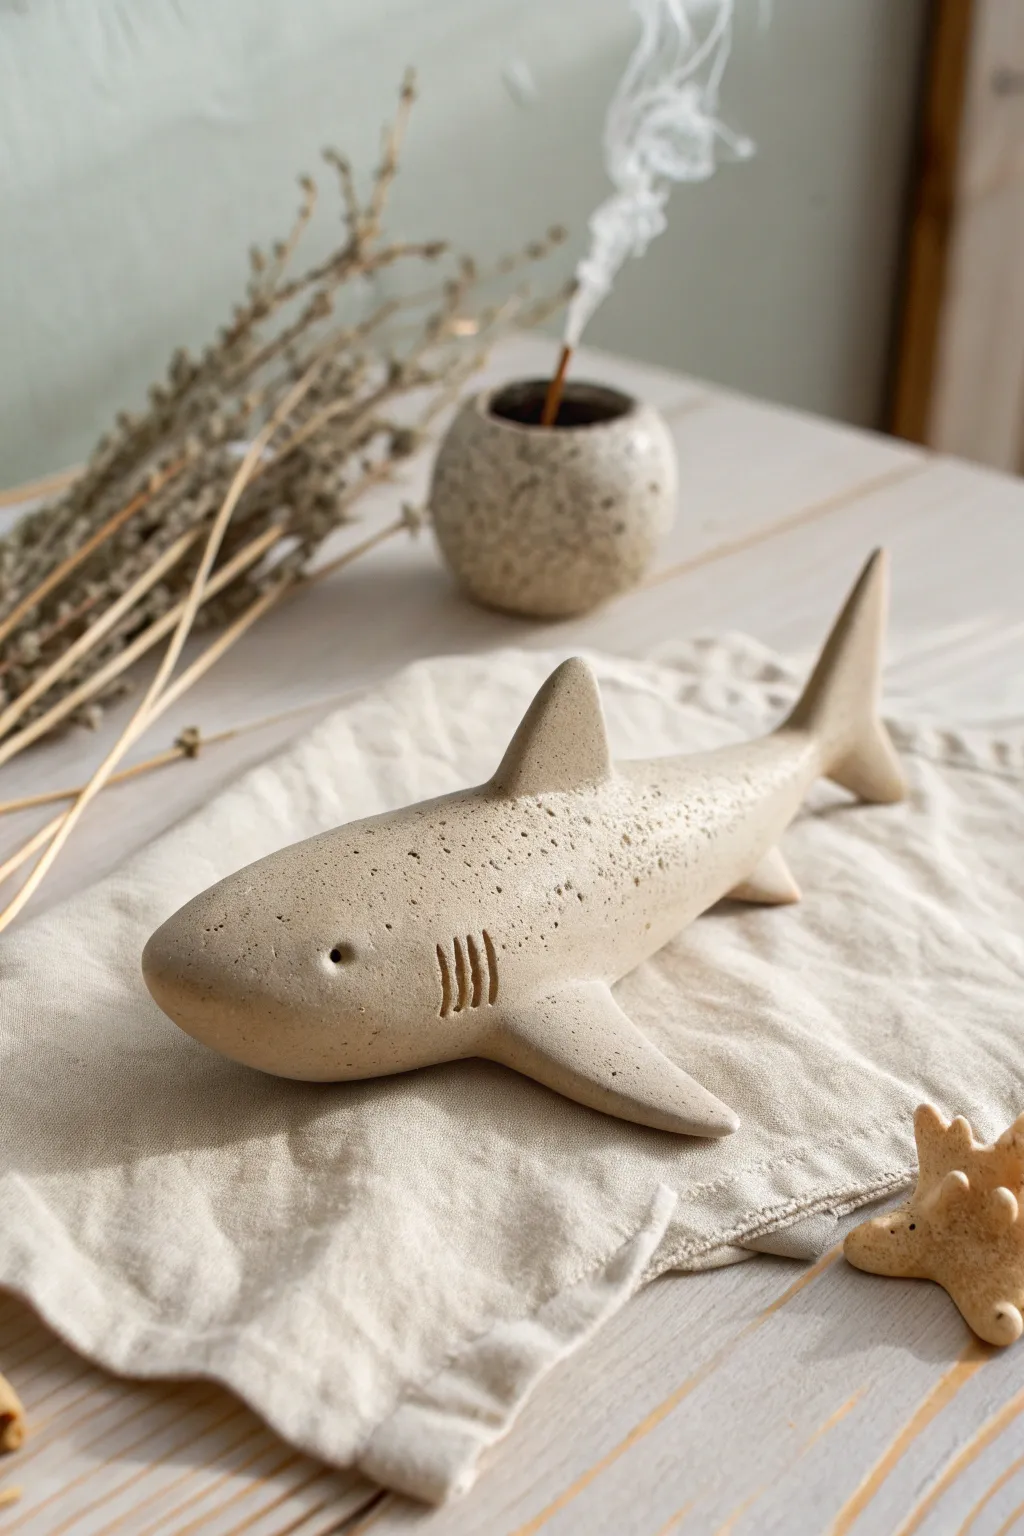
This elegant shark sculpture doubles as a functional incense holder, featuring a natural, speckled stone finish that fits perfectly with minimalist or coastal decor. The design captures the shark’s streamlined silhouette with simple, stylized details.
Step-by-Step Guide
Materials
- Speckled stoneware clay or polymer clay (granite effect)
- Modeling tools (or a butter knife and needle tool)
- Smooth work surface or clay mat
- Sponge and water bowl
- Rolling pin
- Incense stick (for sizing)
- Sandpaper (fine grit)
- Clear matte varnish or glaze (optional)
Step 1: Shaping the Body
-
Prepare the Clay:
Start with a softball-sized amount of speckled clay. Knead it thoroughly to remove any air bubbles, ensuring the consistency is uniform and pliable. -
Form the Torso:
Roll the clay into a thick sausage shape, tapering it at both ends. The head end should be slightly blunted and rounded, while the tail end should taper to a narrower point. -
Define the Belly:
Gently flatten the bottom of the shape against your work surface. This ensures the shark will sit stable and flat without rolling over. -
Refine the Head:
smooth the nose area into a rounded, bullet-like point. It shouldn’t be too sharp; aim for a soft, curved profile characteristic of a Great White or Reef shark.
Stone Effect Hack
Mix dried coffee grounds or black pepper into plain polymer clay before sculpting. This creates a convincing organic speckled granite texture without needing special paints.
Step 2: Adding Fins and Details
-
Attach the Pectoral Fins:
Create two triangular wedges for the side fins. Score the clay (scratch the surface) where they will attach to the body, add a dab of water or slip, and press them firmly onto the lower sides. Smooth the seams until invisible. -
Add the Dorsal Fin:
Fashion a distinct, classic shark fin shape. Attach this to the top center of the back using the same score-and-slip method. I like to double-check the profile view here to make sure the angle looks aggressive but balanced. -
Construct the Tail:
For the tail fin (caudal fin), shape a crescent or boomerang piece. Attach it vertically to the tapered rear end. Blend the clay smoothly so the transition from body to tail is seamless. -
Create the Gill Slits:
Using a thin tool or the edge of a credit card, press three or four vertical lines just behind the head on both sides. These should be deep enough to be visible but not cut all the way through. -
Puncture the Eye:
Take a small round tool or the blunt end of a skewer and press a single, small indentation for the eye. Keep it simple and devoid of extra detail for that modern look.
Step 3: Functionality and Finishing
-
Create the Incense Groove:
Press a small hole near the tail fin or create a subtle groove along the back ridge where an incense stick can rest. Use an actual stick to test the angle so the ash falls onto the shark’s back or a tray. -
Texture the Skin:
If your clay isn’t pre-speckled, you can flick a toothbrush with watered-down dark brown paint over the surface now, or wait until after baking/firing for a faux stone look. -
Smooth with Sponge:
Dip a sponge in water and wring it out almost completely. Gently wipe the entire surface of the shark to remove fingerprints and soften any harsh tool marks. -
Dry or Bake:
If using polymer clay, bake according to package instructions. For ceramic clay, allow the piece to dry slowly under plastic for a few days before firing. -
Sand and Seal:
Once hardened/fired, lightly sand any rough patches. Apply a matte clear coat if you want to protect the finish without adding a glossy shine.
Floppy Fins?
If the dorsal fin droops while you work, prop it up with small wedged sponges or crumpled foil supports. Leave these in place until the clay begins to firm up or during baking.
Now you have a serene, oceanic guardian to hold your favorite scents
Shark Plant Buddy For Tiny Pots
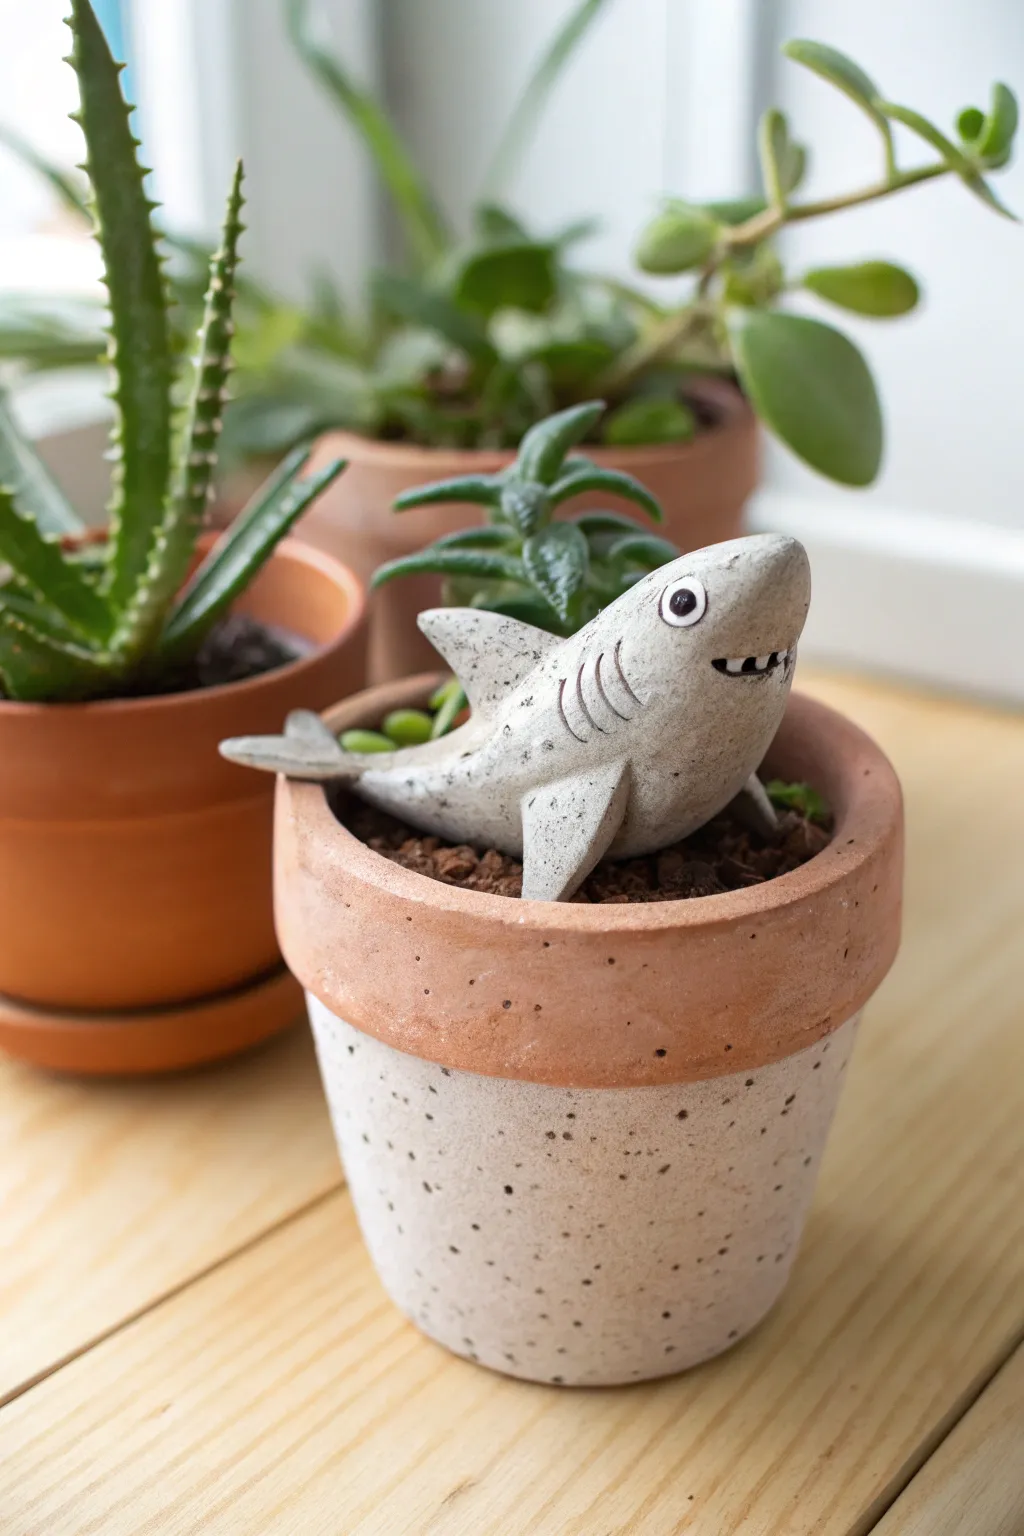
Add a splash of aquatic charm to your succulent collection with this adorable clay shark figurine that fits perfectly in tiny pots. Its simple, stylized shape and friendly grin make it a delightful guardian for your favorite indoor plants.
Detailed Instructions
Materials
- Polymer clay (grey or white)
- Black acrylic paint
- White acrylic paint
- Fine-grit sandpaper
- Toothbrush or stiff bristle brush
- Basic sculpting tools (knife, needle tool)
- Oven for baking
- Matte varnish (optional)
Step 1: Sculpting the Body
-
Condition the clay:
Start by kneading your grey polymer clay until it is soft and malleable. If you only have white clay, mix in a tiny speck of black to achieve a light grey tone. -
Form the main shape:
Roll a walnut-sized ball of clay and then gently elongate it into a teardrop shape. This will form the shark’s torso. -
Curve the body:
Since this shark is meant to rest in a pot, give the body a subtle curve upwards, as if the shark is lifting its head out of the water. -
Flatten the base:
Press the bottom of the shark gently onto your work surface to create a slightly flat belly, which ensures it sits stable on the soil.
Shark Skin Texture
Mix some black pepper or dried used coffee grounds into your grey clay before sculpting for an instant speckled granite effect.
Step 2: Adding Fins and Details
-
Create the pectoral fins:
Roll two small triangles of clay for the side fins. Flatten them slightly and attach one to each side of the shark’s lower body, blending the seams with your finger or a sculpting tool. -
Add the dorsal fin:
Shape a classic shark fin triangle and attach it to the center of the back. Make sure to blend the base of the fin smoothly into the body so it doesn’t break off later. -
Attach the tail:
Form a crescent moon shape for the tail fin. Attach it to the tapered end of the body, positioning it sideways. -
Texture the skin:
I like to use an old toothbrush here to gently tap the surface of the clay. This stippling creates a stone-like, organic texture rather than leaving it perfectly smooth.
Step 3: Facial Features
-
Carve the mouth:
Use a sharp knife tool or needle tool to carve a wide, curved slit for the mouth. Cut slightly downwards into the clay to create depth. -
Add teeth details:
Using a needle tool, gently etch tiny vertical lines along the mouth opening to suggest teeth without needing to sculpt individual ones. -
Create the gills:
On each side of the body, just behind where the head would end, press three curved lines into the clay using a needle tool or the edge of a credit card. -
Make the eyes:
Press a small ball tool into the sides of the head to make sockets, then insert tiny balls of white clay. Flatten them slightly so they look like discs.
Sticky Situation
If the fins won’t stay attached, try scoring (scratching) both connecting surfaces and adding a tiny drop of liquid clay or translucent sculpey as glue.
Step 4: Finishing Touches
-
Bake the clay:
Bake your shark according to the manufacturer’s instructions on your specific package of polymer clay. Let it cool completely before handling. -
Paint the pupils:
Use a toothpick dipped in black acrylic paint to dot the center of the white eyes. -
Highlight the mouth:
Carefully run a fine brush with black paint inside the mouth crevice to define the smile and teeth markings. -
Spatter effect:
Dilute a little black or dark grey paint with water. Dip a toothbrush in it and flick the bristles with your thumb to spray tiny speckles over the shark for that textured, stony look. -
Seal (Optional):
Once the paint is fully dry, you can brush on a coat of matte varnish to protect the artwork from moisture when you water your plants.
Now you have a tough little ocean friend ready to guard your succulents
Shark Undersea Mini Scene
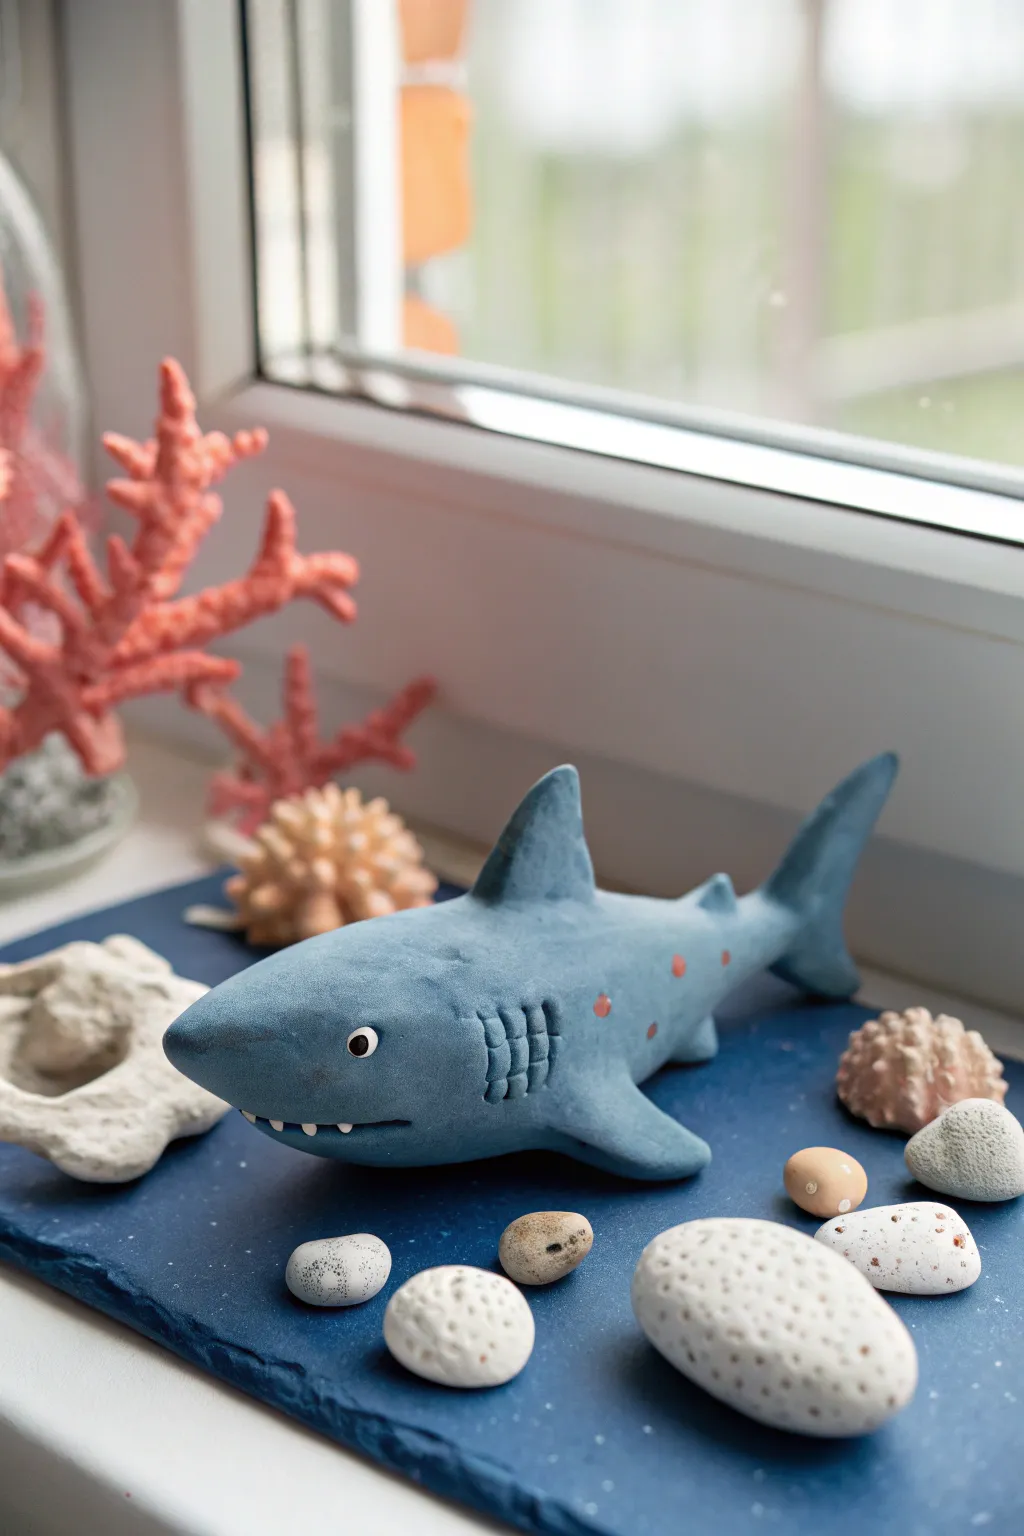
Bring the ocean depths to your windowsill with this charming polymer clay shark scene. Featuring a dusty blue shark with playful red spots and a simple slate base, this diorama is a perfect weekend project for aquatic enthusiasts.
Step-by-Step Tutorial
Materials
- Polymer clay (Dusty Blue, White, Black, Red/Terracotta, Coral/Salmon)
- Small slate board or dark blue matte tile (approx. 4×6 inches)
- Clay sculpting tools (needle tool, small ball tool)
- Acrylic rolling pin
- Blade or craft knife
- Small white pumice stones or porous river rocks
- Sandpaper (optional for texture)
- Liquid clay (pva glue/Bake and Bond)
- Oven
Step 1: Sculpting the Shark
-
Form the body:
Start by conditioning a large lump of dusty blue polymer clay. Roll it into a smooth, thick log, then taper one end to a point for the tail and round the other for the nose. -
Shape the snout:
Gently gently press the rounded front end to flatten the bottom slightly, creating the iconic shark snout profile. It should look somewhat bullet-shaped from above. -
Bend the body:
Add a subtle ‘swimming’ curve to the body by gently bending the tail section to the left or right. This makes the figure look alive rather than stiff. -
Attach the dorsal fin:
Form a flattened triangle from the blue clay. Score the top of the shark’s back and the bottom of the fin, create a small ‘slope’ at the back of the fin, and blend the clay seamlessly onto the body. -
Add pectoral and caudal fins:
Create two smaller flattened triangles for the side fins and attach them low on the body. For the tail, shape a crescent moon piece and blend it onto the tapered rear end. -
Create the gills:
Using a needle tool or a dull blade, carefully impress three to four vertical lines behind the head area to represent gills. Make these deep enough to see but don’t slice through. -
Detail the mouth:
Use a blade to cut a horizontal slit for the mouth. Gently pry it open slightly. Insert tiny, jagged triangles of white clay along the bottom edge for teeth. -
Add eyes and spots:
Press small indentations for eyes. Fill with a tiny white ball, then a smaller black pupil. Finally, press ultra-tiny balls of terracotta clay onto the body and flatten them to create the spotted pattern.
Shark won’t stand up?
If the shark tips over, bake a small supportive wedge of scrap clay under the belly. Remove it after baking, or glue it permanently if it’s hidden from view.
Step 2: Crafting the Coral
-
Mix coral colors:
Blend your salmon or coral-colored clay to get a vibrant yet natural reef tone. Roll several thin snakes of varied lengths. -
Assemble the branches:
I find it easiest to twist these snakes together at a base point, fanning them out like tree branches. Use a needle tool to texture the surface to look like organic calcium growth. -
Sculpt the sea sponge:
Roll a ball of beige or light peach clay. Use a large ball tool to press varying sized divots all over the surface, mimicking the porous texture of a sea sponge.
Add water effects
For a ‘wet’ look, brush a thin layer of UV resin or high-gloss varnish over the shark’s back and the pebbles after everything is assembled.
Step 3: Assembly and Baking
-
Position the scene:
Arrange your shark, coral pieces, and sponge on the slate board or dark tile to test the composition. You aren’t gluing them yet, just checking for fit. -
Bake the clay:
Carefully transfer your clay pieces (shark and coral) to a baking sheet or tile. Bake according to the manufacturer’s instructions for the brand of clay you used. -
Prepare the base:
While the clay cools, clean your slate board. If you want a more textured ‘ocean floor,’ you can dab a little white paint with a sponge for a sandy effect, though plain dark blue works beautifully. -
Final glue down:
Once cool, use strong craft glue or superglue to attach the shark and coral to the base. Scatter real white pumice stones around to complete the seabed look.
Now you have a serene little slice of the ocean to admire right at your desk.
Shark With Float Ring Accessory
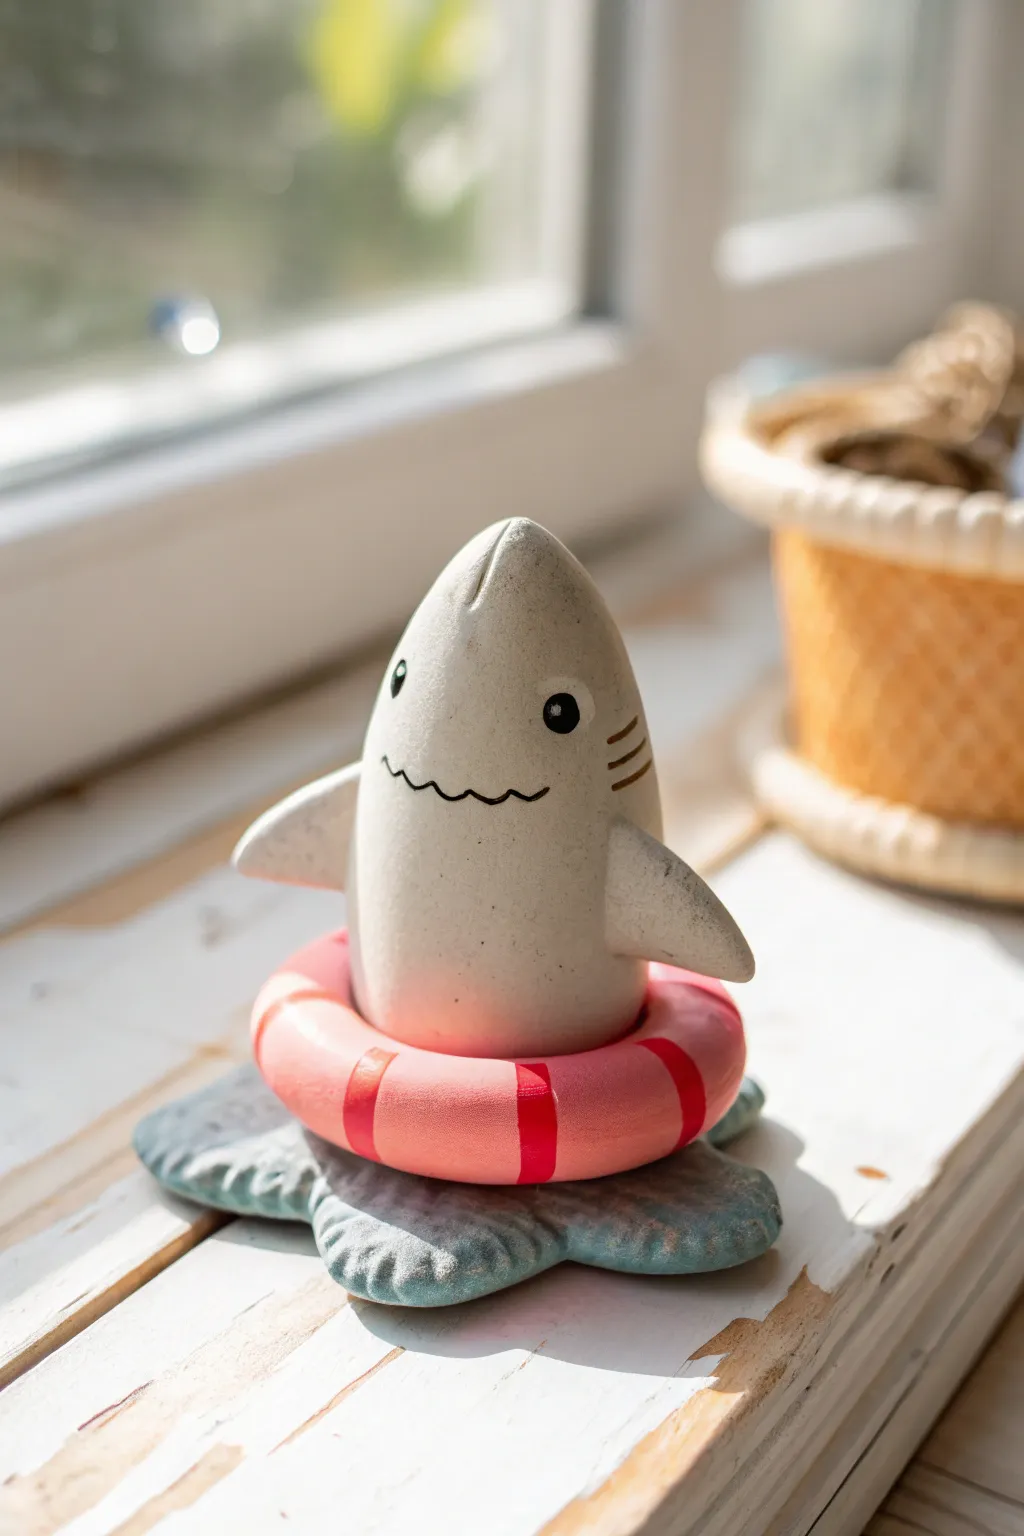
This adorable minimalistic shark sculpture features a smooth, egg-shaped body nestled safely in a striped swim ring. Resting on a textured blue base that mimics splashing water, this little ocean buddy makes for a charming desk accessories or planter decoration.
Detailed Instructions
Materials
- White or speckled light grey air-dry clay (or polymer clay)
- Pink clay
- Red clay
- Blue clay
- Black acrylic paint
- Fine detail paintbrush
- Needle tool or toothpick
- Ball stylus tool
- Clear matte varnish (optional)
Step 1: Sculpting the Shark
-
Shape the body:
Start with a ball of your main shark-colored clay (white or light grey). Roll it into a smooth egg shape, slightly tapered at the top but rounded and stable at the bottom so it can sit upright. -
Add dorsal detail:
Using a needle tool or the back of a knife, gently press a shallow vertical line down the very top center of the head to hint at a dorsal fin separation or just a stylistic seam. -
Form the pectoral fins:
Create two small matching triangles of clay. Gently flatten and curve them slightly. Attach one to each side of the body, blending the clay at the shoulder joint so the connection is seamless. -
Smooth the surface:
Use a tiny bit of water on your finger (for air-dry clay) or baby oil (for polymer) to rub away any fingerprints or attachment lines, ensuring the shark looks like one solid piece.
Step 2: Creating the Swim Ring
-
Roll the ring base:
Take pink clay and roll it into a long, even snake. The thickness should be uniform throughout the length. -
Form the circle:
Wrap the pink snake around the base of your shark to measure the size. It shouldn’t be tight; leave a tiny gap so the shark can slide in and out. Cut the excess and join the ends into a perfect donut shape. -
Add the stripes:
Roll very thin flat strips of red clay. Wrap these strips around the pink donut at even intervals to create the lifeguard-ring pattern. Press them gently so they adhere without smashing the ring shape.
Smooth Seams
For invisible seams on the fins, use a silicone clay shaper tool to drag clay across the joint, then smooth with a wet finger.
Step 3: Adding the Water Base
-
Prepare the base:
Flatten a ball of blue clay into a rough pancake shape, slightly larger than the swim ring. -
Texture the water:
Pinch the edges of the blue pancake outward to create irregular points, resembling a splash or a stylized starfish shape. Use a texturing tool or toothbrush to give the surface a foamy, watery look. -
Dry fitting:
Place the ring on the base and the shark inside the ring to ensure everything balances correctly before final assembly or baking.
Accessories Upgrade
Make tiny sunglasses from black wire and resin to place on the shark’s nose for extra summer vibes.
Step 4: Finishing Details
-
Paint the face:
Once dry or cured, use a fine detail brush and black acrylic paint to add the shark’s features. Paint two small circles for wide-set eyes. -
Add the smile:
Paint a squiggly line between the eyes for the mouth. Using a jagged line instead of a smooth curve mimics shark teeth in a cute, non-threatening way. -
Final highlights:
Add tiny white dots inside the black eyes to bring the character to life. Paint three small horizontal lines on the side for gills. -
Seal the piece:
Protect your paint job with a coat of matte varnish. Avoid glossy varnish unless you want the shark to look permanently wet, which is also a fun option.
Enjoy your new little swimmer friend displayed on your windowsill
Glow-In-The-Dark Night Shark
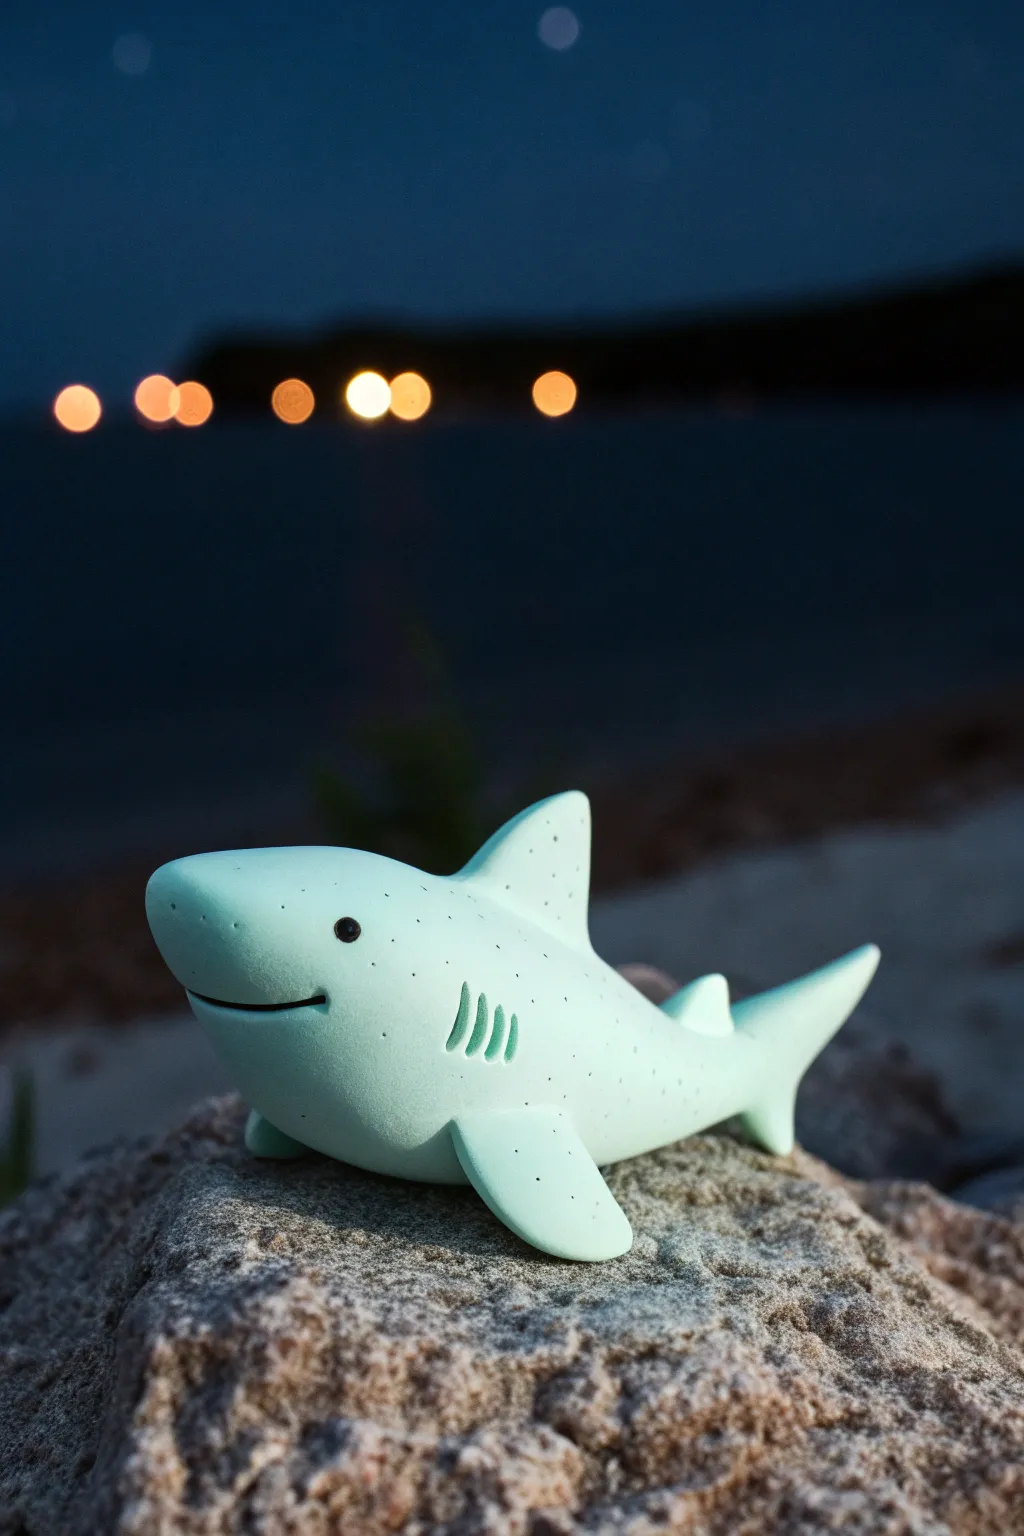
This charming little shark brings the ocean’s mystery to your shelf, featuring a smooth, matte finish that glows softly when the lights go out. Modeled with simple, gentle curves and speckled with tiny stars, it’s a perfect bedside companion for fearlessly navigating the dark.
Step-by-Step Tutorial
Materials
- Glow-in-the-dark polymer clay (neutral/green glow)
- Pale blue or teal polymer clay (for tinting)
- Black polymer clay (tiny amount for eyes)
- Set of clay sculpting tools (needle tool, rubber shaper)
- Rubbing alcohol
- Soft paintbrush
- Acrylic paint (black/dark grey)
- Old toothbrush (for speckling)
- Gloss glaze (optional for eyes)
Step 1: Forming the Body
-
Mix the custom color:
Begin by conditioning the glow-in-the-dark clay until it is soft and malleable. To achieve that ghostly sea-green hue, mix in a very small amount of pale blue or teal clay. You want the glow material to remain dominant, so add pigment sparingly. -
Shape the torpedo:
Roll your mixed clay into a smooth ball to remove any air pockets. Gently elongate this ball into a thick teardrop or torpedo shape. One end should be blunter for the head, tapering down to a pointed tail. -
Smooth the surface:
Use your fingers to gently smooth out any fingerprints. I find that lightly brushing the clay with a little rubbing alcohol at this stage helps create that flawless, porcelain-like texture. -
Define the head:
Slightly flatten the underside of the torpedo so the shark sits stable. push the nose slightly upward to give it a curious, friendly profile.
Step 2: Adding Fins and Features
-
Create the dorsal fin:
Form a small triangle of clay. Curve the back edge slightly inward to look like a classic shark fin. Attach this firmly to the top center of the body, blending the seams down with a rubber sculpting tool until invisible. -
Attach pectoral fins:
Make two smaller, flattened triangles. Attach these to the sides of the body, just behind where the head area ends. Angle them slightly backwards for a streamlined look. -
Form the tail:
Create the tail fin by shaping a crescent moon or boomerang shape. Attach the center of the crescent to the pointed end of the body. Blend the clay well so the tail looks like an extension of the spine. -
Sculpt the gills:
Using a needle tool or a thin blade, press three vertical, curved slits into the side of the body, just in front of the pectoral fin. Repeat on the other side. -
Add the smile:
Use a curved tool or the edge of a small spoon to impress a wide, friendly smile near the bottom of the face. Cut deep enough that the shadow makes it visible. -
Insert the eyes:
Use a ball tool to make small indentations for the eyes. Roll two tiny spheres of black clay and press them into these sockets. They should protrude slightly for a cute, toy-like effect.
Why is my Clay Cracking?
Cracks often happen if the clay wasn’t conditioned enough before shaping. Knead the clay until it’s very warm and soft. Also, ensure you cool the piece slowly inside the oven.
Step 3: Detailing and Curing
-
Adding the speckles:
Dilute a tiny amount of black or dark grey acrylic paint with water. Dip an old toothbrush into this mixture and verify the spray pattern on a scrap piece of paper first. -
Splatter texture:
Gently flick the toothbrush bristles to spray fine speckles over the top half of the shark. This mimics the look of natural stone or a starry night sky. -
Line the mouth:
Take a very thin snake of black clay or use a fine paint liner to darken the inside of the engraved smile mouth line, giving the expression more definition. -
Baking:
Preheat your oven according to the manufacturer’s instructions for your specific brand of polymer clay. Place the shark on a ceramic tile or baking sheet lined with parchment paper. -
Tent with foil:
Cover the shark loosely with an aluminum foil tent. This prevents the light-colored clay from scorching or yellowing during the bake. -
Cooling down:
Once baked, turn off the oven and let the shark cool down completely inside. This gradual cooling helps prevent cracks. -
Final polish:
If desired, add a tiny dot of gloss glaze to the black eyes to make them look wet and alive, contrasting with the matte skin.
Starry Night Effect
Instead of black paint speckles, press tiny bits of glow-in-the-dark clay (in a contrasting color like yellow) into the blue body before baking for a multi-colored glow effect.
Place your finished shark under a lamp for a minute and watch it light up your nightstand