
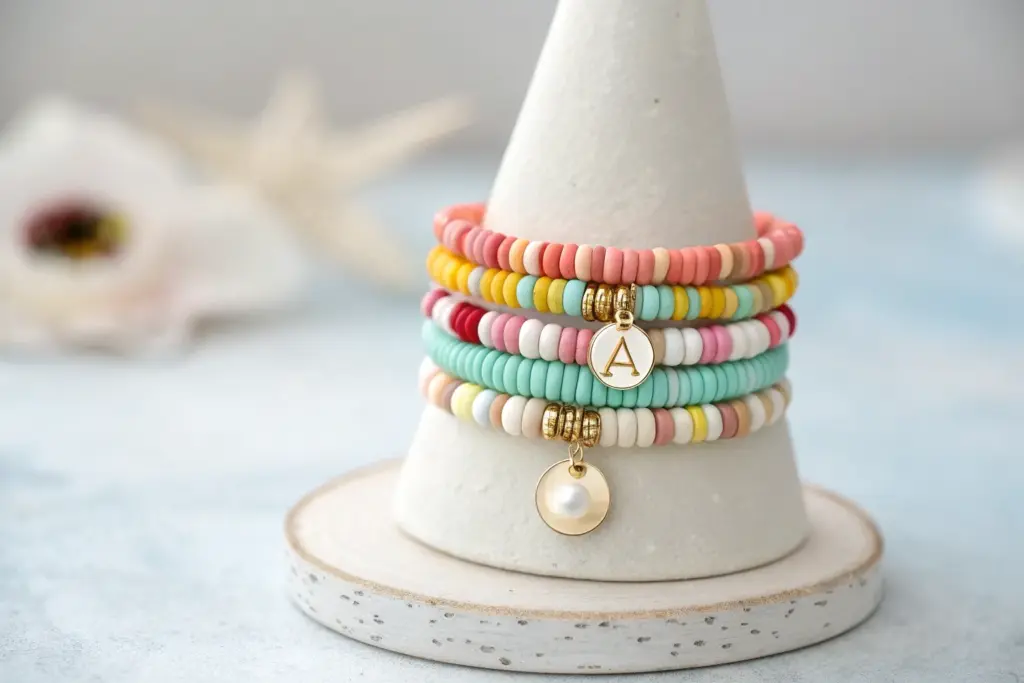
I reach for summer clay beads anytime I want jewelry that feels like sunshine you can wear. These summer clay bead ideas lean into beachy color palettes, playful charms, and easy stackable designs you can mix and match all season.
Classic Beachy Heishi Stack
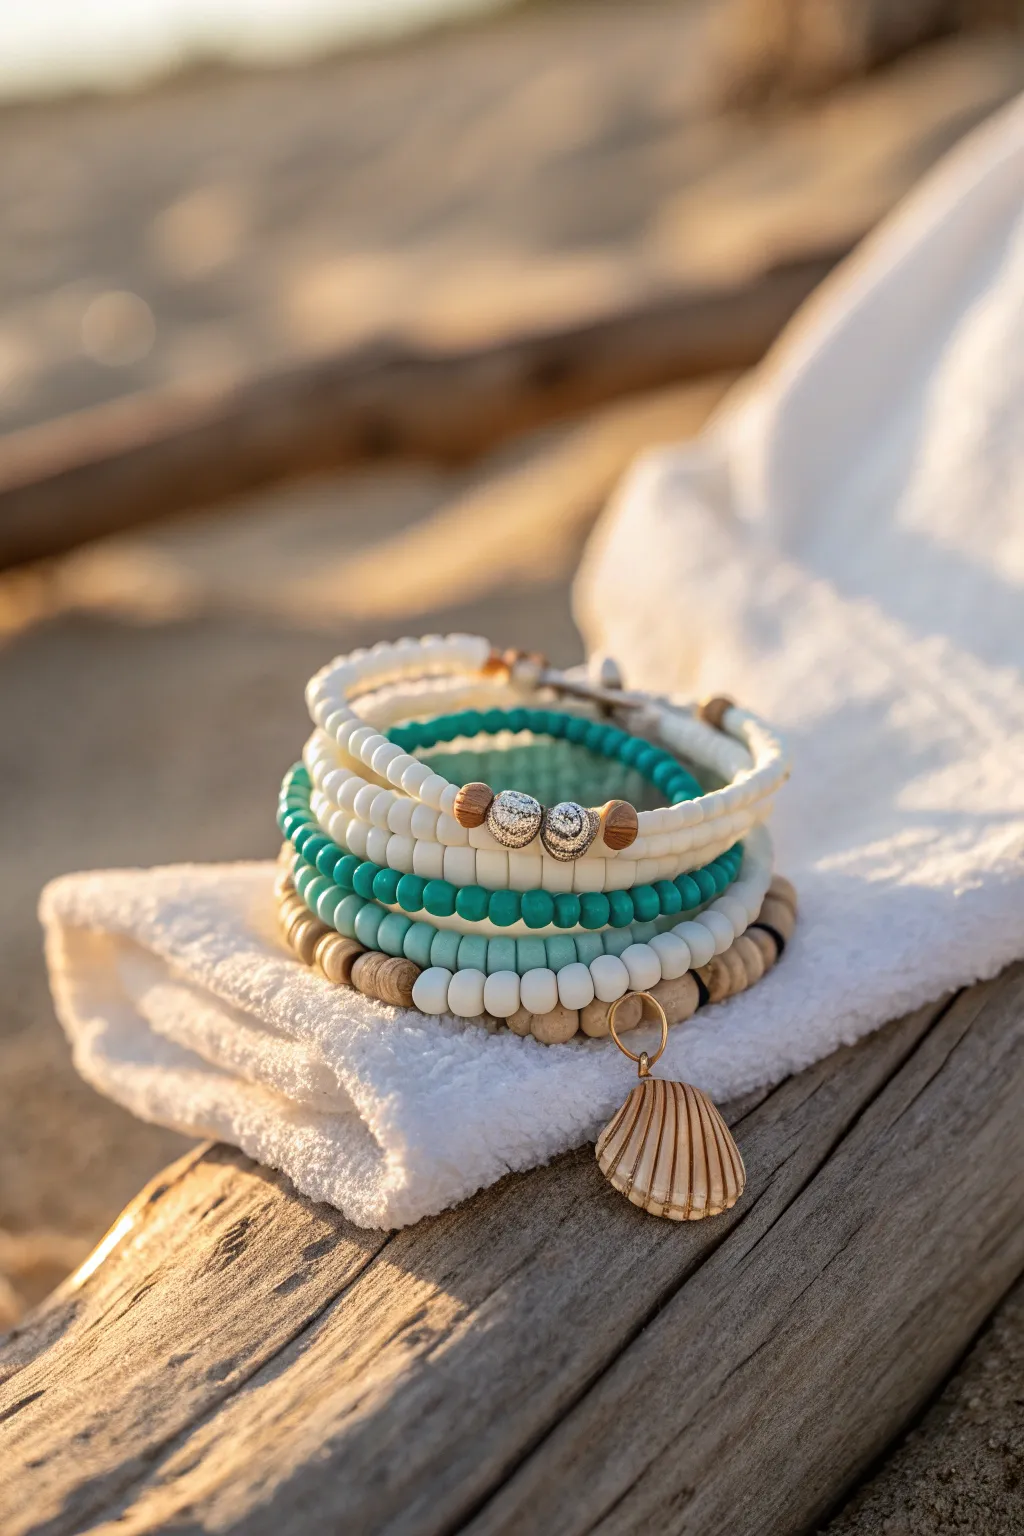
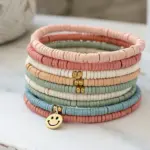
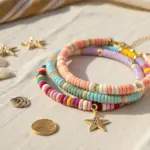
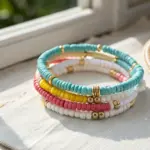
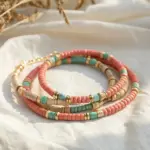
Capture the essence of a serene beach day with this beautiful stack of heishi bead bracelets featuring sea-glass hues and natural textures. This multi-strand set combines crisp white discs, calming turquoise tones, and earthy wooden accents for a timeless summer accessory.
Step-by-Step Guide
Materials
- White polymer clay heishi beads (6mm or 8mm)
- Turquoise or teal polymer clay heishi beads
- Natural wood round beads (approx. 6mm)
- Small wooden spacer beads
- Silver textured rondelle spacer beads
- Gold tone seashell charm
- Gold tone jump ring (6mm or 8mm)
- Elastic stretch cord (0.8mm clear)
- Jewelry glue or clear nail polish
- Scissors
Step 1: Strand One: The Wooden Foundation
-
Prepare your cord:
Cut a piece of elastic cord about 10-12 inches long. This generous length gives you plenty of room to tie secure knots later without struggling. -
Pre-stretch the elastic:
Hold the cord firmly at both ends and give it several good tugs. This crucial step prevents the bracelet from loosening up the first time you wear it. -
String the wood beads:
Begin threading the natural wood round beads onto the cord. Continue until the strand measures approximately 6.5 to 7 inches, or your desired wrist size. -
Add the charm connector:
Before tying off, decide where you want your charm. I prefer to attach the clamp or jump ring directly between two wood beads now, or you can attach it after knotting. -
Secure the jump ring:
Open your gold jump ring with pliers, slide on the seashell charm, and then loop it around the elastic cord between two beads. Close the jump ring securely. -
Knot the first bracelet:
Tie a surgeon’s knot (right over left, left over right twice) to secure the strand. Pull tight, dab the knot with a tiny drop of glue, let dry, and trim the excess cord.
Step 2: Strand Two: The Teal & White Mix
-
Start the pattern:
Cut and pre-stretch a new piece of cord. Begin this strand by threading about 2 inches of solid turquoise heishi beads. -
Create the focal point:
After the section of turquoise, add a single small wooden spacer bead, followed by a textured silver rondelle, another small wooden spacer, and a second silver rondelle. -
Finish the color block:
Complete the rest of the strand length using white heishi beads. This asymmetry creates a sophisticated, modern look rather than a simple repeating pattern. -
Check the fit:
Wrap the unfinished strand around your wrist to ensure it matches the length of your wooden bead bracelet perfectly. -
Tie it off:
Secure this strand with a glued surgeon’s knot just like the first one, hiding the knot inside the hole of the larger beads if possible.
Knot Security
Hide your knot inside a bead hole! If the heishi holes are too small, place a metal crimp cover over the knot for a professional finish.
Step 3: Strand Three: The Classic White & Accent
-
Build the white base:
For the third bracelet, prepare your cord and string predominately white heishi beads for a clean, fresh look. -
Insert subtle accents:
Randomly intersperse 3-4 turquoise beads or a few small wooden spacers throughout the white strand to visually tie it to the other bracelets in the stack. -
Finalize the stack:
Knot and trim the final bracelet. I suggest making this one slightly looser or tighter than the others so they sit comfortably together without bunching up.
Texture Twist
Mix in a few matte finish beads or raw coconut shell spacers. The contrast between smooth clay and rough natural textures elevates the beachy vibe.
Enjoy styling your handmade stack individually or wearing them all together for maximum beach vibes
Sunset Ombre Bracelet
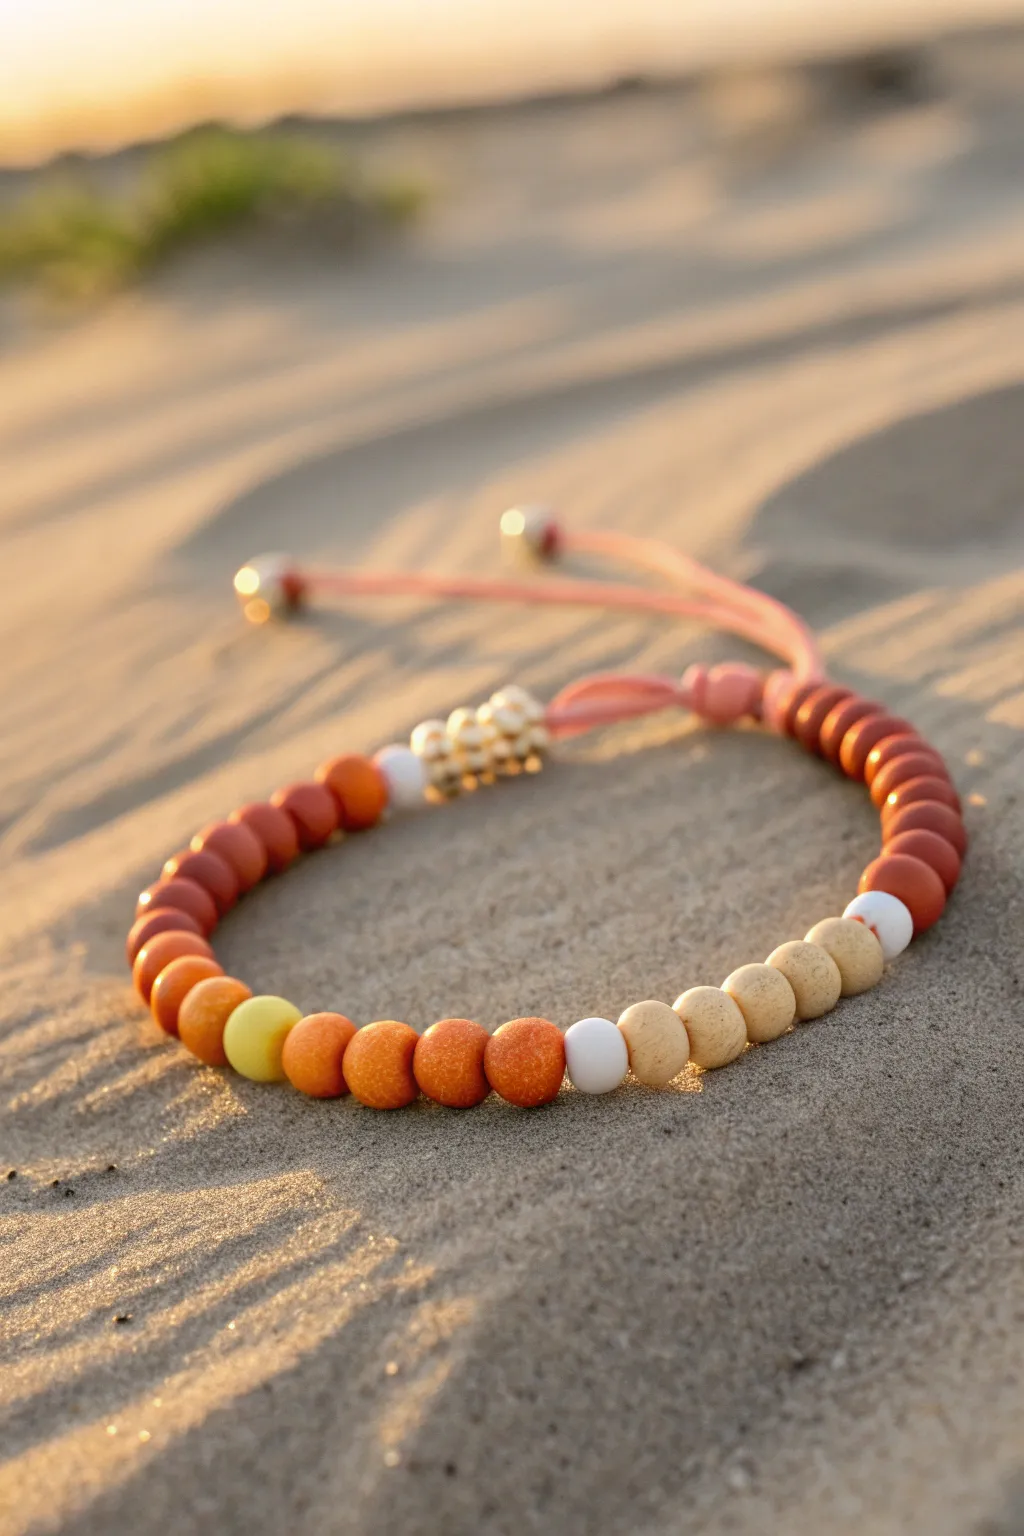
Capture the magic of a beach sunset with this stunning beaded bracelet featuring a warm gradient of clay beads. The earthy tones transition from deep burnt orange to sandy beige, creating a versatile accessory perfect for summer evenings.
How-To Guide
Materials
- Polymer clay beads in 5 colors: burnt orange, terracotta, mustard yellow, cream/white, and sandy beige
- Small gold spacer beads (approx. 2mm)
- Small white ceramic or glass accent beads
- Waxed polyester cord (0.8mm or 1mm) in coral pink
- Scissors
- Lighter (for sealing cord ends)
- Measuring tape
- Beading needle (optional but helpful)
Step 1: Preparation
-
Measure and cut:
Begin by cutting a length of your coral pink waxed cord. About 14-16 inches is sufficient to allow room for the sliding knot and adjustable tails. -
Seal one end:
Quickly pass one end of the cord through a flame to melt it slightly, then tap it (carefully!) to form a subtle point. This makes threading beads much easier without fraying. -
Anchor knot:
Tie a loose overhand knot about 4 inches from the end of the cord. This acts as a temporary stopper so your beads don’t slide off while you work.
Knot Slipping?
If the sliding macrame knot feels too loose, you likely didn’t pull the square knots tight enough. Undo it and retie firmly, applying tension after every single loop.
Step 2: Beading the Pattern
-
Start the sequence:
thread on about 8 to 10 of the darkest burnt orange/terracotta beads first. This establishes the deep end of your sunset gradient. -
Add first accent:
Slide on a single white accent bead. This stark contrast breaks up the earthy tones and adds visual interest. -
Transition lighter:
Now, add 4 to 5 of the slightly lighter orange or rust-colored beads. -
Yellow highlight:
Add a single mustard yellow bead. This pop of brightness mimics the sun dipping below the horizon. -
Mid-tone warm gradation:
Continue the gradient by adding 3 burnt orange beads, followed by 3 terracotta beads. -
Center point shift:
Place one white bead followed by 4 sandy beige beads to represent the beach sand. -
Refining the sand tones:
Add 4 cream-colored wooden or clay beads to lighten the palette further. -
The golden finish:
Add a white separator bead, then thread on a stack of 4 to 5 small gold spacer beads. This metallic touch elevates the bracelet from casual to chic.
Step 3: Finishing the Closure
-
Check the length:
Wrap the beaded section around your wrist to check the fit. Add or remove beads from the dark orange end if you need to adjust the size. -
Secure the beads:
Once satisfied, tie an overhand knot snugly against the last bead (the gold stack) to lock everything in place. Untie your starting temporary knot and tie a permanent knot against the first bead. -
Cross the cords:
Bring the two tail ends of the cord together so they overlap and run parallel to each other. -
Macrame sliding knot:
Using a scrap piece of the same pink cord (about 6 inches), tie a square knot around the two parallel tail cords. Continue tying square knots for about a half-inch to create the sliding mechanism. -
Trim slider ends:
Trim the excess cord from your sliding knot short, carefully melt the tips with a lighter, and press them into the knot to seal. -
Finish tails:
Slide a single gold bead or a small clay bead onto the very end of each tail cord. Tie a knot below the bead to secure it. -
Final trim:
Trim any excess cord below the tail knots and lightly singe the ends to prevent fraying.
Level Up
Swap the solid clay beads for speckled polymer clay or add a tiny seashell charm near the gold spacers for an even stronger beach vibe.
Slip on your new bracelet and enjoy the warm glow of sunset right on your wrist
Citrus Slice Pop Accents
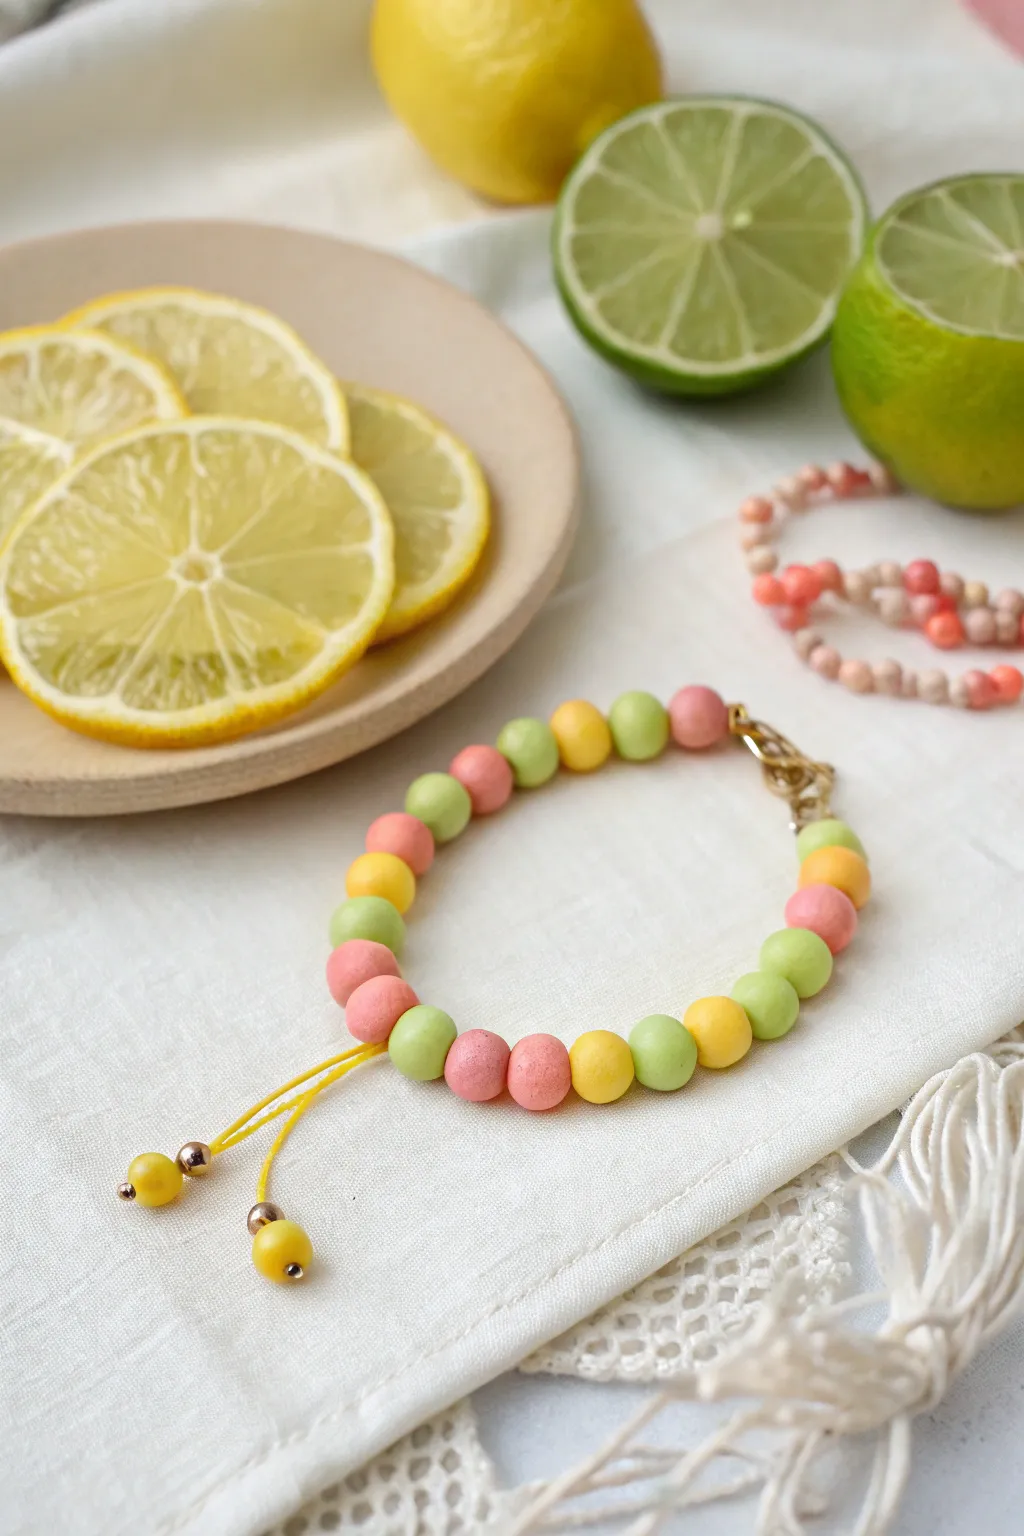
Capture the refreshing zest of summer with this matte-finish beaded bracelet inspired by lemon and lime slices. Using soft clay tones and a simple sliding knot mechanism, this accessory adds a sweet, adjustable pop of color to any wrist stack.
Detailed Instructions
Materials
- Polymer clay in pastel yellow, soft lime green, and coral pink
- Yellow waxed cotton or nylon cord (approx. 1mm thickness)
- Clay roller or pasta machine
- Small round bead roller tool (optional but helpful for uniformity)
- Needle tool or toothpick
- Gold tone crimp ends (optional, for decorative finish near closure)
- 2 small gold spacer beads
- Oven for baking
- Scissors
Step 1: Prepping the Clay Beads
-
Condition the colors:
Begin by kneading your three blocks of polymer clay—yellow, soft green, and coral—until they are warm and pliable. This prevents cracks later on. -
Measure the portions:
Pinch off equal-sized small chunks of each color. Aim for pieces that are roughly the size of a large pea to ensure your finished beads are uniform. -
Roll spheres:
Roll each chunk between your palms or use a bead roller tool to create smooth, perfect spheres. You’ll need about 20-25 main beads total for an adult bracelet. -
Create tassel beads:
Don’t forget to roll two smaller yellow spheres that will serve as the decorative stoppers on the pull strings. -
Poke holes:
Using a needle tool or toothpick, carefully pierce the center of each sphere. Gently rotate the tool as you push through to avoid squishing the perfectly round shape. -
Wide bore check:
Double-check that your holes are wide enough to accommodate two strands of your yellow cord, especially for the sliding mechanism area. -
Bake the clay:
Arrange the beads on a baking sheet lined with parchment paper. Bake according to your specific clay brand’s temperature and time instructions—usually around 275°F (135°C) for 15-30 minutes. -
Cool down:
Allow the beads to cool completely before handling so they harden properly.
Smooth Surface Secret
Before baking, lightly dust your raw clay beads with cornstarch or baby powder. This removes fingerprints and gives that soft, matte texture shown in the photo.
Step 2: Assembly and Knotting
-
Cut the cord:
Cut a length of yellow cord approximately 12 inches long. This will be the main strand your beads sit on. -
String the pattern:
Thread your cooled beads onto the cord. I like to alternate the colors in a random but balanced pattern—pink, yellow, green—to mimic that mixed citrus look. -
Add gold details:
Once the main section of beads is strung (covering about 6-7 inches), slide a gold crimp tube or bead onto each end of the beaded section to frame it. -
Form the circle:
Bring the two ends of the cord together, crossing them over each other to form a circle. -
Tie the sliding knot:
Cut a separate small piece of yellow cord (about 5 inches). Place it under the crossed main cords and tie a square knot or a series of macramé flat knots around both strand ends. This creates the adjustable slider. -
Trim the slider:
Tighten the macramé knots securely, trim the excess from this short tying piece, and carefully melt the tips with a lighter or use a dab of glue to secure them. -
Finish the tails:
On the two dangling tail ends of the main cord, slide on a small gold spacer bead followed by one of the small yellow clay beads you made earlier. -
Secure the ends:
Tie a simple overhand knot right below the small yellow bead at the very end of each tail to keep it in place. -
Final trim:
Trim any excess cord below the final knots for a clean, professional finish.
Textured Twist
Before baking, gently roll the raw beads over a piece of coarse sandpaper or a clean sponge to give them a realistic, rind-like texture.
Slip on your new citrus-inspired accessory and enjoy the handmade summer vibes
Watermelon Color-Block Stripes
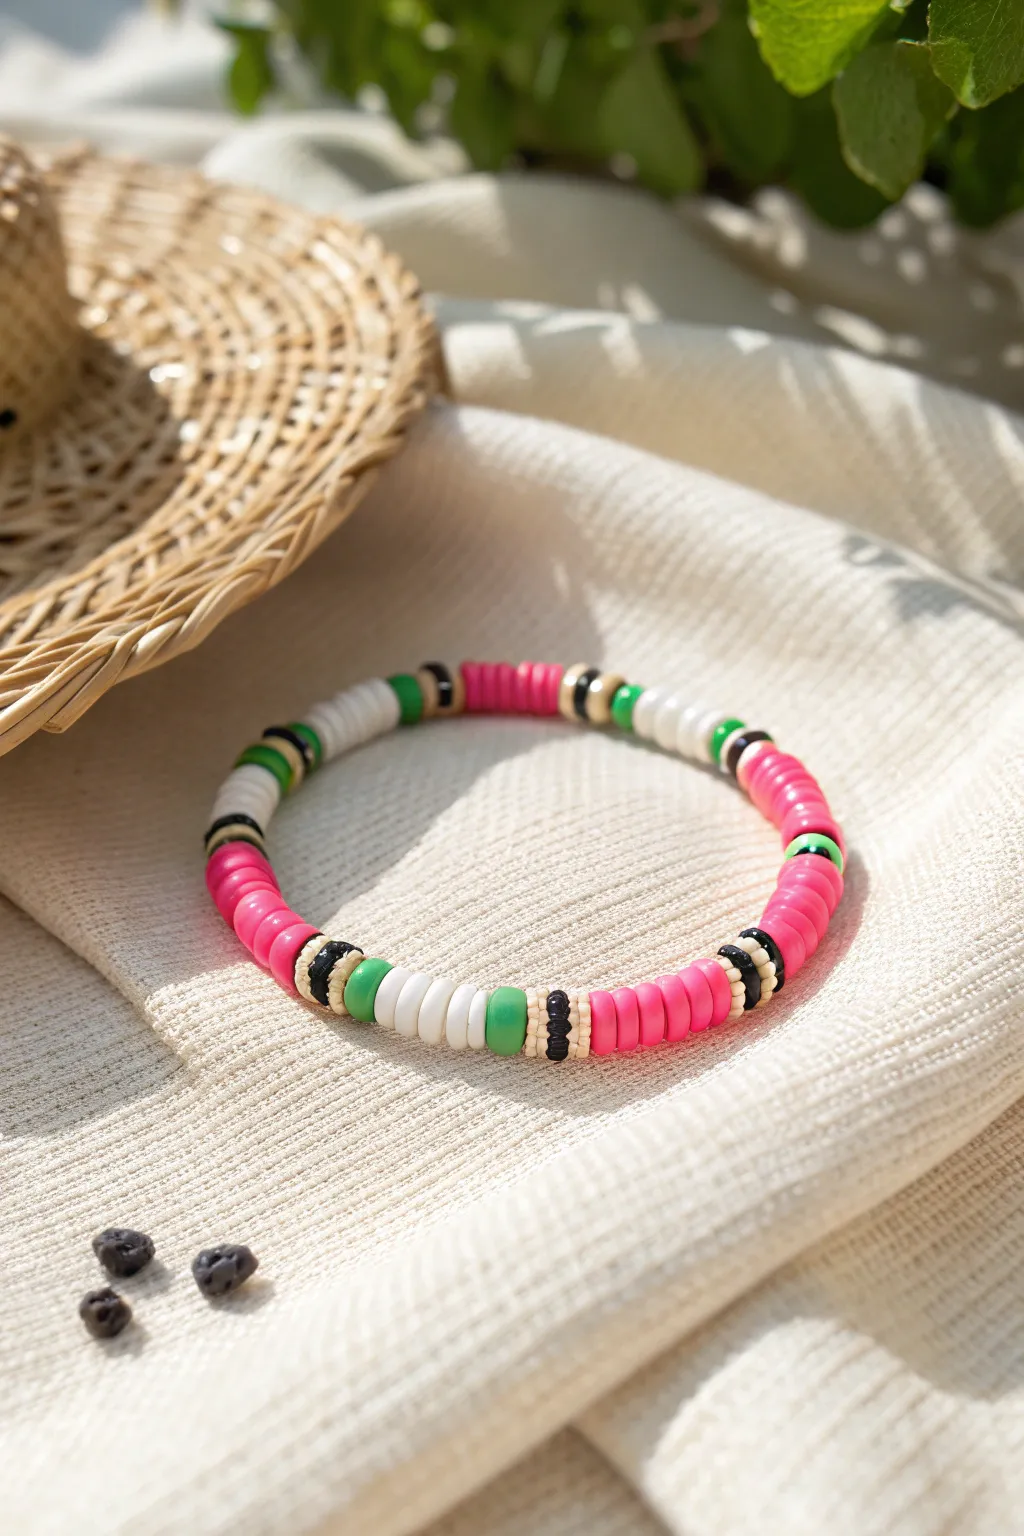
Capture the refreshing vibe of a summer picnic with this vibrant watermelon-inspired bracelet. Its distinct color-block pattern mixes bright pinks, crisp whites, and grassy greens with graphic black accents for a modern twist on fruit-themed jewelry.
Step-by-Step Guide
Materials
- Polymer clay heishi disc beads (6mm) in: Hot Pink
- Polymer clay heishi disc beads (6mm) in: White
- Polymer clay heishi disc beads (6mm) in: Kelly Green
- Polymer clay heishi disc beads (6mm) in: Black
- Polymer clay heishi disc beads (6mm) in: Cream or Pale Beige (optional, for subtle variation)
- Elastic beading cord (0.8mm clear)
- Beading needle (optional but helpful)
- Scissors or jewelry snips
- Super glue or jewelry adhesive
- Ruler or tape measure
- Bead stopper or simple binder clip
Step 1: Preparation and Patterning
-
Measure your wrist:
Wrap a flexible measuring tape around your wrist, adding about half an inch to the measurement for a comfortable fit that isn’t too tight. -
Cut the cord:
Cut a piece of elastic cord approximately 10-12 inches long. Having extra length makes tying the final knot much easier without fumbling. -
Secure the end:
Attach a bead stopper or a binder clip to one end of the cord to prevent your colorful work from slipping off as you string. -
Establish the main pink section:
Begin the pattern with the dominate color. Thread on about 10 to 12 Hot Pink heishi beads. This creates the ‘fruit flesh’ part of the watermelon motif. -
Add the first rind transition:
After the pink section, slide on one cream or beige bead followed by two black beads. The black beads act as the graphic separator stripes. -
Create the white rind layer:
Thread on approximately 4 to 5 White beads. This represents the inner rind of the watermelon.
Seed Tip
To mimic watermelon seeds, randomly substitute one black bead into the middle of your pink ‘fruit’ sections instead of keeping them solid pink.
Step 2: Building the Motif
-
Add the green skin:
Follow the white section with 2 Kelly Green beads. This provides that classic watermelon skin pop. -
Repeat the transition:
Finish this specific block by adding one cream bead, two black beads, and another cream bead to mirror the earlier transition. -
Start the second pink block:
Return to your Hot Pink beads and string another large section, aiming for the same count (around 10-12) as your first block. -
Vary the pattern slightly:
To keep it interesting, you can make the next separator section slightly different. Try just adding a White section followed by a Green bead, skipping the black accents for a softer look, or stick to the rigid pattern for consistency. -
Continue the sequence:
Repeat the pattern of Pink Block -> Transition -> White/Green Rind -> Transition until you reach your measured length. -
Check the fit:
Wrap the unfinished strand around your wrist to verify the size. The beads should meet comfortably without stretching the elastic.
Step 3: Finishing Touches
-
Pre-stretch the cord:
I always find it crucial to give the ends of the elastic a gentle tug before tying. This prevents the bracelet from stretching out permanently the first time you wear it. -
Tie the knot:
Remove the bead stopper and tie the two ends together using a strong surgeon’s knot (right over left, left over right, and loop through an extra time). -
Secure with glue:
Place a tiny drop of super glue or jewelry adhesive directly onto the knot. Let it dry completely for a minute or two. -
Hide the knot:
Trim the excess cord ends close to the knot, then carefully slide a nearby bead with a larger hole over the knot to conceal it.
Knot Slipping?
If your elastic knot feels insecure, try a drop of GS Hypo Cement. It has a precision tip perfect for getting glue exactly inside the knot, not on the beads.
Slip on your new accessory and enjoy a pop of fruity color on your wrist all summer long
The Complete Guide to Pottery Troubleshooting
Uncover the most common ceramic mistakes—from cracking clay to failed glazes—and learn how to fix them fast.
Pastel Poolside Palette
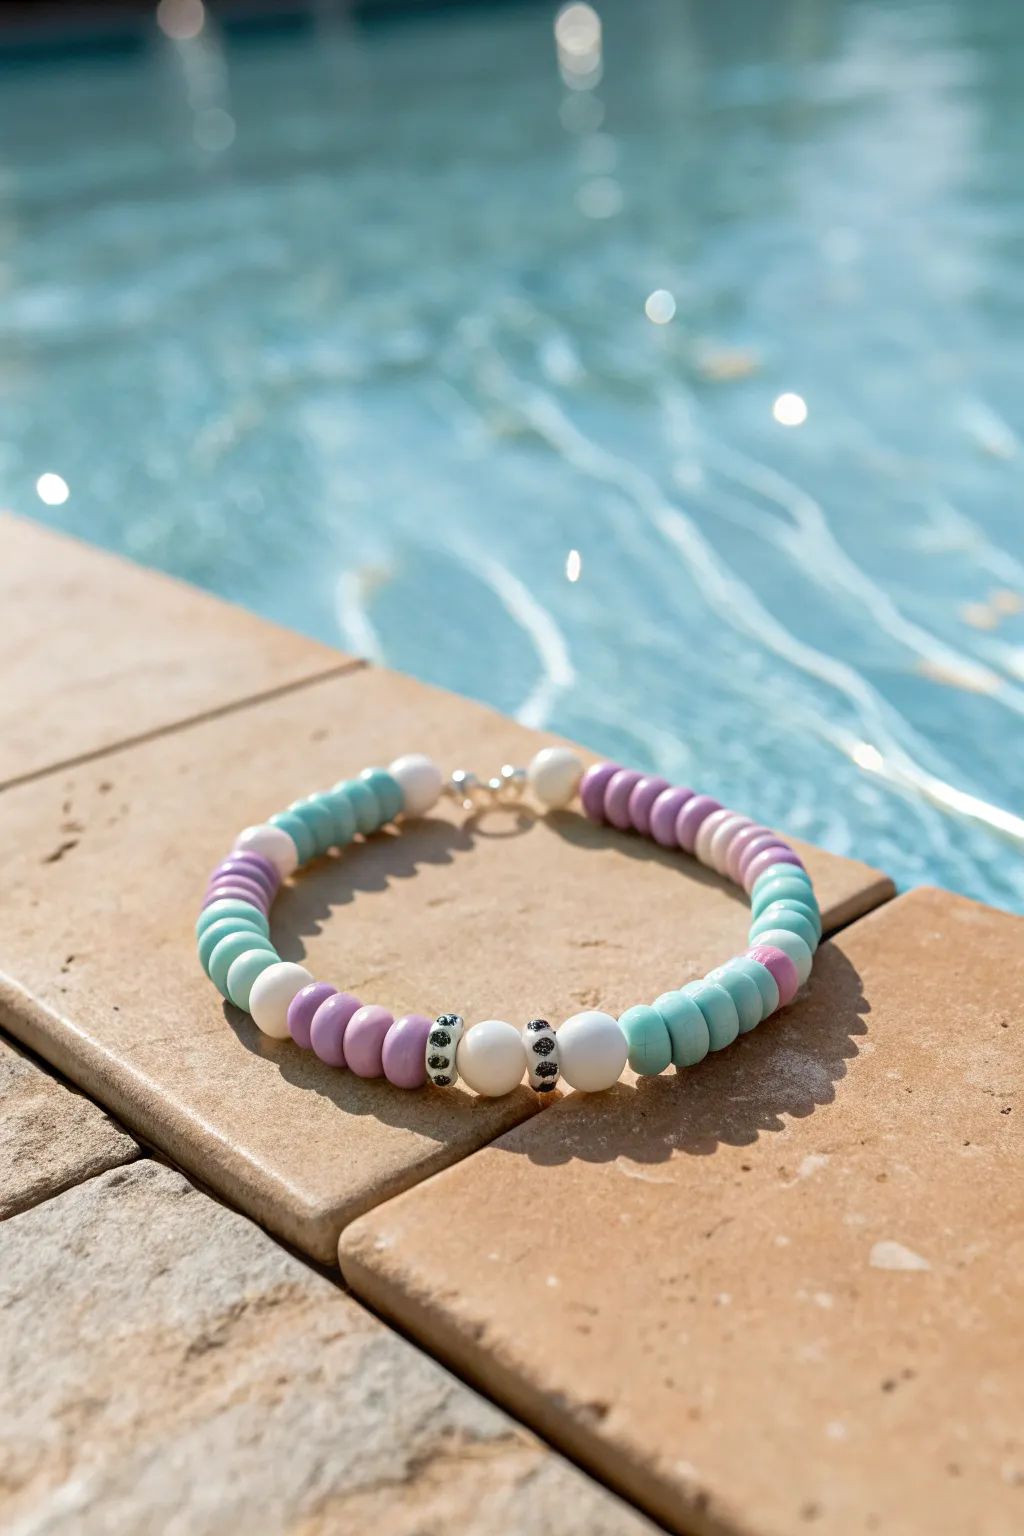
Evoke the cool, shimmering vibes of a swimming pool with this soft pastel bracelet. Combining matte clay discs with uniquely patterned focal beads creates a fresh accessory perfect for sunny days.
Detailed Instructions
Materials
- Polymer clay Heishi beads (aqua blue)
- Polymer clay Heishi beads (lavender purple)
- Polymer clay Heishi beads (white)
- 3 Round white acrylic or wooden beads (approx. 8-10mm)
- 2 Decorative spacers or focal beads (white with black spots/Dalmatian pattern)
- Elastic beading cord (0.8mm recommended)
- Silver crimp beads
- Silver jump rings
- Silver lobster clasp
- Jewelry pliers
- Scissors
Step 1: Planning and Preparation
-
Measure your wrist:
Wrap a measuring tape loosely around your wrist to determine the desired length. Add about an inch to this measurement to account for the bulk of the beads and tying the knot. -
Cut the cord:
Cut a piece of elastic cord about 3-4 inches longer than your final measurement. This extra length ensures you have enough room to work comfortably without beads sliding off. -
Secure one end:
Attach a piece of tape or a bead stopper to one end of the cord. This simple step saves you the heartbreak of beads slipping off while you design.
Loose Beads?
If your large round beads hole is too big and swallows the crimp, add a tiny seed bead on either side of the crimp to act as a stopper.
Step 2: Creating the Pattern
-
Start with the clasp side:
Identify the pattern start. In the image, the pattern begins near the clasp with a white clay disc followed by a section of aqua beads. -
Build the first aqua block:
Thread on approximately 6-7 aqua clay Heishi beads. -
Transition through white:
Add a single white clay disc, then thread on one large round white bead. -
Create a lavender section:
Follow the round bead with another single white clay disc, then string on about 6-7 lavender Heishi beads. -
Add the center focal point:
This is the star of the show. Thread a decorative spotted spacer bead, followed by a large round white bead, and then the second spotted spacer bead. -
Mirror the lavender side:
Now, work backwards to create symmetry. Add 6-7 lavender Heishi beads after the central focal section. -
Mirror the transition:
Add a single white clay disc, one large round white bead, and another single white clay disc. -
Finish the beadwork:
Complete the beading with a final block of 6-7 aqua Heishi beads. Check the length against your wrist and add more beads to the aqua sections if needed.
Step 3: Finishing Touches
-
Add crimp beads:
Thread a silver crimp bead onto each end of the elastic cord. -
Loop onto hardware:
On one side, loop the cord through a jump ring attached to the lobster clasp. On the other, loop it through a closed jump ring. -
Check the fit:
Before securing anything permanently, drape the bracelet around your wrist one last time to ensure the size feels comfortable. -
Secure the crimps:
Feed the tail of the elastic back through the crimp bead to create a loop holding the hardware. Use your flat-nose pliers to squeeze the crimp bead flat and tight. -
Trim excess cord:
Cut away the remaining tail of the elastic cord close to the crimp bead, being careful not to nick the main strand. -
Hide the crimp (optional):
If possible, slide the first bead over the crushed crimp bead to conceal it for a seamless professional look.
Mix It Up
Swap the lavender for peach or soft yellow clay discs to create a sunrise palette, or replace silver hardware with gold for a warmer finish.
Slip on your new accessory and enjoy the cool summer style you’ve just created
Rainbow Stack With White Breaks
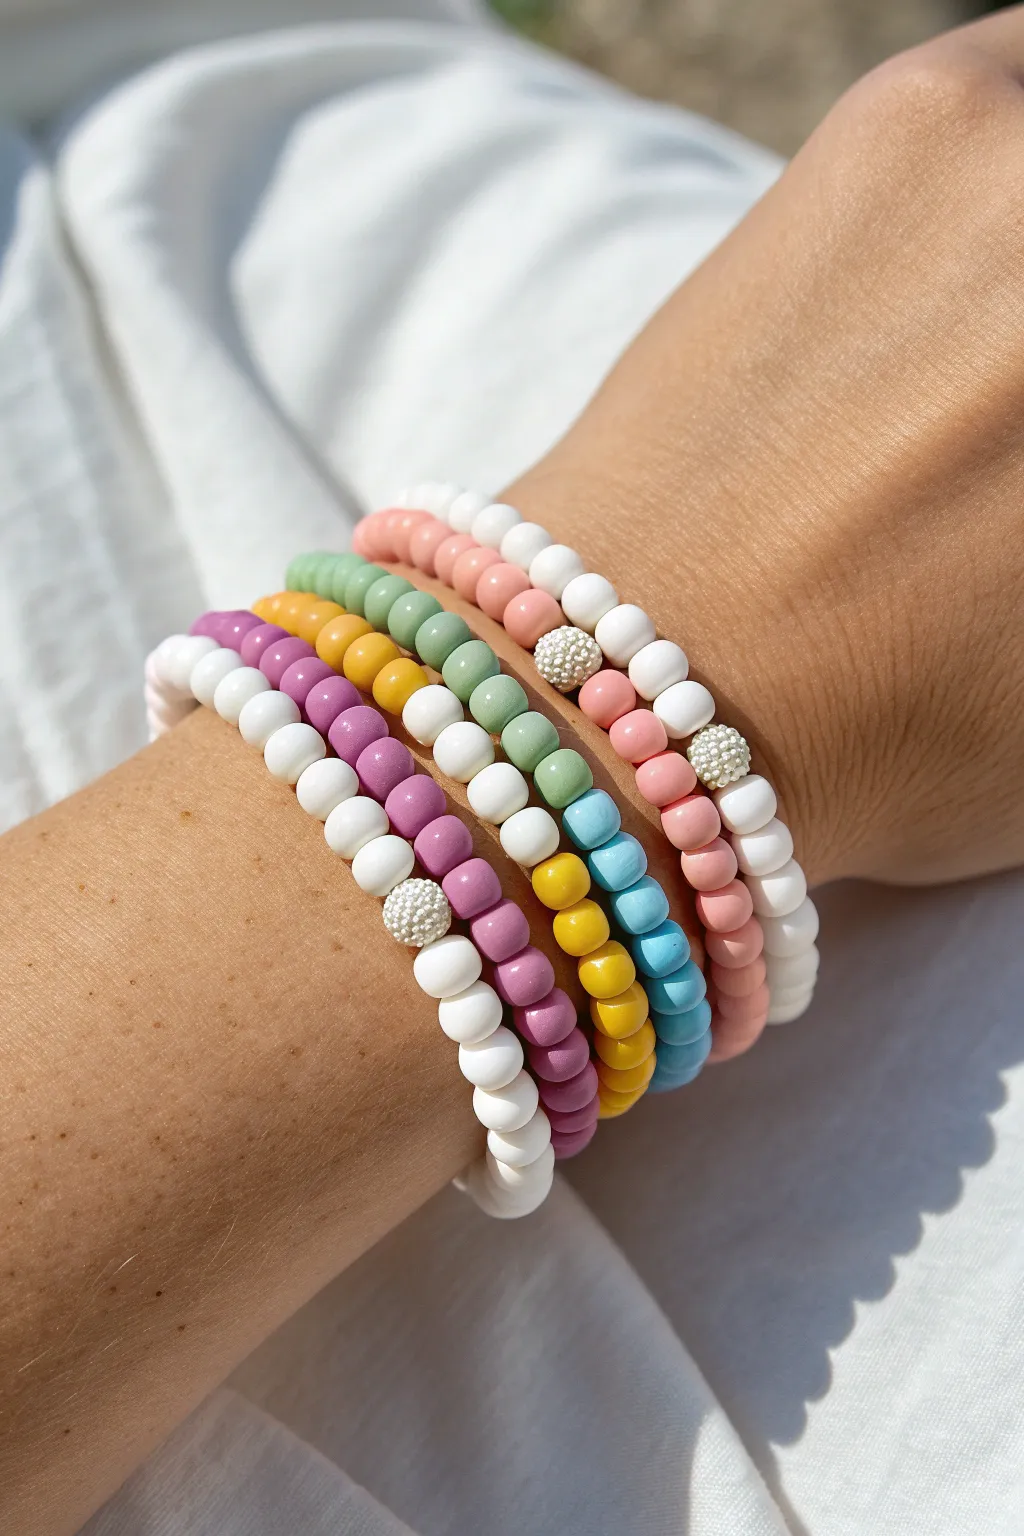
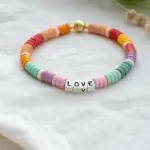
Embrace the joy of summer with this delightful stack of five bracelets that blends soft pastels with crisp white accents. The repeating pattern of white sections creates a unified look across the stack, making the colors pop without overwhelming the wrist.
Step-by-Step Tutorial
Materials
- 6mm HEISHI polymer clay beads in pastel pink
- 6mm HEISHI polymer clay beads in pastel purple
- 6mm HEISHI polymer clay beads in pastel green (sage)
- 6mm HEISHI polymer clay beads in mustard yellow
- 6mm HEISHI polymer clay beads in sky blue
- 6mm – 8mm round white acrylic or ceramic beads
- 8mm sparkly silver/white paved disco ball beads (polymer clay or crystal)
- .8mm strong elastic stretch cord
- Super glue or jewelry cement
- Scissors
- Bead stopper or tape
Step 1: Planning the Palette
-
Measure your wrist:
Wrap the elastic cord loosely around your wrist to find a comfortable fit, then add about 4 inches of extra length to allow for thorough knotting later. -
Cut five strands:
Cut five pieces of elastic based on your measurement; laying them side-by-side helps visualize the final stack. -
Secure the ends:
Place a bead stopper or a piece of masking tape on one end of each elastic strand to prevent your beads from sliding off while you work.
Loose Elastic?
Pre-stretch your elastic cord by firmly pulling it a few times before beading. This prevents the bracelet from loosening up and sagging after the first time you wear it.
Step 2: Creating the Solid Foundations
-
Start the pink bracelet:
Begin your first strand by threading on approximately 3-4 inches of the pastel pink clay beads; this will form the colorful back section of the bracelet. -
Add the first white break:
After the pink section, thread on about 5-6 round white beads. -
Insert the accent bead:
Slide on one sparkly paved disco ball bead; this acts as the focal point of the white section. -
Finish the pink strand:
Add another 5-6 round white beads to mirror the other side, then fill the remaining length with more pink clay beads until it fits your wrist perfectly. -
Knot the first bracelet:
Tie off the elastic with a surgeon’s knot (right over left, left over right, and loop through twice), pull tight, add a dot of glue, and trim the excess cord.
Step 3: Building the Rainbow
-
Construct the purple strand:
Follow the same pattern for the second bracelet: start with a solid run of purple clay beads for the back half. -
Design the purple front:
Instead of a solid white block, try alternating for variety: thread three white round beads, one purple clay bead, then one paved disco ball bead. -
Complete the purple loop:
finish the symmetry with one purple clay bead, three white round beads, and fill the rest with purple clay. -
Start the yellow/green mix:
For the third bracelet, use the mustard yellow beads for the main color. -
Create a distinct pattern:
If you look closely at the reference, some strands mix colors; try mixing a few sage green beads into your yellow strand before adding the white section to tie the colors together. -
Make the green strand:
Thread your sage green clay beads, but for this layer, omit the sparkly disco ball bead and use a simple solid white round bead as the center focal point for a cleaner look. -
Assemble the blue strand:
Create the final bracelet using sky blue beads; I like to use a solid block of 10-12 white round beads in the center here without any sparkles to balance the stack.
Gold Glam Upgrade
Swap the white spacer beads for gold-filled rounds or add flat gold spacers between the colored clay sections to give the stack a warmer, luxurious summer sunset vibe.
Step 4: Final Assembly
-
Check sizes:
Before tying the remaining knots, slip the loose strands onto your wrist to ensure they sit comfortably together without pinching. -
Secure all knots:
Tie surgeon’s knots for all remaining bracelets, applying a small dab of jewelry cement to each knot for durability. -
Hide the knots:
If the hole of your round white beads or clay beads allows, gently tug the elastic so the knot slides inside a bead to hide it. -
Trim and finish:
Snip off any visible tail ends of the elastic once the glue has fully dried.
Stack them up on your wrist and enjoy the fresh, breezy summer style you just created
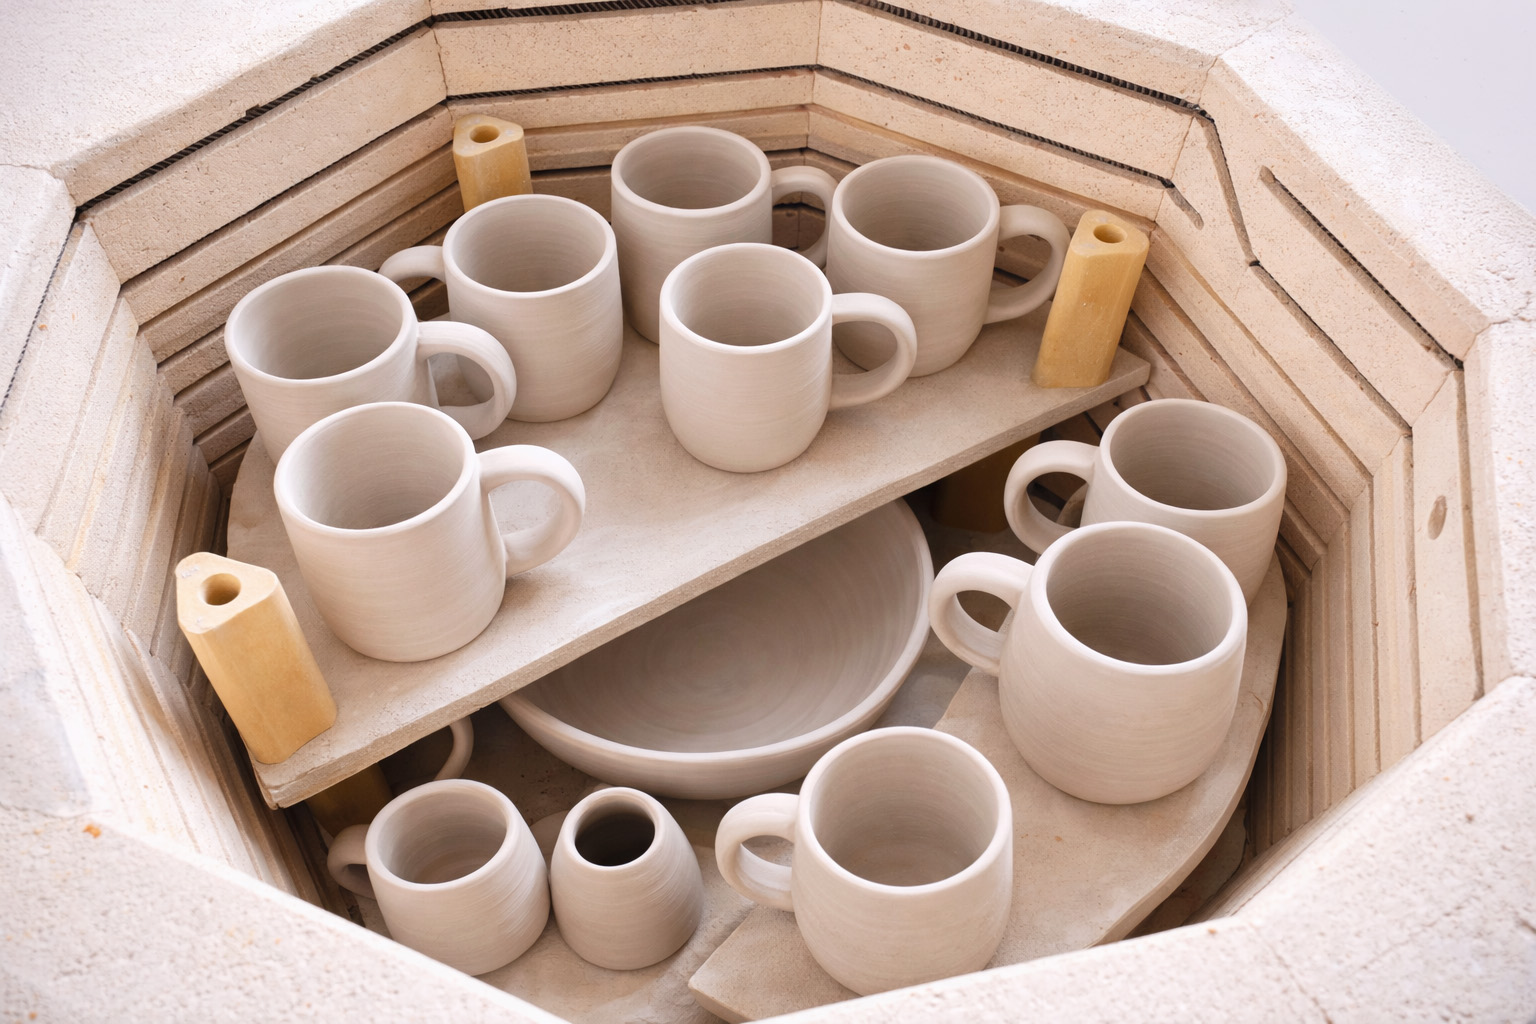
What Really Happens Inside the Kiln
Learn how time and temperature work together inside the kiln to transform clay into durable ceramic.
Ocean Tones With Wave Pattern
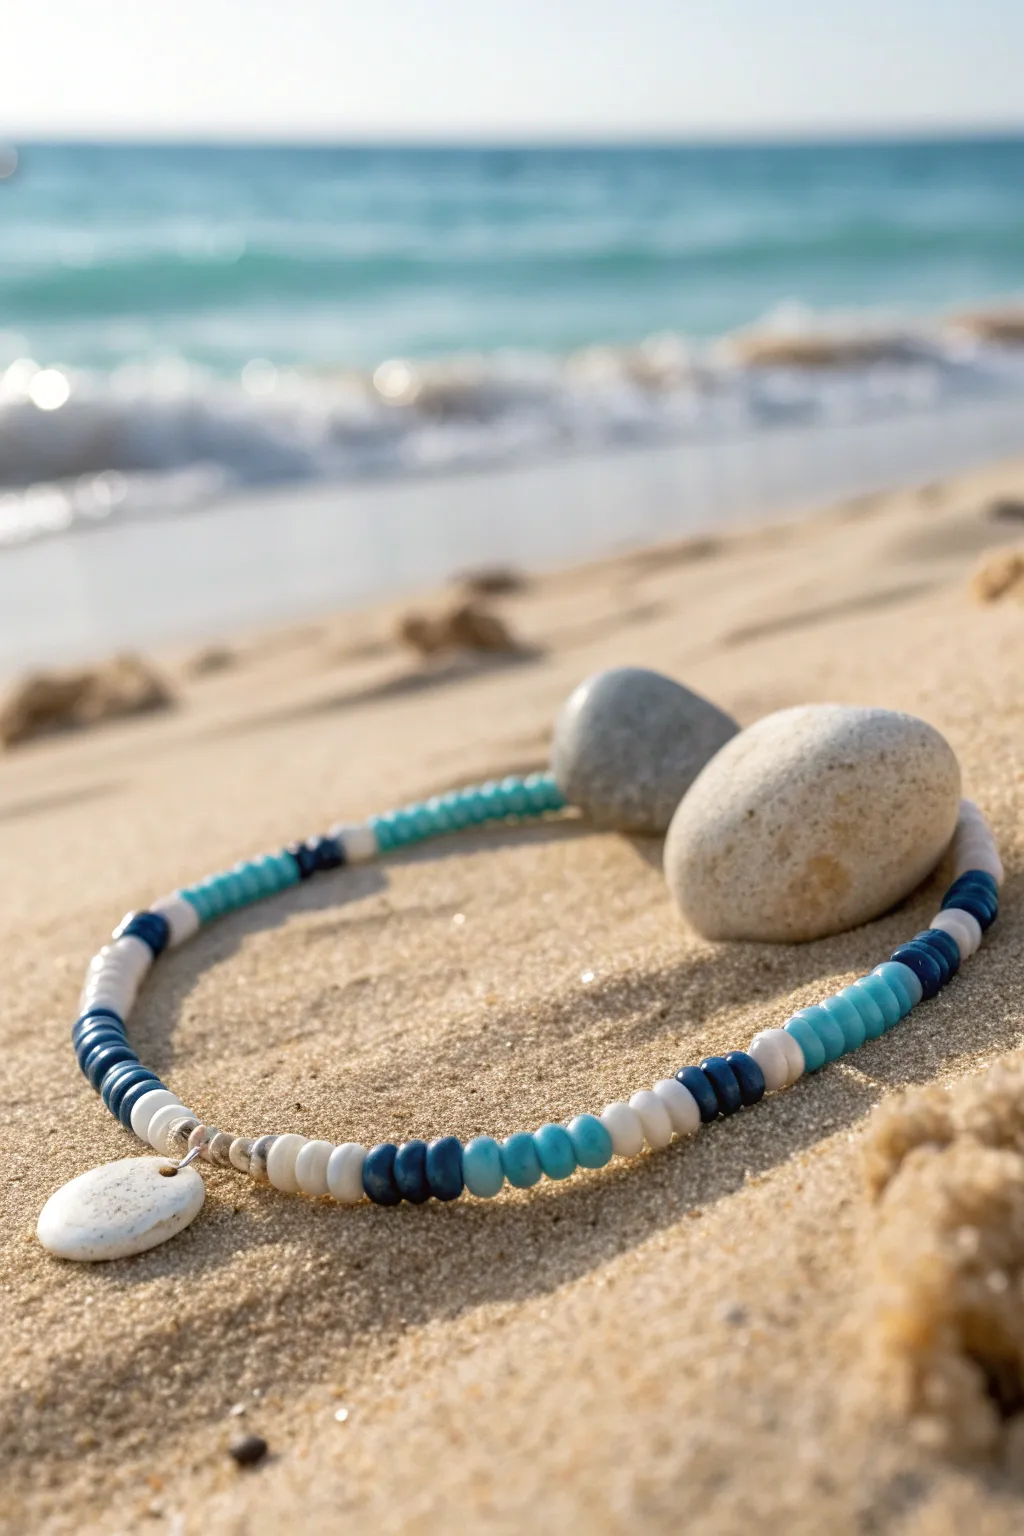
Capture the rhythm of the tides with this refreshing necklace featuring handmade clay beads in a soothing palette of white, teal, and deep ocean blue. The centerpiece is a simple, organic white clay pendant that feels just like a tumbled beach stone.
Detailed Instructions
Materials
- White polymer clay
- Teal polymer clay
- Navy blue polymer clay
- Beading wire or strong nylon cord
- Jewelry clasp (lobster claw + jump ring)
- 2 crimp beads suitable for your wire size
- Pliers (chain nose and crimping)
- Clay roller or pasta machine
- Round clay cutter or straw (for bead shape)
- Needle tool or toothpick
- Wet/dry sandpaper (400-800 grit)
- Gloss glaze (optional)
Step 1: Creating the Clay Stone Pendant
-
Conditioning the White Clay:
Start by warming a small amount of white polymer clay in your hands until it is soft and pliable. I find that really working the clay prevents cracking later. -
Shaping the Stone:
Roll the clay into a smooth ball about the size of a quarter, then flatten it gently between your palms to create an organic, slightly oval disc shape. -
Adding Texture:
To mimic a real stone, lightly tap the surface with a piece of sandpaper or a toothbrush to give it a subtle, porous texture. -
Piercing the Pendant:
Use a needle tool to create a hole near the top edge of your pendant. Wiggle the tool gently to ensure the hole is large enough for your beading wire or a jump ring.
Step 2: Forming the Ocean Beads
-
Mixing Color Gradients:
Create a few marbled mixes by combining tiny amounts of white with teal, and white with navy, so you have a variety of shades ranging from pure white to deep blue. -
Rolling Snakes:
Roll each color of clay (white, light teal, dark teal, light blue, navy) into long, even snakes, approximately 5mm in diameter. -
Cutting Segments:
Slice the snakes into small, equal segments. These will become your individual beads. -
Rounding the Beads:
Roll each small segment between your fingers to form a smooth, round bead. If you prefer the look in the photo, flatten the sides slightly so they sit flush against each other. -
Piercing the Beads:
Carefully pierce the center of each bead with your needle tool. Rotate the bead on the needle to ensure the hole is clean and round. -
Baking:
Arrange all your beads and the pendant on a baking sheet lined with parchment paper. Bake according to your clay manufacturer’s instructions (usually 275°F for 15-30 minutes). -
Cooling and Buffing:
Let the beads cool completely. If there are any rough fingerprints, lightly sand them with fine-grit wet sandpaper for a polished finish.
Sticky Situation?
If clay sticks to your needle tool while piercing, try dipping the tip in a tiny bit of cornstarch or water before pushing it through the bead.
Step 3: Stringing the Design
-
Preparing the Wire:
Cut a length of beading wire about 18 inches long (or your desired choker length plus 2 inches). -
Attaching the First Clasp:
Thread a crimp bead and one half of your clasp onto one end of the wire. Loop the wire back through the crimp bead and use your pliers to flatten it securely. -
Planning the Pattern:
Lay out your beads on a flat surface. Create a ‘wave’ pattern by grouping colors: start with 3-4 white beads, transition to 3-4 teal, then 3-4 navy, and reverse back to white. -
Stringing First Half:
Thread your beads onto the wire following your pattern until you reach the halfway point of your necklace. -
Adding the Pendant:
Slide your white stone pendant onto the wire so it sits right in the center. -
Completing the Strand:
Continue stringing the remaining beads, mirroring the pattern from the first half so the design looks symmetrical. -
Securing the End:
Add a final crimp bead and the other half of your clasp. Loop the wire back through the crimp bead and a few adjacent clay beads before tightening and flattening the crimp.
Make It Yours
Add tiny silver or gold spacer beads between the color sections to simulate sunlight glinting off the ocean waves.
Now you have a piece of the seaside to wear wherever you go
Gold-Spacer Resort Glam
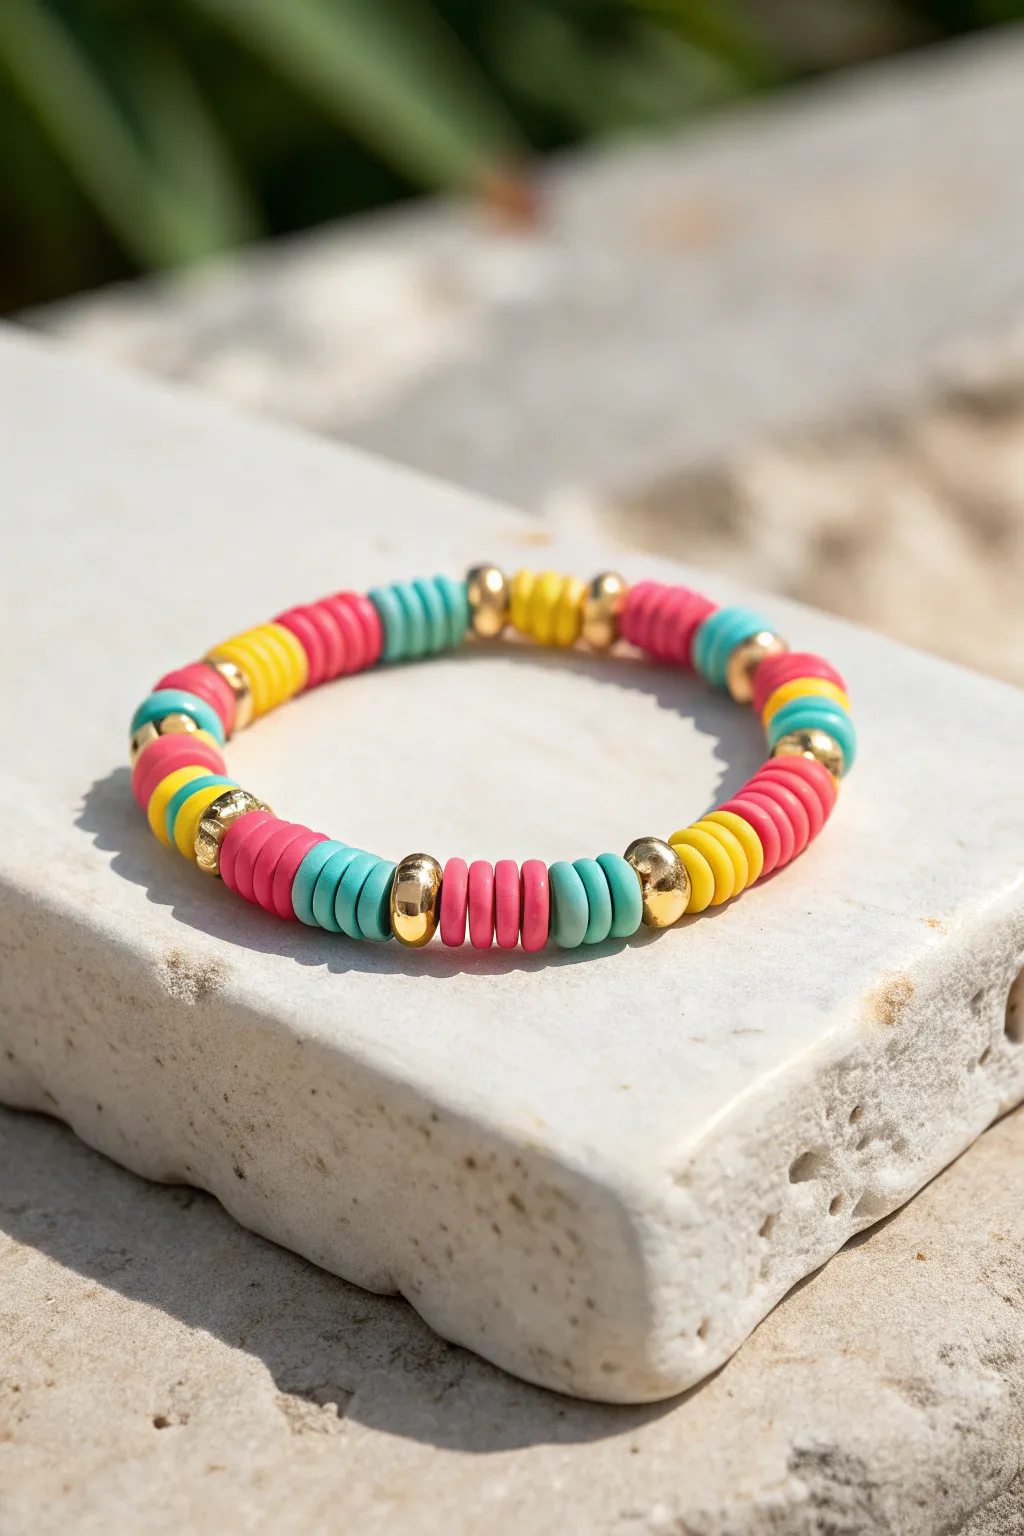
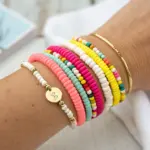
Capture the essence of a luxury beach vacation with this vibrant heishi bead bracelet. Featuring a stunning palette of hot pink, turquoise, and sunshine yellow punctuated by gleaming gold accents, this piece brings resort-ready glamour to any wrist.
Step-by-Step Guide
Materials
- 6mm polymer clay heishi beads in hot pink
- 6mm polymer clay heishi beads in turquoise/teal
- 6mm polymer clay heishi beads in bright yellow
- 6mm gold metallic spacer beads (rounded/rondelle shape)
- 0.8mm clear elastic stretch cord
- Jewelry glue or clear nail polish
- Scissors
Step 1: Preparation
-
Measure the cord:
Cut a piece of elastic cord about 10-12 inches long. This gives you plenty of extra slack for tying knots later without struggling. -
Stretch the elastic:
Before adding any beads, firmly pull on the elastic cord several times to ‘pre-stretch’ it. This crucial step prevents the finished bracelet from sagging after you wear it a few times. -
Secure the end:
Place a piece of tape or a bead stopper clip on one end of the cord so your beads don’t slide right off while you work.
Smooth Moves
Use crimp covers instead of just knots. If the knot won’t fit inside the gold bead, a gold crimp cover placed over the knot looks intentional and polished.
Step 2: Creating the Layout
-
Start with turquoise:
This pattern relies on color blocking. Begin threading your first section: slide on five turquoise clay beads. -
Add the first highlight:
Immediately following the turquoise, add a single gold spacer bead. These gold accents act as the separators that give the bracelet its ‘resort’ look. -
Transition to pink:
After the gold spacer, add your next block of color: five hot pink clay beads. -
Add a second spacer:
Slide on another gold spacer bead to close off the pink section. -
Introduce yellow:
Thread on five yellow clay beads. This creates a bright, sunny pop against the cooler turquoise and pink tones. -
Close the sequence:
Add a gold spacer bead after the yellow section. You have now completed one full sequence of the pattern.
Step 3: Building the Length
-
Repeat the pattern:
Continue the sequence: 5 turquoise, 1 gold, 5 pink, 1 gold, 5 yellow, 1 gold. Repeat this cycle until you reach your desired length. -
Check the fit:
Wrap the unfinished strand around your wrist to check the sizing. For an average adult wrist, you will likely need to repeat the full sequence about 4 to 5 times. -
Adjust the pattern ending:
Try to end the strand so that when you tie it, the pattern flows seamlessly. For example, if you started with turquoise, try to end after a gold spacer following a yellow section. -
Verify symmetry:
Look closely at your color blocks. I usually do a quick count to ensure every color section has exactly five beads so the rhythm remains consistent.
Stack It Up
Make two matching bracelets but vary the pattern: do one with all pink and gold spacers, and one with all turquoise and gold spacers for a cohesive stack.
Step 4: Finishing Touches
-
Prepare to tie:
Remove the tape or clip from the end. Bring the two ends of the elastic together carefully. -
Tie the first knot:
Tie a standard overhand knot, pulling the elastic tight enough that there are no gaps between beads, but not so tight that the bracelet buckles. -
sThe surgeon’s knot:
For the second knot, loop the elastic through twice before pulling tight. This is a surgeon’s knot and is much more secure for stretchy jewelry. -
Apply adhesive:
Dab a tiny drop of jewelry glue or clear nail polish directly onto the knot. This prevents it from slipping over time. -
Hide the knot:
Once the glue is tacky but not fully hard, slide the knot inside the hole of the nearest gold bead if possible to hide it. -
Trim excess:
Once the glue is fully dry, use sharp scissors to trim the excess cord ends close to the beads.
Now you have a chic, colorful accessory perfect for pairing with a summer tan
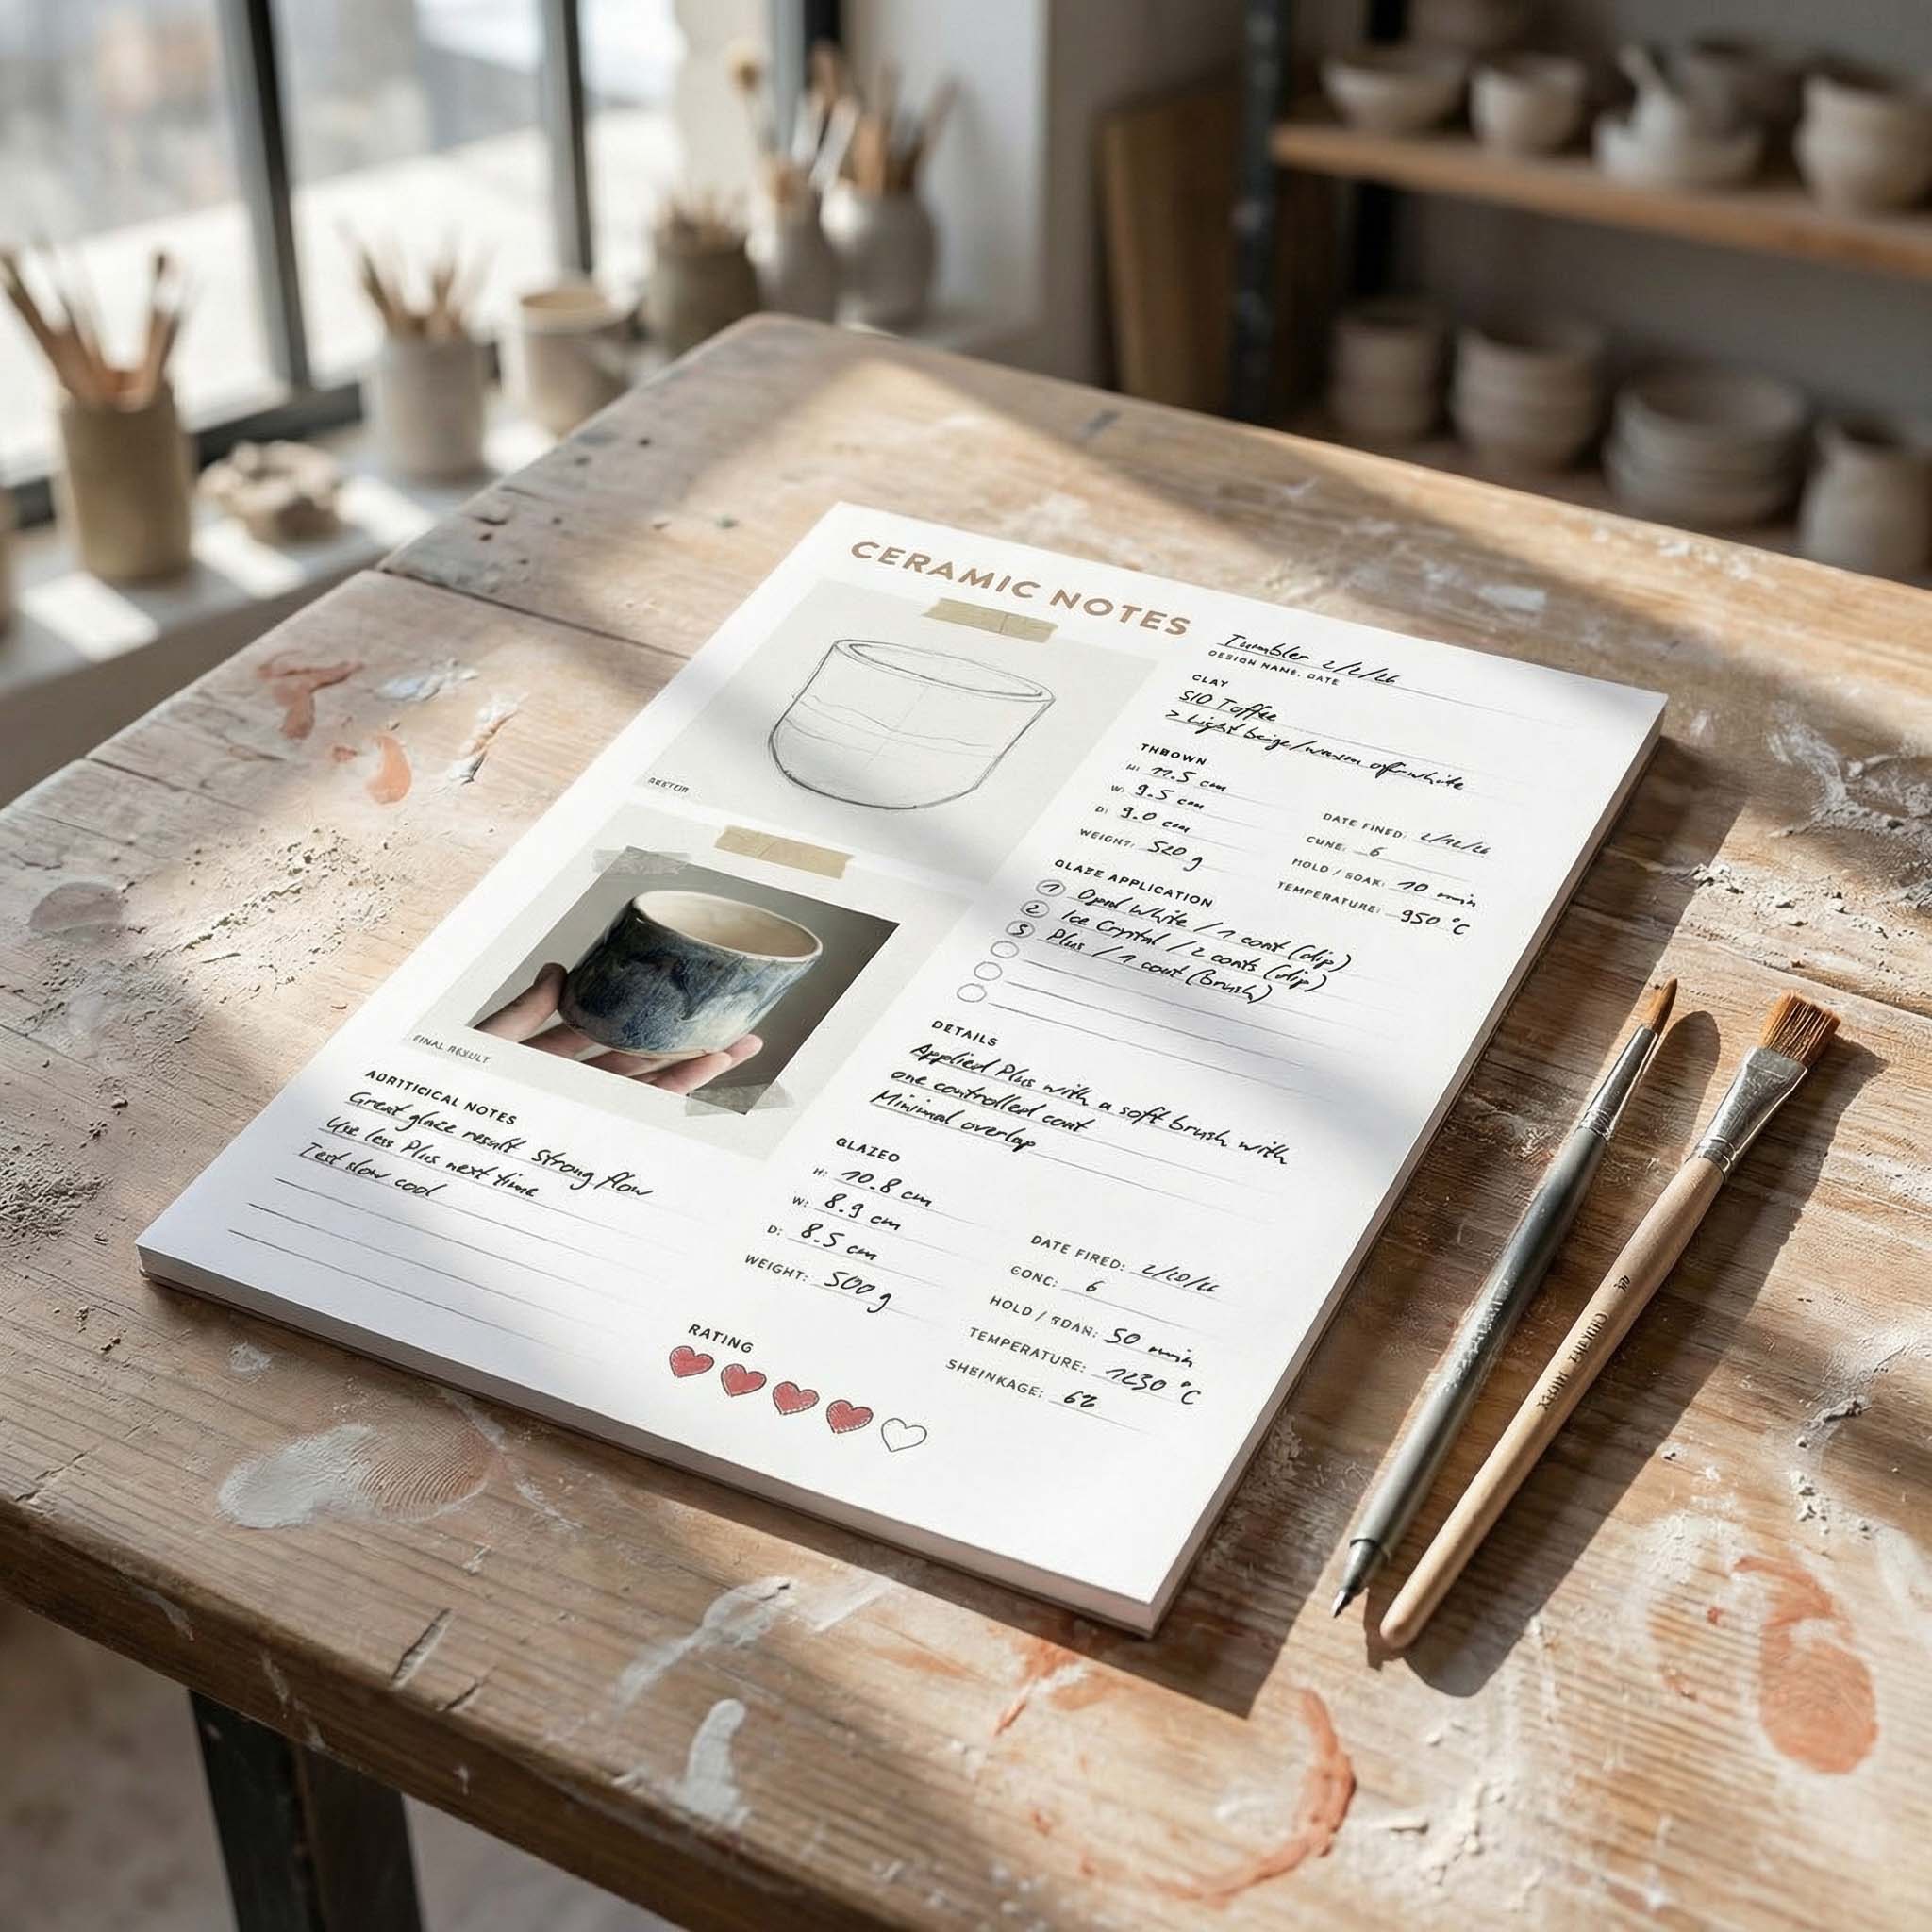
TRACK YOUR CERAMIC JOURNEY
Capture glaze tests, firing details, and creative progress—all in one simple printable. Make your projects easier to repeat and improve.
Pearl and Clay Beach Mix
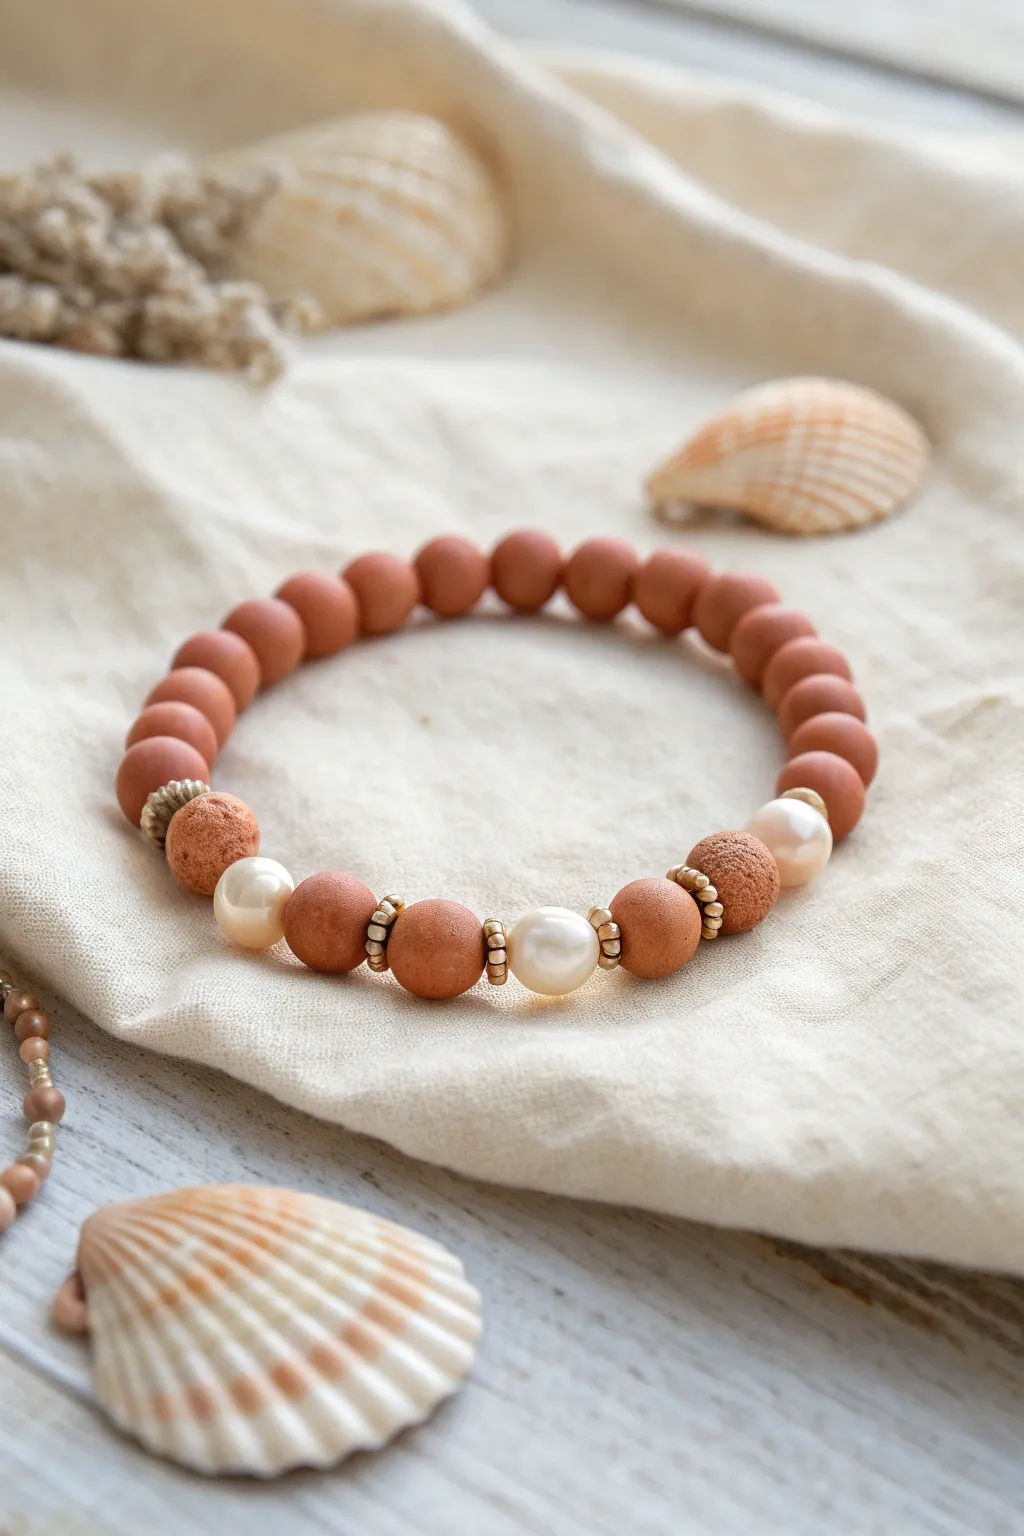
Evoke the warmth of sun-baked sand with this elegant bracelet that pairs matte terracotta hues with the lustrous shine of freshwater pearls. The mix of smooth, textured, and metallic elements creates a sophisticated beach-ready accessory perfect for summer layering.
How-To Guide
Materials
- Matte terracotta polymer clay beads (approx. 8mm)
- Textured terracotta or lava stone beads (approx. 8-10mm)
- Freshwater pearls or high-quality pearl beads white/cream (approx. 8mm)
- Small gold or antique brass metallic spacer beads
- Strong elastic bead cord (0.8mm or 1mm)
- Jewelry glue or clear nail polish
- Scissors
Step 1: Planning and Preparation
-
Measure your wrist:
Before cutting any cord, wrap a measuring tape around your wrist to find your size, then add about half an inch for a comfortable fit. -
Cut the elastic:
Cut a piece of elastic cord about 10-12 inches long. Having this extra length makes tying the final knot much easier without struggling to hold tension. -
Pre-stretch the cord:
Firmly pull on the ends of your elastic cord several times. This prevents the bracelet from stretching out and becoming loose after only a few wears. -
Secure one end:
Place a bead stopper or simply a piece of tape on one end of the cord to prevent your beads from sliding off while you design your pattern.
Knot Slipping?
If your elastic knot feels insecure, try pulling it tight, then letting it relax, and pulling tight again three times before gluing to ‘set’ the stretch memory.
Step 2: Stringing the Design
-
Begin the focal section:
Start by threading one large freshwater pearl onto the cord. This will act as the center point of your focal design. -
Add metallic accents:
On either side of the center pearl, slide on a group of three small gold spacer beads. These act as bright dividers that separate the pearl from the clay. -
Introduce the clay texture:
Next to the gold spacers on both sides, add a smooth terracotta clay bead to begin transitioning into the earthy tones. -
Repeat the pattern outward:
Follow the smooth clay bead with another set of three gold spacers on each side. Then, add another white pearl to flank the design. -
Add textured contrast:
Beside the outer pearls, add a textured or rough lava-style terracotta bead. This textural difference adds depth to the piece. -
One final metallic touch:
Place a single, slightly larger decorative metallic bead or a cluster of small spacers next to the textured bead on the left side to create visual asymmetry. -
Fill the rest of the strand:
Finish the rest of the bracelet by stringing the standard smooth matte terracotta beads until you reach your desired length.
Level Up
Add a small gold seashell charm heavily attached to one of the spacer sections for an even more distinct beach vibe.
Step 3: Finishing Touches
-
Check the fit:
Wrap the unfinished strand around your wrist to verify the size. Add or remove a few smooth clay beads from the back section if necessary. -
Pre-knot tension:
Bring the two ends of the elastic together and remove the tape or stopper, being careful not to drop any beads. -
Tie the surgeon’s knot:
Make a standard overhand knot, but loop the end through the circle a second time before pulling tight. This extra pass creates friction that holds the elastic securely. -
Secure with glue:
Apply a tiny dab of jewelry glue directly onto the knot. I prefer to pull the knot slightly inside the hole of a neighboring bead while the glue is wet. -
Trim the excess:
Once the glue is fully dry, stick the tips of your scissors close to the bead hole and snip off the excess cord tails cleanly.
Slip this bracelet on alongside your favorite watch or stack it with other bangles for an effortless summer look
Letter Beads That Say Summer
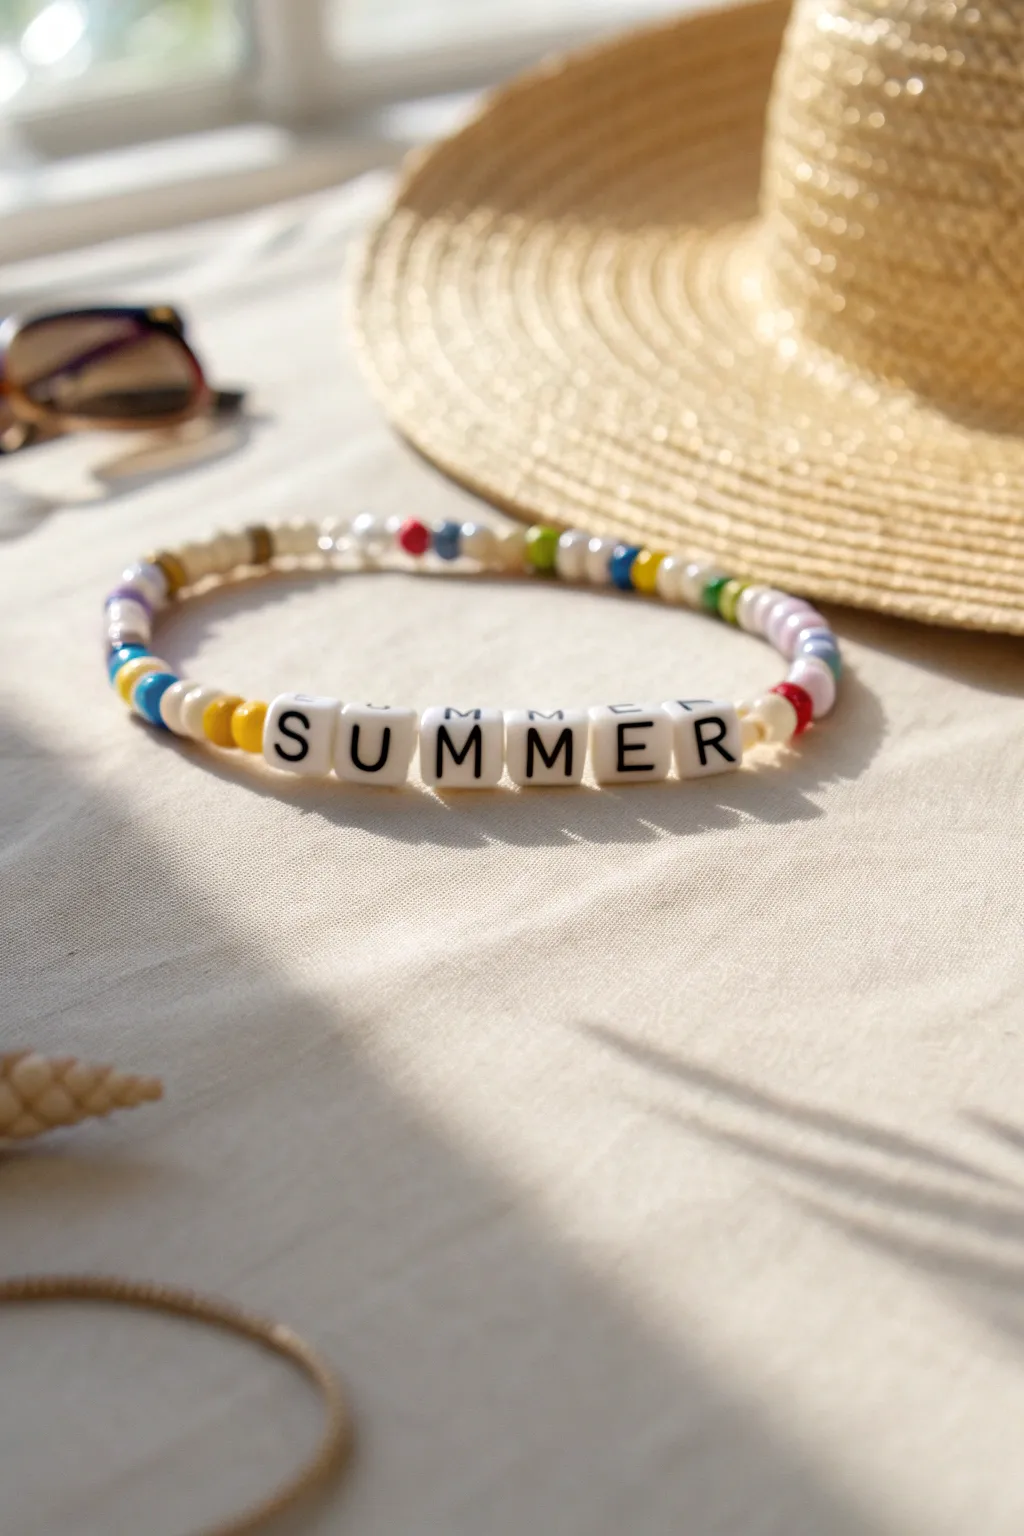
Capture the essence of the season with this nostalgic and stylish beaded bracelet featuring a bold ‘SUMMER’ centerpiece. Combining bright, colorful spacer beads with classic black-and-white alphabet cubes creates a playful accessory that pairs perfectly with a straw hat and sandy days.
Step-by-Step Tutorial
Materials
- Elastic stretch cord (0.8mm or 1.0mm recommended)
- Square white alphabet beads with black letters (‘S’, ‘U’, ‘M’, ‘M’, ‘E’, ‘R’)
- Assorted glass seed beads (size 6/0 or 8/0) or small heishi beads
- Colors needed: white/cream, yellow/gold, light blue/turquoise, red/coral, lime green, pink, purple/lilac
- Scissors
- Jewelry glue or clear nail polish
- Bead stopper or a simple piece of tape
- Ruler or measuring tape
Step 1: Planning and Preparation
-
Measure your wrist:
Before cutting anything, wrap a measuring tape around your wrist to find your size. Add about 3-4 inches to this measurement to allow enough slack for tying the knot later. -
Prepare the cord:
Cut your length of elastic stretch cord. I like to pre-stretch the cord slightly by pulling on it gently a few times; this helps prevent the bracelet from loosening up right after you finish it. -
Secure the end:
Place a bead stopper or adhere a small piece of masking tape to one end of the cord. This crucial step stops your beads from sliding off while you design the pattern. -
Lay out the lettering:
Find your alphabet beads to spell out ‘SUMMER’. Keep them separate and accessible so you can grab them easily once you reach the center of your design.
Pro Tip: Knot Security
For extra security on slippery elastic, tie your knot while the cord is under slight tension. This prevents gaps from forming between beads later.
Step 2: Creating the Bead Pattern based on color
-
Start the first sequence:
Begin creating a random, cheerful pattern using your colored seed beads. Based on the photo, start with a sequence like light purple, white, and a pop of yellow. -
Thread the left side:
Continue threading colorful beads until you have covered about one-third of your desired bracelet length. Alternate brights like blue and red with neutrals like cream or white to mimic the photo’s airy feel. -
Check the fit:
Wrap the beaded section partially around your wrist. You want the colored section to eventually sit on the underside or sides of your wrist, framing the word. -
Introduce the color transitions:
Just before the letter beads, add a specific transition sequence. In the example, notice the yellow and gold beads right next to the ‘S’. Thread one yellow and one gold bead now.
Level Up: Golden Touch
Swap the plain glass spacer beads immediately next to the word ‘SUMMER’ for tiny 3mm gold-filled or brass balls to add a hint of luxury to the casual look.
Step 3: Adding the Letters and Finishing
-
Thread the word:
Slide on your alphabet beads in order: S – U – M – M – E – R. Ensure they are facing the correct direction so the word reads left-to-right when worn. -
Add trailing transition beads:
Immediately following the ‘R’, add a cream or white bead to mirror the softness on the other side, followed by a red or coral bead for contrast. -
Finish the second half:
Continue beading the rest of the cord with your remaining colorful mix—pinks, greens, blues, and whites—until the total beaded length matches your wrist measurement. -
Double-check size:
Bring the two ends together around your wrist one last time to ensure the ‘SUMMER’ text sits centered on top of your wrist comfortably without pinching. -
Tie the knot:
Remove the tape or stopper. Tie a surgeon’s knot (right over left, left over right, and loop through again) pulling tightly to secure the beads. -
Apply adhesive:
Dab a tiny drop of jewelry glue or clear nail polish exactly on the knot. Let this dry completely before moving on. -
Hide the knot:
If one of your adjacent beads has a large enough hole, gently tug the elastic so the knot slides inside the bead, hiding it from view. -
Trim excess cord:
Using sharp scissors, carefully snip off the extra elastic tails close to the knot (or the bead hiding the knot), being careful not to cut the main bracelet cord.
Now you have a charming, vibrant accessory that carries the sunny vibes with you wherever you go
Daisy Bead Bracelet Stack
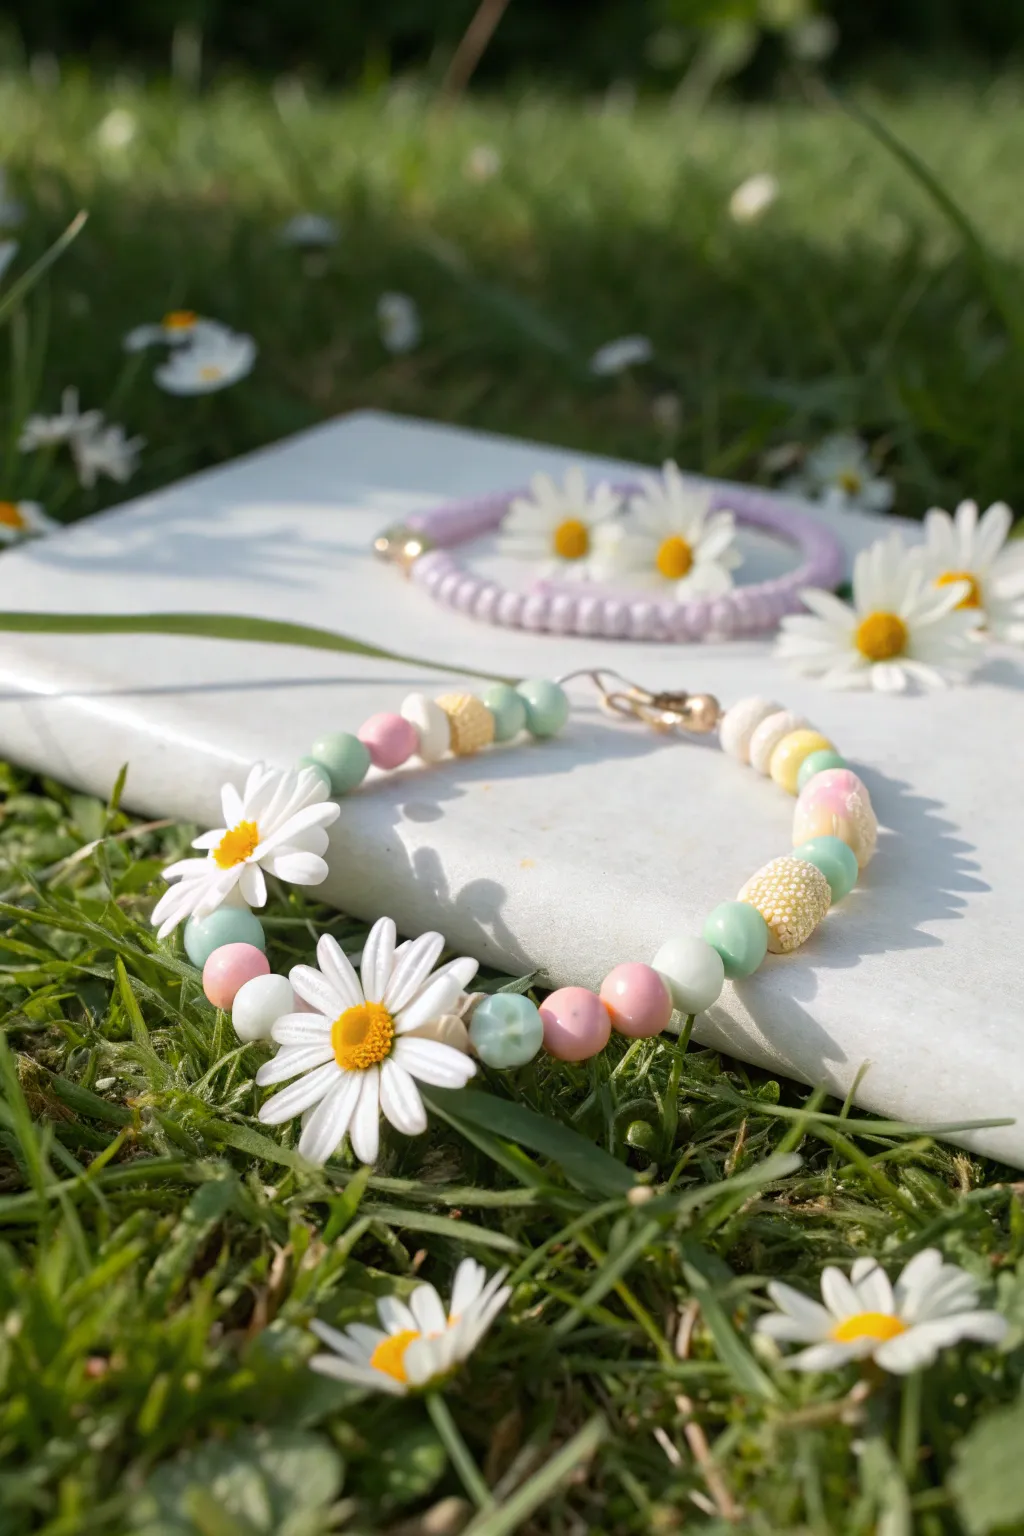
Capture the essence of a sunlit meadow with this charming bracelet design that mixes soft pastels with striking floral focal points. This playful stack combines smooth clay beads, textured accents, and adorable daisy charms for a look that screams summer picnic.
How-To Guide
Materials
- Elastic jewelry cord (0.8mm recommended)
- Round polymer clay beads (pastel pink, mint green, pale yellow, white)
- Textured or ‘sugar’ beads (cream/yellow)
- Large acrylic or resin daisy flower beads/charms (white petals, yellow center)
- Gold crimp beads
- Gold jump rings
- Jewelry pliers (flat nose)
- Scissors
Step 1: Planning Key Elements
-
Measure your wrist:
Cut a piece of elastic cord about 10-12 inches long. This gives you plenty of extra room for tying knots without struggling against tension. -
Pre-stretch the cord:
Give your elastic a few gentle tugs before you begin stringing. This crucial step prevents the finished bracelet from sagging or stretching out permanently after the first wear. -
Lay out the pattern:
Before threading, arrange your beads on a bead board or a piece of felt. I like to visualize the spacing of the large daisy charms first to ensure they sit evenly around the wrist.
Step 2: Stringing the Design
-
Start with the clasp side:
Thread a gold crimp bead onto one end of your elastic, followed by a gold jump ring. Loop the elastic back through the crimp bead. -
Secure the start:
Squeeze the crimp bead flat using your flat nose pliers to lock the jump ring in place. This creates a secure starting point for your bead chemes. -
Begin the bead sequence:
Start threading your patterned section. Slide on a textured ‘sugar’ bead followed by a pastel yellow round bead to build a soft foundation. -
Add pastel accents:
Continue the pattern with a mix of pastel pink and mint green round beads. Alternating these soft colors creates that candy-like aesthetic seen in the photo. -
Insert the first daisy:
Thread the elastic through the center hole of your first large daisy bead. Alternatively, if your daisies are charms with loops, attach them using a jump ring between two round beads. -
Create spacing:
Add a spacer sequence after the daisy. Use a white round bead, a pastel pink bead, and a mint green bead to separate the floral elements without crowding them. -
Add texture:
Include another textured cream bead in this section. These beads add a lovely tactile difference that contrasts well with the smooth clay beads. -
Place the second daisy:
Thread your second daisy bead. Check your layout to ensure the petals are facing outward if the bead has a specific front and back. -
Continue the pattern:
Repeat your color sequence—pink, white, mint, and textured beads—until you reach the desired length. Aim for symmetry, but a random mix also looks organic and cute.
Sticky Fix
Apply a tiny dab of clear nail polish or jewelry glue (like E6000) to the final knot before trimming. This prevents it from slipping over time.
Step 3: Finishing Touches
-
Check the fit:
Wrap the unfinished strand around your wrist. The ends should meet comfortably without pinching your skin. -
Prepare the closure:
Thread a final gold crimp bead onto the working end of the elastic, followed by the clasp component (lobster claw or ring). -
Loop and lock:
Thread the elastic back through the final crimp bead. Pull it snug so there are no large gaps between the beads, but not so tight that the bracelet stiffens. -
Crimp firmly:
Use your pliers to flatten the final crimp bead securely. Give it a gentle tug to ensure the cord doesn’t slip. -
Tie a surgeon’s knot:
For extra security, tie the two tail ends of the elastic together in a double or surgeon’s knot right next to the crimp bead. -
Trim and hide:
Cut off the excess elastic tail close to the knot. If the hole of the adjacent bead is large enough, gently tuck the knot inside for a seamless finish.
Make It a Stack
Create a companion bracelet using only the solid purple or pink seed beads shown in the background for a layered, textured look on your wrist.
Now slip on your new floral accessory and enjoy a touch of everlasting spring on your wrist
Starfish Charm Focal Bracelet
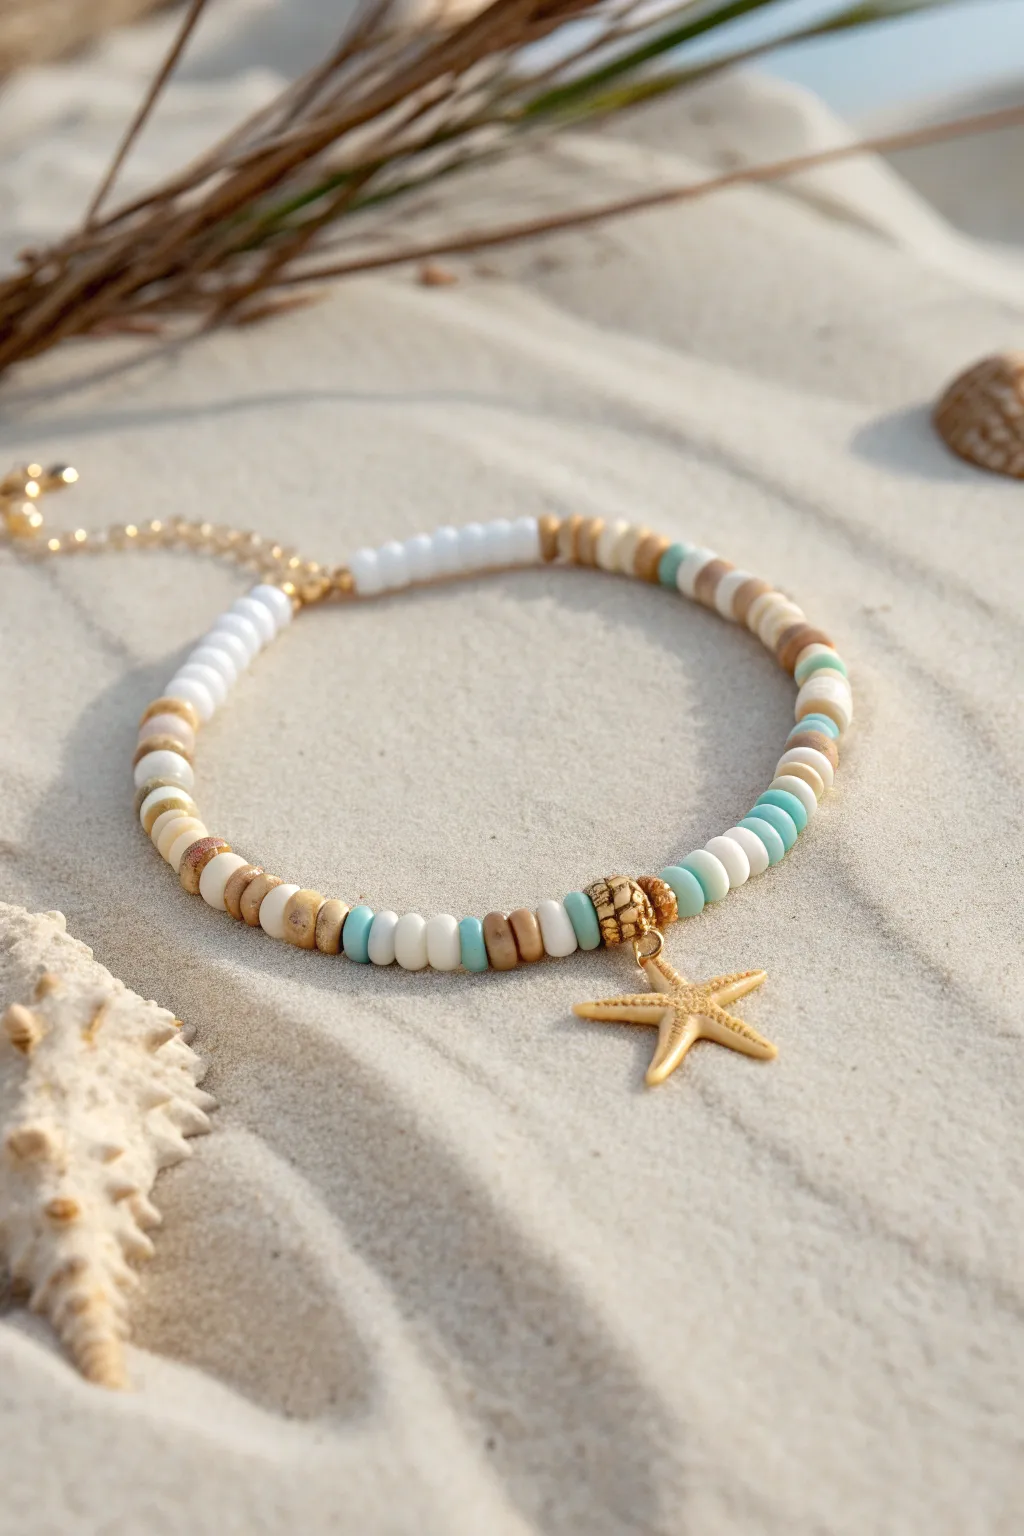
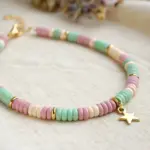
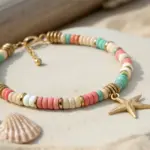
Capture the essence of a tranquil beach day with this elegant clay bead bracelet featuring calm neutrals and pops of aqua. A delicate golden starfish charm acts as the focal point, making it the perfect accessory for your next coastal getaway.
Detailed Instructions
Materials
- White polymer clay heishi beads (4-6mm)
- Tan/beige speckled clay heishi beads (4-6mm)
- Light turquoise/aqua polymer clay heishi beads (4-6mm)
- Gold starfish charm with jump ring
- Gold spacer beads or crimp covers (textured preferred)
- Beading wire (flexible, 7-strand or 49-strand)
- 2 Crimp beads
- 2 Gold wire guardians (optional but recommended)
- Gold lobster clasp
- Gold extension chain
- Wire cutters
- Flat nose pliers
- Crimping pliers
Step 1: Planning and Prep
-
Measure your wrist:
Before cutting any wire, wrap a measuring tape around your wrist to determine the desired length. For a standard fit, add about half an inch to your wrist measurement. -
Cut the wire:
Cut a piece of beading wire roughly 9-10 inches long. I always like to give myself a few extra inches of slack on each end to make finishing the clasp easier. -
Secure the first end:
Thread a crimp bead onto one end of the wire, followed by a wire guardian if you are using one. Loop the wire back through the crimp bead. -
Attach the clasp:
Place your lobster clasp inside the loop of the wire guardian (or the wire loop itself). Use your crimping pliers to flatten the crimp bead securely, locking the clasp in place. -
Cover the crimp (optional):
If you have a crimp cover, place it over the flattened crimp bead and gently close it with pliers to make it look like a seamless gold bead.
Knot Security Pro-Tip
Add a tiny drop of clear jewelry glue or superglue (like E6000) to the final crimp bead before closing it. This ensures the wire never slips out.
Step 2: Beading the Pattern
-
Start with white:
Begin threading your beads. Based on the photo, start with a solid section of about 8-10 white clay beads to create a clean start near the clasp. -
Introduce the pattern:
Transition into the main pattern sequence: 3 tan beads, 1 white, 1 tan, 1 white, 3 tan. This creates a natural, sandy texture. -
Add a pop of color:
String on 2-3 aqua beads, followed by a small section of white and tan mixed beads. The pattern in the image is organic, so don’t stress about perfect symmetry. -
Build the first half:
Continue alternating small sections of white, tan, and the occasional aqua stripe until you reach the halfway point of your bracelet length. -
Prepare the center:
Slide on a decorative gold textured bead or a larger spacer bead. This will flank one side of your charm. -
Attach the charm:
Thread the wire directly through the jump ring of your gold starfish charm. Ensure the starfish is facing outward correctly. -
Secure the center:
Add a second matching gold textured bead on the other side of the charm to frame it perfectly.
Step 3: Finishing Touches
-
Mirror the pattern:
Continue beading the second half of the bracelet. Aim to roughly mirror the color balance of the first half—using aqua accents and sections of tan/white neutrals—until you reach your desired length. -
Add final crimson bead:
Once beading is complete, slide a crimp bead onto the end of the wire. -
Thread the loop:
Pass the wire through the loop of your extension chain (or a closed jump ring) and thread it back down through the crimp bead and into the first few clay beads. -
Pull and tighten:
Pull the wire taut so there are no gaps between beads, but keep it loose enough so the bracelet drapes nicely and clearly bends. -
Crimp to close:
Use your crimping pliers to flatten the crimp bead securely. I recommend testing the strength with a gentle tug. -
Trim excess wire:
Using your flush cutters, trim the excess tail of wire as close to the beads as possible so it doesn’t poke the skin. -
Final adjustment:
If needed, use your pliers to ensure the starfish jump ring is fully closed so the charm doesn’t slip off the wire.
Level Up: Beach Texture
Swap standard gold spacer beads for tiny real puka shells or irregularly shaped freshwater pearls to enhance the organic, washed-up-on-shore theme.
Now you have a stunning piece of wearable beach art that brings a bit of summer with you wherever you go
Tropical Brights With Tiny Tassel
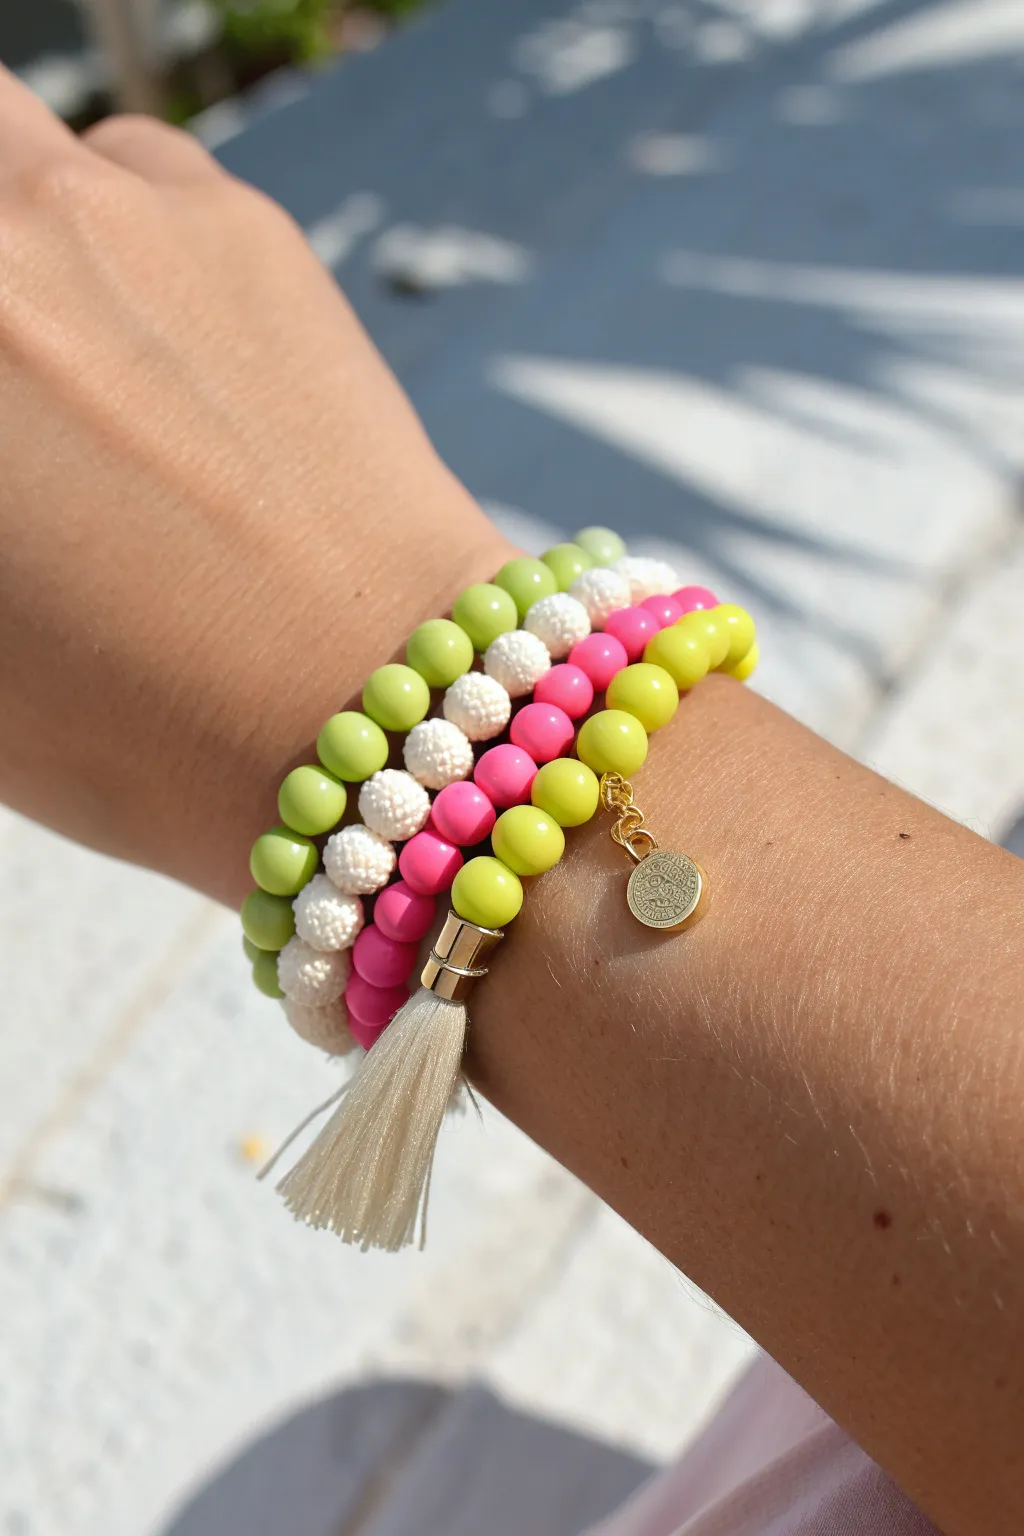
Brighten up your summer wardrobe with this vibrant set of three stackable bracelets featuring a playful mix of textures and eye-popping colors. The combination of smooth neon beads, textured white spheres, and delicate gold accents creates a fun, tropical vibe perfect for beach days.
Step-by-Step Guide
Materials
- Elastic stretch cord (0.7mm or 0.8mm)
- Lime green round beads (approx. 8mm)
- Bright pink round beads (approx. 8mm)
- Textured white ‘sugar’ or stardust beads (approx. 8mm)
- Small gold coin charm or pendant
- Cream or white mini tassel with gold cap
- Gold jump rings (4mm or 5mm)
- Jewelry glue (e.g., G-S Hypo Cement)
- Scissors
Step 1: Preparation
-
Measure your wrist:
Wrap a piece of string or a flexible measuring tape around your wrist to find your size. Add about half an inch to this measurement to ensure a comfortable fit that isn’t too tight. -
Cut the elastic:
Cut three strands of elastic cord, each about 10-12 inches long. Having extra length makes it much easier to tie the final knots securely without fumbling. -
Pre-stretch the cord:
Hold each piece of elastic and give it a few gentle tugs. Pre-stretching helps prevent the bracelets from sagging or loosening up immediately after you wear them.
Sticky Situation?
If your knot keeps slipping while gluing, use a piece of masking tape to hold the elastic taut against a table while the glue sets.
Step 2: Bracelet 1: The Lime & White Mix
-
Begin the pattern:
Secure one end of your first elastic strand with a bead stopper or a piece of tape. Start threading your beads in a simple pattern: one lime green bead followed by one white textured bead. -
Check the texture:
Make sure you are alternating strictly between the smooth neon green and the bumpy white beads. This textural contrast is key to the design. -
Complete the strand:
Continue until you reach your desired length. Wrap it around your wrist to check the fit before tying off. -
Tie the knot:
Tie a surgeon’s knot (right over left, left over right) and pull tight. Add a drop of jewelry glue on the knot, let it dry for a moment, and trim the excess cord.
Variation Station
Swap the white textured beads for lava stones. You can then add a drop of essential oil to turn your stack into a diffuser bracelet.
Step 3: Bracelet 2: The Pink & Green Stack
-
Establish the color block:
On the second elastic strand, you will be color-blocking. Thread a long section of lime green beads first—typically enough to cover about half your wrist. -
Add the pink section:
Switch to the bright pink beads for the second half of the bracelet. The goal is a split design where the colors meet at opposite sides. -
Attach the coin charm:
Before tying the knot, slide a gold jump ring with the small coin charm onto the elastic so it sits right at the junction where the pink and green beads meet. -
Finish the second bracelet:
Secure with a surgeon’s knot, glued and trimmed just like the first one. I find hiding the knot inside a bead hole gives it a cleaner finish.
Step 4: Bracelet 3: The Tassel Accent
-
Create the repeating pattern:
For the final bracelet, use a repeating pattern of three beads: one lime green, one pink, and one textured white bead. -
Maintain consistency:
Keep repeating this green-pink-white sequence around the entire length of the cord. -
Add the tassel:
Find the gold loop at the top of your mini tassel. Slide this directly onto the elastic cord at any point in your pattern. -
Balance the design:
Ensure the tassel hangs freely and isn’t pinched too tightly between beads. You might want to place it between two smooth beads rather than the textured ones for better movement. -
Final secure:
Tie your final surgeon’s knot, apply a dab of adhesive, and trim the ends close once dry.
Slide on your new colorful stack and enjoy the boost of summer energy on your wrist
Glow-at-Dusk Bonfire Bracelets
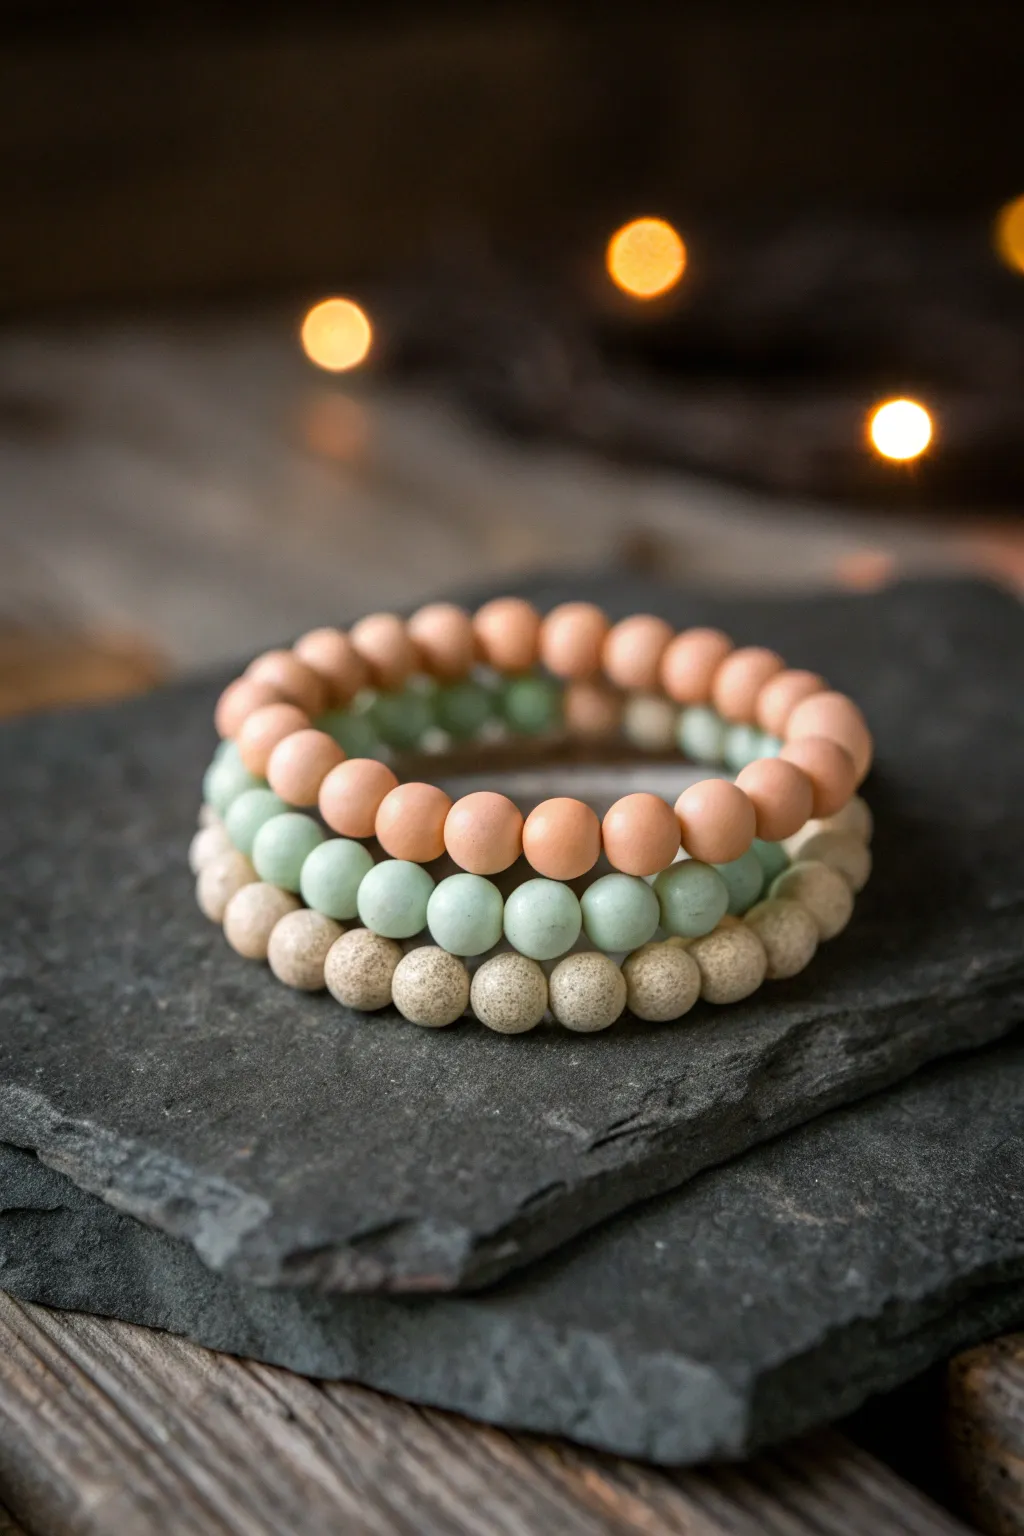
Capture the warmth of a summer evening with this trio of clay bead bracelets. Featuring matte peach, mint green, and speckled sand textures, these accessories bring a cozy, earthy vibe to your wrist stack.
Step-by-Step
Materials
- Polymer clay in peach/coral
- Polymer clay in pastel mint green
- Polymer clay in beige or translucent white
- Fine sand or black pepper (for speckling)
- Bead roller tool (optional but helpful)
- Elastic beading cord (0.7mm or 0.8mm)
- Super glue or jewelry cement
- Toothpicks or bead pins
- Baking sheet and parchment paper
- Gloss or matte glaze (optional)
Step 1: Preparing the Clay Beads
-
Condition the peach clay:
Start by warming the peach polymer clay in your hands until it becomes soft and pliable. Roll it into a smooth, even log on your work surface, aiming for a consistent thickness of about 1/2 inch. -
Cut equal segments:
Using a tissue blade or craft knife, slice the peach clay log into equal segments. Consistency here is key to getting uniform beads later, so try to eyeball the cuts carefully. -
Roll spheres:
Take each small segment and roll it between your palms to create a sphere. A bead roller tool is fantastic here if you want perfectly uniform sizes, but hand-rolling works just fine for a more organic look. -
Create the mint beads:
Repeat the conditioning, rolling, cutting, and shaping process with your pastel mint green clay. Aim to make these approximately the same size as your peach beads for a cohesive stack. -
Mix the speckled clay:
For the bottom bracelet shown in the image, take your beige clay and flatten it out. Sprinkle a small amount of fine decorative sand or even cracked black pepper over it. Fold the clay over and knead it thoroughly until the speckles are evenly distributed. -
Shape the textured beads:
Roll this speckled mixture into a log, cut into segments, and shape into spheres just like the previous batches. The texture adds a wonderful contrast to the smoother solid colors.
Fixing Flat Beads
If your beads flatten while piercing, let the raw clay sit in the fridge for 15 minutes before making holes. The cooler clay holds its shape better.
Step 2: Baking and Assembly
-
Pierce the holes:
Before baking, use a toothpick or a bead pin to carefully pierce a hole through the center of each bead. I like to rotate the bead slightly as I push the pin through to avoid flattening the sphere. -
Smooth the edges:
Check the exit point of the hole; if the clay pushed out slightly, gently smooth it back down with your finger to ensure the bead sits flush against its neighbor later. -
Bake the beads:
Arrange your beads on a baking sheet lined with parchment paper. Bake according to your brand of polymer clay instructions (usually around 275°F/135°C for 15-30 minutes). -
Cool down:
Allow the beads to cool completely before handling them. They harden fully as they cool, so patience is important to avoid accidentally squishing a hot bead. -
Measure your cord:
Cut three lengths of elastic cord, making them about 3-4 inches longer than your wrist measurement to allow plenty of room for tying knots. -
Pre-stretch the elastic:
Give each piece of elastic a few firm tugs. This pre-stretching step prevents the bracelet from sagging or loosening up immediately after you wear it. -
String the peach bracelet:
Thread the peach beads onto the first cord until the strand fits comfortably around your wrist. Test the fit by wrapping it around; it should be snug but not tight. -
Tie the knot:
Tie a secure surgeon’s knot (right over left, left over right twice). Add a tiny drop of super glue or jewelry cement to the knot for extra security. -
Hide the knot:
Before the glue fully sets or immediately after, gently pull the knot inside the hole of the nearest bead to conceal it seamlessly. -
Finish the set:
Repeat the stringing and tying process for the mint green beads and the speckled sand beads to complete your trio.
Glow Up
Mix glow-in-the-dark powder into the peach or mint clay before rolling. They will look normal by day but softly luminescent by the bonfire at night.
Now you have a stunning set of handmade bracelets ready for your next outdoor gathering
Fruit Salad Charm Cluster Anklet
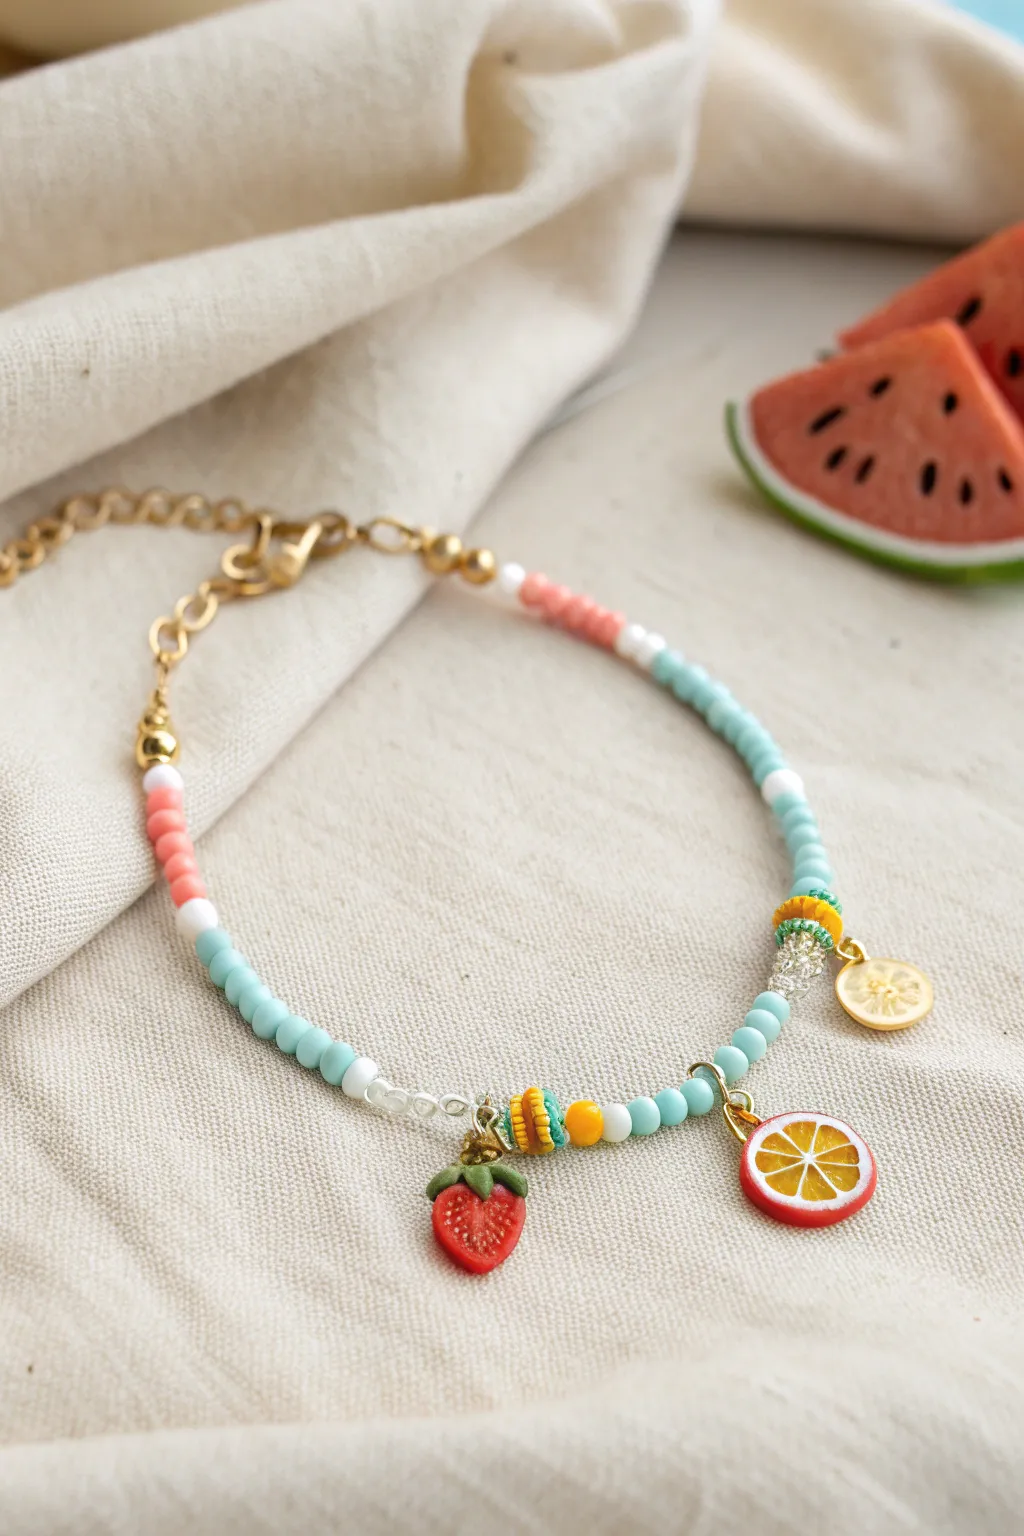
Capture the essence of a refreshing summer fruit salad with this playful charm anklet. Featuring a mix of matte seed beads and delightful fruit charms, this accessory combines soft pastels with vibrant pops of citrus and berry for the perfect poolside look.
How-To Guide
Materials
- Gold-plated chain extender with lobster clasp
- Gold beading wire or tigertail wire
- 2 Crimp beads (gold)
- 2 Crimp covers (gold)
- 2 Wire guardians (gold)
- Matte glass seed beads (opaque light blue/turquoise)
- Matte glass seed beads (opaque coral/salmon)
- Matte glass seed beads (opaque white)
- Assorted spacer beads (mustard yellow discs, small gold balls)
- Fruit charms: Polymer clay strawberry, enamel orange slice, gold lemon coin
- Gold jump rings (4mm and 6mm)
- Jewelry pliers (chain nose, flat nose, crimping tool)
- Wire cutters
Step 1: Planning and Prep
-
Measure and cut:
Begin by measuring your ankle to determine the length needed. Cut a piece of beading wire about 3 inches longer than your measurement to allow ample room for finishing the ends. -
Secure the first end:
Thread a crimp bead onto one end of the wire, followed by a wire guardian. Loop the wire through the guardian and back through the crimp bead. -
Attach the clasp:
Before crimping, hook the loop of your lobster clasp onto the wire guardian. Use your crimping pliers to flatten the crimp bead securely, then trim the short excess wire tail. -
Cover the mechanics:
Takes a gold crimp cover and place it over the flattened crimp bead. Gently close it with pliers so it looks like a neat gold bead.
Pro Tip: Jump Rings
When opening jump rings for the charms, always twist the ends away from each other (front to back) rather than pulling them apart horizontally. This maintains the ring’s strength.
Step 2: Beading the Pattern
-
Start the coral section:
Begin threading your beads. Start with a small gold ball bead, then add a section of about 8-10 coral seed beads. Follow this with a single white bead. -
Transition to blue:
Add a long section of the light blue matte beads. This will be the main color block of the anklet, wrapping around the back of the ankle. -
Add first focal cluster:
Pause the blue pattern to create the first charm station. Thread on a clear or silver faceted spacer, followed by a mustard yellow disc spacer. -
Attach the lemon charm:
Use a jump ring to attach the small gold lemon coin charm directly to the wire or between the spacers if the jump ring is large enough to slide over the beads. -
Continue the blue:
Resume threading the light blue seed beads for another inch or so. Add the orange slice charm here using a jump ring that slides between two blue beads.
Step 3: The Main Attraction
-
Create the center cluster:
Thread a few more blue beads, then add a decorative sequence: one white bead, one mustard yellow disc, and one large yellow bead. -
Add spacer details:
Add two more mustard yellow discs. In between these discs is where your strawberry charm will hang. -
Hang the strawberry:
Open a gold jump ring, slide on the strawberry charm, and close it around the wire between the yellow disc beads. I find using two pairs of pliers helps keep the jump ring circle perfect. -
Finish the bead pattern:
Mirror the pattern on the other side of the strawberry with a clear spacer and white bead, then finish the strand with enough blue beads to reach your desired length. -
End the strand:
Finish the design with a small section of coral beads and a final white bead to balance the start of the anklet.
Level Up: Mixed Media
Add a tiny freshwater pearl next to each fruit charm to evoke water droplets, or swap the matte beads for semi-precious stones like jade or turquoise for a luxe upgrade.
Step 4: Finishing Touches
-
Prepare the closure:
Thread a crimp bead and a wire guardian onto the end of the wire. Loop the wire back through the crimp bead. -
Attach the chain:
Hook the last link of your chain extender onto the wire guardian. Pull the wire tight to remove slack in the beads, but not so tight that the anklet becomes stiff. -
Secure and trim:
Flatten the crimp bead firmly. Trim the excess wire flush against the bead. -
Final polish:
Place a crimp cover over the final crimp, squeeze it shut, and give the entire piece a gentle tug to ensure everything is secure.
Now you have a refreshing, fruity accessory ready for your next beach day
Shell-Texture Imprint Disc Beads
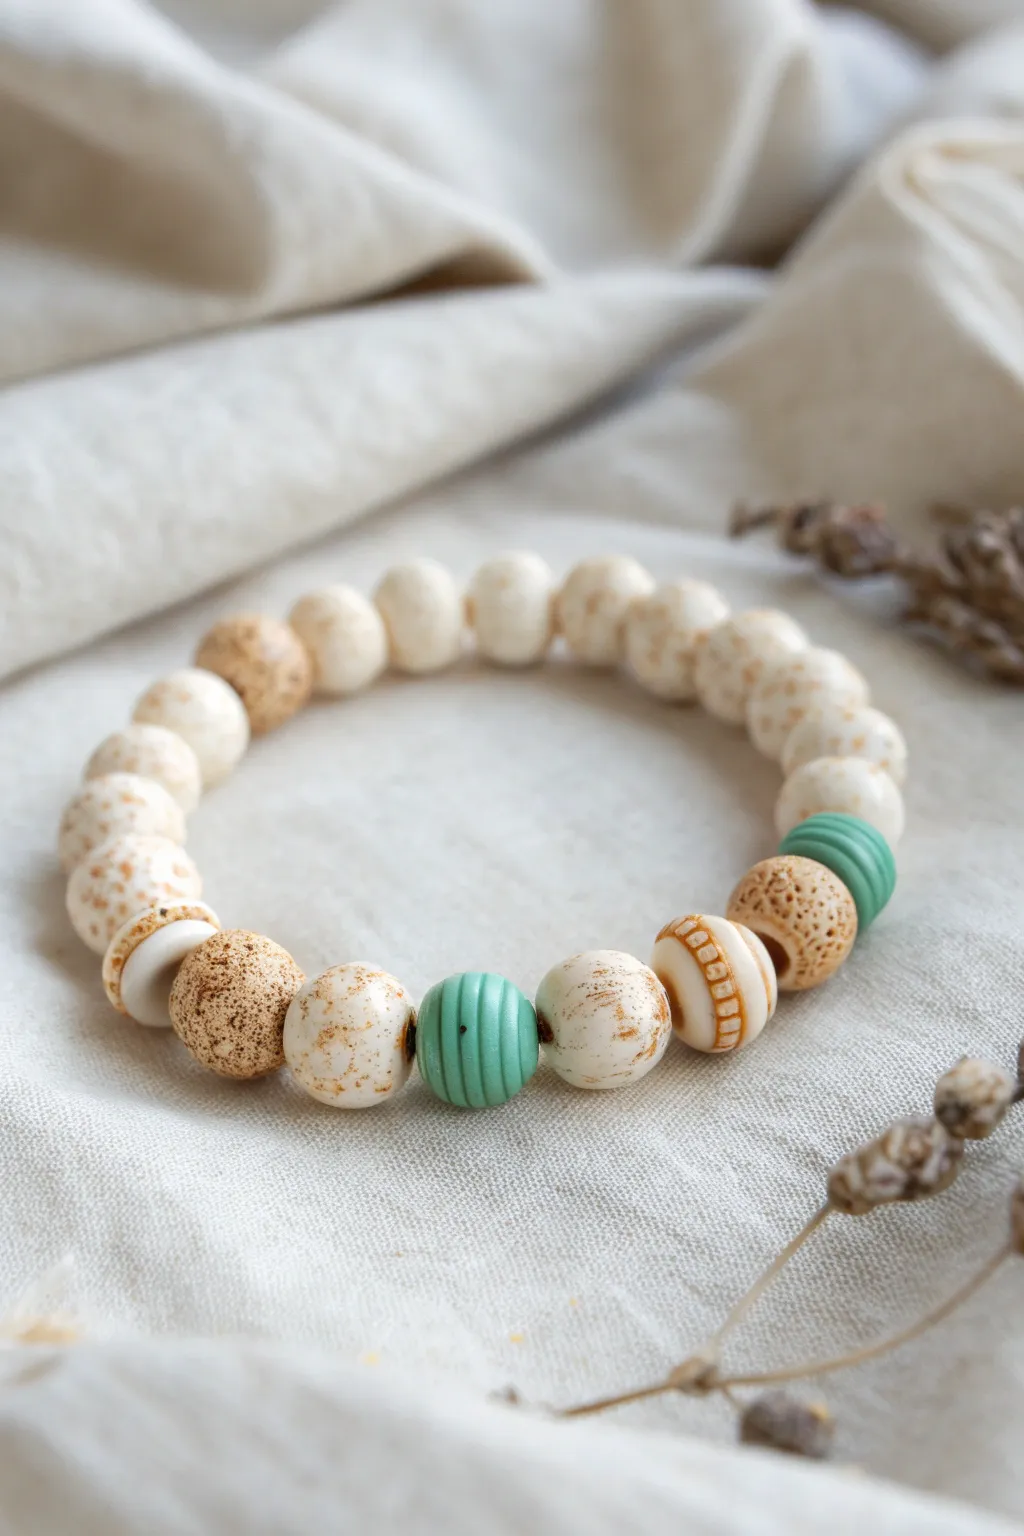
Capture the essence of a sandy beach walk with this textured polymer clay bracelet. The organic speckling and shell-like imprinted patterns create a relaxed, natural finish perfect for summer styling.
Detailed Instructions
Materials
- White polymer clay
- Light beige or translucent polymer clay
- Teal or seafoam green polymer clay
- Acrylic paint (burnt umber/dark brown)
- Small seashells or textured stamps
- Needle tool or toothpick
- Bead piercing pins or thick wire
- 150-grit sandpaper (optional)
- Elastic beading cord (0.8mm)
- Super glue or jewelry cement
- Oven (for baking clay)
- Old toothbrush or stiff paintbrush
Step 1: Creating the Base Clay
-
Conditioning the Clay:
Begin by conditioning the white polymer clay until it is soft and pliable. If you want a slightly more translucent, stone-like look, mix in a very small amount of translucent or beige clay. -
Adding Texture:
To create the ‘sand’ look before shaping, I like to mix coarsely ground black pepper or dried coffee grounds directly into the white clay. Knead it thoroughly until the specks are evenly distributed. -
Rolling Spheres:
Roll the speckled clay into a long log shape and slice it into even segments. Roll each segment between your palms to create smooth, consistent spheres about 10mm in diameter.
Paint Looking Streaky?
If your antique wash looks too streaks, your paint was likely too thick. Add more water to the mix and wipe immediately. You want a watery stain, not a solid coat.
Step 2: Forming the Focal Beads
-
Creating the Teal Accents:
Take your teal clay and roll two spheres of the same size as your white beads. Flatten them slightly into thick discs. -
Adding Ridges:
Using a dull knife or the side of a credit card, press parallel vertical lines around the circumference of the teal beads to create a ribbed texture. -
Shell Imprinting:
Select a few of the white clay spheres to be your focal ‘shell’ beads. Gently press a small seashell or a textured stamp into the surface to create unique indentations. -
Detailing the Banded Bead:
For the striped focal bead seen in the center, flatten a white sphere into a thick disc. Use a needle tool to carve two deep parallel channels around the middle, then make tiny perpendicular tick marks inside the channels.
Step 3: Baking and Antiquing
-
Piercing:
Carefully pierce a hole through the center of every bead using a bead pin or thick wire. Rotate the pin as you push through to avoid distorting the shape. -
Baking:
Arrange the beads on a baking sheet or tile. Bake according to your clay package instructions (usually 275°F/135°C for 15-30 minutes per 1/4 inch thickness). -
Cooling:
Allow the beads to cool completely before handling. They will be slightly soft when hot but harden as they cool. -
Applying the Wash:
Dilute a small drop of burnt umber acrylic paint with water. Brush this wash liberally over the textured white beads, ensuring it gets into all the imprints and cracks. -
Wiping Back:
Quickly wipe the surface of the beads with a damp paper towel or cloth. The dark paint will remain in the recessed crevices, highlighting the texture, while the raised areas return to white.
Try Adding Gold
After the brown wash dries, dry-brush a tiny amount of metallic gold paint over the high points of the shell-imprint beads for a subtle, sun-kissed shimmer.
Step 4: Assembly
-
Layout:
Lay out your bead design on a bead board or soft cloth. Place the teal beads and the specialized shell-imprint beads as the central focal point, flanked by the standard speckled spheres. -
Stringing:
Cut a piece of elastic cord about 10 inches long. Pre-stretch the cord by pulling it firmly a few times to prevent sagging later. -
Threading:
Thread all the beads onto the elastic cord in your desired pattern. -
Knotting:
Tie a surgeon’s knot (a square knot with an extra loop through) to secure the bracelet. Pull it tight enough so the beads touch, but not so tight that they buckle. -
Securing:
Add a tiny drop of super glue or jewelry cement to the knot. Let it dry, then trim the excess cord and tuck the knot inside a neighboring bead hole.
Enjoy wearing your handcrafted piece of the shore all year round