If you’ve been craving DIY clay gift ideas that feel thoughtful (not fussy), you’re in the right place. I love how a little air-dry clay or polymer clay can turn into something personal you’ll actually be proud to wrap up and hand over.
Marbled Trinket Dishes
This elegant trinket dish combines classic white tones with swirls of blush and terracotta for a sophisticated marbled effect. The speckled finish and smooth curves make it a lovely addition to any nightstand or vanity for holding your most precious jewelry.
Step-by-Step Tutorial
Materials
- Polymer clay (white, beige, and terracotta/copper)
- Faux speckled effect clay (optional: or mix black pepper into white clay)
- Acrylic rolling pin
- Circle cutter or a small bowl to use as a template
- Craft knife
- Smooth work surface (glass or ceramic tile)
- Oven-safe bowl (for shaping)
- Fine-grit sandpaper
- Matte or satin polymer clay varnish
Step 1: Preparing the Clay
-
Condition the white base:
Begin by taking a large block of your white or speckled clay and kneading it in your hands until it becomes soft and pliable. -
Prepare accent colors:
Take much smaller amounts of the beige and terracotta clays. Knead them separately until soft. -
Create snakes:
Roll each color of clay into long, thin snakes. You should have a thick snake for your white base and very thin spaghetti-like strands for your accent colors. -
Combine the coils:
Gather the strands together, twisting them into one large rope. Fold this rope in half, twist again, and repeat this process.
Clean Cuts Only
Chill your rolled-out clay slab in the fridge for 10 minutes before cutting. Firm clay cuts much cleaner than warm, mushy clay.
Step 2: Marbling and Shaping
-
Roll the coil:
Continue twisting and rolling until the colors start to merge, but be careful not to over-mix, or the colors will turn muddy. -
Form a ball:
Roll your twisted rope into a tight ball. This helps compress any air bubbles inside the clay. -
Flatten the clay:
Using your acrylic rolling pin, roll the ball out flat. Work from the center outward, rotating the clay frequently to ensure an even thickness of about 1/4 inch. -
Check the pattern:
Examine your slab. If you want more swirling, you can fold the clay over and roll it out again, but remember that less is often more with marbling. -
Clean the surface:
I always do a quick check for lint or dust on the surface and gently pick it off before cutting. -
Cut the shape:
Place your circle cutter or bowl template onto the most attractive part of the marbled pattern and cut out your circle using the craft knife.
Step 3: Curving and Finishing
-
Smooth the edges:
Dip your finger in a tiny bit of water (or baby oil) and run it along the cut edge of the circle to smooth out any sharpness or roughness. -
Create the curve:
Gently lift your clay circle and place it inside your oven-safe bowl. Press it down very lightly so it takes on the curved shape of the bowl bottom. -
Bake the dish:
Place the bowl with the clay inside into a preheated oven. Bake according to your specific clay package’s instructions (usually around 275°F/130°C for 15-30 minutes). -
Cool down:
Remove from the oven and let the clay cool completely inside the bowl so it retains its shape while hardening. -
Remove and sand:
Pop the clay dish out of the bowl. If the rim feels slightly rough, use fine-grit sandpaper to gently buff the edges smooth. -
Seal the piece:
Apply a thin layer of matte or satin varnish to protect the surface and give it a finished, professional look.
Gilded Edge
Paint the very rim of your finished dish with liquid gold leaf paint. This adds a luxurious metallic definition that pops against the matte clay.
Place your new creation on your dresser and enjoy organized elegance every day


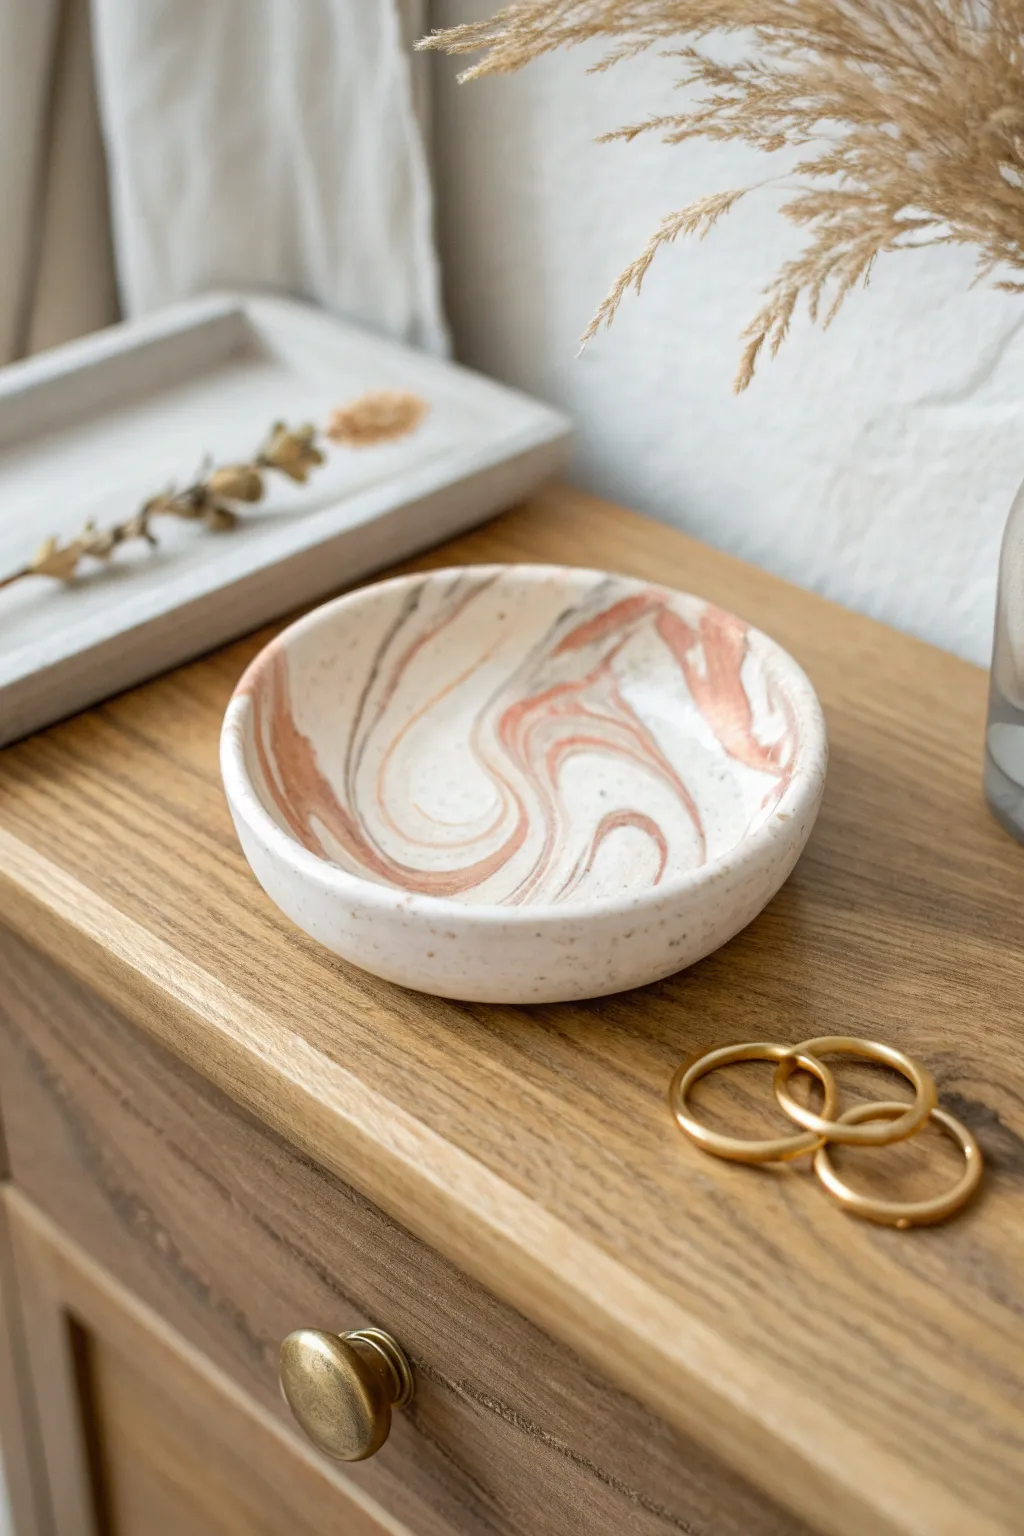
Ring Cone or Ring Dish

This elegant duo combines the softness of speckled blush clay with the luxury of gold leaf accents. The set includes a sturdy ring cone mounted on a marble base and a delicate matching dish, perfect for keeping your everyday jewelry organized and displayed beautifully.
Step-by-Step Guide
Materials
- Polymer clay (blush pink or peach)
- Black pepper or faux granite clay (for speckling)
- White marble coaster or clay round
- Gold leaf sheets
- Gold leaf adhesive size
- Gold liquid gilding paint
- Rolling pin
- Clay knife or craft blade
- Small paintbrush (soft bristle)
- Sandpaper (fine grit)
- Gloss glaze (optional)
- Strong craft glue (e.g., E6000)
Step 1: Creating the Speckled Clay
-
Condition the base clay:
Start by warming up your blush pink polymer clay in your hands. Knead it thoroughly until it becomes soft, pliable, and easy to work with. -
Add the speckles:
To achieve that organic, stoneware look, sprinkle a pinch of ground black pepper into the clay. Alternatively, mix in a tiny amount of granite-effect clay. Fold the clay over itself repeatedly to distribute the speckles evenly.
Step 2: Forming the Ring Cone
-
Shape the cone:
Take a significant portion of your speckled clay and roll it into a ball. Place the ball on your work surface and use the palm of your hand to roll it back and forth, applying more pressure to one side to form a tapered cone shape. -
Refine the height:
Stand the cone up and gently smooth the sides with your fingers to ensure it is symmetrical. I usually aim for a height of about 3 to 4 inches. -
Flatten the base:
Press the wide bottom of the cone firmly onto your work surface to ensure it is perfectly flat and stands straight without wobbling. Use your blade to slice off any unevenness if necessary.
Clean Edges Tip
For a super crisp line where the gold leaf meets the bare clay on the cone, apply a strip of painter’s tape before brushing on your adhesive size.
Step 3: Making the Ring Dish
-
Roll out a slab:
Take the remaining clay and roll it out with your rolling pin until it is about 1/4 inch thick. -
Cut the circle:
Use a round cookie cutter or trace around a small glass to cut a perfect circle from the slab. -
Shape the dish:
Gently pinch the edges of the circle upward with your fingertips to create a shallow rim. Smooth out any fingerprints to keep the surface clean.
Texture Twist
Before baking, gently roll a piece of linen fabric over the wet clay to imprint a subtle, fabric-like texture that catches the light beautifully.
Step 4: Baking and Prep
-
Bake the clay:
Place both the cone and the dish on a baking sheet lined with parchment paper. Bake according to the manufacturer’s instructions for your specific brand of polymer clay. -
Cool and sand:
Allow the pieces to cool completely. Once cool, use fine-grit sandpaper to smooth out any rough edges or bumps on the surfaces. -
Wipe clean:
Use a damp cloth to wipe away any sanding dust to prepare the surface for gilding.
Step 5: Adding the Gold Accents
-
Apply adhesive for gold leaf:
Paint a band of gold leaf adhesive size around the bottom 1/2 inch of the ring cone. Let it sit until it becomes tacky, which usually takes about 10-15 minutes. -
Apply gold leaf:
Gently press a sheet of gold leaf onto the tacky adhesive. Use a dry, soft brush to smooth it down and brush away excess flakes, creating a textured, luxurious finish. -
Paint the dish rim:
For the small dish, use liquid gilding paint instead of leaf for a smoother edge. Carefully paint the top rim of the dish gold and let it dry completely.
Step 6: Assembly
-
Prepare the base:
Clean the surface of your marble coaster or prepared clay base to ensure a strong bond. -
Attach the cone:
Apply a generous amount of strong craft glue to the bottom of your finished cone. -
Final placement:
Center the cone on the marble base and press down firmly. Allow the glue to cure fully before placing any rings on your new display.
Now you have a chic, modern display for your favorite rings that looks like it came from a boutique.


Personalized Initial Keychains
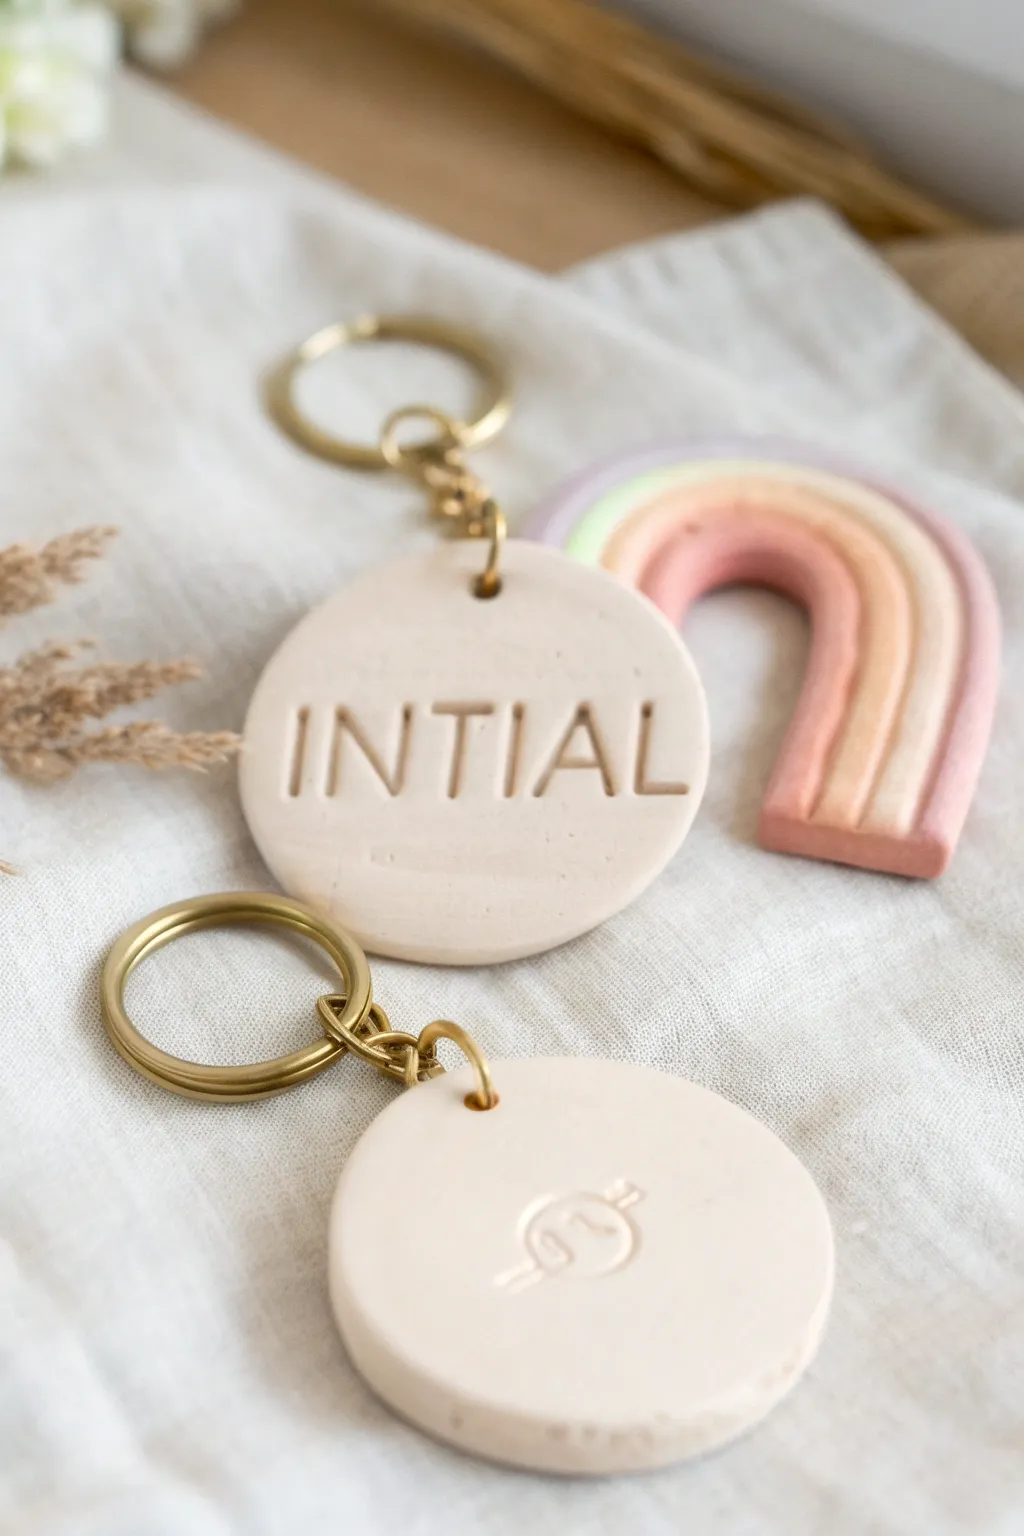
Create a set of charming, minimalist keychains using polymer clay in soft, neutral tones. This project features stamped personalized pendants and a sweet pastel rainbow, finished with elegant gold hardware.
Detailed Instructions
Materials
- Polymer clay (white, beige, blush pink, pastel yellow, light purple)
- Acrylic rolling pin
- Circle cookie cutter (approx. 2 inches)
- Letter stamps or alphabet impress set
- Small symbol stamps (optional)
- Needle tool or toothpick
- Parchment paper or baking tile
- Gold keychains with jump rings
- Jewelry pliers (flat nose and round nose)
- Liquid polymer clay or Bake & Bond (for the rainbow)
- Fine grit sandpaper (400-600 grit)
- Oven
Step 1: Shaping the Clay Rounds
-
Condition the base clay:
Start by warming a generous amount of beige or sand-colored clay in your hands. Knead it until it is soft and pliable to prevent cracking during baking. -
Roll out the slab:
Place the conditioned clay on parchment paper. Use your acrylic roller to flatten it into an even sheet, approximately 1/4 inch thick. I find using depth guides helps keep the thickness uniform. -
Cut the circles:
Press your circle cutter firmly into the clay sheet to punch out two round pendants. Gently wiggle the cutter before lifting to separate the shape.
Sticky stamps?
Dust your rubber stamps lightly with cornstarch or baby powder before pressing into the clay. This prevents the clay from sticking inside the detailed crevices.
Step 2: Stamping Designs
-
Prepare your stamps:
Arrange your alphabet stamps to spell ‘INITIAL’ or your desired name. If your stamps slide together, tape them together for perfect alignment. -
Stamp the text:
Press the stamps into the center of the first clay circle. Apply steady, even pressure, but don’t push all the way through the clay. -
Add symbols:
For the second circle, take a small stamp—like the zodiac or geometric symbol shown—and press it gently into the center. -
Pierce holes:
Use a needle tool or toothpick to create a hole near the top edge of each circle. Make sure the hole is large enough for your jump rings but not too close to the edge. -
Smooth the edges:
Dip your finger in a little cornstarch or water and gently run it around the cut edges of the circles to soften any sharp cutting lines.
Level Up: Paint Fill
After baking, brush acrylic paint into the stamped letters. Quickly wipe the surface with a damp cloth, leaving paint only inside the grooves for high contrast.
Step 3: Building the Rainbow
-
Roll snakes:
Condition small amounts of purple, yellow, clay-pink, and beige clay. Roll each color into a long, even snake or rope. -
Form the arch:
Take the innermost color (beige) and form a small U-shape. Apply a thin line of liquid clay or Bake & Bond to its outer edge. -
Layer the colors:
Press the next color rope against the first arch. Continue adding layers—pink, then yellow, then purple—gluing each with liquid clay. -
Trim the bottom:
Once all layers are attached, use a rigid blade to slice straight across the bottom of the rainbow legs so they are perfectly flush. -
Add a hole:
Use your needle tool to pierce a hole through the top center of the rainbow arch for the hardware.
Step 4: Baking and Assembly
-
Bake the pieces:
Transfer all your clay pieces on the parchment paper to a baking sheet. Bake according to your brand’s instructions (usually around 275°F for 30 minutes). -
Cool down:
Allow the pieces to cool completely in the oven or on a cooling rack. The clay hardens fully as it cools. -
Sand for finish:
If there are fingerprints, wet-sand the cured pieces under running water with fine-grit sandpaper for a professional matte finish. -
Open jump rings:
Use two pairs of pliers to twist open your gold jump rings. Twist the ends away from each other rather than pulling them apart to maintain the circle shape. -
Attach hardware:
Thread a jump ring through the hole in your clay pendant. Loop the keychain mechanism onto the ring before twisting it closed. -
Final check:
Repeat for the other pendants, ensuring all closures are tight and secure so your keys stay safe.
Now you have a set of personalized accessories ready for gifting or keeping


Coaster Set With Modern Patterns
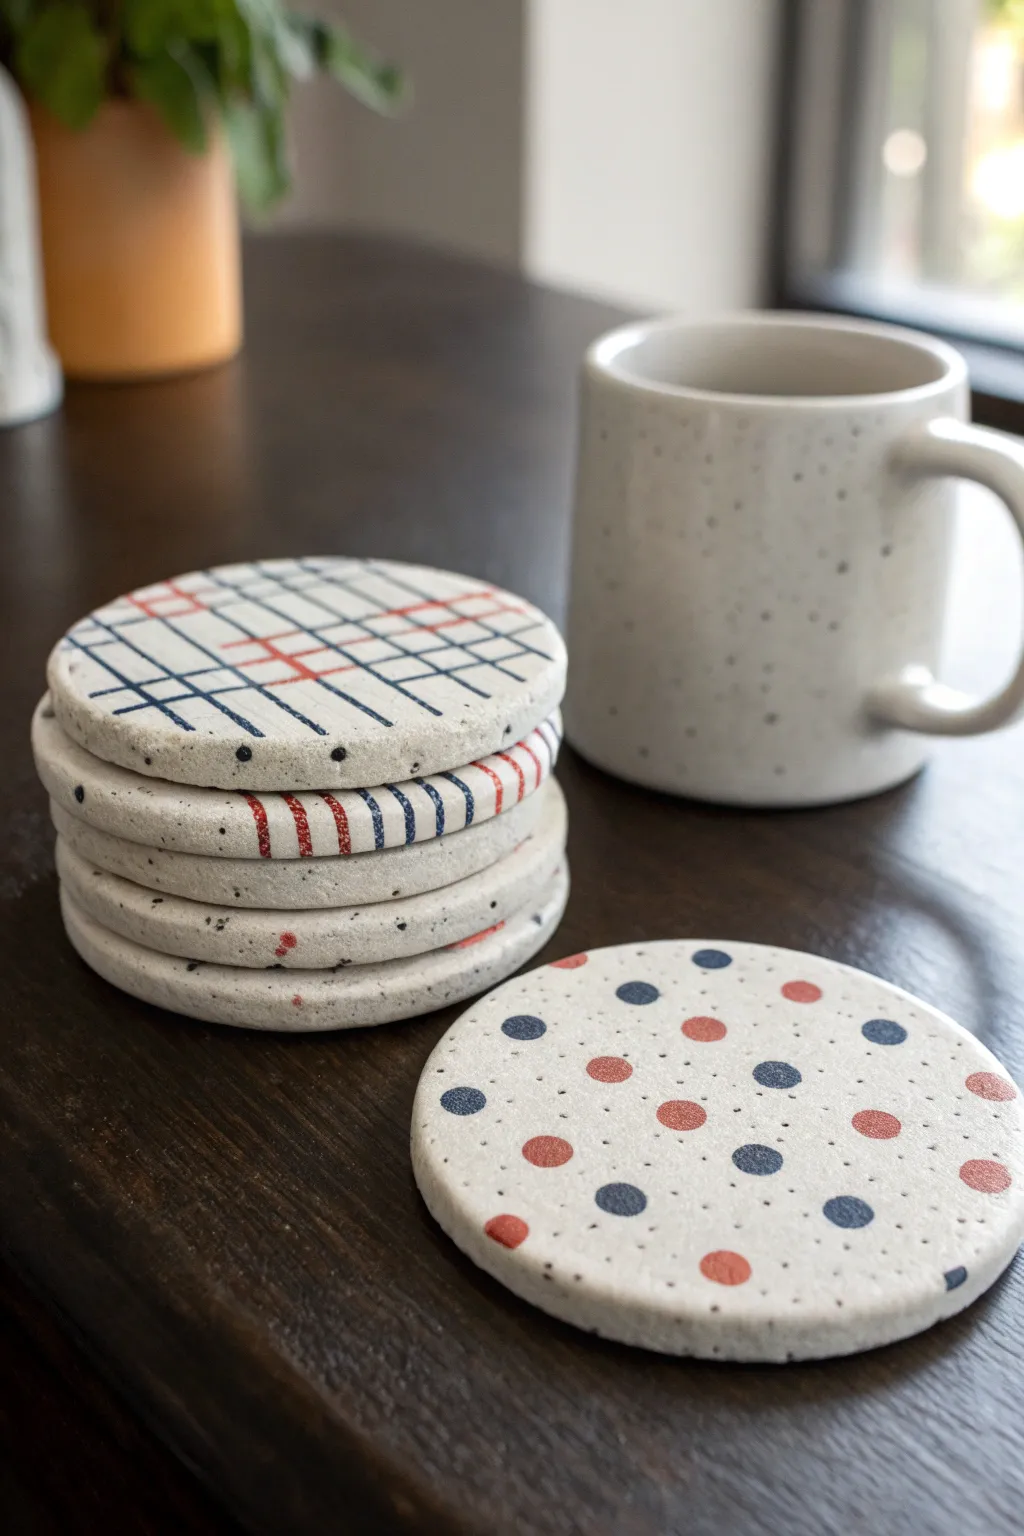
These modern coasters combine a trendy speckled stone look with classic geometric patterns for a gift that feels both handmade and high-end. The red and blue designs pop beautifully against the neutral clay, making them perfect for adding a splash of color to any coffee table.
Step-by-Step Tutorial
Materials
- White polymer clay with granite/speckled effect (e.g., Fimo Effect Granite or Premo Accents)
- Acrylic rolling pin or clay machine
- Round cookie cutter (approx. 3.5-4 inches)
- Fine grit sandpaper (400 to 600 grit)
- Acrylic paints (Navy Blue and Burnt Orange/Red)
- Fine detail paintbrush (size 0 or 00)
- Dotting tool or end of a paintbrush
- Ruler
- Parchment paper
- Oven for baking
- Matte spray varnish or Mod Podge (optional for sealing)
Step 1: Shaping the Clay Base
-
Condition the clay:
Begin by warming the speckled clay in your hands to condition it. Knead it thoroughly until it is pliable and soft, ensuring there are no air bubbles trapped inside. -
Roll it out:
Place the clay between two sheets of parchment paper to prevent sticking. Use your acrylic roller to roll it out into an even slab. Aim for a thickness of about 1/4 inch (6mm) to ensure the coasters are sturdy enough for daily use. -
Cut the circles:
Press your round cookie cutter firmly into the clay slab. Try to fit as many circles as possible to minimize waste. If the clay sticks to the cutter, gently push it out from the edges. -
Smooth the edges:
Carefully lift the raw clay circles. Dip your finger in a little bit of water (or cornstarch) and gently run it along the cut edge to smooth out any sharpness or irregularities from the cutter. -
Initial bake:
Place your clay circles on a parchment-lined baking sheet. Bake according to the manufacturer’s instructions on your specific package of clay (usually around 230-265°F for 15-30 minutes). Let them cool completely before moving to the next phase.
Step 2: Creating the Patterns
-
Prep the surface:
Once the coasters are fully cool, lightly sand the top surface and edges with fine-grit sandpaper. This not only smooths the piece but gives the surface a slight ‘tooth’ for the paint to adhere to. Wipe away all dust with a damp cloth. -
Paint the grid lines:
For the plaid coaster, lay a ruler across the surface. Using your fine detail brush and navy blue paint, carefully paint straight parallel lines across the coaster. I find that holding my breath slightly while pulling the brush helps keep the line steady. -
Cross the lines:
Rotate the coaster 90 degrees and paint a second set of navy lines perpendicular to the first set to create a grid. Don’t worry if they aren’t perfectly uniform; the hand-painted look adds charm. -
Add the accent color:
Using the red/orange paint, add accent lines within the blue grid. You can do single lines through the center of the grid squares or offset them slightly for a modern asymmetrical look. -
Paint the dots:
For the dotted coaster, pour small puddles of both paint colors onto a palette. Dip a dotting tool or the back end of a paintbrush into the navy paint and press it onto the clay. -
Create the pattern:
Continue adding navy dots in a loose grid formation. Clean your tool, then switch to the red paint, filling in the spaces between the navy dots to create an alternating polka dot pattern. -
Add texture marks (optional):
To mimic the look of the reference image, use a very sharp needle tool or a incredibly fine brush with diluted grey paint to add tiny pin-prick dots between the larger colored circles, enhancing the ‘stone’ texture. -
Dry thoroughly:
Allow the paint to dry completely. Acrylics usually dry to the touch in 20 minutes, but wait at least an hour to be safe before sealing.
Uneven Edges?
If your baked clay circles aren’t perfectly round, wet sand them tightly. Place sandpaper flat on a table, wet it, and rub the coaster edge against it in a circular motion.
Step 3: Finishing Touches
-
Seal the work:
To protect your paint from hot mug bottoms and condensation, apply a thin coat of matte varnish. A spray varnish works best to avoid smearing your crisp lines. -
Final cure:
Let the varnish cure in a dust-free area for 24 hours. Once fully cured, your coasters are ready to be stacked and gifted.
Make it a Set
Create a matching trivet for a teapot by rolling out a larger slab (6-7 inches) and replicating the pattern. Use thicker clay (1/2 inch) so it can handle heavier heat.
Stack them up and tie them with a simple leather cord or ribbon for a beautiful presentation

The Complete Guide to Pottery Troubleshooting
Uncover the most common ceramic mistakes—from cracking clay to failed glazes—and learn how to fix them fast.
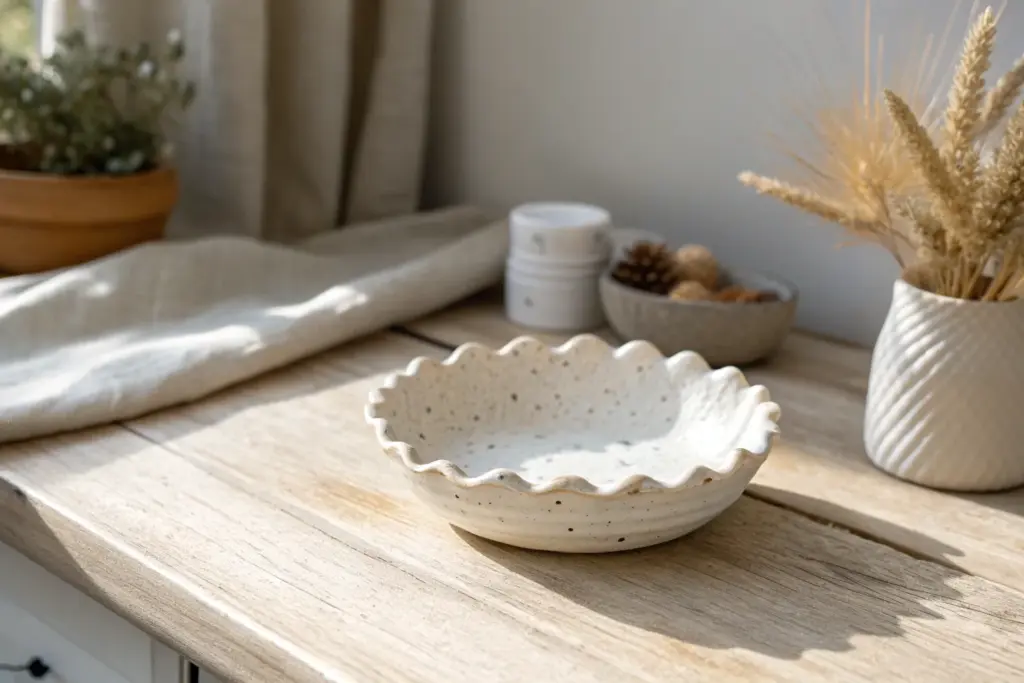
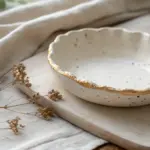
Minimal Incense Holders
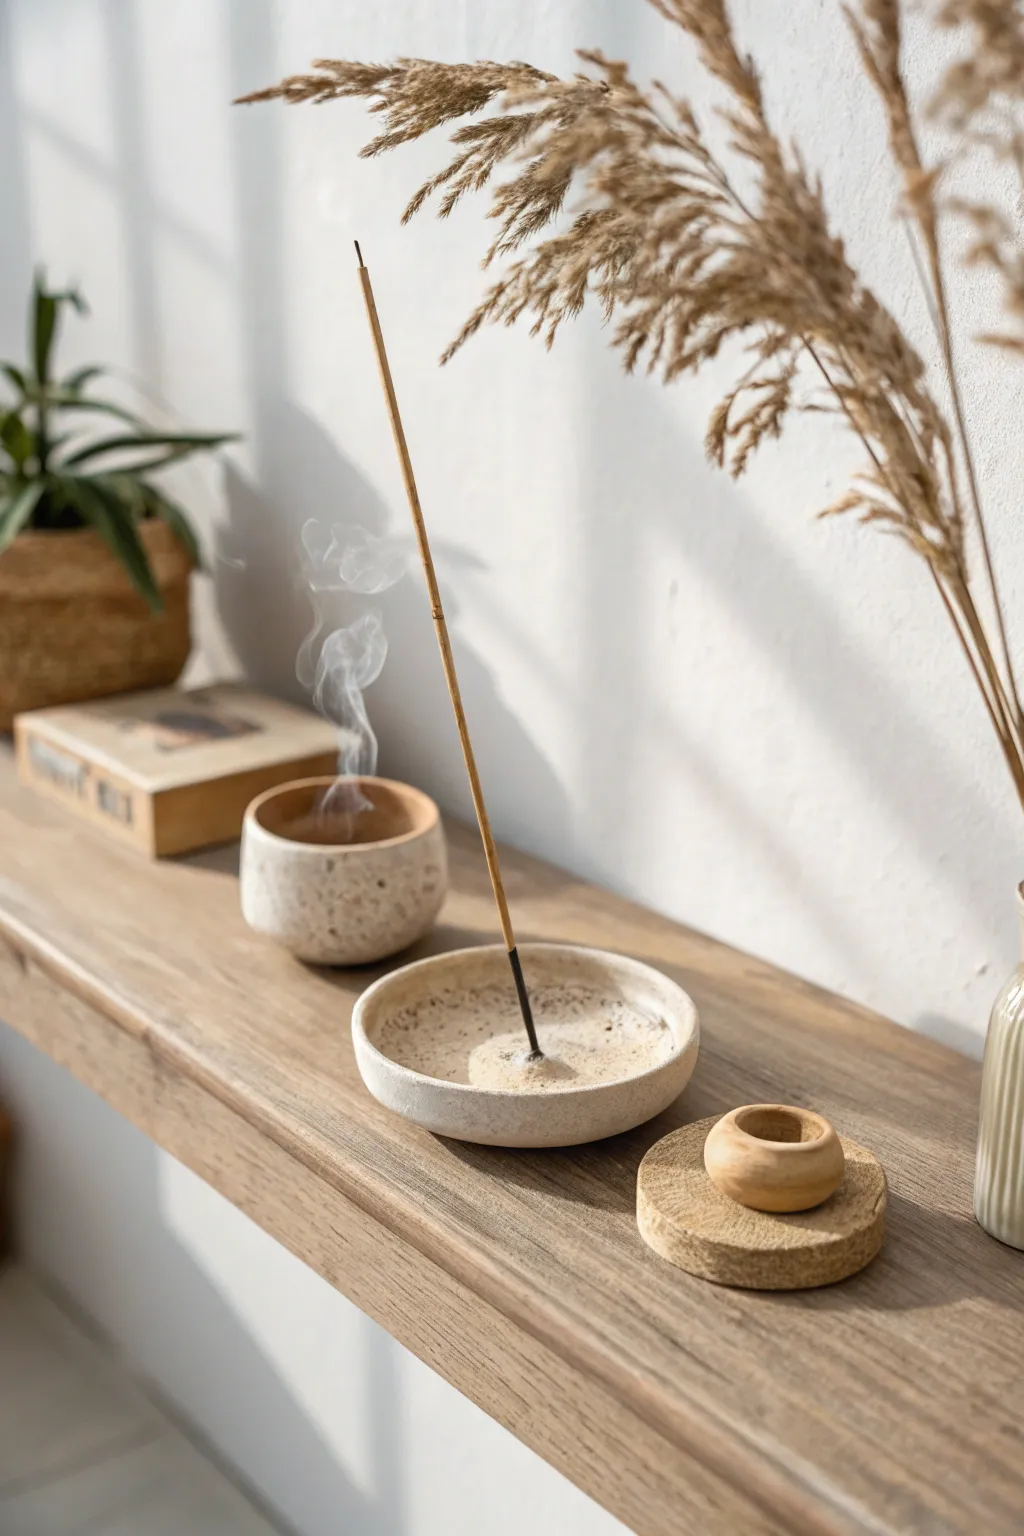
Capture the essence of calm with this ultra-minimalist incense holder featuring a shallow, wide basin design and a natural speckled finish. Its earthy tones and understated elegance make it a perfect gift for anyone who loves slow living and mindful decor.
Detailed Instructions
Materials
- White or beige air-dry clay (or polymer clay)
- Dried coffee grounds or fine sand (for speckling)
- Rolling pin
- Circle cutter or a small bowl (approx. 4-5 inches diameter)
- Small bowl (for shaping)
- Sponge
- Water
- Sandpaper (fine grit)
- Pointed tool (toothpick or skewer)
- Matte sealant or varnish
Step 1: Preparation & Mixing
-
Condition the clay:
Start by taking a handful of your white or beige clay and kneading it in your hands until it becomes soft, pliable, and free of any cracks. -
Add texture:
To achieve that beautiful speckled stone look seen in the photo, flatten your clay slightly and sprinkle a pinch of dried coffee grounds or fine dark sand onto it. -
Fold and knead:
Fold the clay over the speckles and knead thoroughly again. Continue folding and kneading until the specks are evenly distributed throughout the entire ball of clay.
Fixing Cracks
If you notice tiny hairline cracks appearing as the clay dries, mix a small amount of fresh clay with water to make a paste (slip) and fill them in immediately, then smooth over.
Step 2: Shaping the Form
-
Roll it out:
On a clean, flat surface, roll out your speckled clay ball. Aim for a thickness of about 1/4 inch—thick enough to feel substantial but thin enough to look delicate. -
Cut the circle:
Place your circle cutter or an inverted small bowl onto the clay and press down firmly to cut a perfect circle. Remove the excess clay from around the edges. -
Smooth the edges:
Dip your finger in a little water and gently run it along the cut edge of the circle to smooth out any sharpness or roughness left by the cutter. -
Establish the rim:
To get that slight lip shown in the project, gently pinch the very edge of the circle upward all the way around. I like to rotate the clay on a piece of paper while doing this to keep the lift consistent. -
Form the shallow curve:
Place your clay circle inside a slightly larger, shallow bowl. Gently press it down so it takes on the subtle curve of the bowl, ensuring the bottom remains somewhat flat for stability.
Step 3: Creating the Holder
-
Make the center mount:
Take a small pea-sized leftover piece of clay and roll it into a tiny ball. -
Attach the mount:
Score (scratch) the center of your dish and the bottom of the tiny ball. Add a drop of water as ‘glue’ and press the ball firmly into the exact center of the dish. -
Blend the seams:
Use a modeling tool or your finger to smooth the edges of the tiny ball into the dish floor so it looks like one seamless piece rather than an attachment. -
Create the hole:
While the clay is still soft, take your incense stick (or a skewer of similar thickness) and poke a hole straight down into the center mound. Wiggle it slightly to ensure the fit isn’t too tight, as clay shrinks when drying.
Make a Set
Use the same speckled clay technique to make a matching taller cup for burning sage or Palo Santo, creating a cohesive meditation set like the one in the photo.
Step 4: Finishing Touches
-
Initial drying:
Let the piece dry in the shaping bowl for about 12-24 hours until it holds its shape firmly. -
Remove and dry completely:
Remove the holder from the bowl and let it air dry completely on a wire rack for another 24-48 hours. The color will lighten as moisture evaporates. -
Sand for smoothness:
Once fully dry, take your fine-grit sandpaper and gently sand the rim and the outer body to remove any fingerprints or bumps. -
Wipe clean:
Use a slightly damp cloth or sponge to wipe away all the clay dust created by sanding. -
Seal the piece:
Apply a coat of matte sealant to protect the clay from ash stains. The matte finish is crucial to maintaining that natural, stone-like aesthetic.
Now you have a serene, functional piece of art ready to bring a calming atmosphere to any corner of the home
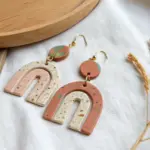
Polymer Clay Statement Earrings
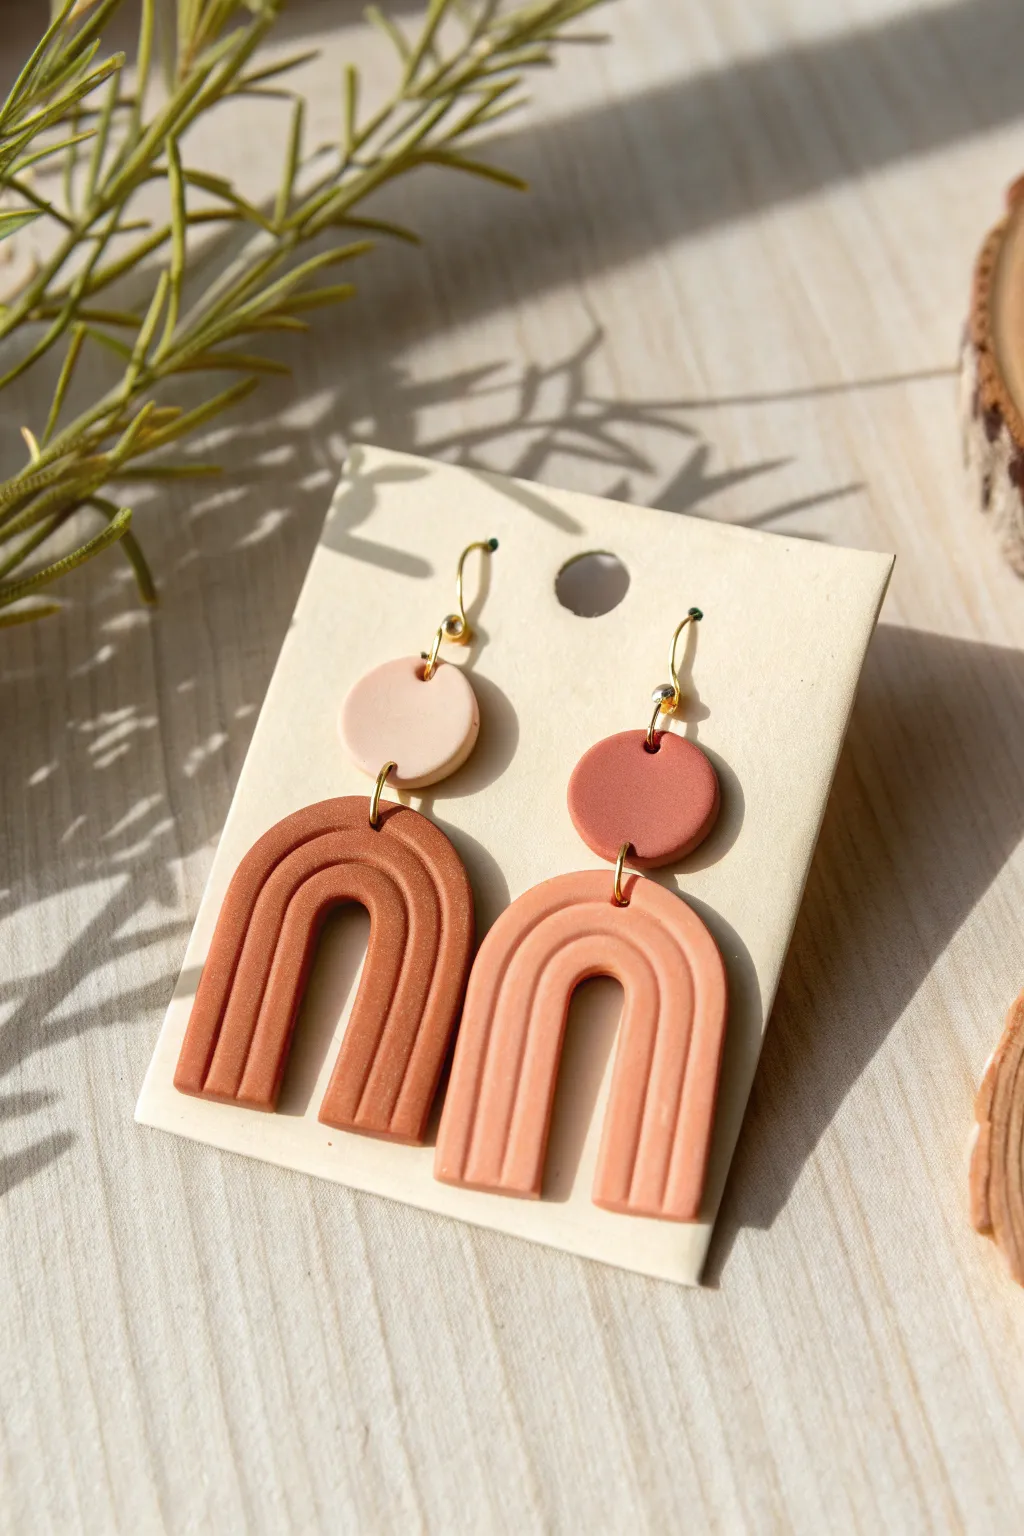
Create a stunning pair of statement accessories with these earthy, asymmetrical arch earrings. Featuring a mix of terracotta, blush, and coral tones, these polymer clay dangles offer a trendy, textured look that mimics high-end boutique finds.
Step-by-Step
Materials
- Polymer clay in three coordinating colors (e.g., terracotta, coral, light blush)
- Clay roller or pasta machine
- Circle cutters in two sizes (approx. 10mm and 20mm)
- Flexible tissue blade
- Gold jump rings (6mm or 8mm)
- Gold earring hooks
- Jewelry pliers (flat nose and round nose)
- Small hand drill or needle tool
- Ceramic tile or glass baking surface
- Oven
Step 1: Preparing the Clay
-
Soften the clay:
Begin by conditioning each color of polymer clay separately. Knead the clay in your hands until it is warm, soft, and pliable. This prevents cracking later. -
Initial rolling:
Roll out slabs of each color you intend to use. Aim for a consistent thickness of about 3mm or use the thickest setting on a pasta machine.
Smooth Operator
Before baking, adhere a small piece of plastic wrap over the clay before using your cutters. This creates a lovely domed ’rounded edge’ effect rather than a sharp cut.
Step 2: Forming the Arches
-
Start the snake:
Take your terracotta clay slab and slice off a strip. Roll this strip on your work surface to create a long, even snake or log. -
Refine the size:
Continue rolling the snake until it is roughly 5-6mm in diameter. I find that using an acrylic block to roll creates a smoother surface than just using fingers. -
Cut to length:
Cut two equal segments from your clay snake, each about 3-4 inches long. -
Create the U-shape:
Gently bend each segment into a tight U-shape or arch. Place them on your baking tile to ensure they maintain their flat back. -
Flatten and texture:
Using your acrylic roller or block, gently press down on the arches to flatten them slightly. Use a needle tool or the dull side of a blade to impress two or three vertical lines following the curve of the arch for that grooved texture. -
Clean cuts:
Use your tissue blade to slice off the bottom ends of the arches, ensuring they are perfectly straight and even.
Fingerprint Fix
If you see fingerprints on your raw clay, lightly brush the surface with a little cornstarch or baby oil before baking to smooth them out completely.
Step 3: Creating the Stud Tops
-
Roll the contrasting colors:
Roll out your lighter blush and coral clays into flat sheets, roughly 2-3mm thick. -
Cut the circles:
Using your small circle cutter, punch out one circle from the blush clay and one from the coral clay to serve as the connector pieces. -
Smooth edges:
Gently rub your finger along the edges of the cut circles to smooth out any harsh lines or clay burrs.
Step 4: Assembly and Baking
-
Pre-bake drilling:
Using a needle tool, carefully poke a hole at the top center of each main arch piece and at the top and bottom of each circle piece. Ensure the holes are large enough for your jump rings. -
Bake carefully:
Arrange all pieces on your ceramic tile. Bake according to the manufacturer’s instructions for your specific brand of clay (usually 275°F/135°C for 15-30 minutes). -
Cool down:
Allow the pieces to cool completely inside the oven with the door cracked, or remove and let sit until room temperature. They are fragile while hot. -
Open jump rings:
Use two pairs of pliers to twist open your jump rings sideways. Never pull them apart, as this weakens the metal. -
Connect the pieces:
Thread a jump ring through the top of an arch and the bottom of a circle stud. Close the ring securely with pliers. -
Attach hooks:
Open the loop on your earring hook (or use a small jump ring) and attach it to the top hole of the circle piece. -
Final check:
Repeat the assembly for the second earring, creating a mismatched pair if desired by swapping colors, and check that all rings are closed tightly.
You now have a chic custom accessory ready to wear or gift to a lucky friend


What Really Happens Inside the Kiln
Learn how time and temperature work together inside the kiln to transform clay into durable ceramic.
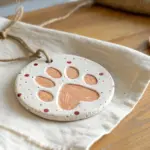
Textured Pendant Charms
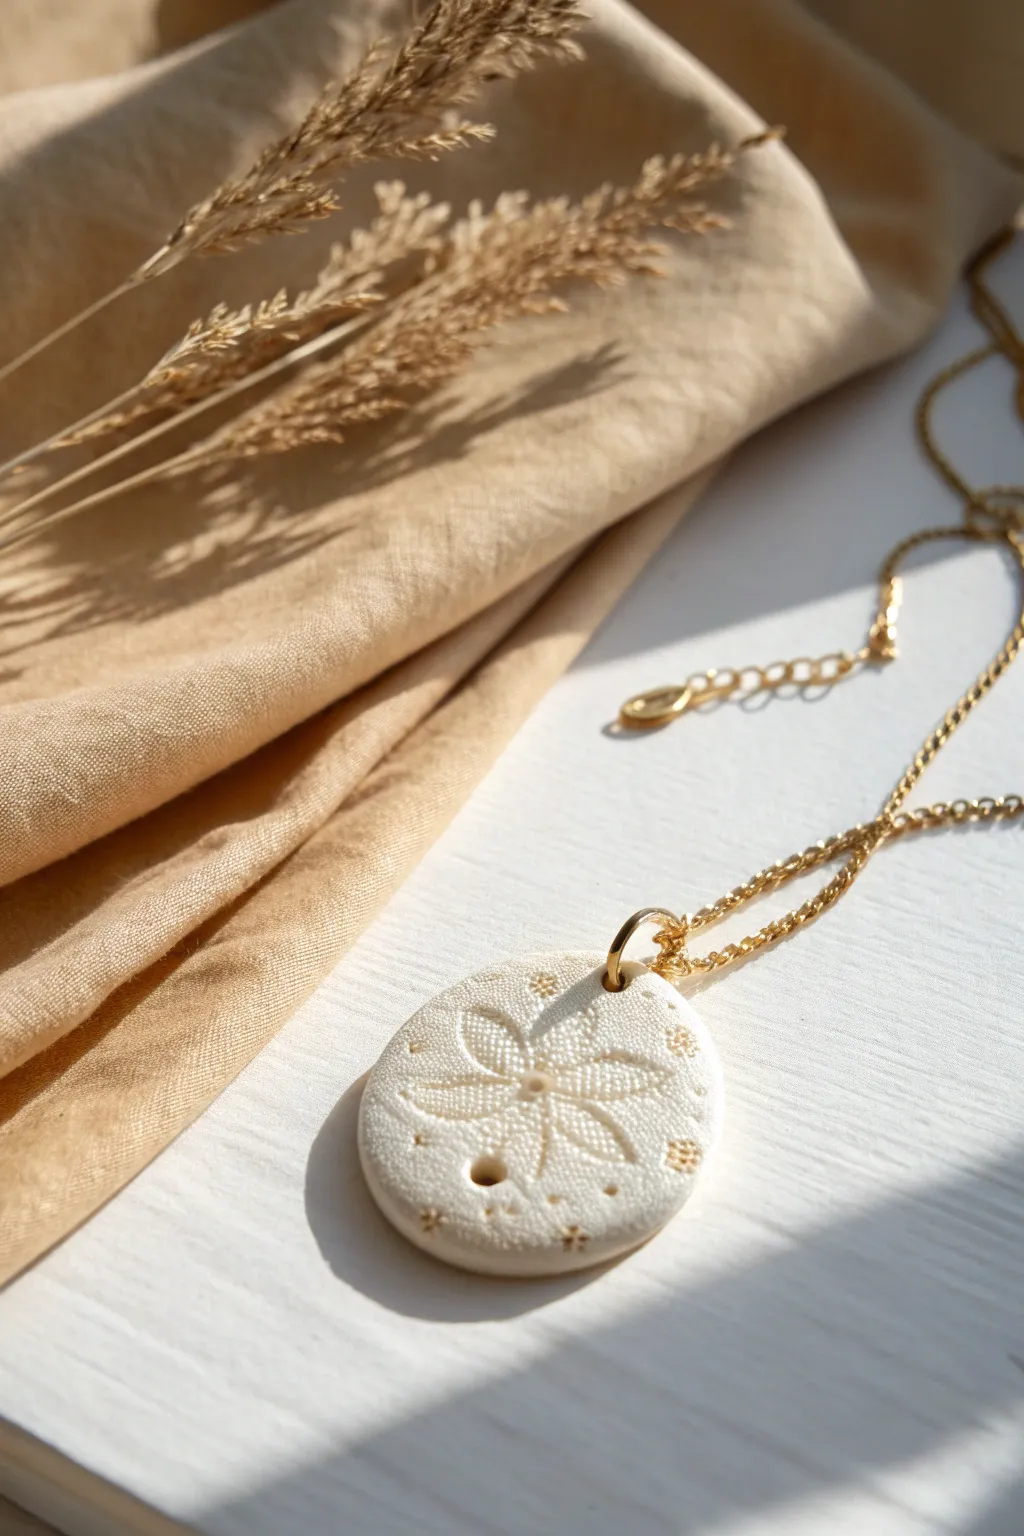
Create a delicate, bohemian-inspired accessory with this simple textured clay pendant project. Featuring a subtle floral imprint and elegant gold accents, this piece mimics the look of high-end ceramic jewelry.
Step-by-Step Tutorial
Materials
- White polymer clay (cernit, fimo, or similar)
- Granite or stone-effect polymer clay (for mixing)
- Small piece of lace or a floral texture mat
- Circle clay cutter (approx. 3-4 cm diameter)
- Gold metallic paint or gilding wax
- Fine detail paintbrush
- Rolling pin or acrylic roller
- Small jump rings (gold)
- Gold chain necklace
- Oven for baking clay
- Straw or small drill bit (for hole)
- Sandpaper (optional)
Step 1: Preparing the Clay Base
-
Condition the clay:
Start by kneading your white polymer clay until it is soft and pliable. If you want that slight speckle seen in the photo, mix in a very small amount of granite-effect clay, kneading until the speckles are evenly distributed but not completely blended into a gray tone. -
Roll it out:
Using an acrylic roller, flatten the clay into a sheet about 3mm thick. Try to keep the thickness consistent so the pendant feels substantial but not too heavy. -
Texturize the surface:
Before cutting your shape, you can add an overall subtle texture. Gently press a piece of fine sandpaper or a sponge onto the surface to take away the shiny, plastic look of raw polymer clay.
Use Cornstarch
Dust your texture stamp or lace lightly with cornstarch before pressing it into the clay. This acts as a release agent and prevents the clay from sticking to intricate patterns.
Step 2: Creating the Design
-
Position your stamp:
Take your piece of lace or floral texture stamp. Place it carefully over the smooth clay sheet where you intend to cut your circle. -
Impress the pattern:
Roll your roller firmly over the lace or stamp once. Avoid rolling back and forth, as this can shift the pattern and create a ghost image. Lift the texture tool straight up to reveal the design. -
Cut the shape:
Position your circle cutter over the clearest part of the floral impression. Press down firmly to cut the pendant shape. -
Refine the edges:
Gently lift the circle from your work surface. Use your finger to softly smooth the raw edges created by the cutter, softening them slightly for a more organic, ceramic feel. -
Create the hanging mechanism:
Use a small straw or a tool to poke a hole near the top edge of the pendant. Ensure the hole is large enough for your jump ring but not too close to the edge where it might break.
Try an Antique Wash
For a vintage look, rub brown acrylic paint into the grooves and wipe the surface clean before baking. The dark paint stays in the recesses, highlighting the texture.
Step 3: Baking and Finishing
-
Bake the piece:
Place your clay pendant on a ceramic tile or baking sheet lined with parchment paper. Bake according to the specific manufacturer’s instructions on your package of clay (usually around 110°C/230°F for 30 minutes). -
Cool down:
Let the piece cool completely inside the oven with the door slightly ajar. This prevents thermal shock and potential cracking. -
Optional sanding:
If there are any rough spots on the edges after baking, I like to use very fine-grit wet sandpaper to polish them smooth. -
Highlight the details:
Dip a very fine brush into gold metallic paint or pick up a tiny amount of gilding wax on your finger. Gently dab the gold onto specific details of the floral pattern, like the petal centers or random dots, to make them shimmer. -
Seal the piece (optional):
If you used paint, apply a thin layer of matte varnish to protect the surface, though polymer clay is durable enough on its own.
Step 4: Assembly
-
Attach the hardware:
Open a gold jump ring using two pairs of pliers (twist sideways, don’t pull apart). Thread it through the hole you created. -
Connect the chain:
Before closing the jump ring, slide your gold chain into the ring. -
Secure the loop:
Close the jump ring securely by twisting it back into place until the ends meet flush.
Enjoy wearing your handcrafted piece of art that looks just like expensive ceramic jewelry
Mini Succulent Planters
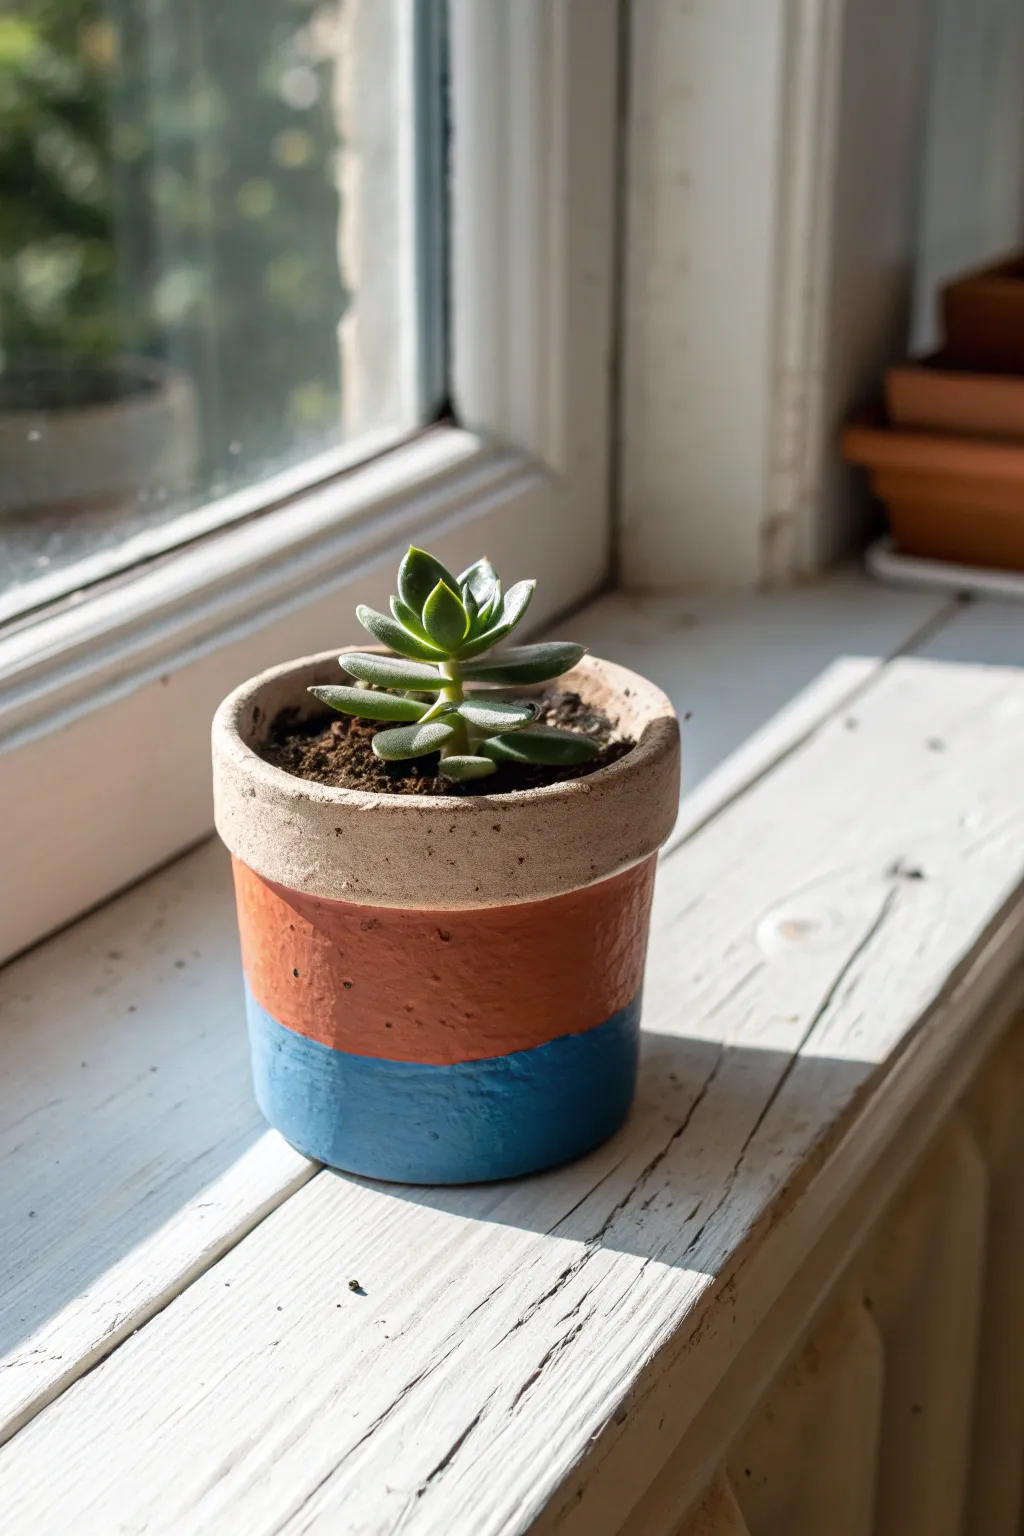
Brighten up any windowsill with this charmingly simple painted planter project involving clean lines and rustic textures. By transforming a standard terracotta pot with bands involving earthy white, warm terracotta, and deep blue, you create a modern home for your favorite tiny succulent.
Step-by-Step
Materials
- Small terracotta pot (2-3 inch diameter)
- Acrylic craft paints (creamy white, burnt orange/terracotta, deep cerulean blue)
- Flat paintbrush (medium width)
- Detail paintbrush (small)
- Painter’s tape or masking tape
- Small succulent plant
- Cactus potting soil
- Clear matte acrylic sealer (optional)
- Parchment paper or scrap cardboard
Step 1: Preparation and Base Layer
-
Clean the surface:
Begin by wiping down your terracotta pot with a slightly damp cloth to remove any warehouse dust or loose clay particles. Let it dry completely for a few minutes to ensure the tape sticks properly. -
Plan the sections:
Visually divide your pot into three horizontal sections. The top rim will range into the upper body, the middle band will remain natural or be painted terracotta, and the bottom third will be blue. -
Paint the top band:
Load your medium flat brush with the creamy white acrylic paint. Paint the entire top rim of the pot, including the inside lip about an inch down so the clay doesn’t show when soil is added. -
Extend the white:
Continue painting the white color just below the rim’s ridge, creating a band that is approximately half an inch wide on the main body of the pot. Don’t worry about perfect straightness yet. -
Apply a second coat:
Terracotta is very porous and soaks up paint quickly. Once the first coat is dry to the touch, apply a second layer of white to get that solid, opaque finish shown in the photo.
Step 2: Color Blocking
-
Tape the bottom section:
Once the top white section is fully dry, place a strip of painter’s tape horizontally around the pot to mark off the bottom third. Press the edges down firmly to prevent paint bleed. -
Paint the blue base:
Using a clean flat brush, apply your deep cerulean blue paint to the bottom section below the tape. Use horizontal strokes that follow the curve of the pot for a smooth texture. -
Check coverage:
Similar to the white section, you will likely need a second coat of blue to cover the orange clay fully. Let the first coat dry for about 15 minutes before adding the next. -
Remove the tape:
Carefully peel off the painter’s tape while the final coat of blue is still slightly damp. This helps keep the edge crisp and prevents dried paint from chipping off with the tape. -
Paint the middle band:
For the middle section, if your pot is already a nice terracotta color, you can leave it bare. However, for a more uniform look, mix burnt orange with a tiny dot of brown and paint this middle strip. -
Refine the lines:
Use your small detail brush to tidy up the meeting points between the three colors. I find that freehanding these final touch-ups often looks more organic and pleasing than rigid taped lines.
Clean Lines
If paint bleeds under your tape, wait for it to dry completely, then use fine-grit sandpaper to gently scrape away the mistake.
Step 3: Finishing and Planting
-
Seal the pot:
To protect your paint job from water damage, apply a coat of clear matte acrylic sealer over the painted exterior. This helps the design last longer, especially near sunny windows. -
Prepare for planting:
Fill the bottom third of the pot with specialized cactus potting soil, which provides the drainage succulents need to thrive. -
Place the succulent:
Gently remove your small succulent from its nursery container, careful not to damage the roots. Center it in your new painted pot. -
Fill the gaps:
Spoon more soil around the sides of the roots until the soil line is just below the painted inner rim. Press the soil down gently to secure the plant. -
Clean the rim:
Use a soft, dry brush to sweep away any stray soil particles that might be stuck to the white painted rim or the succulent leaves.
Add Texture
Mix a teaspoon of baking soda into your acrylic paint before applying firmly. This creates a trendy, terra-cotta textured ceramic look.
Place your finished creation on a sunny ledge and enjoy the pop of color it brings to your view

TRACK YOUR CERAMIC JOURNEY
Capture glaze tests, firing details, and creative progress—all in one simple printable. Make your projects easier to repeat and improve.
Cute Clay Fridge Magnets
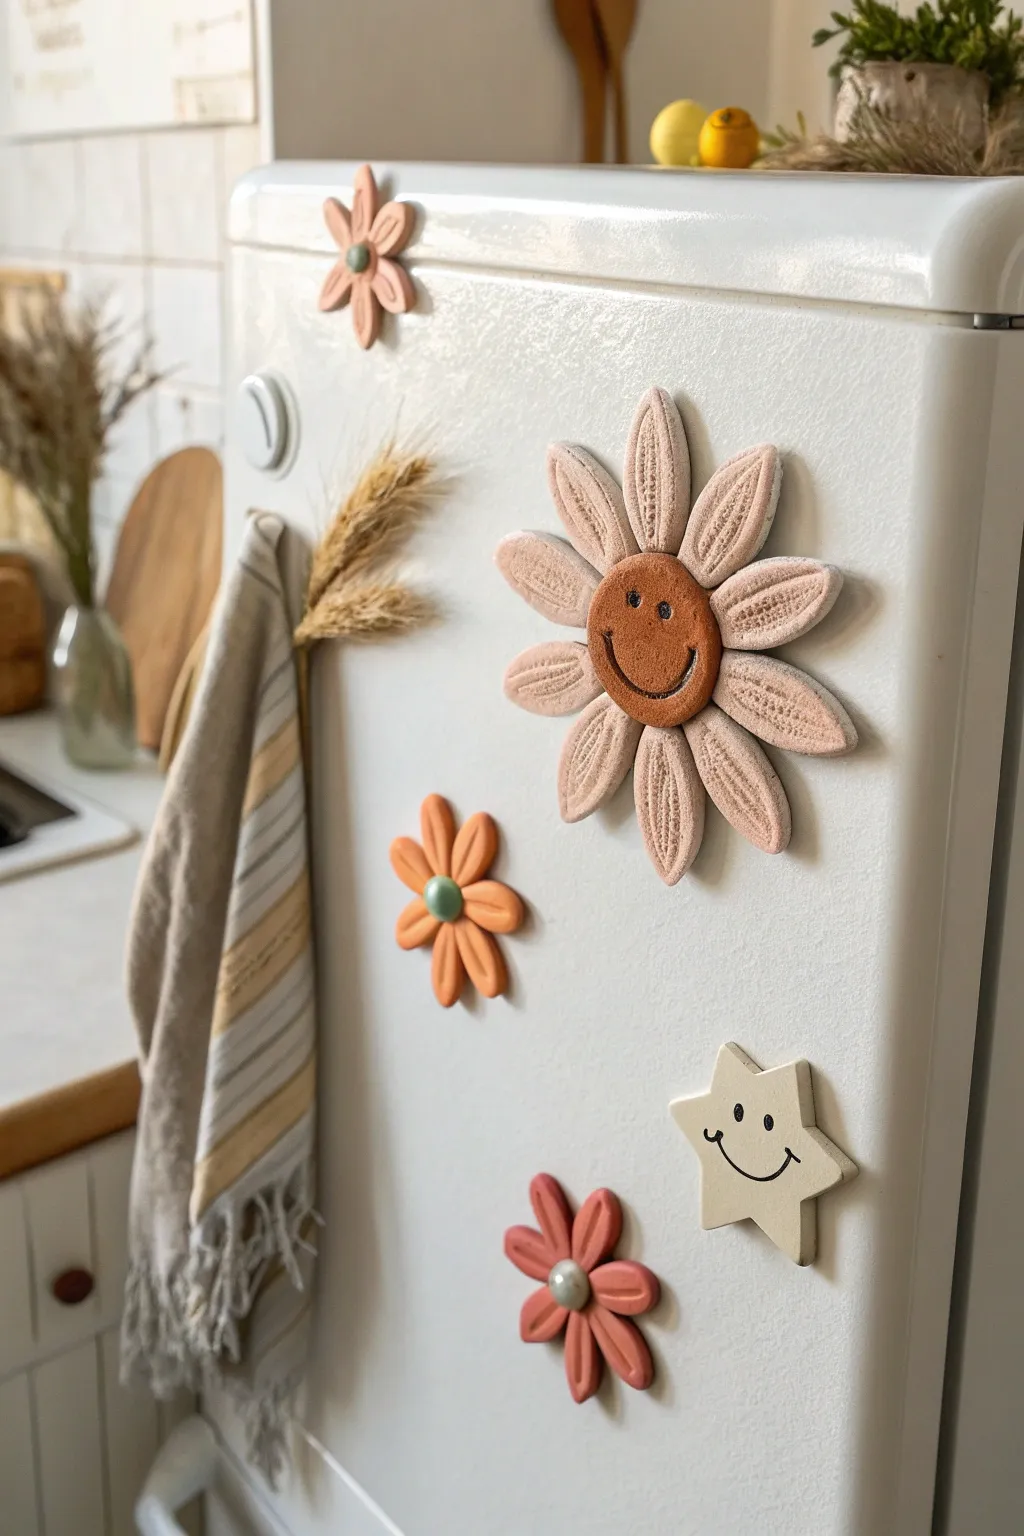
Brighten up your kitchen with these adorable, oversized clay magnets featuring charming smiley faces and retro floral shapes. The soft, matte finish and grooved petal details give them a delightful handcrafted pottery vibe without requiring a kiln.
How-To Guide
Materials
- Air-dry clay (white and terracotta/brown)
- Rolling pin
- Clay tools (needle tool, ball stylus tool)
- Small round cookie cutters (assorted sizes)
- Flower petal cutter (teardrop shape) or printable template
- Sandpaper (fine grit)
- Strong craft glue (E6000 or similar)
- Round ceramic or ferrite magnets
- Acrylic paint (black for details, optional pastel colors)
- Sealant (matte varnish or Mod Podge)
Step 1: Prepping the Centerpieces
-
Roll the clay:
Begin by rolling out your terracotta or brown-colored clay on a flat surface to about 1/4 inch thickness. Aim for a consistent level so the magnets sit flat. -
Cut the circles:
Use a small round cutter (about 1.5 inches for the large flower, smaller for the others) to punch out the flower centers. If you are making the star magnet, cut a star shape from white clay now too. -
Smooth the edges:
Dip your finger in a tiny bit of water and gently run it around the cut edges of your clay circles to smooth out any harsh lines or burrs.
Step 2: Creating the Faces
-
Add the eyes:
For the signature smiley face, use a small ball stylus or the back of a paintbrush to gently press two small divots into the upper half of the clay circle. -
Carve the smile:
Using a needle tool or a small curved carving tool, etch a wide, U-shaped smile below the eyes. Press deep enough to create a shadow but not all the way through. -
Make the star face:
Repeat this process for the star shape and smaller flowers if desired, varying the expression slightly for character.
Cracking Clay?
If you see hairline cracks while drying, mix a tiny bit of fresh clay with water to make a paste and fill them in before painting.
Step 3: Forming the Petals
-
Cut the large petals:
Roll out a slab of white clay or a pale blush color. Use a teardrop cutter to create roughly 8-10 large petals for the main daisy. -
Add texture details:
To get that specific textured look from the photo, use a needle tool to score lines down the center of each petal. I like to add tiny stipple dots or cross-hatching inside the scored lines for extra visual interest. -
Assemble the flower:
Arrange the petals in a circle, points facing inward. Score and slip (scratch the surface and add water) the inner tips of the petals, then press your smiley face center firmly on top. -
Shape the small flowers:
For the smaller floral magnets, you can cut freehand simple 5-petal shapes from colored clay, or mold small teardrops and join them together at the center. -
Add bead centers:
Press a small ball of contrasting clay (like Mint or White) into the center of the smaller flowers. Round it off so it looks like a bead.
Level Up: Retro Shade
Mix a tiny drop of burnt sienna paint into your white clay before rolling to achieve that warm, vintage cream color seen in the photo.
Step 4: Finishing Touches
-
Dry completely:
Let all your clay pieces dry flat for at least 24-48 hours. Flip them over halfway through so the backs dry evenly. -
Sand until smooth:
Once fully cured, use fine-grit sandpaper to gently smooth the edges of the petals and the star points. -
Paint the details:
If you want the eyes and smile to pop, use a tiny brush to fill the carved grooves with black acrylic paint. Wipe away excess surface paint quickly with a damp cloth if you go outside the lines. -
Seal the surface:
Apply a coat of matte varnish to protect the clay while keeping that natural, earthy look. -
Attach magnets:
Flip the dried pieces over and use a strong adhesive (like E6000) to glue a round magnet to the center back of each flower.
Now your fridge is ready to greet you with a friendly smile every time you reach for a snack
Modern Photo Holders
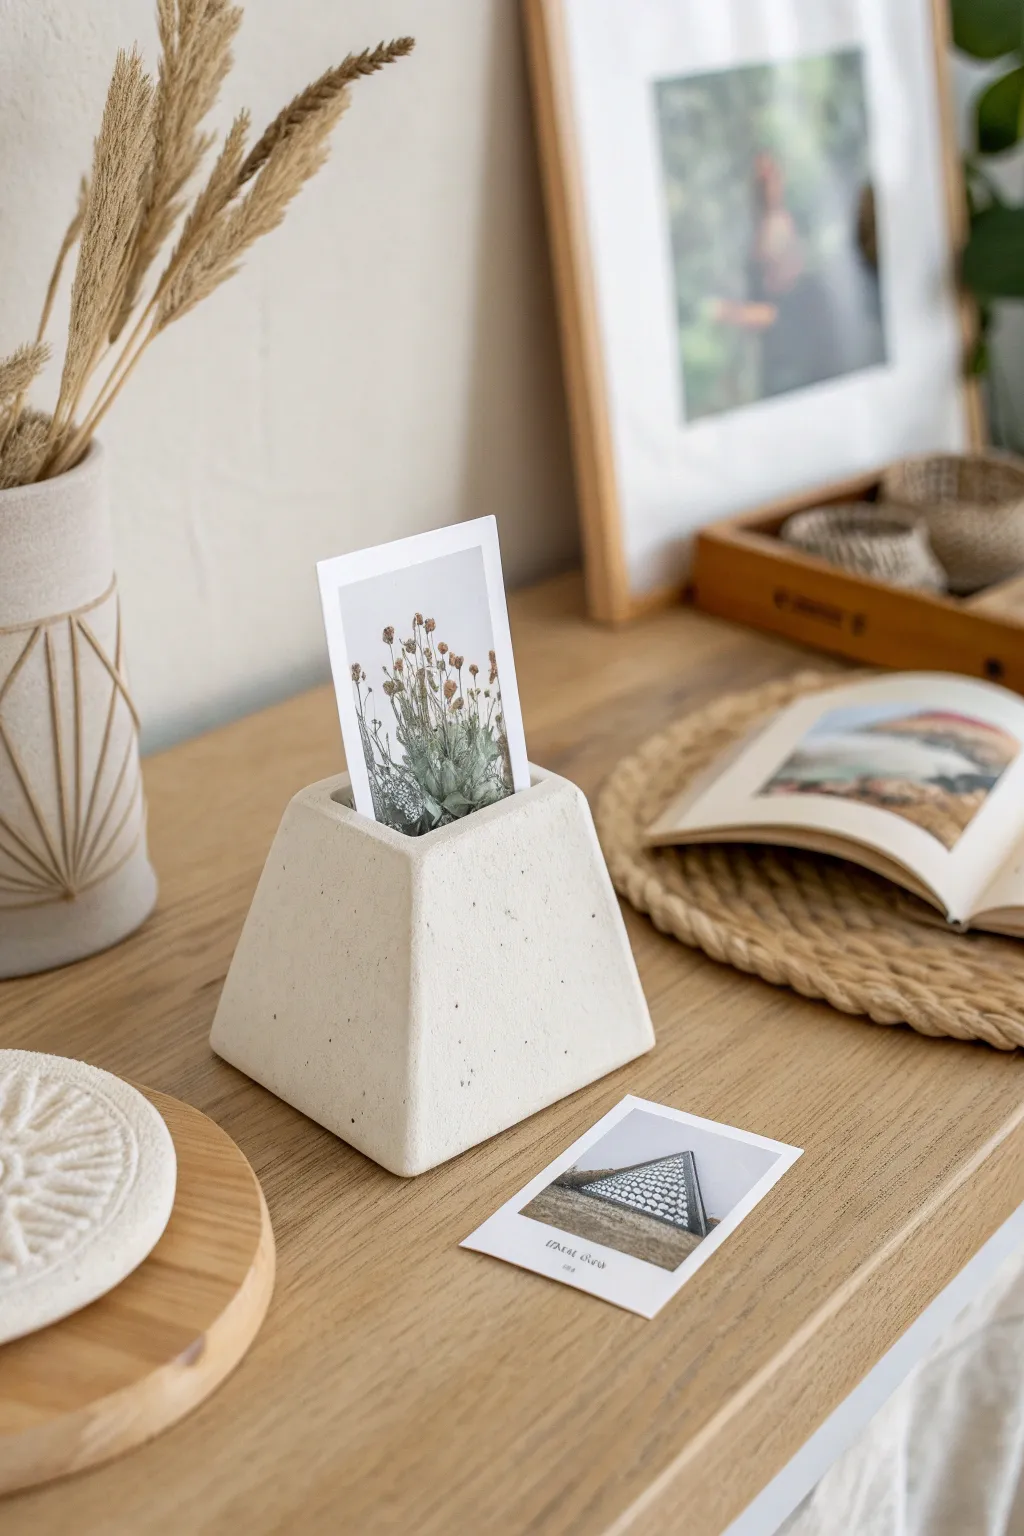
This minimalist photo holder mimics the industrial chic of concrete but uses accessible crafting clay to achieve that trendy geometric look. With its truncated pyramid shape and subtle speckled texture, it serves as a sophisticated yet understated base for your favorite memories.
Step-by-Step Guide
Materials
- Air-dry clay (white or light grey)
- Black pepper or dried tea leaves (for texture)
- Rolling pin
- Ruler
- Craft knife or scalpel
- Cardboard or cardstock (for template)
- Fine-grit sandpaper
- Water and a small sponge
- A polaroid or cardstock photo (for sizing)
Step 1: Preparation & Templating
-
Design the template:
Start by drawing your template on cardboard. You need four trapezoids for the sides and a small square for the top. A good size for the bottom base of the trapezoid is 3.5 inches, angling up to a 1.5-inch top width, with a height of about 2.5 inches. -
Cut the template:
Cut out one trapezoid to use as your master guide. This ensures every side of your pyramid will be identical. -
Prepare the clay:
Take a large chunk of air-dry clay. To achieve that faux-concrete speckled look, knead in a pinch of course black pepper or loose dried tea leaves. I find this adds just enough organic texture without weakening the structure. -
Roll the slab:
Roll out the clay to an even thickness of about 1/4 inch (6mm). Use guide sticks on either side of your rolling pin if you have trouble keeping it level.
Uneven Seams?
If gaps appear at your seams as it dries, make a thick paste ‘spackle’ with dry clay crumbs and water. Fill the cracks, let dry, then sand smooth.
Step 2: Cutting & Assembly
-
Cut the shapes:
Place your cardboard trapezoid on the clay and cut around it using a sharp craft knife. Repeat this three more times to get four identical sides. -
Cut the top and base:
Cut a square that matches the top dimensions of your trapezoids (approx 1.5 x 1.5 inches). You can also cut a larger square for the bottom if you want a closed base, though an open bottom works fine too. -
Score the edges:
Take your craft knife and gently score cross-hatching marks onto the long angled edges of all your trapezoid pieces. This rough surface helps the clay bond. -
Apply slip:
Dab a little water or clay slip (clay mixed with water to a paste consistency) onto the scored edges. -
Form the pyramid:
Stand the four walls up, pressing the angled sides together to form the pyramid shape. Use your fingers to smooth the seams on the outside and inside essentially ‘erasing’ the join lines. -
Attach the top:
Place the small square on top of the structure. Blend the edges of the square down into the side walls so it becomes one seamless unit.
Step 3: Refining & Finishing
-
Create the slot:
While the clay is still soft, use a ruler or a thick piece of cardstock to press a slot into the center of the top square. Press down about half an inch deep. -
Test the fit:
Wiggle the ruler slightly front-to-back to ensure the opening is wide enough for a photograph, but tight enough to hold it upright. -
Smooth surfaces:
Dip your finger or a small sponge in water and run it over the entire piece to smooth out fingerprints and sharp edges. This is your chance to perfect that clean, modern silhouette. -
Initial drying:
Let the piece dry for about 24-48 hours. Keep it away from direct heat or sunlight to prevent cracking. -
Sanding:
Once fully cured and hard, use fine-grit sandpaper to gently buff the sides. This reveals the speckles from the pepper/tea more clearly and creates a stone-like matte finish. -
Cleaning:
Wipe away any sanding dust with a slightly damp cloth or a dry paintbrush. -
Insert photo:
Your holder is ready. Slide your favorite polaroid or printed photo into the top slot to display.
Level Up: Color Tint
Knead a drop of grey or beige acrylic paint directly into the wet clay before rolling. This gives a consistent stone color all the way through.
This sculptural piece looks just as good standing alone on a shelf as it does holding your treasured snapshots
Candle Holders in a Gift Trio
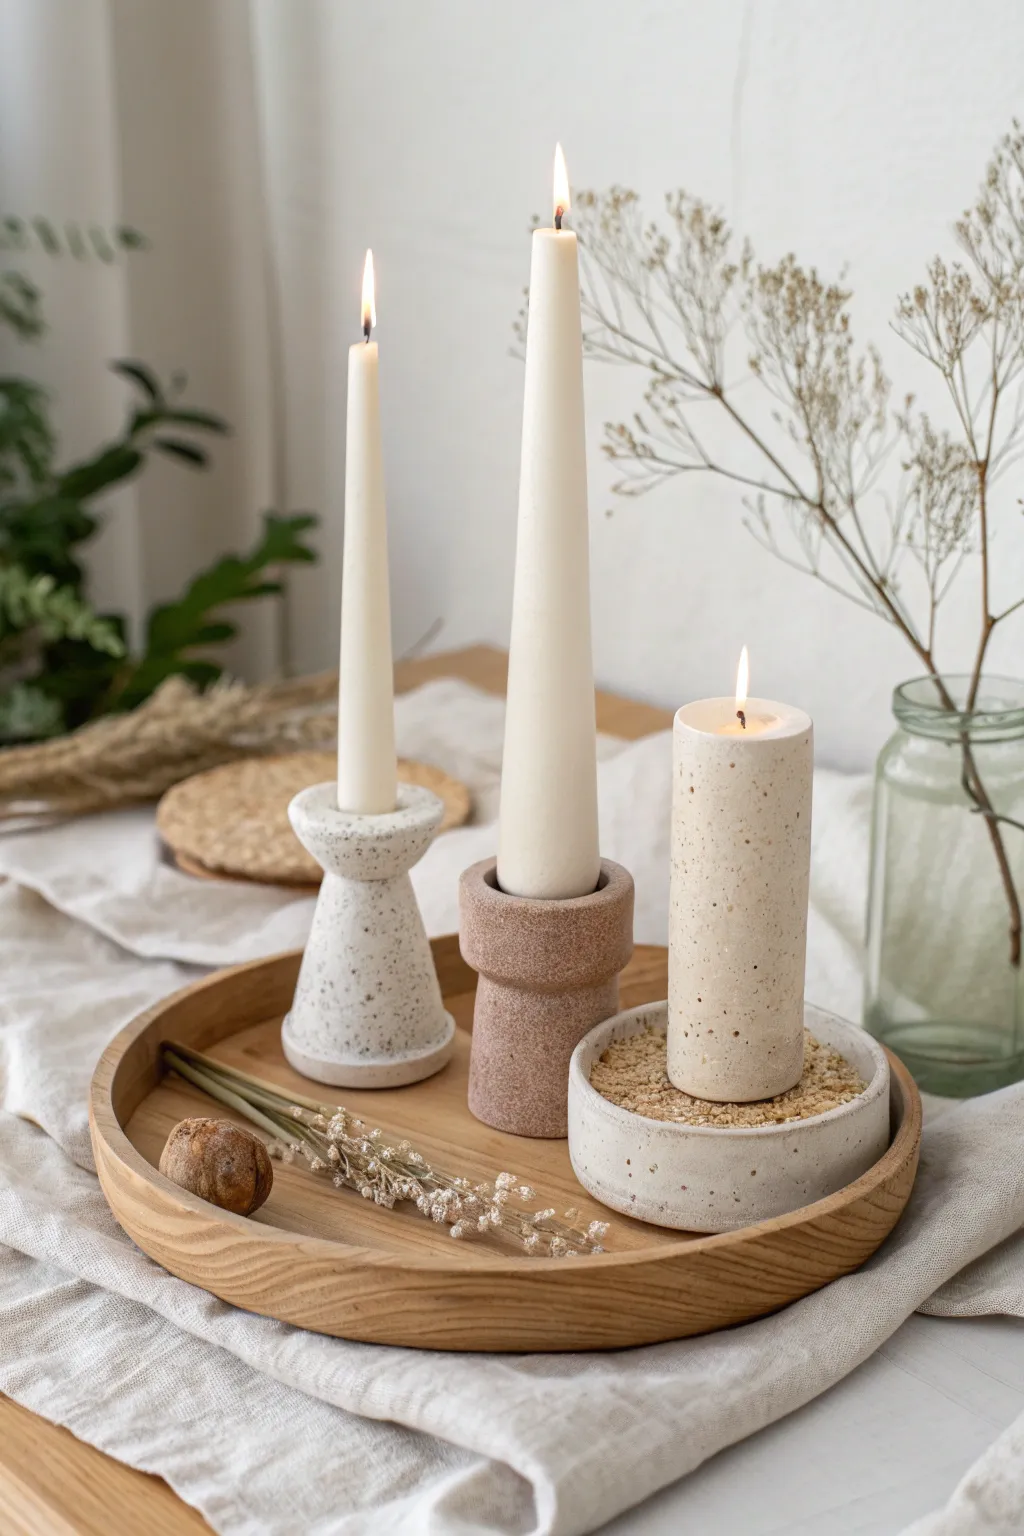
Create a stunning centerpiece with this set of three distinct candle holders, featuring a trendy speckled stone finish. This trio combines a taper holder, a pillar stand, and a shallow vessel for a textured pillar candle, all brought together by their cohesive earthy tones.
Detailed Instructions
Materials
- Air-dry clay or polymer clay (white, beige, and terracotta)
- Acrylic rolling pin
- Clay knife or fettling knife
- Slip (clay mixed with water) and scoring tool
- Sandpaper (medium and fine grit)
- Used coffee grounds or black pepper (for speckling)
- Taper candle and pillar candle (for sizing)
- Circle cutters or round objects to trace
- Clear matte sealant or varnish
Step 1: Preparing the Clay
-
Mix for texture:
To achieve that beautiful stone-like finish, start by kneading a small amount of dried coffee grounds or coarse black pepper into your white and beige clay bodies. Knead thoroughly until the speckles are evenly distributed. -
Roll it out:
Roll out a portion of your speckled white clay to about a 1/4 inch thickness on a smooth surface. This will be for the base of the taller taper holder.
Cracked While Drying?
Mix a tiny amount of dry clay powder with white vinegar to make a paste. Fill the crack, smooth it over, and let it dry slowly under plastic.
Step 2: Shaping the Taper Holder (Left)
-
Create the base cone:
Form a cone shape from a solid lump of white speckled clay. It should be wide at the bottom for stability and narrow near the top. Flatten the very bottom against your table so it stands straight. -
Add the cup:
Roll a small ball of clay and press your thumb into the center to create a cup shape. Check that it fits the base of your taper candle snugly but not too tight, as clay shrinks slightly. -
Join the pieces:
Score the top of your cone and the bottom of your cup with a needle tool or knife. Apply a dab of slip (clay water) and press them firmly together. -
Smooth the seams:
Using your thumb or a modeling tool, drag clay across the seam to blend the two parts into one cohesive silhouette. Creating a smooth transition is key here.
Customize the Look
Before drying, press dried flowers or herbs into the wet clay for a botanical imprint, then paint the impression with gold acrylic after firing.
Step 3: Crafting the Pillar Stand (Center)
-
Form the terracotta cylinder:
Using the terracotta or brown-tinted clay, roll a thick cylinder. You can do this by rolling a slab and wrapping it around a tube form, or by shaping a solid log of clay. -
Make the collar:
Roll a thick strip of the same clay, about 1 inch wide. Wrap this around the top third of your cylinder to create a bulky, decorative collar. I like to pressing it firmly to ensure it doesn’t detach later. -
Create the candle recess:
Press the base of your taper candle into the top of this cylinder to create an indentation. Make it deep enough (about 1 inch) to hold the candle securely. -
Texture the surface:
Take a stiff bristle brush or a crumpled ball of aluminum foil and tap it all over the exterior to give it a rough, stone-like texture.
Step 4: Building the Low Vessel (Right)
-
Cut the base:
Roll out your speckled beige clay again. Use a large circle cutter or trace a bowl (approx 4-5 inches diameter) and cut out a flat disc. -
Build the wall:
Roll a long snake (coil) of clay. Place it on top of the outer edge of your base disc. Score and slip the contact points first for a strong bond. -
Blend the coil:
Smear the clay from the coil down into the base on both the inside and outside. Use a flat wooden tool or your fingers to smooth the walls until they are vertical and even. -
Refine the rim:
Gently pinch the rim to even out the thickness. Run a damp sponge along the top edge to soften any sharp angles.
Step 5: Finishing Touches
-
Dry slowly:
Place all three pieces in a non-drafty area to dry. Cover them loosely with plastic wrap for the first 24 hours to prevent cracking, then uncover to let them fully cure. -
Sand for smoothness:
Once bone dry, use medium grit sandpaper to level the bottoms so they sit flat. Use fine sandpaper to smooth out any fingerprints on the taper holder. -
Seal the deal:
Apply a coat of clear matte varnish or sealant. This protects the clay from soot and wax drips and enhances the speckled effect. -
Assemble the look:
For the low vessel, fill the surrounding space with coarse sand, small pebbles, or dried texture (like the crushed material in the photo) to support the pillar candle.
Arrange your handmade trio on a wooden tray for a cozy, organic display that warms up any room.
Stamped Affirmation Tokens
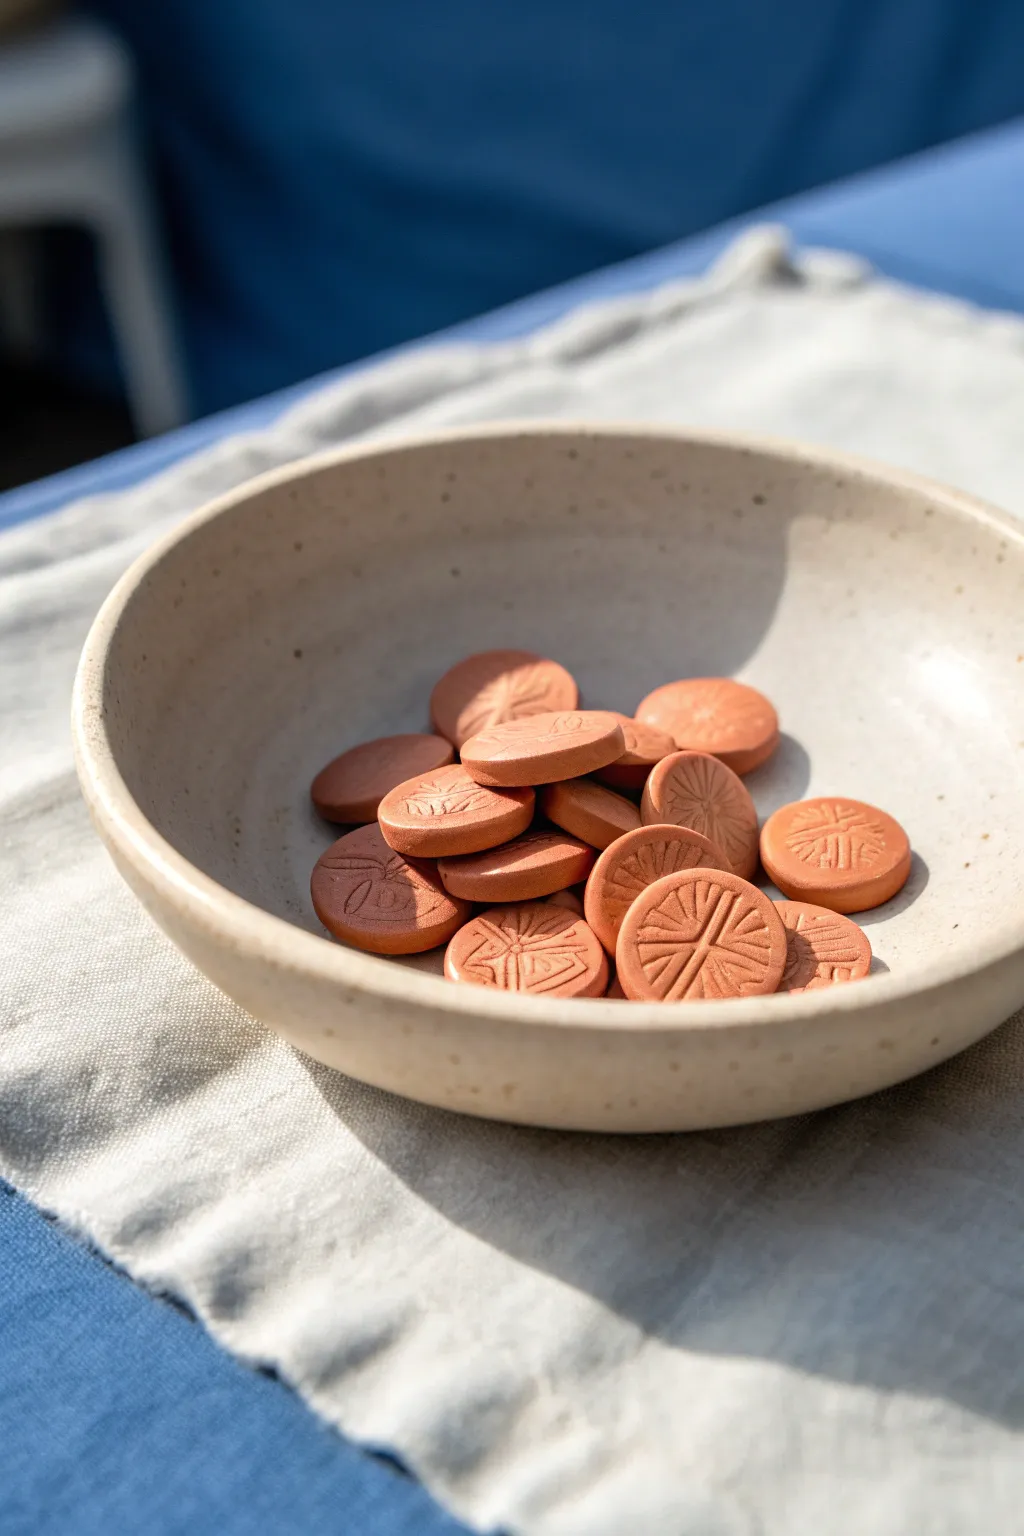
These simple yet striking clay coins serve as tactile reminders or grounding tools, featuring earthy terracotta tones and crisp geometric impressions. They make wonderful pocket charms or decorative bowl fillers, offering a moment of calm whenever they are held.
How-To Guide
Materials
- Terracotta-colored polymer clay (or air-dry clay)
- Small round cutter (approx. 1 inch diameter)
- Texture stamps (geometric patterns, celestial, or floral)
- Acrylic rolling pin
- Parchment paper or ceramic tile
- Fine-grit sandpaper (400-600 grit)
- Oven (if using polymer clay) or drying rack
- Matte varnish (optional)
Step 1: Preparation & Rolling
-
Condition the Clay:
Begin by warming the terracotta clay in your hands. Knead it thoroughly until it creates a smooth, pliable consistency without cracks. -
Set Up Your Work Surface:
Lay down a sheet of parchment paper or work directly on a ceramic tile to prevent sticking. This ensures your tokens remain flat during the cutting process. -
Roll Out a Slab:
Using your acrylic rolling pin, roll the clay out into an even sheet. Aim for a thickness of about 1/4 inch (6mm)—I find this thickness gives the tokens a nice weight in the hand. -
Check for Air Bubbles:
Inspect the surface of your clay slab. If you see any small air bubbles, gently pierce them with a needle tool and smooth over the area with your finger.
Step 2: Cutting & Stamping
-
Cut the Circles:
Press your small round cutter firmly into the clay slab to create discs. Cut as many as you can fit, maximizing the use of your rolled sheet. -
Release the Shapes:
Gently remove the excess clay from around the circles. If a disc is stuck inside the cutter, a light tap or a gentle push from the back usually frees it. -
Smooth the Edges:
Pick up each disc carefully. lightly run your finger around the circumference to smooth down any sharp ridges left by the cutter. -
Apply Release Agent:
Before stamping, lightly mist your stamp with water (for air-dry clay) or dust it with cornstarch (for polymer clay) to prevent it from pulling the clay up. -
Impress the Pattern:
Center your geometric stamp over a clay disc. Press down evenly and firmly, but not so hard that you distort the round shape of the token. -
Repeat the Design:
Continue stamping each token. Feel free to rotate the stamp orientation for variety, or use different coordinating stamps for a mixed collection.
Stamp Clarity Tip
If your stamp impression isn’t deep enough, place a piece of plastic wrap over the clay before stamping. This creates a softer, more rounded edge to the design.
Step 3: Finishing
-
Bake or Dry:
If using polymer clay, bake according to the manufacturer’s instructions (usually 275°F/135°C for 15-30 minutes). If using air-dry clay, allow them to dry on a flat wire rack for 24-48 hours. -
Cool Down:
Let the tokens cool completely inside the oven or on the counter before handling to ensure they reach full hardness. -
Sand for Smoothness:
Once fully cured, use fine-grit sandpaper to buff away any fingerprints or rough spots on the edges or back. -
Rinse and Dry:
Wipe the tokens with a damp cloth to remove sanding dust. The natural matte finish is beautiful on its own, but you can add a varnish if desired. -
Optional Sealing:
For a bit of protection, brush on a very thin layer of matte varnish. This deepens the terracotta color slightly without adding unnatural shine.
Fixing Distortion
Did the circle warp while stamping? Use the round cutter again like a cookie cutter—place it over the stamped clay and gently nudge the edges back into a perfect circle.
Now you have a collection of grounding tokens ready to be gifted or kept close for a moment of mindfulness
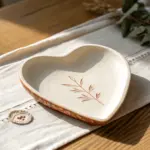
Leaf-Imprint Trinket Trays
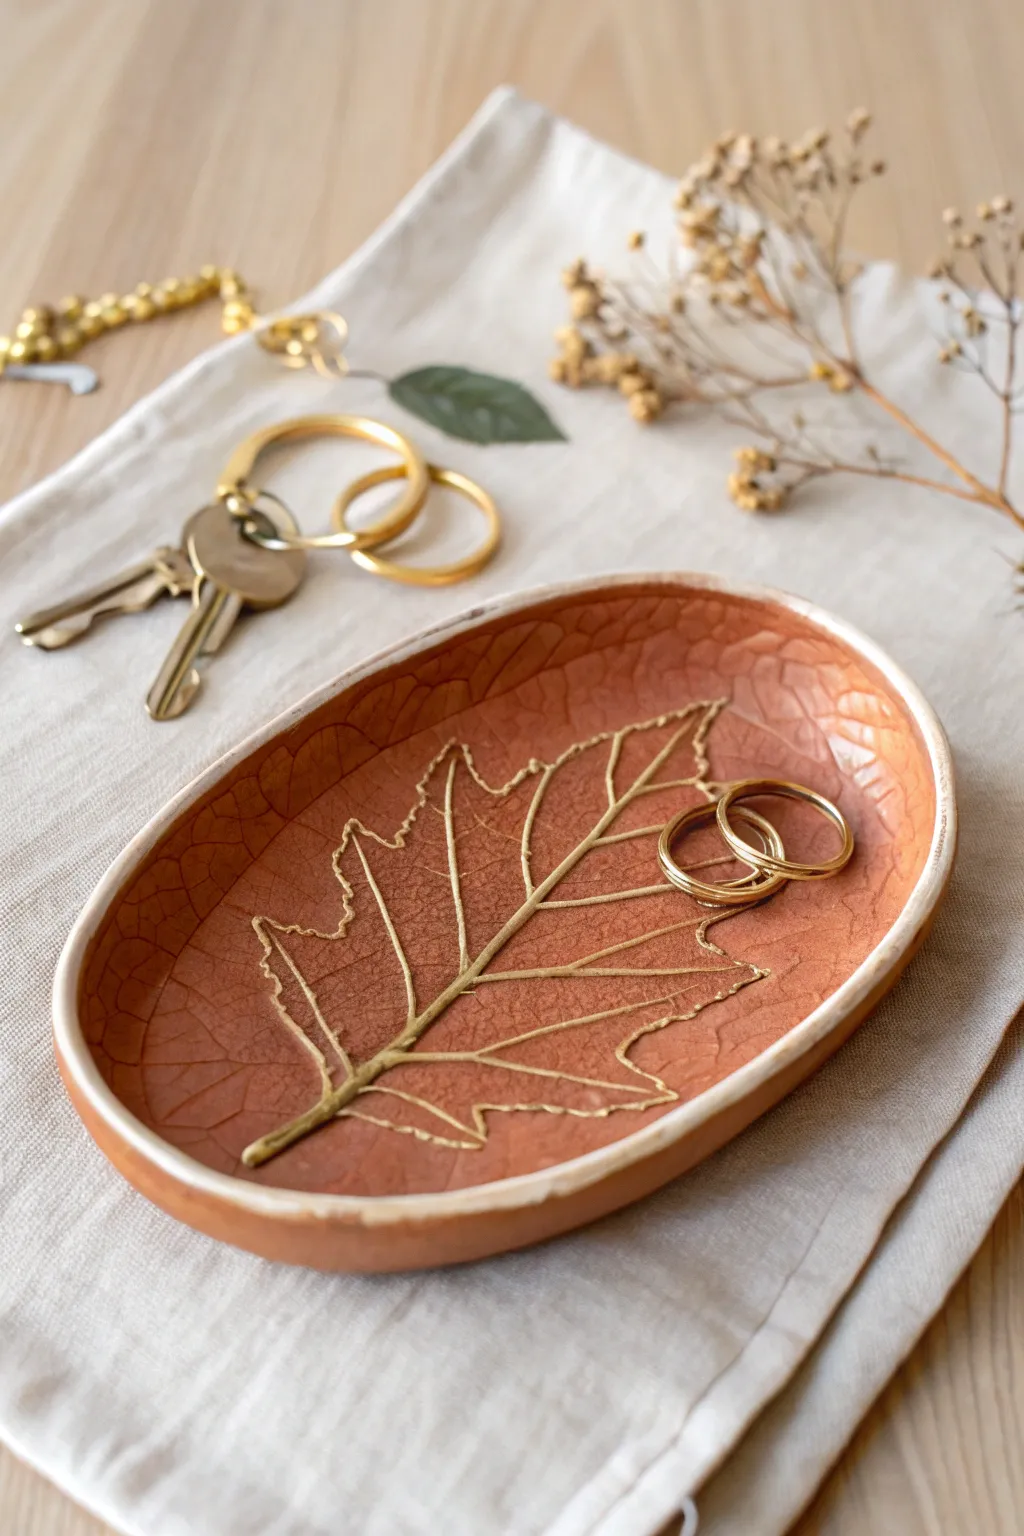
Capture the delicate details of nature with this elegant terracotta-style trinket dish featuring a raised gold leaf design. The contrast between the warm, earthy clay tone and the metallic gold creates a sophisticated piece perfect for holding rings and keys.
Step-by-Step Tutorial
Materials
- Air-dry clay (terracotta color)
- Fresh leaf with prominent veins (maple or sycamore work well)
- Rolling pin
- sharp craft knife or scalpel
- Small bowl or dish (to use as a mold)
- Fine-grit sandpaper
- Gold acrylic paint or liquid gold leaf
- Fine detail paintbrush (size 0 or 00)
- Clear matte varnish or sealant
- Water and sponge for smoothing
- Parchment paper or canvas mat
Step 1: Shaping the Clay Base
-
Condition the clay:
Begin by taking a handful of terracotta air-dry clay and kneading it in your hands until it becomes soft, pliable, and free of any cracks. -
Roll it out:
Place the clay on a sheet of parchment paper or a canvas mat. Using a rolling pin, flatten the clay to an even thickness of about 1/4 inch (6mm). -
Prepare the leaf:
Select a leaf that is slightly smaller than your desired dish size. Ensure it is fresh and not brittle, as you need it to bend with the clay without crumbling. -
Create the imprint:
Place the leaf vein-side down onto the rolled clay slab. Gently roll over the leaf with the rolling pin to embed the veins deep into the surface. -
Cut the oval shape:
Use a craft knife to cut a smooth oval shape around the leaf imprint. You can freehand this or trace a paper template for symmetry.
Cracks Appearing?
If small drying cracks form, mix a tiny amount of clay with water to make a paste (slip) and fill them in before painting.
Step 2: Forming and Drying
-
Smooth the edges:
Dip your finger in a little water and run it along the cut edge of the oval to smooth out any roughness or sharp clay burrs. -
Shape the curvature:
Carefully lift the clay oval and place it inside a shallow bowl or curved dish. Gently press it down so the clay takes on the concave shape of the bowl. -
Initial peel:
I like to carefully peel the leaf away at this stage while the clay is still wet to reveal the crisp impression underneath. -
Slow drying:
Leave the clay in the bowl to dry for 24-48 hours. Keep it away from direct heat sources to prevent warping or cracking. -
Remove and finish drying:
Once the top feels dry and stiff, turn the clay dish out of the mold and let the underside dry completely for another 12-24 hours.
Step 3: Detailing and Finishing
-
Sand for perfection:
Once fully cured, use fine-grit sandpaper to gently buff the rim of the dish until it feels completely smooth. -
Create the white rim:
Using a very steady hand or a flat brush, paint the very top edge of the rim with a creamy white or light beige paint to create the border seen in the photo. -
Paint the veins:
Load a fine detail brush with gold paint or liquid gold leaf. Carefully trace the indented veins of the leaf imprint. -
Add texture highlights:
For a more artistic look, lightly dry-brush a tiny amount of gold onto the raised areas between the veins to highlight the clay’s texture. -
Paint the stem:
Extend the gold line down to paint the stem at the base of the leaf, making it slightly thicker than the veins. -
Seal the piece:
Apply a coat of clear matte varnish over the entire dish to protect the clay and paint from moisture and wear.
Make it Shine
Use actual gold leaf sheets and gilding size instead of gold paint for a hyper-reflective, luxurious metallic finish.
Now you have a stunning, nature-inspired catch-all dish ready to display your favorite jewelry pieces.
Pressed-Flower Keepsake Ornaments
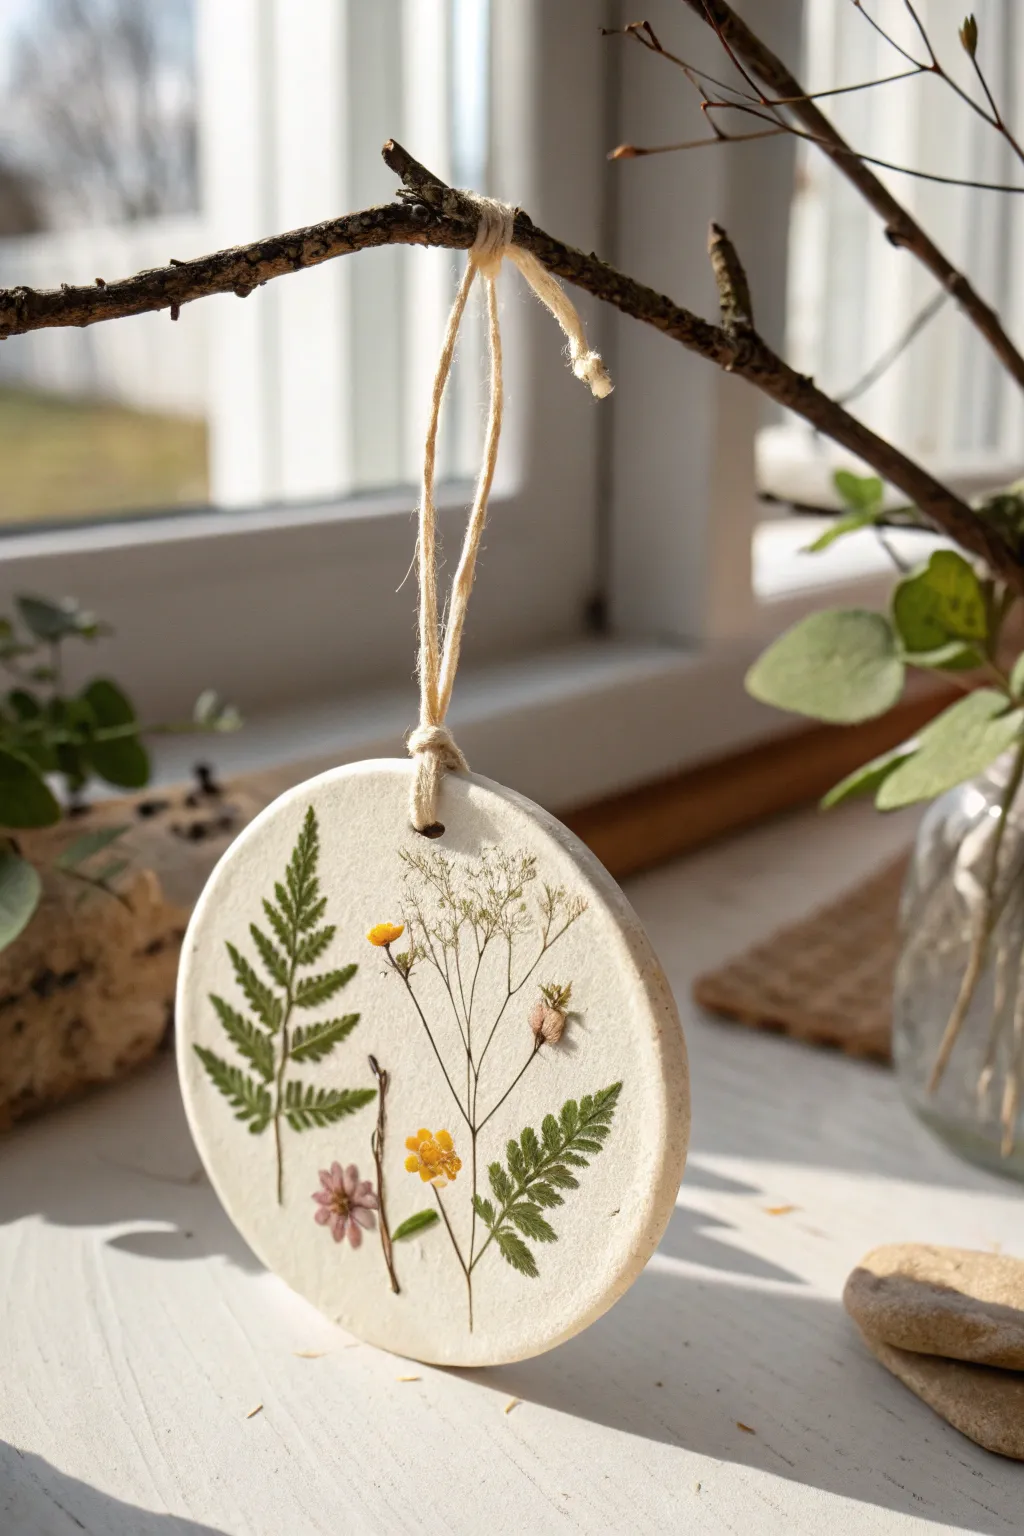
Capture the delicate beauty of nature with these simple yet elegant clay ornaments that look like they belong in a cozy cottage window. The clean white clay provides the perfect backdrop for vibrant ferns and tiny meadow flowers, creating a timeless keepsake that brings the outdoors in.
Step-by-Step Guide
Materials
- Air-dry clay (white)
- Small rolling pin
- Round cookie cutter (approx. 3-4 inches)
- Fresh or pressed flowers and ferns (fern leaves, buttercups, wildflowers)
- Parchment paper or non-stick craft mat
- Small straw or toothpick (for the hanging hole)
- Fine-grit sandpaper (optional)
- Mod Podge or satin varnish sealant
- Natural jute twine
- Small paintbrush
- Tweezers (helpful for placement)
- Heavy book (if pressing flowers fresh)
Step 1: Preparation & Clay Work
-
Prepare your botanicals:
Before touching the clay, ensure your flowers and leaves are ready. You can use pre-pressed flowers for a flat look, or fresh sturdy stems that will be pressed directly into the clay. I often pick small fern fronds and tiny yellow wildflowers like the buttercups seen here. -
Condition the clay:
Take a handful of white air-dry clay and knead it in your hands until it becomes soft, pliable, and free of cracks. This body heat helps prevent crumbling later. -
Roll it out:
Place the clay on parchment paper or a craft mat. Using your rolling pin, roll the clay out evenly until it is about 1/4 inch thick. Don’t go too thin, or the ornament might be fragile. -
Check for smoothness:
Run your finger lightly over the surface. If you see tiny cracks or lint, smooth them out now with a tiny bit of water on your fingertip. -
Cut the shape:
Press your round cookie cutter firmly into the rolled clay. Twist slightly to ensure a clean cut, then remove the excess clay from around the circle before lifting the cutter. -
Create the hanging hole:
Use a straw or a wooden skewer to punch a hole near the top edge of the circle. Make sure it’s not too close to the edge to prevent tearing, but high enough to hang properly.
Step 2: Design & Impression
-
Plan your arrangement:
Hover your botanical elements over the clay circle to visualize the layout. Aim for an organic composition, perhaps grouping a fern on the left and taller, delicate stems on the right. -
Place the first element:
Gently lay your largest piece, such as the fern leaf, onto the clay surface. Use tweezers if the piece is delicate to avoid transferring oils from your fingers. -
Add floral details:
Position your smaller flowering stems alongside the greenery. Try to vary the heights to create visual interest, mimicking a small meadow scene. -
Press into clay:
Once you are happy with the arrangement, take your rolling pin and gently roll *over* the flowers once. Use firm, even pressure to embed them flush with the clay surface without distorting the circle shape. -
Secure loose edges:
If any tiny stems or petals are sticking up, press them down gently with your fingertip. They need to be flush so they dry as part of the ornament.
Fresh vs. Pressed
Fresh flowers pressed into clay will shrink as they dry, creating a ‘fossil’ look. Use pre-pressed dried flowers if you want to retain the exact shape and vibrant color shown here.
Step 3: Drying & Finishing
-
Begin drying:
Move the parchment paper with the ornament to a safe, flat spot. Let it air dry for 24-48 hours. I suggest flipping it over gently halfway through so the back dries evenly. -
Smooth the edges:
Once fully hardened and bone-white, check the edges. If there are any rough spots from the cookie cutter, gently sand them with fine-grit sandpaper. -
Seal the piece:
To preserve the flower colors and protect the clay, apply a thin coat of Mod Podge or satin varnish over the entire front surface using a soft brush. -
Let the sealant cure:
Allow the varnish to dry completely according to the bottle instructions. It should look clear and slightly sheen when ready. -
Cut the twine:
Cut a length of natural jute twine, approximately 8-10 inches long. -
Thread the loop:
Fold the twine in half and push the looped end through the hole in the ornament from front to back. -
Secure the hanger:
Pull the loose ends of the twine through the loop you created and tighten it gently against the top of the ornament (a lark’s head knot). -
Tie the top:
Tie the two loose ends of the twine together in a simple overhand knot to close the loop for hanging.
Curling Edges?
If your clay circle starts curling up at the edges while drying, gently weigh it down with a light book or board once the surface is dry to the touch to flatten it back out.
Hang your new botanical art in a sunny window and enjoy the translucent glow of the petals against the clay
Personalized Gift Tags That Last
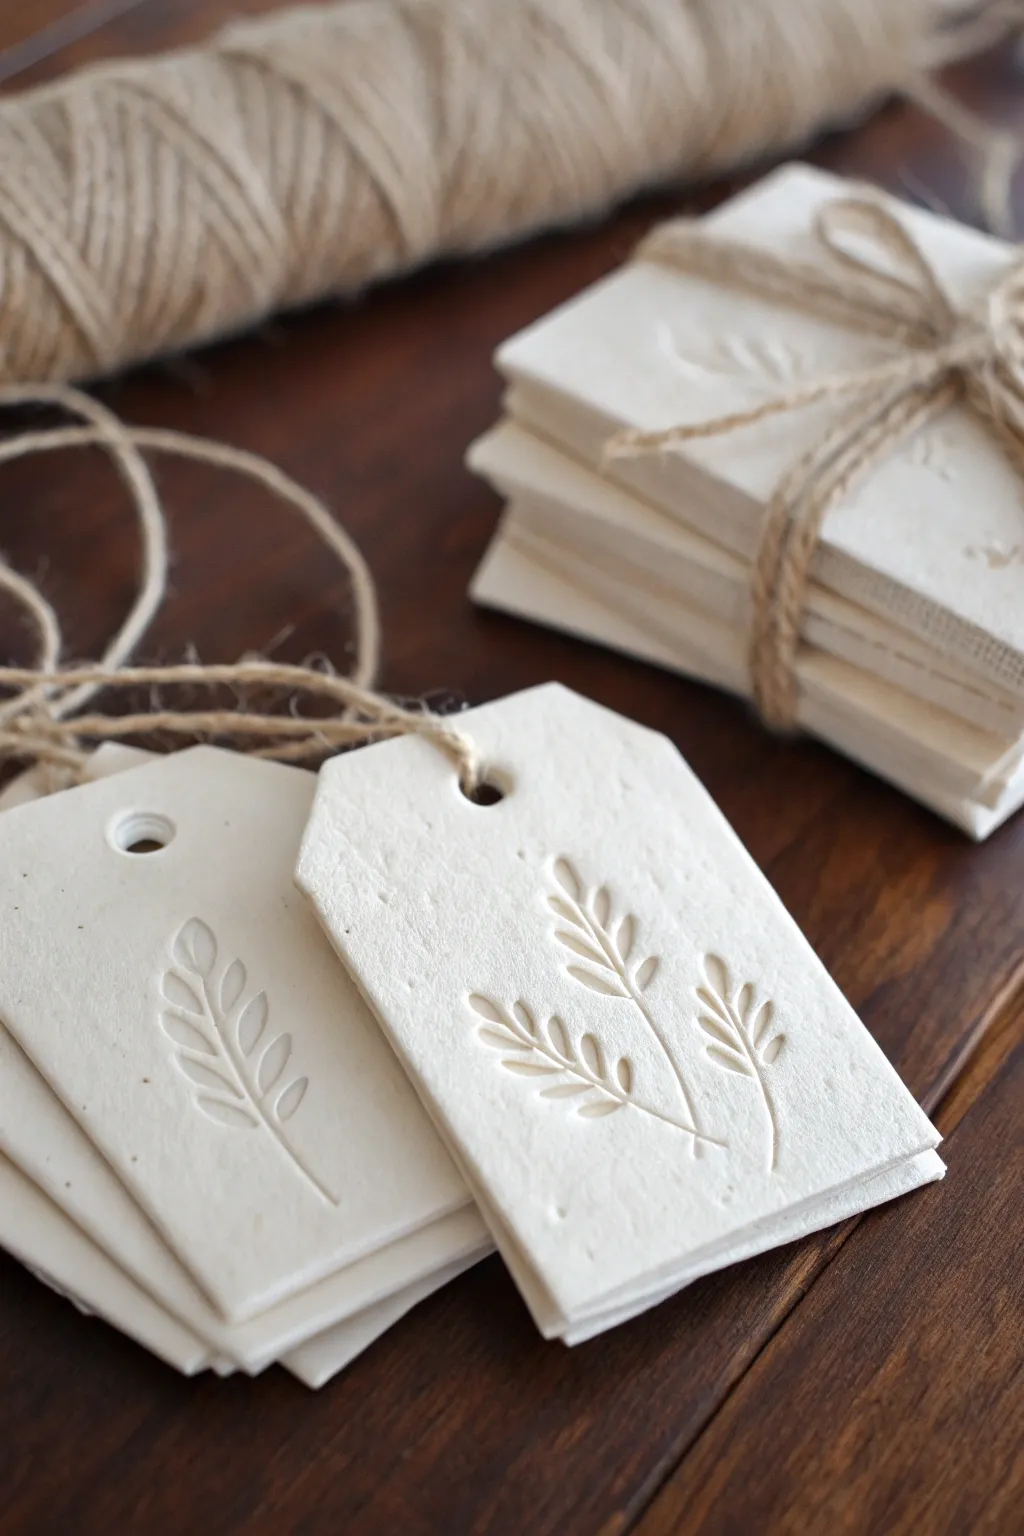
Elevate your gift wrapping with these elegant, earthy gift tags that double as keepsakes. Featuring a delicate embossed wheat design and a soft matte finish, they bring a touch of rustic sophistication to any package.
Step-by-Step Tutorial
Materials
- White stone clay or premium air-dry clay
- Rolling pin
- Parchment paper or silicone mat
- Tag-shaped cookie cutter (or ruler and craft knife)
- Botanical rubber stamp (wheat or fern design)
- Drinking straw or small circular cutter
- Fine-grit sandpaper (320-400 grit)
- Jute twine
- Bowl of water
- Clear matte varnish (optional)
Step 1: Prepping and Shaping
-
Condition the Clay:
Begin by taking a handful of clay and kneading it in your palms until it is warm and pliable. This prevents cracks later on. -
Roll It Out:
Place the clay between two sheets of parchment paper or directly on a silicone mat. Roll it out to an even thickness of about 1/8 to 1/4 inch. -
Ensure Consistency:
Check that the thickness is uniform across the slab so your tags dry evenly. I find that using guide sticks on either side helps maintain a perfect level. -
Cut the Base Shape:
Use your tag-shaped cookie cutter to punch out the main forms. If you don’t have a cutter, use a ruler to cut rectangles, then trim the top corners at a 45-degree angle to create the classic tag silhouette. -
Create the Hanging Hole:
While the clay is still soft, press a drinking straw or small circular cutter into the top center of each tag to remove a plug of clay. -
Smooth the Edges:
Dip your finger in a little bit of water and gently run it along the cut edges of the tag to soften any sharpness or stray clay bits.
Step 2: Decorating and Refinement
-
Position the Stamp:
Select your botanical rubber stamp. Hover it over the wet clay tag to visualize the placement, aiming for a centered or slightly offset look depending on your preference. -
Make the Impression:
Press the stamp firmly and evenly into the soft clay. Be careful not to push all the way through; just deep enough to leave a crisp indentation. -
Lift Gently:
Peel the stamp away straight up to avoid smudging the design. Check the impression for clarity. -
Initial Drying:
Move the tags onto a clean surface lined with parchment paper. Let them air dry away from direct heat sources for at least 24 hours. -
Flip for Evenness:
Halfway through the drying process, flip the tags over. This is crucial for preventing the edges from curling upward as moisture evaporates. -
Check for Dryness:
The clay is ready when it feels room temperature to the touch (coldness indicates moisture remains) and looks completely chalky white. -
Sand for Smoothness:
Take your fine-grit sandpaper and very gently buff the edges and flat surfaces. This gives that professional, porcelain-like finish visible in the photo. -
Clean Up Dust:
Wipe the tags down with a slightly damp cloth or soft brush to remove any clay dust generated by sanding. -
Seal (Optional):
If you want extra durability, brush on a thin coat of matte varnish. This will slightly deepen the white color but protects against moisture. -
Add the Ties:
Cut lengths of jute twine about 8 inches long. Thread a loop through the hole, pass the tails through the loop, and pull tight to secure.
Stamp Release Trick
Dust your rubber stamp lightly with cornstarch before pressing it into the wet clay. This acts as a release agent and ensures the stamp lifts away cleanly without pulling the clay.
Fixing Edge Cracks
If you see tiny cracks forming on the edges while drying, make a paste of clay and water (slip) and smooth it into the cracks with your finger, then let it dry again.
Now you have a set of charming, durable tags ready to hang on gifts or use as place card holders for your next dinner party
Boho Rainbow Arch Decor
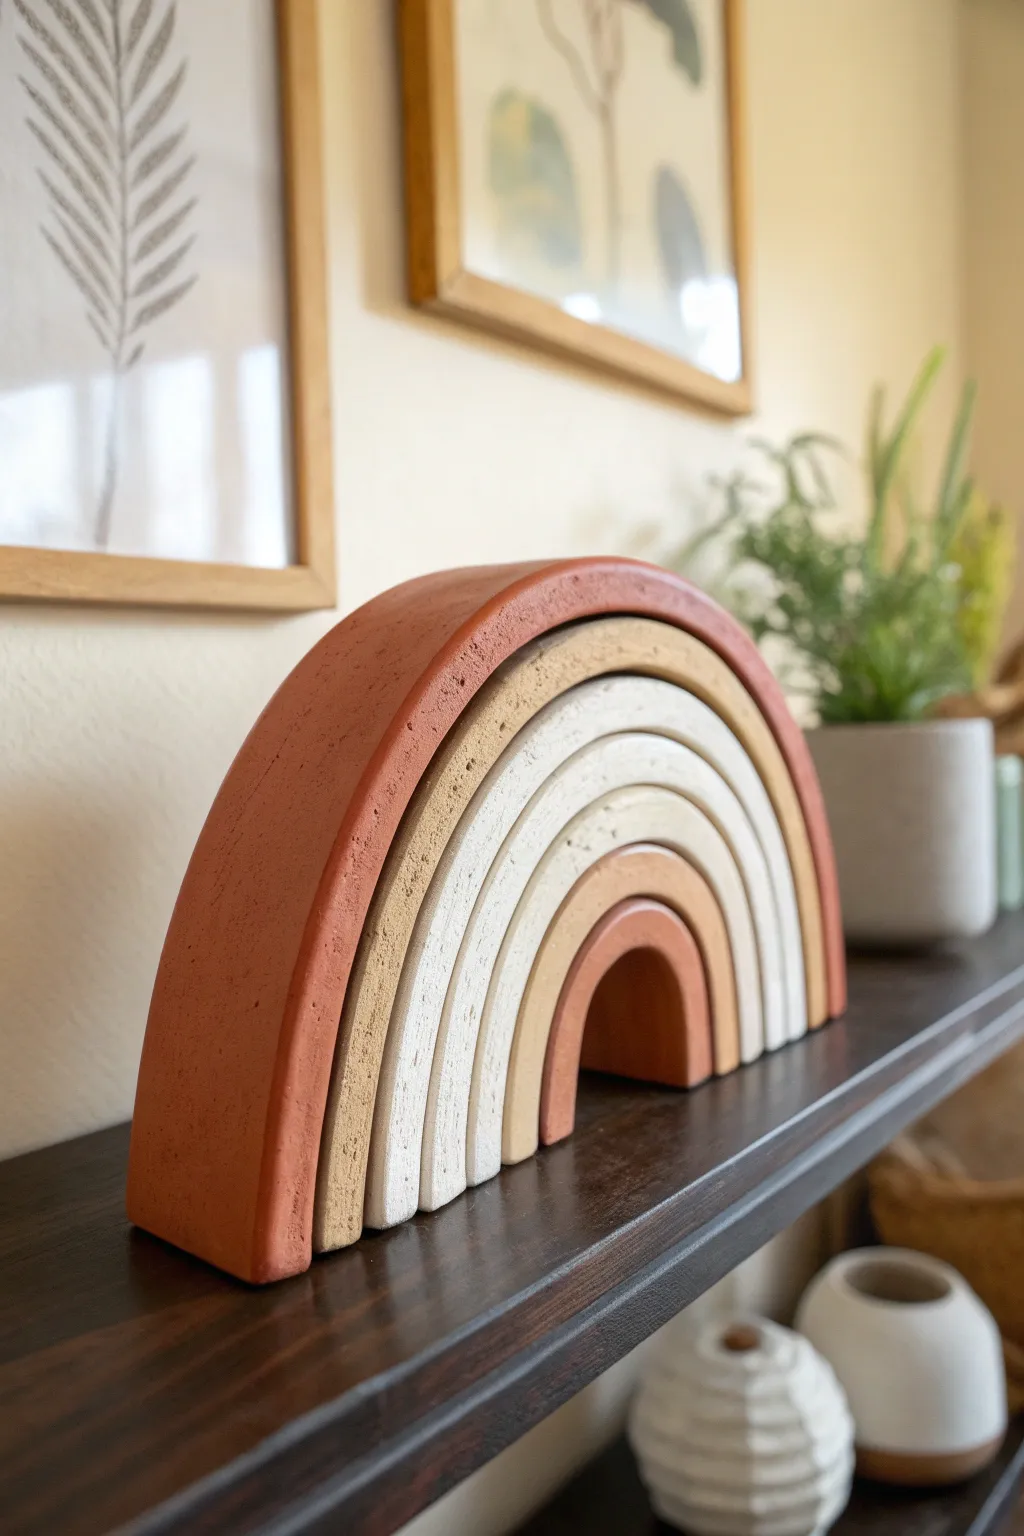
Bring a touch of organic warmth to any shelf with this sculptural rainbow decor piece, featuring soothing, muted earth tones. The varying arch sizes and textured matte finish create a sophisticated, boho-modern look that makes for a thoughtful, handmade gift.
How-To Guide
Materials
- Air-dry clay (white or terracotta base)
- Acrylic paints (terracotta/rust, beige, cream/off-white, tan)
- Rolling pin
- Sharp craft knife or clay slicer
- Parchment paper or wax paper
- Small bowl of water
- Fine-grit sandpaper
- Matte sealant (optional)
- Ruler
- Sponge or paintbrush
Step 1: Shaping the Arches
-
Prepare the workspace:
Lay down a sheet of parchment paper on a flat surface to prevent the clay from sticking. Tape the corners down so the paper doesn’t shift while you work. -
Roll the first snake:
Take a large handful of clay and knead it until soft. Roll it back and forth on the table to create a long, even ‘snake’ or log. Aim for a thickness of about 3/4 inch to 1 inch for a chunky look. -
Form the smallest arch:
Take your clay log and bend it into a tight U-shape to form the center arch. Cut the ends straight across with your craft knife so it stands flat. -
Create sequential arches:
Roll more clay logs of the exact same thickness. Wrap the next log gently over the first arch to measure the length, then cut the bottom ends so they align perfectly with the first one. -
Build the full stack:
Continue rolling and measuring until you have five distinct arches. It is crucial to ensure they fit snugly against each other without being stuck together yet. -
Flatten the front:
Once all five arches are formed and nested, lay a flat board or book gently on top of them to ensure the front and back faces are relatively flat and uniform. -
Wait for drying:
Ideally, separate the arches slightly so air can circulate. Let them dry completely for 24-48 hours. I find flipping them over halfway through helps them dry evenly and prevents warping.
Step 2: Refining and Painting
-
Sand imperfections:
Once bone dry, use fine-grit sandpaper to smooth out any rough bumps, fingerprints, or sharp edges on the ends of the arches. Wipe away the dust with a barely damp cloth. -
Mix the color palette:
Prepare your acrylic paints. You want an earthy gradient: a deep terracotta for the outer and inner arches, a warm beige, a creamy off-white, and a soft tan. -
Paint the outer arch:
Apply the darkest terracotta shade to the largest, outermost arch. Use a sponge for a textured look or a brush for a smoother finish. Painting in thin layers prevents brush strokes. -
Paint intermediate layers:
Move inward with your lighter shades. Paint the second arch a warm beige, the third arch a bright cream or white, and the fourth arch a soft tan. -
Paint the center arch:
Return to the terracotta shade (or a slightly lighter variant of it) for the smallest, central arch to balance the color scheme. -
Dry and assemble:
Allow the paint to fully dry. Stack them back together to check the fit. If you want a permanent sculpture, apply a strong craft glue between the layers and clamping them gently until set. -
Seal the piece:
Finish with a matte spray sealant to protect the paint while maintaining that natural, pottery-like texture.
Fixing Cracks
If small cracks appear during drying, mix a tiny bit of fresh clay with water to make a paste (slip). Fill the crack, smooth it with your finger, and let it dry again.
Use Textured Paint
Mix baking soda into your acrylic paint before applying (1 part soda to 2 parts paint). This creates a faux-ceramic, gritty texture that looks high-end.
Now you have a stunning, modern decor piece ready to anchor a bookshelf vignette or be wrapped up as a unique gift
Moon Phase Wall Hanging
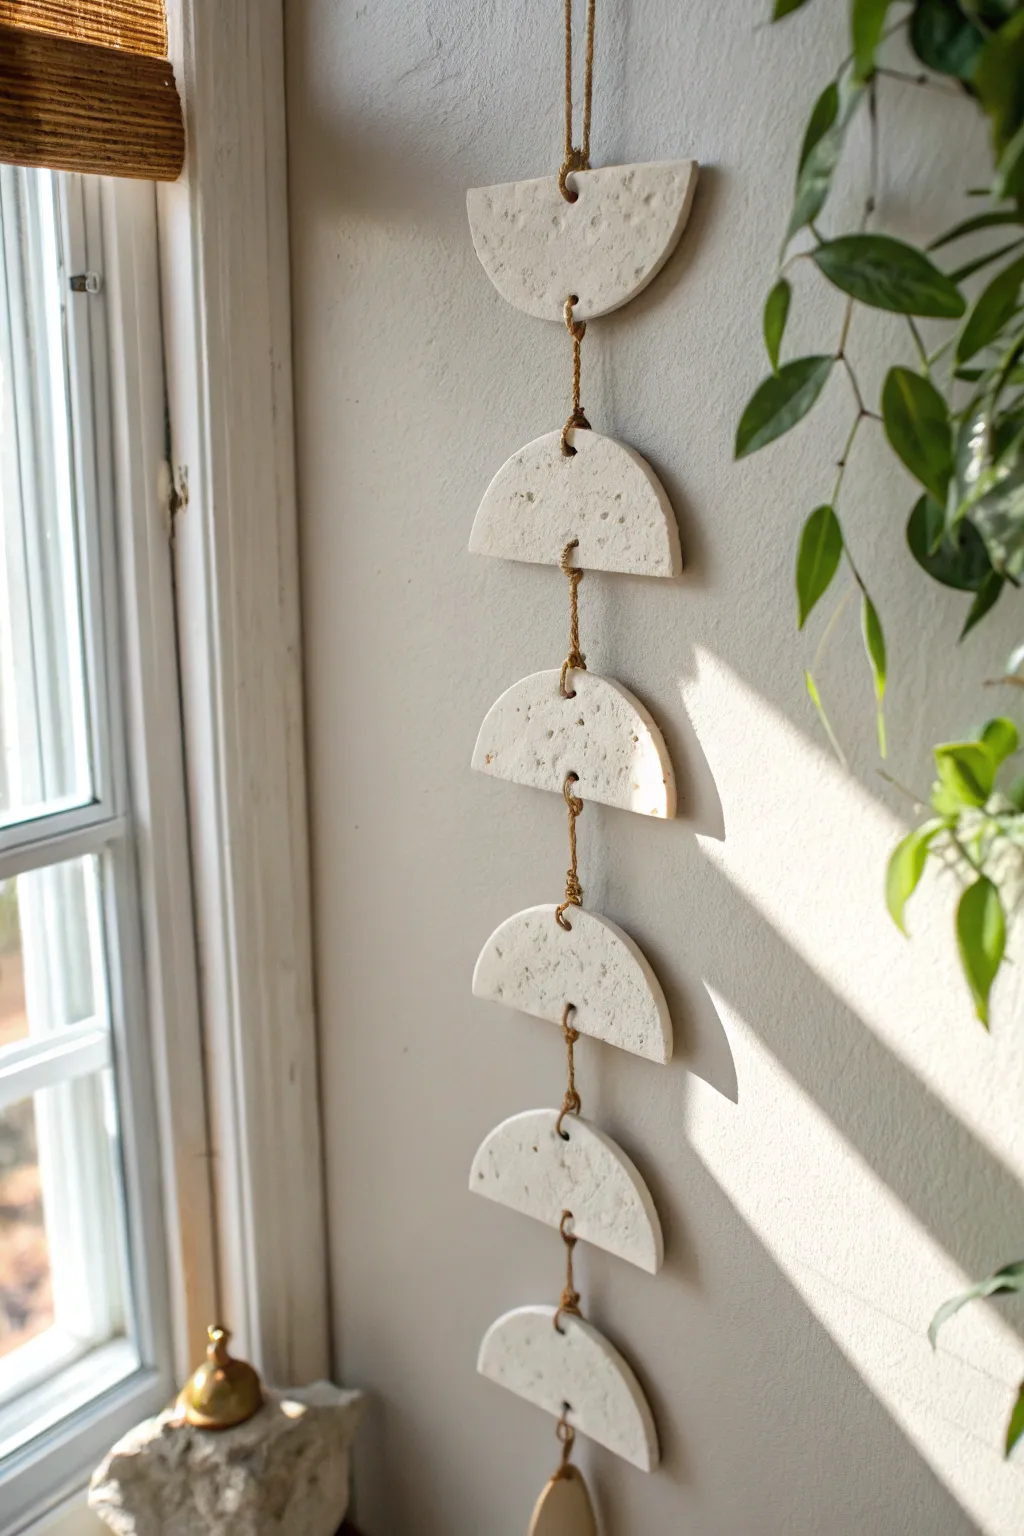
This minimalist wall hanging brings a calming, earthy texture to any room with its cascading series of speckled clay semi-circles. It is a deceptively simple project that makes for a sophisticated and modern handmade gift.
Step-by-Step
Materials
- White air-dry clay or polymer clay (approx. 1lb)
- Rolling pin
- Circle cookie cutter (approx. 3-4 inches diameter) or a drinking glass
- Sharp craft knife or clay slicer
- Coarse sand, coffee grounds, or black pepper (for speckling)
- Jute twine or hemp cord
- Straw or skewer (for poking holes)
- Fine-grit sandpaper
- Parchment paper or silicone mat
- Small bowl of water
Step 1: Preparing the Clay
-
Condition the clay:
Start by kneading your white clay in your hands until it becomes soft, pliable, and warm, which helps prevent cracks later on. -
Add texture:
To achieve the organic, speckled stone look seen in the photo, knead a small pinch of coarse sand, dried coffee grounds, or cracked pepper into the white clay until distributed evenly. -
Roll it out:
Place the clay on a sheet of parchment paper or a silicone mat. Roll it out to an even thickness of about 1/4 inch, ensuring it isn’t too thin or the pieces might be brittle.
Smooth Surface Trick
If your clay surface looks fingerprinted or bumpy before drying, lightly roll a damp sponge over the surface. It acts like a mini-eraser for imperfections.
Step 2: Shaping the Moons
-
Cut circles:
Using your cookie cutter or the rim of a glass, press down firmly into the clay to cut out several full circles. For the length shown in the image, you will need to cut enough circles to create at least 6-7 half-moons. -
Create semi-circles:
Take your sharp craft knife and carefully slice each circle exactly in half to create two semi-circles. I find using a ruler as a guide helps keep this line perfectly straight. -
Smooth the edges:
Dip your finger in a little water and gently run it along the cut edges of each semi-circle to smooth down any roughness or sharp corners. -
Pierce holes:
Using a straw or skewer, poke two holes in each semi-circle: one in the center of the curved top edge, and one directly opposite in the center of the flat bottom edge. Make sure the holes are large enough for your twine to pass through. -
Final inspection:
Check that your top and bottom holes align vertically so the sculpted pieces will hang straight, then let them dry completely according to package instructions (usually 24-48 hours).
Step 3: Assembly
-
Sand for finish:
Once fully dry, lightly sand the edges of your clay pieces with fine-grit sandpaper to remove any remaining jagged bits for a polished look. -
Cut the cord:
Cut a long piece of jute twine, roughly 4 feet long to be safe; you can always trim the excess later. -
Start at the bottom:
Tie a secure double knot at the very end of your twine. Thread the first clay semi-circle onto the twine through the bottom flat-edge hole, resting it on the knot. -
Secure the piece:
Thread the twine up through the top curved hole of the same piece. Tie a knot roughly 1-2 inches above the top of this first piece to act as the stopper for the next one. -
Add sequential pieces:
Thread the next semi-circle on, entering through the bottom hole and exiting through the top. It should rest on the knot you just created. -
Repeat the pattern:
Continue tying knots at equal intervals (about 1.5 to 2 inches) and threading on the remaining clay pieces until your chain reaches the desired length. -
Create the hanger:
Once the final top piece is secured, tie a loop at the remaining top end of the twine for easy hanging on a wall hook or nail.
Add a Bell
Tie a small brass bell or a crystal prism to the very bottom knot below the last clay piece. It adds a lovely sound or light refraction when near a window.
Hang your new creation near a window where the sunlight can highlight the natural texture of the clay
Book Page Holder Thumb Stone
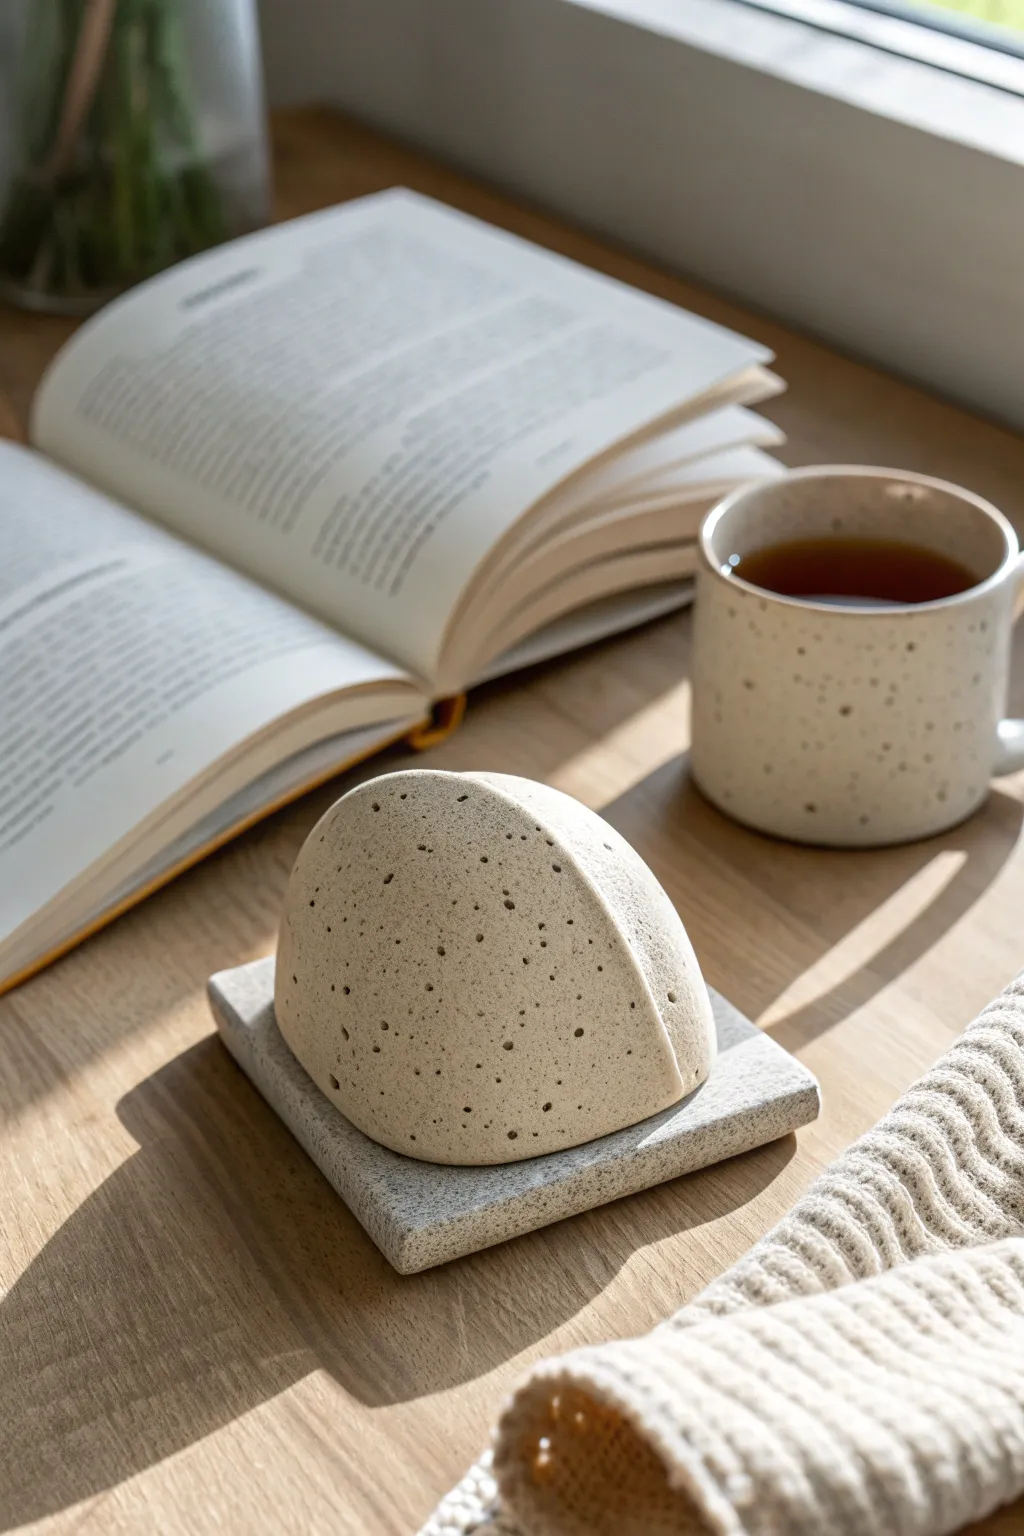
This minimalist, nature-inspired reading accessory features a smooth, domed shape with a clever groove to hold your book open effortlessly. Paired with a matching square base, the speckled texture gives it a modern, organic ceramic look without needing a kiln.
How-To Guide
Materials
- Speckled polymer clay (e.g., Granite or stone effect)
- Smooth work surface (ceramic tile or glass)
- Acrylic roller
- Circle cutter (approx. 3-inch diameter)
- Flexible tissue blade or rigid clay slicer
- Square cookie cutter (approx. 3.5 inches) or ruler and craft knife
- Sandpaper (400 to 1000 grit)
- Oven for baking
- Matte spray varnish (optional)
Step 1: Shaping the Book Weight
-
Condition the clay:
Begin by taking a substantial chunk of your speckled polymer clay. Warm natural oils from your hands will help soften it as you knead, making it pliable and preventing cracks later on. -
Form a ball:
Roll the conditioned clay into a smooth, tight sphere between your palms. Aim for a ball slightly larger than a golf ball to ensure it has enough weight to hold pages down. -
Create the dome shape:
Place the ball on your work surface. Gently press it down until the bottom flattens and the top forms a smooth, rounded mound. It should look like a halved egg or a small hill. -
Refine the curve:
Use your fingers to smooth out the sides, ensuring the slope is even all around. I find gently cupping the clay helps create that perfect organic curve. -
Cut the page groove:
Take your rigid slicing blade. Align it directly over the center of the dome. Press straight down firmly to slice the dome completely in half. -
Separate the halves:
Carefully pull the two halves apart. You now have two identical shapes that look like sliced citrus wedges. -
Widen the gap:
This step is crucial for functionality. You need to slice a thin sliver of clay off the vertical face of *one* of the halves. This creates the necessary gap for the book pages to rest in when you reassemble it later. -
Rejoin the halves:
Press the two vertical flat sides back together. Because you removed that sliver, the dome shape will now look slightly narrower, but the join needs to be sealed. Smooth the seam firmly with your thumb so it disappears completely on the rounded surface. -
Create the thumb hollow (Optional):
If you want this to function as a thumb holder rather than just a weight, gently press your thumb into the center of the flat bottom to create a slight indentation. -
Final smooth:
Rub your finger lightly over the clay to remove any fingerprints. A drop of baby oil can help smooth it to a glass-like finish before baking.
Seamless Merging
When rejoining the two halves of the dome, score the flat sides with a needle tool and add a tiny dab of liquid polymer clay ‘glue’ to ensure a bond that won’t crack.
Step 2: Making the Square Base
-
Roll the slab:
Roll out a fresh portion of the speckled clay until it is about 1/4 inch thick. Use guides or playing cards stack on either side to ensure an even thickness. -
Cut the square:
Using a square cutter or a ruler and craft knife, cut out a clean square base. This will serve as the resting spot or coaster for your stone. -
Soften edges:
Lightly tap the sides of the square with your finger to round off the sharp cut edges, mimicking the stone-like aesthetic of the dome. -
Texture match:
Double-check that the finish on the square matches the smooth texture of the dome so they look like a cohesive set.
Step 3: Baking and Finishing
-
Bake everything:
Place both the dome and the square tile on a baking sheet lined with parchment paper. Bake according to the specific temperature and time instructions on your package of polymer clay. -
Cool down:
Let the pieces cool completely in the oven with the door open. This prevents thermal shock and ensures maximize durability. -
Sand for stone effect:
Once cool, wet sand the pieces starting with 400 grit and moving to 1000 grit. This reveals the beautiful speckles and makes the surface feel incredibly soft to the touch. -
Seal (Optional):
If you prefer a natural stone finish, leave it raw. For protection, apply a light coat of matte spray varnish.
Add a Cord Hole
Before baking, pierce a horizontal hole through the top of the dome. After baking, thread a leather cord through it so the stone can double as a bookmark.
Place this handsome stone on your nightstand for a functional piece of décor that encourages your reading habit