There’s something weirdly magical about a handmade clay bank—the moment you cut that coin slot, it suddenly becomes a real little keeper of goals. Here are my favorite creative clay bank ideas that go way beyond the basic pig, while still staying totally doable at home.
Classic Round-Belly Pig Bank
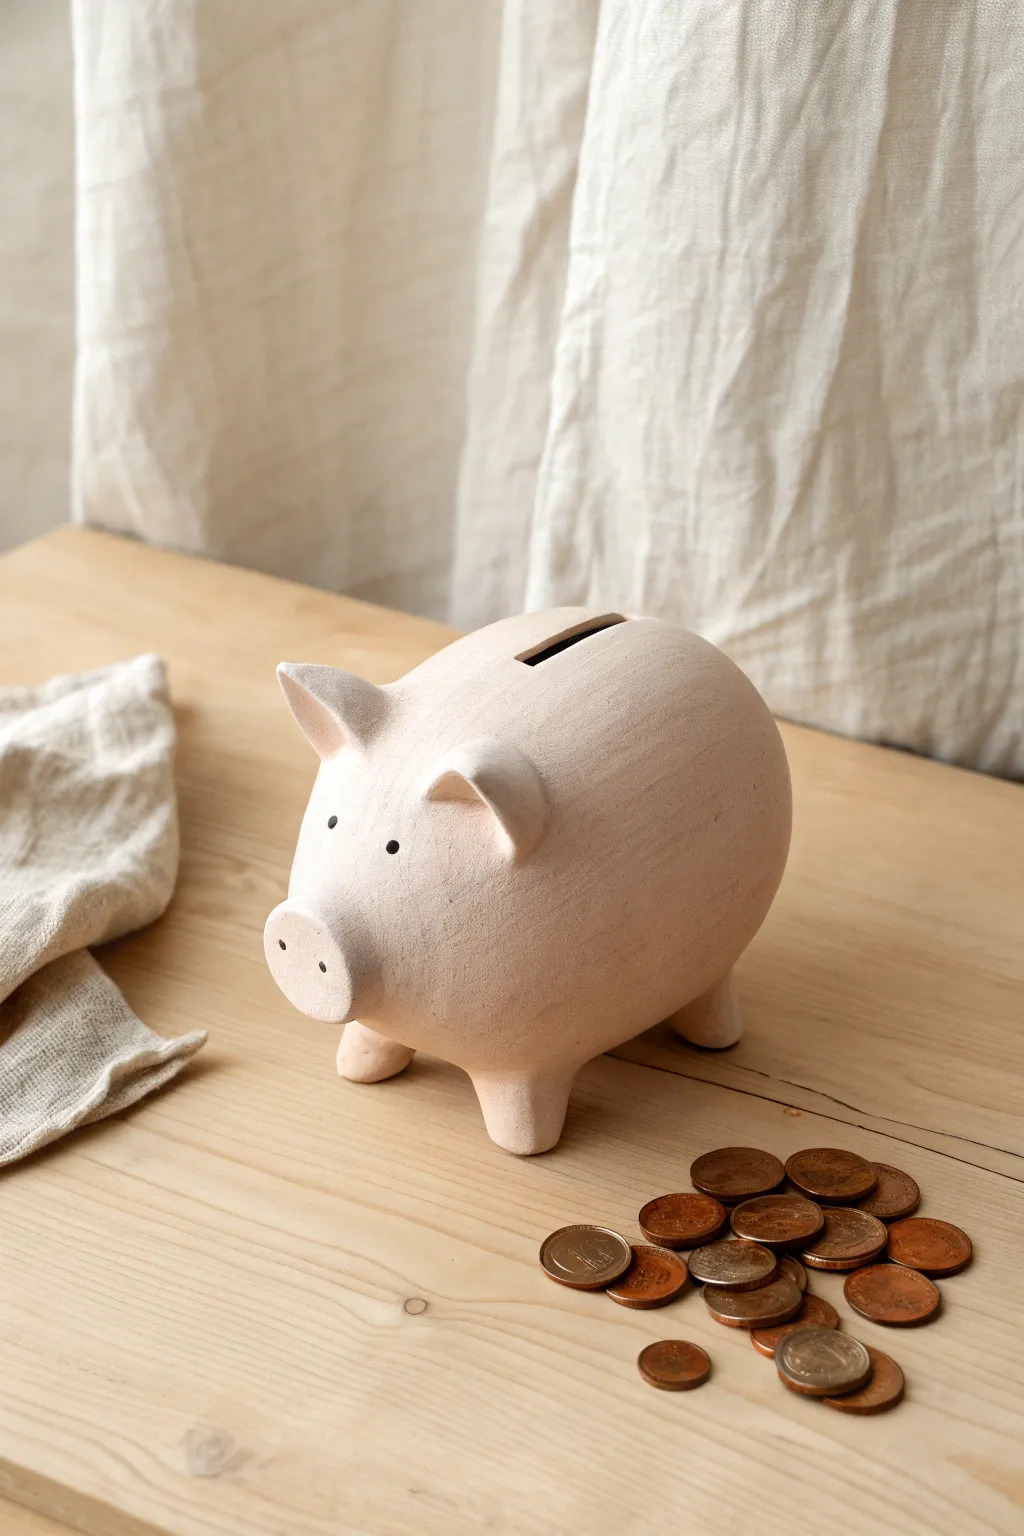
Bring a touch of modern charm to your savings with this understated, matte-finish piggy bank project. Its soft, sandy texture and simple features create a timeless piece that looks beautiful on any shelf while keeping your coins safe.
Detailed Instructions
Materials
- Air-dry clay (stone, ivory, or white color)
- Foil or newspaper (for armature)
- Masking tape
- Rolling pin
- Small sponge
- Clay knife or craft knife
- Needle tool or toothpick
- Water in a small cup
- Black acrylic paint
- Fine detail paintbrush
- Fine-grit sandpaper (optional)
- Matte sealant spray
Step 1: Forming the Body
-
Create the core armature:
To save weight and clay, crumple a large ball of newspaper or aluminum foil into an oval egg shape roughly the size of a grapefruit. This will determine the belly size. -
Secure the form:
Wrap masking tape snugly around your crumpled core to smooth out the lumps and secure the shape. It should feel firm, not squishy. -
Roll out the clay:
Roll your air-dry clay on a flat surface to about a 1/4 inch thickness. You want an even sheet large enough to cover your armature. -
Wrap the body:
Drape the clay sheet over the taped core. Gently smooth it down around the egg shape, cutting away excess clay with your knife where it overlaps. Use a little water on your finger to blend the seams until they vanish.
Weight & Balance
Before the clay hardens, tap the pig firmly on the table. This flattens the feet bottoms slightly, ensuring it won’t wobble when filled with coins.
Step 2: Adding Features
-
Shape the snout:
Roll a small ball of clay and flatten it slightly into a thick disk. Score the back of the disk and the front of the pig’s face (scratching cross-hatch marks), add a dab of water, and press the snout firmly onto the narrower end of the body. -
Blend the snout:
Using a modeling tool or your thumb, drag clay from the edge of the snout back onto the face to create a seamless transition, ensuring it won’t pop off later. -
Form the legs:
Create four identical cylinders of clay about 1.5 inches tall. These should be sturdy and slightly tapered at the bottom. -
Attach the legs:
Flip the body gently. Score and slip (add water) to the tops of the legs and the belly where they will attach. Press them on firmly. Stand the pig up and gently press down to ensure it stands level. -
Create the ears:
Cut two small triangles from your rolled clay. Gently curve them to give them a natural cup shape. Attach them to the top of the head using the score-and-slip method, blending the base of the ears into the skull.
Cracking Issues?
If hairline cracks appear while drying, mix a tiny bit of fresh clay with water to make a paste (slip) and fill the cracks. Smooth over with a damp finger.
Step 3: Refining and Drying
-
Cut the coin slot:
While the clay is still workable but firm, use your craft knife to carefully cut a rectangular slot along the top of the pig’s back. Make it wide enough for your thickest coin. -
Add facial details:
Use the rounded end of a paintbrush handle or a detail tool to press two small indents into the flat front of the snout for nostrils. -
Texture the surface:
To get that rustic, matte look seen in the photo, dampen a small sponge and gently dab the entire surface of the pig. This removes fingerprints and adds a subtle, sandy texture. -
Initial drying phase:
Let the pig dry slowly for 24-48 hours away from direct heat or sunlight. Rotate it occasionally so the bottom dries evenly.
Step 4: Finishing Touches
-
Smooth imperfections:
Once bone dry, check for any sharp burrs or rough spots. I usually run a piece of fine-grit sandpaper lightly over the slot edges and feet bottoms. -
Paint the eyes:
Dip the tip of a fine paintbrush or a toothpick into black acrylic paint. Dot two small, wide-set eyes onto the face. Keep them small for that minimalist aesthetic. -
Paint the nostrils:
Add a tiny dot of black inside the nostril indentations you made earlier to give them depth. -
Seal the piece:
Since air-dry clay is porous, finish with strictly matte spray varnish. Avoid glossy sprays if you want to maintain the natural, earthen look of the original project.
Now you have a charming, handmade vessel ready to hold your savings for a rainy day


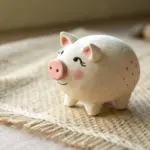
Pinch-Pot Pig Bank With a Sweet Face
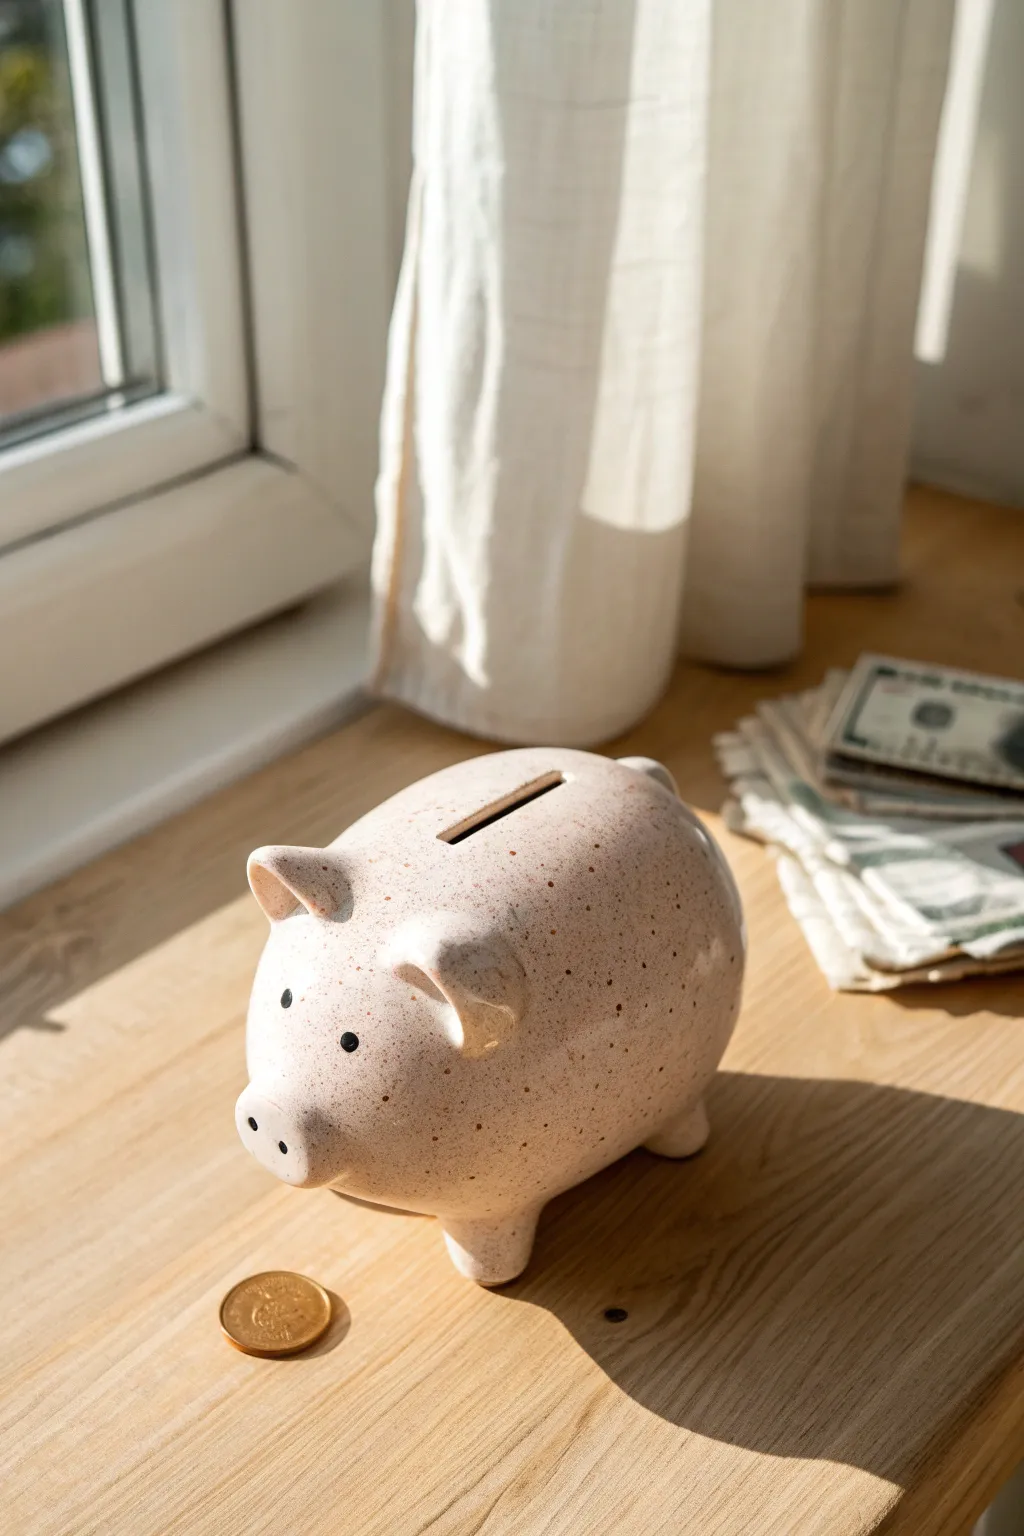
This charming coin bank combines the classic appeal of a piggy bank with a modern, minimalist ceramic aesthetic. Its soft, speckled pink glaze and sweet, simple face make it a timeless keepsake perfect for any windowsill.
Step-by-Step Guide
Materials
- White stoneware or earthenware clay
- Speckled glaze (cone 06 or cone 6, depending on your kiln)
- Black underglaze
- Small fine-point paintbrush
- Loop tool (for hollowing, if solid building)
- Fettling knife
- Needle tool
- Scoring tool (or an old toothbrush)
- Slip (clay mixed with water)
- Sponge
- Wooden modeling tool
Step 1: Forming the Body
-
Make the pinch pots:
Start by dividing a large ball of clay into two equal halves. Form each half into a smooth ball, then stick your thumb into the center and pinch the walls evenly to create two matching bowl shapes. -
Score and slip:
Take your scoring tool and rough up the rim of each bowl. Apply a generous amount of slip to these roughed-up areas to act as glue. -
Join the halves:
Press the two bowl rims together firmly to entrap a pocket of air. This creates the hollow body of your pig. There may be a seam, but don’t worry about that yet. -
Smooth the seam:
Using a wooden tool or your thumb, drag clay across the seam to knit the two halves together. Smooth the entire surface with a rib tool so it becomes a perfect, seamless egg shape. -
Paddle into shape:
Gently tap the egg shape on your work surface to flatten the bottom slightly so it won’t roll away. You can also gently paddle the sides to make the pig look a bit plumper.
Step 2: Adding Features
-
Create the legs:
Roll four small, equal-sized balls of clay. Roughly shape them into short cones. Score the bottom of the pig body and the tops of these cones, apply slip, and attach them firmly. -
Blend the legs:
I find using the rounded end of a wooden tool works best here to blend the clay of the legs seamlessly into the body. Check that the pig stands level. -
Form the snout:
Roll a small ball of clay and flatten it slightly into a disc. Attach this to the front of the pig using the score-and-slip method. Smooth the edges so it transitions gently into the face. -
Add nostrils:
Use the back of a small paintbrush or a rounded tool to press two indentations into the snout for nostrils. Keep them symmetrical for that sweet expression. -
sculpt the ears:
Shape two small triangles of clay. Gently curve them to look like pig ears. Attach them near the top of the head, blending the clay downward at the back of the ear for a strong bond. -
Cut the slot:
Once the clay has stiffened slightly to ‘leather hard,’ use a fettling knife to carefully cut a rectangular coin slot in the top. Smooth the raw edges with a damp sponge. -
Refine the surface:
Go over the entire piece with a slightly damp sponge to remove any fingerprints or rough tool marks. This is crucial for a professional-looking glaze finish.
Air Pressure Tip
Before closing the pinch pots fully, it helps to poke a tiny pinhole somewhere hidden. This allows expanding hot air to escape during drying/firing so your pig doesn’t crack.
Step 3: Finishing and firing
-
Bisque fire:
Allow the pig to dry completely—this can take up to a week. Fire it in the kiln to bisque temperature (usually cone 04). -
Apply the eyes:
Using a very fine brush and black underglaze, paint two small dots for eyes just above the snout. If you prefer, add tiny eyebrows, but simple dots keep the look modern. -
Glaze application:
Apply your chosen speckled glaze. If brushing, apply three even coats, letting each dry in between. Be careful not to fill in the nostrils or coin slot with too much glaze. -
Wipe the feet:
Use a wet sponge to wipe all glaze off the very bottom of the four feet. This prevents the pig from fusing to the kiln shelf during firing. -
Final smooth:
Check for any drips or rough patches in your glaze application and smooth them out with your finger. -
Glaze fire:
Fire the pig a second time to the temperature required by your specific glaze (often cone 6 for stoneware). Let the kiln cool completely before retrieving your new bank.
Make it a stopper
Instead of a sealed bank, cut a larger hole in the belly before firing. Purchase a rubber stopper online and size the hole to fit it, so you can access money without breaking the pig.
Start saving your coins in your adorable new handmade creation


Minimal Modern Pig Bank With Clean Lines
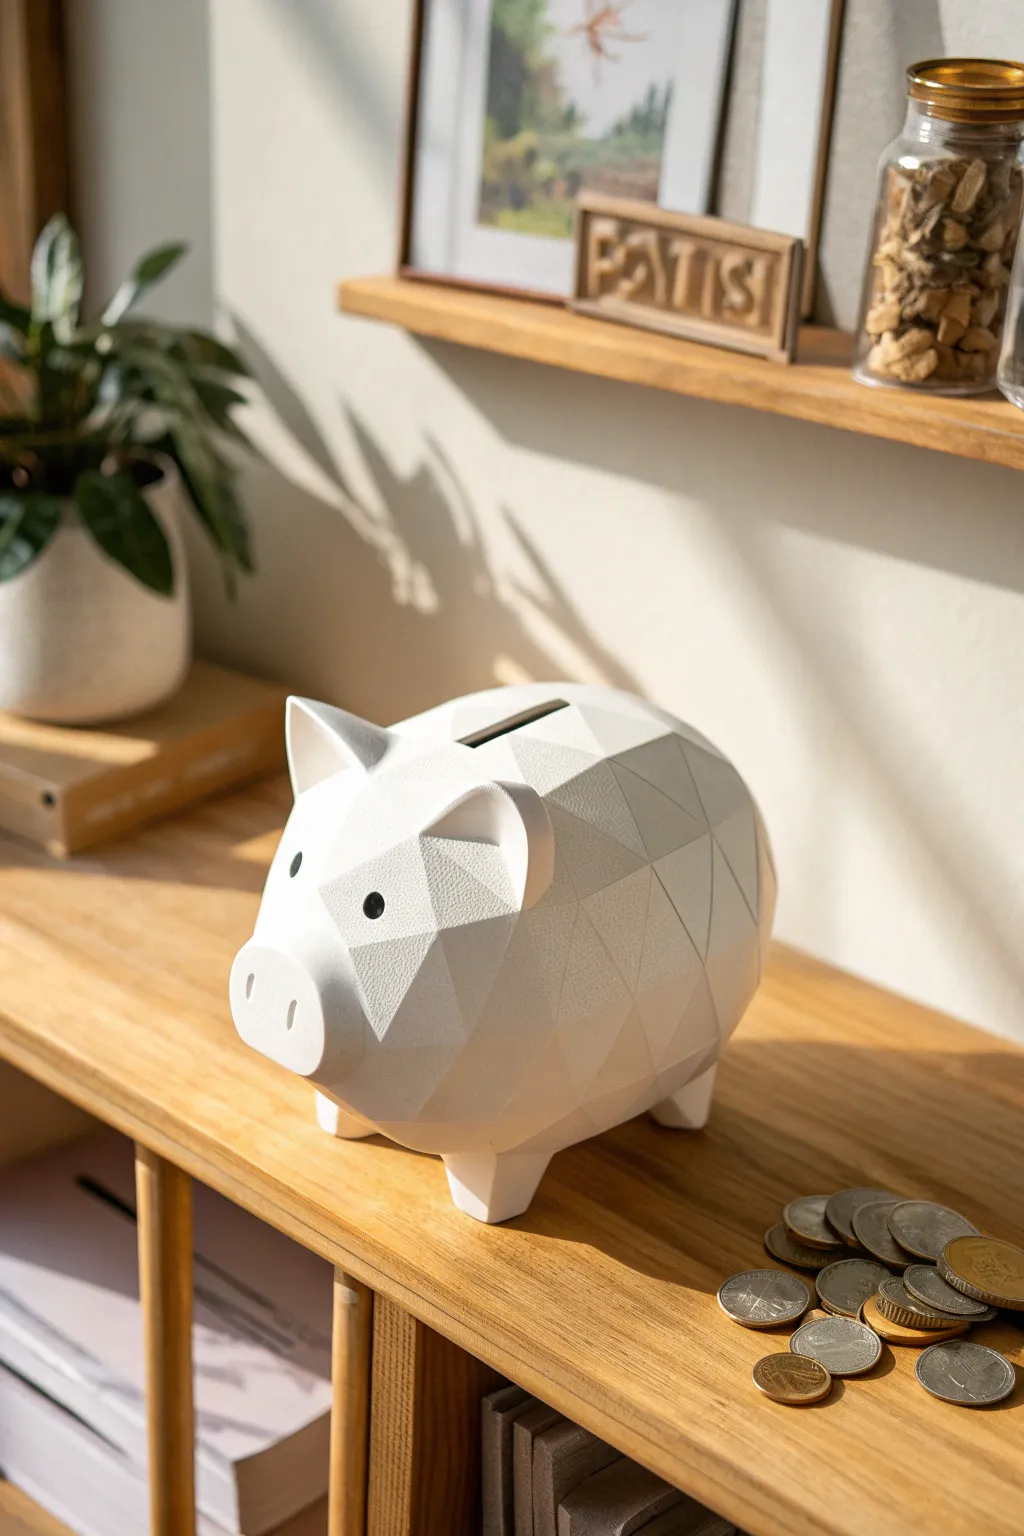
This project transforms the classic piggy bank into a modern art piece featuring a striking low-poly design. The clean white finish and sharp geometric facets create a sophisticated look that fits perfectly in contemporary minimalist decor.
How-To Guide
Materials
- High-quality air-dry clay (white) or polymer clay
- Rolling pin
- Sharp craft knife or scalpel
- Ruler
- Cardstock (for templates)
- Clay sculpting tools (smoothing tool, needle tool)
- Fine-grit sandpaper (220 and 400 grit)
- White acrylic gesso or primer
- Matte white acrylic paint
- Soft synthetic paintbrush
- Water and sponge
- Small drill bit (optional for coin slot)
Step 1: Preparation & Base Form
-
Create the structural core:
Start by forming a solid oval shape using aluminum foil tightly compressed into a ball. This will serve as the armature, saving clay and reducing weight. Aim for a shape roughly the size of a small melon. -
Condition the clay:
Knead your clay thoroughly until it is soft, pliable, and free of air bubbles. If using polymer clay, the warmth of your hands is essential here. -
Cover the armature:
Roll out a slab of clay approximately 1/4 inch thick. Drape this over your foil armature, smoothing the seams together to create a seamless, enclosed egg shape. -
Establish the pig silhouette:
While the clay is soft, gently push and pull the form to define the front snout area and the rounded rear. It doesn’t need to be perfect yet, just the general organic mass.
Keep it Sharp
To get ultra-crisp edges between facets, sand your clay against a flat block of wood rather than holding the sandpaper in your hand.
Step 2: Geometric Faceting
-
Mark geometric guidelines:
Using a needle tool, very lightly sketch a grid of connecting triangles across the body. These lines will guide your cuts for the low-poly look. -
Apply stiff clay slabs:
Instead of carving away, I find it easier to add geometry. Cut small triangles of clay and press them onto the surface to build up the sharp planes, blending the edges meticulously. -
Refine the facets:
Use a straight-edged modeling tool or a ruler to flatten each triangle. The goal is to make the surface look like a computer-generated 3D mesh with sharp ridges where the planes meet. -
Sculpt the snout:
Form a flat projecting cylinder for the nose. Flatten the front face completely and use a small circular tool to press in two distinct nostrils. -
Construct the ears:
Cut two thick triangles for ears. Bevel the edges to keep the geometric theme, attach them securely to the head, and blend the seams so they emerge naturally from the faceted skull. -
Add supportive legs:
Create four identical trapezoidal prisms for the legs. Attach them to the underside, ensuring the pig stands perfectly level on a flat surface. -
Carve the coin slot:
While the clay is leather-hard (firm but not dry), carefully cut a rectangular slot in the top center of the back. Ensure it is wide enough for the thickest coin you intend to save.
Texture Twist
Before the clay dries, press a piece of coarse linen or canvas onto just a few random facets to create a subtle textural contrast.
Step 3: Finishing Touches
-
Initial smoothing:
Dip your finger or a smoothing tool in a little water (or oil for polymer) and run it over the flat planes to remove fingerprints, being careful not to round over your crisp edges. -
Let it cure:
Allow the piece to dry completely. For air-dry clay, this may take 24-48 hours. If using polymer, bake according to the manufacturer’s temperature instructions. -
Sanding the planes:
Once fully cured, use 220-grit sandpaper to sharpen the geometric ridges. Sand each triangle flat. Follow up with 400-grit for a silky smooth finish. -
Create the eyes:
Drill or carve two small, shallow circular divots for the eyes. This recessed look adds depth without breaking the minimal aesthetic. -
Priming the surface:
Apply a coat of white gesso or primer. This seals the clay and provides a uniform base, making the final white paint look bright and opaque. -
Painting details:
Paint the inside of the eye divots black using a fine brush. This high contrast brings the character to life. -
Final coat:
Apply 2-3 thin layers of matte white acrylic paint to the entire body. The matte finish helps emphasize the shadows created by the faceted geometry. -
Seal (Optional):
If this will be handled often, finish with a spray matte varnish to protect the paint from chipping.
Now you have a stylish guardian for your savings that proves piggy banks can be high art


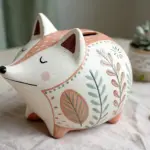
Sleepy Pig Bank With Closed Eyes
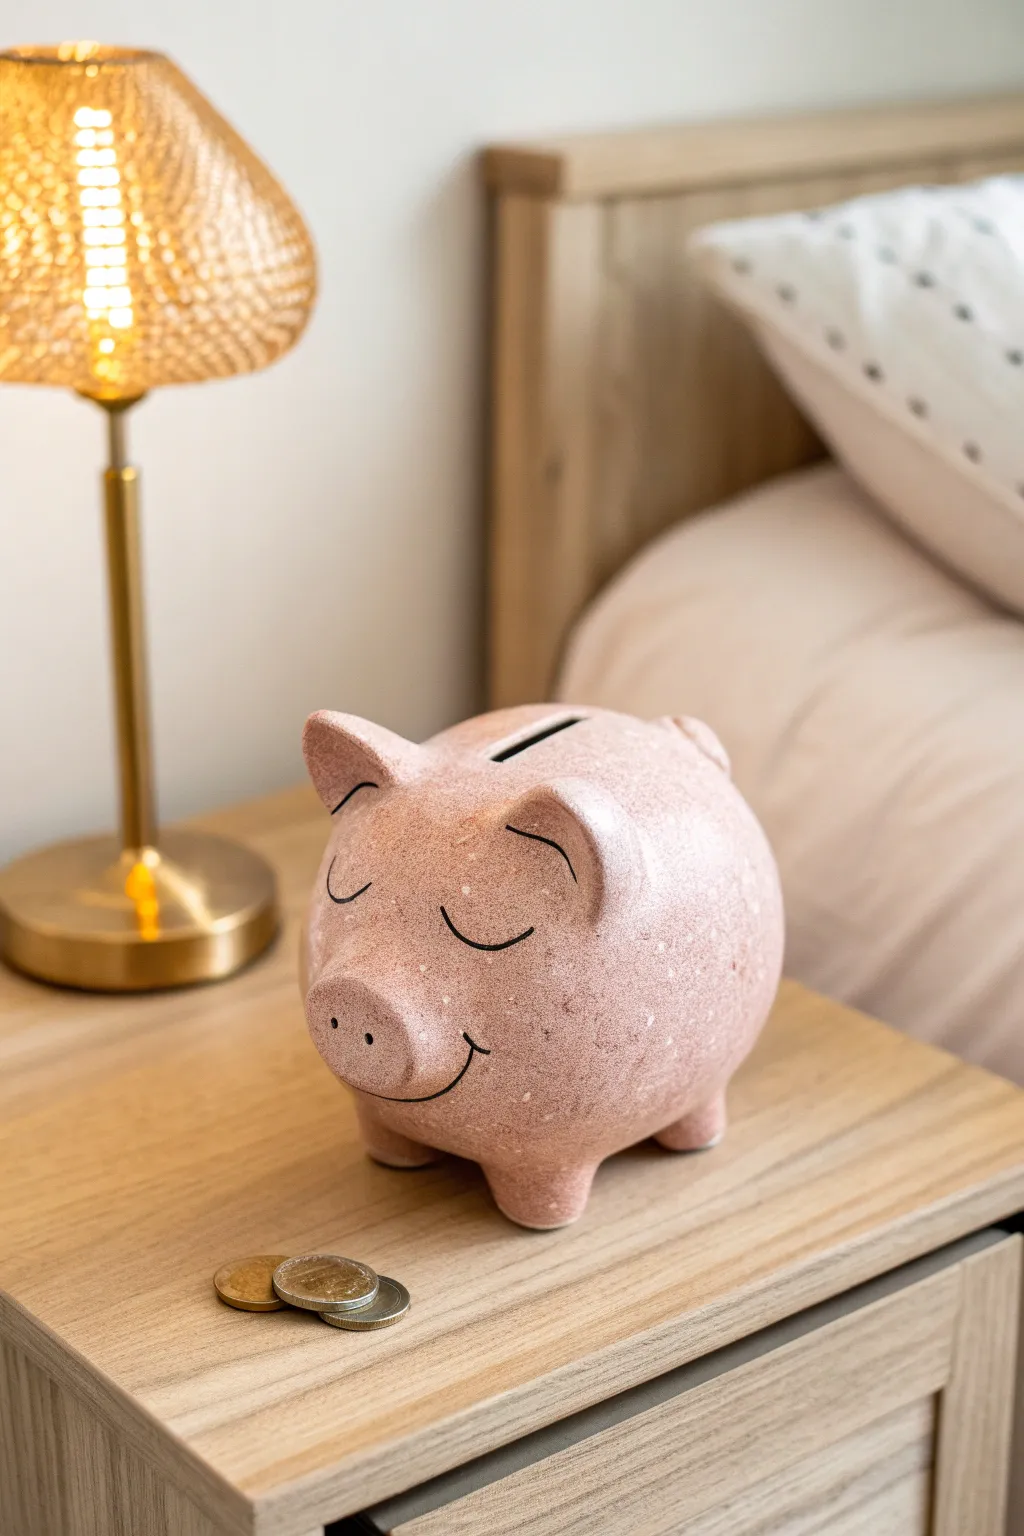
This adorable project captures the serene feeling of a good night’s sleep with a minimalist, stylized pig design. Featuring a soft, speckled pink glaze and a simply drawn sleepy face, it makes for a charming bedside companion.
Detailed Instructions
Materials
- White stoneware clay or air-dry clay
- Rolling pin
- Rubber rib or kidney tool
- Fettling knife
- Needle tool
- Slip and scoring tool (if using ceramic clay)
- Two wooden spheres or small bowls (for shaping molds)
- Pink tonal glaze or acrylic paint (light salmon/blush)
- Toothbrush (for speckling)
- White and brown acrylic paint (for speckling if not glazing)
- Fine-point black permanent marker or black underglaze pencil
- Sponge and water
- Clear sealant (if using air-dry clay)
Step 1: Forming the Body
-
Prepare the Clay:
Begin by wedging your clay thoroughly to remove air bubbles. Roll out a large slab of clay to a uniform thickness of about 1/4 inch. -
Create Hemispheres:
Drape the clay slab over two identical round forms—like small bowls or wooden spheres—to create two half-spheres. Trim the excess clay at the base of the mold. -
Stiffen the Forms:
Allow the clay to dry slightly on the molds until it is leather-hard. It needs to be firm enough to hold its shape without collapsing when you handle it. -
Join the Halves:
Remove the hemispheres from the molds. Score the edges of both halves and apply slip generously. Press them together firmly to create a hollow sphere. -
Smooth the Seam:
Using a rubber rib or a damp sponge, blend the seam line completely so the sphere looks like one continuous piece. I like to take my time here to ensure the surface is perfectly round.
Smoother Seams
When joining the two half-spheres, stick a paddle pop stick or long tool inside the coin slot (after cutting it) to support the seam from the inside while you smooth the outside.
Step 2: Adding Features
-
Shape the Legs:
Roll four small, equal-sized balls of clay. Flatten them slightly into tapered cylinders to form the pig’s feet. -
Attach the Legs:
Score and slip the bottom of the sphere and the tops of the legs. Attach them firmly, blending the clay upwards into the body for a seamless transition. -
Create the Snout:
Form a small oval of clay and flatten the front face. Attach this to the front center of the sphere, smoothing the edges into the face. -
Add Ears and Tail:
Cut two small triangles for ears and a tiny coil for the tail. Attach the ears near the top, curving them slightly forward, and add the tail to the back. -
Cut the Coin Slot:
Carefully use a fettling knife or cutting tool to slice a rectangular coin slot into the very top of the pig’s back. Smooth the rough edges with a damp finger. -
Final Smoothing:
Go over the entire piece with a barely damp sponge to remove any fingerprints or tool marks. Let the piece dry completely.
Cork Stopper
Make your bank reusable by cutting a large hole in the belly before attaching legs. Fit a rubber or cork stopper into this hole so you can retrieve savings without breaking the bank.
Step 3: Decoration & Finish
-
Apply Base Color:
If using ceramic clay, bisque fire first, then apply a matte pink glaze. If using air-dry clay, paint the entire pig with a solid coat of blush pink acrylic paint. -
Create the Speckles:
To achieve the stone-like texture, dilute a small amount of white and light brown paint (or glaze). Dip a toothbrush into the mixture and flick the bristles to splatter fine dots over the pink surface. -
Paint the Face:
Once the base is dry, use a fine tip brush or marker to draw two ‘U’ shapes for closed sleepy eyes and a simple curved line for the smile. -
Detail the Snout:
Don’t forget to add two small dots on the snout for nostrils. Keep these simple to match the minimalist aesthetic. -
Seal or Fire:
For ceramic clay, fire the piece to the glaze temperature. For air-dry clay, apply a matte clear sealant to protect the paint job and give it a finished look.
Now you have a peaceful piggy ready to guard your coins while you sleep

The Complete Guide to Pottery Troubleshooting
Uncover the most common ceramic mistakes—from cracking clay to failed glazes—and learn how to fix them fast.
Terrazzo-Style Pig Bank Finish
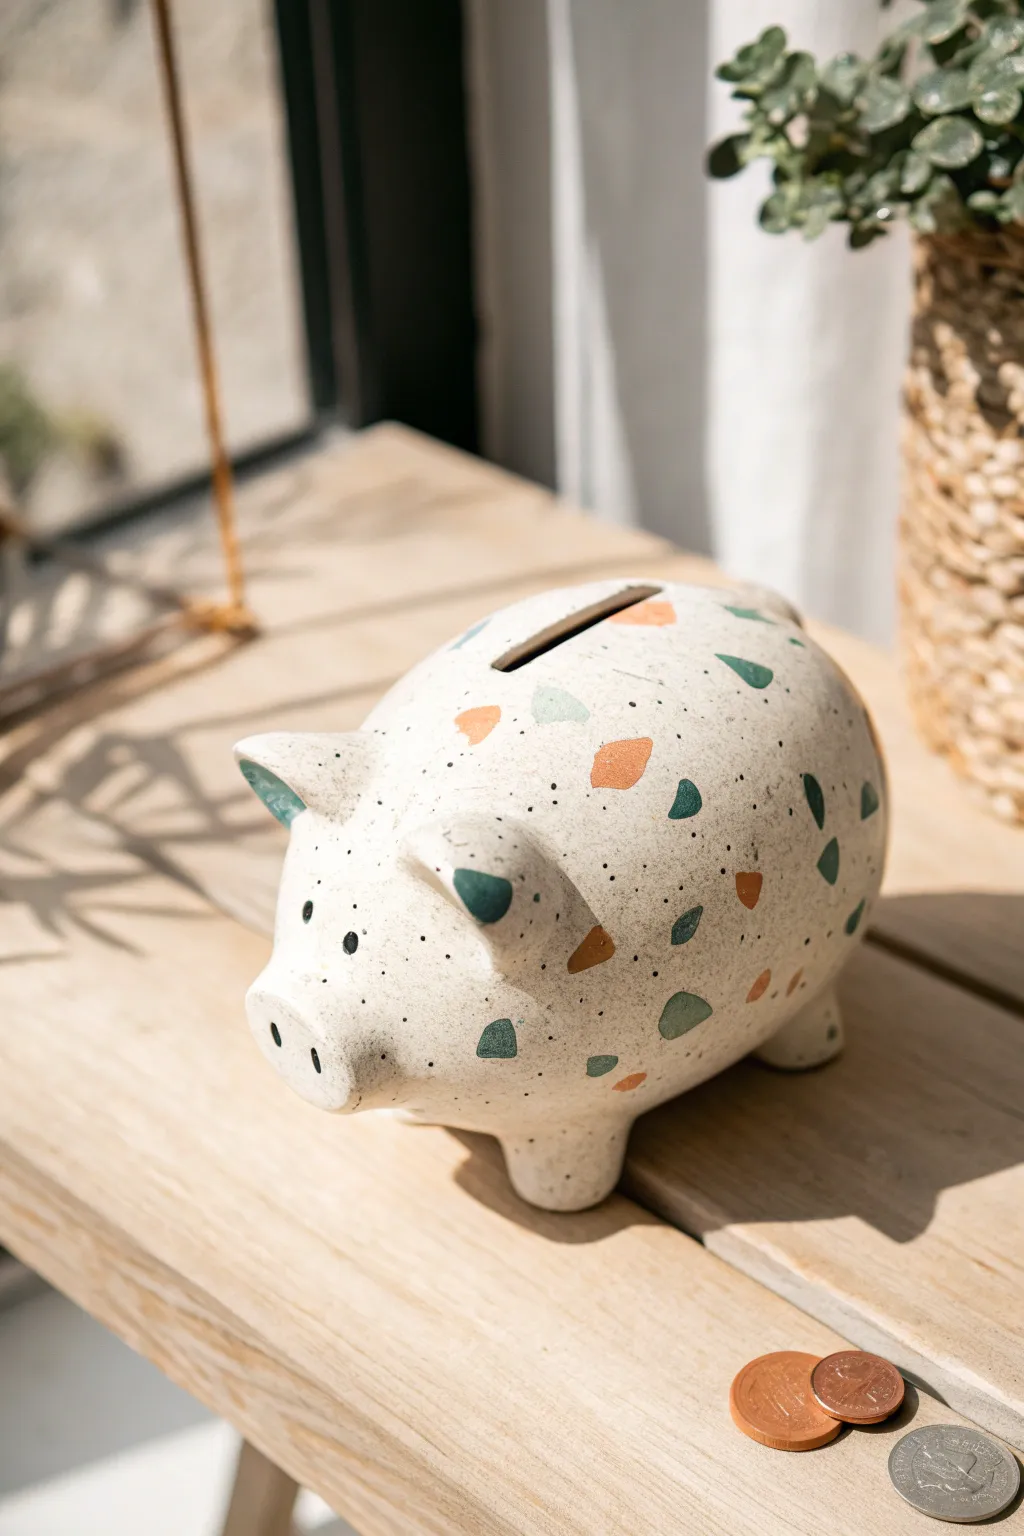
Transform a simple piggy bank into a modern home decor piece with this faux terrazzo finish. Using simple painting techniques, you’ll create a sophisticated speckled look that mimics the texture of polished stone without the weight.
Step-by-Step
Materials
- Unfinished ceramic or white clay piggy bank
- White acrylic paint (matte or satin)
- Black acrylic paint
- Terra cotta or burnt orange acrylic paint
- Teal or sage green acrylic paint
- Dark forest green acrylic paint
- Small flat paintbrushes
- Old toothbrush or stiff bristle brush
- Palette or paper plate
- Water cup and paper towels
- Clear matte spray sealant
Step 1: Base Coat Preparation
-
Clean surface:
Begin by wiping down your piggy bank with a slightly damp cloth to remove any dust or oils. This ensures the paint adheres perfectly to the clay surface. -
Apply base color:
Squeeze out a generous amount of white acrylic paint. Using a medium-sized flat brush, apply an even coat over the entire bank. Don’t forget the underbelly and legs. -
Dry and repeat:
Allow the first coat to dry fully to the touch, usually about 20 minutes. Apply a second coat of white to ensure full opacity so no raw clay shows through. -
Inspect coverage:
Check for any streaks or thin spots. A solid, clean white canvas is crucial for the terrazzo effect to pop, so touch up any uneven areas now.
Step 2: Creating the Terrazzo Pattern
-
Plan your palette:
Prepare your accent colors: burnt orange, teal/sage green, and dark forest green. You want a harmonious mix of earthy and cool tones. -
Paint first shapes:
Start with the burnt orange paint. Using a small flat brush, paint random, irregular geometric shapes scattered across the pig’s body. Think triangles with soft corners or uneven trapezoids. -
Add second color:
Switch to your teal or sage green. Paint similar irregular shapes in the empty spaces. Vary the sizes—some should be about the size of a fingernail, others slightly smaller. -
Add dark accents:
Finally, add the dark forest green shapes. These act as the darkest value in your pattern, grounding the design. Ensure the shapes are well-distributed so no area looks too cluttered or empty. -
Refine edges:
Go back over any shapes that look too translucent with a second layer of paint. Crisp, solid colors look more like authentic stone chips. -
Detail areas:
Don’t forget to wrap a few shapes around the ears, snout, and legs. Painting over curves makes the pattern feel continuous and realistic.
Splatter Control
If the toothbrush splatter feels too risky, put on a disposable glove and flick the bristles inside a large cardboard box to contain the mess while you practice your aim.
Step 3: Speckling and Finishing
-
Prepare splatter paint:
Mix a small amount of black paint with a few drops of water. You want an inky consistency that flicks easily but isn’t dripping wet. -
Test splatter:
Dip an old toothbrush into the thinned black paint. Test the splatter on a scrap piece of paper by running your thumb along the bristles. You want fine, mist-like specks, not large blobs. -
Apply speckles:
Hold the toothbrush about 6 inches from the pig. Gently flick the bristles to spray fine black dots over the entire surface. This mimics the grit found in real terrazzo. -
Control density:
Rotate the bank as you splatter to ensure even coverage. I like to add slightly more density around the bottom legs for a weighted look. -
Clean mistakes:
If you get a large accidental blob, quickly dab it gently with a damp q-tip or paper towel corner before it dries. -
Paint eyes and snout:
Using a very fine brush or the end of a paintbrush handle, dot two simple black eyes and two nostrils onto the face. -
Full dry:
Let the entire project sit for several hours or overnight to ensure all thick paint layers are completely cured. -
Seal:
Take the bank to a well-ventilated area. Apply a light coat of clear matte spray sealant to protect the paint from chipping and give it a unified finish.
Gilded Touch
Add a touch of luxury by painting a few of the terrazzo ‘chips’ with metallic gold leaf paint instead of standard matte colors for a high-end variation.
Place your stylish new bank on a shelf and start saving for your next creative adventure
Marbled Pig Bank With Swirly Clay
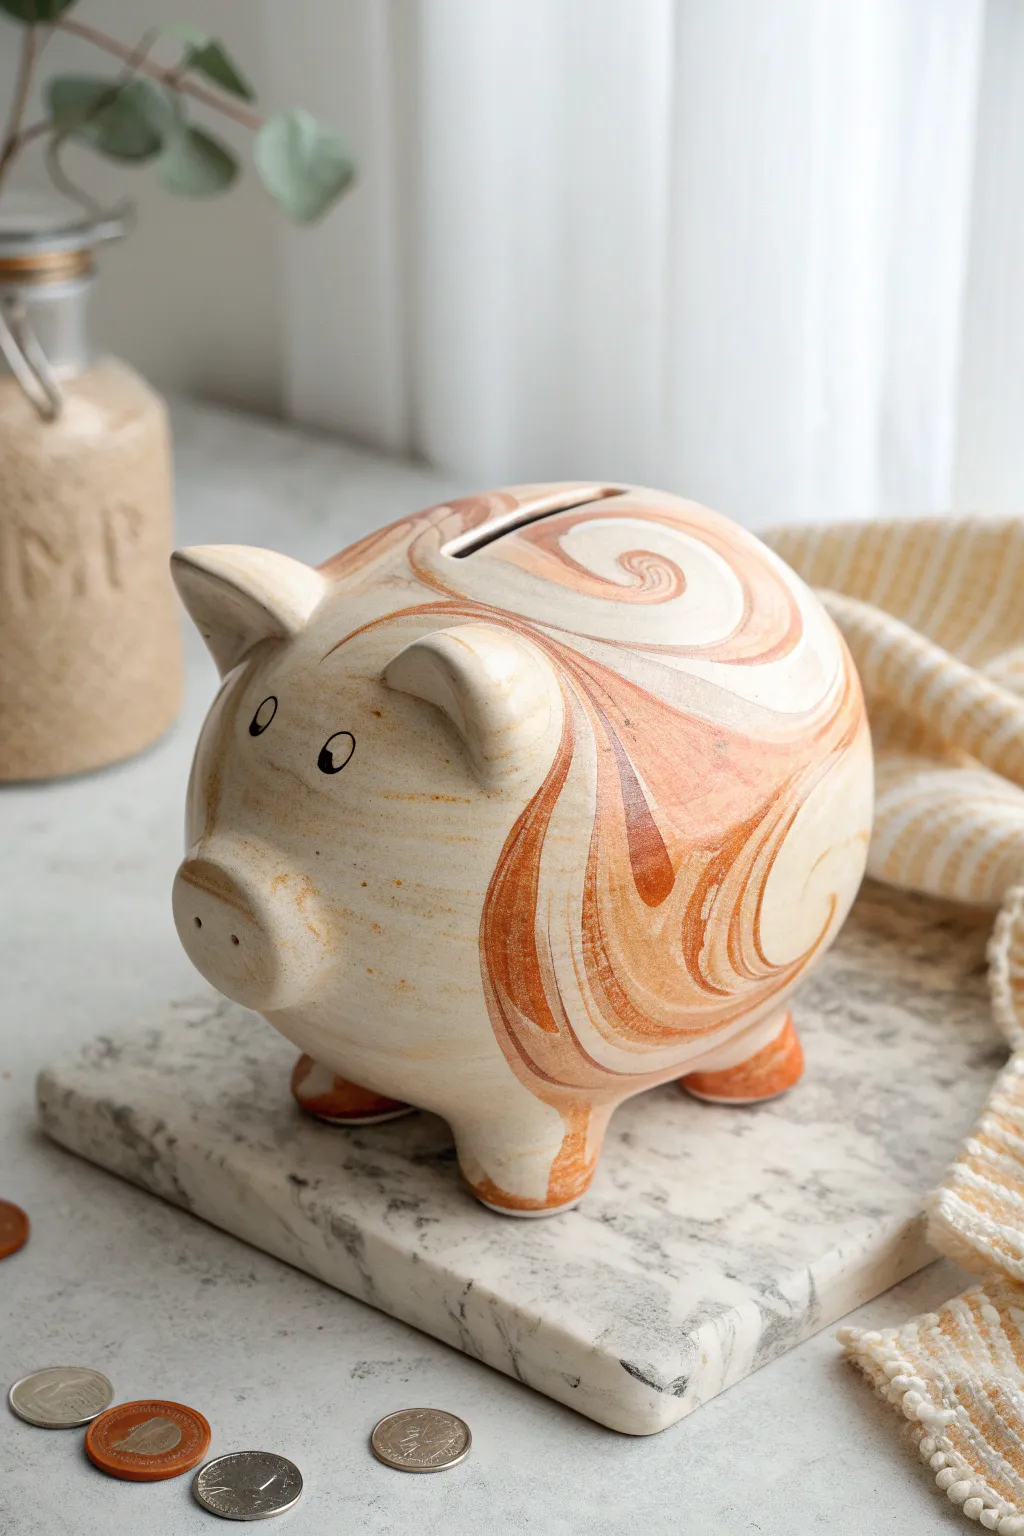
This charming piggy bank captures the warmth of natural pottery with a sophisticated twist, featuring erratic swirls of terracotta and cream clay. The marbling technique creates a unique, organic pattern that mimics high-end ceramic glazing without needing a kiln.
Step-by-Step Tutorial
Materials
- Polymer clay (White or translucent base)
- Polymer clay (Terracotta/Burnt Orange color)
- Polymer clay (Beige/Tan color)
- Large plastic piggy bank armature or aluminum foil core
- Rolling pin or clay pasta machine
- Sculpting tools (needle tool, smoothing tool)
- Black acrylic paint
- Fine detail paintbrush
- Satin or Gloss water-based varnish
- Ceramic or craft knife
- Oven (for curing)
Step 1: Preparing the Marbled Slab
-
Condition the Clay:
Begin by thoroughly conditioning your white, beige, and terracotta polymer clays separately until they are soft and pliable. You’ll need about 50% white, 30% beige, and 20% terracotta for this specific color balance. -
Create Snakes:
Roll each color into several long, snake-like ropes of varying thicknesses. The variety in thickness contributes to a more natural-looking marble effect later. -
Twist and Combine:
gather the ropes into a bundle, twisting them together like a candy cane. Fold the twisted rope in half and twist again. Repeat this twisting and folding process 2-3 times, but stop before the colors blend into a single muddy hue. -
Roll the Slab:
Form the twisted clay into a rough ball and use your rolling pin or pasta machine to flatten it into a sheet about 1/4 inch thick. You should see beautiful, sweeping swirls of color emerging.
Step 2: Forming the Bank Body
-
Prepare the Core:
If using a hollow plastic form, lightly sand it to help the clay adhere. Alternatively, create a solid egg shape using crumpled aluminum foil as a base structure, ensuring it’s tightly packed. -
Cover the Body:
Drape your marbled clay sheet over the core form. Gently smooth the clay down, pressing out any air bubbles trapped underneath. I find working from the top center down towards the belly helps prevent pleating. -
Seam Smoothing:
Trim away excess clay at the bottom and join the seams. Use a smoothing tool or your finger to blend the edges until the seam is invisible and the surface is continuous. -
Cut the Slot:
While the clay is still uncured, identify the top center and carefully cut the coin slot using your craft knife. Widen it slightly, as the gap can shrink a tiny bit during baking.
Muddy Colors?
If your swirls turn into one solid color, you are over-mixing. Stop twisting the clay ropes sooner. The colors should look distinct before you start rolling the sheet flat.
Step 3: Sculpting the Features
-
Shape the Legs:
Roll four short, stout cylinders from leftover marbled clay. Press them firmly onto the bottom of the pig for legs, blending the clay upwards onto the body to secure them. -
Create the Snout:
Form a flattened oval of clay and attach it to the front for the snout. Use a large blending tool to smooth the back edge of the snout into the face so it looks integral, not just stuck on. -
Add Nostrils:
Using a small ball stylus or the end of a paintbrush, press two indentations into the snout to create the nostrils. -
Form the Ears:
Shape two triangles from the marbled clay. Curl them slightly to give them a concave shape and attach them near the top of the head, blending the base of the ears into the body. -
Refine the Surface:
Give the entire pig a final inspection. Smooth out any fingerprints with a drop of baby oil on your finger or a soft brush.
Golden Touch
Mix a small amount of gold mica powder or gold leaf flakes into the translucent clay sections before rolling. This creates subtle metallic veins throughout the marbling.
Step 4: Finishing Touches
-
Bake the Pig:
Place your bank on a baking sheet and cure it in the oven according to your polymer clay package instructions. Usually, this is around 275°F (135°C) for 30 minutes per 1/4 inch of thickness. -
Cool Down:
Let the pig cool completely inside the oven with the door slightly ajar to prevent cracking from thermal shock. -
Paint the Eyes:
Once cool, use a fine detail brush and black acrylic paint to carefully draw two small ovals for eyes. Add tiny arched eyebrows floating above them for expression. -
Seal the Work:
Apply a coat of satin or gloss water-based varnish to the entire piece. This protects the clay and gives it that kiln-fired ceramic sheen seen in the photo.
This sophisticated little bank is now ready to guard your savings in style


What Really Happens Inside the Kiln
Learn how time and temperature work together inside the kiln to transform clay into durable ceramic.
Polka Dot Pig Bank With Color Blocking

This charming piggy bank combines warm, earthy tones with playful patterns for a classic yet modern look. The design features a soft beige base, bold terracotta dots, and delicate white pin-dots for added texture.
Step-by-Step Guide
Materials
- Bisque ceramic piggy bank
- Acrylic paints (Soft Beige/Cream, Terracotta/Rust Brown, White, Black)
- Medium flat paintbrush
- Small round paintbrush
- Dotting tools (various sizes) or ends of brush handles
- Pencil
- Palette or paper plate
- Gloss varnish or sealer
- Water cup and paper towels
Step 1: Base Coat and Blocking
-
Prepare the Surface:
Wipe down your ceramic pig with a slightly damp cloth to remove any dust or debris. Let it dry completely before starting to paint. -
Apply the Base Coat:
Using a medium flat brush, paint the entire body of the pig with a soft beige or cream color. You may need two to three thin coats to get full, opaque coverage, letting each coat dry in between. -
Define the Snout:
Paint the snout area with the terracotta or rust brown paint. Use a steady hand to create a smooth, curved line where the snout meets the face. -
Color Block the Ears:
Paint the front and back of the ears with the same terracotta shade. To add depth, you can mix a tiny bit of white into the paint for the inner ear if desired, though a solid color works perfectly. -
Add Details to Feet:
Carefully paint the very bottom of the feet with a thin line of terracotta paint to simulate hooves or just add a decorative accent.
Perfect Polka Circles
For perfectly round large dots, use a round sponge pouncer. Dip it lightly in paint, dab off the excess on paper, and press straight down.
Step 2: Adding the Polka Dots
-
Plan Your Pattern:
Lightly mark small circles with a pencil where you want your large terracotta dots to go. Stagger them irregularly across the body rather than placing them in perfect rows. -
Paint Large Dots:
Using a small round brush or a large dotting tool, fill in your pencil circles with terracotta paint. These don’t have to be perfect circles; a little irregularity adds to the handmade charm. -
Create White Pin-Dots:
Once the large dots are dry, take a fine dotting tool or the tip of a toothpick dipped in white paint. Create very small dots filling the beige spaces between the large brown dots. -
Detail the Ears:
Add a few medium-sized white dots to the back of the terracotta-painted ears for a cute, contrasting detail. -
Paint the Eyes:
Use the handle end of a paintbrush dipped in black paint to stamp two small eyes above the snout. Once dry, add a tiny white fleck of paint to each eye for a highlight. -
Add Snout Nostrils:
Paint two vertical hash marks or ovals on the snout using black paint and a fine liner brush to create the nostrils.
Uneven Dot Spacing?
If you have awkward gaps between large dots, fill the empty space with a cluster of three tiny white dots instead of just one.
Step 3: Finishing Touches
-
Check for Touch-ups:
Look over your pig for any uneven edges or spots where the base coat shows through too much. Apply small touch-ups as needed. -
Seal the Project:
Once all paint is completely dry (I usually give it a full 24 hours just to be safe), apply a coat of gloss varnish. This gives it that shiny, fired-ceramic look and protects the paint from chipping. -
Dry the Sealer:
Let the varnish cure according to the manufacturer’s instructions before handling or inserting the bottom stopper.
Now you have an adorable, customized bank ready to start collecting your spare change
Coil-Built Pig Bank With Chunky Legs
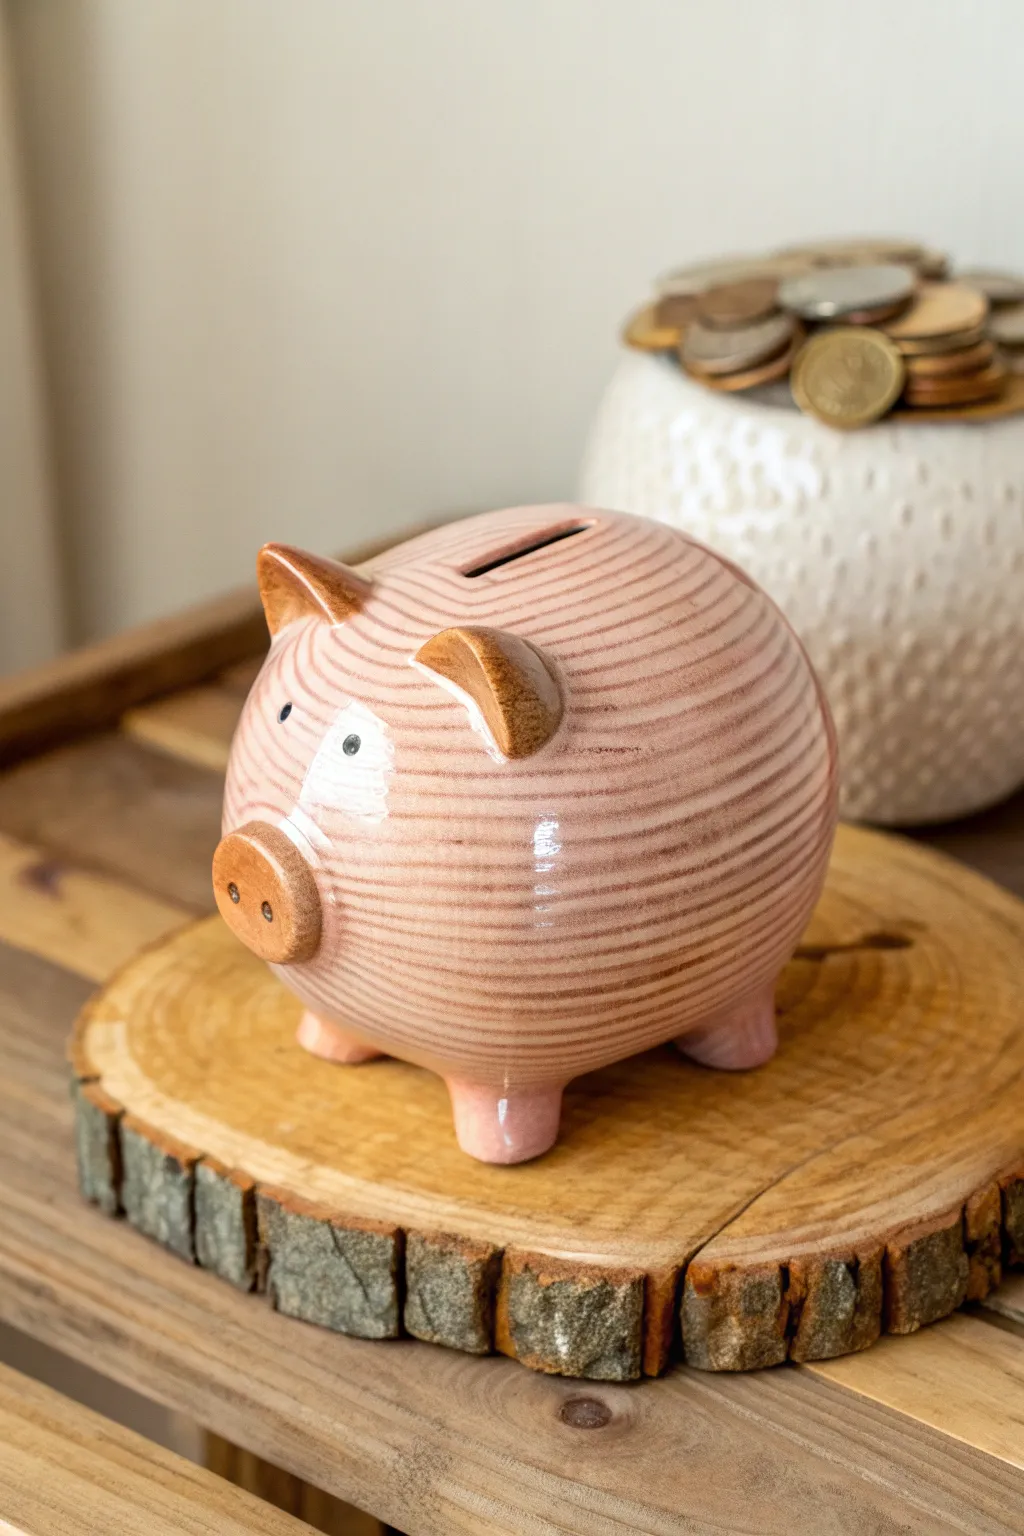
This delightful ceramic bank embraces the process of its creation, leaving the coil texture visible for a rustic, handmade touch. Its round, friendly form and contrasting earthy accents make it a perfect beginner-friendly project that looks great on any shelf.
Detailed Instructions
Materials
- Stoneware clay (buff or white)
- Pottery wheel (optional, but hand-building tools work too)
- Needle tool
- Scoring tool or fork
- Slip (clay slurry)
- Wooden rib tool
- Sponge
- Pink ceramic glaze (transparent or semi-transparent)
- Brown ceramic glaze (for accents)
- Black underglaze
- Small paintbrush
- Kiln
Step 1: Forming the Body
-
Prepare the base:
Start with a small ball of clay about the size of a tangerine. Flatten it slightly to create a thick, sturdy floor for your bank. -
Roll coils:
Roll out several long, even snakes of clay, roughly the thickness of your pinky finger. Try to keep them consistent for a uniform look. -
Begin building walls:
Score the edge of your base and apply slip. Lay your first coil around the perimeter. Gently pinch the coil onto the base to secure it, but be careful not to smooth out the outside texture completely if you want to keep that ribbed look. -
Stack and shape:
Continue stacking coils, scoring and slipping between each layer. As you build up, gradually place the coils slightly outward to widen the belly of the pig. -
Close the form:
Once you reach the widest point, start placing coils slightly inward to narrow the shape back down, effectively creating a sphere. Leave the very top open for now. -
Refine the interior:
While you can still reach inside, use a wooden rib or your fingers to smooth the internal coils together. This adds structural integrity without ruining the exterior pattern. -
Seal the top:
Add the final smaller coils to close the sphere completely. Gently smooth the very top connection point.
Step 2: Adding Features & Details
-
Attach the legs:
Roll four short, thick stumps of clay. Score and slip the bottom of the pig body and attach them firmly so the pig stands stable and level. -
Create the snout:
Form a flat, oval disk of clay. Score the front of the pig’s face and attach the disk. Use a small tool to poke two nostrils into the snout. -
sculpt the ears:
Shape two triangular wedges of clay. Curve them slightly to look like perked-up ears and attach them near the top of the head using the score-and-slip method. -
Cut the coin slot:
Once the clay is leather hard (firm but not dry), use a sharp fettling knife to carefully cut a rectangular slot in the top of the back involved. -
Clean up edges:
Smooth out any sharp burrs around the coin slot and the feet using a slightly damp sponge, being careful not to erase the coil texture on the body.
Groove Control
To emphasize the coil lines, gently run a damp sponge along the grooves *after* glazing but before firing. This thins the glaze in the high spots.
Step 3: Glazing & Firing
-
Bisque fire:
Let the piece dry completely (bone dry) before firing it in the kiln to bisque temperature (usually cone 04). -
Apply accent colors:
Paint the snout and the ears with a warm brown glaze. Use a steady hand to keep the edges crisp. -
Paint the eyes:
Using a fine detail brush and black underglaze, paint two small dots for eyes just above the snout. -
Glaze the body:
Apply a semi-transparent pink glaze over the entire body (avoiding the brown accents). The transparency allows the coil lines to remain defined and visible. -
Final fire:
Fire the piece again to the glaze temperature specific to your clay and glaze choice (commonly cone 5 or 6). I find this final firing brings the whole character to life.
Trapped Air Alert
Because the pig is a hollow closed form (before the slot is cut), ensure you cut the coin slot before the clay gets too dry, or it may crack.
Now you have a charming, handmade place to stash your spare change

TRACK YOUR CERAMIC JOURNEY
Capture glaze tests, firing details, and creative progress—all in one simple printable. Make your projects easier to repeat and improve.
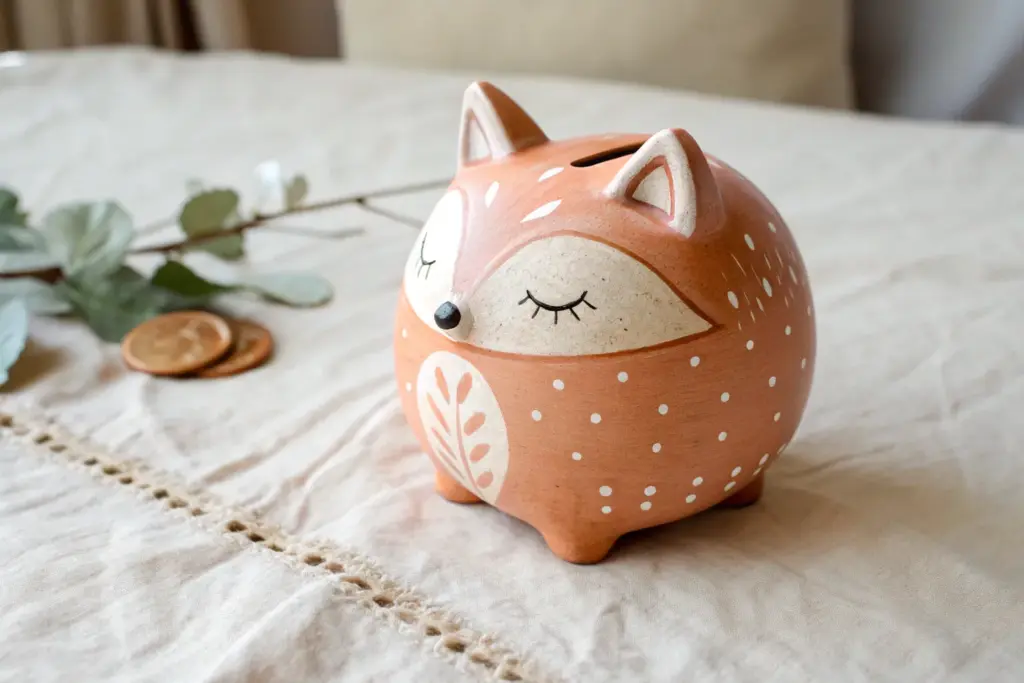
Cat Bank With a Tail Coin Slot
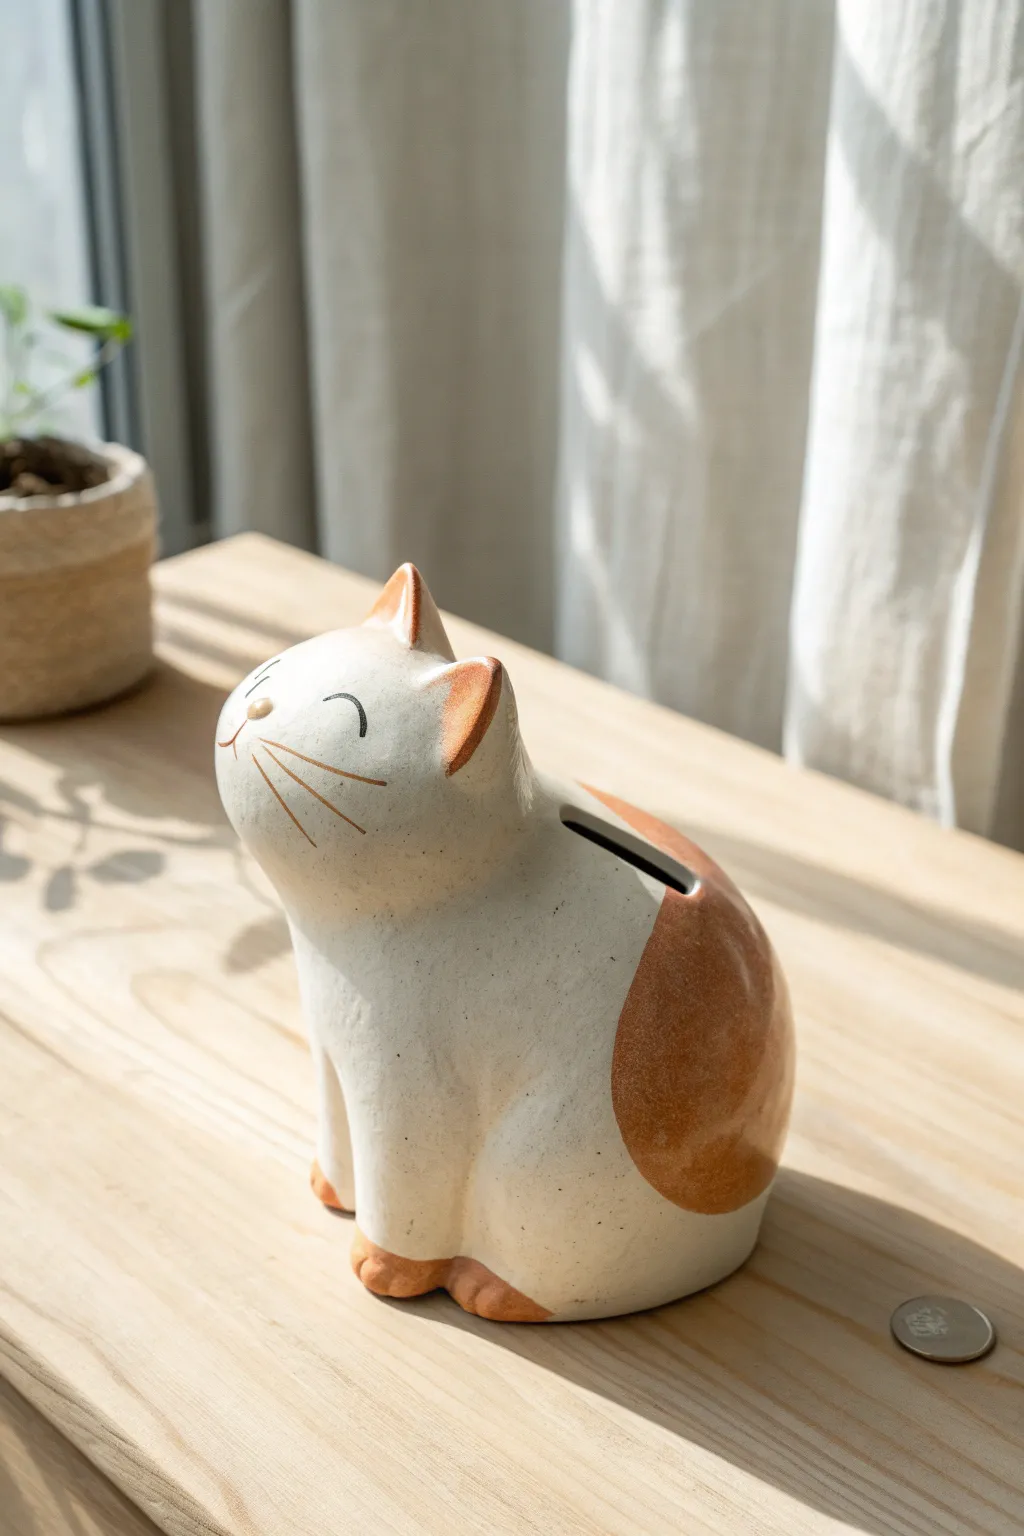
Capture the charm of a sun-dappled afternoon with this adorable ceramic cat bank, featuring a gentle upward gaze and earthy terracotta accents. This project combines simple organic shapes with a smooth, matte finish to create a functional piece of art that looks lovely on any windowsill.
Step-by-Step
Materials
- White stoneware or earthenware clay (smooth body)
- Slip (clay mixed with water)
- Scoring tool or needle tool
- Wooden modeling tool
- Fettling knife
- Terracotta colored underglaze or iron oxide wash
- Fine sponge
- Clear matte glaze (optional, for a sealed finish)
- Black underglaze pencil or fine liner brush
- Rolling pin
- Rib tool (kidney shaped)
Step 1: Forming the Body
-
wedge the clay:
Begin by wedging your clay thoroughly to remove any air bubbles, ensuring a consistent texture throughout your workpiece. -
Create the base:
Shape a solid ball of clay about the size of a grapefruit, then gently elongate it into a pear shape. This will be the main body of the sitting cat. -
Hollow the form:
If you are strictly hand-building a solid form, slice it in half vertically, hollow out the inside leaving 1/4 inch walls, and score and slip the halves back together. Alternatively, use the pinch pot method to create two bowls and join them to form the enclosed pear shape. -
Refine the silhouette:
Stand the pear shape on its wider bottom. Gently paddle the sides to smooth them and gently pull the top section upward and slightly backward to suggest the cat looking up.
Step 2: Sculpting the Features
-
Add the front legs:
Roll two thick coils of clay for the front legs. Attach them vertically to the front of the body using the score and slip method, blending the clay smoothly into the chest area so no seams remain visible. -
Shape the ears:
Pinch two small, triangular pieces of clay for the ears. Attach them to the highest point of the head, blending the base of the ears seamlessly into the skull. -
Create the coin slot:
Locate the upper back area of the cat. Using your fettling knife, carefully cut a clean, rectangular slot wide enough for coins. Smooth the edges of the cut with a damp finger or tool. -
Smooth the surface:
Take a flexible rib tool and run it over the entire surface of the cat to remove fingerprints and create that seamless, stone-like quality seen in the photo. Follow up with a barely damp sponge for a polished finish.
Air Venting
Make sure to poke a tiny, hidden hole in the bottom of the bank before firing. Closed hollow forms can explode in the kiln if expanding air cannot escape.
Step 3: Decoration and Firing
-
Dry to leather hard:
Allow the sculpted piece to dry slowly until it reaches a leather-hard state. This is crucial before adding color. -
Paint the patches:
Using the terracotta underglaze, paint the inside of of the ears, the front paws, and a large, rounded patch on the rear haunch to mimic the calico design. -
Draw the face:
With a very fine brush and black underglaze (or a specialized underglaze pencil), verify the clay is dry enough not to smudge. Carefully draw the arching closed eyes, the small nose, and long whiskers. -
Bisque fire:
Once the piece is bone dry, load it into the kiln for the initial bisque firing according to your clay body’s temperature requirements. -
Apply clear coat:
If you want a sealed surface, apply a thin layer of clear matte glaze over the entire piece. I find dipping the piece ensures an even coat without brushstrokes. -
Glaze fire:
Fire the kiln a second time to the maturation temperature of your glaze to finish the piece. -
Final check:
Once cool, inspect the bottom for any sharp burrs and sand them down if necessary to protect your furniture.
Texture Twist
Before the clay dries, gently press a piece of rough linen or canvas against the white areas to give the bank a warm, fabric-like texture.
Place your finished bank in a sunny spot and start saving while enjoying your handmade creation
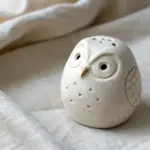
Owl Bank With Big Textured Feathers
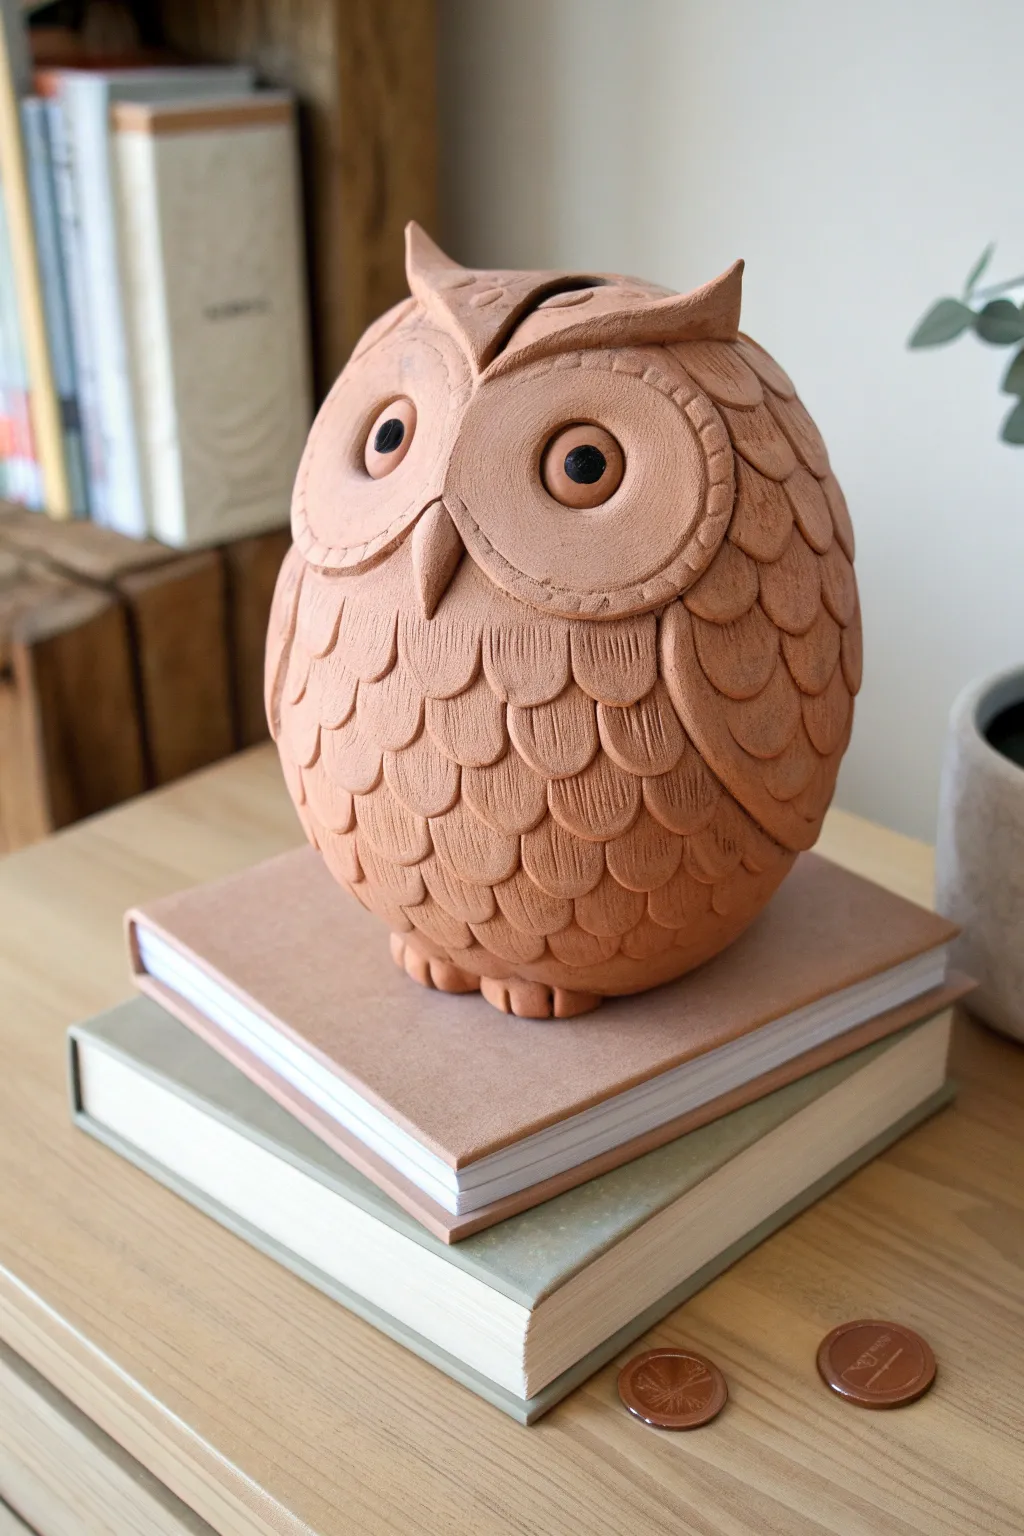
This charming owl bank features a warm, earthy terracotta finish and deeply textured plumage that is incredibly satisfying to create. Its rotund shape and oversized eyes give it a friendly personality while serving as a sturdy guardian for your savings.
Step-by-Step Tutorial
Materials
- Terracotta air-dry clay or polymer clay (approx. 1-1.5 lbs)
- Round styrofoam ball or crumpled foil core (about 4-5 inches diameter)
- Rolling pin
- Circle cutters (various sizes)
- Small teardrop cutter (optional for feathers)
- Sculpting tools (needle tool, small loop tool)
- Slip (clay mixed with water) or scoring tool
- Black acrylic paint (for eyes)
- Small paintbrush
- Sponge
Step 1: Forming the Base Body
-
Prepare the Core:
Start by shaping a tight ball of aluminum foil about the size of a large grapefruit. If you prefer a lighter finished piece, use a styrofoam ball, but foil is easier to remove later if you want a hollow ceramic-feel interior. -
Roll the Base Slab:
Roll out a large slab of terracotta clay to approximately 1/4 inch thickness. Ensure it’s wide enough to completely wrap around your core form. -
Cover the Form:
Drape the clay slab over your core sphere. Gently smooth the clay down the sides, trimming away excess at the bottom. Pinch the seams together tightly and smooth them out with a bit of water so the join is invisible. -
Shape the Head:
While the clay is still pliable, gently press the sides near the top to slightly ovalize the sphere. Push up two small peaks at the very top to form the underlying structure for the ear tufts.
Smooth Seams
Keep a small bowl of water and a sponge nearby. Smoothing clay seams with a damp finger immediately prevents cracks from appearing as the thick body dries.
Step 2: Applying Feathers and Texture
-
Create Feather Shapes:
Roll out more clay to a thinner 1/8 inch thickness. Use a teardrop cutter or hand-cut dozens of U-shaped feather scales. You will need enough to cover the bottom two-thirds of the owl. -
Texture the Feathers:
Before attaching, use a needle tool to scratch vertical lines into each feather. I find doing this assembly-line style speeds up the process significantly. -
Layer the Plumage:
Starting at the very bottom center, attach the feathers using a bit of slip. Overlap each row slightly as you work your way up the body, staggering them like bricks to create a dense, ruffled look. -
Define the Wings:
When you reach the sides, create slightly longer, curved feathers to suggest wings. Layer these vertically down the flanks, distinguishing them from the chest feathers.
Step 3: Sculpting the Face and Details
-
Form the Eye Discs:
Cut two large circles of clay (about 1.5 inches wide). Flatten them slightly and attach them side-by-side on the upper front of the body, overlapping the top row of feathers. -
Detail the Eye Rims:
Roll a very thin snake of clay and adhere it around the outer edge of each eye disc. Use a tool to press tiny dashed indentations around this rim for a stitched effect. -
Add the Eyes:
Roll two small balls of clay and press them into the center of the discs. Use the back of a paintbrush or a small loop tool to create a deep indentation in the center of each for the pupil. -
Attach the Beak:
Form a small, sharp triangular cone of clay. Attach this securely between the two eye discs, pointing downward. Smooth the top edge into the forehead so it looks integrated. -
Create Ear Tufts:
Add extra clay to the peaks you made earlier on the head. Reshape them into distinct, curved triangles that sweep backward slightly, mimicking the Great Horned Owl style. -
Carve the Coin Slot:
Using a craft knife or fettling knife, carefully cut a rectangular slot horizontally across the top of the head, just behind the ear tufts. Wiggle the knife slightly to ensure the opening is wide enough for coins. -
Make the Feet:
Roll six small sausages of clay. Group them in threes to form two clawed feet. Attach these to the bottom front of the owl so they peek out from under the feathers.
Glossy Contrast
For a striking finish, apply a high-gloss varnish only to the black painted pupils and the beak, leaving the rest of the clay matte and natural.
Step 4: Finishing Touches
-
Final Surface Texture:
Take a damp sponge and gently wipe the unfeathered areas (like the forehead and eye discs) to give them a slightly rough, stone-like texture that matches the terracotta aesthetic. -
Drying:
Allow the owl to dry slowly away from direct heat or sunlight to prevent cracking. This thick form may take 3-5 days to dry completely. -
Painting Pupils:
Once fully dry, dip a small brush into black acrylic paint and carefully fill inside the deep indentations of the eyes to bring your owl to life.
Place your finished guardian on a bookshelf to watch over your savings wisely
Whale Bank With Waves on Top

This charming, chubby whale bank is the perfect beginner sculpture project because its simple, rounded form is forgiving and fun to shape. The speckled blue finish gives it an organic, ocean-inspired look while keeping your loose change safe and sound.
Step-by-Step Guide
Materials
- Light-colored stoneware clay (about 1.5 – 2 lbs)
- Pottery tools (needle tool, rib tool, sponge)
- Rolling pin
- Fettling knife
- Slip (clay mixed with water)
- Scoring tool or old toothbrush
- Speckled blue ceramic glaze (cone 5/6 recommended)
- Soft fan brush
Step 1: Forming the Body
-
Prepare the pinch pots:
Start by dividing your clay into two equal balls roughly the size of a large orange. Create two deep pinch pots by pressing your thumb into the center and pinching the walls to an even thickness of about 1/4 inch. -
Join the halves:
Score the rims of both pinch pots thoroughly and apply a generous amount of slip. Press the two halves together firmly to create a closed hollow sphere, trapping air inside to help hold the shape. -
Shape the ovoid:
Gently paddle or roll the sphere on your work surface to elongate it slightly into a fat egg shape. This will be the main body of your whale. -
Smooth the seam:
Using a rib tool and a slightly damp sponge, blend the clay across the seam where your pinch pots joined until the line disappears completely and the surface is smooth.
Air Pressure Alert
Before the clay dries, poke a tiny pinhole in the bottom or ensure the coin slot is fully open. Trapped air inside a sealed form expands in the kiln and will cause the whale to explode.
Step 2: Adding Fins and Tail
-
Roll out a slab:
Roll a small amount of leftover clay into a slab about 1/4 inch thick. You will cut your appendages from this piece. -
Cut the tail:
Cut out a ‘V’ shape or a crescent moon shape for the tail flukes. Gently round the edges so they aren’t sharp or boxy. -
Attach the tail:
Score and slip the narrow(er) end of the egg shape. Attach the tail piece, blending the clay downwards onto the body to ensure a very strong connection. I like to add a tiny coil of clay at the joint for extra reinforcement. -
Create the side fins:
Cut two small, rounded triangles from your slab for the pectoral fins. Soften the edges with a damp sponge. -
Secure the fins:
Attach the fins low on the sides of the body using the score and slip method. Angle them slightly backwards for a streamlined look.
Step 3: Facial Features and Details
-
Scrub the eyes:
Use the back end of a paintbrush/tool or a small hole cutter to press two small indentations for eyes on either side of the ‘face’ area. -
Carve the smile:
Using a needle tool or fettling knife, carve a long, curving line that wraps around the front of the face for the mouth. Go deep enough to see the shadow, but don’t cut all the way through. -
Cut the coin slot:
Once the clay has stiffened slightly (leather hard), use a fettling knife to cut a rectangular slot on the uppermost part of the back. Ensure it is wide enough for your thickest coin. -
Refine the surface:
Go over the entire piece with a barely damp sponge to smooth out any fingerprints or rough tool marks. -
Dry slowly:
Let the whale dry slowly under loose plastic for a few days to prevent the tail or fins from cracking at the joints.
Make Waves
Before glazing, use a carving tool to gently create wave patterns or barnacle bumps on the whale’s back for added texture that the glaze will break over beautifully.
Step 4: Glazing and Firing
-
Bisque fire:
Fire the piece in a kiln to bisque temperature (usually cone 04) to prepare it for glazing. -
Apply glaze:
Using a soft fan brush, apply 2-3 coats of a speckled blue glaze. Ensure you let each coat dry to the touch before applying the next. -
Check the bottom:
Wipe the bottom of the whale (and the underside of the fins if they touch the table) completely clean of glaze with a wet sponge to prevent it from sticking to the kiln shelf. -
Final fire:
Fire the piece again to the glaze’s recommended temperature (likely cone 5 or 6) to achieve that glossy, durable finish.
Now you have an adorable ocean friend ready to help you save up for your next adventure
Dog Bank With a Collar Detail
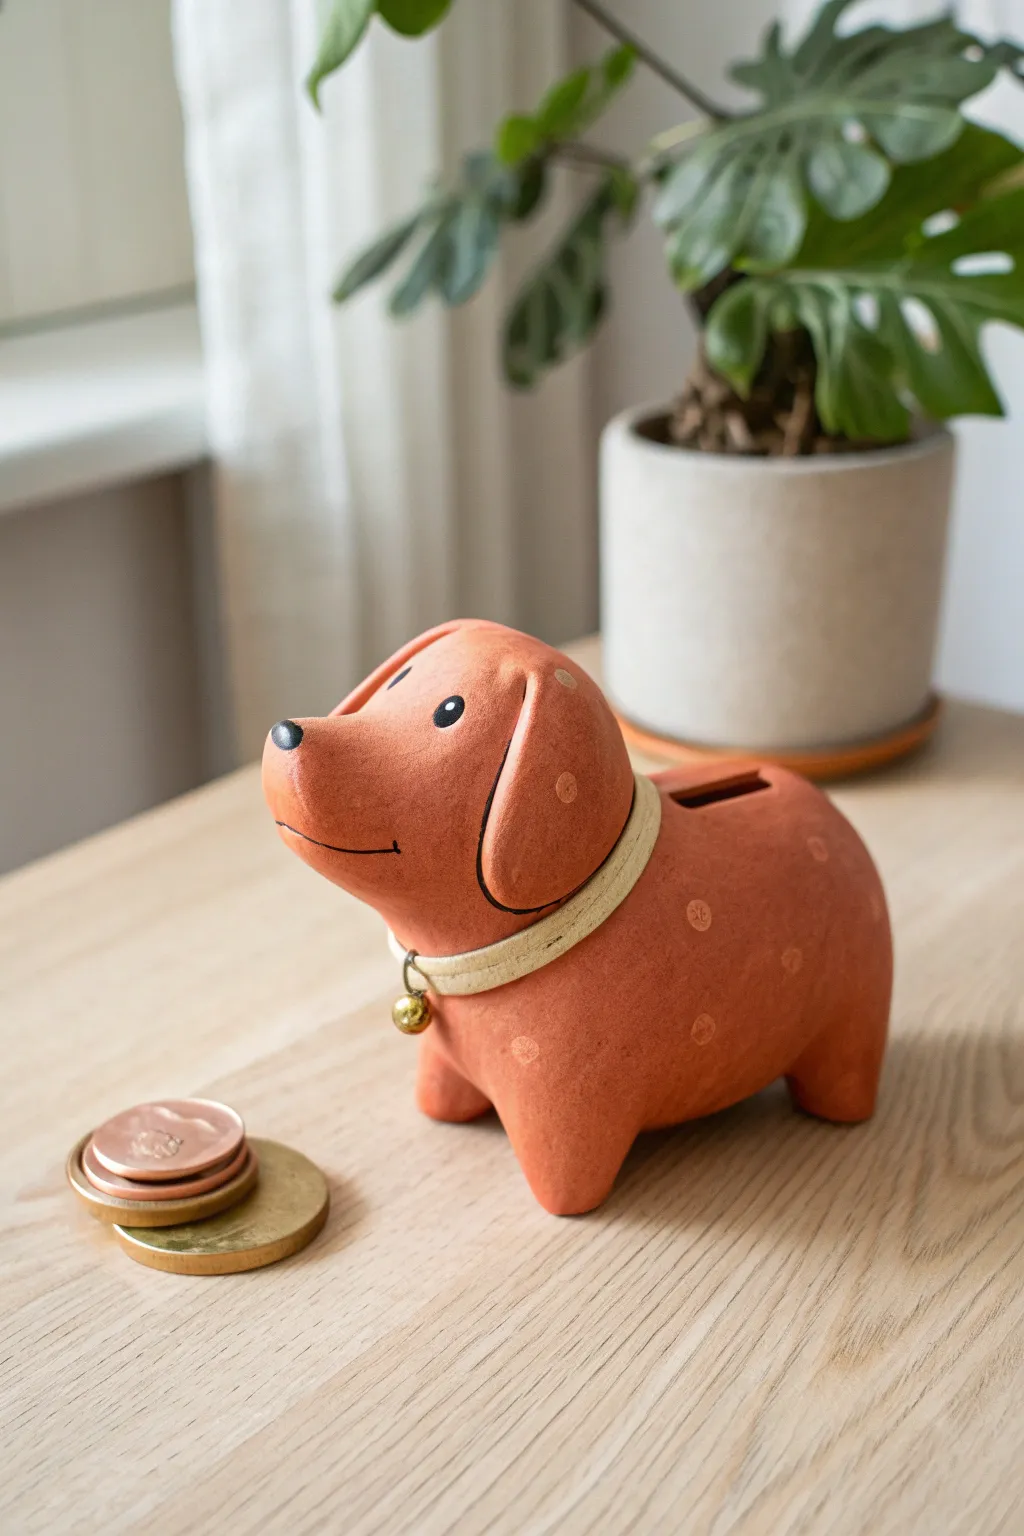
This adorable terracotta-hued dog bank brings a touch of whimsy to saving small change, featuring a smooth, rounded design and sweet painted details. With its charming collar and tiny bell, this functional sculpture is as fun to make as it is to display.
Step-by-Step
Materials
- Air-dry clay (terracotta color or white)
- Acrylic paints (terracotta/burnt orange, cream/beige, black, light tan)
- Small paintbrush set (fine liner and small round)
- Mod Podge or satin varnish
- Felt or thin leather strip (cream/beige)
- Small brass bell
- Needle tool or toothpick
- Rolling pin
- Bowl of water
- Sandpaper (fine grit)
- Craft knife
Step 1: Shaping the Base
-
Form the main body:
Start with a large ball of clay about the size of a grapefruit. Gently elongate it into a thick oval shape, keeping one end slightly more bulbous for the rear and tapering slightly towards where the neck will be. Smooth out any cracks with a bit of water. -
Create the legs:
Pull four small, equal amounts of clay from a fresh lump. Roll them into short, sturdy cylinders or cones. Attach these to the underside of the body using the score-and-slip method—scratching both surfaces and adding a drop of water—to ensure they bond tightly. Press firmly so the dog stands stable. -
Sculpt the head:
Roll a slightly smaller ball for the head. Shape it into a rounded tear-drop form to create a gentle snout. Attach this onto the front, upper part of the body, blending the clay at the neck seam until it is completely smooth and invisible. -
Add the coin slot:
While the clay is still workable, use a craft knife or a fettling tool to carefully cut a rectangular slot into the top of the dog’s back. Make sure it is wide and long enough for your largest coin to pass through easily.
Smooth Seams Secret
Use a little vinegar in your slip water when joining air-dry clay parts. It breaks down the clay surface slightly, creating a much stronger bond and smoother seam.
Step 2: Adding Details
-
Attach the ears:
Flatten two small ovals of clay to make the floppy ears. Attach one to each side of the head, blending the top seam into the skull while leaving the bottom flaps free to hang slightly away from the face for dimension. -
Refine the face:
Use a modeling tool or your fingers to smooth the snout area. If you want a slight nose bump, gently press a tiny bit of extra clay onto the tip. Ensure the overall surface is free of fingerprints by lightly brushing with a damp sponge. -
Hollow it out (Optional):
If you are experienced and working with kiln fire clay, you would hollow the piece now. For air-dry clay, you can leave it solid if it’s not too thick, though I prefer to carefully hollow the belly from underneath to speed up drying, leaving a hole for a future stopper. -
Dry completely:
Set your sculpture in a cool, dry place. Let it dry slowly for 24-48 hours. Rotate it occasionally so the legs dry evenly and don’t warp under the weight.
Step 3: Painting & Finishing
-
Sand for smoothness:
Once fully dry, use fine-grit sandpaper to gently buff away any rough spots, especially around the leg joints and the coin slot edges. Wipe away dust with a slightly damp cloth. -
Base coat:
Paint the entire dog with a terracotta or burnt orange acrylic paint. Apply two thin coats rather than one thick one for the best coverage, letting it dry between layers. -
Paint the spots:
Mix a lighter tan or peach shade. Using a small round brush, dab gentle, imperfect circles randomly across the body and ears to create the spotted pattern shown in the reference. -
Detail the face:
Use a fine liner brush and black paint to draw a simple curved line for the mouth and fill in a small oval for the nose. Paint two round black eyes, adding a tiny white dot in each once dry for a spark of life. -
Seal the piece:
Protect your paint job with a coat of satin varnish or Mod Podge. This gives the clay a lovely, finished ceramic look and prevents the paint from chipping.
Personalize It
Before the clay dries, use alphabet stamps to gently press a name onto the dog’s side or belly for a custom personalized gift.
Step 4: The Collar Accessory
-
Prepare the collar:
Cut a thin strip of cream-colored felt or light leather, measuring the circumference of the dog’s neck. It should be about a quarter-inch wide. -
Attach the bell:
Thread a small brass craft bell onto a jump ring or piece of wire, and attach it to the center of your collar strip. -
Place the collar:
Wrap the strip around the neck of your painted dog. Secure the ends at the back or under the chin with a small dab of strong craft glue.
Now you have a loyal little guardian for your spare change that looks great on any shelf
Turtle Bank With a Patterned Shell
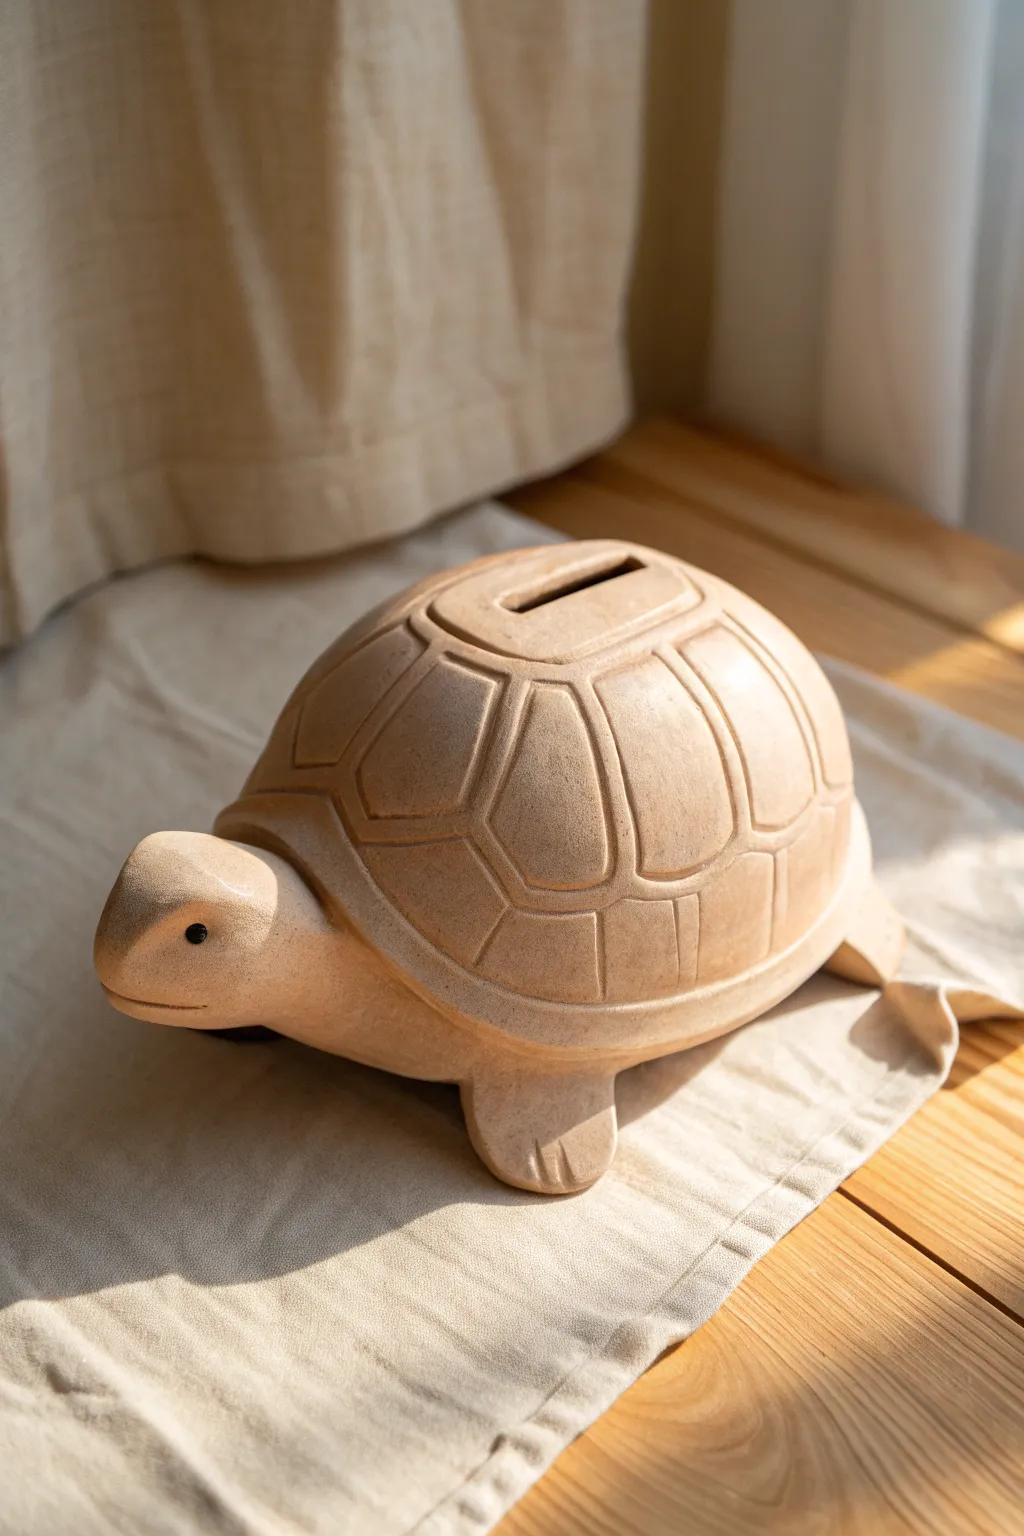
Sculpt a charming companion for your savings with this naturalistic turtle bank. Featuring a satisfyingly round shell with deep-carved geometric patterns and a smooth, stone-like finish, this piece brings an earthy warmth to any shelf.
Step-by-Step Tutorial
Materials
- Stoneware or earthenware clay (buff or terracotta color)
- Rolling pin
- Two small bowls (one for the mold, one for slip)
- Plastic wrap (cling film)
- Needle tool
- Loop carving tool
- Wooden modeling tool
- Serrated rib or scoring tool
- Sponge
- Black underglaze (optional, for eye)
- Kiln (or air-dry clay alternative if not firing)
Step 1: Forming the Body
-
Prepare the Hump Mold:
Find a medium-sized bowl to use as a hump mold for the shell. Turn it upside down and cover the exterior tightly with plastic wrap to prevent the clay from sticking. -
Roll the Slab:
Roll out a slab of clay to an even thickness of about 1/4 to 3/8 of an inch. Ensure it is wide enough to drape completely over your bowl mold. -
Shape the Shell:
Drape the clay slab over the covered bowl. Gently smooth it down with your hands to conform to the bowl’s shape, taking care not to stretch the clay too thin. Trim away the excess clay at the bottom rim with a needle tool. -
Create the Base:
Roll a second slab for the belly of the turtle. Place your bowl-covered shell onto this slab and trace around it lightly. Cut out this base circle, making it just slightly smaller than the shell footprint so the seam is hidden underneath. -
Join the Halves:
Once the shell has stiffened slightly (leather hard), remove it from the mold. Score the rim of the shell and the edge of the base slab. Apply water or clay slip, then press them firmly together to seal the hollow form.
Clean Carving Lines
Wait until the clay is true ‘leather hard’ before carving the shell. If the clay is too wet, the tools will drag and create messy ragged edges rather than clean grooves.
Step 2: Adding Extremities
-
Sculpt the Head:
Form a solid rounded cylinder of clay for the head and neck. Smooth the front into a blunt snout. I find it helps to attach the neck at a slight upward angle to give the turtle an inquisitive look. -
Attach the Head:
Score and slip the attachment point on the front of the shell body. Press the neck firmly into place and use a wooden tool to blend the clay seams until invisible. -
Form the Flippers:
Shape four thick, flattened triangular tabs for the legs. They should be sturdy enough to support the turtle’s weight but flat on the bottom for stability. -
Attach Legs and Tail:
Attach the legs to the underside of the body using the score and slip method. Add a small, pointed tail at the rear. Blend all seams thoroughly with a damp sponge. -
Cut the Slot:
Identify the very top center of the shell. Using a needle tool or fettling knife, carefully cut a rectangular slot wide enough for coins. Smooth the rough edges with a slightly damp finger.
Texture Twist
Before carving the geometric lines, gently paddle the shell with a canvas-wrapped wood paddle. This adds a subtle fabric texture that looks great under a matte glaze.
Step 3: Carving and Detailing
-
Map the Shell Pattern:
Lightly sketch your shell pattern with a needle tool. Start with a central shape around the coin slot, then draw classic hexagon-like shapes radiating outward toward the rim. -
Carve the Grooves:
Use a U-shaped loop tool to carve out the lines you sketched. Make the grooves deep enough to be distinct but be careful not to puncture through the wall to the hollow inside. -
Define the Rim:
Carve a horizontal line around the base of the shell to distinguish the ‘carapace’ from the belly. Add vertical lines along this lower rim to mimic the turtle’s scutes. -
Detail the Face and Feet:
Use a needle tool or a small wooden tool to press three indentations into the ends of the flippers for toes. Carve a simple horizontal line for the mouth. -
Smooth the Surface:
Once the carving is complete, go over the entire piece with a well-wrung damp sponge to soften any sharp clay burrs or crumbs created by the carving tools. -
Add the Eye:
Use a small drill bit or round tool to make a tiny indentation for the eye. You can leave it as a shadow dot or paint a small dot of black underglaze into the recess. -
Dry and Fire:
Allow the turtle to dry slowly under loose plastic to prevent cracking. Once bone dry, bisque fire the piece. If you want the natural finish shown, simply fire to maturity without a gloss glaze.
Now you have a sturdy little guardian ready to protect your coins one by one
Mushroom Bank With a Cap Slot
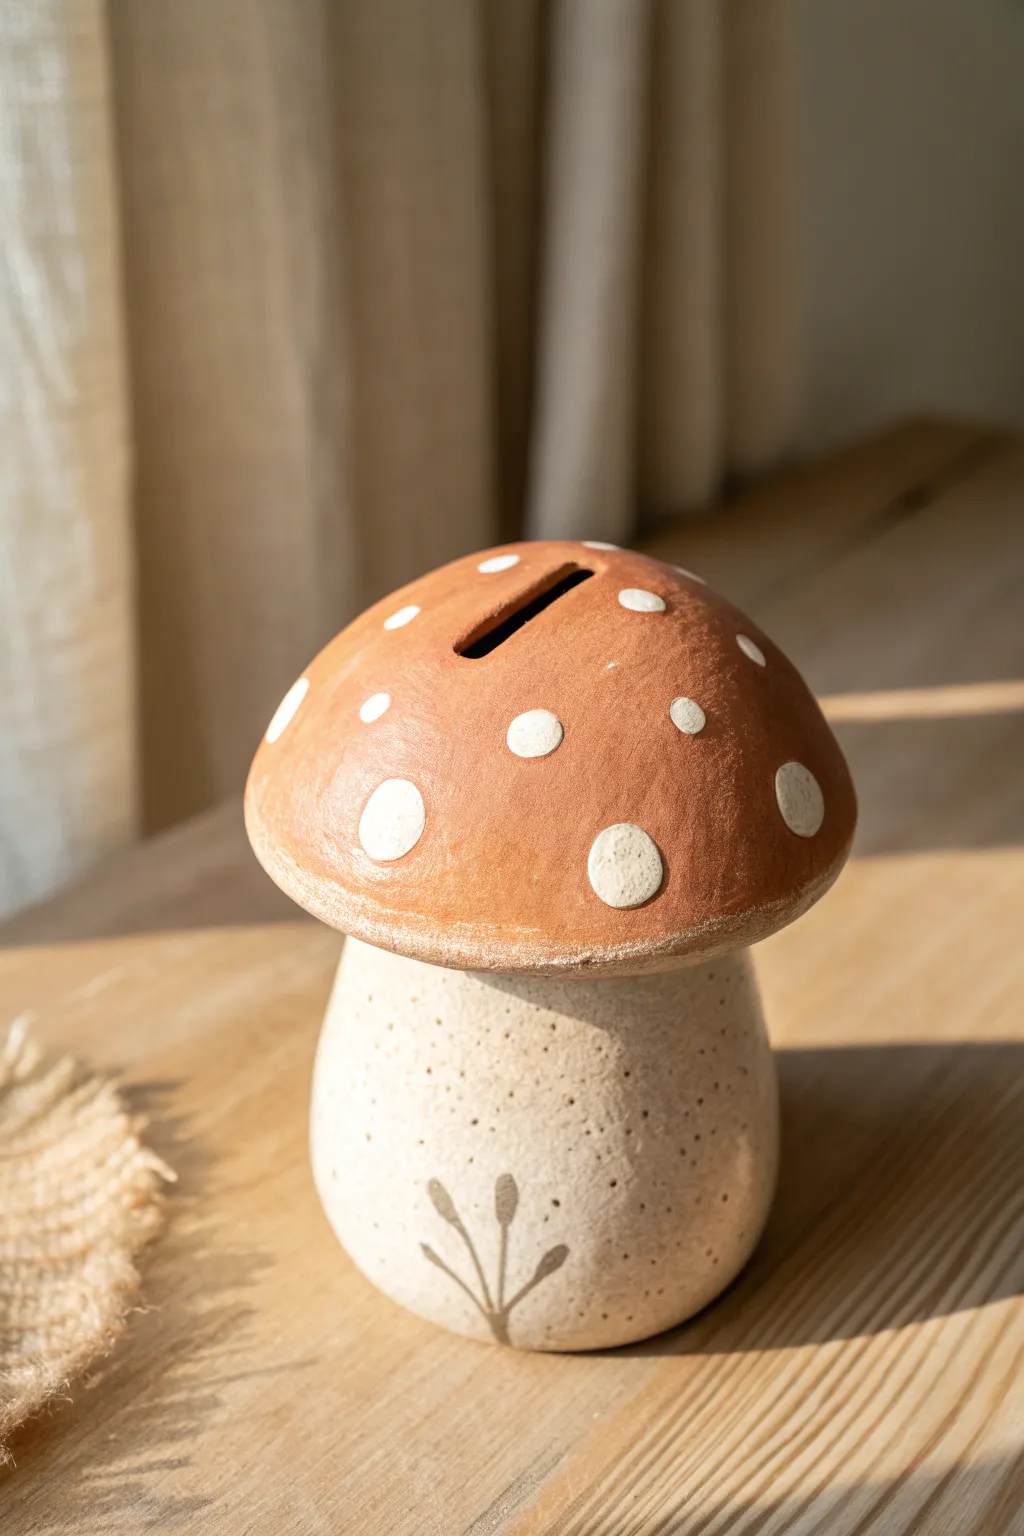
Bring a touch of forest charm to your savings with this adorable mushroom-shaped coin bank. Featuring a rustic terracotta-hued cap dotted with white and a creamy, speckled stem, this project combines simple hand-building techniques with earthy aesthetics.
Step-by-Step Guide
Materials
- Earthenware or stoneware clay (a speckled clay body works best for the stem)
- Terracotta colored underglaze or slip
- White underglaze
- Dark brown or black underglaze (for the plant detail)
- Clear matte glaze
- Pottery wheel (optional, can be hand-built)
- Needle tool
- Fettling knife
- Sponge
- Rib tool
- Small round paintbrush
- Fine liner brush
- Scoring tool or fork
- Slip (liquid clay)
Step 1: Shaping the Stem
-
Form the base:
Begin with a ball of speckled clay about the size of a large orange. You can either throw a hollow cylinder on the wheel that tapers slightly inward at the top, or use a pinch pot method. -
Close the form:
If using pinch pots, create two deep bowls and join them rim-to-rim to make a closed hollow shape. Gently paddle or roll the form on your table to smooth the seam and create a rounded, bulbous bottom that tapers up to a narrower neck. -
Refine the surface:
Use a rib tool to smooth the exterior walls. The shape should resemble a sturdy pear, wider at the bottom for stability. Ensure the bottom is flat so it sits securely. -
Create the connection point:
At the very top of your stem, flatten the peak slightly. This flat area will be where you eventual attach the mushroom cap.
Air Pocket Prevention
When joining two hollow forms like pinch pots, pierce a tiny pinhole in the seam before sealing completely. This lets expanding hot air escape during firing, preventing explosions.
Step 2: Crafting the Cap
-
Create the mushroom cap:
Roll out a slab of clay to about 1/4 inch thickness. Cut a circle roughly 1-2 inches wider than the widest part of your stem. Alternatively, shape a shallow, wide bowl on the wheel. -
Curve the cap:
Place your clay circle over a hump mold or a plastic-covered bowl to give it a gentle, domed curve. Smooth the edges with a damp sponge so they are rounded, not sharp. -
Cut the coin slot:
While the clay is leather hard, use your fettling knife to cut a rectangular slot in the center top. Make it wide enough for your largest coin. Smooth the raw edges of the cut with a refined sponge or finger. -
Dry fit:
Place the cap onto the stem to check proportions. The cap should overhang the stem significantly for that classic toadstool look. If it fits well, remove it for joining.
Step 3: Assembly and Decoration
-
Join the pieces:
Score the top of the stem and the underside of the cap where they will meet. Apply slip generously and press the cap firmly onto the stem. Use a coil of clay on the underside seam to reinforce the joint if necessary. -
Pierce a retrieval hole:
Don’t forget to cut a hole in the bottom of the stem for retrieving money later! You can fit this with a rubber stopper (measure your stopper first) or leave it as a ‘smash bank’ for a one-time use. -
Apply base color:
Once the piece is bone dry, apply 2-3 coats of terracotta-colored underglaze to the entire top surface of the cap. Leave the underside of the rim natural or clear. -
Paint the dots:
Using a small round brush and white underglaze, paint irregular circles onto the terracotta cap. I prefer to make them slightly organic and varying in size rather than perfectly round geometric dots. -
Add stem details:
If your clay isn’t naturally speckled, you can flick a toothbrush with thinned brown underglaze onto the stem now to create faux speckles. -
Paint the plant motif:
Near the base of the stem, use a fine liner brush and dark brown underglaze to paint a simple stylized plant. Draw three or four thin lines radiating from a point, topped with small oval leaf shapes. -
Bisque fire:
Fire the piece to cone 04 (or your clay’s specified bisque temperature). This hardens the clay and sets the underglaze decoration. -
Glaze application:
Dip the entire piece in a clear matte glaze. A matte finish looks much more earthy and natural for this project than a high gloss. -
Final wipe down:
Use a sponge to wipe any glaze off the very bottom of the piece (the foot ring) so it doesn’t stick to the kiln shelf. -
Glaze fire:
Fire the kiln again to the maturity temperature of your clay and glaze (likely cone 5 or 6 for stoneware). Let it cool completely before removing.
Make It Magical
Before the final glaze firing, paint a tiny door on the stem to make it look like a fairy house. You can even carve slight texture into the ‘door’ for a wood grain effect.
Once cooled, pop a rubber stopper in the base and start saving your coins in this charming woodland creation
Upcycled Jar Core Bank Wrapped in Clay
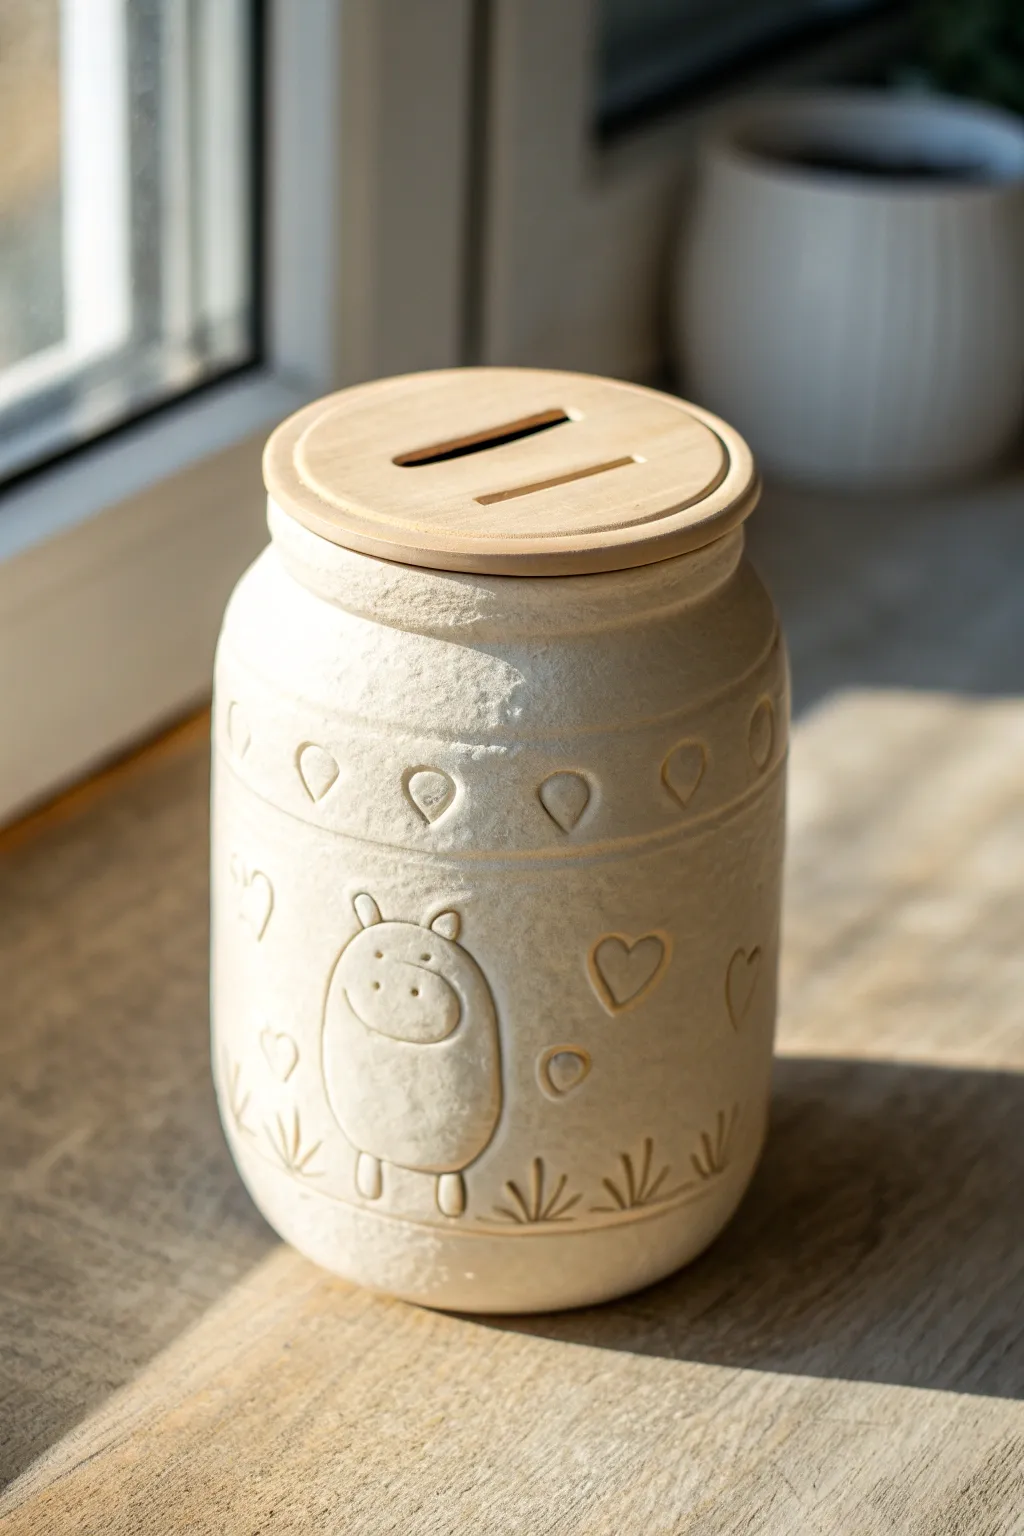
Transform a simple glass jar into a charming keepsake bank featuring a friendly pig character. This texture-rich project uses an upcycled core for stability while giving you the delightful look of hand-thrown pottery.
Step-by-Step Tutorial
Materials
- Clean glass jar (wide mouth)
- Air-dry clay (stone or white color)
- A wooden lid with a coin slot (sized to fit the jar)
- Textured sponge or piece of rough fabric
- Rolling pin
- Pointed sculpting tool or toothpick
- Small loop tool
- Small cup of water
- Craft knife
- Fine-grit sandpaper
Step 1: Preparation and Wrapping
-
Prep the jar:
Begin by removing any labels from your glass jar and ensuring the surface is completely clean and dry. Check that your wooden lid fits snugly before applying any clay. -
Roll the clay slab:
Roll out a slab of air-dry clay to a uniform thickness of about 1/4 inch. It needs to be long enough to wrap around the entire circumference of the jar and tall enough to cover it from base to just below the rim threads. -
Texture the surface:
Before attaching, press a textured sponge or a piece of rough canvas gently onto the clay slab. This creates that lovely organic, stone-like surface you see in the final piece. -
Apply the clay:
Carefully lift the clay slab and wrap it around the glass jar. Press firmly to ensure it adheres to the glass, but try not to smooth out your nice texture. -
Seal the seam:
Where the two ends of the clay meet, use a little water on your finger to blend the seam together until it becomes invisible. -
Refine the rim:
Trim any excess clay at the top so the threads of the jar remain exposed, allowing the lid to sit properly. Smooth the top edge of the clay slightly with a damp finger to create a soft, rounded lip.
Step 2: Sculpting the Design
-
Outline the pig:
Using a pointed tool or toothpick, very lightly sktech an oval shape for the pig’s body on the lower front section of the jar. -
Define the body:
Use a small loop tool to carve a shallow groove around your sketched oval. This ‘sgraffito-like’ technique makes the pig look embossed and raised from the background. -
Add facial features:
Press two small indentations for eyes and carve a curved line for the snout area. Don’t forget two tiny dots for nostrils. -
Ears and legs:
Carve simple U-shapes at the bottom for legs and triangular shapes at the top for ears, connecting them directly to the body outline. -
Create the border:
About an inch down from the top rim, carve a horizontal line around the entire jar. Carve a second parallel line just below it to create a decorative band. -
Add pattern details:
Inside the band you just created, press teardrop or heart shapes at regular intervals using a sculpting tool or a small cutter. -
Fill the background:
Scatter small carved hearts around the pig figure. At the very bottom, carve simple grass tufts—just three or four quick radiating lines for each tuft—to ground your character.
Jar Grip Tip
Before wrapping, wrap masking tape around the glass jar. The porous tape gives the wet clay something to grip onto, preventing it from sliding down the slick glass.
Step 3: Finishing
-
Final smoothing:
Check the carving lines for any rough clay burrs. Gently brush them away with a soft, dry brush or your finger. -
Drying phase:
Let the jar sit in a cool, dry place for at least 24-48 hours. I usually rotate the jar every few hours during the first day so it dries evenly around the glass core. -
Sanding:
Once bone dry, very lightly sand any sharp edges, particularly around the rim, using fine-grit sandpaper. -
Assembly:
Place the wooden coin-slot lid on top. If the fit is tight due to clay shrinkage, sand the inner clay rim slightly until the lid pops on comfortably.
Cracking Clay?
If small cracks appear as the clay shrinks around the rigid glass, mix a tiny bit of fresh clay with water to make a paste and fill the cracks. Smooth it over and let dry again.
Now you have a sturdy, adorable vessel ready to safeguard your savings sitting on your shelf
Geometric Faceted Bank With Sharp Planes
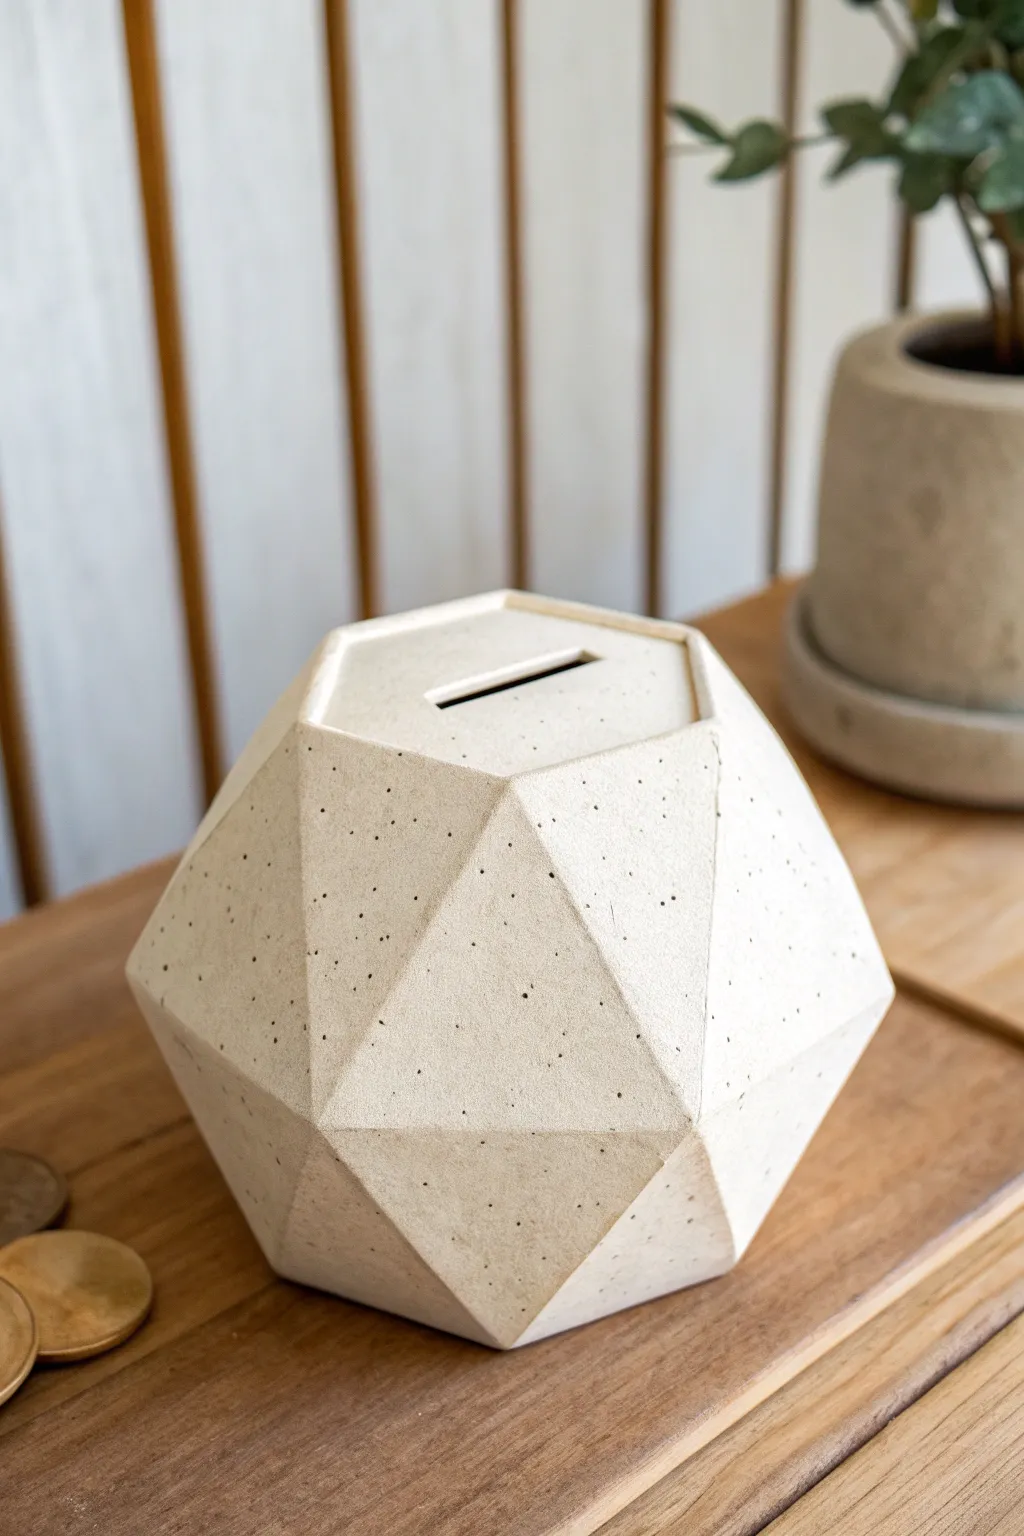
Move beyond the traditional piggy bank with this sleek, modern geometric sphere constructed from carefully cut slabs. The white speckled clay body and sharp, faceted planes create a minimalist sculpture that doubles as a functional coin saver.
How-To Guide
Materials
- White or speckled stoneware clay (approx. 2-3 lbs)
- Rolling pin
- Two long wooden guide strips (1/4 inch thickness)
- Fettling knife or X-Acto blade
- Paper templates (pentagon and hexagon)
- Scoring tool or serrated kidney
- Slip (clay and water slurry)
- Rubber rib
- Sponge
- Ruler
- Cardboard or stiff paper for templates
Step 1: Preparation and Cutting
-
Prepare your templates:
Create your geometric templates from stiff cardboard. You will need equilateral triangles for the main body faces, and a pentagon or hexagon for the top mechanism (depending on your specific geometric preference). For this specific look, aim for a ‘geodesic’ style pattern using primarily triangles. -
Roll out the slab:
Wedge your clay thoroughly to remove air bubbles. Flatten it onto a canvas workspace and roll it into a large, even slab. Place your 1/4 inch wooden guide strips on either side of the clay to ensure the slab has a consistent thickness throughout. -
Smooth the surface:
Before cutting, take a soft rubber rib and compress the clay slab on both sides. This aligns the clay particles, making it stronger and removing canvas textures for that smooth, modern finish. -
Cut the shapes:
Lay your templates onto the leather-hard slab. Using a needle tool or fettling knife, carefully cut out your shapes. You will need approximately 15-20 triangles to form the rounded, faceted body, plus a hexagonal piece for the top cap. -
Bevel the edges:
This is crucial for clean joints. I like to run the knife at a 45-degree angle along the edges of each shape where they will join. This allows the pieces to fit together snugly like a puzzle without creating thick, bulky seams. -
Stiffen the slabs:
Let the cut pieces sit until they reach a firm leather-hard stage. If they are too soft, the faceted walls will sag; if too dry, they won’t bond well.
Keep Edges Sharp
When smoothing seams, smooth *away* from the corners rather than fully across them. This helps maintain the crisp, sharp angles where the facets meet.
Step 2: Assembly
-
Score and slip the base:
Start with a pentagon or hexagon base piece (or a ring of triangles). Score the edges thoroughly with a serrated tool and apply a liberal amount of slip. -
Build the first ring:
Attach the first row of triangles to the base piece. Press the beveled edges together firmly. Use a small coil of clay on the interior seams to reinforce the joints, smoothing it down with a modeling tool. -
Continue building upward:
Work your way up, adding the next tier of triangles. As the form creates a curve, support the walls with your hand from the inside while pressing from the outside to maintain the sharp geometric angles. -
Refine the seams:
On the exterior, use a rubber rib to smooth over the connection points. You want the planes to look sharp, so be careful not to round over the distinct edges of the facets. -
Install the top face:
For the top piece (the hexagon), cut a clean rectangular slot large enough for coins using your X-Acto blade. Smooth the raw edges of the slot with a damp sponge or finger to ensure no sharp burrs remain. -
Close the form:
Score and slip the top edges of your nearly finished sphere. Place the slotted top piece onto the opening. This part can be tricky since you can’t reach inside, so press gently but firmly along the seams to seal it. -
Trap air pressure:
Since the form is enclosed (except for the slot), the trapped air will help hold the shape while you do final refinements. Gently paddle the shape if any sides look bulging or uneven.
Add a Cork Stopper
Cut a hole in the bottom during the leather-hard stage fitting a standard rubber or cork stopper. This makes the bank reusable without smashing it.
Step 3: Finishing Touches
-
Clean and refine:
Once the bank is fully constructed and slightly stiffer, go over the entire surface with a barely damp sponge. Remove any slip smears, but avoid washing away the nice speckled texture of the clay. -
Sharpen the angles:
Use a straight edge or a flat wooden paddle to define the planes one last time. The beauty of this piece relies on the contrast between flat surfaces and sharp ridges. -
Dry slowly:
Cover the bank loosely with plastic sheeting. Because slabs can warp as they dry, slow drying is essential to keep the geometric shape true. -
Bisque fire:
Fire the piece to cone 04 (or your clay’s bisque temperature). -
Glaze or leave raw:
To match the reference image, leave the exterior unglazed if using a beautiful speckled clay body, applying only a clear matte glaze to the interior if desired. Alternatively, wipe a very thin matte clear glaze over the exterior to seal it without hiding the clay’s character. -
Final firing:
Glaze fire to maturity (likely cone 5 or 6 depending on your stoneware).
Place your new faceted bank on a shelf where the light can catch its many angles
Fantasy Creature Bank With Horns and Wings
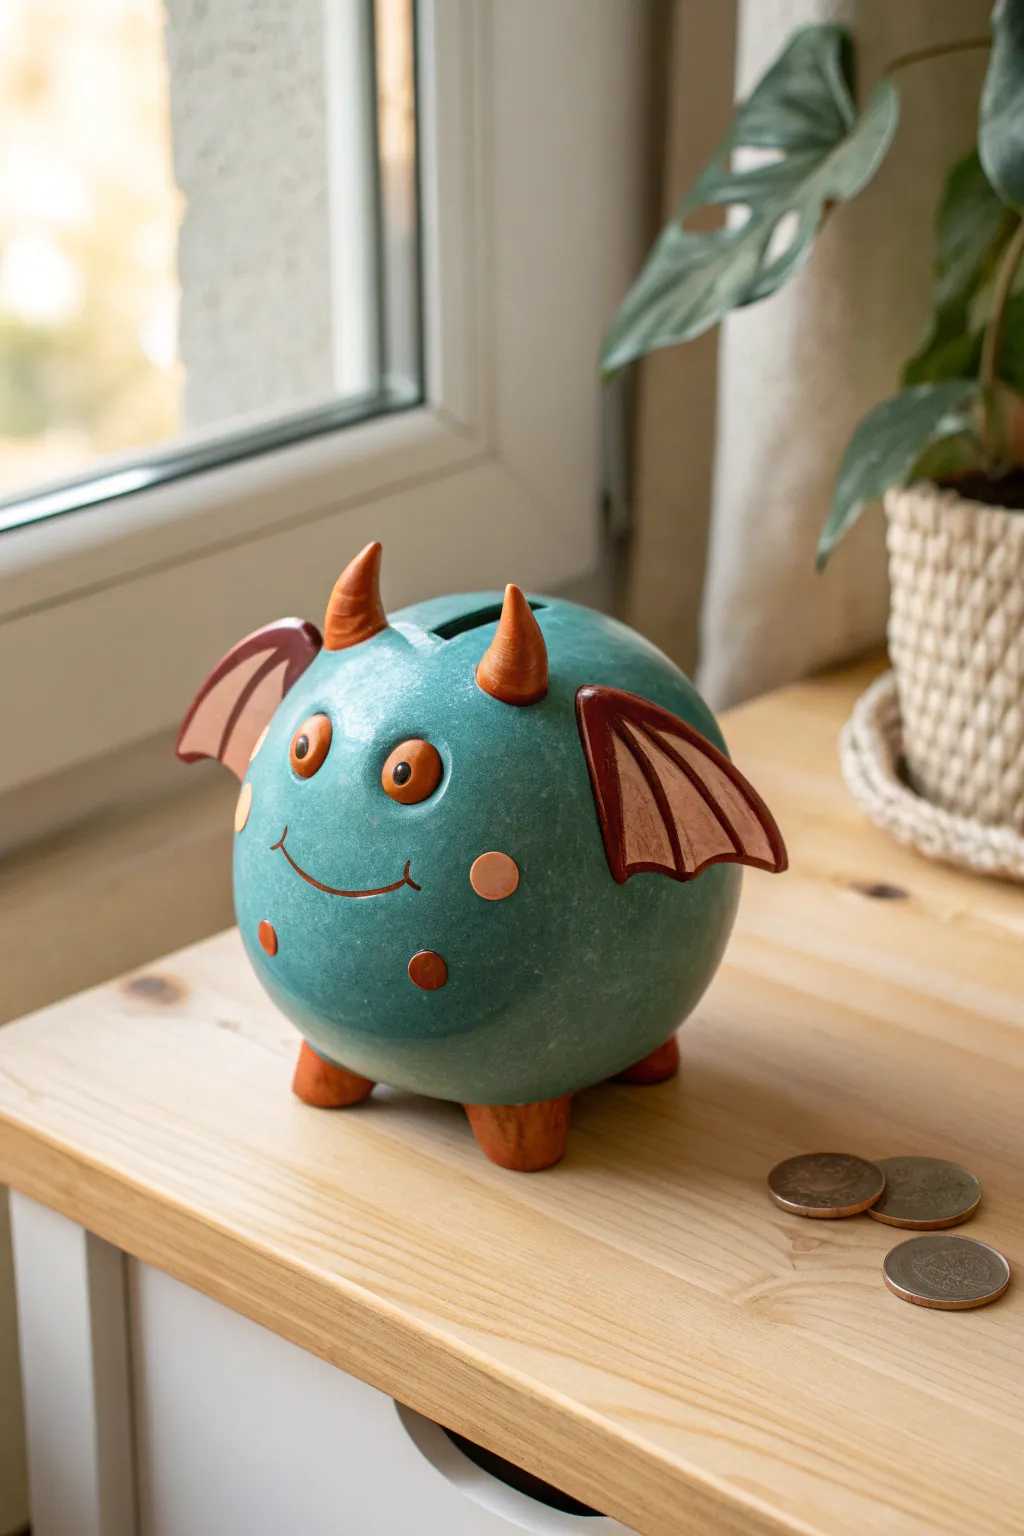
Guard your treasure with this adorable, spherical dragon bank that looks like it rolled right out of a fantasy story. Featuring a textured teal body, playful orange horns, and tiny wings, this project is perfect for beginners wanting to try their hand at hollow-form sculpting.
Step-by-Step Tutorial
Materials
- Polymer clay (Teal for body, Orange for accents, Reddish-brown for wing details)
- Aluminum foil
- Rolling pin or pasta machine
- Sculpting tools (needle tool, ball stylus)
- Hobby knife (X-Acto)
- Oven
- Acrylic gloss varnish (optional)
- Sandpaper (fine grit)
Step 1: Foil Core & Body Base
-
Create the core:
Begin by crumpling aluminum foil into a tight ball, roughly the size you want your finished bank to be—about the size of a large orange works well. Roll it on a table to smooth out major lumps. -
Prepare the teal clay:
Condition your teal polymer clay until it’s soft and pliable. Use a rolling pin to create a large, even sheet about 1/4 inch thick. -
Cover the form:
Wrap the clay sheet around your foil ball. Gently smooth the seams together with your thumbs so they disappear completely, creating a seamless sphere. -
Add texture:
For that mottled, stone-like look seen in the photo, gently dab the surface with a crumpled piece of aluminum foil or a textured sponge. Don’t press too hard; just enough to disrupt the smoothness. -
Create the coin slot:
Use your hobby knife to carefuly cut a rectangular slot in the top center of the sphere wide enough for coins. Ensure you cut through the clay down to the foil core.
Step 2: Adding Features
-
Make the feet:
Form four small, equal-sized cones from orange clay. Flatten the tops slightly and press them onto the bottom of the sphere to act as stabilizing feet. -
Sculpt the horns:
Roll two tapered cones of orange clay for the horns. Curve the tips slightly backward and attach them near the top of the head, flanking the coin slot. -
Construct the wings:
Create two small triangles from the reddish-brown clay. Roll out thinner pieces of lighter orange clay and press them into the center of the triangles to create the inner wing contrast. -
Attach the wings:
Press the wings firmly onto the sides of the body. You can use a bit of liquid clay or scoring to ensure a strong bond. -
Detail the wings:
Use a needle tool or knife to gently press lines into the lighter orange part of the wings to mimic skeletal structure or veins.
Clay Won’t Stick?
If your wings or horns keep falling off the round body, apply a tiny drop of ‘Bake and Bond’ or liquid polymer clay as glue before pressing the pieces together.
Step 3: Expressive Details
-
Form the eyes:
Roll two small balls of orange clay and flatten them onto the face area. Use a smaller tool to press a tiny indentation in the center of each for the pupil. -
Add pupils:
Place a tiny speck of dark brown or black clay into the indentations you made to complete the eyes. -
Create the smile:
Roll a very thin snake of reddish-brown clay. Shape it into a U-curve and press it onto the face. -
Refine the smile:
Add tiny perpendicular ticks at the ends of the smile line for cheeks. -
Add spots:
Roll tiny balls of orange and reddish-brown clay, flatten them into discs, and press them randomly around the lower half of the body for decorative spotting.
Scale Effect
Before baking, press the end of a small straw or a U-shaped tool repeatedly into the clay surface to create a dragon scale pattern instead of the smooth stone texture.
Step 4: Finishing
-
Bake the project:
Bake the bank according to your clay package’s instructions. Usually, this means around 275°F (135°C) for 15-30 minutes depending on thickness. -
Cool down:
Let the bank cool completely in the oven before removing it to prevent thermal shock cracks. -
Remove core (Optional):
If you want the bank to be truly hollow, carefully cut a plug out of the bottom (between the feet) using a heavy-duty craft knife and dig out the foil with tweezers. -
Varnish:
I like to finish with a coat of water-based gloss varnish to give the dragon a ceramic-like shine and protect the surface details.
Now you have a mythical guardian ready to protect your growing savings