If you want something handmade that feels genuinely special (but doesn’t require a kiln), air-dry clay is my go-to for gift making. Here are my favorite air clay gift ideas—the kind that look polished, feel personal, and are totally doable at your kitchen table.
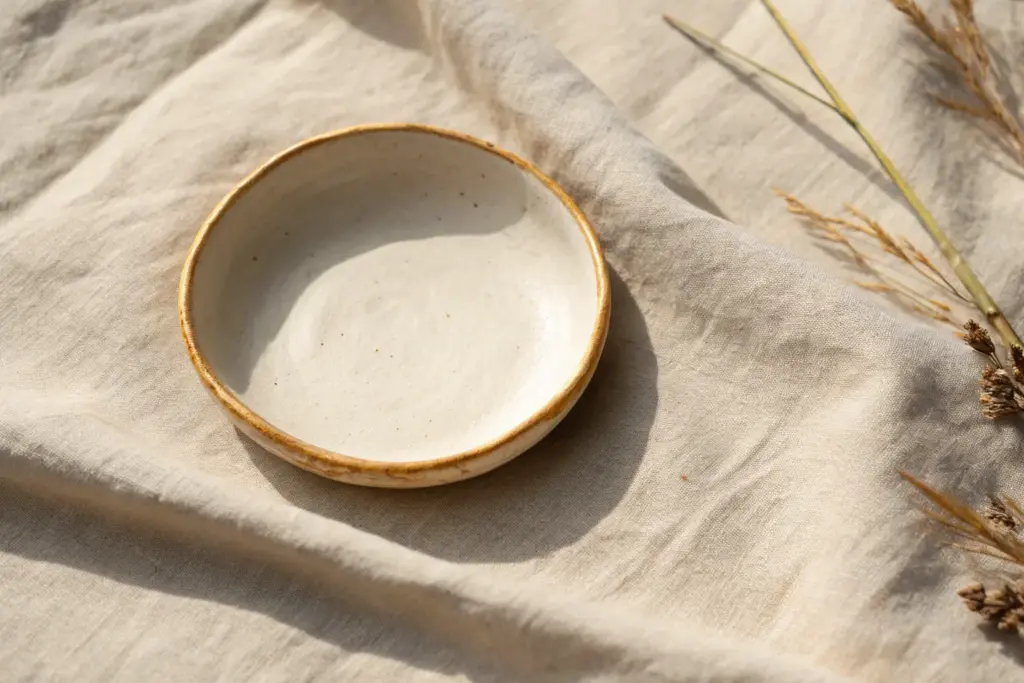
Classic Trinket Dish
This elegant trinket dish mimics the look of high-end hand-thrown pottery with its clean white base and warm, terracotta-hued rim. It is the perfect size for keeping everyday rings and studs safe on a nightstand.
How-To Guide
Materials
- White air-dry clay (approx. 200g)
- Acrylic rolling pin
- Sharp craft knife or clay needle tool
- Small bowl or circle cutter (approx. 4-5 inches diameter)
- bowl of water
- Small sponge
- Fine-grit sandpaper (220-400 grit)
- White acrylic paint (matte or satin)
- Terracotta or warm ochre acrylic paint
- Gloss varnish or polyurethane sealer
- Paintbrushes (medium flat and fine detail)
Step 1: Shaping the Base
-
Condition the Clay:
Begin by taking a handful of white air-dry clay and kneading it in your hands to warm and soften it. This helps reduce cracking later on. -
Roll the Slab:
Place the clay on a smooth work surface or canvas mat. Use the acrylic rolling pin to roll it out into an even slab, aiming for a thickness of about 1/4 inch. -
Cut the Circle:
Place your small bowl upside down on the clay as a template, or use a large circle cutter. Trace around it with your craft knife to cut out a perfect circle. -
Smooth the Edges:
Dip your finger in a little water and run it along the cut edge of the circle to smooth out any sharpness or loose bits of clay.
Crack Control
If small cracks appear while drying, don’t panic. Mix a tiny bit of fresh clay with water to make a paste and fill them in, then sand smooth once dry.
Step 2: Creating the Rim
-
Roll a Coil:
Take a separate piece of clay and roll it into a long, thin snake or coil. Aim for a thickness slightly thinner than a pencil. -
Score and Slip:
Use your needle tool or knife to scratch cross-hatch marks (scoring) around the top edge of your clay circle. Do the same to one side of your coil. Dab a little water (slip) onto the scored areas. -
Attach the Coil:
Gently press the coil onto the edge of the circle base. Cut off any excess coil and blend the two ends together seamlessly. -
Blend the Seams:
Using your thumb or a modeling tool, drag the clay from the inside of the coil down onto the base to merge them. I find using a slight downward stroking motion works best here. -
Refine the Shape:
Use a damp sponge to smooth the transition between the coil and the base so it looks like one solid piece. Gently pinch the rim to create that slightly organic, raised lip seen in the photo.
Step 3: Finishing Touches
-
Let it Dry:
Place the dish in a safe spot away from direct heat. Let it dry for 24 to 48 hours until it is bone dry and turns a chalky white. -
Sand for Smoothness:
Once fully dry, lightly sand the entire surface, paying special attention to the rim and the inside curve, to achieve a ceramic-like smoothness. -
Paint the Base:
Apply 1-2 coats of white acrylic paint to the entire dish. This creates a uniform canvas, even if your clay was already white. -
Paint the Rim:
Using a steady hand and a fine detail brush, paint just the very top edge of the rim with your terracotta or ochre paint. It doesn’t have to be mechanically perfect; a little waviness adds character. -
Seal the Dish:
Finish by applying a coat of gloss varnish. This gives the piece a glazed pottery look and protects it from tarnishing your jewelry.
Speckled Pottery Look
Flick diluted brown paint onto the wet white base coat using an old toothbrush before sealing. This creates a trendy faux-ceramic stoneware effect.
This simple yet sophisticated dish is ready to organize your treasures in style


Ring Cone Holder
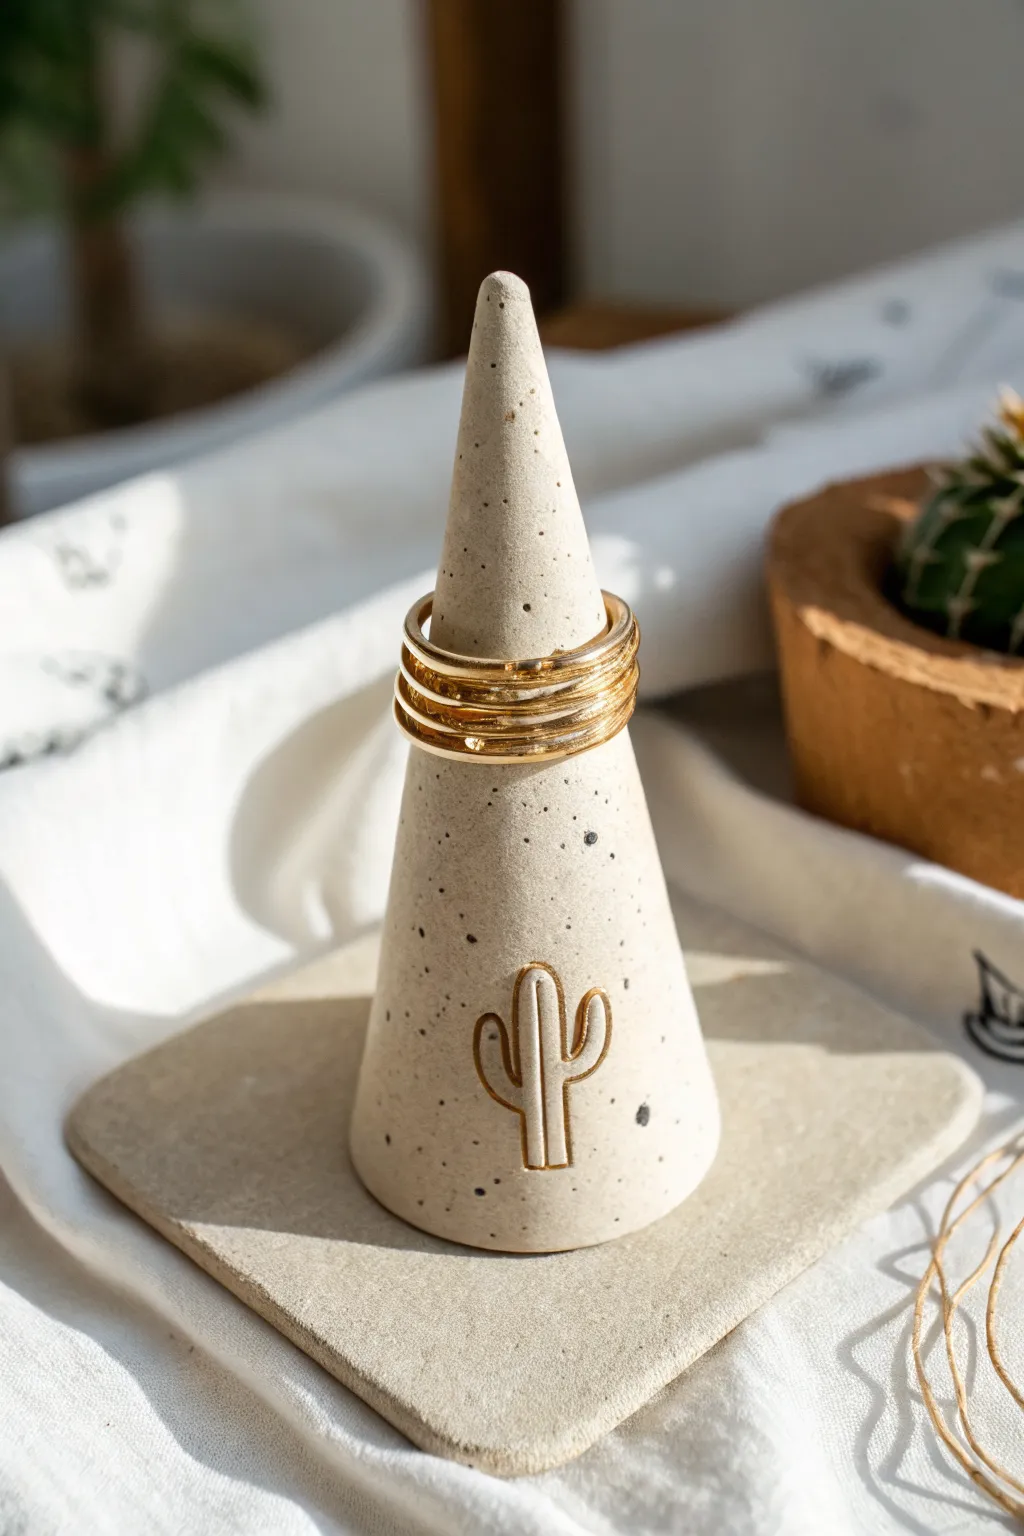
This minimalist ring holder combines the rustic charm of speckled stoneware with the ease of air dry clay. Its sleek cone shape and delicate gold cactus accent make it a functional piece of art perfect for storing your favorite bands.
Detailed Instructions
Materials
- Air dry clay (white or cream)
- Black pepper or dried coffee grounds (for speckling)
- Rolling pin
- sharp craft knife or X-Acto blade
- Small bowl of water
- Sponge or fine-grit sandpaper
- Gold acrylic paint or gold leaf pen
- Small detail paintbrush
- Cardstock or stiff paper (for template)
- Tape
- Clear sealant (matte or satin finish)
Step 1: Preparing the Clay
-
Mix the Speckles:
Take a handful of air dry clay and flatten it slightly. Sprinkle a pinch of black pepper or dried coffee grounds onto the surface to create that faux-stone look. -
Knead Thoroughly:
Fold the clay over itself and knead until the speckles are evenly distributed throughout the batch. If the clay feels dry, dip your fingers in water to keep it pliable. -
Create a Cone Template:
While the clay rests for a moment, cut a piece of cardstock into a quarter-circle shape. Roll this into a cone to test the size, then tape it in place to use as a visual guide.
Cracking Up?
If small cracks appear during drying, make a ‘slip’ paste of clay and water. Fill the cracks, smooth over, and let dry again.
Step 2: Shaping the Form
-
Form the Cone Base:
Roll your speckled clay into a smooth ball, then begin rolling it back and forth on your work surface, applying more pressure to one side to taper it into a cone shape. -
Refine the Shape:
Stand the cone upright. Gently tap the base against the table to flatten it so it stands perfectly straight without wobbling. -
Smooth the Sides:
Dip your finger in a little water and run it up and down the cone to smooth out any fingerprints or uneven ridges. Aim for a sleek, modern silhouette. -
Make the Square Base:
Roll out a separate smaller piece of clay to about 1/4 inch thickness. Use your craft knife to cut a clean square slightly larger than the cone’s base. -
Soften the Edges:
Use a damp sponge or finger to gently round off the sharp cut edges of the square base for a softer, ceramic-like finish.
Step 3: Adding Details & Assembly
-
Score and Slip:
Use your knife to scratch cross-hatch marks on the bottom of the cone and the center of the square base. Apply a dab of water or clay slurry to these scored areas. -
Attach Components:
Firmly press the cone onto the center of the square base. Use a modeling tool or your finger to smooth the seam where they meet so they look like one continuous piece. -
Carve the Cactus Design:
With the tip of a dull pencil or a modeling tool, gently press a cactus outline into the wet clay near the bottom of the cone. Don’t dig too deep, just create a clear impression. -
Enhance the Impression:
Go over your cactus lines one more time to ensure they are clean and uniform. -
Allow to Dry:
Set the piece aside in a cool, dry place. Let it dry for at least 24-48 hours. I like to rotate it occasionally so the bottom dries evenly.
Golden Glow Tip
For the brightest shine, apply two thin layers of gold paint rather than one thick gloppy layer inside the grooves.
Step 4: Finishing Touches
-
Sand Imperfections:
Once fully dry, inspect your piece. Use fine-grit sandpaper to buff away any final bumps or rough spots on the cone or base. -
Paint the Accent:
Using a very fine detail brush and gold acrylic paint (or a gold marker), carefully fill in the indented cactus design. -
Clean Up Lines:
If any gold paint spills over the edge of the indentation, quickly wipe it away or scrape it off gently once dry. -
Seal the Project:
Apply a coat of matte or satin sealant over the entire piece to protect the clay from moisture and give it a professional sheen.
Now your jewelry has a stylish new home that looks like expensive boutique decor


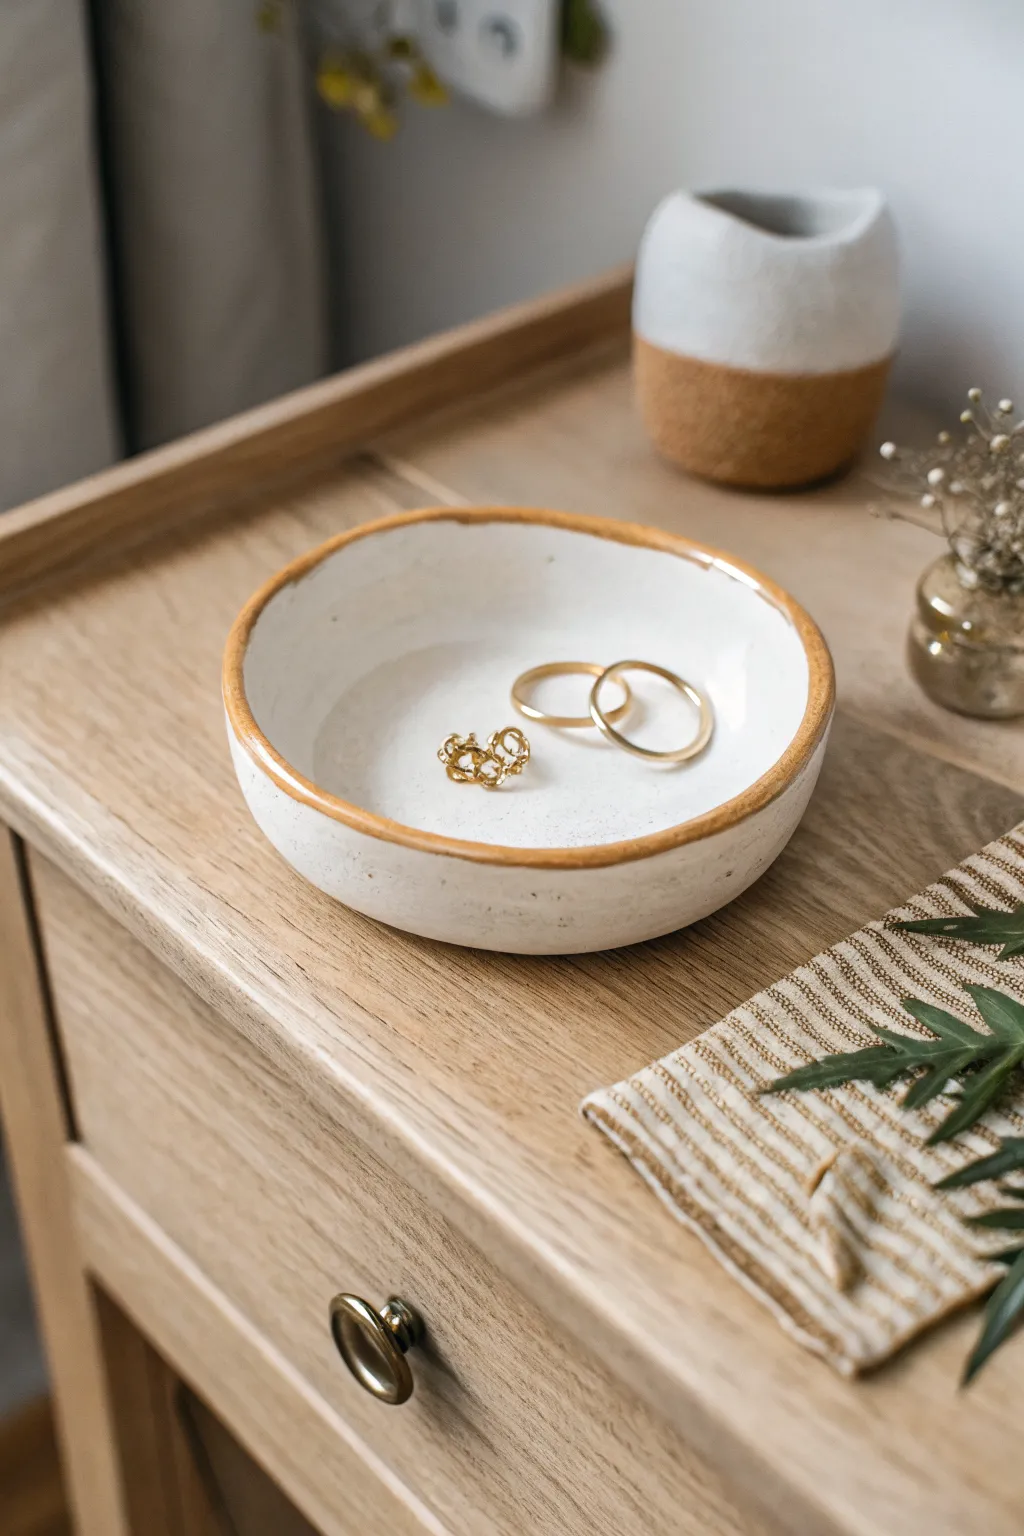
Stamped Initial Catchall Bowl
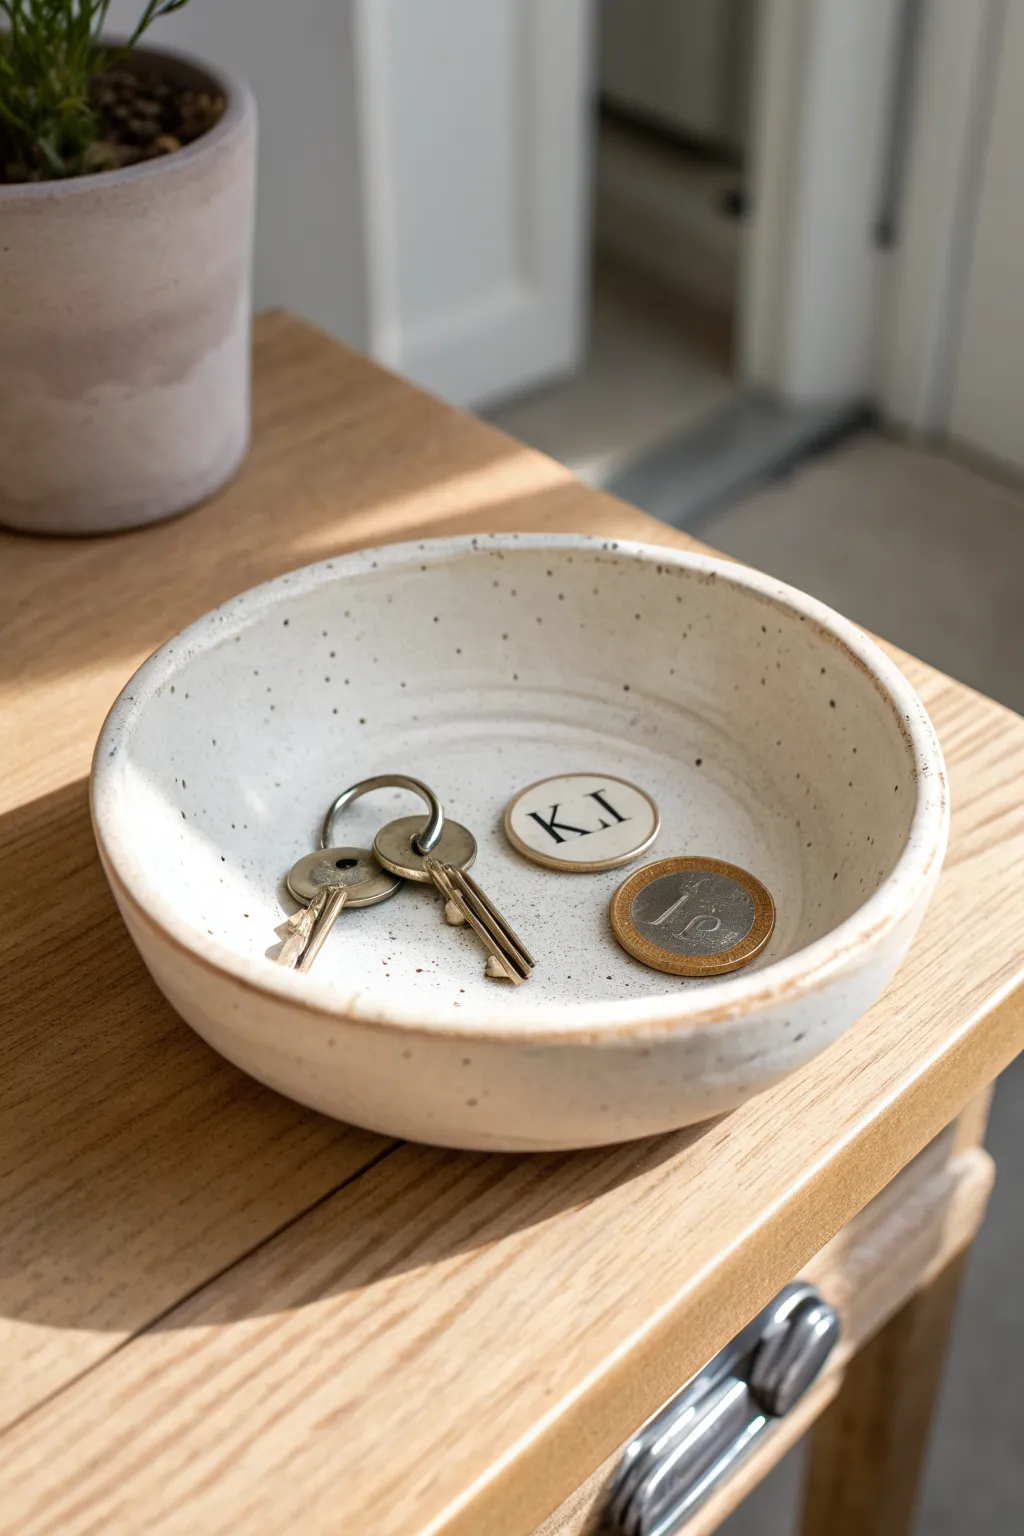
Create a charming, organic-looking catchall dish perfect for holding keys, loose change, or jewelry. This project uses air-dry clay to mimic the look of speckled stoneware pottery without needing a kiln, featuring a personalized initial token as a sweet bonus element.
Step-by-Step Guide
Materials
- White air-dry clay (approx. 500g)
- Small rolling pin
- Small bowl or plate (to use as a mold)
- Craft knife or needle tool
- Sponge
- Cup of water
- Fine-grit sandpaper (220 grit)
- Acrylic paints (Cream/Off-white, Brown/Black)
- Old toothbrush or stiff bristle brush
- Glossy varnish or sealant (Mod Podge or polyurethane)
- Letter stamp set (optional for initial token)
- Circular cookie cutter (small, for token)
Step 1: Shaping the Clay
-
Prepare the workspace:
Lay down a piece of parchment paper or a silicone mat to prevent the clay from sticking to your table. Take a chunk of white air-dry clay and knead it until it’s soft and pliable. -
Roll the slab:
Using your rolling pin, roll the clay out into an even slab, aiming for a consistent thickness of about 1/4 inch. If you see any air bubbles, pop them gently with a needle tool and smooth over. -
Cut the circle:
Place a bowl upside down on your clay slab to act as a template. Use your craft knife to trace around the rim, cutting out a perfect circle. -
Create the token:
With the leftover clay scrap, use a small circular cookie cutter to punch out a coin-sized disc. If you have a letter stamp, press an initial deeply into the center. Smooth the edges with a wet finger. -
Shape the bowl form:
Take your large clay circle and gently drape it *inside* your mold bowl. Press it down lightly so it takes the curved shape, but don’t press so hard that it gets stuck. I prefer to line the mold with plastic wrap first for easier removal. -
Smooth the edges:
Dip your sponge lightly in water and run it along the rim of your clay bowl. You want to round off the sharp cut edge to make it look like thrown pottery. -
Drying phase:
Let the clay sit in the mold for about 24 hours until it’s firm enough to hold its shape. Then, remove it from the mold and let it air dry completely for another 24-48 hours. It should turn white and feel hard.
Fix Cracks Fast
If hairline cracks appear while drying, mix a small amount of fresh clay with water to make a paste (slip) and fill the crack. Smooth it over and let dry again.
Step 2: Finishing and Painting
-
Sand for smoothness:
Once fully dry, take your fine-grit sandpaper and gently sand away any bumps, particularly around the rim and the bottom. Wipe away the dust with a slightly damp cloth. -
Base coat application:
Mix a warm cream color using white acrylic paint with a tiny drop of yellow ochre or brown. Paint the entire bowl (inside and out) and the small token. Let dry. -
Prepare the speckle:
Dilute a small amount of dark brown or black acrylic paint with water on a palette until it is quite runny/ink-like. -
Splatter technique:
Dip an old toothbrush into the watered-down dark paint. Holding the brush over the bowl, run your thumb across the bristles to flick tiny specks of paint onto the surface. Practice on paper first to control the spray. -
Paint the rim:
Using a small detail brush or your finger, lightly dab the dark brown paint along the very top edge of the rim to create that rustic, burnt-edge look often seen on stoneware. -
Highlight the initial:
For the token, use a very fine brush to paint black inside the stamped letter indentation, making the initial pop against the cream background. -
Seal the project:
Apply a coat of glossy varnish to the entire bowl. This mimics the shine of a ceramic glaze and protects the air-dry clay from moisture. -
Second coat:
Wait for the first layer of sealant to dry, then apply a second coat for extra durability and a higher shine finish.
Make it Luxe
Instead of brown paint for the rim, use liquid gold leaf or metallic gold paint to give the edge a sophisticated, dipped-gold effect.
Place this stylish bowl on your entryway table to keep your essentials organized and beautifully displayed


Botanical Imprint Coaster Set
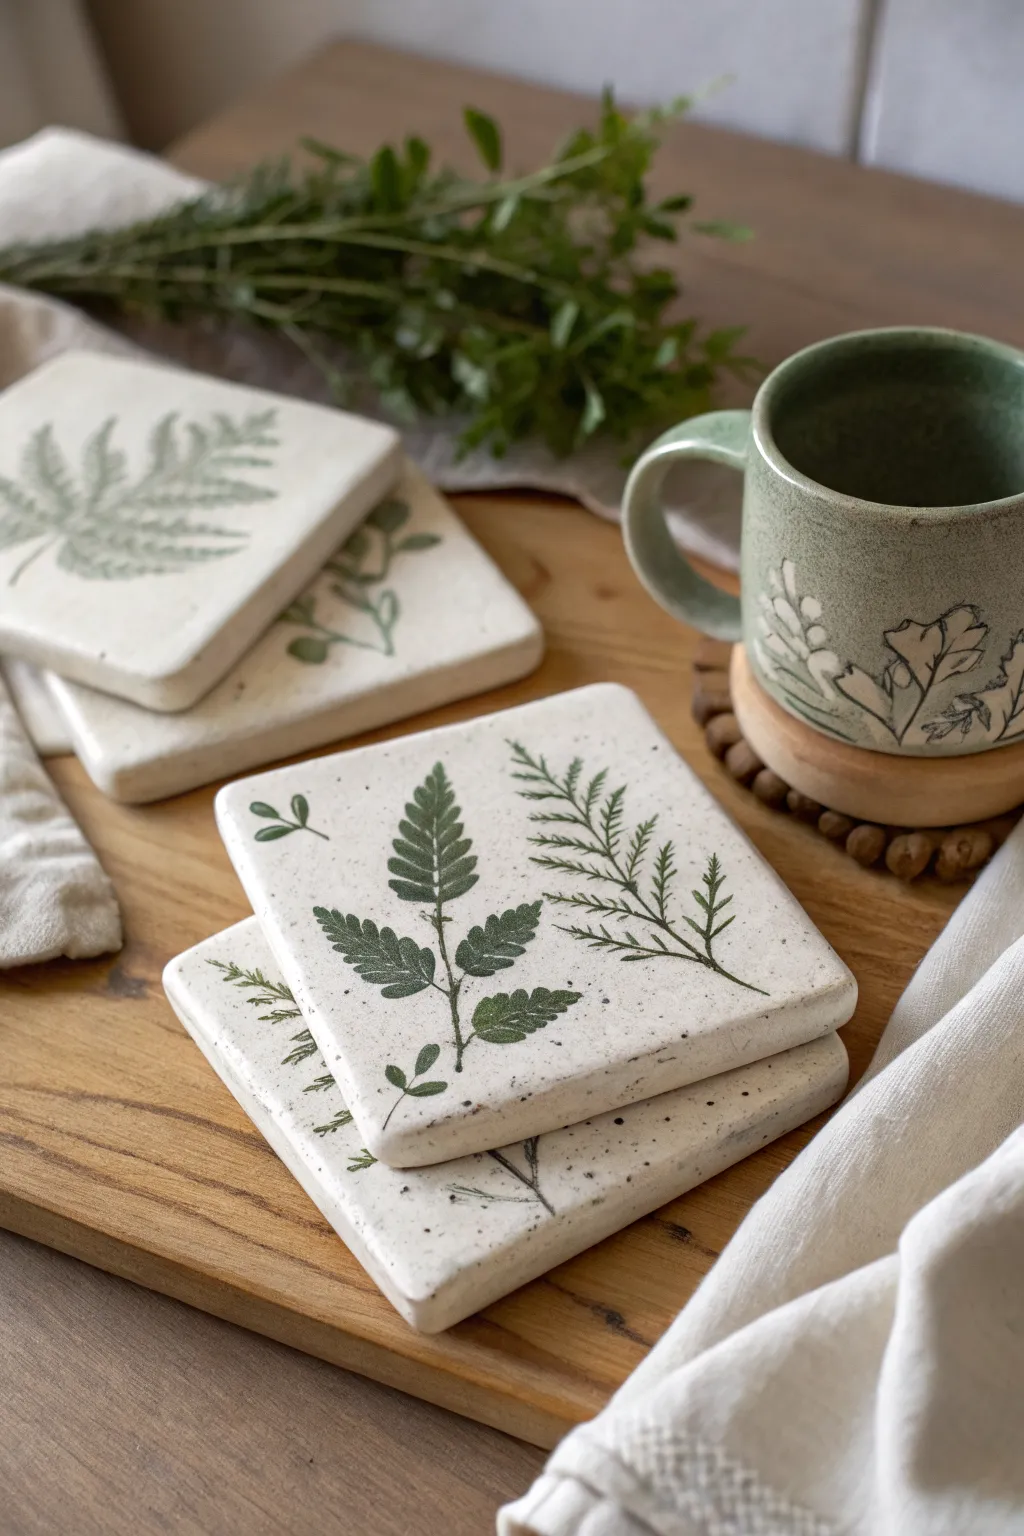
Bring the calming vibes of a forest walk into your home with these charming botanical coasters. Using simple air-dry clay and fresh clippings from your garden, you’ll create elegant, nature-inspired pieces perfect for gifting or keeping.
Detailed Instructions
Materials
- White organic air-dry clay
- Rolling pin
- Fresh fern fronds or sturdy leaves
- Square cookie cutter (approx. 4 inches) or hobby knife
- Fine-grit sandpaper
- Acrylic paint (Deep forest green and sage green)
- Fine detail paintbrush
- Matte spray sealant or waterproof varnish
- Parchment paper or canvas mat
- Small bowl of water
Step 1: Preparing the Clay Base
-
Condition the clay:
Begin by taking a generous handful of air-dry clay and kneading it in your hands until it feels warm and pliable. This conditioning step prevents cracks from forming later. -
Roll out the slab:
Place the clay on a sheet of parchment paper or a canvas mat to prevent sticking. Use your rolling pin to flatten the clay into an even slab, aiming for a thickness of about 1/4 inch to ensure durability. -
Smooth surface:
Dip your finger lightly in water and run it over the surface of the clay slab to remove any canvas textures or fingerprints, creating a pristine white canvas for your prints.
Step 2: Creating the Impressions
-
Arrange the botanicals:
Select your fresh fern fronds or leaves. Place them vein-side down onto the clay slab in your desired composition. I find that leaving some negative space around the edges makes the design feel more elegant. -
Press the leaves:
Gently roll your rolling pin over the leaves once or twice with firm, even pressure. You want to embed the plant material flush with the clay surface without distorting the slab’s shape too much. -
Reveal the texture:
Carefully peel back the leaves using tweezers or your fingernail. Do this slowly to ensure you don’t pull up chunks of clay, revealing the intricate vein patterns left behind. -
Cut the shape:
Position your square cookie cutter over the imprinted design and press down firmly to cut the coaster shape. If you don’t have a cutter, use a ruler and a hobby knife to cut a perfect 4-inch square. -
Smooth the edges:
Dip your finger in water again and gently run it along the cut edges of the square to soften the sharp corners. This gives the coaster a more finished, ceramic pottery look. -
Dry completely:
Transfer the coasters to a drying rack or a fresh sheet of parchment. Let them dry for 24-48 hours, flipping them occasionally to ensure even drying and prevent warping.
Prevent Warping
If your coasters start curling up at the corners while drying, place a heavy book on top of them (with parchment paper in between) once they are semi-dry but still slightly pliable.
Step 3: Finishing and Painting
-
Sand imperfections:
Once fully dry and hard, lightly sand the edges and the flat surface with fine-grit sandpaper to remove any rough spots or burrs. -
Wipe clean:
Use a slightly damp cloth or a dry brush to remove all the sanding dust from the crevices of the leaf imprints. -
Mix your greens:
Squeeze out a small amount of deep forest green and sage green acrylic paint. You can mix them slightly to create a natural, varied tone that mimics real foliage. -
Paint the imprint:
Using a fine detail brush, carefully paint into the depressed areas of the leaf impression. Don’t worry if you get paint on the upper surface; the slightly messy look adds to the rustic charm. -
Add speckling (optional):
To match the reference image’s speckled pottery look, add a tiny bit of water to your dark green paint. Load a stiff brush, and flick the bristles to splatter tiny dots across the white surface. -
Seal the coaster:
Apply two to three thin coats of a waterproof varnish or sealant. Allow proper drying time between coats. This is crucial to protect the clay from moisture from cups or mugs.
Antique Finish
For an aged look, paint the entire coaster with diluted brown paint, then immediately wipe the surface with a damp cloth, leaving the dark color only in the deep leaf crevices.
Stack your finished coasters and tie them with twine for a beautiful handmade gift connection

The Complete Guide to Pottery Troubleshooting
Uncover the most common ceramic mistakes—from cracking clay to failed glazes—and learn how to fix them fast.
Heart-Shaped Ring Dish
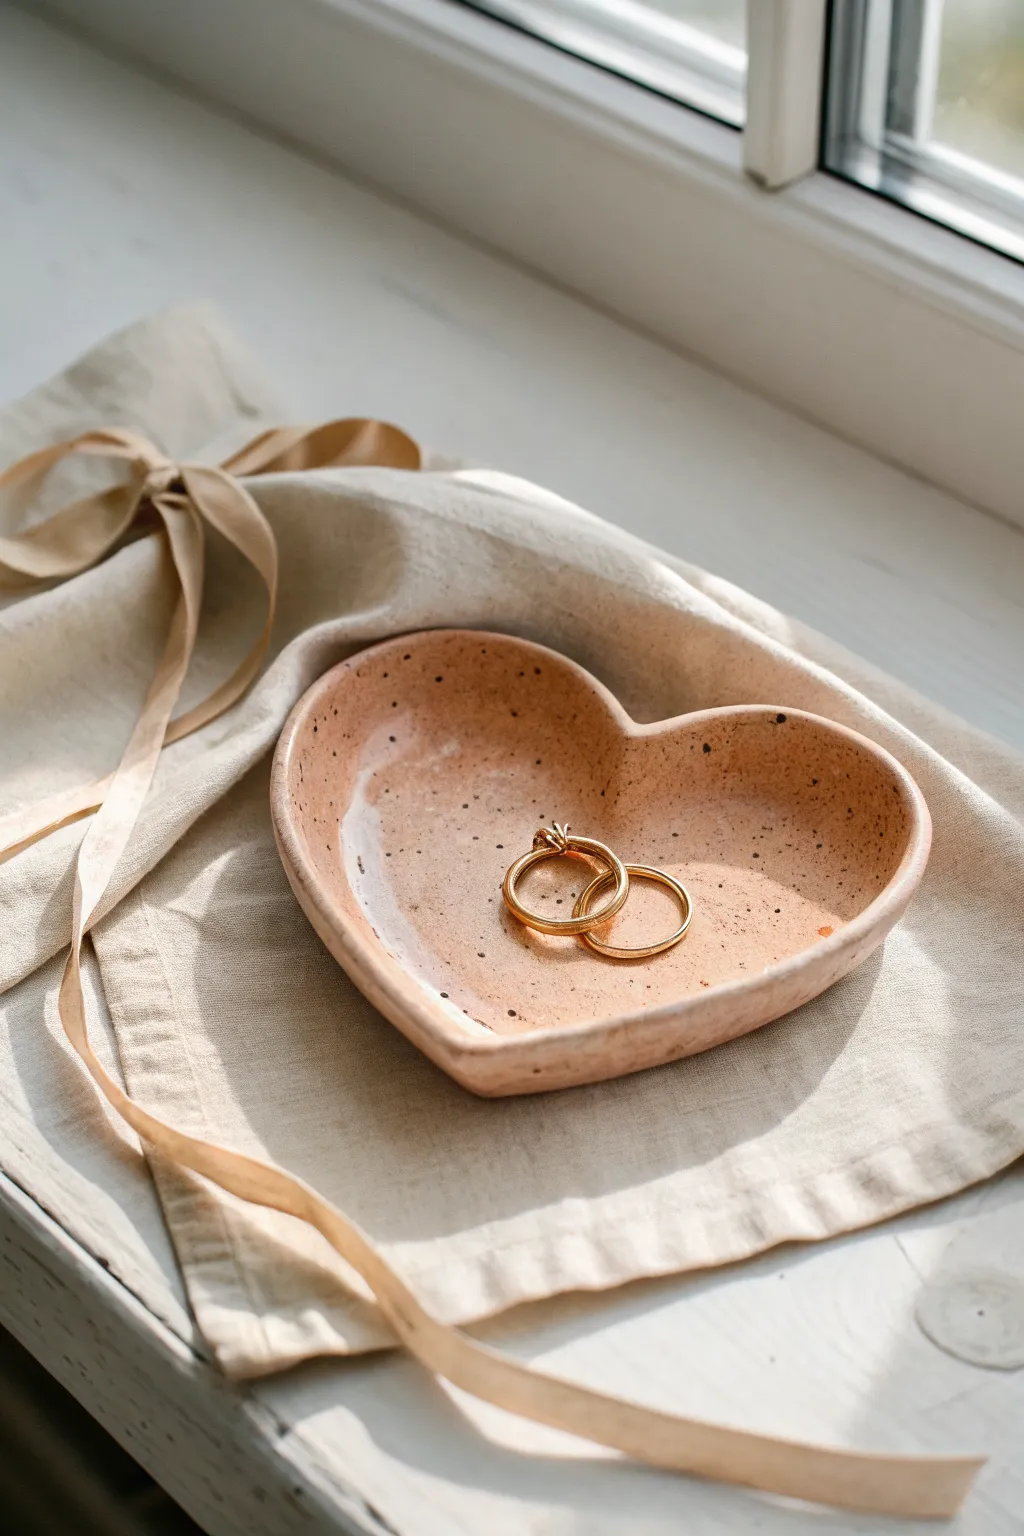
This charming, organically shaped jewelry dish combines a soft terracotta hue with delicate speckling for a modern, handmade aesthetic. It’s the perfect size for holding cherished rings or earrings and makes a thoughtful, romantic gift.
Step-by-Step Guide
Materials
- White or terracotta-colored air-dry clay
- Rolling pin
- Heart-shaped cookie cutter (or paper template and craft knife)
- Small bowl or sponge
- Water
- Fine-grit sandpaper
- Acrylic paints (pale peach/terracotta, espresso brown)
- Old toothbrush
- Gloss varnish or clear sealant
- Paintbrush
Step 1: Shaping the Clay
-
Conditioning the Clay:
Begin by taking a handful of air-dry clay and kneading it in your hands until it becomes soft, pliable, and free of cracks. Since air-dry clay dries quickly, keep a small bowl of water nearby to wet your fingertips if the material starts to feel crumbly. -
Rolling out the Slab:
Place the clay on a smooth surface or a dedicated clay mat to prevent sticking. Use your rolling pin to flatten the ball into an even slab, aiming for a thickness of about 1/4 inch (6mm) to ensure durability. -
Cutting the Shape:
Press a large heart-shaped cookie cutter firmly into the clay slab. If you don’t have a cutter, you can sketch a heart on paper, cut it out, place it on the clay, and trace around it carefully with a craft knife or needle tool. -
Softening Edges:
Remove the excess clay from around the heart. Dip your finger in water and gently run it along the cut edges to smooth out any sharpness or roughness left by the cutting tool. -
Forming the Curve:
To give the dish its gentle bowl shape, pick up the heart and carefully curl the edges upward with your thumbs. I like to pinch the edges slightly to create a raised rim, but keep it looking organic rather than mechanially perfect. -
Drying:
Place the formed heart somewhere safe to dry for 24 to 48 hours. Turning it over halfway through the drying process helps underneath dry properly and prevents warping.
Smooth Surface Secret
To get a flawlessly smooth inside curve without fingerprints, try drying the clay inside a plastic-wrap-lined bowl that has the curvature you want.
Step 2: Finishing and Decoration
-
Sanding:
Once the clay is bone dry and hard, use fine-grit sandpaper to buff away any remaining uneven spots, particularly around the rim. Wipe away the dust with a slightly damp cloth. -
Base Coat:
Mix a small amount of peach and light brown acrylic paint to achieve a warm, terracotta-like shade. Apply two thin coats to the entire dish, allowing the first coat to dry before adding the second. -
Prepping the Speckles:
Pour a tiny bit of dark espresso brown or black paint onto a palette and water it down slightly until it has an inky consistency. -
Splattering:
Dip an old toothbrush into the watered-down dark paint. Hold the brush over the dish and run your thumb across the bristles to flick tiny specks of paint onto the surface. Practice on a scrap paper first to control the spray. -
Sealing:
Allow the paint to dry completely. Finally, apply a coat of gloss varnish or clear sealant to the entire dish. This not only protects the paint but gives it that beautiful, ceramic-like shine shown in the photo.
Gold Rim Upgrade
For an elegant touch, paint just the very top edge of the rim with liquid gold leaf or metallic gold paint after the speckling step is dry.
Now you have a delicate keepsake ready to hold your favorite jewelry pieces
Simple Statement Earrings
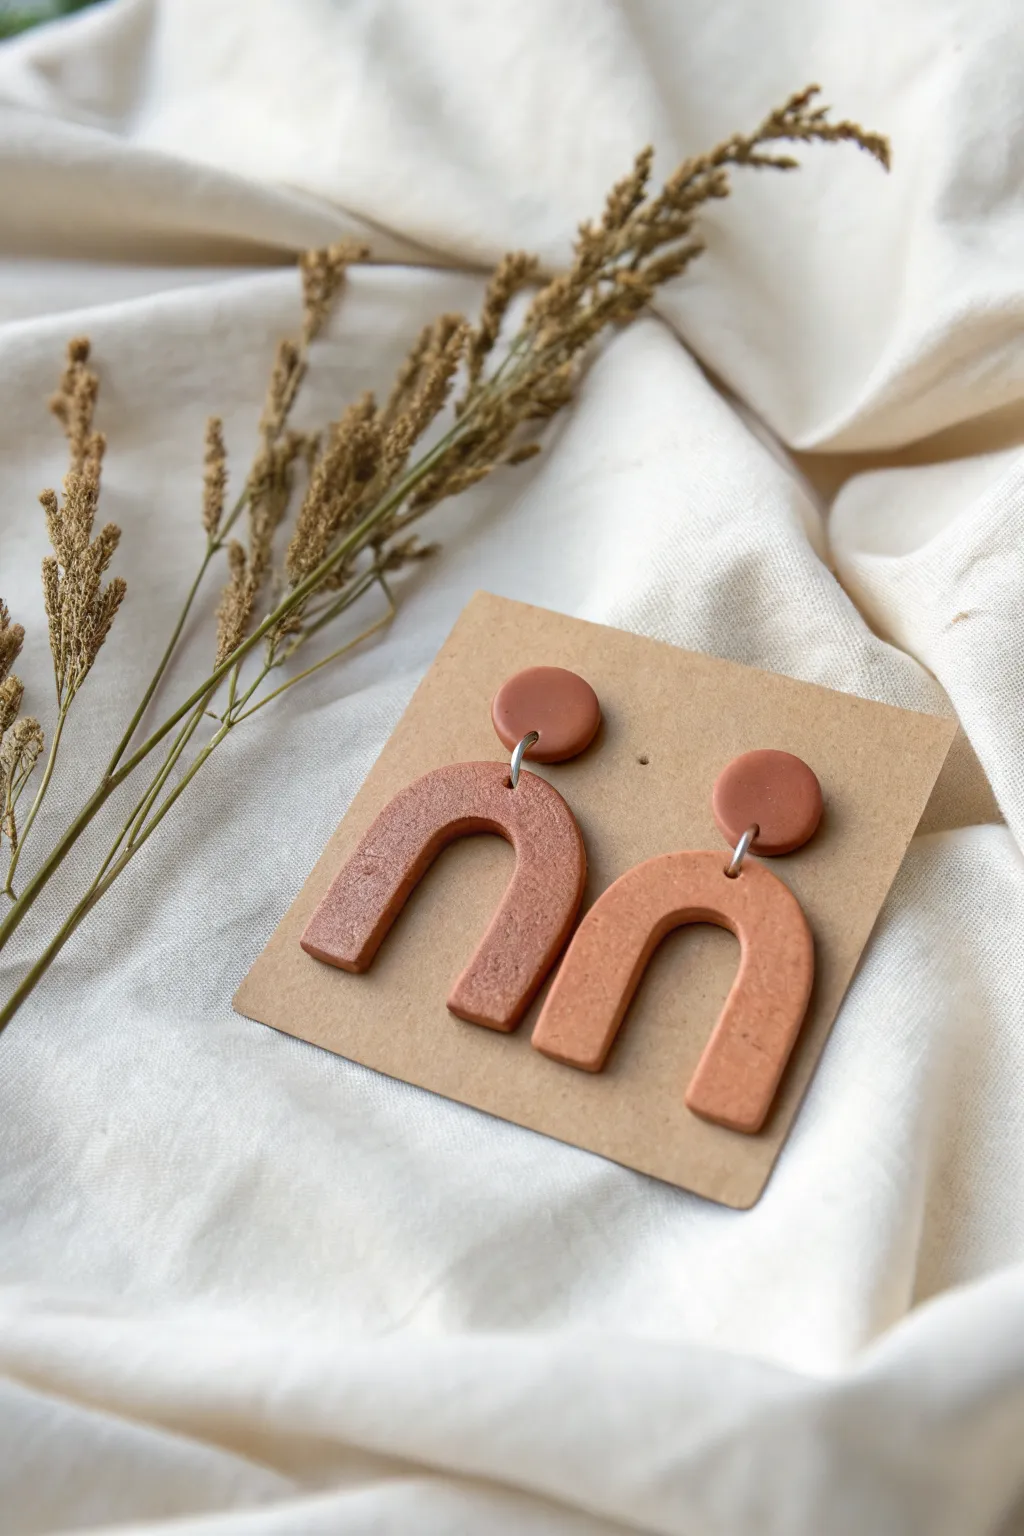
These minimalist arch earrings bring an earthy, bohemian warmth to any outfit with their rich terracotta tone and subtle texture. The simple geometric shapes create a modern statement piece that looks incredibly professional yet is surprisingly easy to make at home.
Detailed Instructions
Materials
- Terracotta-colored air-dry clay (or polymer clay)
- Small circular clay cutter (approx. 1cm)
- U-shaped clay cutter or exacto knife & template
- Rolling pin (acrylic or glass works best)
- Parchment paper or baking mat
- Two silver jump rings
- Earring posts and backs
- Superglue or jewelry glue
- Small pair of jewelry pliers
- Needle tool or toothpick
- Fine-grit sandpaper (optional)
- Mod Podge or clay varnish (optional)
Step 1: Shaping the Clay
-
Condition the block:
Begin by taking a chunk of your terracotta clay and kneading it in your hands. You want it to be warm and pliable, which helps prevent cracks from forming later on. -
Roll it out:
Place the clay on your parchment paper or work mat. roll it out to a uniform thickness of about 3mm—any thinner and they become fragile; any thicker and they might be too heavy. -
Cut the studs:
Using your small circular cutter, punch out two circles. These will be the top parts of your earrings that sit on the earlobe. -
Create the arches:
Cut out two U-shapes for the bottom dangles. If you don’t have a specific U-shaped cutter, I like to lightly sketch the shape onto the clay with a needle tool first, then carefully cut it out with an exacto knife. -
Smooth the edges:
Dip your finger in a tiny bit of water (for air dry clay) or baby oil (for polymer clay) and gently run it along the cut edges to soften any harsh lines or jagged bits.
Smooth Operator
To remove fingerprints before drying, lightly brush the raw clay surface with a little cornstarch or baby powder.
Step 2: Assembly Prep
-
Pierce holes for hardware:
Before the clay dries, use a needle tool or toothpick to poke a hole near the bottom edge of each circle stud. -
Pierce the arch:
Create a corresponding hole at the very center top of each U-shape arch. Make sure the hole is big enough for your jump ring to move freely but not so close to the edge that it breaks the clay. -
Add texture (optional):
If you want that subtle gritty look seen in the photo, you can lightly tap a piece of sandpaper or a rough sponge over the surface of the wet clay now. -
Let it dry:
Allow the pieces to dry completely according to your clay package’s instructions. Air dry clay typically takes 24-48 hours; do not rush this or the pieces may warp.
Make It Marble
Mix white clay into your terracotta clay but stop kneading halfway through to create a stunning swirled marble effect.
Step 3: Finishing Touches
-
Sand for perfection:
Once fully cured, gently sand the edges with fine-grit sandpaper if there are any remaining rough spots. -
Seal surface:
Apply a thin layer of matte varnish or Mod Podge if you want to protect the clay from moisture, though leaving it raw maintains that lovely matte stone look. -
Attach the posts:
Turn the small circles over. Apply a drop of strong jewelry glue to the flat pad of an earring post and press it firmly onto the back of the circle, near the top edge. -
Connect the pieces:
Using two pairs of pliers (or pliers and your fingers), twist a jump ring open sideways—never pull it apart. -
Link them up:
Slide the jump ring through the hole in the arch and the hole in the circle stud. -
Secure the closure:
Twist the jump ring back closed until the ends meet perfectly flush, ensuring the dangle won’t slip off.
Pop these beauties on a kraft card for gifting or wear them immediately to show off your handiwork


What Really Happens Inside the Kiln
Learn how time and temperature work together inside the kiln to transform clay into durable ceramic.
Cute Fridge Magnet Set
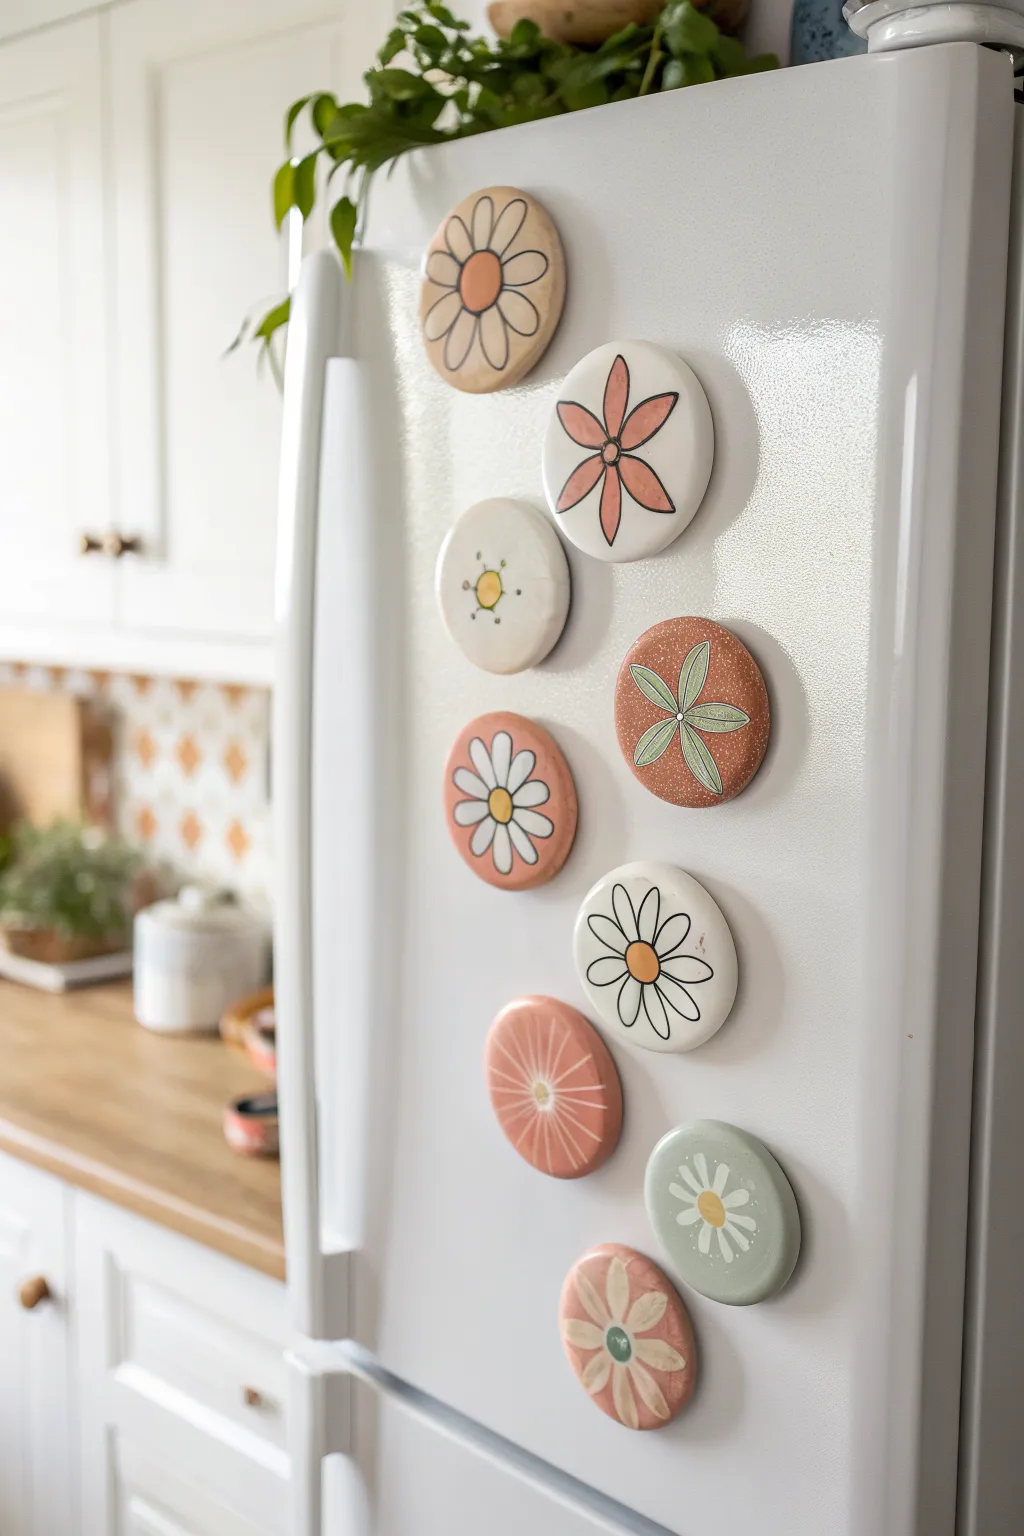
Brighten up your kitchen appliances with this charming collection of hand-painted floral magnets made from simple air-dry clay. The soft, earthy color palette and playful daisy designs add a touch of handcrafted whimsy to any magnetic surface.
Step-by-Step Tutorial
Materials
- White classic air-dry clay
- Rolling pin
- Circle cookie cutter (approx. 2-3 inches)
- Sandpaper (fine grit)
- Acrylic paints (terracotta, sage green, cream, mustard yellow, dusty pink)
- Detail paintbrushes (fine and medium round)
- Black fine-tip paint pen or permanent marker
- Gloss or matte varnish for sealing
- Strong round magnets
- E6000 or super glue
- Cup of water and parchment paper
Step 1: Shaping the Clay Base
-
Roll out the clay:
Take a chunk of air-dry clay and knead it briefly until it feels smooth and pliable. Place it on a sheet of parchment paper and use your rolling pin to flatten it to an even thickness of about 1/4 inch. -
Cut the circles:
Press your circle cookie cutter firmly into the clay to create your magnet shapes. For a full set like the picture, aim for 8-10 circles. -
Smooth the edges:
Dip your finger in a little bit of water and run it gently around the cut edges of each circle to soften any sharp ridges or burrs. -
Let them dry:
Leave the clay circles on a flat surface to dry completely. This usually takes 24-48 hours depending on humidity; turn them over halfway through to ensure even drying. -
Sand for perfection:
Once fully cured and hard, use fine-grit sandpaper to gently buff the surface and edges until they are silky smooth.
Smooth Surface Secret
Use a damp sponge to smooth the clay surface *before* cutting your circles. This reduces sanding time later and keeps the clay dust to a minimum.
Step 2: Painting the Blooms
-
Apply base coats:
Select a few circles to have colored backgrounds and paint them solid colors like terracotta or sage green. Leave the others plain white or paint them a soft cream. -
Add second coats:
For the solid colored bases, you might need a second layer of paint to get an opaque, rich finish. Let this dry completely before adding designs. -
Draw simple daisies:
On the white/cream circles, use a medium brush to paint simple five or six-petal flower shapes in colors like dusty pink or coral. Keep the petals loose and rounded. -
Paint the centers:
Add a contrasting dot in the center of your flowers using mustard yellow or terracotta paint. I find using the back end of a paintbrush handle makes the perfect dot. -
Create reverse designs:
On your colored backgrounds (like the terracotta one), use white or cream paint to add petals. This creates a striking reverse effect. -
Add fine details:
For the green leaf design, paint thin, elongated oval shapes radiating from the center. Use a thin liner brush for precision. -
Outline with marker:
Once the paint is 100% dry, use a black fine-tip paint pen to add definition. Outline the petals on the white magnets and draw the veins on the green leaf designs. -
Add decorative dots:
For variety, create one magnet with just small yellow dots and tiny dashed lines for a minimalist look, or add sunburst lines to a solid colored circle.
Texture Twist
Before the clay dries, gently press a piece of lace or a textured fabric onto one of the circles to add a subtle embossed pattern behind your painted flower.
Step 3: Finishing Up
-
Seal the surface:
Apply a coat of gloss or matte varnish over the top and sides of each magnet. This protects the paint from chipping and makes them easy to wipe clean. -
Attach the magnet:
Flip the clay pieces over. Apply a strong dab of E6000 or strong adhesive to the back center of the clay. -
Secure and set:
Press a round magnet firmly into the glue. Let the adhesive cure according to the package instructions before sticking them to your fridge.
Now your fridge is ready to show off your creativity with these sweet botanical accents
Minimal Photo or Card Holder
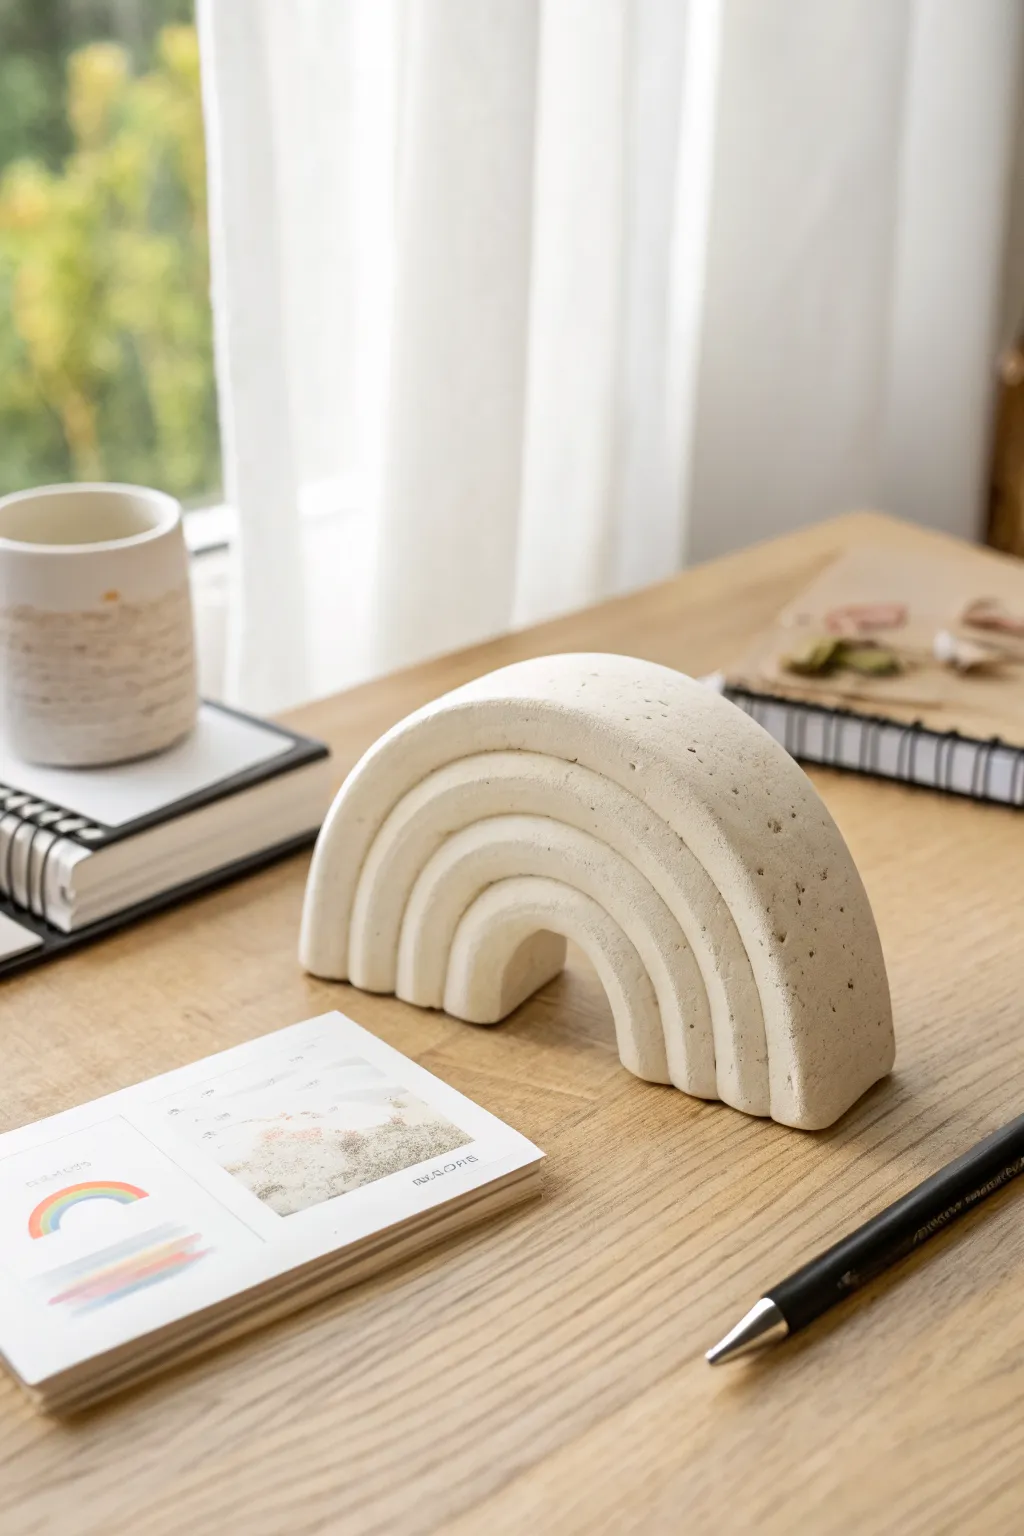
This project creates a chic, architectural desk accessory that doubles as a card or photo holder. With its simulated stone texture and clean arches, it brings a modern, earthy element to any workspace.
Detailed Instructions
Materials
- White air-dry clay (approx. 500g)
- Rolling pin
- Sharp craft knife or scalpel blade
- Sandpaper (medium and fine grit)
- Ruler
- Small bowl of water
- Used coffee grounds or black pepper (for texture)
- Parchment paper or non-stick mat
- Circular cookie cutters or glasses (various sizes)
Step 1: Preparation & Mixing
-
Condition the clay:
Begin by taking a substantial chunk of white air-dry clay and kneading it in your hands to warm it up and make it pliable. -
Add faux-stone texture:
To achieve that speckled concrete look, sprinkle a pinch of dried coffee grounds or coarse black pepper onto the clay and knead it thoroughly until the specks are evenly distributed. -
Roll the slab:
Place the clay between two guides (like rulers or magazines) to ensure even thickness, and roll it out until it is approximately 1.5 cm thick. You want a chunky, substantial feel.
Cracks Appearing?
Mix a tiny bit of fresh clay with water to make a thick paste. Fill any drying cracks with this paste, let it dry, and then sand it smooth.
Step 2: Shaping the Arches
-
Cut the largest arch:
Use your largest circular cutter or a bowl as a guide to cut a semi-circle shape. For the straight bottom edge, use your ruler and craft knife to slice cleanly across. -
Create the nesting arches:
Instead of rolling separate snakes of clay, we are creating a solid block look. Use progressively smaller circular cutters to slice nested semi-circles out of your main slab, or carefully freehand these concentric curves with a scalpel. -
Separate sections:
Gently separate the concentric arches. You should now have 4-5 semi-circular rainbow bands of equal thickness. -
Check fit:
I like to arrange them back together loosely to ensure the gaps aren’t too wide. If they are tight, trim the inner edges slightly with your knife.
Color Wash
Mix acrylic paint with water (1:10 ratio) and brush lightly over the dried piece. The pigment will settle into the stone texture for an antique look.
Step 3: Refining & Assembling
-
Smooth the edges:
Dip your finger in a little water and run it along all the cut edges to soften any sharp corners or drag marks from the knife. -
Score the connection points:
Use your knife to make small hatched scratches (scoring) on the inner curve of the larger arches and the outer curve of the smaller arches where they will touch. -
Apply slip:
Dab a small amount of water or liquid clay (slip) onto the scored areas to act as glue. -
Construct the rainbow:
Press the arches together firmly but gently, reassembling the rainbow shape. Ensure the bottom is perfectly flat by pressing the whole unit down onto your work surface. -
Add the card slot:
This step is crucial for functionality. While the clay is still wet, use the edge of a ruler or a thick piece of cardstock to press a slot into the very top center of the rainbow structure. -
Deepen the slot:
Wiggle the tool slightly to widen the groove so it can comfortably hold a heavy photograph or postcard later.
Step 4: Drying & Finishing
-
Initial dry:
Let the piece sit undisturbed on parchment paper for 24 hours. Rotate it occasionally to ensure airflow reaches the bottom. -
Full cure:
Wait another 24-48 hours until the clay is completely white and hard to the touch with no cold spots. -
Sanding:
Once fully dry, take medium-grit sandpaper to the flat sides to make them perfectly flush. This reveals the beautiful speckled texture even more. -
Softening details:
Switch to fine-grit sandpaper to round off the outer edges for a soft, professional ceramic finish. -
Sealing (optional):
For longevity, you can apply a matte varnish, though leaving it raw preserves the stone-like texture best.
Now you have a stylish, functional piece of decor ready to display your favorite memory

TRACK YOUR CERAMIC JOURNEY
Capture glaze tests, firing details, and creative progress—all in one simple printable. Make your projects easier to repeat and improve.
Tea Light Candle Holder
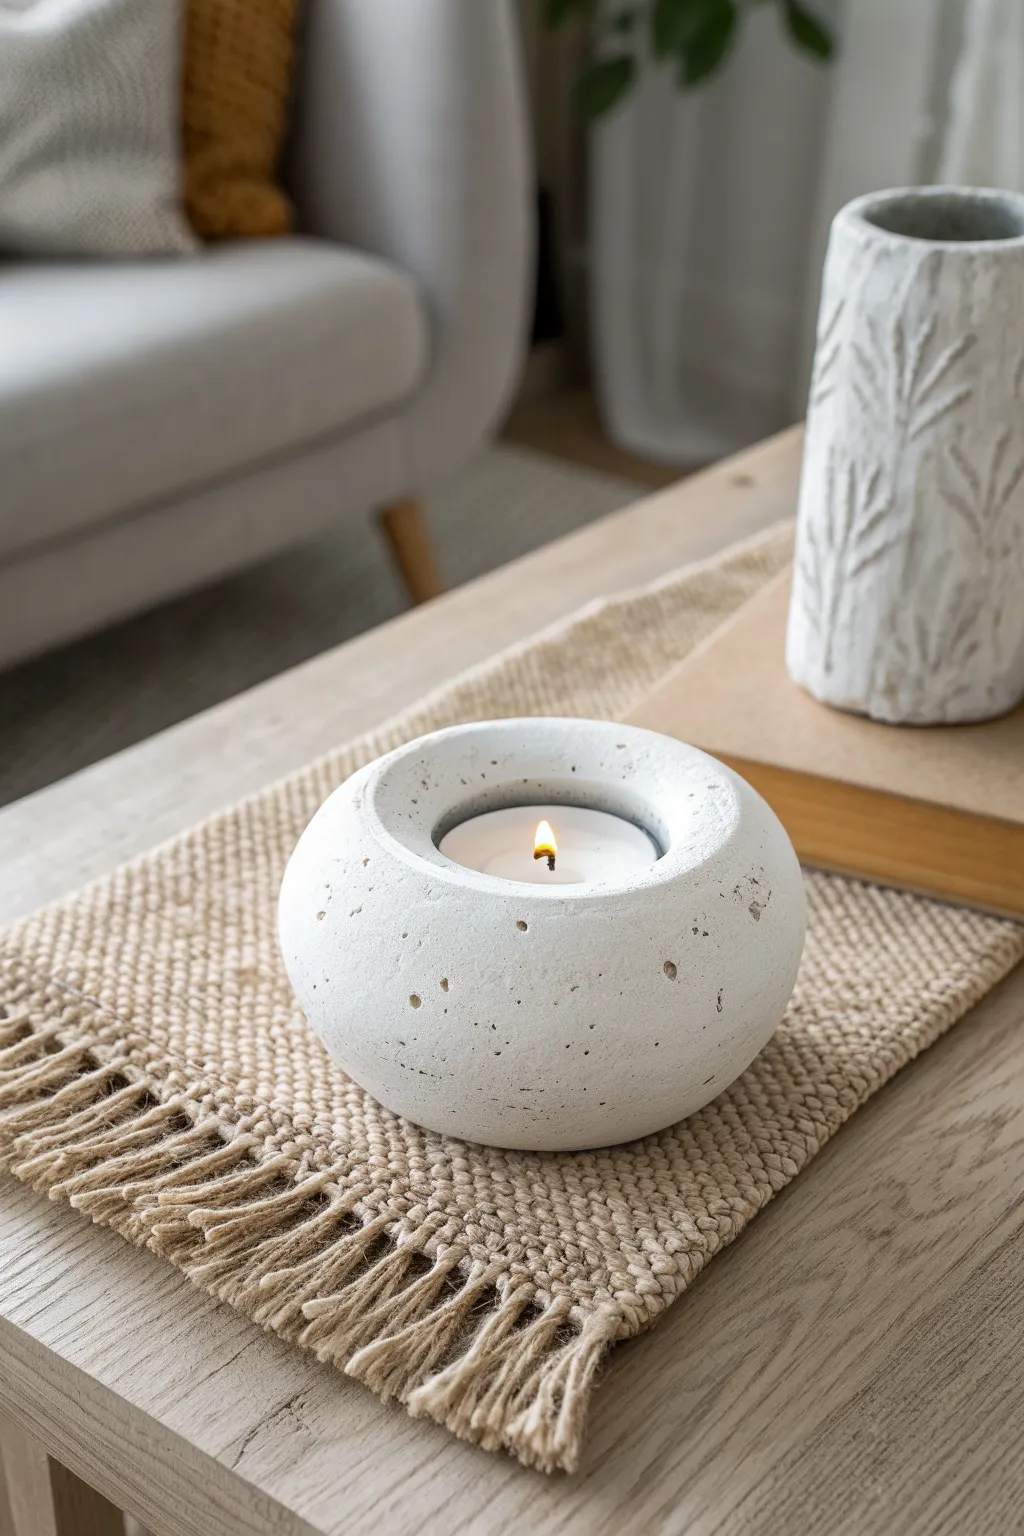
Bring a touch of organic serenity to any room with this minimalist tea light holder that mimics the look and texture of a weathered river stone. Using air dry clay, you’ll sculpt a perfectly imperfect rounded form with a textured limestone finish.
Step-by-Step Tutorial
Materials
- White air dry clay (approx. 300g)
- Standard tea light candle (for sizing)
- Small rolling pin (acrylic or wood)
- Water in a small cup
- Medium-grit sandpaper
- Old toothbrush or stiff bristle brush
- Sponge
- Toothpick or needle tool
- Matte white acrylic paint (optional)
- Matte sealant/varnish
Step 1: Shaping the Base
-
Condition the clay:
Start by taking a generous handful of white air dry clay. Knead it thoroughly in your hands to warm it up and ensure it’s pliable and free of air bubbles. -
Form a sphere:
Roll the clay between your palms or on your work surface to create a smooth, tight ball. It should naturally be slightly flattened, like a large pebble. -
Flatten slightly:
Gently press the ball down against your work table to create a stable, flat bottom so the holder won’t wobble. -
Smooth the perimeter:
Use a little water on your fingertips to smooth out any major cracks on the curved sides, aiming for a nice, consistent dome shape.
Stone Effect Trick
Mix varying amounts of coffee grounds or coarse black pepper into your white clay before shaping. When sanded later, these specks create an incredibly realistic granite texture
Step 2: Creating the Interior
-
Position the candle:
Take your tea light candle (metal casing included) and center it on top of your clay dome. -
Press the indentation:
Firmly press the tea light down into the clay until the metal rim is flush with or slightly below the clay surface. Wiggle it very gently to create a tiny bit of wiggle room for removal. -
Remove the candle:
Carefully lift the candle out. If the clay deformed slightly while pressing, gently cup the sides with your hands to restore the round pebble shape. -
Refine the rim:
Dip your finger in water and run it around the top edge of the hole you just made to smooth and round off the lip, so it looks soft rather than sharp.
Step 3: Texturing the Stone
-
Initial roughing:
To get that realistic limestone look, take an old toothbrush and dab it randomly all over the exterior surface of the clay. -
Create pitting:
Using a toothpick or a needle tool, poke small, shallow holes sporadically around the sides. Group a few together and leave other areas smooth for a natural variation. -
Soften the texture:
Dampen a sponge slightly (squeeze it out well!) and gently pat over the textures you just created. This knocks back the sharp edges of the holes, making them look like natural erosion. -
Inspect the shape:
Give the piece a final once-over from all angles. I like to make sure the top curve flows seamlessly into the bottom edge.
Centerpiece Set
Make a trio of these holders in staggered sizes—small, medium, and large. Group them on a wooden tray with dried eucalyptus or moss specifically for a stunning, minimalist table centerpiece
Step 4: Finishing Up
-
Dry thoroughly:
Set the holder aside in a cool, dry place. Let it dry for at least 24-48 hours. Don’t rush this; the center needs to be fully cured. -
Sand for finish:
Once bone dry, take your medium-grit sandpaper and lightly sand the exterior. This enhances the matte, stone-like feel. -
Dust off:
Wipe away any clay dust with a dry cloth or soft brush to clarify the texture. -
Optional painting:
The dried clay often looks perfect as is, but if you want a brighter finish, apply a thin wash of white acrylic paint mixed with water. -
Seal:
Apply a coat of matte varnish to protect the piece from humidity and handling without adding an artificial glossy shine.
Place a lit candle inside and enjoy the warm glow emanating from your handmade stone creation
Tiny Bud Vase Gift
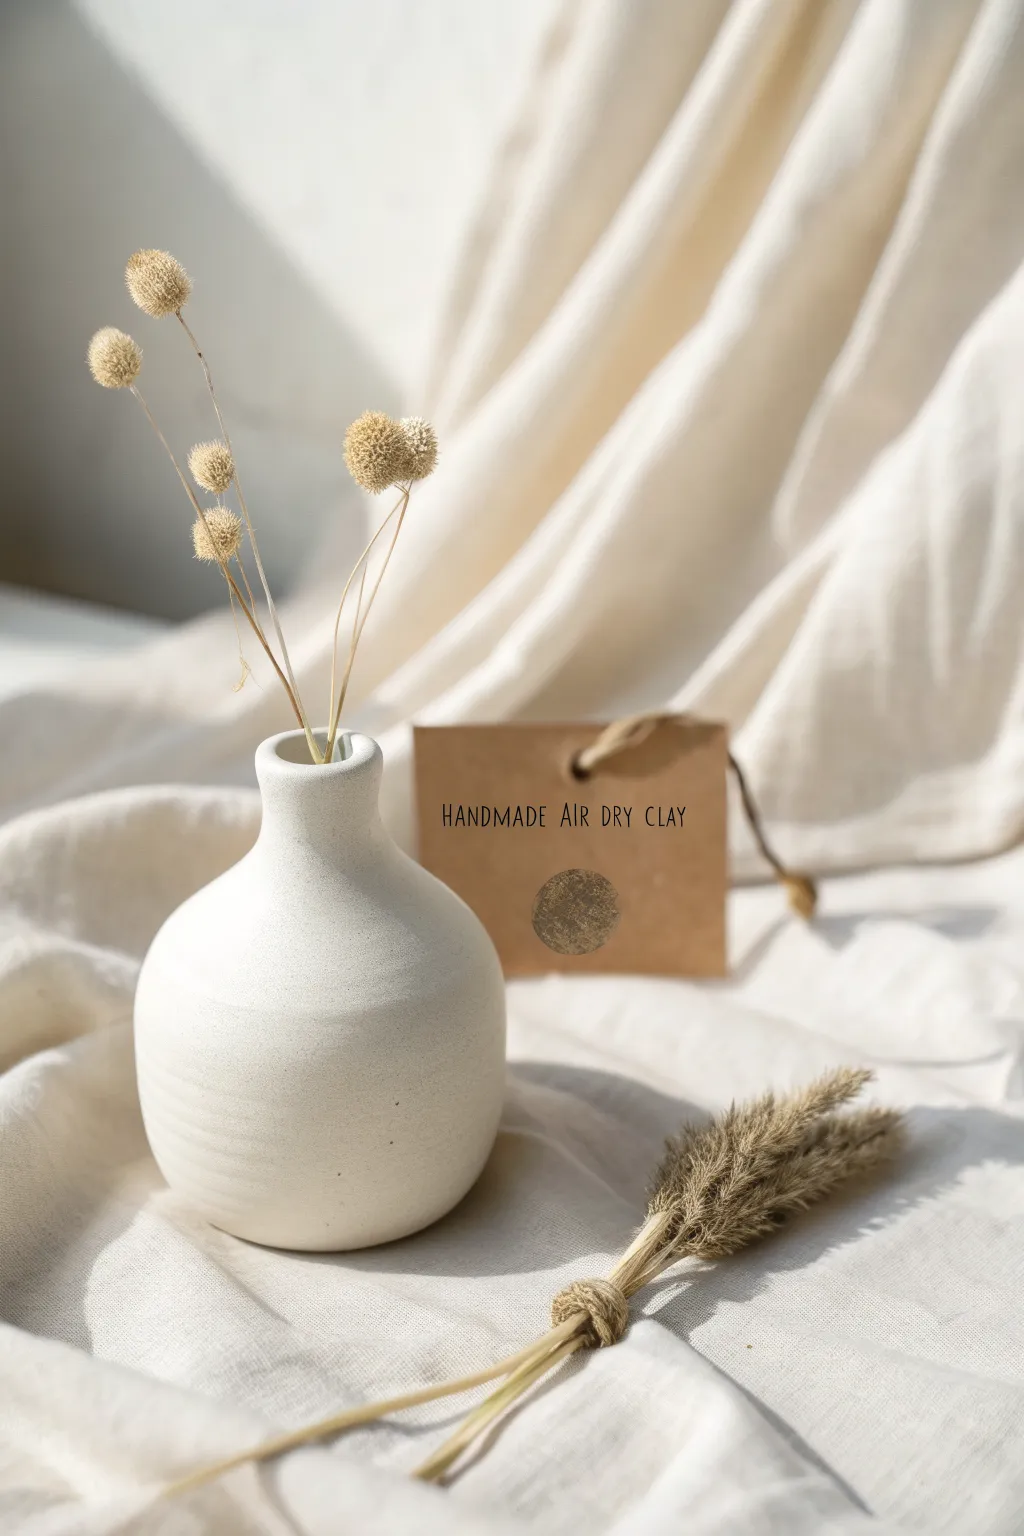
This tiny, elegant bud vase is the perfect minimalist vessel for dried botanicals. Its smooth, stone-like texture and soft, rounded form bring a sense of handmade calm to any shelf or desk.
Step-by-Step Guide
Materials
- White smooth air dry clay
- Rolling pin
- Clay knife or craft knife
- Sponge
- Small cup of water
- Fine-grit sandpaper (220-400 grit)
- Matte spray varnish or acrylic sealer
Step 1: Shaping the Base
-
Prepare the Clay:
Cut off a chunk of white air dry clay about the size of a large lemon. Knead it in your hands for a minute to warm it up and ensure there are no air bubbles trapped inside. -
Roll a Sphere:
Roll the clay between your palms to create a smooth, tight ball. Aim for a sphere that feels dense and solid, smoothing out any cracks with a damp finger as you go. -
Create the Opening:
Hold the sphere in your non-dominant hand. Use your thumb to press gently into the center of the ball, creating a deep indentation. Don’t push all the way through; leave a thick base at the bottom for stability. -
Pinch the Form:
Using a pinching motion with your thumb inside the hole and fingers on the outside, slowly rotate the ball. Gently pinch the walls to thin them out slightly and expand the interior cavity.
Smooth Seams for Strength
When attaching the neck coil, use a ‘score and slip’ method (scratching both surfaces and adding water) to ensure the neck doesn’t crack off while drying.
Step 2: Refining the Silhouette
-
Form the Shoulder:
Instead of opening the pot wide like a bowl, gently press the upper rim inwards as you rotate. This defines the ‘shoulder’ of the vase where the round body transitions into the neck. -
Build the Neck:
Take a separate small coil of clay. Score the top opening of your base and the coil, add a dab of water, and attach the coil to form the vertical neck structure. -
Smooth the Join:
Use your thumb or a modeling tool to blend the clay from the neck downward into the body. The seam should disappear completely, creating a continuous flow. -
Shape the Rim:
Refine the very top edge of the neck. I like to gently tap it flat with a ruler or paddle creates a clean, modern lip, rather than leaving it rounded. -
Add Subtle Texture:
While turning the vase, you can create the faint horizontal ridges seen on the body by lightly dragging your finger or a rib tool across the surface as you rotate. This mimics wheel-thrown pottery.
Create a Speckled Look
Before sealing, mix a tiny amount of brown acrylic paint with water. Use an old toothbrush to flick tiny specks onto the vase for a ceramic stoneware effect.
Step 3: Finishing Touches
-
Sponge Smooth:
Dip your sponge in water and squeeze it out until it’s just damp. Wipe the entire surface of the vase to remove fingerprints and harsh tool marks. -
Let it Dry:
Place the vase on a wire rack or a piece of cardboard to dry. Depending on humidity, this will take 24-48 hours. Rotate it occasionally so it dries evenly. -
Sand for Perfection:
Once fully bone dry (the clay will turn white and feel chalky), take your fine-grit sandpaper and gently sand the surface. Focus on the rim and any uneven spots on the body. -
Dust Clean:
Use a soft, dry brush or a tack cloth to remove all the sanding dust from the vase, inside and out. -
Seal the Piece:
Because air dry clay isn’t waterproof, apply a matte spray varnish. This protects the finish without making it glossy, maintaining that natural stone look. -
Add Greenery:
Once the sealer is dry, arrange a few stems of dried bunny tails or billy buttons inside. Remember, since it’s not waterproof, stick to dried botanicals only.
This charming little vessel makes a thoughtful gift, especially when paired with a simple handmade tag and some dried flowers
Mini Planter for Plant Lovers
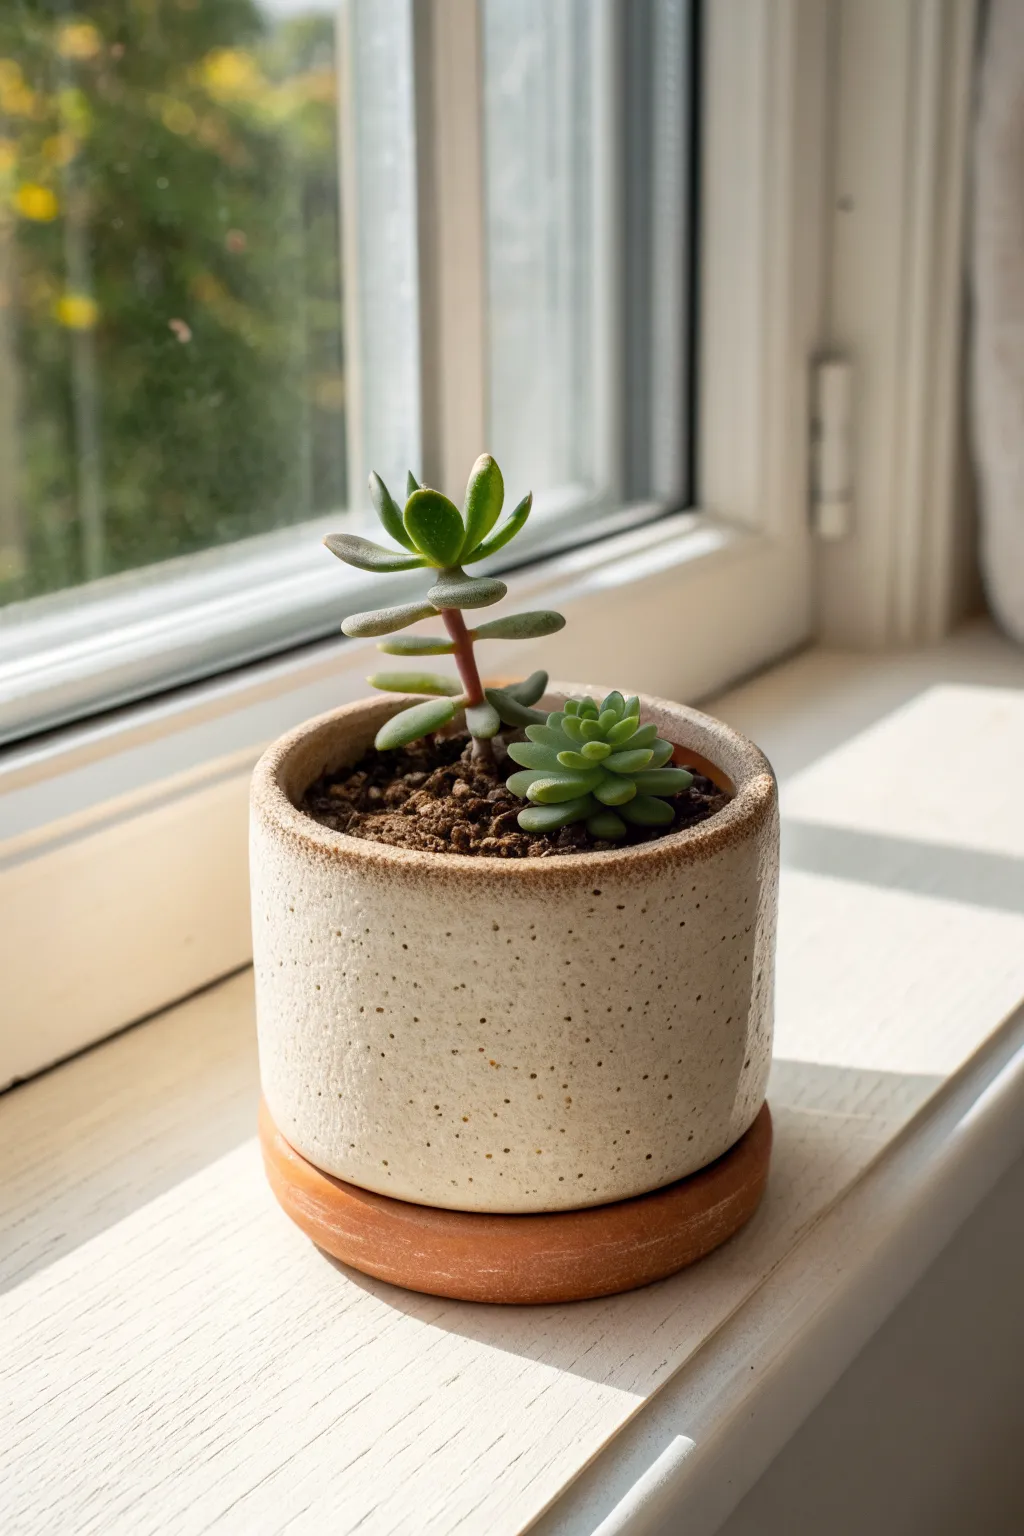
Achieve the high-end look of fired ceramics with simple air-dry clay in this charming mini planter project. By kneading specific spices into your white clay, you’ll create a realistic speckled texture that mimics expensive stoneware perfectly.
How-To Guide
Materials
- White air-dry clay
- Coarse black pepper or dried coffee grounds
- Rolling pin
- Craft knife or clay tool
- Small circular cookie cutter (optional)
- Small bowl or cup (to use as a mold)
- Sandpaper (fine grit)
- Acrylic paints (terracotta/burnt orange, cream/beige, burnt umber)
- Gloss or satin varnish (waterproof sealant crucial)
- Paintbrushes
- Sponge
Step 1: Preparing the Speckled Clay
-
Mix your speckles:
Begin with a handful of white air-dry clay. To mimic that authentic pottery grit, sprinkle in a pinch of coarse black pepper or dry, used coffee grounds. I usually start with just a little and add more as needed. -
Knead thoroughly:
Fold and knead the clay repeatedly until the specks are distributed evenly throughout the mass. The goal is a consistent, stone-like appearance. -
Roll the base:
Roll out a portion of your speckled clay to about 1/4 inch thickness. Use a circular cutter or trace around a small cup to cut out the base of your pot. -
Create the walls:
Roll out a long, rectangular strip of clay for the walls, maintaining the same 1/4 inch thickness. Ensure the strip is long enough to wrap around the circumference of your base.
Crack Prevention
If you see tiny hairline cracks appearing as the clay dries, smooth a slurry of clay and water into them immediately while the pot is still damp.
Step 2: Building the Form
-
Score and slip:
To ensure a strong bond, scratch cross-hatch marks (scoring) on the edge of the base and the bottom edge of your wall strip. apply a tiny amount of water (slip) to these roughed-up areas. -
Assemble the cylinder:
Wrap the wall strip around the base circle. Join the two ends of the wall strip by scoring and slipping them as well, pressing them firmly together. -
Blend the seams:
Use your finger or a modeling tool to smooth the clay where the walls meet the base and where the vertical seam joins. The seams should disappear completely for a clean look. -
Refine the rim:
Gently smooth the top rim with a wet finger to round off any sharp edges. Flip the pot carefully to ensure the bottom edge is also neat. -
Form the saucer:
Roll a smaller amount of clay into a flat disk, slightly wider than your pot. Create a very low rim by pinching the edges upward slightly, mimicking a traditional terracotta saucer shape.
Step 3: Finishing and Coloring
-
Let it dry:
Allow your pieces to dry completely for 24-48 hours. They should turn white and feel hard to the touch. -
Sand for smoothness:
Once dry, gently sand any rough spots or unevenness on the rim and sides using fine-grit sandpaper. -
Paint the saucer:
Paint the saucer with a terracotta or burnt orange acrylic paint. Apply two coats for solid coverage, aiming for that classic clay pot warmth. -
Base coat the pot:
Paint the main pot body with a cream or warm beige color. Because you mixed pepper into the clay earlier, the texture might naturally show through, but a light coat of paint unifies the tone. -
Add the rim detail:
To create the ‘glazed’ look where the rim appears slightly toasted, sponge or dab a very small amount of watered-down burnt umber paint right along the top edge. -
Simulate more speckles (optional):
If the paint covered your pepper speckles too much, dip an old toothbrush in watered-down brown paint and flick it gently over the pot to re-introduce those tiny dots. -
seal completely:
This is crucial for planters: apply 2-3 coats of a waterproof varnish or sealant to both the inside and outside of the pot and saucer to protect it from moisture.
Drainage Hole Hack
Use a straw to punch a hole in the center of the pot base while the clay is wet. This keeps your succulents healthy by allowing water to escape.
Now you have a chic, handmade home for your favorite little plant succulent
Desk Organizer Pocket Tray
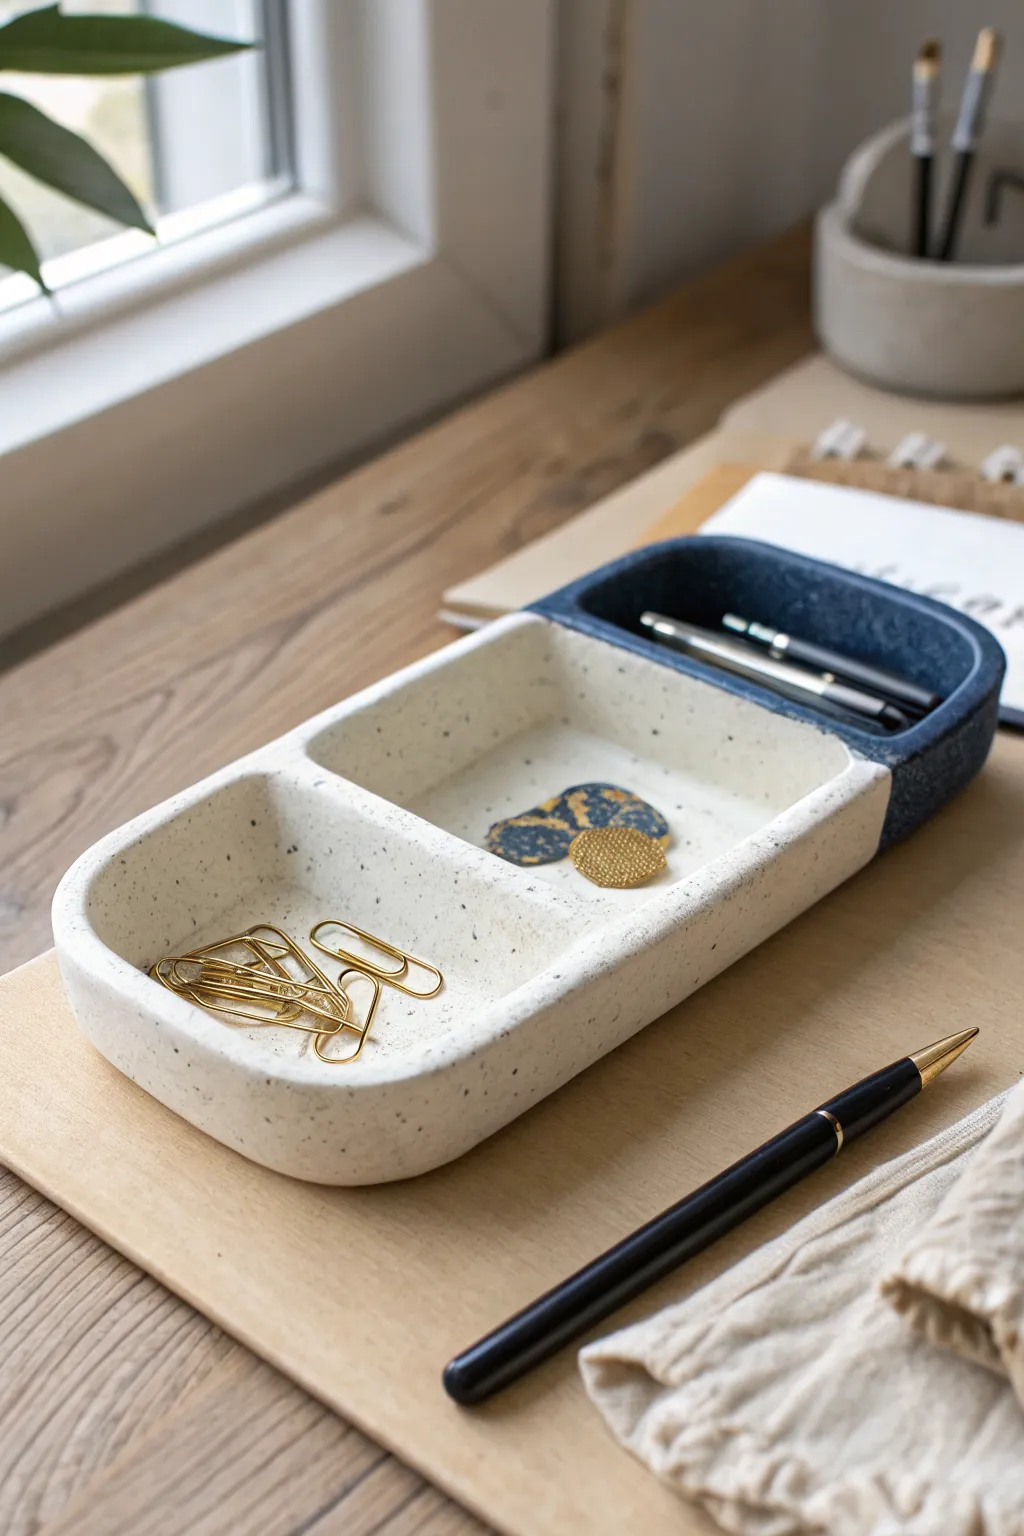
Bring instant organization to any workspace with this sleek, minimalist desk tray crafted from humble air-dry clay. The design features three distinct compartments and a striking color-blocked finish, combining a raw, speckled cream texture with a deep navy contrast for a modern look.
Detailed Instructions
Materials
- White air-dry clay (approx. 500g)
- Rolling pin
- Parchment paper or canvas mat
- Craft knife or clay cutter
- Ruler
- Small bowl of water
- Navy blue acrylic paint
- Heavy body white acrylic paint (optional, for base)
- Black and brown acrylic ink or watered-down paint (for speckles)
- Old toothbrush
- Fine grit sandpaper (320-400 grit)
- Matte varnish or sealant
- Cardboard (for templates)
Step 1: Shaping the Base
-
Create templates:
Cut a rectangular piece of cardboard approximately 4 inches by 9 inches for the base. This will ensure your tray stays uniform. -
Roll the slab:
Roll out your air-dry clay on parchment paper to an even thickness of about 1/4 inch. Ensure the slab is large enough to accommodate your cardboard template plus extra for the walls. -
Cut the base:
Place your cardboard template onto the clay slab and cut around it using your craft knife. Remove the excess clay but keep it nearby for the walls. -
Prepare wall strips:
Roll the remaining clay to the same 1/4 inch thickness. Cut long strips that are about 1 inch tall. You will need enough length to go around the entire perimeter plus two interior dividers.
Straight Lines Made Easy
For a perfect line between the blue and white sections, apply masking tape or washi tape over the dry white paint before painting the blue end.
Step 2: Building the Structure
-
Score and slip:
Score the outer edges of your base slab with a needle tool or knife tip. Do the same to the bottom edge of your clay strips. Dab a little water on the scored areas to create a ‘slip’ that acts as glue. -
Attach outer walls:
Press the wall strips onto the base. Gently blend the seam where the wall meets the floor using your finger or a clay tool until the join is invisible. -
Smooth the corners:
I find that using a slightly wet finger to round out the interior corners makes the tray look more professional and easier to clean later. Ensure the exterior corners are rounded gently to match the photo. -
Add dividers:
Cut two pieces of clay strip to fit the width of the tray. Score and slip these into place to create three compartments: one small square section on the left, a large central section, and a small section on the far right. -
Refine the rim:
Run a damp sponge or finger along the top rim of the walls to smooth out any sharp edges or unevenness. The walls should look consistent in height.
Faux Stone Effect
Mix a small amount of fine sand or baking soda into your white paint before applying it to give the piece a genuine gritty, ceramic texture.
Step 3: Finishing and Painting
-
Dry thoroughly:
Let the tray dry completely for 24-48 hours. Turn it over gently halfway through so the bottom dries evenly. -
Sand for smoothness:
Once bone dry, use fine-grit sandpaper to buff away any fingerprints or bumps. Wipe away the dust with a slightly damp cloth. -
Base coat:
Paint the entire left and center sections (inside and out) with a creamy white acrylic paint. You may need two coats for opaque coverage. -
Apply the speckles:
Dip an old toothbrush into watered-down black or dark brown paint. Run your thumb across the bristles to flick tiny specks onto the white painted areas. Practice on paper first to control the spray. -
Color blocking:
Paint the third compartment (on the far right) with deep navy blue acrylic paint. Use a flat brush to get a crisp, straight line where the blue meets the white section. -
Seal the piece:
Finish by applying a coat of matte varnish over the entire tray to protect the paint and give it a finished, stone-like feel.
Place your new organizer on your desk and enjoy the satisfaction of a tidy workspace made by hand
Boho Rainbow Wall Hanging
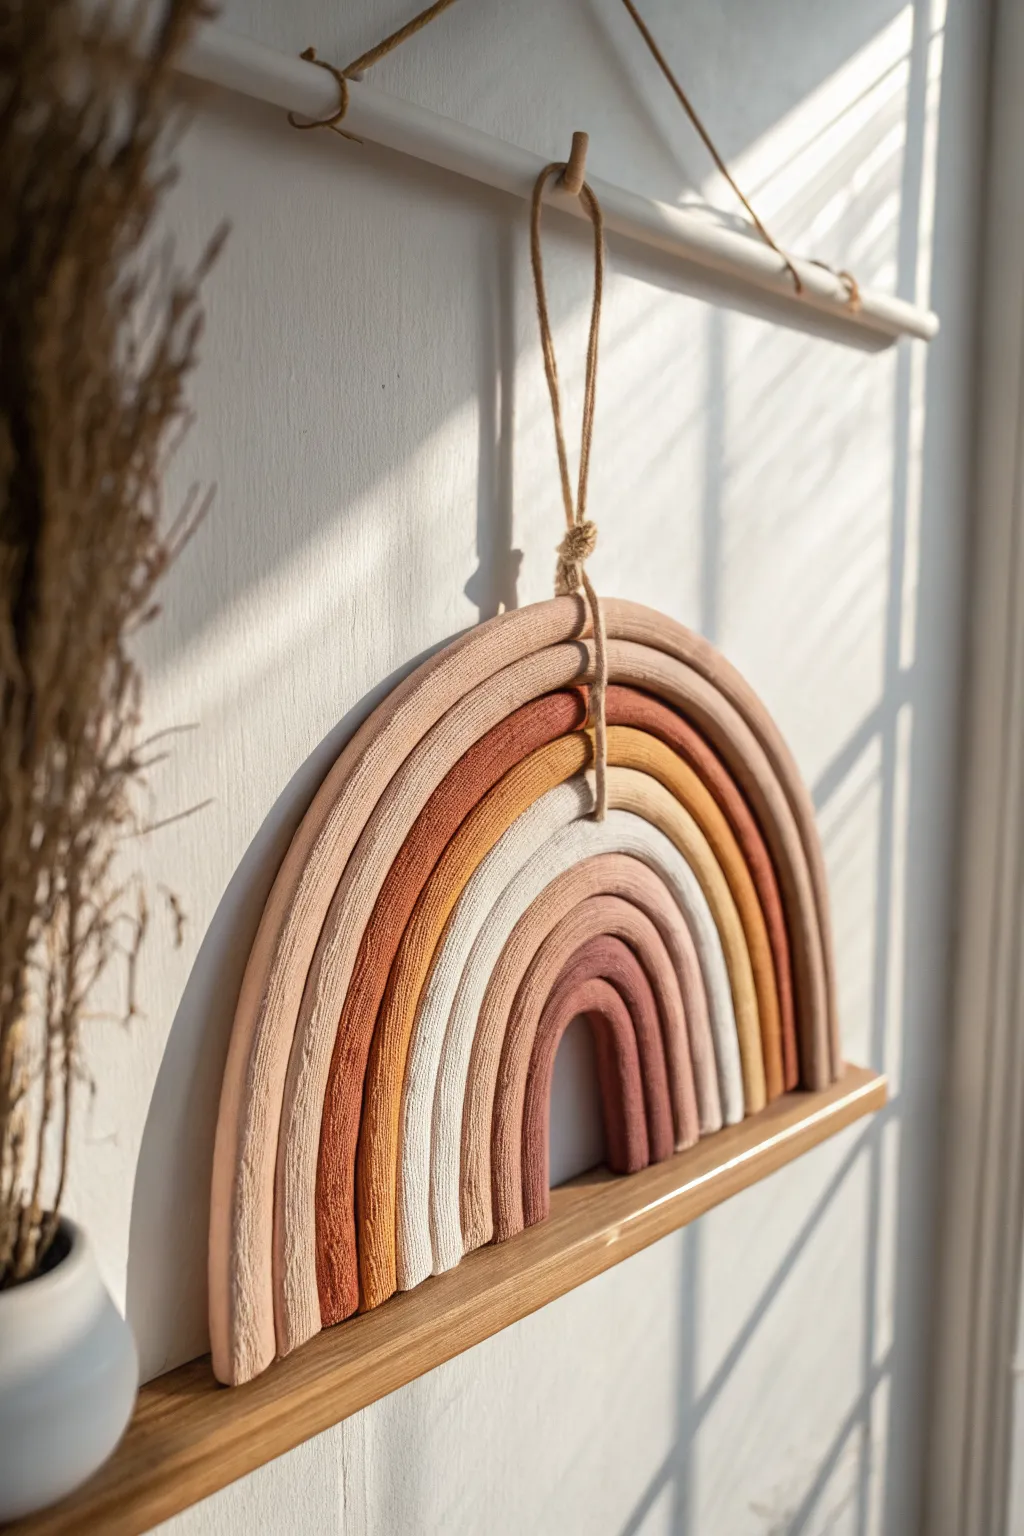
Bring warmth and modern bohemian charm to any wall with this textured air-dry clay rainbow. Its soothing palette of terracotta, ochre, and cream combined with a unique hanging shelf design makes it a standout piece of decor.
Step-by-Step Tutorial
Materials
- White air-dry clay (approx. 500g)
- Acrylic paints (terracotta, burnt sienna, mustard yellow, cream, dusty rose)
- Wooden dowel (12 inches)
- Flat wooden slat (for the base)
- Jute twine
- Rolling pin
- Craft knife
- Water cup
- Paintbrushes (medium flat)
- Strong craft glue or E6000
Step 1: Sculpting the Arches
-
Prepare the workspace:
Clear a large, flat surface and cover it with parchment paper or a silicone mat to prevent the clay from sticking as you roll. -
Divide the clay:
Cut your block of air-dry clay into seven equal portions. Knead each piece briefly in your hands to warm it up and remove any air bubbles. -
Roll the first coil:
Take the first portion and roll it into a long, even snake. Aim for a thickness of about half an inch. This will be your smallest, innermost arch. -
Form the center arch:
Curve the coil into a tight ‘U’ shape. Use a knife to trim the bottom ends so they are perfectly flat and flush with each other. -
Create subsequent layers:
Roll out the next portion of clay. Place it directly over the first arch to measure the length needed, gently pressing them together to ensure they fit snugly. -
Repeat the process:
Continue rolling coils and stacking them over the previous arch until you have seven concentric layers. The outer arches will need significantly longer clay coils. -
Join the arches:
To make the rainbow one solid unit, score the touching sides of each coil with a needle tool, add a dab of water, and press them firmly together. Smooth the back with your finger or a tool if needed. -
Trim the base:
Once all layers are assembled, use a long blade or ruler to cut across the bottom of the entire rainbow one last time, ensuring a perfectly straight, flat base so it can stand upright. -
Add texture (optional):
If you want the fabric-like texture seen in the photo, gently press a piece of coarse linen or canvas onto the wet clay surface, then peel it away. -
Dry properly:
Lay the rainbow flat to dry for 24-48 hours. I recommend flipping it over halfway through the drying process to prevent warping.
Cracked Clay?
Cracks happen! Mix a tiny bit of fresh clay with water to make a paste (slip). Fill the cracks, smooth with a finger, and let dry again.
Step 2: Painting and Assembly
-
Mix your palette:
Prepare your acrylic paints. The inspiration piece uses dusty rose for the center, followed by cream, metallic gold/ochre, terracotta, light beige, burnt orange, and a pale blush for the outer edge. -
Apply the inner colors:
Start painting from the smallest inner arch and work your way out. Use a steady hand to keep clean lines between the coils. -
Paint the outer layers:
Finish painting the larger arches. You may need two coats for the lighter cream colors to ensure the clay is fully covered. -
Prepare the shelf base:
Take your flat wooden slat and cut it to be just slightly wider than your rainbow. Sand any rough edges until smooth. -
Attach the twine:
Drill two small holes in the wooden slat near the ends, or glue the twine directly to the underside. Ideally, tie a central knot in the twine loop to hang from the dowel later. -
Mount the rainbow:
Apply a strong adhesive like E6000 to the flat bottom of your painted clay rainbow. Press it firmly onto the wooden shelf slat and let it cure fully. -
Create the hanging mechanism:
Tie a length of jute twine to each end of your wooden dowel to create a triangle hanger. Then, loop the twine from the shelf over the center of the dowel. -
Final adjustments:
Adjust the knot height so the rainbow hangs centered and balanced below the dowel. The entire piece is now ready to hang.
Go Botanical
Before the clay dries, press dried flowers or leave imprints into the outer arch for an organic, fossil-like texture.
Hang your beautiful new creation in a sunny spot to enjoy those warm earthy tones all day long
Mini House Keepsake Ornament
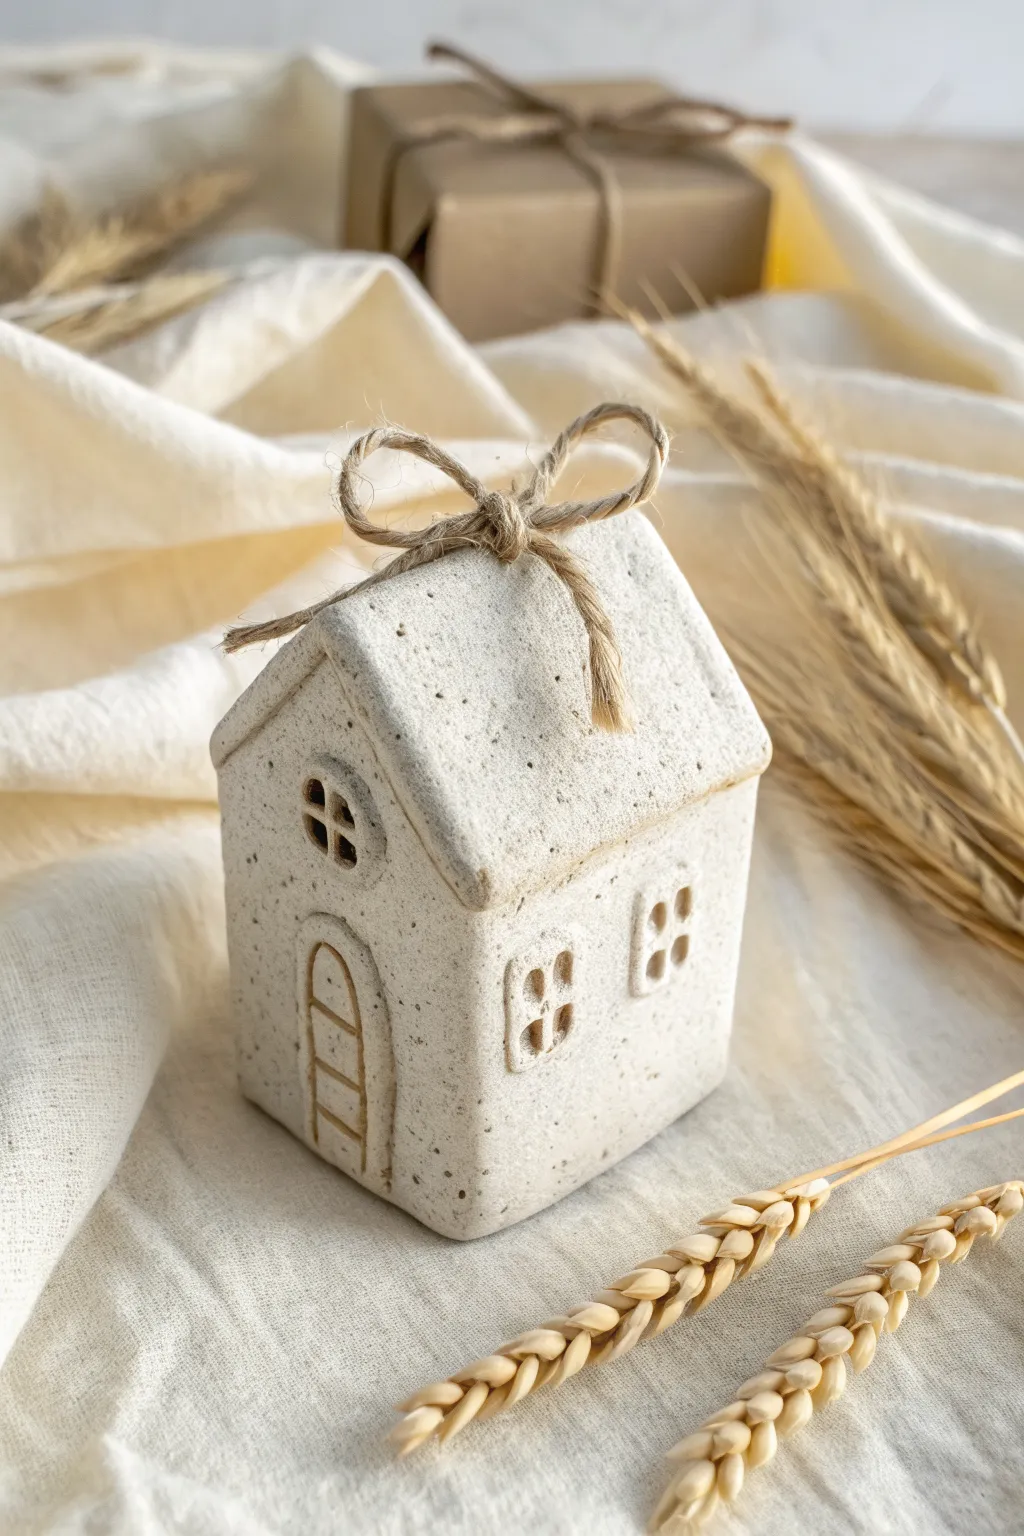
This charming miniature house brings a rustic, fairytale feel to your decor with its convincing stone-like texture and sweet jute accent. It is a deceptively simple sculpture that transforms basic air-dry clay into a timeless heirloom perfect for gifting.
Detailed Instructions
Materials
- Air-dry clay (stone effect or white mixed with sand)
- Rolling pin
- Sharp craft knife or clay blade
- Ruler
- Small square cookie cutter (optional)
- Small round cutter or drinking straw
- Needle tool or toothpick
- Jute twine
- Sandpaper (fine grit)
- Water and a small brush (for joining)
Step 1: Shaping the Base Structure
-
Prepare the clay:
Begin by kneading your clay until it is meaningful and pliable. If you are using plain white clay and want that speckled look, knead in a small amount of fine black sand or dried coffee grounds. -
Roll the slab:
Roll the clay out onto a flat surface to a thickness of about 1/4 inch (6mm). Ensure the thickness is even throughout to prevent warping as it dries. -
Cut the walls:
Using your ruler and craft knife, cut out two identical pentagons (for the front and back of the house) and two identical rectangles (for the side walls). The pentagons should have vertical sides with a triangular peak. -
Initial assembly:
Score the edges of the side walls and the back of the front pentagon using your needle tool. Apply a little water or slip to the scored areas. -
Join the walls:
Press the side walls firmly against the front piece. Smooth the seams on the inside and outside with your finger or a clay tool so the connection is invisible. -
Complete the box:
Attach the back pentagon piece in the same manner, scoring and slipping to ensure a strong bond. You should now have a house shape without a roof.
Step 2: Adding the Roof and Details
-
Cut the roof slabs:
Roll out more clay and cut two rectangular slabs for the roof. They should be slightly wider and longer than the house structure to create an overhang. -
Attach the roof:
Score the top edges of your house walls. Place the two roof rectangles on top, joining them at the center peak. Gently pinch the peak together and smooth the seam. -
Create the windows:
use a small square cutter or carefully cut small squares on the side walls with a knife. For the attic window, press a small circle cutter gently into the clay without cutting all the way through. -
Add window panes:
Take tiny, thin noodles of clay and arrange them in crosses inside the window indentations to create panes. Press them gently to adhere. -
Sculpt the door:
Outline an arched door shape on the front using a needle tool. Create an indented border around it for the door frame. -
Add door details:
Press horizontal lines into the door area to simulate wood planks or a ladder design, as seen in the photo. -
Refine the texture:
I find that gently tapping the surface with an old toothbrush gives it a lovely weathered texture that hides fingerprints.
Stone Texture Secret
Mix spent, dried ground coffee into white clay. It creates perfect brown speckles that mimic natural stone without needing paint.
Step 3: Finishing Touches
-
Let it dry:
Allow the house to dry slowly away from direct heat for 24-48 hours. Turn it occasionally to ensure even drying. -
Sand and smooth:
Once fully dry, lightly sand any sharp edges or rough seams with fine-grit sandpaper. -
Prepare the twine:
Cut a length of jute twine roughly 12 inches long. -
Tie the bow:
Wrap the twine around the entire house vertically, going under the floor and over the roof peak. Tie a secure knot at the top. -
Final flourish:
Tie a small, neat bow right on the peak of the roof. Trim the tails of the twine so they drape nicely down the roof slope.
Sagging Roof?
If the roof slope droops while wet, support the overhangs with crumpled balls of paper towel or foil until the clay firms up.
Place your finished cottage on a shelf or wrap it up as a thoughtful handmade gift that celebrates the feeling of home