
If your earrings are always vanishing into drawers, a cute clay earring holder is the kind of little upgrade that changes everything. Here are my favorite ideas to organize studs and dangles in a way that still feels like decor you actually want to leave out.
Simple Slab Stand With Poked Holes
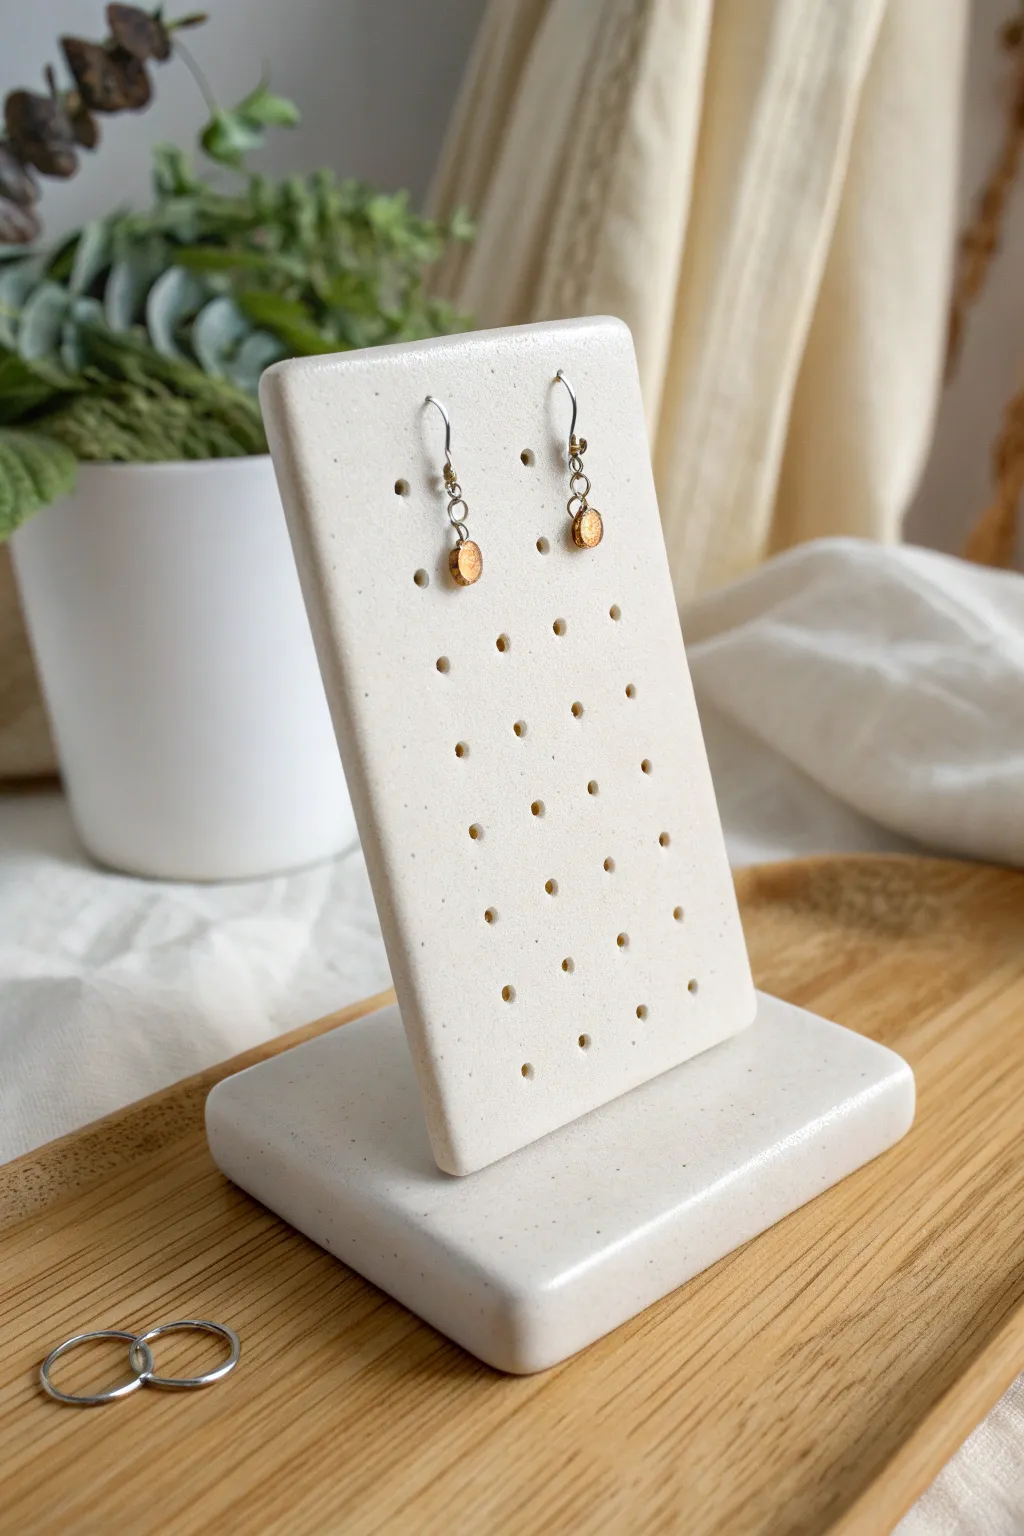
Showcase your favorite jewelry with this clean, modern earring holder made from polymer clay. The design features a tall, perforated slab resting slightly angled in a matching rectangular base, offering a professional display look right at home.
Step-by-Step
Materials
- White or speckled polymer clay (e.g., Fimo or Sculpey)
- Acrylic rolling pin
- Clay slicer or sharp craft knife
- Wooden skewer or strong toothpick
- Ruler
- Parchment paper or baking mat
- Oven
- Fine-grit sandpaper (400-800 grit)
- Liquid clay (e.g., Bake and Bond)
Step 1: Creating the Slab
-
Condition the Clay:
Begin by kneading a large block of polymer clay in your hands until it becomes soft, pliable, and warm. This prevents cracking later on. -
Roll Out the Slab:
Place the clay on a sheet of parchment paper. Use your acrylic roller to flatten it into an even sheet, aiming for a thickness of about 4mm to 5mm for stability. -
Cut the Rectangle:
Using a ruler and your clay slicer, cut a neat rectangle. For the scale shown, aim for approximately 3 inches wide by 5 inches tall. -
Mark the Grid:
Lightly press the tip of your ruler or a tool into the clay to mark faint horizontal lines or dots where your holes will go, creating a staggered pattern. -
Poke the Holes:
Using a wooden skewer, poke holes completely through the slab at your marked spots. Use a gentle twisting motion to keep the hole clean. -
Smooth the Excess:
Poking holes often pushes clay out the back. Flip the slab over and gently slice off any raised bumps with your blade, then smooth the surface with your finger. -
Round the Corners:
Use your finger or the side of your thumb to gently round off the sharp corners and edges of the rectangle for a softer, organic look. -
Bake the Slab:
Bake this piece flat on a baking sheet according to your clay package instructions (usually 275°F/130°C for 15-30 minutes). Let it cool completely.
Step 2: Making the Base
-
Roll the Base Clay:
Roll out a second portion of clay, making this one slightly thicker than the slab—around 6mm to 8mm—to provide a heavy anchor. -
Cut the Base Shape:
Cut a smaller rectangle that is slightly wider than your upright slab but shorter in depth, roughly 3.5 inches by 2.5 inches. -
Soften the Edges:
Just like the slab, gently smooth and round the top edges and corners of this base piece with your fingertips. -
Create the Slot:
Press the *cooled* baked slab into the raw base clay to create an indentation. Angle it slightly backward so the stand won’t tip forward when loaded with earrings. -
Remove and Refine:
Gently wiggle the slab out. If the indentation edges look rough, smooth them carefully with a small tool without closing the gap. -
Bake the Base:
Bake the base piece on its own. I like to bake it slightly longer than the thin slab to ensure it is fully cured and rigid.
Clean Cuts Tip
Before slicing your rectangles, pop the rolled-out clay in the fridge for 10 minutes. Cold clay cuts cleaner and deforms less under the blade.
Step 3: Assembly & Finishing
-
Sand for Smoothness:
Once both pieces are cool, use fine-grit sandpaper to buff away any fingerprints or lint. You can do this under running water to keep dust down. -
Apply Liquid Clay:
Squeeze a small line of liquid clay (which acts as a strong oven-safe glue) into the slot on the base. -
Insert the Slab:
Place the upright slab permanently into the slot. You may need to prop it up with a mug or foil to keep it at the correct angle. -
Final Bake:
Place the assembled structure back in the oven for about 15-20 minutes to cure the liquid clay bond. -
Cool and Fill:
Let the stand cool completely before testing it. Once hard, it’s ready to organize your earring collection.
Wobbly Stand?
If the slab feels loose in the base slot before baking, pack tiny snakes of raw clay into the gaps, smooth them out, and then bake to seal it tight.
Now you have a chic, functional display piece that keeps your jewelry organized and accessible


Arched Rainbow Stud Organizer
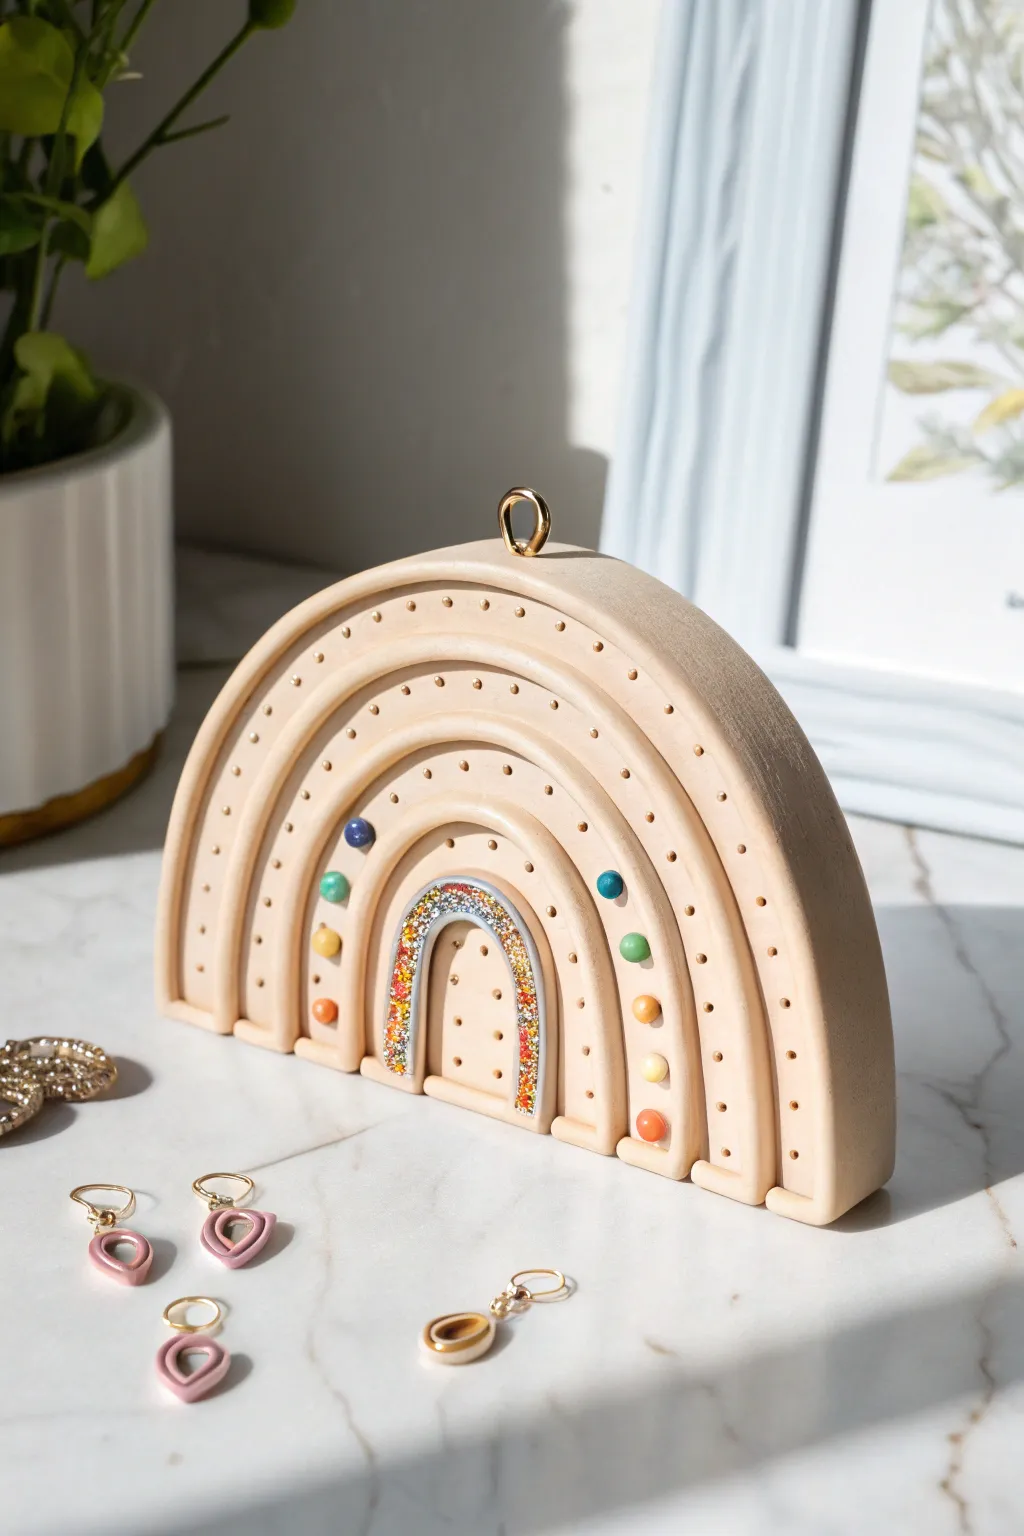
This elegant tabletop display transforms a simple earring holder into a piece of sculpture for your vanity. Featuring a minimalist beige palette with hidden pops of glitter and inlaid gems, it provides a sturdy and stylish home for your favorite studs.
How-To Guide
Materials
- Polymer clay (beige or sand color)
- Polymer clay (white or translucent for mixing)
- Liquid polymer clay (optional, for bonding)
- Small round clay cutter or craft knife
- Rolling pin or pasta machine
- Needle tool or toothpick
- Fine glitter (multi-color/warm tones)
- Small colorful seed beads or micro clay balls
- Gold jewelry bail (glue-on style)
- Strong craft glue (E6000)
- Sandpaper (fine grit)
- Gloss glaze (optional)
Step 1: Creating the Base Arches
-
Condition and Mix:
Begin by conditioning your beige polymer clay until it is soft and pliable. If you want a more natural, stoneware look, you can mix in a tiny amount of translucent clay or black pepper specks. -
Roll the Slabs:
Roll the clay out into a thick, even slab, approximately 1/4 inch thick. You want it sturdy enough to stand upright on its own once baked. -
Cut the Main Arch:
Using a large arch cutter or a paper template and craft knife, cut out the largest semi-circle shape. This will be the back wall of your organizer. -
Form the Layered Arches:
Roll several long snakes of clay. Flatten them slightly with your rolling pin to create rectangular strips that will become the raised arches. -
Attach the Layers:
Drape these flattened strips onto the face of your main slab, creating concentric rainbow arches. Leave small gaps between them. Use a little liquid clay as ‘glue’ to ensure they bond securely during baking. -
Smooth the Edges:
Gently smooth the sides where the strips meet the base slab so everything looks like one cohesive unit. I find using a rubber sculpting tool helps blend these seams invisibly.
Clean Arch Trick
To get perfectly symmetrical arches without a cutter, find round household objects (bowls, cups) to trace lightly onto your clay slab before cutting.
Step 2: Adding Textures and Details
-
Create Stud Holes:
Using a needle tool, poke holes through the raised arches where you intend to store earrings. Ensure the holes go all the way through if you want to use earring backs, or just create deep divots for aesthetic texture. -
Apply Decorative Dots:
For the purely decorative dotted texture seen on the outer rim, gently press the tip of a small ball stylus or a blunt toothpick into the clay without piercing all the way through. -
Prepare the Glitter Center:
Mix a small amount of liquid clay with your choice of fine glitter. Carefully paint or spread this mixture into the recessed area of the very smallest, innermost arch. -
Inlay the Gemstones:
Identify the second arch from the center. Press small colorful seed beads or tiny hand-rolled balls of colored clay into the surface in a vertical line on the right side. Press them in deep enough to sit flush. -
Final Shaping:
Stand the piece up to ensure the bottom is perfectly flat. If it wobbles, gently tap it on your work surface to flatten the base.
Fixing Wobbly Bases
If your rainbow won’t stand straight after baking, simply glue a heavy, flat metal washer or a small rectangle of wood to the bottom for added stability.
Step 3: Baking and Assembly
-
Bake:
Bake the piece according to your clay manufacturer’s instructions (usually 275°F for 30-45 minutes depending on thickness). Because this piece is thick, a longer bake at a slightly lower temp can prevent cracking. -
Cool Down:
Let the rainbow cool completely in the oven. Removing it while hot can cause warping or cracks in the thick layers. -
Pre-Sand:
Once cool, use fine-grit sandpaper to smooth any rough fingerprints or sharp edges on the outer rim. -
Attach the Hardware:
Apply a dot of strong craft glue to the flat pad of a gold jewelry bail. Press this firmly onto the top center of the outermost arch. -
Seal (Optional):
If you want a glossy finish, apply a thin coat of polymer clay glaze, focusing on the glitter section to make it sparkle.
Now you have a stunning, sculptural home for your jewelry collection
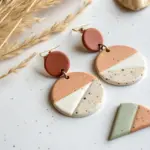
Round Terrazzo-Style Earring Board
This minimalist earring display combines an arch-shaped board with a sturdy round base, featuring a subtle, warm-toned terrazzo effect. The speckled clay finish provides an organic backdrop that makes gold jewelry pop while keeping your favorite pairs organized.
Step-by-Step Tutorial
Materials
- White polymer clay (approx. 4-6 oz)
- Polymer clay in terracotta/rust and beige/sand colors (small amounts for speckles)
- Acrylic rolling pin or pasta machine
- Circle cutter (large, approx. 4-5 inches diameter)
- Arch cutter or craft knife with a paper template
- Drinking straw or small circular cutter (for earring holes)
- Sandpaper (various grits from 400 to 1000)
- Flexible blade or tissue blade
- Ceramic tile or glass sheet for baking
- Ruler
Step 1: Preparing the Terrazzo Clay
-
Condition the base clay:
Start by thoroughly conditioning your white polymer clay until it is soft and malleable. Warm it in your hands and roll it through your pasta machine or with a rolling pin until smooth. -
Create the color inclusions:
Take small pinches of the terracotta and beige clay. Roll these into very thin, uneven sheets or snakes. -
Chop the colors:
Using your flexible blade, chop these colored pieces into tiny, irregular confetti-like bits. Keep the size variations natural—some like dust, some slightly larger chunks. -
Mix the terrazzo:
Sprinkle the colored bits over your flattened white clay. Fold the clay over to sandwich the bits inside, then roll it out again. Repeat this fold-and-roll process until the speckles are evenly distributed throughout the block.
Wobbly Arch?
If the arch leans, the slot in the base isn’t deep enough. Before baking, ensure the slot goes down at least half the depth of the base for stability.
Step 2: Forming the Base
-
Roll the base slab:
Roll out a portion of your terrazzo clay to a significant thickness, approximately 3/4 inch (2 cm). This needs to be heavy enough to support the vertical stand. -
Cut the circle:
Use your large circle cutter to stamp out the round base. If you don’t have a cutter this deep, cut a long strip and wrap it into a circle, smoothing the seam, or cut multiple thinner circles and stack them. -
Smooth the edges:
Gently rub the sides of the cylinder with your finger or a bit of cornstarch to remove any fingerprints and ensure the edge is perfectly vertical.
Step 3: Creating the Arch Display
-
Roll the arch slab:
Roll the remaining clay into a slab that is about 1/4 inch (6mm) thick. It needs to be thinner than the base but sturdy enough not to warp. -
Cut the arch shape:
Place your arch cutter or paper template onto the clay slab. Cut cleanly around the shape. Use your blade to lift away the excess clay. -
Pierce the grid:
Using a ruler to guide you, gently mark a grid pattern of dots on the arch. Press a drinking straw or small hollow cutter into each mark to remove a clean plug of clay, creating the holes for your earrings. -
Create the connection slot:
This is crucial: Cut a slot into the center of your thick round base that matches the width and thickness of the bottom of your arch. I find it helpful to use the actual arch piece to gently imprint the size before cutting the material away with a blade.
Add Texture
Before baking, gently roll a piece of rough sandpaper or a stiff bristle brush over the clay surface to mimic the porous texture of real sandstone.
Step 4: Baking and Finishing
-
Bake the pieces:
Place the arch flat on a ceramic tile. Place the base nearby. Bake according to your clay manufacturer’s instructions (usually 275°F/130°C for 30-45 minutes). Tent with foil to prevent scorching. -
Cool completely:
Allow the pieces to cool fully in the oven or on the counter. Do not try to assemble them while warm, as the clay is still slightly flexible. -
Sand for stone effect:
Wet sand the cured pieces under running water, starting with 400 grit and moving to 1000 grit. This reveals more of the inner terrazzo speckles and gives the surface a matte, stone-like feel. -
Final assembly:
Insert the arch into the slot on the base. If the fit is loose, a dab of super glue or two-part epoxy inside the slot will secure it permanently.
Arrange your favorite dangling earrings on the grid and enjoy your chic new display piece


Dish and Center Post Combo
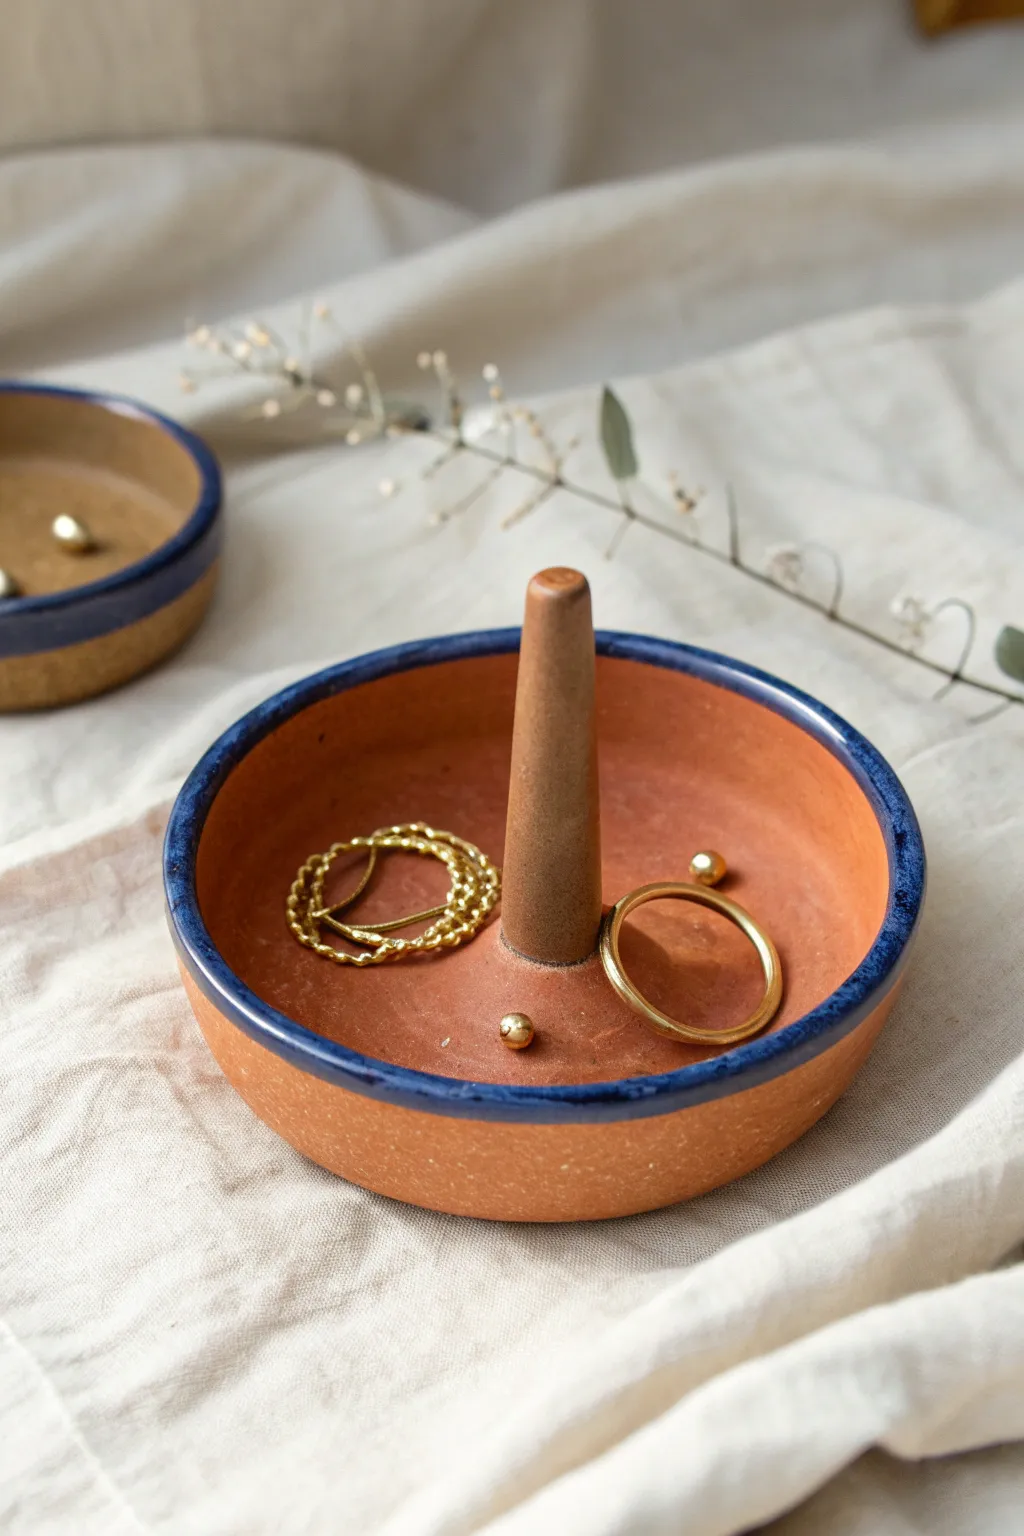
This rustic yet refined jewelry holder features the warm, earthy tones of terra cotta clay contrasted with a striking deep blue glazed rim. The simple dish design includes a sturdy central column, perfect for stacking rings, while the basin keeps studs and earrings secure.
Step-by-Step Guide
Materials
- Terra cotta air-dry clay (or polymer clay in terra cotta color)
- Rolling pin
- Circle cutter or small bowl (approx. 4-5 inches diameter)
- Craft knife or clay needle tool
- Small bowl of water
- Slip (clay mixed with water)
- Sponge or sanding block
- Deep blue acrylic paint or gloss glaze
- Fine detail paintbrush
- Clear matte varnish (optional)
Step 1: Farming the Base
-
Prepare the Clay:
Begin by kneading a fist-sized ball of terra cotta clay until it is warm, pliable, and free of air bubbles. This conditioning step is crucial to prevent cracks later. -
Roll the Slab:
Roll out the clay on a flat surface to an even thickness of about 1/4 inch. If you want a uniform look, use guide rails or stacked playing cards on either side of your rolling pin. -
Cut the Circle:
Use a large circle cutter or trace around a small bowl (about 4 inches wide) with your needle tool to cut out the base of your dish. -
Shape the Walls:
Instead of attaching a separate coil, gently pinch the outer edge of the circle upwards to create a raised rim. Work your way around slowly, lifting the edge about 1/2 inch high. -
Refine the Shape:
Smooth the transition between the floor and the wall of the dish using a damp finger or sponge. The wall should be vertical or slightly angled outward, resembling a shallow tart pan.
Centered Perfection
To ensure the post is excessively centered, lightly press an ‘X’ across the circle slab before raising the walls. Attach the post exactly where the lines intersect.
Step 2: Creating the Center Post
-
Form the Cone:
Take a separate small lump of clay and roll it into a cylinder that tapers slightly toward the top, like an elongated cone. It should be tall enough to hold stacked rings (approx. 2 inches). -
Level the Bottom:
Slice the bottom of the post with your craft knife to ensure it is perfectly flat. Check that it stands straight up without leaning. -
Score the Surfaces:
Use your needle tool to scratch crosshatch marks into the center of the dish and the bottom of the post. This rough texture helps the pieces bond. -
Desposit Adhesive:
Dab a small amount of slip (or water if using polymer clay) onto the scored areas. -
Attach the Post:
Press the post firmly into the center of the dish. Give it a gentle twist and wiggle to lock the clay particles together. -
Smooth the Seam:
Roll a very thin snake of clay and wrap it around the base of the post. Smear this clay downward onto the dish and upward onto the post to create a seamless, integrated transition.
Cracking Issues?
If small cracks appear while air-drying, mix a tiny bit of fresh clay with water to make a paste and fill them in immediately. Smooth over with a damp finger.
Step 3: Finishing Touches
-
Final Smoothing:
Dip your finger in water and run it over the entire piece—rim, post, and basin—to remove fingerprints and little imperfections. I usually spend a few extra minutes here to get that professional finish. -
Drying Time:
Allow the clay to dry completely. For air-dry clay, this takes 24-48 hours; for oven-bake clay, follow the manufacturer’s baking instructions. -
Sanding:
Once hardened, specific rough spots can be touched up with fine-grit sandpaper. Wipe away any dust with a damp cloth. -
Painting the Rim:
Load a fine brush with deep blue acrylic paint or gloss glaze. Carefully paint just the top edge of the rim, letting the color extend slightly down the inner and outer lip. -
Clean Up Edges:
If the paint line wobbles, use a slightly damp Q-tip or a clean brush with water to tidy up the edge before the paint dries. -
Seal (Optional):
To protect the raw clay look while sealing the paint, you can apply a matte varnish over the whole piece, or just leave the terra cotta bare for a natural texture.
Now you have a stylish, minimalist organizer ready to display your favorite everyday jewelry pieces

The Complete Guide to Pottery Troubleshooting
Uncover the most common ceramic mistakes—from cracking clay to failed glazes—and learn how to fix them fast.
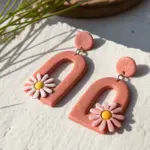
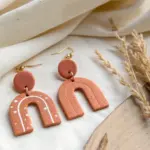
Cute Cactus Hook Holder
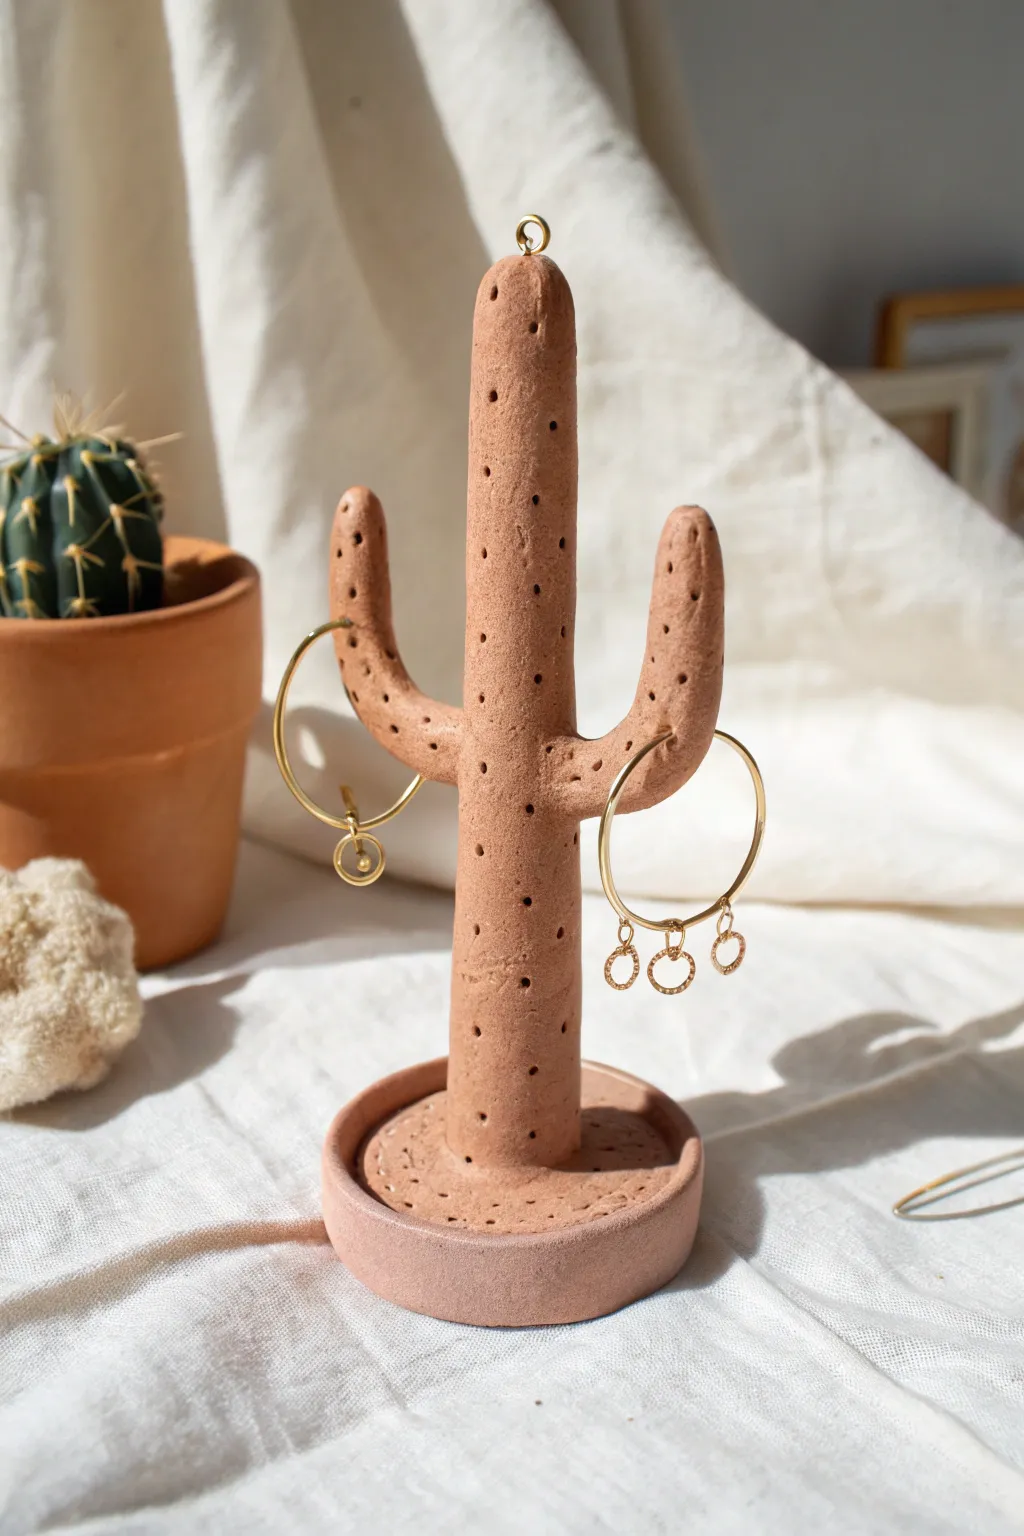
This whimsical jewelry stand brings a touch of the arid Southwest to your dresser, combining the warm tones of terracotta with a playful cactus silhouette. It’s not just cute décor; the clever pinhole texture serves a dual purpose, acting as perfect little slots for your favorite earring posts and wires.
Step-by-Step Tutorial
Materials
- Terracotta-colored polymer clay (or air-dry clay painted terracotta)
- Small rolling pin
- Cutting blade or needle tool
- Thick gauge craft wire (for internal armature)
- Small metal eye pin (gold or brass)
- Round cookie cutter (approx. 3-4 inches diameter)
- Toothpick, skewer, or needle tool (for texturing)
- Oven (if using polymer clay) or baking sheet
- Strong craft glue (E6000 or similar)
- Fine grit sandpaper
Step 1: Sculpting the Base
-
Condition the Clay:
Begin by warming up a good chunk of your terracotta clay in your hands. Knead it until it is soft, pliable, and free of any air bubbles. -
Roll the Platform:
Roll out a portion of the clay to a thick, even slab, roughly 1/2 inch thick. Place it on your work surface or a piece of parchment paper to prevent sticking. -
Cut the Base Shape:
Use your round cookie cutter to stamp out a clean circle. This will serve as the stable bottom for your cactus. -
Create the Rim:
Roll a long, thin snake of clay. Wrap this snake around the outer edge of your circular base to create a raised rim, resembling a potted plant saucer. Smooth the seam where the snake meets the base using your finger or a sculpting tool. -
Add Texture to the Base:
Using your needle tool or toothpick, gently poke random holes across the flat surface of the base (inside the rim) to mimic sandy soil texture.
Drooping Arms?
If the clay arms sag while working, insert small pieces of wire or toothpicks inside them to connect to the main stem for hidden structural support.
Step 2: Forming the Cactus
-
Prepare the Armature:
Cut a piece of thick craft wire to act as the spine. It should be slightly shorter than the final height of your cactus so it doesn’t poke through the top. -
Shape the Main Stem:
Roll a thick log of clay for the main body of the cactus. Insert your wire into the center of this log to give it strength and prevent it from drooping during baking. -
Form the Arms:
Roll two smaller logs of clay. Bend them gently into ‘L’ shapes. Attach one to the left side and one slightly higher on the right side of the main stem. Blend the clay seams thoroughly so the arms look like natural extensions. -
Refine the Silhouette:
Smooth out the entire form with your fingertips to remove fingerprints. Slightly round off the tops of the arms and the main stem for a natural, organic look. -
Insert the Top Loop:
Push the gold eye pin into the very top center of the cactus. This little loop is perfect for holding a dangling charm or just adding a finished look.
Pro Tip: Pierce Deep
When making the texture holes, pierce deep enough (about 3-4mm) so that earring posts can actually fit inside securely later on.
Step 3: Detailing and Assembly
-
Create the Pinhole Texture:
This is the most crucial step for the look. Take your toothpick or needle tool and poke numerous small holes all over the cactus body. Vary their spacing slightly but keep them generally uniform. These holes create the ‘spines’ look and can hold stud earrings. -
Check the Fit:
Before fixing the cactus to the base, ensure the bottom of the cactus stem is perfectly flat so it stands upright without leaning. -
Join the Pieces:
If you are confident, score the bottom of the cactus and the center of the base, apply a dab of liquid clay (if using polymer), and press them together firmly. Alternatively, for extra stability, bake them separately and glue later. -
Bake or Dry:
Follow the manufacturer’s instructions for your specific clay type. If using polymer clay, bake it on a dedicated baking sheet. If using air-dry clay, leave it in a dry, draft-free spot for 24-48 hours. -
Cool and Finish:
Once cured and fully cooled, inspect your piece. Use fine-grit sandpaper to gently smooth any rough edges on the base rim or the bottom. -
Final Assembly (If Separate):
If you baked the pieces separately, apply a strong adhesive like E6000 to the bottom of the cactus stem and press it firmly into the center of the base. Let it cure fully before use.
Now you have a charming desert companion ready to organize your jewelry collection in style
Mushroom Cluster Earring Stand
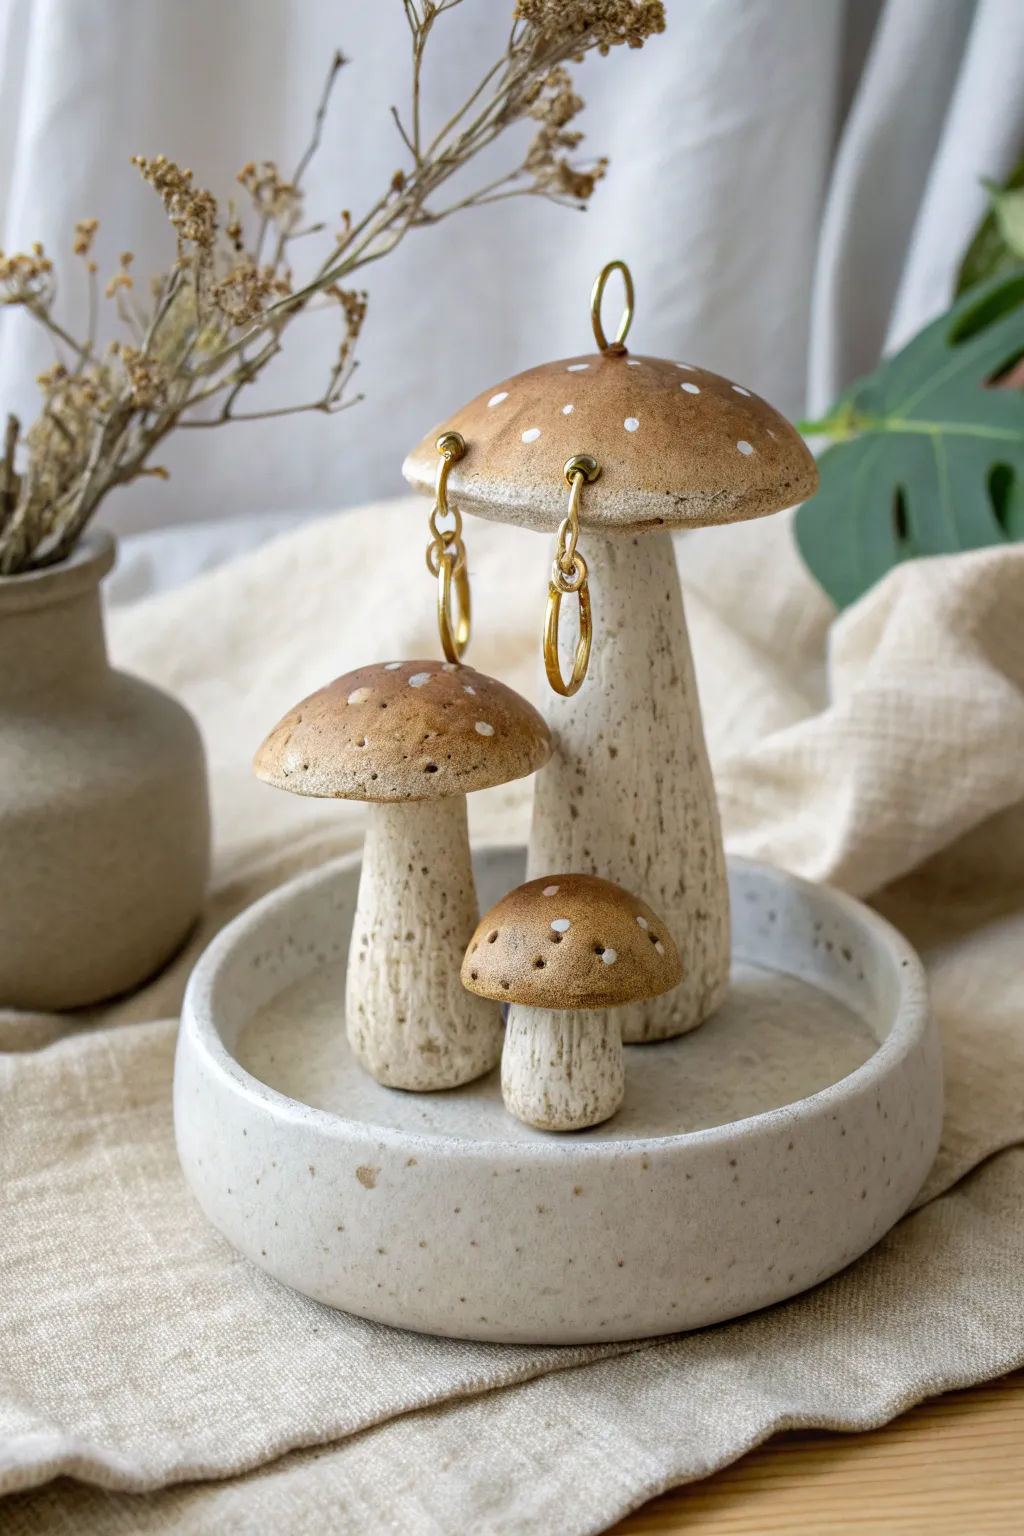
Bring a touch of woodland whimsy to your vanity with this charming mushroom cluster jewelry stand. Featuring three realistic toadstools nestled in a speckled dish, this functional sculpture doubles as an earring holder and a trinket tray.
Detailed Instructions
Materials
- Polymer clay (white or beige granite effect)
- Polymer clay (translucent or ecru for mixing)
- Acrylic paints (burnt umber, raw sienna, antique white)
- Gloss varnish or resin (optional)
- Brass eye hooks (small)
- Texture tool (needle tool or stiff toothbrush)
- Rolling pin
- Circle cutters (various sizes)
- Aluminum foil
- Soft paintbrushes
- Super glue or liquid clay
Step 1: Sculpting the Base Dish
-
Prepare the Clay:
Begin by conditioning your granite-effect polymer clay until it is soft and pliable. If the granite effect is too dark, mix in some plain white or translucent clay to lighten the base tone while keeping the speckles. -
Roll the Base:
Roll out a slab of clay to approximately 1/4 inch thickness. Use a large circle cutter or a bowl capability of cutting a 4-5 inch circle to create the bottom of your dish. -
Form the Rim:
Roll a long snake of clay, about 1/2 inch thick. Place this coil on top of the circle’s outer edge to form the wall of the dish. -
Blend the Seams:
Using a modeling tool or your finger, blend the coil downward into the base on both the inside and outside until the seam is invisible and the wall stands upright creating a shallow bowl.
Drooping Caps?
If the large mushroom cap is heavy and causes the stem to lean before baking, support the cap underneath with a small ball of crumpled aluminum foil until it cures hard in the oven.
Step 2: Creating the Mushrooms
-
Form the Stems:
Roll three cylinder shapes of varying heights and thicknesses for the stems. Taper them slightly so they remain thicker at the bottom for stability. -
Texture the Stems:
Take a needle tool or a stiff toothbrush and drag it vertically up the stems to create natural-looking striations and bark-like texture. -
Shape the Caps:
Roll three balls of clay corresponding to the stem sizes. Flatten them into domes, pressing your thumb into the underside to create a concave space where the stem will attach. -
Attach the Hardware:
For the largest mushroom cap (which will hold the earrings), carefully screw a small brass eye hook into the very top center before baking. You can also insert hooks on the underside edge if you prefer hanging earrings from the rim. -
Pre-Bake Assembly:
Attach the stems to the caps. I find using a small dab of liquid clay ensures a permanent bond. Place the three mushrooms into the dish in a pleasing cluster arrangement, pressing them firmly to bond them to the base. -
Bake:
Bake the entire assembly according to your clay manufacturer’s instructions, usually at 275°F (130°C) for about 30 minutes. Let it cool completely.
Step 3: Painting and Finishing
-
Base Coat the Caps:
Mix raw sienna with a touch of burnt umber to get a warm, nutty brown. Paint the tops of the mushroom caps, fading the color slightly as you reach the edges for a realistic gradient. -
Add Speckles:
Dip a toothbrush or stiff brush into slightly watered-down dark brown paint and flick it over the stems and dish to enhance the granite look if your clay needs more texture. -
Paint the White Dots:
Using a fine detail brush or a toothpick, dot antique white paint onto the brown caps. Make them irregular in size and spacing to mimic a natural amanita or bolete mushroom. -
Apply a Wash:
Create a very watery wash of brown paint. Brush it over the textured stems and immediately wipe it off with a paper towel. The dark paint will stay in the crevices, highlighting the texture. -
Install Hanging Loops:
If you want the earrings to hang from the edge of the cap (as seen in the photo), carefully drill tiny holes through the cured clay rim and insert jump rings large enough to hold your jewelry. -
Seal the Piece:
Once execute paints are fully dry, apply a matte varnish to the stems and base to protect them. Use a semi-gloss varnish on the brown caps to give them a slightly dewy, fresh look.
Make it Mossy
For extra forest flair, glue patches of fake dried mood moss or lichen around the base of the mushroom stems inside the dish after the piece is fully baked and varnished.
This little fungal family is now ready to organize your treasures while looking adorable on your dresser


What Really Happens Inside the Kiln
Learn how time and temperature work together inside the kiln to transform clay into durable ceramic.
Geometric Triangle “Bookend” Holder
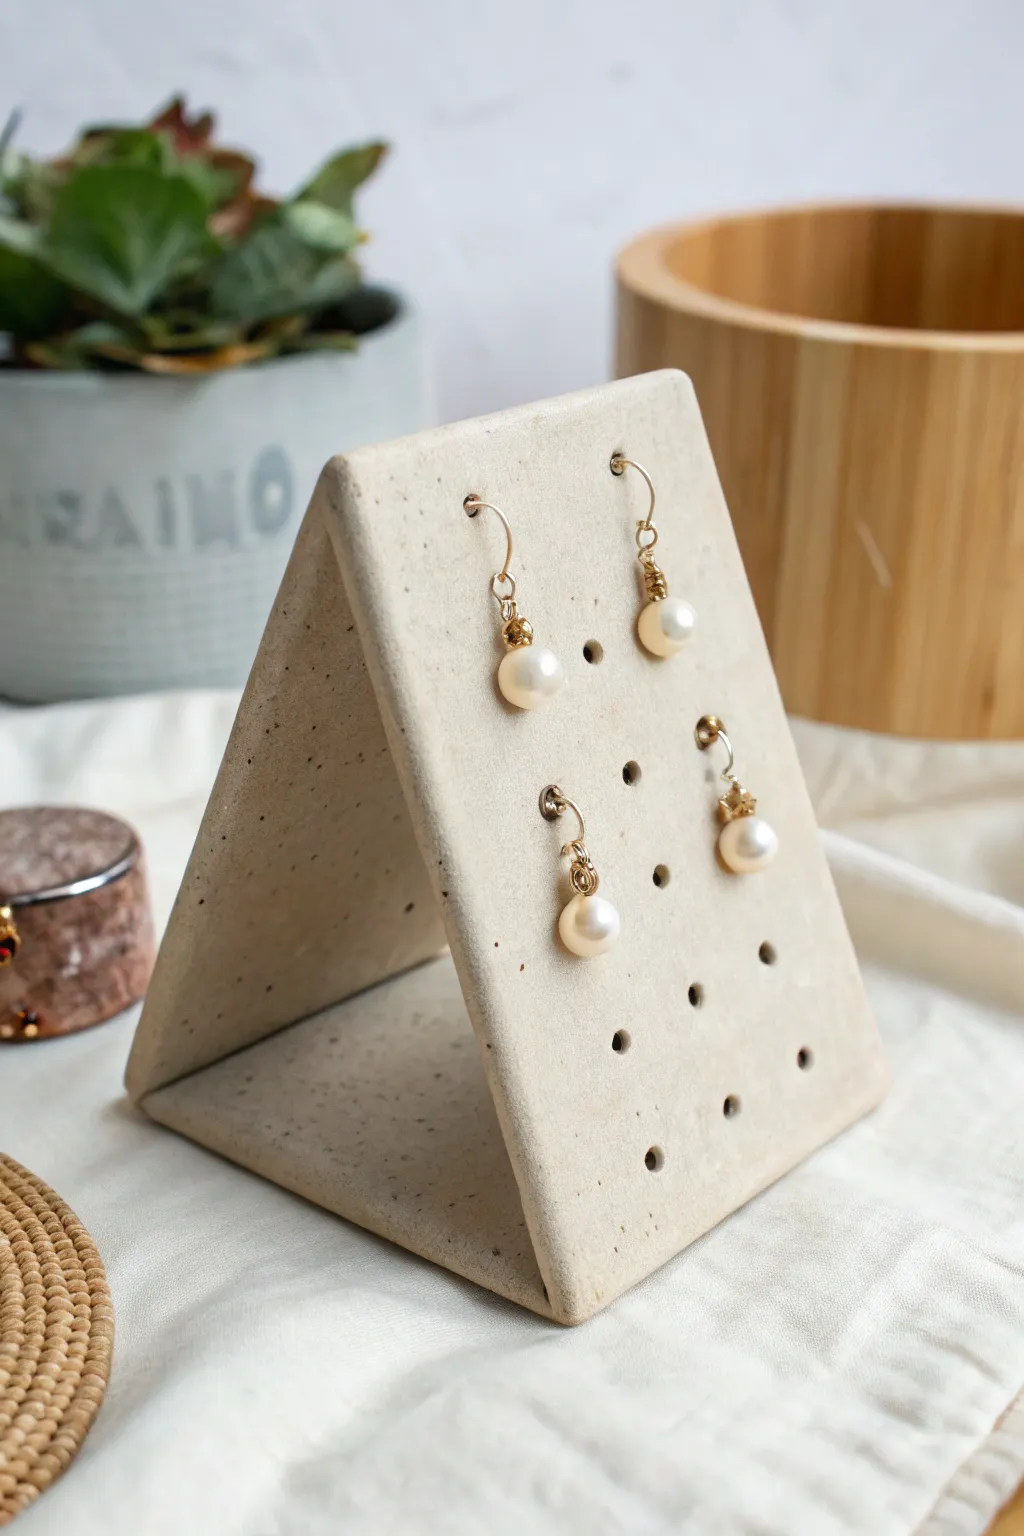
This modern, minimalist earring holder doubles as a functional organizer and a chic decor piece. Featuring a faux-stone finish and a sturdy triangular structure, it perfectly displays dangling earrings while adding a touch of industrial elegance to your vanity.
How-To Guide
Materials
- Stone-effect polymer clay (e.g., Fimo Granite or Premo granite)
- Rolling pin (acrylic preferred)
- Clay slicer or sharp craft knife
- Ruler
- Parchment paper or baking tile
- Small round cutter or bubble tea straw (for large holes)
- Pin tool or toothpick (for pilot holes)
- Liquid polymer clay (optional, for bonding)
- Fine-grit sandpaper (400-600 grit)
- Oven for baking
Step 1: Preparing the Slab
-
Condition the clay:
Begin by warming the stone-effect polymer clay in your hands. Knead it thoroughly until it is soft and malleable to prevent cracking later. -
Roll out the slab:
Place the clay on parchment paper. Using your acrylic rolling pin, roll the clay into a flat, even sheet approximately 4mm to 5mm thick. A slightly thicker slab ensures the standing structure is stable. -
Measure the main rectangle:
Decide on the height and width of your stand. A 4×10 inch rectangle is a good starting point, which will fold into a triangle approximately 3.5 inches tall. -
Cut the rectangle:
Using your ruler as a straight edge, slice the clay firmly with your craft blade to create a clean, perfect rectangle. Save the excess clay for the next step.
Clean Cuts
Chill your rolled clay slab in the fridge for 10 minutes before cutting. Firm clay cuts much cleaner and resists dragging or warping under the knife blade.
Step 2: Forming the Structure
-
Plan the fold lines:
Lightly mark two lines across the width of the rectangle where you intend to fold it. You essentially want three sections: a front face, a back support, and a base. The front face is usually the longest section. -
Create the earring holes:
Before folding, use your small round cutter or a straw to punch a grid of holes on the section designated as the ‘front face.’ Space them evenly to allow room for earring drops. -
Add texture (optional):
If your clay is smooth, you can gently press sandpaper or a coarse sponge against the surface now to enhance the stone-like texture. -
Fold the triangle:
Carefully lift the clay and fold it along your marked lines to form a hollow triangle shape. The ends of the rectangle should meet at the bottom corner. -
Join the seam:
Where the two ends of the slab meet at the base, press them firmly together. You can bevel the edges slightly for a flush fit. I like to smooth a tiny snake of clay over the inside of the seam for extra reinforcement.
Mixed Media Luxe
After baking, brush gold leaf adhesive onto just the top edge or one corner. Apply gold leaf foil to create a high-end, ‘kintsugi’-inspired modern look.
Step 3: Refining and Baking
-
Straighten the sides:
Sets the triangle on your work surface. Use your blade or a flat tool to gently tap the sides, ensuring the walls are straight and not bowing inward or outward. -
Check stability:
Ensure the base sits perfectly flat on the parchment paper. If it wobbles, gently press the structure down to level the bottom. -
Bake the piece:
Transfer the parchment paper to a baking sheet. Bake according to the manufacturer’s instructions for your specific brand of clay—usually around 275°F (130°C) for 30-45 minutes. -
Cool completely:
Let the piece cool in the oven with the door cracked open. This gradual cooling helps prevent thermal shock and brittleness.
Step 4: Finishing Touches
-
Sand the edges:
Once fully cool, use fine-grit sandpaper to gently smooth any sharp edges or rough spots on the corners. -
Clean the surface:
Wipe the clay down with a slightly damp cloth or a baby wipe to remove any sanding dust. -
Test the holes:
If any baking residue blocked the earring holes, use a small hand drill or a sharp craft knife to clear them out carefully.
Place this on your dresser to keep your favorite pearls organized and beautifully displayed
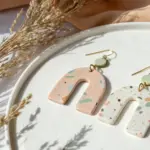
Wavy Ridge Stand for Hoops

Bring a touch of coastal charm to your dresser with this dual-purpose jewelry organizer featuring a standing display for dangle earrings and a dish for studs and rings. The speckled cream finish paired with deep navy scallops creates a sophisticated, handmade ceramic look using accessible polymer or air-dry clay.
Step-by-Step Guide
Materials
- White or cream polymer clay (or air-dry clay)
- Speckled clay additive (e.g., black pepper or faux granite clay for mixing)
- Rolling pin or pasta machine
- Circle cutter (approx. 4-5 inches diameter)
- Craft knife or clay blade
- Small round cutter or star-shaped cutter (optional for rim detail)
- Needle tool or toothpick
- Navy blue acrylic paint
- Fine detail paintbrush
- Gold paint pen or liquid gilding
- Gloss glaze or polyurethane varnish
- Oven (if using polymer clay)
Step 1: Creating the Base Dish
-
Prepare the Clay:
Begin by conditioning the clay until it is soft and pliable. If you want a speckled pottery look like the original, mix a small amount of ‘granite’ style clay or even cracked black pepper into your white clay until evenly distributed. -
Roll the Slab:
Roll the clay out into an even slab, aiming for a thickness of about 1/4 inch. Thicker is better here to provide a sturdy weighted base for the standing element. -
Cut the Circle:
Use your large circle cutter or trace a bowl rim to cut out a perfect circle for the base dish. -
Form the Dish Shape:
Gently lift the edges of the circle to create a shallow rim. You can do this by pinching the clay upward with your fingers or by placing the clay circle inside a slightly larger bowl to help it hold its curved shape. -
Add Decorative Rim Holes:
Using a needle tool or a very small straw, poke evenly spaced holes around the exterior side of the rim for a decorative, airy touch.
Smooth Seams
Use a rubber-tipped clay tool dipped in a tiny bit of baby oil (for polymer) or water to effortlessly smooth the seam where the stand meets the dish.
Step 2: Sculpting the Cloud Stand
-
Sketch the Shape:
Roll out a second piece of clay to the same thickness. Lightly sketch a semi-circle or soft ‘cloud’ shape onto the clay surface using your needle tool. -
Cut the Stand:
Carefully cut out the cloud shape using your craft knife. Ensure the bottom edge is perfectly flat so it will sit flush against the dish. -
Pierce Earring Holes:
While the clay is still flat on your work surface, use a needle tool to create two small holes near the top peak of the cloud shape. Wiggle the tool slightly to ensure the holes are wide enough for earring hooks after baking. -
Joining the Pieces:
Score the bottom edge of the cloud piece and the center strip of the dish where it will sit. Apply a little liquid clay (or water for air-dry clay) and press the pieces firmly together. Smooth the seams with a modeling tool to ensure a strong bond.
Step 3: Finishing and Decoration
-
Bake or Dry:
Follow the manufacturer’s instructions to bake your polymer clay or let your air-dry clay cure completely. I like to prop the vertical piece up with some crumpled foil during baking to keep it straight. -
Sand for Smoothness:
Once cool and hard, lightly sand any rough edges, particularly around the rim of the dish and the earring holes, using fine-grit sandpaper. -
Paint the Scallops:
Using navy blue acrylic paint and a fine brush, paint a scalloped or wave pattern along the bottom edge of the vertical stand. Create two or three rows of semi-circles. -
Add Gold Accents:
Allow the blue paint to dry fully. Then, use a gold paint pen or fine brush with liquid gilding to outline the top edges of each blue scallop for that elegant definition. -
Glaze the Piece:
Finish by applying a coat of high-gloss glaze over the entire piece. This not only seals the paint but mimics the shine of fired ceramic glaze.
Terrazzo Twist
Instead of speckles, chop up tiny bits of colored clay and roll them into your white slab for a trendy terrazzo pattern before cutting your shapes.
Now you have a stunning, boutique-style display to showcase your favorite jewelry pieces.

TRACK YOUR CERAMIC JOURNEY
Capture glaze tests, firing details, and creative progress—all in one simple printable. Make your projects easier to repeat and improve.
Scalloped Fan Stand With Stud Rows
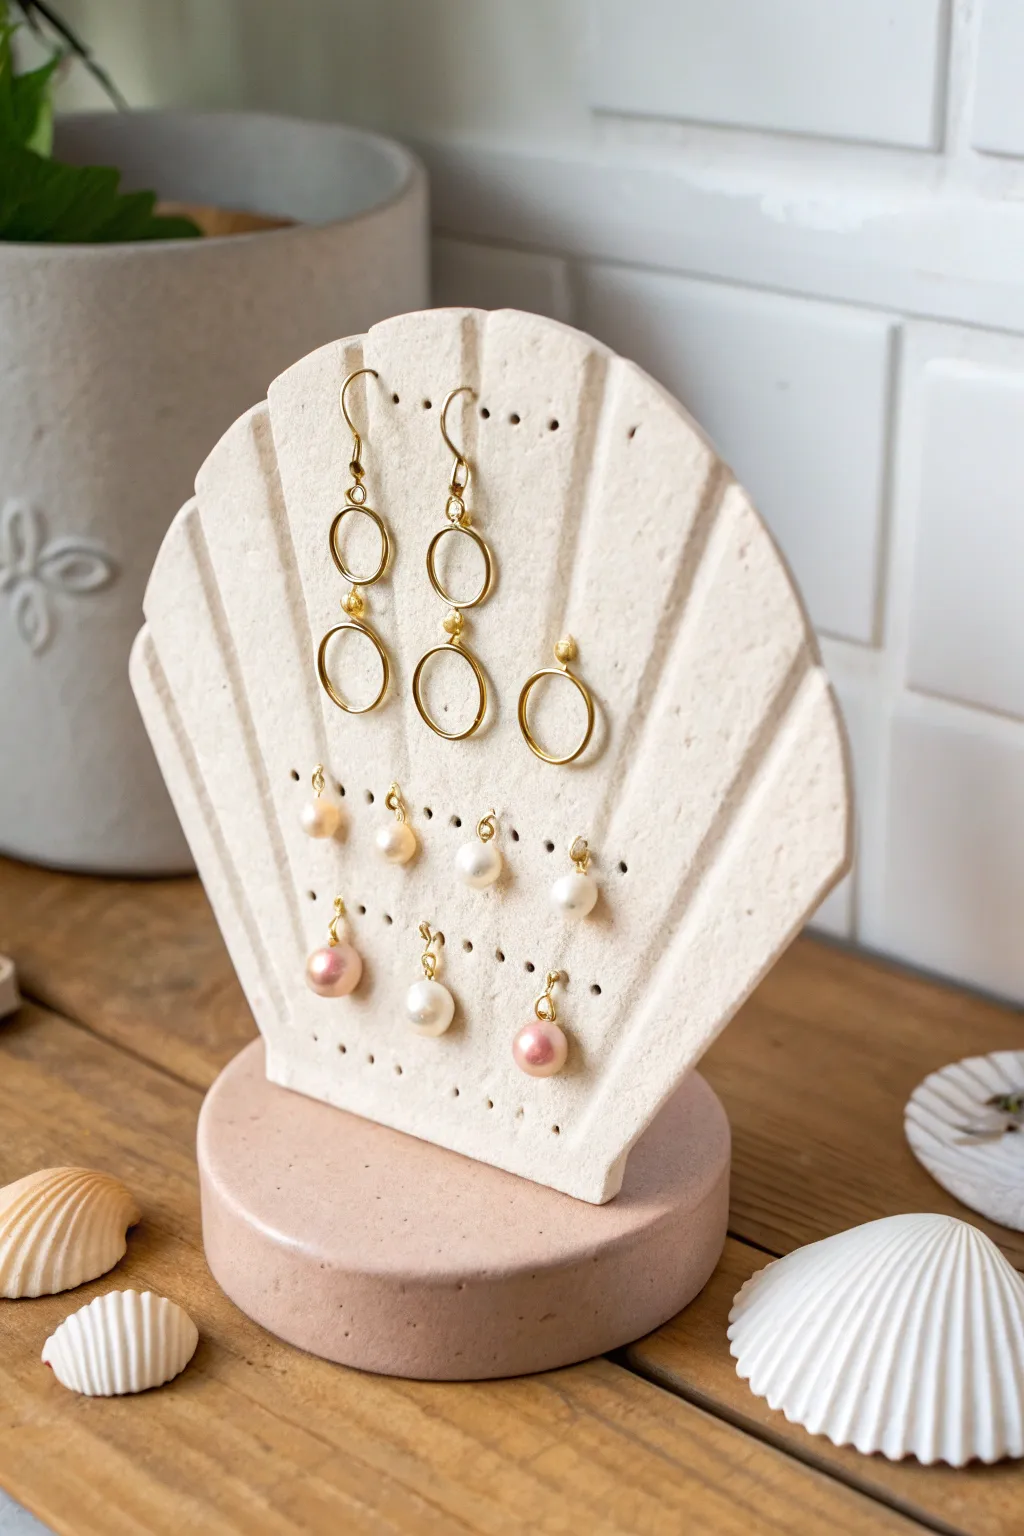
Bring a touch of coastal elegance to your vanity with this scalloped fan earring stand. Its clean lines and textured finish provide a perfect minimalist backdrop for your favorite dangling hoops and studs.
Step-by-Step Tutorial
Materials
- Stone-effect polymer clay (granite or speckled)
- Rose beige polymer clay
- Rolling pin or acrylic roller
- Scalloped shell cookie cutter (large) or printed template
- Craft knife or scalpel
- Circle cutter (approx. 3-4 inches diameter for base)
- Toothpick or small drill bit
- Liquid polymer clay (bakeable adhesive)
- Sandpaper (fine grit)
- Oven (for baking)
- Baking sheet or ceramic tile
Step 1: Shaping the Shell
-
Condition the clay:
Start by warming up your stone-effect polymer clay in your hands. Knead it thoroughly until it is soft, pliable, and free of any air bubbles. -
Roll the slab:
Using your roller, flatten the clay into a slab or sheet. You want a medium thickness—roughly 1/4 inch (6mm)—to ensure the stand is sturdy enough to hold weight without bending. -
Cut the shape:
Place your large scalloped shell cutter onto the slab and press down firmly. If you don’t have a cutter, print a shell outline on paper, cut it out, lay it on the clay, and trace around it carefully with your craft knife. -
Add surface texture:
To mimic the ridges of a real shell, use the back of your craft knife or a modeling tool to gently press vertical lines radiating from the bottom center of the shell up toward the scalloped edges. Don’t cut through; just indent the surface. -
Trim the base:
Slice off a very small straight section at the very bottom point of the shell shape. This flat edge will make it easier to attach to the base later. -
Create earring holes:
Using a toothpick or a small piercing tool, poke pairs of holes into the clay. Arrange them in rows as seen in the photo—some closer to the top for larger earrings and rows near the bottom for studs. -
Smooth the edges:
Dip your finger in a little bit of water (or baby oil if using polymer clay) and gently run it along the cut edges to remove any roughness or loose bits.
Wobbly Stand?
If the shell won’t stand straight during the second bake, bury the base partially in a small bowl of raw baking soda or cornstarch to hold it upright without leaving marks.
Step 2: Creating the Base
-
Prepare the base clay:
Switch to your rose beige clay. Condition it well and roll it into a thick ball. -
Cut the circle:
Flatten the ball slightly until it is about 3/4 inch thick. Use your circle cutter to punch out a clean, thick disc. This heavy base provides the counterweight needed to keep the stand upright. -
Smooth the round:
Inspect the sides of your circle base. If the cutter left a drag mark, smooth it out with your thumb to create a seamless, matte finish. -
Initial bake:
Place both the shell piece (lying flat) and the round base on a baking sheet lined with parchment paper. Bake according to your clay package’s instructions—usually around 275°F (135°C) for 30 minutes. Let them cool completely.
Terrazzo Twist
Mix chopped bits of colored clay scraps into your white clay before rolling. When sanded, this creates a fun, modern terrazzo pattern instead of the stone look.
Step 3: Assembly and Finish
-
Score the connection points:
Once cool, take your craft knife and gently scratch cross-hatch marks on the center of the round base and on the flat bottom edge of the shell piece to create a rough texture for better adhesion. -
Apply adhesive:
Squeeze a line of liquid polymer clay (sometimes called bake and bond) onto the scratched area of the base. -
Attach the shell:
Press the shell piece firmly onto the base. I usually prop the shell up with a small oven-safe object, like a ceramic mug handle or a folded piece of cardstock, to ensure it stays perfectly vertical. -
Seal the seam:
Roll a very thin ‘snake’ of the beige clay and wrap it around the seam where the shell meets the base. Blend this strip into the base clay with a modeling tool so it becomes invisible but adds structural support. -
Final bake:
Place the assembled structure back into the oven, keeping the prop in place. Bake again for about 20-30 minutes to set the bond permanently. -
Final sanding:
After the piece has fully cooled, verify that the earring holes are clear. If any are blocked, gently twist a small drill bit by hand to open them up. Lightly sand any sharp edges.
Organize your collection on your new display and enjoy the calm, beachy vibe it adds to your room
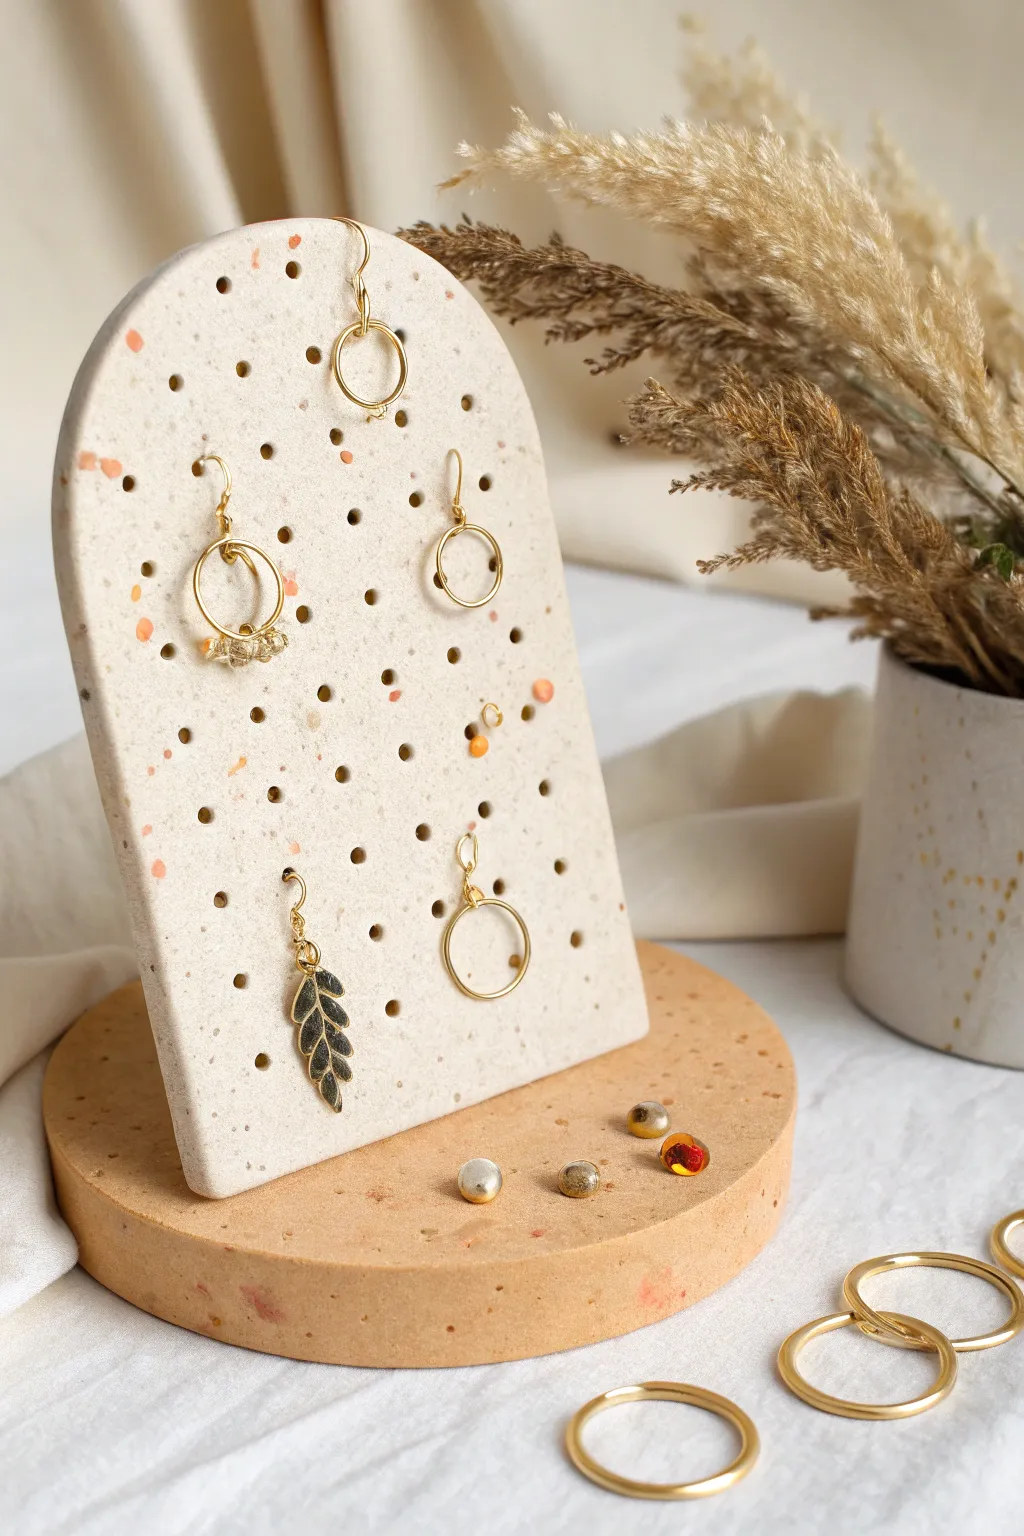
Wall-Mounted Clay Tile With Peg Holes
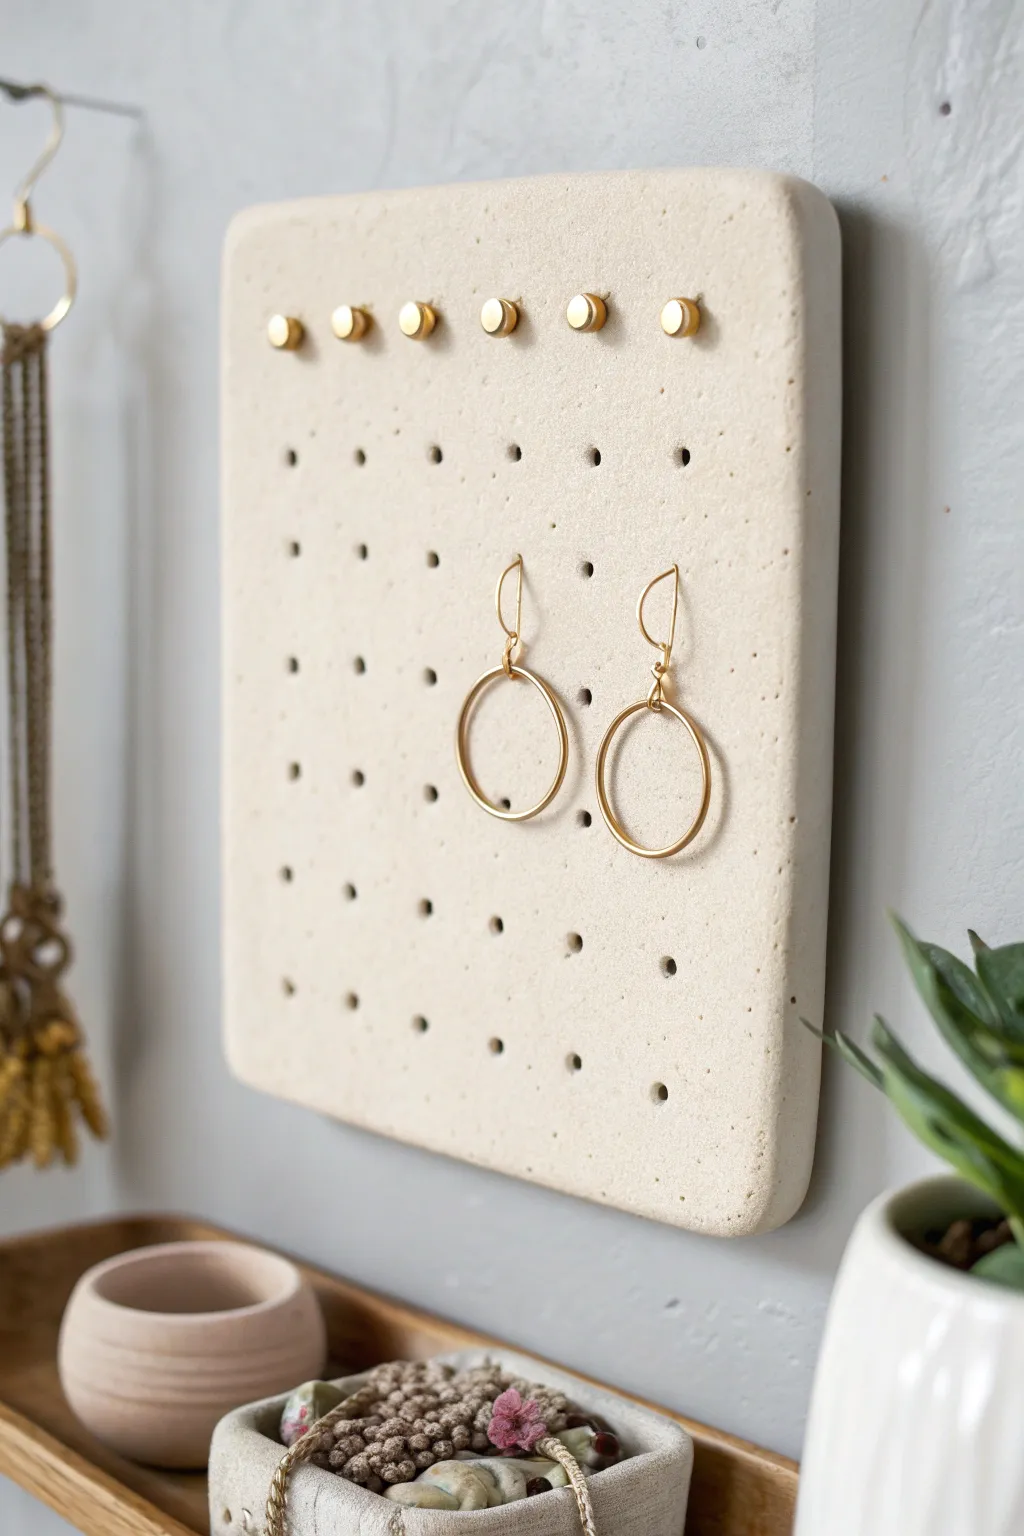
This minimalist wall-mounted organizer combines the organic look of speckled stone with modern functionality. By creating a custom grid of holes in a slab of clay, you can versatilely display both studs and dangling earrings on a piece that doubles as wall art.
Step-by-Step
Materials
- Speckled polymer clay (e.g., Fimo Effect Granite or Premo Granite)
- Acrylic rolling pin or pasta machine
- Parchment paper or ceramic tile (work surface)
- Ruler
- Straw or small circle cutter (approx. 3-4mm diameter)
- Craft knife or tissue blade
- Fine-grit sandpaper (400-600 grit)
- Set of small gold flat-pad earring posts or brass thumb tacks (for the top row)
- Strong adhesive (E6000 or super glue)
- Command strips or picture hanging hardware
Step 1: Shaping the Base
-
Condition the clay:
Begin by thoroughly kneading your speckled polymer clay until it is warm, soft, and pliable. Inadequate conditioning can lead to cracking later. -
Roll out the slab:
Using your acrylic roller or a pasta machine on the widest setting, roll the clay into a flat, even sheet. Aim for a thickness of about 1/4 inch (6mm) to ensure the tile is sturdy enough to hold weight without bending. -
Cut the rectangle:
Lay the clay sheet on parchment paper. Using a ruler as a guide, cut out a neat rectangle with your craft knife or tissue blade. A size around 5×7 inches works well for a vanity display. -
Smooth the edges:
Dip your finger in a tiny bit of water (or baby oil if using oil-based clay) and run it along the cut edges to soften the sharp corners and smooth out any drag marks from the blade.
Step 2: Creating the Grid
-
Plan the spacing:
Before piercing, gently rest your ruler on the clay surface without pressing down. Use a needle tool or toothpick to lightly mark a grid of dots specifically where you want your holes to be, spacing them about 1 inch apart. -
Punch the holes:
Using a straw or a small circular cutter, punch out holes at every marked intersection. Twist the straw as you pull it out to get a clean removal of the clay plug. -
Refine the openings:
Inspect the holes. If the punching process deformed the rectangle slightly, gently push the sides back into square with your ruler. -
Smooth the surface:
Check the surface for fingerprints. I prefer to lightly roll over the piece one last time with parchment paper on top to ensure perfectly flat versatility.
Uneven Surface?
If your baked clay isn’t perfectly flat, place a heavy book on it while it’s still slightly warm from the oven (protected by parchment) to flatten it as it cools.
Step 3: Baking and Finishing
-
Bake the tile:
Transfer the clay (still on the parchment paper or tile) to a baking sheet. Bake according to the manufacturer’s specific instructions for time and temperature—usually around 275°F (135°C) for 30 minutes per 1/4 inch of thickness. -
Cool slowly:
Turn off the oven and open the door slightly, allowing the tile to cool down inside. This prevents thermal shock and keeps the slab flat. -
Sand the edges:
Once fully cooled, use fine-grit sandpaper slightly wet to buff the edges and corners, removing any sharp burrs or irregularities for a professional finish. -
Clean dust:
Wipe the entire piece down with a damp cloth to remove any sanding dust and reveal the speckle pattern clearly.
Go Terrazzo
For a pop of color, mix small chips of colored clay into your white base before rolling to create a custom terrazzo effect instead of granite.
Step 4: Final Assembly
-
Prepare the studs:
Take your gold flat-pad posts or brass thumb tacks. If using earring posts, you will essentially be gluing them permanently into the top row of holes to act as permanent hooks. -
Insert top row hardware:
Apply a small dab of strong adhesive to the barrel of the gold posts (or the pin of the tack) and press them firmly into the top row of holes only. These will serve as hangers for necklaces or bracelets. -
Dry time:
Let the adhesive cure for at least 24 hours to ensure maximum hold strength. -
Mount the organizer:
Attach heavy-duty Command strips or glue a sawtooth hanger to the back of the tile. Press it firmly onto your wall or display area.
Now you have a chic spot to showcase your favorite jewelry pieces right on your wall
Hanging Clay Bar With Built-In Loops
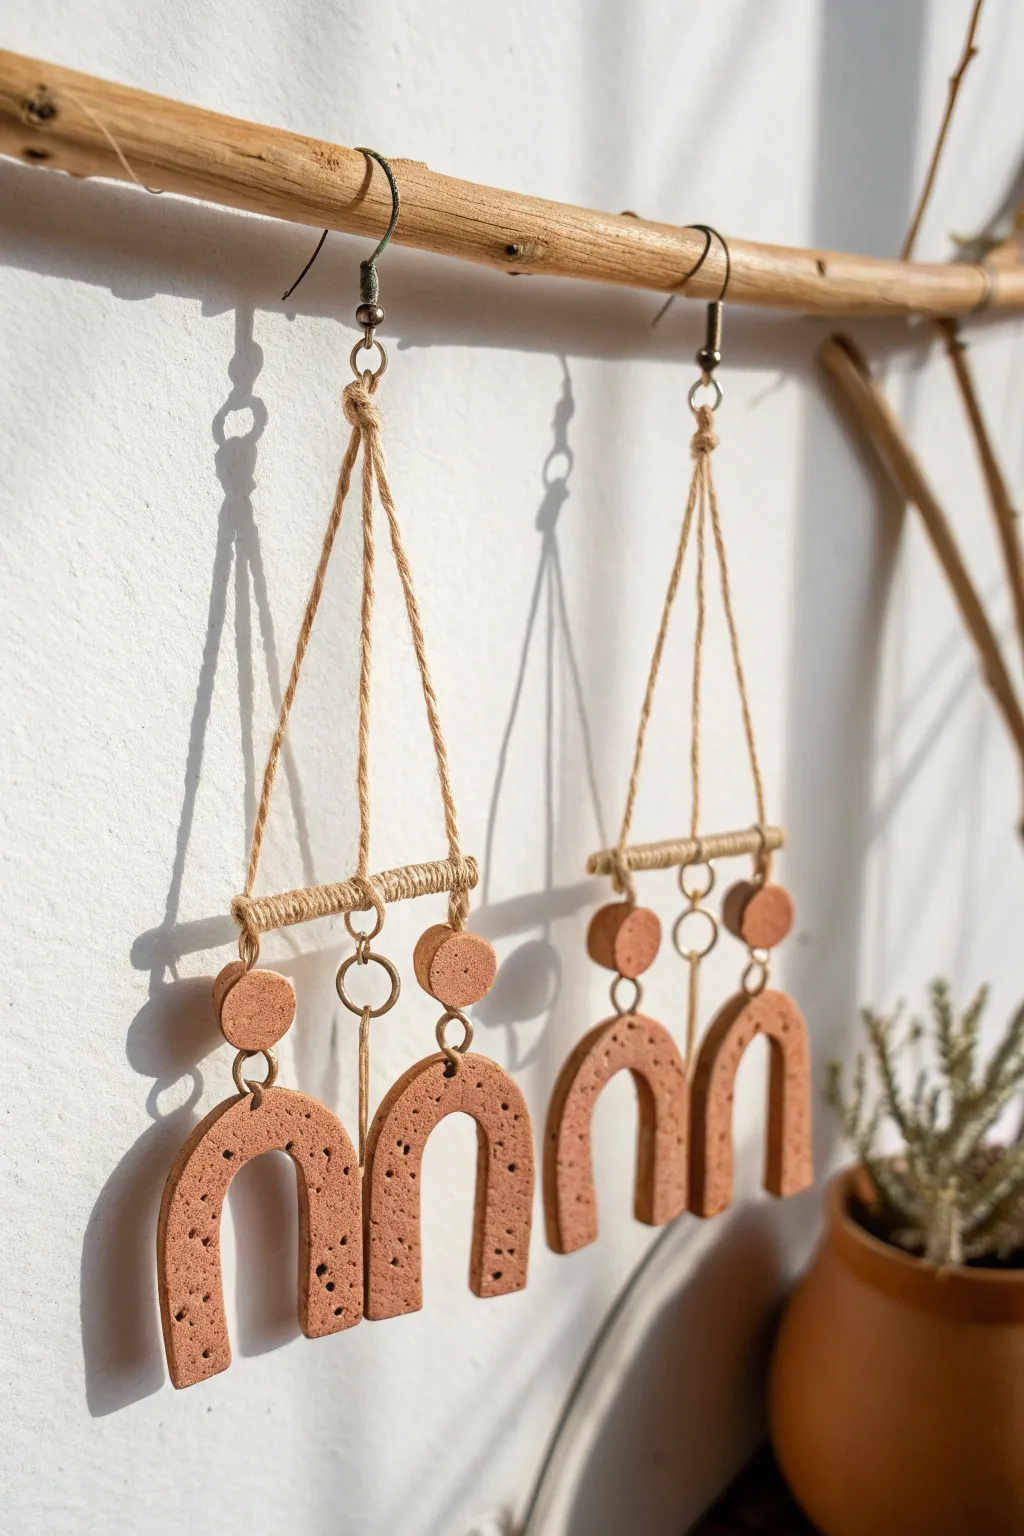
These mobile-inspired earrings combine earthy terracotta textures with the natural warmth of hemp cord. The design features a unique wrapped bar element that suspends geometric clay shapes, creating organic movement and a modern bohemian aesthetic.
How-To Guide
Materials
- Terracotta colored polymer clay
- Speckled clay or black pepper/dried herbs (for texture)
- Hemp cord or thin jute twine (natural color)
- 2 small wooden dowels or toothpicks (approx. 1 inch long)
- Jewelry eye pins and jump rings (gold or bronze finish)
- Earring fish hooks (bronze finish)
- Clay roller or pasta machine
- U-shape arch cutter (small)
- Small circle cutter (approx. 1cm)
- Needle tool or small drill bit
- Super glue or strong craft adhesive
- Jewelry pliers (round nose and flat nose)
- Fine grit sandpaper
Step 1: Creating the Clay Components
-
Condition the Caly:
Start by warming the terracotta polymer clay in your hands until it becomes pliable. If you want that natural speckled stone look seen in the photo, mix in a pinch of black pepper or use a pre-speckled clay variety. -
Roll the Slasbs:
Roll out your clay to a uniform thickness of about 3mm to 4mm. A pasta machine works best for consistency, but a rolling pin with depth guides is also excellent. -
Cut the Shapes:
Using your cutters, press firmly to create four U-shaped arches and four small circles. Ensure the cuts are clean by lifting the cutter straight up. -
Add Suspension Holes:
Using a needle tool, carefully poke a hole at the top center of each U-arch. For the circles, you need two holes: one at the top and one at the bottom, directly aligned vertically. -
Bake the Pieces:
Place your clay shapes on a baking sheet lined with parchment paper or a ceramic tile. Bake according to the manufacturer’s specific instructions for time and temperature. -
Finish the Edges:
Once fully cooled, inspect your pieces. Use fine-grit sandpaper to gently smooth away any rough edges or fingerprints for a professional finish.
Knot Security
Hemp cord can be slippery. Apply a tiny dot of clear drying craft glue or jewelry cement to every knot you tie to ensure the structure doesn’t unravel over time.
Step 2: Wrapping the Suspension Bar
-
Prepare the Bars:
Take your two small wooden dowels or toothpicks. If they are too long, trim them to be slightly wider than your U-arches. -
Attach the Cord:
Dab a tiny dot of super glue at one end of a dowel. Press the end of your hemp cord into the glue to secure it. -
Wrap the Dowel:
Tightly wrap the hemp cord around the dowel, moving from one end to the other. Keep the coils close together so no wood shows through. -
Secure the End:
When you reach the other end, trim the cord and secure it with another dot of glue. Repeat this process for the second bar.
Step 3: Assembly
-
Connect Clay Pieces:
Use your jewelry pliers to open a jump ring. Thread it through the top hole of a U-arch and the bottom hole of a circle piece, then close the ring securely. Repeat for the other pair. -
Create the Triangle Hanger:
Cut a piece of hemp cord approximately 6 inches long. Tie one end to the left side of your wrapped bar and the other end to the right side, creating a triangle shape. -
Knot the Apex:
Find the center top of your cord triangle and tie a small overhand knot to create a loop for the earring hook. This forms the hanging mechanism. -
Hang the Hoop Element:
Cut a shorter piece of hemp cord. Loop it through the top hole of your clay circle component. -
Attach to Bar:
Tie this cord to the center of your wrapped bar. Adjust the length so the clay pieces hang nicely below the bar, then secure the knot with a tiny drop of glue. -
Add Earring Hooks:
Open the loop on your metal earring fish hook. Slide it through the knotted loop you created at the top of the triangle cord. -
Final Adjustments:
Simply trim any excess thread tails very close to the knots. I like to dab the cut ends with clear nail polish or glue to prevent fraying.
Uneven Hanging?
If the bar tilts when worn, the center knot on the triangle suspension isn’t perfectly centered. Slide the knot gently left or right along the cord until the bar hangs level.
Now you have a stunning pair of architectural earrings ready to wear or gift.
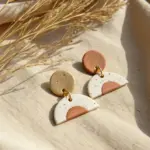
Ring Cone Plus Mini Stud Plate
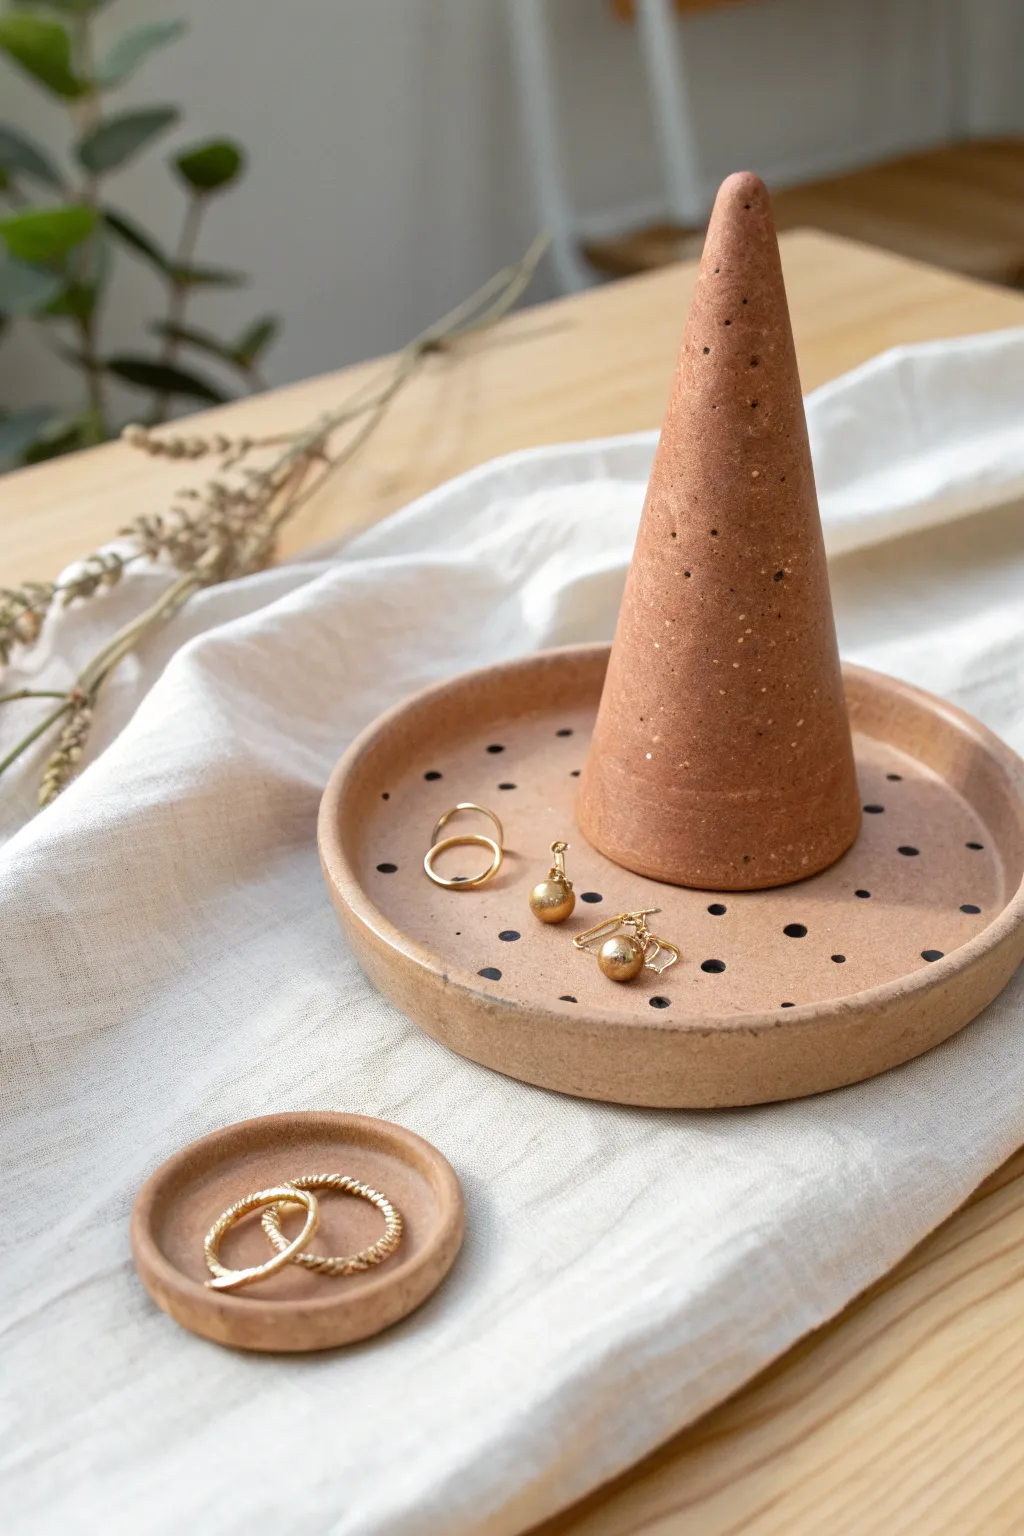
Embrace earthy warmth with this minimal ring cone set featuring a speckled terracotta finish and playful polka dots. This dual-dish design offers a sturdy base for the cone and a separate petite plate for your tiniest studs, creating a cohesive display for your daily jewelry.
Detailed Instructions
Materials
- Terracotta-colored polymer clay (or speckled variety)
- Black acrylic paint
- Rolling pin or acrylic roller
- Circle cutters (large and small)
- Flexible cutting blade
- Cardstock paper
- Tape
- Detail paintbrush or dotting tool
- Sandpaper (fine grit)
- Oven (for baking)
- Baking sheet with parchment paper
Step 1: Forming the Cone
-
Make a template:
Cut a quarter-circle shape out of your cardstock to serve as a cone template. Twist it into a cone shape first to test the height and width, aiming for a tall, slender profile like the one in the photo, and secure your desired size with tape. -
Roll the clay slab:
Condition your terracotta clay until it is soft and pliable, then roll it out into an even slab approximately 1/4 inch thick. Make sure the surface is smooth and free of air bubbles. -
Cut the clay shape:
Lay your cardstock template onto the rolled clay and carefully cut around the edges using your flexible blade. Remove the excess clay. -
Shape the cone:
Gently lift the cut clay piece and wrap it around itself to form a cone. Bring the straight edges together. -
Blend the seam:
Where the edges meet, use your finger or a smoothing tool to gently rub the clay across the seam until it disappears completely. The goal is a seamless, continuous surface, so take your time here. -
Refine the shape:
Stand the cone up on your work surface. If the bottom is uneven, use your blade to slice it straight so it stands perfectly vertical without leaning.
Seamless Blending Tip
To make the cone seam truly invisible, roll the finished cone gently back and forth on a smooth piece of paper. This smooths larger imperfections faster than using fingers alone.
Step 2: Creating the Dishes
-
Cut the bases:
Roll out another slab of clay, slightly thicker than the cone slab for stability. Use your large circle cutter to create the main base and a smaller cutter for the mini jewelry dish. -
Smoothen edges:
Dip your finger in a little bit of water (or cornstarch) and run it along the cut edges of the circles to soften any sharp angles left by the cutters. -
Create the rims:
Roll two long, thin snakes of clay. Wrap one around the circumference of the large circle and the other around the small circle, sitting them right on top of the edge. -
Blend the rims:
Using your thumb or a modeling tool, blend the clay from the snake down into the base on the *inside* of the dish. I prefer to leave the outside seam slightly visible or lightly blended to maintain a handcrafted look, but ensure the bond is strong. -
Check the fit:
Place your unbaked cone into the center of the larger dish to ensure the proportions look right. The dish should naturally frame the cone with plenty of room for rings around the base.
Step 3: Finishing and Baking
-
Pre-bake texture:
Before baking, give all pieces a once-over. You can gently press a piece of coarse sandpaper or a toothbrush against the clay surface to enhance that gritty, natural stone texture seen in the reference. -
Bake the pieces:
Arrangement the cone and dishes on a parchment-lined baking sheet. Bake according to your clay package instructions (usually 275°F for 15-30 minutes, depending on thickness). -
Cool down:
Allow the clay to cool completely in the oven with the door slightly ajar. This prevents thermal shock and cracking. -
Apply the dots:
Dip the very end of a paintbrush handle or a dotting tool into black acrylic paint. Apply scattered, irregular dots across the inside surface of the large dish. -
Seal the work (optional):
If you want extra protection, apply a very thin layer of matte varnish, though leaving the raw clay finish often looks more like authentic pottery.
Leaning Cone?
If your cone sags while baking, make a support structure inside using crumpled aluminum foil. This holds the pointy shape while the clay cures in the heat.
Arrange your favorite gold hoops and delicate bands on your new set for an instant vanity upgrade
Hand-Shaped Holder With Fingers as Hooks
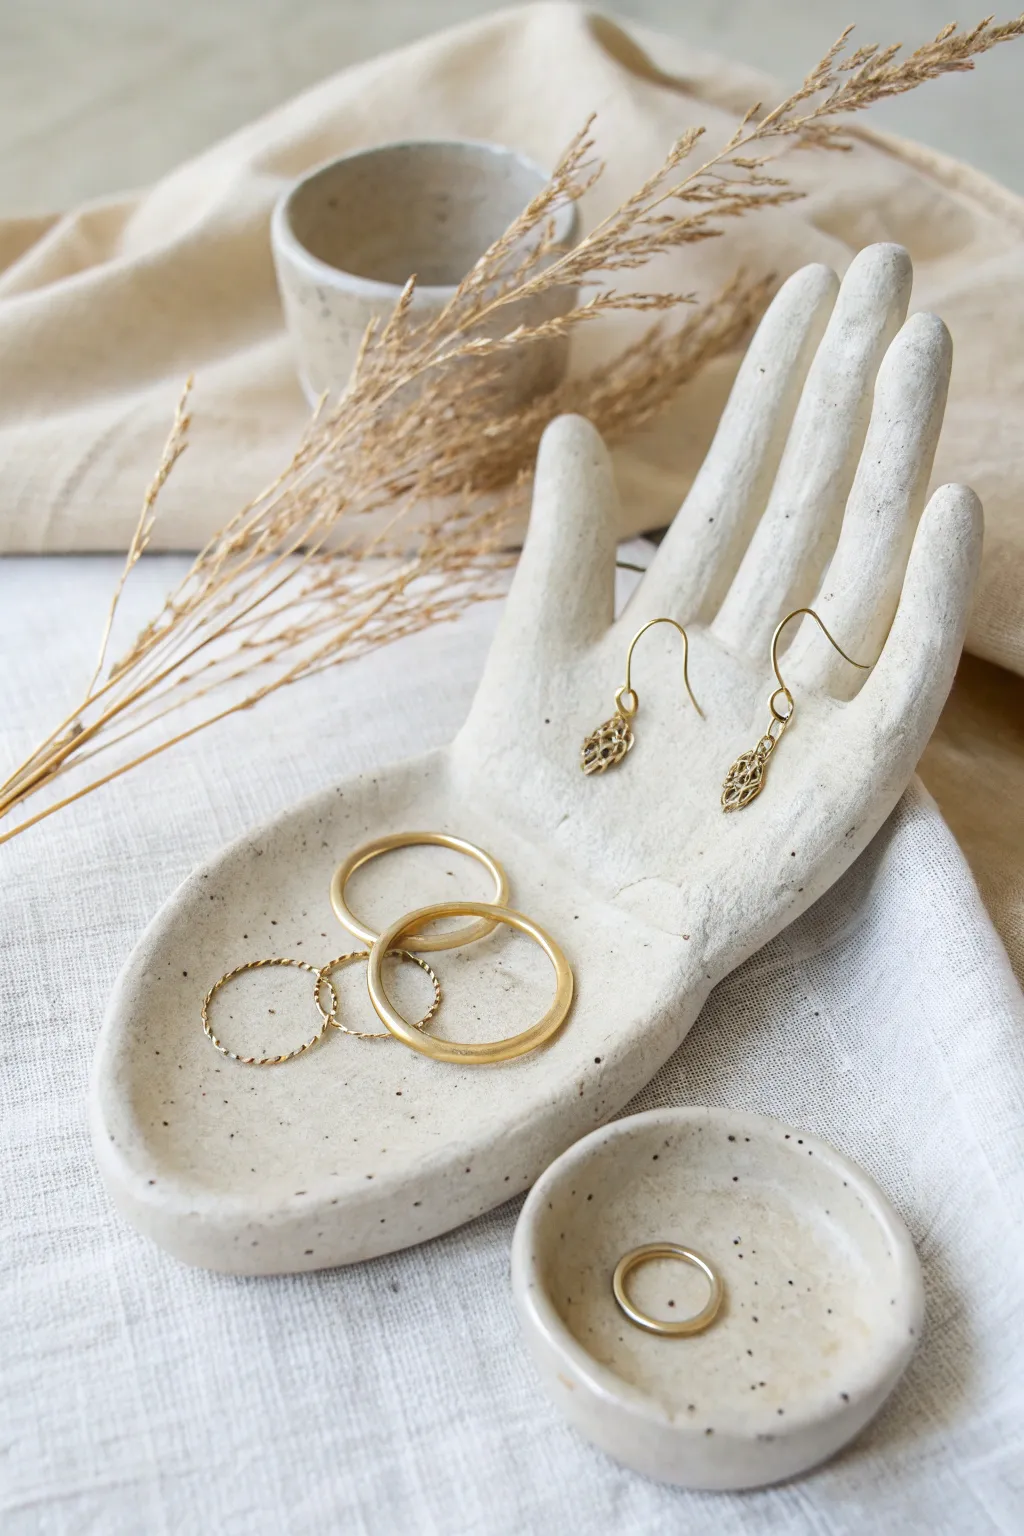
This elegant clay project combines sculptural flair with everyday utility, featuring upright fingers perfect for dangling drop earrings and a naturally cupped palm for rings. With its creamy, speckled finish, it mimics the look of high-end stoneware without needing a kiln.
How-To Guide
Materials
- Air-dry clay (white or cream)
- Rolling pin
- Rolling mat or parchment paper
- Precision craft knife
- Needle tool or toothpick
- Small bowl of water
- Sponge
- Fine-grit sandpaper
- Acrylic paint (cream/off-white)
- Black acrylic paint (for speckles)
- Old toothbrush
- Matte sealant/varnish
- Small crumpled paper or foil
Step 1: Shaping the Foundation
-
Prepare the slab:
Begin by conditioning a generous chunk of air-dry clay until it is pliable and smooth. Roll it out on your mat until it is roughly 1/4 inch thick, ensuring an even surface. -
Trace your hand:
Lightly rest your own hand on the clay slab with your fingers spread slightly apart. Using a needle tool, carefully trace a rough outline around your hand and wrist area. Don’t worry about perfection; a slightly stylized look works beautifully here. -
Cut the shape:
Use your precision craft knife to cut along the traced line. Remove the excess clay and smooth the raw edges with a finger dipped in a little water to soften any harsh cuts. -
Refine the fingers:
Gently pinch and round the edges of each clay finger. The goal is a tubular, organic shape rather than a flat, cookie-cutter look.
Support Success
For taller fingers, insert a short piece of floral wire inside each finger during the sculpting phase to act as an internal armature preventing drooping.
Step 2: Sculpting the Form
-
Create the palm curve:
Carefully lift the clay hand. Gently press the center of the palm downwards while pulling the edges upwards to create a shallow dish shape. This ‘palm’ will eventually hold your rings. -
Position the fingers:
Bend the fingers upwards at the base where they meet the palm. They should stand roughly perpendicular to the palm, curving slightly inward for a natural gesture. -
Support the structure:
Since wet clay is heavy, the fingers will want to slump. Place crumpled balls of paper or foil under the palm and behind the fingers to prop them up in the desired position. I also find tucking small bits of foil between the fingers helps keep them separated. -
Smooth the surface:
Dip your sponge in water and wring it out almost completely. Wipe the entire surface to remove fingerprints and crate a seamless, stone-like texture. -
Deep dry:
Allow the piece to dry completely. This usually takes 24-48 hours depending on humidity. Rotate it occasionally to ensure air reaches the bottom.
Add Texture
Before drying, use a piece of raw canvas or linen to gently press onto the clay surface. This adds a subtle fabric texture that catches the glaze beautifully.
Step 3: Finishing and Decoration
-
Sand for perfection:
Once bone dry, use fine-grit sandpaper to buff away any rough spots, especially around the fingertips and the rim of the palm dish. Wipe away the dust with a barely damp cloth. -
Base coat:
Paint the entire sculpture with a cream or off-white acrylic paint. Apply two coats for solid coverage, letting it dry between layers. -
Create the speckles:
Dilute a tiny amount of black acrylic paint with water until it is inky. Dip an old toothbrush into this mixture. -
Splatter technique:
Hold the toothbrush over the hand sculpture and run your thumb across the bristles to flick tiny droplets onto the surface. Practice on a scrap paper first to control the density of the speckles. -
Seal the piece:
Once the paint is fully dry, apply a coat of matte varnish or sealant. This protects the finish and gives it that professional ceramic feel.
Now you have a stunning, sculptural display piece ready to hold your favorite accessories on your vanity
Mini Head Bust With Pierced Ears

This elegant clay bust brings a touch of gallery sophistication to your vanity while keeping your favorite earrings organized. With its calm expression and primitive-style features, this project combines functional storage with sculptural art.
Step-by-Step
Materials
- Air-dry clay (stone or white color)
- Small wooden base (square or rectangular)
- Wooden dowel (1/2 inch diameter)
- Sculpting tools (wire loop, needle tool, wooden shapers)
- Water and sponge
- Sandpaper (fine grit)
- Brown acrylic paint
- Paper towels
- Strong craft glue or epoxy
- Drill with small bit (optional)
Step 1: Forming the Base Structure
-
Prepare the armature:
Start by securing your wooden dowel into the center of the wooden base if it isn’t already attached. This will act as the neck and internal support for the head. -
Create the core:
Wrap a tight ball of aluminum foil around the top of the dowel to create the bulk of the head shape. This saves clay and reduces drying time. -
Apply the clay:
Flatten a large slab of air-dry clay and drape it over your foil core. Press firmly to ensure it adheres to the foil and the wooden dowel neck. -
Shape the silhouette:
Using wet hands, smooth the clay into an elongated egg shape. Taper the clay down the neck to flare out slightly where it meets the wooden base cover, creating a pedestal look.
Cracks happen!
If small cracks appear while drying, mix a tiny bit of fresh clay with water to make a paste (slip) and fill them in, then sand smooth once dry.
Step 2: Sculpting the Features
-
Map the face:
Lightly sketch a vertical centerline and horizontal eye line with a needle tool to guide your symmetry. -
Build the nose:
Add a small wedge of clay to the center of the face. Blend the edges seamlessly into the forehead and cheeks, creating a long, straight bridge. -
Carve the eyes:
Instead of adding eyeballs, use a carving tool to incise two large, almond-shaped outlines. Carve a curved line for the closed eyelid to give that peaceful, sleeping expression. -
define the mouth:
Add a small mound for the mouth area. Use a wire tool to carve a zig-zag lip line and define the upper and lower lips with gentle curves. -
Add the ears:
Form two C-shaped pieces of clay and attach them to the sides of the head. Position them slightly lower than realistic ears for a stylized look. -
Detail the ears:
Use a modeling tool to press an indentation into the center of each ear. This is crucial as it needs to be thin enough to be pierced later. -
Pierce the lobes:
While the clay is still wet, use a needle tool or a piece of wire to poke a hole through each earlobe. Make sure the hole is large enough for earring hooks.
Step 3: Refining and Finishing
-
Smooth the surface:
Dip a sponge in water and gently wipe the entire sculpture to remove fingerprints. I like to leave a little texture to mimic carved stone. -
Dry completely:
Let the sculpture dry for 24-48 hours. Keep it away from direct heat to prevent cracking. -
Sand imperfections:
Once bone dry, lightly sand any sharp edges or rough patches with fine-grit sandpaper. -
Create an antique wash:
Mix a small amount of brown acrylic paint with plenty of water to create a thin wash. -
Apply the wash:
Brush the wash generously into the carved lines of the eyes, nose, mouth, and eyebrows. -
Wipe back:
Immediately wipe the surface with a damp paper towel. The dark paint will stay in the recesses, highlighting your sculpted details. -
Seal:
Apply a matte varnish to protect the clay from moisture and handle. -
Final assembly:
If you sculpted the head separately, glue the neck firmly onto your wooden display block now.
Make it granite
Mix dried tea leaves or black pepper into your white clay before sculpting to create a convincing faux-stone speckled texture.
Now you have a serene piece of art ready to showcase your favorite jewelry
Cloud Stand With “Raindrop” Dangle Slots
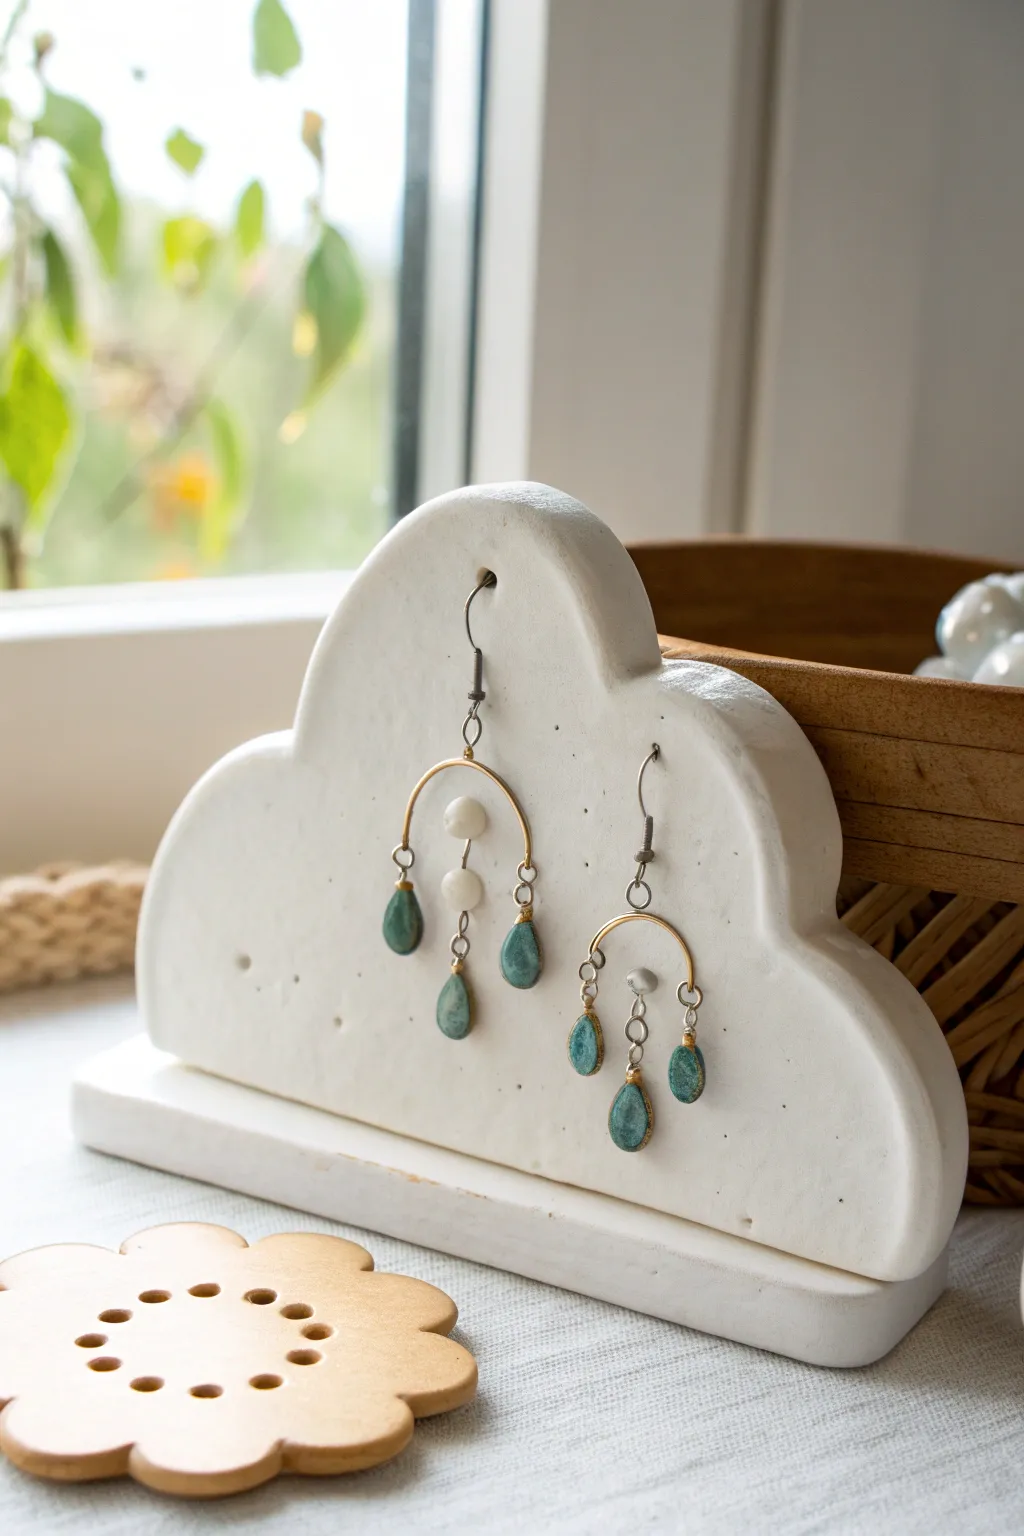
Bring a touch of whimsical weather to your vanity with this charming cloud-shaped earring organizer. This minimalist stand uses a crisp white finish and a clever slotted design to mimic raindrops when your favorite dangles are on display.
Step-by-Step
Materials
- White polymer clay (approx. 4-6 oz)
- Acrylic rolling pin
- Cloud-shaped cookie cutter (approx. 4-5 inches wide)
- Rectangular clay cutter or ruler
- Needle tool or toothpick
- Liquid polymer clay (Bake & Bond)
- Fine grit sandpaper (400-800 grit)
- Baking sheet
- Parchment paper
- Oven
Step 1: Shaping the Cloud
-
Condition the clay:
Begin by kneading your white polymer clay in your hands until it becomes soft, pliable, and warm. This prevents cracking later on. -
Roll out the slab:
Using your acrylic rolling pin, roll the clay out on a clean surface. You want a substantial thickness—aim for about 1/4 inch (6mm)—so the cloud is sturdy enough to stand upright. -
Cut the cloud form:
Press your cloud-shaped cookie cutter firmly into the rolled slab. Wiggle it slightly to ensure a clean cut, then remove the excess clay. Smooth any rough edges with your finger. -
Add texture (optional):
For the slightly matte, faux-stone look seen in the photo, gently dab the surface with a crumpled piece of aluminum foil or a coarse sponge. This removes the shiny, artificial look of the clay. -
Pierce the earring holes:
Use a needle tool or toothpick to poke holes through the cloud shape. Create pairs of holes spaced appropriately for your jewelry. -
Refine the holes:
Ensure the holes go all the way through cleanly. I usually give the tool a little twist as I pull it out to keep the hole circular and neat.
Wobbly Cloud?
If the cloud won’t stand straight during the bonding bake, sandwich it between two ceramic mugs or baking weights on the tray to keep it perpendicular until cured.
Step 2: Creating the Base
-
Form the base slab:
Gather your remaining clay and roll out a second slab. This should be slightly thicker than the cloud, perhaps just over 1/4 inch, to provide a heavy foundation. -
Cut the rectangle:
Use a rectangular cutter or a ruler and blade to cut a rectangle. It should be slightly longer than the width of your cloud (approx. 5-6 inches long by 1.5 inches wide). -
Check the fit:
Before baking, gently hold the cloud upright on the base to ensure the proportions look balanced. Don’t press them together yet.
Make it Sparkle
Before baking, mix a small amount of translucent or iridescent glitter into the white clay. It mimics the glistening look of actual clouds or snow for a magical touch.
Step 3: Baking and Assembly
-
First bake:
Place both the cloud piece (lying flat) and the rectangular base on a baking sheet lined with parchment paper. Bake according to your clay package instructions (usually 275°F/135°C for 30 minutes). -
Cool down:
Allow both pieces to cool completely. Handling them while warm can cause warping. -
Apply adhesive:
Apply a thin line of liquid polymer clay (or strong super glue if you prefer not to re-bake) along the center of the rectangular base where the cloud will sit. -
Join the pieces:
Stand the cloud upright onto the liquid clay line. Use small scrap blocks of clay or heat-safe objects to prop the cloud up so it stays perfectly vertical. -
Second bake (Bonding):
Carefully place the propped assembly back into the oven for another 15-20 minutes to cure the liquid clay bond. -
Final finish:
Once fully cooled, inspect the piece. If there are any fingerprints or sharp edges, lightly wet-sand them with fine-grit sandpaper for a professional, matte finish.
Now you have a serene, functional sculpture ready to organize your jewelry collection