There’s something extra satisfying about turning a classic game into a tiny, handmade clay treasure you can actually play. These easy clay tic tac toe ideas keep the shapes simple, the themes cute, and the results totally giftable.
Classic Slab Board With Coil Grid
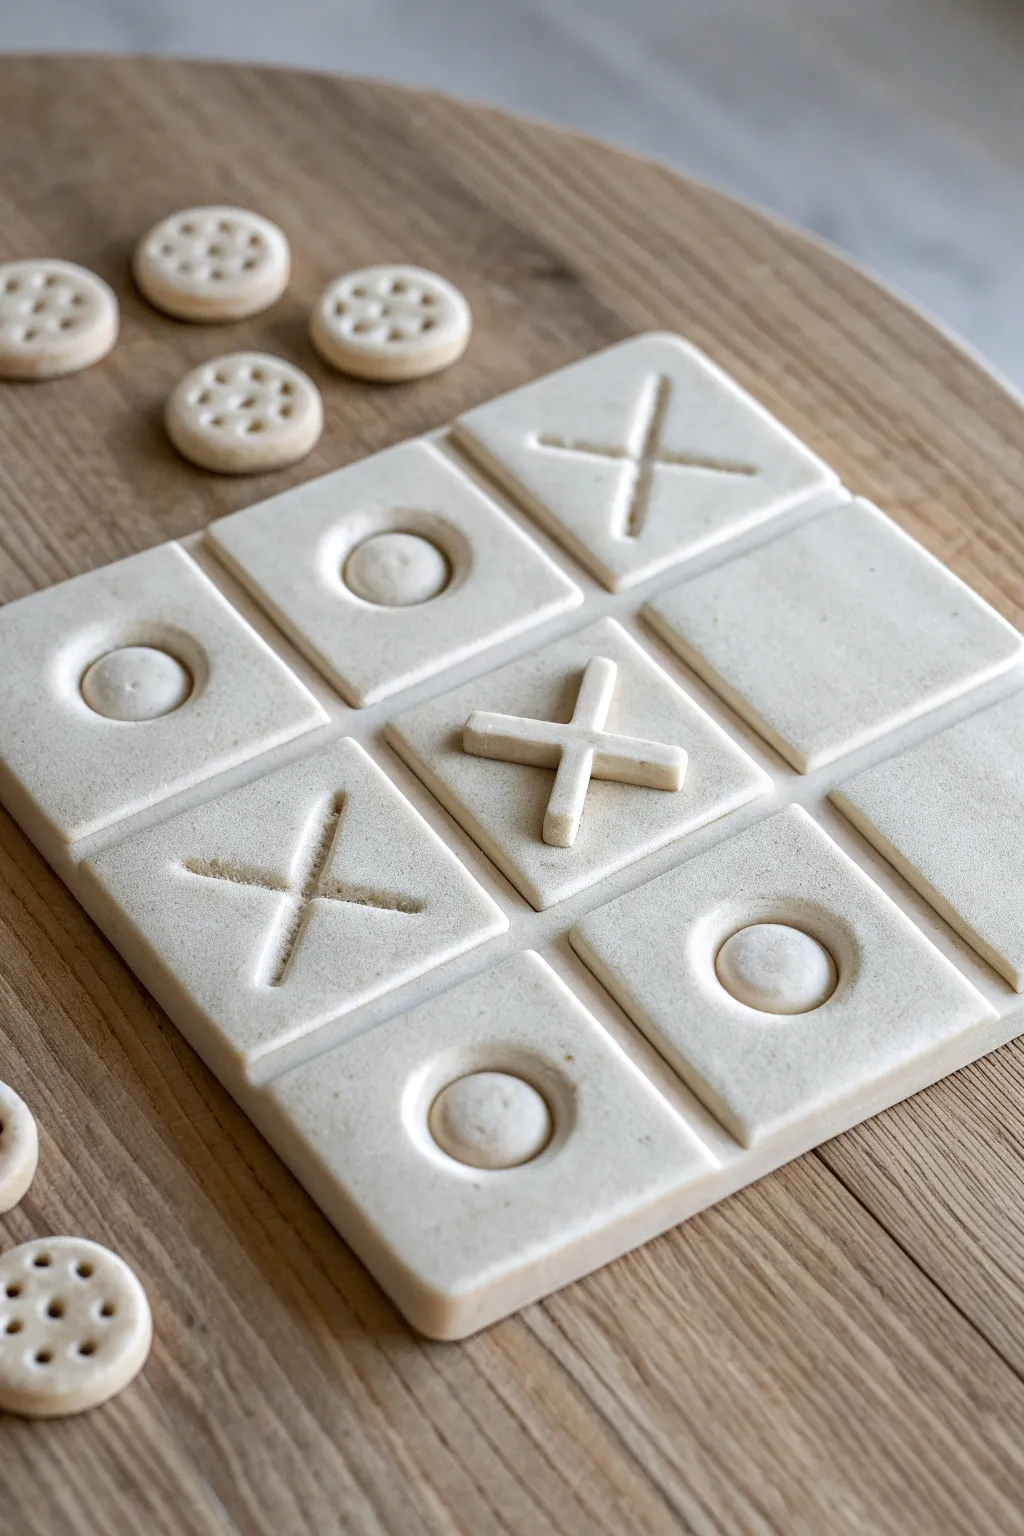
This project combines a rustic, speckled stoneware aesthetic with clean geometric lines for a timeless game set. The thick, substantial slab base features deeply impressed X marks and a raised grid system, creating a tactile and satisfying playing surface.
Step-by-Step Tutorial
Materials
- Speckled buff stoneware clay (or polymer clay with faux stone effect)
- Rolling pin
- Two wooden guide slats (approx. 1/4 inch thick)
- Square template (paper or cardstock)
- Fettling knife or clay cutter
- Wooden sculpting tool with a blunt point
- Thin wooden dowels or square balsa wood strips (for the grid)
- Small round cookie cutter (approx. 1 inch)
- Sponge
- Scoring tool
- Slip (liquid clay)
- Clear matte glaze (optional)
- Sandpaper (for finishing)
Step 1: Creating the Base Slab
-
Prep the clay:
Start by wedging your speckled clay thoroughly to remove air bubbles, which is crucial for a flat slab. If using polymer clay, condition it until soft and pliable. -
Roll the slab:
Place your clay between two wooden guide slats. Roll the clay out into a thick, even slab. The guides ensure the entire board maintains a uniform thickness, which helps prevent warping during drying. -
Cut the square:
Lay your square template over the rolled slab. Using your fettling knife, cut straight down along the edges to create a perfect square shape for your game board. -
Soften the edges:
Since the cut edges can be sharp, gently run a damp sponge or your finger along the rim to create that slightly rounded, soft corner look seen in the photo. -
Create a border lip:
Using your thumb or a modeling tool, gently press down just inside the outer edge to create a very subtle raised rim, framing the playing area.
Warping Worries?
To fix a warped board after drying but before firing, gently sponge the dry side to rehydrate slightly, then weight it down between drywall boards.
Step 2: Designing the Grid and Marks
-
Mock up the grid:
Before making permanent marks, lightly lay your wooden dowels or strips across the slab to visualize the 3×3 grid. Measure to ensure the squares are equal in size. -
Mark the intersections:
Use a needle tool or pencil to make tiny guide dots where the grid lines will intersect, then remove the wooden strips for now. -
Impress the X marks:
In the center of five alternating squares (forming an X pattern on the board itself), use a blunt wooden tool or the side of a ruler to press deep ‘X’ indentations into the wet clay. Press firmly so the mark is distinct. -
Refine the texture:
If the clay displaced by the impression creates rough ridges, smooth them slightly with a soft brush or fingertip, keeping the rustic look intact. -
Install the grid lines:
For the actual grid, you have two options. You can measure and cut thin strips of clay to act as the dividers, or for the mixed-media look in the photo, leave channels to glue in wooden strips later. I prefer cutting thin clay strips for durability. -
Attach the clay strips:
If using clay strips, score the board where the lines go, apply slip, and press the thin clay coils or extruded strips down to form the tic-tac-toe grid. Smooth the joins.
Step 3: Crafting the Playing Pieces
-
Roll clay for pieces:
Roll out a separate, thinner slab of the same clay body. These will become your ‘O’ pieces. -
Cut the circles:
Using your small round cutter, punch out at least five circles. It is always wise to make one or two extras in case one gets lost. -
Decorate the pieces:
Press a smaller circle tool or bottle cap into the center of each disc to create an indented ring pattern, matching the rustic style of the board. -
Smooth the pieces:
Rub the edges of each game piece to remove any burrs or sharp bits left by the cutter.
Level Up: Contrast
Glaze just the indented ‘X’ marks and the circular depressions on the playing pieces with a dark wash to make the symbols pop visually.
Step 4: Drying and Finishing
-
Slow drying:
Place the board and pieces on a wooden board covered with newspaper. Cover them loosely with plastic to let them dry slowly. This is essential to prevent the large square base from curling up at the corners. -
Bisque fire:
Once bone dry, fire the pieces in a kiln according to your clay’s specifications (usually Cone 04 or 06). If using polymer clay, bake according to package instructions. -
Surface treatment:
To enhance the speckles without making it shiny, apply a clear matte glaze, or leave the stoneware bare if it is fully vitrified. Wipe the bottom of the board clean. -
Final firing:
Fire the project a second time for the glaze setting (if using ceramic clay). This usually happens at Cone 5 or 6 for stoneware. -
Add wooden accents:
If you chose the mixed-media route, now is the time to glue your thin wooden strips into the channels you created earlier using a strong craft adhesive. -
Final check:
Ensure the board sits flat on a table. If there is a slight wobble, you can glue small felt pads to the bottom corners.
Now you have a durable, handcrafted game set that looks beautiful enough to leave out on the coffee table year-round.
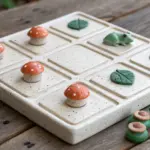

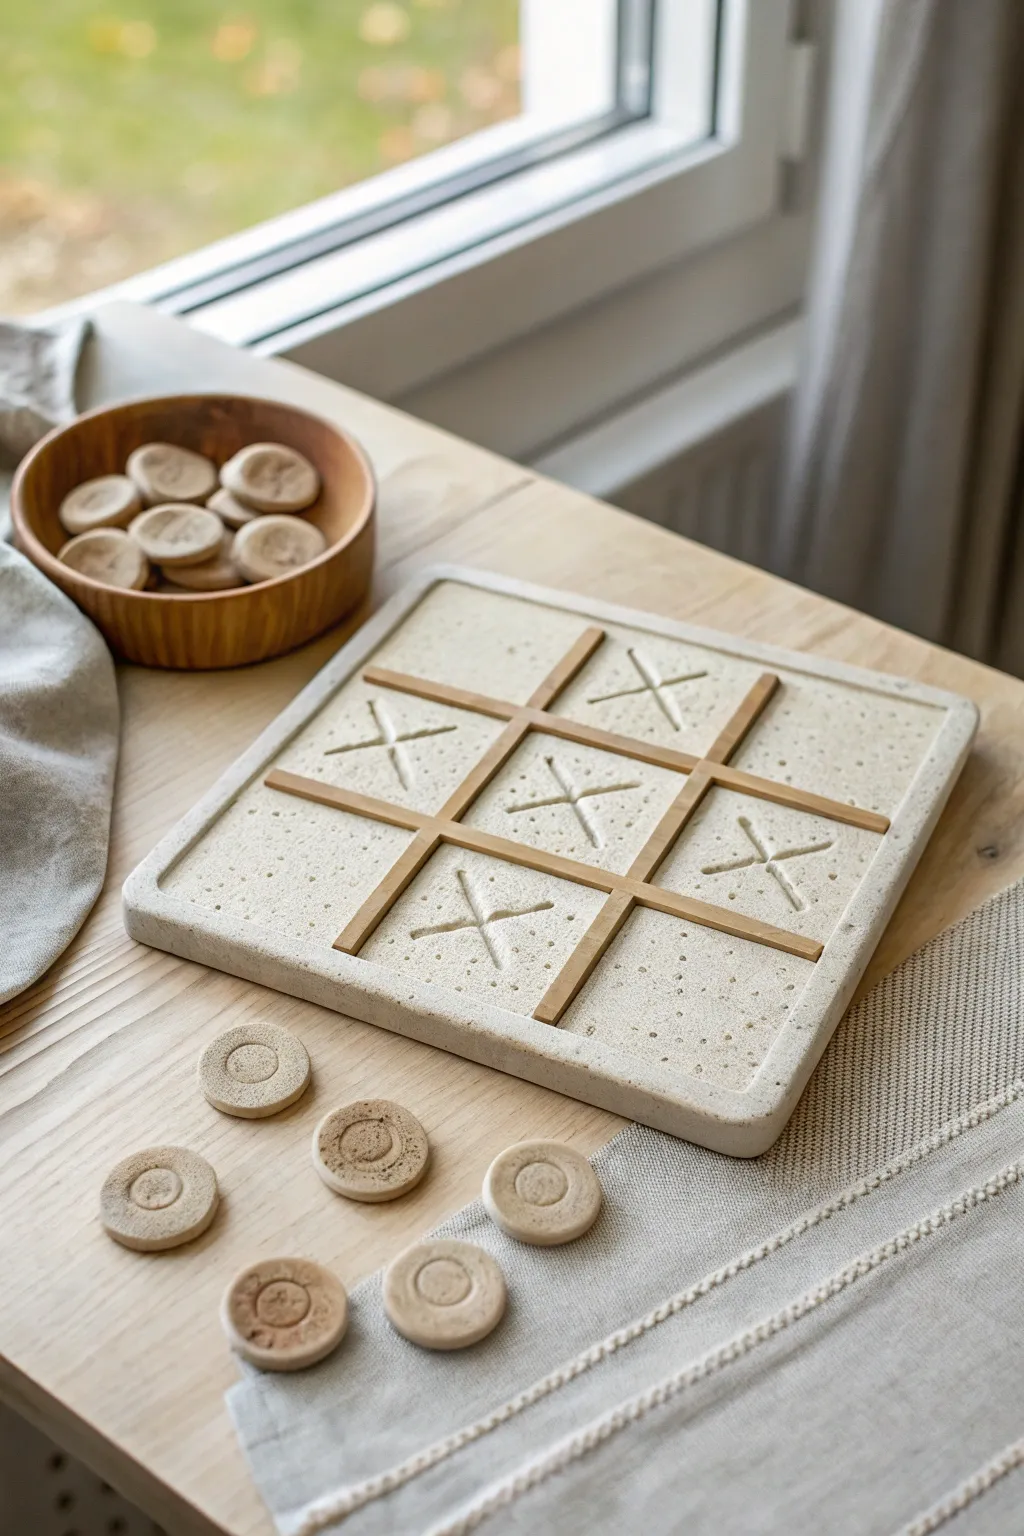
Stamped Line Grid on a Flat Tile
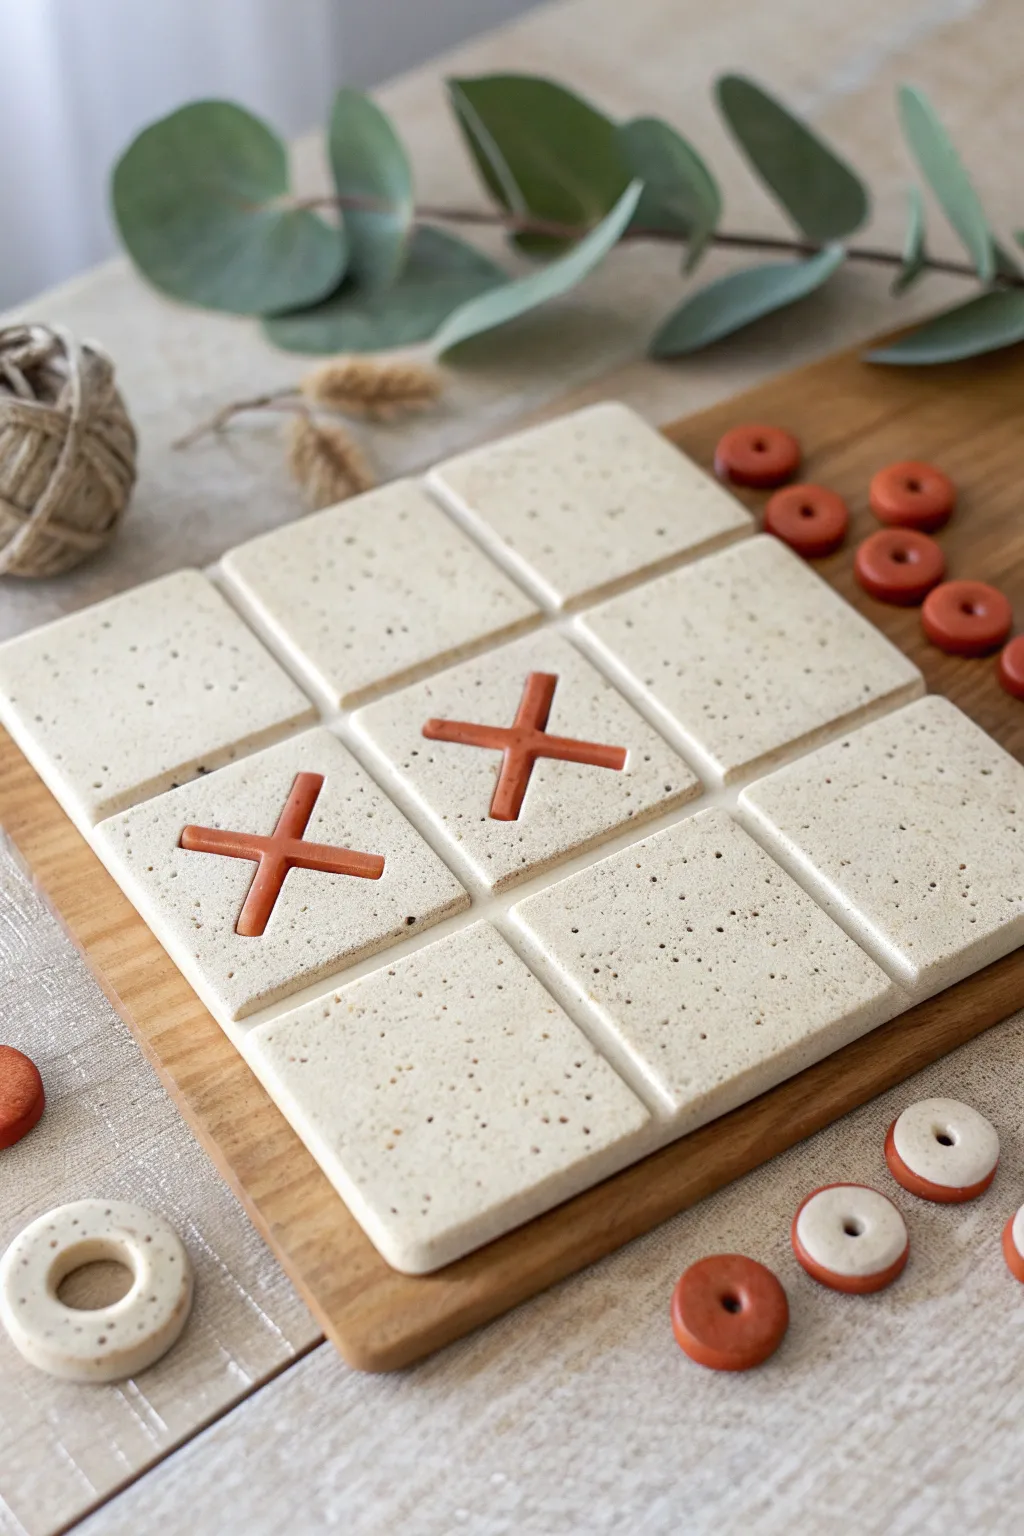
Create a stunningly simple tic-tac-toe set that features a deeply scored grid on a single slab of faux-stone clay. The natural speckled finish combined with contrasting terracotta-colored game pieces makes for a modern, earthy decor piece that is as fun to play as it is to display.
Step-by-Step Guide
Materials
- Polymer clay (granite or speckled beige effect)
- Polymer clay (terracotta or rust color)
- Small round clay cutter (approx. 1 inch)
- X-acto knife or clay blade
- Rolling pin or pasta machine
- Ruler
- Parchment paper or baking tile
- Sandpaper (fine grit)
- Acrylic sealer (matte finish, optional)
- Wooden cutting board (for display)
Step 1: Forming the Base
-
Condition the clay:
Begin by thoroughly conditioning your speckled beige clay until it is soft and pliable. This prevents cracking later on. -
Roll out the slab:
Roll the clay out on parchment paper or a smooth work surface to a consistent thickness of about 1/4 inch. You want a sturdy base that feels substantial. -
Cut the square:
Use your ruler and blade to cut a perfect square from the slab. A size of 6×6 inches works well for a standard tabletop game. -
Mark the grid:
Lightly mark the slab into nine equal squares using your ruler. Do not cut all the way through; just make small guidelines for where your grid lines will go. -
Score the channels:
Using the back of your blade or a dedicated sculpting tool, press firmly along your guidelines to create deep, wide channels. You want to create the illusion of nine separate tiles while keeping the base intact as one solid piece. -
Smooth the edges:
Gently run your finger along the cut edges and the grid channels to soften any sharp corners. I find this gives the piece a more finished, ceramic look.
Step 2: Creating the Game Pieces
-
Prepare accent clay:
Condition the terracotta-colored clay. Roll it out to a slightly thinner thickness than your base, perhaps 1/8 inch. -
Cut the O pieces:
Use your small round cutter to punch out five circles. To create the donut shape, use a smaller cutter (like a straw or pen cap) to remove the exact center of each circle. -
Cut the X pieces:
Cut thin strips of the red clay. Cut them into short segments and cross them over each other to form five ‘X’ shapes. Press the intersection point gently so they fuse together. -
Texture optional:
If your terracotta clay is plain, you can gently press some coarse sand or black pepper into the surface before baking to mimic the speckled texture of the board.
Straight Lines Secret
Use a long metal ruler as a stamp rather than dragging a tool. Pressing straight down into the clay creates a cleaner, straighter channel without dragging or warping the clay.
Step 3: Baking and Finishing
-
Bake everything:
Place the board and the game pieces on a baking tile. Bake according to the manufacturer’s instructions for your specific brand of clay, usually at 275°F (135°C) for about 30 minutes. -
Cool down:
Allow all pieces to cool completely in the oven before moving them. This annealing process makes the clay stronger. -
Sand the edges:
Once cool, use fine-grit sandpaper to smooth out any rough spots on the edges of the board and the game pieces. Rinse off any dust. -
Seal (Optional):
For extra durability, apply a thin coat of matte acrylic sealer to the pieces. This is especially helpful if you used surface inclusions like pepper. -
Mount (Optional):
If you want a heavier board, glue the finished clay grid onto a square piece of wood or cork backing once it’s fully cured.
Magnetic Magic
Embed small magnets into the bottom of your game pieces and corresponding spots on the board grid before baking for a travel-friendly set that snaps into place.
Place your beautiful new game on a coffee table and enjoy a quick match with friends
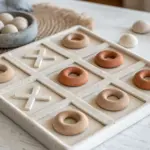

Pinch Dish Board That Holds the Pieces
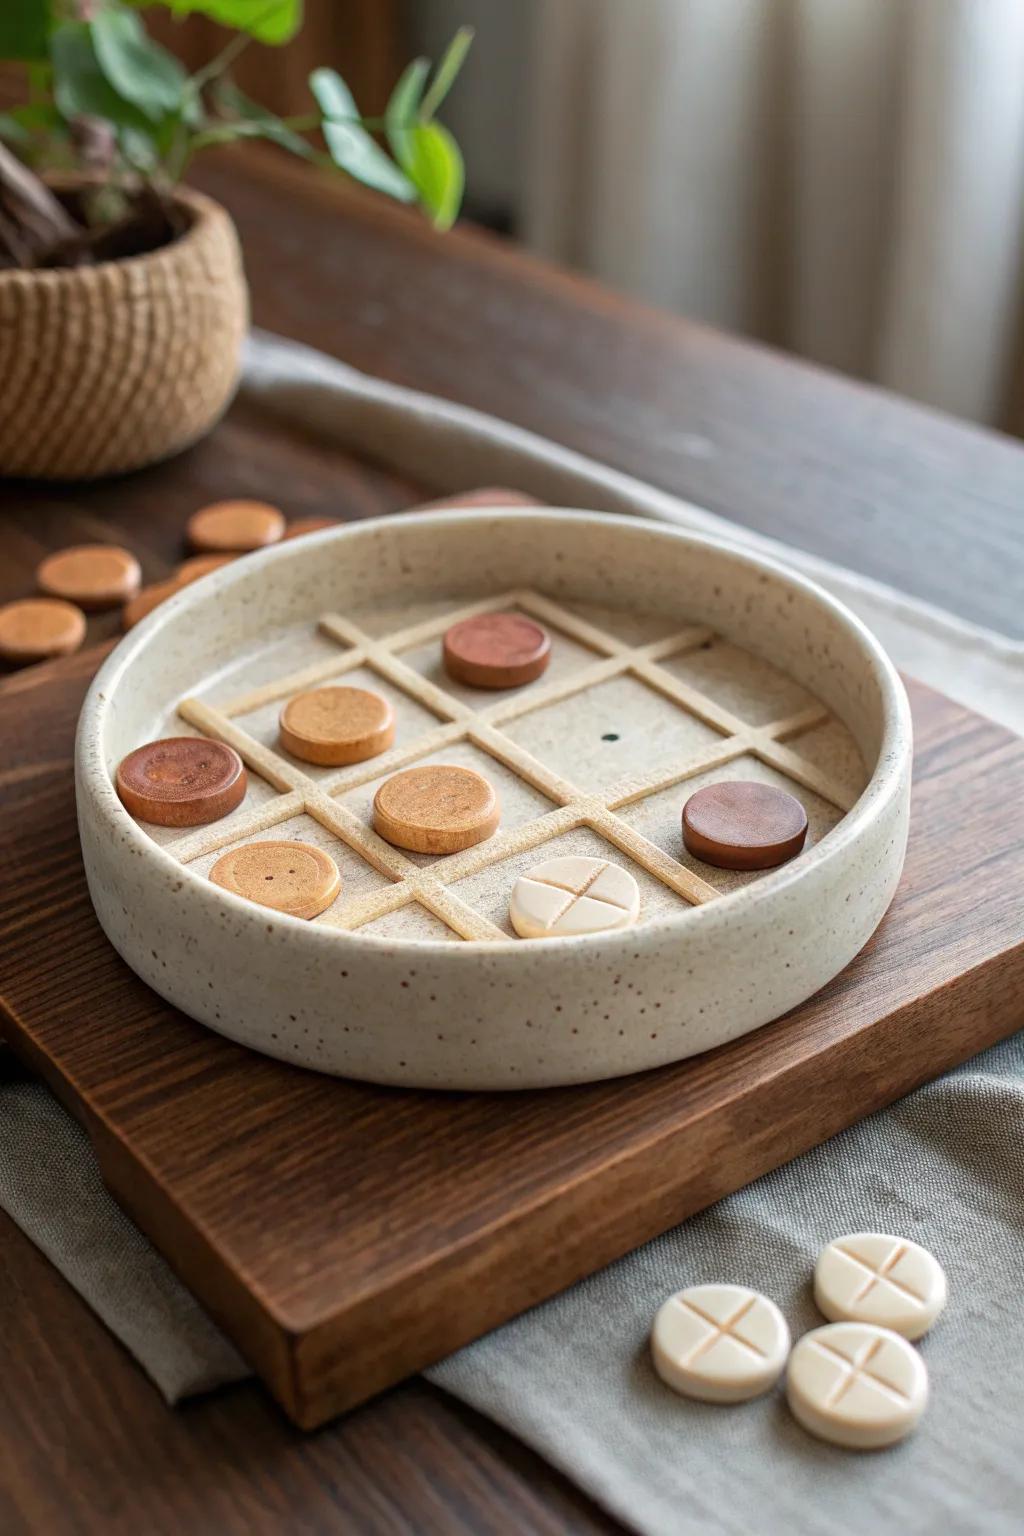
This charming project combines a functional game board with a stylish catch-all dish, perfect for a coffee table centerpiece. The natural speckled clay and warm wood tones give it an organic, modern feel that elevates the classic game.
Step-by-Step Tutorial
Materials
- Speckled stoneware clay (or polymer clay with faux speckles)
- Rolling pin
- Circle cutter (approx. 6-7 inches)
- Small circle cutter (approx. 1 inch)
- Clay knife or fettling knife
- Ruler
- Scoring tool and slip (if using ceramic clay)
- Acrylic paints (warm brown, terracotta, off-white)
- Matte varnish or sealant
- Sponge for smoothing
- X-acto knife or carving tool
Step 1: Base Construction
-
Prepare the Clay:
Begin by wedging your speckled clay to remove any air bubbles. Roll it out into a flat slab that is roughly 1/4 inch thick, ensuring an even surface. -
Cut the Base:
Use your large 6-7 inch circle cutter or trace around a bowl to cut out the main base of your game board. -
Form the Walls:
Roll a long coil of clay, about 1/2 inch thick. Place this coil on top of the outer edge of your circular base to create the wall. -
Blend the Seams:
firmly blend the coil into the base on both the inside and outside. I like to use a wooden modeling tool here to drag the clay down and smooth it out so it looks like one solid piece. -
Shape the Dish:
With damp fingers or a sponge, smooth the walls upward to create a straight, vertical rim. The dish should be shallow, about 1 to 1.5 inches tall.
Step 2: Creating the Grid
-
Measure the Grid:
Using a ruler, lightly mark where your tic-tac-toe grid lines will go. You need two horizontal and two vertical lines spaced evenly. -
Cut Strips:
Roll out a thin sheet of clay (about 1/8 inch thick) and cut four long, thin strips using your ruler and knife. These will be the grid dividers. -
Attach the Lines:
Score the clay along your marked lines inside the dish and apply a little slip. Place the strips into the dish to form the hashtag pattern. -
Trim and Integrate:
Trim the ends of the strips where they meet the inner wall. Gently press them down so they adhere well, but try to keep the top edges fairly crisp.
Uneven Walls?
If your dish walls are wavy, place a long strip of paper or flexible plastic around the inside rim as a support while the clay firms up.
Step 3: Game Pieces
-
Cut the Tokens:
Using the remaining slab, cut out 10 small circles with your 1-inch cutter. Smooth the edges with your finger to remove any sharpness. -
Create the X Pieces:
Take 5 of the circles. Use a knife or carving tool to press a deep ‘X’ or cross shape into the top surface of each one. -
Leave the O Pieces:
Keep the other 5 circles smooth and flat. These will serve as the opposing team’s pieces. -
Dry and Fire:
Allow the dish and all pieces to dry slowly to prevent warping. If using ceramic clay, bisque fire and glaze with a clear matte glaze. If using polymer clay, bake according to package instructions.
Level Up: Texture
Before cutting your wood-tone pieces, press real wood grain texture into the raw clay using a rough piece of sandpaper or a wire brush.
Step 4: Finishing Touches
-
Paint the Dish:
If you used polymer clay or unglazed ceramic, paint the dish an off-white stone color. Use a toothbrush to flick darker brown paint onto it for that speckled pottery effect. -
Paint the Wood Tones:
Paint the plain circle tokens with a mix of burnt sienna and ochre to mimic a warm wood grain. -
Paint the X Tokens:
Paint the ‘X’ tokens a creamy white color. You can darken the indented ‘X’ slightly with a wash to make the design pop. -
Seal:
Apply a coat of matte varnish to everything to protect the paint and give it a finished, professional look.
Now you have a beautiful, handmade game set distinctly your own that is ready to be displayed and played


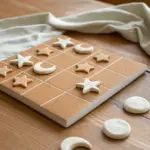
Minimal Star vs. Circle Playing Pieces
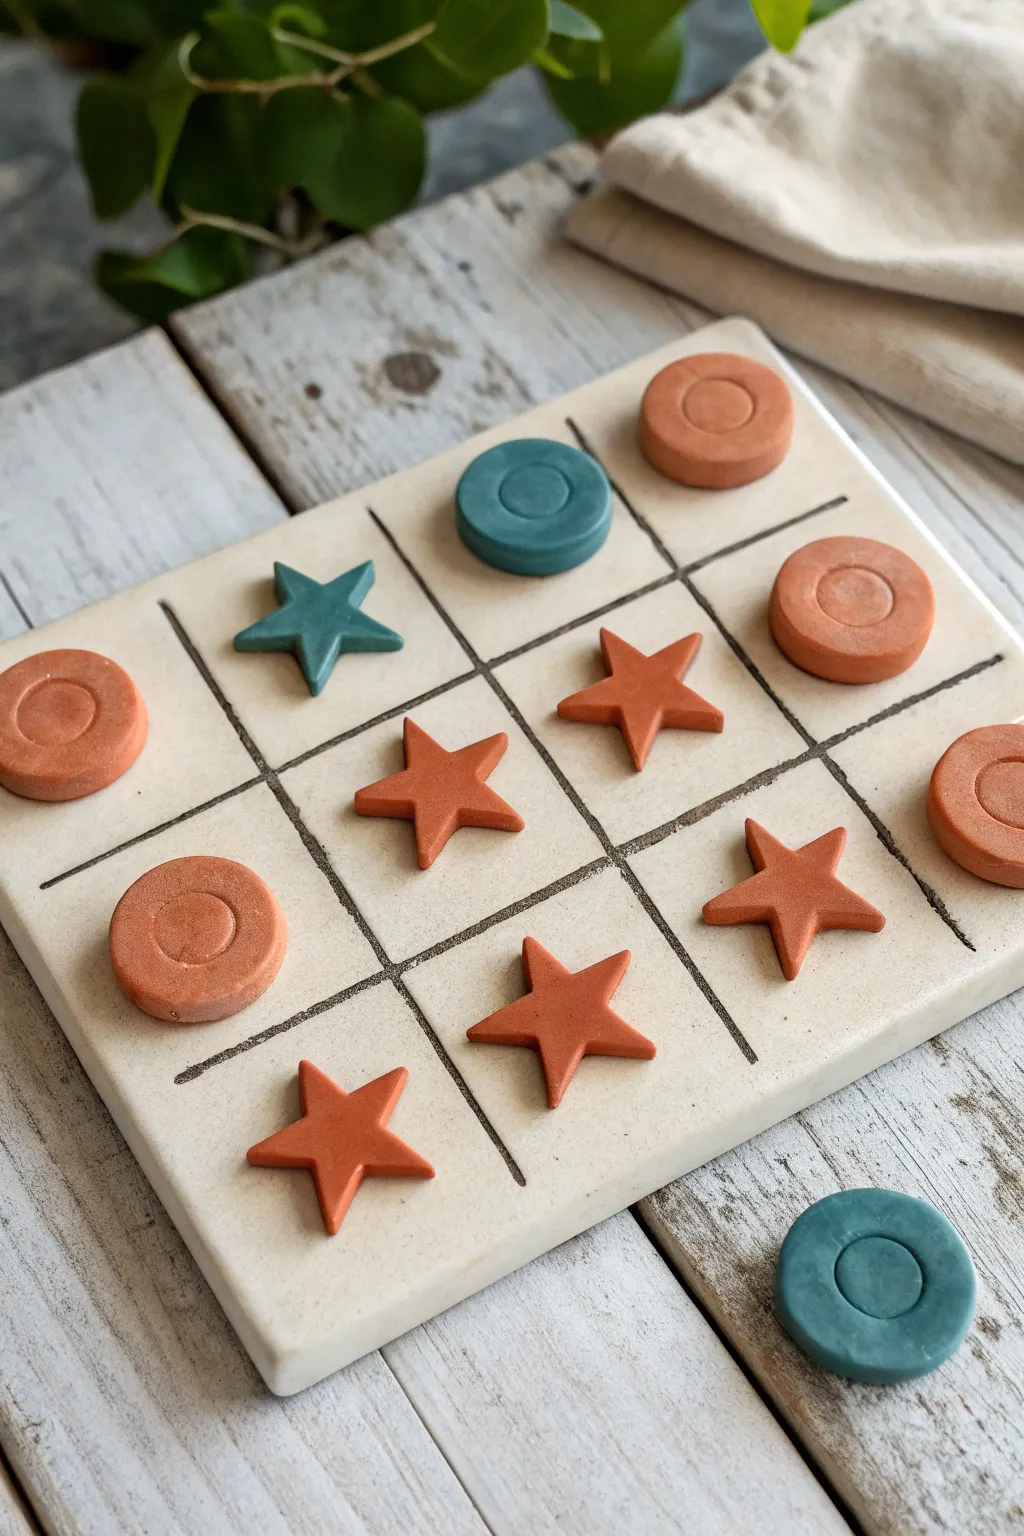
This charming, handmade game set combines a minimalist aesthetic with the tactile joy of clay. Featuring a simple slab board and distinct star versus circle playing pieces in earthy terracotta and teal tones, it’s a perfect functional decor piece.
Step-by-Step Guide
Materials
- White or cream air-dry clay (or polymer clay)
- Terracotta-colored clay
- Teal or slate-blue colored clay
- Rolling pin
- Square cookie cutter (approx. 6×6 inches) or craft knife/ruler
- Small star cookie cutter
- Small circle cookie cutter
- Smaller circle tool or cap (for embossing)
- Black acrylic paint or black fine-point marker
- Fine grit sandpaper
- Matte clear sealant spray
Step 1: Creating the Game Board
-
Roll the base slab:
Start by conditioning your white or cream clay until it is pliable. Roll it out on a smooth surface to an even thickness of about 1/4 inch. -
Cut the square:
Using a large square cutter or a ruler and craft knife, cut a perfect square for your game board. Smooth the edges with a little water on your fingertip to remove any roughness. -
Mark the grid lines:
Lightly score the tic-tac-toe grid into the wet clay using a ruler and a modeling tool. Don’t cut all the way through; just create deep enough grooves to guide your paint later. -
Dry the board:
Set the board aside to dry completely on a flat surface. I recommend flipping it over occasionally to ensure it dries flat and doesn’t warp.
Step 2: Crafting the Playing Pieces
-
Prepare colored clay:
Roll out your terracotta and teal clays to a slightly thicker consistency than the board, perhaps 1/3 inch, to give the pieces a nice chunky feel. -
Cut the shapes:
Use your small star cutter on both clay colors. You will need about five stars in total (mix and match colors or stick to one color per shape if you prefer traditional rules). -
Cut the circles:
Using the small circle cutter, punch out five circular pieces. In the image, the terracotta is used for both shapes, while teal is an accent, but feel free to assign one color per player. -
Add circular details:
For the circle pieces, take a smaller circular object (like a marker cap) and press gently into the center to create an indented ring detail. -
Refine the stars:
Gently pinch the points of your stars to sharpen them if the cutter blunted the tips. Smooth any jagged edges with your finger. -
Dry the pieces:
Place all playing pieces on a flat surface to cure or dry according to your clay package instructions.
Warping Woes?
If your board starts curling up while drying, place a heavy book on top of it (with parchment paper in between) once it’s partially dry to flatten it out.
Step 3: Finishing Touches
-
Sand the edges:
Once the board is bone dry, use fine-grit sandpaper to gently smooth the outer edges and corners for a professional finish. -
Define the grid:
Using a fine brush with black acrylic paint or a steady hand with a black marker, trace over the scored grid lines on the board to make them pop. -
Clean up lines:
If you smudge any black paint, swiftly wipe it away with a damp cloth or wait for it to dry and gently scrape it off. -
Seal the set:
Finish everything with a light coat of matte clear sealant. This protects the clay from oils on your hands during intense gaming sessions.
Make It Magnetic
Glue small round magnets effectively to the back of the board and pieces to create a travel-friendly version or a functional fridge game.
Now you have a stylish, handcrafted game ready for your coffee table

The Complete Guide to Pottery Troubleshooting
Uncover the most common ceramic mistakes—from cracking clay to failed glazes—and learn how to fix them fast.
Heart vs. Lightning Bolt Set
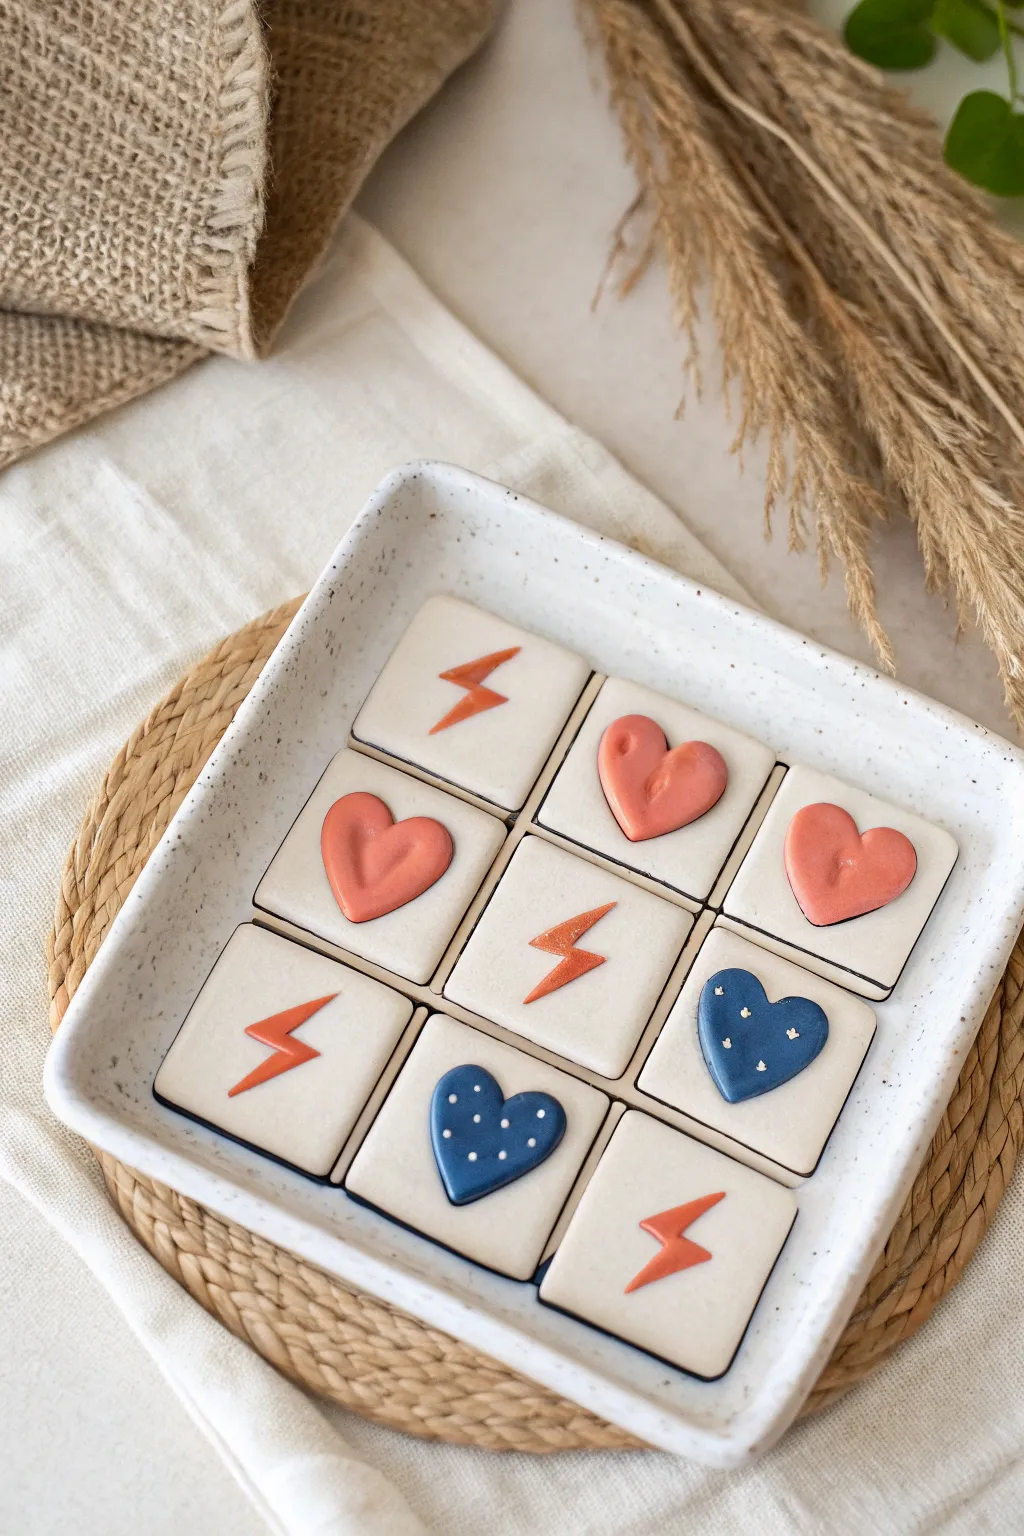
Bring a stylish and playful touch to your coffee table with this handcrafted game set, featuring raised relief tiles in soft coral, deep pink, and navy blue. The speckled stoneware effect gives the piece a professional, high-end ceramic look without needing a kiln.
Step-by-Step
Materials
- White polymer clay (approx. 4 blocks)
- Acrylic rolling pin
- Square cookie cutter (approx. 1.5 – 2 inches)
- Larger square baking dish or oven-safe ceramic tray
- Scalpel or craft knife
- Pottery needle tool
- Acrylic paints (coral orange, dusty rose pink, navy blue, white)
- Fine detail paintbrush
- Gloss or satin varnish (polymer clay compatible)
- Speckled paint or a toothbrush for spatter affect (optional for faux ceramic look)
- Sandpaper (fine grit)
Step 1: Creating the Game Board Base
-
Prep the clay:
Condition your white polymer clay by kneading it in your hands until it is soft, pliable, and free of any air bubbles. -
Roll out the slab:
Roll the clay out onto a clean work surface to a thickness of about 1/4 inch. If you want the speckled ceramic look shown in the photo, you can mix in tiny amounts of black pepper or black sand into the clay before rolling. -
Form the tray:
Drape your rolled slab into your square ceramic baking dish to transform it into the tray shape. Gently press the clay into the corners and up the sides. Ensure the bottom is distinct and flat. -
Trim the edges:
Use your scalpel to trim the excess clay flush with the rim of the dish for a clean, straight edge. Smooth the rim with your fingertip.
Step 2: Making the Playing Tiles
-
Cut the squares:
Roll out more white clay to the same thickness. Use your square cookie cutter to stamp out nine identical tiles. If they stick, lightly dust the cutter with cornstarch. -
Check the fit:
Place the raw tiles gently into your raw tray to ensure they fit comfortably in a 3×3 grid with a small gap in between each for easy removal. -
Sculpt lightning bolts:
For the ‘X’ pieces, roll a thin snake of clay. Cut it into short segments to form five lightning bolt shapes. Gently press these onto the center of five of the square tiles. -
Sculpt heart shapes:
For the ‘O’ pieces, shape four small balls of clay. Flatten slightly and indent the top center to form hearts. Press these onto the remaining four square tiles. -
Refine the edges:
Use the needle tool or your finger to smooth the seams where the relief shapes meet the square base, making them look like a single molded piece. -
Bake everything:
Bake the tray (still supported by the ceramic dish) and the separate tiles on a parchment-lined baking sheet according to your clay package’s temperature instructions. Let them cool completely.
Uneven Tiles?
If your tiles warp during baking, bake them ‘sandwiched’ between two pieces of parchment paper and place a heavy baking sheet on top to keep them perfectly flat.
Step 3: Painting and Finishing
-
Clean up:
Once cool, lightly sand any rough edges or fingerprints on the tiles and tray using fine-grit sandpaper. -
Paint the lightning bolts:
Using a small brush, carefully paint the raised lightning bolt shapes with the coral orange acrylic paint. Keep the edges neat so the white background stays crisp. -
Paint the pink hearts:
Paint two of the raised hearts with the dusty rose or deep pink acrylic paint. You may need two coats for full opacity. -
Paint the navy hearts:
Paint the remaining two hearts with navy blue. I find a flat brush helps get a straight line along the base of the shape. -
Add detail dots:
Dip the very tip of a toothpick or a dotting tool into white paint. Add tiny polka dots to the navy blue hearts for extra texture. -
Speckle effect:
If you didn’t add pepper earlier, create a faux-stone look now by dipping a toothbrush in watered-down brown paint and flicking a very fine mist over the white areas of the tray and tiles. -
Apply varnish:
Seal the painted areas (or the entire set) with a coat of satin or gloss varnish to protect the paint and give it that fired-glaze sheen.
Go Magnetic
Make it travel-friendly by embedding small magnets into the backs of the tiles and gluing a magnetic sheet beneath the clay tray base after baking.
Now you have a chic, custom game board that looks lovely on display even when you aren’t playing
Monochrome Modern Board With Texture Contrast
This elegant, monochrome tic tac toe set brings a modern sculptural feel to a classic game. Using cream-colored clay with subtle speckling creates a sophisticated look that doubles as coffee table decor.
How-To Guide
Materials
- White or cream polymer clay (approx. 500g)
- Small amount of brown or black clay (for speckling)
- Acrylic roller or pasta machine
- Square cookie cutter (approx. 2 inches)
- Small circle cutter (approx. 1 inch)
- Modeling tool or dull knife
- Sandpaper (fine grit)
- Oven for baking
Step 1: Preparing the Clay
-
Condition the base:
Start by thoroughly kneading your white or cream polymer clay until it is soft and pliable. This prevents cracking later. -
Create the stone effect:
Take a tiny pinch of brown or black clay—literally a crumb size—and mix it into the white clay. Knead until streaks disappear and you are left with tiny, realistic speckles throughout the block. -
Roll the slab:
Roll out the conditioned clay to a uniform thickness of about 1/4 inch (6mm). Using depth guides or playing cards stacked on either side of your roller ensures every tile is perfectly even.
Step 2: Creating the Grid Base
-
Cut the squares:
Using your square cutter, punch out 9 identical squares. If your cutter sticks, dip it lightly in cornstarch or water before cutting. -
Arrange the grid:
Place the 9 squares in a 3×3 grid formation on your work surface, touching each other just slightly to visualize the final board size. -
Smooth the edges:
Gently rub the cut edges of each square with your finger to soften any sharp corners left by the cutter, giving it that molded-stone look. -
Mark the permanent X squares:
Select a few random squares on the board (the image shows two) to have permanently embossed ‘X’ marks. Use a dull knife or modeling tool to press a deep cross shape directly into the wet clay surface. -
Mark the permanent O squares:
Select different squares (the image shows four) to have permanently embossed ‘O’ marks. Press your small circle cutter gently into the center of these squares, but only go halfway down—don’t cut through. -
Emboss center details:
For the ‘O’ squares, use a ball tool or your thumb to gently depress the center inside the circle mark, creating a rounded, concave dimple. -
Create blank tiles:
Leave the remaining squares (usually 3) completely smooth and flat. These provide visual rest within the grid. -
Construct the main base:
To make the game portable, gently press the 9 squares together so they adhere into a single solid 3×3 slab, or leave them separate if you prefer a modular board. I prefer pressing them into a thin backing sheet of clay for stability.
Clean Cuts Pro Tip
Place a sheet of plastic wrap over the clay before using your cutters. This creates a beautiful, rounded ‘pillowed’ edge instantly, saving you sanding time later.
Step 3: Sculpting the Playing Pieces
-
Form the X pieces:
Roll minimal clay snakes about 1/4 inch thick. Cut two short lengths for each X piece and cross them over each other. Gently press the intersection so they bond. -
Refine the X shape:
Trim the ends of the X arms so they are blunt and uniform. Make sure the total size fits comfortably within your square tiles. -
Create the O pieces:
Roll small balls of clay and flatten them slightly into thick discs. They should look distinct from the ‘O’ indentations on the board itself. -
Texture the distinct markers:
Using a needle tool, poke distinct hole patterns into a separate set of round tokens (like the ones shown in the top left), creating variety in your game pieces.
Fixing Cracks
If you notice small cracks after baking, mix a tiny bit of raw clay with liquid clay (Bake & Bond) to make a paste. Fill the crack, smooth it, and re-bake briefly.
Step 4: Finishing
-
Bake the project:
Place all components on a ceramic tile or baking sheet. Bake according to your clay manufacturer’s specific instructions (usually 275°F/130°C for 15-30 minutes). -
Cool down:
Allow the pieces to cool completely in the oven before removing them. This helps prevent thermal shock and brittleness. -
Sand for texture:
Once cool, lightly sand the surfaces with fine-grit sandpaper. This removes fingerprints and enhances the matte, stone-like finish.
Display your chic new game board on a coffee table and invite a friend for a match


What Really Happens Inside the Kiln
Learn how time and temperature work together inside the kiln to transform clay into durable ceramic.
Black-and-White Checker Grid With Bold Pieces
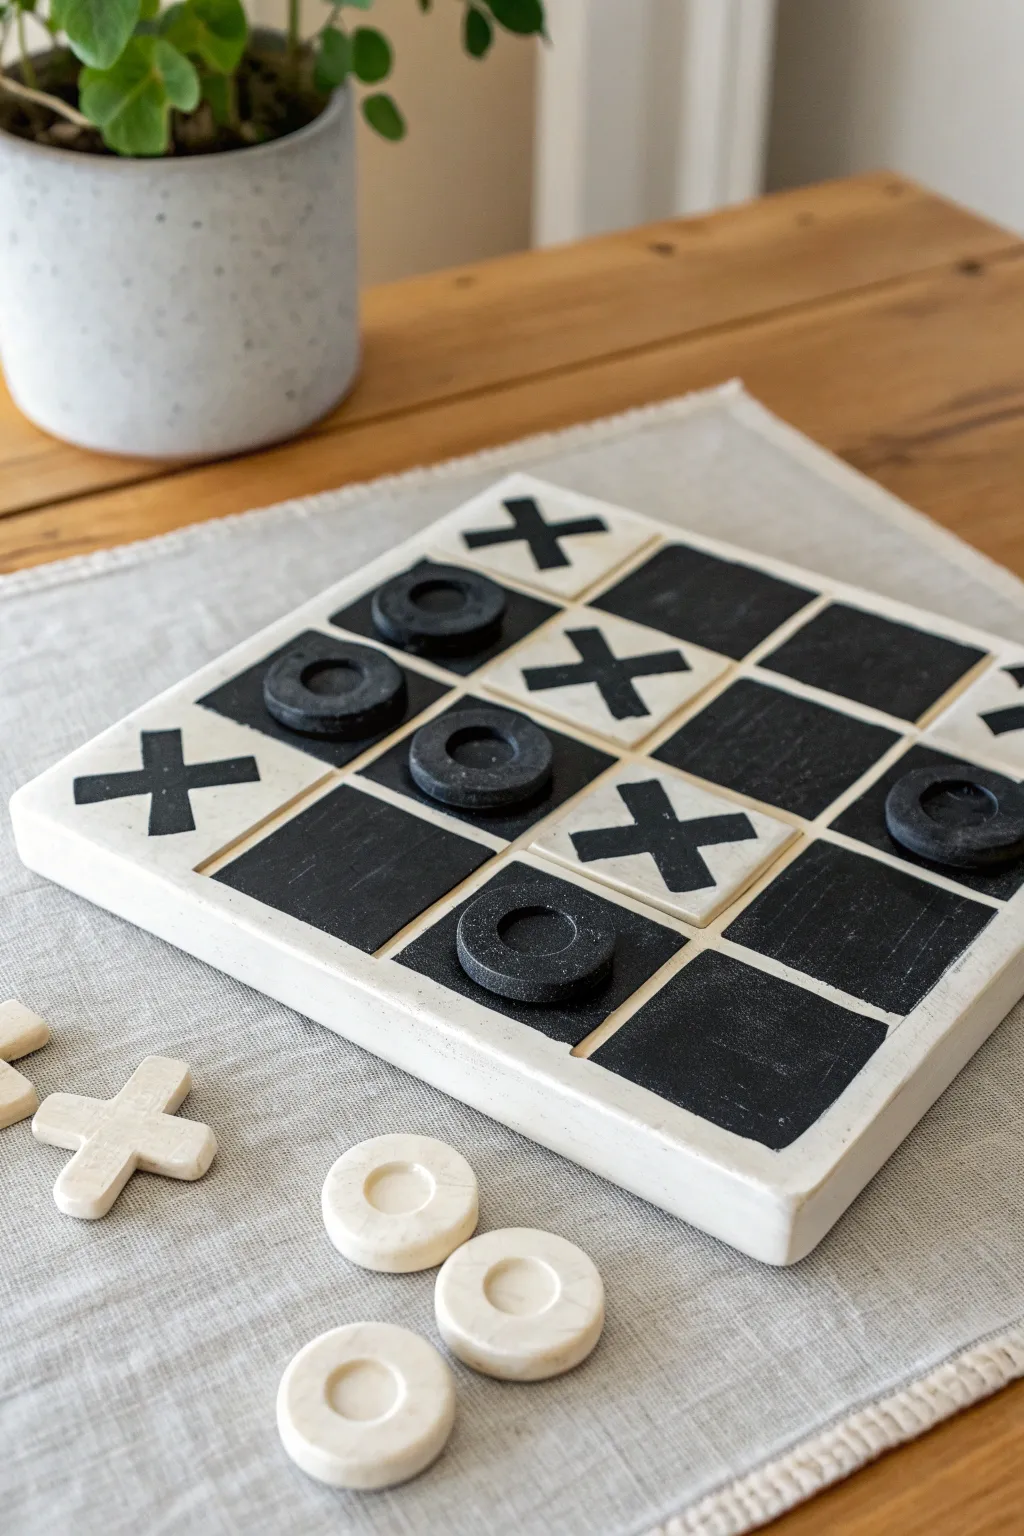
Elevate your coffee table décor with this striking black-and-white clay game set that balances playful fun with sophisticated design. The chunky, handmade aesthetic of the board and pieces adds a wonderful tactile element to a classic pastime.
Detailed Instructions
Materials
- White air-dry clay or polymer clay (approx. 1kg)
- Rolling pin
- Square cookie cutter (approx. 2 inches)
- Ruler
- Craft knife or clay slicer
- Black acrylic paint
- Fine grit sandpaper
- Small flat paintbrush
- Clear matte sealant or varnish
- Small circle cutter or bottle cap (approx. 1 inch)
- Parchment paper
Step 1: Crafting the Board Base
-
Prepare the Clay:
Begin by conditioning a large block of clay in your hands until it becomes pliable and warm. Roll it out on parchment paper into a large slab, aiming for a thickness of about 3/4 inch to give the board a substantial, high-quality feel. -
Cut the Square:
Using a ruler, measure and mark a perfect square, roughly 8×8 inches. Use your craft knife to slice cleanly along these lines, removing the excess clay. -
Create the Grid Lines:
Instead of painting lines later, we’ll carve grooves. Lightly score a 3×3 grid onto the slab with your ruler. Then, gently press the ruler’s edge or a dull knife into these lines to create a distinct separation between the nine playing squares. -
Smooth the Edges:
Dip your finger in a little water and run it along the outer edges and cut corners of the board to soften any sharpness. This gives it that finished, stone-like appearance.
Clean Lines Pro-Tip
For ultra-crisp edges on your black checkerboard squares, apply painter’s tape along the carved grid lines before painting to prevent color bleeding.
Step 2: Sculpting the Playing Pieces
-
Roll the Pieces Slab:
Roll out a fresh slab of clay, slightly thinner than the board—about 1/2 inch thick is perfect for the pieces. -
Cut the Game Tiles:
You will need five ‘O’ pieces and four ‘X’ pieces (or vice-versa, make a few extras just in case). For the ‘O’ pieces, use a small circle cutter to punch out discs. -
Detail the O’s:
To mimic the look in the photo, press a smaller circle cutter or tool into the center of each disc to create an indented ring, rather than cutting a hole all the way through. -
Shape the X’s:
For the ‘X’ pieces, cut small strips of clay and cross them over each other, pressing the center join firmly so they adhere. Alternatively, use an X-shaped cookie cutter if you have one. -
Dry Completely:
Place the board and all pieces on a flat surface away from direct heat. Allow them to dry for at least 24-48 hours. I usually flip them over halfway through so the bottom dries evenly.
Level Up: Stone Effect
Mix black pepper or dried tea leaves into your white clay before rolling it out. This creates a speckled, faux-stone granite look without needing paint.
Step 3: Painting and Finishing
-
Sand Imperfections:
Once fully dry, lightly sand any rough edges on the board or pieces with fine-grit sandpaper. Wipe away the dust with a barely damp cloth. -
Paint the Checkerboard:
Select five squares on your grid to paint black, creating a checkerboard pattern. Use a small flat brush to carefully fill in these squares with black acrylic paint, keeping the edges crisp within the carved grooves. -
Paint the X’s on White Squares:
On the remaining four white squares of the board, hand-paint a bold black ‘X’ in the center. This creates the unique design seen in the inspiration image. -
Paint the Playing Pieces:
Paint your ‘O’ discs entirely black to contrast with the lighter board. Leave the loose ‘X’ playing pieces in their natural white clay color. -
Seal the Set:
Finish by applying a coat of clear matte varnish to the entire board and all pieces. This protects the paint from scratching during gameplay and seals the clay against moisture.
Set up your new game on the coffee table and enjoy a quick match with friends
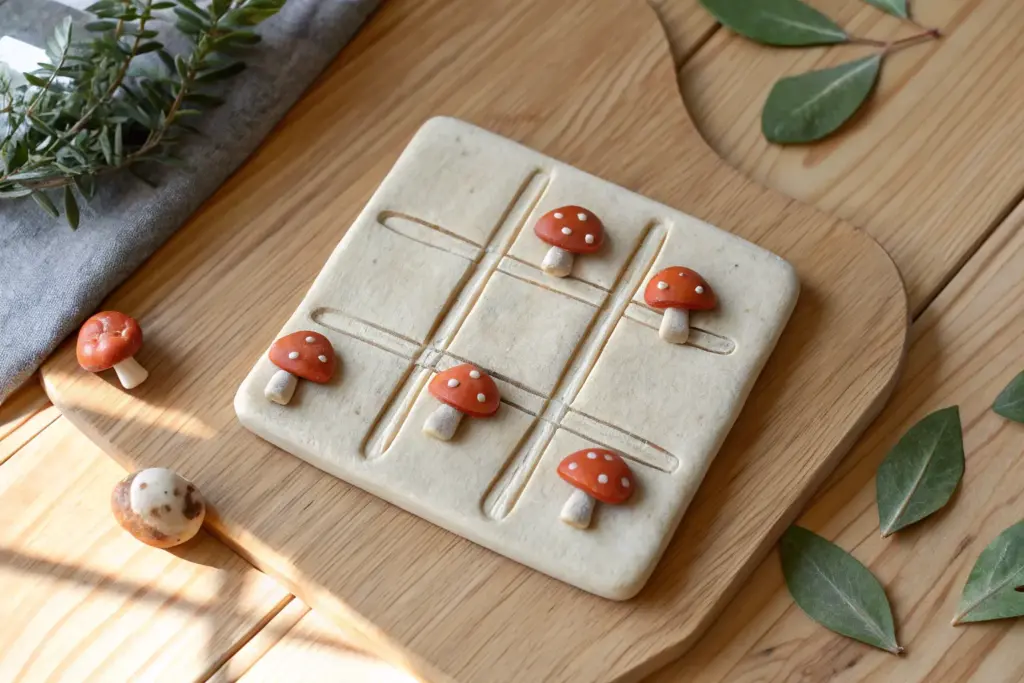
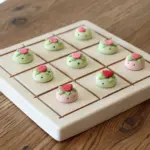
Frog vs. Mushroom Nature Set
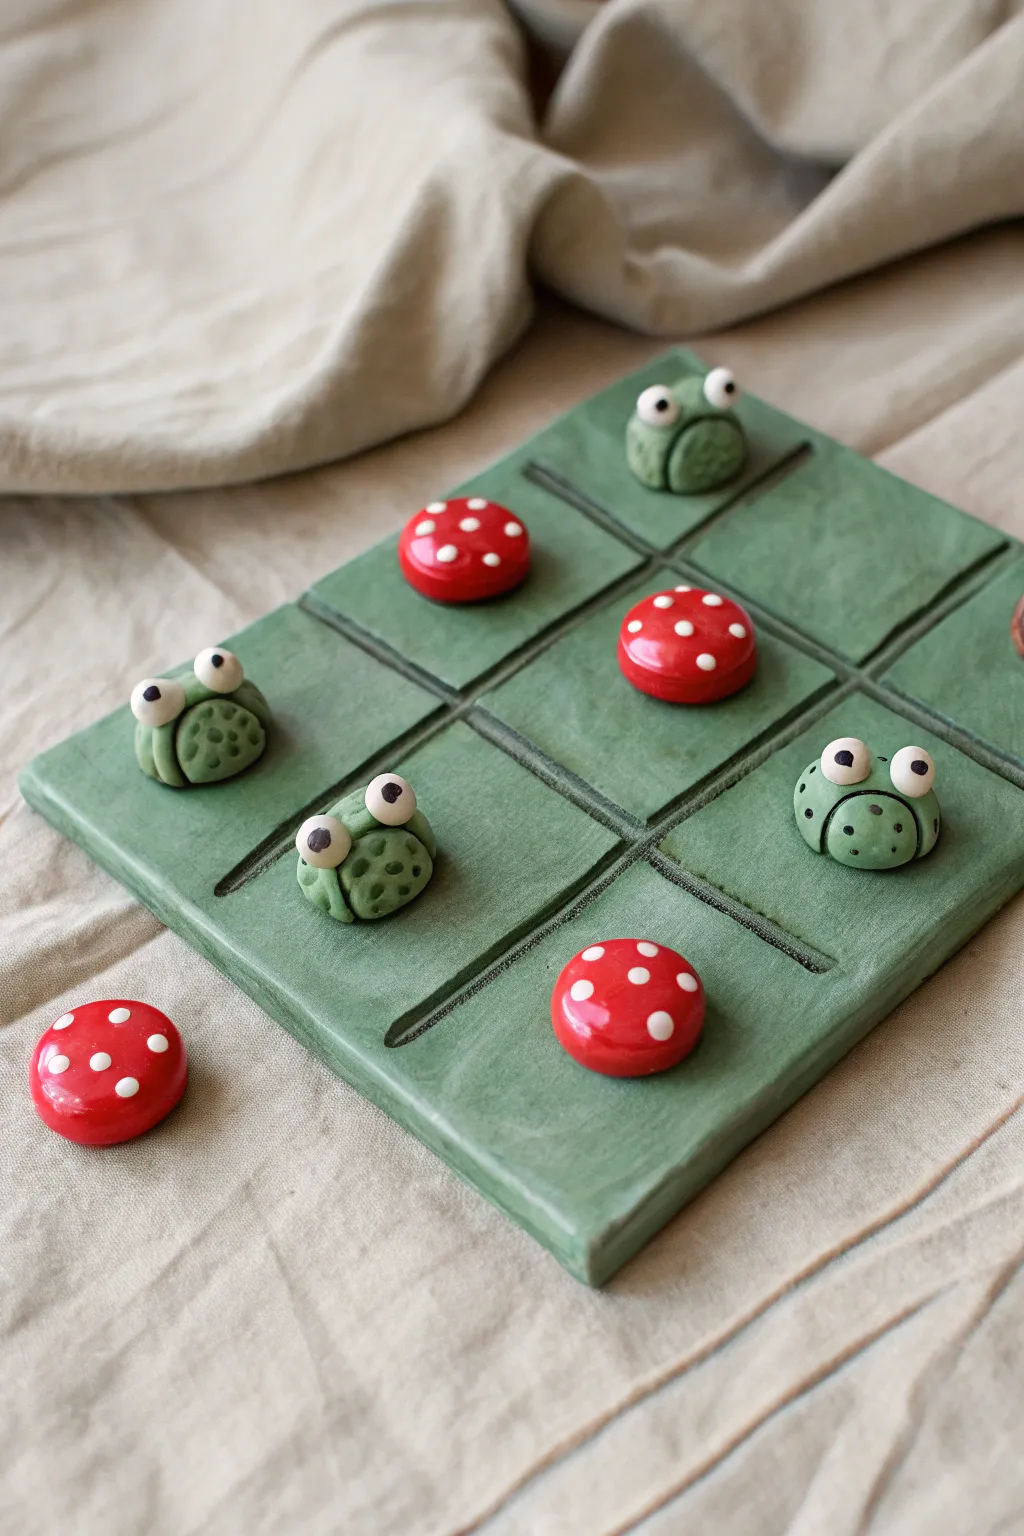
Bring a touch of cottagecore charm to game night with this adorable handmade set featuring bug-eyed frogs and spotted mushrooms. Using polymer clay, you’ll sculpt a sturdy, moss-green game board and two teams of forest critters for a whimsical twist on the classic game.
Step-by-Step Tutorial
Materials
- Green polymer clay (moss shade)
- Red polymer clay
- White or cream polymer clay
- Black polymer clay
- Rolling pin or clay machine
- Square cookie cutter (approx. 4-5 inches) or craft knife
- Grid ruler or straight edge
- Needle tool or toothpick
- Small dotting tool or ball stylus
- Acrylic roller
- Baking sheet and parchment paper
- Gloss glaze (optional for mushrooms)
Step 1: Sculpting the Forest Board
-
Condition the base clay:
Start by warming up a large block of moss-green clay in your hands until it is pliable. Condition it thoroughly to prevent cracking during baking. -
Roll the slab:
Roll the green clay out into an even slab, aiming for a thickness of about 1/4 inch (6mm). This thickness ensures the board is sturdy enough for play. -
Cut the square:
Use a large square cutter or a sharp craft knife with a ruler to cut a perfect square. A 4×4 or 5×5 inch size works well for small game pieces. -
Mark the grid:
Lightly measure and mark the board into nine equal squares using a ruler. Gently press a long, straight tool or the back of a knife into the clay to create the four intersecting lines of the tic-tac-toe grid. Press deep enough to be visible but not so deep that you slice through. -
Smooth the edges:
Run your finger gently along the cut outer edges of the board to soften the sharp corners and give it a finished, professional look.
Step 2: Creating the Frog Team
-
Form the bodies:
Take the remaining green clay and roll five equal-sized balls, roughly the size of a large marble. Flatten the bottoms slightly so they sit stable on a flat surface. -
Add detail spots:
Using a needle tool, gently poke small indentations all over the frog bodies to create a bumpy, textured skin effect. -
Make the eyes:
Roll ten tiny balls of white clay. Press two onto the top of each green frog body, positioning them close together for a cute look. -
Add pupils:
I find that the smallest bit of black clay goes a long way here. Roll extremely tiny specks of black clay and press them into the center of the white eyes. -
Create the mouth:
Use your needle tool to press a simple horizontal line or a tiny smile below the eyes on each frog.
Uneven Grid?
If your grid lines look wobbly, use the side of a credit card to press straight down into the clay instead of dragging a tool across the surface.
Step 3: Crafting the Mushroom Team
-
Shape the caps:
Condition the red clay and roll five balls similar in size to the frogs. Gently press them down onto your work surface to create a domed cap shape. -
Refine the shape:
Smooth the edges of the red domes so they are rounded and resemble button mushroom caps. Ensure the bottoms are flat. -
Add the spots:
Roll various tiny balls of white clay. Press these randomly onto the red caps and flatten them flush with the surface to create the classic toadstool spots. -
Make an extra piece:
It is always smart to make one extra piece for each team (6 frogs and 6 mushrooms total) just in case one gets lost or damaged later.
Level Up: Forest Floor
Before baking, gently texture the green board with a piece of rough sandpaper or a stiff toothbrush to simulate a realistic mossy forest floor effect.
Step 4: Baking and Finishing
-
Prepare for baking:
Place the board and all game pieces on a baking sheet lined with parchment paper. Ensure the pieces aren’t touching. -
Bake the clay:
Bake according to your polymer clay manufacturer’s instructions—usually around 275°F (135°C) for 15-30 minutes depending on thickness. -
Cool down:
Let everything cool completely on the baking sheet before handling. The clay is fragile while hot. -
Optional glaze:
For a wet look, apply a coat of gloss glaze specifically to the red mushroom caps and the frogs’ eyes.
Once cooled, your charming forest game set is ready for play or display on a coffee table

TRACK YOUR CERAMIC JOURNEY
Capture glaze tests, firing details, and creative progress—all in one simple printable. Make your projects easier to repeat and improve.
Cat vs. Fish Mini Sculpture Pieces
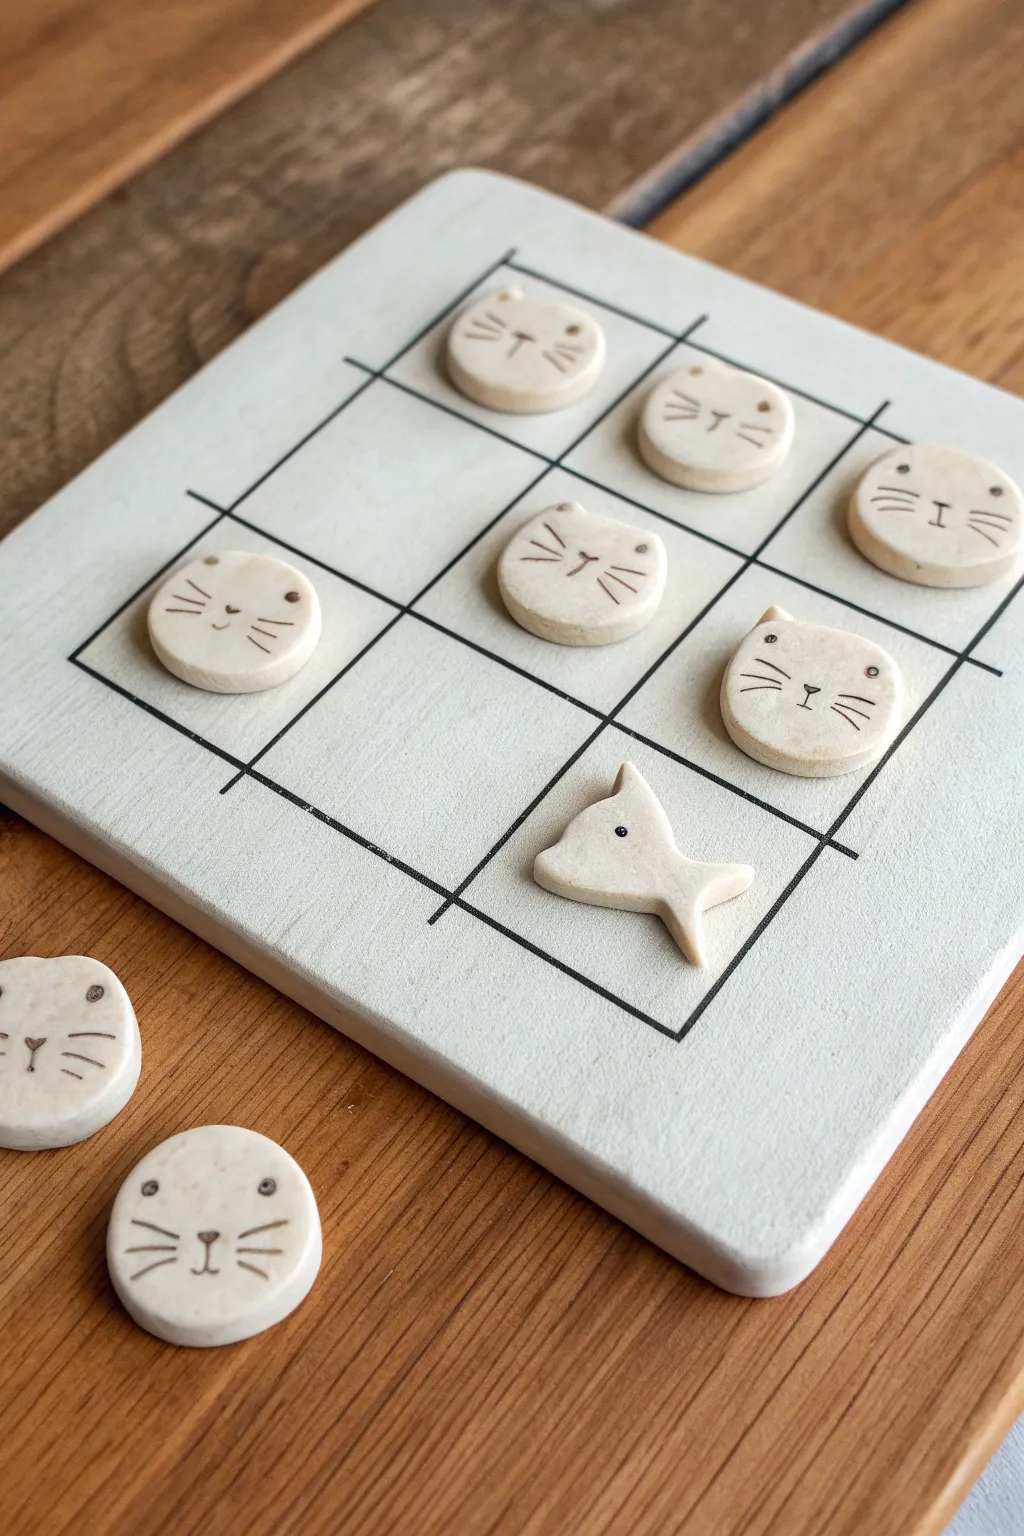
Ditch the X’s and O’s for something far more charming with this handcrafted clay tic tac toe set. Featuring minimalist cat faces and a lone fish playing piece, this cream-colored set brings a lovely, modern-organic aesthetic to game night.
Step-by-Step
Materials
- White or cream air-dry clay (or polymer clay)
- Square wooden plaque (approx. 6×6 inches)
- Rolling pin
- Small circle cutter (approx. 1 inch)
- Needle tool or toothpick
- Black acrylic paint
- Fine-grit sandpaper
- White acrylic paint (for the board)
- Fine detail paintbrush (size 0 or 00)
- Clear matte varnish or sealant
- Ruler
- Pencil
Step 1: Crafting the Game Board
-
Base Preparation:
Begin by sanding your wooden plaque thoroughly until the surface feels completely smooth to the touch. -
First Coat:
Apply a thin layer of white acrylic paint to the top and sides of the plaque; let this dry completely before adding a second coat for solid, opaque coverage. -
Measuring the Grid:
Once the paint is fully cured, use a ruler to find the center of the board. Lightly mark four dots that will guide your grid lines to create nine equal squares. -
Drawing the Grid:
Using your ruler and a black permanent marker or the fine detail brush with black paint, carefully draw the two vertical and two horizontal lines. -
Sealing the Board:
Protect your grid work by applying a coat of matte varnish over the entire board.
Clay Texture Tip
To get that rustic, stone-like look, I like to gently press a piece of canvas fabric onto the rolled clay before cutting the circles.
Step 2: Sculpting the Cat Pieces
-
Conditioning the Clay:
Knead your white air-dry clay until it is soft, pliable, and free of cracks. -
Rolling Out:
Roll the clay out on a flat surface to a uniform thickness of about 1/4 inch. -
Cutting Circles:
Use your small circle cutter to punch out five discs. If the edges are sharp, gently tap them with your finger to round them off slightly. -
Creating Ears:
Pinch the top two corners of each clay disc gently to form small, triangular ears, smoothing the transition into the round face so it looks organic. -
Adding Texture:
Before the clay dries, take your needle tool and gently press it into the surface to sketch the whiskers and nose lines. Do not drag the tool; press it down to create clean indentations. -
Drying:
Set the cat faces aside on a piece of parchment paper to dry according to your clay package instructions.
Step 3: Sculpting the Fish Pieces
-
Shaping the Fish:
For the opposing team, roll simple tear-drop shapes from the remaining clay. -
Tail Detail:
Flatten the wider end of the tear-drop and use a knife tool to cut a small ‘V’ notch, creating the tail fins. -
Smoothing:
Use a droplet of water on your finger to smooth out any rough cuts around the tail area. -
Eye Indentation:
Use the back of your paintbrush or a small ball tool to press a shallow indentation where the fish eye will go. -
Final Cure:
Allow these pieces to dry alongside the cats, flipping them occasionally to ensure even drying.
Level Up: Color Pop
Instead of black paint, use gold leaf paint for the grid lines and facial features to give the set a chic, sophisticated upgrade.
Step 4: Painting and Finishing
-
Painting Cat Details:
Dip your fine detail brush into black paint (wiping most of it off) and carefully fill in the indented whiskers, nose, and eyes on the cat faces. -
Painting Fish Eyes:
Add a simple dot of black paint into the indentation on each fish piece. -
Cleaning Up:
If you get paint outside the indented lines, wait for it to dry and then gently sand it away with fine-grit sandpaper. -
Clear Coat:
Finish all your game pieces with a layer of matte varnish to prevent the clay from chipping during play.
Place your cute new pieces on the grid and invite a friend over for a match
Bee vs. Flower Garden Board
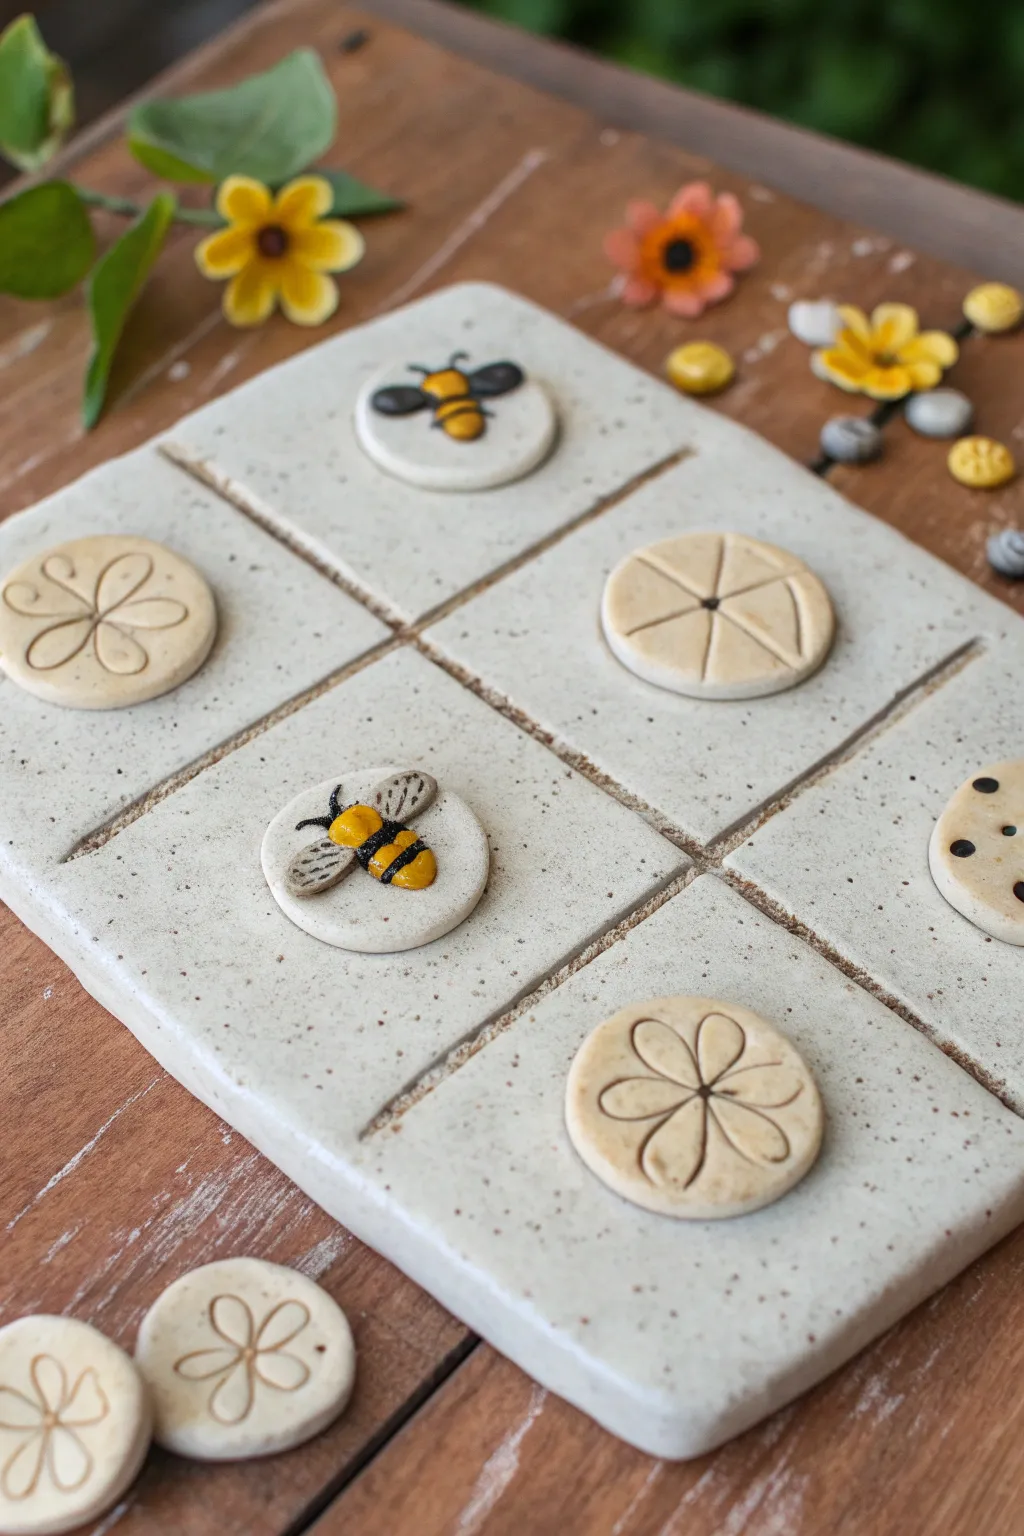
Bring the buzz of a summer garden to your game nights with this charming clay tic tac toe set. Featuring sculpted bumblebees competing against stamped flowers on a speckled cream slab, it is as decorative as it is fun to play.
Detailed Instructions
Materials
- Speckled cream polymer clay (or air-dry clay with added sand/pepper for texture)
- Yellow polymer clay
- Black polymer clay
- Rolling pin
- Square cookie cutter (approx. 5-6 inches) or craft knife
- Small round cookie cutter (approx. 1.25 inches)
- Needle tool or clay sculpting tool
- Flower stamp or makeshift tool (like a pen cap)
- Acrylic rolling guide or wooden slats (optional for even thickness)
- Oven (for polymer clay) or drying rack
- Glaze or varnish (satin finish)
Step 1: Creating the Game Board
-
Prepare the base:
Begin by conditioning your speckled cream clay until it is pliable. Roll it out into a flat sheet about 1/4 inch thick. I like to use wooden slats on either side of the clay to ensure the thickness is perfectly even. -
Cut the square:
Use a large square cutter or a ruler and craft knife to cut a perfect square for your board. Smooth the edges with your finger to remove any sharpness. -
Mark the grid:
Using a ruler, lightly mark the clay to divide it into nine equal squares. Don’t cut all the way through; simply press a long, straight edge (like the back of a knife or a ruler) into the surface to create deep indentations for the grid lines. -
Soften the intersection:
Where the lines cross, gently press down with a blending tool or your finger to ensure the intersection looks intentional and clean, rather than messy.
Step 2: Crafting the Playing Pieces
-
Cut the tokens:
Roll out another sheet of speckled clay, slightly thinner than the board. Use your small round cutter to punch out at least 10 circles (5 for bees, 5 for flowers). -
Smooth the edges:
Take a moment to generally smooth the cut edges of each circle with your fingertip so they feel nice to hold. -
Stamp the flowers:
For the flower team, take five of the circles. Use a small flower stamp or press a tool into the clay to create a simple six-petal design. Deep impressions work best so the design remains visible after baking. -
Refine the petals:
If using a tool, draw a center point and radiate six teardrop shapes outward. Add a tiny dot in the center for the pistil. -
Form the bee bodies:
For the bee team, roll tiny ovals of yellow clay. Gently press these onto the center of the remaining five plain circles. -
Add stripes:
Roll extremely thin snakes of black clay. Wrap these carefully around the yellow bodies to create stripes, trimming the excess. -
Create wings:
Make tiny teardrop shapes from the speckled clay or translucent clay. Press two onto the back of each bee body, flattening them slightly to adhere. -
Add details:
Use a needle tool to add tiny texture or veins to the wings and a small indentation for the bee head.
Uneven Board?
If your large clay tile warps while baking, place a heavy book on top of it while it is still warm (but not hot) from the oven to flatten it as it cools.
Step 3: Finishing Up
-
Bake the project:
Arrange the board and all playing pieces on a parchment-lined baking sheet. Bake according to your clay package instructions (usually 275°F for polymer clay). -
Cool down:
Let everything cool completely in the oven with the door cracked, which helps prevent the large flat board from warping. -
Glaze application:
Once cool, apply a thin coat of satin varnish to seal the clay. This gives the ‘ceramic’ look and protects the pieces during play. -
Final check:
Ensure the bottom of the board is smooth; if it curled slightly, you can glue a piece of felt to the underside to protect your table.
Texture Hack
Don’t have speckled clay? Mix coarser ground black pepper or used dried coffee grounds into plain white or cream clay to mimic that trendy stoneware pottery look.
Set up your board on the coffee table and get ready for a friendly garden game match
Sun vs. Moon Celestial Set
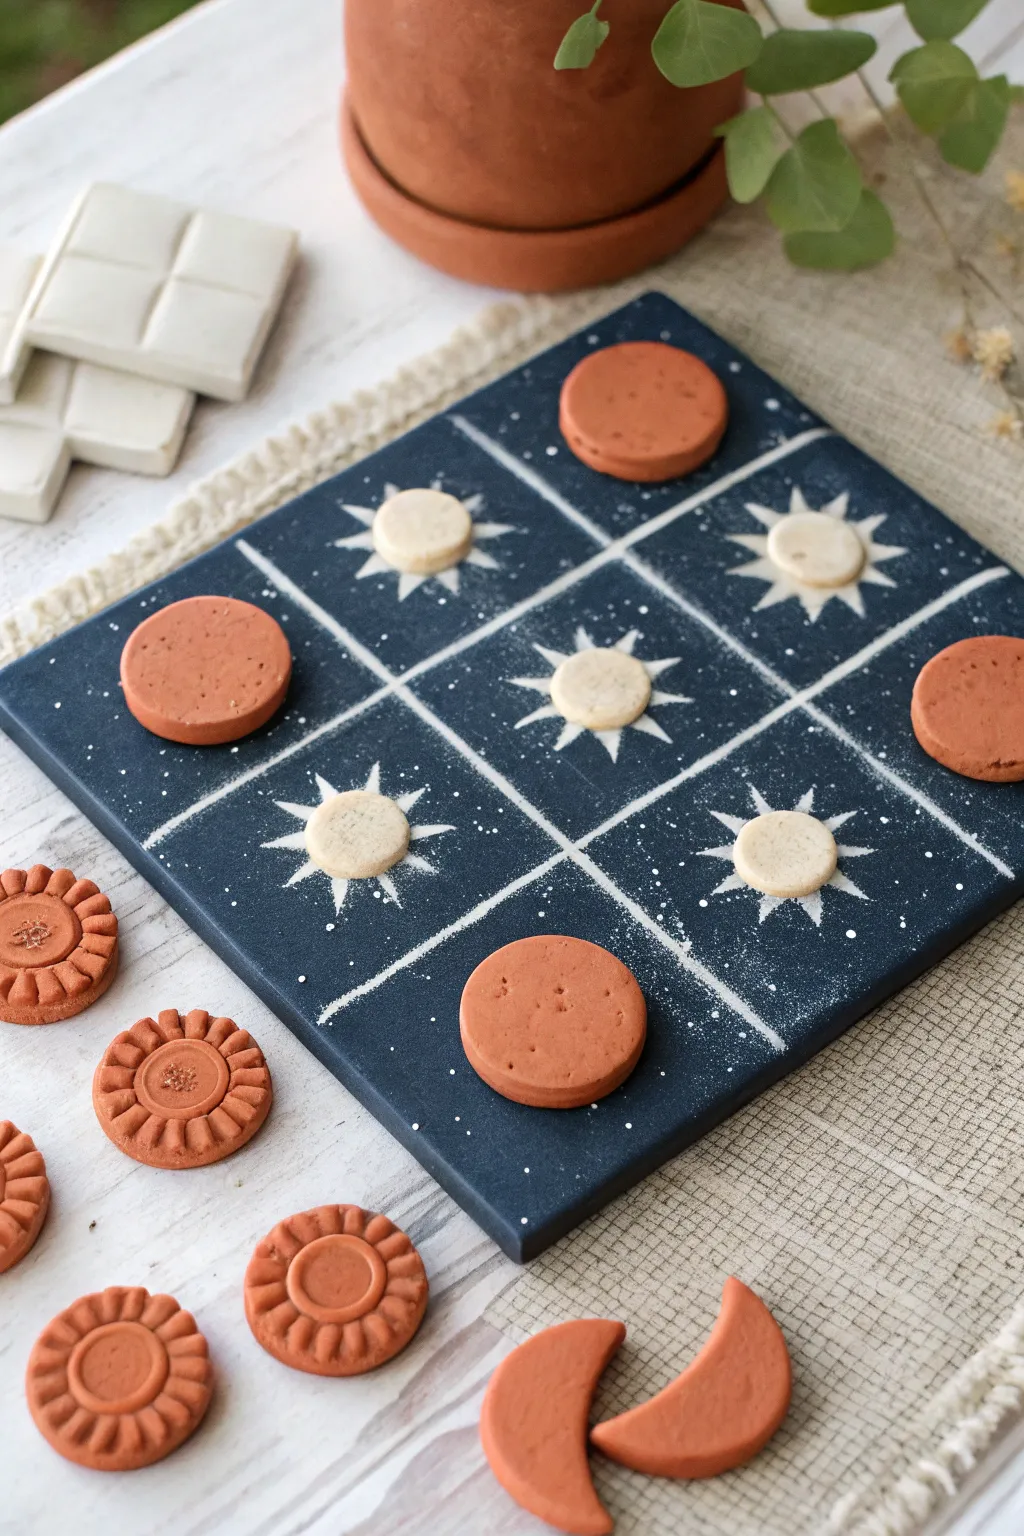
Bring the night sky to your game table with this stunning celestial tic-tac-toe set. Featuring a deep navy board speckled with stars and earthy terracotta sun and moon markers, this project merges rustic charm with cosmic whimsy.
Step-by-Step Guide
Materials
- Air-dry clay (white and terracotta colored)
- Square wooden board or large clay slab (approx. 8×8 inches)
- Acrylic paint (Deep Navy Blue, Titanium White)
- Small flat paintbrush
- Fine detail paintbrush
- Rolling pin
- Circle cookie cutters (two sizes: approx. 1.5 inch and 1 inch)
- Texturing tools or stamps (for the decorative suns)
- Sandpaper (fine grit)
- Matte sealant spray or varnish
- Old toothbrush (for the splatter effect)
- Ruler
Step 1: Crafting the Playing Pieces
-
Roll the terracotta clay:
Start by rolling out your terracotta-colored air-dry clay to an even thickness of about 1/4 inch. Smooth out any major cracks with a little water on your fingertip. -
Cut the sun markers:
Using your larger circle cutter, punch out five circles. These will be your ‘Sun’ markers. If you want the more detailed look shown in the extra pieces, you can stamp a sunburst design into them now or keep them simple and smooth like the ones on the board. -
Cut the moon markers:
For the opposing team, roll out more clay and cut five circles. If you want crescent shapes like the ones at the bottom of the photo, cut a circle first, then use the cutter again to slice a crescent shape off the edge. -
Create the board stars:
Roll out a small amount of white air-dry clay. Use the smaller 1-inch cutter to create five small white discs. These will be permanently attached to the board later as part of the decorative starbursts. -
Smooth the edges:
Dip your finger in water and gently run it along the cut edges of all your clay pieces to soften any sharp ridges. This gives them a finished, professional look. -
Let everything dry:
Lay all your clay pieces on a flat surface to dry completely. This usually takes 24-48 hours depending on humidity. Flip them halfway through so the bottoms dry evenly.
Step 2: Preparing the Cosmic Board
-
Paint the base coat:
Take your square wooden board (or dried clay slab) and paint the entire top surface with Deep Navy Blue acrylic paint. You may need two coats to get that rich, opaque night-sky background. Let this dry fully. -
Create the splatter stars:
This is the fun part. Dilute a little white acrylic paint with water until it’s milky. Dip an old toothbrush into it, point it at the board, and run your thumb across the bristles to flick tiny white speckles across the navy surface. -
Measure the grid:
Once the background stars are dry, use a ruler to lightly mark out a standard 3×3 tic-tac-toe grid. There should be two vertical and two horizontal lines. -
Paint the grid lines:
Using a small flat brush and undiluted white paint, hand-paint over your grid marks. I prefer to keep these lines a bit organic and rough-edged rather than perfectly straight, as it adds to the hand-crafted charm. -
Attach the center stars:
Glue the five small white clay discs you made earlier into five of the grid squares (usually forming an ‘X’ pattern or checkerboard layout). Use a strong craft glue. -
Paint the starburst rays:
With your fine detail brush and white paint, carefully paint triangular rays radiating outward from perfectly glued white clay discs. This creates the ‘fixed’ star designs on the board that the pieces will sit on top of. -
Add extra constellations:
In the empty squares that don’t have the clay discs, use your white paint to add smaller painted starbursts or dots to fill the negative space, so the board looks balanced even when empty.
Clay Cracking?
If your clay pieces crack while drying, mix a tiny bit of fresh clay with water to make a paste (slip) and fill in the cracks, then smooth over.
Step 3: Finishing Touches
-
Sand the playing pieces:
Check your dried terracotta suns and moons. If there are any rough spots, give them a very light sanding with fine-grit sandpaper. -
Seal the project:
To protect your game from wear and tear, spray the entire board and all the loose playing pieces with a matte clear sealant. Do this in a well-ventilated area. -
Assemble for play:
Once the sealant is dry, place your terracotta markers on the board to see the finished effect. The contrast of the earth tones against the deep blue galaxy looks incredible.
Glow Up
Mix glow-in-the-dark powder into your white paint for the grid lines and stars to make the galaxy board actually glow when the lights go out.
Enjoy your beautiful handmade game that doubles as a piece of celestial decor
Leaf vs. Acorn Woodland Pieces
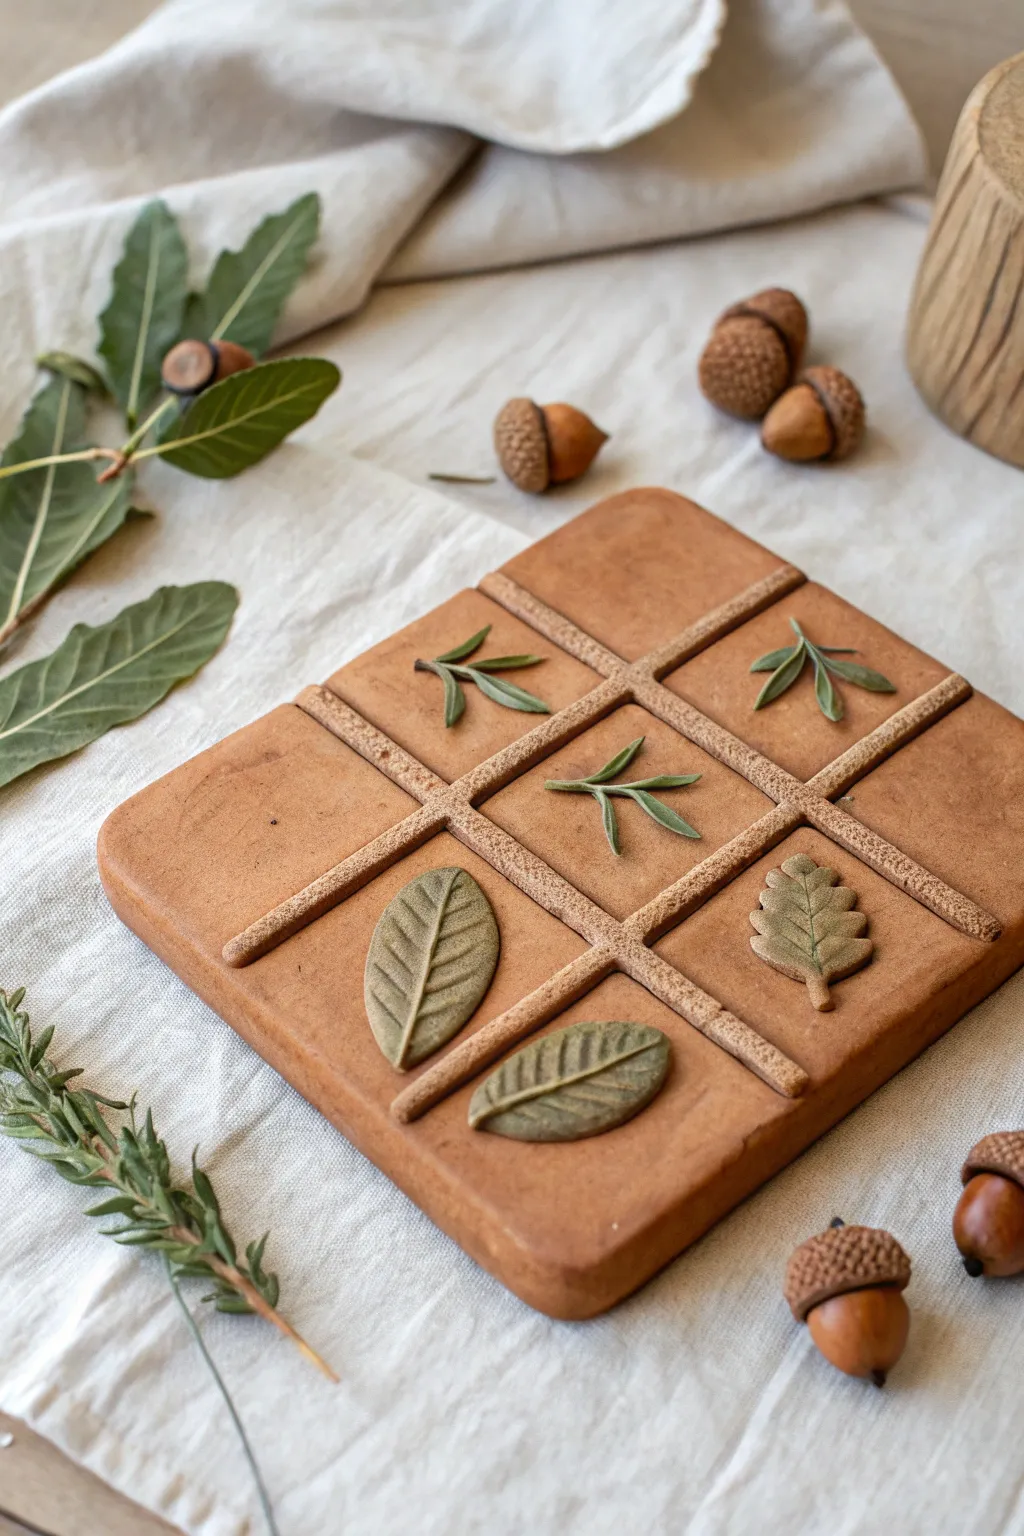
Bring the serenity of the forest into your game nights with this charming, nature-inspired clay project. This tutorial guides you through creating a warm, terra-cotta colored board featuring delicate, inlaid leaf motifs as the playing pieces.
Step-by-Step Tutorial
Materials
- Polymer clay (terracotta or warm brown)
- Polymer clay (sage green and forest green)
- Polymer clay (lighter brown/tan for the grid lines)
- Rolling pin or clay machine
- Square clay cutter or craft knife
- Ruler
- Needle tool or clay sculpting tool (for texture)
- Leaf vein texture mat or real leaves for impression
- Parchment paper
- Baking sheet
- Oven
Step 1: Creating the Base Board
-
Condition the clay:
Start by thoroughly conditioning your terracotta or warm brown polymer clay until it is soft and pliable. This prevents cracks during baking. -
Roll the slab:
Roll the brown clay out into a thick, even slab, approximately 1/4 to 1/2 inch thick. You want it substantial enough to hold the grid without warping. -
Cut the square:
Using a ruler and a craft knife, or a large square cutter, trim your clay slab into a perfect square. Smooth the edges with your finger to remove any sharp cuts.
Step 2: Designing the Grid
-
Prepare the grid strips:
Take a slightly lighter shade of brown clay and roll it into thin snakes. I prefer to roll these quite thin and even to mimic twigs or vines. -
Texturize the strips:
Gently roll a textured tool or a piece of sandpaper over the clay snakes to give them a rough, bark-like appearance. -
Measure and place:
Lay the strips across your base board to form a standard # shape grid. Press them down gently so they adhere to the base without flattening completely. -
Refine the intersections:
Where the strips cross, use a sculpting tool to blend the clay slightly or ensure they look like natural overlapping twigs.
Uneven Grid?
If your grid lines look wobbly, use the edge of a ruler to gently push the clay ‘twigs’ into a straight line before you press them down firmly.
Step 3: Crafting the Leaf Pieces
-
Create the sprigs:
For the ‘X’ pieces, use green clay to roll tiny, thin stems. Arrange three little stems to fan out from a central point. -
Add leaves to sprigs:
Shape tiny teardrops of green clay and flatten them slightly. Attach these to the stems to create small rosemary-like sprig motifs. -
Create the broad leaves:
For the ‘O’ pieces, use a sage or olive green clay. Shape medium-sized ovals and flatten them. -
Vein the leaves:
Use a needle tool or a knife to gently score a central vein and smaller side veins into each broad leaf. Alternatively, press a real leaf into the clay for authentic texture. -
Position the pieces:
Place your finished leaf motifs into the grid squares. You can press them in slightly to effect an inlaid look, or leave them sitting on top for dimension.
Go Magnetic
Make the game playable vertically! Embed small magnets into the back of the board and the leaf pieces before baking to use on a fridge.
Step 4: Finishing Touches
-
Texture the surface:
If desired, lightly tap the exposed brown areas of the board with a toothbrush or sponge to simulate a dull, earthy stone texture. -
Final smooth:
Check the edges of your board one last time to ensure no fingerprints were left behind during the assembly process. -
Bake:
Place the board on parchment paper and bake according to your polymer clay manufacturer’s instructions (usually 275°F for 15-30 minutes). -
Cool:
Allow the piece to cool completely in the oven or on a wire rack before handling to ensure maximum strength.
Once cooled, you have a beautiful, durable piece of functional art ready for display or play.
Cactus vs. Succulent Desert Theme
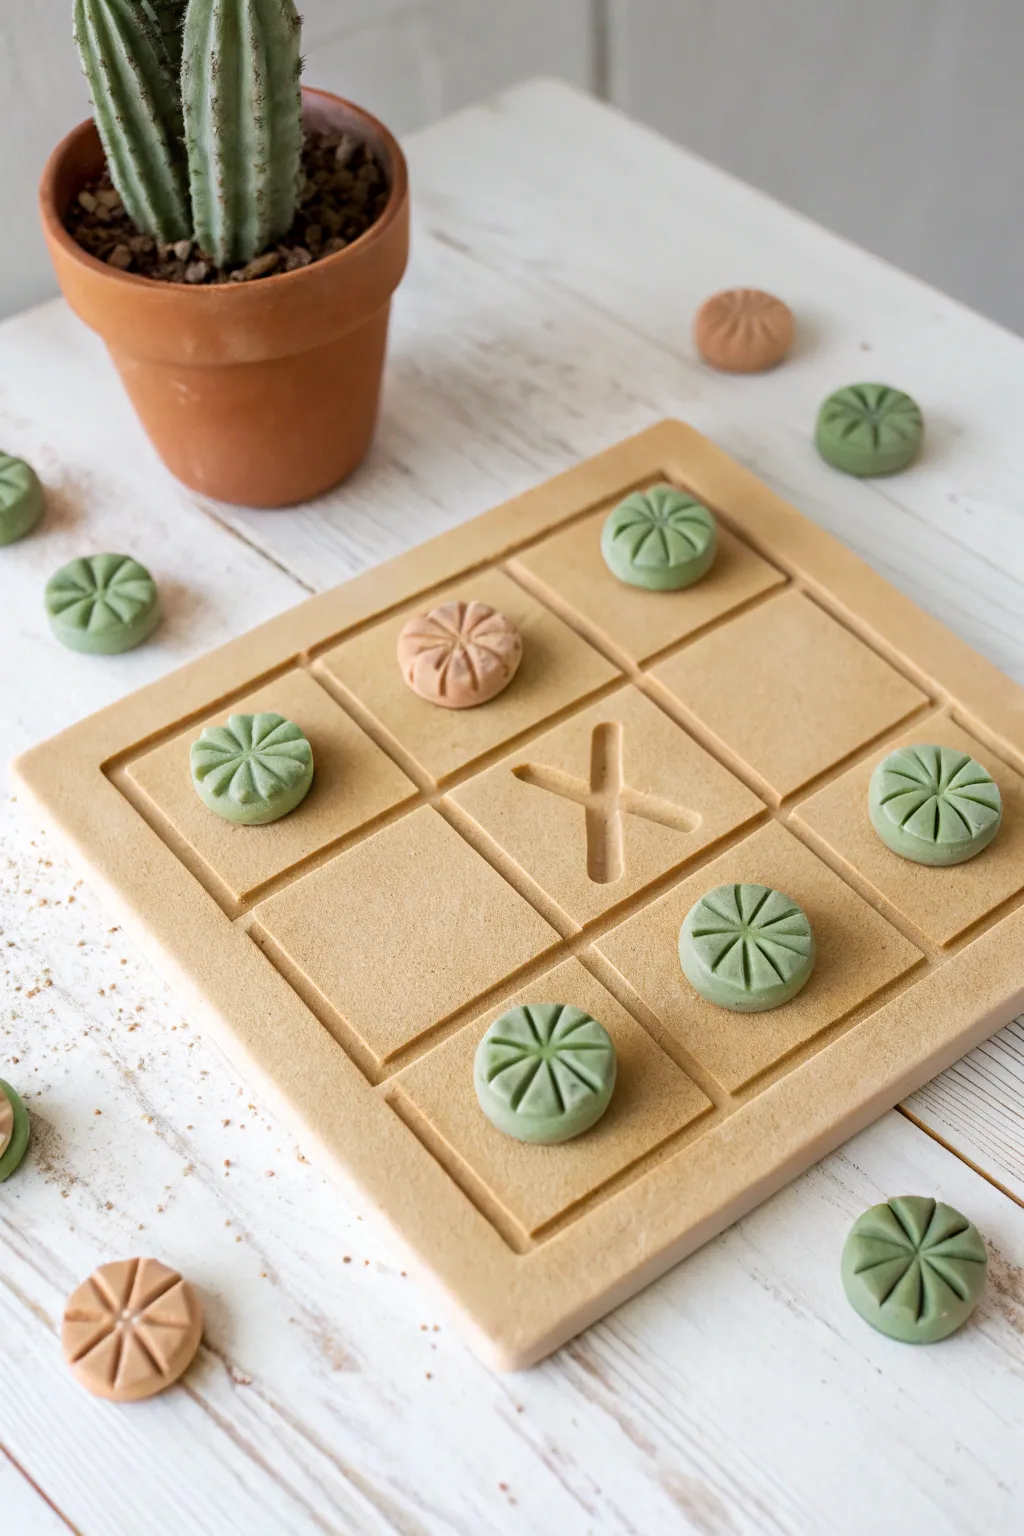
Bring the calming vibes of the desert into your game night with this minimalist clay tic-tac-toe set. Featuring a smooth, sandy-toned board and adorable stamped succulent tokens, this project is as fun to make as it is to play.
Step-by-Step
Materials
- Polymer clay (Tan/Beige specifically for the board)
- Polymer clay (Sage Green and Terracotta/Warm Brown for tokens)
- Square clay cutter (approx. 6×6 inches) or ruler and craft knife
- Rolling pin or pasta machine
- Small round cutter (approx. 1 inch)
- Modeling tool with a dull blade or a credit card
- Sculpting needle tool or toothpick
- Fine-grit sandpaper (optional)
- Baking sheet and parchment paper
- Oven
Step 1: Crafting the Desert Board
-
Condition the base clay:
Start by thoroughly conditioning your tan or beige polymer clay until it is soft and pliable. This prevents cracking and ensures a smooth surface finish. -
Roll out the slab:
Roll the clay into an even slab, approximately 1/4 inch thick. I like to use depth guides or playing cards stacked on either side of the roller to get the thickness perfectly uniform. -
Cut the square:
Using a large square cutter or a ruler and craft knife, cut out a perfect square for your game board. Smooth the cut edges with your finger to soften any sharp corners. -
Mark the grid lines:
Lightly measure and mark the board into a 3×3 grid. Don’t cut all the way through; simply press a ruler or the back of a knife gently into the clay to create straight, indented lines. -
Deepen the channels:
Go back over your impressed lines with a modeling tool or the edge of a credit card to widen the channels slightly, giving the board a nice, professional etched look. -
Add the center detail:
In the center square, carefully carve a large ‘X’ shape. You can dig this out slightly deeper than the grid lines to make it a decorative focal point. -
Texture the surface (optional):
For a sandy effect, you can gently tap the surface with a piece of stiff sandpaper or a toothbrush, but keeping it smooth like the photo works beautifully too.
Clean Lines Hack
Before impressing your grid lines, place a sheet of plastic wrap over the clay. Press your tool through the plastic to get soft, rounded edges without clay crumbs.
Step 2: Sculpting the Succulent Tokens
-
Prepare token colors:
Condition your sage green clay and your terracotta/warm brown clay separately. You will need enough for at least 5 tokens of one color and 5 of the other. -
Cut the clay rounds:
Roll both clay colors out to a slightly thicker slab than the board (about 3/8 inch). Use your small round cutter to punch out 5 green circles and 5 brown circles. -
Shape the domes:
Take each clay circle and gently round the top edges with your fingertips to create a soft, domed, button-like shape. -
Create the center indention:
Using a small ball tool or the rounded end of a paintbrush, make a small indentation in the exact center of each token. -
Stamp the succulent pattern:
Using a needle tool or the side of a toothpick, press lines radiating outward from the center indentation to the edge of the token. Aim for 8 lines to mimic the segments of a peyote cactus or succulent. -
Refine the edges:
Check the edges of your tokens and smooth away any fingerprints or distortion caused by the stamping process.
Step 3: Baking and Finishing
-
Prepare for baking:
Place your board and all the tokens on a baking sheet lined with parchment paper. Ensure the board is lying perfectly flat to avoid warping. -
Bake the clay:
Bake according to your clay manufacturer’s instructions (usually 275°F/135°C for 15-30 minutes depending on thickness). Do not overbake. -
Cool down:
Allow all pieces to cool completely on the baking sheet. Moving them while hot can cause the board to bend. -
Sand for perfection:
Once cool, use a very fine-grit sandpaper to buff the edges of the board and the bottoms of the tokens if there are any rough spots. -
Clean up:
Wipe the finished pieces with a barely damp cloth to remove any sanding dust before setting up your first game.
Textured Aesthetic
Mix black pepper or sand into the tan clay before rolling it out to give the board a realistic, speckled stoneware pottery appearance.
Now you have a stylish, desert-inspired game set that looks great on your coffee table even when you aren’t playing
Ocean Board With Shell vs. Starfish Pieces
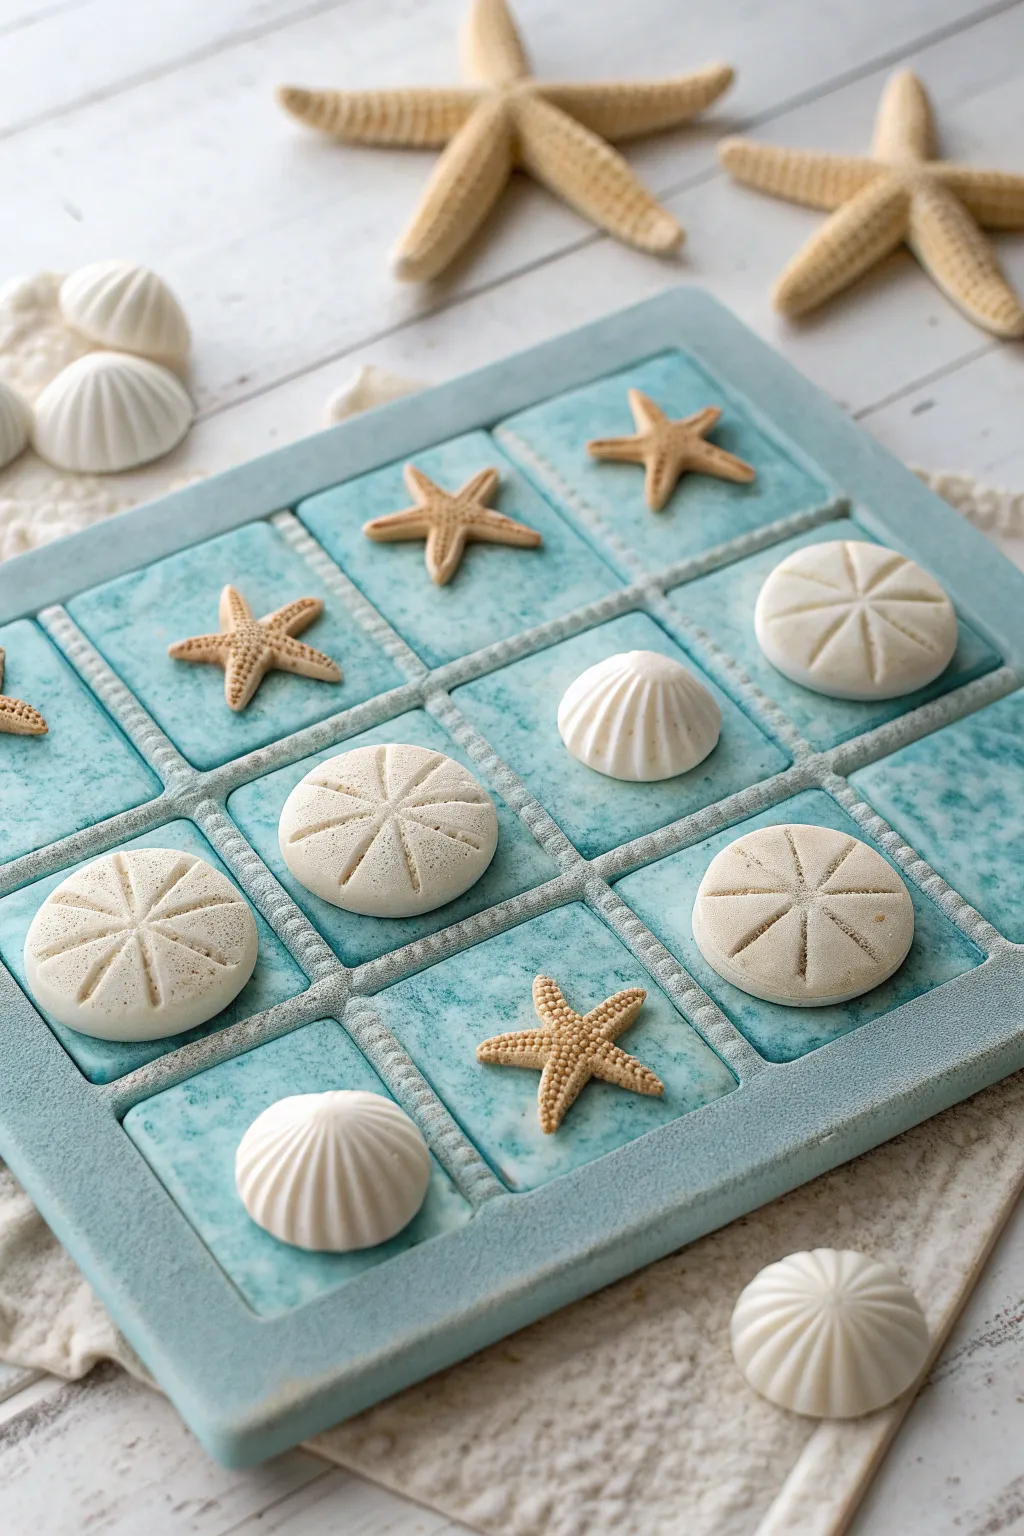
Bring the beach indoors with this charming clay tic-tac-toe set featuring a tiled turquoise board and textured sea creature playing pieces. The combination of sandy beige starfish and crisp white shells creates a soothing coastal palette perfect for a coffee table game.
How-To Guide
Materials
- Air-dry clay (white)
- Acrylic paints (turquoise, teal, white, sandy beige, light brown)
- Square rolling pin guides or wooden slats (approx. 1/4 inch thick)
- Rolling pin
- Ruler and craft knife
- Modeling tools (or toothpicks)
- Texture tool (braided or rope pattern)
- Small sponges for painting
- Fine grit sandpaper
- Matte or satin varnish
Step 1: Sculpting the Board
-
Prepare the base slab:
Begin by rolling out a large slab of white air-dry clay. Use your rolling pin guides to ensure an even thickness of about 1/4 inch throughout the entire piece. -
Cut the square:
Measure and cut a perfect square, approximately 8×8 inches. This will serve as the foundation for your game board. -
Emboss the grid lines:
Using a long ruler, lightly mark out a 3×3 grid. Instead of cutting all the way through, press a braided texture tool or a rope-patterned stamp deep into the soft clay along these lines to create the grid dividers. -
Smooth the edges:
Dip your finger in a little water and run it along the outer edges of the board to soften any sharp corners left by the cutting knife. -
Texture the tiles:
Take a crumpled piece of aluminum foil or a coarse sponge and gently press it into the surface of each square ’tile’ to mimic the look of natural stone or sand.
Keep It Flat
To prevent the large board from curling while drying, place a heavy book on top of it once the clay is leather-hard (surface dry but still cool).
Step 2: Creating the Playing Pieces
-
Form the starfish:
Roll five small balls of clay. Flatten slightly and pull out five points from the center of each. Pinch and shape these points to create starfish limbs. -
Detail the starfish:
Use a needle tool or toothpick to prick tiny holes along the center of each starfish arm for authentic texture. Curve the tips of the arms slightly upwards for a dynamic look. -
Shape the sand dollars:
Roll three balls of clay and flatten them into thick discs. Use a knife to gently score a star pattern in the center without cutting through. -
Create the shell mounds:
For the remaining pieces, roll two balls of clay and shape them into domes. Use a modeling tool to press deep, radiating grooves from the bottom edge up toward the center peak. -
Dry all components:
Place the board and all ten playing pieces on a flat surface away from direct heat. Let them dry completely for 24-48 hours, flipping them occasionally to prevent warping.
Make It Glossy
Use a high-gloss varnish or resin just on the ‘water’ tiles of the board to make them look wet, while keeping the starfish and shells matte.
Step 3: Painting and Finishing
-
Base coat the board:
Mix a small amount of white paint into your turquoise acrylic. Apply this mixture to the entire board, getting into the textured crevices. -
Sponge effect:
Once the base is dry, dab a slightly darker teal paint onto the tiles using a nearly dry sponge. This creates a mottled, stone-like depth. -
Paint the grid:
Mix a light grey with white and carefully paint the indented rope texture of the grid lines to make them stand out against the blue tiles. -
Color the starfish:
Paint the starfish a warm, sandy beige. After it dries, I like to dry-brush a tiny bit of white on the raised textures to highlight the details. -
Whiten the shells:
Paint the sand dollars and shell mounds a crisp, clean white. For the sand dollars, you can dilute a tiny drop of brown paint with water and run it into the star-pattern grooves for definition. -
Seal the project:
Finish by applying two thin coats of matte or satin varnish to all pieces. This protects the clay from moisture and gives the set a finished, professional look.
Now you have a beautiful, handmade game set ready for your next beach house gathering
Rainbow Gradient Board With Color-Team Pieces
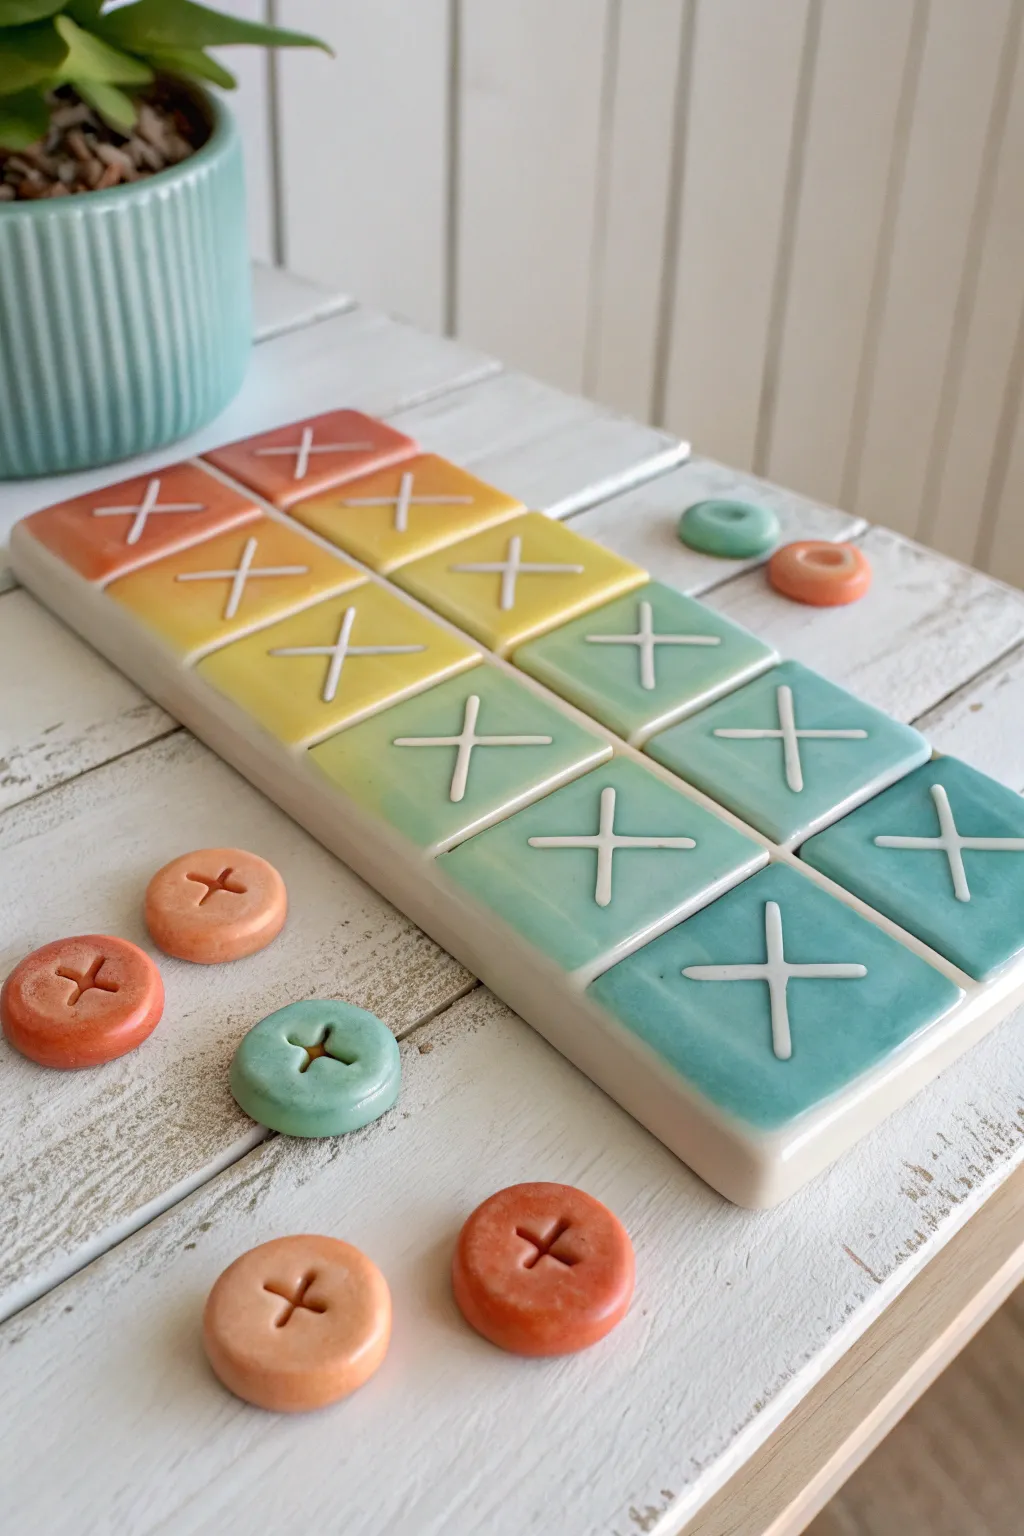
Brighten up your game night with this cheerful clay project featuring a beautifully blended rainbow gradient board and matching playing pieces. The glossy finish and engraved ‘X’s make this board feel professional while keeping a handmade charm.
Detailed Instructions
Materials
- White sculpture clay or polymer clay
- Rolling pin with guide rings (1/4 inch)
- Ruler and craft knife
- Small paintbrush
- Acrylic paints (Red, Orange, Yellow, Green, Teal, Blue)
- White acrylic paint
- High-gloss varnish or resin
- Fine-grit sandpaper
- Clay carving tool or toothpick
- Small circle cutter (approx. 1 inch)
Step 1: Shaping the Board and Pieces
-
Roll the Slab:
Begin by conditioning your clay until it is soft and pliable. Roll it out into a long, rectangular slab about 1/4 inch thick; using rolling pin guides ensures the surface is perfectly even. -
Cut the Rectangle:
Using your ruler and craft knife, cut a clean rectangle. Aim for dimensions that can accommodate two columns of six squares (roughly 3 inches wide by 9 inches long), or customize the size based on your preference. -
Score the Grid:
Lightly score the clay surface with a ruler edge to mark out a grid of twelve equal squares (two wide, six long). Don’t cut all the way through; just create deep enough grooves to define the playing spaces. -
Carve the X Marks:
In the center of each square on the board, carefully carve a large ‘X’ using a clay tool or toothpick. Press deep enough so the paint will settle in later, but keep the lines clean. -
Create Playing Pieces:
Roll out remaining clay leftovers to the same thickness. Use your small circle cutter to punch out at least 10 round playing pieces. -
Detail the Pieces:
Carve a small ‘X’ or ‘+’ into the center of each circle piece to match the board’s theme. Smooth any rough edges with your finger dipped in a little water. -
First Bake/Dry:
Follow the instructions for your specific clay type to bake or air-dry the board and pieces. If using polymer clay, bake on a ceramic tile to keep the long board perfectly flat.
Smooth Blends
Add a tiny drop of distinct acrylic flow improver or water to your paints. This extends drying time, giving you valuable extra minutes to perfect that seamless rainbow transition.
Step 2: Painting the Rainbow Gradient
-
Sand and Prep:
Once fully cured and cooled, lightly sand the edges of the board and pieces to remove any sharp burrs. Wipe away all dust with a damp cloth. -
Base Coat:
Paint the entire board and all pieces with a thin layer of white acrylic paint. This acts as a primer and ensures your gradient colors will pop vibrantly. -
Mix Your Palette:
Prepare a palette with your rainbow colors: red, orange, yellow, lime green, teal, and blue. You’ll want them wet and ready for blending. -
Apply the Gradient:
Start painting the board from the top. Apply the red to the first row, then immediately introduce orange for the second row. While the paint is wet, blend the boundary between the colors using a damp brush. -
Continue Blending:
The key here is speed; I find working quickly prevents harsh lines. Continue down the board, blending orange into yellow, yellow into green, green into teal, and finishing with blue at the bottom. -
Paint the Pieces:
For the playing pieces, paint half of them in a warm tone (like orange or red) and the other half in a cool tone (like teal or green) so players can tell their teams apart. -
Fill the Grooves:
Once the colorful paint is completely dry, use a fine detail brush to fill the carved ‘X’ marks on the board and pieces with crisp white paint.
Level Up
For a true ceramic look without a kiln, coat the finished piece in UV resin and cure under a lamp. It creates a durable, glass-like surface that looks incredibly high-end.
Step 3: Finishing Touches
-
Clean Up:
If any white paint spilled out of the grooves, quickly wipe it away or touch it up with the corresponding background color. -
Seal with Varnish:
Apply a thick, glossy varnish over the entire top surface of the board and the pieces. This mimics the ceramic glaze look seen in the photo. -
Final Cure:
Let the varnish dry completely in a dust-free area for 24 hours before your first game.
This vibrant set makes a lovely coffee table display when you aren’t busy winning matches
Stackable Board With Built-In Piece Storage
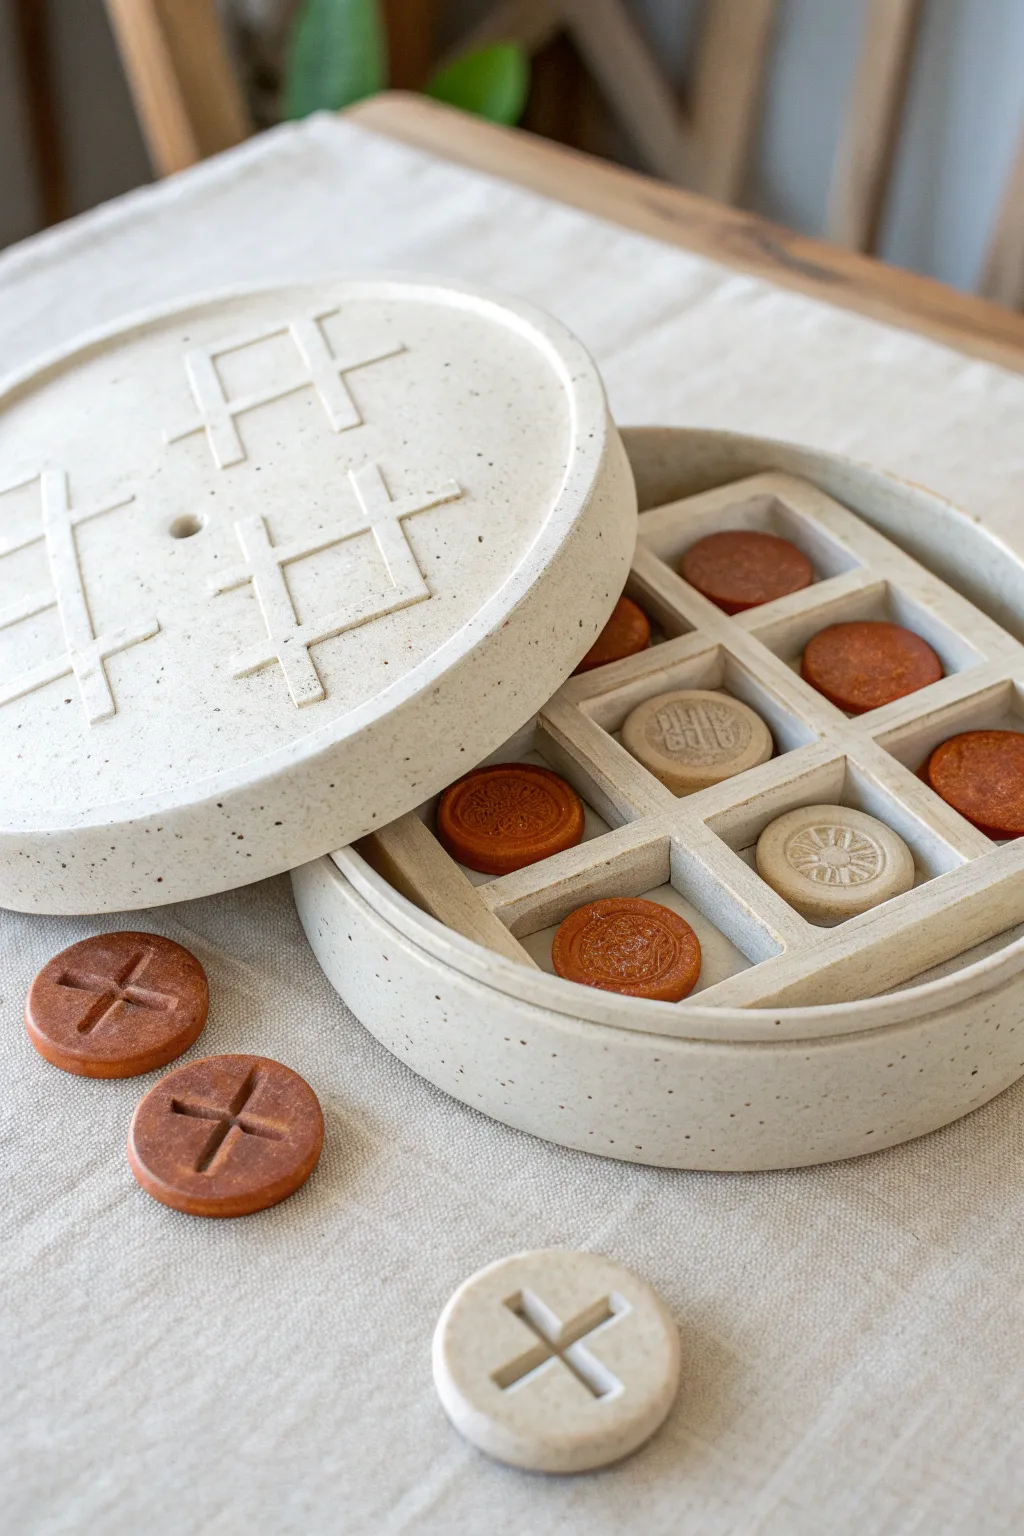
Elevate your coffee table with this sophisticated, stackable tic-tac-toe set that doubles as secret storage. With its faux-stone speckled finish and clever two-tiered design, it combines functional gameplay with high-end sculptural aesthetics.
Step-by-Step
Materials
- White polymer clay or air-dry clay (approx. 1kg)
- Circular cookie cutters (large for container, small for pieces)
- Rolling pin with guide rings
- Craft knife
- Ruler
- Sandpaper (fine grit)
- Pottery needle tool or toothpick
- Acrylic paints (terracotta/burnt orange, cream/beige)
- Black pepper or dried coffee grounds (for speckling)
- Gloss or matte varnish
- Small stamps or texture tools (optional for pieces)
Step 1: Forming the Base & Lid
-
Prepare the speckled clay:
Start by conditioning your white clay. To achieve that gorgeous stoneware look, knead in a generous pinch of coarse black pepper or dried used coffee grounds until they are evenly distributed throughout the batch. -
Roll the main slabs:
Roll out two large, even slabs of your speckled clay to about 1/4-inch thickness. These will form the floor of the box and the top of the lid. -
Cut the circles:
Use your largest circular cutter (or a bowl as a template) to cut two identical circles. Set one aside for the lid. -
Create the walls:
Roll out a long strip of clay, also 1/4-inch thick. Measure the circumference of your base circle and cut the strip to length, ensuring it’s about 1.5 inches tall. -
Attach the container wall:
Score and slip (if using air-dry clay) or use liquid clay (if polymer) to attach the strip around the edge of the base circle. Smooth the seam both inside and out until invisible. -
Form the lid rim:
Repeat the wall process for the lid, but make this strip much shorter—about 1/2 inch tall—so it fits snugly over the bottom container. Test the fit carefully before hardening.
Step 2: Creating the Grid & Pieces
-
Construct the internal grid:
Roll out thinner strips of clay. Measure the interior diameter of your container and cut two long strips to span the middle, notched at the center to interlock in a cross shape. -
Assemble the compartments:
Cut four shorter strips to create the outer lines of the hashtag shape. Place this grid inside the container base to create nine square compartments. Smooth the joints where the grid meets the container walls. -
Decorate the lid:
Using leftover thin strips, create a relief hashtag pattern on top of the lid circle. I like to add a small central hole or knob here for easy lifting. -
Cut the playing pieces:
Roll out a fresh slab of clay. Use a small circle cutter to stamp out 10 game tokens (5 for X, 5 for O) sized to fit inside the grid squares. -
Detail the tokens:
Stamp or carve distinct designs onto the tokens. You might create a raised ‘X’ on half and an intricate circular pattern on the others. -
Curing or drying:
Bake your polymer clay according to package instructions or let air-dry clay cure for 24-48 hours until completely hard.
Stone Effect Secret
Mix different grit sizes (like poppy seeds and pepper) into the clay. This variation creates a much more convincing organic stone texture than using just one size speckle.
Step 3: Finishing Touches
-
Sand for smoothness:
Once fully cured, use fine-grit sandpaper to smooth any rough edges on the rim of the box and the sides of the lid so they slide together effortlessly. -
Undercoat the pieces:
Paint five of the tokens in a warm terracotta or burnt orange shade. Keep the other five tokens and the main box in their natural speckled cream color. -
Highlight the textures:
For the tokens with intricate stamps, apply a diluted wash of darker paint and wipe off the surface to let the color settle into the crevices, enhancing the relief. -
Seal the project:
Apply a coat of matte varnish to the container to maintain that stoneware feel, and perhaps a satin varnish to the colored tokens to make them pop against the matte board.
Magnetic Closures
Embed small magnets into the rim of the base and lid before the clay hardens. This ensures the lid snaps securely shut for travel or vertical storage.
Now you have a stunning, sculptural game set that looks just as good resting on the shelf as it does in play