If you’re brand new to clay, I’m going to point you straight to projects that start with a simple ball, a little “snake,” and a couple of dot eyes. These easy cute clay ideas are quick wins that still give you that satisfying kawaii look without fancy tools.
Classic Kawaii Face Disc Charms
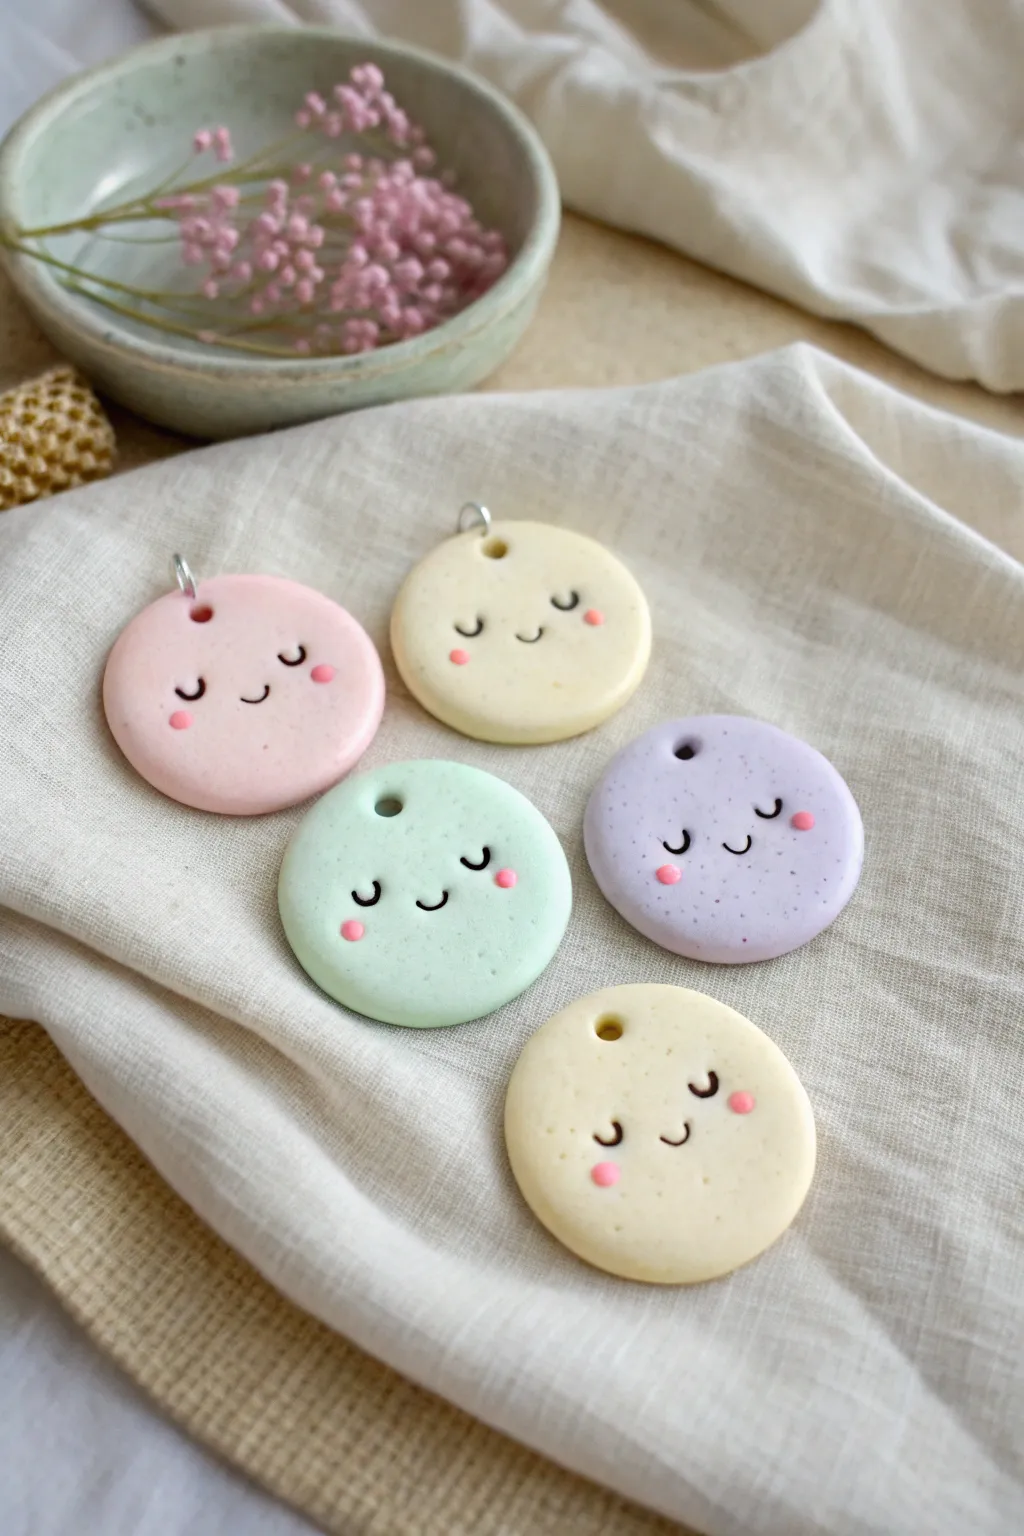
These utterly adorable face disc charms, reminiscent of sweet frosted sugar cookies, are the perfect beginner project. With their soft pastel hues and simple smiling expressions, they make delightful pendants, keychains, or zipper pulls.
Detailed Instructions
Materials
- Polymer clay in pastel colors (classic pink, butter yellow, mint green, lavender)
- Black liquid clay or fine-tip black acrylic marker
- Pink acrylic paint or soft stick pastel (chalk)
- Circle cutter (approx. 1 – 1.5 inch diameter)
- Acrylic rolling pin
- Small dotting tool or toothpick
- Needle tool or very fine paintbrush
- Straw or small tubular tool (for piercing the hole)
- Metal jump rings (optional)
- Gloss or matte varnish (optional)
Step 1: Shaping the Base
-
Condition the clay:
Begin by taking your chosen pastel polymer clay color and kneading it in your hands until it is soft, pliable, and warm. This prevents cracking later. -
Roll it out:
Using your acrylic rolling pin, flatten the clay into a sheet. You want a thickness of about 1/4 inch (6mm) so the charm feels substantial, like a little cookie. -
Cut the circles:
Press your circle cutter firmly into the clay sheet to punch out your round disc shapes. If rugged edges appear, smooth them gently with only your fingertip for a polished look. -
Pierce the hanging hole:
Before baking or detailing, use a straw or a small tubular tool to punch a clean hole near the top edge of the circle. Ensure it isn’t too close to the very edge to prevent breakage.
Clean Fingerprints
Before baking, lightly brush the raw clay surface with a tiny amount of baby oil or cornstarch to smooth out any accidental fingerprints.
Step 2: Creating the Kawaii Face
-
Mark the rosy cheeks:
For the blush, you have two options. If using acrylic paint, dab a tiny dotting tool into pink paint and press two small dots onto the raw clay where the cheeks should be. -
Alternative cheek method:
I personally prefer using scraped pink chalk pastel dust applied with a soft brush for a softer, airbrushed blush look before baking. -
Draft the smile:
Using a needle tool, very lightly scribe the placement of the eyes and mouth to ensure your symmetry is correct before committing with ink or liquid clay. -
Draw the features:
Carefully draw the two ‘U’ shaped sleeping eyes and the small smile in the center using black liquid clay and a needle tool. If you find liquid clay tricky, you can bake the piece first and draw these on later with a fine-tip marker. -
Refine the lines:
If using liquid clay, lift any excess with the very tip of your tool to keep the lines thin and delicate.
Step 3: Finishing Touches
-
Baking time:
Place your charms on a ceramic tile or baking sheet lined with parchment paper. Bake according to your specific clay brand’s package instructions (usually around 230°F – 275°F for 15-30 minutes). -
Cool down:
Allow the charms to cool completely in the oven with the door cracked open; this slow cooling helps prevent thermal shock cracks. -
Sealing the charm:
Once fully cool, apply a thin coat of matte or gloss varnish to protect the surface, especially if you used acrylic paint or marker for the face. -
Add hardware:
Using pliers, gently twist open a metal jump ring, slide it through the hole you created earlier, and twist it closed securely.
Textured Cookie Effect
Gently tap the raw clay surface with an old toothbrush or a crumpled ball of aluminum foil to give it a realistic baked cookie texture.
Now you have a handful of smiling charms ready to brighten up any accessory collection


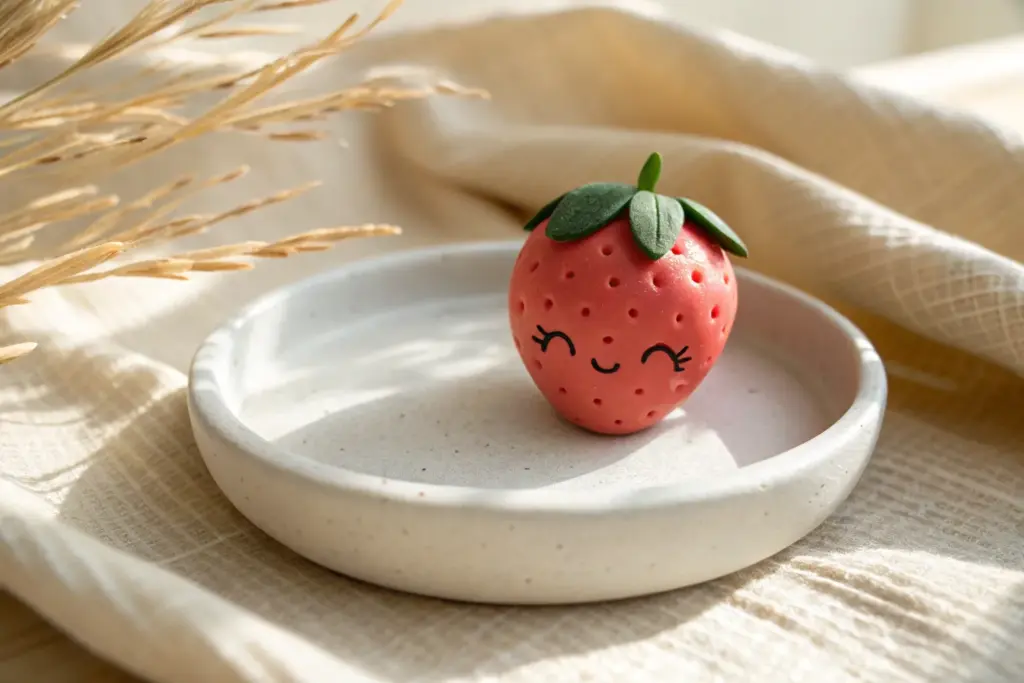
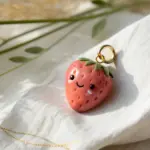
Smiley Strawberry Minis
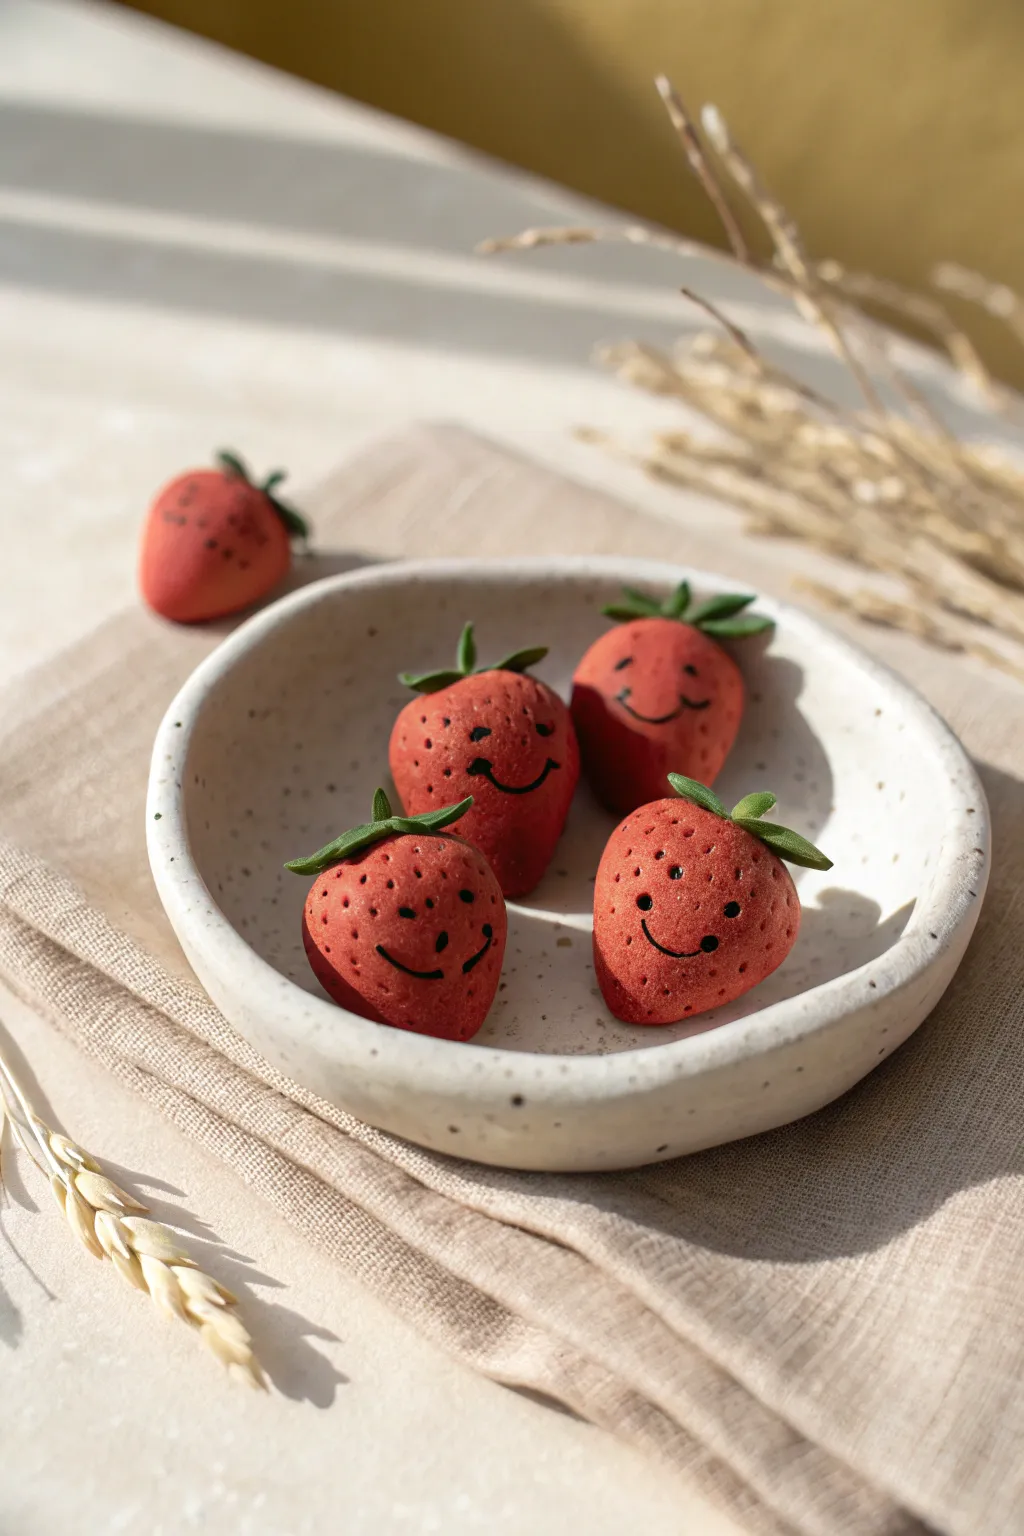
These cheerful little strawberry friends bring a touch of whimsy to any desk or shelf. With their textured surfaces and hand-drawn smiles, they are a perfect, low-pressure project for mastering basic clay shaping and detailing.
Step-by-Step Tutorial
Materials
- Red polymer clay (or air-dry clay)
- Green polymer clay
- Fine-point black permanent marker or black acrylic paint with a tiny brush
- Needle tool or toothpick
- Small dotting tool
- Soft pastel chalks (dark red or brown) for shading
- Small soft paintbrush
- Oven for baking (if using polymer clay)
Step 1: Shaping the Bodies
-
Condition the clay:
Start by kneading your red clay until it is soft, pliable, and free of cracks. Warm clay is much easier to smooth later. -
Form the base shapes:
Roll the clay into four equal-sized balls, roughly 1 inch in diameter. Then, gently roll one end of each ball between your palms to create a tapered, teardrop shape. -
Flatten the bottoms:
Tap the wider bottom of each strawberry gently onto your work surface. You want them to stand up on their own without wobbling. -
Round the tops:
Soften the pointed top of the teardrop slightly with your finger so it isn’t too sharp; real strawberries have somewhat rounded shoulders.
Step 2: Adding Texture and Details
-
Create the seed texture:
Using a needle tool or toothpick, gently press small holes all over the surface of the red clay. Don’t drag the tool; just poke straight in and out. -
Vary the depth:
Make some indentations slightly deeper than others to give the surface an organic, realistic feel, but leave a small smooth area on the front face where the smile will go. -
Shade for realism:
I like to scrape a little dark red or brown soft pastel into a powder. Use a soft brush to dust this powder lightly over the textured surface to accentuate the seed dimples.
Smudged Smile?
If your marker bleeds into the clay texture, try using a tiny dot of black acrylic paint instead. It sits on top of the surface better and can be wiped off quickly if you make a mistake.
Step 3: Creating the Leaves
-
Prepare the green clay:
Condition a small amount of green clay. Roll it into a very thin sheet or flatten it with your fingers. -
Cut the star shapes:
Cut out small star-like shapes with five or six points. You can use a tiny cutter if you have one, or just cut triangles freehand with a craft knife. -
Attach the calyx:
Place a green star shape onto the top of each strawberry. Gently press the center down so it bonds with the red clay. -
Curl the tips:
Use your toothpick to carefully lift and curl the tips of the green leaves upward. This adds movement and life to the sculpture. -
Add a stem:
Roll a tiny snag of green clay into a short stem and press it into the center of the leaves.
Make Them Magnets
Before baking, press a small, strong magnet into the flat back of the strawberry. Bake it with the magnet attached to create adorable fridge decor.
Step 4: Baking and Finishing
-
Bake the batch:
Place your strawberries on a baking sheet or ceramic tile. Bake according to your clay manufacturer’s specific instructions (usually around 275°F or 130°C for 15-30 minutes). -
Cool completely:
Let the pieces cool down fully before handling. The clay hardens as it cools, so be patient. -
Draw the faces:
Using a fine-point black marker, carefully draw two small dots for eyes and a simple U-shape for a smile on the smooth patch you reserved earlier. -
Add personality:
Use a needle tool or the marker to add tiny ‘cheek’ lines at the ends of the smile for that cute, dimpled look seen in the photo. -
Seal the work:
If you want to protect the marker from rubbing off, apply a very thin coat of matte varnish over the face area once the ink is dry.
Now you have a whole bowl of cheerful fruit ready to brighten up your day


Tiny Avocado Friends
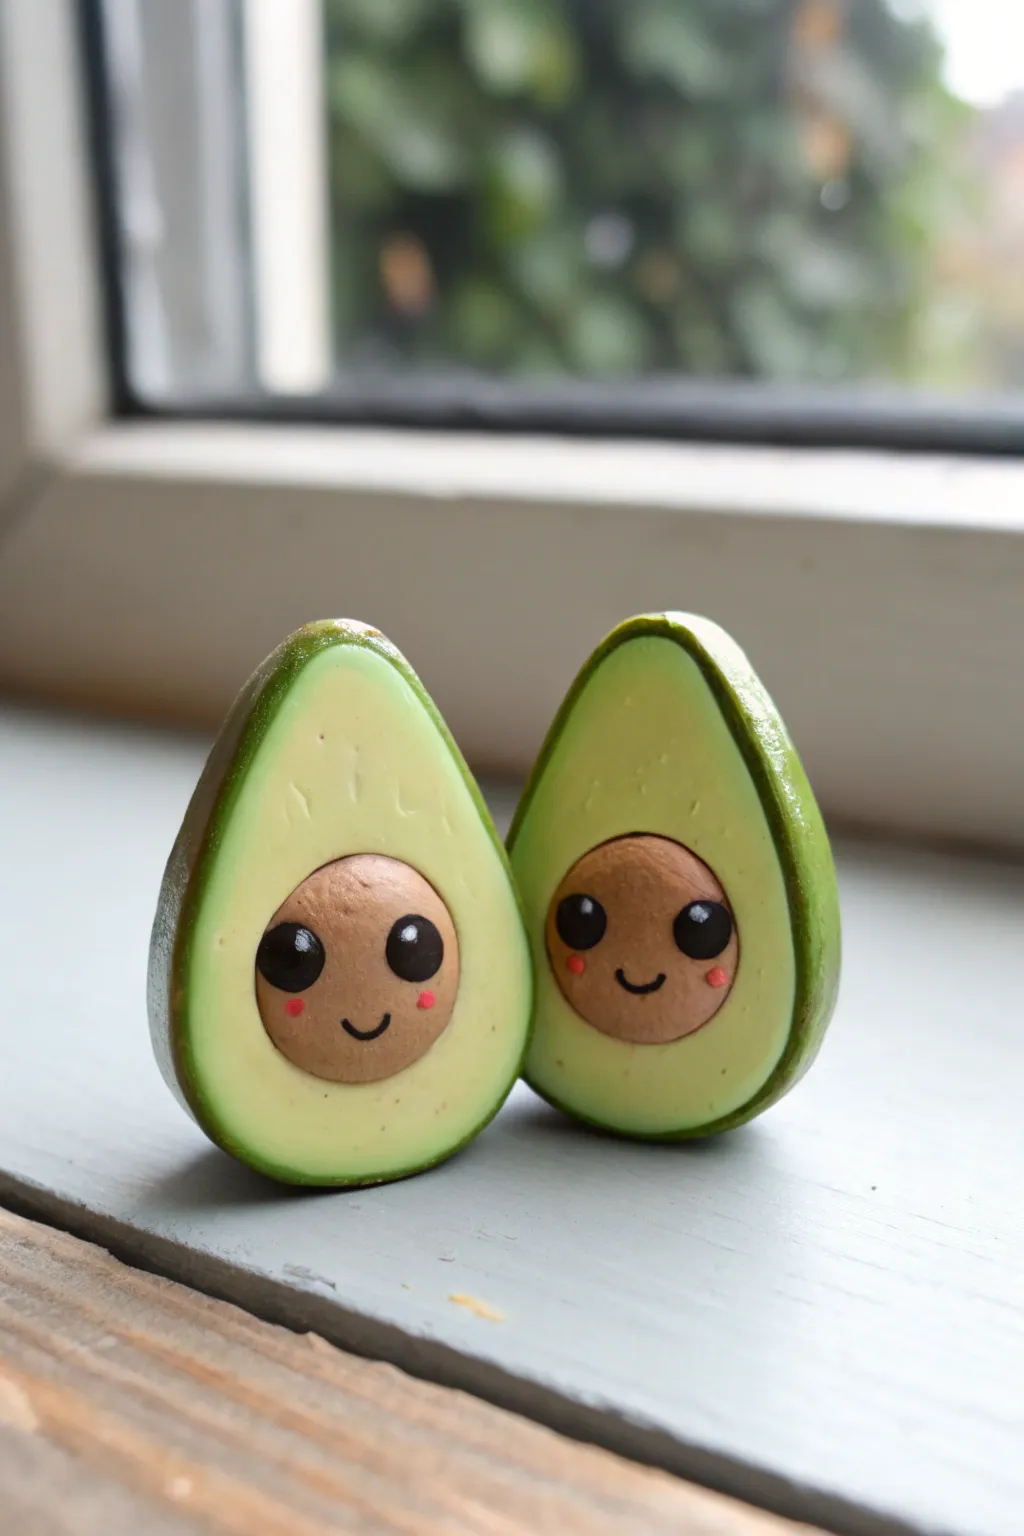
These adorable avocado halves are inseparable friends with beaming smiles that brighten any windowsill. Crafted from polymer clay, they feature a realistic textured skin and sweet, Kawaii-style faces painted right onto their pits.
Step-by-Step Guide
Materials
- Polymer clay: Light green, dark green, and light brown
- Acrylic paint: Black, white, and pink
- Fine detail paintbrush or dotting tool
- Sculpting tools or a craft knife
- Gloss glaze or varnish
- Aluminum foil (optional for core)
Step 1: Forming the Avocado Shapes
-
Condition the Clay:
Begin by kneading your light green polymer clay until it is soft and pliable. This prevents cracks later on. -
Shape the Bases:
Form two teardrop shapes from the light green clay. These will be the main bodies of your avocados. Flatten the back of each teardrop slightly if you want them to stand up easily, or leave them rounded. -
Create the Skin:
Roll out a thin sheet of dark green clay. It should be thin enough to wrap around the light green teardrops without adding too much bulk. -
Wrap the Shapes:
Gently drape the dark green clay over the rounded back and sides of your light green teardrops. Trim the excess around the flat front face so you have a neat border of dark ‘skin’. -
Smooth the Seams:
Use your finger or a smoothing tool to blend the dark green skin into the light green flesh so there isn’t a sharp ridge. The transition should look natural, like a cut fruit. -
Add Texture:
For a realistic touch, gently dimple the dark green skin using a toothbrush or a ball of aluminum foil to mimic the bumpy texture of a real avocado.
Avocado Texture
For ultra-realistic light green flesh, mix a tiny bit of translucent clay into your green before shaping. It mimics the waxy look of real fruit.
Step 2: Sculpting the Faces
-
Prepare the Pits:
Take a small amount of light brown clay and roll two balls. Each ball should be sized appropriately to fit in the lower center of your avocado halves. -
Embed the Pits:
Press one brown ball gently into the center of the wide part of each light green teardrop. flattening them slightly so they look embedded rather than just stuck on top. -
Bake the Clay:
Place your avocado friends on a baking sheet and bake according to your clay manufacturer’s instructions. I usually tent them with foil to prevent scorching. -
Cool Down:
Allow the pieces to cool completely before moving on to painting. Painting on warm clay can ruin your brushes and make the paint dry clumpy.
Uneven Skin?
If the dark green skin looks lumpy where it meets the light green, roll the entire shape gently on your work surface to smooth the seam before baking.
Step 3: Painting the Details
-
Paint the Eyes:
Using a very fine detail brush or a dotting tool, dab two medium-sized circles of black acrylic paint onto the upper half of the brown pit. -
Add the Sparkle:
Once the black paint is dry, add a tiny white dot in the upper corner of each black eye. This reflection brings the character to life. -
Draw the Mouth:
With your thinnest brush or a fine-tip black marker, draw a small, simple ‘u’ shape between the eyes for a happy smile. -
Rosy Cheeks:
Dip a dotting tool into pink paint and add small dots just under the eyes for blush. This adds to the cute factor. -
Seal the Deal:
Finish by applying a coat of gloss glaze over the entire piece. This protects the paint and gives the avocado flesh a freshly-cut, moist look.
Place your little avocado duo on a shelf where they can smile back at you every day


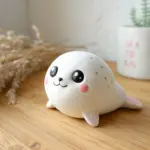
Blob Animal Desk Buddies
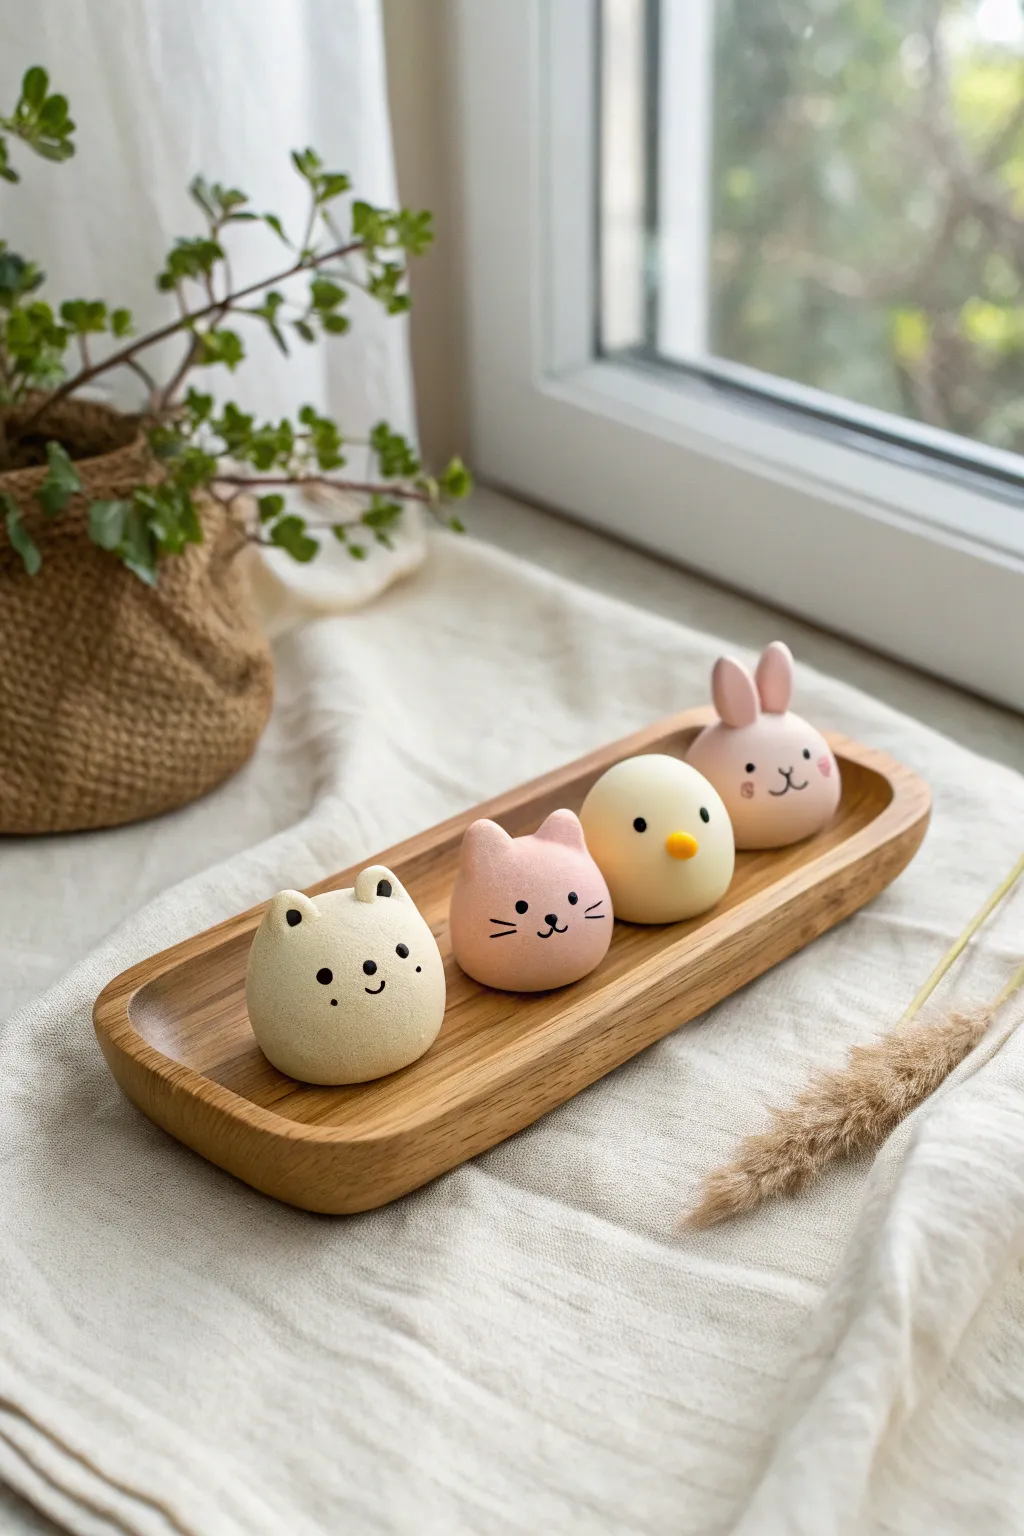
These four adorable blob animals—a bear, cat, chick, and bunny—are the perfect starting point for your clay sculpting journey. With their smooth, matte finish and simple geometric shapes, they add a touch of gentle whimsy to any windowsill or workspace.
Step-by-Step
Materials
- Air-dry clay or polymer clay (white base)
- Acrylic paints (pastel yellow, soft pink, orange, black)
- Small rolling pin
- Sculpting tools (ball tool, needle tool)
- Fine detail paintbrush (size 00 or 000)
- Water (for smoothing)
- Matte varnish or sealant
Step 1: Coloring the Base Clay
-
Prepare the portions:
Divide your white clay into four equal portions, sized roughly like a golf ball or slightly smaller. Keep them covered with a damp cloth or plastic wrap so they don’t dry out while you work. -
Mix the cream color:
Take the first ball and knead in a tiny dot of yellow and a speck of brown paint or pigment to create a warm cream color for the bear base. Knead until the color is completely uniform. -
Mix the pink shade:
For the cat and rabbit, you will need two portions of soft pink. Mix red or rose pigment into two of your white clay balls until you achieve a pastel strawberry milk shade. -
Mix the yellow shade:
For the chick, mix a brighter yellow paint into the final ball of clay. Ensure the color is vibrant but still pastel, reminiscent of lemon curd.
Cracking Clay?
If tiny cracks appear while rolling, dip your finger in water and smooth them out immediately. If cracks appear after drying, fill them with a slurry of clay and water.
Step 2: Sculpting the Basic Blobs
-
Roll the spheres:
Roll each colored portion into a perfect sphere between your palms. I find that applying lighter pressure as you finish rolling helps eliminate tiny cracks. -
Form the blob shape:
Gently tap the bottom of each sphere onto your work surface to flatten the base so the animals sit upright without rolling away. The top should remain rounded. -
Check sizes:
Line them up side-by-side to ensure they are relatively consistent in height and width, creating a cohesive set.
Step 3: Adding Animal Ears
-
Bear ears:
Pinch two tiny pieces of cream clay. Roll them into small balls and press them gently onto the top of the cream blob, spacing them widely apart. -
Cat ears:
For the pink cat, create two small triangles from the pink clay. Attach them to the top of the head, ensuring they are slightly pointed. Smooth the seams with a little water or a silicone tool. -
Bunny ears:
Create two longer teardrop shapes from the pink clay for the rabbit. Attach them to the top of the head, keeping them upright and close together. Smooth the join line at the base carefully. -
Chick features:
The chick needs no ears, but it does need a beak. Roll a tiny cone of orange clay and press it into the center of the yellow blob’s face.
Make Them Functional
Before the clay dries, gently press a magnet into the back or use a crafting knife to cut a slit in the top to turn these cute blobs into photo or card holders.
Step 4: Painting the Faces
-
Dry the clay:
Allow your clay figures to dry completely according to the package instructions (usually 24 hours for air-dry clay or baking for polymer clay). -
Paint the eyes:
Using your finest brush and black acrylic paint, add two small, widely spaced dots for the eyes on each animal. Keep them low on the face for a cuter ‘kawaii’ look. -
Add noses and mouths:
For the bear, paint a tiny nose between the eyes. For the cat and bunny, paint a tiny nose and a ‘w’ shape for the mouth. Add whiskers to the cat with very thin, delicate strokes. -
Cheek details:
Mix a slightly darker pink paint and dab faint blush marks on the bunny’s cheeks using the very tip of your brush or a toothpick. -
Final seal:
Once the paint is fully dry, coat each figure with a matte varnish to protect the surface and give it that soft, professional finish shown in the photo.
Arranging these little friends on your desk is sure to bring a smile to your face every time you look at them

The Complete Guide to Pottery Troubleshooting
Uncover the most common ceramic mistakes—from cracking clay to failed glazes—and learn how to fix them fast.
Sleepy Cat Pinch Pots
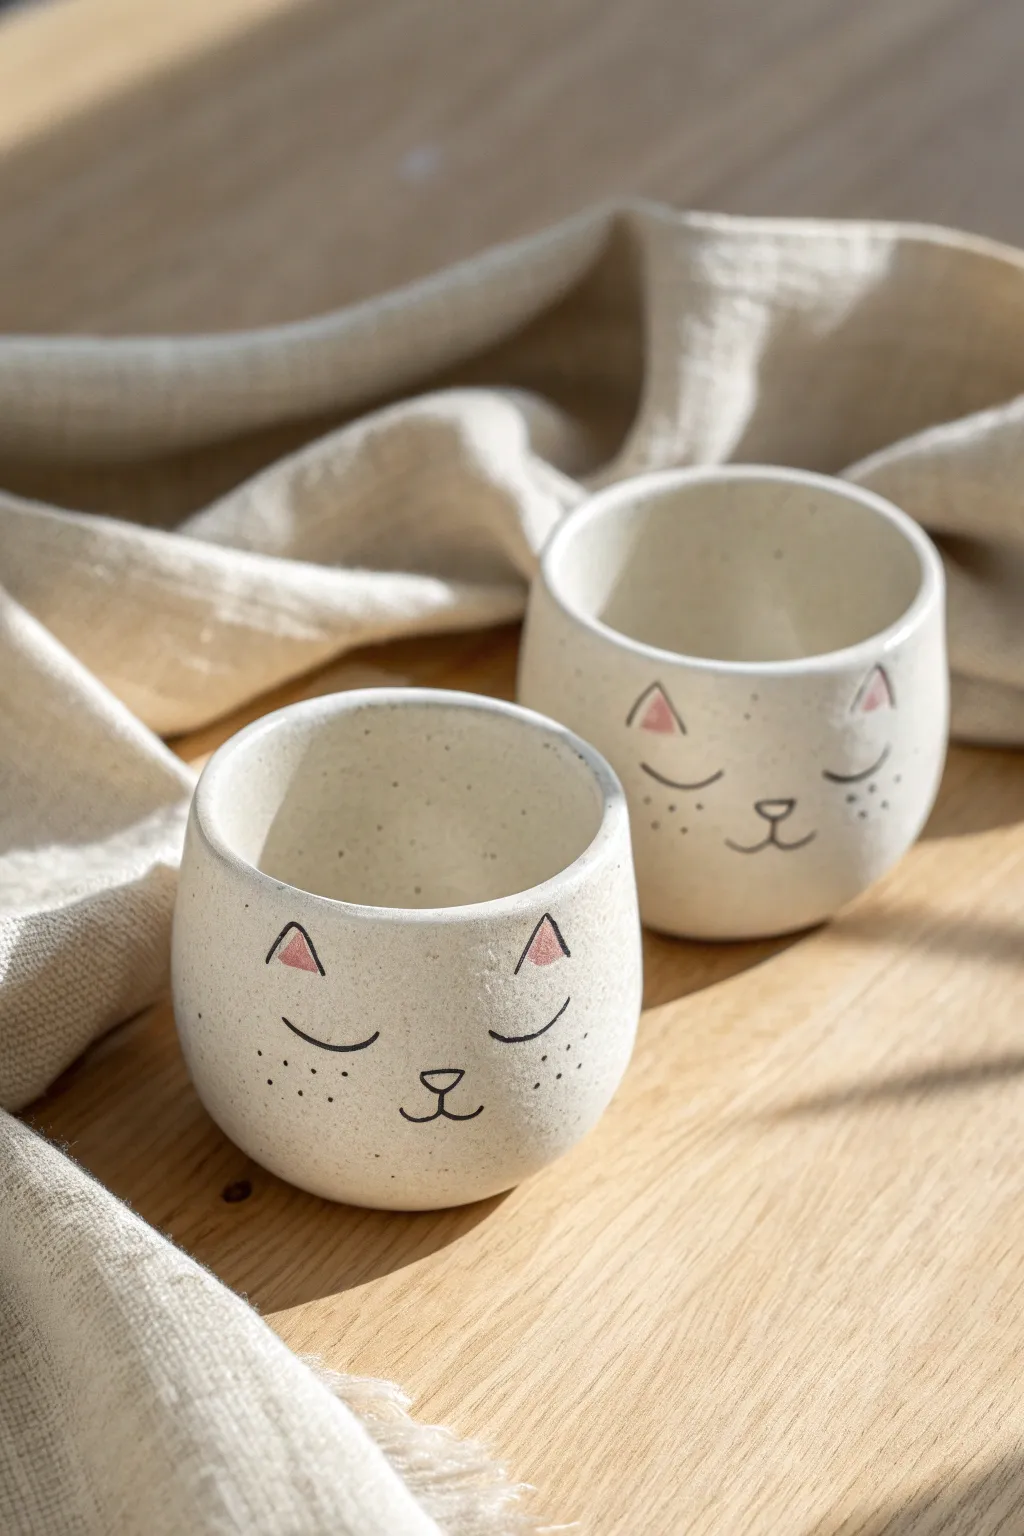
These adorable little planters or trinket cups start as simple balls of clay into which you pinch life and personality. The speckled finish and sweet, sleeping faces make them a cozy addition to any desk or shelf.
How-To Guide
Materials
- White or beige speckled stoneware clay (or air-dry clay if not firing)
- Small sponge
- Pin tool or needle tool
- Loop tool or rib (for smoothing)
- Black underglaze (or acrylic paint if using air-dry)
- Pink underglaze (or acrylic paint)
- Fine liner paintbrush
- Clear glaze (optional, for kiln-fired clay)
Step 1: Forming the Pinch Pot Body
-
Prepare your clay:
Start by taking a lump of clay about the size of a tennis ball. Wedge it thoroughly to remove any air bubbles, which helps prevent cracking later on. -
Roll a sphere:
Roll the wedged clay between your palms or on your work surface until you have a smooth, round ball. -
Create the opening:
Hold the ball in your non-dominant hand. Gently push your thumb into the center of the ball, stopping about half an inch from the bottom. -
Pinch the walls:
Using your thumb on the inside and fingers on the outside, start pinching the clay wall gently. Rotate the ball slightly with each pinch to ensure an even thickness all around. -
Determine the shape:
Continue pinching until the walls are about 1/4 inch thick. Aim for a slightly rounded, cup-like shape rather than a wide bowl, keeping the walls somewhat vertical. -
Flatten the base:
To make sure your cat sits safely without wobbling, tap the bottom of the pot gently against your table to create a flat base.
Cracks on the rim?
Rim cracks happen if clay dries too fast while pinching. Dip your finger in water (sparingly!) and compress the rim by running your finger along it to heal splits immediately.
Step 2: Smoothing and Detailing
-
Smooth the surfaces:
Use a damp sponge or a flexible rib tool to smooth out any fingerprints or cracks on both the exterior and interior. The smoother the surface, the cleaner your painted face will look. -
Form the rim:
I like to gently run a damp sponge over the top rim to round it off, ensuring it’s soft to the touch and not sharp. -
Sketch the face:
Before painting, lightly trace the face design into the raw clay using a needle tool. Mark the triangles for ears, two curved lines for sleeping eyes, a small nose, and a mouth.
Step 3: Adding the Cat Features
-
Paint the ears:
Using a small brush and pink underglaze, fill in the triangle shapes you sketched for the inner ears. You don’t need sculpted ears; painting them directly on the curved surface gives a lovely modern look. -
Outline the ears:
Once the pink is dry to the touch, use a very fine liner brush with black underglaze to outline the pink triangles, giving them definition. -
Detail the eyes:
With the same black liner brush, carefully paint the two downward curves for the sleeping eyelids. Add tiny lashes if you want extra charm. -
Paint the nose and mouth:
Paint a small, soft triangle for the nose and connect it to a ‘w’ shape for the mouth. Keep your lines thin and delicate. -
Add freckles:
For that sweet character seen in the photo, add three or four tiny black dots on each cheek area for whisker spots. -
Drying:
Allow your piece to dry completely. If using kiln-fire clay, it needs to be bone dry before the bisque fire. -
Finishing:
If firing, apply a clear glaze after the bisque fire and fire again. If using air-dry clay, seal your pot with a matte or satin varnish to protect the paint.
Make it a mug
Before drying, pull a thick handle from a coil of clay. Attach it to the back using the score-and-slip method to turn your planter into a functional espresso cup.
Fill your new feline friend with a succulent or use it to hold your favorite rings
Heart Trinket Dishes
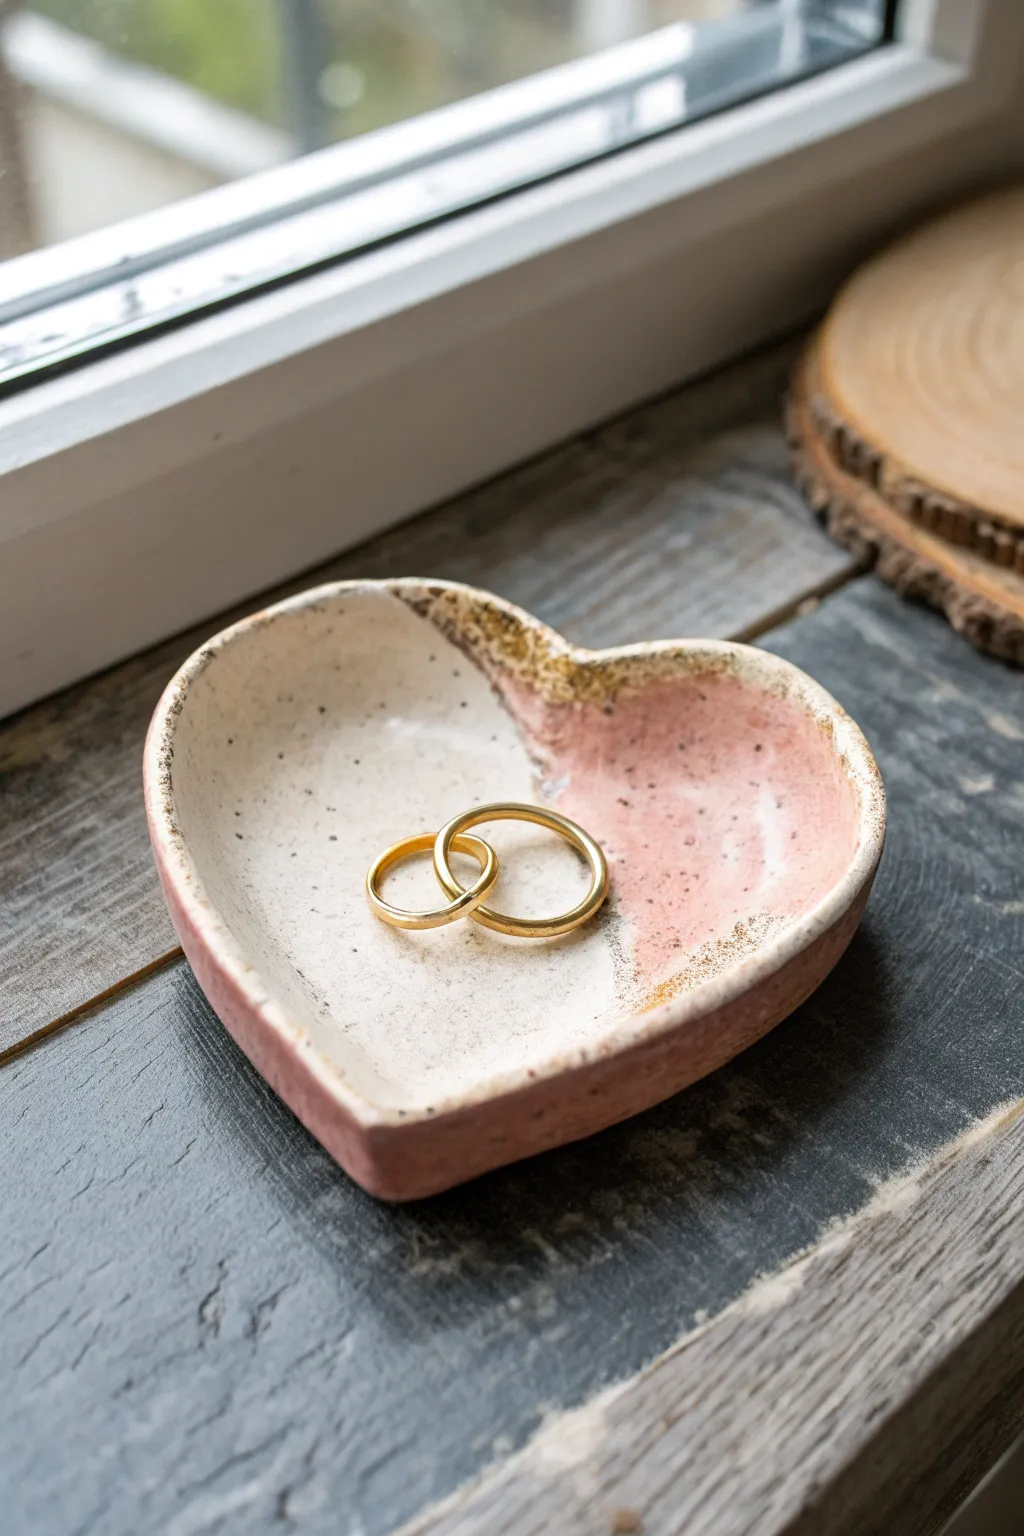
This sweet, speckled heart dish combines earthy textures with a romantic touch of soft pink, making it the perfect spot to rest your everyday jewelry. The natural clay look combined with gold-rimmed edges gives it a handmade yet sophisticated charm that looks lovely on any windowsill.
Detailed Instructions
Materials
- White air-dry clay or polymer clay
- Rolling pin
- Heart-shaped cookie cutter (medium size)
- Sandpaper (fine grit)
- Acrylic paint (soft pink, white, gold)
- Small paintbrush
- Glossy varnish or glaze (clay-safe)
- Old toothbrush (for speckling)
- Brown shade acrylic paint (burnt umber)
- Small bowl of water
- Sponge
Step 1: Shaping the Base
-
Condition the Clay:
Begin by working a handful of white clay in your hands to warm it up and make it pliable. This helps prevent cracks later on. -
Roll it Out:
On a clean, flat surface, roll the clay out to a thickness of about 1/4 inch. Try to keep the thickness consistent so the dish sits level. -
Cut the Heart:
Press your heart-shaped cookie cutter firmly into the clay. Wiggle it slightly to ensure a clean cut, then lift the cutter and remove the excess clay from around the shape. -
Soften the Edges:
Dip your finger in a little water and gently run it along the cut edges of the heart to smooth out any sharpness or burrs left by the cutter. -
Form the Dish Curve:
Gently lift the clay heat into your palm. Using your thumbs, slowly press into the center and curl the edges upward to create a shallow bowl shape. I like to focus on lifting the two rounded humps of the heart specifically to give it dimension. -
Dry Time:
Set the dish aside in a safe, dry place. Let it cure completely according to your clay package instructions (usually 24-48 hours for air-dry clay).
Step 2: Painting and Finishing
-
Sand for smoothness:
Once fully hard, check for any rough spots. Use a fine-grit sandpaper to gently buff the edges and surface until it feels smooth to the touch. -
Base Coat:
Paint the entire inside of the dish with a coat of creamy white acrylic if your clay isn’t naturally white enough for your liking. Let it dry. -
Apply the Pink:
Mix a soft, dusty pink paint. Paint roughly half of the heart, starting from the top right curve and sweeping down diagonally towards the bottom point. Don’t worry about a perfect straight line; an organic, slightly curved line looks best here. -
Create the Speckles:
Dilute a tiny amount of brown paint with water so it is fluid. Dip an old toothbrush into this mixture. -
Flick the Paint:
Hold the toothbrush over the dish and run your thumb across the bristles to flick tiny droplets of brown paint onto the surface. Practice on a paper towel first to control the spray. -
Gild the Rim:
Using a fine paintbrush and metallic gold paint, carefully trace the very rim of the dish. Allow the gold to smudge slightly onto the textured edge for a rustic feel. -
Let Paint Cure:
Allow all paint layers to dry completely before moving to the final step. -
Seal It:
Apply a coat or two of glossy varnish or glaze over the entire dish. This seals the paint and gives it that finished ceramic shine.
Smooth Moves
To get a super smooth curve without fingerprints, try gently pressing the clay heart onto a rounded object (like a large lightbulb or bowl bottom) to dry.
Cracking Up?
If you see tiny cracks as the clay dries, mix a small amount of fresh clay with water to make a paste and fill them in before painting.
Place your finished dish on your dresser and enjoy the sweet pop of color it brings to your room


What Really Happens Inside the Kiln
Learn how time and temperature work together inside the kiln to transform clay into durable ceramic.
Cloud, Star, and Moon Magnets
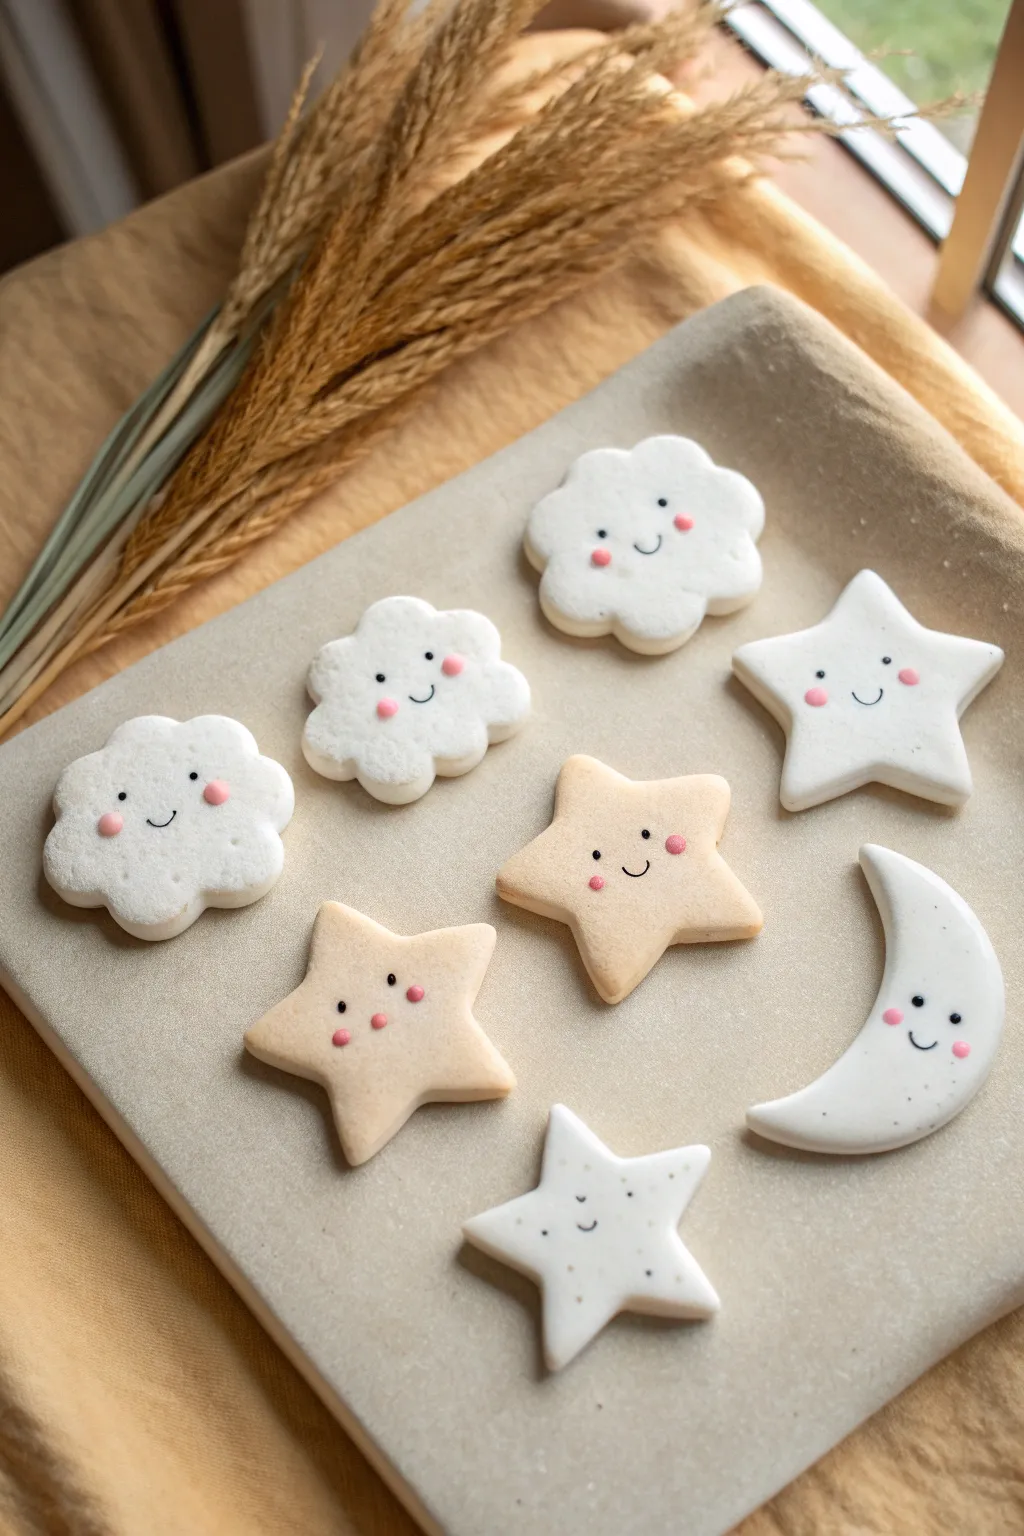
Bring a little piece of the heavens into your home with these adorable cloud, star, and moon clay magnets. Featuring soft matte finishes and sweet kawaii expressions, they add a touch of calm whimsy to any fridge or magnetic board.
Step-by-Step
Materials
- White polymer clay (oven-bake)
- Beige or biscuit-colored polymer clay
- Rolling pin or clay roller
- Cookie cutters: cloud, star, and crescent moon shapes
- Black acrylic paint or fine-point POSCA marker
- Pink acrylic paint or soft pastels
- Small dotting tool or toothpick
- Strong round magnets
- Superglue or E6000 adhesive
- Parchment paper and baking sheet
- Fine-grit sandpaper (optional)
- Glazing medium (matte or satin, optional)
Step 1: Shaping the Sky
-
Condition the Clay:
Start by warming the white polymer clay in your hands. Knead and fold it repeatedly until it is soft, pliable, and free of cracks. Do the same for a smaller amount of beige clay. -
Roll It Out:
Place the conditioned white clay on a smooth work surface or parchment paper. Use your roller to flatten it into an even sheet, aiming for a thickness of about 1/4 inch (6mm) to ensure the magnets are sturdy. -
Cut the Shapes:
Press your cloud, star, and moon cutters firmly into the white clay sheet. Wiggle them slightly before lifting to release the shape cleanly. -
Roll the Beige Clay:
Repeat the rolling process with your beige clay. Cut out a few star shapes from this color to add warmth and variety to your collection. -
Smooth the Edges:
Once all shapes are cut, use your finger to gently tap and smooth the raw edges. This softens the look and removes any sharp ridges left by the cutters.
Step 2: Baking and Refining
-
Prepare for Baking:
Arrange your clay pieces on a parchment-lined baking sheet, leaving a little space between each one so heat circulates evenly. -
Bake:
Bake the clay according to the manufacturer’s instructions on the package. Typically, this is around 275°F (135°C) for 15-30 minutes, but specific brands vary. -
Cool Down:
Allow the clay pieces to cool completely on the baking sheet before moving them. They are fragile when hot and harden as they cool. -
Sand (Optional):
If you notice any fingerprints or rough spots, lightly buff the surface with fine-grit sandpaper for that professional, ultra-smooth finish.
Clean Clay Tip
White clay picks up dust easily. Wipe your hands and work surface with a baby wipe or rubbing alcohol before handling the white clay to keep it pristine.
Step 3: Bringing Them to Life
-
Plan the Faces:
Before painting, visualize where the faces will go. Aim for the lower center of clouds and stars, and the center curve of the moon. -
Paint the Eyes:
Dip a small dotting tool or the blunt end of a toothpick into black acrylic paint. Carefully dot two small, wide-set eyes onto each shape. Keep them tiny for maximum cuteness. -
Draw the Smiles:
Using a very fine detail brush or a fine-point marker, draw a tiny ‘u’ shape between the eyes for a smile. I specifically like to check that the ink is fully dry before moving on to prevent smudging. -
Add Cheeks:
Dip a fresh dotting tool into pink paint. Place a gentle pink dot on either side of the smile, just under the eyes. Alternatively, brush on a tiny bit of shaved pink pastel dust for a softer, airbrushed look. -
Add Speckles (Optional):
For the white stars, you can add a subtle texture by dipping an old toothbrush in diluted grey or metallic paint and flicking tiny speckles onto the surface.
Make It Sparkle
Mix a pinch of fine translucent glitter into your white clay before rolling it out. It gives the clouds and moon a subtle, magical shimmer without being messy.
Step 4: Final Assembly
-
Seal (Optional):
If you want to protect the painted faces, apply a thin coat of matte varnish. Avoid glossy finishes if you want to replicate the soft, stone-like look in the photo. -
Attach Magnets:
Flip the clay pieces over. Apply a dab of strong adhesive (like E6000) to the back center of each shape. -
Secure and Dry:
Press a round magnet into the glue. let them cure face-down for at least 24 hours to ensure the bond is permanent.
Now you have a charming set of sky friends ready to brighten up your magnetic surfaces
Mini Mushroom Pals
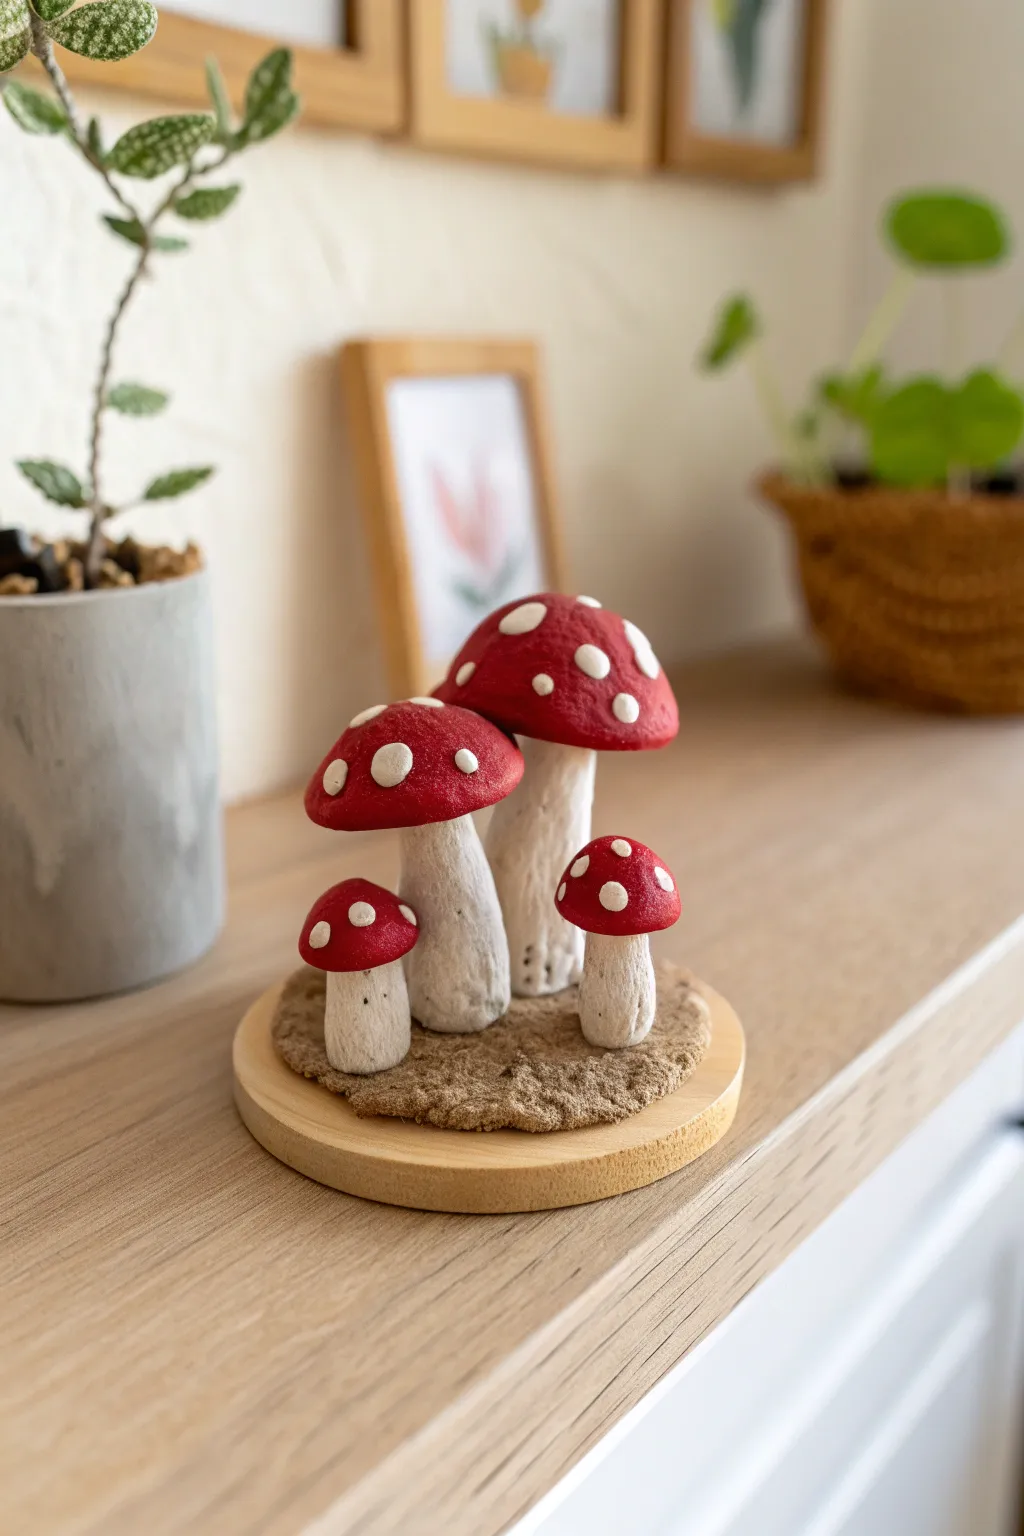
Bring a touch of forest magic indoors with this adorable cluster of red agaric mushrooms. Mounted on a wooden base with textured clay “earth,” these four little fungi feature classic red caps and rustic, textured stems perfect for a beginner sculptor.
Step-by-Step Guide
Materials
- Air-dry clay (white or light grey)
- Acrylic paints (bright red, white, beige/cream, dark brown)
- Small wooden disc (approx. 3-4 inch diameter)
- Clay sculpting tools (needle tool, ball stylus)
- Aluminum foil
- Paintbrushes (detail brush, medium flat brush)
- Toothpicks or crafting wire (for armature)
- Mod Podge or clear matte varnish
- Texture tool or clean old toothbrush
- Strong craft glue
Step 1: Sculpting the Stems
-
Prepare the armatures:
Cut four pieces of toothpick or wire to varying lengths to serve as the core for your mushrooms. You need one tall, one medium, and two quite short pieces. -
Form the clay logs:
Take a small ball of air-dry clay and roll it into a thick log shape. Gently push your wire armature into the center of the log. -
Shape the stems:
Refine the shape of the stem, making it slightly wider at the base where it will meet the ground. Repeat this for all four stems, varying their thicknesses slightly for a natural look. -
Add texture:
Using a needle tool or a stiff bristled brush, scratch vertical lines up and down the stems. This mimics the fibrous texture of real mushroom stalks.
Step 2: Creating the Caps
-
Roll the cap bases:
Roll four balls of clay corresponding to the sizes of your stems. Flatten the bottom of each ball slightly and shape the top into a smooth dome. -
Attach caps to stems:
Score the top of each stem and the underside of each cap with a needle tool. Add a dab of water or slip, then press the cap firmly onto the stem/armature. Smooth the seam gently if needed, though a distinct separation looks nice here. -
Refine the shapes:
Adjust the angle of the caps so they aren’t all perfectly straight—titling one slightly gives it personality. Let the mushrooms dry completely, often 24-48 hours depending on brand.
Natural Texture
For realistic stems, don’t smooth the clay perfectly. Use a crumpled piece of aluminum foil to gently press against the wet stems to create organic wrinkles.
Step 3: Base and Assembly
-
Prepare the base:
Spread a thin, uneven layer of fresh clay over the center of your wooden disc, leaving a clean rim of wood visible around the edge. -
Texturize the ground:
While the clay base is wet, dab it repeatedly with a crumpled ball of aluminum foil or an old toothbrush to create a rough, earthy soil texture. -
Plant the mushrooms:
If your mushrooms are dry, use strong craft glue to adhere them into the wet base clay. If everything is still wet, you can blend the base of the stems directly into the ground clay.
Mossy Vibes
Glue tiny bits of dried craft moss or green flocking powder around the base of the stems after painting for a true forest floor effect.
Step 4: Painting and Details
-
Paint the stems:
Mix white paint with a tiny drop of brown to create a creamy off-white. Paint the stems entirely, getting into the textured grooves. -
Paint the caps:
Apply a coat of bright red acrylic paint to the mushroom caps. You might need two layers to get a solid, opaque red. -
Add the dots:
Once the red is dry, dip the back end of a paintbrush or a ball stylus into white paint. Dot different sizes of circles unevenly across the red caps. -
Paint the soil:
Paint the textured base clay with a mix of dark brown and beige. I like to do a dark wash first, then dry-brush a lighter brown on top to highlight the bumps. -
Seal the project:
Finish with a coat of matte varnish or Mod Podge to protect your paint and give the piece a unified finish.
Place your tiny mushroom family on a shelf near a potted plant for the perfect woodland display

TRACK YOUR CERAMIC JOURNEY
Capture glaze tests, firing details, and creative progress—all in one simple printable. Make your projects easier to repeat and improve.
Tiny Frogs on Lily Pads
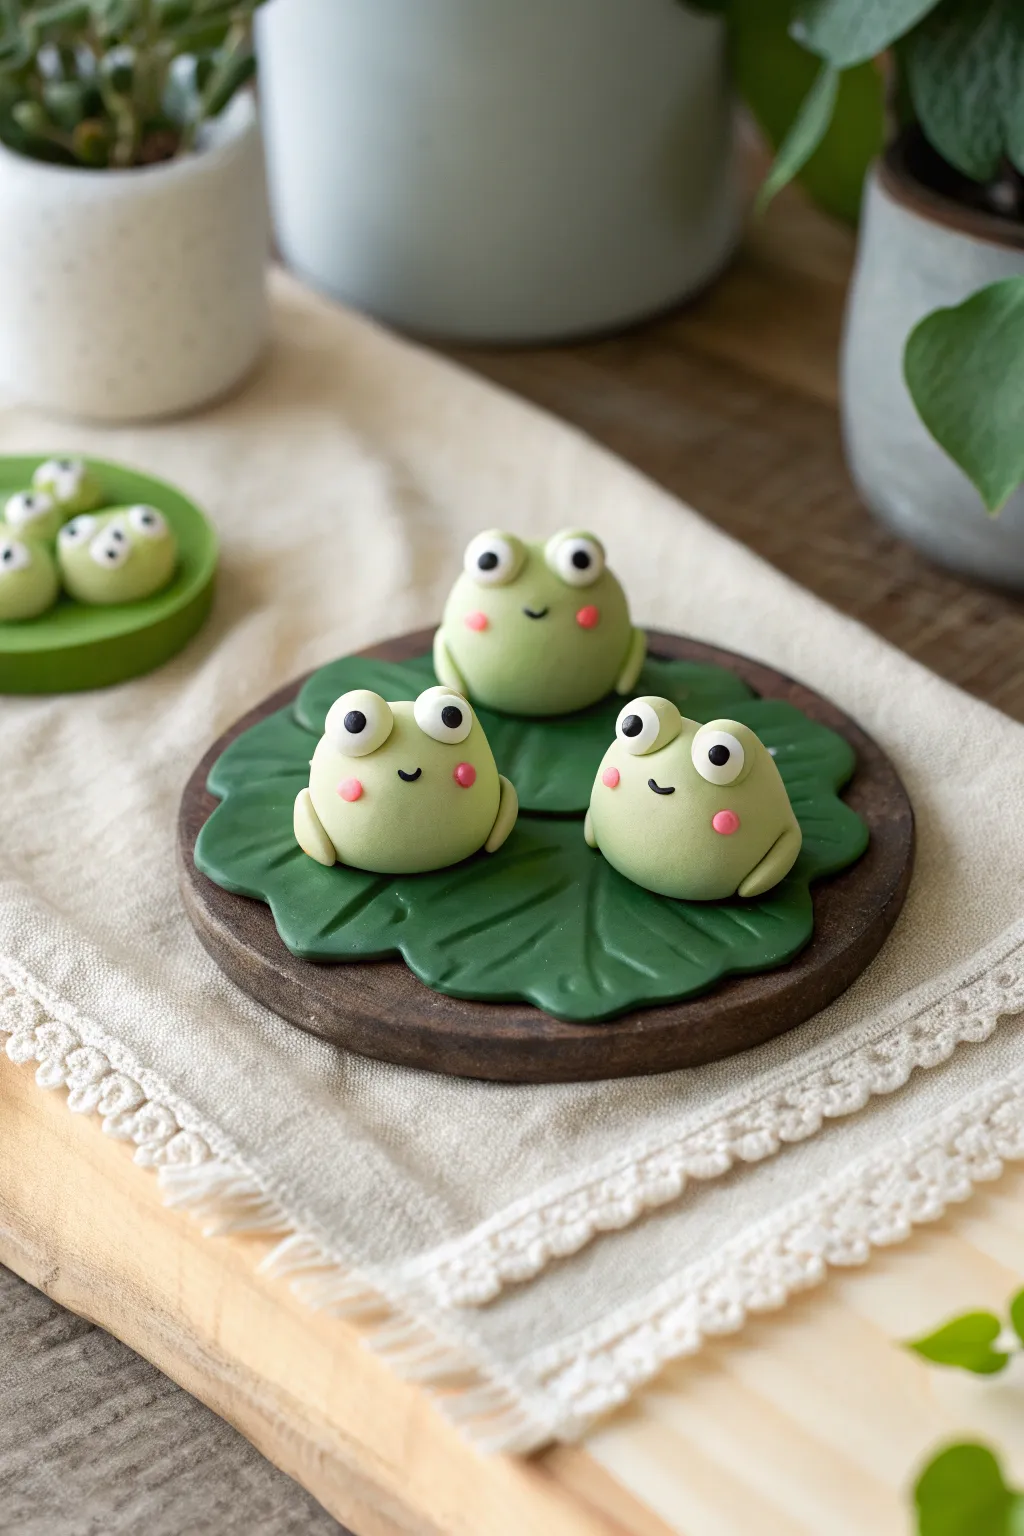
These delightfully chubby frogs resting on a luscious lily pad make for a charming desk companion or a sweet handmade gift. The perfectly round bodies and simple features make this an ideal project for beginners mastering smooth shapes.
Detailed Instructions
Materials
- Light green polymer clay (for frogs)
- Dark green polymer clay (for lily pad)
- White and black polymer clay (for eyes/mouth)
- Pink polymer clay (for cheeks) or soft pastels
- Rolling pin or acrylic roller
- Ball tool or rounded sculpting tool
- Needle tool or toothpick
- Small circle cutter (optional)
- Small wooden round coaster (as a base)
- Clay adhesive or liquid clay (optional)
- Oven (for baking according to clay package)
Step 1: Shaping the Lily Pad Base
-
Prepare the base color:
Start by conditioning your dark green clay until it is soft and pliable. Roll it into a ball and then use your acrylic roller to flatten it into a rough, irregular circle about 3-4 inches wide. -
Texture the leaf:
Place the flattened clay onto your wooden coaster base. Using a needle tool or toothpick, gently gently draw veins radiating from the center to the edges. Don’t cut all the way through; just impress the lines. -
Create the edges:
To give the lily pad a natural look, pinch and lift the edges slightly in a few places to create a wavy, organic rim. Cut a small ‘V’ shape out of one side if you want that classic lily pad silhouette.
Step 2: Sculpting the Frog Bodies
-
Roll the main shapes:
Take your light green clay and roll three smooth balls. Make one slightly larger for the ‘leader’ frog in the back. Aim for about 1 inch in diameter for the main bodies. -
Flatten the bottoms:
Gently tap the bottom of each sphere against your work surface. You want them to have a flat base so they sit securely without rolling away, but keep the top perfectly round. -
Position the frogs:
Place your three green mounds onto the dark green lily pad. I like to arrange them in a triangle formation so each face is visible.
Sticky Fingerprints?
If you see fingerprints on your frogs, lightly brush the raw clay with a tiny amount of baby oil or cornstarch before baking to smooth them out flawlessly.
Step 3: Adding Charming Details
-
Make the eye sockets:
Using a ball tool (or the rounded end of a paintbrush handle), create two distinct indentations on the top of each frog head where the eyes will sit. -
Form the eyes:
Roll tiny balls of white clay. Place them into the indentations you just made. They should bulge out slightly to give that buggy-eyed frog look. -
Add pupils:
Roll extremely tiny specks of black clay. Press them gently onto the center of the white eye balls. The direction or size of the pupil can change their expression entirely. -
Create the rosy cheeks:
Take tiny amounts of pink clay and flatten them into small discs. Press these gently onto the face, just below and slightly outside the eye area. -
Give them a smile:
Roll a very thin ‘snake’ of black clay for the mouth. Curve it into a gentle ‘U’ shape and press it between the cheeks. Alternatively, you can paint this on after baking if the clay is too fiddly. -
Add the legs:
Roll two small oval logs of light green clay for each frog. Flatten them slightly and curb them around the bottom sides of the body to look like folded legs tucked underneath.
Garden Party
Use translucent clay for the lily pad edges to make them look more realistic, or add a tiny clay lotus flower in pink or white to sit beside your frogs.
Step 4: Finishing Up
-
Secure the parts:
If your clay feels dry, use a tiny dab of liquid clay or adhesive to help the legs and eyes stick firmly to the body before baking. -
Bake carefully:
Preheat your oven according to your polymer clay brand’s specific instructions. Place the wooden coaster with the clay directly on a baking sheet (if the wood is untreated and oven-safe) or bake the clay on parchment paper first and glue it to the wood later. -
Cool down:
Let the piece cool completely inside the oven with the door slightly ajar to prevent cracking from sudden temperature changes. -
Varnish optional:
For a wet look, you can add a glossy glaze to the eyes or the lily pad, leaving the frog skin matte for contrast.
Enjoy your durable little amphibian friends sitting peacefully on their leaf