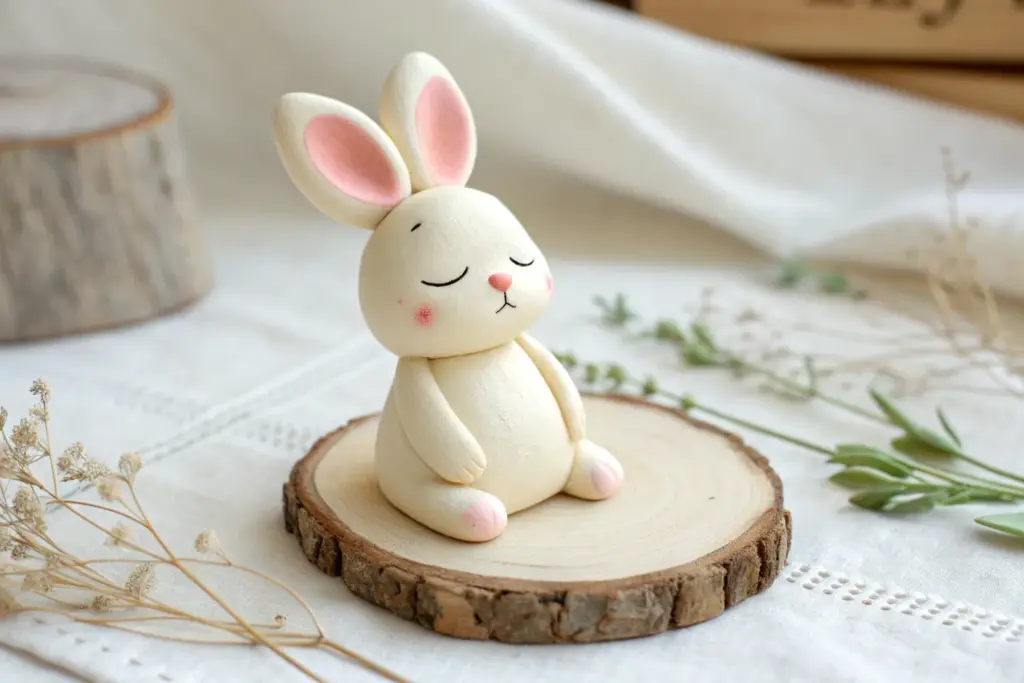
Whenever I need a low-pressure creative win, I grab plasticine clay because you can make something cute fast and keep tweaking it forever. These ideas are all about small, doable projects that feel charming on your desk, shelf, or craft table—no perfection required.
Classic Cute Animal Minis

These delightfully smooth, egg-shaped figurines capture the essence of a cat, panda, and chicken with minimalist charm. Perfect for beginners, this project focuses on achieving clean lines and simple geometric forms to create a totally adorable desk set.
Detailed Instructions
Materials
- Polymer clay or air-dry clay (Pink, White, Black, Yellow, Orange)
- Clean, smooth work surface or acrylic mat
- Pointed detailing tool or toothpick
- Ball stylus tool (small)
- Blade or plastic knife for cutting clay
- Wet wipes (essential for keeping white clay clean)
- Oven (if using polymer clay)
Step 1: The Pink Cat
-
Create the base:
Start with a generous ball of soft pink clay. Roll it in your palms until it creates a smooth, crack-free egg shape, slightly flattened at the bottom so it stands upright on its own. -
Add ears:
From the same pink clay, pinch off two tiny triangular pieces. Gently press them onto the top of the head, blending the back seam downward with your finger to attach them firmly. -
Sculpt the face:
Roll two microscopic balls of black clay for eyes and press them onto the face using your smallest ball stylus. I like to place them slightly wide apart for a cuter look. -
Detail the features:
Roll an incredibly thin snake of black clay. Cut tiny segments to create the whiskers and the inverted ‘Y’ shape for the nose and mouth, pressing them gently onto the pink surface.
Clean Hands Trick
White clay picks up lint instantly. Keep baby wipes or a scrap piece of ‘garbage clay’ nearby. Roll the garbage clay in your hands to pick up dust before touching the white panda.
Step 2: The Panda Bear
-
Form the body parts:
Clean your hands thoroughly. Create two spheres of white clay: a larger one for the body and a slightly smaller, flattened sphere for the head. -
Stack the pieces:
Place the head securely onto the body piece. If the clay is dry, you might need a tiny dab of water or liquid clay to help them bond. -
Add ears and limbs:
Roll four small balls of black clay. Attach two to the top of the head for ears, and two to the sides of the lower body for arms. -
Feet and buttons:
Add two oval-shaped black pieces at the very bottom front for feet. Then, place two tiny black dots vertically on the white belly for buttons. -
Create the eye patches:
Roll two small balls of black clay and flatten them into thin ovals. Press these onto the face, angled slightly downward. -
Finish the face:
Add tiny white dots inside the black eye patches for highlights. Finish with a small black nose and a thin black smile line.
Glazed Finish
Once baked and cooled, apply a coat of UV resin or glossy water-based varnish. This gives them a ceramic look and protects those tiny black facial details.
Step 3: The Little Chicken
-
Shape the body:
Using pale yellow clay, roll a smooth, low dome shape. It should look like the top half of a sphere or a gumdrop. -
Wing placement:
Mix a small amount of pink and orange clay (or use the pink from the cat) to make curved, wing-like shapes covering the sides of the yellow body. -
Make the crest:
Take a tiny bit of orange clay, roll it into a teardrop, and attach it to the very top of the head for the comb. -
Beak and eyes:
Press a small orange cone shape into the center of the face for a beak. Add two small black eyes on either side. -
Final smoothing:
Give all three figures a final inspection, gently smoothing out any fingerprints with a light touch or a drop of baby oil. -
Bake or dry:
Follow your specific clay package instructions for baking temperatures or drying times to harden your new friends.
Arranged together on a shelf or desk, these smooth little creatures bring a calming presence to your space


Tiny Food With Little Faces
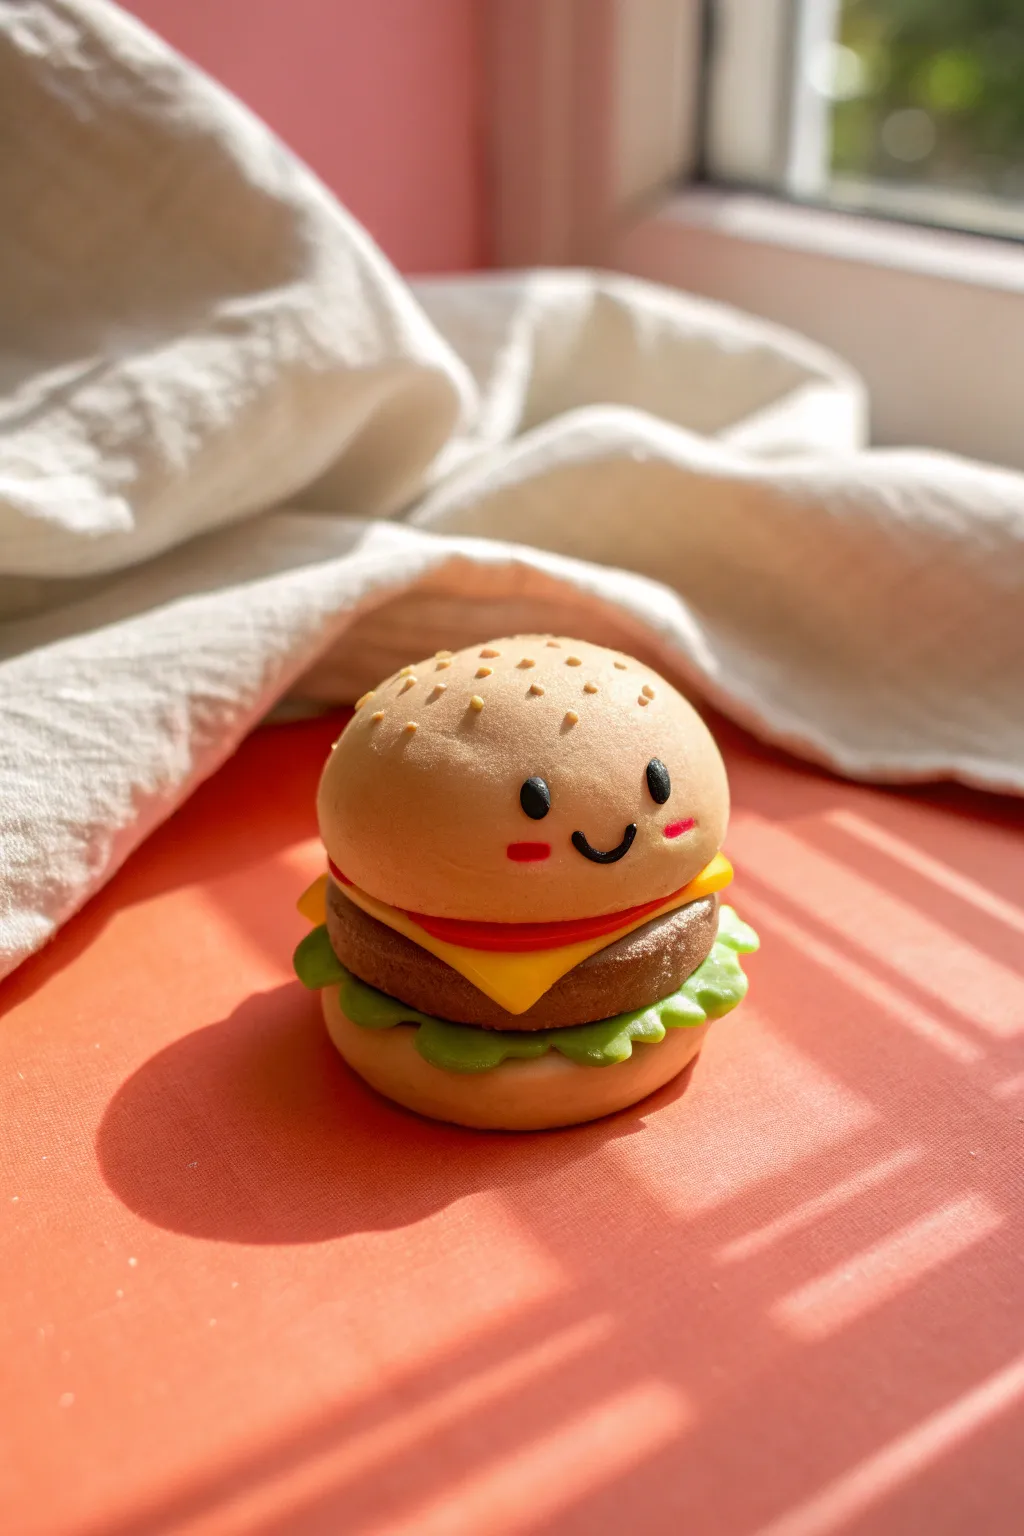
This adorable anthropomorphic hamburger features a classic sesame seed bun and a sweet little smile that brings it to life. Perfect for beginners, this project combines simple shaping techniques with playful character design for a charming desk companion.
Step-by-Step Guide
Materials
- Light tan or beige plasticine (for buns)
- Dark brown plasticine (for patty)
- Yellow plasticine (for cheese)
- Red plasticine (for tomato and blush)
- Green plasticine (for lettuce)
- Black plasticine (for eyes and mouth)
- Sculpting tools (needle tool, small ball tool)
- Rolling pin or smooth round marker
Step 1: Shaping the Buns
-
Prepare the dough color:
Start by conditioning your light tan clay until it is soft and malleable. You want a warm, baked-bread color, so mix in a tiny speck of orange or brown if your beige looks too pale. -
Shape the top bun:
Roll a medium-sized ball of tan clay, then gently press it onto your work surface. Dome the top with your fingers to create a smooth, rounded hemisphere shape for the classic bun top. -
Shape the bottom bun:
Create a slightly smaller ball of the same tan clay. Flatten this one into a thick disc with rounded edges to serve as the sturdy base of your burger. -
Add texture:
Using a soft brush or your finger, gently smooth out any fingerprints on both bun pieces before moving on to the fillings.
Clean Clay Tip
Work from lightest to darkest colors to avoid staining. If your tan clay gets dirty, clean your hands and tools with a baby wipe or alcohol swab immediately.
Step 2: Prepping the Fillings
-
Create the lettuce:
Take a piece of bright green clay and flatten it into a thin, irregular amoeba shape. It should be slightly wider than your bottom bun. -
Ruffle the edges:
Use a needle tool or toothpick to gently press and lift the edges of the green clay, creating a wavy, ruffled texture that mimics fresh lettuce leaves. -
Form the patty:
Roll a ball of dark brown clay and flatten it into a thick disc. I find texturing the sides slightly with a toothbrush gives it a realistic ‘cooked’ look. -
Make the cheese:
Roll out a thin sheet of yellow clay and cut a perfect square. Ensure the corners will drape slightly over the patty when stacked. -
Make the tomato slice:
Create a thin red disc, roughly the same diameter as the patty but much thinner. Smooth the edges so they look clean.
Make it a Charm
Insert a screw eye pin into the center of the top bun before baking (if using polymer clay) to turn this burger into a keychain or necklace pendant.
Step 3: Assembly and Face
-
Stack the base:
Place the ruffled lettuce on top of the bottom bun, pressing down gently in the center to secure it. -
Add the patty:
Center the brown patty on top of the lettuce layer. -
Melt the cheese:
Place the yellow square on top of the patty. Gently press the corners down so they look like they are beginning to melt over the meat. -
Add the tomato:
Place the red tomato disc on top of the cheese. -
Top it off:
Place the domed top bun on the stack. Press down very gently to adhere all layers without squashing the lettuce detail. -
Create the eyes:
Roll two tiny specks of black clay into balls. Press them onto the front of the top bun, spacing them widely for that cute ‘kawaii’ proportion. -
Add the smile:
Roll an incredibly thin snake of black clay. Cut a small ‘U’ shape and press it between the eyes to form a happy smile. -
Apply blush cheeks:
Take tiny bits of red clay and press them into small ovals just under the eyes to give your burger a rosy glow. -
Seed the bun:
Roll minuscule bits of lighter tan or yellow clay into rice shapes. Press these randomly over the top of the bun to create sesame seeds.
Your cheerful little burger is now ready to brighten up any shelf or desk with its winning smile


Easy Snails and Turtles
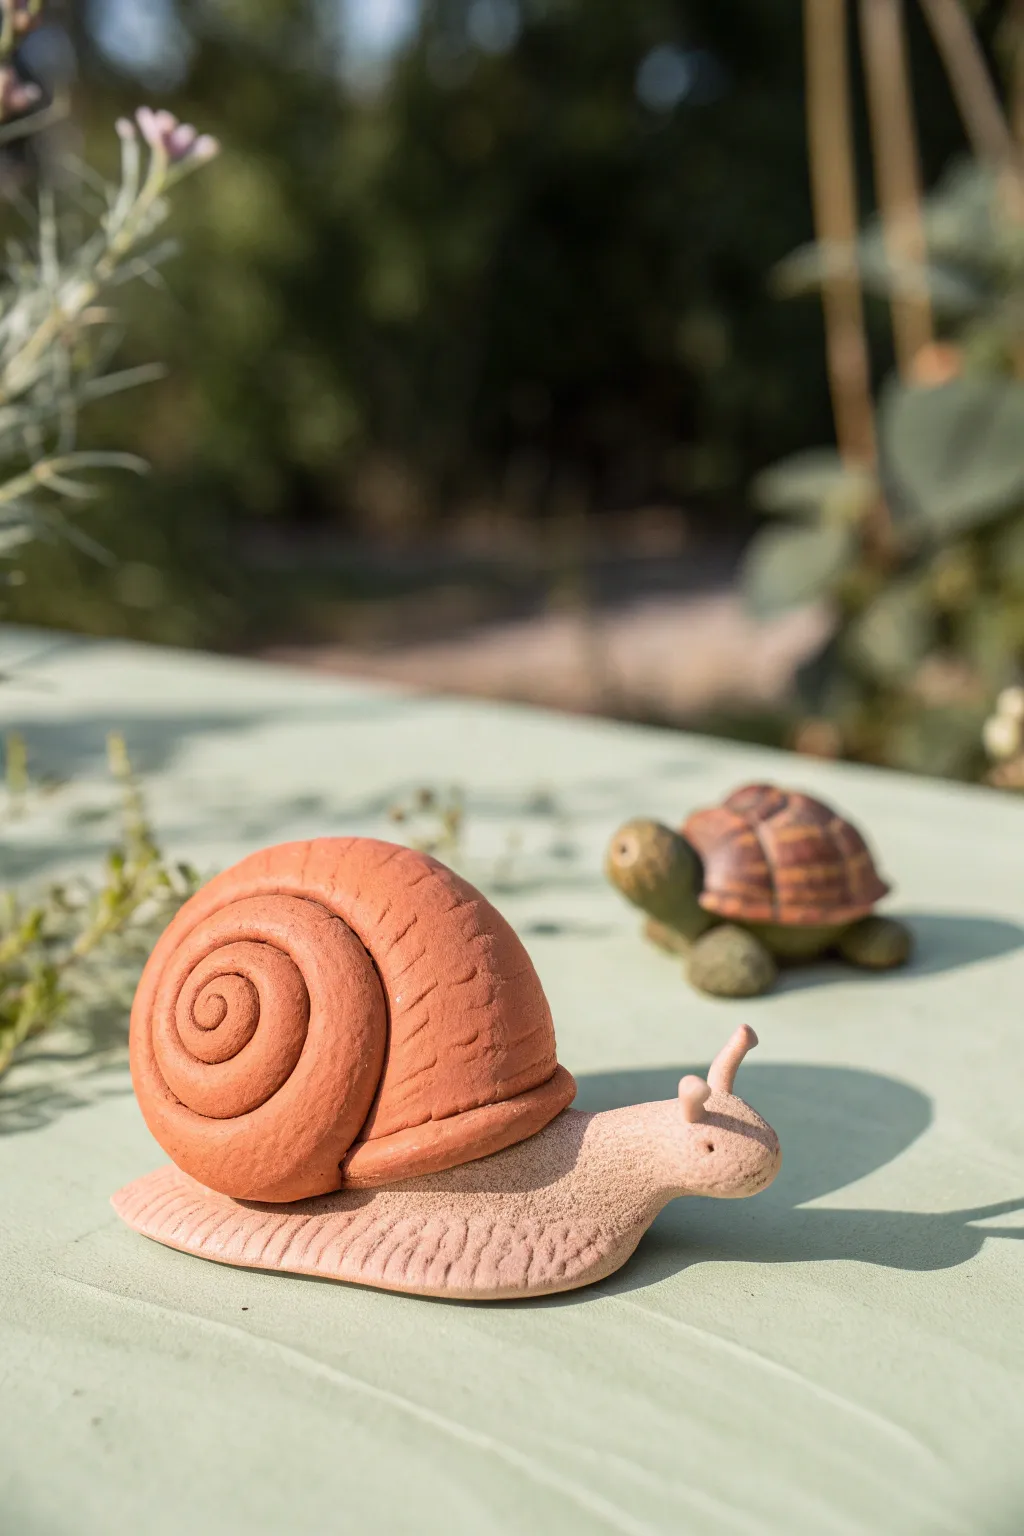
Bring your garden table to life with these charming, textured creatures made from earthy-toned clay. This project focuses on the large, spiral-shelled snail in the foreground, with bonus steps to create its little turtle companion for a complete set.
How-To Guide
Materials
- Terracotta-colored modeling clay or polymer clay
- Beige or sand-colored modeling clay
- Olive green modeling clay
- Dark brown modeling clay
- Clay sculpting tools (needle tool, small spatula)
- Small ball-ended styling tool
- Texture sponge or rough fabric
- Aluminium foil (optional for bulk)
- Baking sheet and oven (if using polymer clay)
Step 1: Sculpting the Snail Body
-
Prepare the base:
Start with a large chunk of beige or sand-colored clay. Knead it until it’s pliable and smooth, warming it up in your hands. -
Form the slug shape:
Roll the clay into a thick log, slightly tapering on one end for the tail and keeping the other end bulbous for the head. Flatten the bottom gently so it sits stable on your work surface. -
Curve the neck:
Bend the thicker ‘head’ end upwards slightly, giving the snail an inquisitive posture as if it’s looking around. -
Add texture:
This is a crucial step for realism. Use a needle tool or a stiff brush to gently scratch vertical lines along the sides of the body, mimicking the wrinkled skin of a real snail. -
Create the foot:
Flatten the very edges of the bottom of the body (the ‘foot’) and use a small fork or comb tool to press distinct ridges all around the perimeter. -
Make the eyestalks:
Roll two small, thin cylinders of beige clay. Attach them to the top of the head, blending the clay at the join so they don’t fall off. -
Add detail:
Use a small dotting tool to poke two tiny eyes just below the stalks or at the tips, depending on your preference for cuteness.
Weight Management
If the snail shell feels top-heavy, hollow out the thickest part of the clay coil before winding, or use a foil core to keep it lightweight.
Step 2: Creating the Spiral Shell
-
Roll the main coil:
Take a large amount of terracotta-colored clay. Roll it into a very long, tapering snake. Make sure the thick end is quite substantial. -
Wind the spiral:
Starting from the thinnest tip, begin rolling the snake into a tight coil. Unlike a flat lollipop, overlap the coils slightly as you wind so the shell becomes three-dimensional and domed. -
Texture the shell:
Before attaching it, use a modeling tool to press shallow, curved indentations across the coils. This gives the appearance of growth ridges. -
Attach to the body:
Place the finished shell onto the back of the beige body. Press it down firmly to ensure a good bond. I like to score both surfaces before joining to make it extra secure. -
Final snail touches:
Check the balance of your snail. If the shell is too heavy, slightly flatten the body’s base further to prevent tipping.
Garden Display
Coat your finished (and baked/cured) pieces with a matte outdoor varnish. They look adorable hiding in flower pots or on patio railings.
Step 3: Bonus: The Little Turtle
-
Form the turtle body:
Roll four small balls of olive green clay for legs and one slightly larger ball for the head. Press them together into a star shape. -
Texture the skin:
Dab the green clay gently with a coarse sponge or a crumpled ball of foil to create a bumpy, reptilian skin texture. -
Make the shell base:
Create a dome shape using dark brown clay. You can use a ball of foil as a core if you want to save clay. -
Add shell plates:
Flatten small pieces of reddish-brown clay and press them onto the dome to create the scutes (shell plates). Use a tool to carve deep lines between them for separation. -
Finish the eye:
Using the tip of a small straw or a hollow tool, press a small circle into the side of the turtle’s head for an eye.
Place your duo together on a windowsill or garden ledge to enjoy their slow and steady company


Chubby Dino Desk Buddies
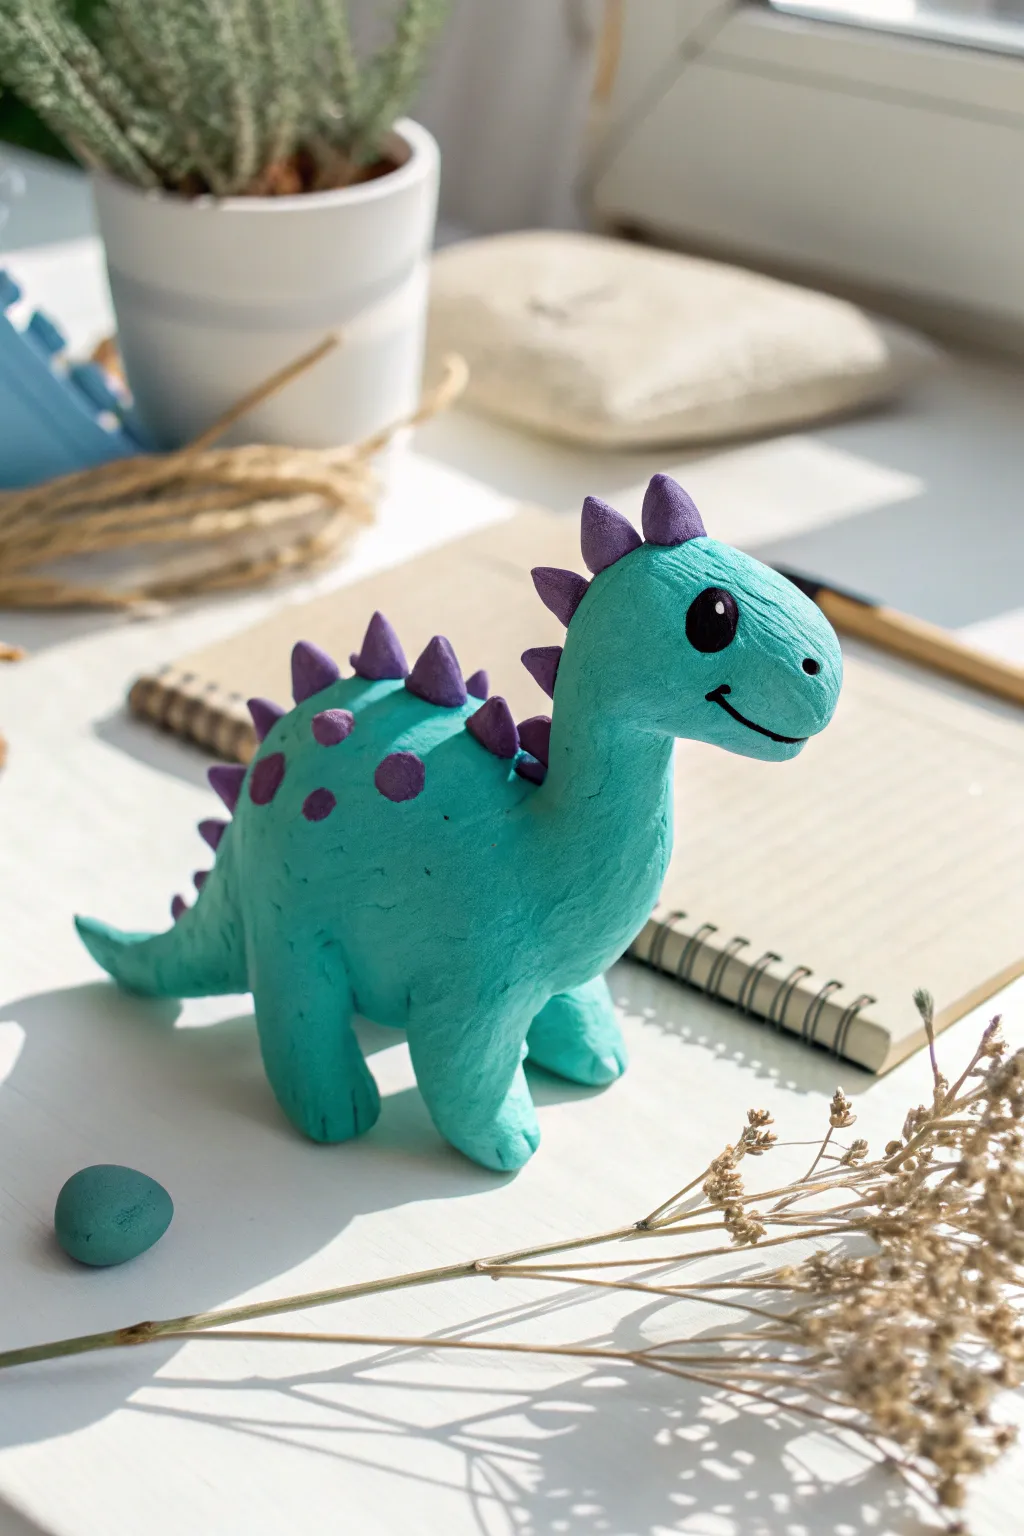
This adorable teal dinosaur makes for a cheerful desk companion with its chunky legs and purple spikes. The soft, rounded shapes and friendly expression are perfect for beginners looking to practice simple animal forms.
Step-by-Step Tutorial
Materials
- Teal plasticine clay
- Purple plasticine clay
- Black plasticine clay
- White or light grey plasticine clay (tiny amount for eye highlight)
- Modeling tools (plastic knife or spatula)
- Toothpick or blending tool
Step 1: Shaping the Body
-
Prepare the main body:
Start with a large ball of teal clay. Roll it between your palms to warm it up, then gently elongate it into a thick, chubby oval shape. This will become the torso of your dinosaur. -
Form the neck and head:
Pinch one end of the oval and gently pull the clay upwards and forwards to create a thick neck. Mold the end into a rounded, bulbous head shape, ensuring it stays connected smoothly to the body without a sharp seam. -
Create the tail:
At the opposite end of the body, pull the clay out into a shorter, tapered tail. Curve it slightly upwards or to the side for a playful look. -
Checking the silhouette:
Set the figure down on your work surface. Smooth out the transition areas between head, neck, body, and tail with your thumb to ensure a flowing, organic shape.
Smooth Operator
If your plasticine shows too many fingerprints, lightly dip your finger in water (or baby oil for oil-based clay) and gently rub the surface to polish it smooth.
Step 2: Legs and Stance
-
Make the leg components:
Roll four equal-sized balls of teal clay. These should be substantial enough to support the chubby body. -
Shape into cylinders:
Roll each ball into a short, stout cylinder. These don’t need to be perfect; a slightly organic, wider-at-the-top shape works well. -
Attach the legs:
Press the legs firmly onto the underside of the body. Position two near the front (under the chest area) and two near the back hips. -
Blend the seams:
Use a modeling tool or your fingertip to drag the clay from the top of the legs onto the body, blending the seams until they disappear and the legs look like they grew naturally from the torso. -
Add toe details:
Using a plastic knife or toothpick, press two or three small indentations into the front bottom of each foot to suggest toes. -
Test stability:
Gently press the dinosaur down onto the table to flatten the bottoms of the feet slightly, ensuring it stands upright on its own without tipping.
Prehistoric Party
Make a few dinosaurs in different colors like orange or lime green. You can vary the spikes by making them round nubs instead for a completely different species.
Step 3: Spikes and Spots
-
Make the spikes:
Take your purple clay and roll several small balls of varying sizes. Pinch each ball into a triangular, cone-like shape to form the spikes. -
Attach dorsal spikes:
Starting from the top of the head and working down to the tail, press the purple cones onto the dinosaur’s back. Place the largest spikes in the middle of the back and use smaller ones near the head and tail tip. -
Create decorative spots:
Roll tiny balls of purple clay and flatten them into discs. Press these randomly onto the sides of the dinosaur’s body for added texture and color contrast.
Step 4: Face and Finishing Touches
-
Carve the mouth:
Use a sharp tool or the edge of a plastic knife to carve a curving smile line into the side of the snout. Deepen the cut slightly at the corner for a happier expression. -
Add the eye sockets:
Press a small indentation on the side of the head where the eye will go. This helps seat the eye securely. -
Place the eye:
Roll a small ball of black clay and press it into the indentation. Gently flatten it so it doesn’t bulge out too much. -
Add the sparkle:
Take a microscopic speck of white clay and place it near the top edge of the black eye. I find this tiny reflection really brings the character to life. -
Nostril detail:
Use a toothpick to poke a small nostril hole near the front of the snout, just above the smile line. -
Surface smoothing:
Give the entire figure a final once-over. Lightly rub out any accidental fingerprints, leaving a nice matte finish on your clay.
Now you have a charming prehistoric pal ready to guard your notebooks and pens

The Complete Guide to Pottery Troubleshooting
Uncover the most common ceramic mistakes—from cracking clay to failed glazes—and learn how to fix them fast.
Sweet Little Monster Characters
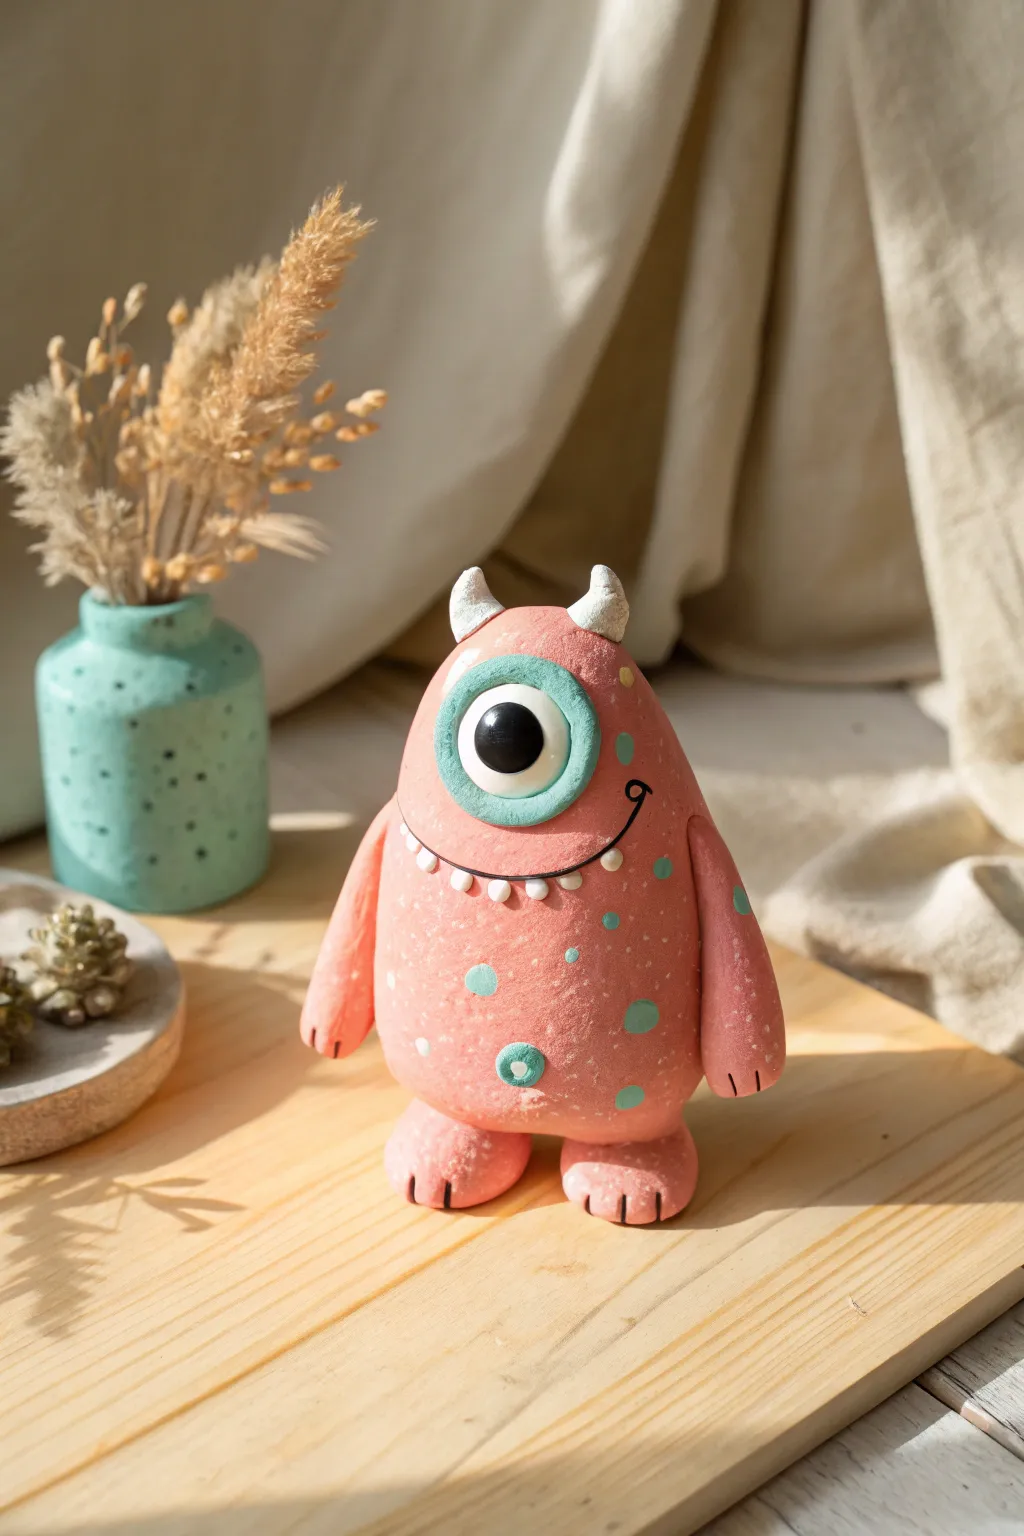
This adorable, one-eyed monster friend brings a pop of color and whimsy to any shelf or desk. With its pastel pink body, teal accents, and charmingly simple smile, this project is perfect for sculptors of all skill levels.
Detailed Instructions
Materials
- Polymer clay or air-dry clay (Pink, Teal/Light Blue, White, Black)
- Clay sculpting tools (dotting tool, needle tool)
- Acrylic rolling pin
- Aluminum foil (for armature)
- Black acrylic paint (optional for smile)
- Soft brush (for texture)
- Gloss glaze (optional)
Step 1: Body & Base
-
Create the core:
Crumple a small piece of aluminum foil into a pear shape. This saves clay and keeps your monster lightweight. Tightly compact it so it’s firm. -
Cover the form:
Condition your pink clay by kneading it until warm and pliable. Flatten it into a sheet and wrap it completely around the foil core, smoothing out any seams with your thumb until the surface is uniform. -
Shape the silhouette:
Gently roll the clay-covered form on your work surface to create a smooth, tapered egg shape. The bottom should be slightly wider and flatter so the monster stands upright securely. -
Add texture:
Before adding details, tap a stiff-bristled toothbrush or a crumpled ball of aluminum foil gently all over the pink surface. This gives the skin a lovely, organic stone-like texture.
Sticky Situation
Is your clay getting fingerprints? Lightly dust your fingertips with cornstarch before smoothing. This prevents prints and helps clay glide.
Step 2: Facial Features
-
Make the eye socket:
Roll a small ball of teal or light blue clay and flatten it into a thick disc. Place this centered near the top third of the body for the eye background. -
Form the eyeball:
Roll a smaller ball of white clay. Press it firmly into the center of the teal disc. It should bulge out slightly, giving that classic cartoon pop. -
Add the pupil:
Place a tiny black clay circle in the center of the white eyeball. Add a minuscule dot of white clay on the black pupil for a ‘sparkle’ reflection, which brings the character to life. -
Carve the mouth:
Use a needle tool or clay knife to carefully score a wide, curved U-shape for the smile. I find it helpful to mark the corners first to keep it symmetrical. -
Inlay the smile:
Roll a very thin snake of black clay and press it gently into the groove you just carved. Alternatively, you can paint this line after baking if you prefer precision. -
Give him teeth:
Roll tiny, rice-sized pieces of white clay. Attach them under the black smile line, spacing them slightly apart for a friendly, goofy expression.
Step 3: Limbs & Horns
-
Shape the feet:
Form two balls of pink clay and flatten them slightly into ovals. Press three indentations into the front of each to suggest toes. -
Attach the feet:
Score the bottom of the body and the tops of the feet slightly for better adhesion, then press the body onto the feet. Ensure the figure still balances. -
Create arms:
Roll two sausage shapes of pink clay, tapering one end of each. These will be the arms. -
Attach the arms:
Press the thicker end of the arms onto the sides of the body, blending the clay smoothly at the shoulder connection point so it looks seamless. -
Define the hands:
Use a knife tool to mark two small lines at the end of each arm to create simple fingers. -
Sculpt the horns:
Create two small cones from white clay. Give them a slight curve if you want extra character. -
Mount the horns:
Place the horns on top of the head, spaced widely apart. Blend the base of the horns slightly into the head or press them down firmly to secure them.
Pro Tip: Eye Spy
For a perfect eye ‘ring’, use a circular cutter or a pen cap to cut the teal clay disc before attaching the white eyeball.
Step 4: Final Details
-
Apply polka dots:
Roll very small balls of teal clay. Flatten them onto the body randomly. Vary the sizes for a more natural look. -
Add micro-details:
If you like, add a few tiny white specks or smaller teal dots in between the larger spots to fill empty space without overcrowding. -
Bake or dry:
If using polymer clay, bake according to the package instructions (usually 275°F/135°C for 15-30 minutes). If using air-dry clay, allow it to sit undisturbed for 24-48 hours.
Place your little monster on a shelf where its goofy grin can greet you every day
Mini Fruit and Veggie Friends
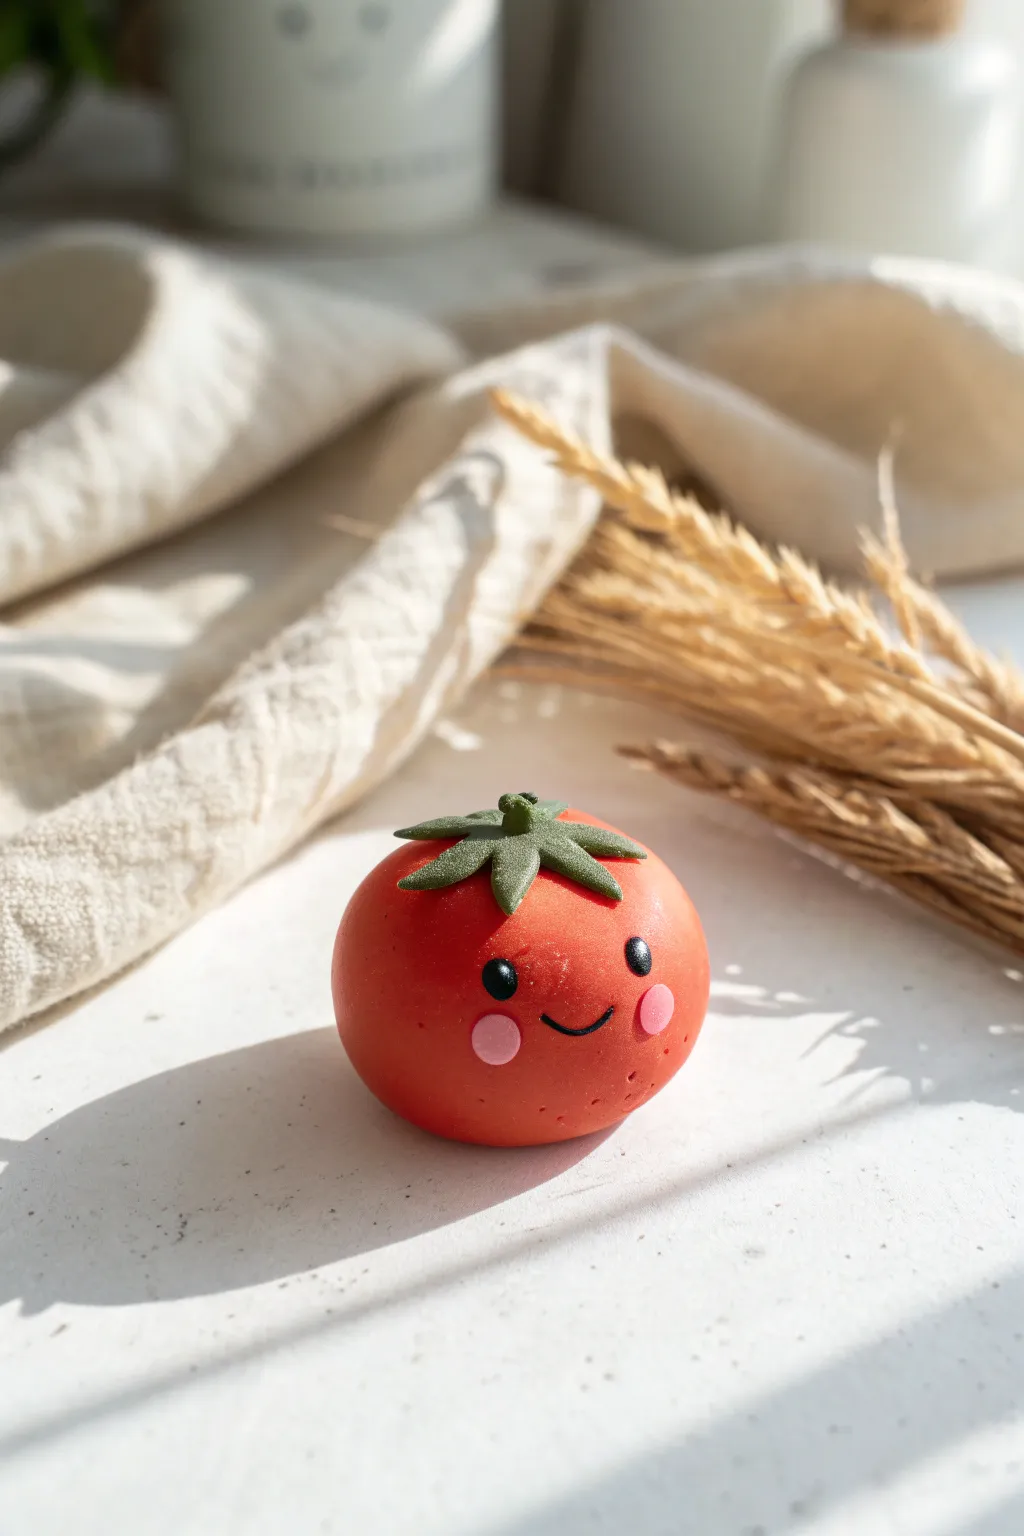
Create a cheerful little companion for your desk or kitchen with this adorable plasticine tomato. Its bright red body and sweet, simple face make it a perfect beginner project that radiates happiness.
Step-by-Step
Materials
- Red plasticine clay
- Green plasticine clay
- Black plasticine clay
- Pink plasticine clay
- Needle tool or toothpick
- Ball stylus tool (optional)
- Clean work surface (acrylic slab or wax paper)
Step 1: The Body Base
-
Prepare the Red Clay:
Begin by taking a chunk of red plasticine roughly the size of a golf ball. Knead it thoroughly in your hands to warm it up and make it pliable. -
Roll a Sphere:
Roll the warmed red clay between your palms to create a smooth, perfect sphere. If you see cracks, keep rolling until the heat from your hands smooths them out. -
Flatten slightly:
Place the sphere on your work surface and press down very gently on the top. You want a slightly flattened bottom so it sits stable without rolling away, giving it a natural tomato shape. -
Create Texture:
Using a dry toothbrush or a piece of texturing sponge, dab very lightly around the surface to break up the perfect smoothness, mimicking organic skin. Keep this subtle.
Clean Hands Tip
Red clay stains easily! Wash your hands thoroughly or use baby wipes before switching to the green or pink clay to keep colors bright and pure.
Step 2: Adding the Greens
-
Shape the Calyx:
Take a pea-sized amount of green clay and flatten it into a small pancake between your fingers. -
Cut the Leaves:
Use your needle tool or a small knife to cut about 5 or 6 triangular points into the flattened green circle, resembling a starburst pattern. -
Refine the Leaves:
Gently pinch the tips of these green stars to make them sharper. If you like, curve one or two tips slightly upward for a more dynamic look. -
Attach the Leaves:
Press the green star firmly onto the top center of your red tomato body. Smooth the center down so it bonds well. -
Add the Stem:
Roll a tiny little cylinder of green clay for the stalk. Press it vertically right into the center of the green leaves you just attached.
Step 3: Character Features
-
Position the Face:
Decide where the ‘front’ of your tomato is. Look for the smoothest side. -
Form the Eyes:
Roll two extremely small balls of black clay. They should be identical in size, no bigger than a peppercorn. -
Place the Eyes:
Press the black balls onto the upper half of the tomato face, spacing them apart widely for a cute, ‘kawaii’ aesthetic. -
Add Eye Highlights:
Take the tiniest speck of white clay (or use white acrylic paint later) and add a microscopic dot to the upper right corner of each black eye for life. -
Shape the Mouth:
Roll a very thin, short snake of black clay. Curve it gently into a ‘U’ shape smile using your needle tool. -
Attach the Smile:
Place the smile centered between and slightly below the eyes. Press it in gently with a tool rather than your finger to avoid smushing it. -
Create Cheeks:
Roll two small balls of pink clay, slightly larger than the eyes. -
Flatten Cheeks:
Squish the pink balls flat on your work surface first so they are thin discs. -
Apply Blush:
Press the flattened pink discs onto the tomato cheeks, just outside and below the eyes. -
Final Texture:
For a finishing touch, use your needle tool to poke a few very random, tiny dots around the skin for extra realism, similar to the reference photo.
Veggie Garden
Why stop at one? Use purple for an eggplant or orange for a carrot friend. Create a whole basket of produce pals with different expressions.
Now you have a charming tomato friend ready to brighten up any corner of your room


What Really Happens Inside the Kiln
Learn how time and temperature work together inside the kiln to transform clay into durable ceramic.
Cactus Ring Holder Sculpture
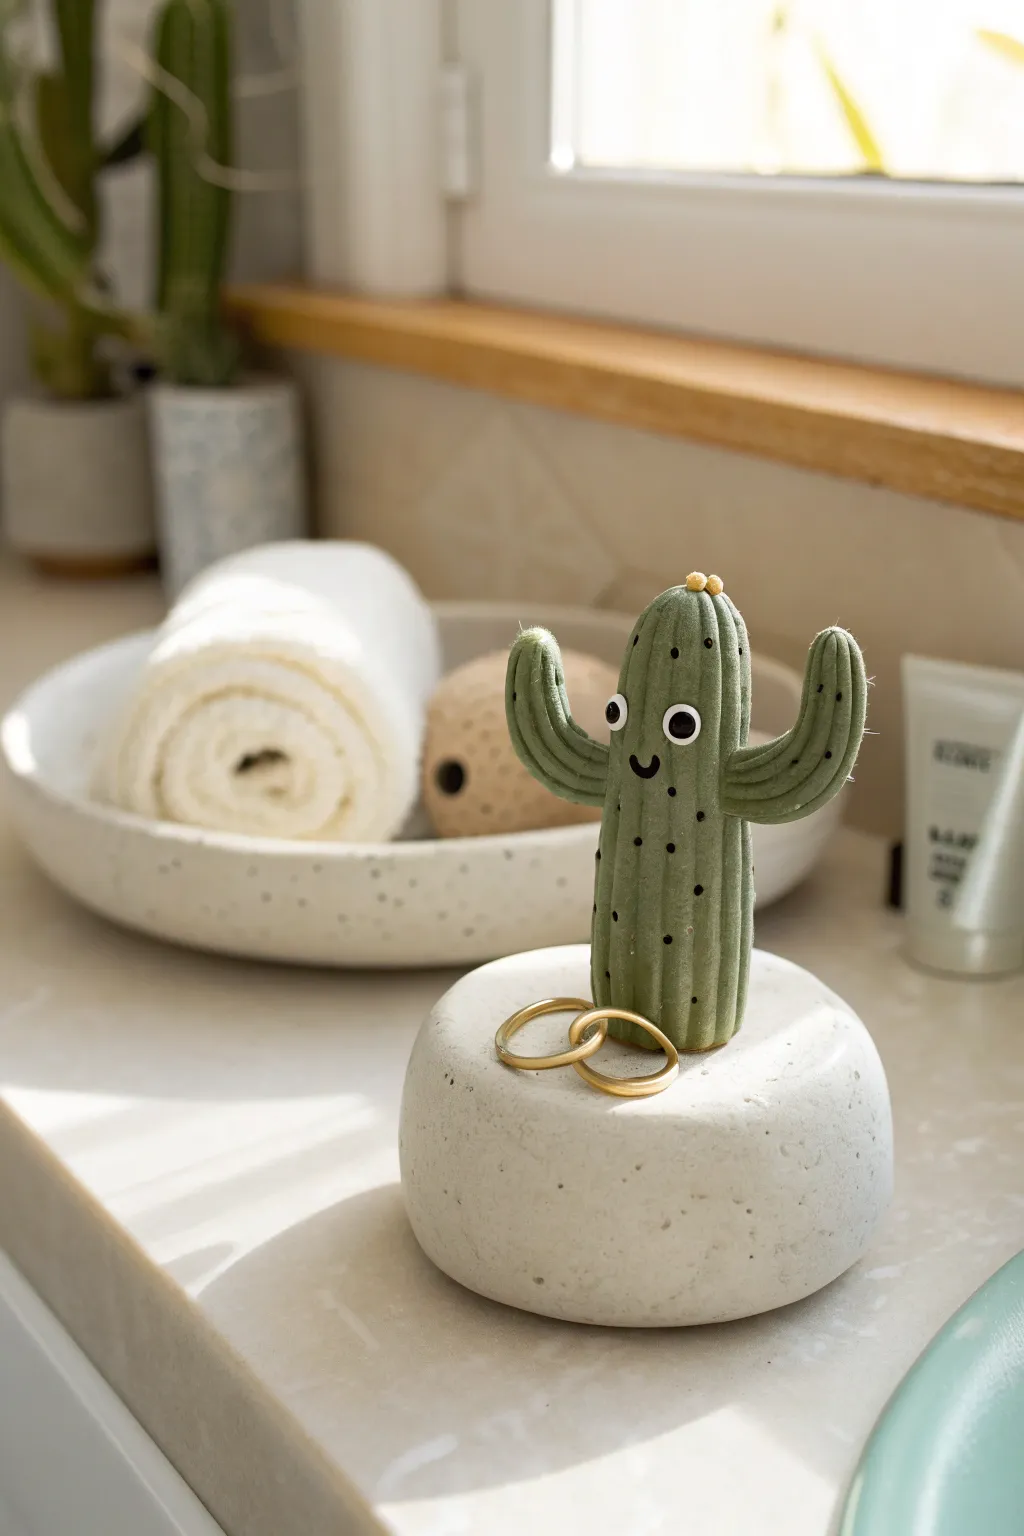
Add a touch of desert charm to your vanity with this adorable cactus ring holder. Perched on a faux-stone base, this little green friend features tiny spines and a sweet, smiling face to keep your jewelry safe and organized.
Detailed Instructions
Materials
- Green polymer clay
- White polymer clay
- Granite effect polymer clay (or white clay mixed with black pepper/sand)
- Black acrylic paint
- Small loose googly eyes (4-5mm)
- Superglue or heavy-duty craft glue
- Fine-point black permanent marker or detail brush
- Modeling tools (needle tool, small ball tool)
- Aluminum foil
- Oven for baking
Step 1: Forming the Base
-
Prepare the core:
Start by scrunching a small amount of aluminum foil into a tight, flattened disc shape to serve as the core of your base. This saves clay and ensures even baking. -
Cover the core:
Roll out a sheet of your stone-effect or white clay. If you don’t have granite clay, I like to knead a pinch of black pepper or craft sand into white clay for a speckled look. Wrap this sheet fully around the foil disc. -
Shape the stone:
Smooth out any seams with your fingers, shaping the clay into a rounded, organic pebble shape. Ensure the top is slightly flattened so the cactus can stand securely later. -
Texture the surface:
Take an old toothbrush or a crumpled ball of aluminum foil and gently press it all over the surface of the base to give it a realistic, porous stone texture.
Don’t Squish Him!
To avoid flattening the ribs while working, hold the cactus gently by the top and bottom, or mount it temporarily on a toothpick stuck into a scrap clay base.
Step 2: Creating the Cactus
-
Shape the main body:
Roll a cylinder of green clay, about the thickness of your thumb and roughly 2.5 inches tall. Round off the top into a smooth dome shape -
Form the arms:
Roll a smaller snake of green clay for the arms. Cut two pieces: one slightly longer than the other. Bend each piece into an ‘L’ shape. -
Attach the arms:
Press the bent arms onto the sides of the main body. Use a modeling tool to blend the clay at the seams until the connection is seamless and smooth. -
Add ribbing texture:
Using a needle tool or the back of a knife, gently press vertical lines running from the top of the cactus down to the bottom to create the ribbed texture of a saguaro. -
Create the spines:
Using a very fine-tipped black marker or a fine brightness of black paint, make tiny dots in vertical rows along the ribs. Keep them spaced out evenly.
Step 3: Details & Assembly
-
Make the flower:
Take a tiny amount of yellow or orange clay and roll three minuscule balls. Press these together at the very top of the cactus head to create a small bud. -
Connect to base:
Press the cactus firmly onto the center of your prepared stone base. You can use a drop of liquid clay or ‘Bake and Bond’ here for extra security. -
Bake the project:
Place your sculpture on a baking sheet and bake according to the specific instructions on your package of polymer clay. Let it cool completely before handling. -
Add the face:
Once the sculpture is cool, use a small dab of superglue to attach two small googly eyes to the upper part of the cactus. -
Draw the smile:
With a fine-point permanent marker or black paint, carefully draw a small, U-shaped mouth centered below the eyes.
Desert Bloom
Instead of a simple bud, create a full blooming flower using tiny teardrop shapes of pink clay arranged in a circle for a pop of bright color on top.
Your prickly little friend is now ready to hold your favorite rings and brighten up your dresser
Blob-Style Toothbrush Stand
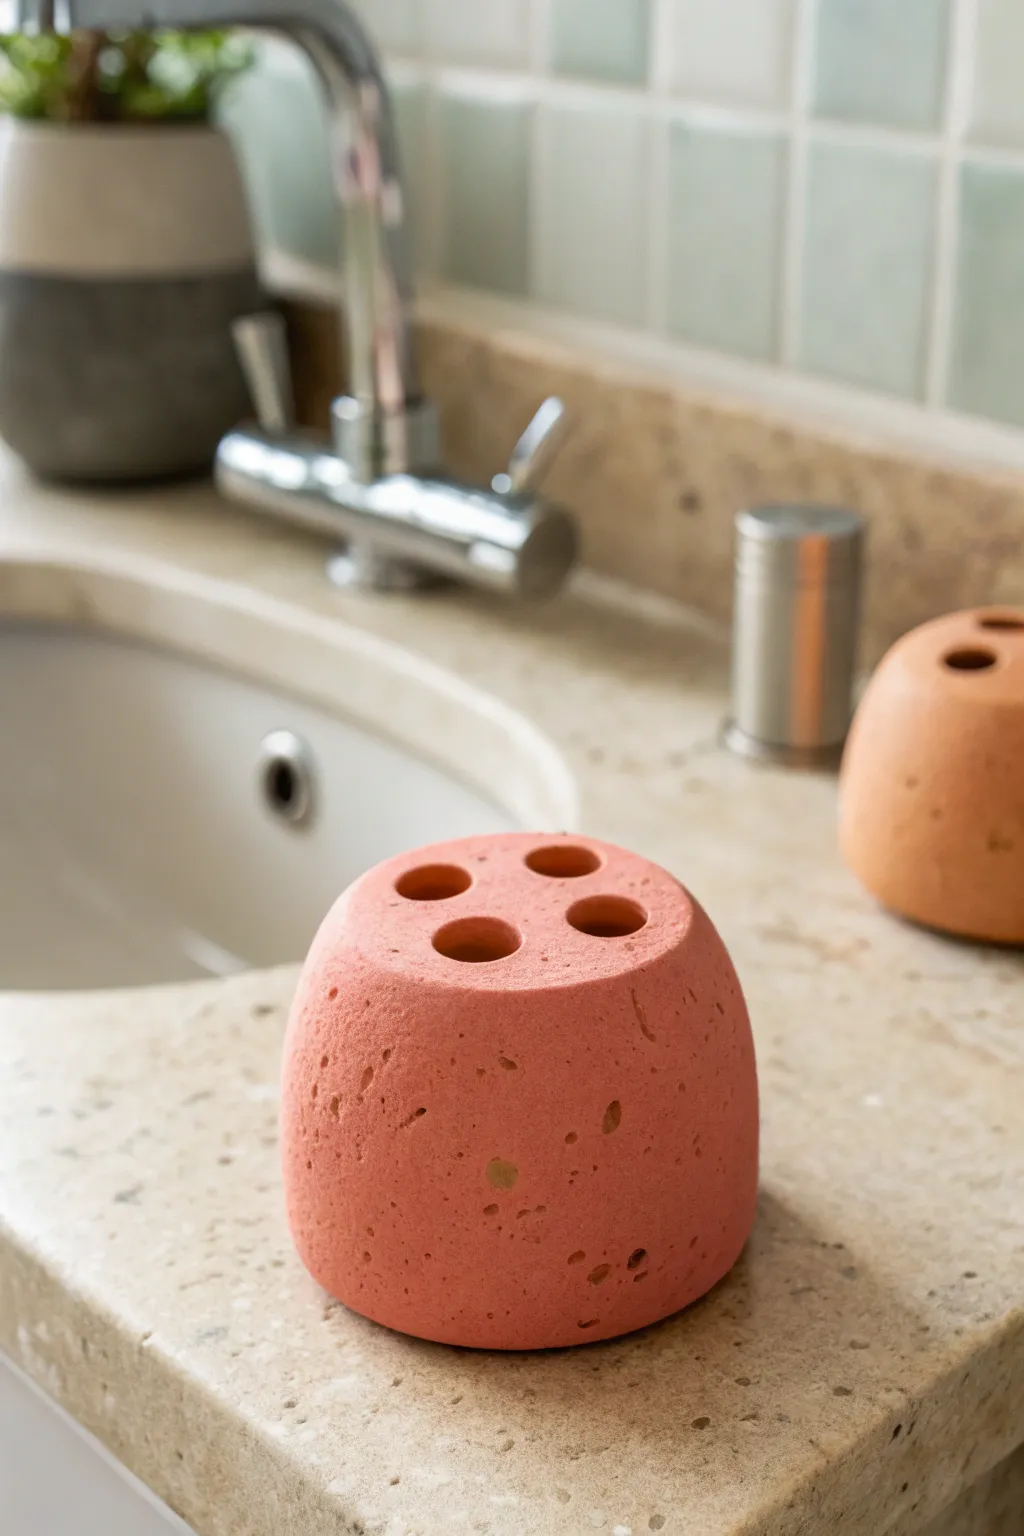
This project creates a charmingly rustic, industrial-chic toothbrush holder with a unique porous texture that mimics coral or aerated concrete. While it looks like heavy stone, it’s actually crafted from accessible clay to achieve that trendy, organic blob shape perfect for a modern bathroom.
Step-by-Step
Materials
- Air-dry clay or polymer clay (terracotta or pink color)
- Course sea salt or rock salt (for texture)
- Pencil or large drinking straw (for holes)
- Rolling pin
- Sandpaper (medium and fine grit)
- Bowl of warm water
- Acrylic sealant or clear matte varnish
Step 1: Shaping the Base
-
Prepare the Clay:
Start with a ball of clay roughly the size of a large orange. Knead it thoroughly until it is soft and conditioned, ensuring there are no air bubbles trapped inside. -
Incorporate Texture:
To achieve the signature porous look, flatten your clay ball slightly and sprinkle a generous amount of coarse sea salt onto it. Fold the clay over the salt and knead it again so the crystals are distributed throughout the mass. -
Form the Dome:
Roll the salted clay back into a ball. Place it on your work surface and gently flatten the bottom by tapping it against the table. Use your palms to smooth the sides into a dome or rounded cylinder shape. -
Flatten the Top:
Press the top of your dome gently against a flat surface or use a rolling pin to create a flat plateau. This area needs to be level so your toothbrushes stand upright. -
Refine the Silhouette:
Inspect the shape from all angles. The sides should slope gently outward towards the bottom for stability. Smooth out any unintentional fingerprints with a tiny bit of water.
Step 2: Creating the Holes
-
Mark Positions:
Lightly mark four spots on the flat top surface where you want your toothbrush holes. Arranging them in a square formation usually works best for spacing. -
Pierce the Clay:
Take your pencil or a large straw and press straight down into the clay at your marked points. Go about two-thirds of the way down into the form—don’t punch all the way through the bottom. -
Widen the Openings:
Wiggle the tool slightly in a circular motion to widen the opening if needed. Test the size with an actual toothbrush to ensure a comfortable fit. -
Smooth the Edges:
The clay might have bulged up around the holes. Use your fingertip or a small modeling tool to gently press these edges back down for a clean, flush finish.
Salt Stubbornness?
If salt crystals won’t dissolve, use a needle tool or toothpick to pick them out manually. Warm water works best to melt them away.
Step 3: Finishing and Texturing
-
Initial Drying:
Let the piece dry for about 24-48 hours if using air-dry clay, or bake according to package instructions for polymer clay. Wait until it is hardened but not fully cured if possible for easier salt removal. -
Dissolve the Salt:
Once the piece is solid, submerge it in a bowl of warm water. Let it soak for about 15-20 minutes. This dissolves the surface salt crystals, leaving behind distinct craters and pits. -
Scrub the Surface:
Remove from the water and use a stiffer brush or rough sponge to scrub the exterior. I find this helps dislodge any stubborn salt grains and enhances the weathered texture. -
Full Dry:
Allow the clay to dry completely again. This is crucial as trapped moisture can cause cracking later. -
Sand for Stability:
Flip the holder over and sand the bottom base until it sits perfectly flat and doesn’t wobble. -
Surface Sanding:
Lightly sand the top and sides with fine-grit sandpaper. You aren’t trying to remove the texture, just soften any sharp jagged edges around the pits. -
Clean Up:
Wipe away all sanding dust with a slightly damp cloth or a dry soft brush. -
Seal Protection:
Apply two coats of a water-resistant matte varnish or acrylic sealant. This is essential for a bathroom item to prevent mold and water damage.
Color Splash
Mix different colors of clay together incompletely before adding salt to create a beautiful marbled stone effect for your stand.
Place your new textured stand by the sink and enjoy the blend of organic style and daily utility

TRACK YOUR CERAMIC JOURNEY
Capture glaze tests, firing details, and creative progress—all in one simple printable. Make your projects easier to repeat and improve.
Cute Photo or Note Stand
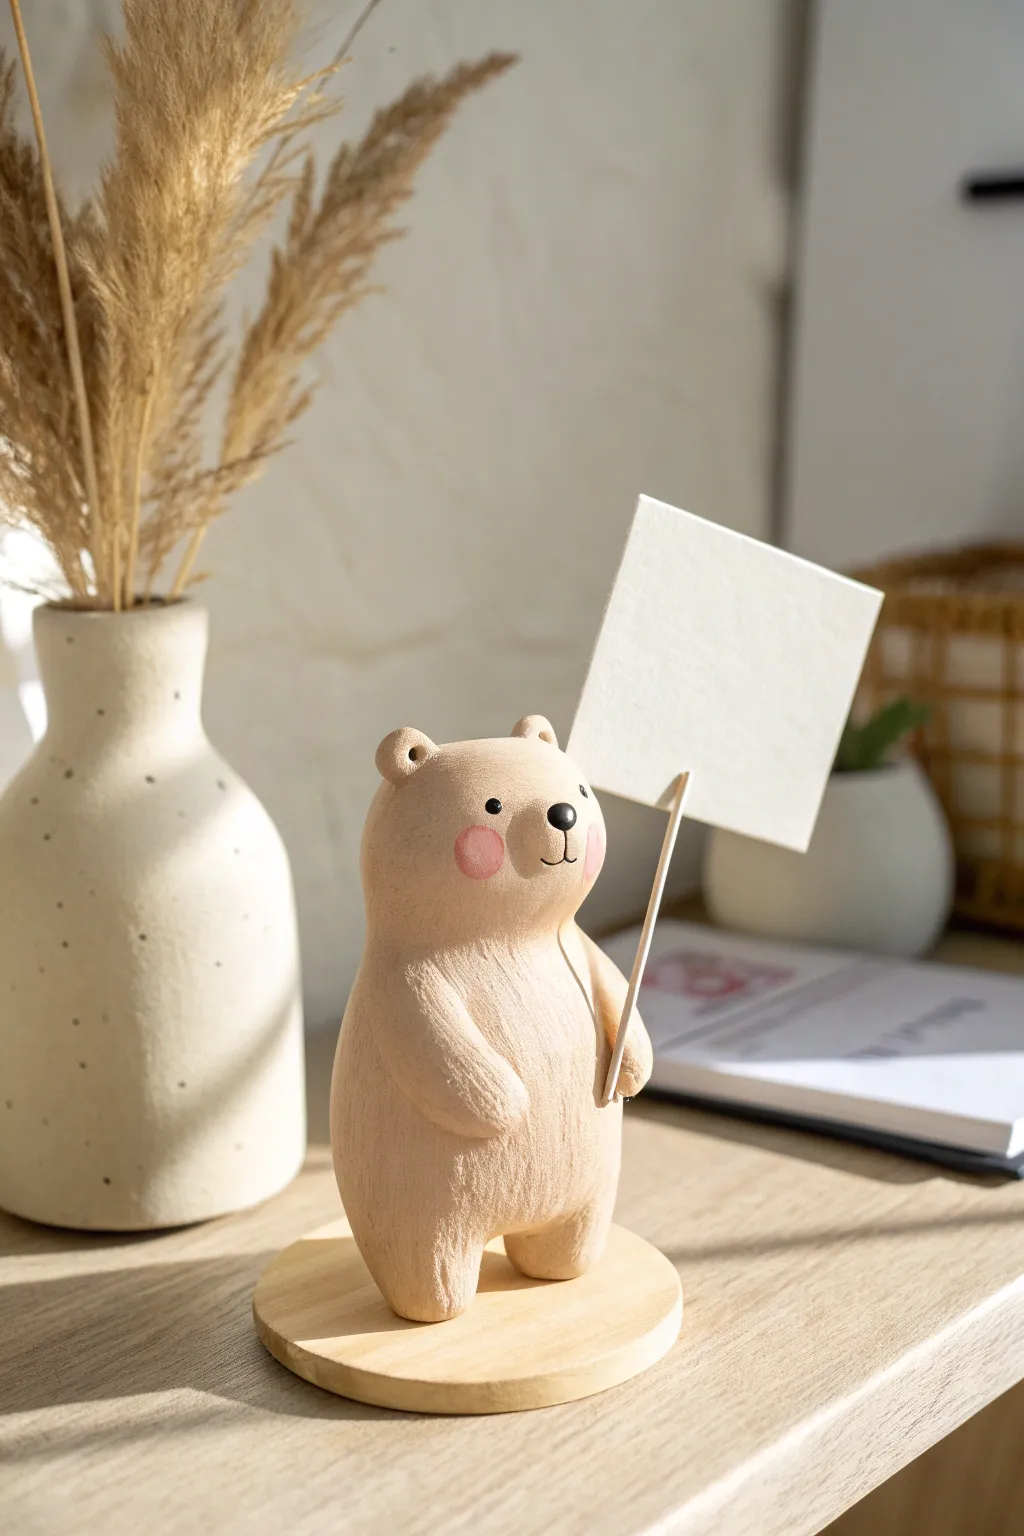
Capture a moment of sweetness with this adorable bear figurine that doubles as a functional note holder. Its soft, textured finish and rosy cheeks make it a charming desk companion ready to display your favorite photos or reminders.
Step-by-Step Tutorial
Materials
- Light tan or wood-effect polymer clay
- Small round wooden base
- Wooden skewer or toothpick
- Cardstock or thick paper
- Soft pastel chalks (pink)
- Black acrylic paint
- Set of small clay sculpting tools
- Texture sponge or toothbrush
- Strong craft glue
- Clear matte varnish (optional)
Step 1: Shaping the base form
-
Mix and condition:
Start by conditioning your tan clay until it is soft and pliable. If you want that specific wood-carved look shown in the photo, you can mix a small amount of translucent clay into a beige base or use a specialized wood-effect clay. -
Create the body:
Roll a large ball of clay into a smooth oval shape, slightly wider at the bottom than the top. This pear shape forms the bear’s main body. Gently flatten the bottom so it can stand upright on your work surface. -
Form the head:
Shape the upper part of the pear form into a rounded head area. You don’t need a separate piece; just gently squeeze the neck area to define the head while keeping it connected to the body for stability. -
Add the ears:
Roll two tiny balls of clay for the ears. Press them onto the top of the head, spacing them evenly. Use a small ball tool to create the inner ear indentation, blending the seams where the ears meet the head so they look seamless.
Step 2: Refining features and texture
-
Sculpt the snout:
Pinch a very small amount of clay onto the center of the face to create a slight muzzle protrusion. Smooth the edges down so it transitions naturally into the cheeks. -
Add arms:
Roll two small sausages of clay for the arms. Attach them to the sides of the body, curving them forward as if the bear is holding something. Blend the clay at the shoulders so they look like part of the main body. -
Create legs:
Form two short, stump-like legs at the bottom of the body. You can either attach separate balls of clay or use a tool to split the bottom of the body shape slightly to define two legs. -
Texturize the surface:
This is the secret to the project’s charm. Take an old toothbrush or a stiff texture sponge and gently tap it all over the bear’s surface. I like to do this lightly to mimic the look of fur or carved wood without making it look messy. -
Prepare the holder:
Cut a wooden skewer to your desired length (about 3-4 inches). Insert it gently into the bear’s hand area to create a pre-bake hole. Wiggle it slightly so it won’t get stuck during baking, but leave it in place if your clay requires it to hold the shape.
Texturing Tip
For a deeper ‘fur’ texture like the photo, drag a needle tool in short, downward strokes specifically on the chest and tummy area after using your toothbrush.
Step 3: Details and finishing
-
Add blushing cheeks:
Before baking, scrape some pink soft pastel chalk into a powder. Use a soft, dry paintbrush to gently dust distinct pink circles onto the bear’s cheeks for that rosy glow. -
Bake the clay:
Bake the figurine according to your specific clay manufacturer’s instructions. Usually, this is around 275°F (130°C) for 15-30 minutes. Let it cool completely before handling. -
Paint the face:
Using a fine-tip brush or a dotting tool dipped in black acrylic paint, add two small eyes and a cute nose. Paint a tiny curved line for the smile. -
Create the sign:
Cut a small rectangle from sturdy white cardstock or thick watercolor paper. Glue this securely to the top of your wooden skewer. -
Mount to base:
Apply a strong craft glue to the bottom of the bear’s feet and press it firmly onto the center of your round wooden base. Hold it for a moment to ensure a good bond. -
Final assembly:
If you removed the stick for baking, glue the sign stick into the bear’s hand/paw now. Position it at a slight angle for a dynamic look.
Make it Magnetic
Instead of gluing a paper sign to the stick, glue a tiny rare-earth magnet to the bear’s paw and one to the stick, so you can swap out flags for seasons.
Now your gentle bear is ready to hold sweet notes or precious memories on your desk
Mini Trinket Dish With a Face
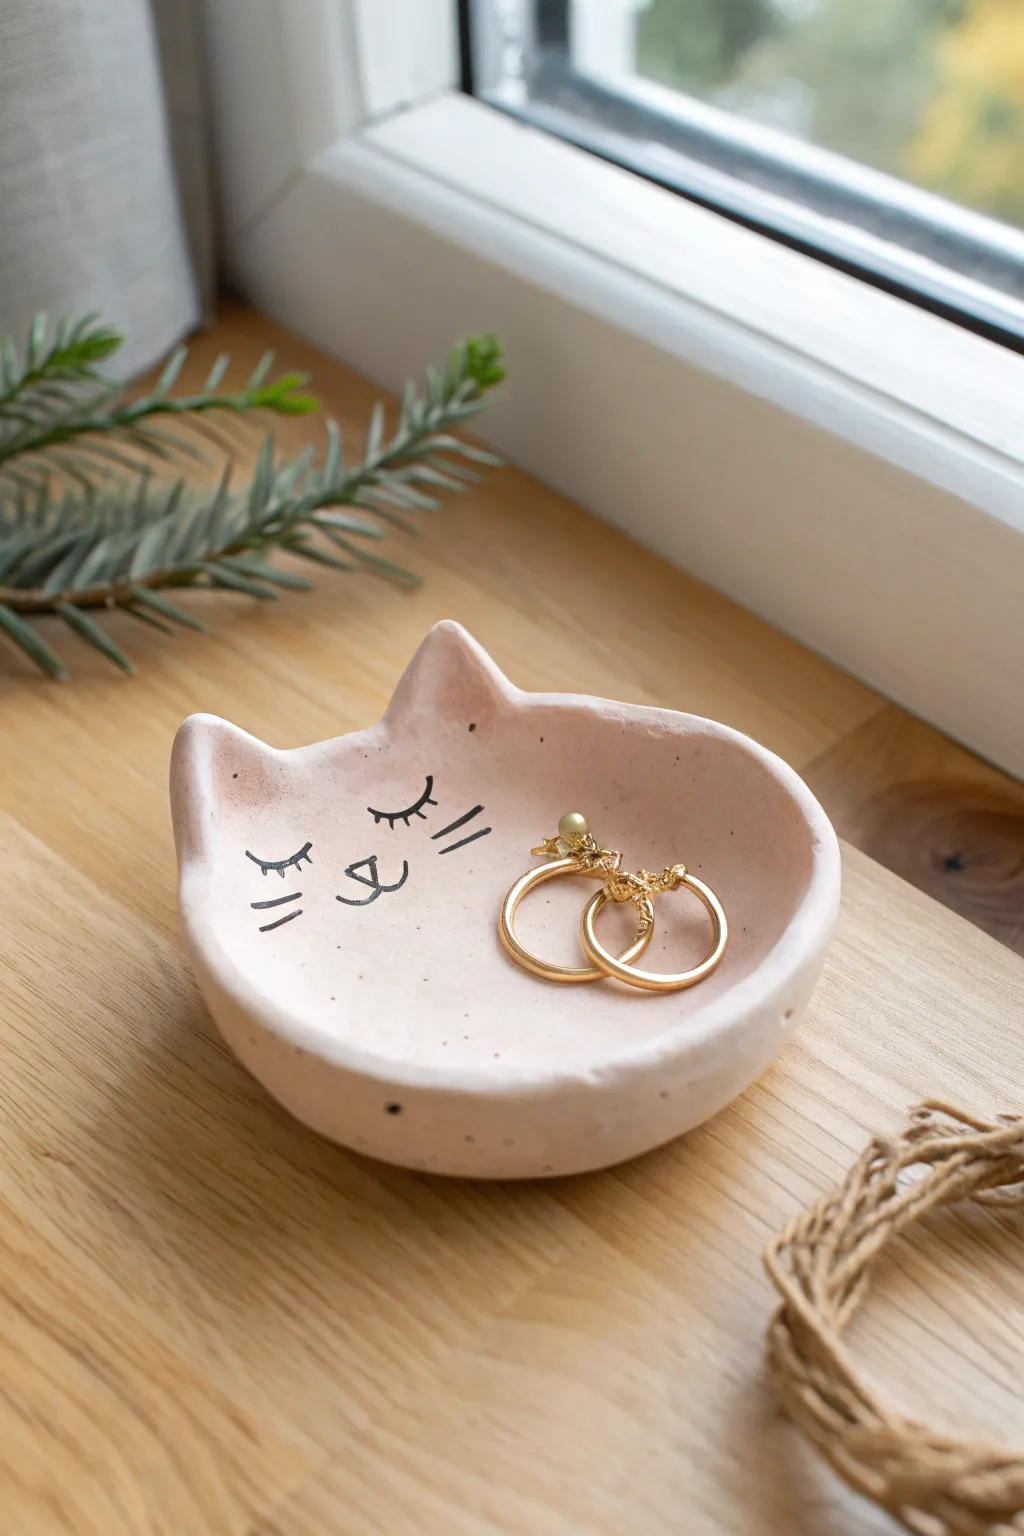
This adorable cat-faced trinket dish offers a sweet spot to rest your earrings or rings at the end of the day. With its gentle pink hue and minimalist painted features, it adds a touch of handmade whimsy to any windowsill or bedside table.
How-To Guide
Materials
- Air-dry clay (or polymer clay)
- Acrylic paint (pale pink or peach)
- Acrylic paint (black)
- Fine detail paintbrush
- Rolling pin
- Small bowl or sandpaper (for smoothing)
- Water
- Clear varnish or sealant (gloss or matte)
- Craft knife or clay shaping tool
- Sponge
Step 1: Shaping the Base
-
Condition the Clay:
Begin by taking a handful of clay and kneading it in your hands until it becomes soft, warm, and pliable. This prevents cracks later. -
Roll it Out:
Using a rolling pin, flatten the clay into a smooth circle, aiming for a consistent thickness of about 1/4 inch. -
Create the Cat Shape:
You can gently press the clay into an existing small bowl to give it a curved shape, or simply cup it in your hands, pressing the center down with your thumbs to create a shallow depression. -
Form the Ears:
Pinch the upper edge of the rim at two points to form the triangular ears. Gently pull the clay upwards and shape them into soft points. -
Refine the Edges:
Dip your finger in a little water and run it along the rim of the dish to smooth out any rough spots or fingerprints. The edges should be rounded and organic. -
Dry Completely:
Set your dish aside to dry. If using air-dry clay, this usually takes 24-48 hours depending on thickness. Flip it occasionally so the bottom dries too.
Smooth Moves
Use a barely damp sponge during the smoothing step instead of just fingers. It acts like an eraser for fingerprints and creates a professional, porcelain-like smoothness.
Step 2: Painting & Details
-
Sand Imperfections:
Once bone dry, take fine-grit sandpaper and lightly buff away any bumps or rough textures on the surface. -
Apply Base Color:
Mix a soft, pale pink or peach acrylic paint. Cover the entire dish, front and back, with a smooth layer. I like to use a slightly damp sponge for a streak-free finish. -
Dry the Base Coat:
Let the pink paint dry completely before moving on to the details. -
Draft the Face:
Lightly sketch the position of the eyes, nose, and whiskers with a pencil if you feel unsure about freehand painting. -
Paint the Features:
Using your finest detail brush and black acrylic paint, carefully draw two curved lines for the closed eyes, adding three little lashes to each. -
Add Nose and Mouth:
Paint a small, inverted triangle for the nose in the center, connecting it to a simple ‘w’ shape for the mouth. -
Draw Whiskers:
Finish the face by painting three short, floating whiskers on each cheek area. -
Add Speckles (Optional):
To mimic the stone-like texture in the photo, you can flick a toothbrush with slightly watered-down brown or grey paint to create tiny speckles across the surface. -
Seal the Project:
Once all paint is totally dry, apply a coat of clear varnish. This protects the clay from moisture and gives the dish a professional finish.
Sparkle Upgrade
Mix a tiny pinch of gold mica powder into your clear sealant topcoat. This will give the entire dish a subtle, magical shimmer when it catches the sunlight.
Now your charming feline friend is ready to keep your favorite little treasures safe
Cable Hugger and Cord Marker Creatures
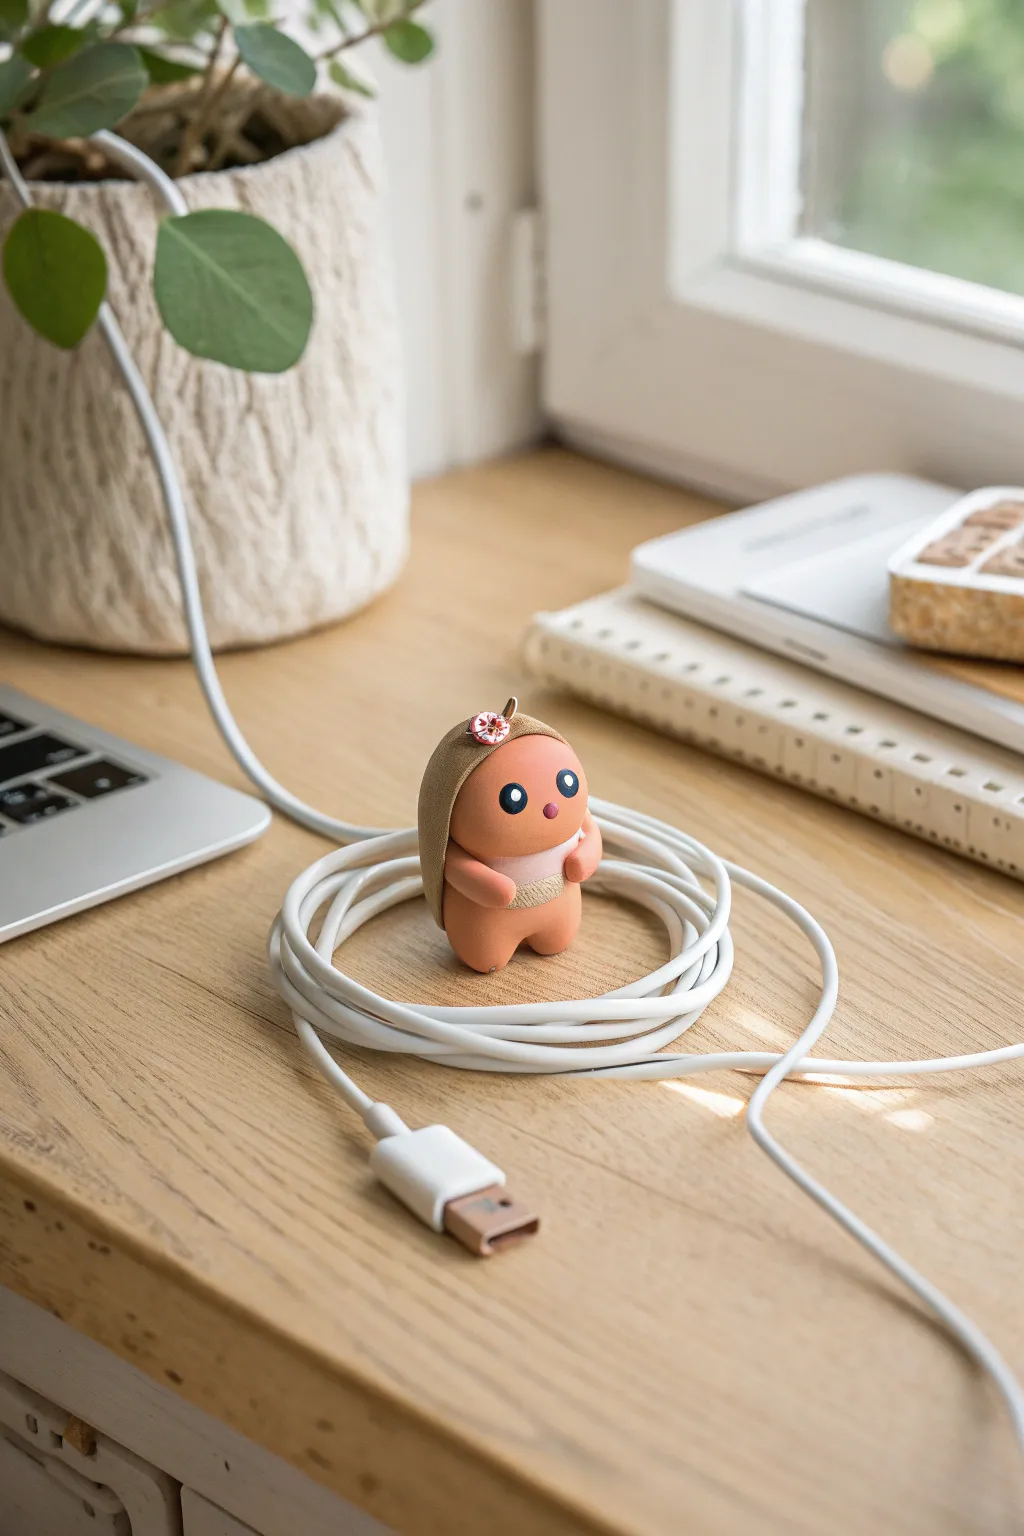
This adorable little seed-like creature adds a touch of whimsy to your workspace while keeping your cables company. With its cozy beige hood and wide, innocent eyes, it acts as a charming guardian for your charging cords.
Detailed Instructions
Materials
- Polymer clay or air-dry clay (Peach/Terra Cotta, Beige, Pink, White, Black)
- Clay sculpting tools (needle tool, small ball tool)
- Rolling pin or pasta machine for clay
- Liquid clay adhesive or PVA glue
- Clear matte varnish
- Gloss glaze (optional, for eyes)
- Small paintbrush
- A spare cable for sizing
Step 1: Shaping the Body
-
Create the base form:
Start with a chunk of peach or light terra cotta clay. Roll it into a smooth ball, then gently elongate it into a pill or potato shape. It should be chubby and rounded at both ends. -
Define the legs:
At the bottom of your shape, use a modeling tool or your finger to gently press an indentation in the center, creating two distinct, stubby legs. Smooth the separation so the legs look integrated, not glued on. -
Check stability:
Press the figure down gently onto a flat surface to flatten the bottoms of the feet slightly. This ensures your little friend can stand upright on its own without toppling over.
Clean Clay Pro-Tip
Light clay colors like peach and beige pick up dust easily. Keep a pack of baby wipes nearby and clean your hands and tools thoroughly between color switches.
Step 2: The Hoodie Shell
-
Prepare the hood clay:
Take your beige or light brown clay and condition it until soft. Roll it out into a thin, even sheet, approximately 2-3mm thick. -
Cut the shape:
Cut an oval or arched shape from the beige sheet. This piece needs to be large enough to cover the back and top of the creature’s head, extending down the sides. -
Drape the hood:
Gently drape the beige clay over the top and back of the peach body. Smooth the clay down the back, hugging the curves of the body underneath. -
Refine the face opening:
Use a sharp blade or needle tool to trim the front edge of the hood so it frames the face perfectly. I like to curve the sides slightly inward to make it look snug.
Hood Won’t Stick?
If the beige hood isn’t adhering to the body curve, apply a very thin layer of liquid clay (polymer) or water/PVA mix (air dry) to the contact points before draping.
Step 3: Details & Features
-
Add the belly stripe:
Roll a very thin strip of pale pink clay. Wrap this horizontally around the creature’s midsection, just below where the arms will go. Flatten it gently to merge it with the body. -
Sculpt the arms:
Roll two small sausages of peach clay for the arms. Attach them to the sides of the body, just overlapping the pink belly stripe. Bend them slightly at the ‘elbows’ so the hands rest on the tummy. -
Create the eyes:
Make two small, flat discs of black clay. Position them centrally on the face, spacing them wide apart for a cuter look. Press them firmly but carefully so you don’t dent the head. -
Add eye highlights:
Roll tiny specks of white clay into balls. Press one onto the upper right of each black eye pupil. This ‘catchlight’ brings the character to life. -
The nose:
Place a minuscule ball of dark pink or reddish clay right between the eyes, slightly lower down, for the nose. -
Create the flower accessory:
Form a tiny flower using a speck of pink clay for petals and a white dot for the center. If you have a tiny clay cane slice, that works too. Attach this to the top of the beige hood. -
Add the stem loop:
Roll a tiny, thin snake of beige clay and form a small loop on the very top of the head to look like a stem or little handle.
Step 4: Finishing Touches
-
Texture the belly band:
Use a needle tool to gently scratch vertical lines onto the lower beige band across the stomach if you added a second decorative strip, giving it a fabric-like texture. -
Smoothing:
Dip your finger or a brush in a little baby oil (if using polymer clay) or water (if using air dry) and gently smooth out any fingerprints. -
Baking or Drying:
Follow the manufacturer’s instructions for your specific clay. If baking, ensure your oven thermometer is accurate to prevent scorching the light colors. -
Varnish:
Once cool or dry, apply a matte varnish to the body to protect it. For an extra pop, use a dot of gloss glaze only on the black part of the eyes.
Place your new little companion inside a coiled cable loop on your desk for instant cheer.
Stackable Mini Macaron Tokens
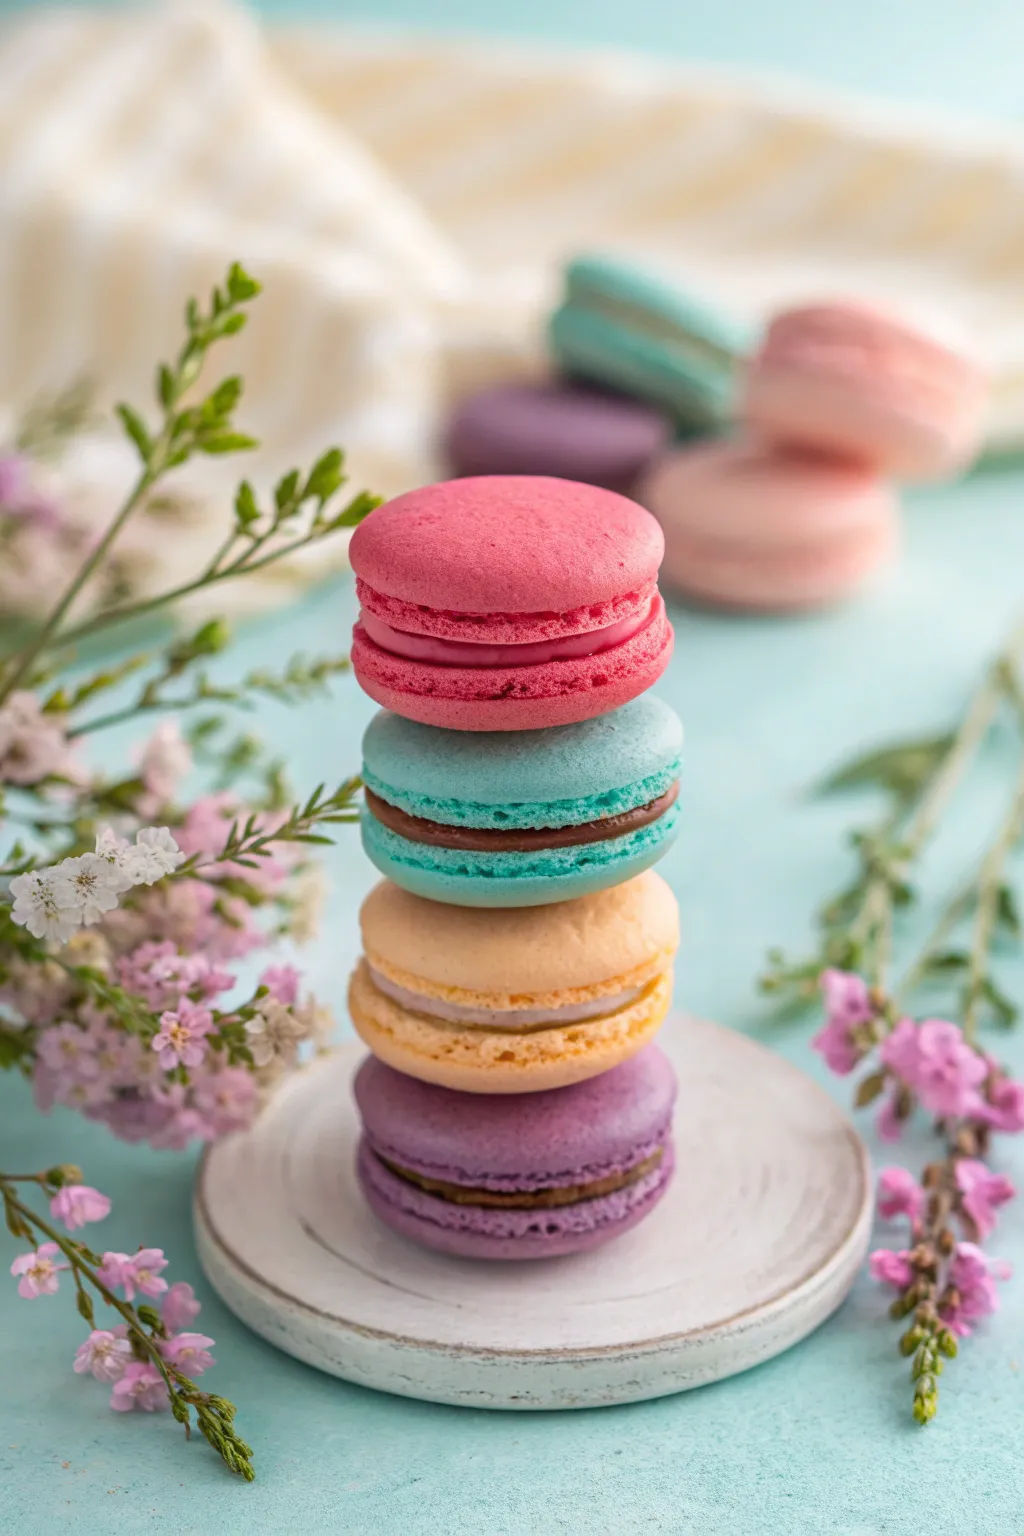
Recreate the delicate charm of French patisserie with these delightful plasticine macaron tokens. This project captures the signature ‘feet’ texture and smooth domes of the real treat, resulting in a colorful, stackable set perfect for play or display.
Step-by-Step Guide
Materials
- Polymer clay or plasticine (bright pink, teal blue, pale yellow, purple)
- White clay (for mixing pastel shades)
- Brown clay (for chocolate ganache filling)
- Dark pink/fuchsia clay (for jam filling)
- Texturing tool (needle tool or toothpick)
- Small circle cutter (approx. 1 inch)
- Acrylic roller or glass jar
- Clean work surface (tile or mat)
- Plastic wrap (optional)
Step 1: Preparing the Shells
-
Mixing Custom Colors:
Start by conditioning your clay until it is soft and pliable. To achieve the soft, realistic hues seen in the photo, mix a small amount of white clay into your teal and purple to create pastel versions, while keeping the bright pink vibrant. -
Rolling the Dough:
Roll out your first color of clay into a thick sheet, approximately 1/4 inch thick. You want the macarons to have a nice, plump height, so avoid rolling it too thin. -
Cutting the Forms:
Place a piece of plastic wrap over the clay before cutting if you want a naturally rounded edge. Press your small circle cutter firmly through the clay to create two identical circles for each macaron. -
Refining the Dome:
Gently smooth the top edge of each circle with your fingertip to enhance the domed shape. Often, I like to gently pat the top to remove any fingerprints and ensure a matte finish.
Fixing Flat Domes
If your macaron shells look too flat after cutting, gently pinch the sides while rotating the circle to push the clay upward, reforming the dome shape before texturing.
Step 2: Texturing the ‘Feet’
-
Creating the Ruffle:
The signature ruffled edge of a macaron is called the ‘foot.’ To replicate this, use your needle tool or a toothpick to gently pick and pull at the clay around the bottom rim of each shell. -
Refining the Texture:
Go around the circumference a second time, poking small holes and dragging the clay slightly downwards to create that aerated, crumbly sponge look. Keep this textured area confined to the bottom 1/8th of the shell. -
Repeating the Process:
Repeat the cutting and texturing steps for the teal, yellow, and purple clay sets. You should end up with four pairs of shells, each with a smooth dome and a textured base.
Make it a Necklace
Insert a metal eye pin into the center of the top pink macaron before baking. Once hardened, you can string your stack onto a chain for sweet, wearable art.
Step 3: Filling and Assembly
-
Making the Ganache:
Take a small ball of brown clay for the chocolate filling. Flatten it between your fingers into a disk that is slightly smaller than the diameter of your macaron shells. -
Making Jam Filling:
For the pink macaron, use a darker fuchsia clay instead of brown. Flatten it similarly to create a berry jam center. -
Creating the Sandwich:
Place the filling disk onto the bottom shell’s flat side. Gently press the top shell onto the filling. Apply enough pressure to secure them, but be careful not to squash the delicate textured feet you just created. -
Adding Realism:
If the filling bulges out too much, gently tuck it back in with a modeling tool. You want a visible line of filling, but it shouldn’t be overflowing. -
Stacking the Tower:
Check the balance of your finished macarons. If you are using polymer clay, bake them according to the package instructions before stacking. If using non-hardening plasticine, simply stack them carefully: purple on the bottom, then yellow, blue, and finally pink on top.
Enjoy displaying your stack of zero-calorie treats that look good enough to eat
Mood Face Pebbles for Fidgeting
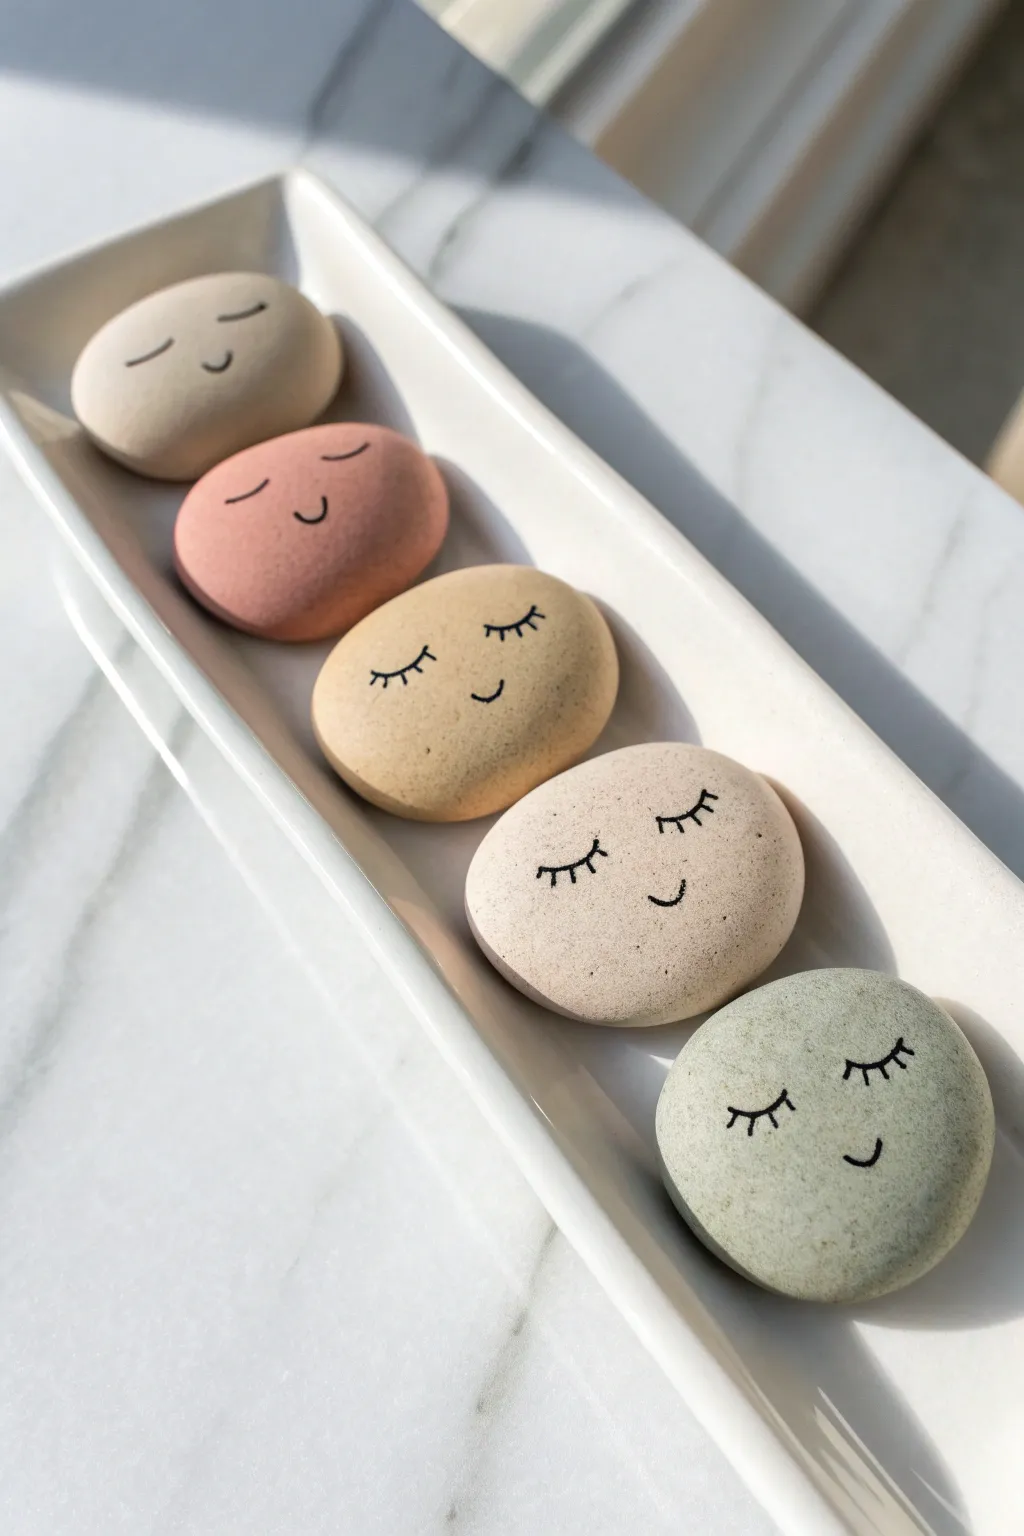
These smooth, palm-sized pebbles offer a grounding tactile experience with their gentle curves and soothing, sleeping expressions. Created from polymer or plasticine clay in soft earth tones, they make perfect desk companions or worry stones for moments when you need a little calm.
Step-by-Step Tutorial
Materials
- Polymer clay or plasticine (in beige, muted pink, warm ochre, off-white, and sage green)
- Fine-point black permanent marker or acrylic paint pen
- Acrylic rolling pin or smooth glass jar
- Fine-grit sandpaper (optional, for polymer clay)
- Matte or satin varnish (optional, for sealing)
- Parchment paper or baking mat
- Baking sheet/tray (if using polymer clay)
Step 1: Prepping the Clay
-
Conditioning:
Begin by taking a chunk of your first clay color—about the size of a golf ball or a large walnut. Knead it thoroughly in your hands until it becomes warm, pliable, and free of any cracks. -
Color Mixing:
For that soft, earthy aesthetic seen in the photo, you might need to mix colors. I like to blend a tiny bit of brown or grey into bright primary colors to desaturate them, creating those muted sage and dusty rose tones.
Smudged Ink?
If your marker bleeds into the clay, the surface might be too porous. Seal the clay with a thin layer of matte varnish first, let it dry completely, and then draw the face on top.
Step 2: Shaping the Pebbles
-
Rolling spheres:
Roll your conditioned clay between your palms to create a perfect, smooth sphere. Focus on eliminating any seam lines or fold marks. -
Creating the oval:
Gently apply pressure and roll the sphere back and forth slightly on your work surface to elongate it into a pillowy oval shape. -
Flattening:
Place the oval on your parchment paper. Using the palm of your hand or a flat tool, press down gently to flatten it into a thick disc. Aim for a thickness of about 1/2 inch so it feels substantial in the hand. -
Smoothing edges:
Pick up the clay and inspect the edges. Use your thumb to gently round off any sharpness, ensuring the stone looks like it has been tumbled by water. -
Repeat process:
Repeat these shaping steps for the remaining four colors, trying to keep them roughly uniform in size for a cohesive set.
Weighted Feel
For a heavier, more grounding fidget stone, embed a small, flat metal washer or a real smooth rock inside the center of your clay ball before flattening it into the final shape.
Step 3: Setting the Shape
-
Hardening instructions:
If using polymer clay, bake the stones on a parchment-lined tray according to the package instructions (usually 275°F for 15-30 minutes). If using air-dry clay, leave them in a cool, dry place for 24-48 hours. -
Cooling down:
Allow the stones to cool completely before handling. Moving them while warm can distort the flat bottom. -
Sanding (Optional):
Once fully cured, use ultra-fine sandpaper to buff out any fingerprints or tiny bumps. This ensures that satisfyingly smooth texture needed for fidgeting.
Step 4: Adding the Details
-
Sketching placement:
Before committing to ink, you can lightly mark where the eyes and mouth will go using a pencil. Keep the features centered and symmetrical. -
Drawing the first eye:
Using your fine-point black marker or paint pen, draw a small downward curve for the left eye. Add three or four tiny, delicate lashes pointing outward. -
Drawing the second eye:
Mirror the first eye on the right side. Don’t worry if they aren’t perfectly identical; slight variations add character. -
Adding the smile:
Draw a tiny, shallow U-shape centered below the eyes for the mouth. Keep the line thin and simple. -
Sealing the work:
To protect the face from rubbing off during use, apply a thin coat of matte or satin varnish over the stone. This also enhances the ‘river rock’ feel.
Enjoy the soothing texture of your new mood stones as you keep your hands busy and your mind focused
Stamped Texture Tiles Sampler
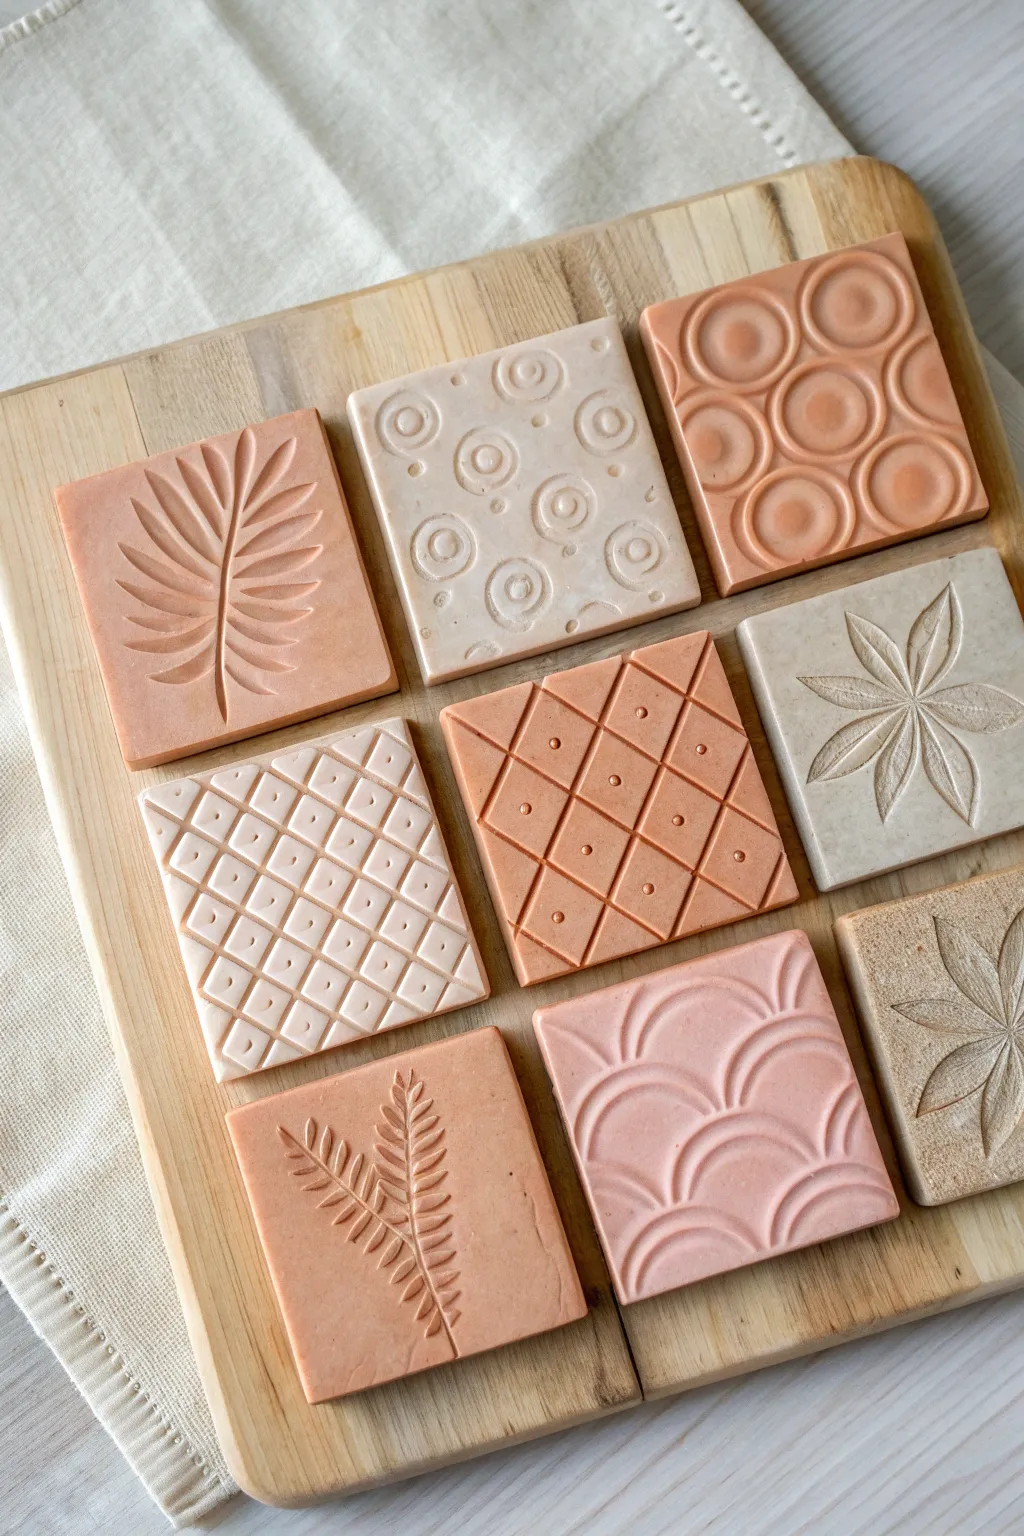
Create a stunning array of textured tiles that celebrate pattern and earth tones. This project transforms simple clay into a curated collection of tactile art pieces, perfect for magnets, coasters, or framed decor.
How-To Guide
Materials
- Plasticine clay or polymer clay (in terracotta, cream, beige, and blush tones)
- Square cookie cutter (approx. 2-3 inches)
- Acrylic roller or rolling pin
- Parchment paper or craft mat
- Pointed sculpting tool or toothpick
- Rubber stamps (geometric and botanical patterns)
- Textured rolling pins (optional)
- Cornstarch or baby powder (release agent)
- Baking sheet (if using polymer clay)
- Fine-grit sandpaper (optional)
Step 1: Preparation & Base Creation
-
Condition the clay:
Begin by warming up your clay in your hands. Knead different colors separately—terracotta, beige, and soft pink—until they are pliable and smooth. If you want custom shades, mix small amounts of white into the terracotta to create lighter variations. -
Roll out the slabs:
Place a ball of clay on parchment paper. Use your acrylic roller to flatten it into an even slab, aiming for a thickness of about 1/4 inch. For consistent thickness, you can place two wooden craft sticks on either side of the clay as guide rails for your roller. -
Cut the shapes:
Press your square cookie cutter firmly into the rolled clay slab. Lift the cutter and carefully remove the excess clay from around the square. Repeat this process until you have nine smooth, blank squares in your desired color palette. -
Smooth the edges:
Gently run your finger along the cut edges of each square to soften any sharp ridges or burrs left by the cutter. This professional finish makes a big difference in the final look.
Sticky Stamps?
If clay keeps getting stuck in your detailed stamps, lay a piece of thin plastic wrap over the clay before pressing. This keeps the stamp clean and creates softer edges.
Step 2: Stamping & Texturing
-
Prepare for stamping:
Lightly dust your stamps or texturing tools with cornstarch or baby powder. This acts as a release agent and prevents the tool from sticking to the clay and ruining your clean lines. -
Create the palm leaf tile:
For the prominent leaf design, use a carving tool or a stamp. If carving by hand, gently impress a central vertical line, then press angled lines radiating outward to mimic palm fronds. Vary the pressure to create depth. -
Imprint the circle pattern:
On a cream or light pink tile, press small circular objects or a specialized stamp to create a repeating bullseye or concentric circle pattern. Ensure the spacing is somewhat uniform for a cohesive look. -
Make the waffle grid:
Using a ruler or a flat edge, press diagonal lines into a square to create a diamond grid. Then, cross them with opposing diagonal lines. Use a small ball tool to press a tiny dot into the center of each diamond. -
Form the large geometric rings:
On a terracotta square, press a larger circle cutter or bottle cap lightly into the clay to create overlapping or adjacent ring shapes. I like to let this one overlap the edges slightly to make the pattern feel expansive. -
Carve the delicate fern:
On a fresh square, use a needle tool to scratch or impress a delicate, twin-branch fern pattern. Keep your hand steady and use shallow strokes to capture the airy feel of the leaves. -
Create the sunburst flower:
Press a pointed petal stamp into the center of a beige tile, rotating it to form a star or flower shape. If doing this freehand, press the side of a modeling tool into the clay eight times, radiating from the center. -
Add the scallop design:
Use the edge of a small round cutter or a piping tip to press semi-circles into the clay. Layer them like fish scales, starting from the bottom and working your way up the tile.
Pro Tip: Depth Check
Don’t press deeper than halfway through the tile thickness. Deep impressions weaken the structural integrity and can cause the tile to warp while baking or drying.
Step 3: Finishing
-
Refine the details:
Look over all your tiles. If any impressions caused the sides of the square to bulge out, gently push the straight edges back into shape with your blade or ruler. -
Bake or dry:
If using polymer clay, arrange the tiles on a parchment-lined baking sheet and bake according to the manufacturer’s instructions (usually 275°F for 15-30 minutes). If using air-dry clay, leave them in a cool, dry place for 24-48 hours. -
Sand for perfection:
Once fully cured or dried, you might notice small fingerprints or rough spots. Use fine-grit sandpaper to lightly buff the surfaces and edges for a velvety finish. -
Seal (Optional):
To protect your work, apply a thin layer of matte varnish. This will help keep the colors vibrant and protect the texture from dust over time.
Enjoy arranging your beautiful new collection of textured tiles.
Marbled Plasticine Color Blends
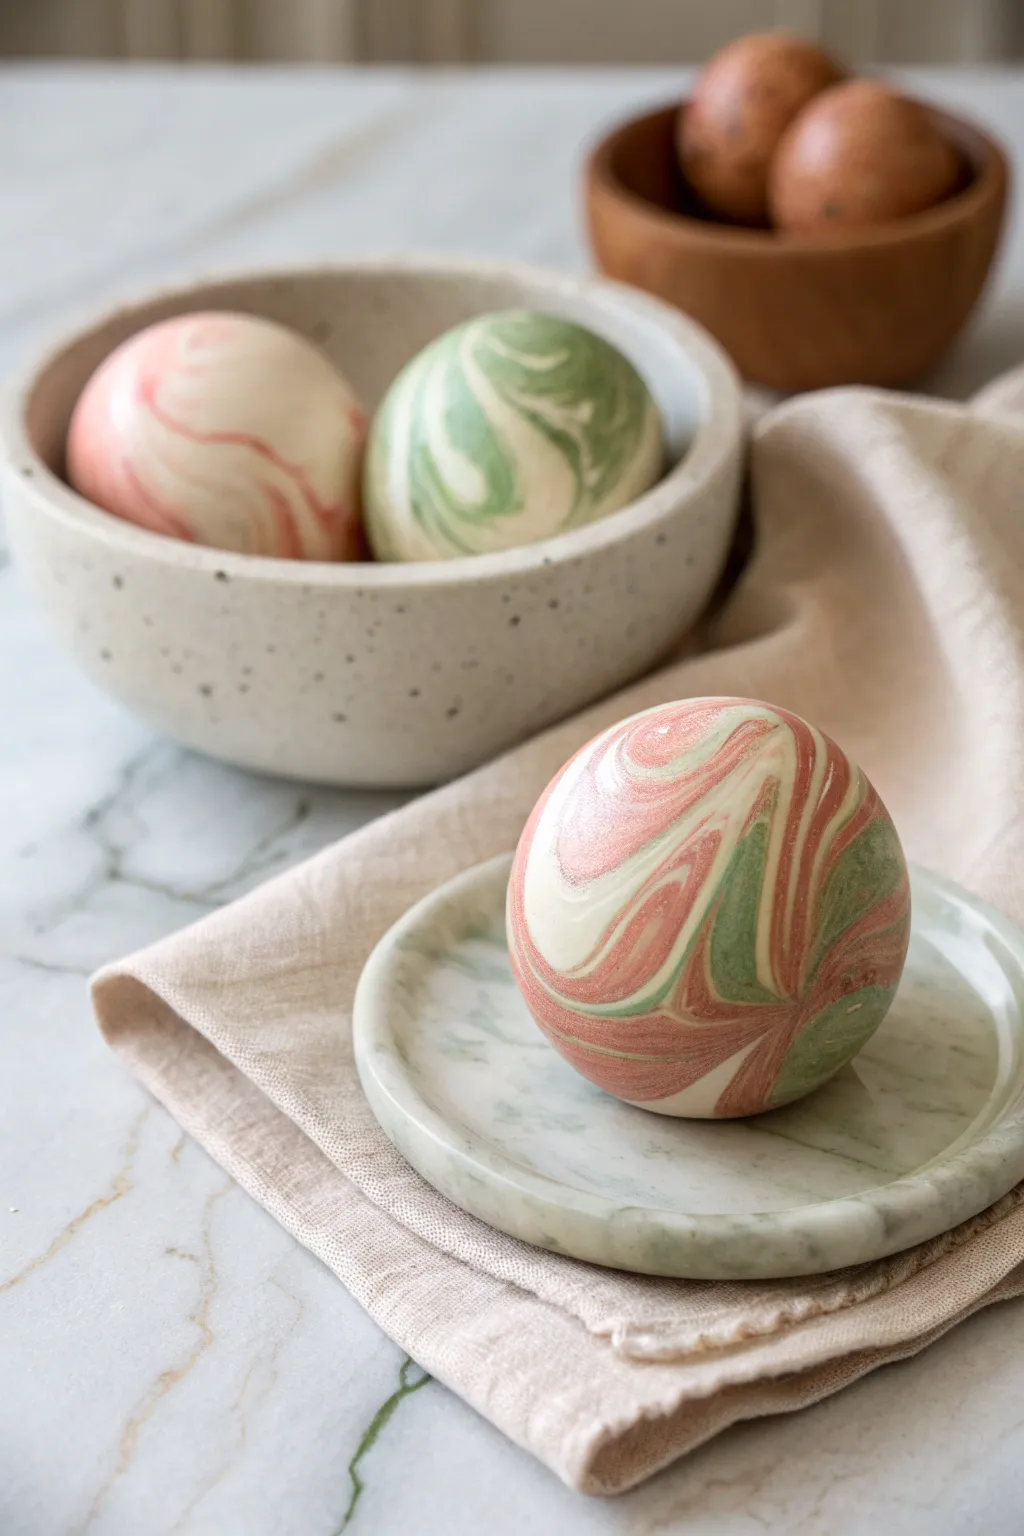
These sophisticated marbled spheres combine soft pinks, gentle greens, and creamy whites into a seamless, stone-like finish. The technique creates organic swirls that mimic polished agate or serpentine, making for stunning decorative accents.
Step-by-Step
Materials
- Plasticine clay (White or cream)
- Plasticine clay (Soft pink or rose)
- Plasticine clay (Sage green or olive)
- Non-stick rolling surface or silicone mat
- Clay roller (optional)
- Smooth polishing stone or spoon back
- Clean, lint-free cloth
Step 1: Preparing the Base Colors
-
Condition the white clay:
Start with a large chunk of white or cream plasticine. Knead it thoroughly in your hands until it becomes warm, soft, and completely pliable. This will act as your primary base color. -
Prepare the accent colors:
Take smaller amounts of the pink and green plasticine. Condition them separately until soft. -
Create color ropes:
Roll each color—white, pink, and green—into long, distinct snakes or ropes. The white rope should be roughly twice as thick as the colored ones since it’s the background tone.
Step 2: Creating the Marbled Blend
-
Twist the strands:
Hold the three ropes together and twist them tightly into a single, large braid-like cylinder. This begins the initial blending process. -
Fold and roll:
Fold the twisted cylinder in half, pressing the ends together. -
Lengthen the blend:
Roll this doubled-up log back out into a snake shape on your work surface. This stretches the colors alongside each other. -
Repeat the twist:
Twist the newly rolled snake again. I find that twisting creates more intricate, thin lines than simply mashing the clay together. -
Assess the pattern:
Stop when you see distinct striations of color. Do not over-mix, or the colors will become muddy and turn brownish-gray instead of distinct swirls.
Temperature Matters
If your swirl lines are blurry, your clay is too warm. Pop the clay in the fridge for 10 minutes before the final roll to keep colors crisp.
Step 3: Forming the Spheres
-
Divide the clay:
Cut off a segment of your marbled log large enough to form a sphere roughly the size of a tennis ball or large egg. -
Ball formation:
Roll the segment between your palms using a circular motion. Apply firm pressure initially to eliminate air pockets, then lighten your touch to perfect the round shape. -
Check surface alignment:
Inspect the sphere. If the swirl pattern looks too linear or boring, gently press and deform the ball slightly, then re-roll it to shift how the surface pattern aligns.
Muddy Colors?
If your sphere turned brown or gray, you over-mixed the colors. Stop twisting sooner next time; barely mixed snakes create the best definition.
Step 4: Finishing and Polishing
-
Smooth imperfections:
Look for any seams or fingerprints. Gently rub these areas with the pad of your finger to smooth them into the surrounding clay. -
Buff the surface:
for a subtle sheen, take a soft, lint-free cloth (like old denim or t-shirt material) and rapidly buff the surface of the sphere. -
Optional shine:
To achieve a truly polished stone look, you can rub a tiny drop of baby oil onto the surface with your fingertips. -
Final shaping:
Set the finished sphere gently on a flat surface. Depending on the softness of your clay, you may need to rotate it occasionally in the first hour to prevent a flat spot from forming on the bottom.
Enjoy styling your new faux-stone spheres in bowls or on decorative trays
Faux Terrazzo Desk Base Shapes
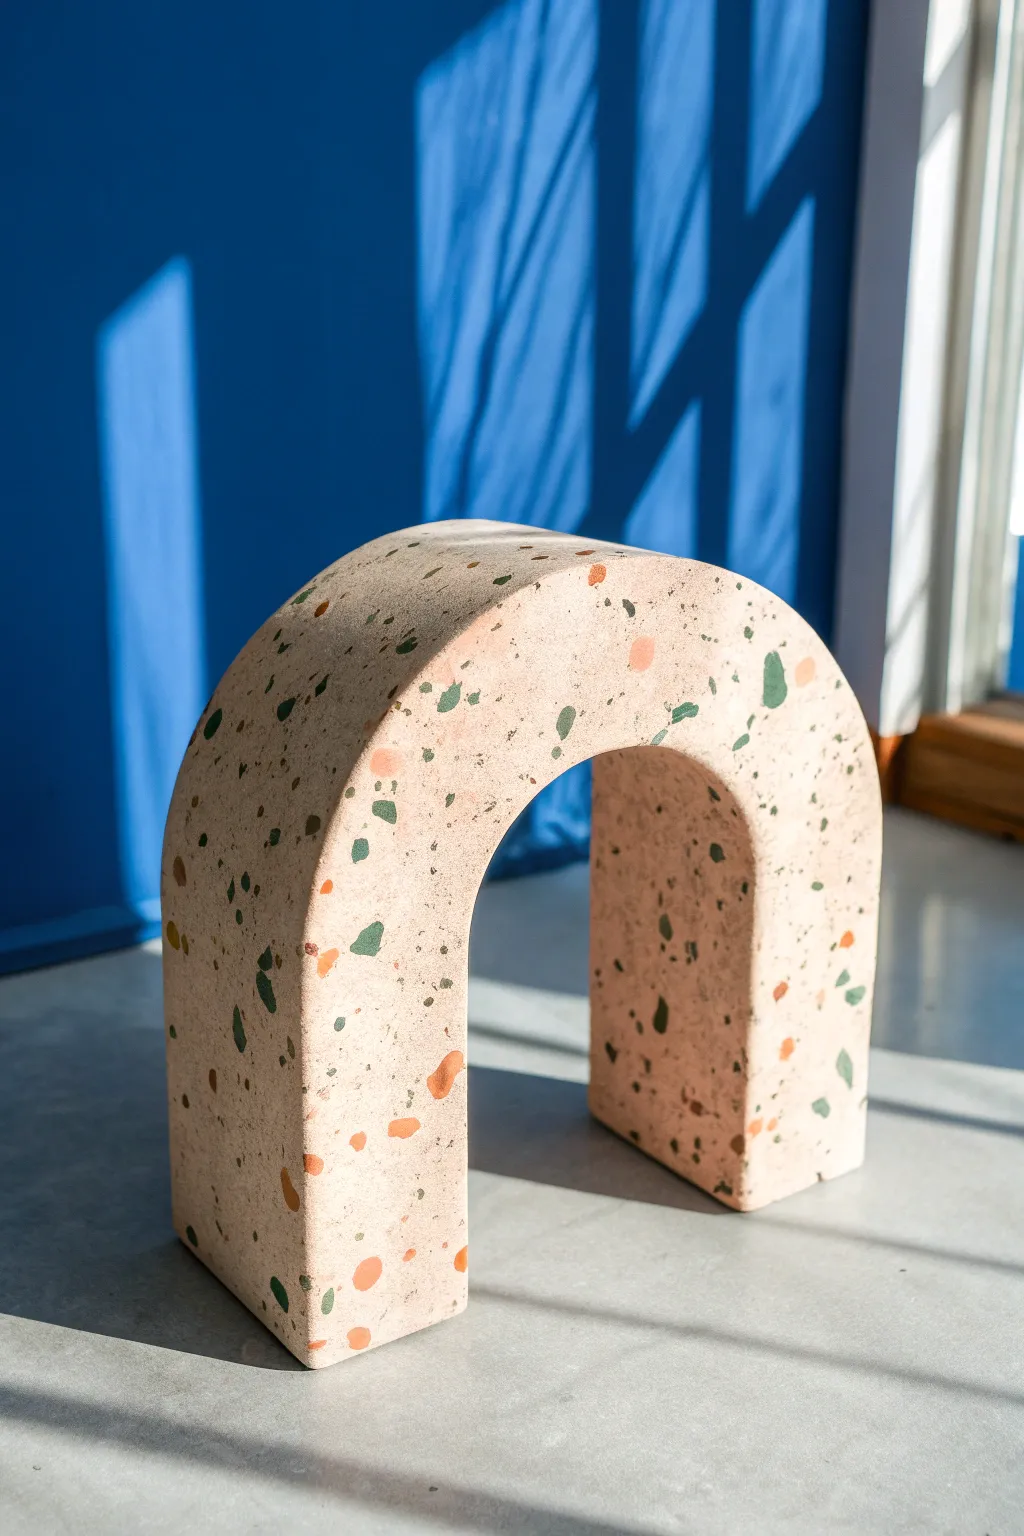
Transform simple polymer clay into a high-end architectural statement piece with this faux terrazzo arch. This project mimics the speckled beauty of real stone using a clever plasticine technique, resulting in a sturdy, stylish shape perfect for bookshelf styling or as a unique desk accent.
How-To Guide
Materials
- Beige or sand-colored polymer clay (large block)
- Small amounts of green polymer clay
- Small amounts of terracotta/orange polymer clay
- Small amounts of white or black polymer clay (optional for contrast)
- Rigid arch form (cardboard, wood, or dense floral foam)
- Acrylic rolling pin
- Craft knife or tissue blade
- Parchment paper
- Oven
- Fine-grit sandpaper (400 to 1000 grit)
- Matte or satin polymer clay varnish
- Soft paintbrush
Step 1: Preparing the Terrazzo Chips
-
Condition the accent colors:
Start by warming up your green and terracotta clays in your hands until they are soft and pliable. If you want a more complex look, mix a tiny bit of white into the green to create a varied sage tone. -
Roll thin sheets:
Roll each accent color out into a very thin sheet, roughly 1-2mm thick. The thinner the sheet, the more delicate your final chips will look. -
Chop the clay:
Using your craft knife or tissue blade, irregularly chop these thin sheets into tiny, jagged confetti-like pieces. Create a mix of sizes—some very fine speckles and some larger, chunkier fragments. -
Separate and set aside:
Keep the chopped piles somewhat loose so they don’t mash back together into a solid lump. I like to let them sit for a few minutes to firm up slightly while I prep the base.
Pro Tip: Chip Definition
To keep the “chips” looking sharp rather than blurry, pop your chopped confetti in the fridge for 10 minutes before pressing them into the warm base clay.
Step 2: Creating the Base Slab
-
Condition the base clay:
Take your large block of beige or sand-colored clay and condition it thoroughly until it is completely smooth and free of cracks. -
Roll the main slab:
Roll the beige clay out into a thick, even slab. For a desk base or sturdy object, you want this to be substantial, about 1/4 inch thick preferably. -
Apply the chips:
Sprinkle your chopped green and orange clay chips generously over the top of the beige slab. Don’t be afraid to overlap them slightly or leave some open spaces for a natural stone look. -
Embed the chips:
Place a sheet of parchment paper over the chip-covered clay and gently roll over it with your acrylic roller. This presses the chips flat into the surface without smearing the colors. -
Repeat if necessary:
Peel back the paper to check coverage. If it looks sparse, add more chips and roll again until the surface is flush and smooth.
Troubleshooting: Dirty Clay
If your beige clay picks up lint or dust while rolling, use a cotton swab dipped in rubbing alcohol or nail polish remover to gently wipe the impurities away before baking.
Step 3: Forming and Baking
-
Prepare your structure:
Create your inner support form. You can cut a sturdy U-shape from thick cardboard or shape a piece of dense foil or wire mesh. This core will stay inside the clay to give it strength. -
drape the clay:
Carefully lift your terrazzo slab and drape it over your arch form. Gently smooth the clay down the sides, ensuring no air bubbles are trapped between the clay and the form. -
Trim the edges:
Use your sharp blade to trim the excess clay at the bottom so the arch stands flat. Also trim the front and back faces to align perfectly with your form. -
Refine the seams:
If you need to seam pieces together (for example, covering the inside of the arch), smooth the joints with your finger or a clay tool until the line disappears. -
Bake the project:
Place the arch on a parchment-lined baking sheet. Bake according to your polymer clay manufacturer’s instructions—usually around 275°F (135°C) for 30-45 minutes depending on thickness.
Step 4: Finishing Touches
-
Cool and sand:
Allow the piece to cool completely. Once hard, wet-sand the surface using fine-grit sandpaper. This removes fingerprints and reveals the crisp edges of your terrazzo chips. -
Wipe clean:
Use a damp cloth to remove any sanding dust and let the moisture evaporate. -
Seal the surface:
Apply a thin coat of matte or satin varnish to protect the clay and give it a finished, stone-like sheen.
Place your new sculptural arch on your desk and enjoy the modern, artistic flair it adds to your workspace
Plasticine Painting Relief Art
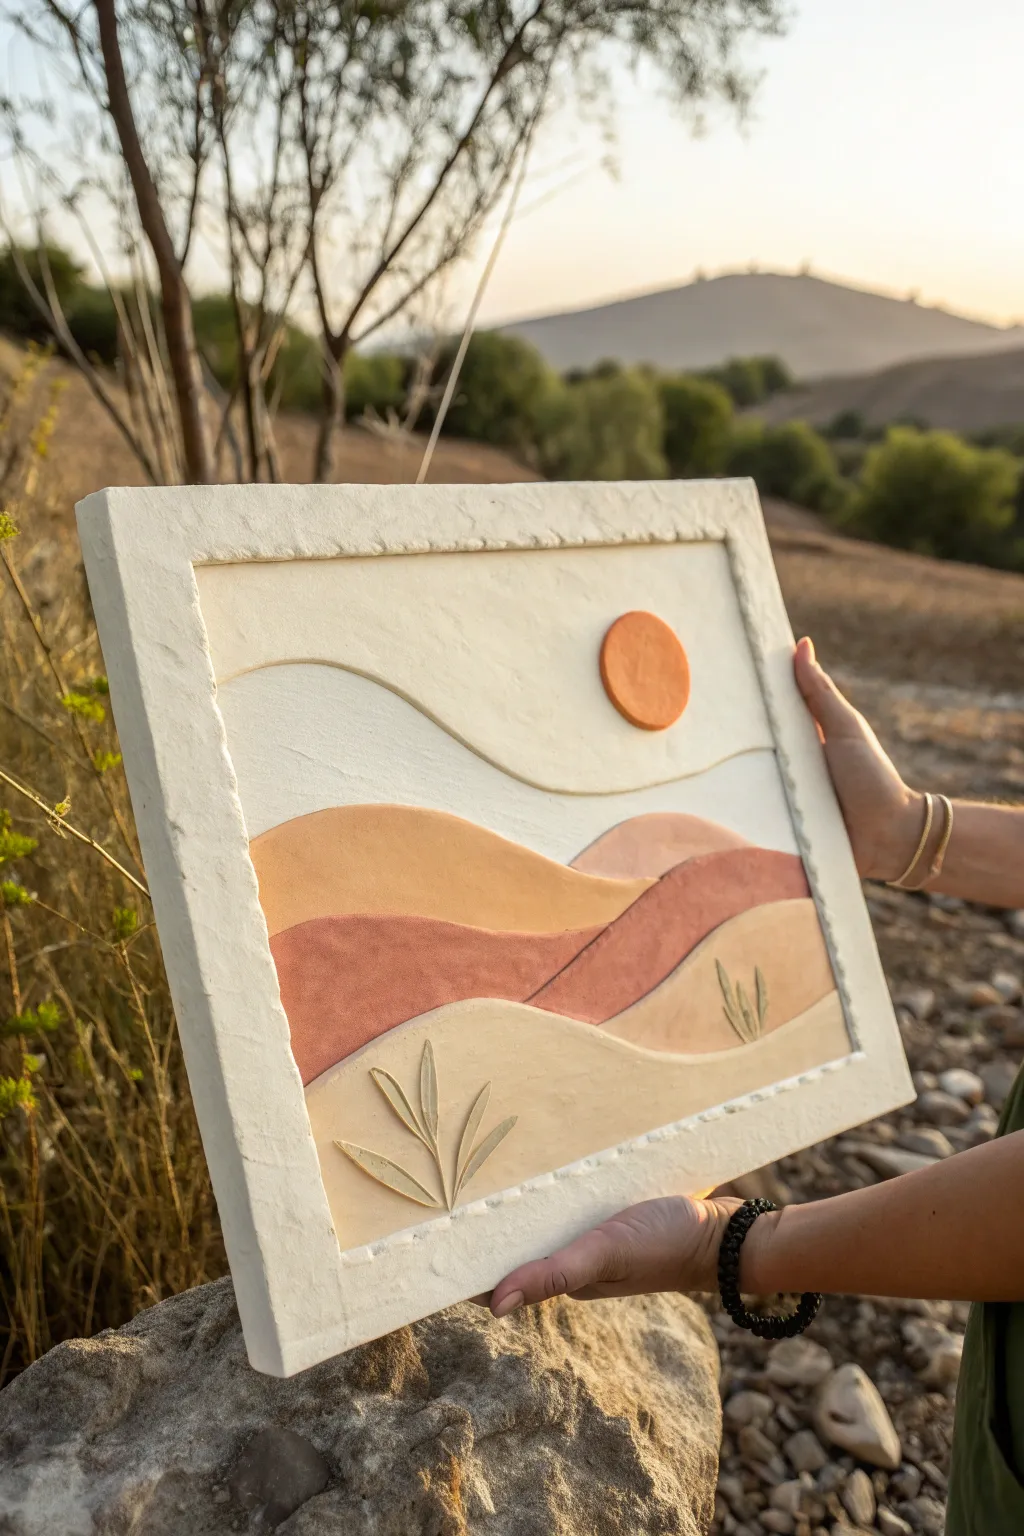
Capture the serene beauty of a rolling desert landscape with this textured plasticine relief art piece. Using soft, earthy tones layered to create depth, this project mimics the look of carved stone or painted plaster.
Step-by-Step
Materials
- Plasticine clay (white, cream, terracotta orange, muted pink, beige)
- Sturdy backing board (plywood, square canvas, or heavy cardstock)
- Clay roller or rolling pin
- Modeling tools (spatula, pointed tool for cutting)
- Palette knife
- Parchment paper (optional, for rolling)
- Frame (optional)
Step 1: Preparation and Background
-
Prepare the base:
Start with a sturdy square backing board. If you are using a wooden panel or cardboard, ensure it is clean and dry. A size around 8×8 or 10×10 inches works well for this level of detail. -
Mix your sky tone:
Knead white plasticine with a tiny pinch of cream or beige to get an off-white, natural stone color. This will be the base color for the sky and the frame border. -
Create the frame border:
Roll out long, flat strips of your off-white mixture, about 1/4 inch thick. Apply these strips around the perimeter of your board to create a raised border. Use a texturing tool or a rough stone to gently tap the surface for that weathered, faux-stone finish. -
Fill the sky:
Take a large portion of the same off-white mixture. Flatten it into a sheet and press it onto the upper third of your board, inside the frame. Smooth it out with your thumbs or a palette knife, ensuring it meets the edges of your frame seamlessly. -
Cut the horizon line:
Using a knife tool, slice a gentle, wavy line across the bottom of your sky layer. Peel away any excess clay below this line to make space for the hills.
Step 2: Layering the Landscape
-
Mix the back hill color:
Blend equal parts beige and terracotta to create a warm, sandy orange hue. Roll this out into a flat sheet, slightly thinner than your frame border. -
Shape the first hill:
Cut a wavy top edge that complements your sky line. Place this sheet directly below the sky, pressing the edges down so it adheres to the backing board. Creating a slight overlap with the sky layer adds dimension. -
Create the middle ground:
For the next layer of hills, mix a muted pink or dusty rose color. I find adding a touch of brown to pink clay grounds the color nicely. Roll it out and cut a new wavy upper edge. -
Apply the middle hill:
Layer this pink section over the bottom part of your orange hill. Gently press the seam where they overlap, but don’t smooth it completely smooth creates a nice shadow line. -
Form the foreground dune:
Use a light beige or cream clay for the closest sand dune. This layer should be placed at the very bottom, overlapping the pink hill significantly. -
Texture the surface:
Once all hills are placed, use your fingers to gently smooth the surfaces, leaving minor imperfections to keep that organic, handmade look.
Clean Lines
To get crisp, clean waves for your hills, roll the clay out on parchment paper first, cut the wavy line with a craft knife, and then lift the whole piece onto the board.
Step 3: Details and Finishing
-
Add the sun:
Roll a small ball of bright terracotta or orange clay. Flatten it into a perfect circle. Press this onto the sky area, positioning it off-center for a balanced composition. -
Sculpt the plants:
Using the same cream clay as the foreground, roll tiny, thin teardrop shapes. Flatten them slightly to look like leaves. -
Place the foliage:
Arrange these leaves in a fan shape on the bottom beige hill to resemble desert agave or grass clumps. Use a sculpting tool to press a central vein into each leaf, which also helps secure them to the background. -
Refine the edges:
Go around the inside edge of your frame border with a modeling tool to ensure a clean visual break between the frame and the artwork. -
Final texture check:
Use a dry bristle brush or a piece of textured fabric to lightly dab the entire surface. This removes fingerprints and unifies the sheen of the different clay colors.
Make It Matte
Plasticine can be shiny. Dust the finished piece lightly with cornstarch using a fluffy brush to instantly give it a matte, stone-like appearance.
Display your desert relief on a shelf where the light can catch the subtle ridges and cast gentle shadows across the hills
Mini Diorama Worlds in a Small Tray
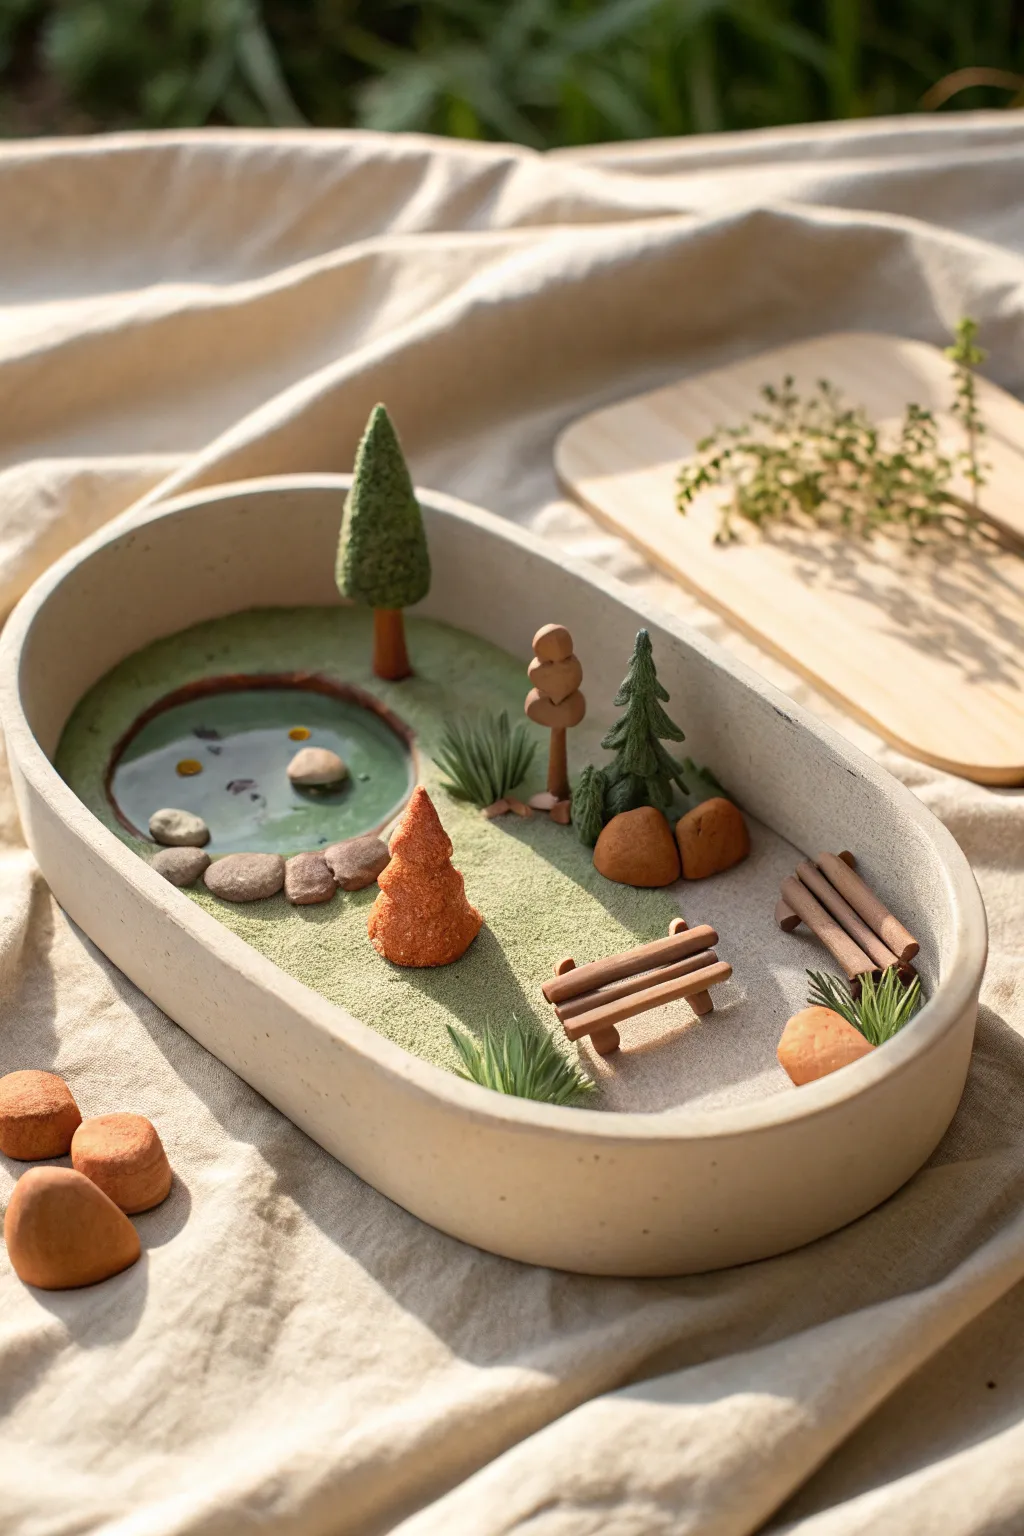
Create a peaceful miniature escape right on your desk with this charming oval tray diorama. Using simple modeling techniques and textured elements, you’ll build a serene park scene complete with a reflecting pond, tiny benches, and diverse greenery.
Step-by-Step Tutorial
Materials
- Oval ceramic or concrete tray (shallow)
- Plasticine or polymer clay (terracotta, light brown, dark green, light green)
- Fine craft sand (light beige or white)
- Green flocking powder or fine green sand
- Clear UV resin or epoxy resin
- Blue/green acrylic paint or alcohol ink (for the water)
- Small pebbles or smooth stones
- Sculpting tools (needle tool, small blade)
- Texture tool (toothbrus or stiff brush)
- Strong craft glue
Step 1: Planning and Base Preparation
-
Map out the zones:
Visualize your tray divided into three areas: a pond zone on the left, a grassy slope in the middle, and a seating area on the right. You can lightly mark these boundaries on the tray bottom with a pencil if helpful. -
Create the pond bed:
Roll out a thin circle of dark reddish-brown clay to serve as the pond’s floor. Press this firmly into the left side of the tray. -
Form the water rim:
Roll a very thin snake of clay and encircle the pond bed to create a barrier. This ensures your resin ‘water’ won’t leak out later. Smooth the edges down so it looks like a natural earthy bank.
Loose Parts?
If your trees feel top-heavy and won’t stand, insert a toothpick into the trunk and push the other end into a small ball of mounting putty hidden under the sand/flocking.
Step 2: Adding Texture and Terrain
-
Apply the grass base:
Brush a layer of glue over the areas designated for grass. While the glue is wet, generously sprinkle your green flocking powder or green sand. -
Create the sandy path:
Carefully apply glue to the remaining empty space on the right side, extending a path towards the pond. Cover this with fine beige craft sand to simulate a walking trail. -
Pour the pond:
Mix a small amount of resin with a drop of blue-green tint. Pour it slowly into your prepared clay pond circle. Let it curve up slightly against the clay rim for surface tension. -
Add floating details:
Before the resin sets completely, carefully place a tiny clay rock or two into the center to look like emerging boulders. Let the resin cure fully according to package instructions.
Step 3: Sculpting the Nature Elements
-
Shape the conifer trees:
Form cone shapes from dark green clay. Using a needle tool or small blade, pull small bits of clay downward from the top to create a rough, shaggy pine needle texture. -
Make the tree trunks:
Roll small cylinders of brown clay for trunks. Attach the green cone tops to these trunks. I generally use a tiny dab of glue here to ensure they stay connected. -
Craft the deciduous tree:
For the rounder tree, shape a ball of light brown or reddish sandy clay. Press deep grooves horizontally into it to suggest stylized foliage layers, then mount it on a thin brown trunk. -
Make the terracotta tree:
Create a distinct conical tree using terracotta-colored clay. Instead of pulling needles, use a toothbrush to stipple the surface, giving it a dense, mossy shrub texture. -
Form the tufted bushes:
Roll small balls of green clay and flatten the bottoms. Use your blade to slice downwards repeatedly around the top, creating a spiky, grass-tuft appearance.
Level Up
Add tiny white clay ducks to the pond surface or make miniature stepping stones leading from the sand path all the way to the water’s edge.
Step 4: Building Furniture and Assembly
-
Construct the benches:
Roll two medium-thickness logs of brown clay for the seats and two slightly thinner logs for the backrests. -
Add bench legs:
Create small, rectangular blocks for the bench legs. Assemble the seat and backrest onto these legs. -
Detail the wood:
Gently score lines lengthwise across the bench seats and backs to mimic wood grain. -
Position the rocks:
Take your smooth pebbles (or sculpt some from grey and rust-colored clay) and arrange them around the pond edge and near the tree bases to create natural transition zones. -
Plant the trees:
Place your trees into the scene. For the tall pine, put it near the back. Place the stylized reddish tree near the center as a focal point. -
Install the seating:
Glue the benches onto the sandy area, angling them slightly toward each other for a conversational layout. -
Final touches:
Add the small spiky grass tufts near the benches and rocks to soften the edges where items meet the sand.
Enjoy the calm vibe of your new handmade park scene