When I’m craving a little magic on my worktable, I always end up making polymer clay details for a fairy garden—they’re tiny, cute, and ridiculously satisfying. Here are my favorite ideas for building durable little oven-bake miniatures that make any plant pot feel like a secret world.
Classic Toadstool Clusters
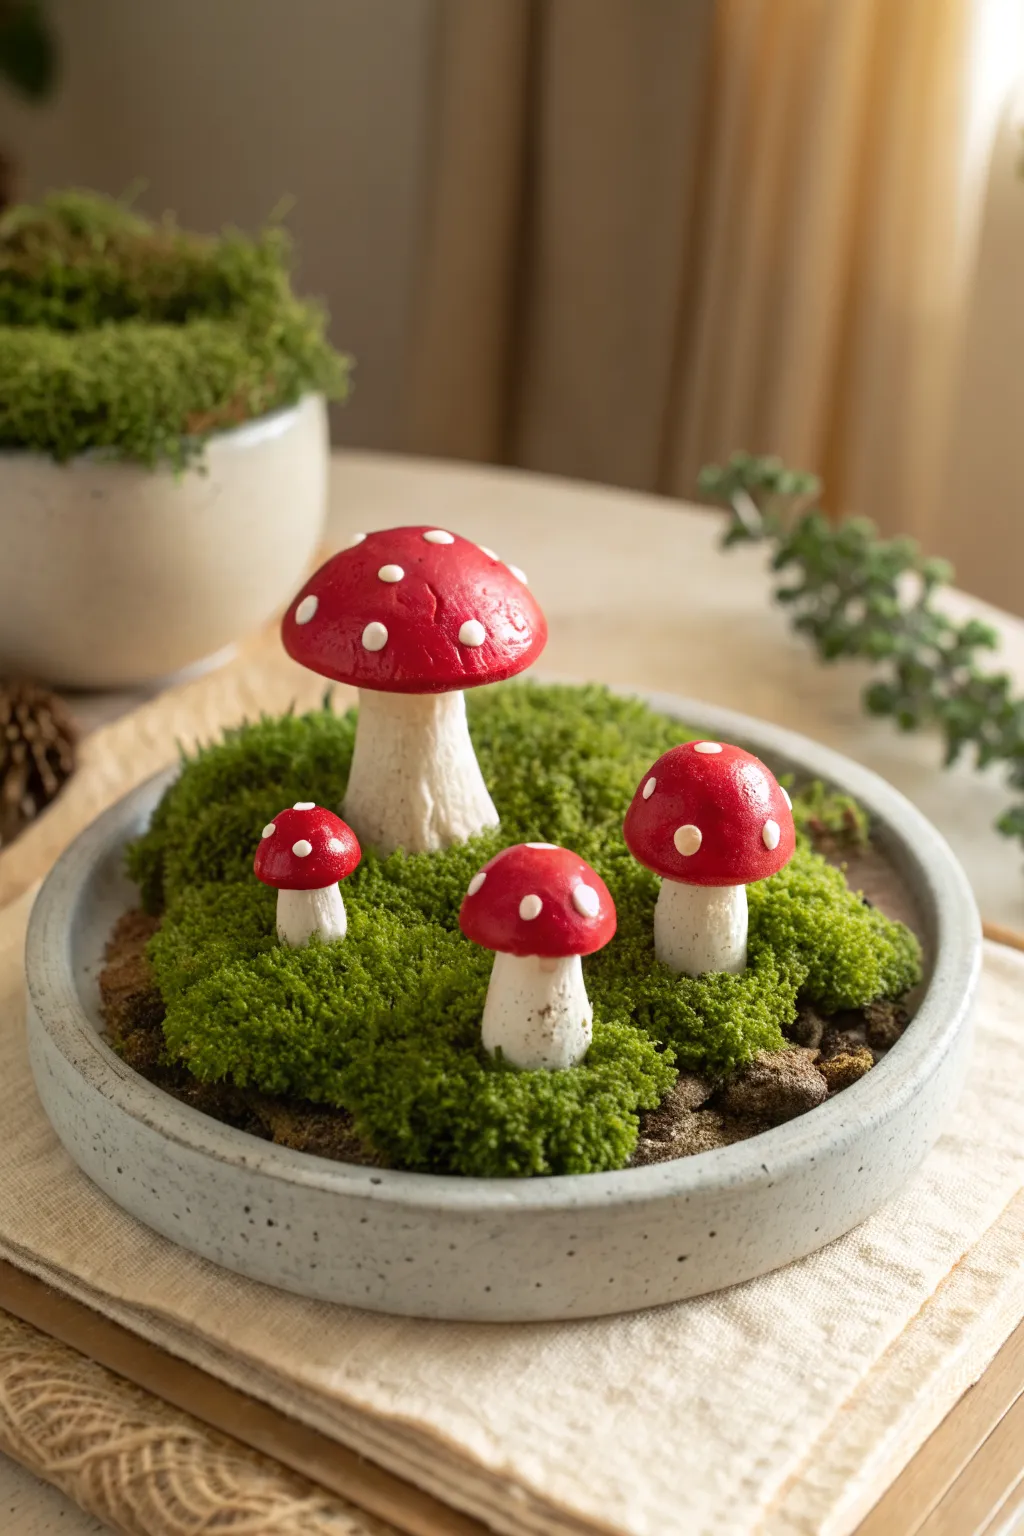
Bring a touch of woodland magic to your home with this miniature mushroom landscape. Featuring vibrant red polymer clay toadstools nestled in a bed of lush preserved moss, this shallow dish garden makes for a charmingly timeless centerpiece.
Step-by-Step Guide
Materials
- White polymer clay
- Red polymer clay
- Glossy polymer clay glaze or varnish
- Shallow round concrete or ceramic planter (approx. 6-8 inches)
- Preserved moss (Reindeer or cushion moss)
- Brown potting soil or dry coffee grounds
- Liquid polymer clay (optional, for bonding)
- Texture tool or toothbrush
- Needle tool
- Aluminum foil
- Baking sheet and parchment paper
- Oven
Step 1: Sculpting the Stems
-
Prepare the foil cores:
Crumple small pieces of aluminum foil into cone shapes for the larger mushroom stems. This saves clay and helps them bake evenly. Make one large cone and three smaller ones for the little guys. -
Cover with clay:
Condition your white polymer clay until pliable, then roll it into thick sheets. Wrap these sheets around your foil armatures, smoothing the seams invisible with your thumb. -
Shape the base:
Gently flare the bottom of each stem so it can stand on its own. The heavy base provides stability once placed in the soil. -
Add natural texture:
Using a stiff toothbrush or a texturing tool, gently tap the surface of the white stems to give them an organic, earthy look rather than a perfectly smooth finish. -
Detail the gills:
Take a small ball of white clay and flatten it onto the top of the stem. Use your needle tool to score radiating lines from the center outward to mimic mushroom gills.
Secret support
Insert a toothpick halfway into the stem before adding the cap. This acts as an internal spine, preventing the heavy red cap from drooping while baking.
Step 2: Creating the Caps
-
Form the red caps:
Roll balls of red polymer clay—one large and three varying smaller sizes. Press them into domed shapes, hollowing the underside slightly so they fit snugly over your stems. -
Attach caps to stems:
Press the red domes firmly onto the white stems. I find a drop of liquid polymer clay here helps ensure a permanent bond during baking. -
Blend the connection:
Use a modeling tool to verify the cap sits securely, smoothing any gaps underneath where the red meets the white gill area. -
Make the dots:
Roll tiny, irregular bits of white clay into small balls. Flatten them extremely thin and press them randomly onto the red caps. -
Texture the dots:
Gently tap the white spots with your finger to ensure they are fully adhered and don’t look like they are just floating on top.
Step 3: Baking and Assembly
-
Bake the mushrooms:
Place your mushrooms on a parchment-lined baking sheet. Bake according to your clay manufacturer’s instructions (usually 275°F/135°C for 15-30 minutes depending on thickness). -
Cool and glaze:
Once fully cooled, apply a coat of glossy varnish specifically to the red caps and white dots. This gives them that wet, forest-morning shine visible in the photo. -
Prepare the base:
Fill your shallow dish with dry potting soil or dried coffee grounds to simulate dark earth. Pack it down slightly so it’s firm. -
Arrange the mushrooms:
Nestle the mushrooms into the soil. Place the largest one slightly off-center, with the smaller ones clustered around it for a natural family look. -
Place the moss:
Tuck clumps of preserved moss tightly around the base of the stems, covering most of the soil but leaving a few ‘dirt’ patches visible near the rim for realism.
Glow up
Mix glow-in-the-dark powder into your white clay for the spots. Your fairy garden will look cute by day and absolutely magical when the lights go out.
Place your finished garden near a window to catch the light on those glossy caps


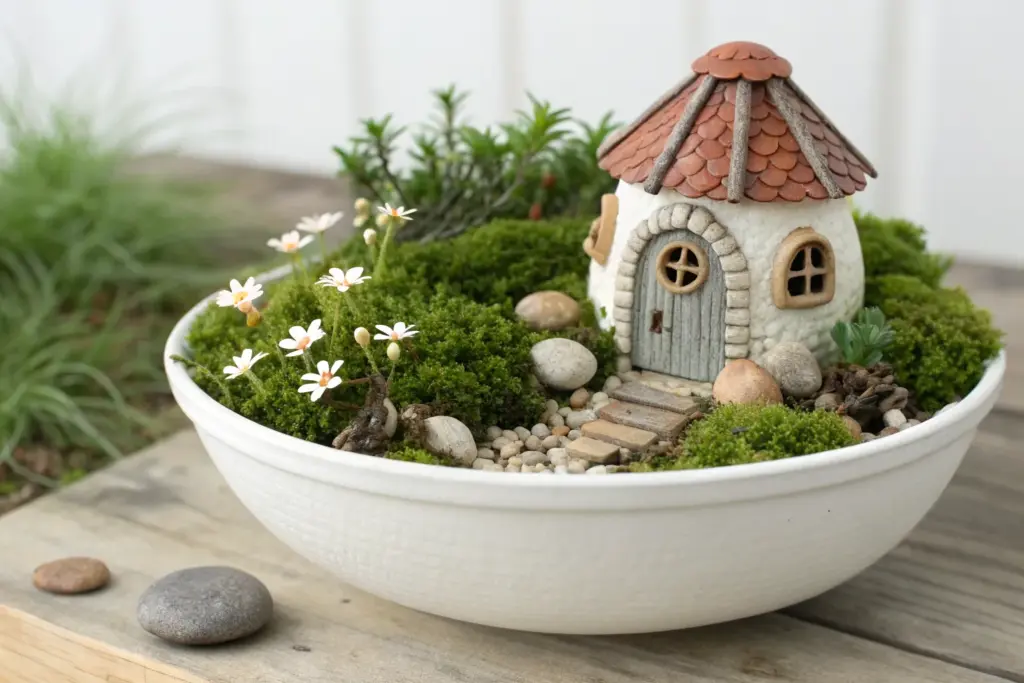
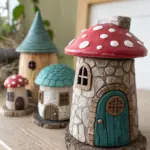
Mini Fairy Cottage With a Textured Roof
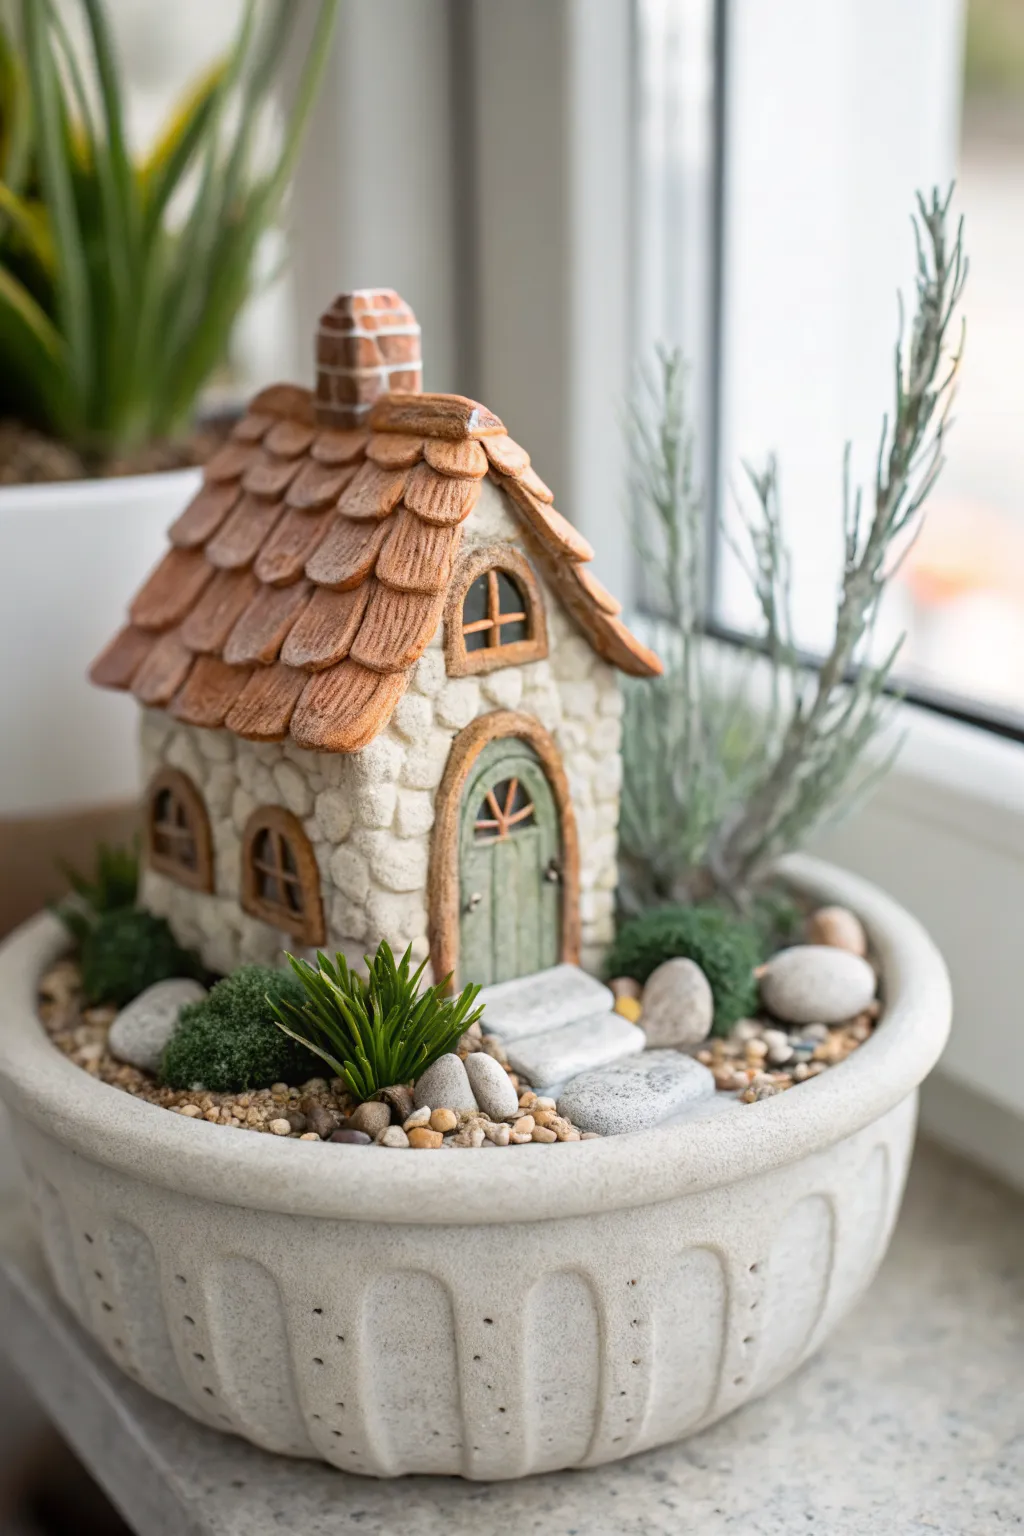
This charming miniature cottage features a highly textured cobblestone facade and a rustic, shingle-by-shingle layered roof that feels straight out of a storybook. Nestled in a shallow planter bowl, the addition of faux moss and tiny stepping stones completes this enchanting fairy garden centerpiece.
How-To Guide
Materials
- Polymer clay (white/cream for walls, terracotta/brown for roof, green for door)
- Aluminum foil (for the core structure)
- Rolling pin or pasta machine
- Ball tool and needle tool
- Liquid polymer clay (Bake & Bond)
- Hobby knife (X-Acto)
- Acrylic paints (brown, white, black washes)
- Small paintbrushes and sponge
- Shallow ceramic planter bowl
- Small pebbles, gravel, and potting soil
- Artificial succulents, rosemary sprigs, and faux moss clumps
Step 1: Building the Cottage Structure
-
Form the Core:
Begin by crumpling aluminum foil into a tight cube shape, slightly taller than it is wide. Press one side to form a peaked roof shape on top. Compress the foil firmly so it helps the house hold its shape during baking. -
Cover with Base Clay:
Roll out a sheet of white or cream polymer clay to about 1/4 inch thickness. Wrap this sheet around your foil core, sealing the seams by smoothing them with your finger or a clay tool. Trim away any excess. -
Create the Cobblestone Texture:
Roll many small balls of the same white clay in varying sizes. Flatten them slightly and press them onto the walls of the house, fitting them close together like a puzzle to mimic a dry-stack stone wall. Cover all vertical sides. -
Texture the Stones:
Use a crumpled ball of aluminum foil or a stiff toothbrush to tap against the stone shapes. This adds a realistic, pitted rock texture to remove the smooth finish.
Step 2: Adding Architectural Details
-
Craft the Door Frame:
Roll a snake of light brown clay and flatten it. Shape it into an arch and press it onto the front center of the cottage for the door frame. Use a needle tool to scratch wood grain lines into it. -
Make the Door:
Create a flat arch shape from sage green clay that fits inside your frame. Scribe vertical planks into the clay and add a tiny cross-hatch window detail near the top using brown clay strips. -
Attach Door Hardware:
Roll tiny specks of black or metallic clay for the doorknob and hinges. Press them gently onto the door using the tip of your needle tool. -
Add Side Windows:
Create smaller arched frames from brown clay for the side and upper windows. Fill the centers with dark clay to simulate depth, or cut through if your foil core allows. Add cross-pane details. -
Construct the Chimney:
Form a small rectangular prism of clay. Use a needle tool to carve tiny brick patterns into the surface. Attach this to the side of the roof slope using a dab of liquid clay.
Roof Slumping?
If the clay roof sags while you work, bake the foil core and base walls first for 15 minutes. Once cool, add the raw roof clay on top of the hardened base for better support.
Step 3: Roofing and Finishing
-
Prepare the Shingles:
Mix brown and terracotta clay for a marbled look. Roll it out thin and cut dozens of small, rounded rectangles. I find specifically rounding the bottom corners gives a softer, aged look. -
Lay the Roof:
Starting at the bottom edge of the roofline, layer the shingles horizontally, overlapping each row as you move upward toward the peak. Ensure the seams are staggered. -
Texture the Shingles:
Use a toothbrush or a sandpaper sheet to press texture into the roof shingles so they look like weathered terracotta rather than plastic. -
Cap the Ridge:
Roll a final strip of clay and place it over the very top ridge of the roof to cover the meeting point of the last two rows of shingles. -
Bake the Piece:
Bake the cottage according to your clay manufacturer’s instructions (usually 275°F for 15-30 minutes). Let it cool completely inside the oven to prevent cracking. -
Apply an Antique Wash:
Dilute brown acrylic paint with water. Brush it over the entire house, especially the stones and roof, then immediately wipe off the surface with a damp sponge. The dark paint will stay in the crevices, highlighting the texture.
Light It Up
Before adding the roof, hollow out the bottom of the foil core. Leave a channel so you can place the finished house over a battery-operated LED tea light for a cozy glow.
Step 4: Assembling the Garden Bowl
-
Prepare the Planter:
Fill your shallow bowl with soil or floral foam if using artificial plants. Place the cottage slightly off-center for a balanced composition. -
Lay the Pathway:
Use flat gray stones or makeshift clay slabs to create steps leading up to the front door. Surround them with fine gravel or sand. -
Add Greenery:
Tuck clumps of preserved moss around the base of the cottage to hide any gaps. Plant tall, spriggy succulents or faux rosemary behind the house to mimic trees. -
Final Touches:
Add a few larger pebbles around the perimeter and a small faux succulent shrub near the front corner to frame the scene.
Place your bowl on a sunny windowsill and enjoy your handmade miniature landscape
Pebble-Style Garden Path Tiles
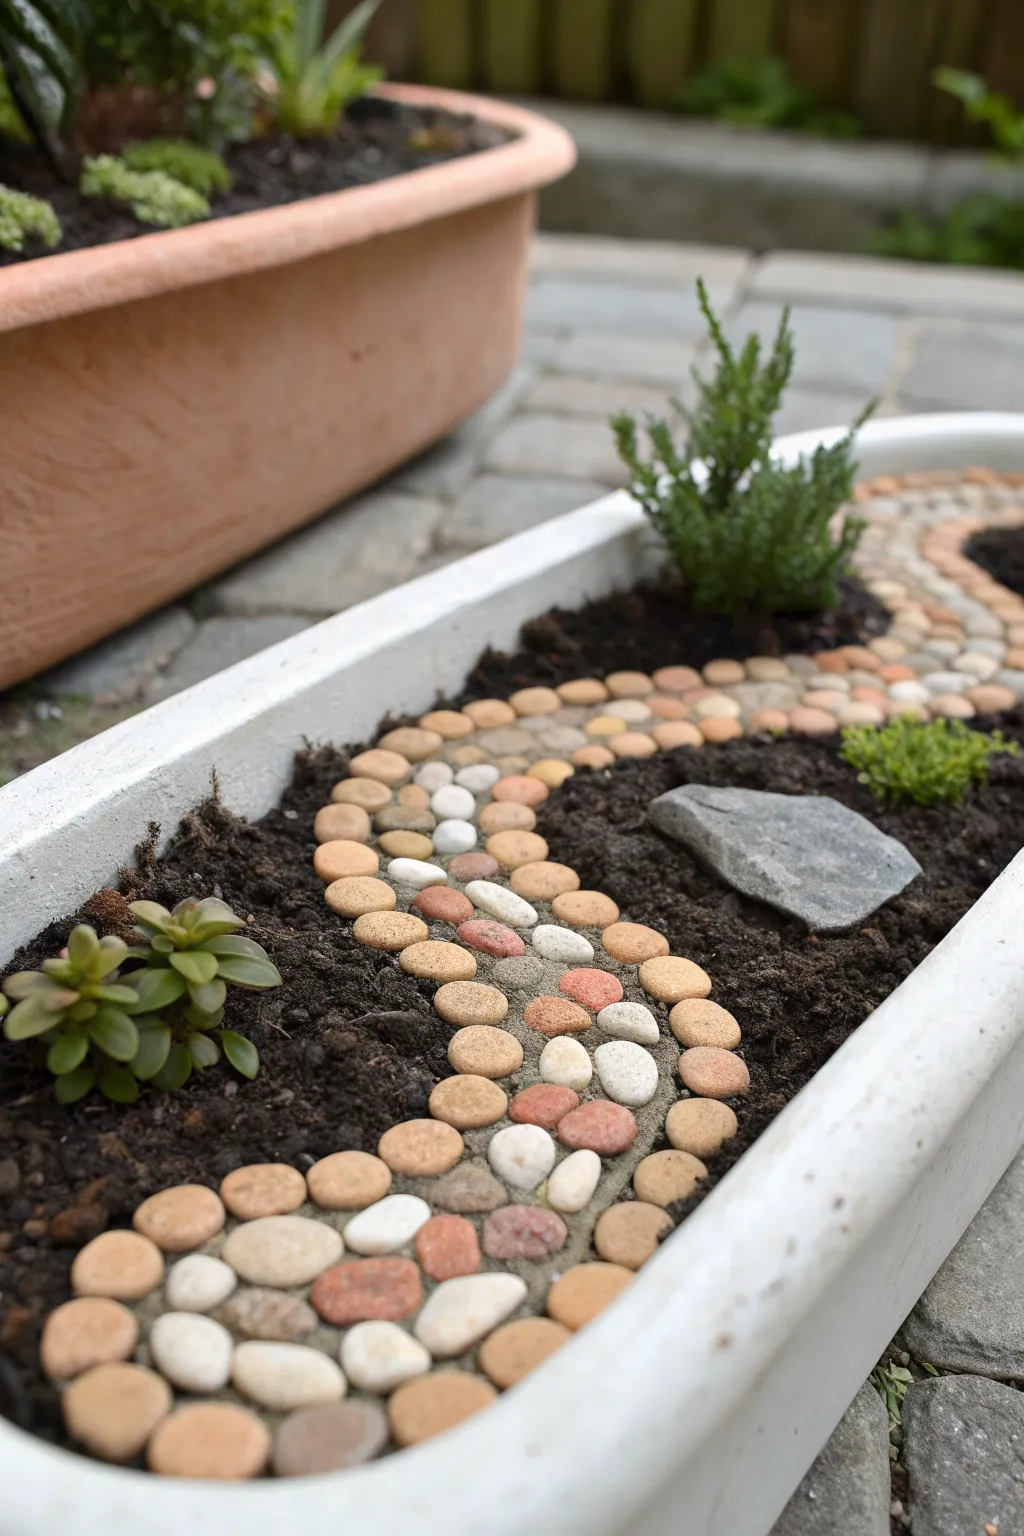
Transform your miniature garden with this charming winding walkway that mimics the look of natural river stones. Using polymer clay allows you to customize the color palette perfectly while creating a durable, water-resistant path for your tiny landscape.
Detailed Instructions
Materials
- Polymer clay (beige, white, tan, terracotta, and grey)
- Grey polymer clay (for the base/grout)
- Faux moss or real moss blocks
- Miniature plants (succulents or faux greenery)
- Long, rectangular planter or tray
- Potting soil
- Rolling pin or pasta machine
- Texture sponge or toothbrush
- Optional: Satin varnish
Step 1: Prepping the ‘Pebbles’
-
Mix your stone colors:
Begin by conditioning your blocks of polymer clay. To achieve the natural variety seen in the photo, don’t just use solid colors. Marble a bit of white into your tan and terracotta clays to create streaks and realistic stone patterns. -
Correct sizing:
Pinch off small pieces of clay, roughly the size of a pea or smaller. Roll them into balls between your palms. -
Flattening the stones:
Gently press each ball onto your work surface with your thumb to flatten it slightly. Aim for uneven, organic ovals rather than perfect circles. -
Adding texture:
For a more realistic finish, lightly tap the surface of your clay pebbles with a coarse sponge or an old toothbrush. This removes fingerprints and adds a stony grit texture.
Sticky Situation?
If your clay pebbles aren’t sticking to the base strip, add a tiny dot of liquid polymer clay (Bake & Bond) to the back of each stone before pressing it down.
Step 2: Creating the Path Base
-
Roll the grout strip:
Condition a large piece of grey clay effectively. Roll it out into a long, flat strip about 1/8 inch thick. This will serve as both the foundation and the ‘grout’ between your stones. -
Shape the curve:
Using a craft knife, cut the grey strip into a winding, S-shape curve. Measure it against your planter to ensure it fits the length and width you desire. -
Positioning the base:
Lay this grey strip on a baking tile or parchment paper. This is where you will assemble the path so it can go straight into the oven.
Step 3: Assembling the Mosaic
-
Arranging the stones:
Press your prepared clay pebbles onto the grey base strip. Start by outlining the edges to define the path’s shape, then fill in the center. -
Packing them tight:
Ideally, place the stones close together, leaving small gaps where the underlying grey clay shows through, imitating mortar or dirt. -
Securing the bond:
Once all pebbles are placed, use a rolling pin to roll gently over the entire path once. This ensures all stones are level and firmly adhered to the base layer. -
Baking:
Bake the entire assembled path according to your clay package’s instructions (usually 275°F/130°C for 15-30 minutes). Let it cool completely before moving.
Pro Tip: Weathering
After baking, try a ‘black wash’. Paint diluted black acrylic over the stones and wipe it off immediately. The dark paint stays in the crevices for instant age.
Step 4: Garden Installation
-
Prepare the soil:
Fill your long planter with potting soil. Create a shallow trench or depression down the center where your path will sit. -
Laying the path:
Nestle your cooled polymer clay path into the soil. Wiggle it down slightly so the edges are flush with the dirt level, making it look embedded rather than floating. -
Adding greenery:
Plant small succulents or place faux plants along the curves of the path. In the example, a small shrub fits perfectly in the back curve, and a low mossy plant sits in the front curve. -
Final touches:
Place a larger natural rock or two near the path to break up the texture. Brush any loose soil off your clay pebbles to make the colors pop.
Your miniature garden now has a durable, enchanting walkway ready for visitors

Stepping-Stones With Leaf Imprints
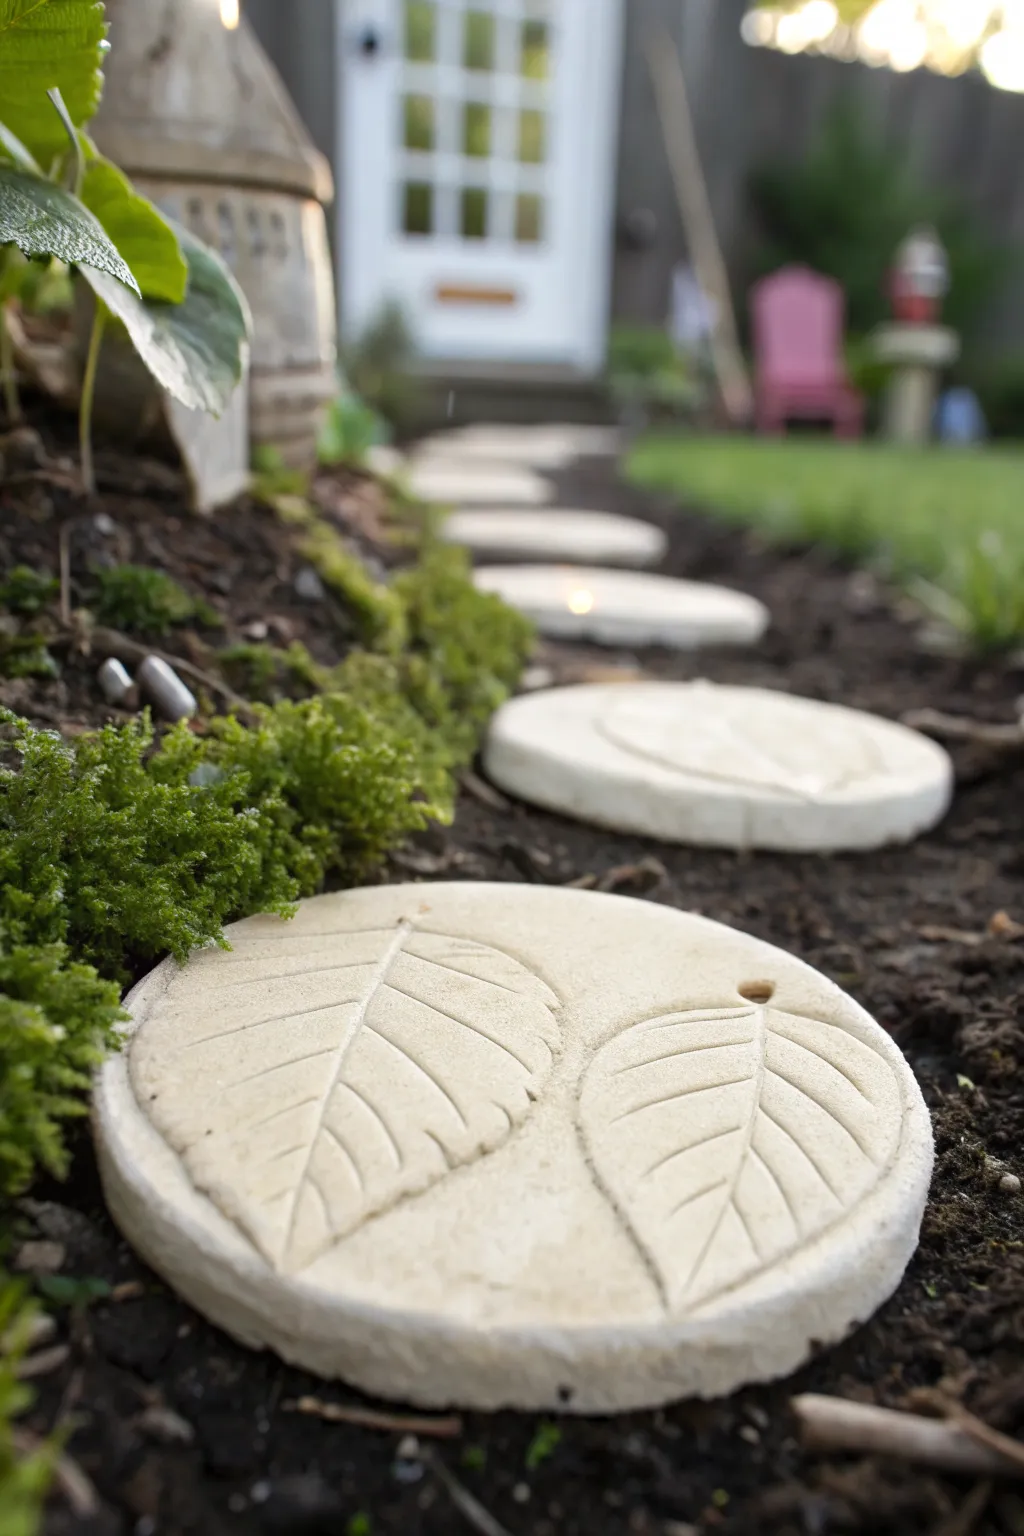
Create a magical pathway for your fairy garden with these charming round stepping stones featuring delicate leaf impressions. The natural off-white clay mimics the look of real stone while capturing the intricate vein details of your favorite foliage.
Step-by-Step Tutorial
Materials
- White or beige polymer clay (choose a brand that bakes hard/durable)
- Conditioning machine or rolling pin
- Circle cookie cutter (approx. 1.5 – 2 inches diameter)
- Fresh leaves with prominent veins (e.g., sage, mint, or small hydrangeas)
- Texture sponge or piece of sandpaper
- Ceramic tile or glass sheet for baking
- Sharp craft knife
- Oven
- Brown acrylic paint (optional for antiquing)
- Paper towels
Step 1: Preparation & Forming
-
Condition the Clay:
Begin by thoroughly conditioning your polymer clay until it is soft and pliable. If the clay is too stiff, mix in a tiny amount of clay softener or baby oil to make it workable. -
Roll a Slab:
Roll the clay out into a thick sheet, approximately 1/4 inch to 3/8 inch thick. You want it substantial enough to look like a stone paver. -
Cut the Circles:
Using your circle cutter, press firmly into the clay sheet to cut out your stepping stone shapes. If you don’t have a cutter, trace a small jar lid with a craft knife. -
Smooth the Edges:
Gently rub your finger along the cut edge of each circle to soften the sharp cut lines, giving the piece a more weathered, tumbled stone appearance. -
Texture the Surface:
To mimic the gritty texture of real concrete or stone seen in the photo, lightly press a coarse texture sponge or a piece of sandpaper onto the surface of the clay circles.
Vein Definition Tip
If your leaves are too soft to leave a mark, pop them in the freezer for 5 minutes before pressing. The rigid veins will create a much sharper, deeper imprint.
Step 2: Creating the Imprints
-
Select Your Leaves:
Choose small leaves that fit nicely within your circle. The back side of the leaf usually has more prominent veins, which creates a better impression. -
Position the Leaves:
Place two leaves onto a clay circle, arranging them so they lean away from each other slightly, mimicking the V-shape shown in the example. -
Embed the Pattern:
Use your rolling pin or a brayer to roll firmly over the leaves. I find that placing a piece of parchment paper over the leaf first prevents the clay from sticking to the roller. -
Check the Depth:
Lift a corner of the leaf to check the impression depth; you need deep grooves to catch shadows later. If it’s too faint, lay it back down and roll again with more pressure. -
Remove the Foliage:
Carefully peel the leaves away from the clay using tweezers or the tip of your craft knife to reveal the intricate skeletons underneath. -
Add a Tiny Feature:
Notice the small hole in the example stone? Use a toothpick or needle tool to poke a small decorative hole near the edge or between the leaves if you plan to hang them or just for detail.
Step 3: Baking & Finishing
-
Bake the Stones:
Transfer your stones to a ceramic tile or baking sheet. Bake according to the manufacturer’s instructions for your specific brand of clay, usually at 275°F (135°C) for 15-30 minutes. -
Cool Down:
Allow the stones to cool completely in the oven with the door slightly ajar. This gradual cooling helps prevent cracks. -
Apply an Antiquing Wash:
For added realism, dilute a small amount of brown acrylic paint with water. Brush this wash over the entire surface, ensuring it gets into the leaf veins. -
Wipe Back:
Immediately wipe the surface with a paper towel. The paint will remain in the deep crevices of the leaves and the texture, highlighting the design while leaving the high points clean. -
Seal (Optional):
If these will be outdoors in a fairy garden, seal them with a matte exterior varnish to protect the clay from UV rays and moisture.
Glow-in-the-Dark Magic
Mix glow-in-the-dark powder into your white clay before rolling. During the day they look like stone, but at night your fairy path will softly illuminate.
Arrange your finished stones in a winding path through some moss to complete the enchanting look

The Complete Guide to Pottery Troubleshooting
Uncover the most common ceramic mistakes—from cracking clay to failed glazes—and learn how to fix them fast.
Arched Bridge With Wood-Grain Texture
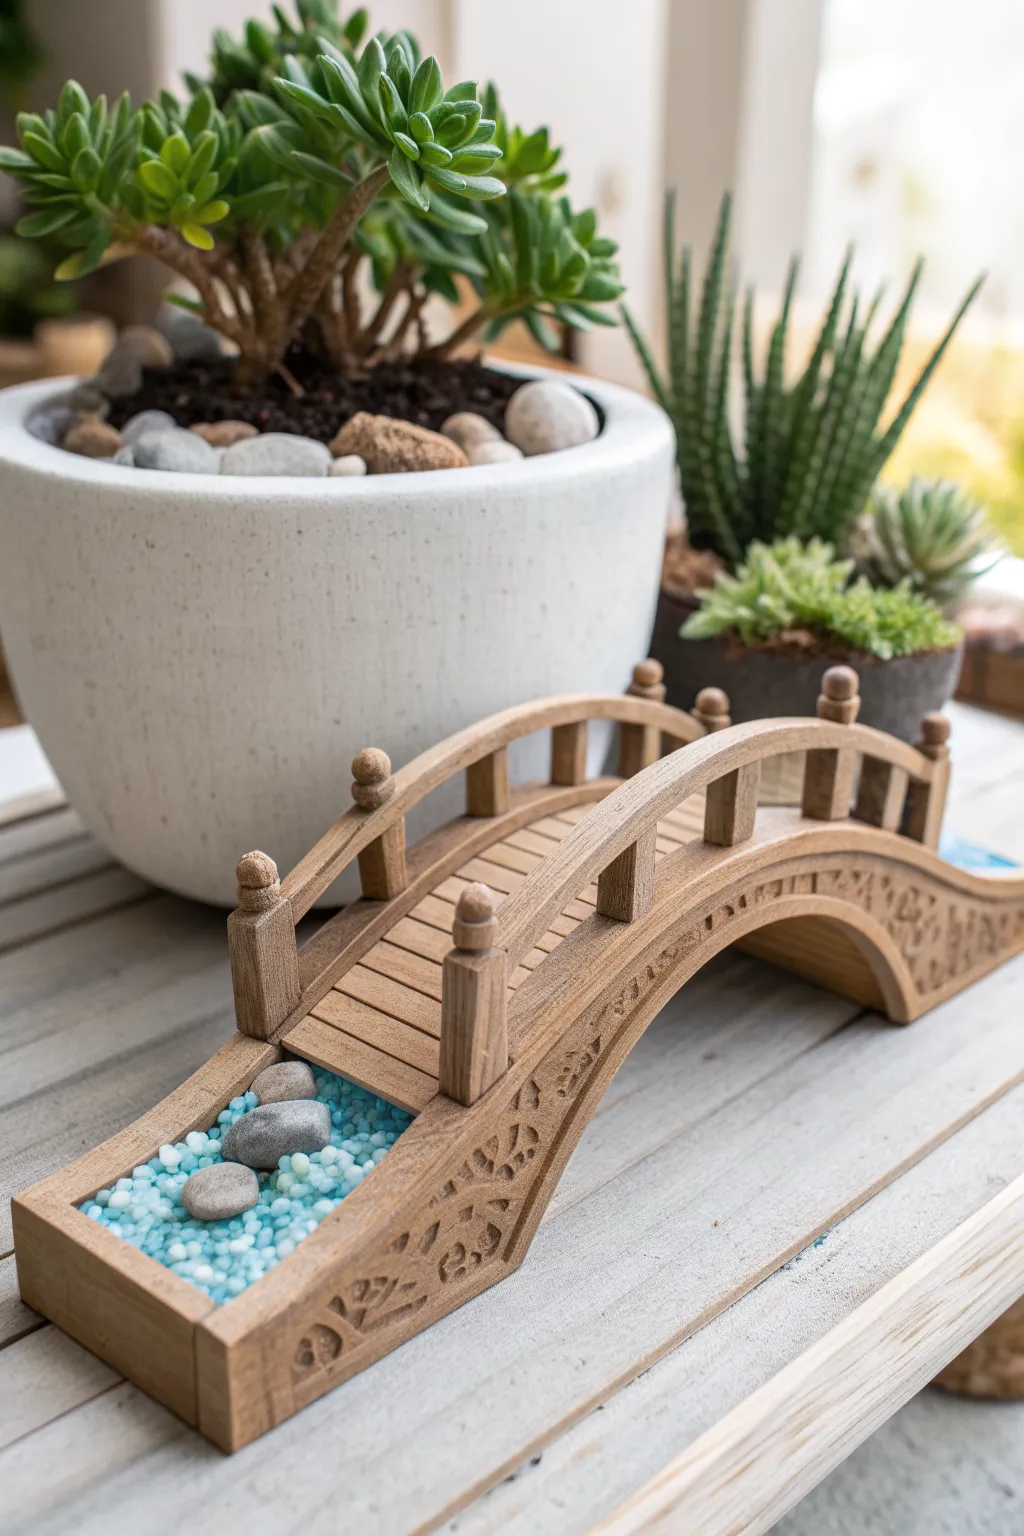
Every fairy needs a safe crossing over imaginary streams, and this charming arched bridge is the perfect architectural addition to your miniature garden. Crafted from polymer clay but textured to look like aged timber, it features delightful carved details and faux river stones for a realistic touch.
Detailed Instructions
Materials
- Polymer clay (medium brown, dark brown, grey, light blue)
- Acrylic roller or pasta machine
- Flexible blade or craft knife
- Texture tools (needle tool, toothbrush, or stiff bristle brush)
- Small ball stylus or dotting tool
- Cardboard or cardstock (for the arch form)
- Liquid clay (optional but recommended)
- Oven-safe glass or ceramic bowl (optional, for baking curve)
- Dark acrylic paint (for antiquing)
- Paper towels
Step 1: Creating the Structural Base
-
Prepare the arch form:
Cut a strip of sturdy cardstock approximately 6 inches long and 2 inches wide. Bend it into a gentle arch shape. If needed, tape the ends down to your work surface or use an overturned oven-safe bowl to support the clay during baking. -
Roll the base clay:
Condition your medium brown polymer clay and roll it out into a thick sheet (about 1/4 inch). Cut a long rectangular strip that matches the width of your planned bridge deck plus a little extra for the sides. -
Form the bridge deck:
Drape the clay strip over your cardstock arch or bowl form. Smooth it down gently so it holds the curve without thinning out the clay too much. -
Add wood grain texture:
Using a needle tool, lightly drag irregular lines lengthwise down the clay strip to mimic wood grain. I like to add occasional knots by swirling the tool tip for a more organic look. -
Define the planks:
Use the back of your craft knife to press horizontal indentations across the width of the bridge every half-inch, creating the appearance of individual wooden planks.
Step 2: Crafting the Side Panels
-
Cut the side arches:
Roll out two more strips of brown clay, slightly thinner than the base. Cut them into curved arch shapes that will fit flush against the sides of your bridge deck. -
Carve the relief pattern:
This is where the magic happens. On each side panel, use a small dotting tool or needle to carve a repeating floral or geometric pattern. Press gently to create recessed designs along the lower half of the arch. -
Attach the sides:
Score the edges of the bridge deck and the back of the side panels. Apply a tiny amount of liquid clay if you have it, then press the side panels firmly against the deck to fuse them. -
Add the railing posts:
Roll small cylinders of brown clay for the vertical posts. Cut them to equal lengths and attach them upright along the top of the side panels, spacing them evenly.
Sagging Arch?
If the bridge sags while working, stuff the space under the arch with polyester batting or crumpled parchment paper. It supports the clay but won’t leave hard marks during baking.
Step 3: Railings and Refining
-
Install the handrails:
Create two long, thin rectangular strips of clay. Drape these over the tops of your vertical posts to create the handrail, following the curve of the bridge. -
Create the finials:
Roll tiny spheres of brown clay. Place one on top of each vertical post where it meets the handrail, pressing down slightly to secure them. -
Detailed texturing:
Go back over the new additions—posts, rails, and sides—with your needle tool or a stiff brush to continue the wood grain texture everywhere. Consistency helps sell the illusion of real wood.
Mossy Magic
For a ‘level_up’, mix translucent liquid clay with green chalk pastel shavings or flocking powder. Dab this ‘moss’ into the cracks of the wood and between the stones after baking.
Step 4: The Water Feature & Finish
-
Build the water base:
At the foot of the bridge, press a small, flat patch of light blue clay into the ‘ground’ area between the bridge walls to simulate water. -
Add river stones:
Roll varying sizes of grey and dark brown clay into small, irregular pebble shapes. Press these into the blue clay and cluster larger ones near the bridge entrance. -
Baking the project:
Bake the bridge according to your clay manufacturer’s instructions (usually 275°F for 15-30 minutes), keeping it supported by the cardstock or bowl form so the arch doesn’t collapse. -
Antiquing wash:
Once cool, water down some dark brown acrylic paint. Brush it over the entire wood section, getting into the carved grooves. -
Wipe away excess:
Immediately wipe the surface with a paper towel. The paint will stay in the grain lines and carved patterns, emphasizing the texture and mimicking aged timber.
Place this sturdy little structure across a dry riverbed of pebbles to complete your enchanting scene
Stone Garden Wall Borders
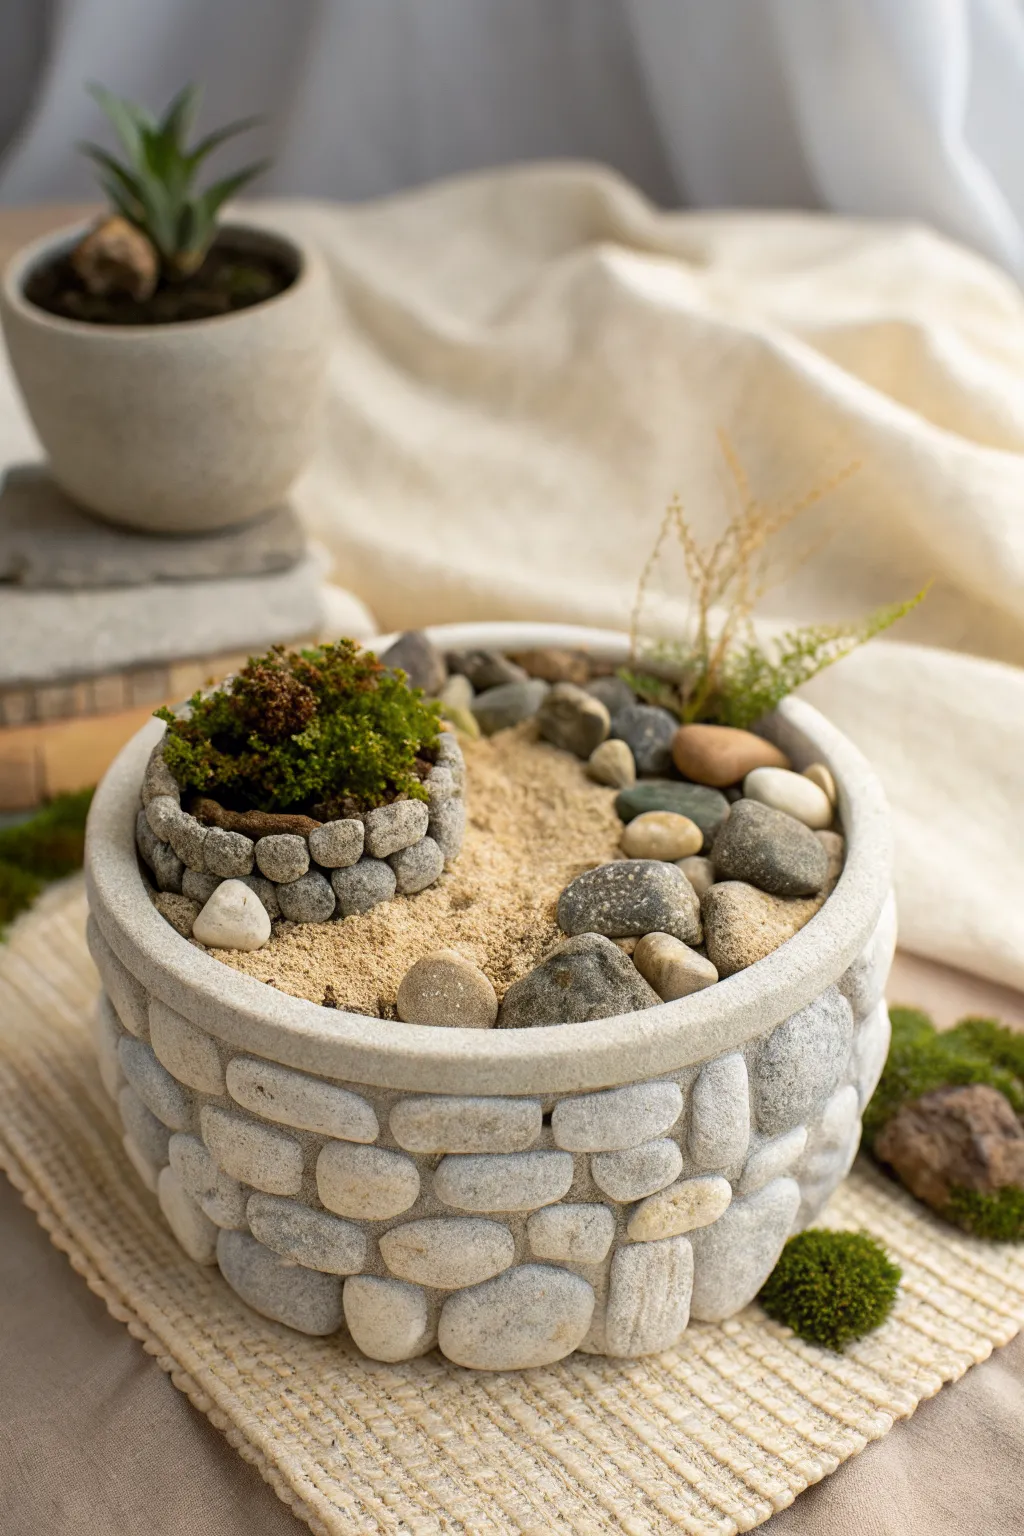
Transform ordinary polymer clay into a stunningly realistic stone retaining wall planter for your indoor garden. This project combines trompe-l’œil sculpting with simple assembly techniques to create a rustic, textured vessel perfect for succulents or moss.
How-To Guide
Materials
- Light grey polymer clay (plenty of it)
- Translucent liquid polymer clay (Bake & Bond)
- Oven-safe glass or metal bowl (to use as a form)
- Smaller oven-safe ramekin (for the inner planter)
- Aluminum foil
- Stiff-bristled toothbrush or texture sponge
- Needle tool or toothpick
- Ball stylus tool
- Acrylic paints (black, dark brown, white)
- Paper towels
- Oven
- Matte spray varnish
Step 1: Preparing the Base Forms
-
Cover the mold:
Begin by flipping your larger oven-safe bowl upside down on your work surface. Cover the entire exterior tightly with heavy-duty aluminum foil to ensure the clay doesn’t stick to the bowl later. -
Prepare the smaller form:
Repeat the foil covering process for the smaller ramekin, which will serve as the inner, elevated moss planter. -
Condition the clay:
Thoroughly knead your light grey polymer clay until it is soft and pliable. You want it warm enough to manipulate without cracking, but firm enough to hold texture.
Stone Texture Secret
Mix a pinch of coarse black pepper or dried used coffee grounds into your grey clay before sculpting. It adds seemingly random speckles that look incredibly like real granite.
Step 2: Building the Stone Walls
-
Create the cobblestones:
Roll dozens of clay balls in varying sizes, roughly 1/2 inch to 1 inch in diameter. Slightly flatten them between your fingers to create oval, river-stone shapes rather than perfect spheres. -
Apply base layer:
Apply a thin layer of liquid polymer clay to the foil-covered base of the large bowl. Press your flattened clay stones onto the foil, starting at the rim (which will become the bottom) and arranging them closely together. -
Build upward:
Continue adding rows of clay stones, working your way ‘up’ the bowl (which is actually down toward the rim). Use a little liquid clay between stones to act as mortar. -
Create the rim:
For the top rim of the planter, roll a long, thick snake of clay. flatten it into a wide band and press it along the edge of the bowl form, smoothing it over the top row of stones to create a solid coping stone effect. -
The inner planter:
Using the smaller ramekin form, build a similar but smaller stone wall using tinier clay pebbles. Focus on making the rim look like a ring of flat stones. -
Texturing the stones:
This is where the magic happens. Vigorously press a stiffer toothbrush or a crumpled ball of aluminum foil against every single clay stone. This eliminates fingerprints and mimics the porous surface of real rock. -
Refining the gaps:
Use a needle tool or small ball stylus to deepen the crevices between the stones, defining their individual shapes clearly.
Step 3: Baking and Finishing
-
Initial bake:
Bake both pieces while they are still on their forms according to your clay package instructions (usually 275°F/135°C for 15-30 minutes). -
Cool and remove:
Allow the clay to cool completely before carefully removing the bowls and peeling away the aluminum foil from the inside. -
The wash technique:
Mix a small amount of black and dark brown acrylic paint with water to create a very jagged, thin wash. -
Applying the age:
Brush the dark wash over the entire textured surface, ensuring it gets deep into the cracks between the stones. -
Wipe back:
I like to immediately wipe the surface with a damp paper towel. This leaves the dark color in the crevices and texture pits while revealing the light grey stone color on the raised areas. -
Dry brushing highlight:
Once the dark wash is dry, dip a dry brush into white paint, wipe off almost all of it, and lightly drag it across the tops of the stones to catch the texture. -
Seal:
Spray the finished pieces with a matte varnish to protect the paint and eliminate any unnatural polymer clay shine.
Mossy Grout Level-Up
Before baking, press tiny bits of green flocking powder or dried tea leaves into the deep crevices between the stones to simulate moss growing in the mortar lines.
Step 4: Assembly
-
Filling the base:
Fill the bottom of the large planter with sand or fine gravel to provide a stable base. -
Positioning:
Nestle the smaller planter into the sand, offsetting it to one side to create visual interest. -
Adding life:
Fill the open spaces with fine sand, moss clumps, tiny pebbles, and faux or real air plants to complete your miniature landscape.
Now step back and admire how a simple bowl form and some textured clay became a rugged, ancient-looking garden feature

What Really Happens Inside the Kiln
Learn how time and temperature work together inside the kiln to transform clay into durable ceramic.
Snail and Frog Garden Friends
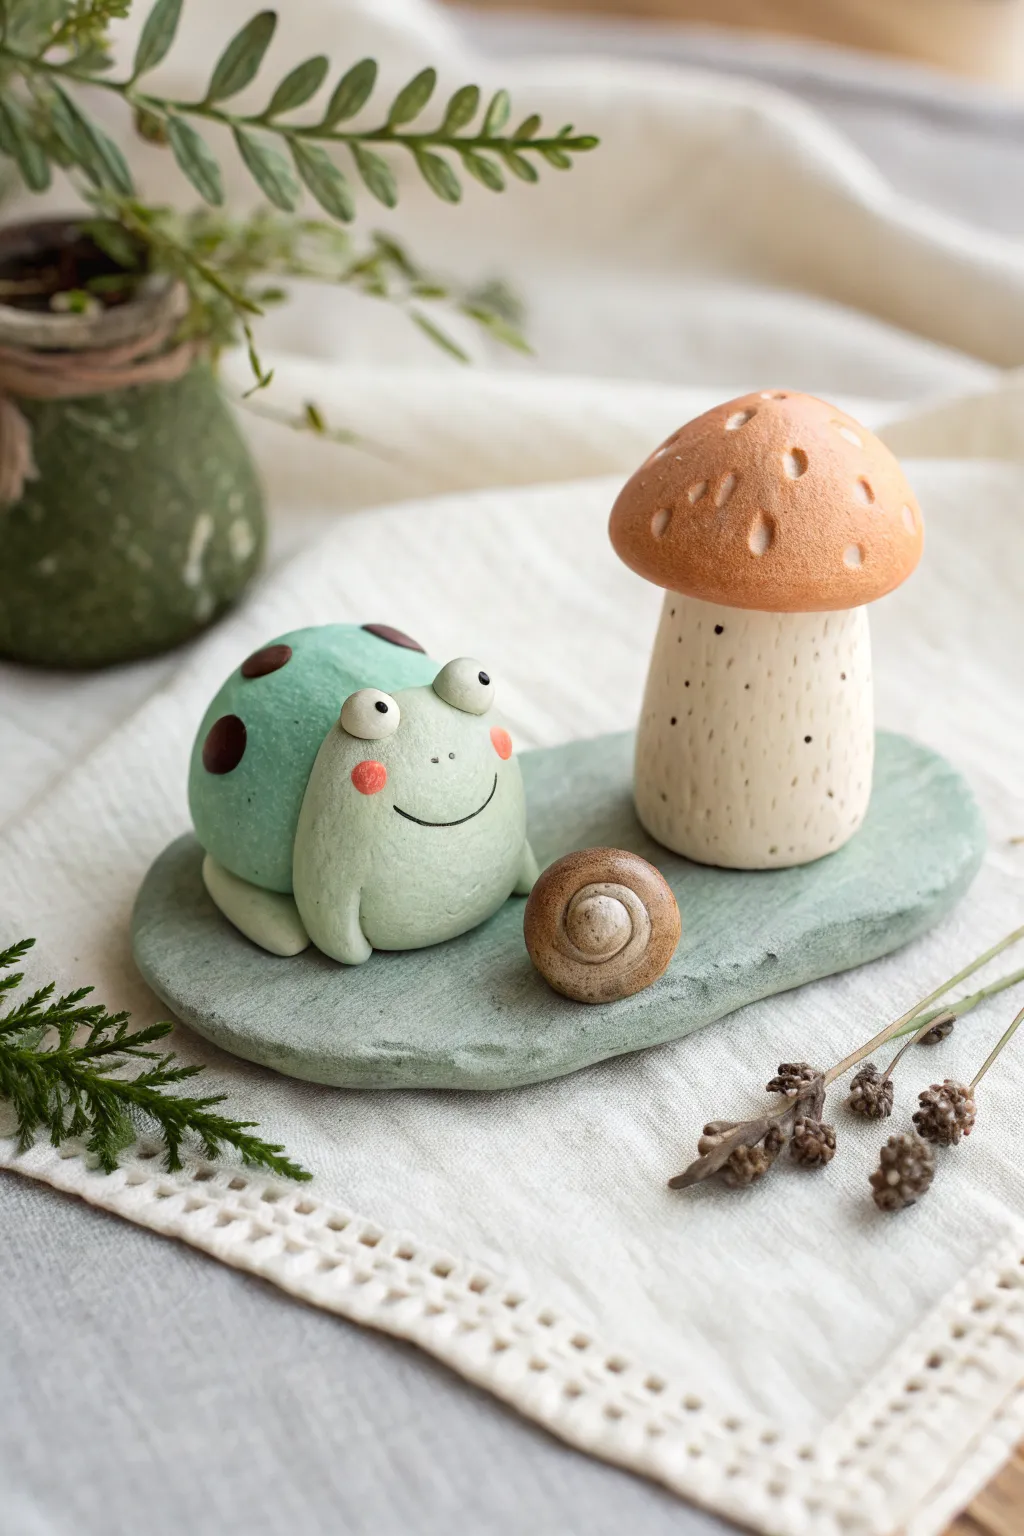
Bring a touch of forest charm to your desk or fairy garden with this adorable polymer clay trio featuring a spotty frog, a textured mushroom, and a tiny snail. Mounted on a leaf-green clay base, this miniature scene captures the cozy feeling of finding little friends in the undergrowth.
Step-by-Step Tutorial
Materials
- Polymer clay (pale mint green, terracotta orange, cream/beige, dark brown, leaf green)
- Acrylic paints (black, pink/blush)
- Dotting tool or small ball stylus
- Define needle tool or toothpick
- Small fine-tipped paintbrush
- Rolling pin or pasta machine
- Clay Blade
- Gloss varnish (optional)
Step 1: Shaping the Base
-
Mix Custom Green:
Start by mixing a leaf green clay with a significant amount of white or grey to create a muted, stone-like sage green color for the base. -
Form the Slab:
Roll the clay out into an oval slab about 1/4 inch thick. Don’t worry about perfect edges; a slightly organic, uneven rim looks more like a natural rock or moss patch. -
Texture the Surface:
Use an old toothbrush or a crumpled ball of aluminum foil to gently tap texture onto the surface of the base so it isn’t perfectly smooth.
Smoother Surfaces
Before baking, lightly brush the unbaked clay with a tiny amount of baby oil or cornstarch. This removes fingerprints and fingerprints for a professional matte finish.
Step 2: Creating the Frog
-
Body Basics:
Roll a large ball of pale mint green clay into a smooth, slightly flattened dome shape for the frog’s body. -
Adding Spots:
Take tiny pieces of dark brown clay, flatten them into thin discs, and press them firmly onto the back of the frog body to create its spots. -
Legs and Feet:
Roll two small sausages of mint green clay. tuck them under the sides of the body, flattening the ends slightly to suggest feet resting on the leaf. -
Sculpting the Eyes:
Roll two small balls of mint green clay and place them on top of the head. Add two smaller balls of white clay onto the front of these mounds for the eyeballs. -
Adding Pupils:
If you are comfortable with tiny clay pieces, add minuscule black dots for pupils now, or wait to paint them after baking for more control.
Glow in the Dark
Use glow-in-the-dark polymer clay for the mushroom stalk or the frog’s eyes. It adds a magical hidden feature when the lights go out at night!
Step 3: Making the Friendships
-
Mushroom Stalk:
Roll a thick cylinder of cream or beige clay. Taper it slightly so it is wider at the bottom and narrower at the top where the cap will sit. -
Mushroom Cap:
Form a dome from terracotta orange clay. Use a small ball tool to press random indentations all over the cap for a porous, rustic texture. -
Stalk Details:
Before attaching the cap, use a needle tool to poke tiny holes randomly around the cream stalk to mimic natural pores. -
Assemble the Mushroom:
Press the orange cap firmly onto the cream stalk. I like to use a drop of liquid clay here to ensure a permanent bond. -
Tiny Snail Shell:
Roll a thin snake of brown clay that tapers at one end. Coil it up tight, starting from the thin end, to create a spiral shell.
Step 4: Expression and Assembly
-
Positioning:
Arrange the frog, mushroom, and snail shell onto the green base plate. Press them down gently so they make good contact with the textured surface. -
Baking:
Bake the entire piece according to your clay manufacturer’s instructions (usually 275°F/130°C for 15-30 minutes). -
Face Painting:
Once cool, use a very fine brush to paint a thin black smile line on the frog. Add tiny dots of black for pupils if you didn’t use clay earlier. -
Rosy Cheeks:
Dip a dotting tool or the end of a toothpick into pink paint and dab two rosy cheeks just outside the smile line. -
Final Touches:
Use diluted black or brown paint to add tiny speckles to the mushroom stalk or snail shell if you want extra weathering.
Place your finished piece near a sunny window or nestled in a potted plant to enjoy your new garden friends
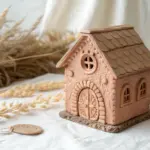
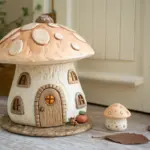
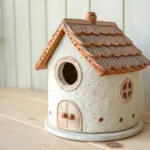
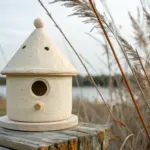
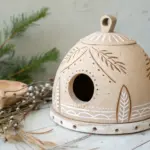
Acorn-Cap Birdhouse With Clay Details
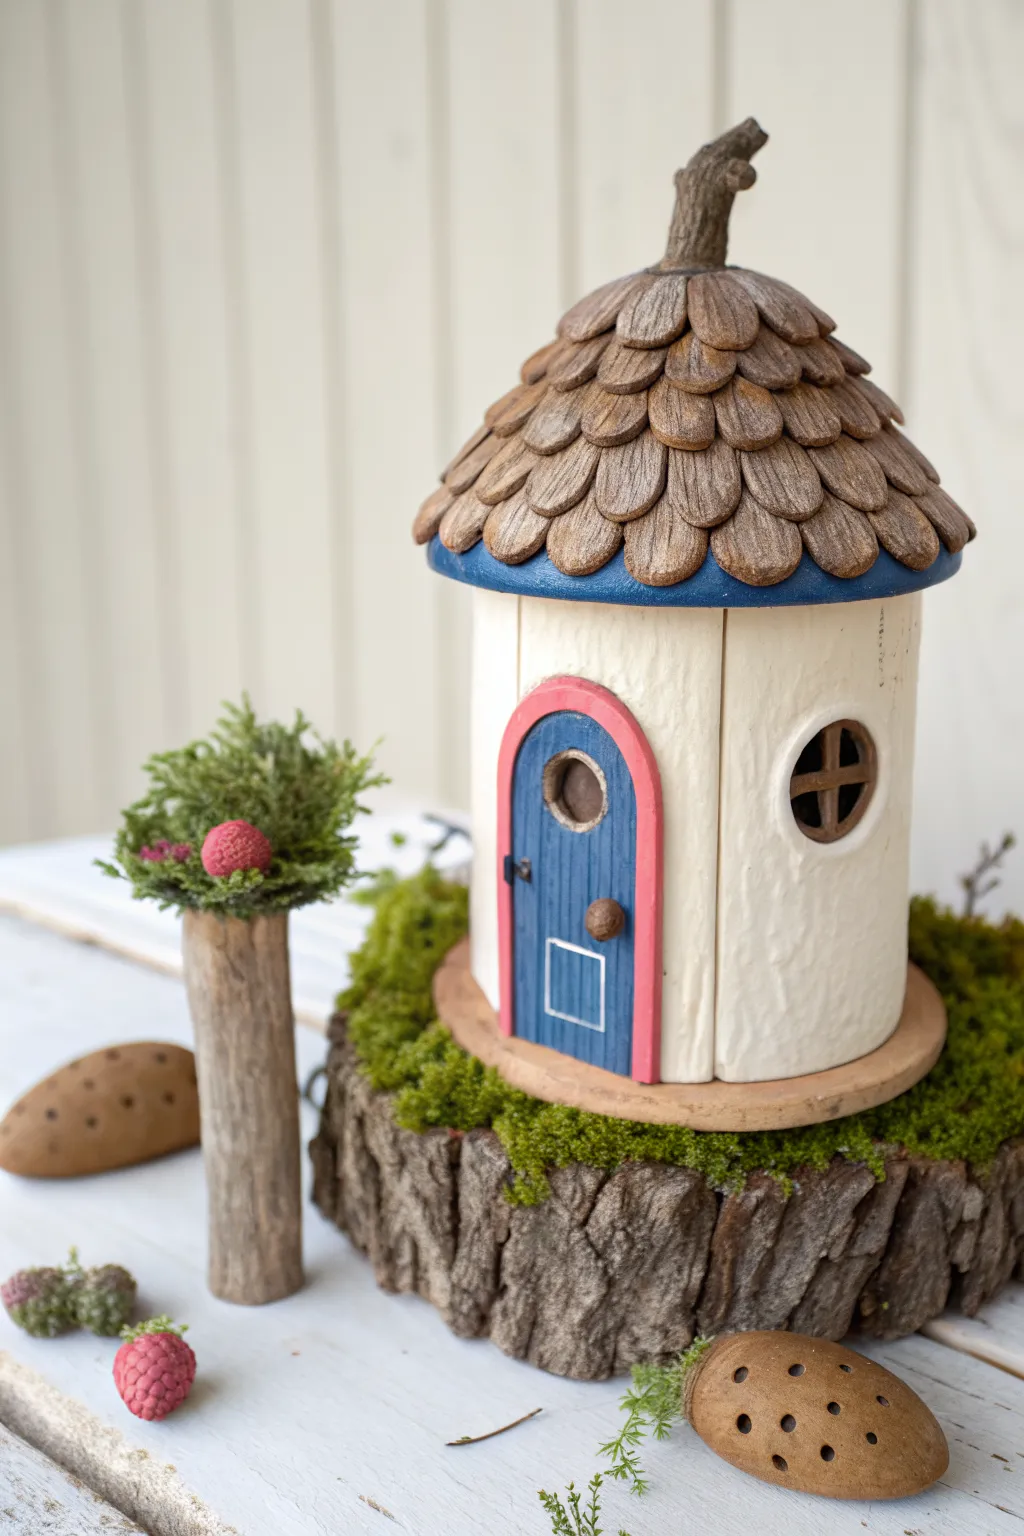
Transform simple materials into an enchanting miniature dwelling featuring a textured acorn-style roof and charming architectural details. This polymer clay project captures the rustic magic of the forest floor, perfect for nestled spots in your fairy garden.
Step-by-Step
Materials
- Recycled cylinder container (e.g., spice jar, cardboard tube, or PVC pipe)
- Polymer clay (brown, white, blue, pink, dark brown)
- Acrylic paints (blue, white, brown)
- Textured wood slice base
- Liquid polymer clay or strong craft glue
- Clay sculpting tools (needle tool, ball stylus)
- Rolling pin or pasta machine
- Texture sheet (wood grain) or stiff bristle brush
- Aluminum foil
- Sandpaper
Step 1: Preparing the Structure
-
Base Selection:
Choose a sturdy cylindrical base for your house structure. A small recycled spice jar or a section of a cardboard tube works perfectly for this scale. -
Siding Texture:
Roll out a sheet of white polymer clay to roughly 1/8 inch thickness. Wrap this around your cylinder, trimming the excess and smoothing the seam with your finger or a clay tool. -
Adding Wood Grain:
To give the white walls a rustic look, use a stiff bristle brush or a needle tool to drag vertical lines down the clay. This mimics the texture of painted white wood planks. -
Creating the Roof Form:
Crumple aluminum foil into a cone shape that fits atop your cylinder. Cover this foil cone with a thin layer of scrap clay to smooth out the lumps and create a solid base for the shingles.
Scale Perfection
Keep your clay walls thin! If the clay is too thick, the house will look bulky. Using a pasta machine ensures an even, delicate thickness for the walls.
Step 2: Shingling the Roof
-
Mixing Shingle Colors:
Blend brown clay with a touch of tan or grey to get a natural acorn-shell color. I like to leave it slightly unmixed for a realistic, variegated effect. -
Forming Scales:
Roll small balls of the brown clay and flatten them into teardrop or seed shapes. These will be your individual roof scales. -
Applying the Bottom Row:
Start at the very bottom edge of the roof cone. Press your clay scales onto the form, overlapping them slightly side-by-side. Make sure they overhang the edge just a tiny bit. -
Layering Upward:
Add the next row of scales above the first, positioning each new scale in the gap between the two below it (bricklay pattern). Continue this process until you reach the peak. -
Texturing the Scales:
Use a needle tool to gently scratch fine lines into each scale, running from the top to the tip, to replicate the fibrous texture of a real acorn cap. -
Adding the Stem:
Fashion a twisted stalk from dark brown clay. Attach it securely to the very top of the roof, blending the clay at the base so it looks like it grew there. -
Creating the Eaves:
Roll a snake of blue clay and flatten it into a strip. Wrap this around the very bottom edge of the roof to create a finished trim, smoothing it against the shingle layer.
Mossy Magic
Glue preserved reindeer moss around the base of the house where it meets the wood slice. It hides any glue seams and instantly adds forest realism.
Step 3: Doors and Windows
-
Door Shape:
Cut an arched shape from blue clay intended for the door. Press a texture sheet or needle tool into it to create vertical wood planks. -
Door Frame:
Roll a thin snake of pink clay. Outline the blue door arch with this snake, pressing it gently to adhere. -
Attaching the Door:
Use a dab of liquid polymer clay or bake-and-bond to attach the door assembly to the white house base. -
Window Details:
Cut a small circle from the white wall clay to create a recessed window (or layer a dark circle on top). Frame with a simple clay ring and add cross-bars for panes. -
Hardware Accents:
Roll tiny balls of metallic or brown clay to serve as the doorknob and hinges. Press them gently into place on the door.
Step 4: Assembly and Finishing
-
Baking:
Bake the roof and the house base separately according to your clay manufacturer’s instructions (usually 275°F for 15-30 minutes). Let them cool completely. -
Roof Assembly:
Once cool, glue the roof onto the house base using strong craft glue or two-part epoxy for a permanent bond. -
Mounting the Base:
Create a circular ‘foundation’ disc from tan clay. Glue the house to this disc, and then glue the entire assembly onto your rustic wood slice. -
Final Touches:
Use acrylic paint to add a white square outline on the lower door for detail, or to dry-brush highlights onto the roof shingles to emphasize the texture.
Place your finished cottage in a sheltered spot among ferns to welcome your tiny garden guests

TRACK YOUR CERAMIC JOURNEY
Capture glaze tests, firing details, and creative progress—all in one simple printable. Make your projects easier to repeat and improve.
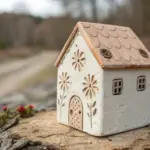
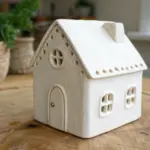
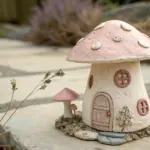
Mini Window Boxes and Planter Pots
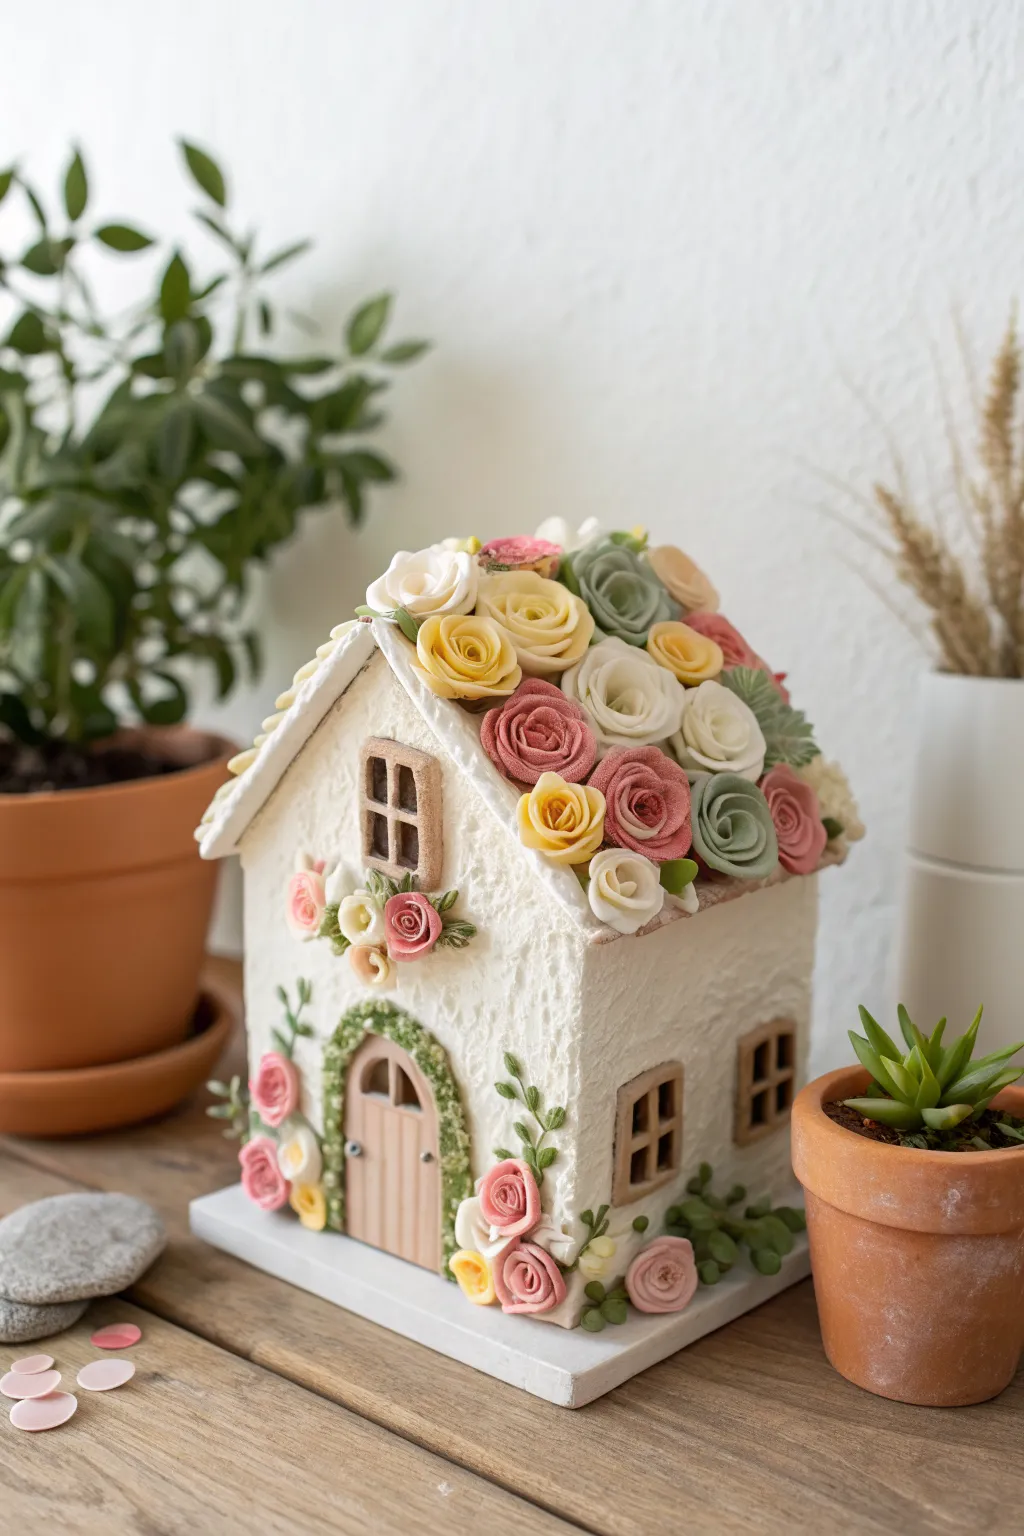
Transform a simple square jar or wooden block into a stunning floral abode that looks like it grew straight out of a storybook. Covered in textured white plaster and adorned with dozens of delicate hand-rolled polymer clay roses, this cottage makes a breathtaking centerpiece for any indoor fairy garden display.
Step-by-Step
Materials
- Polymer clay (white, pale yellow, soft pink, coral, sage green, and light blue)
- Small wooden birdhouse or sturdy cardboard house base (approx. 4-5 inches tall)
- White texture paste or heavy body acrylic gel medium
- Balsa wood bits or brown polymer clay (for doors/windows)
- Liquid polymer clay (Bake & Bond)
- Sculpting tools (needle tool, ball stylus)
- Craft knife
- Palette knife
- Base plaque (wood or ceramic tile)
- Matte varnish (optional)
Step 1: Prepping the Structure
-
Prepare the base:
Start with a clean, dry house structure. If using a wooden birdhouse, lightly sand it to ensure adhesion. If you are building from scratch, assemble sturdy cardboard or foam core into a simple house shape with a peaked roof. -
Apply the stucco texture:
Using a palette knife, slather the white texture paste or heavy body gel all over the exterior walls and roof. Don’t smooth it out perfectly; use a stippling motion to create a rough, stucco-like surface which gives the cottage its rustic charm. Let this dry completely, usually overnight. -
Create the base platform:
If your house doesn’t have a floor, glue it securely to a small white square base or painted wooden plaque. This provides stability and a place for the ground-level flowers to rest.
Stucco Secret
Mix white acrylic paint with baking soda to create your own gritty texture paste if you don’t have store-bought medium. It dries hard and grippy!
Step 2: Architectural Details
-
Sculpt the door:
Roll out a sheet of brown polymer clay or cut a piece of balsa wood into an arched door shape. Use a needle tool to score vertical lines to mimic wood planks. -
Add door hardware:
Form a tiny ball of silver or black clay for the doorknob and attach it to the door. Secure the door to the front center of the cottage using strong craft glue or liquid clay if the surface is polymer-compatible. -
Frame the stone arch:
Mix scraps of brown, green, and white clay to create a mossy stone color. Roll tiny pebbles and press them around the arched door frame, creating a rustic stone entrance. -
Create the windows:
Cut small rectangles from your brown clay or wood for the window frames. Use thin snakes of clay to create the cross-mullions within the frames. -
Install the windows:
Attach one window directly above the door and two others on the side walls. Press them firmly into the texture paste if it’s still slightly tacky, or use glue if it is dry.
Level Up: Night Light
Cut a hole in the bottom of the base before decorating. Use a hollow house frame so you can slip an LED tea light inside to illuminate the windows.
Step 3: Creating the Rose Garden Roof
-
Mix your floral palette:
Condition your polymer clay in pastel shades: cream, butter yellow, dusty rose, coral, and sage green. I like to keep the colors soft and muted for a vintage look. -
Roll the rose centers:
Start a rose by taking a tiny pinch of colored clay and rolling it into a tight coil or spiral. This forms the bud. -
add petals:
Flatten small balls of clay into thin, delicate petals. Wrap these petals around the center coil, overlapping them slightly and flaring the edges outward to simulate blooming. -
Vary the sizes:
Create roses in various sizes—some tight buds, some medium blooms, and several large, open flowers for the roof’s focal points. You will need roughly 40-50 flowers total depending on your roof size. -
Attach the roof garden:
Apply a layer of liquid polymer clay or strong adhesive to the roof. Begin placing the largest roses first, clustering them densely so no roof surface shows through. -
Fill the gaps:
Tuck smaller roses and buds into the spaces between the large flowers. Vary the colors so you don’t have too many of the same shade touching. -
Add greenery:
Shape small teardrops of sage green clay and flatten them into leaves. Score a center vein with a needle tool and tuck these leaves underneath the outer edges of the rose cluster to frame the bouquet.
Step 4: Climbing Vines and Finishing
-
Form the climbing vines:
Roll very thin snakes of green clay. Gently press these vertically onto the textured walls, curving them slightly as if they are creeping up the sides of the house. -
Add wall blossoms:
Attach small clusters of 2-3 mini roses along the vines and near the window corners. This connects the roof garden visually to the ground. -
Plant the foundation hygiene:
Place a few larger roses and scattered loose petals at the base of the house where the walls meet the ground plaque, grounding the structure. -
Bake the project:
If your base housing is oven-safe (wood/cardboard is fine at low temps, plastic is not), bake the entire piece according to your clay manufacturer’s instructions. If the base isn’t safe, you should have sculpted the flowers on a separate sheet, baked them, and then glued them on. -
Final touches:
Once cool, check for any loose petals and secure with super glue if needed. You can lightly dry-brush white paint over the colored roses to highlight the texture, but leaving them matte works beautifully too.
Place your flowery cottage on a mantle or shelf and enjoy the eternal spring it brings to your room
Mini Vegetable Patch and Basket Harvest
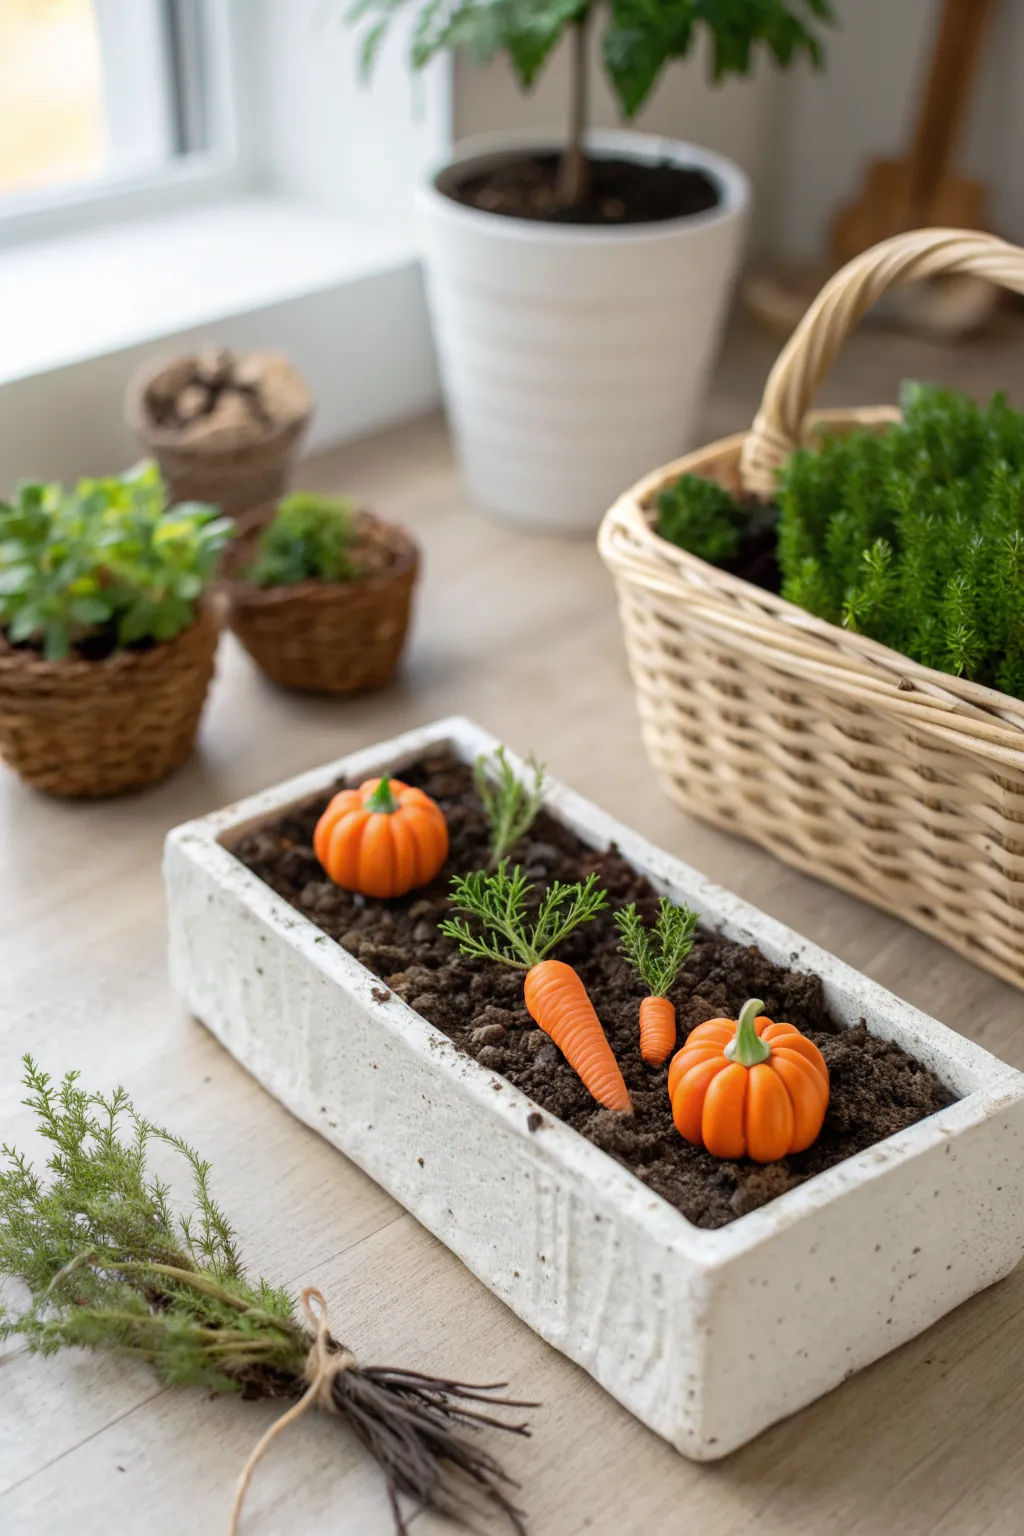
Bring the bounty of a farmhouse garden to your fairy world with this adorable miniature vegetable patch. Featuring vibrant orange pumpkins and detailed carrots nestled in realistic faux soil, this project adds immediate charm to any sunny windowsill layout.
Detailed Instructions
Materials
- White or light grey polymer clay (for planter)
- Orange polymer clay (various shades)
- Green polymer clay or thin artificial moss stems (for carrot tops and pumpkin stems)
- Textured rolling pin or concrete texture stamp
- Liquid polymer clay or strong craft glue
- Dried coffee grounds or loose tea (for soil)
- Brown acrylic paint
- Modeling tools (needle tool, ball tool)
- Soft artist pastels (brown, orange, yellow)
Step 1: Crafting the Concrete-Look Planter
-
Create the base:
Roll out a thick slab of white or light grey polymer clay, about 1/4 inch thick. Cut a rectangle for the base, roughly 4 inches long by 1.5 inches wide. -
Cut the walls:
Cut two long strips for the sides and two shorter strips for the ends, keeping the height around 1 inch. Score the edges where they will join to ensure a strong bond. -
Assemble the box:
Press the walls onto the base and seal the seams on the inside using a sculpting tool. Don’t worry if the outside is a bit rough; that enhances the concrete look. -
Add texture:
Gently press a piece of coarse sandpaper, a rock, or a crumpled ball of aluminum foil against the exterior walls to mimic the pitted texture of cast stone. -
Pre-bake:
Bake the planter box according to your clay package instructions to set the shape before filling it.
Step 2: Sculpting the Harvest
-
Shape the pumpkins:
Roll two balls of orange clay—one slightly larger than the other. Slightly flatten them so they sit stable on a surface. -
define the ribs:
Use the side of a needle tool or toothpick to press vertical grooves all around the pumpkins, creating the classic ribbed sections. -
Create the carrots:
Roll small snakes of orange clay into tapered cone shapes. Gently roll the tapered end to create a root tip. -
Texture the carrots:
Using a craft knife or needle tool, make tiny horizontal indentations randomly across the carrot bodies to simulate natural growth lines. -
Add shading:
Brush a tiny amount of brown pastel dust into the grooves of the pumpkins and the lines of the carrots to add depth and realism.
Soil Realism Hack
Mix two different shades of dried tea leaves or sprinkle a pinch of real potting soil on top of the wet glue mixture for ultra-realistic texture variation.
Step 3: Greens and Assembly
-
Make pumpkin stems:
Form tiny curved cone shapes from willow-green clay. Attach them to the center depression of each pumpkin, blending the clay downward slightly. -
Prepare carrot tops:
Poke a small hole in the top of each carrot. Insert a tiny sprig of artificial greenery or preserved moss for the feathery carrot tops. I like to secure this with a dot of liquid clay. -
Bake the vegetables:
Arrange your veggies on a baking tile and bake them according to manufacturer instructions. Let them cool completely. -
Create the soil base:
Mix dried coffee grounds or loose tea with brown acrylic paint and a bit of white glue until you have a thick, clumpy paste. -
Fill the planter:
Spoon the ‘soil’ mixture into your baked planter box, filling it nearly to the rim but leaving it uneven for a natural look. -
Plant your harvest:
While the soil mix is still wet, press your baked carrots and pumpkins into the dirt. Bury the carrots slightly so they look like they are emerging from the ground.
Level Up: Garden Tools
Sculpt a miniature hand trowel with a silver blade and wooden handle, then leave it resting casually on the edge of the planter box.
Once the soil mixture dries completely, your miniature vegetable garden is ready to harvest
Crystal Cluster “Fairy Energy” Stones
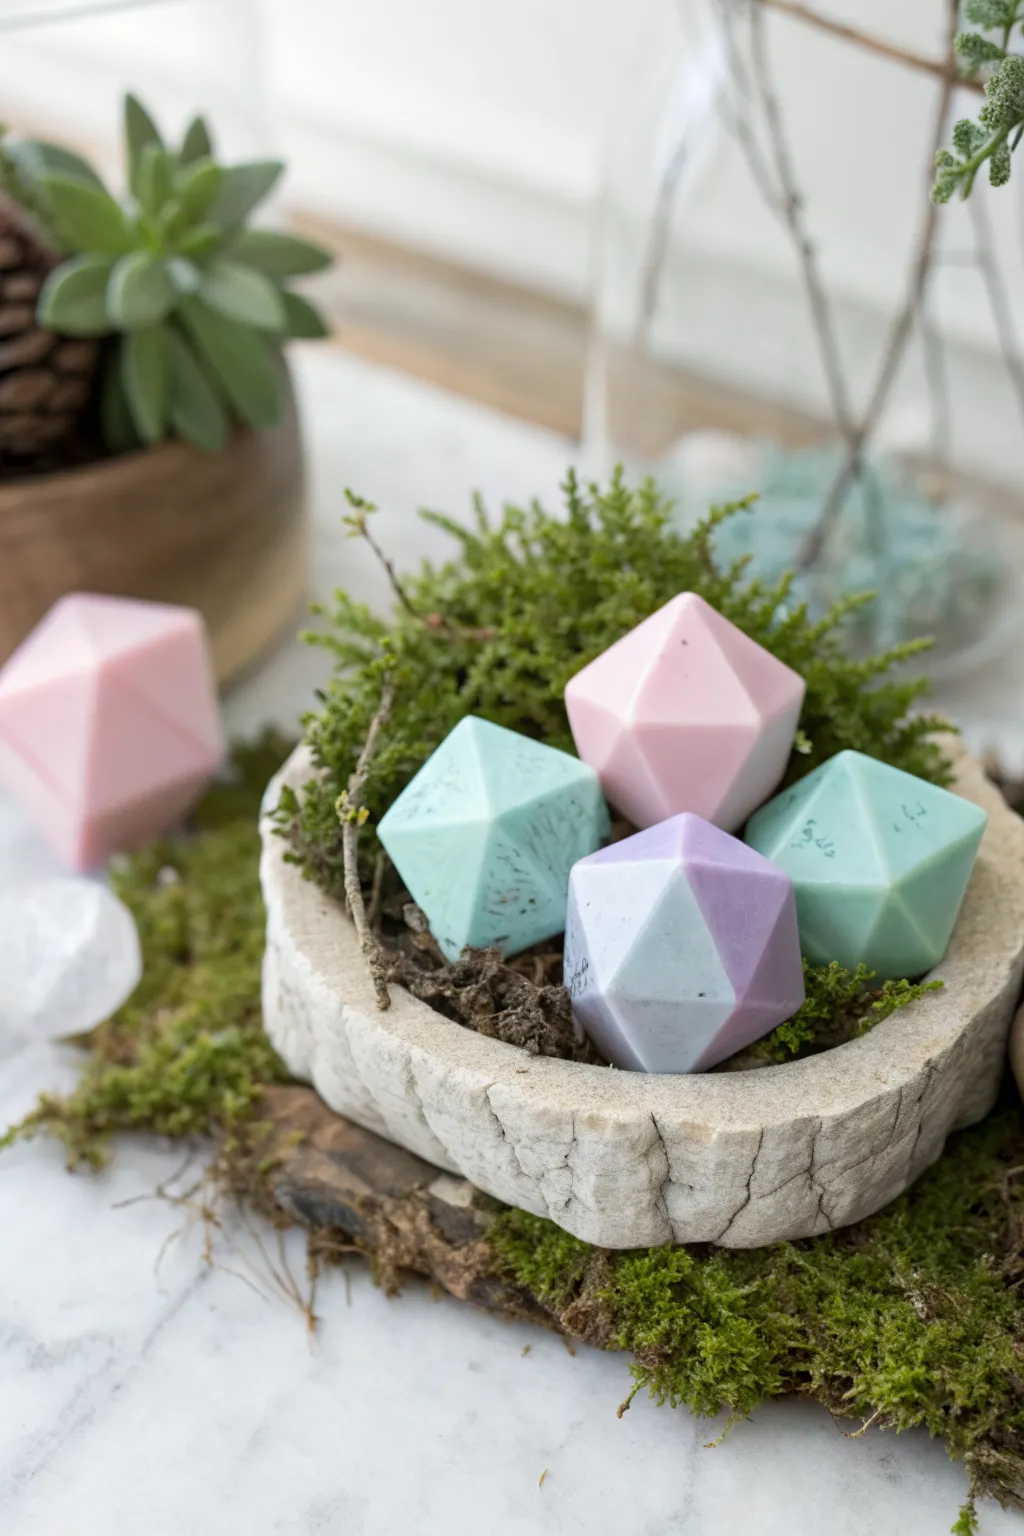
Add a touch of mystical flair to your fairy garden with these soft-hued geometric stones. Mimicking the look of tumbled crystals, these easy-to-make clay gems bring a pop of magical color to any miniature landscape.
Step-by-Step Tutorial
Materials
- Polymer clay (pale pink, mint green, white, lavender)
- Sharp craft blade or tissue blade
- Ceramic tile or glass work surface
- Finger cots or latex gloves (to prevent fingerprints)
- Fine-grit sandpaper (400-800 grit)
- Small baking sheet
- Parchment paper
- Acrylic roller or pasta machine
Step 1: Prepping the Clay
-
Condition the clay:
Begin by kneading each color of your polymer clay until it is soft and pliable. Warm clay prevents cracking later on. -
Mix custom shades:
For the soft, milky look seen in the photo, mix your colored clay with a generous amount of white clay. Aim for a 2:1 ratio of white to color for pastels. -
Create a marble effect (optional):
For the dual-toned stone, take a small log of lavender and a small log of white. Twist them together gently, fold, and twist again just once or twice to keep the distinct separation of colors. -
Form the base shapes:
Roll each clay color into a smooth, round ball about the size of a large grape or customized to your desired stone size.
Uneven Cuts?
If your blade drags and creates jagged cuts, your clay is too warm. Pop it back in the fridge for 5 minutes. A cold, firm ball slices cleanly like hard butter.
Step 2: Faceting the Crystals
-
Chill the clay:
Place your clay balls in the refrigerator for about 10-15 minutes. Firm clay cuts much cleaner and holds sharp edges better than warm, soft clay. -
Make the first cut:
Place a cooled ball on your work surface. Using your sharp blade, slice off one side of the sphere to create a flat face. -
Create opposite facets:
Rotate the ball slightly and make another slice. I find it works best to cut creating somewhat random angles rather than perfect symmetry. -
Continue faceting:
Continue slicing off rounded edges until no curves remain. You want a polyhedral shape with sharp, distinct planes. -
Smooth the surfaces:
Gently gently rub each flat face with your finger (wearing a finger cot helps) to remove any microscopic drag marks from the blade without dulling the sharp edges.
Stone Effect
Mix tiny pinch of black pepper or craft sand into the clay before rolling the balls. This adds speckles that mimic real mineral deposits.
Step 3: Baking and Finishing
-
Prepare for baking:
Line a small baking sheet with parchment paper to prevent shiny spots on your clay where it touches the metal. -
Bake the stones:
Bake the faceted stones according to your specific brand’s package instructions—usually around 275°F (135°C) for 15-30 minutes depending on thickness. -
Cool down:
Allow the stones to cool completely on the baking sheet before handling them, as hot clay is fragile. -
Sand edges (optional):
If any edges feel too incredibly sharp or have burrs, very lightly pass over them with fine-grit sandpaper for a smooth, tumbled finish. -
Clean up:
Wipe the stones with a damp cloth to remove any sanding dust. -
Style the garden:
Arrange your new geometric crystals nestled into live or preserved moss within a faux stone bowl to complete the scene.
Scatter these little gems around your miniature garden for an instant infusion of magical energy
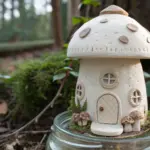
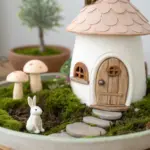
Moonlit Mushrooms With Soft Glow Effects
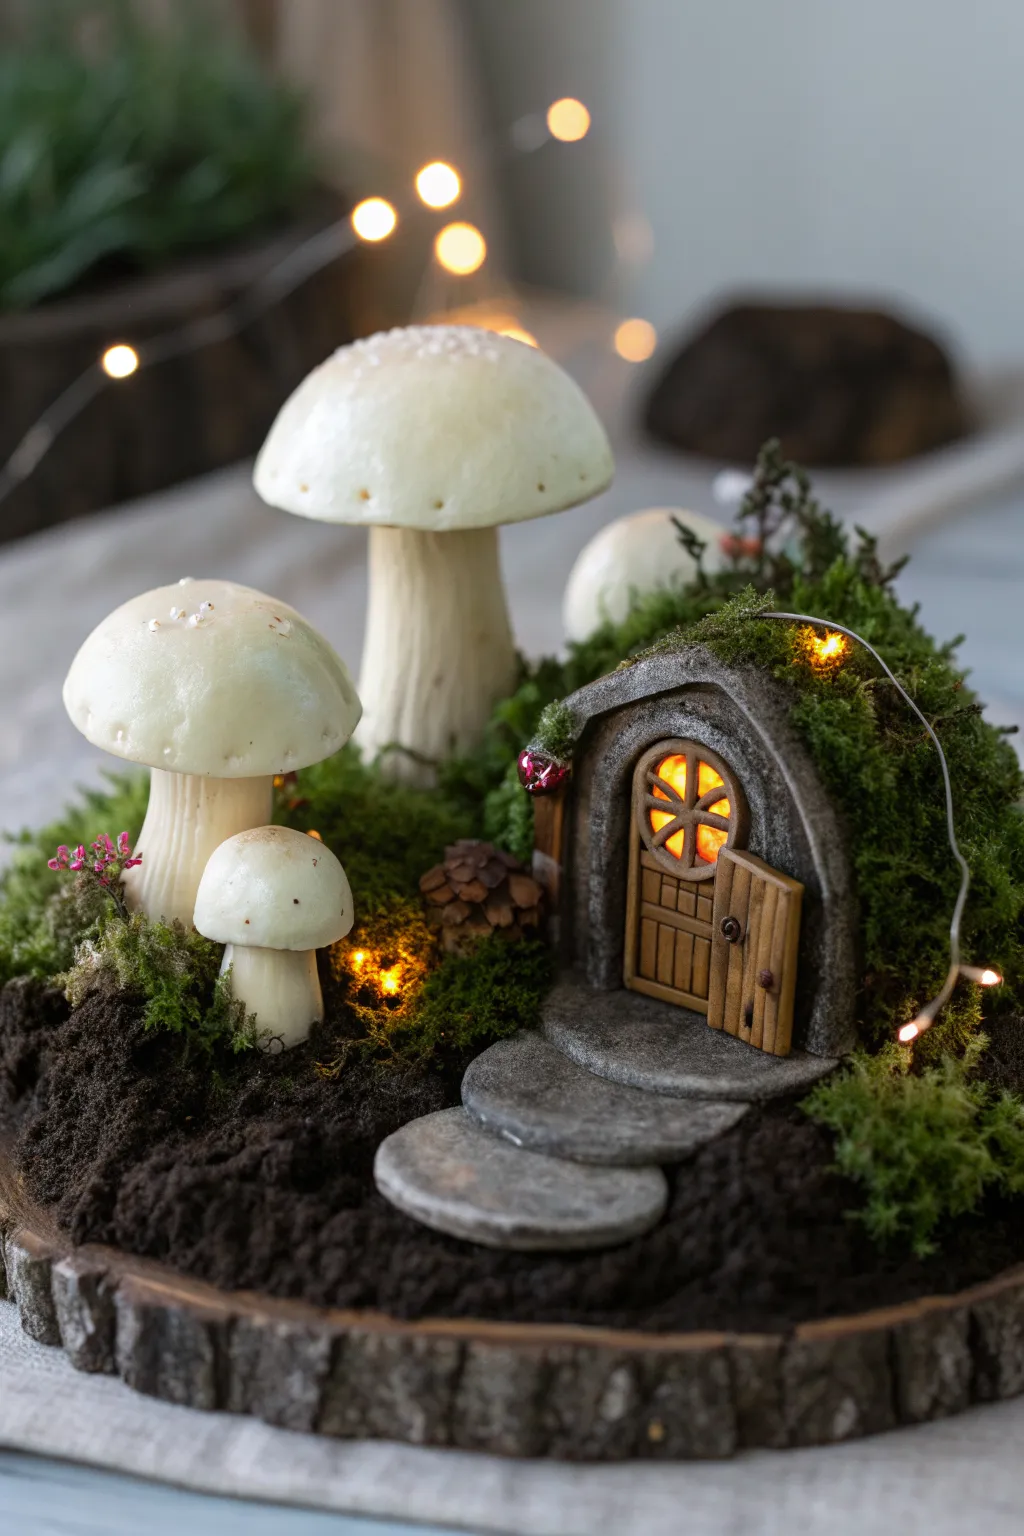
Bring a touch of magic to your shelves with this enchanting polymer clay diorama featuring a cozy hobbit-hole door and oversized glowing mushrooms. Built on a rustic wood slice, the combination of realistic moss textures and warm LED lighting creates a serene, moonlit atmosphere right in your home.
Step-by-Step
Materials
- White or translucent polymer clay (for mushrooms)
- Grey granite-effect polymer clay (for stonework)
- Brown polymer clay (for wood door)
- Black or dark brown acrylic paint
- Dried coffee grounds or faux soil texture paste
- Preserved reindeer moss and sheet moss
- Micro LED fairy light string (warm white)
- Large wood slice base (approx. 8-10 inches)
- Aluminum foil
- Liquid polymer clay or strong craft glue
- Sculpting tools (needle tool, ball stylus)
- Soft pastels (brown/tan for shading)
- Gloss varnish (optional)
Step 1: Sculpting the Glowing Mushrooms
-
Form the mushroom caps:
Condition your white or translucent clay until soft. Roll three balls of varying sizes—one large, one medium, and one small. Flatten them slightly into domes and gently pinch the edges to create a natural, uneven mushroom cap shape. -
Create the gills:
Turn the caps upside down. Using a needle tool or a dull knife, score fine lines radiating from the center to the outer edge to mimic mushroom gills. Variation in depth adds realism here. -
Shape the stems:
Roll three thick cylinders of clay for the stems, tapering them slightly toward the top. I like to twist the clay slightly as I roll to give the stalk a bit of organic movement rather than a straight pipe shape. -
Texture and assemble:
Use a toothbrush or stiff brush to texture the stems vertically. Attach the caps to the stems using a drop of liquid polymer clay for a secure bond. Use a ball stylus to add tiny indentations on the top of the caps for character. -
Pre-bake the mushrooms:
Bake the mushrooms according to your clay manufacturer’s instructions (usually 275°F/135°C for 15-30 minutes). Let them cool completely while you work on the housing structure.
Wire Support Tip
For taller mushrooms, insert a crumpled wire or toothpick into the stem before baking. This prevents the heavy caps from causing the stem to droop in the oven.
Step 2: Constructing the Hobbit Door
-
Build the hill core:
Crumple a ball of aluminum foil to create the mound shape for the house. Flatten the back and bottom so it sits flush against your wood slice. Press a hollow into the front where the door will sit, ensuring there is room to tuck a few LED lights inside. -
Sculpt the stone archway:
Roll out a sheet of granite-effect or grey clay. Cut a thick strip and wrap it around the foil opening to form an arch. Use your needle tool to carve deep cracks and separate ‘stones’ into the surface. -
Create the wooden door:
Flatten a piece of brown clay into a round-topped door shape that fits inside your arch. Use a blade to score vertical wood grain lines. Cut out a small window section near the top. -
Add door details:
Create a lattice for the window using thin snakes of brown clay. Fashion a tiny handle and hinges from black or bronze clay. Attach the door to the stone arch, leaving it slightly ajar if you want more light to spill out later. -
Form the stone steps:
Shape three flat, oval stones from your grey clay. Create a stepping stone path leading up to the door, pressing them gently together so they bond during baking.
Level Up: Magic Glow
Mix glow-in-the-dark powder into your translucent clay for the mushroom caps. They will charge under the LEDs and glow softly even when the lights are off.
Step 3: Assembly and Finishing
-
Final bake:
Place the foil hill structure (with door and arch) and the steps onto a baking tile. Bake securely. Once cooled, glue the foil core to your wood slice base. -
Install the lighting:
Thread your micro LED string lights behind the door (inside the foil cavity) and weave the rest of the strand around the base where the mushrooms will stand. Tape the battery pack to the back or underside of the wood slice. -
Apply the soil ground:
Spread a layer of dark brown acrylic paint or tacky glue over the exposed foil and drag it onto the wood slice. While wet, heavily sprinkle dried coffee grounds or apply a faux soil texture paste to cover the base completely. -
Plant the mushrooms:
Glue the pre-baked mushrooms into the ‘soil,’ arranging them by height. Ensure they are stable; you can add a bit of fresh clay at the base and cover it with soil texture if they wobble. -
Add the mossy roof:
Apply glue over the top of the foil hill and around the base of the mushrooms. Press clumps of preserved reindeer moss and flat sheet moss onto the hill to create a grassy roof, and tufts around the mushroom bases. -
Highlight and refine:
Dry brush a little light grey paint onto the stone arch and steps to make the texture pop. Clean up the edges of the wood slice if any glue dripped over.
Now switch on your fairy lights and watch your miniature world come to life with a cozy, inviting glow
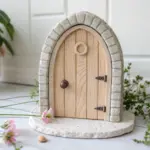
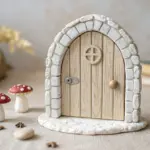
Modular Fairy Garden Set for Swapping Seasons
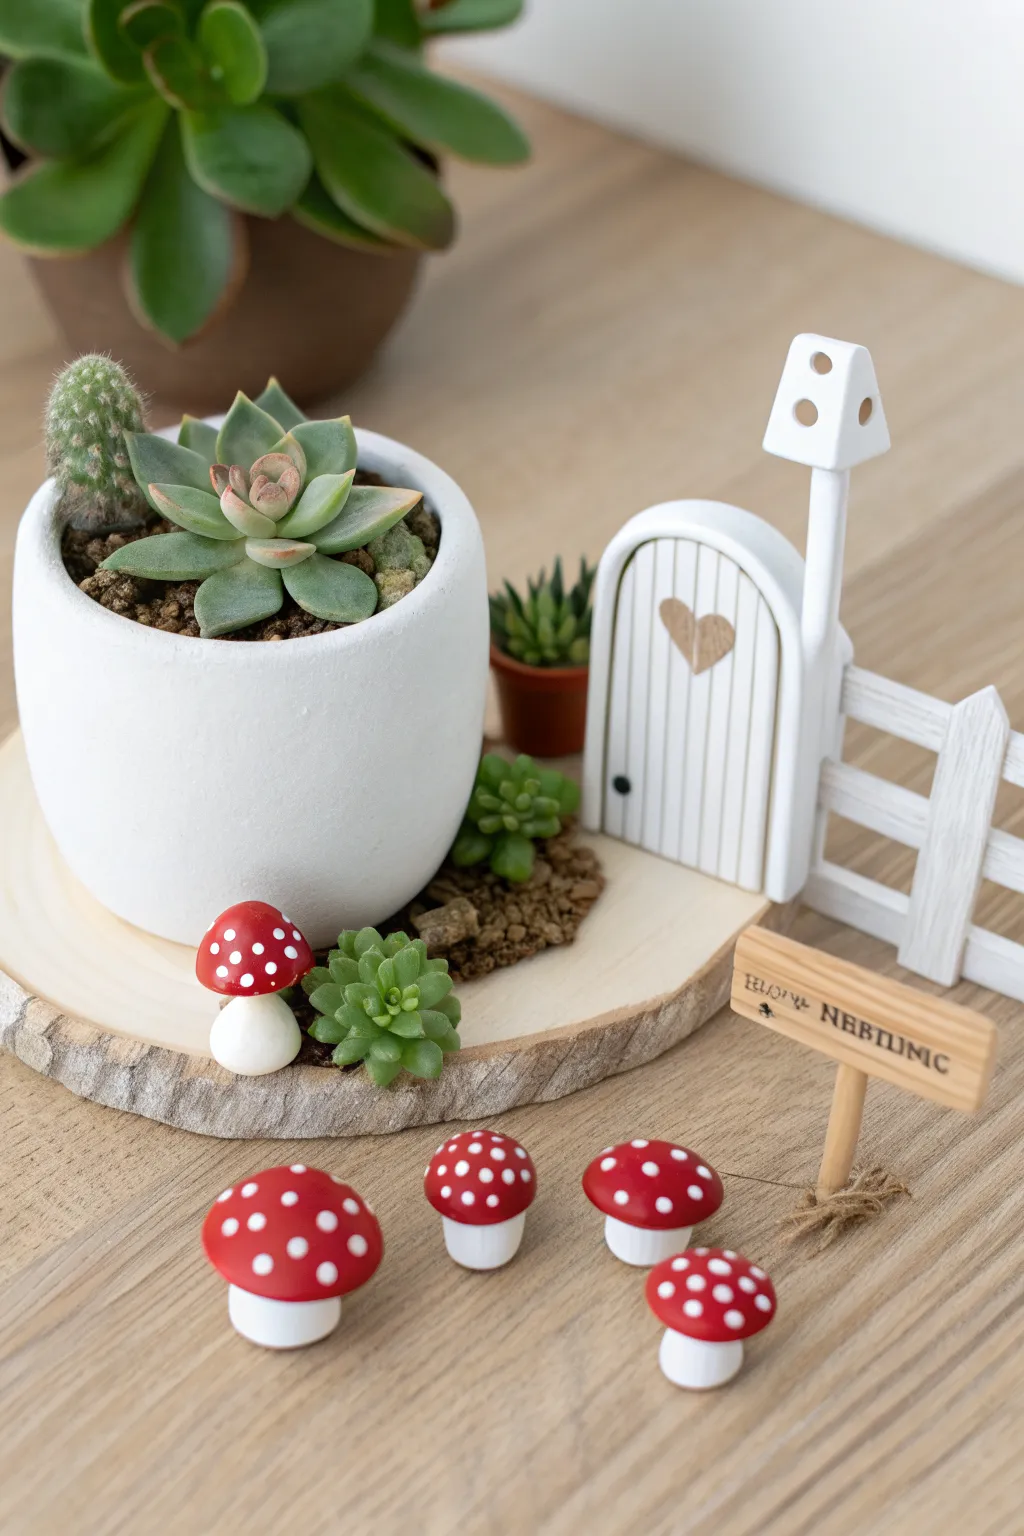
Bring a touch of magic to your desk with this charming modular fairy garden setup, featuring a crisp white fence, a tiny door, and a scattering of cheerful red mushrooms. The beauty of this design lies in its simplicity and the ability to move the tiny components around on the wooden slice base.
Step-by-Step Tutorial
Materials
- White polymer clay
- Red polymer clay
- Translucent liquid clay (Bake & Bond)
- Small wooden slice (coaster size)
- Miniature terracotta pot or white ceramic planter
- Live or faux succulents and moss
- Acrylic rolling pin
- Craft knife or scalpel blade
- Needle tool or toothpick
- Small balsa wood strips (optional for sign)
- Black acrylic paint and fine detail brush
- Gloss glaze (for mushrooms)
- Sandpaper (fine grit)
- Oven for baking
Step 1: Sculpting the Magical Mushrooms
-
Form the stems:
Roll small balls of white polymer clay until smooth, then shape them into cylinders. Keep the bottoms flat so they stand easily, and slightly round the tops where the cap will sit. Create varying heights for a more natural look. -
Create the caps:
Condition the red clay and roll it into a ball. Cut it in half and press your thumb into the center of the flat side to dome it slightly, creating a classic mushroom cap shape. -
Add the spots:
Roll extremely tiny balls of white clay. Press these gently onto the red caps to flatten them into polka dots. I like to vary the sizes of the dots to make them look more organic. -
Assemble the fungi:
Add a tiny drop of liquid clay to the top of a white stem and press the red cap gently on top. Repeat for all your mushrooms.
Clay Too Soft?
If your white clay gets sticky and hard to handle, pop it in the fridge for 10 minutes. This firms it up, making precise cuts for the fence much easier.
Step 2: Building the Fairy Door and Fence
-
Prepare the door slab:
Roll out a thick sheet of white clay (about 1/4 inch). Use a craft knife to cut an arch shape for the main door. -
Texture the wood planks:
Use the back of your craft knife or a needle tool to score vertical lines down the door. This mimics the look of wooden planks. -
Add door details:
Cut a tiny heart from scrap clay (wood tone or white) and press it into the center. Add a tiny black ball of clay for the doorknob. Create a frame by rolling a thin snake of white clay and wrapping it around the arch’s exterior. -
Construct the fence posts:
Cut strips of white clay for the fence. You’ll need vertical posts with pointed tops and thinner horizontal rails. Lay them out on a ceramic tile to assemble. -
Assemble the fence:
Press the horizontal rails onto the vertical posts. Use a dab of liquid clay at each intersection to ensure a strong bond. -
Create the lantern post:
Roll a taller white snake for the lamp post. Fashion a small trapezoid shape for the lantern head, using a dotting tool to indent ‘holes’ for the light. Attach this to the top of the post.
Glow in the Dark
Swap the white clay dots on the mushrooms for glow-in-the-dark polymer clay. Your fairy garden will come alive with a magical luminescence when the lights go out.
Step 3: The Tiny Wooden Sign
-
Cut the wood:
Take a small strip of balsa wood or stiff cardstock. Cut a rectangular sign shape and a thin stick for the post. -
Lettering:
Using a very fine brush or a fine-tip permanent marker, write a whimsical word like ‘Welcome’ or ‘Neptunic’ on the sign face. -
Assembly:
Glue the sign face to the post using strong craft glue.
Step 4: Baking and Final Setup
-
Bake the clay:
Place all your clay pieces (mushrooms, door, fence) on a baking sheet. Bake according to your customized clay package instructions, usually around 275°F (135°C) for 15-30 minutes. -
Glaze the mushrooms:
Once fully cooled, brush a coat of gloss glaze over the red caps of the mushrooms to give them a wet, fresh-from-the-forest shine. -
Prepare the base:
Set your wooden slice on a flat surface. Place your potted succulent on one side to anchor the scene. -
Arrange the scene:
Place the fairy door leaning against the pot or standing freely if balancing allows. Position the fence to one side. -
Sprinkle the details:
Scatter the small clay mushrooms around the base of the wood slice and near the sign. Add a pinch of loose soil or faux moss for texture.
Now you have a serene little world that sits perfectly on a corner table or shelf