If you’ve been craving that cozy, handmade holiday feel, modeling clay is basically Christmas magic you can hold in your hands. Here are my favorite Christmas clay ideas—from classic ornaments to little tabletop cuties you’ll want to keep out all season.
Classic Clay Christmas Tree Ornaments
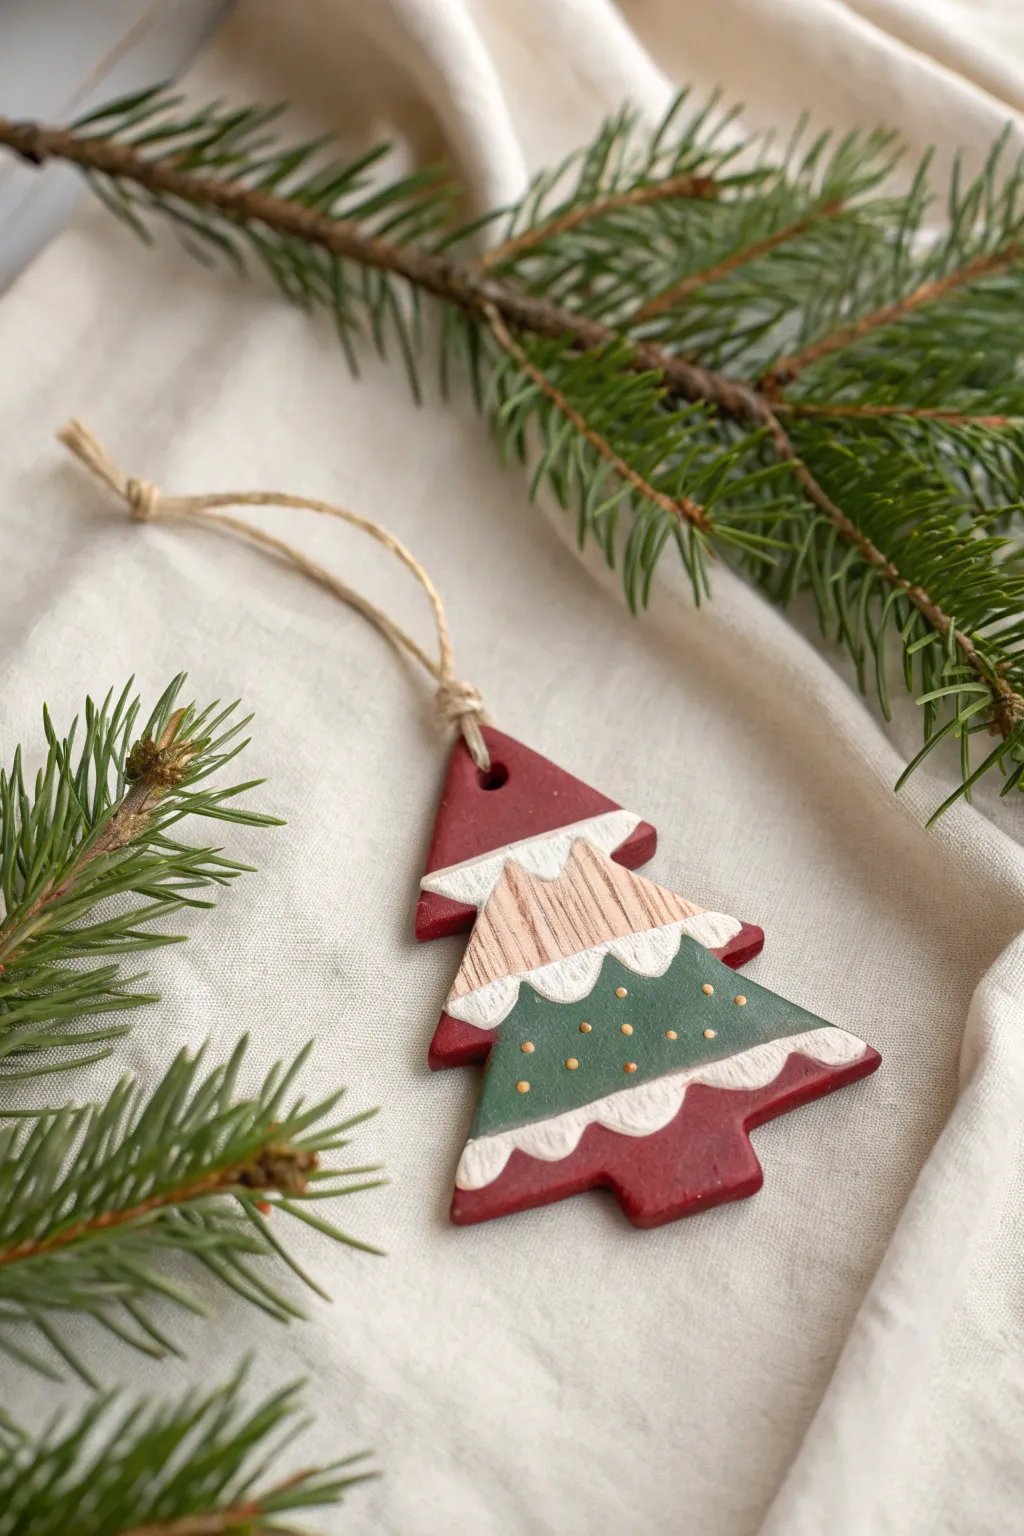
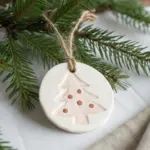
Create a charming, rustic Christmas tree ornament using simple clay techniques and paint. This project features defined layers of red, wood-tone, and green, separated by textured snowy scallops for a traditional holiday look.
Step-by-Step Guide
Materials
- White air-dry clay or polymer clay (white is best base)
- Rolling pin
- Christmas tree cookie cutter (approx. 3-4 inches tall) or craft knife and template
- Acrylic paints: Deep red/burgundy, forest green, light tan/beige, warm brown
- Gold puff paint or fine-tip gold marker
- Small flat paintbrush
- Very fine detail brush
- Sculpting tool with a small rounded tip or a toothpick
- Jute twine or hemp cord
- Straw or skewer (for hole punching)
- Matte varnish (optional)
Step 1: Shaping the Clay Base
-
Condition and Roll:
Start by kneading your clay until it is soft, pliable, and free of cracks. On a clean surface, roll it out to an even thickness of about 1/4 inch. -
Cut the Shape:
Press your Christmas tree cookie cutter firmly into the clay. If you don’t have a cutter, you can print a small tree template, place it on the clay, and carefully trace around it with a craft knife. -
Smooth the Edges:
Dip your finger in a little water (for air-dry clay) or baby oil (for polymer) and gently run it along the cut edges. This smoothes out any jagged bits left by the cutter. -
Create the Hanging Hole:
Using a straw or a wooden skewer, poke a hole near the very top point of the tree. Make sure the hole is big enough for your twine to pass through later, keeping in mind clay shrinks slightly when drying. -
Dry or Bake:
If using air-dry clay, let the ornament sit on a flat surface for 24-48 hours until completely hard. Flip it halfway through drying to prevent curling. If using polymer clay, bake according to the manufacturer’s package instructions and let cool completely.
Steady Hand Tip
Rest your pinky finger on the table or a dry part of the ornament while painting fine details like the wood grain or scallops. This acts as an anchor for stability.
Step 2: Painting the Sections
-
Base Red Coat:
Since the background and edges are red, paint the entire front, back, and sides of the tree with your deep red acrylic paint. Let this base coat dry fully before moving on. -
Marking the Tiers:
Lightly sketch curved, scalloped lines across the tree with a pencil to demarcate where the different colored sections will go. Aim for three distinct tiers. -
Painting the Wood Tier:
For the middle-top section, mix a light tan color. Paint this section carefully, following the scalloped line you drew. You may need two thin coats for full coverage. -
Adding Wood Grain:
Once the tan paint is dry, take a watered-down warm brown paint and a fine detail brush. Paint very thin, vertical lines to mimic wood grain texture on the tan section. -
Painting the Green Tier:
Paint the section below the wood tier with forest green acrylic paint. Again, follow the scalloped guide lines you pencil-marked earlier.
Uneven Paint Lines?
If your scalloped lines look messy, wait for the colors to dry completely, then go over the dividing line with a thicker application of white ‘snow’ paint to hide any mistakes.
Step 3: Adding Details and Assembly
-
Creating the Snowy Trim:
Using white paint (or thick white texture paste if you have it), paint the scalloped borders between the colored sections. This represents the snow. -
Building Texture:
To make the snow look fluffy like in the photo, dab the white paint on thickly rather than brushing it smooth. You can even use a toothpick to rough up the surface while the paint is wet. -
Adding Gold Dots:
On the green section, use a gold paint pen or the tip of a toothpick dipped in gold paint to create tiny, evenly spaced polka dots. -
Sealing the Ornament:
Once all paint is completely dry, apply a coat of matte varnish. I find this unifies the finish and protects the paint from chipping over time. -
Stringing:
Cut a length of jute twine about 8 inches long. Fold it in half to create a loop. -
Attaching the Loop:
Thread the folded end of the twine through the hole in the ornament from front to back. Pull the tails through the loop to create a lark’s head knot that sits securely at the top.
Hang your handcrafted tree on a sturdy branch and enjoy the rustic warmth it adds to your holiday decor this year.


Snowflake Ornaments With Impressed Texture
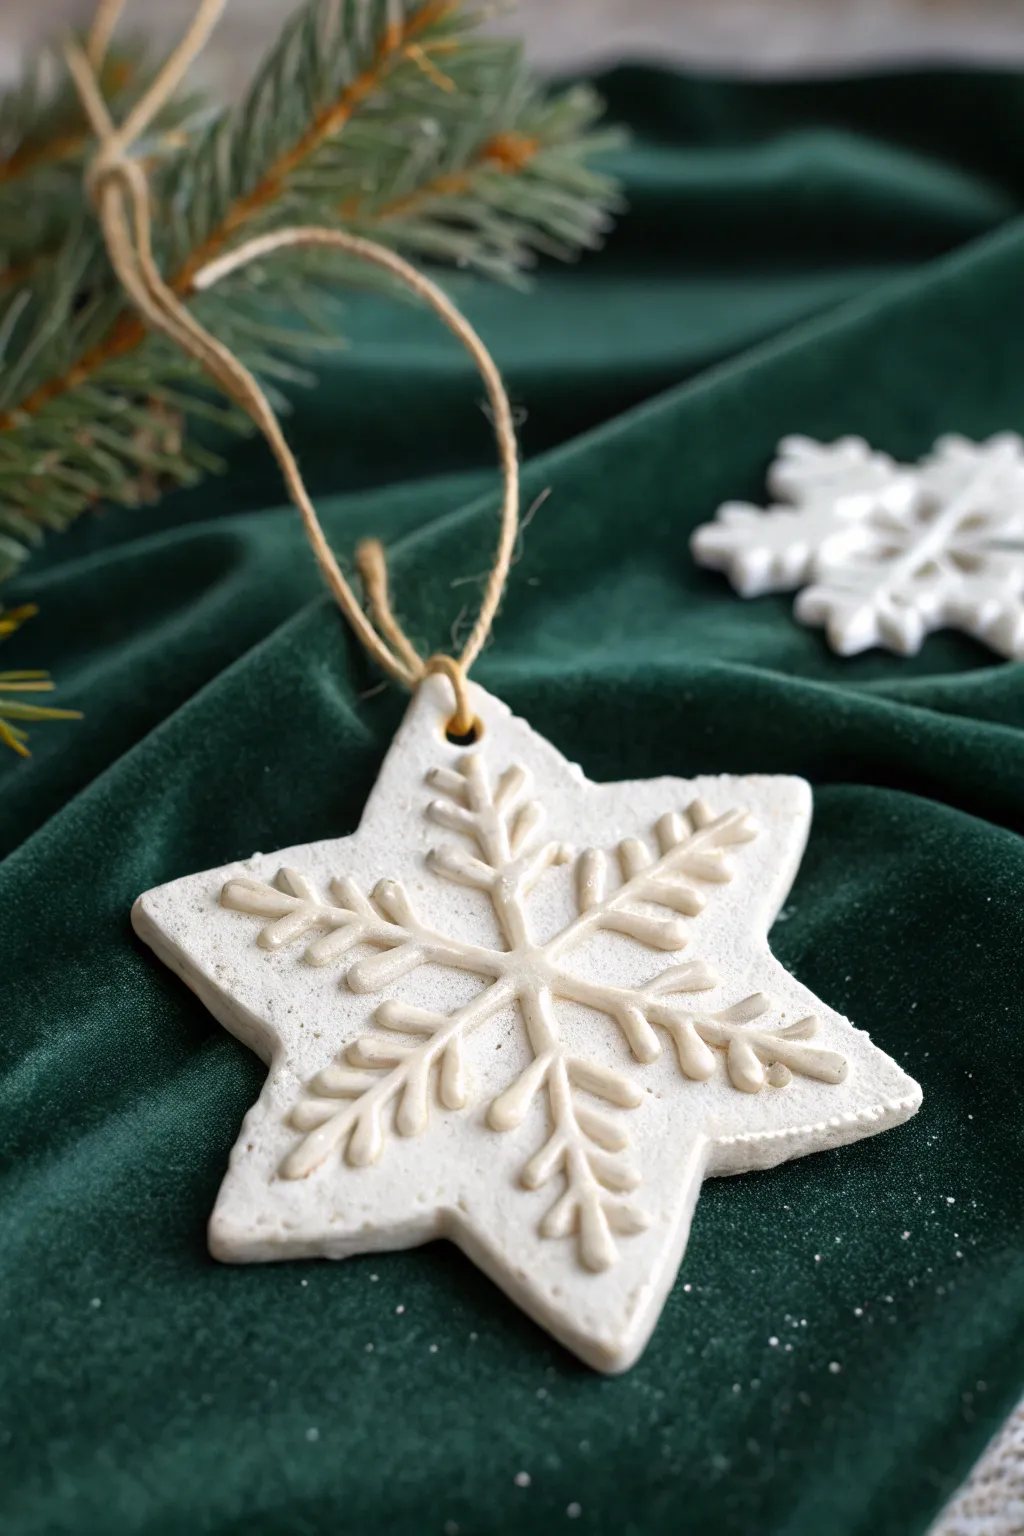
These elegant star ornaments feature a stunning raised snowflake design that looks intricate but is surprisingly simple to achieve. Made from modeling clay, they have a creamy, porcelain-like finish that pops beautifully against evergreen boughs.
Detailed Instructions
Materials
- White modeling clay (air-dry or polymer)
- Star-shaped cookie cutter (medium size)
- Rolling pin
- Parchment paper or silicone mat
- Liquid clay or ‘slip’ (water mixed with clay)
- Fine-point sculpting tool or toothpick
- Small round piping nozzle (optional)
- Straw or skewer (for the hole)
- Jute twine or ribbon
- Fine grit sandpaper
- Clear matte varnish (optional)
Step 1: Preparing the Base
-
Condition the Clay:
Begin by kneading a ball of white modeling clay until it is soft, pliable, and free of cracks. Warm clay is much easier to work with. -
Roll out the Slab:
Place the clay between two sheets of parchment paper or on a silicone mat. Roll it out evenly to a thickness of about 1/4 inch (6mm). You want it sturdy enough not to warp. -
Cut the Star Shape:
Press your star-shaped cookie cutter firmly into the clay slab. Wiggle it slightly to ensure a clean cut, then gently remove the excess clay from around the star. -
Smooth the Edges:
Dip your finger in a little water (for air-dry clay) or baby oil (for polymer) and gently run it along the cut edges of the star to soften any harsh sharpness. -
Create the Hanging Hole:
Use a straw or a skewer to poke a hole near the top point of the star. Make sure the hole is large enough for your twine to pass through later, keeping in mind clay shrinks slightly when drying.
Cracks Appearing?
If small cracks appear while air-dry clay is drying, mix a tiny bit of fresh clay with water to make a paste and fill them in gently with your finger.
Step 2: Sculpting the Snowflake
-
Make the Center Coil:
From your scrap clay, roll a very thin, snake-like coil. Cut three short pieces of equal length to form the main axes of the snowflake. -
Arrange the Snowflake Base:
Apply a tiny amount of liquid clay or slip to the center of the star. Lay the three coils across each other in an asterisk (*) pattern, pressing them down very gently. -
Create the Branches:
Roll more thin coils and cut twelve tiny V-shapes. These will be the traditional snowflake ‘feathers’ or branches. -
Attach the Details:
Using your slip as glue, attach two V-shapes to each of the six main arms of your asterisk. I find tweezers helpful here for precise placement without squishing the clay. -
Blend the Seams:
With a fine-point sculpting tool or toothpick, very gently blend the bottom of the coils into the star base just slightly, so they look embossed rather than just stuck on. -
Define the Shape:
Use the side of your tool to press lightly into the raised coils, giving them a more flattened, relief-style look rather than rounded worms. -
Refine the Snowflake Tips:
Add tiny balls of clay to the tips of the main arms or use a small tool to round them off for a polished finish.
Add Subtle Sparkle
While the varnish is still wet, sprinkle ultra-fine white or iridescent glitter over the raised snowflake design to mimic fresh snow.
Step 3: Finishing Touches
-
Dry or Bake:
If using air-dry clay, let the ornament dry on a flat surface for 24-48 hours, turning it over halfway through. If using polymer, bake according to the package instructions. -
Sand Imperfections:
Once fully cured and hard, check the edges. Use fine-grit sandpaper to gently buff away any rough spots or fingerprints. -
Seal the Ornament:
Apply a coat of clear matte varnish to protect the clay and give it a finished, ceramic appearance. Let this dry completely. -
Add the Hanger:
Cut a length of natural jute twine. Thread it through the hole at the top of the star. -
Secure the Loop:
Tie a secure knot at the end of the twine to create a loop, trimming any excess fraying for a neat look.
Now your handcrafted snowflake star is ready to bring a touch of winter elegance to your holiday decor


Evergreen-Imprint Rustic Christmas Tags
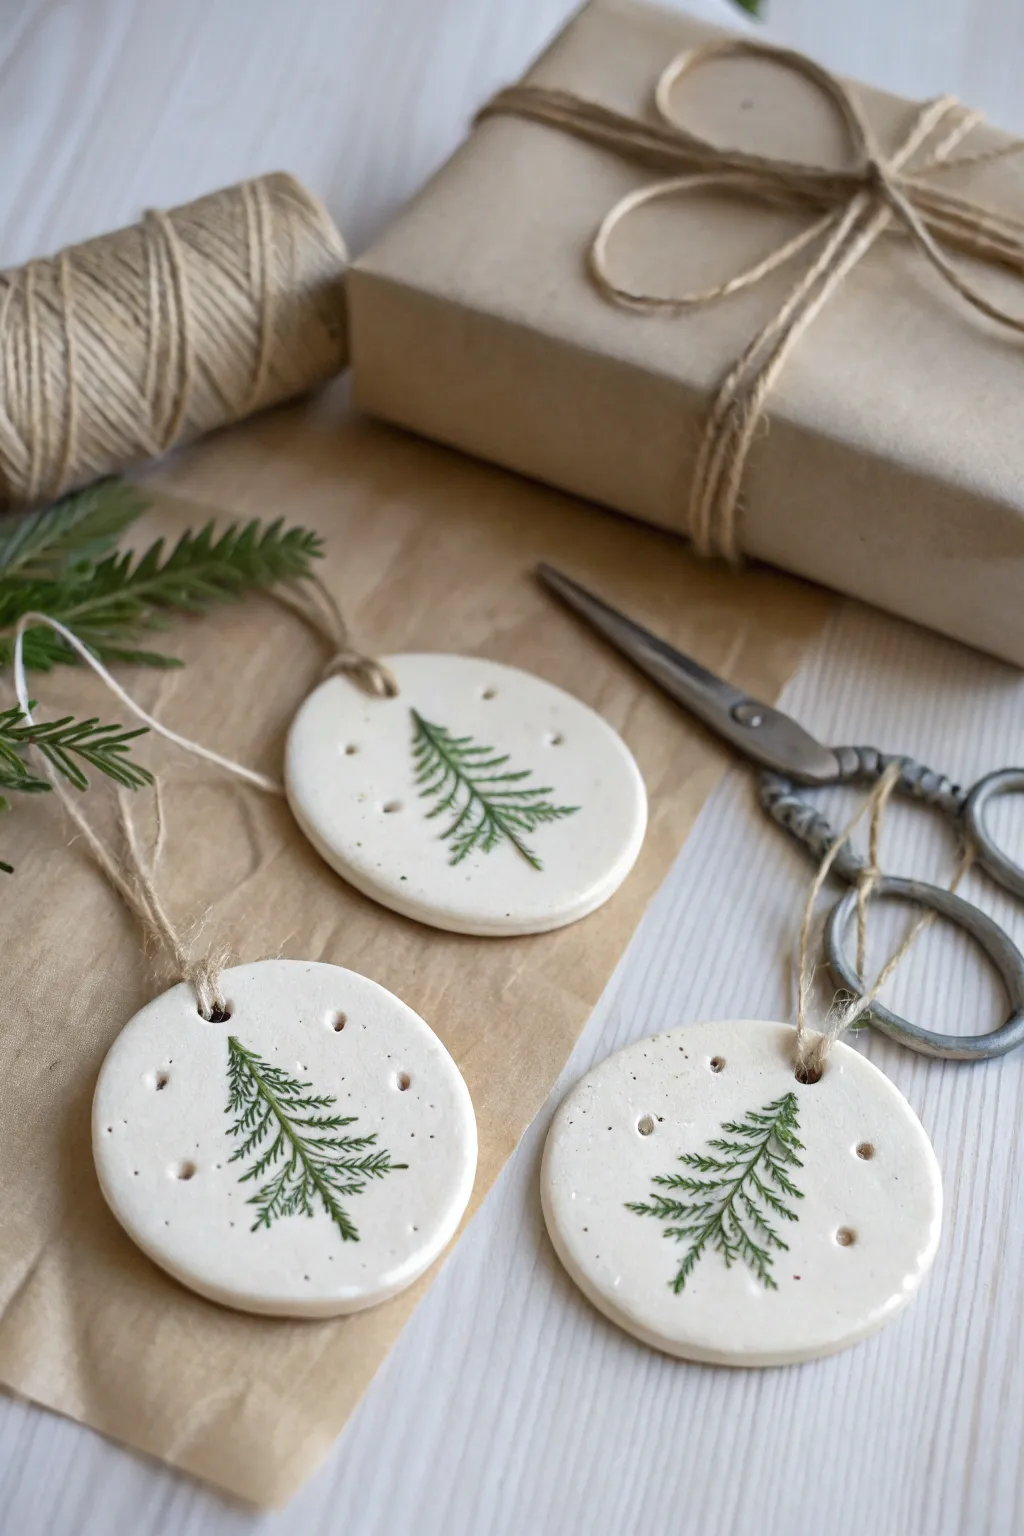
Capture the delicate beauty of winter greenery with these simple yet elegant clay tags. Featuring real evergreen imprints and a glossy finish, they add a perfect touch of Scandinavian charm to any gift.
Step-by-Step Guide
Materials
- White air-dry clay or polymer clay
- Fresh evergreen sprigs (cedar or cypress work best)
- Rolling pin
- Parchment paper or craft mat
- Round cookie cutter or a drinking glass
- Straw or skewer (for the hole)
- Sandpaper (fine grit)
- Clear gloss varnish or Mod Podge
- Small paintbrush
- Jute twine
- Scissors
Step 1: Preparation & Impression
-
Work the clay:
Begin by kneading a chunk of your white clay until it is soft, pliable, and free of cracks. Warm clay takes impressions much better than cold clay. -
Roll it out:
Place the clay on a sheet of parchment paper. Roll it out evenly until it is about 1/4 inch thick. Aim for a smooth surface without any air bubbles. -
Select greenery:
Choose small, flat sprigs of evergreen. Cedar or arborvitae are ideal because their flat, fern-like structure creates a crisp, detailed print. -
Position the sprig:
Lay the greenery gently on top of the rolled clay. Press it down lightly with your fingers just to tack it in place. -
Create the imprint:
Use your rolling pin to roll directly over the greenery firmly once. Do not roll back and forth; a single, confident pass prevents a double image. -
Reveal the design:
Carefully peel the evergreen sprig away from the clay. You should be left with a deep, detailed textured impression. -
Cut the shape:
Position your round cutter over the best part of the imprint. Press down firmly to cut out your tag shape. -
Add detail holes:
Using a toothpick or a small skewer, poke a few tiny, decorative holes randomly around the tree shape to mimic falling snow. -
Make the hanger hole:
Use a straw to punch a clean, larger hole at the very top of the ornament for the twine. Make sure it isn’t too close to the edge to prevent cracking.
Step 2: Finishing Touches
-
Dry completely:
Transfer the clay discs to a flat, dry surface. Let them dry according to the package instructions—usually 24 to 48 hours for air-dry clay. Flip them halfway through to ensure even drying. -
Smooth the edges:
Once fully hard, gently run fine-grit sandpaper around the rim to remove any sharp bits or roughness from the cutting process. -
Enhance the green:
If the natural sap from the plant didn’t leave enough color, or if you used polymer clay, you can dry-brush a tiny amount of dark green acrylic paint into the grooves now. -
Apply gloss:
I particularly love how a glossy finish elevates these tags. Paint a coat of high-gloss varnish or Mod Podge over the entire top surface to seal the clay and make the imprint pop. -
Let it cure:
Allow the varnish to dry thoroughly until it is no longer tacky to the touch. -
Cut the twine:
Cut a length of jute twine, approximately 8 inches long. -
Thread the loop:
Fold the twine in half and push the loop through the hole from front to back. -
Secure the knot:
Pull the loose ends through the loop and tighten gently to create a lark’s head knot.
Fixing Cracks
If small cracks appear while drying, mix a tiny bit of fresh clay with water to make a paste. Fill the crack, smooth with a damp finger, and let re-dry.
Scented Tags
Add warmth by dropping essential oils like cinnamon or pine onto the un-glazed back of the dried ornament. It acts as a diffuser for the tree!
Tie these onto your brown paper packages for a look that feels both organic and festive


Mini Santa Face Ornaments

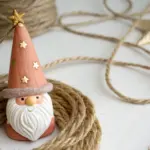
Capture the magic of Christmas with this charming Santa face ornament, featuring textured details and a classic festive color palette. This mini sculpture brings a touch of handcrafted warmth to your tree, perfect for beginners and seasoned clay artists alike.
How-To Guide
Materials
- White modeling clay (polymer or air-dry)
- Red modeling clay
- Flesh-tone modeling clay
- Small amount of black clay (or black acrylic paint)
- Jute twine or rustic string
- Needle tool or toothpick
- Small rolling pin
- Clay knife or craft blade
- Small ball tool (optional)
- Gloss varnish (optional)
Step 1: Forming the Base
-
Prepare the face shape:
Start with a ball of white clay about the size of a walnut. Flatten it into a smooth, thick disc. Press a smaller, flattened oval of flesh-tone clay onto the upper half of the white disc to define the face area versus the beard area. -
Shape the beard:
Using your fingers, gently pull and shape the bottom half of the white clay to create a rounded, slightly tapered beard shape. Ensure the transition between the flesh tone and white clay is seamless by smoothing the edges where they meet. -
Texturing the beard:
Take your needle tool or toothpick and press short, vertical lines into the bottom white section. Work your way around the curve of the beard to simulate hair texture, leaving the very center closer to the mouth area smoother.
Step 2: Adding Facial Features
-
Create the mustache:
Roll two small, teardrop-shaped pieces of white clay. Curl the pointed ends slightly upward. -
Attach the mustache:
Press these teardrops just below the flesh-tone area, meeting in the center to form a classic handlebar mustache. Use a tool to blend the top edges slightly for a secure hold. -
Add the nose:
Roll a tiny ball of red clay. Press this directly into the center where the mustache halves meet, flattening it slightly so it looks nestled in. -
Form the cheeks:
Use a very small amount of diluted red clay or pink chalk pastel dust to blush the cheek area on the flesh tone, or simply leave it plain for a clean look. -
Create the eyes:
Roll two minuscule balls of black clay. Press them firmly into the flesh-tone area above the mustache. If using paint, wait until the end to dot these on. -
Add eyebrows:
Roll two tiny, thin sausages of white clay. Place them above the eyes, curving them slightly to give Santa a friendly, surprised expression.
Fixing Cracks
If you see cracks forming as air-dry clay cures, dip your finger in a tiny bit of water and smooth over the fissure. For baked clay, fill cracks with a mix of liquid clay and solid clay, then re-bake.
Step 3: Crafting the Hat
-
Shape the red hat:
Fashion a flat triangle or semi-circle of red clay. Attach this to the top of the head, overlapping the flesh-tone forehead area. -
Add the brim:
Roll a thick snake of white clay. Flatten it slightly and press it over the seam where the red hat meets the forehead. Texture this strip by stippling it with a toothbrush or needle tool to make it look like fluffy fur. -
Position the pom-pom:
Roll a ball of white clay for the pom-pom. Attach it to the side or top of the hat, adding the same fluffy texture as the brim. -
Create the mouth:
Using a small tool, gently press a tiny indentation or attach a tiny sliver of red clay just below the mustache to hint at a smiling mouth. -
Make the hanging hole:
Before the clay hardens, use a toothpick or straw to poke a hole through the very top of the red hat. Wiggle it slightly to ensure the opening is wide enough for your twine.
Texture Play
Make the beard extra fluffy by pressing a piece of sandpaper or a clean toothbrush against the white clay instead of drawing lines. This gives a softer, more realistic woolly look.
Step 4: Finishing Touches
-
Bake or dry:
Follow the manufacturer’s instructions for your specific clay type. If baking, place on a dedicated baking sheet. If air-drying, leave it in a safe, dust-free spot for 24-48 hours. -
Seal (optional):
Once fully cured, you can brush a layer of gloss varnish over the red parts and the eyes to make them pop, leaving the white beard matte for contrast. -
Attach the hanger:
Cut a length of jute twine. Thread it through the hole in the hat and tie a secure knot to create a loop.
Now you have a wonderful little Santa ready to hang on the tree or gift to a friend

The Complete Guide to Pottery Troubleshooting
Uncover the most common ceramic mistakes—from cracking clay to failed glazes—and learn how to fix them fast.
Chubby Snowman Figurines for Shelves
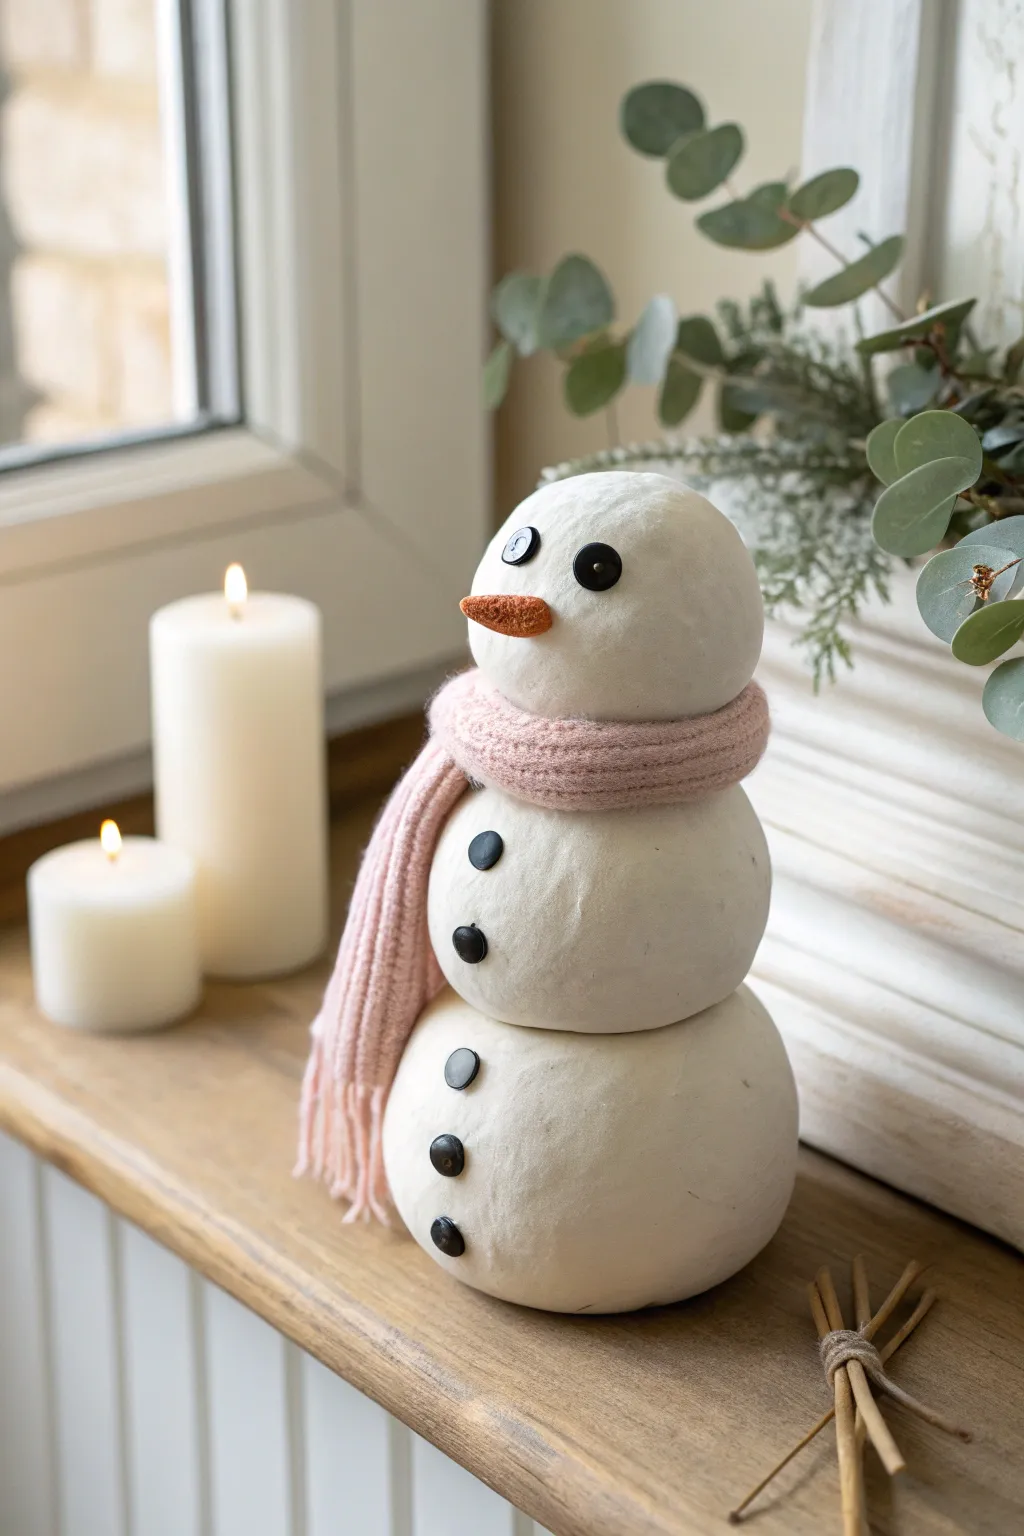
Bring a touch of winter wonder to your shelves with this charming, handcrafted snowman figurine that radiates a rustic, cozy feel. Made from air-dry clay with a soft, matte finish, this chubby three-tiered friend comes complete with a knit pink scarf and classic button details.
Step-by-Step Guide
Materials
- White or natural air-dry modeling clay
- Small buttons (black for eyes/body, various sizes)
- Orange felt or clay for the nose
- Scrap of pink textured knit fabric or an old sweater sleeve
- Craft glue or tacky glue
- Toothpicks or a wooden dowel (for internal structure)
- Sandpaper (fine-grit)
- Small scissors
- Water in a small cup
Step 1: Sculpting the Body
-
Prepare the base:
Start by taking a large chunk of air-dry clay and rolling it into a mostly spherical shape. This will be the bottom tier. Gently press the bottom onto a flat surface to create a stable base so he won’t wobble on your shelf. -
Create the middle section:
Roll a second ball of clay, slightly smaller than the first. This will be the snowman’s torso. -
Form the head:
Roll a third, smallest ball for the head. Test the stack to ensure the proportions look pleasing; the head should be slightly rounded but sturdy. -
Add structural support:
Before joining them, push a toothpick or a thin wooden dowel down into the center of the base ball. Leave enough sticking up to skewer the next two layers. -
Stack and join:
Apply a tiny dab of water or clay slip (clay mixed with water) to the top of the base. Slide the middle ball onto the dowel, pressing it gently into the base. Repeat for the head. -
Refine the surface:
Using your fingertips and a little water, smooth out any cracks, but don’t over-polish. I like to leave the surface slightly imperfect to mimic the texture of real packed snow.
Texture Trick
Before the clay dries, gently dab the surface with a stiff-bristle toothbrush or a crumpled ball of foil to create a realistic, icy snow pockmark texture.
Step 2: Adding Details
-
Position the eyes:
While the clay is still slightly soft, take two small black buttons and press them firmly into the head for eyes. Apply a dot of craft glue to the back of each button first to ensure they stay put as the clay dries. -
Add the body buttons:
Select five slightly larger black buttons for the body. Press two into the middle section and three into the bottom section, arranging them in a slightly curved vertical line to suggest a round belly. -
Create the nose:
Cut a small triangle of orange felt or sculpt a tiny cone of orange clay. Glue this securely between the eyes, pointing slightly upward for a cheerful expression. -
Let it dry:
Allow your snowman to dry completely in a well-ventilated area. This usually takes 24-48 hours depending on the thickness of your clay.
Step 3: Finishing Touches
-
Prepare the scarf:
Cut a long, thin strip from your pink knit fabric or old sweater material. The strip should be roughly 1 inch wide and long enough to wrap around the neck with tails hanging down. -
Fray the ends:
Gently pull the threads at the ends of your fabric strip to create a fringe effect, giving it a realistic scarf appearance. -
Wrap the scarf:
Drape the fabric strip around the snowman’s neck area (the gap between the top and middle spheres). Tie a simple knot or loop one end over the other. -
Secure the fabric:
Use a small dot of glue under the knot of the scarf to keep it from slipping down or unraveling over time. -
Final inspection:
Check that all buttons are secure. If the dried clay looks too smooth, you can lightly scuff it with fine-grit sandpaper to bring back that powdery snow texture.
Level Up: Frosty Sparkle
Once fully dry, brush a thin layer of white craft glue over the clay and sprinkle with extra-fine clear glitter for a shimmering, freshly-fallen snow effect.
Place your finished snowman near a window or candle to let his friendly face warm up your winter decor
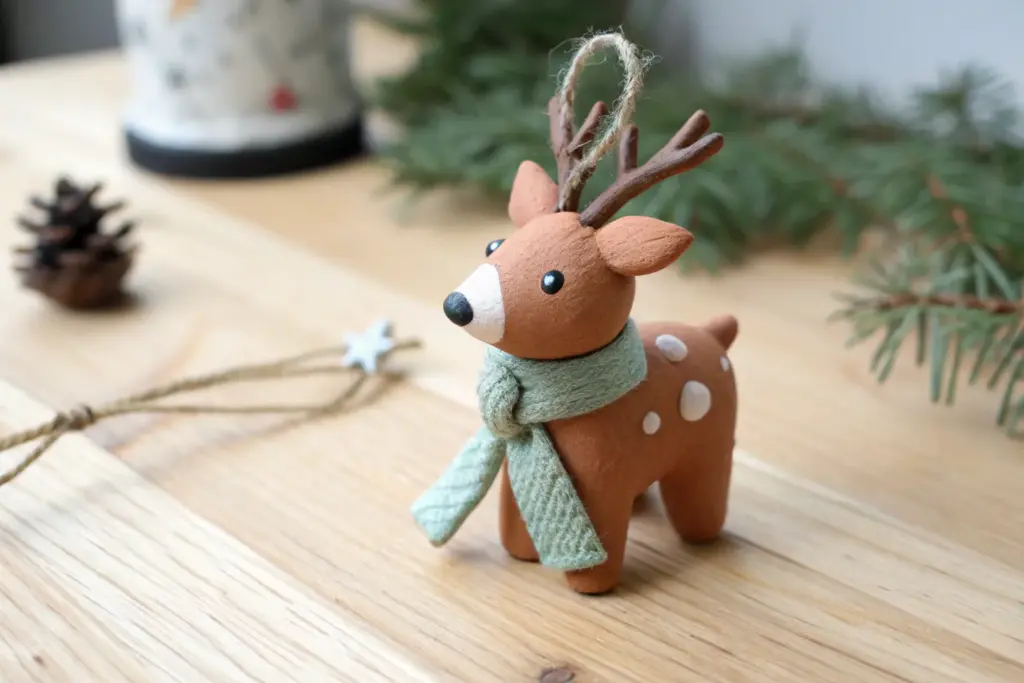
Reindeer Ornaments With Little Antlers

These adorable reindeer ornaments bring warmth to your Christmas tree with their gingerbread-like appearance and friendly faces. Crafted from simple modeling clay, they feature charmingly crooked antlers and a bright red nose that pops against the rich brown finish.
Step-by-Step
Materials
- Brown modeling clay (air-dry or polymer)
- Small amount of red modeling clay
- Small amount of black modeling clay (or black beads)
- Rolling pin
- Circle cookie cutter (approx. 2-3 inches)
- Knife or clay sculpting tool
- Jute twine or rustic string
- Needle tool or toothpick
- Fine grit sandpaper (optional)
- Matte varnish (optional)
Step 1: Creating the Base
-
Prepare the clay:
Start by conditioning your brown clay until it is soft and pliable. Use a rolling pin to flatten it to a uniform thickness of about 1/4 inch, ensuring it’s not too thin to support the antlers later. -
Cut the faces:
Using your circle cookie cutter, punch out as many round shapes as you plan to make. Smooth the edges of the circles with your finger to remove any sharp cuts or stray bits of clay. -
Shape the ears:
Take a small amount of leftover brown clay and roll two small teardrop shapes for each reindeer. Gently flatten them. -
Attach the ears:
Press the wide end of the teardrop ears onto the sides of the circle, roughly at the 10 and 2 o’clock positions. Blend the seam slightly on the back so they stay secure.
Smoother Surfaces
Before drying or baking, dip your finger in a tiny bit of water (for air-dry clay) or baby oil (for polymer) and rub it over the surface to remove fingerprints.
Step 2: Sculpting the Antlers
-
Roll the main branches:
Roll out thin snakes of brown clay for the main antler stems. These should be slightly thicker at the base and taper toward the top. -
Create the points:
Roll smaller, tiny snakes for the antler points. I find it easiest to make these quite short so they don’t droop. -
Assemble the antlers:
Attach the small points to the main stems by pressing them gently together. You can score the connection points lightly with a needle tool for a better grip. -
Attach to head:
Place the assembled antlers onto the top of the head, just inside the ears. Press down firmly to bond the clay, smoothing the join on the backside. -
Texture connection:
Use a tool to gently smooth the seam where the antlers meet the head, ensuring there is no visible line that might crack later.
Festive Textures
Before attaching facial features, gently press a piece of textured fabric or a clean toothbrush onto the brown clay to mimic a baked cookie texture.
Step 3: Adding the Details
-
Add the nose:
Roll a small ball of red clay. Flatten it slightly into an oval or circle and press it firmly into the center of the face. -
Create the eyes:
Roll two tiny specks of black clay into balls for eyes. Press them into the clay just above the nose. Alternatively, you can embed small black beads. -
Carve the smile:
Use a specialized curved sculpting tool or the edge of a spoon to impart a small, upward-curving smile directly below the nose. -
Create hanging hole:
While the clay is still workable, use a straw or a thick skewer to poke a hole through the top of the head, directly between the antlers.
Step 4: Finishing Up
-
Drying or baking:
Follow the instructions for your specific clay type. If baking polymer clay, ensure the antlers are supported flat on the baking sheet. If air drying, flip them occasionally to prevent curling. -
Touch ups:
Once fully cured or dry, inspect the edges. You can lightly sand any rough spots with fine-grit sandpaper for a professional finish. -
Add the hanger:
Cut a length of jute twine. Thread it through the hole you created earlier. -
Secure the loop:
Tie a simple knot at the base of the twine, close to the ornament, and then tie the ends together to create a hanging loop.
Now your little herd is ready to hang on the tree or be given as sweet handmade gifts


What Really Happens Inside the Kiln
Learn how time and temperature work together inside the kiln to transform clay into durable ceramic.
Candy Cane Swirls and Peppermint Discs
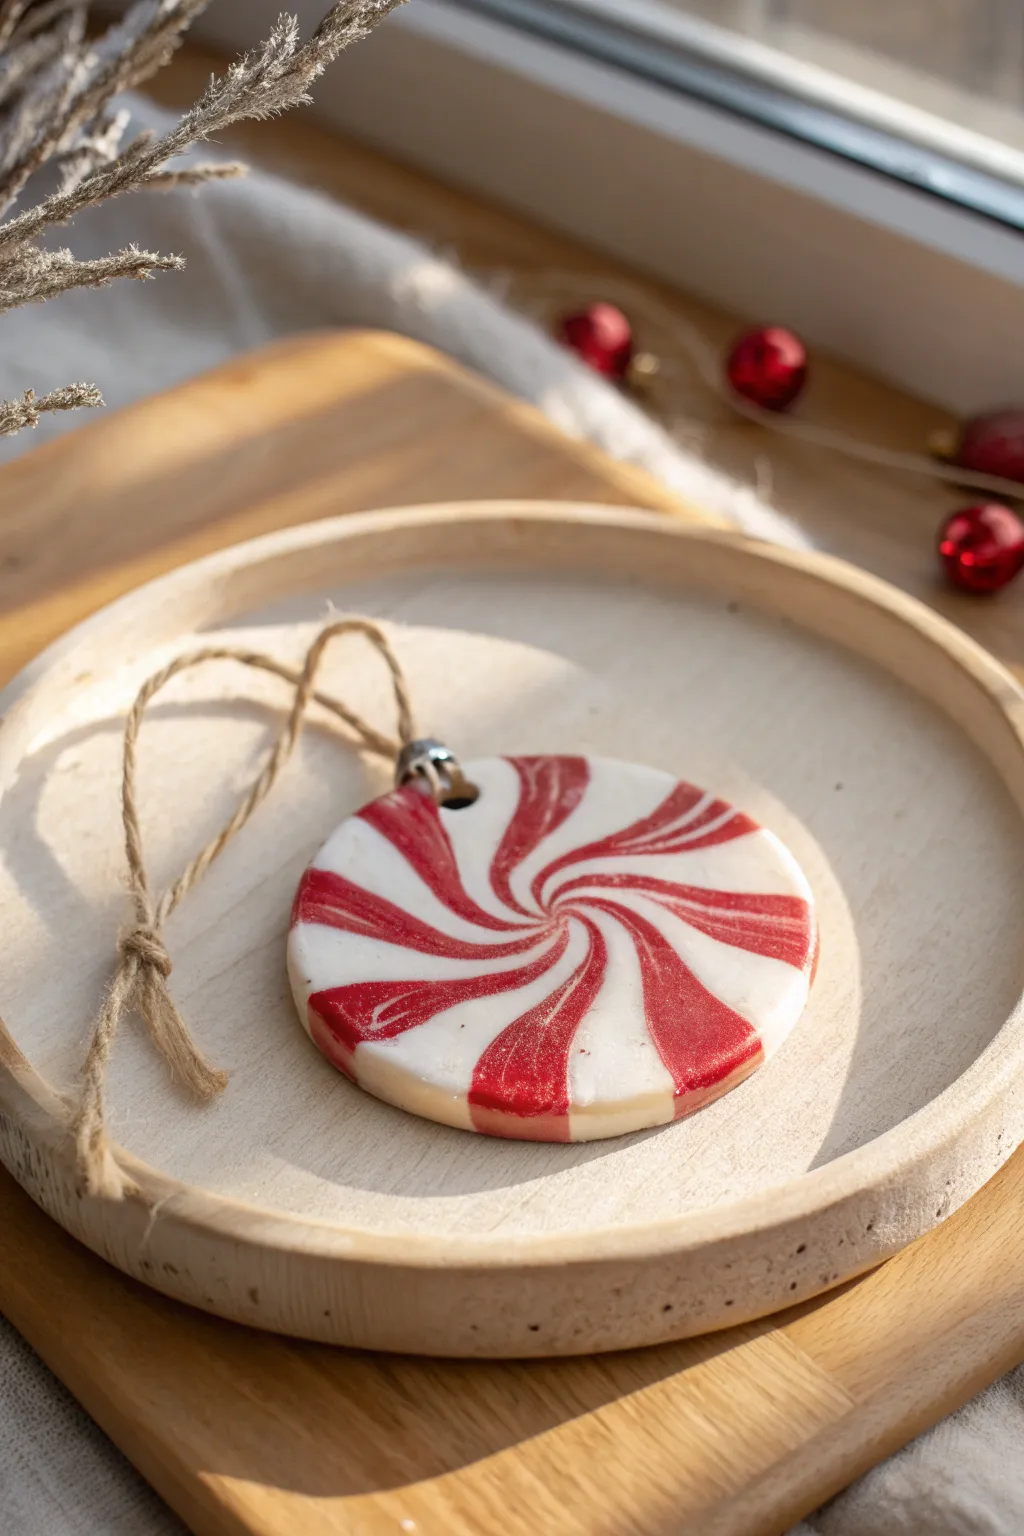
Capture the sweetness of the season with this classic peppermint disc ornament made from polymer clay. Its mesmerizing red and white spiral mimics real hard candy, adding a delightful, nostalgic touch to your holiday décor.
Step-by-Step
Materials
- White polymer clay
- Red polymer clay (preferably a translucent or glittery red for a candy effect)
- Acrylic rolling pin
- Circle clay cutter (approx. 3 inches)
- Blade or craft knife
- Small eye hook or screw eye
- Jute twine or ribbon
- Glossy polymer clay glaze or resin (optional)
- Small paintbrush
- Oven and baking sheet
Step 1: Prepare the Base Colors
-
Condition the white clay:
Start by warming up a generous portion of white polymer clay in your hands until it becomes soft and pliable. Roll it into a smooth ball. -
Condition the red clay:
Repeat the process with the red clay. If you have a translucent red or one with fine glitter like the example, it adds a lovely sugary realism. -
Create logs:
Roll both the white and red balls into thick, even logs of equal length, roughly 4 inches long.
Candy Shine Secret
Mix fine iridescent glitter into your translucent red clay before twisting. It creates a ‘sugared’ depth that looks incredible under Christmas tree lights.
Step 2: Form the Swirl Pattern
-
Create smaller strips:
Divide the red log into four equal wedges lengthwise to create long triangular strips, and do the same for the white log. -
Assemble the cane:
Reassemble the strips into a log shape, alternating a red wedge next to a white wedge until you have a striped log. -
Twist the log:
Grasp one end of the log in your left hand and the other in your right. Gently twist in opposite directions to create the spiral pattern. Continue twisting until the stripes are angled significantly. -
Roll to smooth:
Roll the twisted log on your work surface to smooth out the ridges created by twisting, ensuring the log becomes a uniform cylinder again. -
Coil the rope:
Since this disc uses a ‘lollipop’ method, roll your twisted log out further until it is a long, thin snake (about 1/4 inch thick). Start from the center and tightly coil this snake flat on your work surface, creating a spiral disc. -
Alternative plug method:
If you prefer the ‘slice’ method, simply compress your thick twisted log into a shorter, wider cylinder.
Make it Scented
After baking and cooling, rub a tiny drop of peppermint essential oil onto the untreated back of the ornament for a scratch-and-sniff holiday experience.
Step 3: Shape and Finish
-
Flatten the disc:
Using your acrylic roller, gently roll over your coiled or cylinder clay to flatten it into a smooth sheet about 1/4 inch thick. The twisting pattern will now look like a peppermint swirl. -
Cut the shape:
Position your circle cutter over the most attractive part of the swirl pattern. Press down firmly to cut out your perfect round ornament. -
Smooth the edges:
Remove the excess clay from around the circle. Use your finger to gently rub the cut edge of the circle, softening any sharp ridges left by the cutter. -
Add the hardware:
Carefully screw a small eye hook into the top edge of the clay disc. I usually add a tiny dab of liquid clay or bake-and-bond to the threads ensuring it stays secure after baking. -
Texturize (optional):
To mimic the look of pulled sugar, you can lightly brush the surface with a stiff brush, though leaving it smooth works perfectly for a hard candy look.
Step 4: Bake and Gloss
-
Bake the ornament:
Place the clay disc on a baking sheet lined with parchment paper or a ceramic tile. Bake according to your specific clay manufacturer’s instructions (usually around 275°F/135°C for 15-30 minutes). -
Cool down:
Allow the piece to cool completely inside the oven or on a wire rack before handling, as warm clay is fragile. -
Apply glaze:
For that realistic hard-candy shine, apply a thin coat of glossy polymer clay glaze or UV resin to the surface. Let this dry or cure completely. -
Attach the hanger:
Cut a length of jute twine or festive ribbon. Thread it through the eye hook and tie a secure knot to complete the loop.
Hang this sweet creation on your tree and enjoy the handmade charm it brings to your holiday season
Wreath Ornaments With Tiny Berries
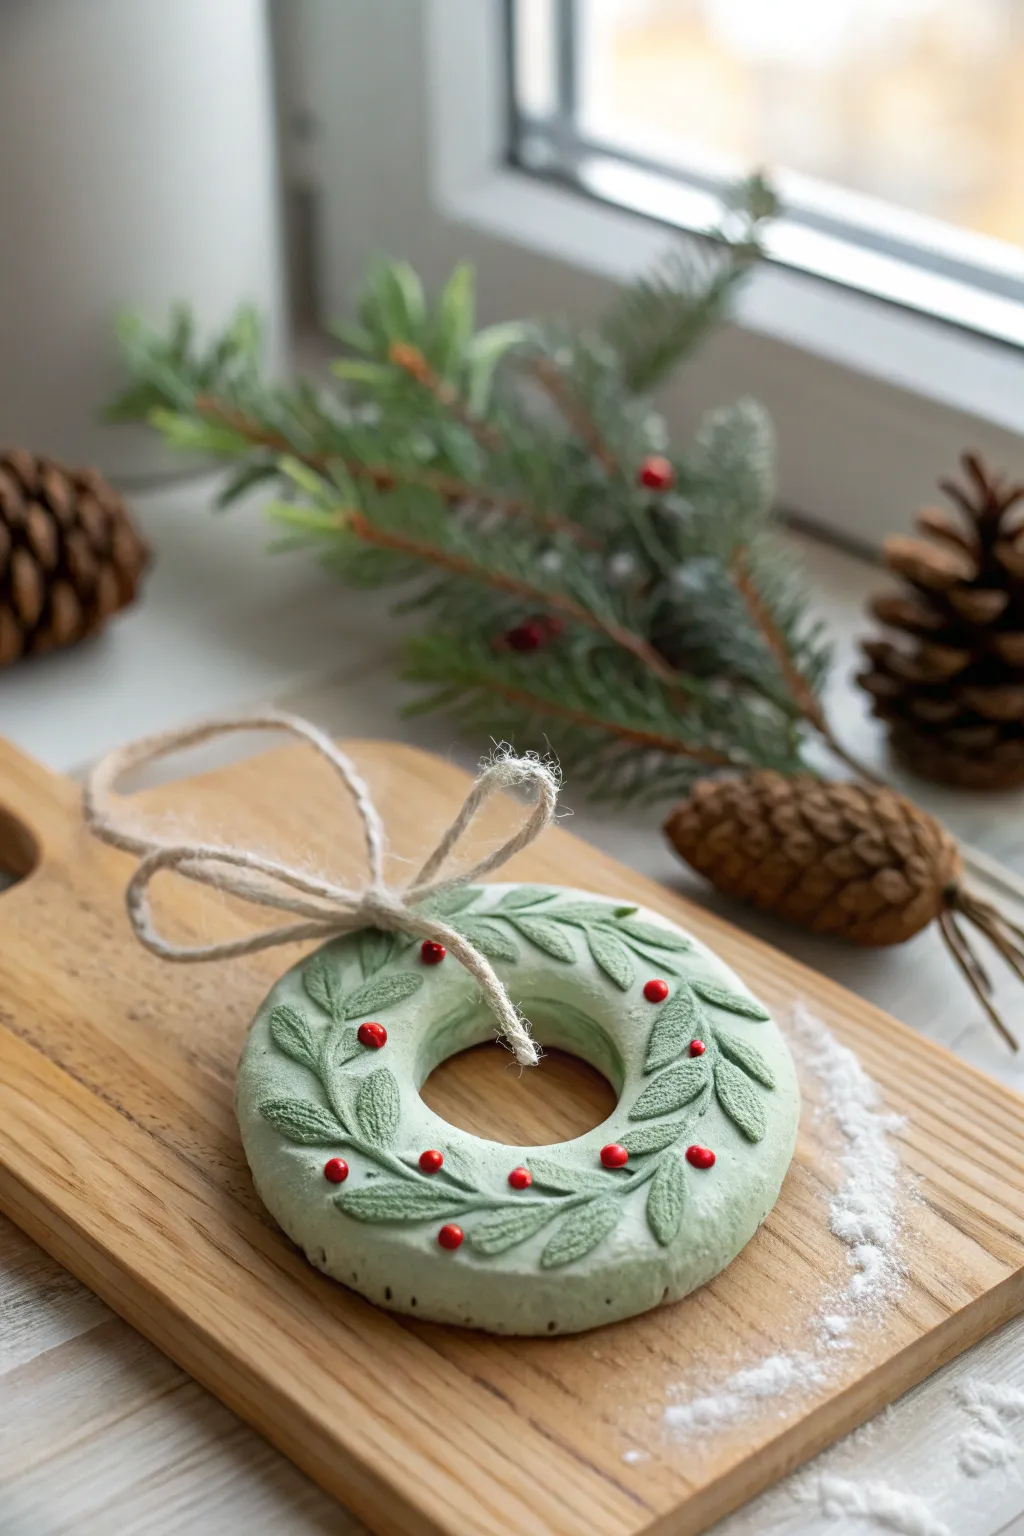
Capture the evergreen charm of winter with these delicate clay wreath ornaments, featuring sculpted leaves and vibrant red berries. Their soft, matte finish and rustic twine hanger give them a timeless, handcrafted appeal perfect for any Christmas tree.
How-To Guide
Materials
- White air-dry clay or polymer clay
- Sage green acrylic paint (or green clay pigment)
- Deep red acrylic paint
- Rolling pin
- Circle cookie cutters (one medium, one small)
- Modeling tool or toothpick
- Small craft knife
- Paintbrushes (fine detail and flat)
- Jute twine
- Strong craft glue
- Sandpaper (fine grit)
- Matte varnish (optional)
Step 1: Crafting the Base
-
Prepare the Clay:
Start by conditioning your clay. If using white air-dry clay, you can either knead in a small amount of sage green acrylic paint now for a consistent base color or plan to paint it later. Aim for a soft, pale green tone. -
Roll out the Dough:
Roll the clay out on a smooth surface to a thickness of about 1/4 to 1/2 inch. You want the ornament to be substantial enough to not crack, but light enough to hang. -
Cut the Wreath Shape:
Use your larger circle cutter to stamp out the main disc. Then, center the smaller cutter inside it to remove the middle, creating a perfect donut-shaped ring. -
Smooth the Edges:
Dip your finger in a little water (for air-dry clay) or baby oil (for polymer) and gently run it along the cut edges to soften any sharpness or irregularities.
Step 2: Sculpting the Foliage
-
Roll a Thin Sheet:
Take a leftover portion of green clay and roll it out much thinner than your base, almost like a thin pie crust. -
Cut Leaf Shapes:
Using a craft knife, carefully cut out numerous small, elongated almond shapes to serve as the leaves. You will need about 20-30 leaves depending on the wreath size. -
Add Leaf Texture:
With a needle tool or toothpick, gently press a central vein down the middle of each leaf. I like to add tiny diagonal lines branching off the center for extra realism. -
Arrange the Leaves:
Dab a tiny amount of water or liquid clay (for polymer) onto the wreath base. Place the leaves in a flowing pattern, having them overlap slightly as if growing in a circle. -
Create the Berries:
Roll tiny spheres of clay between your fingertips. These should be quite small to maintain the delicate scale of the ornament. -
Attach the Berries:
Press the tiny spheres gently onto the wreath in clusters of two or three, nestling them between leaves or atop the stems. Ensure they adhere well. -
Create the Hanger Hole:
Before the clay hardens, carefully poke a hole through the top of the wreath ring using a skewer or straw, ensuring it’s wide enough for your twine.
Pro Tip: Seamless Leaves
To make leaves look integrated rather than just stuck on, use a modeling tool to gently blend the very bottom tip of each leaf into the wreath base before baking or drying.
Step 3: Finishing Touches
-
Dry or Bake:
Follow the instructions for your specific clay type. For air-dry clay, let it rest on a wire rack for 24-48 hours. For polymer, bake according to the package directions. -
Sand Imperfections:
Once fully cured, gently sand any rough edges on the back or sides of the wreath with fine-grit sandpaper. -
Enhance the Greenery:
If you started with white clay, paint the entire wreath a soft sage green now. If you used colored clay, dry brush a slightly lighter green over the raised leaf textures to highlight them. -
Paint the Berries:
Using a fine detail brush, carefully paint the little clay spheres with deep red acrylic paint. A second coat helps the color pop. -
Add a Flocked Effect:
For a frosty look similar to the image, lightly dab a nearly-dry brush with white paint over the highest points of the leaves and berries. -
Seal the Ornament:
Apply a coat of matte varnish to protect the paint and give the ornament a finished, professional look without making it too shiny. -
Add the Twine:
Cut a length of jute twine. Thread it through the center hole (or the hole you poked earlier) and tie it into a simple bow at the top, leaving a loop for hanging.
Level Up: Scented Clay
Knead a drop of essential oil like pine, cinnamon, or spruce into air-dry clay before sculpting. Your wreath will smell just like a real winter forest.
Enjoy hanging your handmade botanical wreath and the festive touch it brings to your holiday decor

TRACK YOUR CERAMIC JOURNEY
Capture glaze tests, firing details, and creative progress—all in one simple printable. Make your projects easier to repeat and improve.
Nativity-Inspired Mini Figures

Embrace the serenity of the season with these calming, Scandinavian-style clay figures that bring a modern touch to traditional nativity scenes. The smooth, white finish paired with delicate gold accents creates an elegant, ethereal look perfect for any mantelpiece.
Step-by-Step
Materials
- Air-dry white modeling clay (or polymer clay)
- Small cup of water (for smoothing)
- Fine-grit sandpaper
- Gold acrylic paint or gold leaf pen
- Fine-point black permanent marker or detail brush
- Soft pink pastel chalk or blush (for cheeks)
- Gloss varnish or matte sealant (optional)
- Clay sculpting tools (or a toothpick)
Step 1: Shaping the Base Figures
-
Prepare the Clay:
Begin by kneading your white clay until it is warm, pliable, and free of cracks. Divide it into balls of varying sizes: larger ones for the adult figures and angels, smaller ones for the children, and a tiny one for the infant. -
Form the Bodies:
For the standing figures, roll the clay into a smooth cylinder, slightly wider at the bottom for stability. Gently taper the top to create a rounded, cone-like shape resembling a simple robe. -
Create the Heads:
Roll separate small spheres for the heads. Make sure they are proportional to the bodies you just created. Flatten the bottom of the sphere slightly so it sits flush. -
Attach Head to Body:
Score the connection points (the top of the body and bottom of the head) with a scratching tool. Add a dab of water or liquid clay (if using polymer) and press them firmly together. Smooth the seam with your finger or a tool if you want a one-piece look, or leave the seam for a separate pieces effect. -
Sculpt the Hoods and Veils:
Roll out a thin, flat sheet of clay. Cut small semicircles or ovals. Drape these over the heads of the larger figures (like Mary or the angels) to create hoods. Gently press the edges down onto the ‘shoulders’ of the figure to secure them seamlessly. -
Form the Baby Figure:
For the infant, create a small, pill-shaped oval for the swaddled body. Attach a tiny spherical head to one end. If desired, wrap a very thin strip of clay around the ‘head’ to mimic a bonnet. -
Add Collars and Details:
For some figures, roll a small snake of clay and wrap it around the neck area to create a thick, cozy collar. Flatten it gently against the body.
Smooth Operator
Keep a pack of baby wipes nearby while working. Wiping your hands often prevents dust from getting transferred onto the pristine white clay.
Step 2: Refining and Decorating
-
Smooth Imperfections:
Dip your fingertip in a little water and run it over the figures to erase fingerprints and smooth out any bumps. I find this step crucial for that clean, ceramic look. -
Drying Time:
Let the figures dry completely according to your clay’s package instructions. For air-dry clay, this usually takes 24-48 hours. Turn them occasionally so the bottoms dry properly. -
Sand for Smoothness:
Once fully cured, use fine-grit sandpaper to gently buff away any remaining rough spots or lint, paying attention to the bottom edges. -
Paint Gold Accents:
Using a fine brush and gold acrylic paint, add simple decorative elements. Paint a star on the chest of the angels or Mary. Add gold bands to the collars or scalloped patterns near the base of the robes. -
Line Work:
For certain figures, create delicate lines representing folded wings or robe pleats using the very tip of your brush or a gold paint pen. -
Draw the Faces:
Keep the faces minimal. Use a fine-point black marker or the tiniest brush to dot two eyes and a small, curved smile. Position the features lower on the face for a sweeter, younger appearance. -
Add Rosy Cheeks:
Shave a tiny bit of pink pastel chalk into dust. Use a dry brush or cotton swab to pick up the dust and gently dab it onto the cheeks for a soft, natural blush. -
Seal the Work:
Finish by applying a coat of matte or satin varnish to protect the paint and give the clay a finished, professional sheen.
Textured Touch
Before the clay dries, gently press a piece of lace or linen onto the ‘robe’ area to imprint a subtle fabric texture onto the surface.
Now you have a serene little family ready to bring peace to your holiday decor
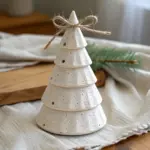
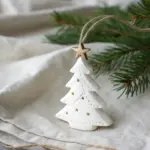
Little Christmas Tree Forest Centerpiece
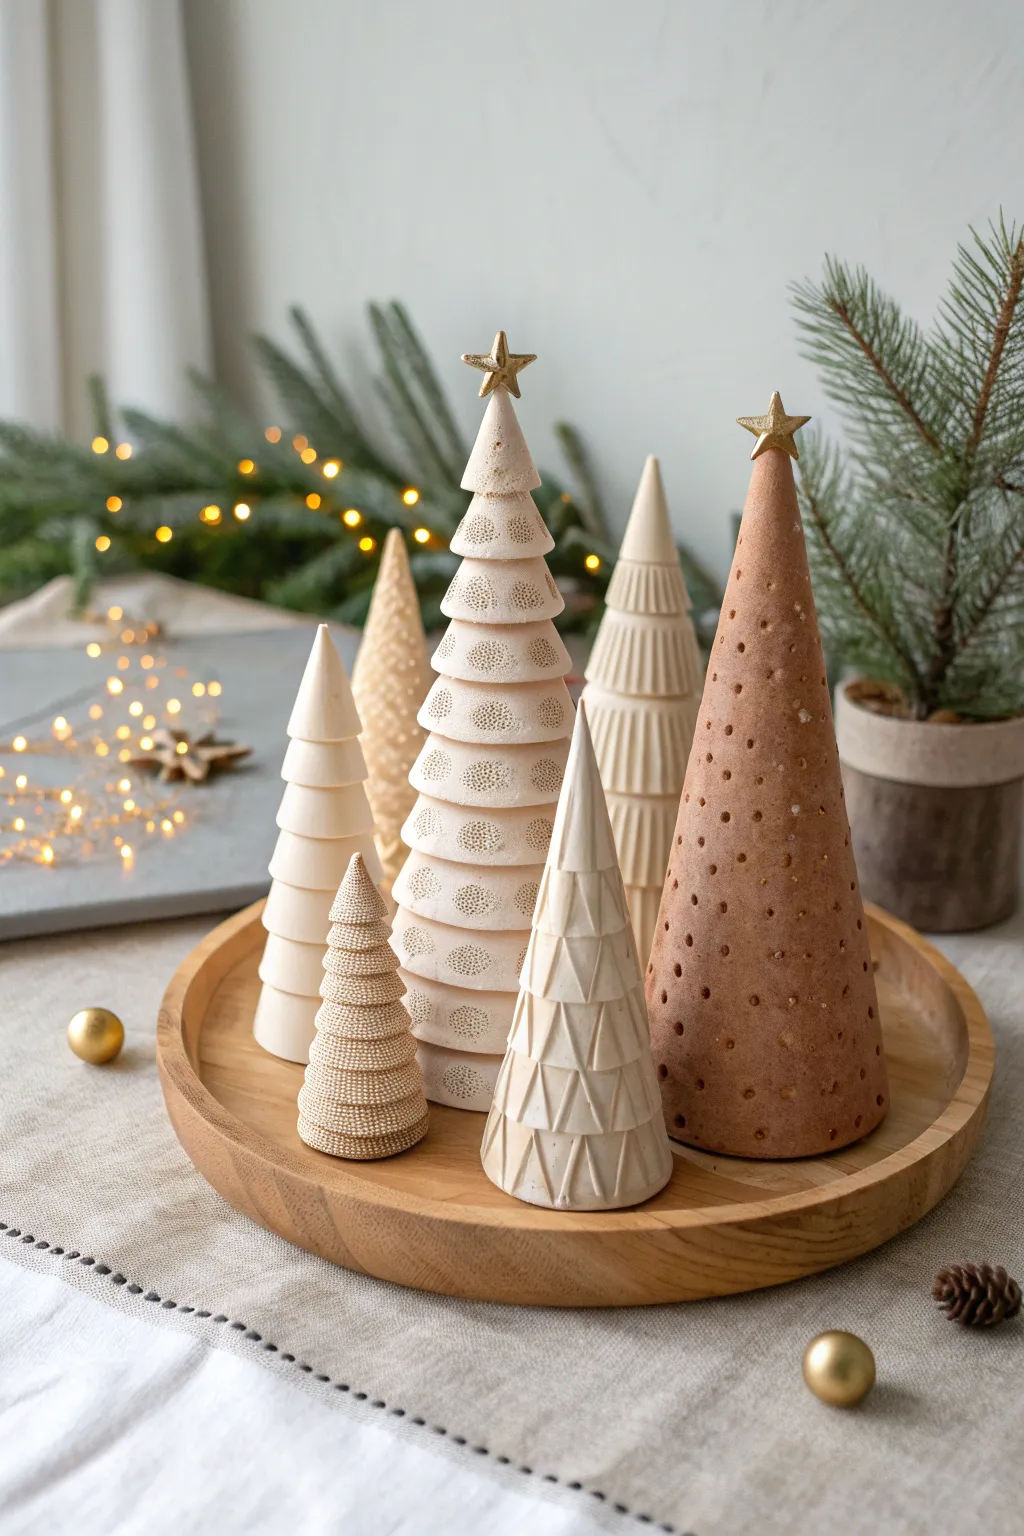
Bring a touch of minimalist Scandinavian charm to your holiday table with this forest of handcrafted clay trees. Each tree features unique textures and subtle earth tones, creating a serene and festive display when gathered on a wooden tray.
Step-by-Step Tutorial
Materials
- Air-dry clay or polymer clay (white, beige, and terracotta colors)
- Rolling pin
- Cone templates (paper or flexible plastic)
- Craft knife
- Texture tools: toothpicks, skewers, small straws, lace, or clay sculpting tools
- Small star cookie cutter or molds
- Gold metallic paint
- Fine detail paintbrush
- Strong craft glue
- Fine-grit sandpaper
- Wooden round tray (for display)
Step 1: Shaping the Cones
-
Prepare the Clay:
Begin by conditioning your clay. If using air-dry clay, knead it slightly to remove air bubbles. For polymer clay, warm it in your hands until pliable. You will need three shades: a crisp white, a soft cream/beige, and a warm terracotta or gingerbread brown. -
Roll Out Slabs:
Roll your clay out into even slabs, approximately 1/4 inch thick. Aim for a smooth surface, but don’t worry about perfection as slight irregularities add to the handmade organic look. -
Cut the Shapes:
Using paper templates or simply free-handing, cut out wedge shapes (like a slice of pie with a curved bottom). When rolled up, these wedges will form cones. Vary the sizes of your wedges to create trees of different heights. -
Form the Cones:
Gently roll the clay wedges into cone shapes. Join the seam by scoring the edges (making little hatch marks), adding a dab of water (for air-dry) or liquid clay (for polymer), and pressing them together. Smooth the seam with your finger or a sculpting tool so it becomes invisible. -
Solid Cone Option:
Alternatively, creating solid cones works wonderfully for smaller trees. Roll a ball of clay and then roll it against your work surface with the palm of your hand, applying more pressure on one side to taper it into a point.
Cracking Woes?
If air-dry clay cracks while drying, mix a tiny bit of fresh clay with water to make a paste (slip). Fill the cracks, smooth it over with a finger, and let it dry again.
Step 2: Adding Texture
-
The Dotted Tree:
For the tall terracotta tree, take a skewer or a small blunt tool. Press gentle indentations all over the surface in a random pattern. I like to vary the pressure slightly so some holes are deeper than others for visual interest. -
The Layered Tree:
To recreate the layered look, roll out a solid cone first. Then, cut thin strips of clay. Wrap these strips around the cone starting from the bottom, overlapping them slightly as you move up. Soften the edges if they look too sharp. -
Geometric Triangles:
For the white tree with triangles, use a flat modeling tool or the back of a knife. Gently press horizontal lines around the cone, and then diagonal lines connecting them to create a zig-zag or triangle pattern. -
Spiral Ridges:
Make the tall, thin cream tree by using a sculpting tool to carve a continuous spiral groove from the base to the tip. Keep the line depth consistent for a clean, turned-wood effect. -
Detailing the Tiny Trees:
For the smallest tree, use a very fine tool or a texturing comb to create dense, horizontal rows of tiny dots. This creates a highly tactile, almost fabric-like appearance.
Make it Glow
Poke holes all the way through the clay cones before drying. Place them over LED tea lights to turn your centerpiece into a glowing luminaria forest.
Step 3: Finishing Touches
-
Create Stars:
Roll out a small amount of leftover clay. Use a tiny star cutter or hand-cut small stars. Make sure the base of the star is flat enough to sit on the clear tip of a tree, or attach them immediately if the clay is still wet. -
Drying or Baking:
If using air-dry clay, set the trees in a cool, dry place for 24-48 hours. Turn them occasionally to ensure the bottom dries. If using polymer clay, bake according to the package instructions (usually around 275°F for 15-30 minutes). -
Sanding:
Once fully cured or dried, inspect your trees. Use fine-grit sandpaper to gently smooth the bottom edges so they stand perfectly flat on your tray. -
Adding the Gold:
Dip a fine brush into gold metallic paint. Carefully paint the clay stars. For a cohesive look, stick to just the stars, leaving the trees natural. -
Assembly:
If you baked your stars separately, glue them to the peaks of selected trees using strong craft glue. Arrange your finished forest on a wooden tray, perhaps weaving in some battery-operated fairy lights for extra sparkle.
Now you have a timeless, handcrafted holiday display that looks beautiful on a mantle or dining table
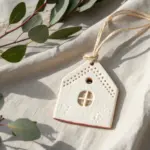
Mini Gingerbread House Clay Village

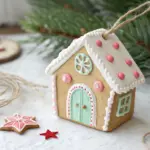
Create a cozy, everlasting holiday centerpiece with this remarkably realistic clay gingerbread house. By texturing the clay to mimic baked dough and using liquid clay for icing, you’ll craft a sweet decoration that looks good enough to eat but lasts for years.
How-To Guide
Materials
- Light brown or biscuit-colored polymer clay
- Liquid polymer clay (white)
- Red and green polymer clay (small amounts)
- Texture sponge or toothbrush
- Craft knife or clay blade
- Rolling pin
- Cardboard or stiff paper (for templates)
- Small square cookie cutter (optional, for windows)
- Needle tool
- Baking tile or parchment paper
- Oven (for baking polymer clay)
- White acrylic paint (optional, for dusting)
- Wooden tray and fake snow (for display)
Step 1: Preparing the Dough Walls
-
Create Templates:
Sketch and cut out paper templates for your house: two pointed gable ends (front/back), two rectangular side walls, and two rectangular roof panels. Keep the dimensions small, around 3-4 inches high, for a cute miniature look. -
Roll the Clay:
Condition your light brown clay until soft, then roll it out into a slab about 1/4 inch thick. You want it substantial enough to stand up, just like real gingerbread. -
Add Texture:
Before cutting, firmly press a coarse sponge or an old clean toothbrush all over the surface of the clay. This creates that crucial baked-good texture. -
Cut the Shapes:
Lay your paper templates onto the textured clay and cut around them cleanly with your craft knife. You’ll need one front, one back, two sides, and two roof pieces. -
Create Windows and Doors:
On the front panel, use a needle tool to lightly impress an arched door shape. Use a small square cutter or your knife to carefully remove window squares on the front and side walls.
Step 2: Assembly and Baking
-
Pre-Bake the Walls:
Place your flat wall and roof pieces on a ceramic tile or baking sheet. Bake them flat according to the clay package instructions (usually 20-30 minutes). Let them cool completely—this ensures they are rigid and easy to assemble. -
Construct the Base:
Join the four walls together using a thick bead of liquid polymer clay or a snake of regular clay along the inner seams. You can prop them up with small boxes while they bond. -
Attach the Roof:
Apply adhesive clay to the top slopes of the front and back walls. Gently press the roof panels on, ensuring they overhang slightly at the eaves. I usually add a little extra clay inside the roof peak for stability. -
Final Structural Bake:
Bake the assembled house structure again for about 15-20 minutes to fuse the seams. Allow it to cool fully before decorating.
Realistic Texture Tip
For an even more realistic gingerbread look, mix a pinch of translucent clay and some ground black pepper or real cinnamon into your brown clay before rolling it out.
Step 3: Icing and Decoration
-
Mix the Icing:
If your white liquid clay is too runny, mix in a tiny bit of white clay to thicken it until it holds a peak, just like royal icing. -
Frost the Roof:
Spread a generous layer of the white liquid clay ‘icing’ over the entire roof. Use the tip of the bottle or a tool to drag the bottom edge down into varied drips. -
Add Scalloped Details:
Pipe careful scalloped lines across the roof surface to mimic shingles. If you don’t have a piping tip, you can roll tiny thin snakes of white clay and press them on. -
Embellish Windows:
Pipe or paint thin lines of white liquid clay around the window panes and the door arch to define the frames. -
Make Candy Accents:
Roll tiny balls of red and green clay. Press them gently into the wet ‘icing’ on the roof in an alternating pattern. -
Decoration Details:
Add a red clay circle above the door for a wreath or window accent. Add a tiny red doorknob to the stamped door. -
Final Cure:
Bake the entire decorated house one last time to set the liquid clay and candy pieces. -
Snowy Finish:
Once cool, dab a dry brush with white acrylic paint and lightly ‘stipple’ it over the brown wall areas to look like a dusting of flour or powdered sugar.
Illuminated Village
Leave the back wall of the house open or cut a hole in the bottom to place a battery-operated tea light inside for a warm, glowing window effect.
Place your finished cottage on a wooden tray filled with artificial snow for a heartwarming holiday display
Layered Cutout Ornaments With Color Blocking
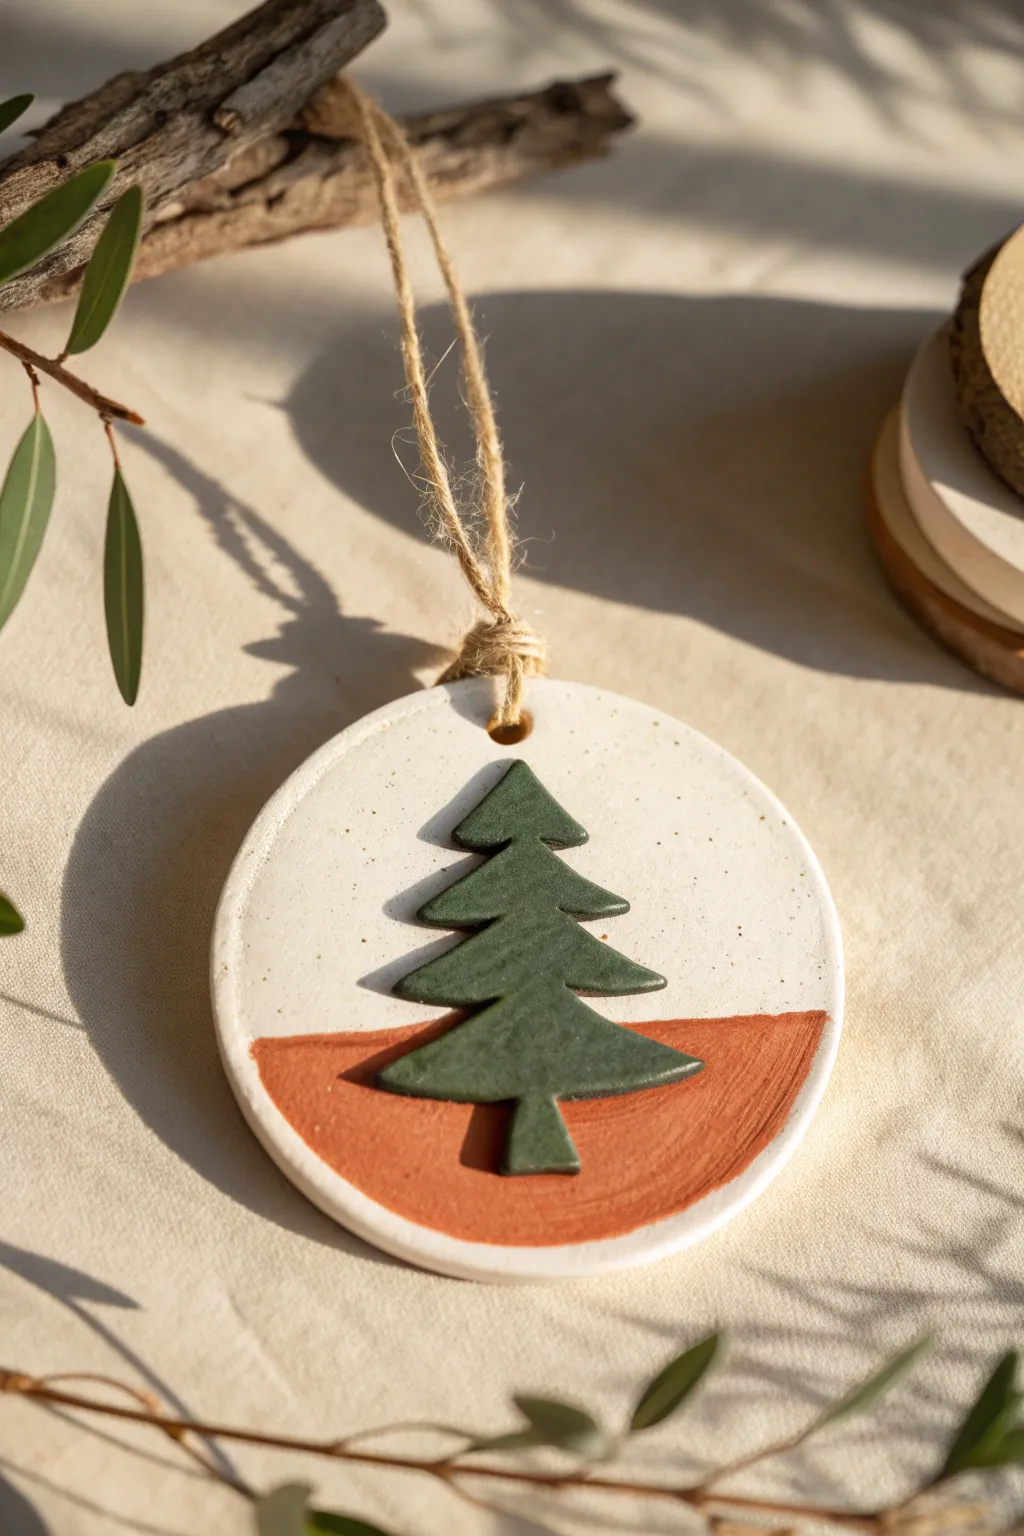
Embrace a minimalist aesthetic this holiday season with a charming layered ornament that combines crisp white clay with earthy tones. This project uses a simple color-blocking technique and dimensional layering to create a decoration that looks effortlessly chic hanging from your tree.
Step-by-Step Guide
Materials
- White polymer clay or air-dry clay (speckled finish preferred)
- Forest green polymer clay
- Terracotta or burnt orange acrylic paint
- Rolling pin
- Round cookie cutter (approx. 3-inch diameter)
- Christmas tree cookie cutter (small enough to fit inside the circle)
- Sharp craft knife or scalpel
- Small paintbrush
- Straw or small circular tool for the hanging hole
- Jute twine
- Parchment paper or silicone mat
- Liquid polymer clay or craft glue
- Masking tape or painters tape (optional)
Step 1: Creating the Base
-
Condition the white clay:
Start by warming the white speckled clay in your hands to condition it, kneading until it becomes soft and pliable. -
Roll the base slab:
Roll out the white clay on a piece of parchment paper to an even thickness of about 1/4 inch. I like to use guide sticks or playing cards on either side of the roller to ensure it’s perfectly level. -
Cut the circle:
Press your round cookie cutter firmly into the white clay slab to create the main body of the ornament. -
Smooth the edges:
Gently lift the circle and use your finger dipped in a tiny bit of water (if using air-dry) or baby oil (if using polymer) to smooth away any rough edges left by the cutter. -
Make the hanging hole:
Use a straw or a small circular tool to punch a clean hole near the top edge of the circle for the twine loop.
Uneven Paint Lines?
If paint bleeds under the tape near the raised tree, scrape it gently with a toothpick while wet, or touch up with white paint later
Step 2: Adding the Tree Layer
-
Prepare the green clay:
Condition and roll out your forest green clay. You want this layer to be slightly thinner than your base, perhaps around 1/8 inch thick. -
Cut the tree shape:
Use your tree-shaped cutter to punch out a perfect evergreen shape from the green clay. -
Check placement:
Lay the green tree gently onto the center of the wet white circle to check the positioning without pressing it down yet. -
Adhere the layers:
Apply a small amount of liquid polymer clay (or slip/glue if using other clay types) to the back of the tree. Press it firmly onto the center of the white round base so they bond together. -
Initial hardening:
Bake the ornament according to your clay package instructions (or let it fully air dry). Ensure it lies flat during this process to prevent warping.
Pro Tip: Texture
Add black pepper or decorative sand to your white clay before rolling to mimic the trendy stoneware ceramic look effortlessly
Step 3: Color Blocking and Finish
-
Map out the horizon line:
Once the ornament is cool and hard, decide where you want your color block to start. It should ideally cut across the lower third of the tree. -
Tape the line:
Carefully place a strip of masking tape horizontally across the ornament. Press it down firmly, especially where it jumps over the raised tree shape, to prevent paint from bleeding under. -
Paint the bottom section:
Using a small brush, apply the terracotta paint to the bottom section of the disc. Paint right over the bottom branches of the green tree that fall below your tape line. -
Refine the edges:
For the crispest results, apply thin layers. If the tape gap near the raised tree is tricky, I prefer to hand-paint that specific seam with a very fine detail brush. -
Remove tape:
Peel the tape away slowly while the paint is still slightly tacky to avoid chipping the dry acrylic. -
Final touch-ups:
Check the sides of the raised tree; paint the edges of the green clay terracotta where they sit in the colored zone so the illusion of the horizon line is complete. -
Add the hanger:
Cut a length of natural jute twine, thread it through the top hole, and secure it with a rustic knot.
Hang your new decoration on the tree and enjoy the modern, handmade warmth it brings to your holiday display
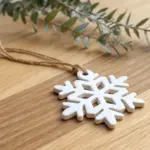
Cookie-Cutter Ornaments With Painted Folk Details
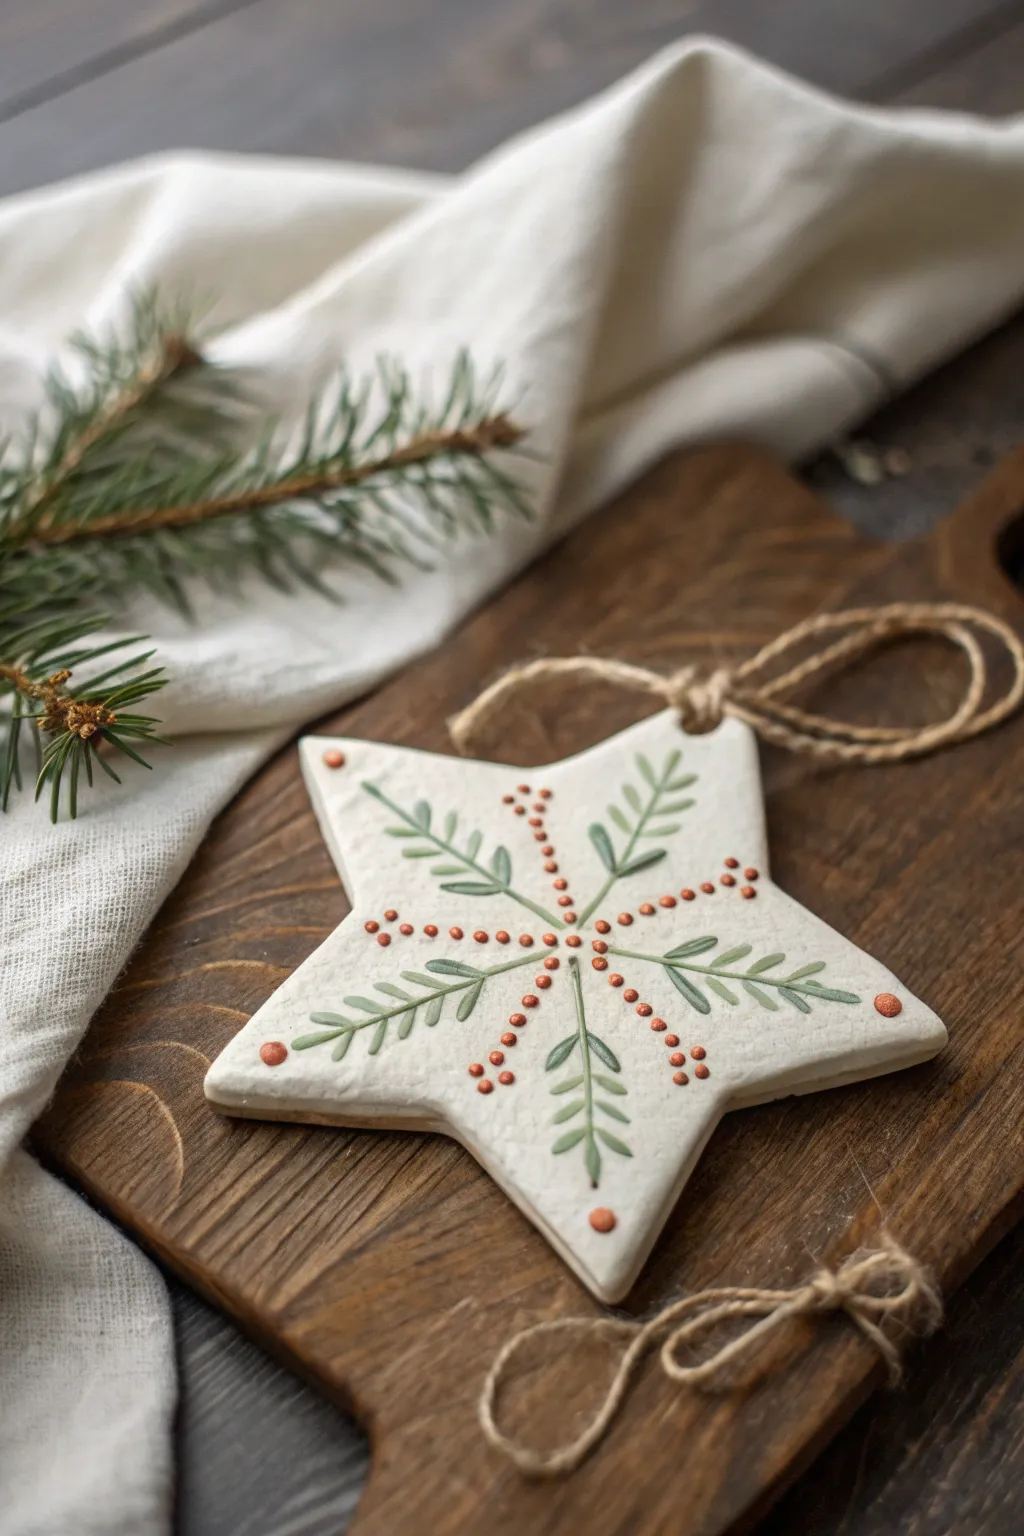
These charming star ornaments combine the simple elegance of white clay with hand-painted botanical details inspired by Scandinavian folk art. The subtle texture and earthy color palette make them a perfect rustic addition to your holiday decor.
How-To Guide
Materials
- White air-dry clay or polymer clay
- Star-shaped cookie cutter (approx. 3-4 inches)
- Rolling pin
- Canvas mat or parchment paper
- Fine-grit sandpaper
- Acrylic paints (olive green, muted forest green, terracotta orange/burnt sienna)
- Very fine detail paintbrush (size 0 or 00)
- Stylus tool or toothpick (for dots)
- Drinking straw or skewer (for the hanging hole)
- Jute twine
- Matte spray varnish (optional)
Step 1: Shaping the Base
-
Prepare your clay:
Begin by kneading a fist-sized ball of white clay until it is warm and pliable. This prevents cracks from forming later. -
Roll it out:
Roll the clay flat on a canvas mat or parchment paper to a uniform thickness of about 1/4 inch. Avoid making it too thin, as you want the ornament to feel substantial. -
Cut the shape:
Press your star-shaped cookie cutter firmly into the clay. Give it a tiny wiggle to ensure a clean cut before lifting it away. -
Smooth the edges:
Dip your finger in a little bit of water and gently run it along the cut edges of the star to smooth out any roughness or stray bits of clay. -
Create the hanging point:
Use a drinking straw or a thick skewer to punch a hole near the top of one of the star’s points. Make sure the hole is at least 1/4 inch from the edge to prevent tearing. -
Let it cure:
Allow the star to dry completely according to your clay’s package instructions. For air-dry clay, I usually flip it over halfway through the drying process to keep it flat. -
Surface prep:
Once fully hard, lightly sand the surface and edges with fine-grit sandpaper to create a perfectly smooth canvas for your painting. Wipe away any dust with a slightly damp cloth.
Uneven Dots?
If your painted berries look inconsistent, try dipping your tool into the paint box freshly for every single dot. This ensures the same amount of paint is deposited each time.
Step 2: Painting the Design
-
Mix your greens:
Prepare two shades of green acrylic paint: a lighter olive tone and a deeper forest green. You can mute bright greens by adding a tiny touch of brown or grey. -
Paint the central stems:
Using your fine detail brush and the darker green, paint five thin lines radiating from the very center of the star out toward the valleys between the star points. -
Add first leaves:
Along these stems, paint small, simple leaves branching off. Keep your strokes light and consistent. -
Paint the secondary sprigs:
Switch to your lighter olive green. Paint five additional botanical sprigs, this time extending out toward the tip of each star point. -
Layer the details:
Add small leaves to these lighter stems as well, creating an alternating pattern of dark and light foliage around the star. -
Prepare the dot color:
Mix a warm terracotta or burnt sienna color. This earthy red adds a lovely warmth without being too bright. -
Paint the berry chains:
Dip your stylus tool or the tip of a toothpick into the terracotta paint. Carefully dot a line of ‘berries’ radiating from the center in between your green sprigs. -
Add accent dots:
Place a single larger dot at the very tip of each star point to anchor the design. -
Protect your work:
Once the paint is completely dry to the touch, apply a light coat of matte spray varnish to seal the design and protect it from moisture. -
Add the hanger:
Cut a length of jute twine, thread it through the hole, and tie it securely. You can tie a bow near the hole for extra decoration.
Make It Sparkle
Before the varnish dries, sprinkle very fine iridescent glitter over the white areas of the clay to mimic the look of fresh snow glistening on the ornament.
Hang your beautiful new creation on the tree or use it as a special gift topper for someone you love
Tiny Holiday Charm Sets for Gifts and Stockings
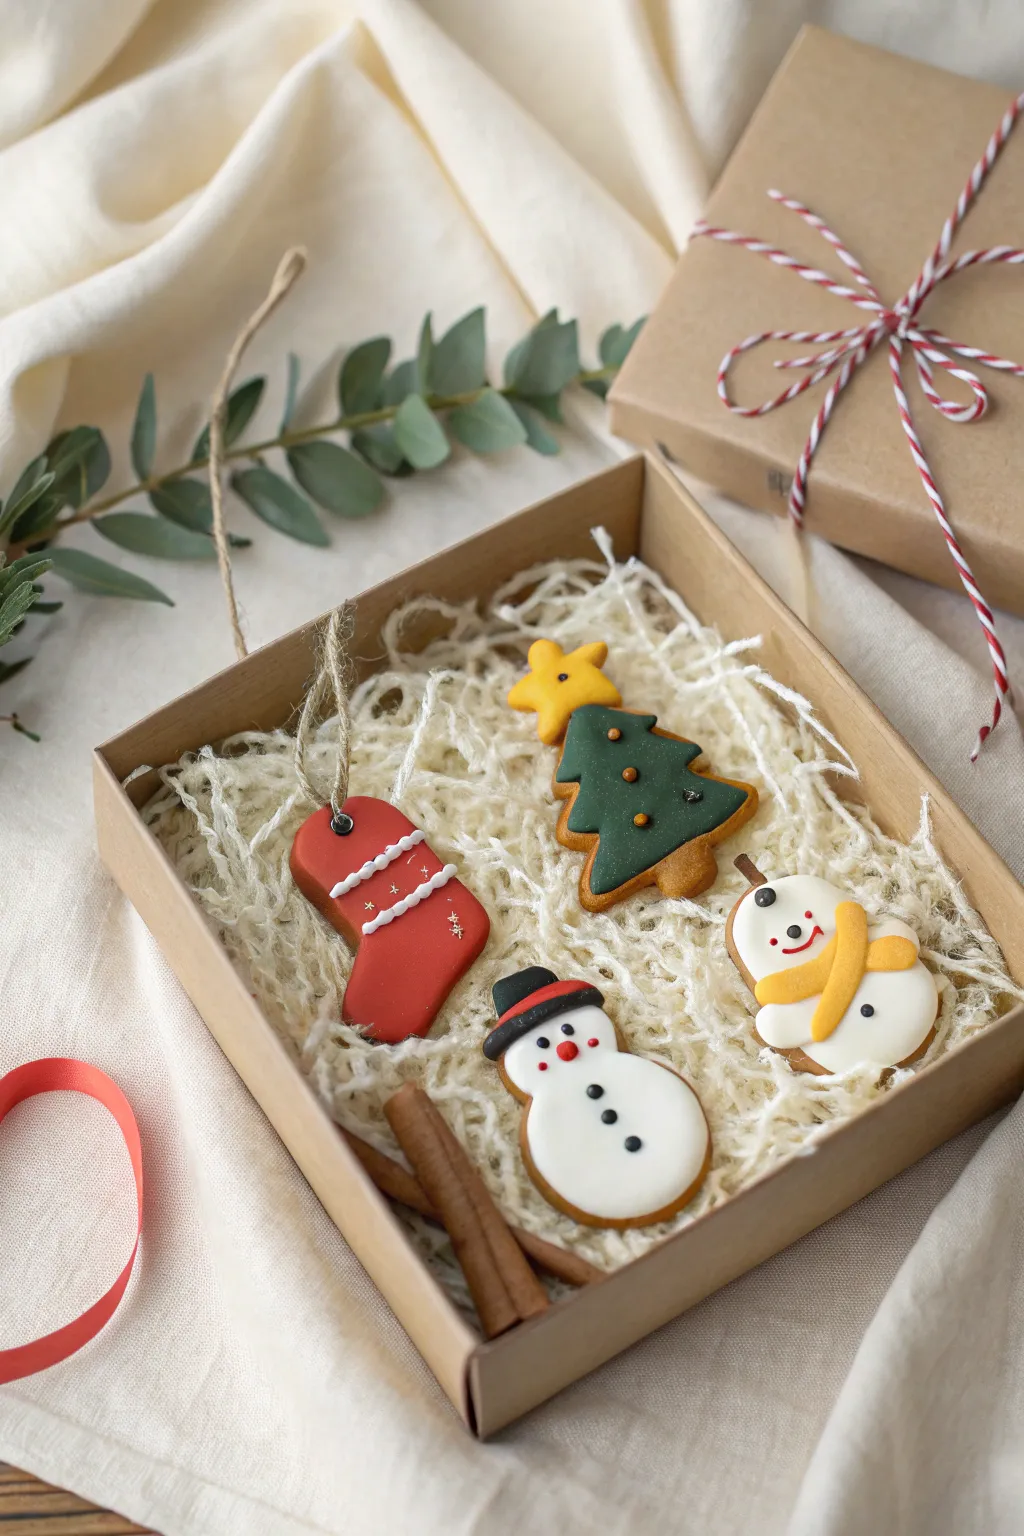
Create a heartwarming collection of miniature Christmas charms that nestle perfectly into a gift box for a sweet surprise. These tiny polymer clay creations, including a festive stocking, a frosty tree, and two cheerful snowmen, capture the cozy spirit of the holidays with simple shapes and joyful details.
Step-by-Step Tutorial
Materials
- Polymer clay (Red, Green, White, Black, Yellow/Gold, Orange, Brown)
- Clay roller or pasta machine
- Precision craft knife or clay blades
- Small dotting tools and needle tool
- Texture sponge or stiff brush (for cookie texture)
- Liquid polymer clay (optional, for connecting pieces)
- Small eye pins (for hanging)
- Gloss glaze or matte varnish (optional)
- Jute twine
- Small kraft gift box and shredded paper filler
- Real cinnamon sticks (for styling)
Step 1: Preparation & Base Shapes
-
Condition the clay:
Begin by warming and kneading your clay colors until they are soft and pliable. This step creates a smooth finish and prevents cracking during baking. -
Roll your sheets:
Roll out slabs of red, green, and white clay to a uniform thickness, roughly 1/4 inch. You want them thick enough to look like little cookies but thin enough to verify they bake through evenly. -
Cut the stocking:
Using the red slab, carefuly cut out a classic boot shape. Smooth the edges with your finger to remove any sharp cutting marks and make it look soft. -
Form the tree foundation:
Cut a stylized fir tree shape from the green clay. Instead of sharp triangles, try to round the edges of the branches slightly for a more playful, cartoon-like aesthetic. -
Shape the snowmen bodies:
For the snowmen, cut rounded shapes from white clay. For shape #1 (traditional), make a smaller circle on top of a larger one. For shape #2 (blobby snowman), create a smooth, pear-like organic shape. -
Add cookie texture (Optional):
If you want these to look like gingerbread cookies, gently tap the sides and backs with a clean toothbrush or texture sponge to simulate a baked crumb.
Clean Clay Tip
Baby wipes are essential! Clean your hands and tools thoroughly between colors, especially before touching white clay, to avoid transferring red or green tint.
Step 2: Adding Details
-
Decorate the stocking:
Roll two very thin snakes of white clay. Press these horizontally across the upper part of the stocking. Use a needle tool to add tiny vertical indents along the white strips to mimic knitting or embroidery. -
Tree star and ornaments:
From yellow clay, cut a small, bubbly five-pointed star and press it to the tree’s peak. Roll tiny balls of various colored clays (gold, red, or dark green) and scatter them across the green surface as baubles. -
Create snowman #1 (Top Hat):
Form a small black cylinder and a flat disk to make a top hat; attach this to the head. Add a tiny red strip for the hat band. Use black clay seeds for eyes and buttons, and a tiny orange cone for the nose. -
Dress snowman #2 (Scarf):
Roll a thin strip of yellow clay and wrap it around the neck area, crossing the ends over the chest to look like a scarf. Add a small brown rectangle on top as a simple cap stem or hair detail. -
Add rosy cheeks:
I like to scrape a tiny bit of red pastel chalk into powder and brush it gently onto the snowmen’s cheeks before baking for a soft, blushing glow. -
Secure the eye pins:
If you plan to hang these as ornaments, insert a small metal eye pin into the top of each shape now. A dab of liquid clay on the pin shaft helps it stick permanently.
Scented Surprise
Add a drop of cinnamon or peppermint essential oil to the shredded paper filler (not the clay itself) to make the unboxing experience smell like Christmas baking.
Step 3: Baking & Assembly
-
Bake the charms:
Place your pieces on a ceramic tile or baking sheet lined with paper. Bake according to your specific clay brand’s instructions (typically 275°F/135°C for 15-30 minutes). -
Cool and varnish:
Let the pieces cool completely inside the oven to prevent thermal shock. Once cold, apply a matte varnish if you want a natural look, or gloss glaze specifically on the ‘icing’ details for shine. -
Draw final faces:
If intricate clay steps are tricky, use a fine-tip permanent marker or acrylic paint to draw the snowman mouths and eyes after baking. -
Tie the twine:
Thread a length of rustic jute twine through the eye pins of your finished charms, tying a simple knot to create a hanging loop. -
Box assembly:
Fill your kraft box with crinkled shredded paper. Arrange your new clay charms gently inside, nestled alongside a few real cinnamon sticks for a delightful scent.
Wrap your box with twine to complete this charming handmade gift set.