When kids get their hands into air dry clay, Christmas crafting turns into the kind of memory you actually want to keep. Here are my favorite kid-friendly ideas that stay simple to shape but still look adorable on the tree or tied onto a gift.
Classic Cookie-Cutter Christmas Ornaments

Sometimes the simplest decorations are the most striking, like this thick, textured star suspended from a natural jute cord. Its matte white finish and organic feel make it a perfect addition to a Scandi-inspired or rustic holiday scheme.
Step-by-Step Guide
Materials
- White air-dry clay (stone effect or standard)
- Star cookie cutter (medium size)
- Jute twine or hemp cord
- Rolling pin
- Parchment paper or non-stick mat
- Straw, skewer, or toothpick
- Fine-grit sandpaper (optional)
- Small bowl of water
Step 1: Shaping the Star
-
Condition the clay:
Begin by taking a handful of air-dry clay and kneading it in your hands for a minute or two. This warms up the material and makes it pliable, reducing the risk of cracks forming later on. -
Roll it out:
Place your clay on a sheet of parchment paper. Use a rolling pin to flatten the clay to a substantial thickness—aim for about 1/4 to 1/3 inch (6-8mm). Leaving it slightly thicker gives the ornament that premium, chunky look seen in the photo. -
Cut the shape:
Press your star-shaped cookie cutter firmly into the clay. Give it a tiny wiggle to detach the edges before lifting the cutter away. -
Remove excess:
Peel away the excess clay from around the star shape. If the clay sticks to the cutter, gently push it out from the back, being careful not to warp the points. -
Smooth the edges:
Dip your finger into a small bowl of water and run it gently along the cut edges of the star. This softens any sharp ridges left by the cutter and creates a more finished appearance. -
Add texture (optional):
For a more organic, stone-like feel, you can gently pat the surface with a crumpled piece of plastic wrap or a stiff brush. If you prefer the smooth look shown here, simply ensure your rolling pin was clean.
Smooth Operator
To fix hairline cracks while drying, mix a tiny bit of fresh clay with water to make a paste (slip). Rub this into the crack and smooth it over with your finger.
Step 2: Finishing Details
-
Create the hole:
Using a straw, skewer, or toothpick, poke a hole through the top point of the star. Make sure the hole is large enough to accommodate your jute twine—remembering that clay sometimes shrinks slightly as it dries. -
Refine the hole:
Twist the tool gently as you remove it to keep the hole circular and neat. Check the back of the star and smooth down any clay that pushed through the exit point. -
Initial drying:
Leave the star on the parchment paper to dry in a cool, dry place. Flip the star over after about 12 hours so the bottom can air out evenly. This prevents curling. -
Full cure:
Allow the clay to dry completely, which usually takes 24 to 48 hours depending on thickness and humidity. The clay will turn a lighter matte white when fully cured. -
Sanding:
Once bone dry, take a piece of fine-grit sandpaper and lightly buff the edges. I find this helps remove any tiny burrs or sharp points on the star tips.
Step 3: Assembly
-
Cut the twine:
Cut a length of jute twine, roughly 8-10 inches long. -
Loop it:
Fold the twine in half. Push the folded loop end through the hole in the star from front to back. -
Secure the knot:
Pass the loose ends of the twine through the loop you just pushed through the hole and pull tight (a layout hitch knot). Alternatively, just thread it through and tie a simple overhand knot at the top. -
Final trim:
Trim any excessively long tails on the knot to keep things tidy, and your ornament is ready to hang.
Scented Decor
Add a few drops of essential oil like cinnamon or pine into the clay while kneading. Your star will smell like Christmas as it hangs on the tree.
Your beautiful star is now ready to bring a touch of natural elegance to your holiday display


Leaf-Print Holly And Evergreen Ornaments
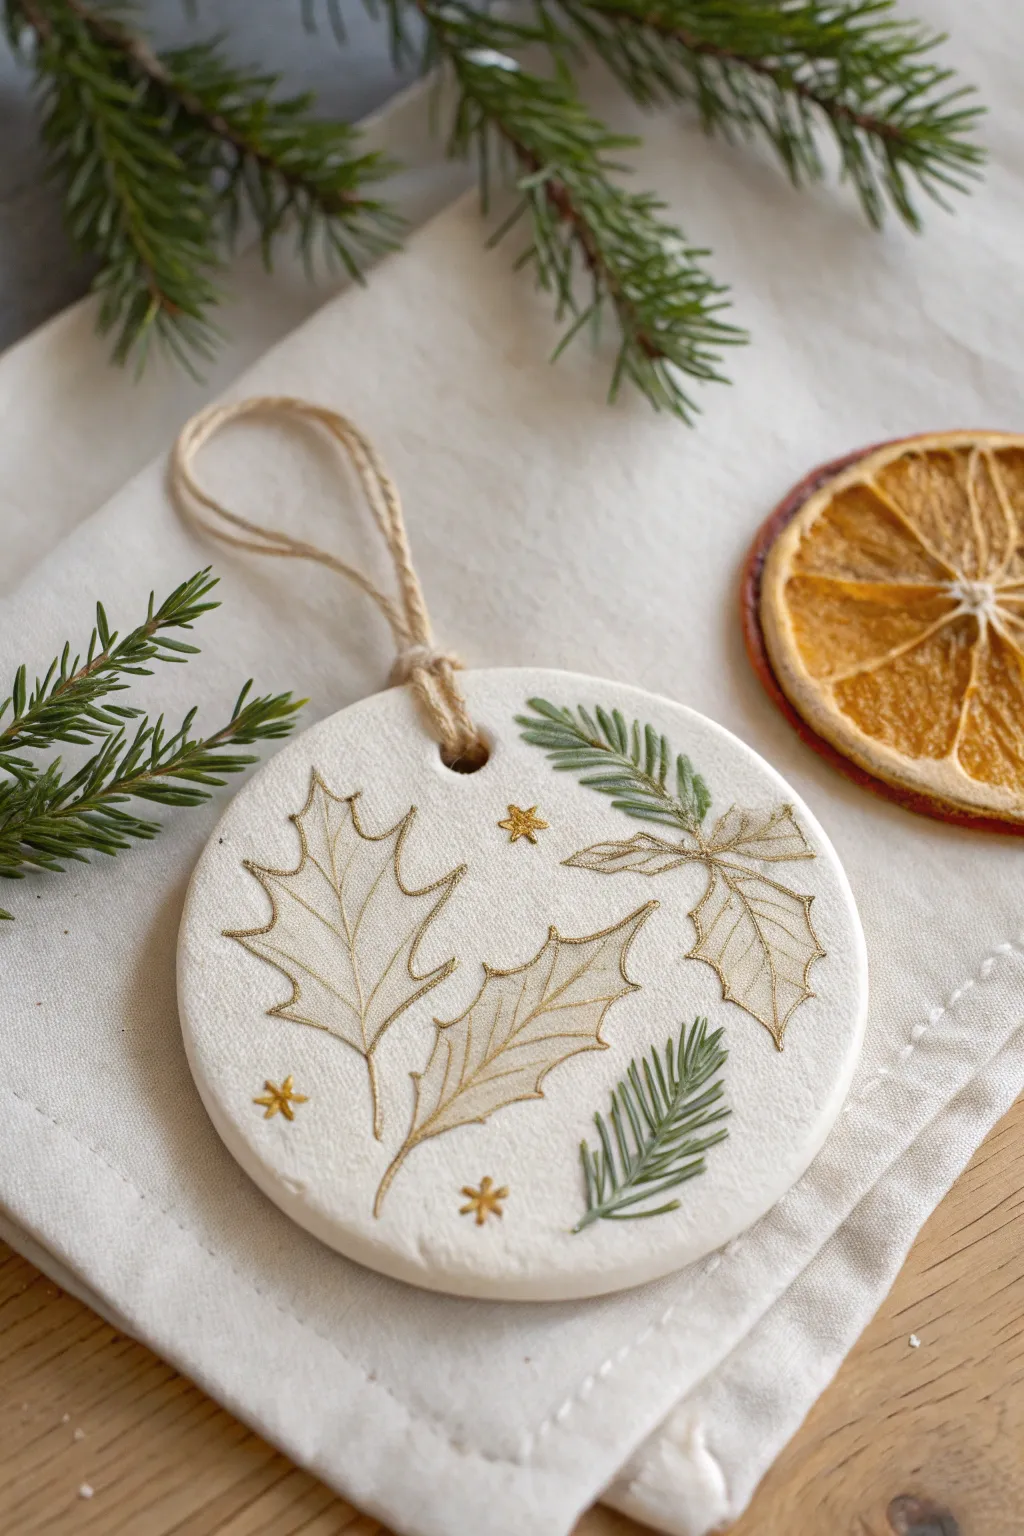
Capture the delicate beauty of winter foliage with these elegant air dry clay ornaments. By pressing real greenery into soft clay and highlighting the details with gold paint, you create a timeless decoration that looks far more expensive than it is.
Step-by-Step
Materials
- White air dry clay
- Rolling pin
- Circle cookie cutter (approx. 3-4 inches)
- Small holly leaves (fresh or artificial with good veining)
- Small evergreen sprigs (pine or fir)
- Gold acrylic paint or a gold paint pen
- Fine detail paintbrush (size 0 or 00)
- Drinking straw or skewer
- Jute twine
- Parchment paper or craft mat
- Small sanding block or fine-grit sandpaper
Step 1: Shaping the Base
-
Prepare the Clay:
Take a handful of white air dry clay and knead it briefly in your hands to warm it up. This helps smooth out any initial cracks and makes the texture more pliable for stamping. -
Roll It Out:
Place the clay on a sheet of parchment paper or a craft mat to prevent sticking. Use your rolling pin to flatten the clay to an even thickness of about 1/4 inch. If the clay is too thin, it might curl; too thick, and it takes forever to dry. -
Cut the Shape:
Press your circle cookie cutter firmly into the rolled clay. Lift the cutter straight up and peel away the excess clay from around the circle. Smooth the edges gently with a dampened finger if they look rough.
Fixing Cracks
If small cracks appear as the clay dries, mix a tiny bit of fresh clay with water to make a paste. Fill the crack, smooth it with a finger, and let it dry again.
Step 2: Imprinting Nature
-
Arrange the Foliage:
Position two or three holly leaves in the center of the circle, creating a pleasing overlapping pattern. Tuck two small sprigs of evergreen near the edges to balance the composition. -
Press and Imprint:
Once you are happy with the arrangement, place a small piece of parchment paper over the leaves. Gently roll your rolling pin over the top once or twice with firm, even pressure to embed the leaves into the clay. -
Reveal the Texture:
Carefully peel back the parchment paper. Use tweezers or the tip of a craft knife to very slowly lift the leaves out of the clay. You should be left with a crisp, indented impression of the veins and needles. -
Add the Hole:
Before the clay hardens, use a drinking straw to punch a clean hole near the top edge for hanging. Give the straw a little twist as you pull it out to ensure a neat opening. -
Drying Time:
Let the ornament dry flat on a wire rack for 24 to 48 hours. I find flipping it over halfway through the drying process helps keep it perfectly flat. -
Refining the Edges:
Once completely dry and hard, use a fine-grit sanding block to gently smooth the outer rim of the circle, removing any sharp burrs or uneven spots.
Step 3: Gilding the Details
-
Outline the Holly:
Dip your fine detail brush into the gold paint (or use a gold paint pen for easier control). Carefully trace the indented outline of the holly leaves. You don’t need to fill the whole leaf; just follow the perimeter. -
Highlight the Veins:
Paint a thin line down the center vein of each holly leaf imprint, adding tiny feathery strokes for the side veins. This makes the texture pop against the white clay. -
Paint the Evergreens:
For the pine sprigs, create a realistic two-tone effect. First, mix a tiny drop of green paint with the gold for the base of the needles, or simply paint selected needles purely in green to contrast with the gold holly. -
Add Star Accents:
Using the tip of your brush or a toothpick, paint small, simple asterisks or stars in the empty white spaces around the leaves to mimic a starry night sky. -
Seal (Optional):
If you want the ornament to last for years, apply a coat of matte spray varnish or Mod Podge over the entire surface once the paint is fully dry. -
Add the Hanger:
Cut a length of jute twine, thread it through the hole, and tie it in a secure loop. The rustic twine complements the natural botanical theme perfectly.
Scented Clay
Add a sensory twist by kneading a drop of cinnamon or pine essential oil into the clay before rolling it out. The ornament will smell like Christmas.
Hang your beautiful handmade creation on the tree or use it as a sophisticated gift topper for a loved one

Handprint Keepsake Tree Ornament
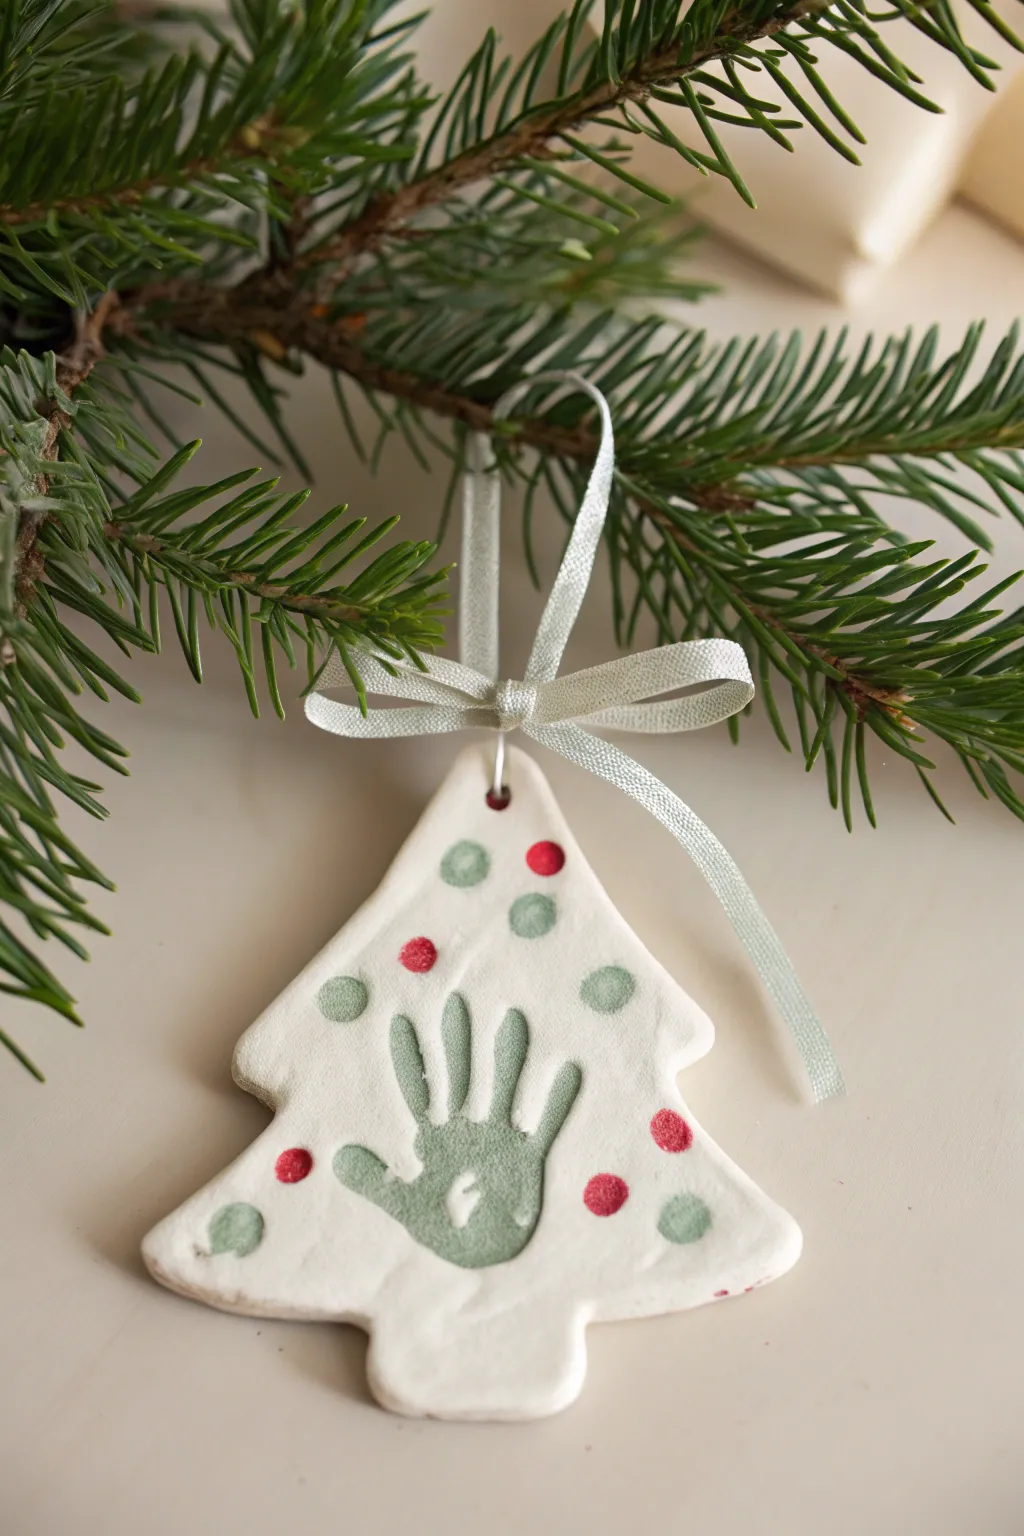
Capture a moment in time with this adorable Christmas tree ornament featuring your child’s handprint impression. The soft white clay provides the perfect canvas for festive red and green polka dots that frame the sweet little hand at the center.
Step-by-Step Tutorial
Materials
- White air-dry clay (smooth, fine-grain)
- Rolling pin
- Christmas tree cookie cutter (large) or knife and template
- Green acrylic paint
- Red acrylic paint
- Small round sponge dobber or q-tip
- Sponge brush or paintbrush
- Straw or skewer (for the hole)
- Silver ribbon (approx. 1/4 inch wide)
- Fine grit sandpaper (optional)
- Clear sealant spray (optional)
Step 1: Shaping the Clay
-
Prepare your workspace:
Lay down a piece of parchment paper or a silicone mat to prevent the clay from sticking to your table. -
Condition the clay:
Take a generous handful of white air-dry clay and knead it briefly in your hands until it feels soft and pliable. -
Roll it out:
Use your rolling pin to flatten the clay into a slab. You want it to be roughly 1/4 to 1/2 inch thick—thick enough to take a deep impression without tearing. -
Cut the tree shape:
Press a large Christmas tree cookie cutter firmly into the clay. If you don’t have a cutter large enough to fit a hand, use a paper template and trace around it with a butter knife or clay tool. -
Smooth the edges:
Dip your finger in a tiny bit of water and run it along the cut edges of the tree to smooth out any roughness or loose bits of clay.
Clean Edges Pro-Tip
If the clay drags when cutting with a knife, apply a tiny amount of lotion or oil to the blade beforehand. It helps the tool glide through without pulling or distorting the shape.
Step 2: The Impression
-
Position the hand:
Have your child open their hand comfortably. Place their palm in the center of the widest part of the tree shape, ensuring the fingers point upward toward the top point. -
Make the print:
Gently but firmly press down on the palm and each individual finger. I like to press gently on the knuckles to ensure a clear shape. -
Remove the hand:
Carefully lift the child’s hand straight up to avoid smudging the clay ridges. -
Create the hanging hole:
Use a straw to punch a clean hole near the top point of the tree. A straw works best because it removes the plug of clay effortlessly. -
Drying time:
Set the ornament aside on a flat surface to dry completely. Depending on humidity and thickness, this usually takes 24 to 48 hours. Flip it over halfway through to ensure even drying.
Step 3: Decorating & Finishing
-
Sand imperfections:
Once fully dry and hard, you can use fine-grit sandpaper to gently buff away any rough spots on the edges. -
Paint the handprint:
Using a small brush and sage green acrylic paint, carefully fill in the depressed area of the handprint. Try to keep the paint only inside the impression. -
Add polka dots:
Dip a small round sponge dobber, the handle end of a paintbrush, or a q-tip into red paint. Stamp dots randomly around the tree shape. -
Add contrast dots:
Clean your tool and repeat the process with sage green paint, filling in the empty spaces with green polka dots. Let the paint dry completely. -
Seal the ornament:
For longevity, spray the entire ornament with a matte or satin clear sealant spray. -
Measure the ribbon:
Cut a length of silver ribbon, approximately 10-12 inches long. -
Attach the hanger:
Thread the ribbon through the hole at the top. Tie a knot at the ends to create a loop for hanging. -
Add the bow:
Cut a second, shorter piece of silver ribbon. Tie it into a small bow around the base of the ribbon loop, right against the top of the tree, for a polished finish.
Curling Issues?
If the edges of your tree start curling up while drying, place a lightweight book on top of the ornament once the surface is dry to the touch but the inside is still damp.
Hang this precious memory on your tree year after year or gift it to grandparents for a heartfelt present


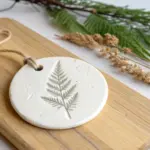
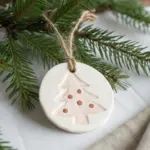
Fingerprint Light Christmas Tree Plaque

This charming Christmas tree ornament is crafted from simple white air-dry clay and decorated with colorful clay dots for a festive, minimalist look. It captures the joy of holiday baking without the calories, creating a keepsake that will last for years.
Step-by-Step Guide
Materials
- White decorative air-dry clay (or salt dough)
- Colored polymer clay or air-dry clay (pink, red, yellow, teal)
- Rolling pin
- Christmas tree cookie cutter
- Parchment paper
- Small straw or skewer
- Twine or ribbon
- Sandpaper (optional)
- Small round piping tip or cap (for cutting dots)
Step 1: Shaping the Base
-
Prepare your workspace:
Lay down a sheet of parchment paper on a flat surface to prevent the clay from sticking while you work. -
Condition the white clay:
Take a handful of white air-dry clay and knead it gently in your hands until it becomes soft, pliable, and free of any large cracks. -
Roll it out:
Use a rolling pin to flatten the white clay to an even thickness of about 1/4 inch (6mm). If you want a smoother finish, lay a second sheet of parchment on top while rolling. -
Cut the tree shape:
Press your Christmas tree cookie cutter firmly into the rolled clay. Wiggle it slightly to ensure a clean cut, then lift the cutter away. -
Remove excess clay:
Peel away the excess clay from around the tree shape so you are left with just your clean tree cutout on the parchment paper. -
Smooth the edges:
Dip your finger in a tiny bit of water and gently run it along the cut edges of the tree to smooth down any roughness or stray bits of clay. -
Create the hanging hole:
Using a small straw or a skewer, poke a hole through the very top tip of the tree. Make sure the hole is big enough for your twine to pass through later.
Cracks Appearing?
If you see hairline cracks while drying, smooth a tiny bit of water-mixed clay paste (slip) into the cracks with your finger
Step 2: Decorating
-
Prepare colored clays:
Take very small amounts of your colored clays—pink, red, yellow, and teal. Roll each color out thinly on a clean section of your workspace. -
Cut out the ornaments:
Use a very small round cutter, like the wide end of a piping tip or a small straw, to punch out tiny circles from the colored clay sheets. These will be your tree lights. -
Plan your placement:
Before attaching them, lay the colored dots gently on top of the white tree loosely to decide on a pattern that looks balanced. -
Attach the dots:
Once you like the arrangement, press each colored dot firmly onto the white clay surface. If the clay has started to dry, lightly dampen the back of each dot with a dab of water to help it stick. -
Embed slightly:
I find it helpful to gently press the dots down so they sit flush or slightly embedded in the surface, rather than just perched on top. This ensures they don’t pop off later. -
Add texture (optional):
If you want the rustic texture seen in the photo, you can lightly tap the white surface with a stiff brush or a crumpled piece of foil, being careful not to distort the shape.
Step 3: Finishing
-
Allow to dry:
Leave the ornament flat on the parchment paper to air dry completely. This usually takes 24-48 hours depending on humidity. Flip it over halfway through to ensure the back dries evenly. -
Sand edges:
Once fully hard, check the edges. If there are any sharp spots, very gently sand them down with fine-grit sandpaper. -
String it up:
Cut a length of natural twine or ribbon. Thread it through the hole at the top of the tree. -
Knot the loop:
Tie the ends of the twine securely into a loop so your ornament is ready to hang.
Make it Sparkle
Before the clay dries, lightly dust the colored dots with edible glitter or fine craft glitter to make the ‘lights’ shimmer
Hang your new handcrafted ornament on a sturdy branch where the lights can catch the colors

The Complete Guide to Pottery Troubleshooting
Uncover the most common ceramic mistakes—from cracking clay to failed glazes—and learn how to fix them fast.
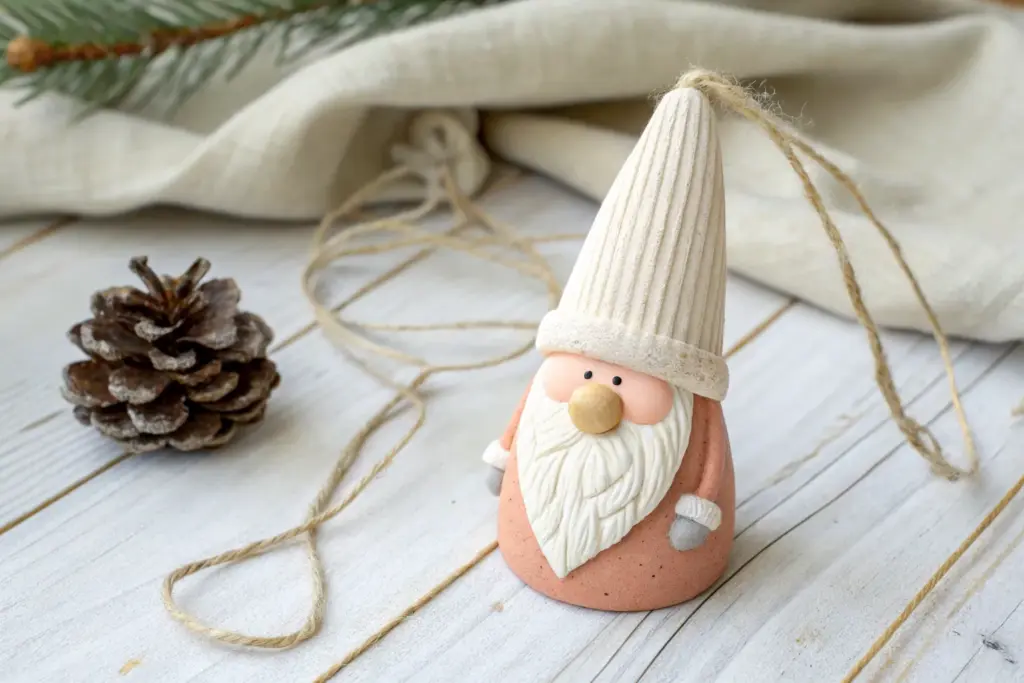
Mini Santa Face Ornaments
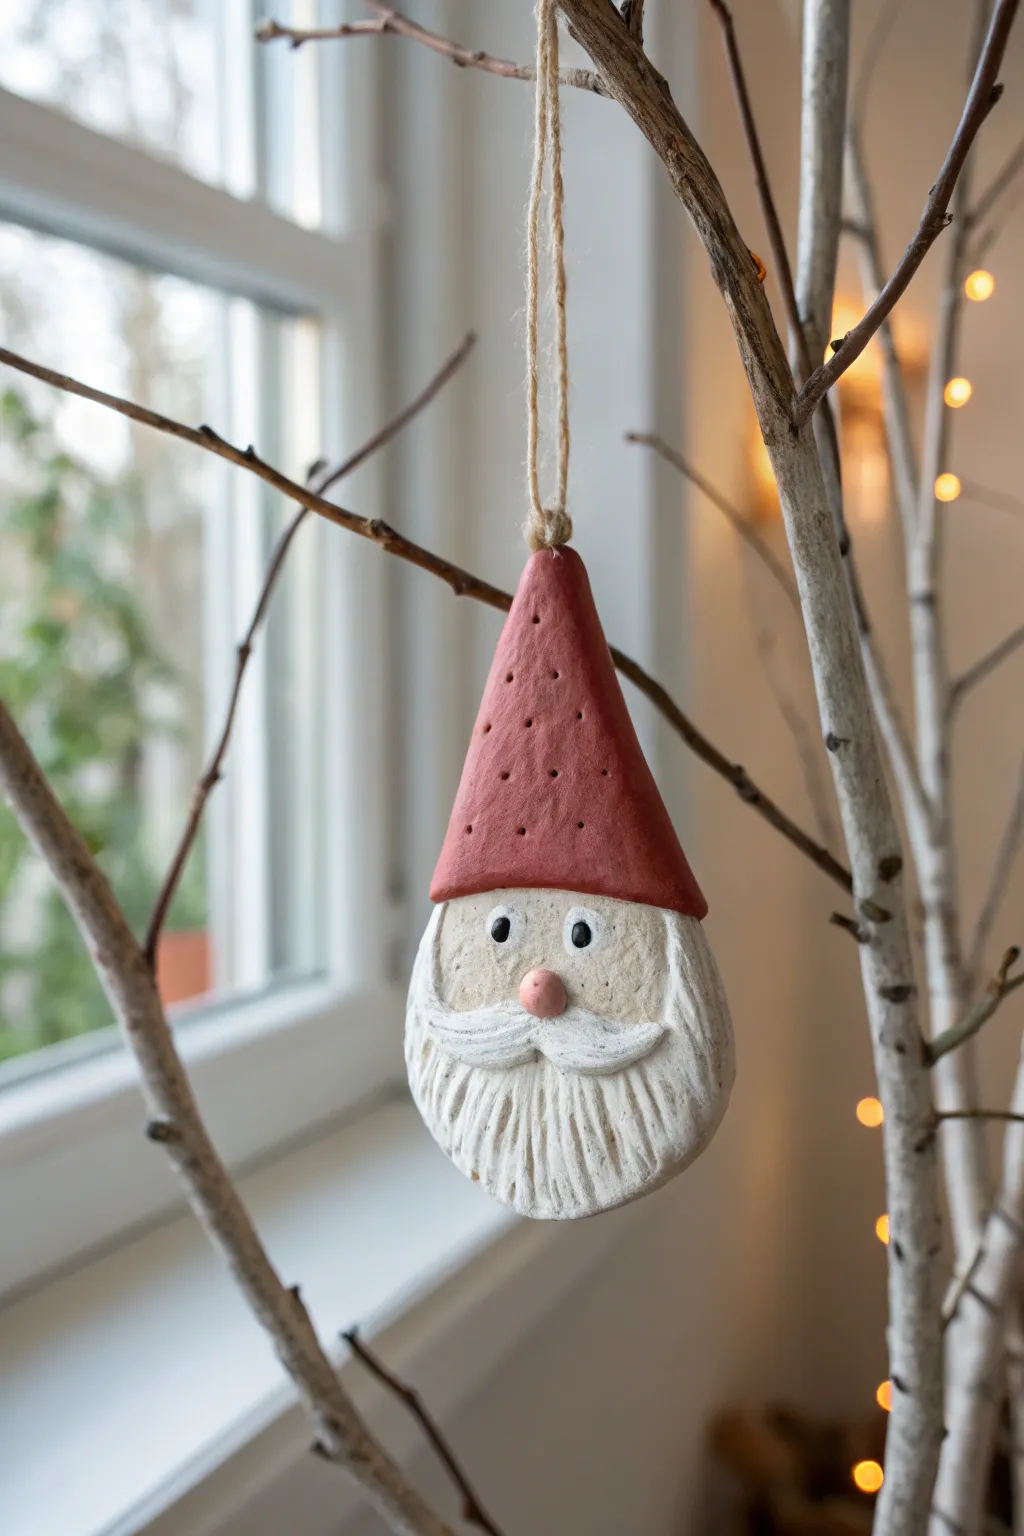
Capture the charm of a Scandinavian Christmas with this delightfully textured Santa ornament. Featuring a simple red hat and a detailed beard, this handcrafted piece adds a cozy, rustic touch to your holiday decor.
How-To Guide
Materials
- Air dry clay (white or terracotta)
- Rolling pin
- Santa face cookie cutter or knife
- Acrylic paints (red, white, black, pink/peach)
- Fine detail paintbrush
- Sculpting tool or toothpick
- Jute twine
- Water cup
- Clear matte varnish (optional)
Step 1: Shaping the Base
-
Roll out the clay:
Begin by softening a chunk of air dry clay in your hands until it’s pliable. Roll it out on a flat surface to a thickness of about 1/4 inch (6mm) to ensure it’s sturdy enough for an ornament. -
Cut the shape:
Use a specialized Santa face cookie cutter if you have one. If not, use a knife to cut a long teardrop shape; the pointed top will be the hat, and the rounded bottom will be the beard. -
Smooth the edges:
Dip your finger in a little bit of water and run it along the cut edges to smooth out any roughness or stray clay bits. -
Create the hanging hole:
While the clay is still wet, use a toothpick or a skewer to poke a hole through the very top of the hat. Make sure it’s wide enough for your twine to pass through later.
Cracking Clay?
If small cracks appear as the clay dries, mix a tiny bit of fresh clay with water to make a paste and smooth it into the cracks with your finger.
Step 2: Adding Details & Texture
-
Define the hat brim:
Roll a very thin snake of clay and press fit firmly across the shape, roughly 1/3 of the way down from the top. This separates the hat from the face. -
Add the nose:
Roll a small ball of clay about the size of a pea. Press it gently into the center of the face area, just below the hat brim line. Use a tiny bit of water as ‘glue’ to help it stick. -
Sculpt the mustache:
Form two small, tapered teardrop shapes of clay. Attach them directly under the nose, curving them slightly upwards like a handlebar mustache. -
Texture the beard:
Take your sculpting tool or a toothpick and drag deeper vertical lines from the mustache down to the bottom edge of the ornament to simulate hair strands. -
Detail the mustache:
Add lighter, shorter horizontal strokes to the mustache pieces to give them texture as well. -
Texture the hat:
Using the tip of a toothpick or a needle tool, poke small, random holes all over the hat area to create a perforated, rustic look. -
Let it dry completely:
Place the ornament on a drying rack or a sheet of parchment paper. Allow it to air dry for at least 24-48 hours until it turns fully white and hard.
Step 3: Painting & Finishing
-
Paint the hat:
Using a flat brush, paint the entire hat area with a deep, matte red acrylic paint. I find that two thin coats cover better than one thick one. -
Paint the face:
Mix a small amount of peach or skin-tone paint. Carefully fill in the space between the hat brim and the mustache, avoiding the nose for now. -
Paint the nose:
Use a slightly darker pink shade for the nose to give Santa a frosty, cold-weather look. -
Paint the beard and trim:
Paint the beard, mustache, and the thin hat brim strip with white acrylic. You can use a ‘dry brush’ technique here—wiping most paint off the brush first—to let the clay texture show through. -
Add the eyes:
Dip the non-brush end of a paintbrush handle into black paint and dot two eyes onto the face. Once dry, add a tiny white dot to each for a sparkle. -
Seal (Optional):
For longevity, coat the front and back with a matte varnish once the paint is fully dry. -
String it up:
Cut a length of jute twine, thread it through the hole at the top, and tie a knot to create a rustic hanging loop.
Glittery Snow Effect
Before the white paint on the beard and hat brim dries, sprinkle a pinch of iridescent glitter over it to make the ornament look frosted and snowy.
Now you have a charming, handmade keepsake to hang on your tree or gift to a loved one
Snowman Family Hanging Set

Create a charming trio of hanging snowman ornaments that bring a rustic, handmade touch to your holiday decor. These sweet figures feature a delightful textured finish that mimics fresh snow and are durable enough to hang on your tree year after year.
Step-by-Step Guide
Materials
- White stone-effect air dry clay (or standard white air dry clay)
- Orange air dry clay (or white clay painted orange)
- Black beads or small black clay balls
- Pink or salmon-colored soft clay (for scarves)
- Thin ribbons (red and orange)
- Twine or string
- Eye pins or wire paperclips
- Toothpicks
- Texturing tool (old toothbrush or stiff bristle brush)
- PVA glue or craft glue
- Knitting noodle or textured roller (optional for scarf)
Step 1: Forming the Bodies
-
Roll the base shapes:
Start by taking chunks of white clay to create the snowmen’s bodies. For each snowman, you’ll need one larger ball for the body (about the size of a golf ball) and a smaller ball for the head. -
Create the texture:
Before joining them, gently tap the surface of each ball with a stiff bristle brush or an old toothbrush. This creates a pitted, snowy texture rather than a perfectly smooth finish. -
Join body parts:
Insert half a toothpick into the top of the body sphere. Apply a dab of clay slip or PVA glue at the base of the toothpick, then press the head sphere firmly onto the toothpick to secure the two parts together. Smooth the seam slightly if needed, but keep the definition. -
Flatten the base:
Gently press the bottom of the larger sphere onto your work surface so the snowman can stand upright on its own while you work.
Step 2: Adding Features
-
Make the carrot noses:
Roll tiny amounts of orange clay into small cones. Vary the lengths slightly to give each snowman personality—make some pointy and others a bit stubbier. -
Attach the noses:
Use a tiny dot of glue to attach the orange cone to the center of the face. Gently press it in so it adheres well to the textured surface. -
Embed the eyes:
Press two small black beads into the clay for eyes. If you don’t have beads, roll tiny balls of black clay and press them flat against the head. -
Add the buttons:
Press two larger black beads or flattened black clay discs onto the lower body sphere to create buttons. If using clay buttons, you can poke two tiny holes in them with a needle for a realistic look. -
Create the mouth:
Use a needle tool or toothpick to poke small, shallow holes in a curved line to form a smile, or press in tiny black microbeads if you prefer a coal-mouth look.
Realistic Snow Texture
For an even frostier look, mix baking soda into your white clay before rolling, or brush the finished dry piece with white glitter glue.
Step 3: Dressing and Finishing
-
Create the scarves:
Roll out a strip of pink or peach-colored clay. I like to press a piece of actual knit fabric or a texturing plate into the clay strip to imprint a realistic knitted pattern onto it. -
Wrap the scarves:
Drape the textured strip around the snowman’s neck, crossing one end over the other. Trim the ends to a suitable length and use a tool to fray the clay at the tips solely to mimic fringe. -
Insert hanging hardware:
While the clay is still wet, push a metal eye pin or a hook made from wire deep into the top center of the head. Secure it with a little glue on the stem before insertion. -
Allow to dry:
Let the snowmen air dry completely for 24-48 hours. Keep them away from direct heat to prevent cracking. -
Attach ribbons:
Once dry, thread thin red or orange ribbons through the eye pins. Tie them securely in a loop for hanging.
Cracked Clay?
If small cracks appear as the clay dries, mix a tiny bit of fresh clay with water to make a paste and smooth it into the cracks with your finger.
Now you have a frosty little family ready to hang on the tree or gift to a friend


What Really Happens Inside the Kiln
Learn how time and temperature work together inside the kiln to transform clay into durable ceramic.
Gingerbread Buddy Ornaments

These adorable ornaments look good enough to eat but are designed to last for years on your tree. By adding paint directly into the clay, you achieve a rich, baked-cookie colour, while 3D paint mimics royal icing perfectly.
How-To Guide
Materials
- White polymer or air-dry clay
- Brown acrylic paint (burnt umber or teddy bear brown)
- Red acrylic paint (optional, for warmer tone)
- White 3D fabric paint (puffy paint) or dimensional fabric paint
- Gingerbread man cookie cutter
- Rolling pin
- Parchment paper or wax paper
- Straw or toothpick
- Texture tool (clean toothbrush or sandpaper)
- Jute twine or ribbon for hanging
Step 1: Mixing and Shaping the Dough
-
Prepare the Clay Base:
Start with a ball of white air-dry clay about the size of a tennis ball. This amount typically makes two or three standard-sized ornaments. -
Add the Cookie Colour:
Flatten the ball slightly and add a generous squirt of brown acrylic paint into the center. I like to add a tiny drop of red paint here too, as it gives the ‘dough’ a warmer, baked look rather than a flat, muddy brown. -
Knead Until Uniform:
Fold the clay over the paint and knead thoroughly. Wear gloves if you want to keep your hands clean during this step. Continue kneading until the colour is solid and consistent throughout, with no white streaks remaining. -
Roll Out the Clay:
Place your coloured clay onto a sheet of parchment paper. Roll it out to an even thickness of about 1/4 inch (6mm). Keeping it slightly thick helps mimic the look of a real cookie. -
Add Texture:
Before cutting, gently press a clean toothbrush or piece of coarse sandpaper over the surface of the clay. This creates a realistic, baked texture instead of a perfectly smooth finish. -
Cut the Shape:
Press your gingerbread man cookie cutter firmly into the clay. Give it a little wiggle to ensure clean edges, then lift the cutter away. -
Clean Up Edges:
Peel away the excess clay from around your shape. If the edges of the gingerbread man look ragged, gently smooth them with a fingertip dipped in a tiny bit of water. -
create the Hanger Hole:
Use a drinking straw to poke a hole near the top of the head. Twist the straw as you push through to get a clean cut, then remove the small clay plug.
Cracking Clay?
If small cracks appear while drying, mix a tiny bit of fresh clay with water to make a paste and smooth it into the cracks with your finger.
Step 2: Drying and Decorating
-
Initial Drying Time:
Let the ornament dry flat on the parchment paper. Depending on your humidity, this usually takes 24 to 48 hours for air-dry clay. Flip it over halfway through so the back dries evenly. -
Prepare the Icing:
Once the clay is completely hard and dry, shake your bottle of white 3D puffy paint well. This paint acts exactly like royal icing because it holds its shape. -
Test the Flow:
Practice squeezing a line on a scrap piece of paper first to ensure the paint flows smoothly without air bubbles spluttering out. -
Pipe the Face:
Squeeze two small dots for the eyes. Below them, pipe a simple curved line for the smile, adding small tick marks at the ends for dimples if desired. -
Add Buttons:
Pipe three distinct dots vertically down the center of the gingerbread man’s chest to represent gumdrop buttons. -
Decorate the Cuffs:
On the arms and legs, pipe two thin, parallel lines across the wrists and ankles. Inside these parallel lines, add a row of tiny dots for extra detail. -
Let the Icing Set:
Allow the 3D paint to dry completely flat. This typically takes another 4-6 hours. Don’t touch it while wet, or the ‘icing’ will smear. -
String the Ornament:
Cut a length of jute twine or rough string. Thread it through the hole in the head and tie a secure knot to create a rustic hanging loop.
Make It Sweet
Before the paint dries, sprinkle ultra-fine clear or iridescent glitter over the ‘icing’ to mimic the look of sugar crystals.
Hang these charming faux cookies on your tree or tie them onto gifts for a handmade touch that looks delightfully real
Candy Cane Swirl Clay Ornaments

These classic red and white spiral candy canes look good enough to eat but will last for years on your tree. This simple twisting technique creates a professional, bakery-fresh look that adds a traditional touch to your holiday decor.
Step-by-Step Tutorial
Materials
- White polymer or air-dry clay
- Red polymer or air-dry clay
- Jute twine or rustic string
- Clear gloss glaze or varnish
- Fine iridescent glitter (optional)
- Small paintbrush
- Rolling pin or smooth surface
- Scissors
Step 1: Creating the Ropes
-
Portion the clay:
Start by taking two equal amounts of clay, one ball of white and one ball of red, each about the size of a walnut. -
Warm it up:
Knead the clay thoroughly in your hands until it becomes soft and pliable to prevent cracking later. -
Roll the first snake:
On a clean, flat surface, roll the white clay back and forth with your palms to create a long, even rope approximately 6-8 inches long. -
Match the size:
Repeat the rolling process with the red clay, ensuring it matches the thickness and length of your white rope. -
Trim the ends:
Use a knife or clay tool to trim the uneven ends of both ropes so they start and finish cleanly.
Step 2: Twisting and Shaping
-
Line them up:
Place the red and white ropes side-by-side, gently pressing them together at one end to anchor them. -
Begin the twist:
Hold the joined end still and gently twist the two ropes around each other. I find it easiest to roll the combined rope slightly on the table as I twist to keep the shape round. -
Tighten the pattern:
Continue twisting until you have a tight, consistent spiral pattern running the entire length of the rope. -
Smooth the seam:
Gently roll the twisted rope on your work surface one final time to meld the two colors together and smooth out the exterior texture. -
Form the hook:
Bend the top third of the rope over to create the classic shepherd’s hook shape of a candy cane. -
Refine the ends:
Check the ends of your cane; if they have become distorted during twisting, trim them again for a neat finish.
Clean Lines Tip
Wipe your hands or work surface with a baby wipe between handling the red and white clay to prevent the red pigment from staining the pristine white sections.
Step 3: Finishing Touches
-
Make the hanging hole:
Using a toothpick or a small skewer, carefully poke a hole through the top curve of the candy cane for the string. -
Let it dry:
Place the candy cane on a piece of parchment paper to dry completely according to your clay package instructions. -
Apply the glaze:
Once dry, brush a thin coat of clear gloss varnish over the entire ornament to give it that shiny, hard-candy appearance. -
Add a sugary sparkle:
While the glaze is still wet, sprinkle a very light dusting of fine iridescent glitter over the white sections to mimic sugar crystals. -
Attach the hanger:
Cut a piece of jute twine, thread it through the hole you made earlier, and tie it securely in a loop. -
Knot the twine:
Tie a small knot at the base of the loop right against the clay to keep the hanger stable on the branch.
Fixing Cracks
If small cracks appear while bending the hook, dip your finger in a tiny bit of water and gently smooth the clay over the fissure until it disappears.
Enjoy hanging your sweet, homemade creation on the tree this season

TRACK YOUR CERAMIC JOURNEY
Capture glaze tests, firing details, and creative progress—all in one simple printable. Make your projects easier to repeat and improve.
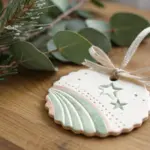
Star And Bell Gift Tags In Clay

Elevate your gift wrapping this season with these charming, rustic star tags made from simple air-dry clay. Featuring a delicate dotted border and a peek-a-boo tree cutout, they add a handmade touch that looks beautiful against classic kraft paper.
Step-by-Step
Materials
- White smooth air-dry clay (or white polymer clay)
- Rolling pin
- Large star cookie cutter
- Small Christmas tree cookie cutter (micro size)
- Toothpick or skewer
- Parchment paper or non-stick craft mat
- Fine-grit sandpaper (optional)
- Red twisted paper twine
- Red fabric ribbon with white stitching
- Small straw or large skewer (for the hole)
Step 1: Shaping the Clay
-
Condition the clay:
Begin by working a chunk of air-dry clay in your hands for a minute to warm it up. This conditioning process helps prevent cracks and ensures a smooth finish. -
Roll it out:
Place your clay on a sheet of parchment paper or a non-stick mat. Use your rolling pin to flatten the clay to an even thickness of about 1/4 inch (6mm). Avoid rolling too thin, as the tag needs to be sturdy. -
Cut the star shape:
Press your large star cookie cutter firmly into the rolled clay. Give it a tiny wiggle to ensure clean edges before lifting it straight up. -
Create the center cutout:
Position the tiny Christmas tree cutter exactly in the center of your star. Press down gently to cut out the inner shape and remove the excess clay carefully. If the tree gets stuck, push it out gently from the back using a soft tool. -
Smooth the edges:
Dip your finger in a tiny bit of water and run it along the raw cut edges of the star and the inner tree shape. This smooths out any jagged bits or clay burrs left by the cutters.
Prevent Cupping
If your stars curl up at the edges while drying, place a lightweight book on top of them (with parchment paper in between) once they are semi-dry to press them flat.
Step 2: Adding Details
-
Make the hanging hole:
Use a small straw or the blunt end of a skewer to punch a hole near the top point of the star. Ensure the hole is large enough for your twine and ribbon to pass through later. -
Create the dotted border:
Take a toothpick or a skewer and gently press a pattern of small dots around the perimeter of the star. I find spacing them about 2-3mm apart creates a nice stitched look. -
Repeat the border pattern:
For extra detail, repeat this dotting process around the inner cutout of the Christmas tree if you wish, though the example looks lovely with just the outer border. -
Dry the tag:
Place the clay star on a flat surface in a dry, ventilated area. Let it air dry for 24-48 hours, flipping it over halfway through the process to ensure both sides dry evenly and stay flat. -
Sand imperfections:
Once fully cured and hard, check for any rough spots. You can lightly buff the edges with fine-grit sandpaper for a professional finish.
Step 3: Assembly
-
Prepare the ribbon:
Cut a length of the red ribbon with white stitching. This will be the main decorative band that wraps around your gift. -
Prepare the twine:
Cut a generous length of the red twisted paper twine. You want enough to loop through the tag multiple times for a layered look. -
Thread the tag:
Pass the red twine through the hole in your clay star. Loop it through two or three times to create a thicker, more textured attachment point. -
Tie it all together:
Wrap your gift box in brown kraft paper. Wrap the stitched ribbon around the box first, then overlay it with the star tag attached to the twine. -
Secure the knot:
Knot the twine and ribbon together securely at the top of the package. Let the ends of the twine dangle slightly loosely for a relaxed, rustic appearance.
Clean Cuts
If your cookie cutter is sticking, dip the cutting edge into a little cornstarch or flour before pressing it into the clay. This acts as a release agent for perfect shapes.
Your packages will look festive and thoughtful with these customized, handcrafted tags
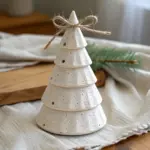
Tabletop Cone Christmas Trees
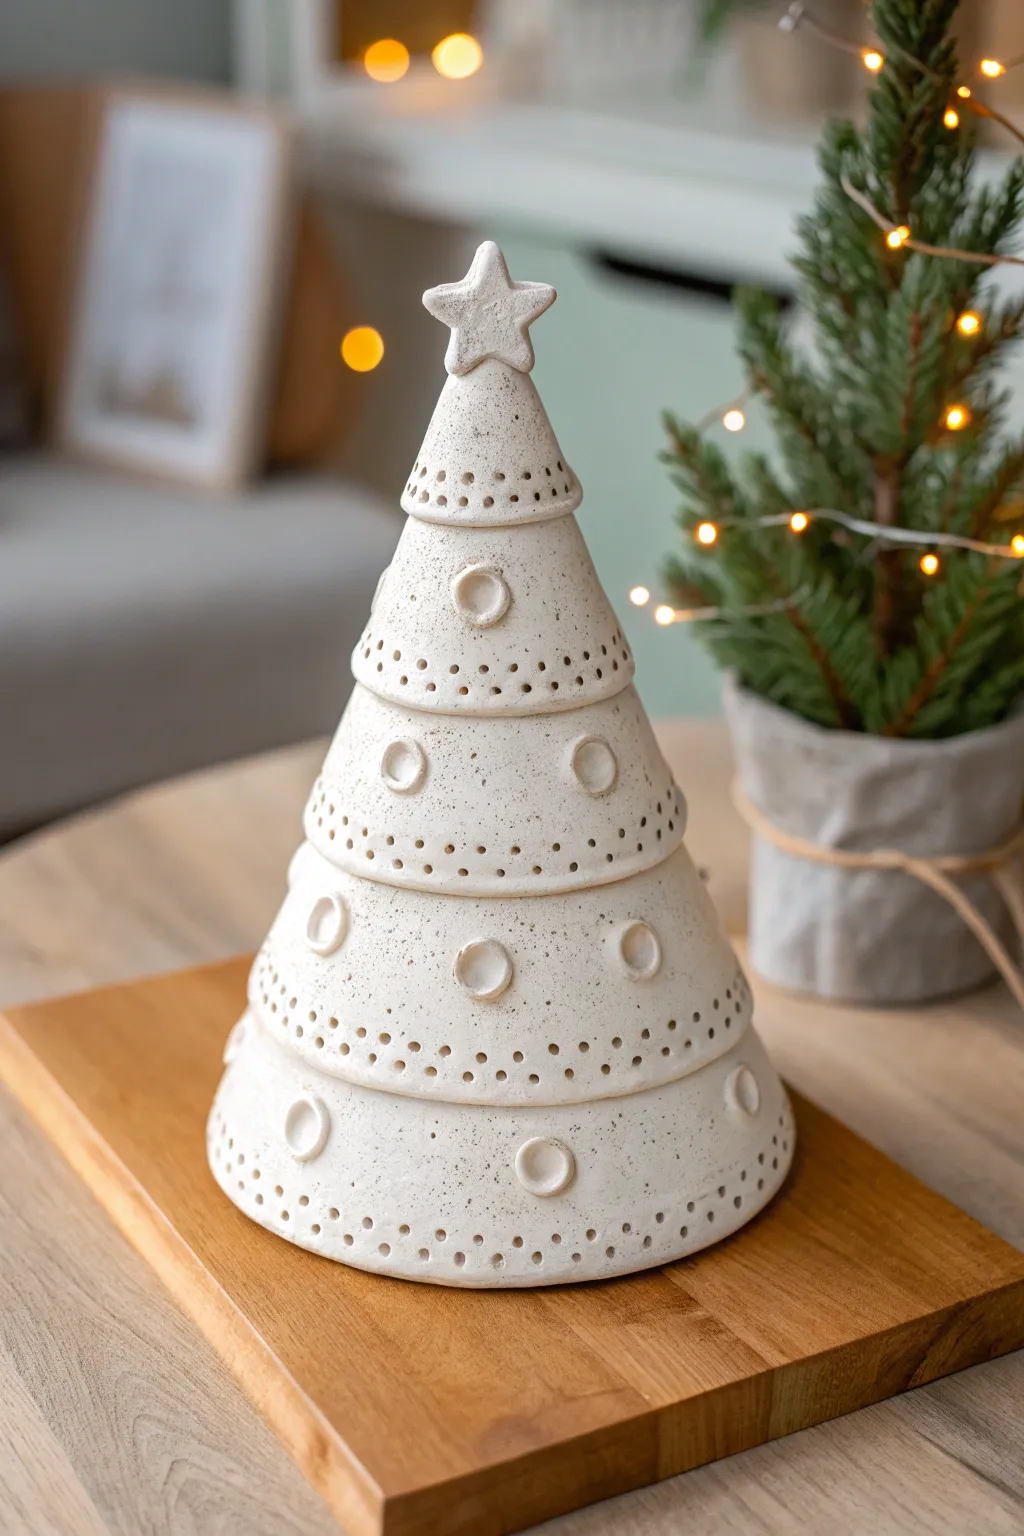
Create a sophisticated, tiered Christmas tree sculpture that captures the charm of handmade artisan pottery using simple air dry clay. This project features elegant circular cutouts and star-like perforations, finished with a delightful speckled texture that glows warmly anywhere in your home.
Step-by-Step Tutorial
Materials
- White or light grey air dry clay (approx. 500g)
- Small rolling pin
- Cone form (styrofoam or stiff cardstock)
- Plastic wrap (if using styrofoam)
- Clay knife or butter knife
- Small circle cutters or a straw
- Water in a small dish
- Sponge or crafting brush
- Sandpaper (fine grit)
- Toothpick or needle tool
- Acrylic paint (black or dark brown)
- Old toothbrush
- Matte sealant (optional)
Step 1: Forming the Base Structure
-
Prep your cone:
Before touching clay, prepare your cone base. If you are using a styrofoam cone, wrap it tightly in plastic wrap to ensure the clay doesn’t stick permanently. If using cardstock, tape it securely into a cone shape. -
Roll out slabs:
Roll your air dry clay into a slab about 1/4 inch thick. Aim for an even thickness so your tiers will look uniform later. -
Cut tier strips:
Cut the slab into four or five long, distinct strips. Each strip needs to be slightly curved (like a rainbow arch) rather than perfectly straight, so they will wrap around the cone shape correctly. Make them different lengths: longer for the bottom, shorter for the top.
Step 2: Building the Tiers
-
Wrap the bottom tier:
Start at the bottom of your cone form. Take the longest strip of clay and wrap it around the base, overlapping the ends slightly. Use a bit of water to ‘slip and score’ (scratch and wet) the seam to join it securely. -
Flare the edges:
Gently gently pull the bottom edge of the clay strip outward to give it a flared, skirt-like appearance. It shouldn’t lie flat against the cone; it needs volume. -
Add subsequent layers:
Repeat this process moving upward. Place the next strip so it slightly overlaps the top of the tier below it. Work your way up to the top, creating about 4-5 distinct sections resembling a stacked tree. -
Cap the top:
For the very top point of the cone, shape a small solid cone of clay and blend it onto the highest tier so the tree comes to a smooth peak. -
Smooth the seams:
With a damp sponge or finger, smooth out the joining seams of each tier. While you can leave the tiered edges crisp, blending the vertical back seam is crucial for structural integrity.
Slumping Clay?
If the tiers look droopy while wet, stuff crumpled paper towels under the flared edges for support until the clay firms up.
Step 3: Adding Details & Texture
-
Create circle reliefs:
Roll out a tiny, thin scrap of clay. Use a small round cutter or a bottle cap to cut small circles. Attach these randomly to the tiers using a dab of water, pressing the centers in slightly to create a recessed button look. -
Pierce the pattern:
Using a toothpick or a needle tool, poke a row of small, evenly spaced holes along the bottom rim of every tier. This mimic the perforated ceramic style seen in the photo. -
Sculpt the star:
Hand-shape a small, chunky five-pointed star. It shouldn’t be too flat; keep it slightly rounded. Score the bottom of the star and the top tip of the tree, add water, and press the star firmly into place. -
Let it dry:
Allow the sculpture to dry on the form for about 24 hours. Carefully remove the cone form from underneath, then let it dry for another 24-48 hours until completely hard and white. -
Sand for smoothness:
Once fully cured, use fine-grit sandpaper to gently buff away any fingerprints or rough edges, focusing on the rims of the tiers.
Glow Up
This tree is hollow! Once dry, place a battery-operated LED tea light underneath to let light shine through the poked holes.
Step 4: Faux Ceramic Finish
-
Create the splatter mix:
Mix a tiny amount of black or dark brown acrylic paint with water until it is very runny and ink-like. -
Apply the speckles:
Dip an old toothbrush into the watery paint. Hold it near the tree and run your thumb across the bristles to flick tiny specks of paint onto the white clay. I prefer testing this on a paper towel first to control the spray. -
Seal (Optional):
If you want a true ceramic look, apply a coat of matte varnish or Mod Podge to protect the clay and give it a finished sheen.
Place your beautiful speckled tree on a mantel or wooden board to enjoy its minimalist charm all season long
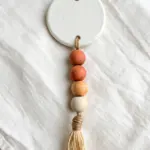
Mini Wreath Ornaments With Bow Details
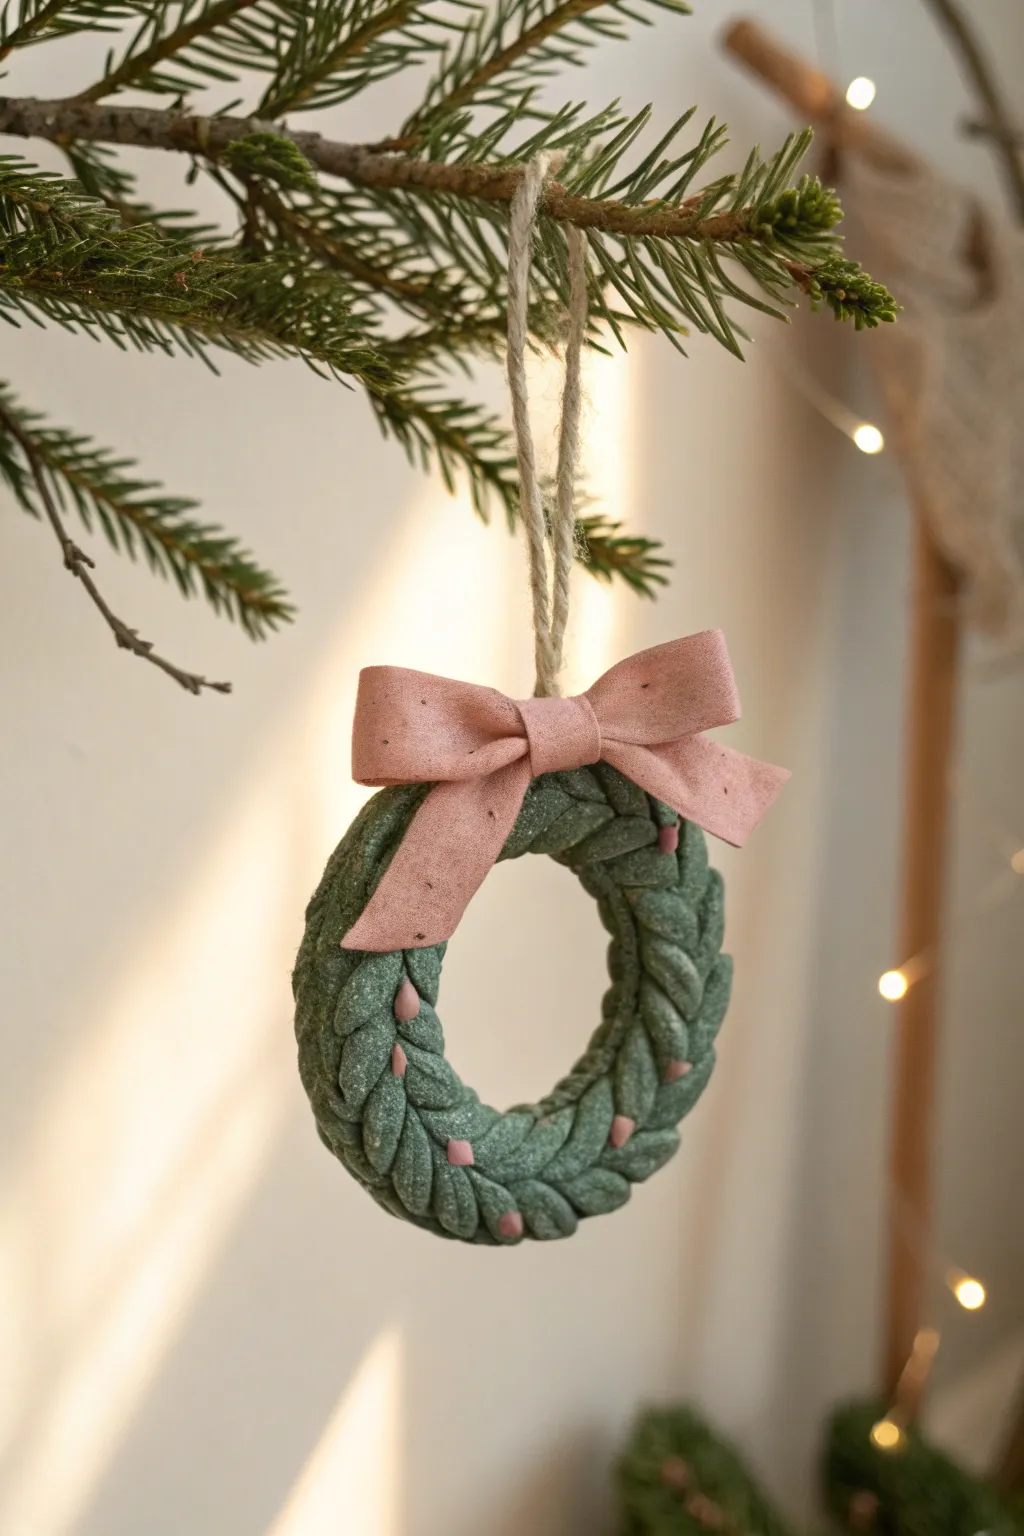
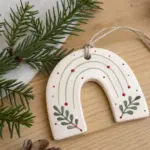
These charming ornaments bring a rustic touch to your holiday decor with their textured, braided design and soft hues. Finished with a delicate fabric bow and pink clay “berries,” they look wonderful hanging amongst the pine needles.
How-To Guide
Materials
- White air dry clay
- Green acrylic paint (muted, sage tone)
- Pink acrylic paint (dusty rose)
- Twine or jute string
- Small rolling pin
- Parchment paper or craft mat
- Craft knife or clay tool
- Water in a small cup
- Strong craft glue or hot glue gun
- Strip of pink fabric or ribbon (approx. 0.5 inch wide)
Step 1: Preparing the Clay
-
Color the clay:
Start by taking a handful of white air dry clay. Add a few drops of sage green acrylic paint directly into the clay and knead it thoroughly until the color is uniform and streak-free. Wear gloves if you want to keep your hands clean. -
Divide into sections:
Once your green clay is ready, pinch off three equal-sized balls of clay. Each ball should be roughly a bit larger than a marble, depending on how big you want your final wreath to be. -
Roll the strands:
On a clean surface or parchment paper, roll each of the three balls into long, thin snakes. Aim for them to be about 6-8 inches long and roughly equal in thickness—about the width of a pencil.
Step 2: Braiding the Wreath
-
Start the braid:
Pinch the three strands together at one end to secure them. Carefully braid the strands together, keeping the tension gentle so you don’t squash the roundness of the snakes. -
Form the circle:
Once you have braided the entire length, curve the braid into a circle. Bring the two ends together. -
Join the ends:
Trim any messy excess from the ends of the braid with your craft knife. Use a dab of water on your finger to smooth the cut edges together, blending the clay so the seam becomes invisible. This creates a seamless loop.
Cracking Clay?
If you see tiny cracks forming as you bend the braid into a circle, smooth them immediately with a drop of water on your finger. Keeping the clay moist while working prevents breakage.
Step 3: Adding Details
-
Mix the berry color:
Take a very small amount of fresh white clay and knead in a drop of dusty rose paint until you achieve a soft pink color. -
Create the berries:
Roll tiny, seed-sized bits of the pink clay between your fingers to make small ovals or spheres. -
Attach the berries:
Gently press these pink berries into the crevices of the braided green wreath. You can secure them with a tiny dot of water or wait to glue them after drying if they don’t stick well on their own. -
Create a hanging hole:
Before the clay hardens, ensure there is a clear gap in the braid at the top to pass a string through later. If the braid is too tight, use a toothpick to gently widen a space between the strands.
Sparkle & Shine
For a frosty look, brush a thin layer of white glue over the dried wreath (avoiding the berries) and sprinkle with fine iridescent glitter before attaching the bow.
Step 4: Finishing Up
-
Dry the ornament:
Place the wreath on a flat surface lined with parchment paper. Let it air dry completely according to your clay package’s instructions—usually 24 to 48 hours. Turn it over halfway through to ensure the bottom dries evenly. -
Make the bow:
While the clay dries, take your pink fabric strip. Tie it into a small, neat bow. Trim the ends at an angle or into a V-shape for a polished look. -
Attach the hanger:
Once the clay is rock hard, cut a piece of twine about 8 inches long. Thread it through the gap you made at the top of the wreath and tie a knot to form a loop. -
Secure the bow:
Using strong craft glue or a tiny dot of hot glue, attach the pink fabric bow to the top of the wreath, covering the spot where the twine loops through the clay. -
Final check:
Inspect your ornament for any loose berries or weak spots. I sometimes add a matte varnish at this stage to protect the clay and give it a finished sheen, though leaving it matte looks very natural.
Now you have a lovely handmade ornament ready to hang on the tree or gift to a friend
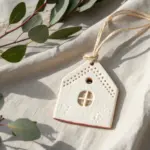
Stocking Ornaments With Textured Cuffs
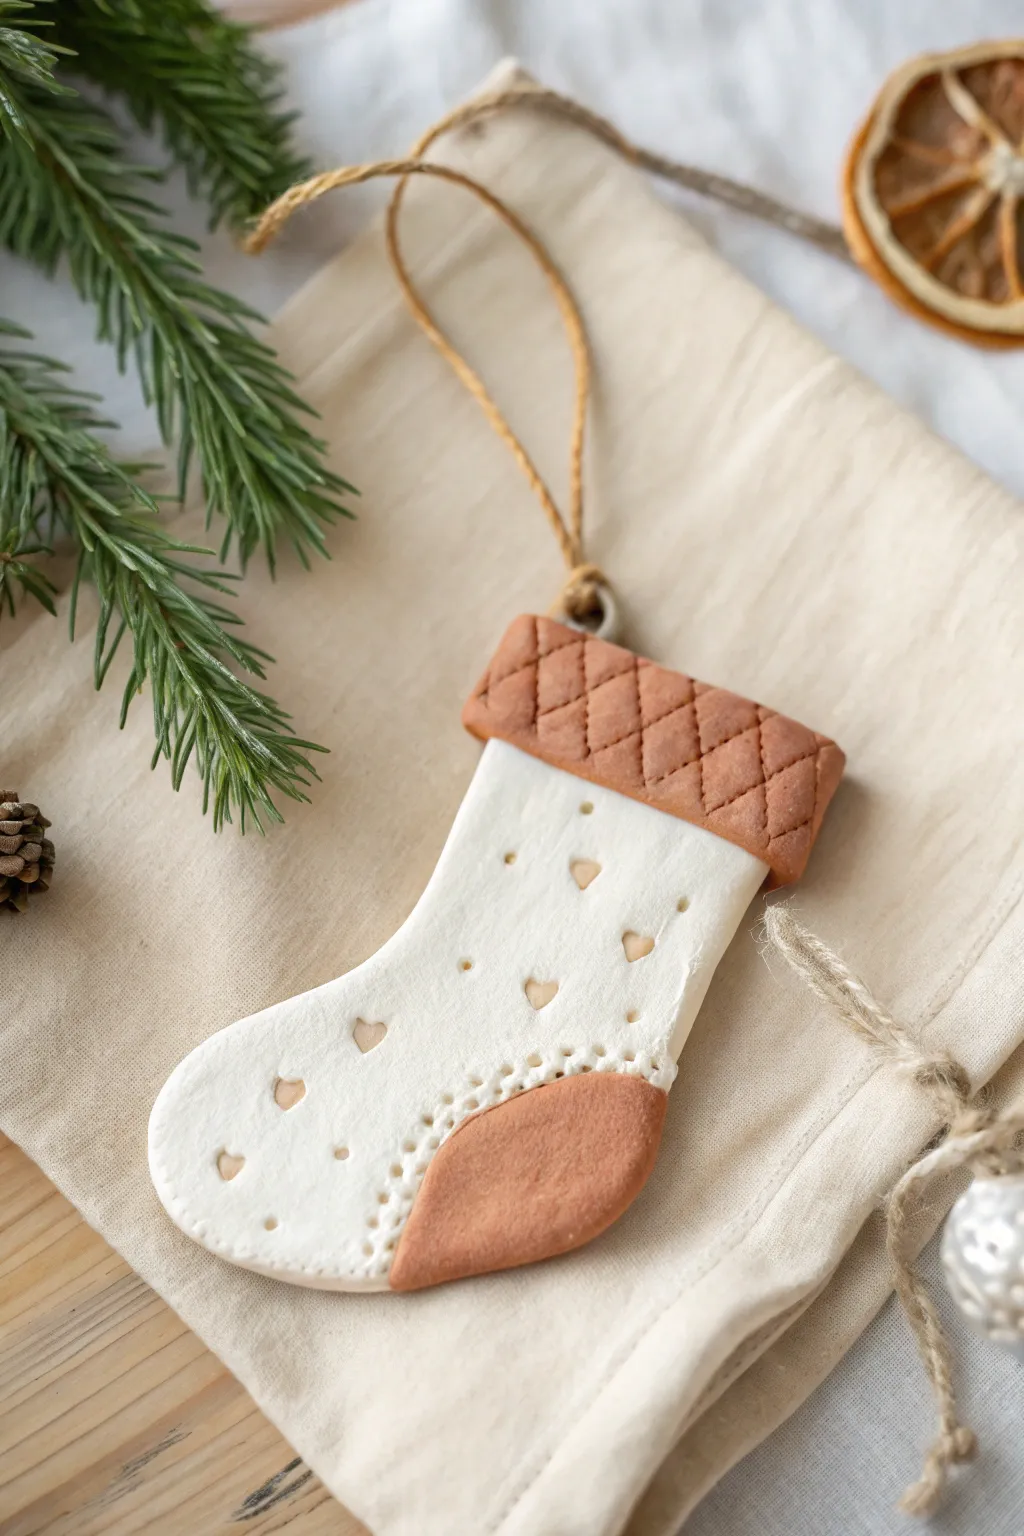
Capture the cozy feeling of winter woolens with this charming clay stocking ornament. Featuring a textured ‘knit’ cuff and delicate embossed details, this keepsake combines the rustic look of terracotta with clean white clay for a timeless holiday decoration.
Detailed Instructions
Materials
- White or cream air dry clay
- Terracotta or brown air dry clay
- Rolling pin
- Stocking cookie cutter (or a knife and paper template)
- Knife tool or clay cutter
- Small heart-shaped stamp or tool
- Small round piping tip or straw (for dots)
- Small toothpick or needle tool
- Water in a small cup
- Jute twine or rustic string for hanging
- Baking paper or non-stick mat
Step 1: Shaping the Base
-
Roll the main body:
Begin by taking a generous amount of the white air dry clay. Roll it out on your non-stick surface until it is an even slab, roughly 1/4 inch thick so it’s sturdy but not too heavy. -
Cut the shape:
Press your stocking cookie cutter firmly into the white clay. If you don’t have a cutter, place a paper stocking template on the clay and trace around it carefully with a knife tool to cut out the shape. -
Smooth the edges:
Dip your finger in a tiny bit of water and run it along the cut edges of the stocking to remove any jagged bits or clay burrs, creating a soft, rounded finish. -
Create the hanging hole:
Using a straw or a skewer, punch a clean hole at the very top corner of the stocking shape where the cuff will eventually sit. Make sure it’s large enough for your twine to pass through later.
Clean Impressions
If your stamps are sticking to the clay, dust them lightly with cornstarch before pressing them down. This ensures a crisp, clean imprint without pulling up any clay.
Step 2: Adding the Terracotta Accents
-
Form the cuff:
Roll out a strip of the terracotta-colored clay to the same thickness as your stocking. Cut a rectangle that is the exact width of your stocking’s top edge and about an inch tall. -
attach the cuff:
Score the back of the terracotta strip and the top front of the white stocking with a needle tool. Apply a tiny dab of water to the scored areas and press the terracotta strip firmly onto the top of the stocking. -
Re-punch the hole:
The terracotta strip likely covered your original hanging hole. Use your tool to poke through the hole again, clearing away the new layer of clay so the channel is open. -
Shape the heel:
Roll a small piece of terracotta clay and cut it into a rounded teardrop or semi-circle shape that mimics the heel of a sock. -
Attach the heel:
Use the same scoring and water technique (often called slip and score) to attach this terracotta patch specifically to the heel area of the white stocking.
Step 3: Texturing and Details
-
Quilt the cuff:
Take your knife tool and gently press diagonal lines across the terracotta cuff in one direction. Then, cross them in the opposite direction to create a quilted or diamond pattern. -
Blend the heel seam:
To make the heel look sewn on, take a needle tool and poke a row of tiny holes along the curved edge where the terracotta heel meets the white clay. -
Imprint hearts:
Using a small heart stamp or a shaped tool, press random little heart indentations scattered across the white portion of the stocking. -
Add dot accents:
Fill the empty spaces between the hearts by pressing the small round tip of a tool or a dull pencil point into the clay to create decorative dots. -
Refine the edges:
Do a final check of the perimeter. If handling the clay distorted the shape, gently nudge the edges back into a clean silhouette. -
Dry completely:
Lay the ornament flat on a piece of parchment paper to dry. I find flipping it over carefully after about 12 hours helps the back dry evenly without curling. -
String it up:
Once fully hard and dry (usually 24-48 hours), cut a length of jute twine. Thread it through the hole, tie a secure knot, and your ornament is ready to hang.
Personalized Toe
Add a third terracotta section to the toe of the stocking perfectly match the heel, or use letter stamps to imprint a child’s name into the white clay body.
Hang your finished ornament on the tree or use it as a special gift tag for a wrapped present
Stamped Date Keepsake Ornaments
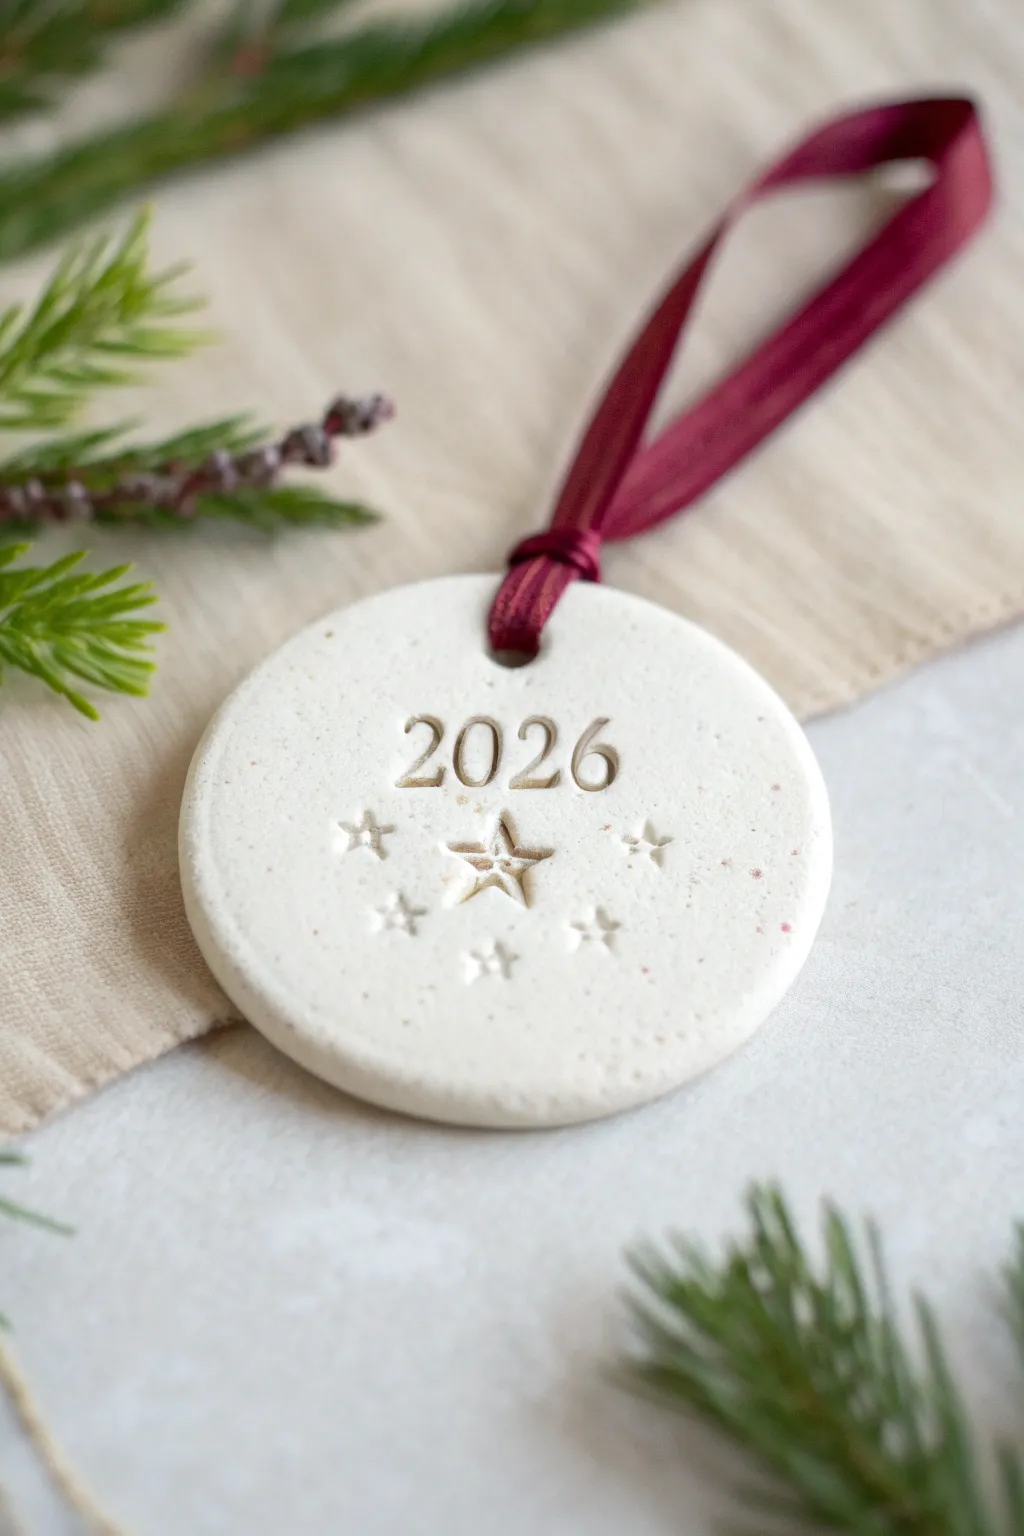
Capture a moment in time with these elegant, minimalist ornaments that serve as beautiful reminders of Christmases past. The textured white clay and deep red ribbon create a classic look, while the stamped date ensures you never forget exactly when this memory was made.
Detailed Instructions
Materials
- White air-dry clay
- Rolling pin
- Circle cookie cutter (approx. 3 inches)
- Number stamps
- Small star stamps (various sizes)
- Straw or skewer (for hole)
- Fine grit sandpaper
- Burgundy satin ribbon (1/4 inch width)
- Parchment paper or craft mat
- Small bowl of water
Step 1: Shaping the Clay
-
Prepare your workspace:
Lay down a sheet of parchment paper or a non-stick craft mat to protect your table and prevent the clay from sticking. -
Condition the clay:
Take a handful of white air-dry clay and knead it in your hands for a minute until it feels soft, pliable, and free of cracks. -
Roll it out:
Place the clay ball on your mat and use a rolling pin to flatten it into an even slab. Aim for a thickness of about 1/4 inch—too thin and it might crack, too thick and it will be heavy. -
Cut the shape:
Press your circle cookie cutter firmly into the clay. Give it a gentle wiggle before lifting to ensure a clean cut. -
Smooth the edges:
Dip your finger in a tiny bit of water and run it gently around the rim of the circle to smooth out any rough edges left by the cutter. -
Create the hanging hole:
Using a straw or a skewer, poke a hole near the top edge of the circle. Make sure it’s not too close to the edge to prevent tearing later.
Cracks Appearing?
If small cracks appear while drying, mix a tiny bit of fresh clay with water to make a paste (slip) and fill them in, then smooth over with a finger.
Step 2: Stamping and Detailing
-
Plan your spacing:
Before stamping, lightly hover your stamps over the clay to visualize where the numbers and stars will go. I like to mark the center point lightly with a tool to keep things symmetrical. -
Stamp the year:
Press your number stamps into the clay just above the center line to form ‘2026’. Apply firm, even pressure to get a crisp impression, but don’t push all the way through. -
Add the central star:
Take your largest star stamp and press it directly below the year, centered horizontally. This anchors the design. -
Add floating stars:
Using smaller star stamps, add a few decorative stars on either side of the central star. Try to curve them slightly upwards to cradle the main design. -
Check for imperfections:
Look closely at the surface. If any stamping displaced the clay too much, gently tap it back down with a flat finger.
Step 3: Finishing Touches
-
Allow to dry:
Let the ornament air dry completely on a flat surface. This usually takes 24-48 hours depending on humidity. Flip it over halfway through to ensure even drying. -
Sand for perfection:
Once fully hard, take fine-grit sandpaper and very gently buff the edges and surface to remove any remaining fingerprints or rough spots. -
Dust off:
Wipe the ornament with a dry, soft cloth or brush to remove any clay dust from sanding. -
Cut the ribbon:
Cut a length of burgundy satin ribbon, approximately 8-10 inches long. -
Thread the loop:
Fold the ribbon in half and push the folded loop end through the hole from front to back. -
Secure the hanger:
Pull the loose ends of the ribbon through the loop you just pushed through the hole and tighten gently to create a lark’s head knot at the top of the ornament.
Make It Sparkle
For a festive twist, brush a thin layer of glitter glue inside the stamped stars after the clay has fully dried to make the impressions catch the light.
Hang your personalized keepsake on the tree and enjoy the snapshot of time it represents
Night-Sky Ornament With Sparkly Snow
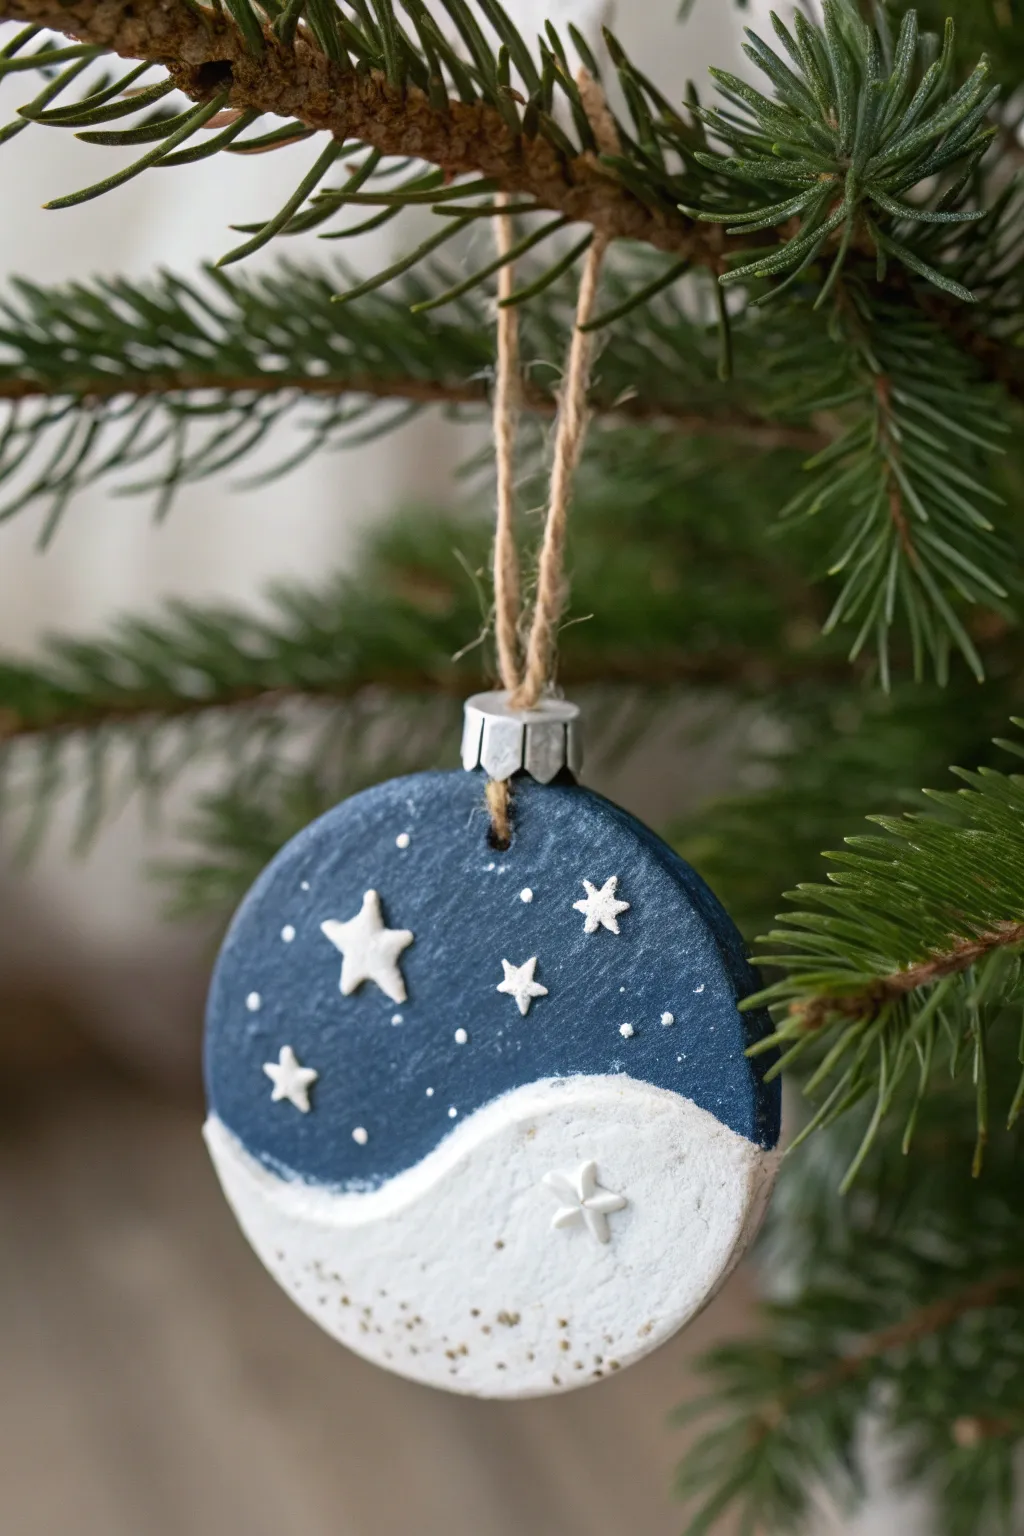
Capture the serene beauty of a winter evening with this simple yet striking two-tone ornament. The deep blue sky contrasts beautifully with textured white snowy drifts, while tiny clay stars add a dimensional pop to the night scene.
How-To Guide
Materials
- Air dry clay (white)
- Circle cookie cutter (approx. 3 inches)
- Small star plunger cutters or tiny star mold
- Rolling pin
- Acrylic paint (navy blue, white)
- Fine glitter or glitter paint
- Small round paintbrushes
- Toothpick or skewer
- Jute twine or ribbon for hanging
- Water cup
- Parchment paper
- Sandpaper (fine grit)
- Metal ornament cap (optional)
Step 1: Shaping the Base
-
Roll the clay:
Begin by taking a handful of white air dry clay and kneading it until soft and pliable. Roll it out on a piece of parchment paper to an even thickness of about 1/4 inch. -
Cut the circle:
Use your circle cookie cutter to press firmly into the clay. Remove the excess clay from around the edges, leaving behind a perfect disk. -
Smooth the edges:
Dip your finger in a little water and gently run it along the cut edge of the circle to smooth out any roughness or loose bits of clay. -
Make the hole:
Use a toothpick or skewer to poke a hole near the top edge for hanging. Make sure the hole is large enough for your twine to pass through later, keeping in mind clay shrinks slightly as it dries. -
Create the stars:
Roll out a small scrap of clay much thinner than the base. Use tiny star cutters to punch out 4-5 miniature stars. If you don’t have cutters, you can carefully hand-mold tiny star shapes. -
Attach the stars:
Score the backs of the stars lightly with a needle tool or toothpick. Dab a tiny amount of water on the spot where you want a star, then press it gently onto the upper half of the circle. -
Dry completely:
Place the ornament on a flat surface to dry. I like to flip it over halfway through the drying process to prevent curling. Allow 24-48 hours depending on humidity.
Fixing Cracks
If tiny cracks appear as the clay dries, mix a small amount of fresh clay with water to make a paste and smooth it into the cracks with your finger.
Step 2: Painting the Scene
-
Sand imperfections:
Once fully dry, lightly sand the edges with fine-grit sandpaper if there are any sharp spots remaining from the cutter. -
Mark the horizon:
visualize a wavy line across the lower third of the circle. This will separate your snow from the sky. You can sketch it lightly with a pencil if it helps guide you. -
Paint the sky:
Using a small brush, carefully paint the upper portion of the ornament with navy blue acrylic paint. Paint around the raised stars, leaving them white for now. -
Refine the edges:
Go back with a finer brush to tidy up the blue paint around the star outlines, ensuring the blue meets the white clay crisply. -
Paint the snow:
Paint the lower section with white acrylic paint. Even though the clay is white, painting it gives it a uniform finish and texture that matches the painted sky. -
Touch up stars:
Paint the raised stars with white paint to make them bright and opaque against the dark blue background. -
Add distant stars:
Dip the tip of a toothpick or the handle end of a paintbrush into white paint. Dot tiny specks onto the blue sky area to create distant stars and snow flurries.
Glow in the Dark
Mix glow-in-the-dark pigment into your white paint for the stars. When the lights go out, your night sky will actually glow softly on the tree.
Step 3: Finishing Details
-
Add sparkle:
While the white paint on the bottom ‘snow’ section is still slightly tacky, sprinkle a pinch of fine glitter over it, or wait for it to dry and apply a coat of glitter paint. -
Golden specks:
For a bit of warmth, you can add a few tiny dots of gold or silver paint near the bottom edge of the snow, mimicking light reflecting off the ice. -
Attach the hanger:
If you have a metal ornament cap, glue it over the top tab. Otherwise, simply thread a piece of natural jute twine through the hole you made earlier. -
Tie the knot:
Tie the ends of the twine securely to create a loop for hanging your new masterpiece on the tree.
Now you have a peaceful winter scene to add a handmade touch to your holiday decor