If you’ve got a little air-dry clay or polymer clay and that cozy holiday itch to make something by hand, clay ornaments are the sweetest place to start. Here are my go-to homemade clay ornament ideas—from classic, timeless styles to a few playful twists that always make people lean in for a closer look.
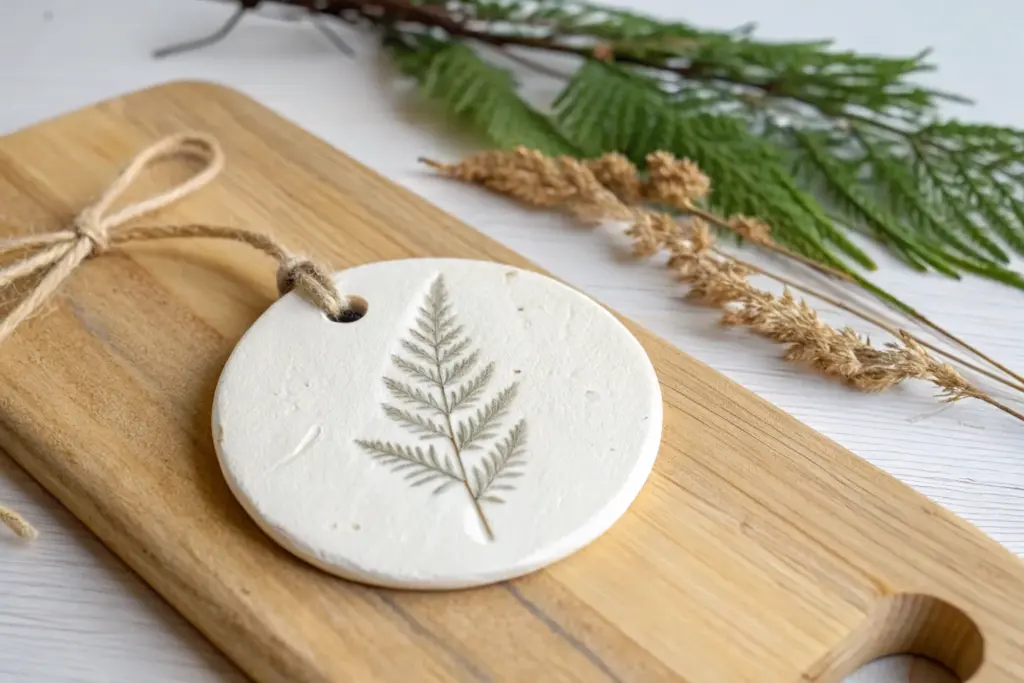
Classic Botanical Imprint Discs
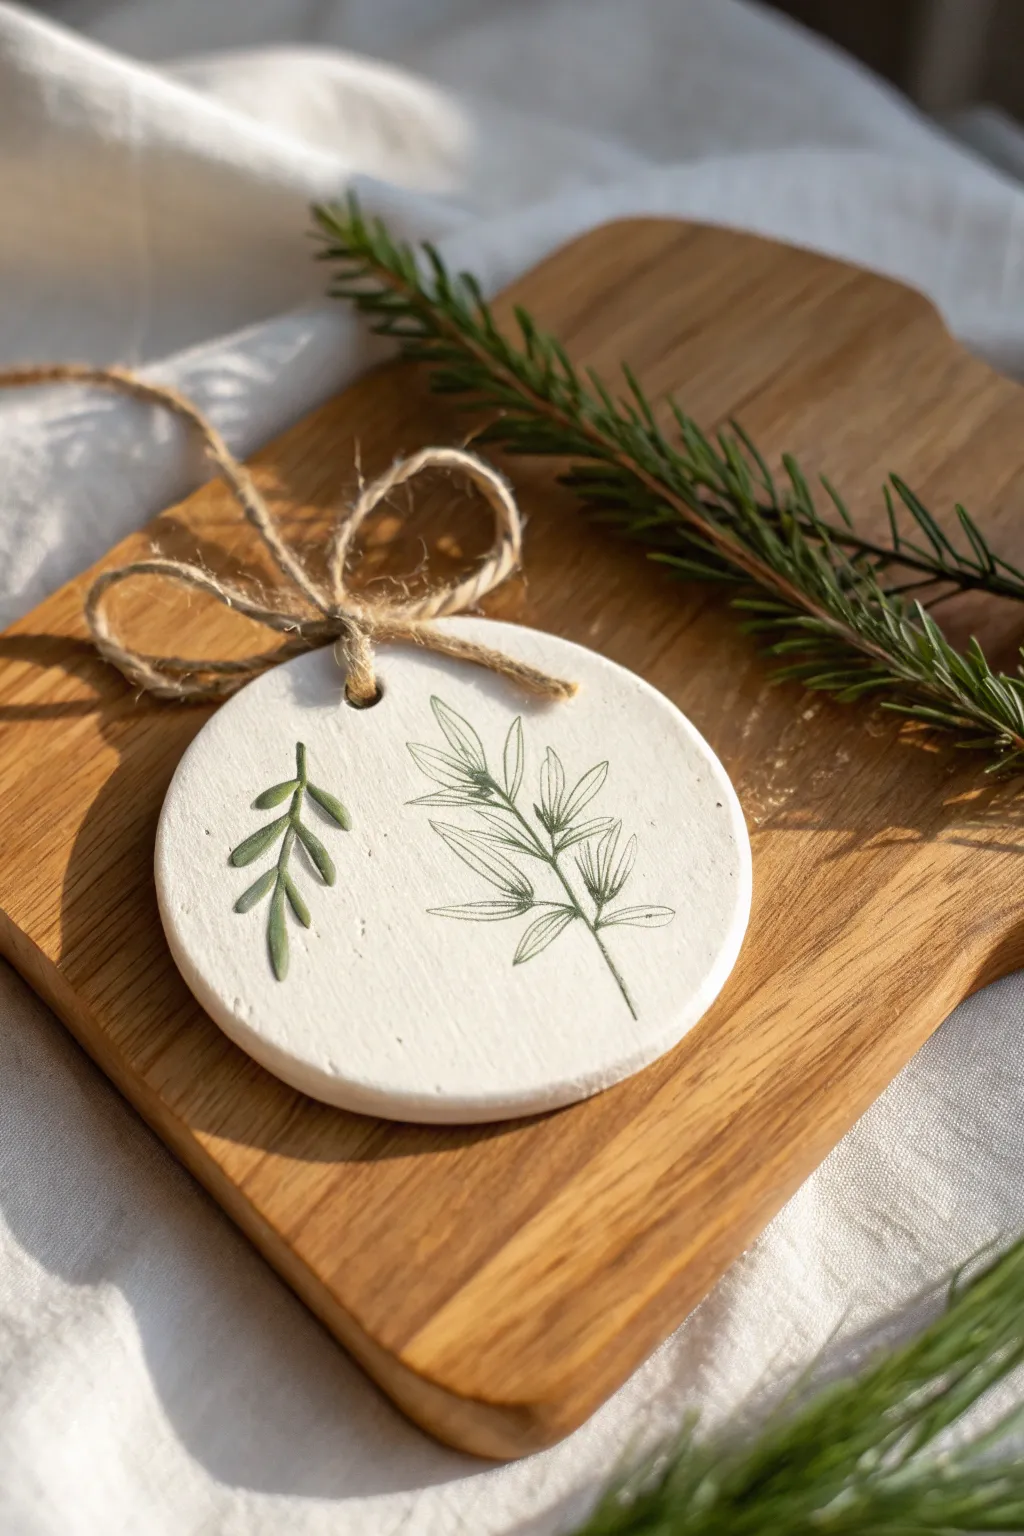
Marrying texture with illustration, these elegant clay discs capture the quiet beauty of winter greenery. By combining a physical impression with a delicate ink drawing, you create a sophisticated contrast that feels both organic and refined.
Step-by-Step Guide
Materials
- Air-dry clay (white)
- Rolling pin
- Circle cookie cutter (approx. 3 inches)
- Fresh greenery sprig or sturdy herb (for impressing)
- Fine-grit sandpaper
- Green acrylic paint (muted, mossy tone)
- Fine detail paintbrush (0 or 00 size)
- Fine-tip pigment liner pen (dark green or black)
- Drinking straw or skewer
- Jute twine
- Matte spray varnish (optional)
Step 1: Shaping the Base
-
Condition the Clay:
Begin by taking a handful of white air-dry clay and kneading it in your hands until it becomes pliable and warm. This prevents cracks from forming later. -
Roll Out the Slab:
On a clean, smooth surface or silicone mat, roll the clay out to an even thickness of about 1/4 inch. Try to keep the surface as level as possible for a professional finish. -
Create the Impression:
Select a fresh sprig of greenery—boxwood or rosemary works beautifully—and press it firmly into the left side of your clay slab. I like to gently roll over it once with the rolling pin to ensure a deep, crisp imprint. -
Remove the Botanical:
Carefully lift the stem away from the clay using tweezers or a needle tool if it sticks. Pull slowly to avoid tearing the delicate edges of the impression. -
Cut the Shape:
Position your circle cutter so the botanical impression is off-centered to the left, leaving open space on the right. Press down firmly to cut your disc. -
Add the Hanging Hole:
While the clay is still wet, use a straw or skewer to punch a clean hole near the top edge for the twine. -
Smooth the Edges:
Dip your finger in a little water and gently run it along the cut edge of the circle to soften any sharp ridges left by the cutter.
Step 2: Drying and Refining
-
Let it Dry:
Place the ornament on a wire cooling rack to air dry for 24-48 hours. Flip it over halfway through the process to prevent the edges from curling upward. -
Sand for Smoothness:
Once fully cured and hard, take a piece of fine-grit sandpaper and lightly buff the surface and edges. The goal is a porcelain-like finish without rubbing away the botanical depth. -
Dust Off:
Use a dry, soft brush or a tack cloth to remove all clay dust from the sanding process, paying special attention to the crevices of the impression.
Fixing Cracks
If hairline cracks appear while drying, create a ‘slip’ by mixing a tiny bit of clay with water. Smooth this paste into the cracks and sand once dry.
Step 3: Painting and Drawing
-
Paint the Impression:
Using your fine detail brush and mossy green acrylic paint, carefully fill in the debossed leaf impression. You can thin the paint slighty with water for a more translucent, watercolor effect that pools in the deeper recesses. -
Clean Up Edges:
If any paint strays outside the impression lines, quickly wipe it away with a damp cotton swab before it sets. -
Sketch the Second Leaf:
On the smooth, right side of the ornament, use a pencil to very lightly sketch a contrasting botanical shape. Focus on long, slender leaves to balance the rounded impression on the left. -
Ink the Details:
Trace over your pencil sketch with a fine-tip pigment liner. Use short, feathery strokes to mimic the texture of pine needles or thin leaves, keeping the lines delicate. -
Erase Guidelines:
Wait at least 15 minutes for the ink to fully dry, then gently erase any visible pencil marks. -
Seal the piece:
To protect the raw clay and your artwork, apply a light coat of matte spray varnish. Do this in a well-ventilated area. -
Add the Twine:
Cut a length of jute twine, thread it through the hole, and tie it off with a simple bow to complete the rustic look.
Cleaner Impressions
Lightly dust your fresh greenery with cornstarch before pressing it into the clay. This acts as a release agent and prevents the leaves from sticking.
Hang your finished ornament on a prominent branch where the light can catch the subtle difference between the painted depth and the drawn lines


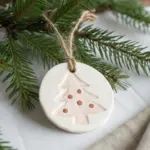
Cookie-Cutter Stars and Trees
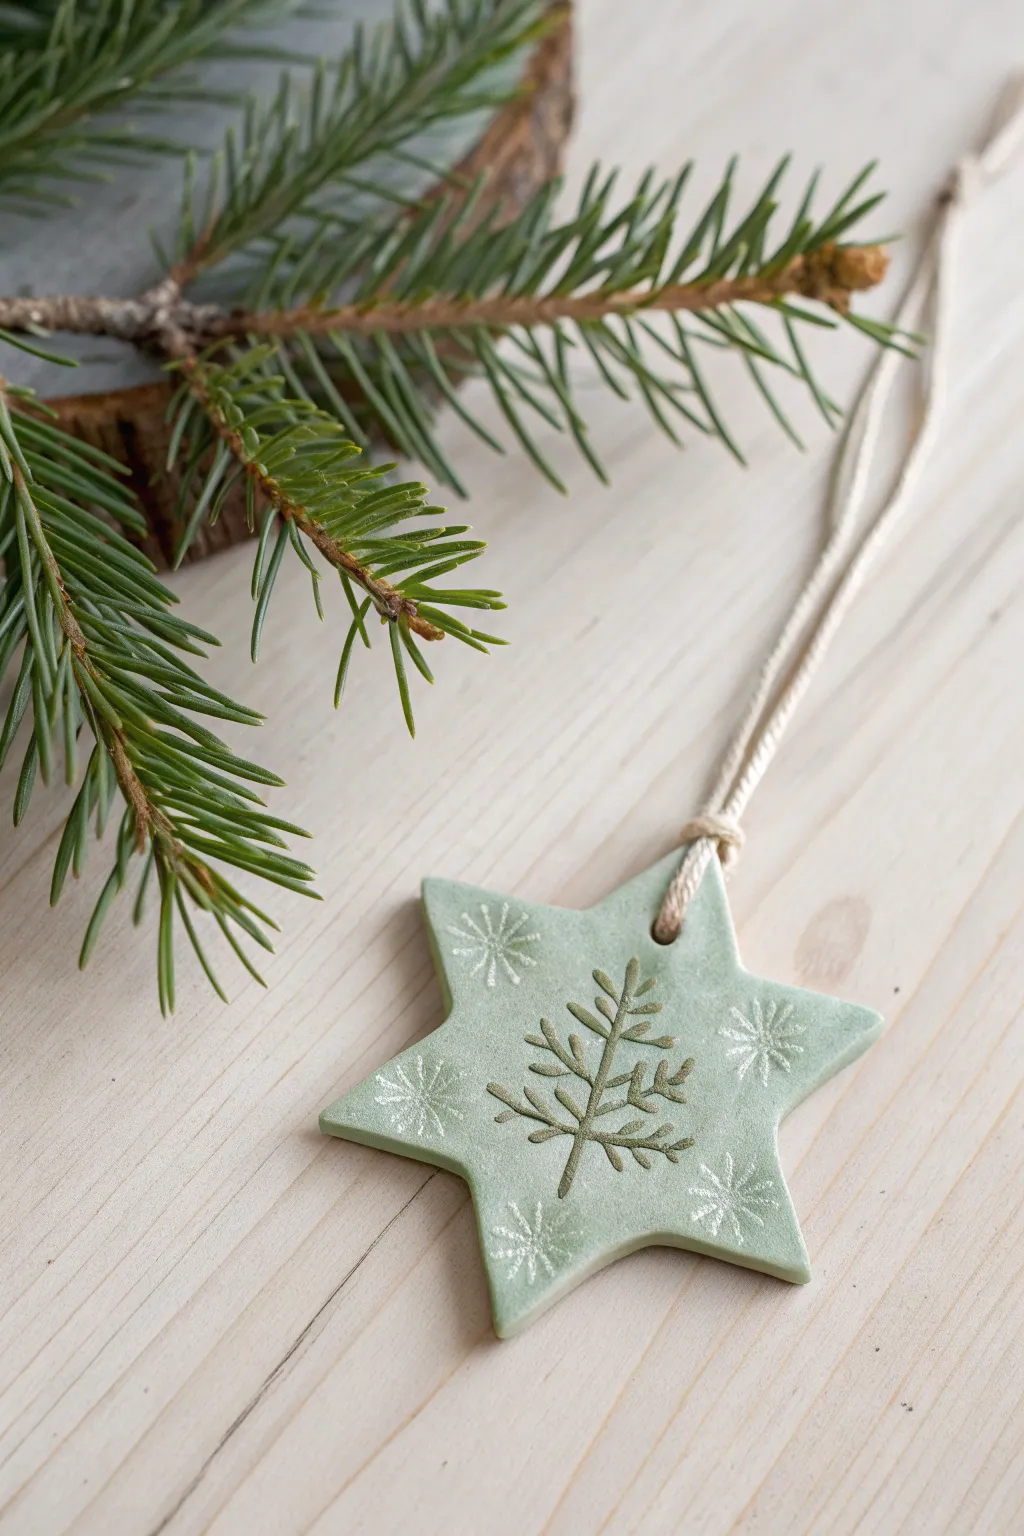
These elegant clay stars capture the quiet beauty of a winter forest with their soft sage hue and delicate botanical imprints. The pairing of a central evergreen motif with tiny snowflakes on the points creates a balanced, festive design that looks lovely hanging on a tree or gift.
Step-by-Step Tutorial
Materials
- Air-dry clay (white)
- Acrylic paint (sage green, dark green, white)
- Star-shaped cookie cutter (approx. 3-4 inches)
- Rolling pin
- Parchment paper or craft mat
- Rubber stamp: Evergreen branch/tree design
- Rubber stamp: Small snowflake design
- Fine-grit sandpaper
- Natural jute twine or cotton string
- Straw or cocktail stick (for making the hole)
- Small paintbrush
- Paper plate or palette
- Water cup
Step 1: Preparing the Base
-
Condition the Clay:
Begin by taking a handful of white air-dry clay. Knead it in your warm hands for a minute or two until it feels pliable and smooth, removing any potential air bubbles. -
Roll it Out:
Place the clay on a sheet of parchment paper to prevent sticking. Use a rolling pin to flatten the clay to an even thickness of about 1/4 inch or slightly less. You want it sturdy but not chunky. -
Cut the Shape:
Press your star-shaped cookie cutter firmly into the clay. Give it a tiny wiggle before lifting to ensure clean edges, then carefully peel away the excess clay from the outside. -
Smooth the Edges:
Dip your finger in a little bit of water and gently run it along the cut edges of the star to smooth out any roughness or loose bits left by the cutter. -
Create the Hanging Hole:
Use a straw or a cocktail stick to poke a hole in one of the star’s points. Ensure the hole is not too close to the edge, or the clay might crack when hanging.
Step 2: Adding the Design
-
Stamp the Center:
Take your evergreen branch rubber stamp. Simply press it firmly into the exact center of the star while the clay is still wet. I find that checking the depth from the side ensures I don’t push all the way through. -
Stamp the Snowflakes:
Using the small snowflake stamp, press a design into each of the remaining five points of the star, surrounding the central tree. -
Dry Completely:
Allow the clay star to dry flat on the parchment paper. Flip it over halfway through the drying process (usually after 12 hours) to prevent curling. Total drying time is typically 24-48 hours depending on humidity. -
Sand for Finish:
Once bone dry, take a piece of fine-grit sandpaper and very gently buff the edges and surface to remove any imperfections.
Clean Stamp Trick
Dust your rubber stamps lightly with cornstarch or baby powder before pressing into the wet clay. This acts as a release agent and prevents sticky clay from getting trapped in the stamp details.
Step 3: Decoration & Assembly
-
Mix the Base Color:
Create a watery wash of sage green acrylic paint. Mix a drop of sage paint with plenty of water until it has a milky consistency. -
Apply the Wash:
Brush this sage wash over the entire ornament. Because it’s a wash, the clay will absorb the pigment beautifully while keeping a natural, matte texture rather than looking plastic. -
Paint the Foliage:
Using a very fine brush and un-thinned dark green acrylic paint, carefully fill in the debossed lines of the central evergreen branch. -
Highlight the Snow:
Clean your brush thoroughly, then use white acrylic paint to fill in the snowflake impressions on the star points. -
Clean Up Lines:
If you paint outside the stamped lines, wait for it to dry slightly, then gently scrape the excess away with a damp toothpick. -
Final Surface Sand (Optional):
For a distressed look where the paint only stays deep in the grooves, lightly sand the surface again once the paint is fully dry. This reveals the base color on the high points. -
Add the Hanger:
Cut a length of natural jute twine or string, about 8 inches long. -
Knot the Loop:
Thread the twine through the hole you made earlier and tie a secure knot at the ends to create a loop.
Go For Texture
Instead of a rubber stamp for the center, press a real sprig of rosemary or fir into the clay. It leaves an incredibly realistic botanical texture that takes paint washes beautifully.
Hang these natural beauties near a window to let the light catch the delicate stamped details


Hand-Stamped Initial Medallions
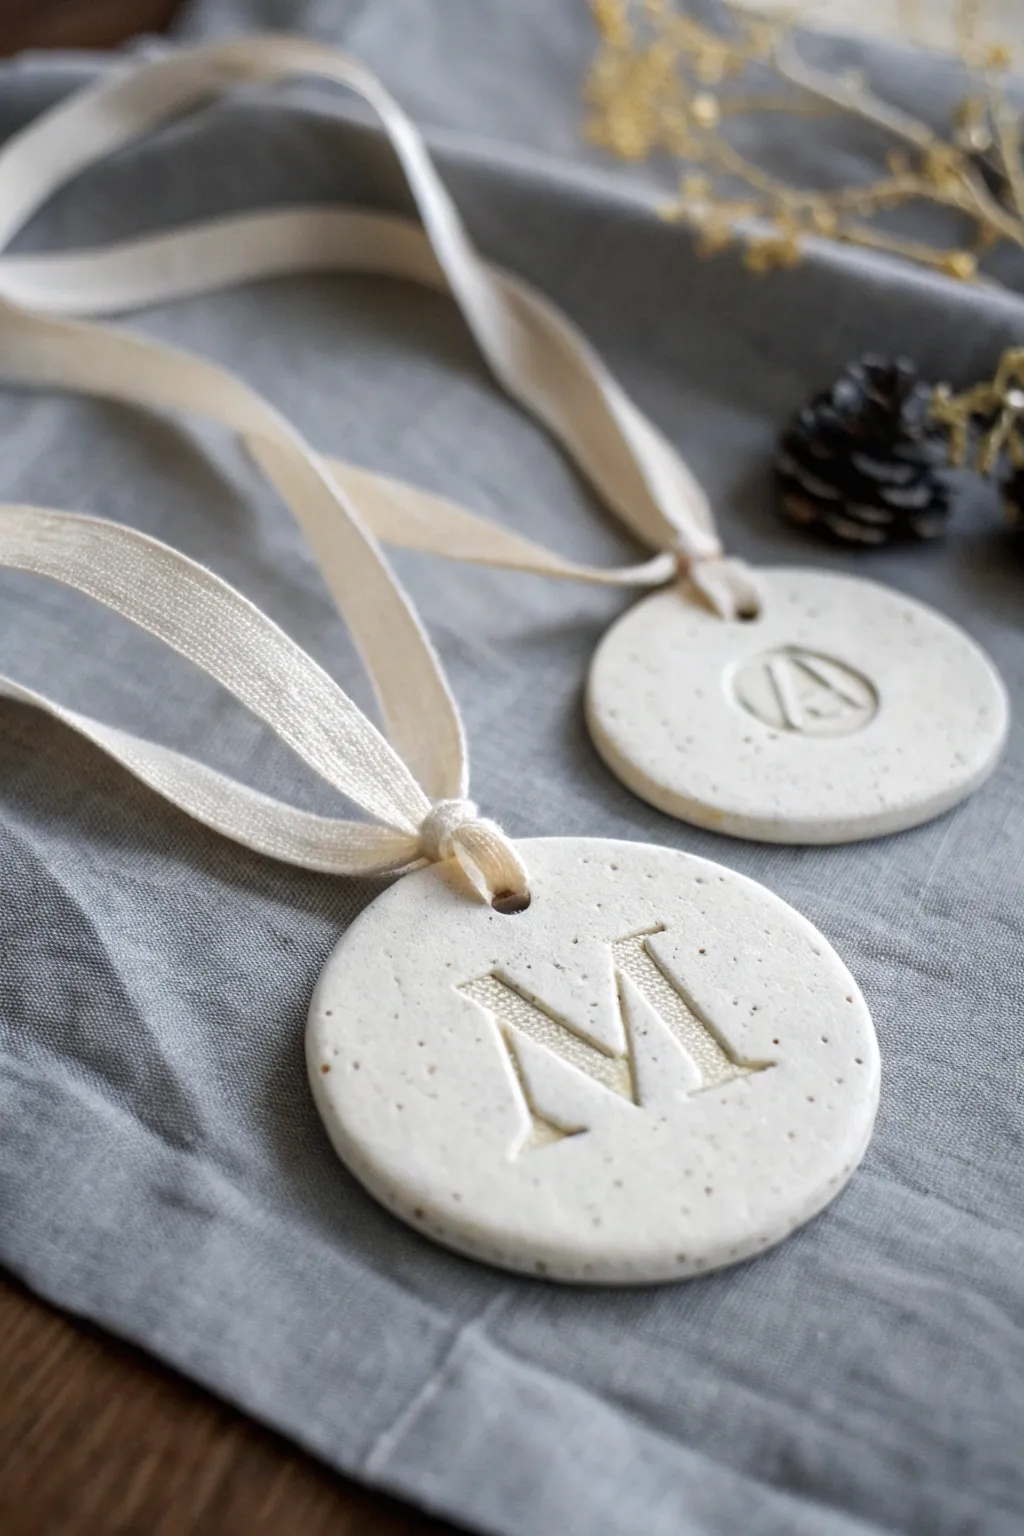
These elegant ornaments combine the rustic charm of speckled stoneware with clean, modern typography for a timeless holiday look. The creamy, textured finish and delicate ribbon make them perfect for gift tags or sophisticated tree decor.
Detailed Instructions
Materials
- White or cream oven-bake polymer clay (preferably ‘granite’ or speckled effect)
- Acrylic rolling pin
- Circle cookie cutter (approx. 2.5 – 3 inches)
- Large letter stamps (serif font preferred)
- Wide silk or cotton ribbon (cream color)
- Plastic drinking straw or small round cutter
- Baking sheet
- Parchment paper
- Fine-grit sandpaper (optional)
- Gold acrylic paint (optional for inlay)
- Small detail paintbrush (optional)
Step 1: Preparation & Cutting
-
Condition the clay:
Begin by warming the polymer clay in your hands. Knead it thoroughly until it is soft, pliable, and free of cracks. If you are using a speckled clay, ensure the flecks are distributed evenly. -
Roll out the slab:
Place the conditioned clay on a smooth surface or a dedicated clay mat. Using the acrylic rolling pin, roll the clay out to an even thickness of about 1/4 inch (6mm). Avoid rolling it too thin, as you want a substantial, medallion-like feel. -
Cut the shapes:
Press your circle cutter firmly into the clay slab. Give it a gentle wiggle before lifting to ensure a clean cut. Repeat for as many ornaments as you plan to make. -
Smooth the edges:
After removing the excess clay, gently run your finger around the perimeter of each circle to soften the sharp cut edge. This gives the finished piece a more polished, ceramic look.
Stamp sticking?
If your stamp pulls the clay up when you lift it, lightly dust the stamp surface with cornstarch or brush it with a tiny bit of water before pressing it down.
Step 2: Stamping & Detailing
-
Position the letter:
Select your desired initial stamp. Hover it over the center of the clay circle to visualize the alignment. I find it helpful to look directly from above rather than at an angle to ensure it’s centered. -
Press the impression:
Press the stamp straight down into the clay with firm, even pressure. Do not rock the stamp, as this can distort the letter walls. Lift the stamp straight up to reveal the impression. -
Inspect the depth:
Check that the impression is deep enough to catch the light but not so deep that it thins the clay backing dangerously. -
Create the hanging hole:
Use a plastic drinking straw or a small round cutter to punch a hole near the top edge of the ornament. Ensure there is enough clay above the hole (at least 1/4 inch) so the loop won’t break under the weight of the ribbon. -
Clean up debris:
If the stamping process left any tiny raised ridges or ‘burrs’ of clay, gently tap them down with a fingertip or a clay shaping tool.
Create faux stone
Can’t find speckled clay? Mix black pepper or dark sand into plain white clay before rolling. Use a ratio of 1/2 tsp mix-in per 2oz of clay for a realistic look.
Step 3: Baking & Finishing
-
Prepare for baking:
Transfer the clay circles onto a baking sheet lined with parchment paper. Lay them flat so they don’t warp during the heating process. -
Bake the ornaments:
Bake according to your specific clay package’s instructions (usually around 275°F / 135°C for 15-30 minutes per 1/4 inch of thickness). Do not raise the temperature to speed it up, as this can scorch the white clay. -
Cool completely:
Remove the tray from the oven and let the ornaments cool completely on the baking sheet. They will harden fully as they return to room temperature. -
Optional sanding:
Once cool, check the edges one last time. If there are any rough spots, lightly buff them with fine-grit sandpaper for a professional finish. -
Adding the ribbon:
Cut a length of cream silk ribbon, approximately 12-14 inches long. -
Thread the loop:
Fold the ribbon in half. Push the folded loop end through the hole in the ornament from front to back. -
Secure the knot:
Thread the two loose ends of the ribbon through the loop you just pushed through the hole. Pull the ends tight gently to secure the cow hitch knot at the top of the medallion.
Now you have a set of personalized, heirloom-quality ornaments ready to hang or gift


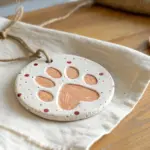
Personalized Family Name Plaques
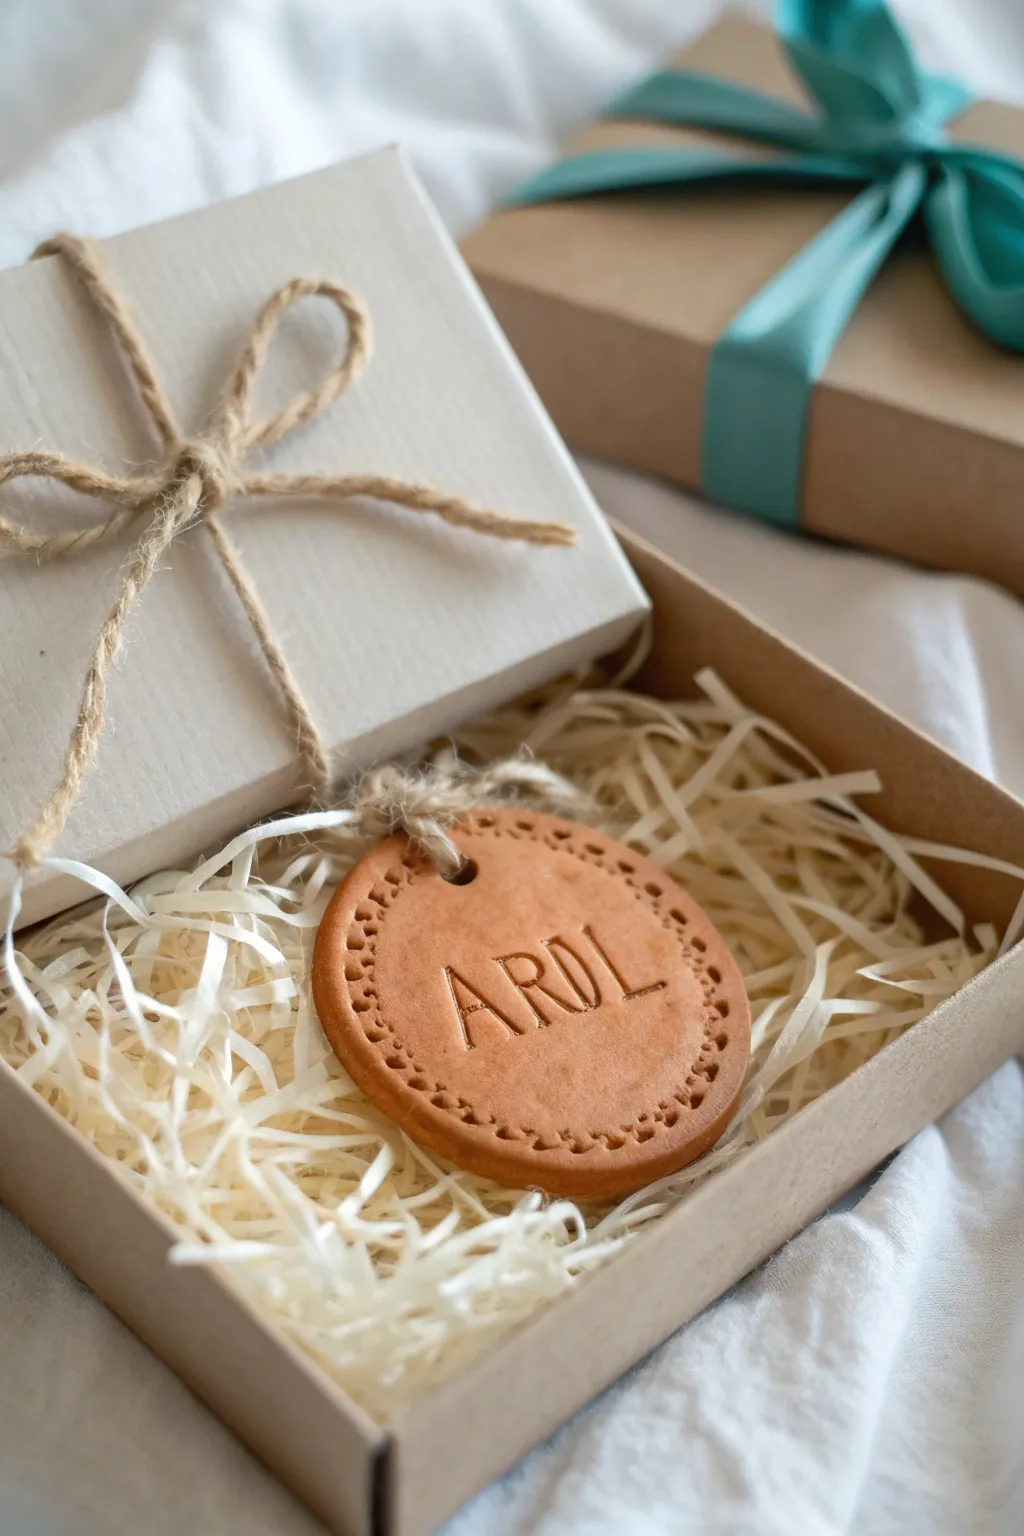
This charming, rustic ornament mimics the warm hues of fired terracotta without needing a kiln. With its personalized name stamping and delicate dotted border, it makes a perfect gift tag or keepsake ornament.
How-To Guide
Materials
- Terracotta-colored air-dry clay (or polymer clay)
- Small rolling pin
- Round cookie cutter (approx. 2.5 – 3 inches)
- Alphabet stamp set
- Small wooden skewer or toothpick
- Parchment paper or non-stick craft mat
- Jute twine
- Sandpaper (fine grit)
- Drinking straw (for punching the hole)
- Clear matte sealant (optional)
Step 1: Shaping the Base
-
Condition the Clay:
Begin by taking a chunk of your terracotta-colored clay and kneading it in your hands until it becomes soft, pliable, and free of cracks. -
Roll it Out:
Place the clay on parchment paper to prevent sticking. Use your rolling pin to flatten the clay to an even thickness, aiming for about 1/4 inch (5-6mm). -
Cut the Shape:
Press your round cookie cutter firmly into the clay. Give it a tiny wiggle to ensure a clean cut, then lift the cutter. Peel away the excess clay from the outside. -
Smooth the Edges:
Dip your finger in a tiny bit of water and run it gently around the rim of the circle to soften any sharp edges left by the cutter.
Alignment Secret
Place a piece of clear tape across the clay circle as a baseline. Stamp your letters just above the tape edge to keep the text perfectly straight.
Step 2: Adding Details
-
Create the Hanger Hole:
Use a drinking straw to punch a hole near the top edge of the circle. Twist the straw slightly as you push down to get a clean removal of the clay plug. -
Plan the Text:
Before stamping, lay your letter stamps out on the table to check spelling and spacing. I find it helpful to lightly mark the center point of the circle with a faint scratch to guide alignment. -
Stamp the Name:
Press the alphabet stamps into the center of the clay. Apply firm, even pressure to ensure the letters are deep enough to be legible but not so deep they warp the shape. -
Clean Up Impressions:
If the stamping pushed up little ridges of clay around the letters, gently tap them down with a flat finger or smooth them carefully. -
Create the Border:
Take your wooden skewer or toothpick. Starting near the top, press the blunt end gently into the clay to make small dots. -
Complete the Pattern:
Continue adding dots around the entire circumference, keeping the spacing as consistent as possible. This mimics a stitched leather look.
Step 3: Finishing Touches
-
Dry the Clay:
Set the ornament aside on a flat surface to dry. If using air-dry clay, let it sit for 24-48 hours, flipping it halfway through to prevent curling. If using polymer clay, bake according to package instructions. -
Sand Imperfections:
Once fully cured and hard, use a piece of fine-grit sandpaper to briefly gently smooth the outer rim if there are any rough spots. -
Seal (Optional):
To deepen the color and protect the surface, you can brush on a thin layer of matte varnish. This will give it a finished, professional look. -
Cut the Twine:
Cut a length of jute twine, roughly 6-8 inches long. -
Thread the Hanger:
Fold the twine in half, push the loop through the hole from front to back, then pull the loose ends through the loop to create a lark’s head knot. -
Secure the Knot:
Tie a simple overhand knot at the very ends of the twine to close the loop. -
Final Presentation:
If gifting, nestle the finished ornament into a small box filled with shredded paper to complete the rustic aesthetic.
Fixing Clay Cracks
If you see hairline cracks while drying, mix a tiny bit of fresh clay with water to make a paste and smooth it over the crack with your finger.
This simple personalized token adds a heartfelt, handmade touch to any gift wrapping or holiday tree

The Complete Guide to Pottery Troubleshooting
Uncover the most common ceramic mistakes—from cracking clay to failed glazes—and learn how to fix them fast.
Snowflake Stamped Round Ornaments
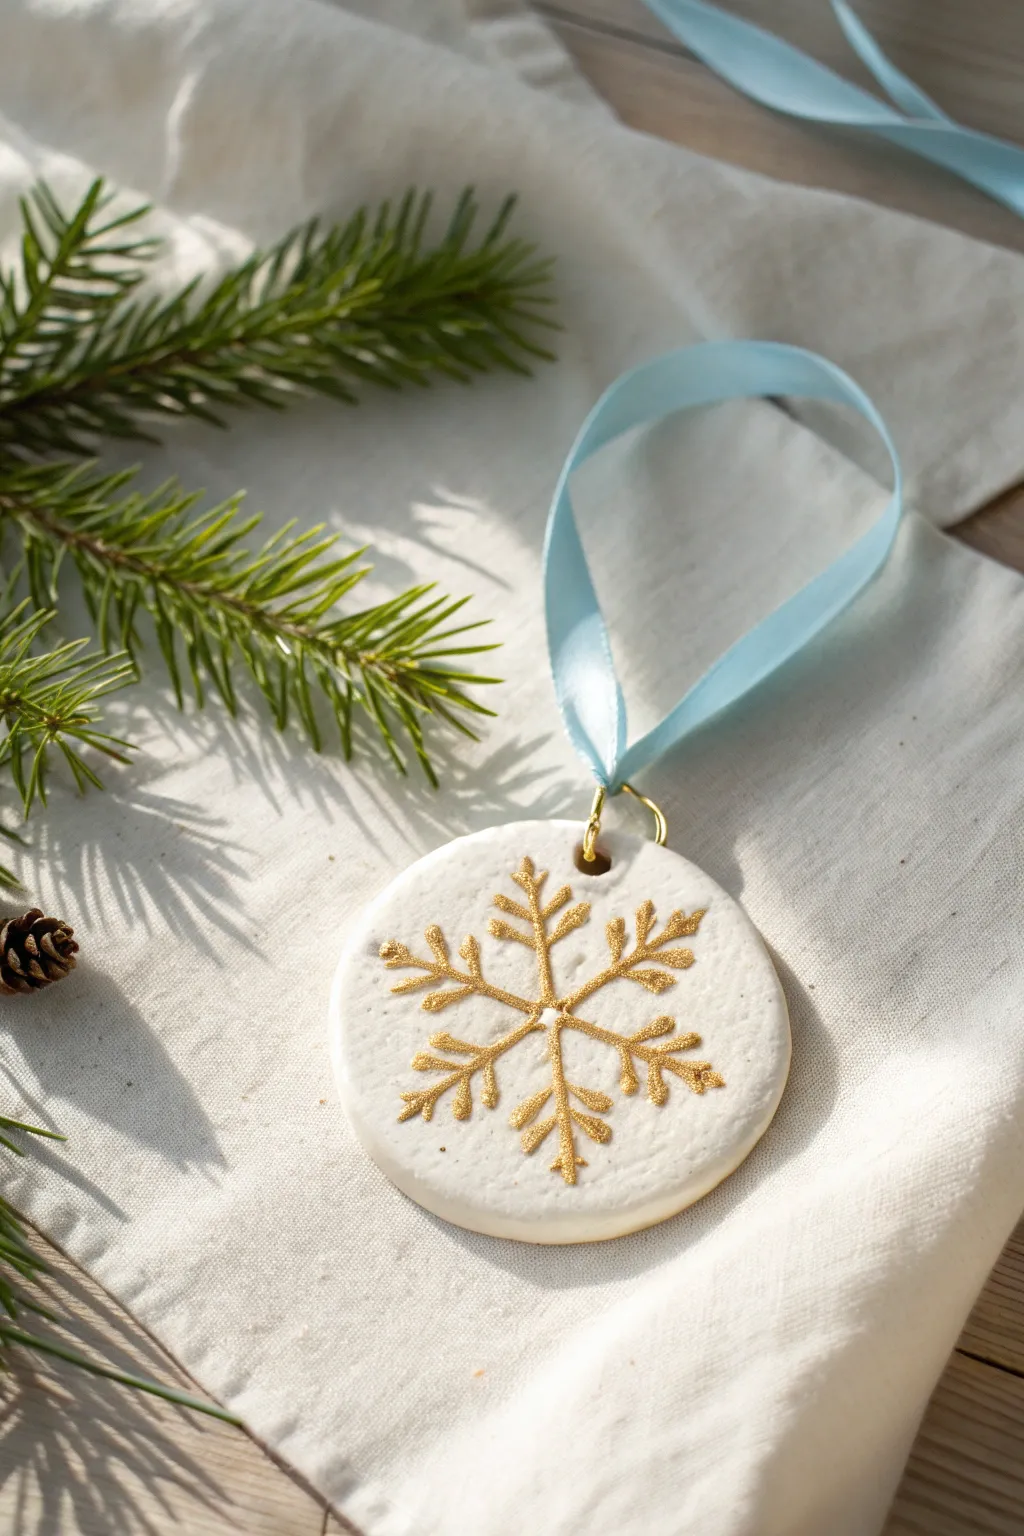
Capture the magic of winter with these elegant, minimalist ornaments featuring a sparkling gold snowflake embossed into pristine white clay. The soft blue ribbon adds a frosty touch, making this the perfect sophisticated addition to your tree or gift wrapping.
How-To Guide
Materials
- White air-dry clay (or polymer clay)
- Round cookie cutter (approx. 3-inch diameter)
- Small snowflake stamp or embossing tool
- Rolling pin
- Parchment paper or silicone mat
- Gold metallic paint or liquid gilding
- Fine-grit sandpaper (optional)
- Small detail paintbrush
- Drinking straw or small circular tool
- Light blue satin ribbon (1/4 inch width)
- Gold jump ring
- Clear sealant (optional)
Step 1: Preparation and Cutting
-
Prepare your workspace:
Lay down a piece of parchment paper or a silicone mat on a flat surface. This prevents the clay from sticking and ensures a smooth back for your ornament. -
Condition the clay:
Take a handful of white air-dry clay and knead it gently in your hands until it becomes pliable and warm. If it feels too sticky, you can dust your hands lightly with cornstarch. -
Roll it out:
Place the clay on your mat and use the rolling pin to flatten it. Aim for a consistent thickness of about 1/4 inch so the ornament is sturdy but not too heavy. -
Cut the shape:
Press the round cookie cutter firmly into the rolled clay. Give it a tiny wiggle to ensure it cuts all the way through, then lift the cutter away. -
Smooth the edges:
After removing the excess clay from around the circle, dip your finger in a little water and gently run it along the cut edge to smooth out any roughness.
Clean Lines Pro Tip
If you accidentally get gold paint outside the snowflake lines, wait for it to dry slightly and gently scrape it off with an X-Acto knife or a damp cotton swab.
Step 2: Embossing and Drying
-
Position the stamp:
Center your snowflake stamp over the clay circle. Take a moment to eye it up carefully so the design sits right in the middle. -
Create the impression:
Press the stamp down firmly and evenly. You want the indentation to be deep enough to hold paint later, but not so deep that it distorts the round shape. -
Add the hanging hole:
Use a drinking straw to punch a clean hole near the top edge of the ornament. Position it about a half-inch down from the top to ensure the clay doesn’t break later. -
Let it dry:
Place the ornament in a safe spot to dry. Air-dry clay usually needs 24-48 hours. I like to flip them over gently halfway through the drying time to prevent curling. -
Sand imperfections:
Once fully cured and hard, check the edges. If there are any sharp bits or unevenness, lightly buff them away with fine-grit sandpaper for a professional finish.
Step 3: Gilding and Assembly
-
Load the brush:
Dip a very fine detail brush into your gold metallic paint. Wipe off excess paint on the rim of the jar so you don’t drip. -
Fill the snowflake:
Carefully paint inside the embossed snowflake lines. Let the brush glide along the grooves; the indentation acts as a guide to keep your lines neat. -
Check for gaps:
Look closely at the design and dab a little extra gold paint into the deeper crevices to ensure the snowflake looks solid and shimmering from all angles. -
Paint the hole rim:
For a cohesive look, dab a tiny ring of gold paint around the rim of the hanging hole you punched earlier. -
Dry the paint:
Allow the gold paint to dry completely, which usually takes about 20-30 minutes depending on the brand. -
Seal the piece (Optional):
If you want extra durability, brush a thin layer of clear matte sealant over the entire ornament. -
Attach hardware:
Open a gold jump ring with pliers, loop it through the clay hole, and pinch it closed securely. -
Add the ribbon:
Cut a length of light blue satin ribbon. Thread it through the jump ring and tie the ends in a simple knot to create a hanging loop.
Level Up: Texture
Before cutting the circle, gently roll a piece of linen fabric over the clay to imprint a subtle woven texture, giving the ornament a rustic, fabric-like background.
Hang your beautiful new creation on a branch near a light source to catch the golden glimmer
Mini Gingerbread Figure Ornaments
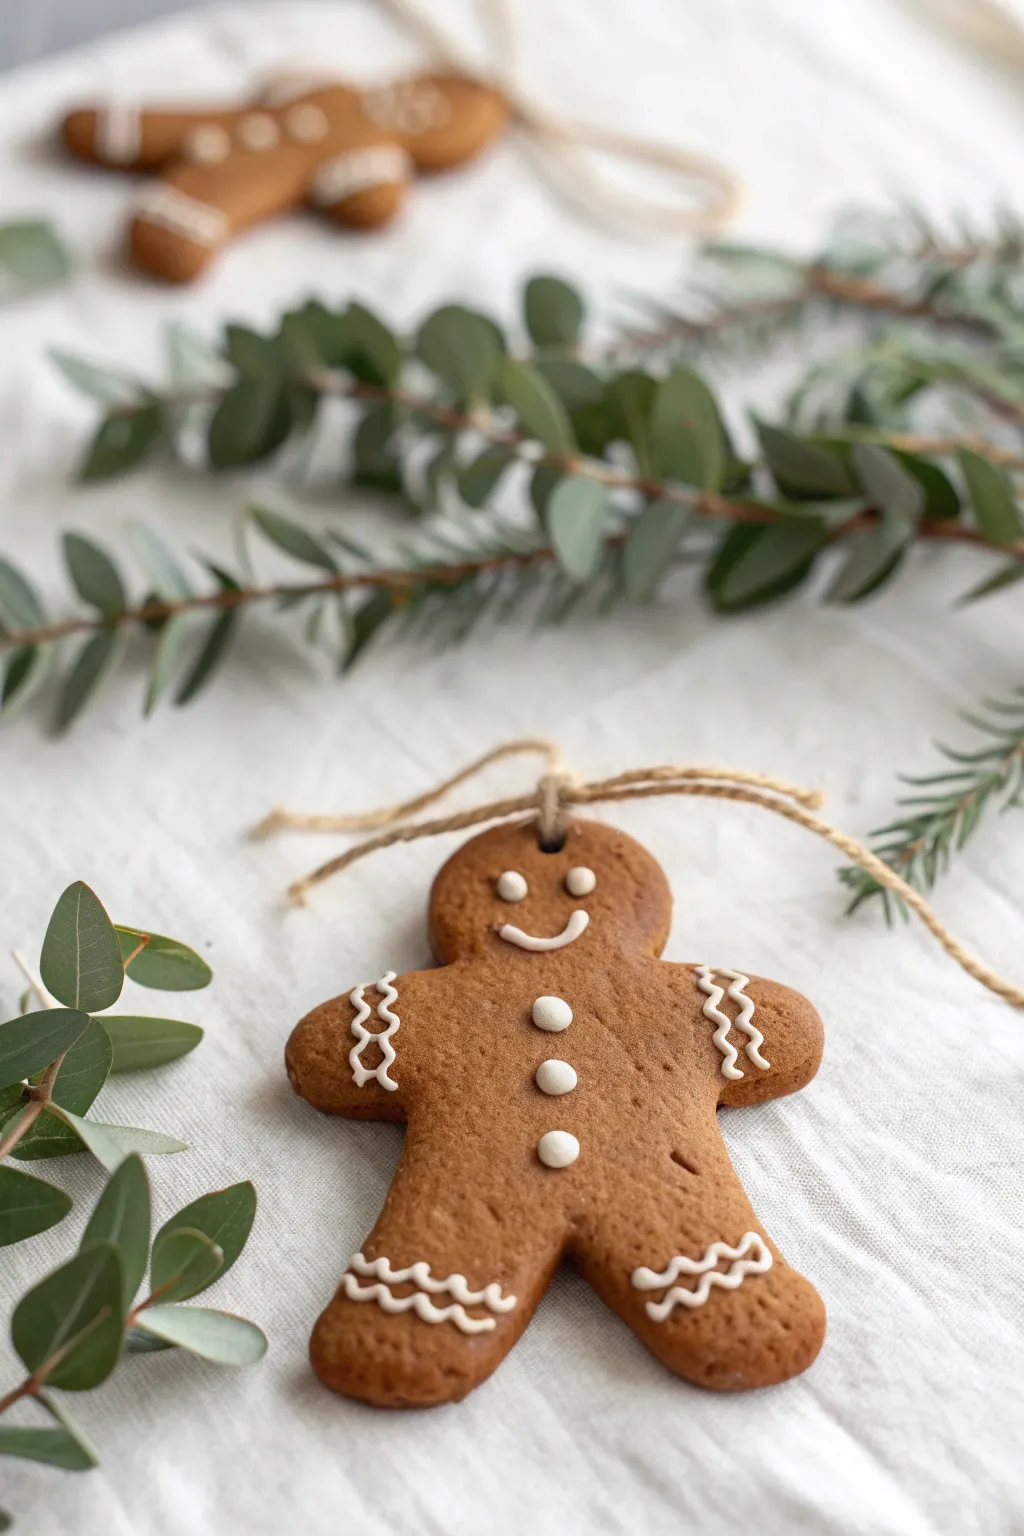
These charming ornaments capture the warm, spiced look of real gingerbread without the baking fuss. With realistic texturing and puffy paint ‘icing,’ they make sweet additions to your tree that will last for years.
Step-by-Step Tutorial
Materials
- Brown air-dry clay (terracotta or gingerbread colored)
- Gingerbread man cookie cutter (small/medium size)
- Aluminum foil (crumbled into a ball)
- Rolling pin
- Parchment paper or non-stick mat
- Straw or cocktail stick (for the hole)
- White 3D puffy fabric paint (or white clay slip in a fine-tip applicator)
- Twine or jute string
- Sandpaper (fine grit, optional)
- Clear matte varnish (optional)
Step 1: Shaping the Dough
-
Prepare the surface:
Lay down parchment paper or a non-stick mat to prevent sticking. If your clay is sticky, you can lightly dust the surface with cornstarch, just like flour for real cookies. -
Roll the clay:
Take a portion of brown air-dry clay and knead it until soft. Roll it out to an even thickness of about 1/4 inch (6mm). Avoid rolling it too thin, as you want that slightly chubby, baked-cookie look. -
Add cookie texture:
Take a ball of aluminum foil and gently roll or press it over the surface of the flattened clay. This transfers a pitted, baked texture that mimics the surface of a real gingerbread cookie. -
Cut the shape:
Press your gingerbread man cookie cutter firmly into the textured clay. Give it a little wiggle to ensure a clean cut, then carefully lift the cutter away. -
Soften the edges:
Remove the excess clay from around the shape. Use your finger to gently tap and smooth the cut edges; real cookies rarely have sharp, 90-degree angles, so softening the sides adds realism. -
Make the hanging hole:
While the clay is still wet, use a drinking straw or a thick cocktail stick to punch a hole at the top of the head. Ensure the hole is large enough for your twine to pass through later. -
Let it dry:
Transfer the shape to a flat drying rack. Let it dry completely according to package instructions (usually 24-48 hours), flipping it halfway through to prevent curling.
Secret Cookie Texture
Use a toothbrush to gently stipple the clay surface before cutting. It mimics the porous ‘crumb’ of a baked cookie even better than foil!
Step 2: Decorating the Cookie
-
Smooth imperfections:
Once fully dry, check the edges. If there are any sharp jagged bits, lightly sand them down with fine-grit sandpaper. -
Prepare the ‘icing’:
For the icing effect, use white 3D puffy paint directly from the bottle. Test the flow on a scrap piece of paper first to ensure you can make steady, thin lines. -
Face details:
Start with the face. Squeeze two small dots for eyes and a curved line for a simple, friendly smile. Keep the expression minimal for a classic look. -
Buttons:
Add three distinct dots down the center of the chest for buttons. Try to keep them evenly spaced and roughly the same size as the eyes. -
Cuff details:
On the wrists and ankles, pipe a squiggly or zigzag line to represent decorative frosting cuffs. This little detail frames the figure nicely. -
Dry the paint:
Let the puffy paint dry completely. This usually takes a few hours, during which the paint will firm up and hold its dimensional shape. -
Optional sealing:
If you want extra protection, apply a coat of clear matte varnish. I usually skip gloss finishes here because a matte finish looks more like real baked dough. -
String it up:
Cut a length of natural jute twine or string. Thread it through the hole in the head and tie a loop for hanging.
Fixing Cracks
If the clay cracks while drying, mix a tiny bit of fresh clay with water to make a paste. Fill the crack, smooth it with a wet finger, and let re-dry.
Hang these faux-baked treats on your tree for a cozy, handmade holiday display


What Really Happens Inside the Kiln
Learn how time and temperature work together inside the kiln to transform clay into durable ceramic.
Cute Reindeer Face Ornaments

Brighten up your tree with these adorable, minimalistic reindeer faces that capture the sweet simplicity of the season. Made from smooth white clay, this project features charming details like glittering red antlers and a jolly round nose that pops against the snowy background.
Step-by-Step Guide
Materials
- White air-dry clay or baking soda dough
- Rolling pin
- Circular cookie cutter (approx. 3 inches)
- Drinking straw or skewer (for the hole)
- Sandpaper (fine grit)
- Red acrylic paint
- Black acrylic paint
- Small round detail brush
- Small dotting tool or toothpick
- Red clay or small red bead (optional for nose)
- Red glitter (fine)
- Jute twine
- Gloss varnish or Mod Podge (optional)
Step 1: Shaping the Base
-
Prepare the dough:
Begin by kneading your white clay until it is smooth and pliable. If you are using homemade baking soda dough, ensure it has cooled completely before working with it. -
Roll it out:
Roll the clay out on a smooth surface to an even thickness of about 1/4 inch. If the clay sticks, lightly dust your surface with cornstarch. -
Cut the circles:
Press your circular cookie cutter firmly into the clay to create clean, round ornament shapes. -
Smooth the edges:
Dip your finger in a little water and run it gently around the rim of the circle to soften any sharp edges left by the cutter. -
Create the hanging hole:
Use a drinking straw to punch a hole near the top center of the circle. Make sure it isn’t too close to the edge, or the clay might crack later. -
Dry the ornaments:
Place your clay circles on a wire rack or parchment paper to dry. Depending on your clay type, this may take 24–48 hours; flip them halfway through to ensure even drying and prevent curling.
Step 2: Adding the Reindeer Details
-
Sand for perfection:
Once fully dry, lightly sand the surface with fine-grit sandpaper if there are any bumps or rough spots. -
Form the nose:
You can paint the nose flat, but for dimension, roll a small ball of fresh clay (or red clay) and glue it to the center of the face. Flatten it slightly so it stays put. -
Paint the nose:
If you used white clay for the nose, paint it a vibrant cherry red. Let it dry completely. -
Paint the antlers:
Using a very fine brush and red paint, draw two antlers starting just above the eye area curving outward. Add small V-shapes for the tines. -
Add some sparkle:
While the red antler paint is still wet, carefully sprinkle a pinch of fine red glitter over them. Tap off the excess once dry to make them shimmer. -
Dot the eyes:
Dip the end of a paintbrush handle or a dotting tool into black paint. press two solid dots symmetrically slightly above the nose level for the eyes. -
Create the smile:
Using your finest brush or even a black ultra-fine marker, draw a simple, small ‘U’ shape below the nose for a gentle smile. -
Add freckles:
I like to add a few tiny reddish-brown specks on the cheeks using a toothpick to give the reindeer a little extra character. -
Seal the piece:
Apply a coat of matte or gloss varnish over the entire face to protect the paint and keep the glitter in place. -
Hanging loop:
Cut a length of jute twine, thread it through the top hole, and tie a secure knot to create the rustic hanging loop.
Smoother Surfaces
Use parchment paper on top of your clay while rolling. This prevents the rolling pin from sticking and leaves a flawlessly smooth finish without fingerprints.
Dimensional Nose
Instead of clay, glue a small red wooden bead or a mini pom-pom onto the face for a fun, mixed-media 3D effect that kids love to touch.
Hang your charming new reindeer on a sturdy branch and enjoy the handmade warmth it brings to your holiday decor
Chunky Snowman Character Ornaments
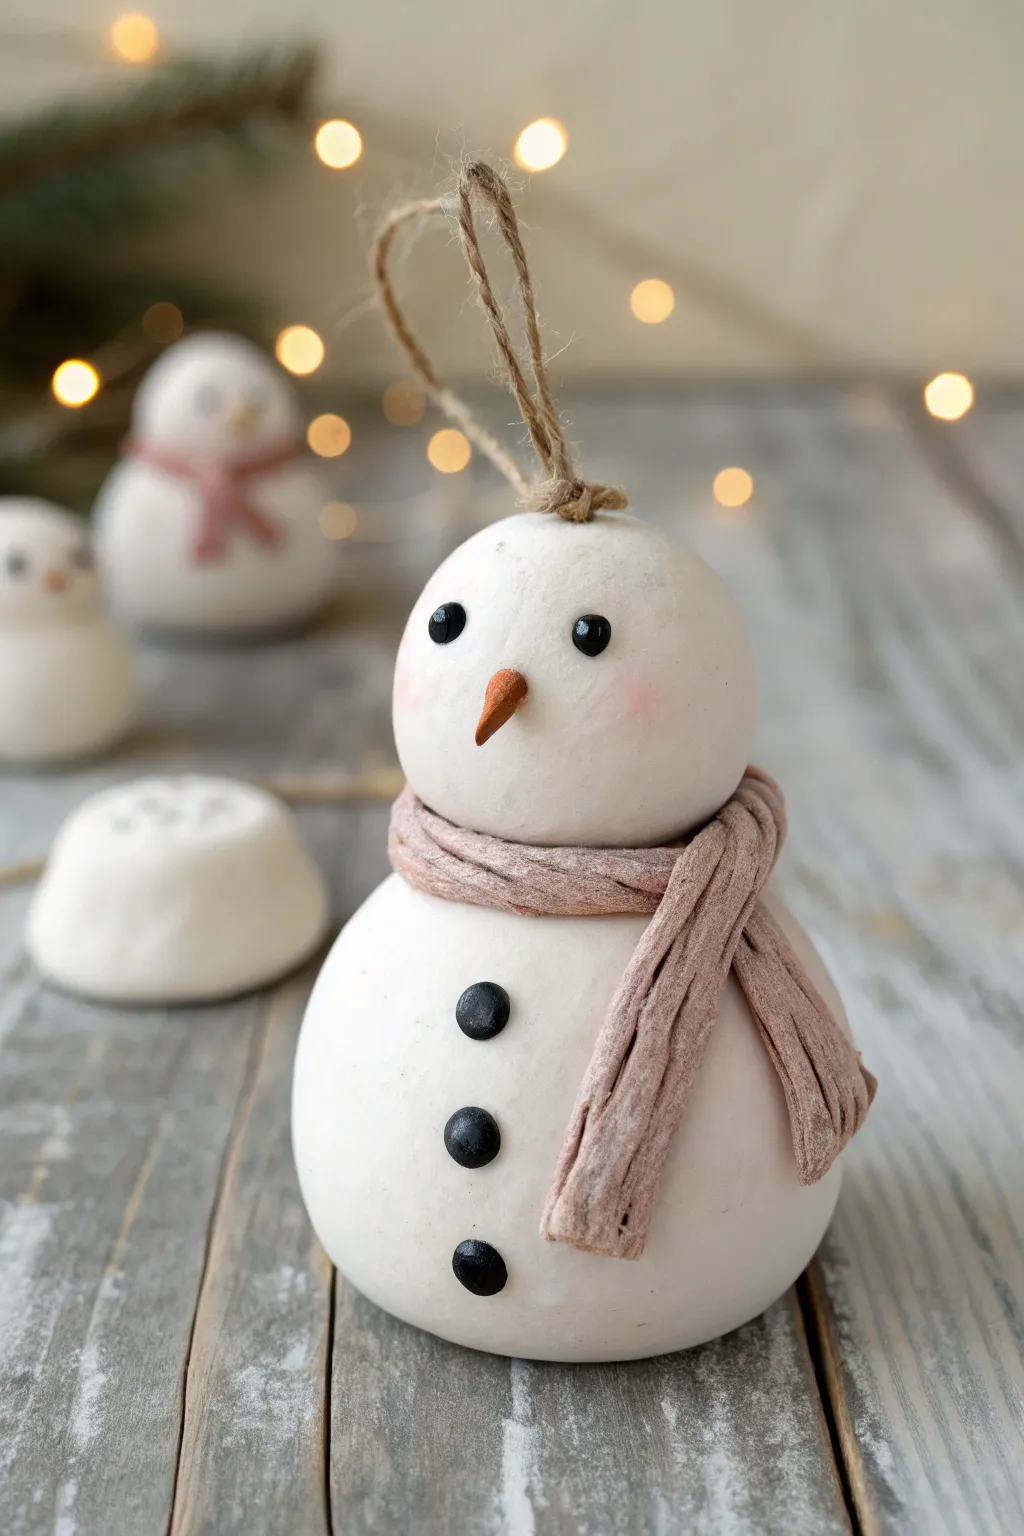
This adorable, chubby snowman ornament brings a rustic and cozy touch to your holiday decor with its simple shapes and sweet expression. With just a few basic sculpting moves, you can create a charming character wrapped in a textured clay scarf that looks surprisingly soft.
Step-by-Step
Materials
- White air-dry clay or polymer clay
- Small amount of orange clay (or orange acrylic paint)
- Small black beads or black clay for eyes/buttons
- Pastel pink chalk or blush powder
- Soft paintbrush
- Jute twine
- Sculpting tools or a toothpick
- Textured fabric scrap (like linen or gauze)
- Strong craft glue
- Acrylic matte varnish (optional)
Step 1: Forming the Body
-
Roll the base:
Start by taking a generous amount of white clay and rolling it into a smooth, even ball for the snowman’s body. Aim for a slightly flattened bottom so it can sit upright on a table if you choose not to hang it. -
Shape the head:
Roll a second, slightly smaller ball of white clay for the head. It should be proportional to the body but definitely smaller to give that cute, chubby look. -
Connect the parts:
If using air-dry clay, score the top of the body and bottom of the head with a texture tool, dab a little water on the rough spots, and press them firmly together. For polymer clay, simply press them together gently to bond. -
Insert the hanger:
Cut a loop of jute twine and knot the ends together. Push the knotted end deep into the top center of the head while the clay is still wet, smoothing the clay back over the insertion point to secure it.
Natural Hanger Tip
Soaking the knot of your jute twine in white glue before inserting it into the clay creates a rock-hard internal anchor once it dries.
Step 2: Adding the Details
-
Create the nose:
Take a tiny pinch of orange clay—or white clay mixed with orange paint—and roll it into a small cone. Gently curve it slightly to resemble a carrot. -
Attach facial features:
Press the carrot nose into the center of the face. For the eyes, press two small black beads into the clay above the nose. If you don’t have beads, roll tiny balls of black clay instead. -
Make the buttons:
Press three black beads or small flattened balls of black clay down the center of the body to create the classic coal buttons. -
Add rosy cheeks:
I like to do this while the clay is fresh: take a soft brush and dab it into pink chalk pastel dust or real cosmetic blush. Gently buff two soft circles onto the snowman’s cheeks for a wintery glow.
Step 3: Designing the Scarf
-
Roll the scarf strip:
Roll out a thin snake of clay, then flatten it into a long, ribbon-like strip. It needs to be long enough to wrap around the neck with tails hanging down. -
Add texture:
Before attaching it, press a piece of textured fabric (like coarse linen or a towel) onto the clay strip to imprint a realistic woven pattern. -
Paint the scarf:
If your clay isn’t already colored, mix a muted pinkish-brown acrylic paint and apply a wash to the textured strip. Allow the paint to settle into the grooves to highlight the texture. -
Wrap and drape:
Wrap the clay strip around the snowman’s neck where the head meets the body. Cross the ends over each other in the front, letting one side hang slightly longer than the other. -
Sculpt the folds:
Use a toothpick or sculpting tool to gently press creases into the scarf where it crosses, making it look like heavy, soft wool.
Make It Sparkle
While the varnish is still wet, sprinkle ultra-fine iridescent white glitter over the top of the head and shoulders to mimic fresh snowfall.
Step 4: Finishing Touches
-
Smooth imperfections:
Dip your finger in a tiny bit of water (for air-dry clay) or baby oil (for polymer) and gently smooth out any fingerprints on the white body sections. -
Texture the body:
For an extra snowy feel, you can lightly tap the white surfaces with a stiff toothbrush to give it a speckled, snowy texture rather than a perfectly smooth finish. -
Dry or bake:
Follow the manufacturer instructions for your specific clay. If baking polymer clay, ensure the jute twine doesn’t touch the heating elements. -
Seal the work:
Once fully dry or cooled, apply a coat of matte varnish to protect the surface, especially over the painted scarf and rosy cheeks.
Now your chunky little snowman is ready to add a warm, handmade smile to your holiday tree

TRACK YOUR CERAMIC JOURNEY
Capture glaze tests, firing details, and creative progress—all in one simple printable. Make your projects easier to repeat and improve.
Simple Angel Silhouette Ornaments
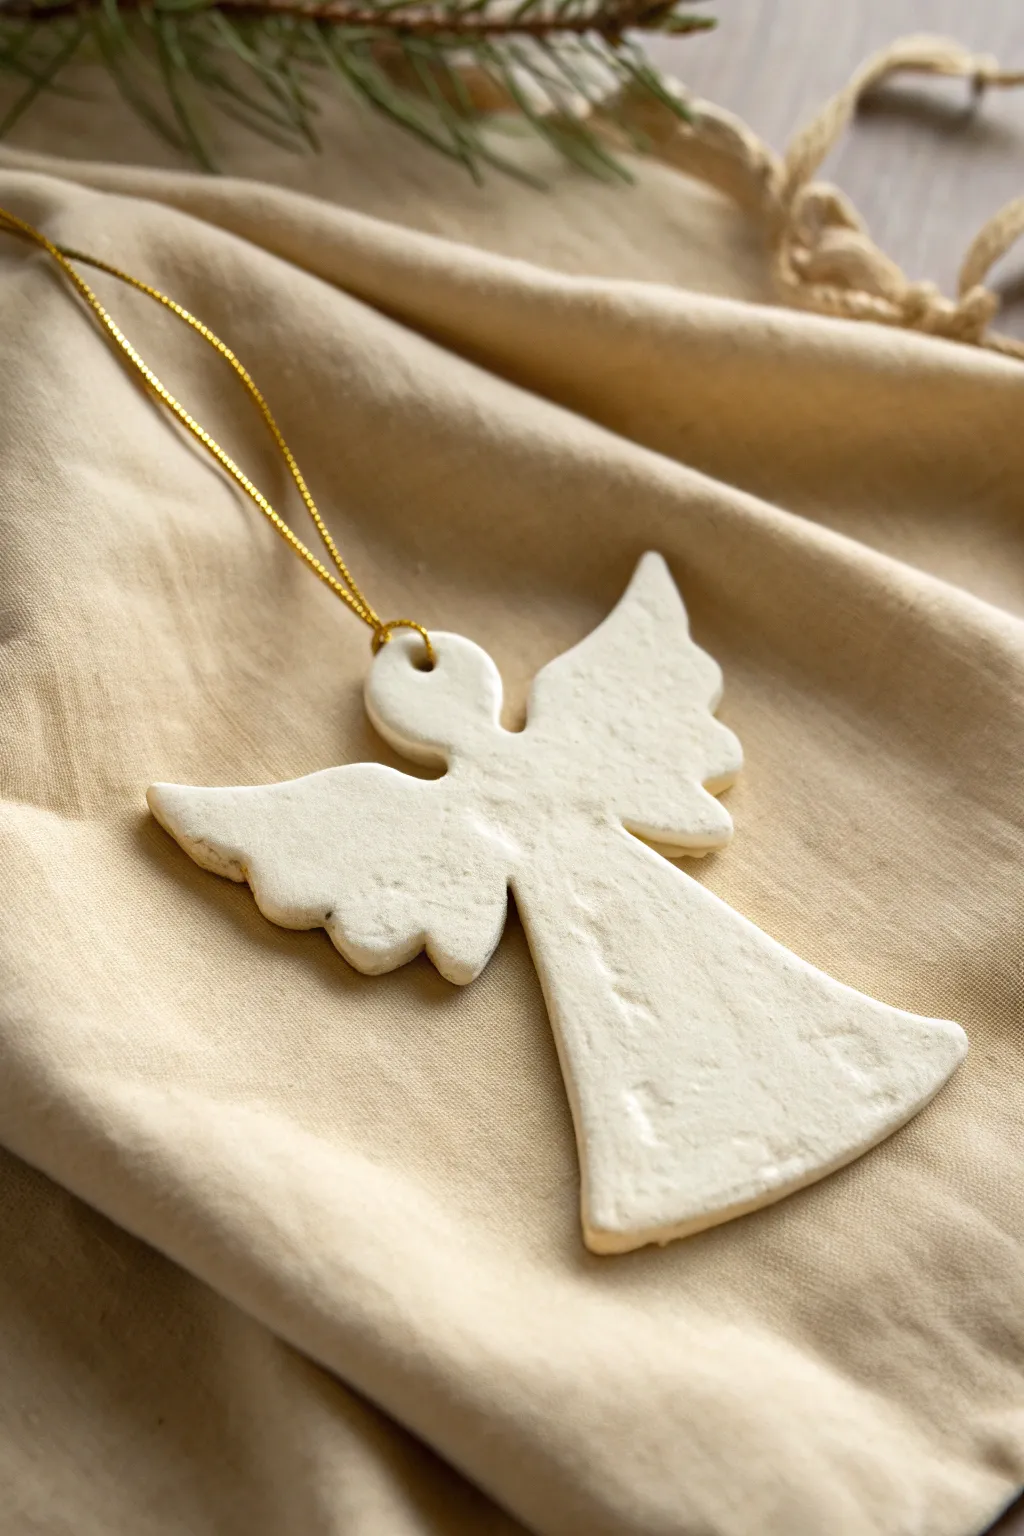
Capture the serenity of the season with these minimalist angel ornaments, featuring a soft matte finish and elegant silhouette. This project relies on a simple homemade clay recipe to create a timeless decoration that looks beautiful against evergreen branches.
Step-by-Step Guide
Materials
- 1 cup baking soda (cornstarch clay recipe) or white air-dry clay
- 1/2 cup cornstarch
- 3/4 cup water
- Angel-shaped cookie cutter (approx. 3-4 inches)
- Rolling pin
- Parchment paper
- Straw or toothpick for the hole
- Fine grit sandpaper
- Gold embroidery thread or thin ribbon
- Optional: White acrylic paint and matte sealer
Step 1: Preparing the Clay
-
Mix ingredients:
If making your own clay, combine the baking soda and cornstarch in a medium saucepan. Make sure there are no large lumps before proceeding. -
Add water:
Pour in the water and whisk thoroughly until the mixture is smooth and resembles milk. -
Cook the dough:
Place the saucepan over medium heat. Stir constantly—don’t walk away, as it thickens quickly. You are looking for a consistency similar to mashed potatoes. -
Cool down:
Once the dough pulls away from the sides of the pot and forms a ball, remove it from the heat. Transfer it to a glass bowl and cover it with a damp cloth to let it cool until it’s comfortable to handle. -
Knead slightly:
Once cool, knead the dough gently on a clean surface to ensure it is perfectly smooth and pliable. If using store-bought air-dry clay, simply condition a handful by kneading it until soft.
Prevent Cracking
Drying too fast causes cracks. Keep the ornaments away from direct heaters, sunlight, or vents while they dry. Slow and steady is key for homemade clay.
Step 2: Shaping the Angels
-
Roll out:
Lay down a sheet of parchment paper. Roll your clay out to a thickness of about 1/4 inch. I find that going any thinner makes the angel wings too fragile. -
Cut the shapes:
Press your angel cookie cutter firmly into the dough. Give it a tiny wiggle to ensure clean edges before lifting it straight up. -
Clean edges:
Use your finger or a small modeling tool to gently smooth down any jagged clay around the wing tips or the hem of the robe. -
Create the hanger hole:
Before the clay begins to dry, take a plastic straw or a toothpick and press a hole near the top of the angel’s head or halo area. Make sure it goes all the way through cleanly.
Sticky Dough?
If your dough feels too sticky to roll perfectly, lightly dust your rolling pin and surface with a little extra cornstarch to keep things moving smoothly.
Step 3: Drying and Finishing
-
Air dry:
Leave the angels on the parchment paper in a safe, dry place. Let them air dry for 24-48 hours. Carefully flip them over halfway through the drying time to prevent curling. -
Sand imperfections:
Once bone dry and hard, take fine-grit sandpaper and very gently buff the edges. This removes any sharp burrs left by the cutter. -
Optional painting:
The natural clay is a lovely off-white, but for a brighter snowy look, brush on a thin coat of white acrylic paint. -
Seal:
To protect against humidity, you can apply a matte varnish or mod podge, though leaving them raw gives a lovely rustic texture shown in the photo. -
Thread the hanger:
Cut a 6-inch length of gold embroidery thread or metallic string. Thread it through the hole you created earlier. -
Knot the loop:
Tie the ends of the gold thread securely in a knot to form a loop, trimming any excess thread for a neat finish.
Hang your angelic creations on the tree or use them as elegant gift toppers for friends and family
Cozy Little House Ornaments
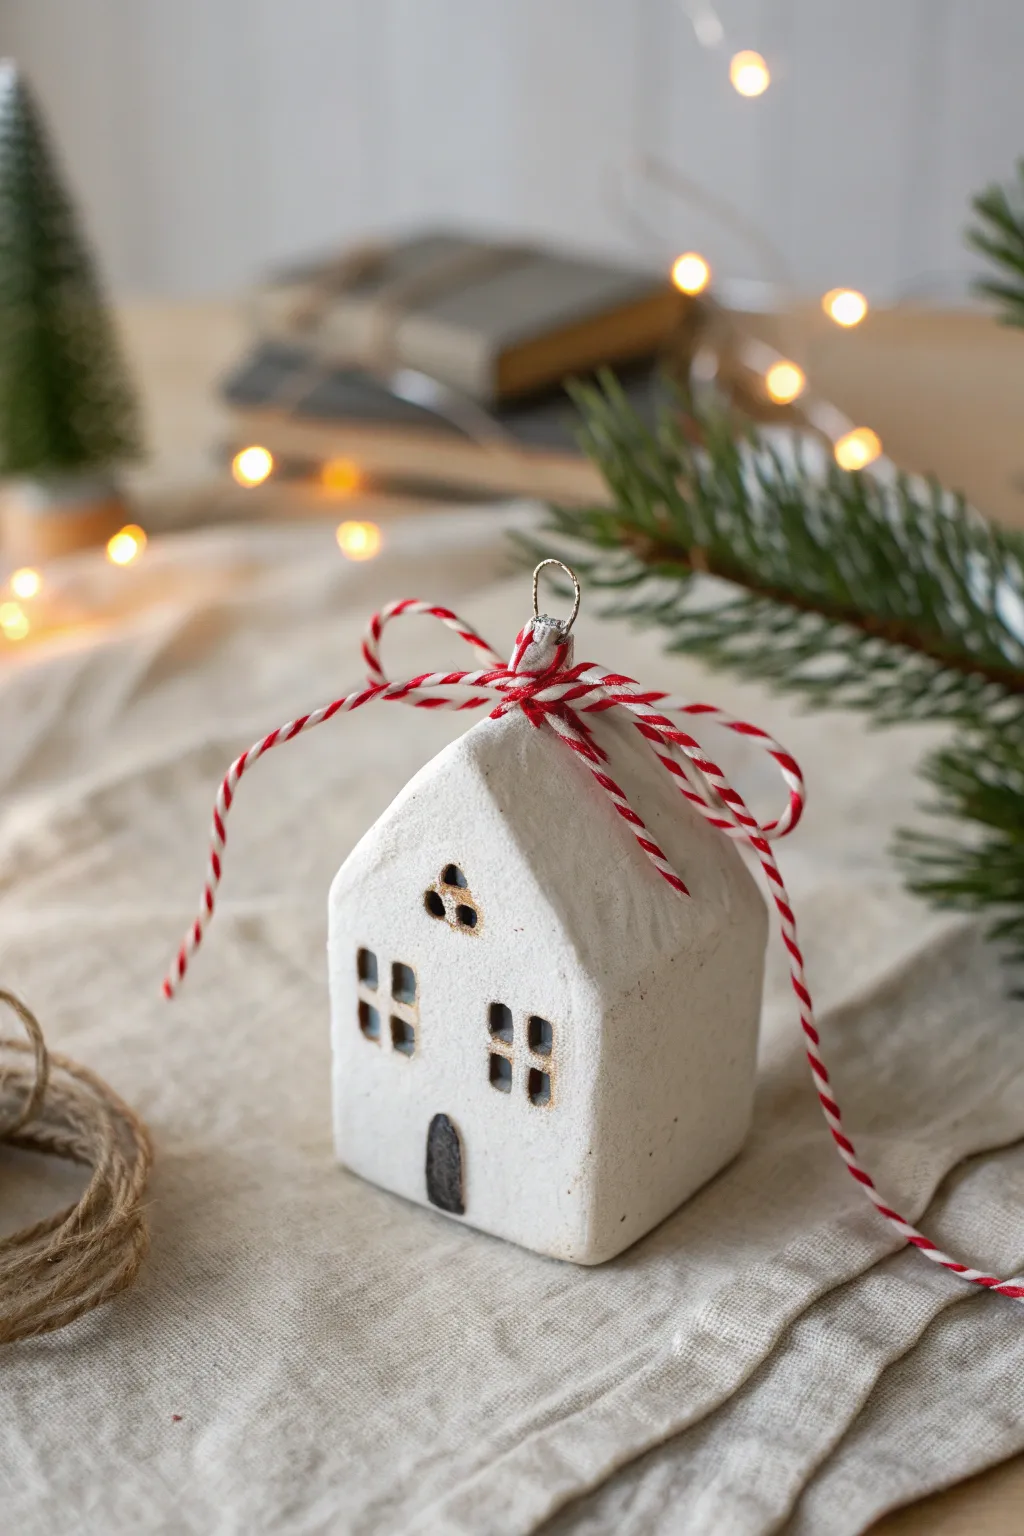
Bring a touch of minimalist Scandinavian design to your tree with this charming little clay house ornament. Its textured white finish and simple cutout windows create a cozy, handmade feel that looks lovely paired with rustic twine.
Detailed Instructions
Materials
- Air-dry clay (white)
- Rolling pin
- Parchment paper or craft mat
- Sharp craft knife or scalpel
- Ruler
- Small square cutter (optional)
- Toothpick or needle tool
- Water in a small cup
- Fine-grit sandpaper
- Acrylic paint (black or dark brown)
- Small fine-point paintbrush
- Matte white acrylic paint (optional)
- Baker’s twine (red and white)
- Small screw eye or bent wire loop
Step 1: Planning and Shaping the Base
-
Prepare your workspace:
Lay down parchment paper or a craft silicone mat to prevent the clay from sticking. Tape the corners down if needed so your surface is stable. -
Roll the clay block:
Take a chunk of air-dry clay and knead it briefly to make it pliable. Use your hands to form it into a rough rectangular block shape rather than a flat sheet, as this is a solid 3D house. -
Refine the block shape:
Tap the block against your work surface on all four sides to square it up. You want a solid rectangular prism that stands about 2-3 inches tall and 2 inches wide. -
Form the roof peak:
Using your fingers or a flat tool, gently pinch and press the top third of the block into a triangular prism shape to form the roof. Smooth the transition so the walls flow seamlessly into the roofline. -
Smooth the surfaces:
Dip your finger in a tiny bit of water and run it over all sides of the house to smooth out fingerprints and cracks. Keep the edges relatively crisp but soft enough to look handmade. -
Add the hanging hardware:
While the clay is still wet, carefully screw a small eye hook into the very peak of the roof. If you don’t have one, form a loop with thin wire and push the twisted ends deep into the clay.
Cracking Clay?
Thick clay blocks shrink as they dry. To prevent cracks, dry slowly under a loose plastic sheet, or hollow out the bottom slightly to reduce bulk.
Step 2: Adding Architectural Details
-
Mark the windows:
Use a needle tool or toothpick to lightly sketch where your windows will go. Place two square windows side-by-side on the lower level, and two slightly smaller ones above them. -
Carve the windows:
Use a sharp craft knife or a very small square cutter to press into these marked areas. You don’t need to cut all the way through the block; just create a recess about 2-3mm deep to suggest depth. -
Create the attic vent:
Above the upper windows, near the roof peak, press three small holes in a triangular formation using the blunt end of a small paintbrush or a dedicated clay tool. -
Carve the door:
Sketch a small arched door at the bottom center. Carve out the clay inside this arch to create a recessed doorway, similar to how you did the windows. -
Final smoothing:
Check your carvings for any jagged clay bits. Use a damp brush or your finger to smooth the inside edges of the windows and door. -
Drying time:
Let the house dry completely. Because this is a thick block of clay, it may take 48-72 hours. Rotate it occasionally so all sides get air exposure.
Step 3: Painting and Finishing
-
Sand imperfections:
Once fully dry, use fine-grit sandpaper to gently buff away any rough textures on the flat surfaces. Wipe away the dust with a dry cloth. -
Whitewash (optional):
If your air-dry clay dried slightly grey or off-white, apply a coat of matte white acrylic paint to the entire exterior for that crisp, clean look shown in the photo. -
Darken the recesses:
Using a fine-point brush and black or dark brown paint, carefully paint the inside of the recessed windows and door. This contrast mimics the look of a lit interior or shadowed glass. -
Clean up edges:
If any dark paint got on the white walls, wait for it to dry and then touch it up with a tiny dab of white paint. -
Tie the bow:
Cut a length of red and white baker’s twine. Thread it through the eye hook loop. -
Create the knot:
Tie a simple, floppy bow right at the base of the metal loop. Ensure the tails drape down over the roof of the house for that festive finishing touch.
Snowy Roof Effect
Apply a textured snow paste or a mix of white paint and baking soda to the roof area only for a fluffy, winter-weathered texture.
Hang your little cottage on a sturdy branch and enjoy the cozy atmosphere it brings to your holiday decor
Marbled Swirl Clay Baubles
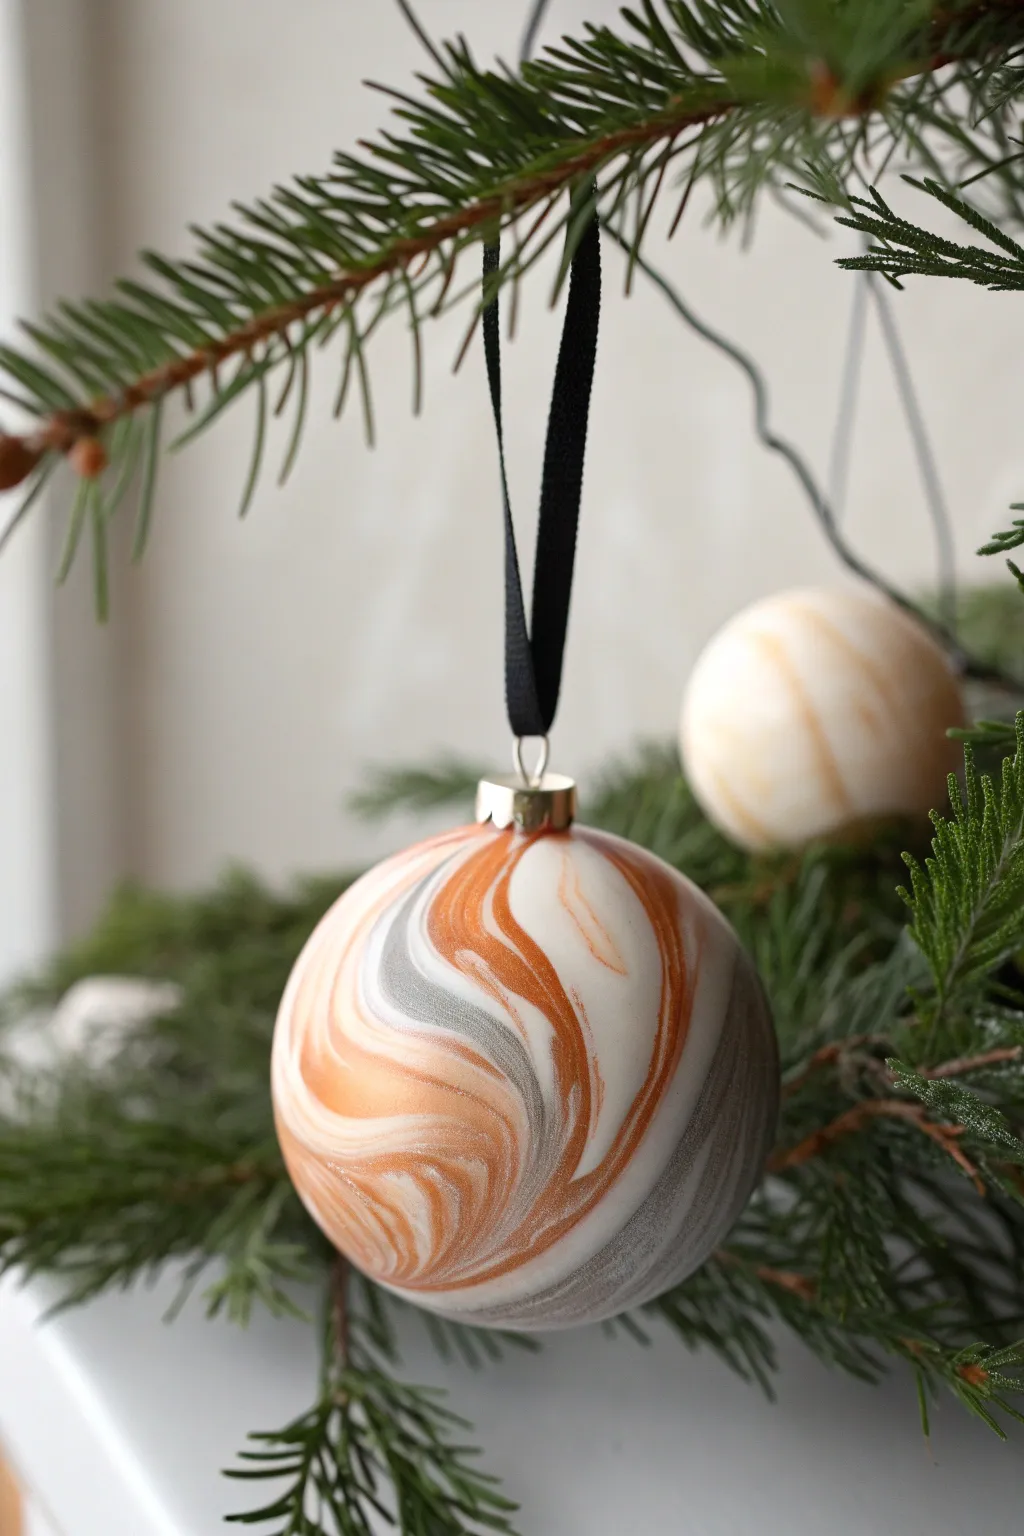
Achieve a high-end designer look with these stunning marbled ornaments that blend crisp white with warm copper and soft grey tones. The organic swirl patterns ensure that no two baubles are ever exactly alike, creating a sophisticated and unique collection for your tree.
Step-by-Step Guide
Materials
- Polymer clay (White, Burnt Orange/Copper, Metallic Silver or Light Grey)
- Acrylic rolling pin
- Sharp clay blade or X-Acto knife
- Circle cookie cutters (various sizes)
- Clear polystyrene bauble fillable spheres OR Styrofoam balls (approx. 3-inch diameter)
- Liquid polymer clay (optional, for adhesion)
- Gloss or matte polyurethane varnish (optional)
- Jewelry eye pins or ornament caps
- Super glue (cyanoacrylate)
- Black grosgrain ribbon (1/4 inch width)
- Baking sheet with parchment paper
- Oven (for polymer clay curing)
Step 1: Preparing the Marbled Clay
-
Condition the Clay:
Begin by taking portions of your white, copper, and grey polymer clay. Knead each color individually in your hands until they are soft, pliable, and easy to work with. -
Form the Ropes:
Roll each conditioned color into a long, snake-like rope. For this look, make the white rope the thickest (about twice the size of the others), as it is the base color. -
Twist Together:
Gather your clay ropes and twist them together into one large combined strand. Fold this strand in half and twist again to begin integrating the colors. -
Roll and Fold Technique:
Roll the twisted strand smooth on your work surface until it lengthens. Fold it over on itself again and roll it out once more. Repeat this process until you see a pleasing striated pattern, but stop before the colors muddy into a single shade. -
Create a Swirl Block:
Compress your marbled rope into a rectangular block or ball. This consolidates the pattern and prepares it for slicing. -
Slice Thin Sheets:
Using your sharp clay blade, carefully slice thin cross-sections off your block. You should reveal beautiful, intricate swirls on the cut face of each slice.
Muddy Colors?
If your colors are blending into a brown mess, you are over-mixing. Stop twisting as soon as streaks appear. Marbling happens fast; less is more
Step 2: Assembling the Bauble
-
Prepare the Core:
Take your Styrofoam ball or polystyrene sphere. If usage directions for your clay suggest it, lightly brush the core with a little liquid polymer clay to help the slices stick better. -
Apply the Slices:
Place your marbled clay slices onto the sphere. Gently press them down so they adhere to the surface, arranging them so the edges of the slices just barely overlap. -
Cover completely:
Continue adding slices until the entire sphere is covered. Don’t worry about small gaps or seams yet; just ensure the underlying ball is hidden. -
Smooth the Seams:
Now, roll the covered ball vigorously between your palms using a circular motion. The warmth of your hands and the pressure will fuse the seams together and smooth out the surface completely. -
Insert the Hanging Mechanism:
If using a cap-style top, press the neck of the cap into the top of the soft clay to create an indent, then remove it. If using an eye pin, you can bake it directly into the clay now or drill a hole later. -
Check for Imperfections:
inspect the bauble for any fingerprints. You can lightly brush the surface with a tiny bit of baby oil or cornstarch to smooth away final marks before baking.
Step 3: Baking and Finishing
-
Bake the Ornament:
Place your baubles on a parchment-lined baking sheet. Bake according to your specific polymer clay manufacturer’s instructions (usually around 275°F/135°C for 15-30 minutes). -
Cool Down:
Turn off the oven and let the ornaments cool completely inside. This gradual cooling helps prevent cracks in the clay. -
Attach the Cap:
Once cool, use a drop of super glue to permanently attach the metal ornament cap into the indentation you made earlier. Hold firmly for a few seconds to set. -
Add Varnish (Optional):
For a shinier finish or extra durability, apply a thin coat of polymer clay varnish. I personally prefer a matte finish for a modern look, but gloss works great too. -
Add the Ribbon:
Cut a length of black grosgrain ribbon, thread it through the loop of the cap, and tie the ends securely. Trim any excess ribbon for a neat finish.
Gilt Edges
After baking, paint thin lines of gold leaf liquid along the natural marble veins for an opulent, geode-inspired sparkle
Hang these elegant spheres on a tree with greenery to let the copper tones truly pop against the pine needles
Terrazzo Speckled Modern Drops
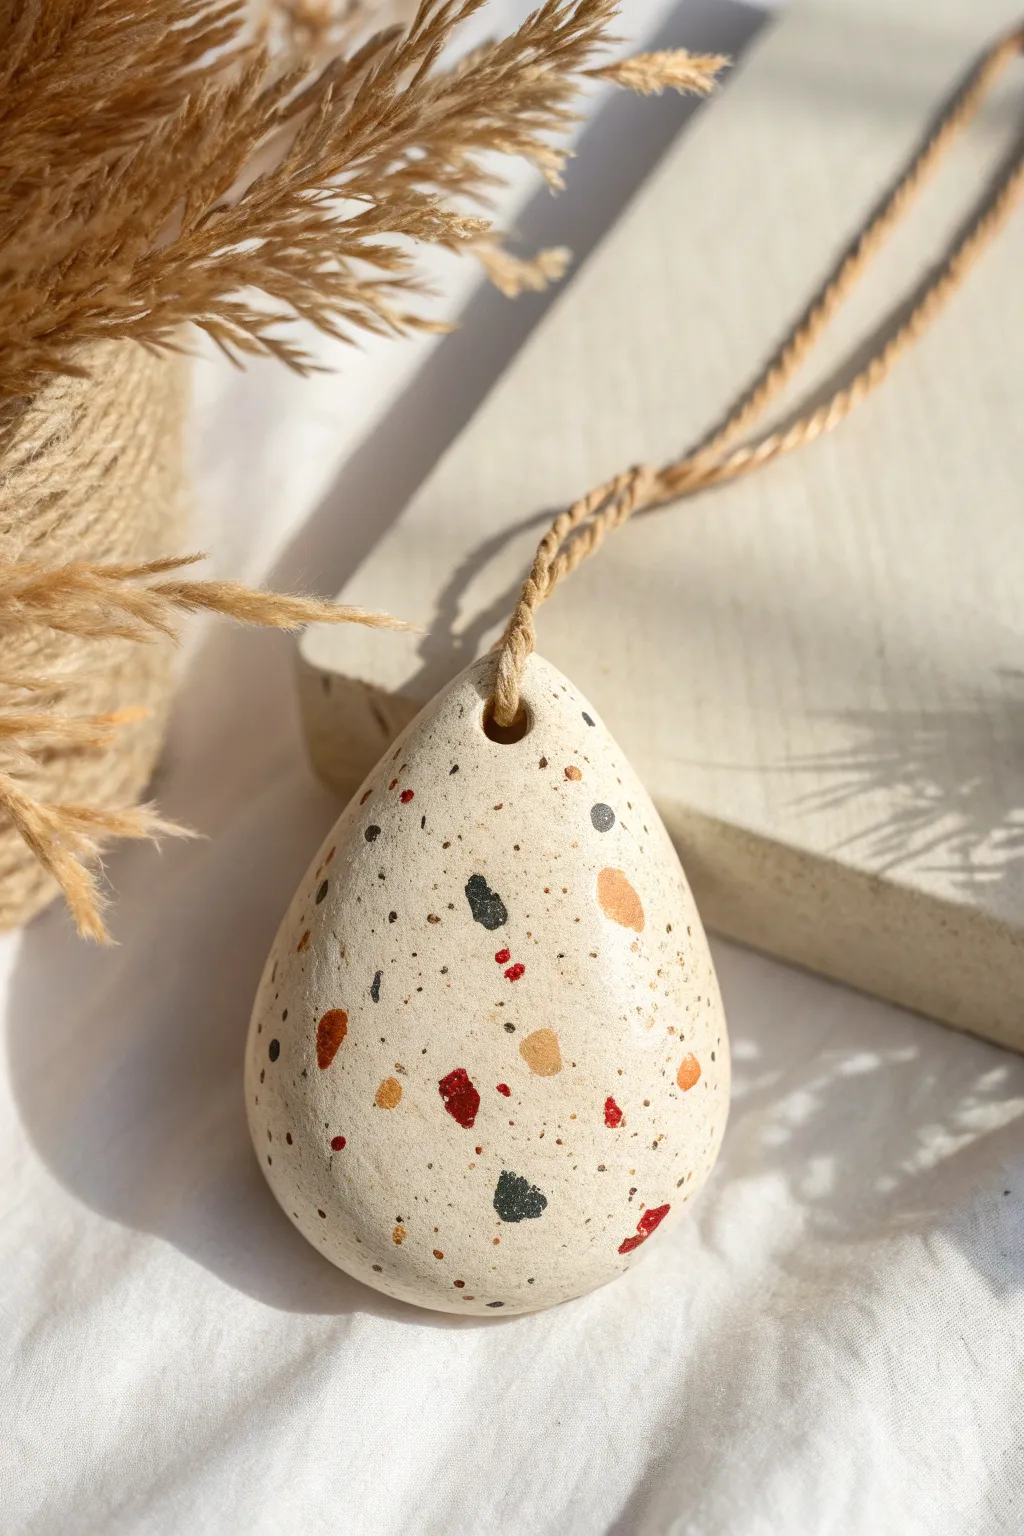
Bring a touch of modern minimalism to your decor with this elegant teardrop ornament featuring a chic terrazzo pattern. The creamy base acts as the perfect canvas for scattered flecks of black, terra cotta, and deep red, mimicking the look of real stone without the weight.
How-To Guide
Materials
- White or cream polymer clay (approx. 2 oz)
- Small scraps of colored polymer clay (black, terra cotta/orange, dark red)
- Rolling pin or acrylic roller
- Teardrop cookie cutter (or a sharp craft knife and paper template)
- Straw or small circle cutter (for the hole)
- Parchment paper or baking mat
- Fine-grit sandpaper (400 to 600 grit)
- Matte or satin polymer clay varnish (optional)
- Jute twine or leather cord for hanging
- Oven and baking sheet
Step 1: Preparing the Clay Base
-
Condition the base:
Start by taking your white or cream polymer clay and warming it up in your hands. Knead it thoroughly until it is soft, pliable, and free of any air bubbles. -
Initial rolling:
Place the conditioned clay on your parchment paper or baking mat. Roll it out into a slab that is roughly 1/4 inch thick. Don’t worry about perfection yet; this is just the canvas.
Stone Texture Trick
Mix a pinch of ground black pepper or dried tea leaves into your white clay base before rolling. This adds tiny, natural-looking inclusions for realistic depth.
Step 2: Creating the Terrazzo Pattern
-
Prepare the chips:
Take your colored clay scraps (black, terra cotta, dark red) and chop them into tiny, irregular pieces using a craft knife. Vary the sizes slightly, but keep them generally small and jagged. -
Apply the color:
Scatter the colored chips randomly over your rolled-out white clay slab. Aim for an organic distribution—some areas can be dense while others remain sparse. -
Secret ingredient:
For that realistic speckled stone look, I like to take a tiny bit of black clay and rub it between my fingers until it crumbles into nearly dust-like particles. Sprinkle this ‘dust’ over the slab to fill the negative space. -
Embed the flecks:
Gently run your acrylic roller over the slab again. Press firmly enough to push the colored chips down so they become flush with the white surface, creating a smooth, unified sheet. -
Check the thickness:
Ensure your slab is now an even thickness, ideally around 3/16 inch to 1/4 inch. If the pattern stretched too much, you can gently nudge the sides back in.
Gilded Upgrade
Add flecks of gold leaf to the clay slab alongside your colored chips before the final rolling for a glamorous, high-end sparkle within the stone pattern.
Step 3: Shaping and Baking
-
Cut the shape:
Position your teardrop cutter over the most visually pleasing section of the pattern. Press down firmly to cut the shape. If using a knife, trace around a paper template instead. -
Smooth the edges:
Lift the excess clay away. Gently run your finger along the cut edge of the ornament to smooth out any harsh ridges or cutter marks. -
Piercing the hole:
Use a straw or a small circular tool to punch a hole near the top, pointed end of the teardrop. Make sure it’s centered and not too close to the very edge to prevent breakage. -
Baking time:
Transfer the parchment paper with the ornament onto a baking sheet. Bake according to your specific clay manufacturer’s instructions (usually 275°F for 15-30 minutes). -
Cooling down:
Once baked, remove from the oven and let the piece cool completely on a flat surface. Do not try to flex it while it’s still warm.
Step 4: Finishing Touches
-
Sanding:
Dip your fine-grit sandpaper in water and gently wet-sand the surface and edges. This reveals the sharpness of the terrazzo chips and creates a silky stone-like feel. -
Buffing:
Dry the ornament and buff it briskly with a soft denim cloth or piece of uncolored fabric to bring out a natural low sheen. -
Sealing (Optional):
If you prefer a glossy finish or want extra protection, apply a thin layer of matte or satin varnish using a soft brush. Let it dry completely. -
Stringing:
Cut a length of jute twine or leather cord. Fold it in half, push the loop through the hole, and pull the ends through the loop to create a lark’s head knot. -
Final knot:
Tie the loose ends of the twine together securely to create the hanging loop, trimming any excess length.
Hang your new modern ornament on a branch or use it as a sophisticated gift tag for a special present
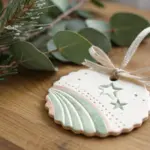
Layered Cutout Shadow Ornaments
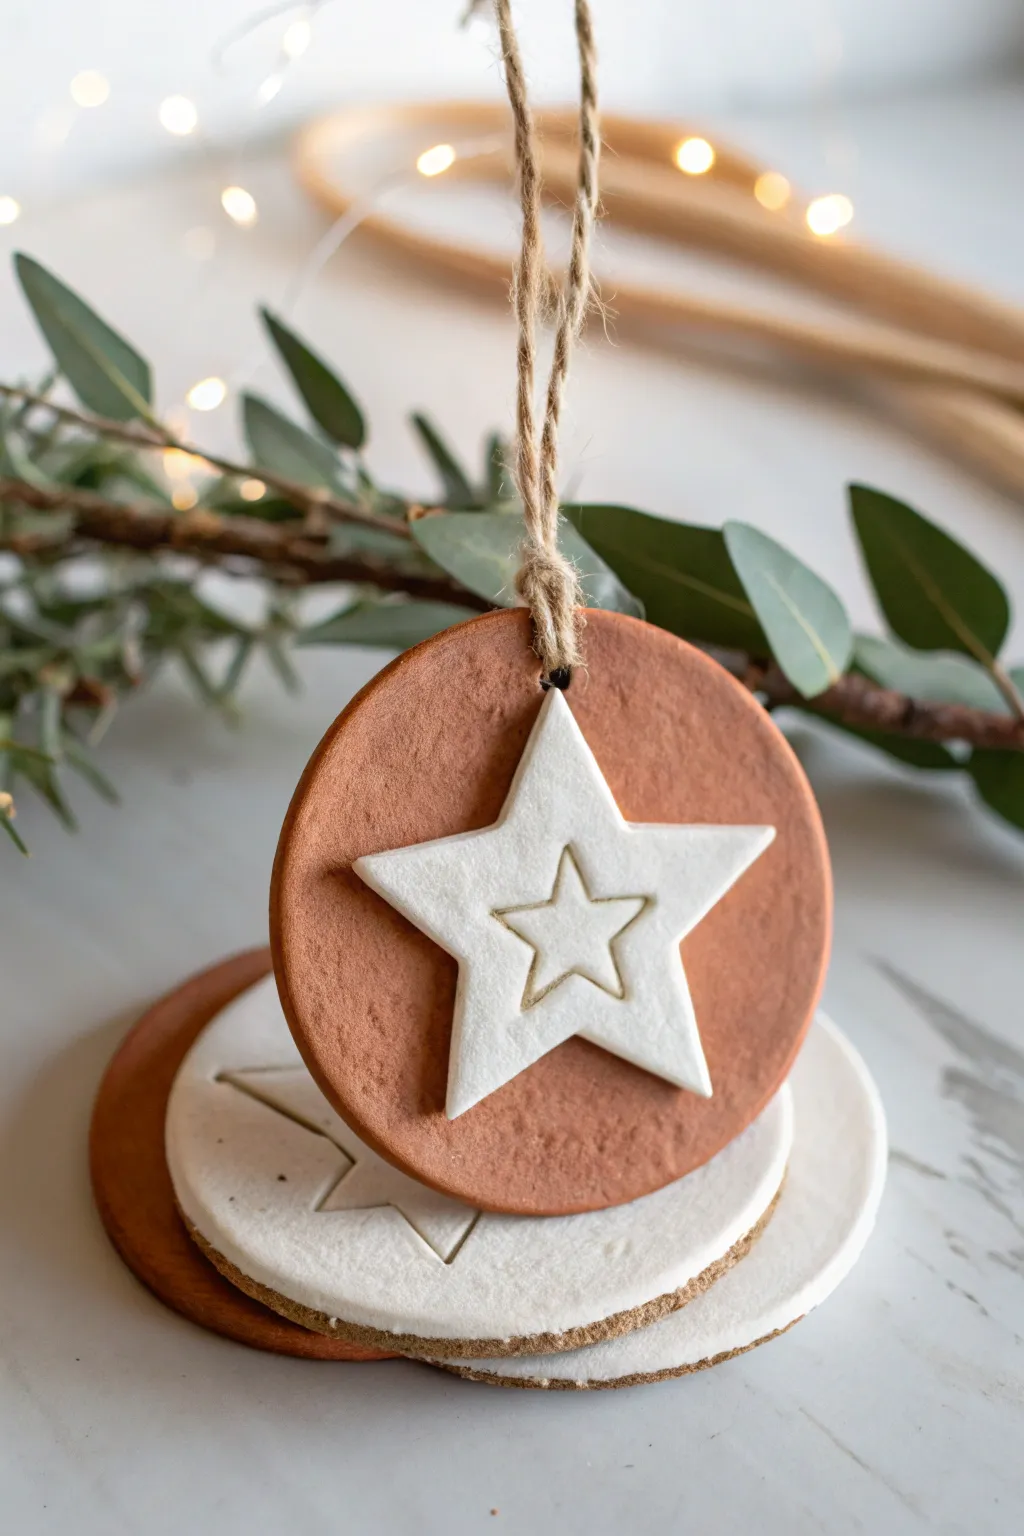
These two-tone ornaments combine the rustic warmth of terracotta with the classic elegance of white clay for a strikingly modern look. By layering simple geometric shapes, you achieve a dimensional shadow effect that looks far more complex than it is.
Detailed Instructions
Materials
- Air-dry clay (terracotta color)
- Air-dry clay (white)
- Circle cookie cutter (approx. 3 inches)
- Star cookie cutter (smaller than circle)
- Smaller star cutter or stamp (for impression)
- Rolling pin
- Parchment paper or canvas mat
- Water in a small cup
- Small paintbrush
- Jute twine
- Toothpick or straw
- Fine-grit sandpaper (optional)
- Matte sealant spray (optional)
Step 1: Preparing the Base
-
Roll the terracotta clay:
Begin by taking a handful of the terracotta-colored clay and kneading it briefly to warm it up. Roll it out on parchment paper until it is an even thickness, roughly 1/4 inch thick. -
Cut the circles:
Press your large circle cookie cutter firmly into the rolled terracotta clay. Wiggle it slightly to ensure a clean cut, then lift the cutter. Repeat for as many ornaments as you plan to make. -
Create the hanging hole:
While the clay is still fresh, use a straw or a tool to punch a hole near the top edge of each circle. Make sure the hole isn’t too close to the edge to prevent tearing later. -
Smooth the edges:
Dip your finger in a little water and gently run it around the circumference of your circles to smooth down any rough clay burrs left by the cutter.
Step 2: Creating the Star Layer
-
Roll the white clay:
Clean your rolling pin or use a fresh sheet of parchment. Roll out the white clay slightly thinner than your base, aiming for about 1/8 inch thickness. -
Cut the stars:
Using your medium-sized star cutter, cut out shapes from the white clay. Carefully remove the excess clay from around the star shapes. -
Add the inner detail:
Take the smallest star cutter or stamp and gently press it into the center of your white star cutouts. Do not cut all the way through; just apply enough pressure to leave a clear indentation. -
Score the backs:
Flip the white stars over gently. Use a needle tool or toothpick to scratch a cross-hatch pattern onto the back. Do the same to the center of the terracotta circles where the star will sit. This creates ‘tooth’ for a better bond.
Cracking Issues?
If cracks appear while drying, the clay likely dried too fast. Repair small fissures by rubbing a paste of clay and water into the crack with your finger.
Step 3: Assembly and Finish
-
Apply slip:
Create a simple ‘slip’ by mixing a tiny bit of clay with water until it’s a paste, or just brush plain water onto the scored area of the terracotta circle. -
Attach the star:
Place the white star directly onto the damp center of the terracotta circle. I usually press down very gently in the center to secure it without squashing the star shape. -
Dry properly:
Move the assembled ornaments to a wire rack or a fresh sheet of parchment. Let them dry for at least 24-48 hours. Turn them over halfway through the drying process to prevent curling. -
Sand imperfections:
Once fully cured and hard, check the edges. If there are any sharp spots, use a fine-grit sandpaper to give them a quick polish. -
Add twine:
Cut a length of jute twine, about 8 inches long. Thread one end through the hole at the top of the ornament. -
Secure the hanger:
Bring the ends of the twine together and tie a simpler overhand knot to close the loop, trimming any excess fray.
Make it Sparkle
For a festive touch, brush a thin layer of gold paint into the impressed inner star indentation after the clay is fully dry.
Now you have a set of handcrafted ornaments ready to add a cozy, natural touch to your holiday decor
Lace-Pressed Vintage Medallions
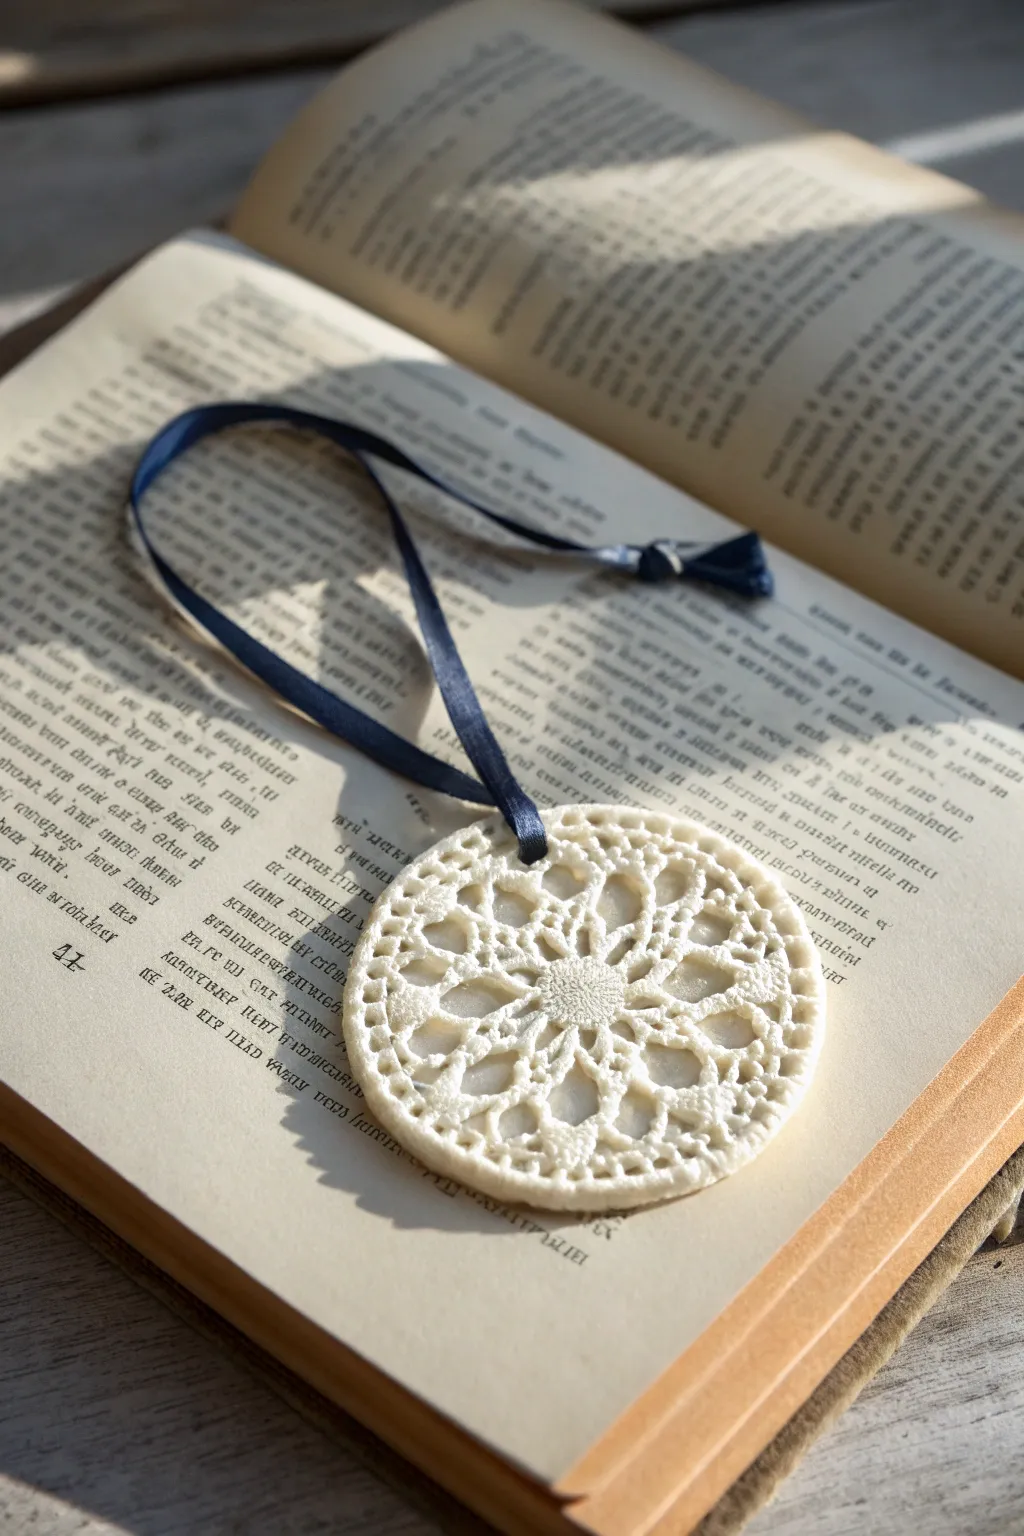
Capture the elegance of antique embroidery with these delicate clay ornaments that look far more intricate than they actually are to make. By pressing vintage lace doilies into soft air-dry clay, you create a timeless texture that resembles fine plasterwork or porcelain.
How-To Guide
Materials
- White polymer clay or air-dry clay
- Rolling pin
- Parchment paper or non-stick silicone mat
- Vintage lace doily (cotton or crochet works best)
- Circular cookie cutter (approx. 3 inches)
- Drinking straw
- Fine grit sandpaper
- Clear matte varnish (optional)
- Navy blue satin ribbon (3mm width)
Step 1: Prepping the Clay
-
Condition the clay:
Begin by kneading your white clay in your hands until it is warm, soft, and pliable. This prevents cracks from forming later. -
Prepare your workspace:
Lay down a sheet of parchment paper or a silicone mat to protect your table and ensure the clay doesn’t stick. -
Roll out the slab:
Place the ball of clay on the mat and use your rolling pin to flatten it. Aim for an even thickness of about 1/4 inch (6mm) to ensure durability. -
Smooth the surface:
Lightly run your fingers or the roller over the clay one last time to remove any fingerprints or imperfections.
Sticky Situation?
If the lace sticks to the clay, dust the clay surface lightly with cornstarch or baby powder before laying down the doily. This acts as a release agent.
Step 2: Creating the Texture
-
Position the lace:
Take your lace doily and lay it carefully over the smoothed clay slab. Choose the most intricate section of the pattern, usually the center, for the best visual impact. -
Press the pattern:
Use the rolling pin to firmly roll over the lace. Apply consistent, significant pressure to ensure the threads leave a deep impression, but don’t roll it paper-thin. -
Check the impression:
Gently lift one corner of the lace to peek underneath. If the pattern looks faint, lay it back down carefully and roll again with slightly more force. -
Reveal the design:
Slowly peel the lace doily off the clay slab to reveal the raised, intricate texture.
Antique Effect
Mix burnt umber acrylic paint with water, brush over the texture, and wipe off immediately. The dark paint stays in the crevices for an aged look.
Step 3: Cutting and Finishing
-
Cut the shape:
Center your circular cookie cutter over the most pleasing part of the embossed design. Press straight down firmly, then give it a tiny wiggle to separate the edges before lifting. -
Create the hanging hole:
Use a drinking straw to punch a hole near the top edge of the circle. Twist the straw slightly as you pull it out to get a clean hole. -
Smooth the edges:
Dip your finger in a tiny bit of water and run it along the cut edge of the circle to smooth out any roughness left by the cutter. -
Dry the ornament:
Place the medallion on a clean flat surface to dry. If using air-dry clay, let it sit for 24-48 hours, flipping it halfway through. -
Sanding:
Once fully cured, use fine-grit sandpaper to gently buff the outer rim of the circle for a professional finish. -
Seal (Optional):
For longevity, brush on a thin layer of clear matte varnish. This protects the pristine white surface from dust over time. -
Add the ribbon:
Cut a length of navy blue satin ribbon, approx. 12 inches long. Thread it through the hole. -
Secure the loop:
Tie the ends of the ribbon into a simple overhand knot or a small bow, creating a loop long enough to hang comfortably.
Hang your new medallion in a sunny spot or slip it into a book as a charming bookmark gift
Constellation Dot-and-Poke Ornaments
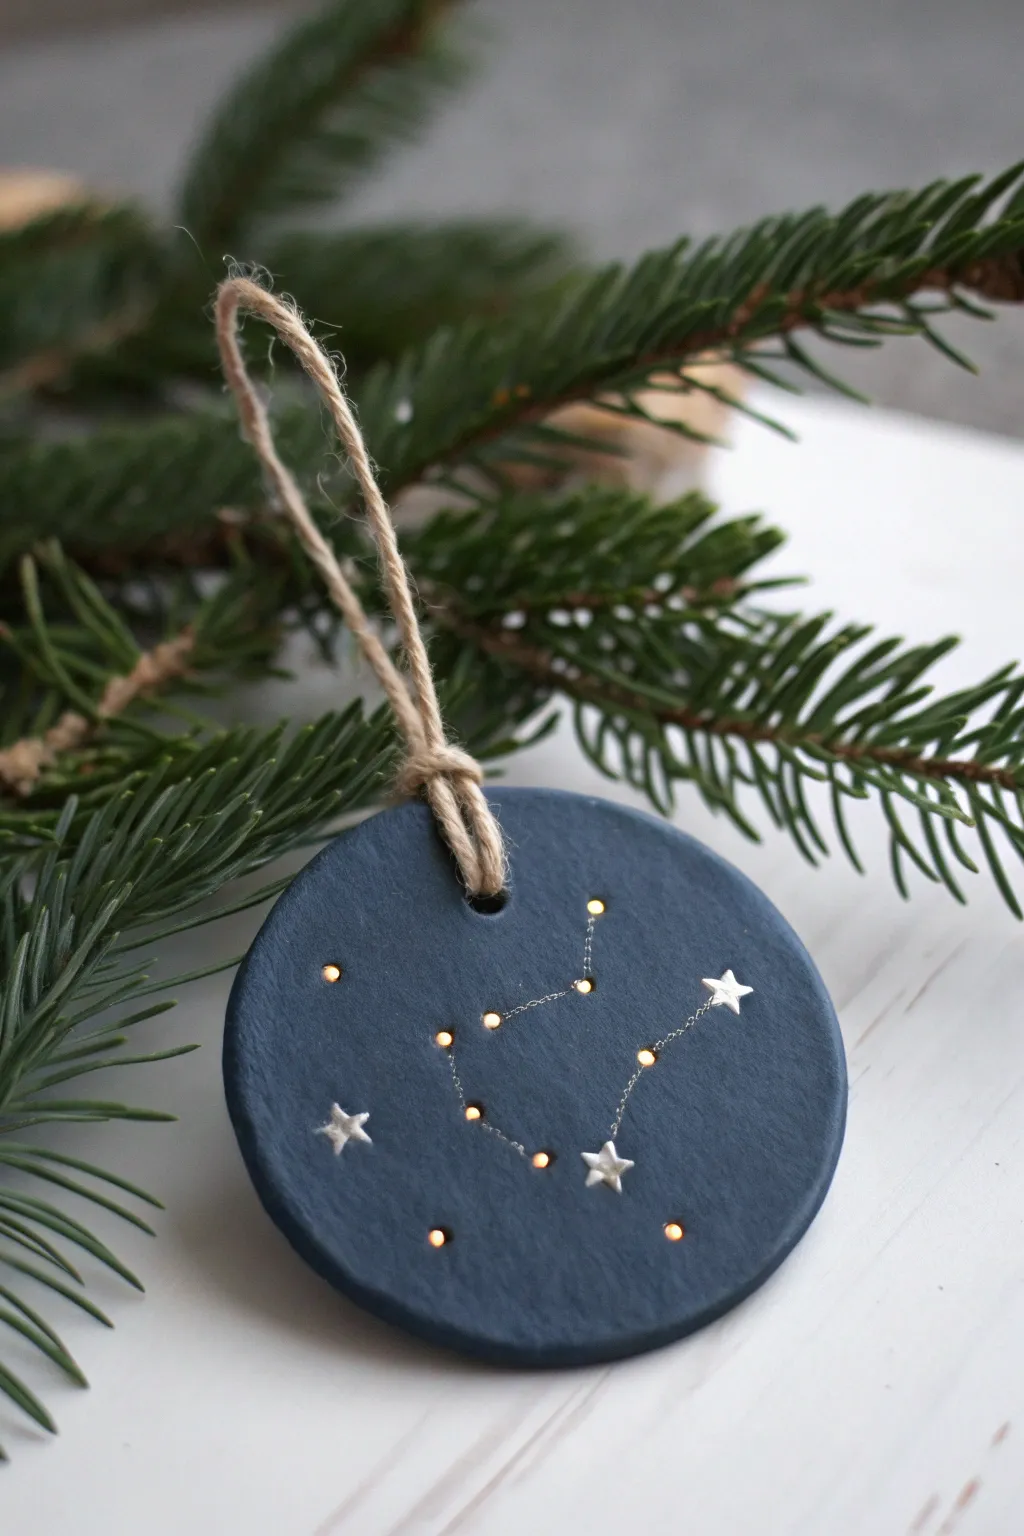
Bring the night sky indoors with these moody, deep blue clay ornaments featuring delicate pin-pricked star patterns. The combination of backlit holes and silver accents creates a magical glowing effect perfect for the holiday season.
Step-by-Step Guide
Materials
- Air-dry clay or polymer clay
- Rolling pin
- Circular cookie cutter or large glass
- Sandpaper (fine grit)
- Deep navy acrylic paint
- Silver metallic paint or paint pen
- Liquid glue or heavy gel medium
- Small star confetti or sequins (silver/white)
- Needle tool, T-pin, or large sewing needle
- Fine liner paintbrush
- Jute twine
- Parchment paper
Step 1: Shaping the Base
-
Prepare the Clay:
Begin by conditioning your clay. If using air-dry clay, knead it briefly to remove large air pockets. If using polymer, work it in your hands until it is pliable and soft. -
Roll Out the Slab:
Place the clay between two sheets of parchment paper to prevent sticking. Roll it out to an even thickness of about 1/4 inch (6mm). You want it thick enough to be sturdy but thin enough for light to potentially pass through the holes. -
Cut the Circle:
Use your circular cookie cutter or the rim of a glass to press a clean circle shape into the clay. Lift away the excess clay around the edges. -
Smooth the Edges:
Dip your finger in a tiny bit of water (for air-dry clay) or baby oil (for polymer) and gently run it around the circumference to smooth out any rough cutting marks. -
Create the Hanging Hole:
Use a straw or a larger dowel to punch a hole near the top edge for the twine. Make sure it’s not too close to the very edge to prevent tearing later.
Step 2: Designing the Stars
-
Mark the Constellation:
Lightly sketch your chosen constellation (like the Big Dipper or Cassiopeia) onto the wet clay surface using a very light touch with a toothpick. Alternatively, lay a printed paper pattern over the clay and poke through the major star points. -
Poke the Star Holes:
Using your needle tool or T-pin, pierce vertically through the clay at your marked star points. Wiggle the tool slightly to widen the holes just enough so paint won’t clog them later. -
Dry or Bake:
If using air-dry clay, let the ornament sit on a wire rack for 24-48 hours until fully hardened, flipping halfway through. If using polymer clay, bake according to the package instructions. -
Sand for Smoothness:
Once fully cured and cool, lightly sand the edges and surface with fine-grit sandpaper to create a professional, flawless finish. Wipe away the dust with a damp cloth.
Blocked Holes?
If paint dries inside your tiny star holes, don’t panic. Wait until fully dry, then use a small hand drill or a heated needle to gently re-pierce the blockage without chipping the paint.
Step 3: Painting and Finishing
-
Apply Base Color:
Paint the entire front, back, and sides with deep navy acrylic paint. I usually apply two thin coats rather than one thick one to avoid clogging the tiny star holes. -
Clear the Punctures:
While the paint is still wet, quickly poke your needle tool back through the holes to ensure they remain open and light can pass through. -
Connect the Dots:
Once the blue paint is dry, use a silver paint pen or a fine liner brush with metallic paint to draw very delicate, dashed or solid lines connecting the star holes, mimicking a constellation map. -
Add Major Stars:
Identify the 2-3 clearly brightest stars in your constellation pattern. Apply a tiny dot of heavy gel medium or strong glue next to these specific holes. -
Place Star Accents:
Carefully press a small silver star sequin or confetti piece onto the glue dots. This adds physical texture and catches the light beautifully. -
Seal the Work:
Determine if you want a matte or glossy finish, and apply a spray sealer to protect the paint. A matte finish gives it a lovely chalkboard-like aesthetic. -
Attach the Hanger:
Cut a length of natural jute twine, fold it in half, and thread the loop through the top hole. Pass the tails through the loop to create a lark’s head knot and tie the ends securely.
Add a Glow
For a magical effect, glue a small battery-operated LED or a patch of yellow vellum paper to the back of the ornament. The light will shine through the pinholes like real stars.
Hang these on your tree near a light source to see your personal galaxy shine
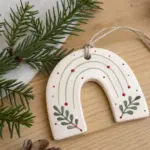
Mini Wreath Ring Ornaments
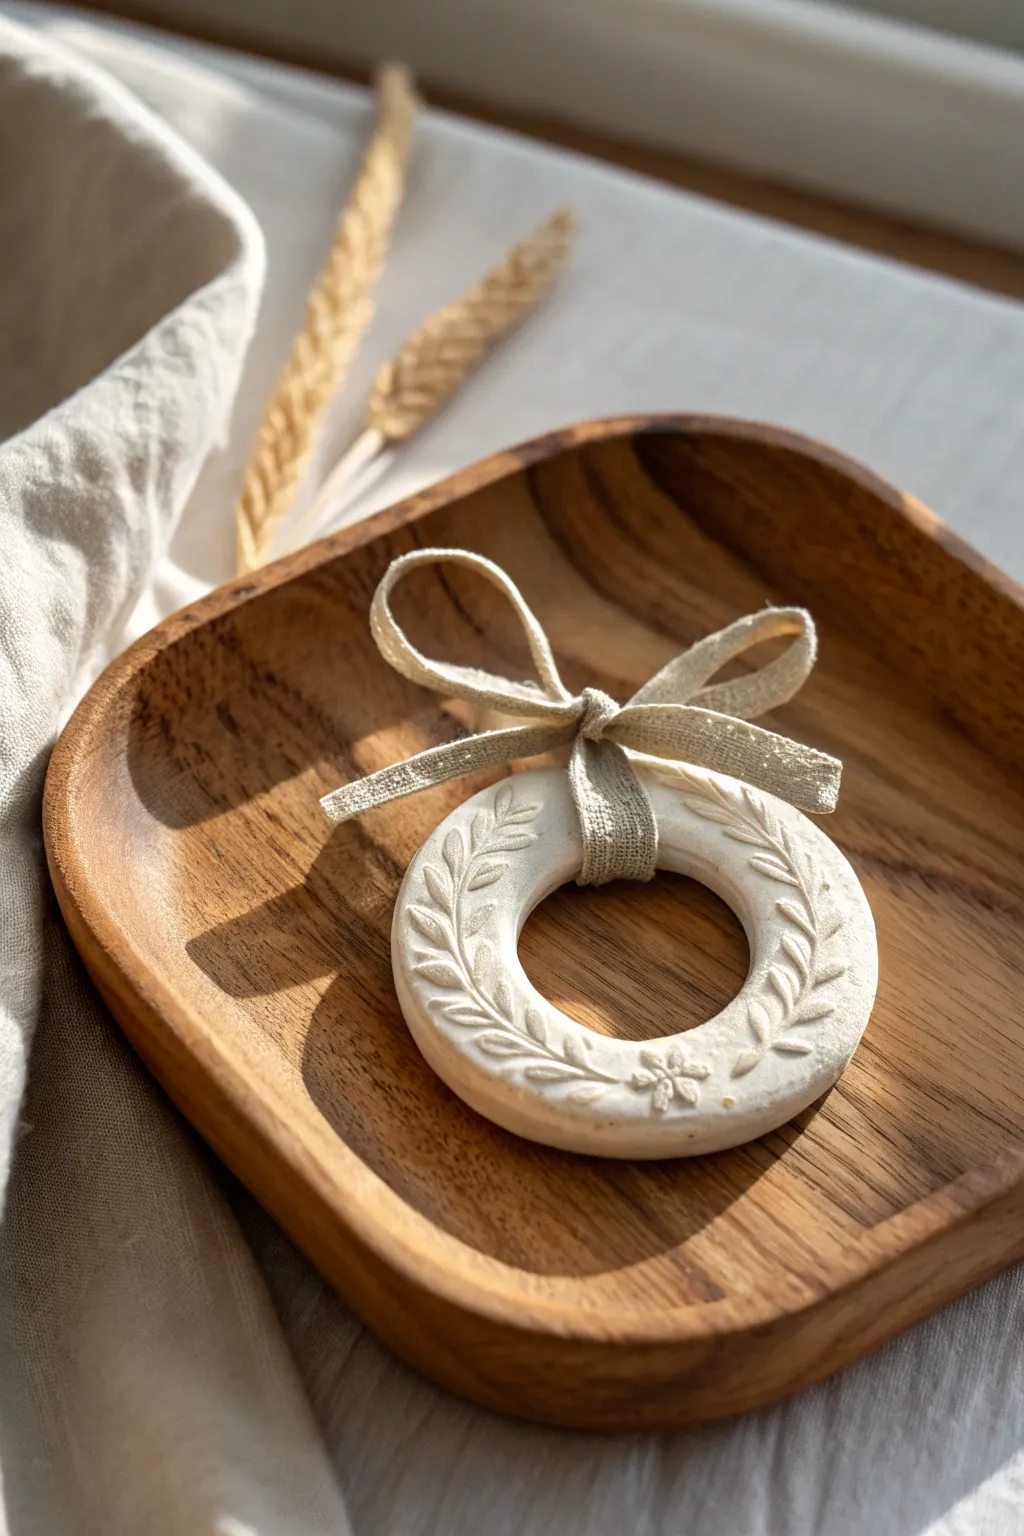
Capture the delicate beauty of nature with these understated wreath ornaments, featuring subtle embossed leaf patterns and a timeless linen bow. Using simple air-dry clay, this project creates a serene, textured decoration perfect for hanging on a tree or gifting as a thoughtful keepsake.
Detailed Instructions
Materials
- White air-dry clay (or polymer clay)
- Small rolling pin
- Two circle cutters (one approx. 3-inch, one approx. 1-inch)
- Botanical stamps or actual small leaves/sprigs
- Fine-grit sandpaper
- Linen or cotton ribbon (beige/natural)
- Parchment paper or silicone mat
- Small sponge (optional)
- Water
- Clear matte varnish (optional)
Step 1: Shaping the Base
-
Prepare your workspace:
Lay down a sheet of parchment paper or a silicone mat to prevent the clay from sticking to your table. -
Condition the clay:
Take a handful of white air-dry clay and knead it in your hands until it becomes warm, pliable, and free of cracks. -
Roll it out:
Using your rolling pin, flatten the clay to an even thickness of about 1/4 inch. Try to keep the surface smooth and level. -
Cut the outer circle:
Press your larger circle cutter firmly into the clay to create the main shape, but don’t remove the excess clay just yet as it helps support the shape during stamping. -
Cut the center hole:
Position the smaller circle cutter exactly in the center of your large circle and press down to create the donut or wreath shape. -
Remove excess clay:
Carefully peel away the excess clay from the outside and remove the center cutout, leaving just your clay ring on the parchment. -
Smooth the edges:
Dip your finger in a tiny bit of water and gently run it along the cut edges to soften any sharp ridges or burrs.
Cracks Appearing?
If small surface cracks appear while drying, mix a tiny amount of fresh clay with water to make a paste (slip) and smooth it into the cracks with your finger.
Step 2: Embossing and Finishing
-
Plan your design:
If using a stamp, align it so the botanical stems curve naturally with the shape of the ring. -
Press the pattern:
Gently but firmly press your stamp or natural leaves into the clay surface. I like to repeat a leafy vine pattern on the left and right sides, meeting at the bottom. -
Add detail:
If your stamp has a small flower element, press a single flower impression at the bottom center where the two leafy vines meet. -
Final smooth:
Check the edges one last time. If the stamping distorted the shape slightly, gently nudge it back into a perfect circle. -
Let it dry:
Allow the ornament to dry completely according to package instructions. This usually takes 24-48 hours. Flip it halfway through to ensure even drying. -
Sand for perfection:
Once bone dry, take fine-grit sandpaper and very lightly buff the edges and surface to remove any texture from the parchment paper or fingerprints. -
Clean surface:
Wipe away any clay dust with a slightly damp sponge or cloth. -
Seal (optional):
For longevity, brush on a coat of clear matte varnish. This protects the bright white color from dust over time.
Add an Antique Wash
Dilute brown acrylic paint with water (1:5 ratio) and brush over the texture. Whip off immediately to leave pigment only in the deep crevices.
Step 3: Ribbon Assembly
-
Cut the ribbon:
Snip a length of natural linen ribbon, approximately 12 inches long. -
Attach the ribbon:
Fold the ribbon in half to find the center, then loop it through the ring ornament at the top. -
Tie the bow:
Tie a secure knot at the top of the ring, then form a standard bow. Adjust the loops so they stand up perky and equal in size. -
Trim ends:
Cut the tails of the ribbon at a slight angle for a polished look.
Hang your beautiful mini wreath in a spot where the light can catch those lovely embossed details
Pattern Transfer Picture Ornaments
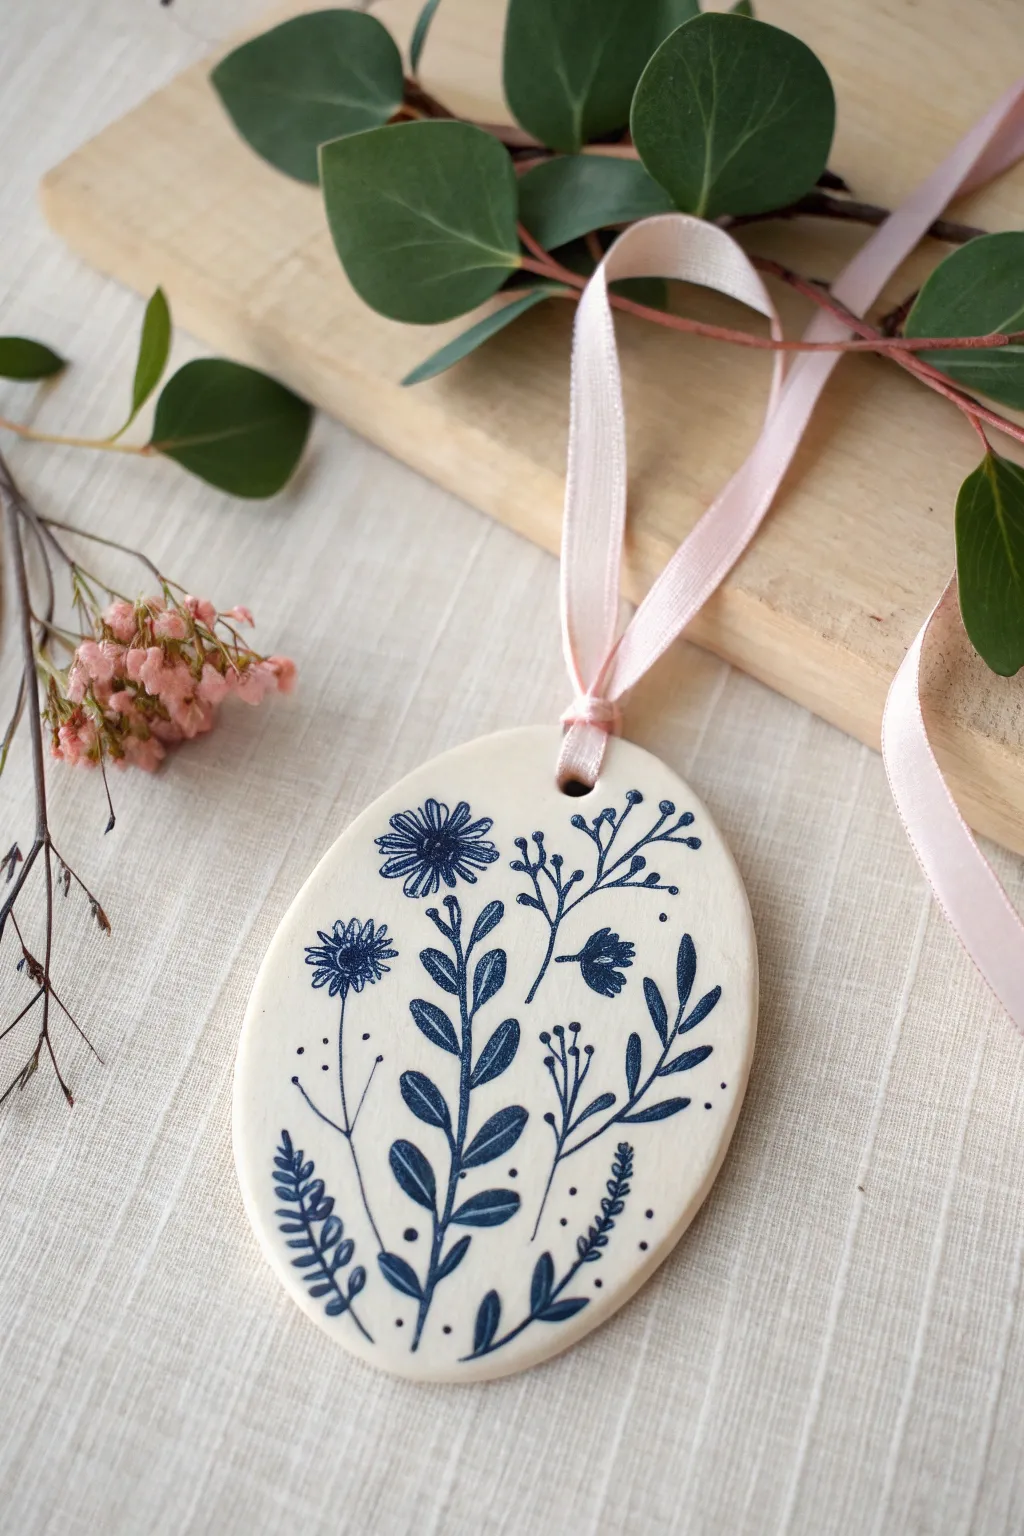
Capture the elegance of classic porcelain with these simple clay ornaments. Using a pattern transfer technique, you can easily apply intricate botanical illustrations in deep indigo blue to smooth white clay for a timeless, handmade keepsake.
Step-by-Step
Materials
- Air-dry clay (white) or polymer clay
- Rolling pin
- Oval cookie cutter (approx. 3-4 inches)
- Laser-printed floral botanical images (mirror image if text is included)
- Transfer medium (e.g., Mod Podge Photo Transfer or dedicated transfer gel)
- Small paintbrush or foam brush
- Sponge and bowl of water
- Drinking straw or small circular cutter (for the hole)
- Fine-grit sandpaper (400 grit or higher)
- Gloss or matte varnish (sealant)
- Pink satin ribbon (1/4 inch width)
Step 1: Preparing the Clay Base
-
Roll the clay:
Begin by conditioning a handful of white clay until it is pliable. Roll it out on a clean, smooth surface or silicone mat until you have an even slab regarding 1/4 inch thick; try to keep the surface as free of fingerprints as possible. -
Cut the shape:
Press your oval cookie cutter firmly into the clay slab. Wiggle it slightly to ensure a clean cut, then lift the cutter. Carefully peel away the excess clay from around your shape. -
Create the hanging hole:
Use a drinking straw or a small circular cutter to punch a hole near the top edge of the oval. Make sure it isn’t too close to the edge to prevent cracking. -
Smooth the edges:
Dip your finger in a tiny bit of water and gently run it along the cut edges of the oval to smooth out any roughness or sharp corners. I prefer to do this now rather than sanding later to keep the dust down. -
Dry completely:
Allow the clay to dry according to the package instructions. For air-dry clay, flip the ornament every few hours to ensure even drying and prevent curling. Wait 24-48 hours until it is bone dry and hard.
Patchy Transfer?
If parts of the image didn’t stick, you likely didn’t use enough medium or trapped an air bubble. Use a fine-tip blue marker to carefully fill in small gaps exclusively.
Step 2: Applying the Transfer
-
Prepare the image:
Cut out your laser-printed floral design, trimming close to the artwork but leaving a small margin. Ensure the size fits comfortably within the borders of your clay oval. -
Apply transfer medium:
Using a brush, apply a generous, even layer of transfer medium directly onto the printed side of the paper. Do not apply it to the clay itself. -
Position the image:
Place the paper image-side down onto the center of the dry clay ornament. Be careful with placement, as you cannot move it once it touches the surface. -
Smooth it out:
Gently smooth the paper down with your fingers or a dry burnishing tool, starting from the center and working outlined. This removes air bubbles and ensures full contact between the ink and the clay. -
Let it cure:
Allow the transfer medium to dry completely. This typically takes 24 hours. Rushing this step is the most common cause of failed transfers, so patience is key.
Gilded Touch
For a luxe upgrade, paint the very edge of the clay oval with liquid gold leaf or a metallic gold paint pen before adding your sealing varnish.
Step 3: Revealing the Design
-
Wet the paper:
Once fully cured, use a damp sponge to wet the back of the paper. Let the water soak in for about 1-2 minutes until the paper backing becomes translucent. -
Rub away paper:
Using the pad of your finger or the soft side of a sponge, gently rub the wet paper in circular motions. The paper fibers will start to roll off, revealing the image underneath. -
Repeat if necessary:
Let the ornament dry briefly you see a hazy white layer, re-wet it and gently rub again. Be very careful not to rub too hard, or you might peel off the blue ink design. -
Sand edges:
Once the image is revealed and the piece is dry, engage in minor touch-ups. Use fine-grit sandpaper to gently smooth the outer rim of the ornament if any rough spots remain. -
Seal the artwork:
Apply a thin coat of clear varnish (matte or gloss depending on your preference) over the entire front face. This protects the transfer and makes the blue ink pop. -
Add the ribbon:
Cut a length of pink satin ribbon, thread it through the top hole, and tie it securely. Your classic botanical ornament is ready to hang.
Hang your beautiful new creation in a prominent spot where the light can catch the delicate floral details
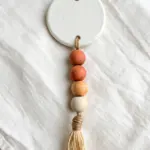
Clay and Wood Bead Tassel Ornaments
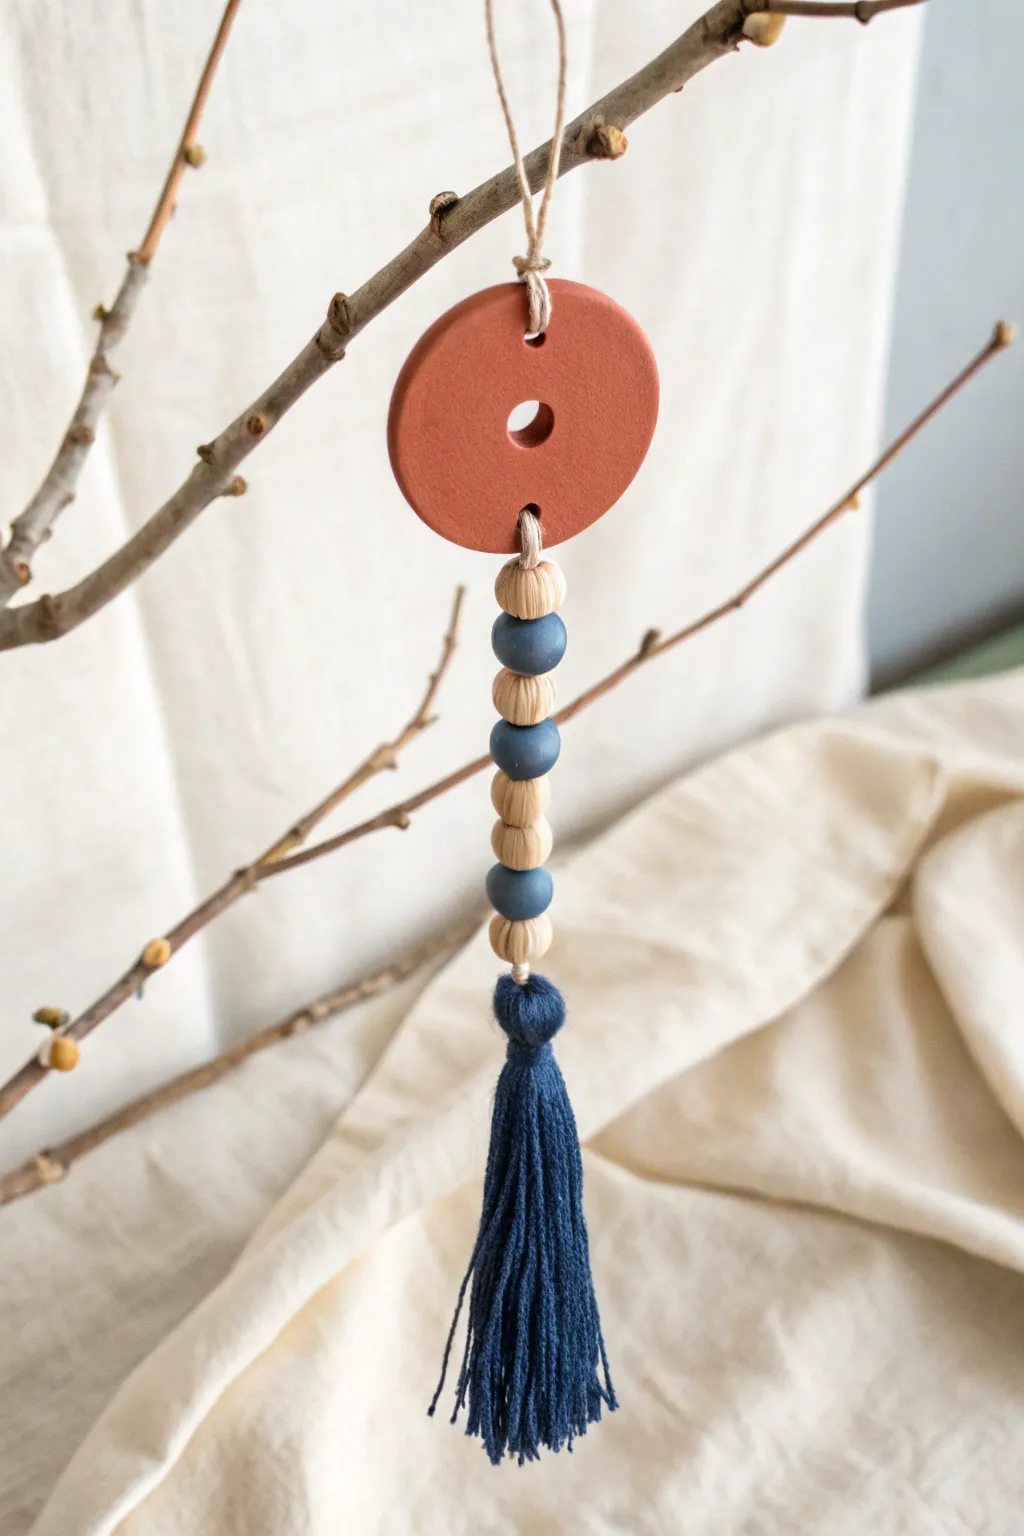
This earthy, textural ornament combines the rustic warmth of terracotta clay with the soft elegance of a deep blue tassel. It’s a perfect modern-boho statement piece that looks intricate but relies on simple beading and clay-cutting techniques.
Step-by-Step Tutorial
Materials
- Terracotta-colored polymer clay (or air-dry clay painted terracotta)
- Small rolling pin or acrylic roller
- Circle cookie cutter (approx. 2-2.5 inches)
- Small circular cutter (approx. 0.25 inch) or a straw
- Toothpick or needle tool
- Jute twine or thin hemp cord
- Dark blue embroidery floss or thin yarn
- 4 small natural wood beads (unfinished)
- 3 small matte blue beads (sized to match wood beads)
- Scissors
- Baking sheet and parchment paper (if using polymer clay)
- Small piece of cardboard (3-4 inches wide) for tassel making
Step 1: Creating the Clay Disc
-
Condition the clay:
Start by warming the terracotta polymer clay in your hands, kneading it until it is soft and pliable. -
Roll it out:
Using your acrylic roller, roll the clay out on a flat surface to an even thickness of about 1/4 inch. -
Cut the main shape:
Press your large circle cutter firmly into the clay to create a clean disc shape. -
Add the center hole:
Take your smaller circle cutter (or a stiff straw) and punch a decorative hole directly in the center of the disc. -
Pierce hanging holes:
Use a toothpick or needle tool to carefully poke a hole at the very top of the disc (for the hanger) and one directly opposite at the bottom (for the tassel strand). -
Smooth the edges:
Gently rub your finger along the cut edges of the clay to smooth out any roughness or loose bits before baking. -
Bake the clay:
Place the disc on a parchment-lined baking sheet and bake according to your specific clay package instructions. Let it cool completely.
Clean Cuts
To avoid distorting the circle shape when lifting it off your work surface, try rolling and cutting the clay directly on the parchment paper you plan to bake on.
Step 2: Making the Tassel
-
Wind the floss:
Wrap your dark blue embroidery floss around a piece of cardboard about 20-30 times, depending on how full you want the tassel to be. -
Secure the top:
Cut a separate 6-inch piece of twine or floss. Slide it under the wrapped loop at one end of the cardboard and tie it tightly with a double knot. This will be the top loop of your tassel. -
Cut the bottom:
Slide the yarn off the cardboard and use sharp scissors to cut through all the loops at the bottom end. -
Create the tassel head:
Cut another piece of blue floss. Wrap it tightly around the entire bundle of yarn, about 1/2 inch down from the top knot, to create the ‘head’ of the tassel. Knot it securely and tuck the ends inside. -
Trim evenly:
Holding the tassel by the top loop, trim the bottom fringe so all strands are even and neat.
Textured Touch
Before baking, gently press a piece of lace or a textured fabric onto the clay surface to leave a subtle, imprinted pattern for extra detail.
Step 3: Assembly
-
Attach twine to clay:
Cut a long length of jute twine (about 12 inches). Fold it in half and feed the loop through the bottom hole of your baked clay disc. -
Secure the tassel:
Before tightening the twine loop on the clay, feed the top loop of your blue tassel through it, or simply tie the twine directly to the tassel loop. -
Thread the beads:
Thread both ends of the twine (coming from the bottom of the clay disc) through your beads. I prefer alternating the pattern: natural wood, blue, wood, blue, wood, blue, ending with a final wood bead. -
Connect to tassel:
Tie the ends of the beaded twine securely to the top loop of your tassel. Hide the knot inside the first bead if possible. -
Add the hanger:
Cut a fresh piece of twine (about 8 inches). Thread it through the top hole of the clay disc. -
Finish the loop:
Tie the ends of the top twine together in a knot to create a hanging loop, trimming any excess cord close to the knot.
Hang your new ornament on a branch or in a window to enjoy the cozy texture it adds to your space