Mother’s Day is my favorite excuse to turn a little lump of clay into something meaningful that your Mom will actually use and keep. I pulled together these Mother’s Day gift ideas with clay that feel heartfelt, doable, and extra special once you add that personal touch.
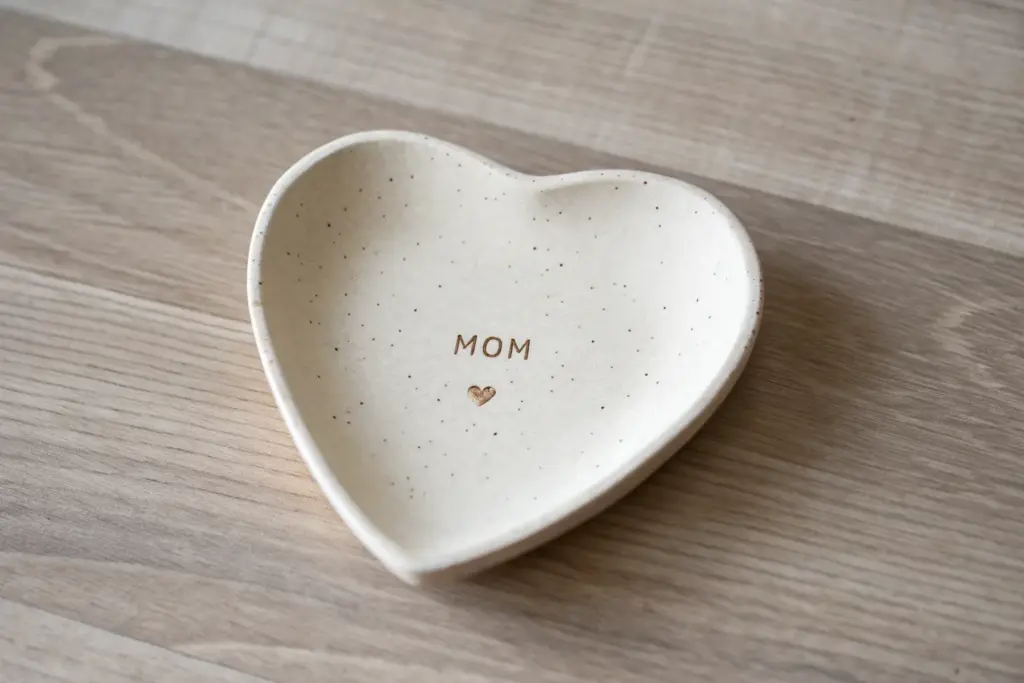
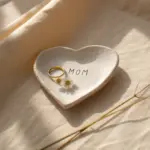
Stamped Mom Trinket Tray

Treat mom to a modern, minimalist jewelry holder that looks effortlessly chic on any nightstand. This two-tone design combines earthy terracotta with a speckled cream finish, centered around a simple, stamped sentiment.
Step-by-Step Tutorial
Materials
- White or cream polymer clay
- Terracotta or reddish-brown polymer clay
- Ground black pepper or dried coffee grounds (for speckling)
- Small alphabet stamps
- Brown acrylic paint
- Rolling pin or acrylic roller
- Round cookie cutter or bowl (approx. 4 inches)
- Dough scraper or craft knife
- Smooth work surface (ceramic tile or glass mat)
- Small oven-safe bowl (for shaping)
- Gloss or satin glaze (optional)
- Fine grit sandpaper
Step 1: Prepping the Clay
-
Condition the base:
Begin by conditioning a block of white or cream polymer clay until it is soft and pliable. Use your hands to warm it up thoroughly. -
Create the speckles:
Flatten the white clay slightly and sprinkle a pinch of ground black pepper or dried used coffee grounds into the center. This creates that trendy ceramic look without needing a kiln. -
Fold and mix:
Fold the clay over the darker flecks and knead it repeatedly until the speckles are evenly distributed throughout the white dough. -
Prepare the accent color:
Condition a smaller amount regarding the terracotta or reddish-brown clay. You’ll need about one-third the amount compared to the white clay.
Step 2: Creating the Two-Tone Slab
-
Roll out the white clay:
Using your acrylic roller, roll the speckled white clay into a sheet roughly 1/4 inch thick. It doesn’t need to be perfectly round yet. -
Cut the accent curve:
Take your craft knife and cut a smooth, curved line through the white clay sheet, removing about one-third of the material on the left side. -
Shape the terracotta:
Roll out your terracotta clay to the exact same thickness as the white sheet. Using the piece of white clay you just removed as a template, cut a matching curved shape from the terracotta clay. -
Join the seams:
Fit the terracotta piece into the space left in the white sheet like a puzzle piece. Gently push the edges together so they touch. -
Smooth the join:
Place a piece of parchment paper over the seam and gently roll over the join to bond the two clays together without distorting the shape too much. I find rubbing the back of a spoon over the seam helps seamless integration.
Seamless Seams
If the seam between colors feels weak after joining, flip the slab over and smear a tiny bit of clay across the back of the line to reinforce the bond.
Step 3: Cutting and Stamping
-
Cut the circle:
Position your round cutter or bowl so that the curve between the colors sits nicely on the left side. Press down firmly to cut your perfect circle. -
Smooth edges:
Lift away the excess clay and use your fingertip to gently run along the cut edge of the circle to smooth out any sharpness or roughness. -
Stamp the text:
Press your alphabet stamps into the center of the white section to spell ‘MOM’. Press firmly enough to leave a clear impression, but not so hard that you warp the clay. -
Shape the dish:
Carefully lift your clay circle and place it inside a shallow, oven-safe bowl. Gently press it into the bottom curve to give the dish its raised edges.
Removing Fingerprints
Before baking, lightly brush the entire surface with a little baby oil or cornstarch. This smooths out accidental fingerprints for a professional look.
Step 4: Finishing Touches
-
Bake the project:
Bake the clay right inside the shaping bowl according to the package instructions (usually 275°F for 15-30 minutes depending on thickness). -
Cool down:
Once baked, remove from the oven and let the dish cool completely before trying to pop it out of the shaping bowl. -
Highlight the text:
Dip a small brush in brown acrylic paint and dab it into the stamped letters. Immediately wipe the surface with a damp paper towel, leaving paint only inside the grooves. -
Seal the piece:
For a protective finish that mimics ceramic glaze, apply a thin coat of satin or gloss varnish over the entire dish and let it dry.
Wrap this lovely handmade dish in tissue paper for a gift that feels both personal and high-end
Fingerprint Pendant Necklace
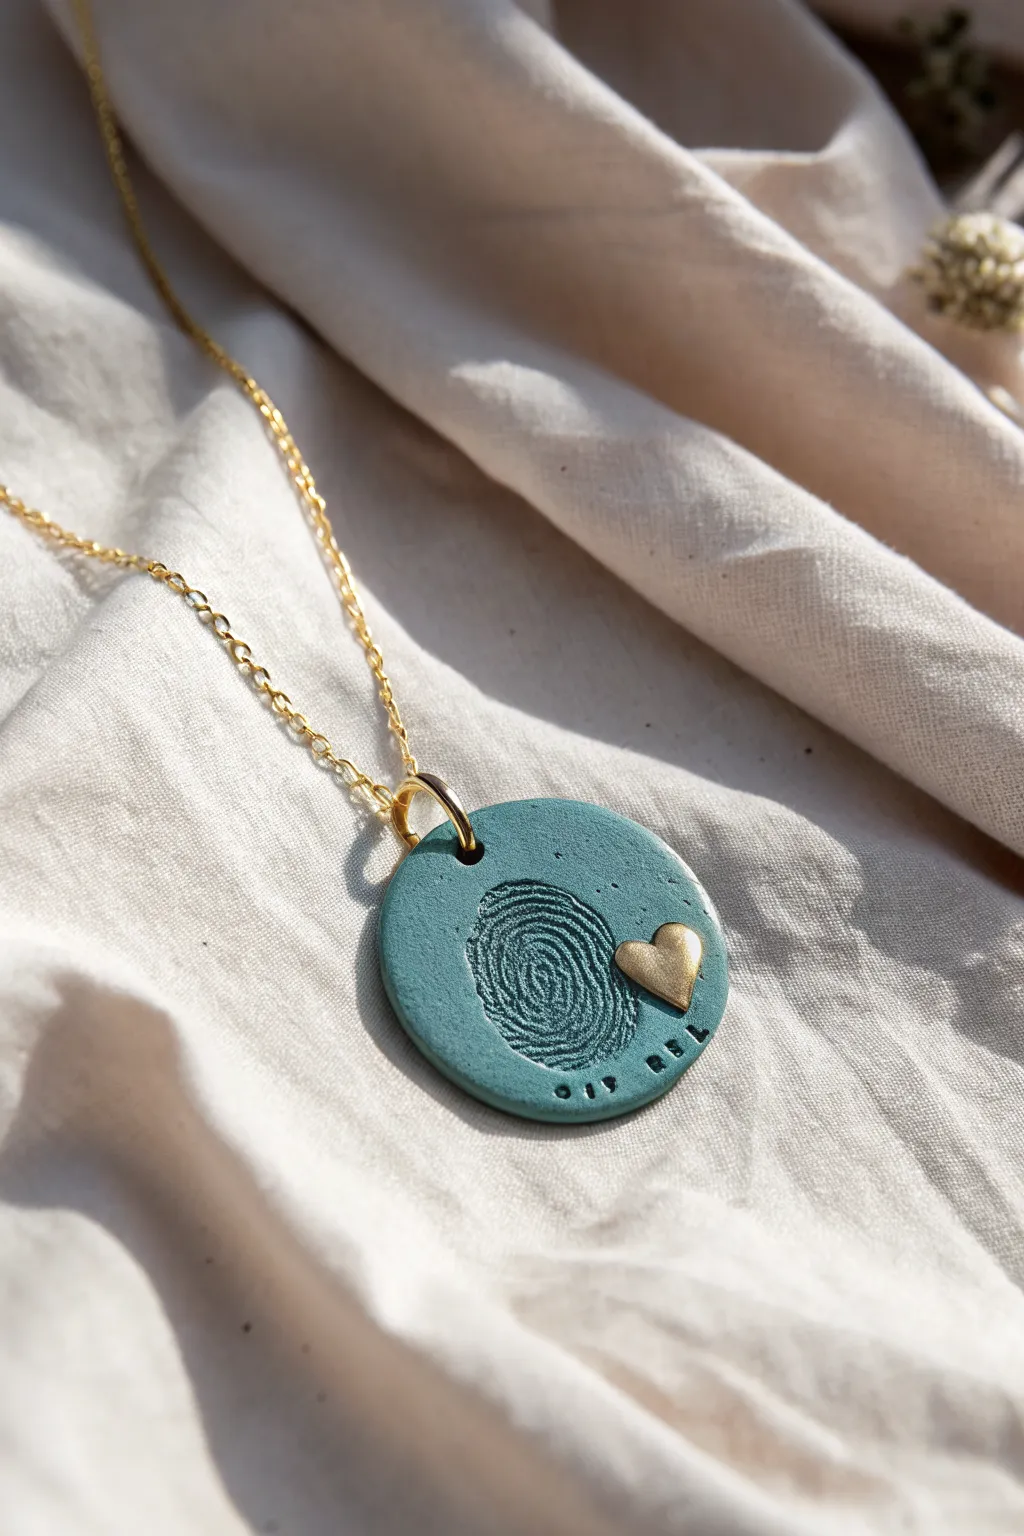
Capture a moment in time with this deeply personal necklace featuring a real fingerprint impression. The soft teal clay contrasts beautifully with a warm gold heart accent, creating a modern yet sentimental piece perfect for Mother’s Day.
Detailed Instructions
Materials
- Teal polymer clay (e.g., Soufflé or Premo)
- Small gold heart charm or stud (metal or oven-safe)
- Small alphabet stamps
- Circle clay cutter (approx. 1-1.5 inches)
- Gold jump ring (large enough for the pendant thickness)
- Gold chain necklace
- Acrylic rolling pin or clay machine
- Clean work surface (tile or glass mat)
- Needle tool or toothpick
- Wet wipes
- Oven and baking tray
- Parchment paper
- Fine grit sandpaper (optional)
Step 1: Prepping and Shaping
-
Condition the clay:
Start by warming the teal polymer clay in your hands. Knead and roll it repeatedly until it is soft, pliable, and free of any air bubbles. -
Roll out the slab:
Using your acrylic roller or pasta machine, flatten the clay into an even sheet. You want it relatively thick, about 4-5mm, so the impression can be deep without piercing through. -
Cut the circle:
Place your circle cutter on the clay and press down firmly to cut your pendant shape. Gently release the clay from the cutter. -
Smooth the edges:
Dip your finger in a tiny bit of water or cornstarch and gently rub the raw edges of the circle to remove any sharpness or stray bits of clay.
Clearer Print
Make the fingerprint stand out more by rubbing a tiny amount of mica powder or cornstarch on the finger before pressing. This prevents sticking and highlights the ridges.
Step 2: Creating the Design
-
Capture the print:
Clean the finger you intend to use to remove oils. Press the finger gently but firmly into the center of the clay circle. Check the impression; if you don’t like it, simply re-roll the clay and try again. -
Embed the heart:
Take your small metal heart charm. Press it firmly into the clay just to the right of the fingerprint impression. Ensure it is embedded flush with the surface so it stays permanent after baking. -
Add the text:
Using your small alphabet stamps, carefully press a name or date along the bottom curve of the circle. Light pressure is usually enough for these tiny letters. -
Create the hanging loop:
Use a needle tool or toothpick to pierce a hole near the top edge of the pendant. Make the hole slightly larger than your jump ring, wiggling the tool gently to widen it. -
Final clean up:
Inspect the piece for any lint or accidental nail marks. Use a baby wipe or a q-tip dipped in rubbing alcohol to lightly smooth away surface imperfections.
Step 3: Baking and Assembly
-
Bake the pendant:
Place the clay piece on a baking sheet lined with parchment paper. Bake according to your specific clay package instructions (usually 275°F/130°C for 30 minutes per 1/4 inch thickness). -
Cool down:
Once the baking time is up, turn off the oven but let the pendant cool inside gradually or remove and let it sit undisturbed until completely cool and hard. -
Sand edges (optional):
If the edges feel rough after baking, lightly sand them with fine-grit wet/dry sandpaper under running water for a polished finish. -
Attach jump ring:
Open your gold jump ring using two pairs of pliers (twist sideways, don’t pull apart). Thread it through the hole you created. -
Thread the chain:
Before closing the jump ring, slip your gold chain into the ring as well. -
Secure the closure:
Use your pliers to twist the jump ring back into a closed position, ensuring the ends meet perfectly flush so the pendant doesn’t slip off.
Add Antique Detail
After baking, rub brown or black acrylic paint into the stamped letters and the fingerprint grooves, then wipe the surface clean to leave the dark color only in the recesses.
This custom heirloom is now ready to be gifted and cherished for years to come


Clay Heart Charm Necklace
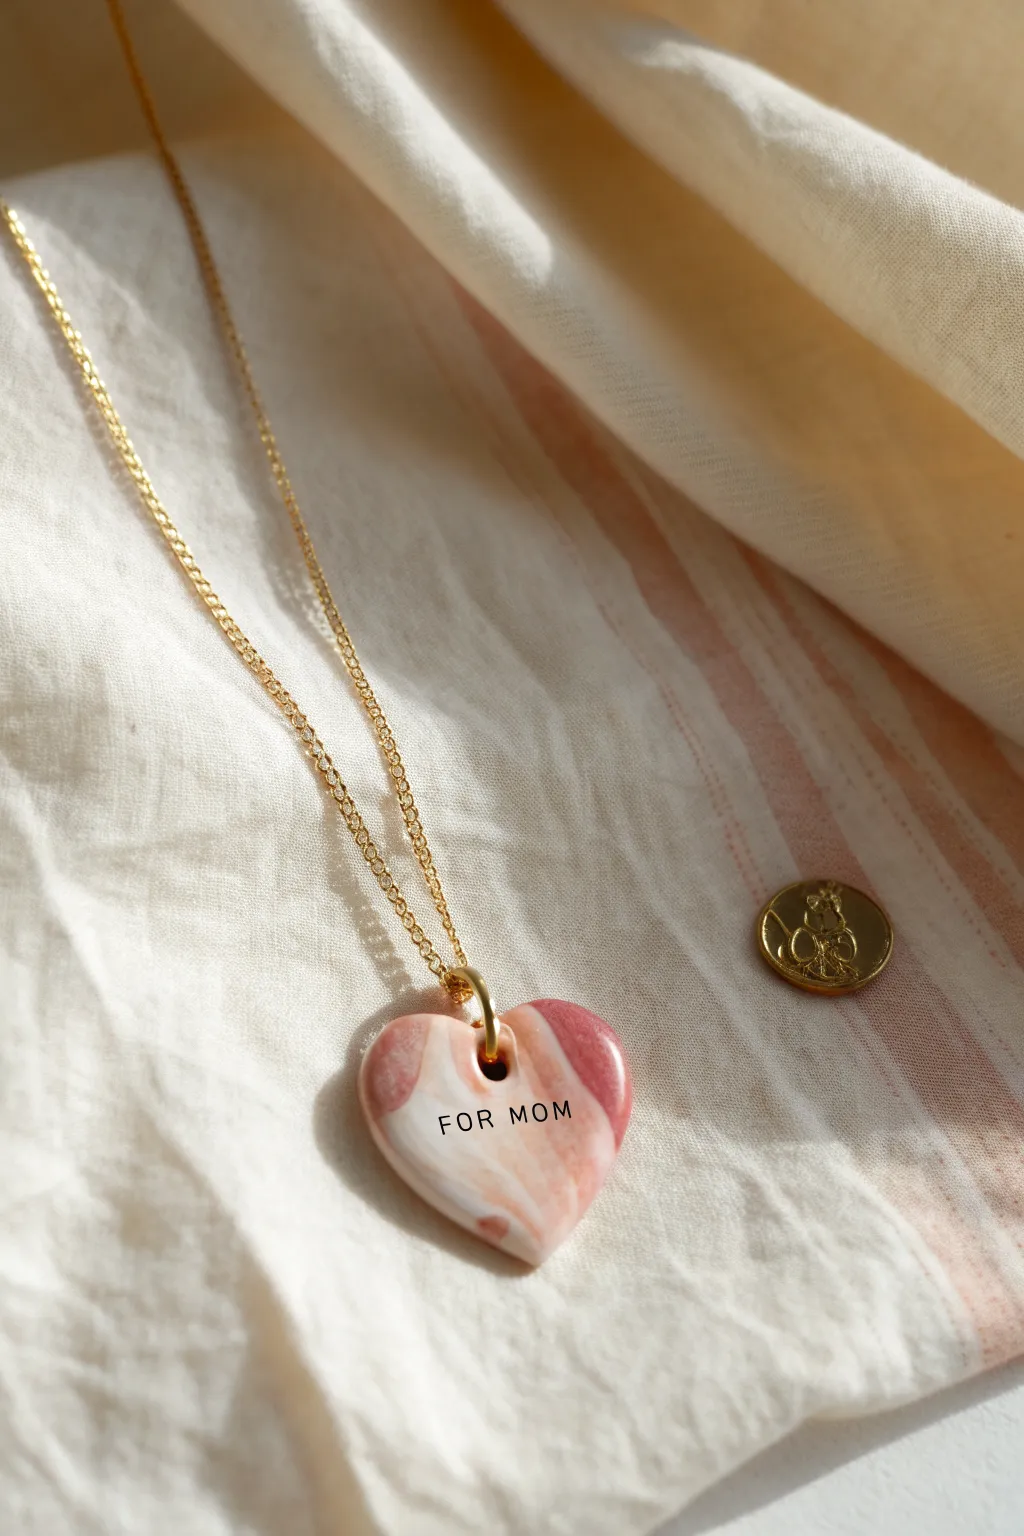
Create a stunning, personalized keepsake for Mom with this elegant marbled heart charm. The swirling pink and white clay mimics natural stone, while the stamped text adds a sweet, heartfelt touch that she can wear close to her heart.
Step-by-Step
Materials
- Polymer clay (white, translucent, dusty rose, and dark pink)
- Acrylic rolling pin or pasta machine
- Heart-shaped clay cutter (approx. 1 inch)
- Small letter stamps
- Gold jump ring (6-8mm)
- Gold chain necklace
- Jewelry pliers
- Clay poking tool or toothpick
- Black acrylic paint
- Paper towel or wet wipe
- Gloss glaze (optional)
- Oven
Step 1: Marbling the Clay
-
Condition the clay:
Start by warming up small amounts of white, translucent, dusty rose, and dark pink clay in your hands until they are soft and pliable. -
Form snakes:
Roll each color into a long, thin snake shape. You want more white and dusty rose than the darker pink to keep the final look soft and airy. -
Twist together:
Gather your clay snakes into a bundle and twist them together tightly to form one thick rope. -
Fold and roll:
Fold the twisted rope in half, then roll it out again. Repeat this twisting, folding, and rolling process 3-4 times. Be careful not to over-mix, or the colors will turn muddy instead of distinct swirls. -
Flatten the slab:
Roll the marbled clay into a smooth slab about 1/4 inch thick using your acrylic roller or pasta machine.
Clean Cuts Pro Tip
Place a sheet of plastic wrap over the clay before using the cutter. This creates a lovely domed, pillow-like edge instantly, saving you time simply sanding later.
Step 2: Shaping and Stamping
-
Cut the heart:
Position your heart cutter over the section of the slab with the most beautiful swirl pattern and press down firmly to cut your shape. -
Smooth edges:
Gently gently rub the edges of the heart with your finger to remove any sharp lines or burrs left by the cutter. -
Stamp the text:
Arrange your letter stamps to spell ‘FOR MOM’. Press them gently into the center of the heart. I prefer to do a test stamp on scrap clay first to ensure the letters are facing the right way. -
Create the hole:
Use a poking tool or toothpick to create a hole at the top center of the heart. Make it large enough to fit your jump ring comfortably, wiggling the tool slightly to widen it. -
Bake:
Place the charm on a parchment-lined baking sheet and bake according to your polymer clay package instructions (usually 275°F for 15-30 minutes). -
Cool down:
Allow the heart to cool completely before handling it further to prevent fingerprints or warping.
Make it Shine
Add flecks of gold leaf into your initial clay bundle before twisting. The metallic flakes will break up the marble pattern and catch the light beautifully.
Step 3: Finishing Touches
-
Fill the letters:
Brush a small amount of black acrylic paint over the stamped letters, ensuring the paint gets into the crevices. -
Wipe excess paint:
Immediately wipe the surface with a damp paper towel or wet wipe. The paint will stay inside the stamped impressions but clear off the smooth surface. -
Glaze (Optional):
For a polished stone look, apply a thin coat of gloss glaze to the front and back of the heart and let it dry. -
Attach jump ring:
Open your gold jump ring using two pairs of pliers. Slide it through the hole in the heart. -
Add the chain:
Before closing the jump ring, slide your gold chain through it. -
Close securely:
Use your pliers to twist the jump ring closed until the ends meet perfectly flush.
Now this beautiful, handmade token of love is ready to be gifted and cherished for years to come


Personalized Clay Keychain Tag
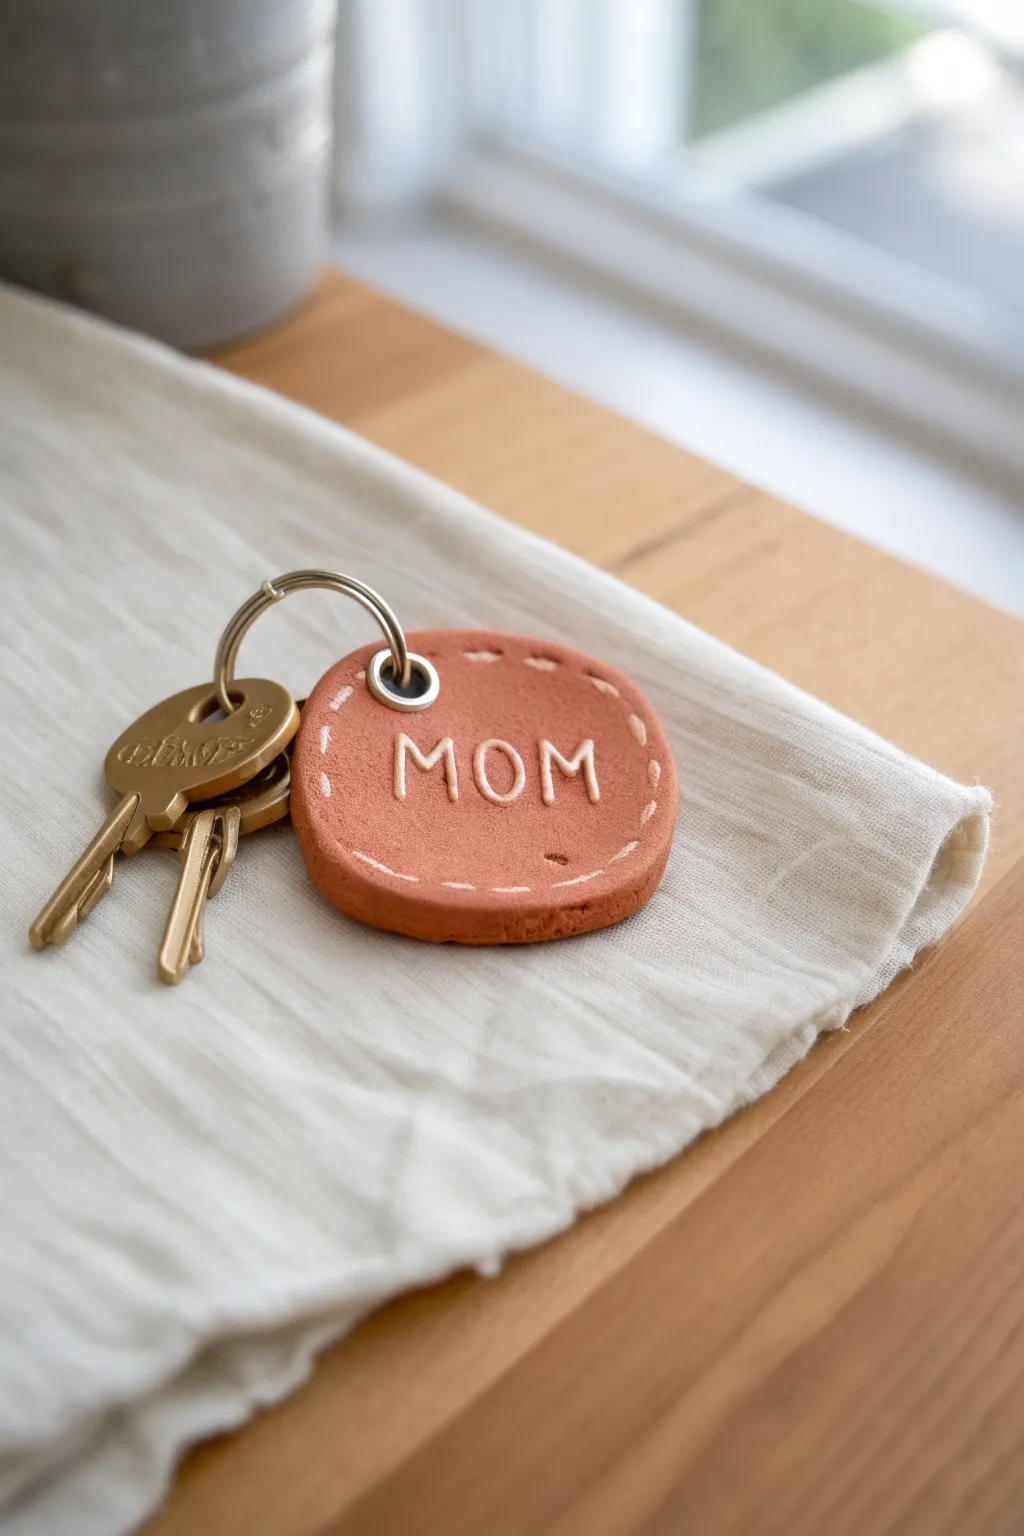
Create a heartfelt, minimalist keepsake with this terracotta clay keychain, featuring playful faux stitching and simple stamped lettering. It’s a tactile and durable gift that Mom can carry with her every day.
Step-by-Step Guide
Materials
- Terracotta-colored polymer clay (or air-dry clay)
- Small metal letter stamps
- Rolling pin or acrylic roller
- Small circle cutter (approx. 2 inches)
- Straw or small metal eyelet for the hole
- White gel pen (fine tip) or white acrylic paint with a tiny brush
- Sandpaper (fine grit)
- Metal jump ring and split keyring
- Parchment paper
- Oven (if using polymer clay)
Step 1: Shaping the Clay
-
Condition the CLay:
Start by warming the terracotta polymer clay in your hands. Knead it thoroughly until it is soft, pliable, and free of cracks. -
Roll it Out:
Place the clay on a sheet of parchment paper. Use your rolling pin to flatten the clay to an even thickness of about 1/4 inch (6mm). You want it thick enough to be durable but not chunky. -
Cut the Shape:
Press your circle cutter firmly into the clay to create a clean disk. If you want a slightly organic look like the photo, you can gently squish the sides a tiny bit after cutting to make it more of a soft pebble shape. -
Smooth the Edges:
Dip your finger in a tiny bit of water (or baby oil for polymer clay) and gently run it around the cut edge to soften any sharp corners. -
Create the Hole:
Use a straw to punch a hole near the top edge. Position it about 1/4 inch from the rim so the clay doesn’t break later. -
Insert Eyelet (Optional):
If you want a polished look, insert a metal eyelet into the hole now. Press the clay gently around it to secure it in place.
Step 2: Detailing and Baking
-
Make the Letter Markings:
Arrange your metal letter stamps to spell ‘MOM’. Press them gently but firmly into the center of the clay disk. Wiggle them slightly to ensure a deep, clear impression. -
Refine the Impression:
Check the letters. If the clay bulged up around the stamps, gently pat it back down with your finger for a smooth surface. -
Add Stitch Indentations:
Using a blunt needle tool or even a toothpick, press small dashes around the perimeter of the disk to simulate stitching marks. Don’t go all the way through. -
Bake the Clay:
Transfer the parchment paper with the clay onto a baking sheet. Bake according to your brand’s package instructions (usually around 275°F for 15-30 minutes per 1/4 inch of thickness). -
Cool Down:
Once baked, remove from the oven and let the piece cool completely. It will harden fully as it cools.
Paint Oopsie?
If you get white paint outside the lines, don’t wipe it while wet! Let it dry completely, then gently scrape the excess away with a toothpick or sand it off.
Step 3: Finishing Touches
-
Sand for Smoothness:
Once cool, grab your fine-grit sandpaper. Lightly buff the edges and surface to remove any fingerprints or imperfections. -
Highlight the Text:
Take your white gel pen or a fine brush dipped in white acrylic paint. Carefully fill in the stamped ‘MOM’ letters. I find doing two thin coats looks cleaner than one thick one. -
Paint the Stitching:
Carefully trace over the small stitch indentations you made earlier with the white ink to make the faux-sewing effect pop against the terracotta color. -
Seal (Optional):
For extra durability, you can brush on a coat of matte polyurethane varnish, though leaving it matte gives it a nice natural stone feel. -
Attach Hardware:
Open a jump ring using pliers and loop it through the hole (or eyelet). Connect this jump ring to your main split keyring. -
Final Check:
Ensure all rings are closed tightly so the tag doesn’t slip off.
Add Texture
Before baking, gently press a piece of coarse sandpaper or denim fabric onto the clay surface to give it a realistic leather-like or stone texture.
Now package this up beautifully for a handmade gift that carries a personal touch

The Complete Guide to Pottery Troubleshooting
Uncover the most common ceramic mistakes—from cracking clay to failed glazes—and learn how to fix them fast.
Ring Cone Holder With Mom Message
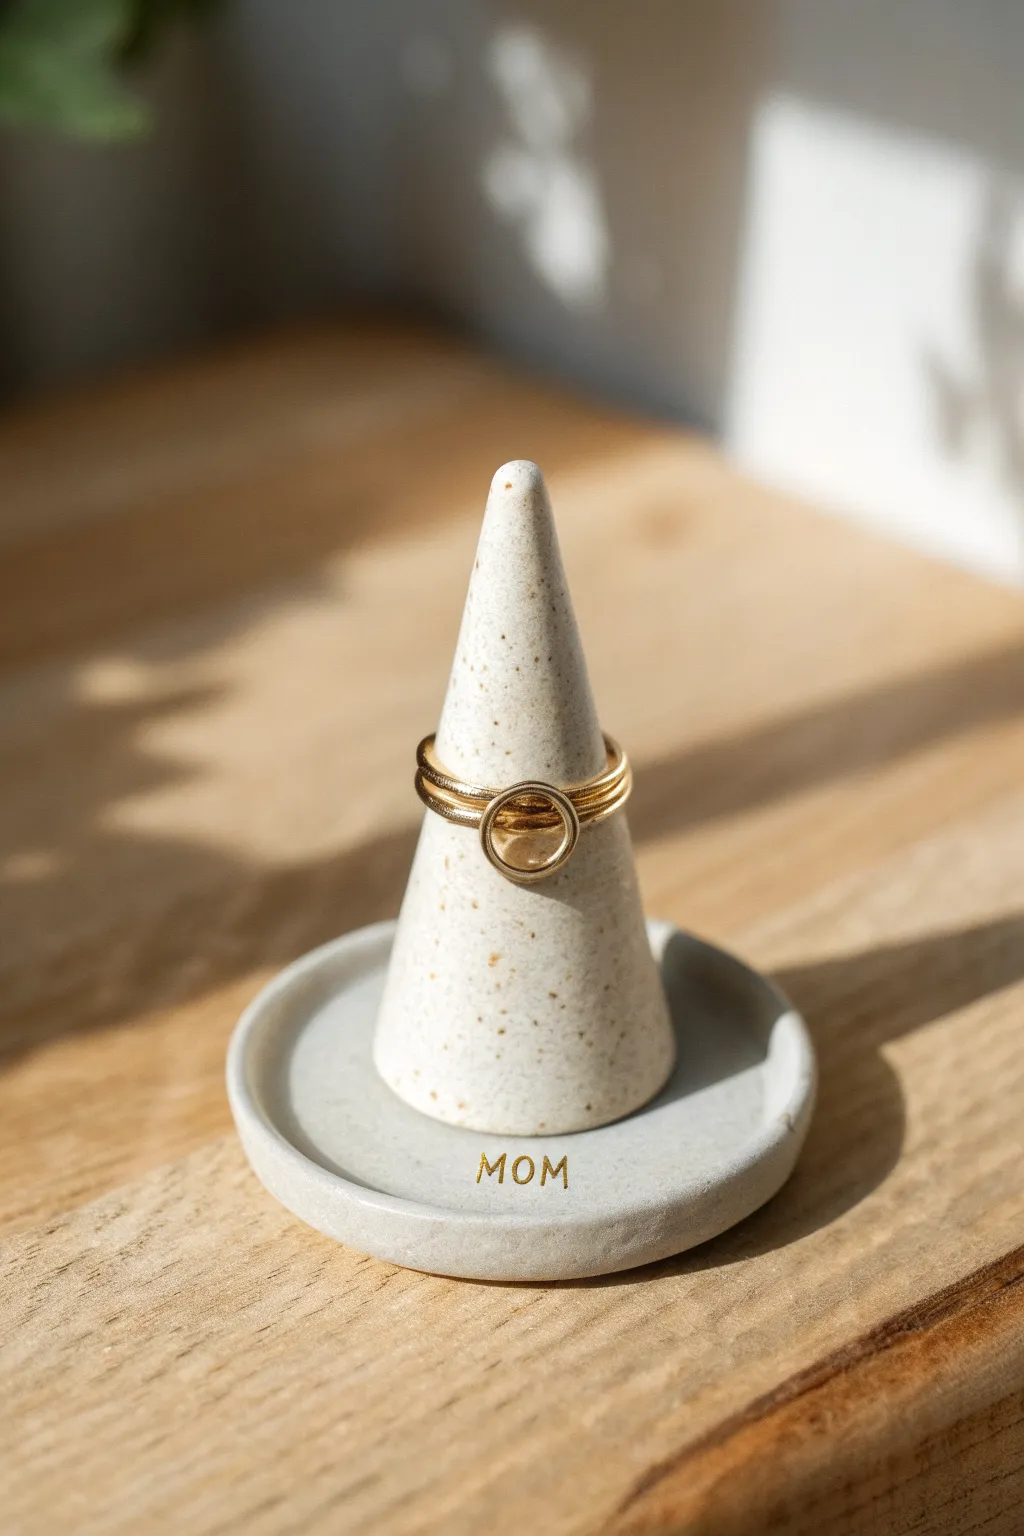
This minimalist jewelry holder combines a sleek ring cone with a catch-all dish for smaller studs or chains. The speckled clay finish gives it a sophisticated stoneware look without needing a kiln, making it a perfect handmade gift for Mom.
Step-by-Step Tutorial
Materials
- Speckled polymer clay (e.g., Fimo Effect Granite or Premo Accents Gray Granite)
- Rolling pin or acrylic roller
- Circle clay cutter (approx. 3-4 inches diameter)
- Small letter stamps
- Gold acrylic paint
- Fine tip paintbrush
- Smooth work surface (ceramic tile or glass)
- Craft knife or blade
- Oven
- Medium grit sandpaper (optional)
- Glaze or varnish (optional)
Step 1: Shaping the Cone
-
Condition the clay:
Begin by taking a chunk of your speckled polymer clay and kneading it in your hands until it becomes soft and pliable. This conditioning step is crucial to prevent cracks later on. -
Form the initial shape:
Roll the conditioned clay into a smooth ball about the size of a walnut to ensure there are no air bubbles trapped inside. -
Roll out the cone:
Place the ball on your work surface and begin rolling it back and forth using the palm of your hand, applying slightly more pressure to one side to create a tapered carrot shape. -
Flatten the base:
Stand the cone upright and firmly press it down onto your work surface to flatten the bottom. Make sure it stands perfectly straight and doesn’t lean. -
Refine the surface:
Gently smooth out any fingerprints or bumps on the cone using your fingertips. I like to lightly roll it on the table one last time to ensure absolute smoothness.
Sticky Stamps?
If clay sticks to your letter stamps, lightly dust the stamp face with cornstarch or baby powder before pressing it into the wet clay.
Step 2: Creating the Dish Base
-
Roll the slab:
Take a larger portion of clay and roll it out into a flat sheet, approximately 1/4 inch thick. Try to keep the thickness consistent throughout. -
Cut the circle:
Use your circle cutter to punch out a perfect round shape from the slab. This will serve as the base dish. -
Smooth the edges:
Run your finger along the cut edge of the circle to soften the sharp angle left by the cutter, creating a more finished, ceramic-like rim. -
Raise the rim:
Gently pinch and lift the outer edge of the circle upwards to create a shallow lip. This ensures small jewelry items won’t roll off. -
Stamp the message:
Press your small letter stamps into the front rim of the dish to spell ‘MOM’. Use gentle, even pressure so the letters are legible but not too deep.
Pro Tip: Liquid Gold
For the brightest metallic shine on the letters, use liquid leaf paint instead of standard metallic acrylics. The luster is unmatched.
Step 3: Assembly and Baking
-
Check the fit:
Place the cone in the center of the dish to ensure they fit well together. You are baking them as separate pieces to make painting easier. -
Bake the pieces:
Place both clay components on a parchment-lined baking sheet. Bake according to your specific clay brand’s package instructions (usually around 275°F or 130°C). -
Let it cool:
Once bakes, allow the pieces to cool completely in the oven with the door slightly ajar. Touching them while hot can leave marks or cause warping.
Step 4: Finishing Touches
-
Sand for smoothness:
If there are any rough spots, lightly sand the baked clay with medium grit sandpaper, wipe away the dust with a damp cloth. -
Paint the letters:
Using a very fine paintbrush, carefully fill in the stamped ‘MOM’ letters with gold acrylic paint. -
Clean up edges:
If paint gets on the surface around the letters, quickly wipe it away with a damp paper towel before it dries, leaving gold only in the recesses. -
Attach the cone:
Apply a dab of strong super glue or E6000 to the bottom of the cone and press it firmly into the center of the dish. -
Final cure:
Allow the glue to cure fully for 24 hours before gift wrapping or placing any jewelry on the holder.
This elegant organizer is now ready to hold treasured keepsakes on a bedside table.
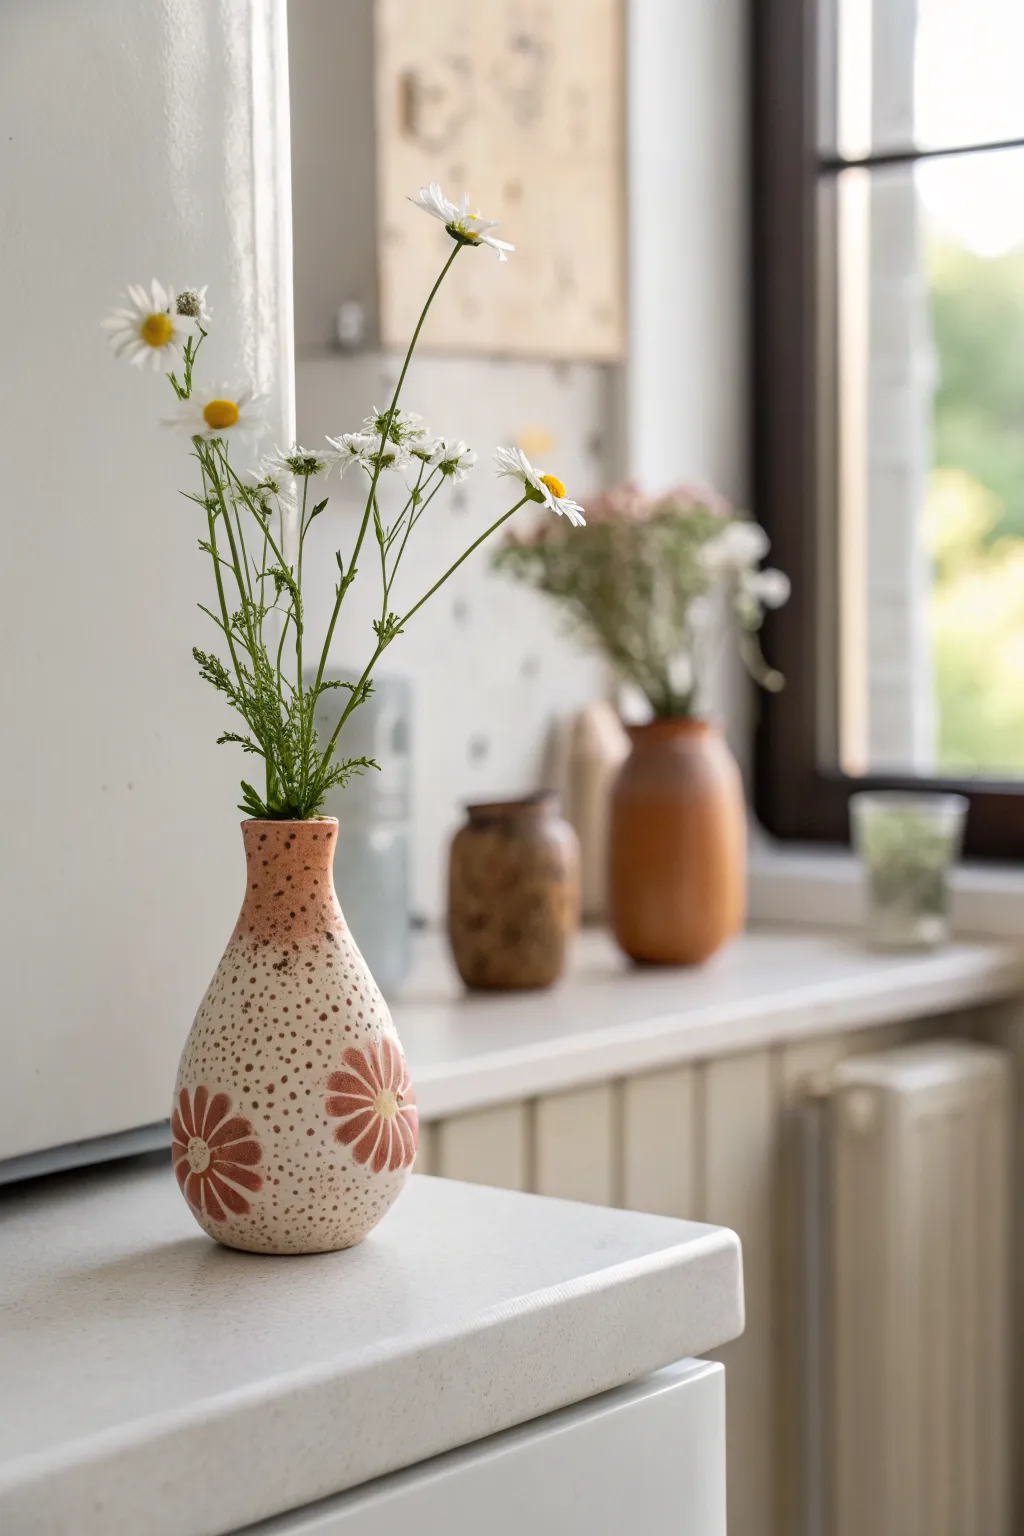
Tiny Bud Vase for Wildflowers
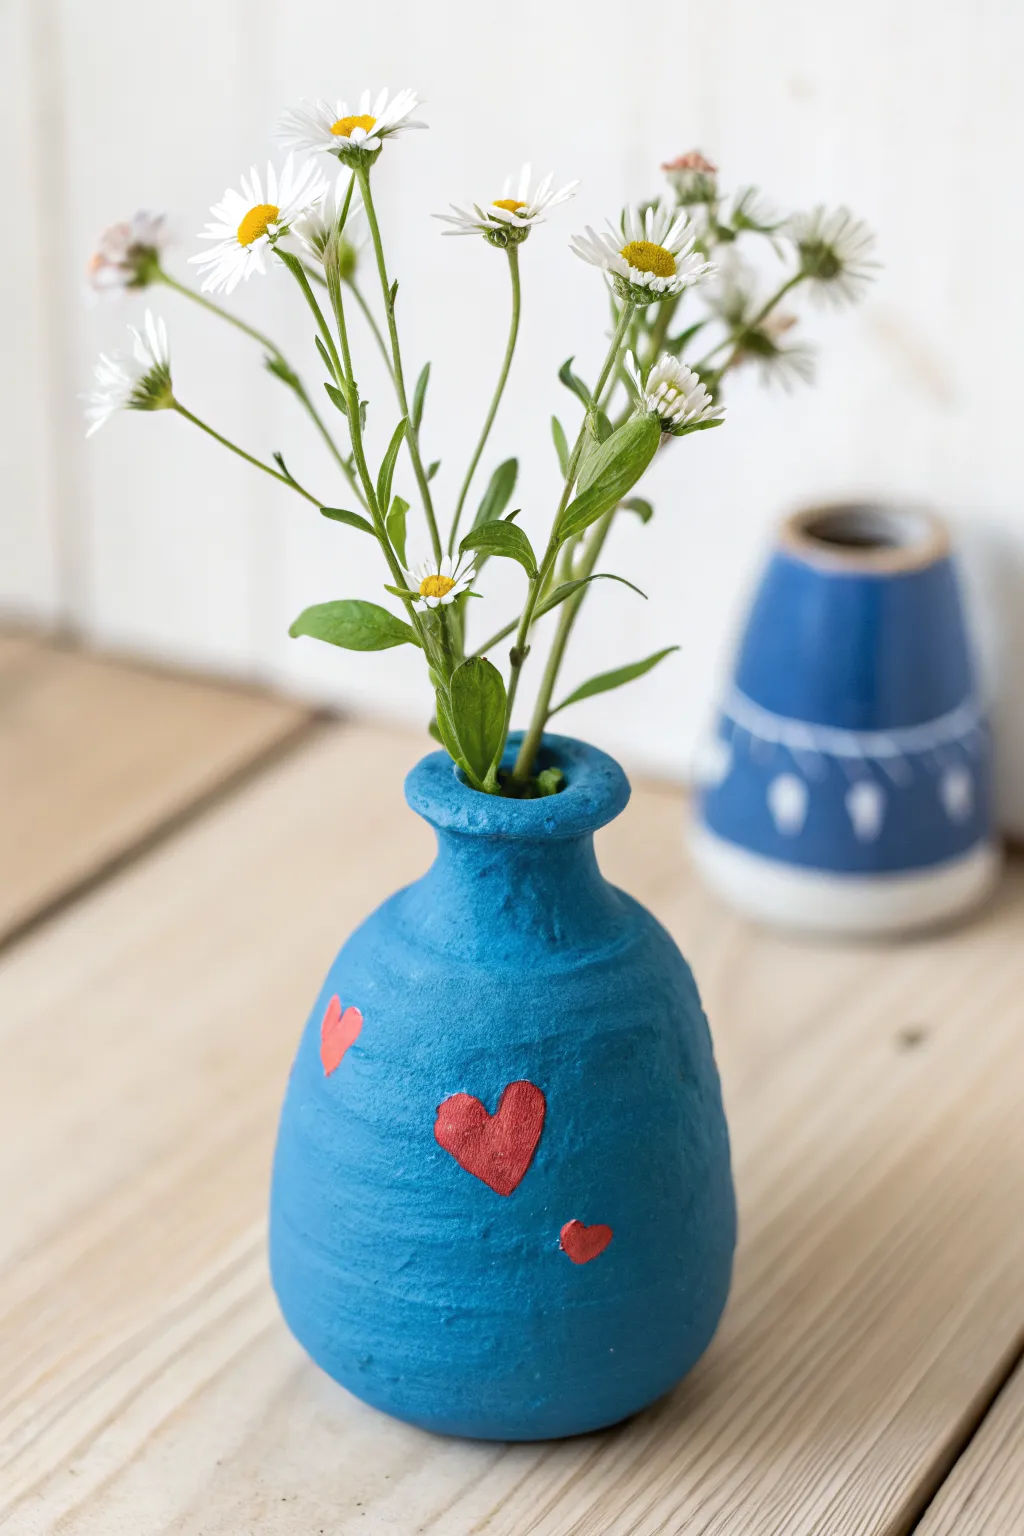
This charming, petite vase is shaped by hand to create a heartfelt home for tiny wildflowers. With its textured blue finish and sweet red heart accents, it brings a pop of cheerful color to any windowsill or bedside table.
Step-by-Step Guide
Materials
- Air-dry clay (white or terracotta)
- Small rolling pin
- Clay sculpting tools or a butter knife
- Small bowl of water
- Sponge
- Fine-grit sandpaper (220 grit)
- Acrylic paints: Bright Blue, Red
- Paintbrushes: Medium flat brush, fine detail round brush
- Matte or satin varnish (optional for sealing)
Step 1: Sculpting the Form
-
Prepare the base:
Start with a ball of clay roughly the size of a tangerine. Squeeze and knead it in your hands to warm it up and remove air bubbles, ensuring a smooth, pliable texture. -
Start the pinch pot:
Push your thumb into the center of the ball, stopping about a half-inch from the bottom. This will establish the interior depth of your vase. -
Pinch the walls:
Gently pinch the clay between your thumb and fingers, rotating the ball as you go. Focus on drawing the clay upwards and outwards to create a rounded, bulbous belly shape. -
Draft the neck:
Once the body has a nice volume, begin gently squeezing the upper portion inward. You are guiding the clay to narrow significantly, forming the bottleneck. -
Form the rim:
At the very top of the neck, pinch the edge slightly outward to create a small flared lip. This gives the vase a finished, classic pottery silhouette. -
Smooth the surface:
Dip your finger in a little water and run it over the exterior. You want to smooth out major cracks, but don’t worry about making it perfectly glass-smooth; the hand-built texture adds character. -
Enhance texture:
I like to take a slightly damp sponge and wipe it horizontally around the body of the vase. This creates subtle, organic rings that will look lovely once painted. -
Check stability:
Gently tap the vase on your table to flatten the bottom. Make sure it stands upright without wobbling before you set it aside. -
Dry completely:
Let the vase dry for 24–48 hours away from direct sunlight. The clay will lighten in color and feel hard to the touch when it is ready.
Cracks happen
If small cracks appear while drying, don’t panic. Simply mix a tiny bit of fresh clay with water to make a paste (slip) and fill them in before painting.
Step 2: Painting & Finishing
-
Refine the surface:
Once fully dry, use fine-grit sandpaper to briefly gently buff away any sharp peaks or unintended rough spots on the rim. -
Apply base coat:
Load your medium flat brush with bright blue acrylic paint. Apply a generous coat over the entire exterior and just inside the rim. -
Build texture with paint:
When painting, use horizontal strokes that follow the curve of the vase. Because clay is porous, a second coat is usually needed for that rich, opaque blue. -
Paint the hearts:
Switch to your fine detail brush and red paint. Carefully paint a large heart near the center of the vase’s belly. -
Add floating hearts:
Paint two or three smaller hearts scattered around the main one. Varying their angles slightly makes them look like they are floating joyfully. -
Dry the details:
Allow the paint to dry completely. If the red looks translucent against the blue background, dab a second layer of red over the heart shapes. -
Seal the work:
Apply a coat of matte or satin varnish to protect the paint. Since this is air-dry clay, remember that the vase is for dried flowers only unless you insert a small glass vial or seal the inside with waterproof resin.
Waterproof it
Air-dry clay dissolves in water! To hold real fresh flowers, hide a small plastic test tube or essential oil bottle inside the neck to hold the water.
Now your tiny masterpiece is ready to hold a sweet posy of wildflowers for Mom


What Really Happens Inside the Kiln
Learn how time and temperature work together inside the kiln to transform clay into durable ceramic.
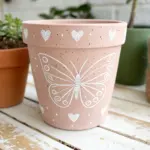
Mini Planter With Sweet Words
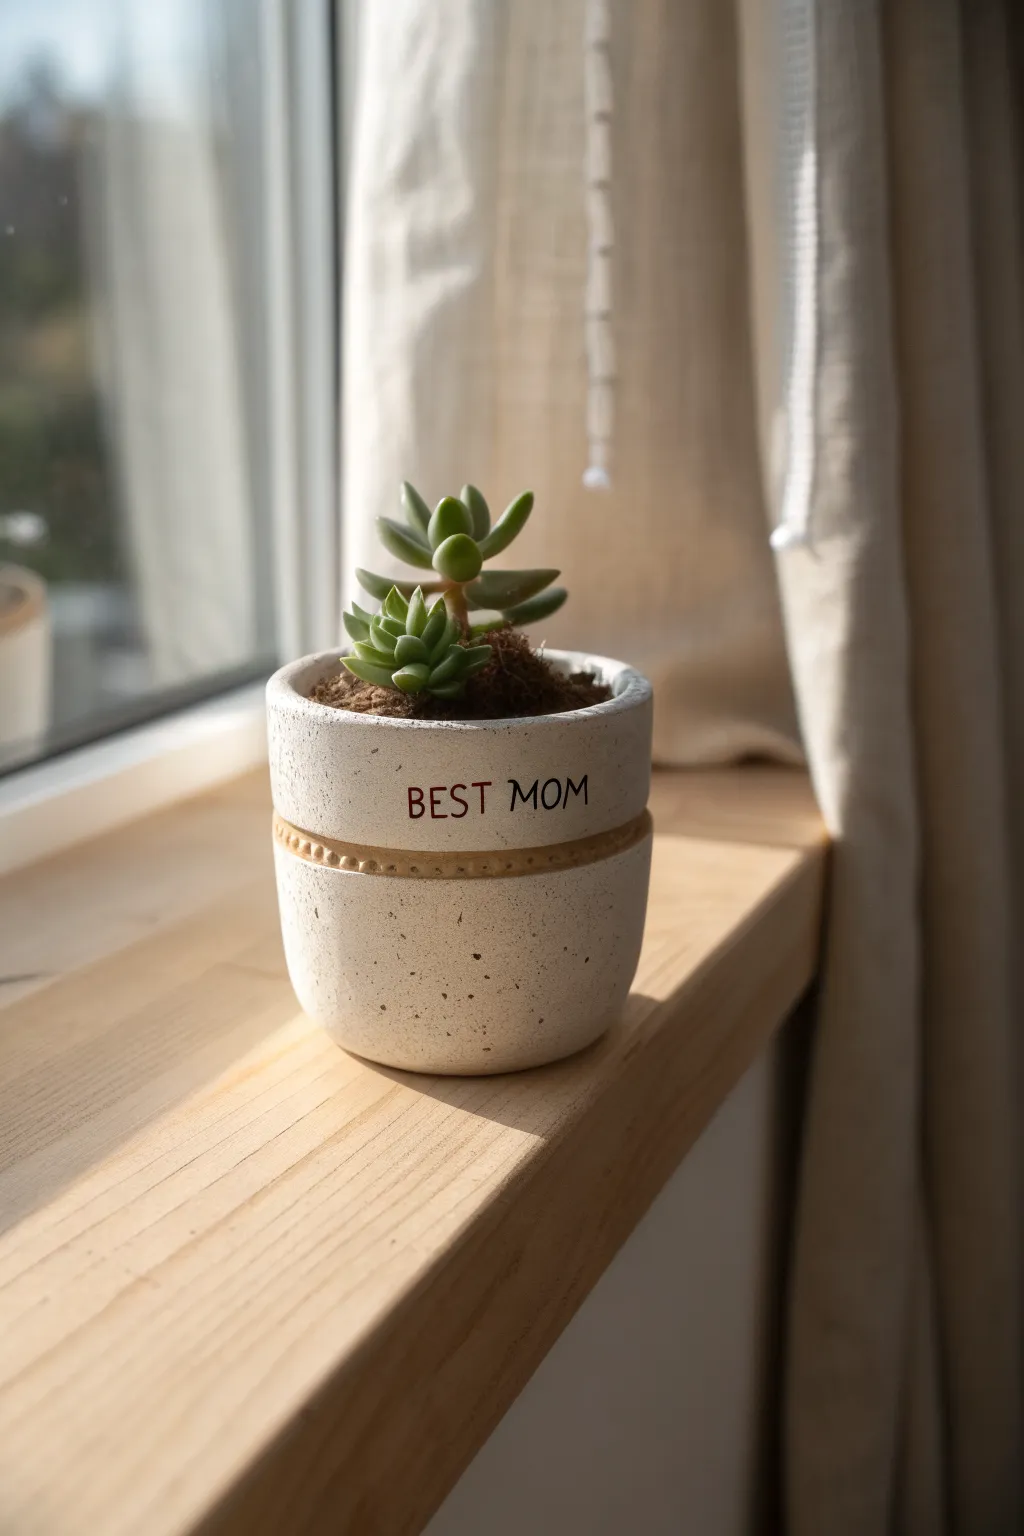
Create a heartfelt, modern planter that looks like high-end speckled ceramic using simple clay techniques. This sweet little pot features stamped lettering and a textured accent band, making it the perfect home for a tiny succulent on Mom’s windowsill.
Step-by-Step Tutorial
Materials
- White polymer clay or air-dry clay
- Coarse black pepper or dried coffee grounds (for speckles)
- Rolling pin
- Circle cookie cutter (approx. 3-inch diameter)
- Small letter stamp set
- Texture tool or blunt toothpick
- Craft knife
- Small bowl or cylinder (to use as a mold)
- Brown acrylic paint
- Small paintbrush
- Paper towel
- Polymer clay adhesive (Bake & Bond) or slip
- Matte varnish (optional)
Step 1: Preparing the Clay
-
Mix the faux stone:
Begin by conditioning your white clay until it is soft and pliable. To achieve that trendy speckled pottery look without buying special clay, knead in a small pinch of coarse black pepper or dried coffee grounds until they are evenly distributed. -
Roll the base slab:
Roll out a portion of your speckled clay to about 1/4 inch thickness. This needs to be sturdy enough to hold the weight of the soil later. -
Cut the base:
Use your circle cookie cutter to punch out a perfect round base for your pot. Set this aside on a piece of parchment paper. -
Create the wall:
Roll out the remaining clay into a long, rectangular strip. The height should be about 2.5 to 3 inches, and the length must be long enough to wrap around the circumference of your circle base with a little overlap.
Clean Lettering Tip
Dust your letter stamps with a tiny bit of cornstarch before pressing them into the clay. This prevents the clay from sticking to the intricate grooves of the letters.
Step 2: Assembling the Pot
-
Add the text:
Before assembling, lay the strip flat. Locate the center area and use your letter stamps to gently press ‘BEST MOM’ into the clay. Don’t press too hard; you just want a clean impression. -
Create the accent band:
Roll a very thin snake of clay. Attach this snake horizontally across the main strip, just below the lettering. I find that lightly scoring the back of the snake helps it adhere better. -
Texture the band:
Using a blunt tool or the back of a paintbrush, press vertical indentations along the thin snake to create a rope-like or beaded texture. -
Form the cylinder:
Carefully wrap the clay strip around your chosen cylinder mold (like a small glass jar wrapped in parchment paper) to help it hold its shape. -
Seal the seam:
Where the two ends of the wall meet, cut through both layers at an angle with your craft knife to create a bevel join. Smooth the seam together with your finger or a clay tool until it disappears. -
Attach the base:
Place the cylinder onto the circle base you cut earlier. Blend the clay from the walls down onto the base on the inside and outside to ensure a water-tight seal. -
Smooth the rim:
Run your finger dipped in a little water (or baby oil for polymer clay) around the top rim to soften any sharp edges.
Troubleshooting Cracks
If you see tiny cracks forming while bending the clay strip, your clay is too dry. Mix in a drop of baby oil or clay softener and knead again before re-rolling.
Step 3: Finishing Touches
-
Initial hardening:
If using polymer clay, bake according to package instructions (usually 275°F for 15-30 minutes). If using air-dry clay, let it dry for 24-48 hours until completely hard. -
Paint the details:
Once cool or dry, dip a small brush into brown acrylic paint. Paint into the ‘BEST MOM’ letters and the textured band. -
Wipe back:
Immediately use a damp paper towel to wipe the paint off the surface. The paint will stay trapped in the recessed letters and texture lines, making them pop against the white clay. -
Seal the pot:
Apply a coat of matte varnish to protect the finish, especially if you plan to put a real plant inside. For air-dry clay, use a waterproof sealer. -
Planting:
Add a small amount of succulent soil and nestle a cute succulent into its new home.
Now you have a charming, personalized gift ready to brighten up Mom’s day
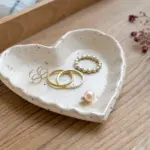
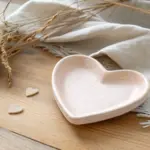
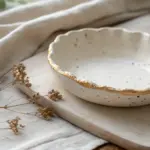
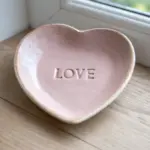
Flower-Shaped Ring Dish

Capture the delicate beauty of spring with this blossom-inspired jewelry dish, featuring a soft pink speckled glaze that mimics falling cherry blossom petals. This charming piece makes a lovely landing spot for special rings.
How-To Guide
Materials
- White clay (polymer or air-dry)
- Acrylic rolling pin
- Flower template or cookie cutter (approx. 4-5 inches)
- Craft knife
- Small sponge
- Bowl for shaping
- Sandpaper (fine grit)
- Pale pink acrylic paint
- Dark brown acrylic paint
- Glossy varnish or glaze (DecoArt Triple Thick works well)
- Paintbrushes
- Toothbrush
- Water
Step 1: Shaping the Clay
-
Condition the Clay:
Begin by kneading your white clay until it is soft, pliable, and free of air bubbles, ensuring it’s warm enough to roll without cracking. -
Roll out a Slab:
Use your acrylic rolling pin to roll the clay out to a consistent thickness, aiming for about 1/4 inch thick for durability. -
Cut the Flower Shape:
Place your flower template or cookie cutter onto the clay slab. -
Trace and Trim:
Carefully cut around the shape with a craft knife if using a template, or press down firmly if using a cutter, then peel away the excess clay. -
Smooth the Edges:
Dip your finger or a small sponge in a tiny bit of water and run it along the cut edges to smooth out any roughness or sharp debris. -
Form the Curve:
Gently lift the clay flower and place it inside a small bowl to give it a curved, dish-like shape while it dries. -
Define the Petals:
While it sits in the bowl, use a dull modeling tool or the back of a knife to gently press indents radiating from the center to the valleys between petals, emphasizing the flower definition. -
Allow to Dry:
Let the clay dry completely according to package instructions; for air-dry clay, this usually takes 24-48 hours.
Step 2: Painting and Finishing
-
Sand for Perfection:
Once fully cured, use fine-grit sandpaper to buff away any remaining uneven spots on the rim. -
Base Coat:
Paint the entire dish, front and back, with a soft, pale pink acrylic paint. -
Apply Second Coat:
Let the first layer dry, then add a second coat to ensure opaque, even coverage. -
Create the Speckles:
Dilute a small drop of dark brown acrylic paint with water until it is inky. -
Splatter Technique:
Dip an old toothbrush into the diluted brown paint, aim it at the dish, and run your thumb across the bristles to flick tiny speckles onto the pink surface. -
Accent the Rim:
Using a very dry brush with a small amount of the undiluted brown paint, gently distress the very edge of the rim to give it a rustic, ceramic look. -
Dry the Paint:
Allow the paint application to dry completely before sealing. -
Seal and Glaze:
Apply a thick coat of high-gloss varnish to the top of the dish to mimic a fired ceramic glaze. -
Final Cure:
Let the varnish cure fully so the surface is hard and non-tacky before placing any jewelry inside.
Natural Texture
Before drying, gently press a piece of linen fabric into the wet clay surface. This leaves a subtle texture that looks incredible under the glaze.
Warping Woes
If the clay curls while drying, weigh the center down with a small bag of rice or beans during the first few hours of the drying process.
Now you have a delicate, handmade piece ready to hold distinctive treasures

TRACK YOUR CERAMIC JOURNEY
Capture glaze tests, firing details, and creative progress—all in one simple printable. Make your projects easier to repeat and improve.
Simple Candle Holder With Texture
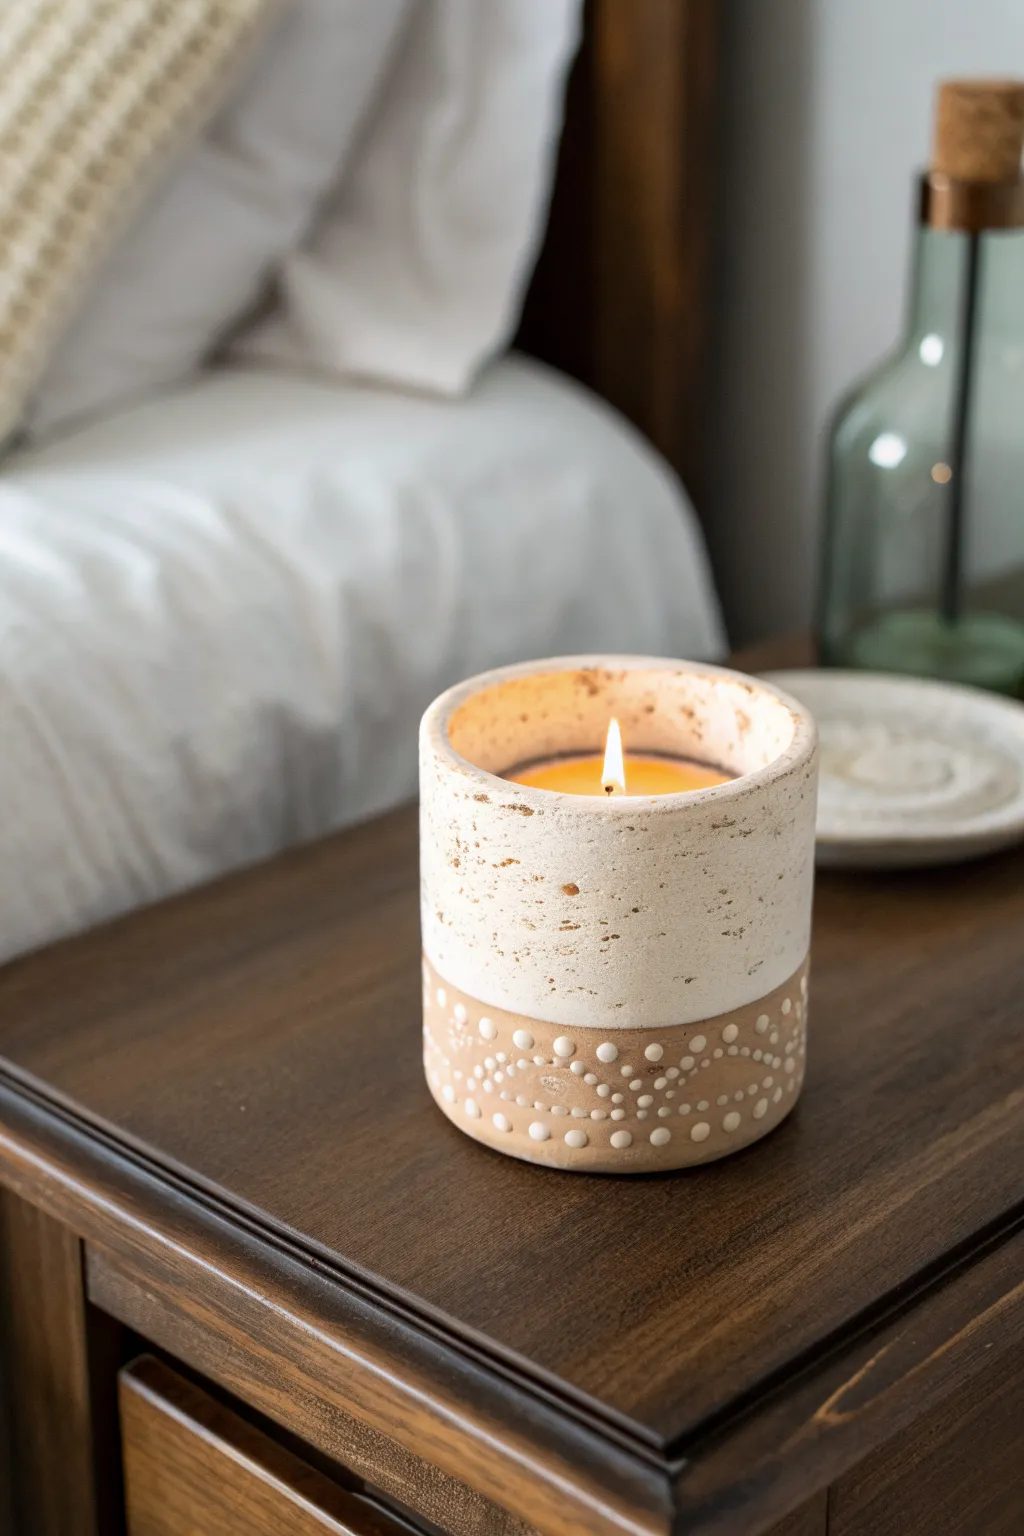
Create a cozy, artisan-style candle holder using air-dry clay and simple texturing techniques anytime. This two-toned vessel combines a rustic terracotta base with a creamy, stone-like upper section for a high-end boutique look without the kiln.
Step-by-Step Tutorial
Materials
- Terracotta colored air-dry clay
- Empty cylindrical glass jar (upcycled candle jar or spice jar)
- White acrylic paint
- Baking soda
- Mod Podge or satin varnish sealant
- Rolling pin
- Craft knife
- Small paintbrush (detail size)
- Sponge dabber or old toothbrush
- Sandpaper
Step 1: Sculpting the Base Form
-
Prepare the clay:
Begin by conditioning a large ball of terracotta air-dry clay in your hands until it becomes pliable and warm. Roll it out on a flat surface to a consistent thickness of about 1/4 inch. -
Cut the base:
Place your glass jar on the rolled clay and trace around the bottom with a craft knife to create a circular base. Set this aside. -
Wrap the vessel:
Cut a long rectangular strip from your rolled clay. Ensure it is tall enough to cover the jar and long enough to wrap around the circumference with a slight overlap. -
Attach to the jar:
Apply a tiny bit of water to the outside of the glass jar to help adhesion. Wrap the clay strip around the jar, pressing it firmly against the glass so no air pockets remain. -
Seal the seam:
Where the clay overlaps, wet your finger and smooth the seam down until it disappears. Do the same where the wall meets the circular base you cut earlier, blending the clay together for a seamless look. -
Smooth the rim:
Check the top rim of the clay. If it’s uneven, trim it carefully with your craft knife to be flush with the glass rim, then smooth the edge with a damp finger.
Seamless Smoothing
Keep a small bowl of water nearby while sculpting. Dipping your finger in water makes smoothing seams and cracks infinitely easier and results in a professional finish.
Step 2: Adding Texture and Pattern
-
Create the rough texture:
Before the clay dries, take an old toothbrush or a crumpled ball of aluminum foil. Gently press it into the upper two-thirds of the pot to create a pitted, stone-like texture. Leave the bottom third relatively smooth. -
Let it dry completely:
Allow the clay to dry fully. Depending on your humidity, this often takes 24-48 hours. The clay will lighten significantly in color when it is ready. -
Sand imperfections:
Once bone dry, use fine-grit sandpaper to lightly smooth out any sharp ridges or fingerprint marks on the bottom third of the vessel. -
Mix textured paint:
Mix white acrylic paint with a teaspoon of baking soda. This creates a thick, chalky mixture that mimics ceramic glaze. -
Paint the top section:
Apply the baking soda paint to the top two-thirds of the pot, following the rough texture you created earlier. Use a dabbing motion to ensure the paint gets into the little pits. -
Add the speckled effect:
Dip an old toothbrush into slightly watered-down brown or dark beige paint. Run your thumb over the bristles to flick tiny specks onto the white painted section for an aged, stone look. -
Create the measurement line:
Use a pencil to lightly mark a straight line around the circumference where the white paint ends and the raw clay begins.
Cracking Clay?
If you notice small cracks as the clay dries, don’t panic. Mix a tiny bit of fresh clay with water to make a paste (slip) and fill the cracks, then sand smooth once dry.
Step 3: Detailing and Sealing
-
Dot pattern row one:
Using a small detail brush or the end of a chopstick dipped in white paint, create a row of dots along the bottom edge of the white section. -
Create the scalloped design:
Below the first row, paint curved, scalloped lines made of dots. Think of painting draped necklaces or half-circles. -
Fill the bottom details:
Add a final row of larger dots near the very bottom edge of the pot to anchor the design visually. -
Seal the project:
Once all paint is dry, coat the entire outside of the vessel with a matte Mod Podge or varnish. This protects the clay from moisture and gives it a finished sheen. -
Insert candle:
Since we built this around a glass jar, you can now safely pour melted candle wax and a wick inside, or simply drop in a tea light.
Now you have a beautiful, custom vessel ready to add warmth to your bedside table
Photo Stand With Love Note Slot
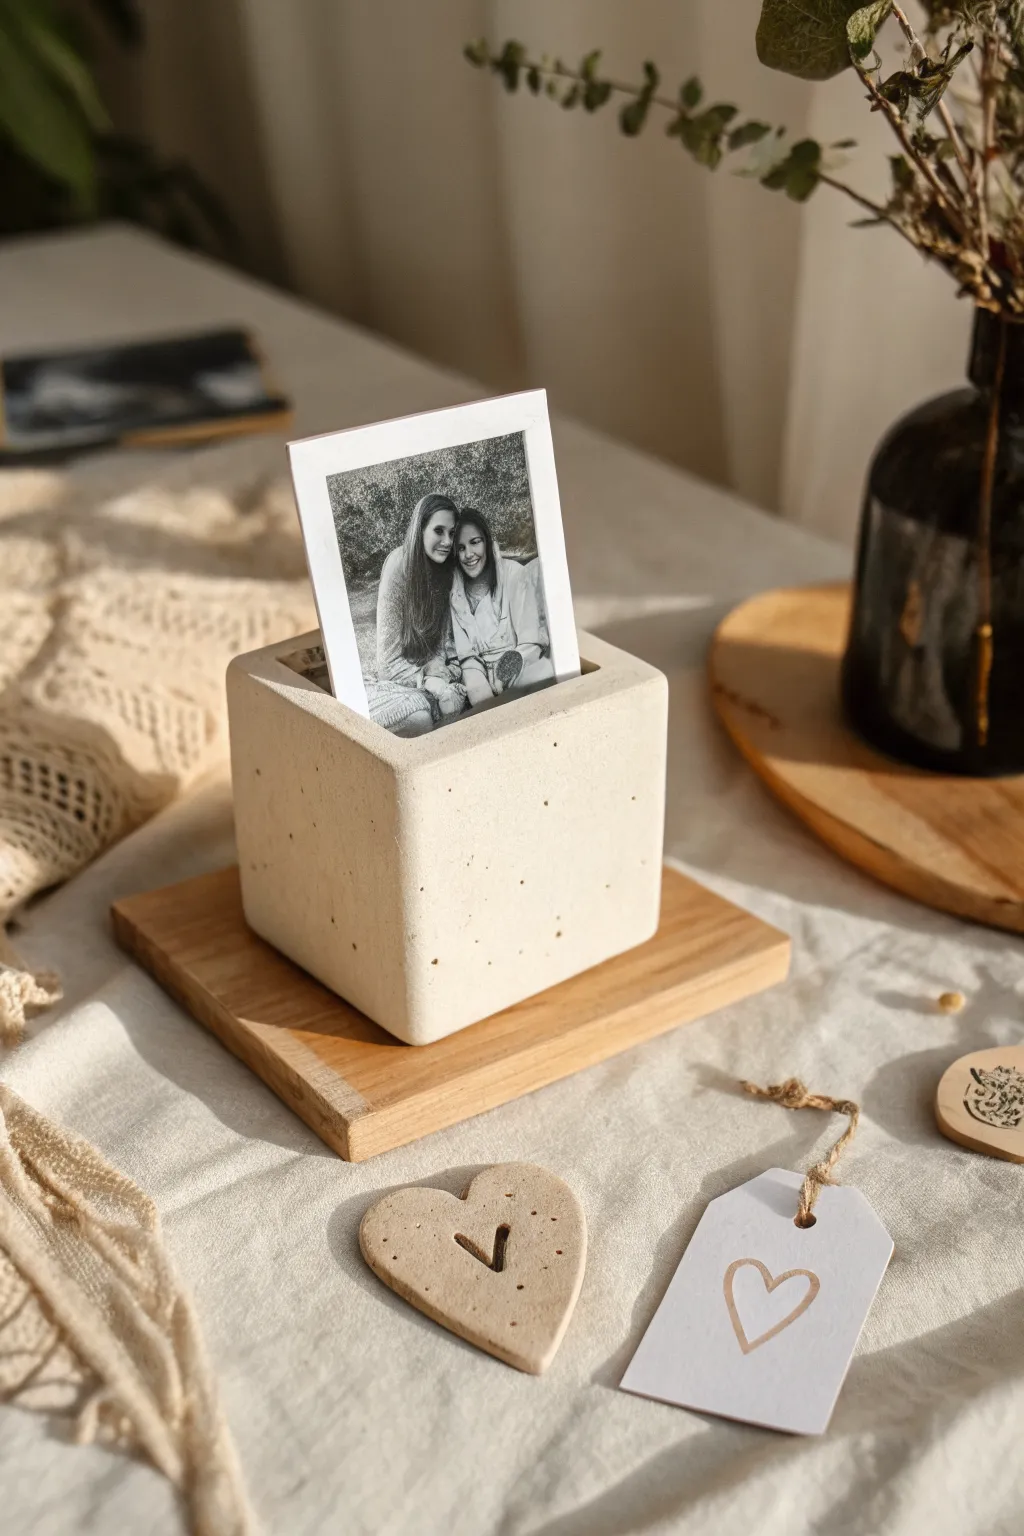
Create a modern, industrial-chic photo stand that mimics the look of high-end concrete decor without the heavy lifting. This simple cube features a charming speckled finish and pairs beautifully with a warm wood base, making it a perfect desktop display for a cherished memory.
Step-by-Step Guide
Materials
- Air-dry clay (white or light grey)
- Square cookie cutter or sharp craft knife
- Rolling pin
- Sandpaper (fine and medium grit)
- Acrylic paint (cream, white, taupe)
- Old toothbrush (for splattering)
- Black acrylic paint (thinned) or brown ink
- Square wood coaster or balsa wood sheet
- Wood glue
- Ruler
- Cardboard or stiff cardstock (for slot spacing)
- Matte sealant spray
Step 1: Shaping the Cube
-
Condition the Clay:
Begin by taking a generous amount of air-dry clay and kneading it in your hands until it becomes warm and pliable. This conditioning prevents cracks from forming later. -
Form the Basic Block:
Shape the clay into a rough ball, then press it against your work surface to flatten the bottom. Gently tap the sides against the table to start forming a square shape. -
Refine the Edges:
Use a rolling pin to lightly flatten the top surface. Then, use two flat objects (like hardback books or wood blocks) on either side to press the clay into a perfect cube. -
Create the Photo Slot:
Wiggle a piece of thick cardstock or a ruler into the center of the cube’s top face. Press it down about half an inch deep to create the slot. I find that rocking the tool slightly widens the slot just enough for a photo to slide in easily. -
Smooth Imperfections:
Dip your finger in a little water and run it over the exterior surfaces to smooth out fingerprints or bumps. Keep the edges relatively crisp but slightly rounded for a stone-cast look. -
Initial Drying Time:
Set the cube aside in a cool, dry place. Let it dry for at least 24-48 hours. Turn the cube onto a different side every few hours to ensure even drying.
Step 2: Creating the Stone Texture
-
Sand for Texture:
Once fully hard, take your medium grit sandpaper and rub down any uneven spots. Don’t make it perfectly smooth; a little texture adds to the concrete illusion. -
Base Coat:
Mix a creamy, off-white acrylic paint color. Paint the entire cube, ensuring you get inside the photo slot as much as possible. Let this coat dry completely. -
Prepare the Splatter Mix:
Dilute a small drop of black paint or brown ink with water until it is very runny. Test the consistency on a scrap piece of paper first. -
Apply Speckles:
Dip an old toothbrush into the watery dark paint. Hold it near the cube and run your thumb across the bristles to flick tiny specks of paint onto the surface. Rotate the cube to cover all sides. -
Seal the Finish:
Allow the paint to cure fully, then spray the entire piece with a matte sealant. This protects the clay from moisture and gives it a professional, non-shiny finish.
Weight It Down
To make the holder feel substantial like real stone, push a small, heavy rock or a fishing weight into the center of the wet clay ball before you shape it into a cube.
Step 3: Mounting the Base
-
Prepare the Wood Base:
If using a pre-made coaster, ensure it is clean. If using balsa wood, cut a square slightly larger than your clay cube (about 0.5 inches wider on all sides). -
Sand and Stain (Optional):
Lightly sand the edges of your wood base. If you prefer a darker tone, apply a layer of wood stain now. I like to leave it raw for a lighter Scandinavian look. -
Glues the Components:
Apply a generous amount of strong wood glue or craft adhesive to the bottom center of your clay cube. -
Final Assembly:
Press the clay cube firmly onto the center of the wooden base. Wipe away any excess glue that squeezes out immediately with a damp cloth. -
Final Cure:
Place a light weight (like a small book) on top of the cube—avoiding the slot—to hold it in place while the glue sets overnight.
Slot Too Tight?
If the slot shrinks during drying and the photo won’t fit, verify the clay is 100% dry, then use a folded piece of sandpaper to widen the gap gently without cracking it.
Slide your favorite black and white memory into the slot and enjoy this timeless piece of handmade decor
Fridge Magnet Mini Vase Set
These miniature clay vases turn a refrigerator door into a living art gallery. Featuring a warm, speckled cream finish with hand-painted reddish blooms, this specific design uses a clever flat-back shape to hold fresh wildflowers securely with a strong magnet.
Step-by-Step
Materials
- White air-dry clay or polymer clay
- Rolling pin
- Small round cookie cutter or jar lid (approx. 2 inches)
- Clay sculpting tools (or a butter knife and toothpick)
- Water bonding slip (if using air-dry clay)
- Fine grit sandpaper
- Acrylic paints: Cream, terracotta/rust, soft brown
- Stiff bristle brush (e.g., old toothbrush)
- Small round paintbrush
- Clear gloss varnish/sealer
- Heavy-duty neodymium magnets
- Strong craft glue (E6000 or similar)
Step 1: Sculpting the Base
-
Prepare the slab:
Begin by rolling out a medium-sized ball of clay until it is about 1/4 inch thick. This will be the back of your vase, ensuring it sits flush against the fridge. -
Cut the back panel:
Cut an elongated teardrop or pear shape from the slab. It should be roughly 3-4 inches tall and about 2 inches wide at the base. -
Form the front volume:
Roll a second ball of clay into a similar shape but slightly larger and thicker. Using your thumbs, gently press into the center to create a hollow cavity, pinching the edges to thin them out. -
Attach the pieces:
Score the edges of both the flat back and the hollow front piece with a needle tool or toothpick. Apply a little water or slip to the scored areas to act as glue. -
Seal the seam:
Press the hollow front onto the flat back. Use a modeling tool or your finger to smooth the clay over the seam so it becomes invisible, blending the two parts into one solid unit. -
Refine the neck:
Gently squeeze the top opening to narrow the neck of the vase. Ensure the opening is wide enough for a few flower stems but narrow enough to hide the water level. -
Smooth and dry:
Dip your finger in water and run it over the entire surface to remove fingerprints and bumps. Allow the clay to dry completely according to package instructions—usually 24-48 hours for air-dry clay.
Step 2: Painting & Finishing
-
Sand imperfections:
Once fully cured, use fine-grit sandpaper to gently smooth out any rough spots on the surface, wiping away the dust with a slightly damp cloth. -
Base coat:
Mix a warm cream or off-white acrylic paint. Apply two even coats over the entire vase, letting the first coat dry before applying the second. -
Add the gradient neck:
While the cream base is dry, mix a wash of terracotta or rust paint with a little water. Gently dab this onto the neck area with a sponge or brush, fading it out as you move down the vase. -
Create the splatter effect:
Load a stiff brush (I often use an old toothbrush specifically kept for crafts) with watered-down soft brown paint. Run your thumb over the bristles to flick tiny speckles across the vase for that ceramic pottery look. -
Paint the flowers:
Using the terracotta paint and a small round brush, paint simple flower shapes near the base. Start with a center dot and pull the brush outward to create petal strokes. -
Detailing the blooms:
Add a small dot of yellow or lighter peach in the center of each flower for dimension. -
Seal the vase:
Since this will hold water (or at least moisture), apply 2-3 coats of a high-quality gloss varnish inside and out. Ensure the inside is thoroughly sealed to prevent leaks. -
Attach the magnet:
Once the sealer is fully cured, glue one or two strong neodymium magnets to the flat back of the vase. Let the glue set for 24 hours before sticking it to the fridge.
Leaking Issues?
Air-dry clay isn’t naturally waterproof. If water seeps through, coat the INSIDE with a thin layer of 2-part epoxy resin instead of standard varnish for a true watertight seal.
Make it a Set
Create a trio of varying shapes—one tall and thin, one round, and one pear-shaped. Paint them with different but coordinating floral patterns for a cohesive gift set.
Fill your tiny vase with water and a few fresh daisies to brighten up the kitchen
Hanging Heart Gift Tag Keepsake
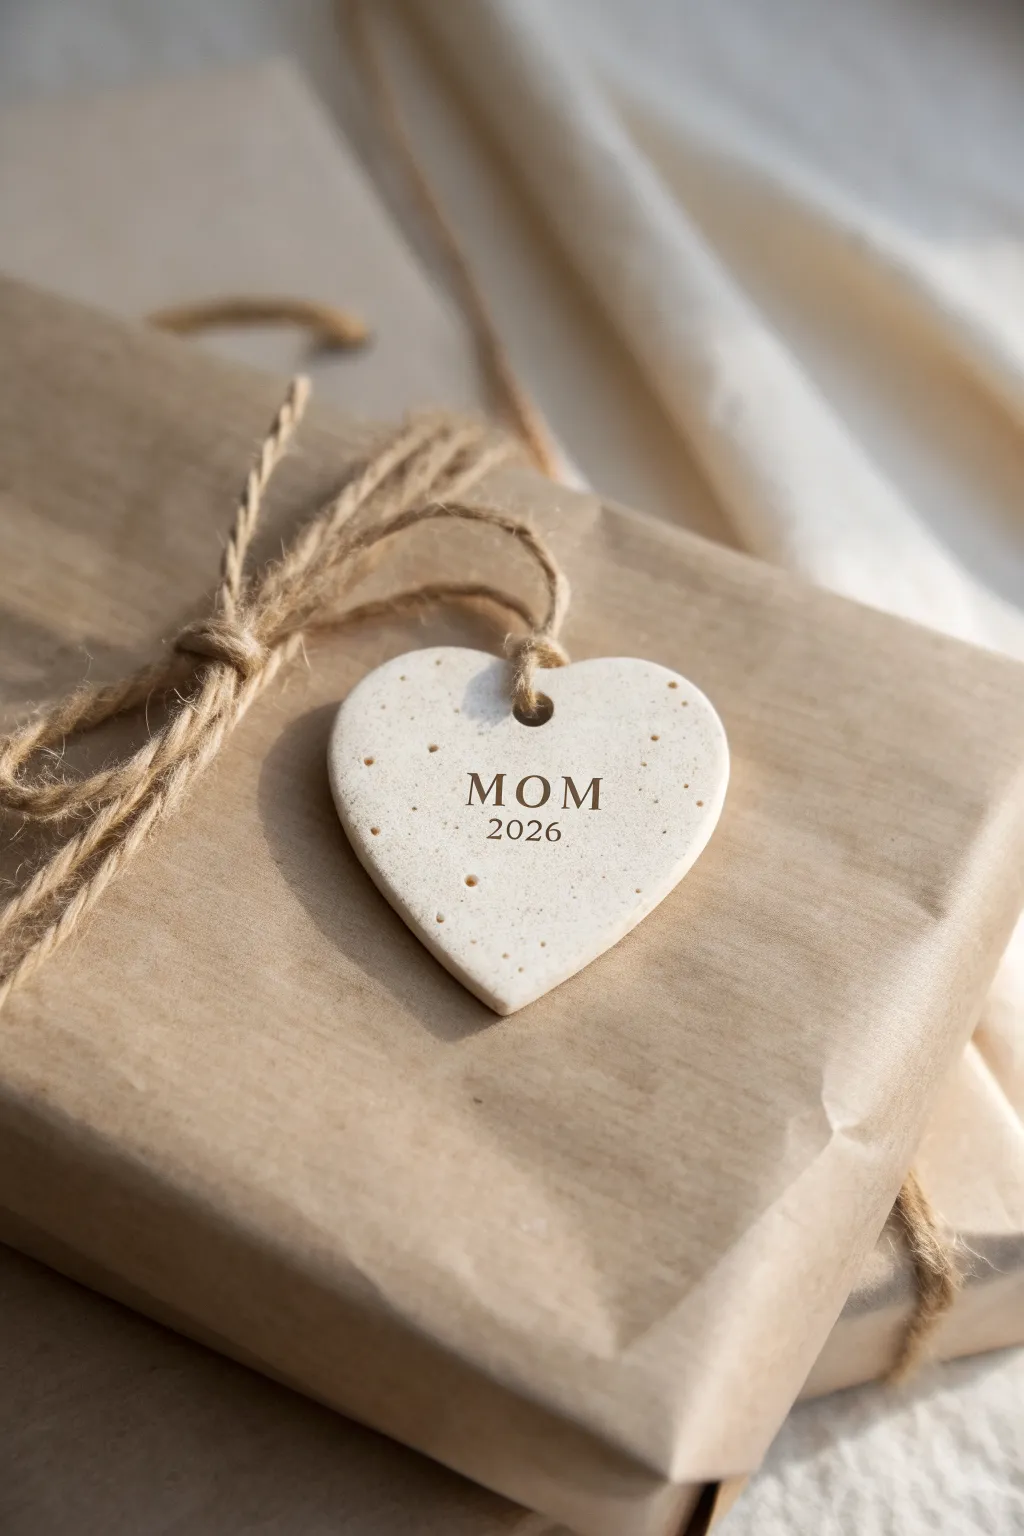
Elevate your Mother’s Day gift wrapping with this sophisticated, minimalist heart tag made from speckled polymer clay. It doubles as a charming keepsake ornament that Mom can hang up long after the wrapping paper is gone.
Detailed Instructions
Materials
- White or beige polymer clay (oven-bake)
- Speckle inclusions (dried coffee grounds, black pepper, or specialty speckled clay)
- Heart-shaped cookie cutter (approx. 2-3 inches)
- Small alphabet stamp set
- Rolling pin or acrylic roller
- Parchment paper
- Drinking straw or small circular cutter
- Brown acrylic paint (optional, for darkening letters)
- Jute twine
- Fine-grit sandpaper
- Baking sheet
- Oven
Step 1: Preparing the Clay
-
Condition the clay:
Start by taking a block of white or light beige polymer clay and kneading it in your hands until it becomes soft and pliable. This warmth helps prevent cracking later. -
Create the speckled effect:
If you aren’t using pre-speckled clay, flatten your clay slightly and sprinkle a tiny pinch of dried coffee grounds or coarse black pepper onto it. I find that less is more here—start small. -
Fold and knead:
Fold the clay over the speckles and knead thoroughly to distribute them evenly throughout the mixture. Repeat until you have a consistent stone-like texture. -
Roll it out:
Place the clay between two sheets of parchment paper to keep it clean. Roll it out to an even thickness of about 1/4 inch (6mm). Too thin, and it might be fragile; too thick, and it will be heavy.
Sticky Letter Fix
If your stamps are sticking to the clay and pulling it up, dust the stamp faces lightly with cornstarch or dip them in water before pressing.
Step 2: Shaping and Stamping
-
Cut the heart shape:
Press your heart-shaped cookie cutter firmly into the rolled clay. If the clay sticks to the cutter, you can dip the cutter in a little cornstarch first. -
Smooth the edges:
Gently lift the heart from the work surface. Use your finger, dipped slightly in water or baby oil, to smooth out any rough edges left by the cutter. -
Create the hanging hole:
Use a drinking straw or a small circular cutter to punch a hole near the top center of the heart, ensuring there is enough clay above the hole so it doesn’t break easily. -
Plan your text:
Before stamping, lay your alphabet stamps out on the table to check the spacing for ‘MOM’ and the year ‘2026’. -
Stamp the text:
Gently but firmly press the stamps into the center of the heart. Try to apply even pressure so the letters are all the same depth. -
Check for flaws:
Look over the piece one last time. If you see any fingerprints, gently buff them away with a light touch.
Pro Tip: Thickness
Use two stacks of playing cards or craft sticks as guide rails on either side of your roller to ensure the clay is perfectly even thickness throughout.
Step 3: Baking and Finishing
-
Bake the clay:
Place the heart on a parchment-lined baking sheet. Bake according to your specific clay package instructions—usually around 275°F (135°C) for 15-20 minutes. -
Cool down:
Let the clay cool completely on the baking sheet. It will harden as it cools. -
Highlight the text (optional):
If you want the letters to stand out more (like in the photo), dilute a tiny drop of brown acrylic paint with water. Brush it into the grooves. -
Wipe away excess:
Immediately wipe the surface with a damp paper towel or baby wipe, leaving the paint only inside the stamped impressions. -
Sand for texture:
To achieve that matte, stone-like finish seen in the image, lightly sand the entire surface with fine-grit sandpaper. -
Add the twine:
Cut a length of jute twine, about 10 inches long. Loop it through the hole you created. -
Tie the knot:
Secure the twine with a simple loop knot at the base of the tag, or tie it directly onto your gift ribbon as shown.
This simple, rustic touch turns a regular package into a memorable gift she will cherish
Handwritten Message Clay Plaque
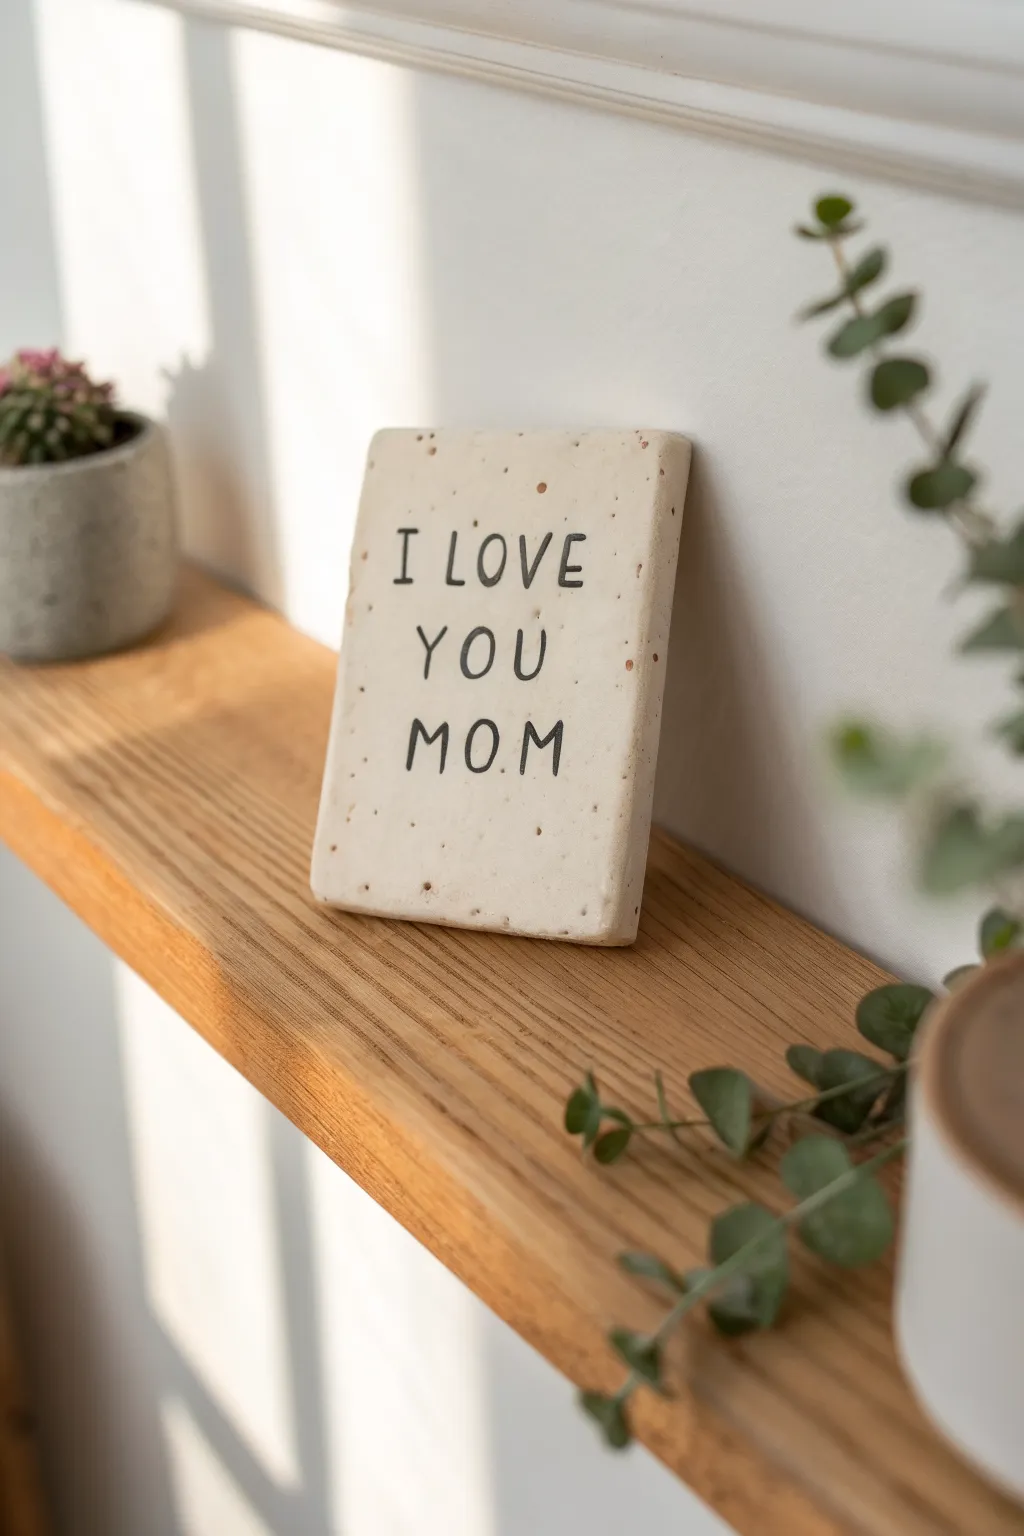
Simple yet heartfelt, this charming clay plaque features a rustic, speckled finish and a straight-to-the-point message for mom. It’s the perfect size for floating shelves or desk decor and captures a modern, minimalist aesthetic.
Step-by-Step
Materials
- Speckled polymer clay (e.g., Fimo Effect ‘Granite’ or Sculpey Premo ‘Granite’)
- Rolling pin (acrylic preferred for clay)
- Rectangular clay cutter or ruler and craft knife
- Alphabet stamp set (small, sans-serif font)
- Black acrylic paint
- Small flat tip paintbrush
- Paper towel or baby wipes
- Baking sheet
- Parchment paper
- Fine-grit sandpaper (optional)
- Matte spray varnish (optional)
Step 1: Shaping the Clay
-
Condition the clay:
Start by warming the speckled polymer clay in your hands. Knead and twist it until it becomes soft, pliable, and free of any crumbly texture. -
Roll it out:
Place the conditioned clay on a clean, smooth surface or silicone mat. Use your acrylic roller to flatten the clay into an even slab. -
Check thickness:
Aim for a thickness of about 1/4 inch (6mm). Too thin and it might crack; too thick and it becomes heavy. I like to use playing cards on either side as depth guides to keep it perfectly even. -
Cut the rectangle:
Using a rectangular cutter or a ruler and craft knife, cut out a rectangle approximately 3 inches wide by 4 inches tall. -
Smooth the edges:
Gently run your finger along the cut edges to soften the sharp corners. The goal is a slightly organic, handmade feel, so don’t worry about razor-sharp machine perfection.
Step 2: Adding the Message
-
Plan your spacing:
Before stamping, lightly hover your stamps over the clay to visualize the spacing. You need to fit ‘I LOVE’, ‘YOU’, and ‘MOM’ on three separate lines. -
Stamp the first line:
Press your alphabet stamps firmly into the clay for the first line: ‘I LOVE’. Apply even pressure to get a deep, clear impression without pushing all the way through. -
Complete the text:
Center the word ‘YOU’ below the first line, and ‘MOM’ below that to finish the sentiment. -
Clean up imperfections:
If the stamping process distorted the rectangle’s shape slightly, gently nudge the sides back into place with your ruler.
Uneven Impressions?
If your letters stamps are impressing unevenly, try rocking the stamp very gently top-to-bottom and side-to-side while pressing down to ensure every part of the letter creates an indent.
Step 3: Baking and Finishing
-
Bake the plaque:
Transfer the clay to a baking sheet lined with parchment paper. Bake according to your specific clay package’s instructions (usually around 275°F or 130°C for 15-30 minutes). -
Cool down:
Let the plaque cool completely on the baking sheet. It will harden as it cools. -
Prepare the paint:
Squeeze a small dot of black acrylic paint onto a palette or scrap paper. You can water it down very slightly to help it flow into the grooves. -
Fill the letters:
Use a small brush to dab paint into the stamped letters. Don’t worry about staying perfectly inside the lines for this step. -
Wipe away excess:
Immediately take a damp paper towel or baby wipe and gently wipe across the surface of the clay. The paint will stay trapped in the indented letters while cleaning off the top surface. -
Repeat if needed:
If the letters look too faint, repeat the painting and wiping process until the text is bold and legible. -
Seal (Optional):
For extra durability, give the plaque a light coat of matte spray varnish once the paint is fully dry.
Make it a Magnet
Turn this into fridge decor by hot-gluing a strong ceramic magnet to the back after baking. Make sure the clay is fully cooled and clean before gluing for the best hold.
Place this sweet little stoneware-style note on a shelf where mom will see it every day
Matching Mom-and-Me Clay Earrings
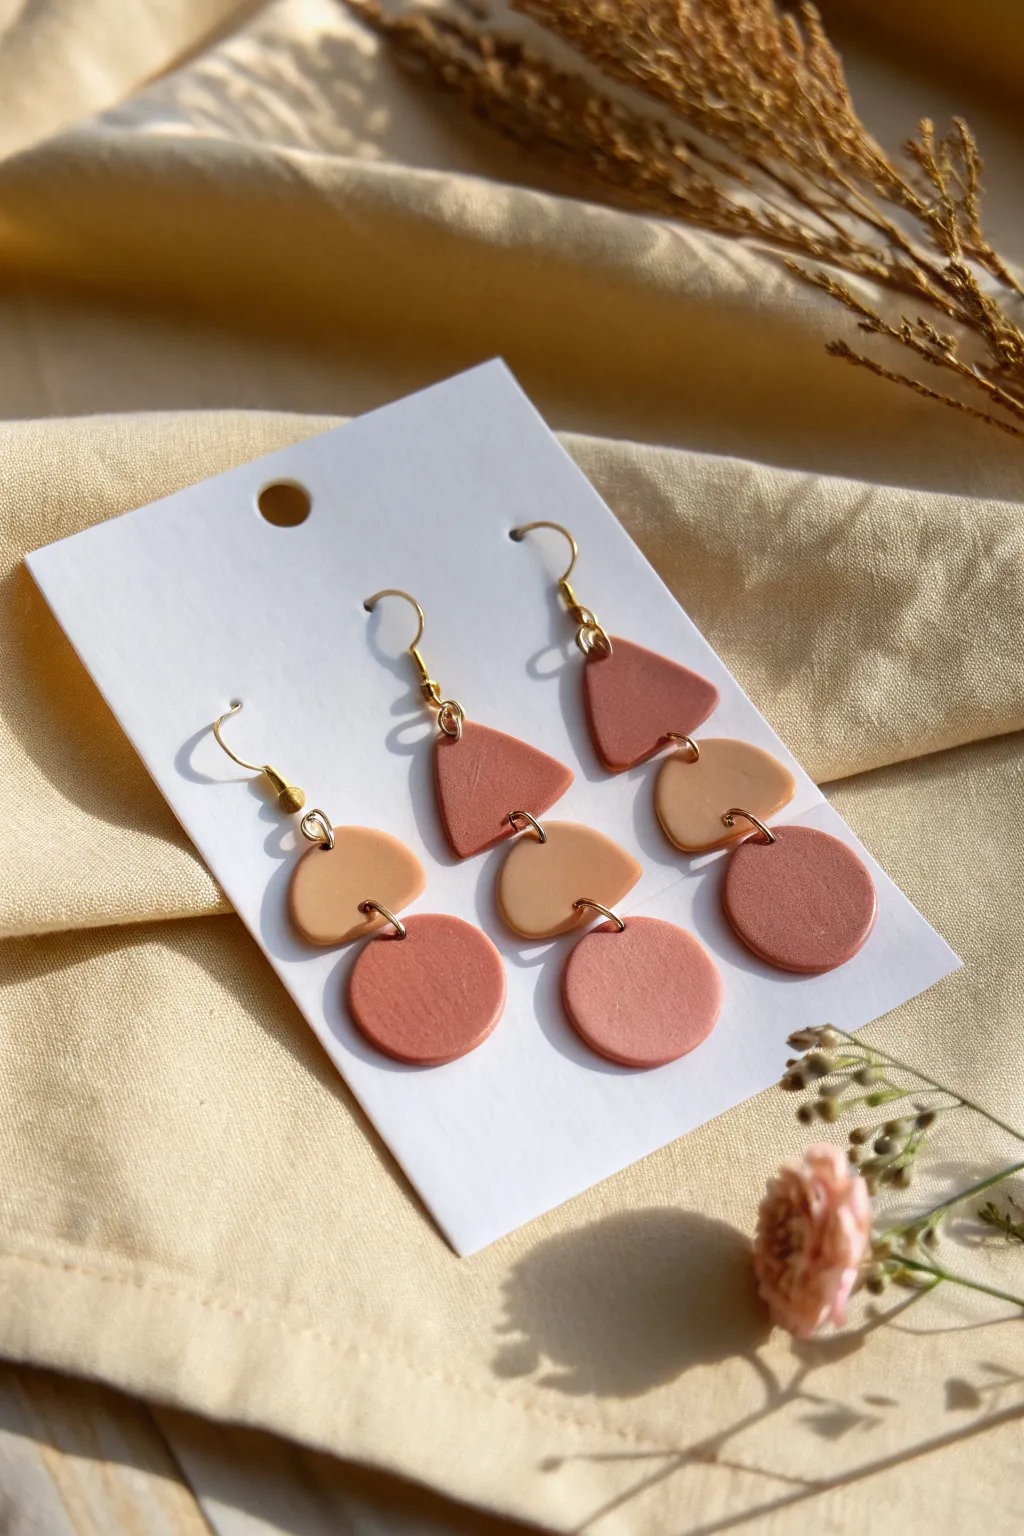
Create a matching set of mom-and-me earrings features soft, earthy tones in a delightful three-tiered dangle design. These lightweight accessories combine muted terracotta and beige shapes for a modern, boho-chic aesthetic that’s perfect for Mother’s Day gifting.
Step-by-Step Tutorial
Materials
- Polymer clay (terracotta/rust, beige/tan)
- Acrylic rolling pin
- Clay cutters (small circle, small arch, small triangle/soft triangle)
- Jump rings (gold finish, approx 6-8mm)
- Earring hooks (gold finish)
- Jewelry pliers (flat nose and round nose)
- Small hand drill or toothpick
- Parchment paper or ceramic tile
- Oven for baking
Step 1: Preparing the Clay Shapes
-
Condition the clay:
Begin by kneading your terracotta and beige polymer clay separately until they are soft and pliable. This conditioning prevents cracking and ensures a smooth finish. -
Roll out the slabs:
Using your acrylic roller, roll the clay out onto a flat surface or parchment paper. Aim for a consistent thickness of about 2-3mm for durability without heaviness. -
Cut the circles:
Use your small circle cutter on the terracotta slab to punch out the bottom tier pieces. You will need one circle for each earring you plan to make. -
Cut the arches:
Switch to your beige clay slab and use the small arch cutter. These will form the middle connecting piece of the design. -
Cut the top shapes:
You can mix and match here as seen in the photo. Cut soft triangles or teardrop shapes from the terracotta clay for the top tier that connects to the ear wire. -
Smooth the edges:
Gently run your finger along the cut edges of each raw clay piece to soften any sharp corners or remove stray clay bits.
Smooth Operator
Before baking, lightly wipe your unbaked clay pieces with a q-tip dipped in rubbing alcohol or acetone. This magically removes fingerprints and lint for a professional finish.
Step 2: Drilling and Baking
-
Pierce holes for assembly:
Using a toothpick or a small needle tool, carefully poke holes in your raw clay shapes. The top pieces need a hole at the top and bottom. The middle arches need a hole at the top curve and bottom center. The bottom circles just need one hole at the top. -
Check hole size:
Ensure your holes are large enough to fit your jump rings comfortably, accounting for very slight shrinkage during baking. -
Bake the pieces:
Arrange the pieces on a parchment-lined baking sheet or ceramic tile. Bake according to your specific clay brand’s manufacturer instructions (usually 275°F/135°C for 15-30 minutes per 1/4 inch of thickness). -
Cool down:
Allow the clay pieces to cool completely inside the oven or on a cooling rack before handling them. They harden fully as they cool.
Texture Play
Before cutting your shapes, press a piece of lace, a sandpaper sheet, or a texture roller onto the raw clay slab to add subtle patterns and depth to the flat surfaces.
Step 3: Assembly
-
Open the jump rings:
Use two pairs of pliers to twist your jump rings open. Remember to twist the ends away from each other sideways, rather than pulling them apart, to maintain the circle shape. -
Connect the bottom tiers:
Slide an open jump ring through the hole of a bottom terracotta circle and the bottom hole of a beige arch. Close the ring securely. -
Connect the top tiers:
Use another jump ring to connect the top of the beige arch to the bottom of your top terracotta triangle piece. -
Attach the ear wires:
Open the small loop on your gold earring hook (or use a small jump ring if needed) and thread it through the top hole of the terracotta triangle. -
Final check:
Close the final loop securely. Give the earring a gentle shake to ensure all connections move freely and the pieces hang straight.
Package these sweet tiered creations on a card backing for a handmade gift mom will cherish forever
Clay Diffuser Charm for Mom’s Space
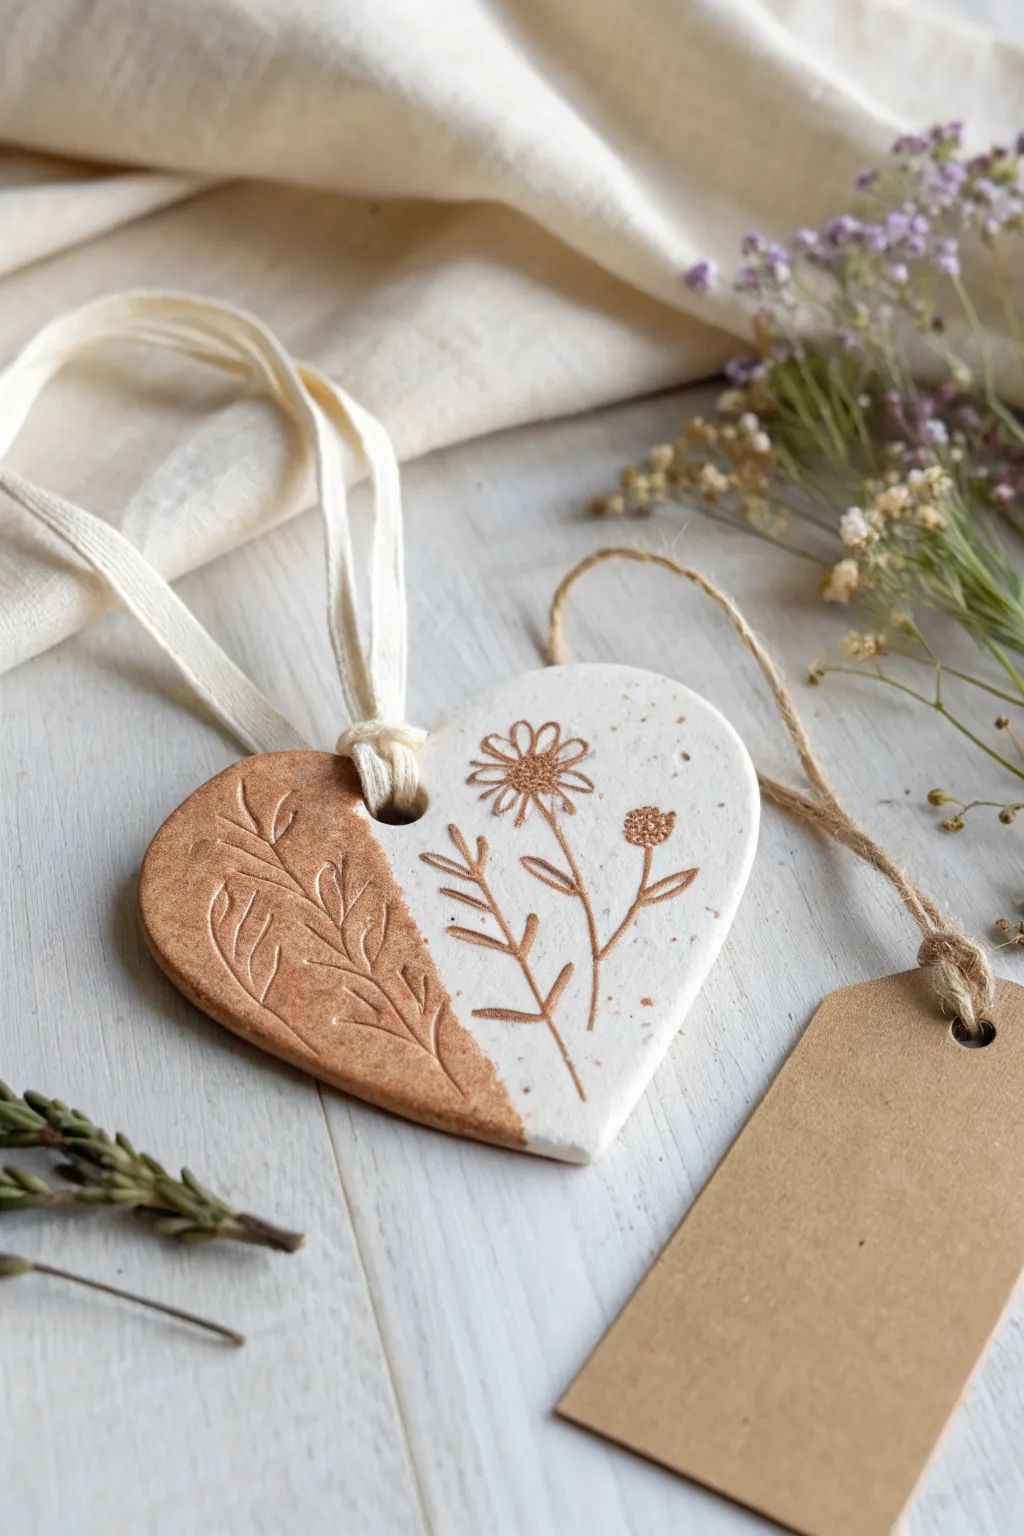
Create a stunning, dual-toned diffuser charm that combines the rustic warmth of terracotta with the clean elegance of speckled white clay. This heart-shaped piece features delicate botanical impressions and serves as a beautiful, functional gift for Mom to scent her favorite space.
Detailed Instructions
Materials
- Air-dry clay (white)
- Air-dry clay (terracotta/brown)
- Heart-shaped cookie cutter
- Rolling pin
- Parchment paper or canvas mat
- Botanical rubber stamps (daisy and sprigs)
- Small straw or cocktail stick (for the hole)
- Brown acrylic paint or antiquing wax
- Paper towel or sponge
- Fine grit sandpaper
- Cream cotton ribbon or twine
- Essential oils (optional, for gifting)
Step 1: Preparing the Two-Tone Base
-
Condition the Clay:
Start by kneading a small ball of white clay and a slightly smaller ball of terracotta clay separately until they are soft, pliable, and free of cracks. -
Create the Join:
Press the two balls of clay together side-by-side. You want a diagonal seam, so shape them roughly into tear drops before joining them to create an organic, angled line where the colors meet. -
Roll the Slab:
Place your joined clay on parchment paper. Using a rolling pin, roll the clay out to an even thickness of about 1/4 inch (6mm). Ensure the seam between the two colors is smoothed over but keep the distinct separation of color. -
Cut the Shape:
Position your heart cutter so the diagonal seam runs through the left side of the heart, leaving the majority white but a distinct terracotta section on the left. Press down firmly to cut the shape. -
Smooth the Edges:
Gently remove the excess clay. Dip your finger in a little water and run it along the cut edges of the heart to smooth out any roughness from the cutter. -
Create the Hanging Hole:
Use a straw or a cocktail stick to punch a hole near the top center of the heart. Make sure the hole is wide enough to accommodate your ribbon later.
Cracking at the Seam?
If the two clay colors separate while drying, mix a tiny bit of clay with water to make a paste (slip) and fill the crack. Smooth it over and let it dry again.
Step 2: Impressing and Finishing
-
Stamp the Design:
Select your botanical stamps. Gently press a daisy stamp into the upper right of the white section. Add a leafy sprig stamp below it closer to the bottom point, and perhaps some leaf details on the terracotta side. -
Deepen the Impression:
If your stamps are shallow, you can carefully trace over the main lines with a needle tool to make the grooves slightly deeper, which helps hold the antique finish later. -
Dry the Clay:
Let the heart dry completely on a flat surface. This usually takes 24-48 hours depending on humidity. Flip it over halfway through drying to prevent curling. -
Sand for Smoothness:
Once bone dry, take fine-grit sandpaper and lightly sand the edges and surface to remove any imperfections or fingerprints. -
Apply Antiquing Medium:
Dilute a small amount of brown acrylic paint with water (or use antiquing wax). Brush this wash over the stamped areas, ensuring it gets into all the grooves. -
Wipe Back:
Immediately use a slightly damp paper towel to wipe the paint off the surface. The brown color will remain in the stamped crevices, highlighting the design, while the surface returns to its natural clay color. -
Add Speckles (Optional):
To mimic the speckled stoneware look in the photo, you can flick a toothbrush with watered-down brown paint lightly over the white section. -
Attach the Ribbon:
Cut a length of cream cotton ribbon or twine. Fold it in loop, thread the loop through the hole from front to back, and pull the tails through the loop to create a lark’s head knot.
Scent It Up
Make this a true aromatic gift by putting a drop of lavender or rose essential oil on the textured terracotta side before wrapping; the unsealed clay absorbs scent perfectly.
Now your beautiful, handcrafted diffuser is ready to be boxed up as a sentimental gift for Mom
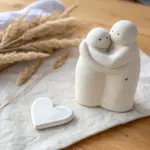
Mother-and-Child Mini Sculpture
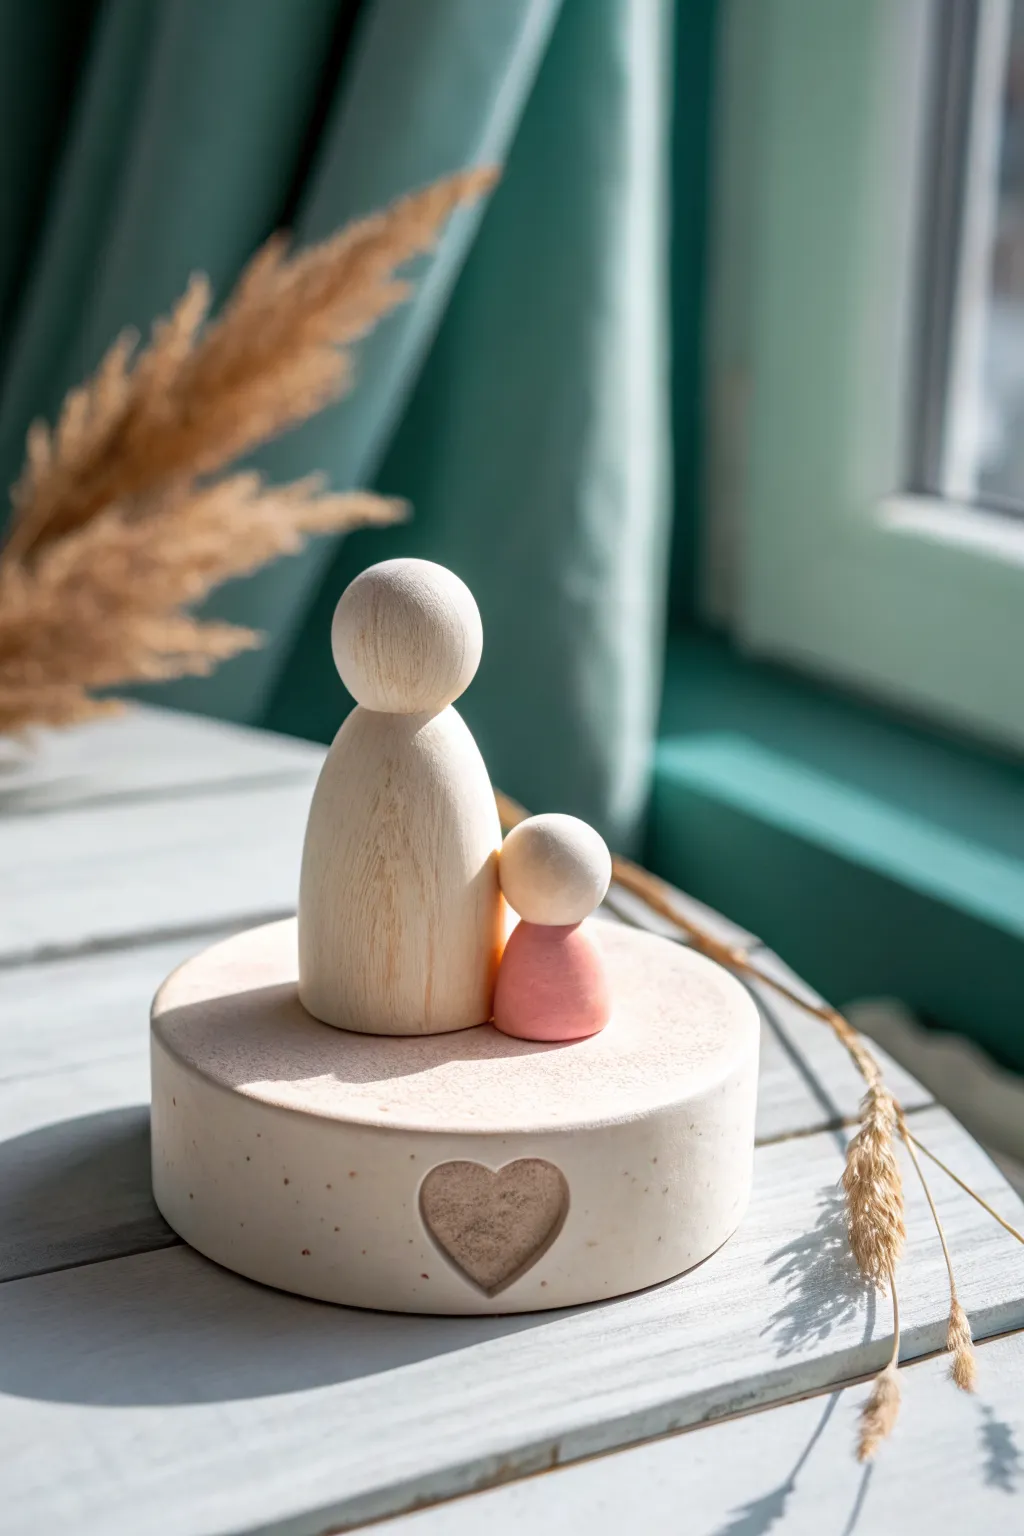
Capture the tender bond between parent and child with this simple yet elegant sculpture. Using smooth wooden peg dolls and a handmade clay base featuring a heart imprint, this project combines natural textures with a soft pop of colour for a beautiful keepsake.
Step-by-Step Guide
Materials
- Large wooden peg doll (approx. 7-9 cm)
- Small wooden peg doll (approx. 3-4 cm)
- Air-dry clay (white or off-white)
- Acrylic paint (soft dusty pink)
- Small paintbrush
- Fine-grit sandpaper
- Round cookie cutter (approx. 10 cm diameter)
- Small heart-shaped cutter or stamp
- Rolling pin
- Strong craft glue or wood glue
- Matte varnish or sealant (optional)
- Parchment paper or craft mat
Step 1: Preparing the Figures
-
Sand the wood:
Begin with your wooden peg dolls. Even if they look smooth, give them a quick rub with fine-grit sandpaper to remove any tiny rough spots or splinters, especially on the ‘head’ areas. -
Mask the small doll:
For the smaller child figure, you want a clean line between the head and body. You can use a small strip of masking tape around the neck, or simply freehand it if you have a steady hand. -
Paint the child figure:
Dip your brush into the dusty pink acrylic paint. Carefully paint the body of the smaller peg doll, leaving the head natural wood. Apply thin coats to avoid drips. -
Apply a second coat:
Once the first layer of pink is dry, apply a second coat to ensure solid, opaque coverage. I find two thin layers always look better than one thick one. -
Seal the wood (optional):
If you want to protect the natural wood of the larger figure and the head of the smaller one, apply a very thin layer of matte varnish over the unpainted areas. Let everything dry completely.
Smooth Surface
To get that speckly, stone-like texture on the clay, mix a tiny pinch of used coffee grounds or cracked pepper into your white clay before rolling it out.
Step 2: Creating the Clay Base
-
Condition the clay:
Take a handful of air-dry clay and knead it in your hands until it’s soft, warm, and pliable. This prevents cracks later on. -
Roll the slab:
Place the clay on parchment paper. Use a rolling pin to flatten it into a thick slab, approximately 2-2.5 cm thick. You want it substantial enough to look like a podium. -
Cut the circle:
Press your large round cookie cutter firmly into the clay to cut out the base. Remove the excess clay from around the outside before lifting the cutter. -
Smooth the edges:
Dip your finger in a little water and run it around the top edge and sides of the clay circle to smooth out any roughness or sharp corners created by the cutter. -
Stamp the heart:
Locate the front center of the cylinder’s side wall. Gently press your small heart-shaped cutter or stamp into the clay. Don’t go all the way through; just create a recessed impression about 3-5mm deep. -
Refine the heart:
If the edges of the heart impression are ragged, use a damp sculpting tool or a wet cotton swab to smooth the inside of the heart shape. -
Dry the base:
Allow the clay base to dry fully. This usually takes 24-48 hours depending on thickness. Flip it over halfway through the drying process to ensure the bottom dries evenly and to prevent warping.
Personalize It
Instead of a recessed heart, try pressing a snippet of lace or a leaf into the side of the wet clay base for a unique, textured imprint pattern.
Step 3: Assembly & Finishing
-
Sand the base:
Once the clay is bone dry, use fine-grit sandpaper to buff away any imperfections on the surface or sides. It should feel smooth to the touch. -
Test the arrangement:
Place your wooden figures on the top of the base to decide their exact positioning. The larger figure should stand slightly behind or to the side of the smaller one. -
Glue the figures:
Apply a dab of strong craft glue to the bottom of the large figure and press it firmly onto the clay base. Repeat with the smaller figure, nesting it close to the larger one. -
Clean up glue:
If any glue squeezes out from under the dolls, wipe it away immediately with a damp cloth or cotton bud before it dries. -
Final touches:
Inspect your sculpture. If you like a polished look, you can varnish the entire clay base, or leave it matte for a more natural, stone-like aesthetic.
Place this touching little sculpture on a sunny windowsill or shelf to enjoy its quiet beauty.