If you’ve been itching to make something festive with your hands, Christmas-themed clay projects are the sweetest little way to do it. I love how a few simple shapes can turn into ornaments, gift toppers, and tiny keepsakes you’ll want to bring out every year.
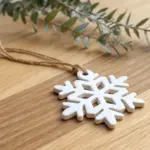
Clay Snowflake Ornaments
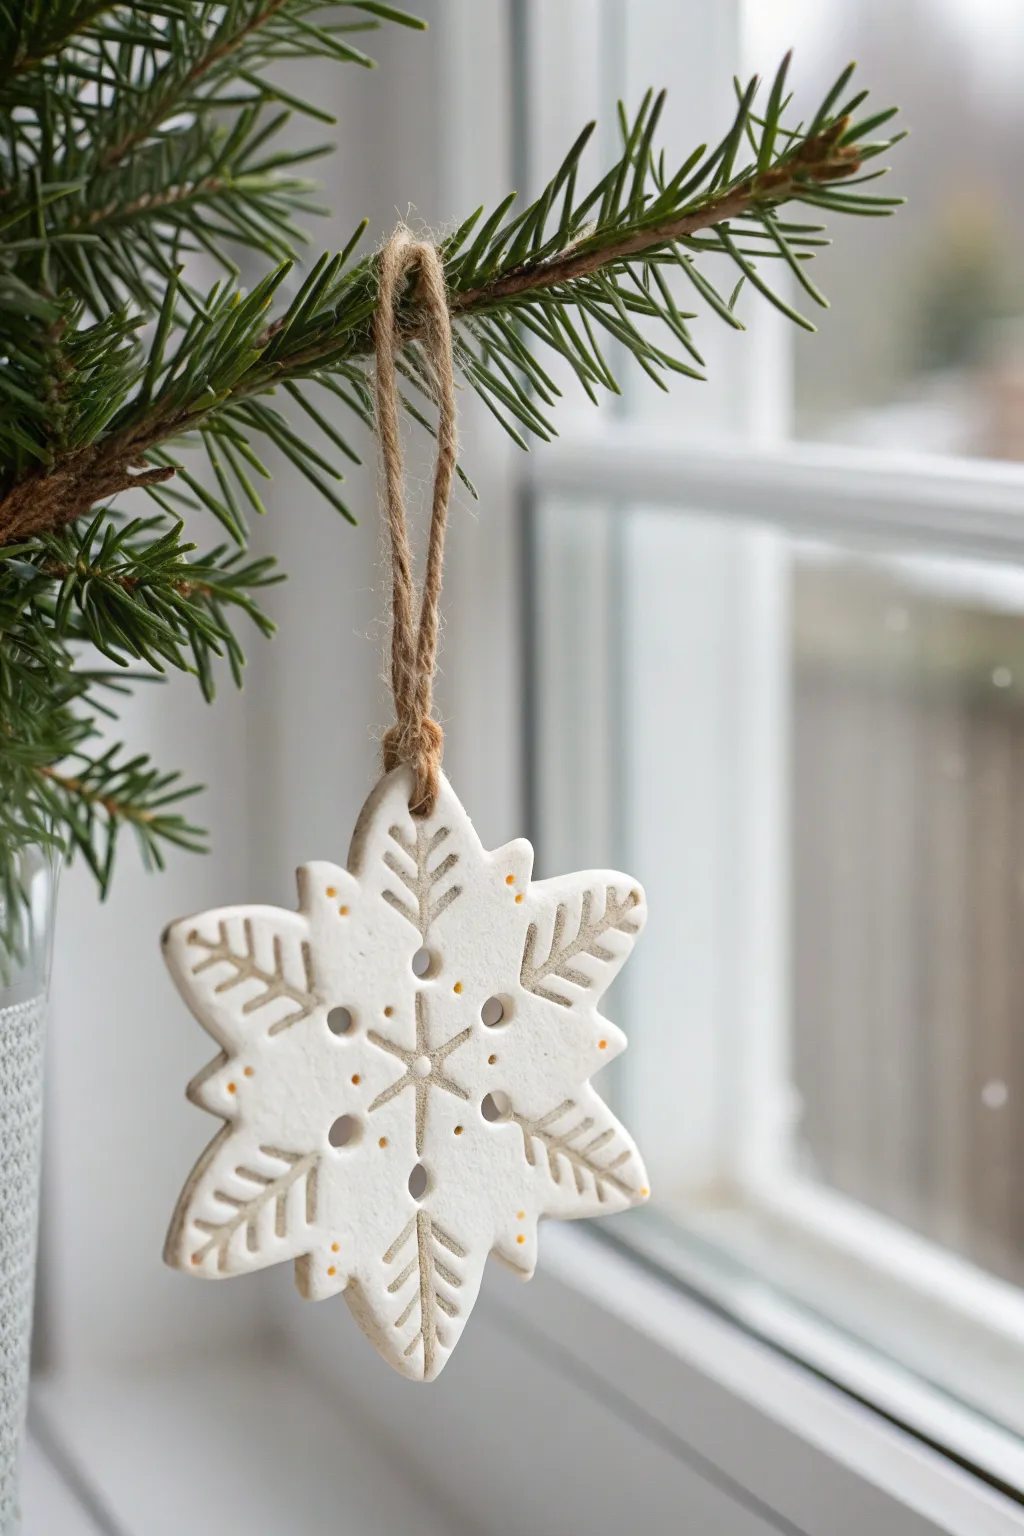
Bring the quiet beauty of a winter forest indoors with these charming, textured clay snowflakes. Their simple carved details and delicate gold accents create a rustic yet elegant look perfect for a minimalist branch display or a traditional tree.
Step-by-Step
Materials
- Air-dry clay (white) or polymer clay
- Rolling pin
- Snowflake cookie cutter (6-pointed star)
- Needle tool or toothpick
- Small straw or drinking straw (for the hanging hole)
- Small round piping tip or skewer (for decorative holes)
- Fine-grit sandpaper
- Gold acrylic paint
- Fine detail paintbrush (size 0 or 00)
- Jute twine
- Parchment paper or silicone mat
Step 1: Shaping the Snowflake
-
Prepare your workspace:
Lay down a piece of parchment paper or a silicone mat. This prevents sticking and makes it easier to move your delicate snowflakes later. -
Condition the clay:
Take a handful of white air-dry or polymer clay and knead it until it is soft, pliable, and free of cracks. Warm clay is much easier to work with. -
Roll it out:
Roll the clay into an even slab, aiming for a thickness of about 1/4 inch (6mm). You want it sturdy enough to hold its shape but not too heavy for a branch. -
Cut the shape:
Press your snowflake cookie cutter firmly into the clay. Give it a tiny wiggle to ensure a clean cut, then lift the cutter. Gently remove the excess clay from around the shape. -
Smooth the edges:
Dip your finger in a little water and gently run it along the cut edges of the snowflake to soften any sharp ridges left by the cutter.
Step 2: Adding Texture & Detail
-
Create the hanging loop:
Use a straw to punch a clean hole through the top point of the snowflake. Make sure it’s not too close to the edge to prevent tearing. -
Punch center details:
Using a smaller circular tool, like a piping tip or a skewer, punch a hole directly in the center of the snowflake. Add six more small holes in a ring around the center, aligning them with the gaps between the points. -
Carve the center star:
With a needle tool or toothpick, lightly carve straight lines connecting the central holes, creating a simple 6-pointed star bursting from the middle. -
Detail the points:
On each of the six main points of the snowflake, use your needle tool to carve a ‘vein’ pattern. Draw a central line down the middle of the point, then add small angled dashes on either side, like the needles on a pine branch. -
Clean up crumbs:
I usually take a soft, dry brush at this stage to gently sweep away any tiny clay crumbs created by the carving process.
Cracking Up?
If you see tiny hairline cracks appearing as the clay dries, mix a tiny bit of fresh clay with water to make a paste and smooth it into the cracks with your finger.
Step 3: Finishing Touches
-
Let it dry:
Allow the clay to dry completely according to package instructions. For air-thy clay, flip it over halfway through the drying process to prevent curling. -
Sand for smoothness:
Once fully cured, gently sand the edges with fine-grit sandpaper if there are any rough spots remaining. -
Paint the accents:
Dip a fine-point brush into gold acrylic paint. Carefully dot the clay in the small depressions you carved or add tiny dots at the tips of the ‘pine’ branches for a subtle sparkle. -
Secure the twine:
Cut a length of jute twine, about 8 inches long. Fold it in half and thread the loop end through the hole. -
Knot the hanger:
Pull the loose ends of the twine through the loop and tighten it gently against the snowflake (a cow hitch knot), then tie the top ends together to close the loop.
Pro Tip: Rustic Wash
For an antique look, water down brown acrylic paint and brush it over the dried texture. Wipe it off quickly with a paper towel so the dark color stays only in the carved grooves.
Hang your handcrafted snowflake in a window or on a bough to enjoy the festive winter atmosphere you created


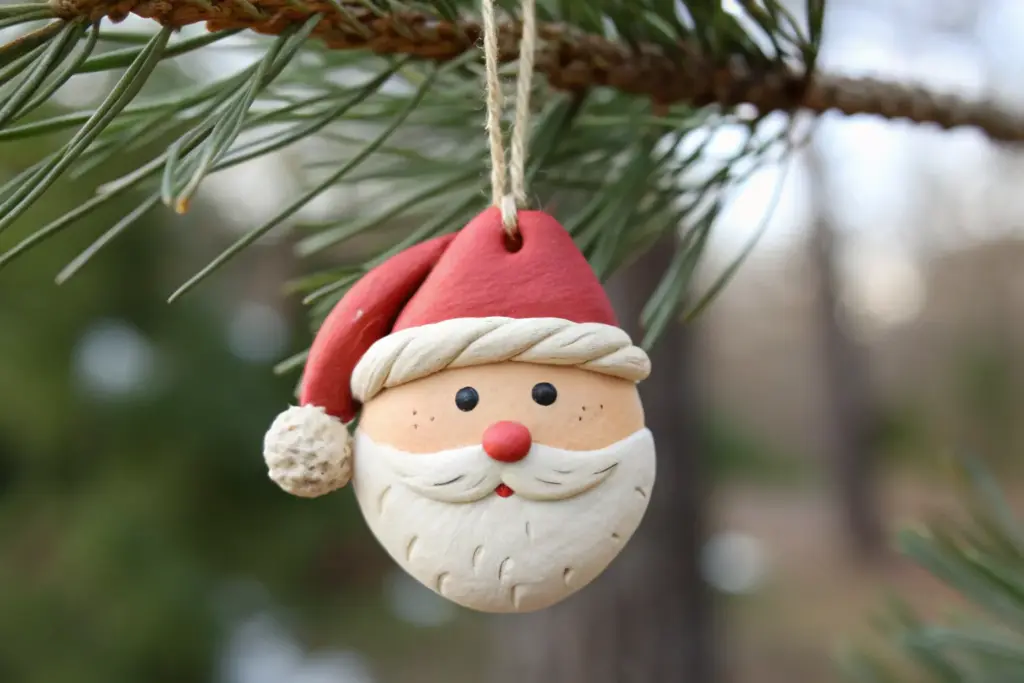
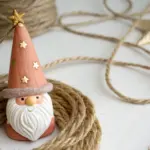
Mini Santa Face Charms

These delightful mini Santa face charms bring a touch of nostalgia to your holiday decor with their simple shapes and textured details. The soft matte finish and tiny, precise features give them a modern, handcrafted feel perfect for ornaments or gift toppers.
Step-by-Step Tutorial
Materials
- Polymer clay (Red, White, Beige/Flesh tone, Black)
- Eye pin or wire loop
- Pointed sculpting tool or toothpick
- Small ball tool
- Needle tool
- Clean work surface (ceramic tile or glass)
- Oven (for baking)
- Optional: Cornstarch (to prevent sticking)
- Red acrylic paint (for the nose)
- Fine-grit sandpaper (optional)
Step 1: Farming the Base
-
Prepare the head:
Start by conditioning a small ball of beige or flesh-toned clay until it’s soft and pliable. Roll it into a smooth oval shape, slightly flattened at the back so it sits nicely. -
Create the hat shape:
Condition a piece of red clay and form it into a cone. Flatten the bottom of the cone so it matches the width of the top of the beige head. -
Join the pieces:
Gently press the red cone onto the top of the beige oval. Smooth the seam slightly at the back to ensure a strong bond, but you can leave the front seam visible as the brim of the hat. Shape the top of the hat to a rounded point. -
Insert the hanging loop:
Before the clay hardens or is baked, carefully insert a metal eye pin into the very top of the red hat. Twist it gently as you push down to anchor it securely.
Clean Lines Only
Red clay stains lighter colors easily! Wash your hands thoroughly or use baby wipes when switching from red to white clay to keep that beard snowy and bright.
Step 2: Adding the Beard and Hair
-
Shape the beard base:
Roll a piece of white clay into a flat, wide teardrop shape. This needs to cover the bottom half of the beige face. -
Attach the beard:
Press the white clay onto the lower portion of the face, curving it up the sides to meet the red hat. Smooth the edges down gently so it looks integrated. -
Texture the beard:
Using a needle tool or a sharp toothpick, gently drag short, vertical lines through the white clay to mimic hair strands. I find short, varied strokes look more realistic than long, perfect lines. -
Create the mustache:
Roll two very tiny teardrops of white clay. Join the rounded ends together in the center and curl the pointed ends slightly upward. -
Place the mustache:
Position the mustache right in the center of the face, slightly overlapping the top of the beard texture.
Step 3: Face Details and Texture
-
Add the nose:
Roll a minuscule ball of beige clay and place it directly atop the center of the mustache where the two pieces join. Press gently to secure it. -
Create eye sockets:
Use a small ball tool to make two shallow indentations above the mustache for the eyes. This helps the black clay sit flush. -
Place the eyes:
Roll two extremely tiny balls of black clay. Carefully place them into the indentations you just made. If they’re too tricky to handle, pick them up with the tip of a needle tool. -
Texture the hat:
To give the hat a knitted or fabric feel, use your needle tool to poke small, scattered dashes across the red surface. Vary the direction slightly for organic texture. -
Add the mouth detail:
Using the very tip of your tool or a speck of red paint post-baking, apply a tiny red dot just below the mustache in the center of the beard for a subtle mouth.
Rustic Finish
For a vintage look, lightly brush the textured beard with diluted brown acrylic paint after baking, then wipe the surface immediately to leave shadow in the grooves.
Step 4: Finishing Touches
-
Final inspection:
Check your charm for any fingerprints. You can gently brush them away with a little baby oil or cornstarch on your finger before baking. -
Bake the clay:
Bake the charm according to your specific polymer clay manufacturer’s instructions (usually around 275°F or 130°C for 15-30 minutes). Let it cool completely. -
Add blush (Optional):
Once cooled, you can use a dry brush with a tiny bit of pink chalk pastel dust to add rosy cheeks to the beige area.
Hang your finished Santa on the tree or attach it to a special gift for a handmade holiday touch


Reindeer With Simple Antlers
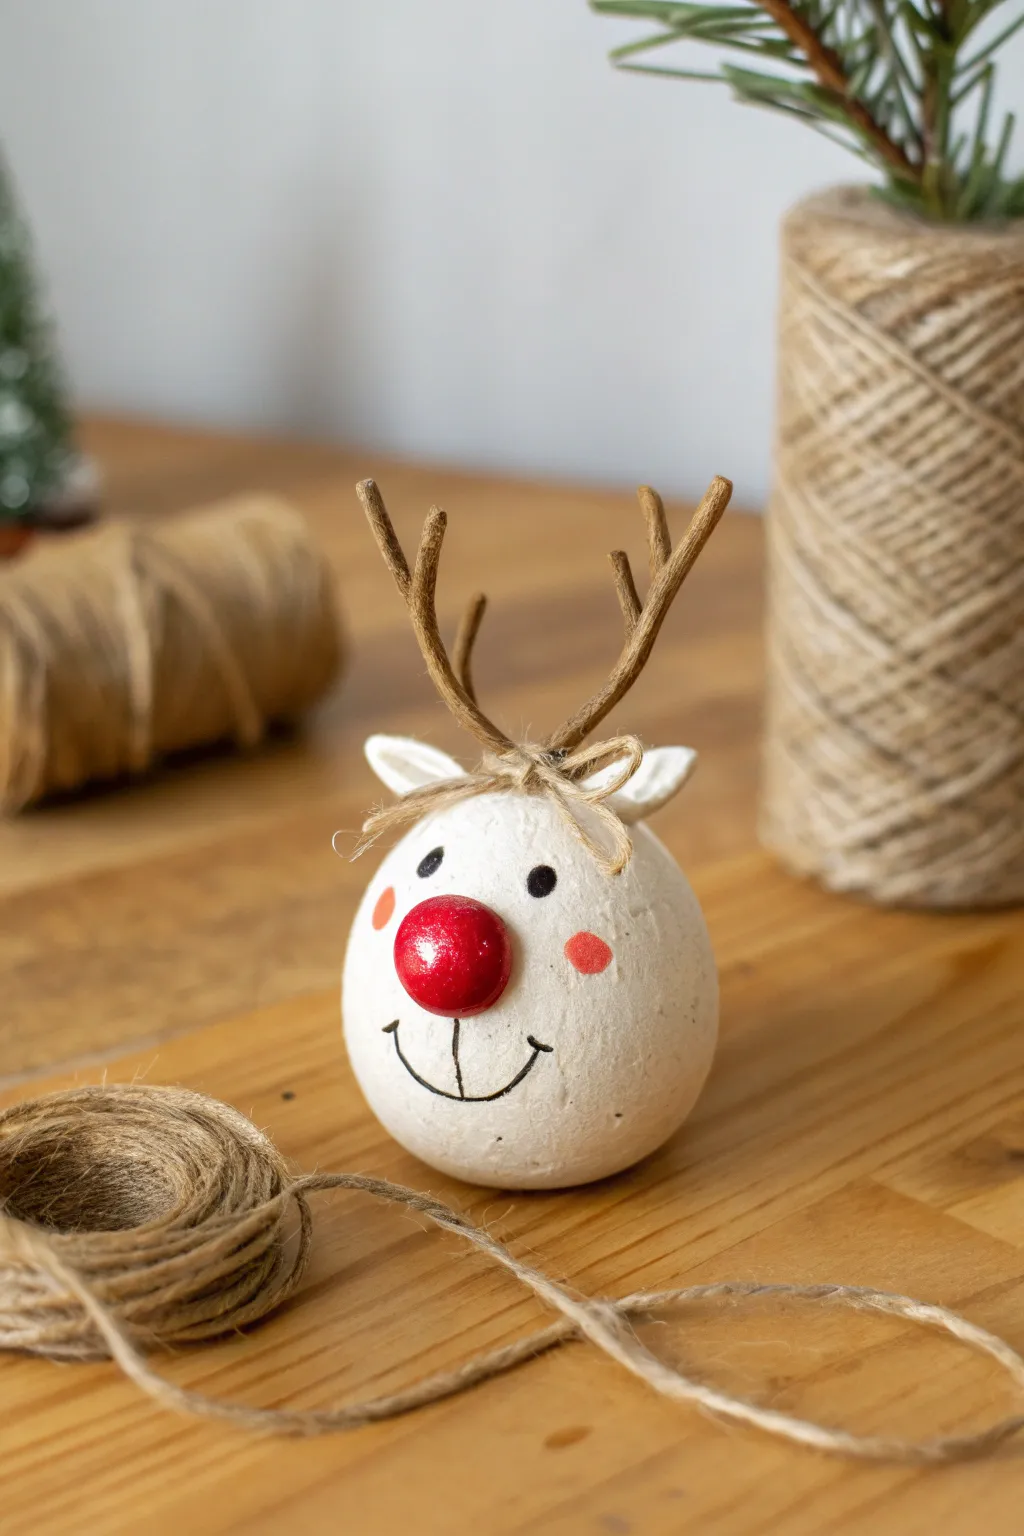
Transform a simple sphere of air-dry clay into this charmingly minimalist reindeer sculpture perfect for a rustic holiday display. Its bright red nose and natural twine accents give it a warm, handmade personality that stands out on any mantel.
Step-by-Step
Materials
- White air-dry clay (or polymer clay)
- Small twigs or brown floral wire for antlers
- Jute twine
- Red acrylic paint
- Black acrylic paint or fine-tip permanent marker
- Pink or light orange acrylic paint
- Small wooden bead or ball of clay (for the nose)
- Craft glue or hot glue gun
- Fine grit sandpaper
- Sculpting tools or toothpick
- Clear matte varnish (optional)
Step 1: Sculpting the Base
-
Shape the body:
Take a generous handful of white air-dry clay and roll it between your palms. Aim for a smooth, slightly egg-shaped sphere about the size of a tennis ball, flattening the bottom gently so it stands upright without wobbling. -
Form the ears:
Pinch off two small, pea-sized pieces of clay. Flatten them into teardrop shapes and pinch the pointed ends slightly to curve them. -
Attach the ears:
Score the top sides of the head where the ears will go, add a tiny dab of water or slip, and press the pinched ends of the ears onto the head. Smooth the seams with your finger or a tool so they look seamless. -
Create the nose base:
If you are using a wooden bead for the nose, verify the sizing now. If making a clay nose, roll a small ball of clay about the size of a cherry and press it firmly onto the center of the face, flattening the back side for a good bond. -
Prepare antler holes:
Before the clay hardens, use a toothpick or the end of your twigs to poke two small holes between the ears. This saves you from trying to drill into hard clay later. -
Let it dry:
Set your reindeer aside in a cool, dry place. Depending on the thickness and brand of your clay, this usually takes 24-48 hours. I like to rotate it occasionally so the bottom dries evenly.
Step 2: Adding Details & Painting
-
Sand imperfections:
Once fully dry, inspect your reindeer. Use fine-grit sandpaper to gently smooth out any fingerprints or rough bumps on the surface. -
Paint the nose:
Paint the nose (whether clay or wood) with a bright, glossy red acrylic paint. You might need two coats for full opacity. -
Add rosy cheeks:
Dip a fingertip or a small sponge into pink or light orange paint. Dab off the excess on a paper towel, then gently press two circles onto the cheeks for a soft, blushing look. -
Draw the face:
Using a fine-tip paintbrush or a permanent marker, draw two small, solid black circles for the eyes. Add a simple curved line for the mouth, adding a small vertical dash at the top/center to connect it visually to the nose area. -
Seal the piece:
If you want your reindeer to last for years, apply a thin coat of clear matte varnish over the entire piece, or spot-varnish just the red nose for extra shine.
Cracking Clay?
If small cracks appear as the clay dries, mix a tiny bit of fresh wet clay with water to make a paste and fill them in like spackle.
Step 3: Final Assembly
-
Prepare the antlers:
Select two small twigs or pieces of brown floral wire that have little forks at the end. Trim them to be proportional to the head, usually about 2-3 inches long. -
Insert antlers:
Apply a drop of craft glue into the pre-made holes on the head and firmly insert your twigs. Hold them in place for a moment until the glue grabs. -
Make the bow:
Cut a short length of thin jute twine. Tie it into a very small, simple bow. -
Attach the headpiece:
Place a dot of glue right between the antlers on top of the head. Press your twine bow into the glue. -
Wrap the messy hair:
For that cute tangled look shown in the image, cut a few short strands of twine (about an inch long) and glue them loosely under and around the bow, making it look like a messy forelock.
Make it an Ornament
Before drying, insert a U-shaped piece of wire or a paperclip into the top of the head behind the antlers to create a hanging loop.
Now you have a sweet woodland friend ready to join your holiday decor


Snowman Stacks With Scarves
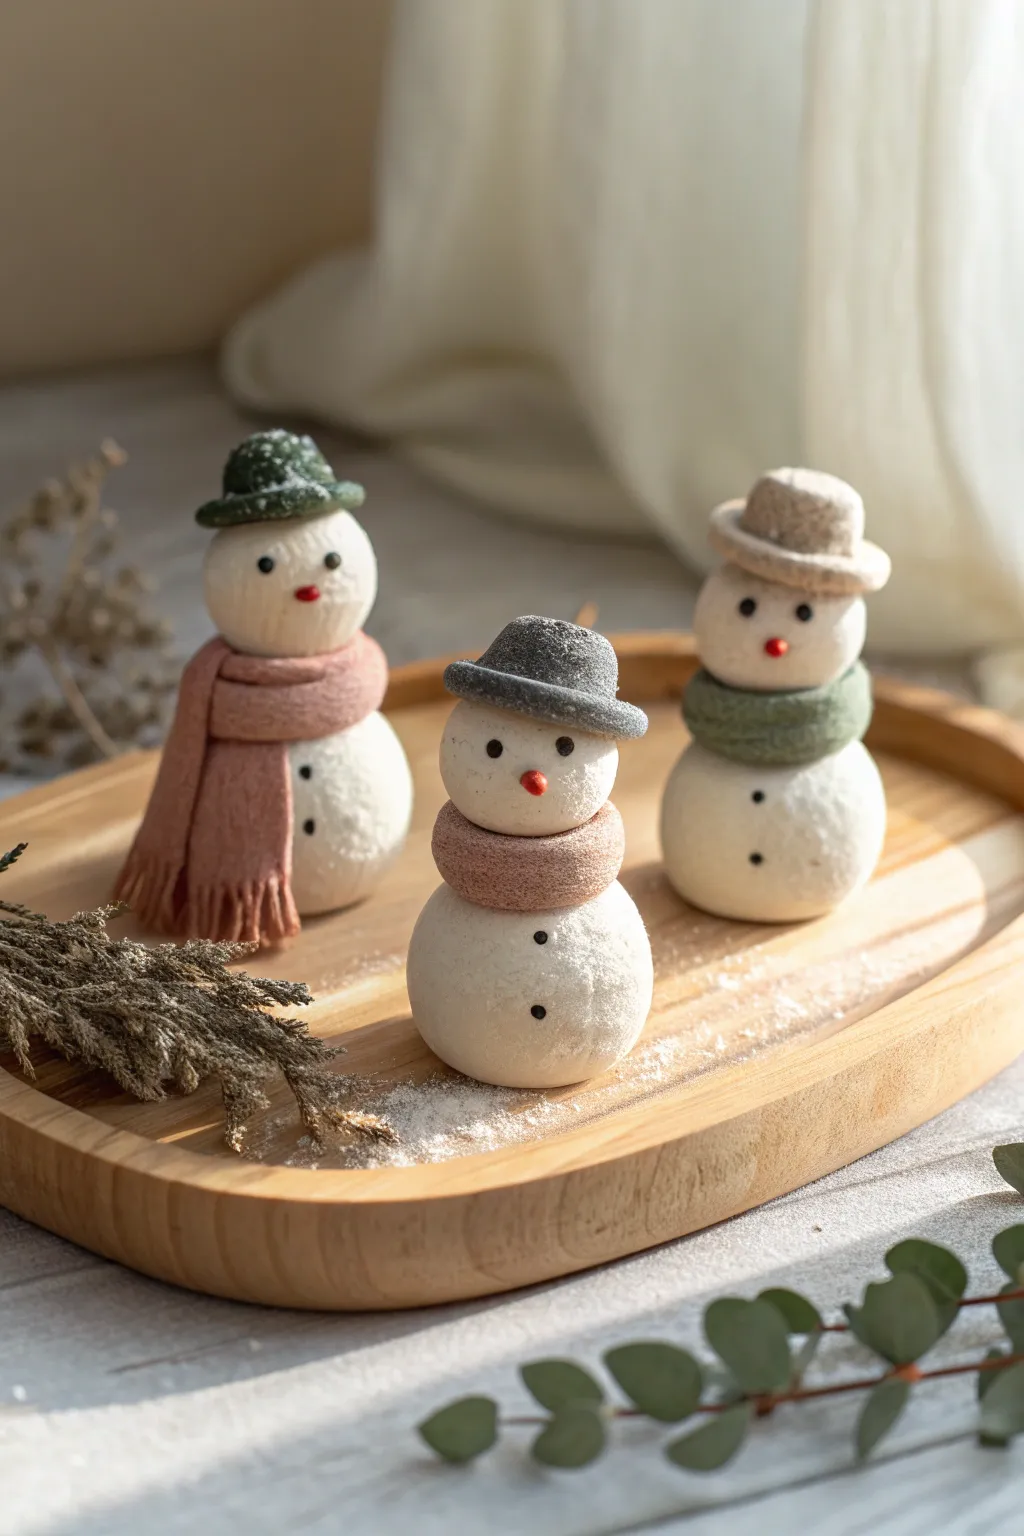
Create a charming winter scene with these three minimalist clay snowmen, each bundled up in their own uniquely colored scarf and hat. The textured, matte finish gives them a delightful sugared appearance that mimics freshly fallen snow.
How-To Guide
Materials
- White polymer clay or air-dry clay
- Colored polymer clay (green, pink, grey, beige) for accessories
- Pointed sculpting tool or toothpick
- Hard pastels or acrylic paint (black and orange)
- Small detail brush
- White acrylic paint or embossing powder (for frosted effect)
- Toothbrush or stiffness brush (for texturing)
- Rolling pin
- Craft knife
Step 1: Shaping the Snowmen
-
Base Construction:
Begin by conditioning your white clay until it is soft and pliable. Roll three medium-sized balls for the snowmen’s bodies and three slightly smaller balls for their heads. -
Stacking Bodies:
Gently press a head onto each body piece. If using air-dry clay, you might need a dab of water or slip to join them effectively; for polymer clay, simply press firmly to bond. -
Adding Texture:
Before adding accessories, take a toothbrush or a stiff bristled brush and tap it all over the surface of the white clay. This creates a realistic, snowy ‘pocked’ texture. -
Flattening the Botoms:
Very gently press the bottom of each snowman onto your work surface so they sit flat and stable without rolling away.
Step 2: Creating the Accessories
-
Scarf Base:
Roll out snakes of clay in your chosen accessory colors—dusty pink, sage green, and beige. Flatten them slightly with a rolling pin to create long, thin strips. -
Wrapping Scarves:
Wrap a flattened strip around the neck of each snowman. For the pink scarf, let one end hang down the front significantly longer, like a traditional winter muffler. -
Adding Fringe:
Use your craft knife to carefully cut small slits at the ends of the scarves to mimic fringe. I find using a needle tool helps separate the strands for a more natural fabric look. -
Scarf Texturing:
Lightly press a piece of fabric or a fine mesh onto the clay scarves to imprint a woven texture, adding to the cozy realism. -
Hat Brim:
To make the hats, roll a small ball of colored clay and flatten it into a disc for the brim. Place this on top of the snowman’s head. -
Hat Crown:
Roll a smaller, slightly cylindrical shape for the top of the hat and place it centered on the brim. Generally match the hat color to the scarf, though mixing and matching works too. -
Hat Detailing:
Use your texture tool or toothbrush again on the hats to give them a felt-like appearances, contrasting with the smooth clay look if you prefer.
Pro Tip: Seamless Heads
Insert a toothpick or a small piece of creating wire into the body before adding the head. This acts as an internal spine, keeping your snowman sturdy and preventing the head from falling off later.
Step 3: Finishing Touches
-
Facial Features:
Use a very small dotting tool or toothpick to indent where the eyes and buttons will go. Taking a tiny amount of black clay or paint, fill these small holes for the eyes and the buttons down the stomach. -
Carrot Noses:
Roll extremely tiny slivers of orange clay into pointed cone shapes. Attach these to the center of the faces for noses. -
Baking or Drying:
If using polymer clay, bake according to the manufacturer’s instructions. If using air-dry clay, allow the figures to dry completely in a cool, dry place for at least 24 hours. -
Frosting Effect:
Once fully cured or dry, dry-brush a very small amount of white acrylic paint over the hats and scarves to make them look dusted with snow. -
Final Dusting:
For an extra sugary finish like the image, you can brush a thin layer of glue and sprinkle fine white embossing powder or white glitter over the entire figure.
Level Up: Knit Texture
Instead of just pressing fabric for texture, twist two very thin strands of clay together before flattening them to create the scarf. This creates a realistic chunky-knit cable pattern.
Arrange your trio on a wooden tray or shelf to add a quiet, cozy winter touch to your home decor

The Complete Guide to Pottery Troubleshooting
Uncover the most common ceramic mistakes—from cracking clay to failed glazes—and learn how to fix them fast.
Candy Cane Twist Minis
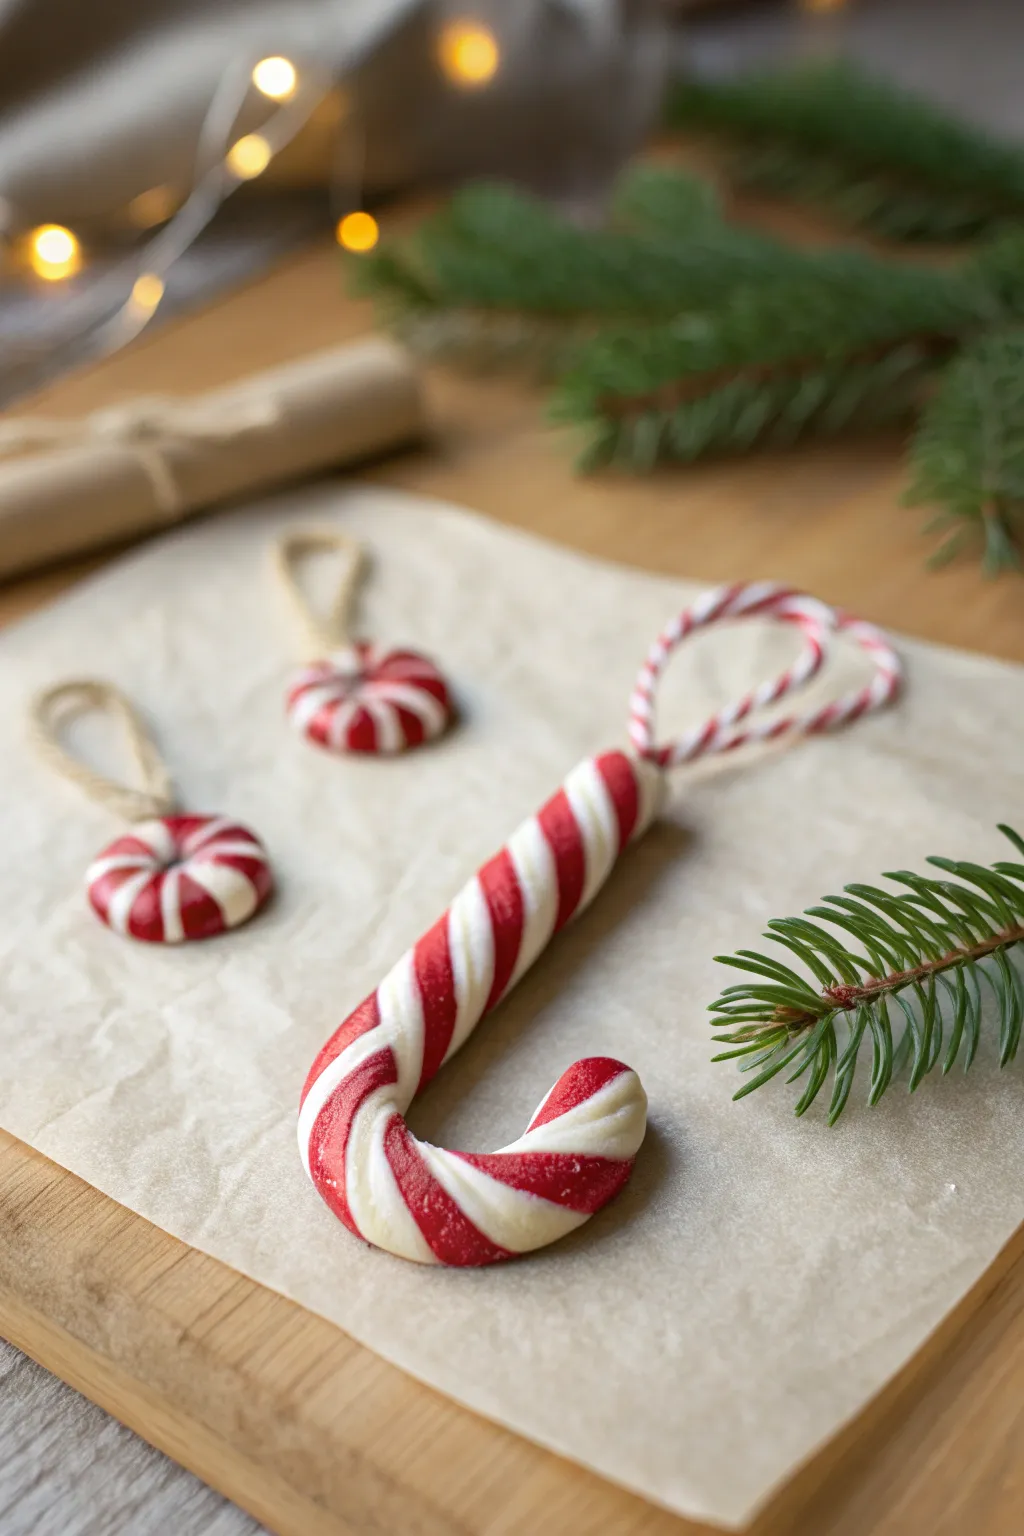
These classic red and white swirled ornaments bring a nostalgic sweetness to any holiday decor without the sticky mess of real candy. Crafted from polymer clay and dusted with faux sugar, they look good enough to eat but are built to last for seasons to come.
Step-by-Step Tutorial
Materials
- Red polymer clay
- White polymer clay
- Rolling pin or acrylic roller
- Blade or craft knife
- Clean work surface (tile or glass mat)
- Baker’s twine or jute cord
- Needle tool or toothpick
- Fine glitter or translucent embossing powder (for the sugar look)
- Liquid polymer clay or strong craft glue
- Oven for baking
Step 1: Creating the Striped Cane
-
Condition the clay:
Begin by thoroughly kneading your red and white clay separately until both are soft, pliable, and free of cracks. Ensure your hands are clean when switching to white to avoid color transfer. -
Roll out logs:
Roll a portion of the red clay into a smooth, even log about 1/4 inch thick. Repeat this process with the white clay, aiming for the exact same thickness and length. -
Twist together:
Place the two logs side-by-side, pressing them gently together. Holding one end stationary, carefully twist the other end to create a spiraled rope effect; continue twisting until you have tight, even stripes. -
Smooth the coil:
Once twisted, gently roll the combined rope on your work surface. This helps smooth out the ridges between the colors and consolidates the clay into a single, seamless cylinder while maintaining that beautiful barber-pole pattern.
Step 2: Shaping the Ornaments
-
Cut to length:
For the candy cane, slice a segment of your twisted rope about 4 to 5 inches long with your blade. -
Form the hook:
Gently bend the top third of the rope into a classic shepherd’s hook shape, being careful not to flatten the clay where it curves. -
Make the peppermints:
For the round mints, cut a longer piece of the twisted rope and coil it tightly around itself into a flat spiral, tucking the end underneath to hide the seam. -
Adding texture:
I like to lightly press the finished shapes just to ensure they aren’t perfectly round tubes, giving them a more hand-pulled candy appearance.
Clean Lines Only
Red clay stains hands easily. Use baby wipes or wash hands thoroughly before touching the white clay to keep your stripes crisp and bright.
Step 3: Adding the Hangers
-
Insert the twine on the cane:
For the candy cane, cut a piece of baker’s twine and tie it into a loop. Press the knot end into the very top of the cane. -
Secure the loop:
Use a small dab of liquid polymer clay or a tiny scrap of your twisted clay to bridge over the twine knot, smoothing it down so the string is embedded securely into the ornament. -
Insert twine on peppermints:
For the round swirls, use your needle tool to pierce a hole near the edge or embed a loop of jute cord into the top before baking.
Smoother Twists
If the clay starts to crack while twisting, it isn’t conditioned enough. Warm it in your hands longer before trying to roll the logs again.
Step 4: Sugaring and Baking
-
Apply the sugar effect:
Before baking, lightly brush the surface with a tiny amount of liquid clay or water, then generously sprinkle fine white glitter or embossing powder over the clay to mimic crystallized sugar. -
Prepare for baking:
Transfer your creations to a baking sheet lined with parchment paper or a ceramic tile. -
Bake:
Bake the ornaments according to the specific temperature and time instructions on your package of polymer clay (usually around 275°F or 130°C for 15-30 minutes depending on thickness). -
Cool down:
Allow the pieces to cool completely in the oven with the door cracked, or on a cooling rack, before handling them to prevent breakage.
Hang these sweet little sculptures on your tree or use them as festive gift toppers for a handmade touch
Gingerbread People With Icing
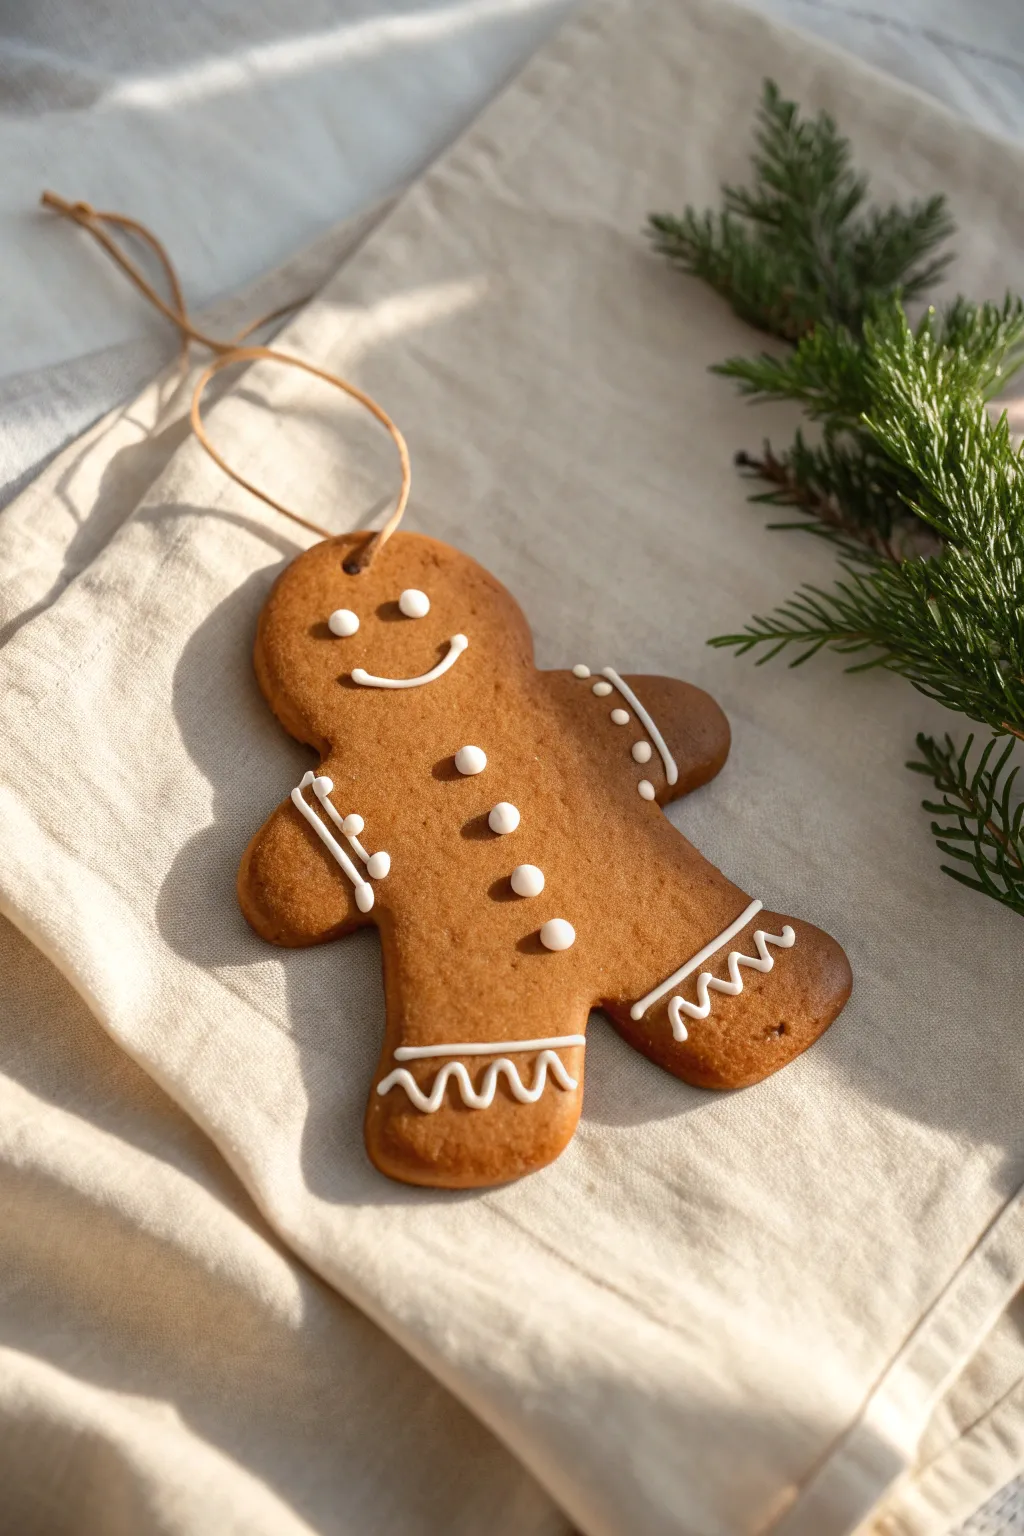
These charming ornaments capture the warm, spicy look of real gingerbread cookies without the risk of crumbling. With simple white icing details and a rustic leather cord, they make timeless additions to your tree or festive gift tags.
Detailed Instructions
Materials
- Polymer clay (warm gingerbread brown)
- White liquid polymer clay or thick white fabric paint (puffy paint)
- Gingerbread man cookie cutter
- Rolling pin or clay machine
- Parchment paper
- Toothpick or needle tool
- Ball stylus tool (optional)
- Leather or suede cord
- Clean work surface (ceramic tile or glass mat)
- Oven (for baking polymer clay)
Step 1: Preparing the Dough
-
Condition the Clay:
Begin by kneading your gingerbread-colored polymer clay in your hands. You want it warm and pliable so it doesn’t crack at the edges. -
Roll it Out:
Roll the clay into a smooth sheet. Aim for a thickness of about 1/4 inch (6mm)—a little thicker than a real cookie helps it feel substantial and durable. -
Create Texture (Optional):
For an ultra-realistic baked look, I like to gently tap the surface of the raw clay with a toothbrush or a piece of crumpled aluminum foil. This mimics the porous texture of a baked cookie.
Texturing Tip
Mix a tiny pinch of translucent clay into your brown clay. This subtle change adds depth and makes the faux cookie look less like plastic and more like baked dough.
Step 2: Cutting and Baking
-
Cut the Shapes:
Press your gingerbread man cookie cutter firmly into the clay sheet. Wiggle it slightly to ensure a clean cut before lifting it away. -
Smooth the Edges:
Use your finger to gently rub around the perimeter of the cutout. This softens any sharp ridges left by the cutter, making it look more like rising dough. -
Make the Hole:
Using a straw or a round tool, punch a hole at the very top of the head for the hanging cord. Ensure the hole is large enough for your leather cord to pass through later. -
Baking:
Place your clay cutout on a parchment-lined baking sheet. Bake according to your specific clay manufacturer’s instructions (usually 275°F/135°C for 15-30 minutes). -
Cooling Down:
Remove from the oven and let the piece cool completely on a flat surface. It must be at room temperature before you start decorating.
Make it Smell Good
Before baking, mix a drop of cinnamon or clove essential oil directly into the raw clay. Your ornaments will carry a faint, festive scent of real gingerbread.
Step 3: The Icing Details
-
Plan the Face:
Visualize where the eyes and mouth will go. The eyes should be spaced widely apart, and the smile should be a gentle upward curve. -
Pipe the Eyes:
Using white liquid clay or puffy paint in a fine-tip applicator bottle, squeeze two small, round dots for the eyes. Don’t flatten them; let them remain slightly domed. -
Draw the Smile:
Carefully pipe a thin, curved line for the mouth. Start from one side and move steadily to the other to keep the line width consistent. -
Add the Buttons:
Pipe three distinct dots down the center of the torso. These should align vertically and be slightly larger than the eyes. -
Decorate the Arms:
On the wrists, pipe a simple zig-zag or wavy line across the arm to simulate icing cuffs. Do this on both hands. -
Decorate the Legs:
Repeat the zig-zag pattern across the ankles. Try to match the ‘frequency’ of the wave to what you did on the arms for symmetry. -
Optional Shoulder Detail:
If you want extra detail, add three small dots or short dashes on the shoulders, creating a little decorative accent. -
Setting the Icing:
If you used liquid polymer clay, you will need to bake the piece a second time for about 15 minutes to set it. If you used puffy paint, simply let it air dry overnight.
Step 4: Finishing Touches
-
Prepare the Cord:
Cut a length of thin leather cord, approximately 8 inches long. -
Thread the Ornament:
Pass one end of the cord through the hole in the gingerbread man’s head. -
Knot the Cord:
Bring the two ends of the cord together and tie an overhand knot near the tips to create a secure loop.
Your permanent gingerbread friend is now ready to hang on the tree for years to come


What Really Happens Inside the Kiln
Learn how time and temperature work together inside the kiln to transform clay into durable ceramic.
Mini Gingerbread House Ornaments

These adorable mini gingerbread houses mimic the cozy texture of real baked goods and make for lasting keepsake ornaments. With realistic “icing” details and a dusting of magic, they look good enough to eat but will last for years to come.
Step-by-Step Tutorial
Materials
- Polymer clay (gingerbread/tan color)
- Polymer clay (white)
- Polymer clay (red)
- Liquid polymer clay (white/translucent) or white acrylic paint
- Rolling pin or pasta machine
- Precision craft knife or clay blade
- Parchment paper
- Needle tool or toothpick
- Small square cookie cutter (optional)
- Small round cutter (for door)
- Jute twine or rustic string
- Wire loop or eye pin
- Aluminum foil (for internal structure/armature)
- Soft toothbrush or sandpaper (for texturing)
Step 1: Shaping the Base & Walls
-
Create the core:
To save clay and reduce weight, form a small cube out of tightly crinkled aluminum foil. This will be the inside of your house. Press it firmly so it holds a square shape, then fashion a triangular prism piece of foil to sit on top for the roof. -
Prepare the dough:
Condition your tan polymer clay until it’s soft and pliable. Roll it out into a medium-thick sheet, about 1/8 inch thick. I find a slightly thicker sheet helps mimic the look of a real cookie. -
Cut the panels:
Using a craft knife or a square cutter, cut out four square panels for the walls and two rectangular panels for the roof sections. You will also need two triangular pieces for the gables (the parts under the roof peaks). -
Texture the cookie:
Before assembling, take a soft toothbrush or a piece of crumpled aluminum foil and gently tap it all over the clay surfaces. This dimpling effect creates that perfect baked gingerbread texture. -
Cover the armature:
Carefully press your clay panels onto your foil core. Smooth the seams where the walls meet using your finger or a clay tool so the corners look baked together, not just stuck on.
Step 2: Adding Architectural Details
-
Install the roof:
Press the triangular gable pieces onto the front and back roof areas first. Then, lay the two rectangular roof panels over the top, allowing them to overhang the walls slightly like real eaves. Smooth the top ridge seam gently. -
Create the door:
Cut a small arch shape from your leftover tan clay for the door. Press it onto the front of the house. Use a needle tool to lightly scribe a vertical line if you want a double-door look, or keep it simple. -
Prepare the hanging loop:
Insert a metal eye pin into the very center of the roof ridge. If you don’t have one, twist a small piece of wire into a loop and push the tails deep into the clay roof to secure it.
Sticky Situation?
If your clay is too soft and sticky to hold sharp corners, place the rolled sheet in the fridge for 10 minutes before cutting your wall panels.
Step 3: Decoration & Baking
-
Apply the snow:
Mix a small amount of white clay with liquid polymer clay (or use a pre-made liquid clay product) to create a thick paste that resembles royal icing. Spread this generously along the roof line, letting it drip down the eaves naturally. -
Pipe the details:
Roll extremely thin snakes of white solid clay to create the outlines for the windows and door frames. Gently press these onto the walls. For the roof dots, press tiny balls of red clay into the roof surface. -
Add window panes:
Inside your white window frames, place tiny crossed snakes of white clay to mimic muntin bars. This adds a charming cottage feel. -
Door detailing:
Add a tiny red ball for the doorknob. Roll even thinner white snakes to create a dotted border around the door arch for extra contrast. -
Bake carefully:
Place your house on parchment paper and bake according to your specific clay manufacturer’s instructions. Usually, this is around 275°F (130°C) for 15-30 minutes per 1/4 inch of thickness. -
Cool and inspect:
Let the house cool completely in the oven with the door cracked. Once cool, verify the eye pin is secure; if it feels loose, a dab of superglue will fix it instantly. -
Final touch:
Thread a piece of rustic jute twine through the loop and tie a bow at the top, just like in the photo. Your ornament is ready to hang.
Make it Sparkle
Before baking, brush white dry pastels or cornstarch lightly over the roof to look like powdered sugar, or add micro-glitter to the ‘icing’ for a festive shimmer.
Hang these charming little houses on your tree to create a cozy village feel right in your living room
Wreath Rings With Berries
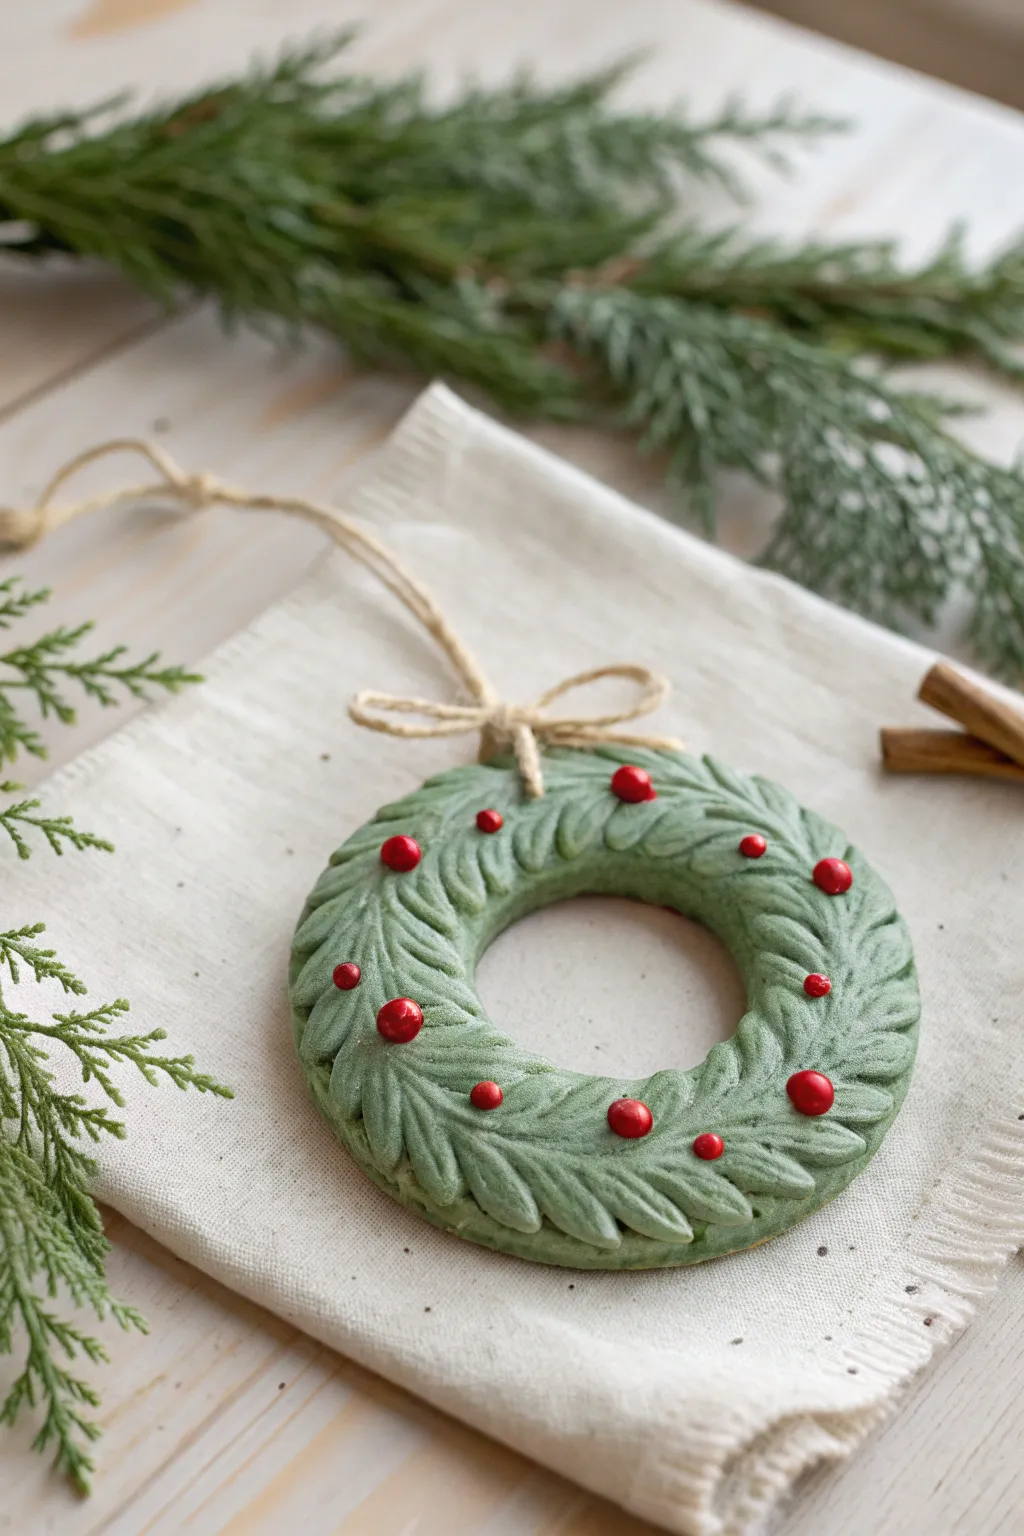
Capture the evergreen spirit of the season with these charming clay wreath ornaments, featuring detailed leaf impressions and vibrant crimson berries. The muted green tone and natural jute twine give them a lovely rustic woodland aesthetic perfect for any tree.
How-To Guide
Materials
- Polymer clay (sage green and bright red)
- Round cookie cutter (approx 3-inch diameter)
- Small round cutter or bottle cap (approx 1-inch diameter)
- Needle tool or toothpick
- Liquid polymer clay or bake-and-bond
- Jute twine
- Rolling pin
- Parchment paper
- Sculpting tool with a small curved blade (optional)
Step 1: Forming the Wreath Base
-
Condition the clay:
Begin by conditioning the sage green polymer clay until it is soft and pliable, ensuring there are no air bubbles trapped inside. -
Roll the slab:
Roll the green clay out on a sheet of parchment paper to a uniform thickness of about 1/4 inch. -
Cut the outer circle:
Use your larger round cookie cutter to punch out the main circle shape for the wreath. -
Cut the center hole:
Center your smaller round cutter or bottle cap in the middle of the green circle and remove the clay to create the ring shape. -
Smooth the edges:
Gently tap and smooth the cut edges with your finger to remove any sharp ridges from the cutting process.
Uneven Impressions?
If your leaf impressions are sticking to the tool, dip the tip of your needle or sculpting tool in a little cornstarch or water before pressing it into the clay.
Step 2: Texturing the Foliage
-
Mark the center line:
Using a needle tool, lightly score a continuous line around the center of the ring’s face to guide your leaf placement. -
Impress outer leaves:
Starting from the outside edge, use the side of a needle tool or a small curved sculpting tool to press leaf-shaped indentations into the clay, angling them toward the center line. -
Impress inner leaves:
Repeat the process on the inside edge, pressing leaf shapes that angle outward to meet the first row at the center line. -
Add vein details:
Go back over each impressed leaf shape and use the very tip of your needle tool to draw a tiny central vein for added realism. -
Define the texture:
I like to gently press a piece of rough sandpaper or a toothbrush over the surface to give the ‘leaves’ a slightly organic, less plastic texture before baking. -
Create the hanging hole:
Use a straw or a tool to poke a clean hole at the very top of the wreath for the twine to pass through later.
Step 3: Adding Berries and Assembly
-
Roll berries:
Take tiny pinches of the bright red clay and roll them between your fingers to create small, smooth spheres of varying sizes. -
Attach the berries:
Place a tiny dot of liquid clay or bake-and-bond at random intervals on top of the leaves, then gently press the red berries onto these spots so they adhere well. -
Bake the ornament:
Bake the wreath according to the manufacturer’s instructions for your specific brand of clay, usually at 275°F (135°C) for 15-30 minutes. -
Cool down:
Allow the clay to cool completely on the baking sheet before handling it to prevent cracking. -
Tie the bow:
Cut a length of jute twine, thread it through the top hole, and tie it into a small, neat bow just above the wreath rim to finish the hanger.
Winter Frost Effect
After baking, lightly dry-brush white acrylic paint over the high points of the textured leaves to create a beautiful snowy, frosted look.
Hang these delicate wreaths on your tree or use them as personalized gift tags to elevate your wrapping

TRACK YOUR CERAMIC JOURNEY
Capture glaze tests, firing details, and creative progress—all in one simple printable. Make your projects easier to repeat and improve.
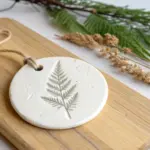
Evergreen Sprig Imprint Tags
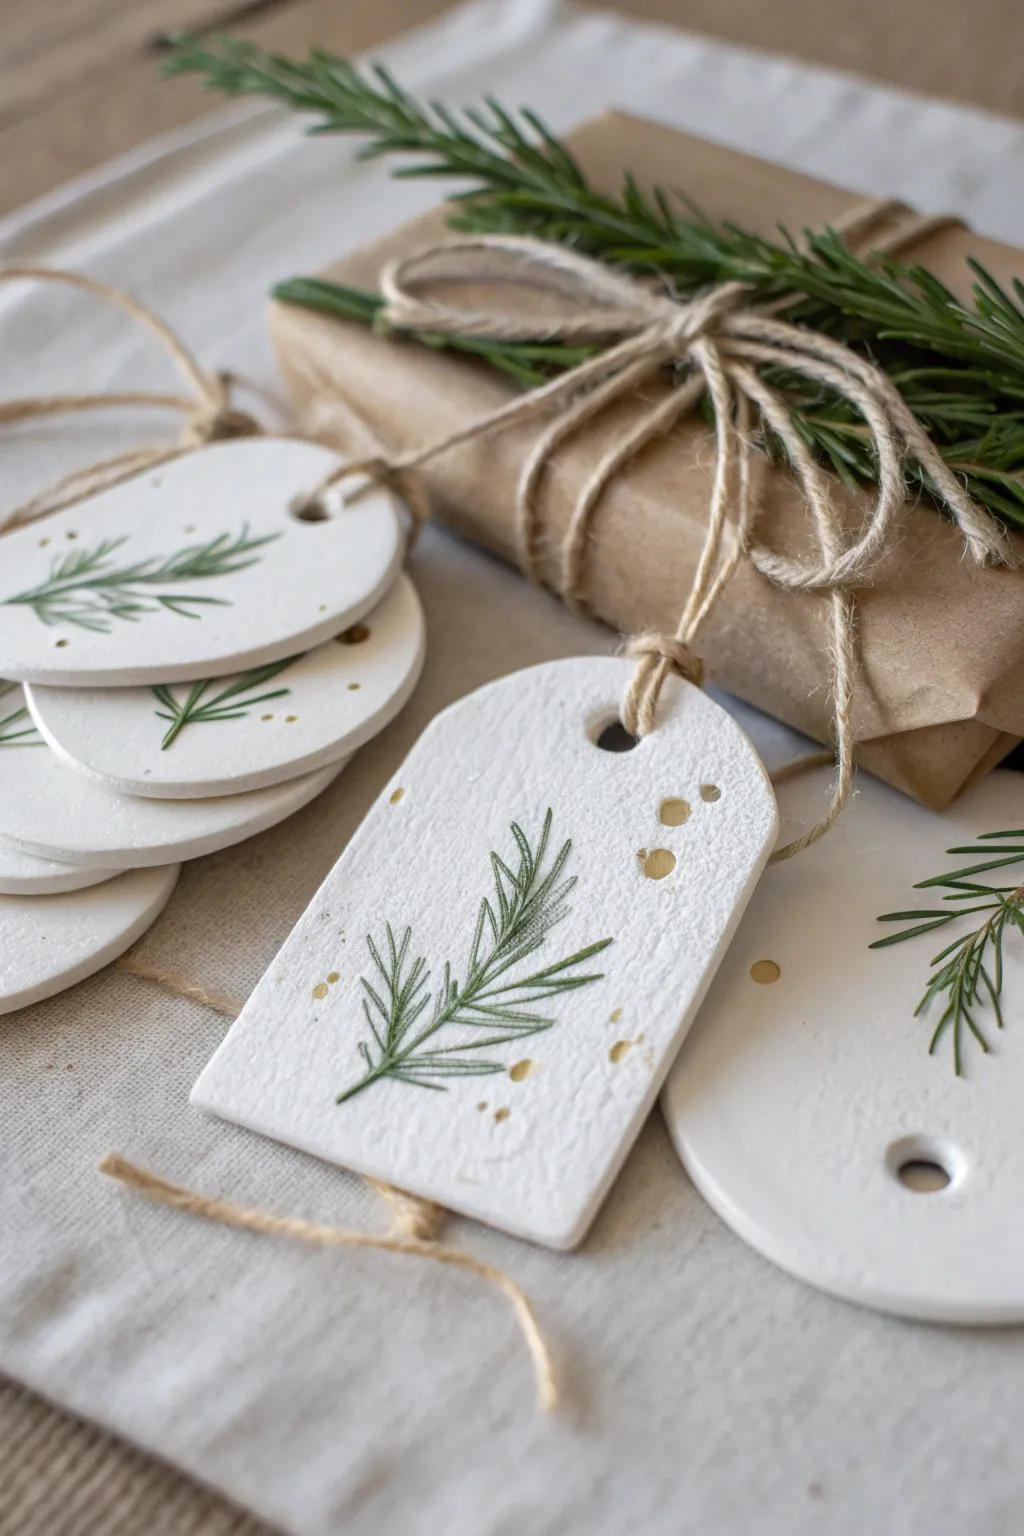
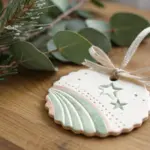
These delicate, minimalist gift tags capture the beauty of winter foliage with simple clay and fresh greenery. The result is a set of elegant white tags featuring realistic pressed evergreen sprigs and subtle touches of gold for a dash of holiday sparkle.
Step-by-Step Guide
Materials
- White air-dry clay or polymer clay
- Fresh rosemary or spruce sprigs (stiff needles work best)
- Rolling pin
- Parchment paper or silicone mat
- Tag-shaped cookie cutter (oval or arch) or craft knife
- Drinking straw or small circular cutter
- Sandpaper (fine grit)
- Green acrylic paint or watercolor (forest green)
- Small detail paintbrush
- Gold metallic paint or gold leaf pen
- Natural jute twine or hemp cord
- Matte spray sealant (optional)
Step 1: Preparation and Rolling
-
Prepare your workspace:
Lay down parchment paper or a silicone mat to prevent the clay from sticking to your table. Take a handful of white clay and knead it gently until it is pliable and smooth. -
Roll the slab:
Using your rolling pin, roll the clay out to an even thickness of about 1/4 inch. If you want a more uniform look, place two wooden rulers on either side of the clay as guides while rolling. -
Select your greenery:
Choose small, firm sprigs of rosemary or spruce. The needles need to be stiff enough to make a clear impression without bending too much. -
Press the botanicals:
Arrange the sprigs on the rolled clay slab. Leave enough space between them for cutting out the tag shapes later. -
Imprint the design:
Gently roll over the sprigs with your rolling pin once. Apply firm, even pressure to embed the greenery into the clay surface, but be careful not to push all the way through. -
Reveal the texture:
Carefully peel back the sprigs to reveal the botanical impression. Use tweezers if any small needles get stuck in the clay.
Uneven Impressions?
If the impression is too faint, try lightly misting the greenery with water before rolling. This softens the clay surface right where you need it to accept the texture.
Step 2: Cutting and Drying
-
Cut the shapes:
Position your tag cutter or use a craft knife to cut shapes around the imprinted designs. Centering the sprig creates a balanced look, while off-center placement feels more organic. -
Create the hole:
Use a drinking straw to punch a hole at the top of each tag for the string. Twist the straw as you pull it out to get a clean circle. -
Smooth the edges:
Dip your finger in a little water and gently run it along the cut edges of the clay to smooth out any roughness before drying. -
Let them dry:
Place the tags on a flat surface to dry. If using air-dry clay, this usually takes 24-48 hours. Carefully flip them over halfway through the process to ensure even drying and prevent curling. -
Sand for perfection:
Once fully cured and hard, use fine-grit sandpaper to buff away any jagged edges or surface bumps for a professional finish.
Level-Up: Scented Tags
Add a few drops of essential oil (like pine or peppermint) to the clay while kneading. The porous clay will hold the scent, making the tag smell like Christmas.
Step 3: Decorating and Finishing
-
Enhance the greenery:
Dip a very fine brush into watered-down forest green acrylic paint. Carefully paint inside the impressed needle marks to highlight the botanical design. -
Wipe away excess:
I find that if the paint looks too heavy, quickly wiping the surface with a damp paper towel leaves the pigment only in the deep crevices for a vintage, stamped effect. -
Add gold speckles:
Dip a stiff brush or toothbrush into gold metallic paint. Run your thumb across the bristles to flick tiny splatters of gold across the white surface of the tags. -
Paint larger gold accents:
For the larger gold dots seen in the image, use the end of a paintbrush handle or a dotting tool to deposit small, deliberate drops of gold paint around the sprig. -
Seal the piece:
Optionally, spray the tags with a matte sealant to protect the paint and clay from moisture. -
String them up:
Cut a length of natural jute twine. Fold it in half, push the loop through the tag hole, and pull the tails through the loop to secure it with a lark’s head knot.
Now your gifts will have a beautifully handmade touch that celebrates the season
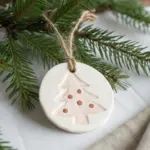
Leaf Vein Botanical Ornaments
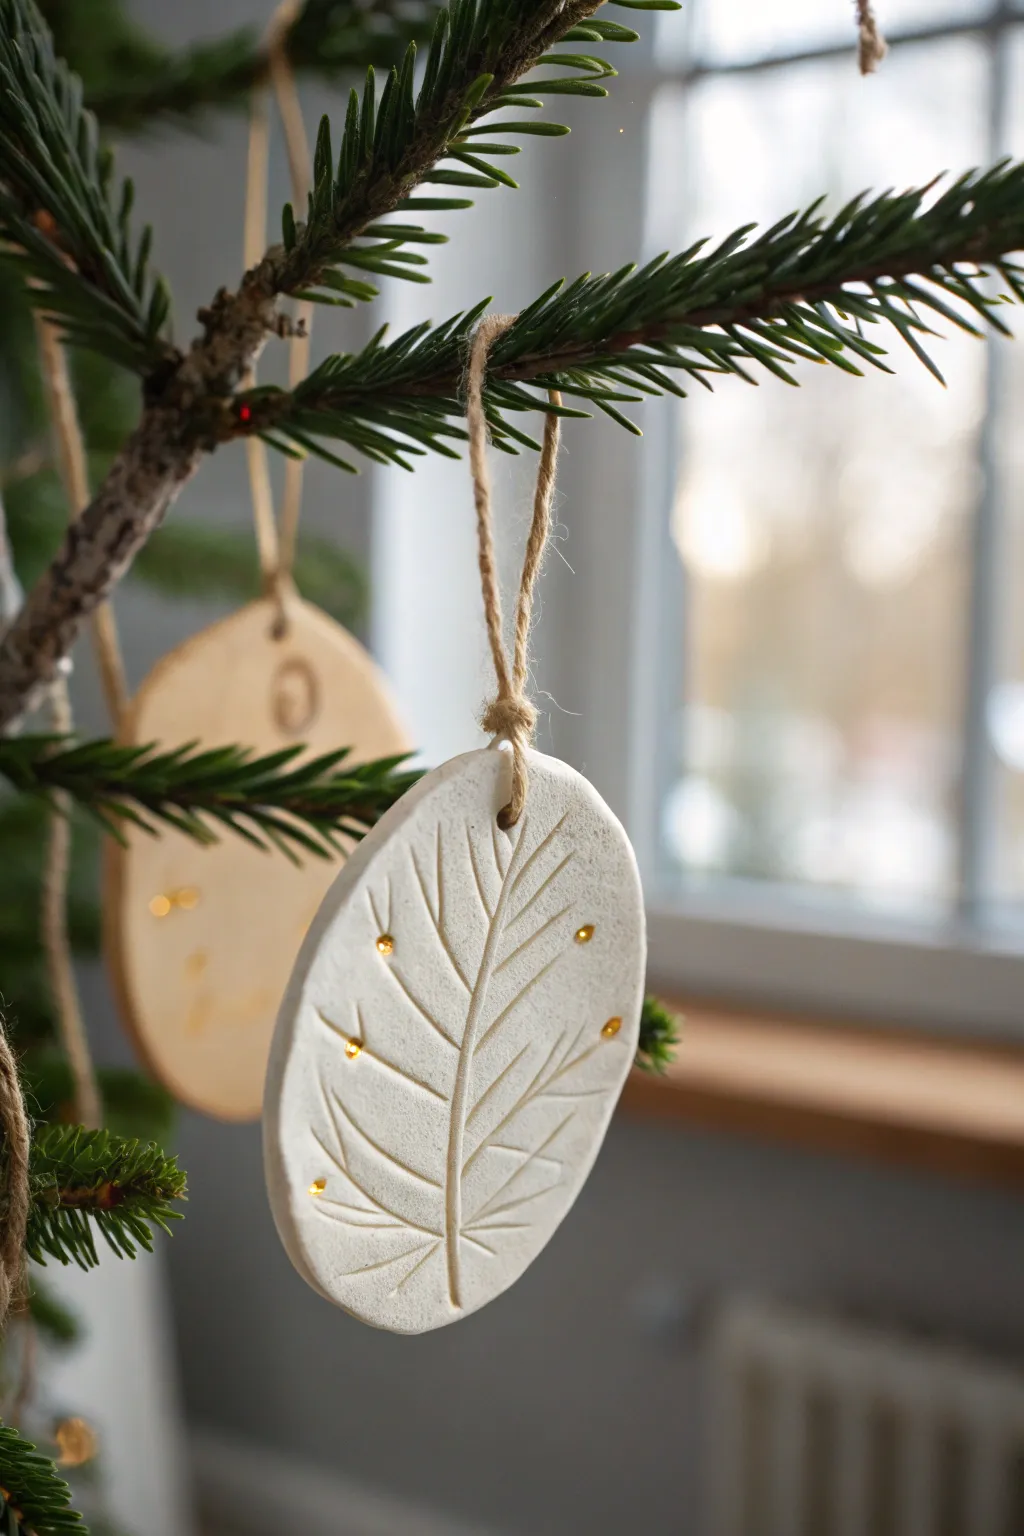
Capture the delicate beauty of winter flora with these elegant handmade ornaments. Imprinted with simple leaf patterns and accented with touches of gold, they add a natural, sophisticated charm to any Christmas tree.
Detailed Instructions
Materials
- White air-dry clay (or homemade baking soda clay)
- Small rolling pin
- Oval cookie cutter (or a knife and paper template)
- Needle sculpting tool or a dull toothpick
- Jute twine
- Gold puff paint or gold dimensional fabric paint
- Straw or skewer (for poking holes)
- Fine-grit sandpaper
- Parchment paper
Step 1: Shaping the Base
-
Prepare the workspace:
Lay down a sheet of parchment paper to prevent sticking. Take a handful of white air-dry clay and knead it until it’s pliable and smooth. -
Roll out the slab:
Using your rolling pin, flatten the clay to an even thickness of about 1/4 inch (6mm). If you want a more rustic look, slightly uneven edges aren’t a problem here. -
Cut the shapes:
Press your oval cookie cutter firmly into the rolled clay. If you don’t have a cutter, place an oval paper template on the clay and trace around it carefully with a craft knife. -
Smooth the edges:
Dip your finger in a tiny bit of water and gently run it along the cut edges of the oval to smooth out any roughness or loose bits of clay.
Smooth Surface Secret
Before cutting your shapes, wipe your rolling pin with a baby wipe or slightly damp cloth to discourage dust and ensure the clay surface is flawlessly smooth.
Step 2: Creating the Design
-
Create the central vein:
Take your needle tool or a dull toothpick. Gently press a curved line starting from the bottom center, reaching up towards the top point, but stopping just short of the edge. -
Add side veins:
Starting from the bottom of the central line, etch upward-curving lines stemming out to the left and right. Keep the pressure moderate; you want a visible groove, but don’t cut all the way through. -
Fill the space:
Continue adding these side veins all the way up the central stem. Spacing them slightly irregularly mimics nature better than perfect symmetry. -
Add hanging hole:
Use a straw or a skewer to punch a clean hole near the very top of the ornament. Ensure it’s not too close to the edge to prevent cracking later. -
Clean up grooves:
Check your etched lines. If the clay displaced and created little ridges (burrs) along the cuts, gently tap them down with a finger or smooth them away. -
Let it dry:
Place the ornaments on a fresh sheet of parchment paper in a safe spot. Allow them to dry completely according to package instructions, usually 24-48 hours. Flip them halfway through for even drying.
Step 3: Finishing Touches
-
Sand imperfections:
Once bone dry, take fine-grit sandpaper and lightly buff the edges. I find this gives the final piece a much more professional, ceramic-like finish. -
Apply gold accents:
Using a tube of gold puff paint or dimensional fabric paint, carefully squeeze tiny dots onto the ornament surface. -
Position the dots:
Place these gold dots randomly near the tips of the etched veins or in the negative space between them. Less is more—aim for a scattered, delicate sparkle. -
Dry the paint:
Let the dimensional paint dry completely. This usually takes a few hours, so be patient to avoid smearing the dots. -
Prepare the twine:
Cut a length of jute twine, approximately 8 inches long. -
Attach the hanger:
Thread the twine through the hole at the top. Bring the two ends together and tie a secure knot. -
Secure the loop:
Pull the loop so the knot sits snugly at the base of the hole, or leave it tied at the top depending on your preference.
Rustic Texture Twist
Instead of hand-drawing the veins, press a real evergreen branch or heavily textured leaf into the wet clay, then highlight the natural impression with the gold dots.
Hang these lovely botanical creations on your tree and enjoy their gentle, handcrafted elegance all season long
Marbled Holiday Baubles
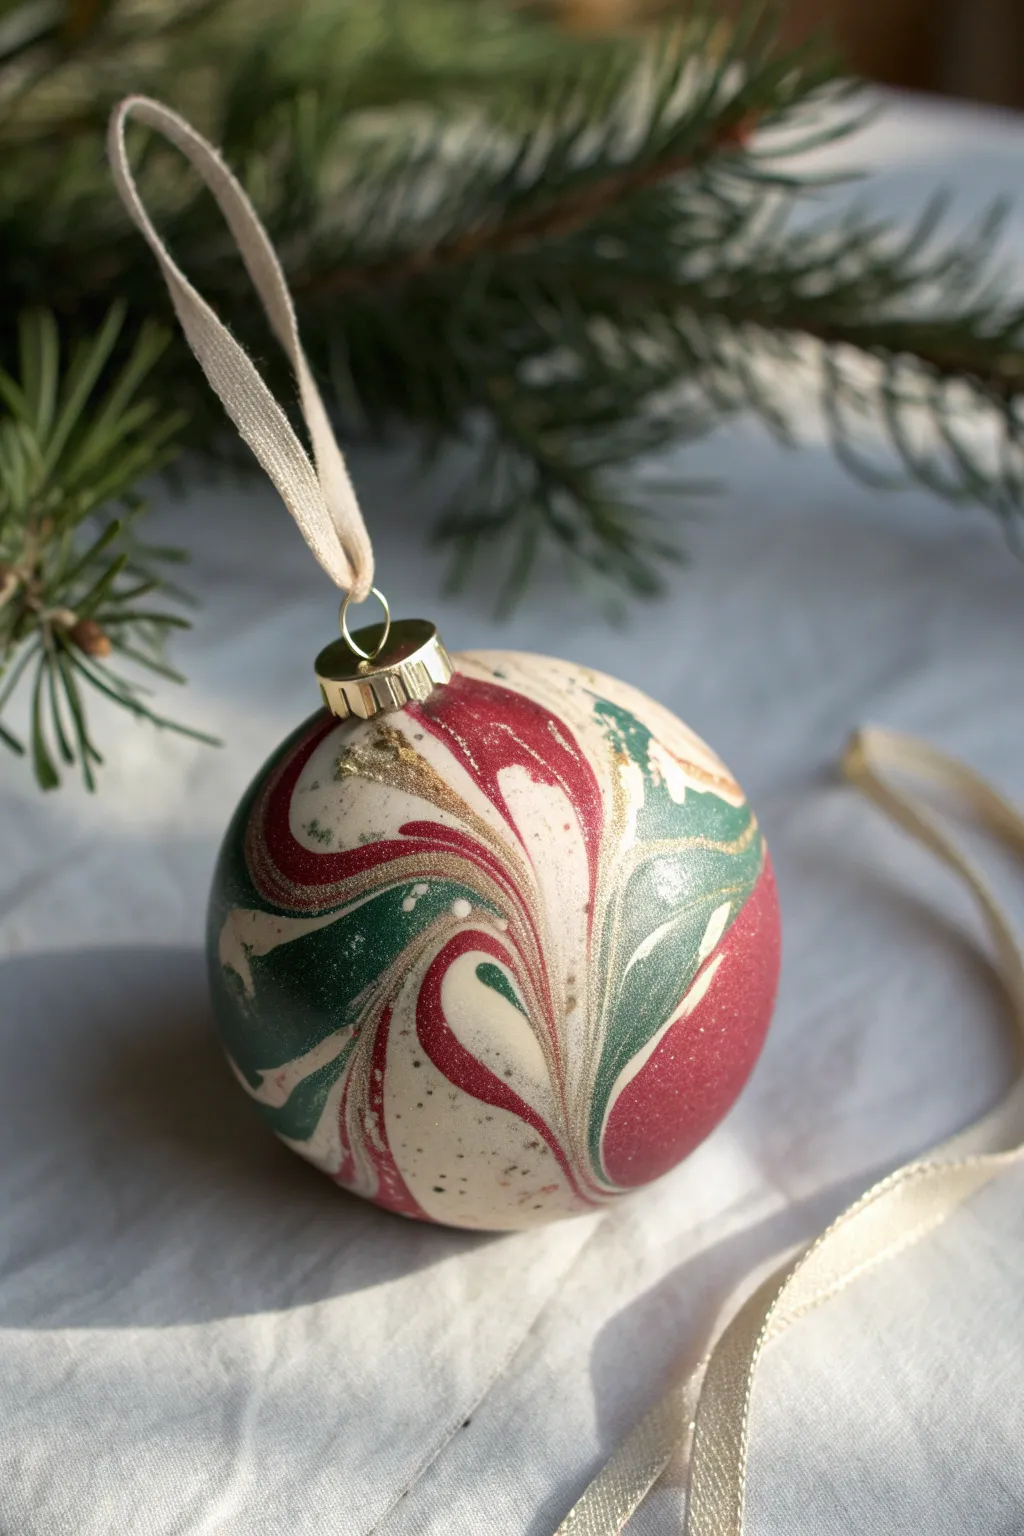
These sophisticated ornaments bring a touch of artisan charm to your holiday decor with their swirling patterns of deep red, forest green, and creamy white. The gold accents threaded throughout the marbling add a subtle shimmer that catches the tree lights beautifully.
Step-by-Step Tutorial
Materials
- Polymer clay (Deep red, Forest green, White, Gold)
- Lightweight core (styrofoam ball or hollow glass ornament)
- Ceramic tile or glass work surface
- Rolling pin (acrylic)
- Clay blade or craft knife
- Liquid polymer clay or Bake and Bond
- Ornament cap and hanger
- Sandpaper (fine grit, wet/dry)
- Gloss varnish (optional)
- Ribbon for hanging
Step 1: Preparing the Base
-
Prepare your clay:
Condition each color of polymer clay separately. Knead them warm in your hands until they are soft and pliable, which is crucial for smooth blending later. -
Select a core:
Choose a lightweight core for your ornament. A styrofoam ball works well, but if you want to bake it, ensure the styrofoam is safe for oven temperatures or cover it completely. Alternatively, wrapping a hollow glass bauble creates a nice weight. -
Coat the core:
If using styrofoam, I like to apply a thin layer of white craft glue and let it dry to seal it. For glass, apply a very thin layer of liquid polymer clay to help the solid clay adhere.
Step 2: Creating the Marble Effect
-
Form logs:
Roll your red, green, white, and gold clay into snake-like logs of roughly equal length. The white log should be slightly thicker if you want it to be the dominant background color. -
Combine the logs:
Twist the four logs together into one large rope. Fold the rope in half and twist it again. Repeat this folding and twisting process 3-4 times, but be careful not to over-blend or the colors will turn muddy. -
Make a block:
Squish the twisted rope into a solid block or ball shape. This compresses the layers and prepares the clay for slicing. -
Slice the pattern:
Using your sharp clay blade, slice thin veneers (sheets) off the block. Each slice will reveal a unique swirled pattern of the four colors. -
Check thickness:
Ensure your slices are consistent in thickness, roughly 2-3mm. If they are too thick, the ornament will be heavy; too thin, and the core might show through.
Muddy Colors?
Step away from the twisting! If you over-mix the clay logs, the distinct red and green definition will turn brown. Twist just enough to see swirls, then stop immediately.
Step 3: Assembly and Finishing
-
Apply the slices:
Gently press the clay slices onto your prepared core. Place them side-by-side, allowing the edges to butt up against each other. -
Close the gaps:
Use your fingers to gently push the seams together. The heat from your hands will help the clay fuse. Continue until the entire sphere is covered. -
Smooth the surface:
Roll the covered ball gently between your palms. This rolling motion smooths out the seams and creates a unified spherical surface. If fingerprints appear, lightly buff them out. -
Add the hanger hole:
If your core doesn’t have a hanger capability, carefully poke a hole at the top where the ornament cap will sit, or form a small neck of clay to hold the cap. -
Bake:
Bake the ornament according to the manufacturer’s instructions for your specific brand of polymer clay. I recommend using an oven thermometer to ensure precise temperature. -
Cool and sand:
Allow the ornament to cool completely inside the oven. Once cool, use fine-grit wet sandpaper under running water to polish away any remaining texture or fingerprints. -
Varnish:
For that glass-like shine seen in the photo, apply a coat of gloss varnish compatible with polymer clay. Let it dry fully. -
Final touches:
Attach the gold ornament cap at the top. Secure it with a dab of superglue if it feels loose. -
String it up:
Thread a length of cream-colored ribbon through the loop to complete the elegant look.
Make it Sparkle
Before baking, gently press genuine gold leaf flakes onto the surface in random patches. The leaf will crackle when you roll the ball smooth for an antique look.
Now hang your masterpiece on the tree and enjoy the handmade warmth it brings to the season
Plaid and Stripe Ornament Sets
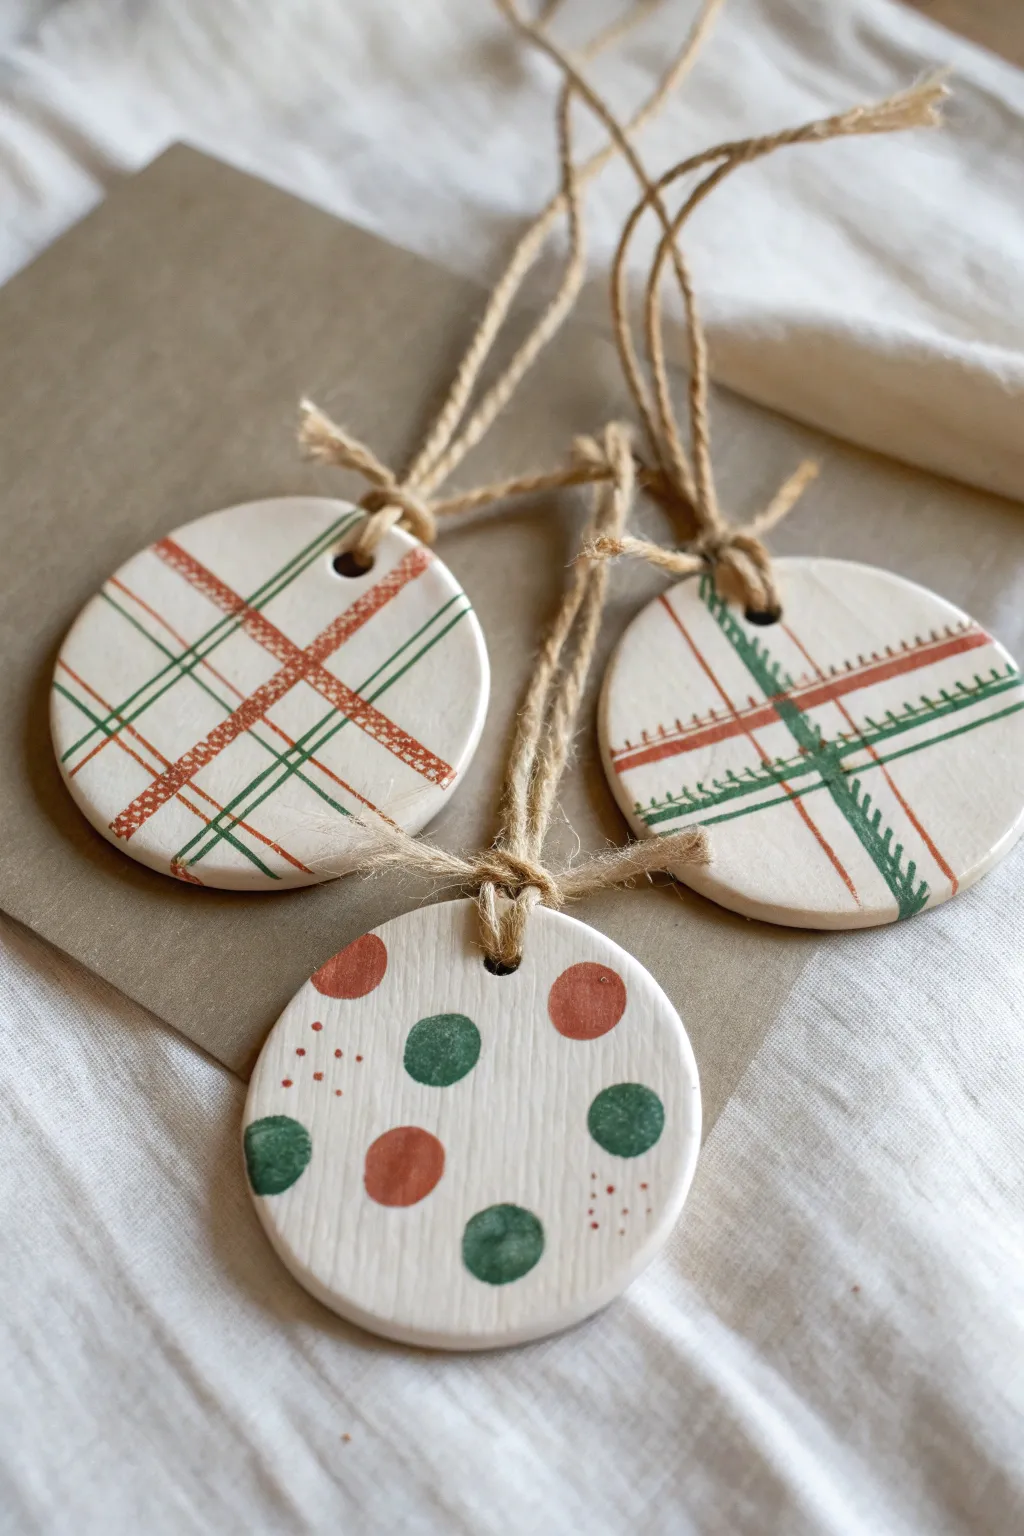
Bring a cozy, rustic charm to your holiday decor with these handmade clay ornaments featuring classic plaid patterns and festive polka dots. The muted red and green tones against the natural white clay create a timeless look that is perfect for tying onto gifts or hanging on the tree.
Step-by-Step Guide
Materials
- White air-dry clay or polymer clay
- Rolling pin
- Circular cookie cutter (approx. 3 inches)
- Straw or small circular tool (for hole punching)
- Fine grit sandpaper
- Fine tip paintbrushes (size 0 and 2)
- Acrylic paints (terracotta/rust red, forest green)
- Small ruler
- Jute twine
- Parchment paper or craft mat
- Matte spray sealant (optional)
Step 1: Shaping the Base
-
Prepare the Clay:
Begin by conditioning your clay. If using air-dry clay, knead it briefly until it is pliable. If using polymer clay, warm it in your hands until soft. Roll the clay out on a smooth surface or parchment paper to an even thickness of about 1/4 inch. -
Cut Out Shapes:
Press your circular cookie cutter firmly into the rolled clay to create your ornament bases. Gently peel away the excess clay from around the circles. -
Smooth the Edges:
Dip your finger in a little water (for air-dry clay) or baby oil (for polymer) and run it along the cut edges of the circles to smooth out any roughness or stray bits. -
Create the Hanging Hole:
Use a drinking straw or a small circular stylus to punch a hole near the top edge of each circle. Make sure it isn’t too close to the edge to prevent cracking. -
Dry or Bake:
If using air-dry clay, let the ornaments sit on a drying rack for 24-48 hours, flipping them halfway through. For polymer clay, bake according to the package instructions (usually 275°F for 15-30 minutes) and let cool completely.
Step 2: Painting the Designs
-
Prep for Paint:
Once the ornaments are fully cured and dry, lightly sand the surface if there are any bumps. Wipe away any dust with a clean, dry cloth. -
Mix Your Palette:
Squeeze a small amount of terracotta red and forest green paint onto your palette. I tend to add a tiny drop of water to the paint to help it flow more smoothly for fine lines. -
Paint the Plaid Lines (Ornament 1):
For the first plaid design, draw a large cross shape using the red paint. Instead of a solid line, create a ‘stitched’ or textured effect by stippling small dots densely together to form the lines. -
Add Green Accents:
Using a very fine brush and green paint, draw thin, parallel lines on either side of the red cross. These can be solid, thin strokes to contrast with the textured red lines. -
Complete the Plaid Grid:
Finish this pattern by adding two more thin green lines that intersect the main cross diagonally or near the edges to create a grid effect. -
Paint the Ikat Plaid (Ornament 2):
For the second plaid style, start with the green paint. Paint a cross, but use small, feathery brushstrokes that pull outward from the center line, mimicking an ikat or woven fabric texture. -
Layer the Red Details:
Once the green is dry, add thin double lines of red paint crossing over the green. Use a ‘dashed’ or broken line technique here to keep the rustic, hand-drawn aesthetic. -
Create the Polka Dots (Ornament 3):
For the third ornament, random placement is key. Paint medium-sized solid circles in both red and green, spacing them generously apart. -
Add Miniature Details:
To fill the negative space on the polka dot ornament, use the very tip of your smallest brush to add clusters of tiny red dots near the edges or between the larger circles.
Keep Lines Straight
Use a flexible ruler or piece of stiff cardstock as a guide when painting plaid. Hold it slightly above the surface so paint doesn’t bleed under.
Step 3: Finishing Touches
-
Seal the Artwork:
Allow the paint to dry completely. To protect your work, you can apply a light coat of matte spray sealant, which helps keep the natural look while preventing scuffs. -
Cut the Twine:
Cut lengths of jute twine, approximately 8-10 inches long for each ornament. -
Attach the Hanger:
Thread the twine through the hole at the top. Fold the twine in half and pass the tails through the loop created at the fold (a cow hitch knot), or simply tie a standard knot at the top to create a hanging loop.
Curling Clay?
If air-dry clay curls while drying, place a heavy book on top of the ornaments once they are mostly dry but still slightly flexible to flatten them.
Now your bespoke ornament set is ready to add a touch of handcrafted warmth to your holiday season
Ugly Sweater Clay Ornaments
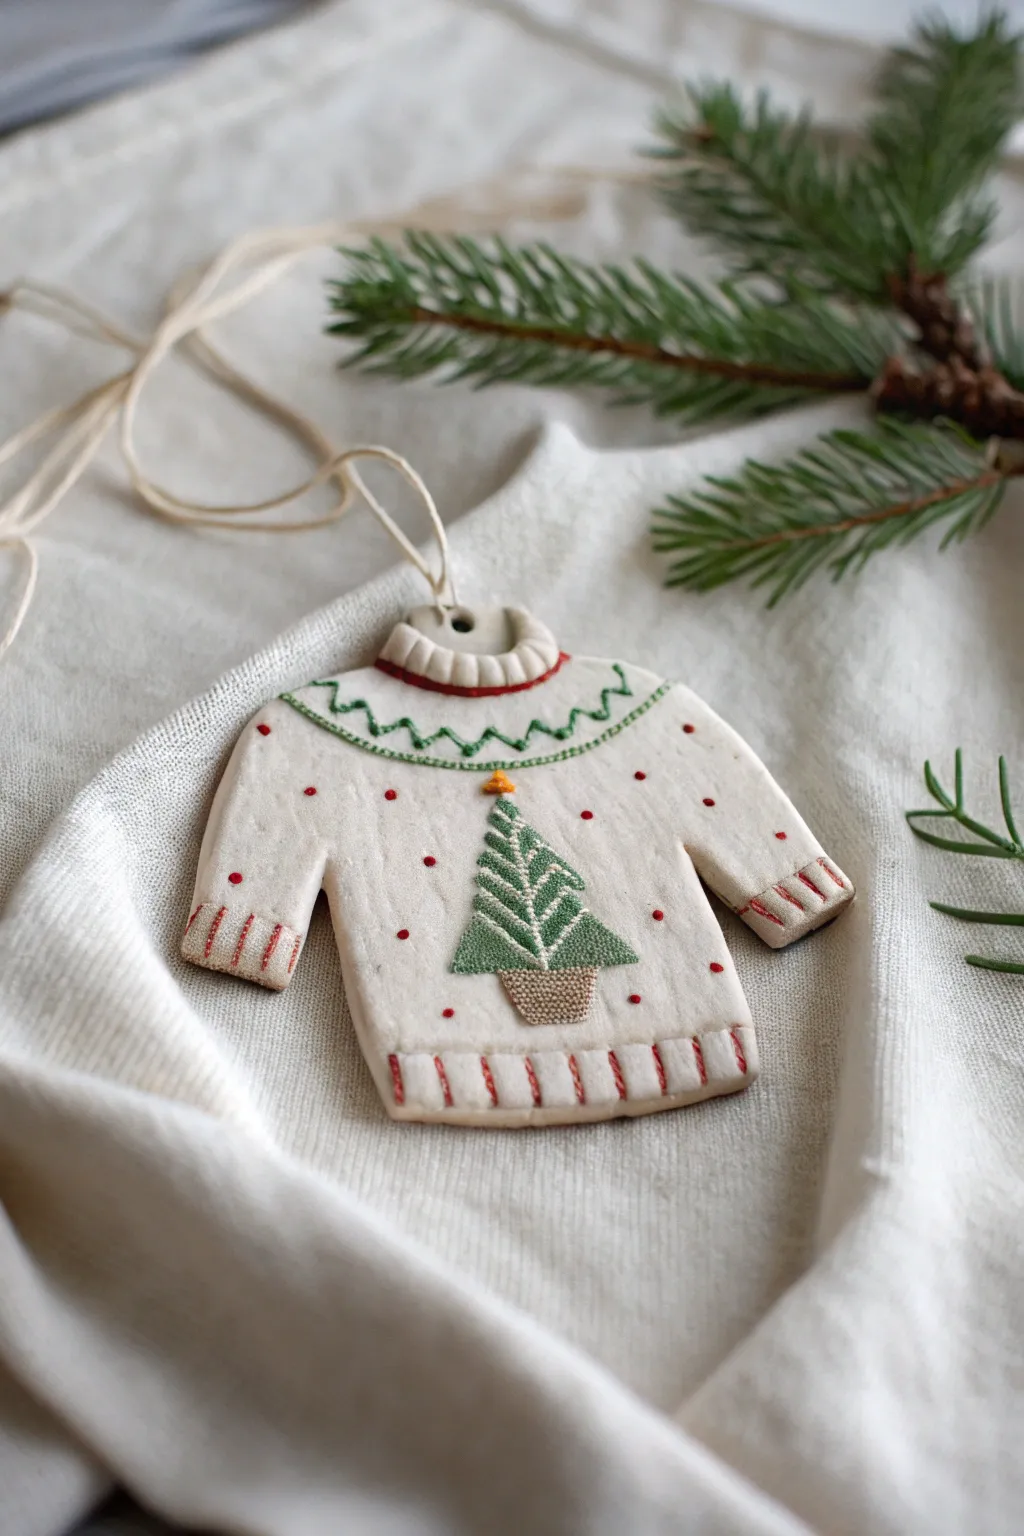
Capture the charm of a classic Christmas jumper with this delightful clay ornament. Featuring textured details that mimic knitwear and a sweet tree motif, it adds a warm, handmade touch to your holiday decor.
How-To Guide
Materials
- White polymer clay
- Rolling pin
- X-acto knife or clay blade
- Paper template of a sweater silhouette
- Needle tool or toothpick
- Small ball stylus tool
- Texture tool (or a scrap of actual fabric/wire mesh)
- Acrylic paints (Green, Red, Gold/Yellow, Brown)
- Fine detail paintbrush (00 or 000 size)
- Twine or ribbon for hanging
- Parchment paper
Step 1: Shaping the Sweater Base
-
Prepare the clay:
Condition your white polymer clay by kneading it until it is soft and pliable. Roll it out on parchment paper to a uniform thickness of about 1/4 inch (6mm). -
Cut the shape:
Place your paper sweater template onto the clay. Carefully trace around it using your X-acto knife to cut out the main body of the sweater. Smooth any rough edges with your finger. -
Add the collar:
Roll a small snake of clay and flatten it slightly. Curve it around the neckline area. Use your needle tool to press vertical lines into this strip to mimic the ribbing of a sweater collar. -
Create the hanging hole:
Before the clay hardens, use a straw or a larger stylus tool to punch a hole cleanly through the top center of the collar for the twine.
Textured Comfort
To create an ultra-realistic knit texture without tools, gently roll a piece of actual sweater fabric or a clean sock over the raw clay before cutting your shape.
Step 2: Adding Texture and Details
-
Emboss the ribbing:
Similar to the collar, use your knife or needle tool to press vertical indentation lines along the bottom hem and the ends of the sleeves. This creates the classic ribbed cuff look. -
Create the knit texture:
For the main body, you want a subtle fabric look. You can gently press a piece of coarse fabric or a wire mesh into the surface, or stipple it lightly with a toothbrush to remove the perfectly smooth sheen. -
Sculpt the center tree:
Roll a very small amount of clay into a flat triangle for the tree and a tiny distinctive rectangle for the pot. Press these onto the center of the sweater. -
Detail the tree:
Using a needle tool, scratch diagonal lines across the tree triangle to give it a pine-needle texture. Stipple the pot area to make it look like a woven basket. -
Add micro details:
Form a microscopic ball of clay for the star topper and press it onto the peak of the tree. If you want raised red dots, you can add tiny specks of clay now, or simply paint them later. -
Outline the yoke:
Use a needle tool to gently scribe a curved line across the chest area where the pattern will go. Add a zig-zag line just below it using the same tool.
Fingerprint Fix
If you see fingerprints on your clay before baking, lightly brush the surface with a tiny amount of baby oil or cornstarch to smooth them away instantly.
Step 3: Baking and Painting
-
Bake the ornament:
Preheat your oven according to the clay manufacturer’s instructions (usually around 275°F/130°C). Bake on a parchment-lined sheet for approximately 15-20 minutes depending on thickness. Let it cool completely. -
Paint the tree:
Using a fine detail brush, paint the textured tree area with a muted sage green. Dry brush a lighter green on top to highlight the ‘needles’. -
Paint the pot and star:
Fill in the basket base with a light brown or tan paint. Carefully dot the star with gold or yellow. -
Add the decorative stitching:
With a steady hand, paint the scribed zig-zag line on the chest with green. Paint a thin red line right at the base of the collar. -
Highlight the ribbing:
Dilute a bit of red paint with water and run it into the grooves of the sleeve cuffs and bottom hem to emphasize the texture without painting the whole strip solid red. -
Polka dots:
Dip the back end of your paintbrush or a ball stylus into red paint. Gently dot red polka dots scattered across the white space of the sweater. -
Seal (Optional):
If you want to protect the paint, apply a thin coat of matte varnish. Avoid glossy finishes to keep the authentic fabric look. -
String it up:
Thread a piece of natural twine or cream ribbon through the hole at the top and knot it securely.
Hang your mini masterpiece on the tree and enjoy the cozy vibes it brings to your holiday setup
Tiny Stocking Wall Hangers
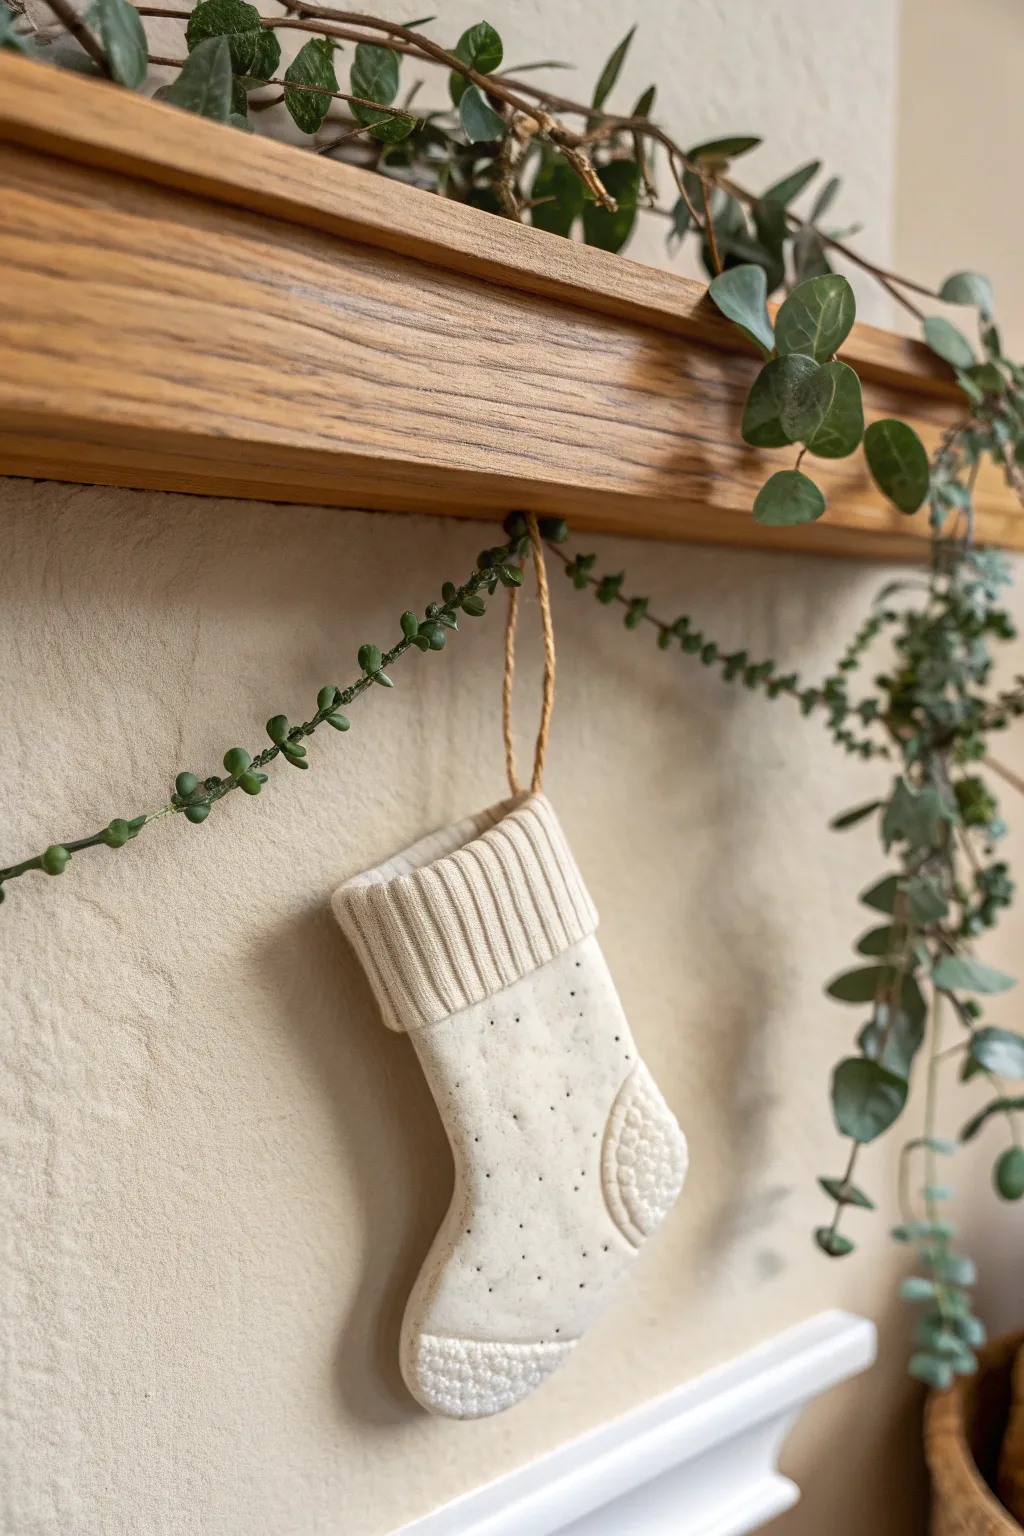
Bring a touch of cozy minimalism to your holiday decor with these charming clay stockings that mimic the look of warm winter socks. The subtle speckled finish and clever texturing techniques create a high-end ceramic look without the need for a kiln.
Step-by-Step Tutorial
Materials
- White air-dry clay or polymer clay
- Coarse black pepper or dried coffee grounds (for speckling)
- Rolling pin
- Stocking cookie cutter or cardstock template
- Craft knife
- Knitting tool or toothpick
- Small piece of textured fabric or burlap
- Jute twine
- Water and paintbrush (for smoothing)
- Matte sealant (optional)
Step 1: Preparing the Clay Base
-
Mix the speckles:
Start by taking a handful of white clay. To achieve that organic, stoneware look, knead in a small pinch of coarse black pepper or dried coffee grounds. Fold the clay repeatedly until the speckles are evenly distributed throughout. -
Roll out the slab:
Roll your speckled clay out on a smooth work surface to an even thickness of about 1/4 inch. If you are using polymer clay, a pasta machine on a thick setting works wonders here. -
Cut the shape:
Place your stocking cookie cutter or a hand-cut cardstock template onto the clay slab. Press down firmly or trace around the template with a craft knife to cut out the main stocking body. -
Smooth the edges:
Dip your finger in a little water (for air-dry clay) or baby oil (for polymer) and gently run it along the cut edges to remove any sharpness or burrs.
Step 2: Creating Texture Details
-
Make the cuff:
Roll a small, separate rectangular strip of clay slightly thicker than your base stocking. Trim it to match the width of the stocking top. -
Texture the cuff:
Using a dull knife or a sculpting tool, gently press vertical lines across the entire strip to mimic a ribbed knit pattern. Don’t cut all the way through; just create indentations. -
Attach the cuff:
Score the back of the textured strip and the top of the stocking leg. Apply a tiny amount of water (or slip) and press the cuff firmly onto the top of the stocking. -
Create the heel and toe:
Roll two small semi-circles of clay. These will be the reinforced heel and toe patches. -
Imprint fabric texture:
For the specific texture seen on the toe and heel, press a piece of coarse fabric, burlap, or even a meat tenderizer gently into these small clay pieces before attaching them. -
Attach the patches:
Secure the textured heel and toe pieces to the main body using the slip-and-score method, blending the edges slightly so they look integrated but distinct.
Preventing Cracks
If your air-dry clay cracks while drying, mix a tiny bit of fresh clay with water to make a paste. Fill the cracks, smooth it over with a damp finger, and let it dry again.
Step 3: Finishing Touches
-
Add stitch details:
Using a needle tool or toothpick, gently poke small holes following the inner curve of the stocking shape to simulate decorative stitching. -
Create the hanging hole:
Pierce a hole through the top corner of the ribbed cuff. Make sure it is wide enough to accommodate your jute twine later. -
Final drying or baking:
Allow the air-dry clay to cure flat for 24-48 hours, flipping halfway through to prevent warping. If using polymer clay, bake according to the package instructions. -
String it up:
Once fully cured and cool, cut a length of jute twine. Thread it through the hole and tie a secure loop.
Add a Wash
For more depth, brush a diluted brown acrylic paint wash over the dried piece, then immediately wipe it off. The dark paint will remain in the textured grooves
Hang your stocking individually or create a whole garland for a festive mantel display
Christmas Light Bulb Garland Charms
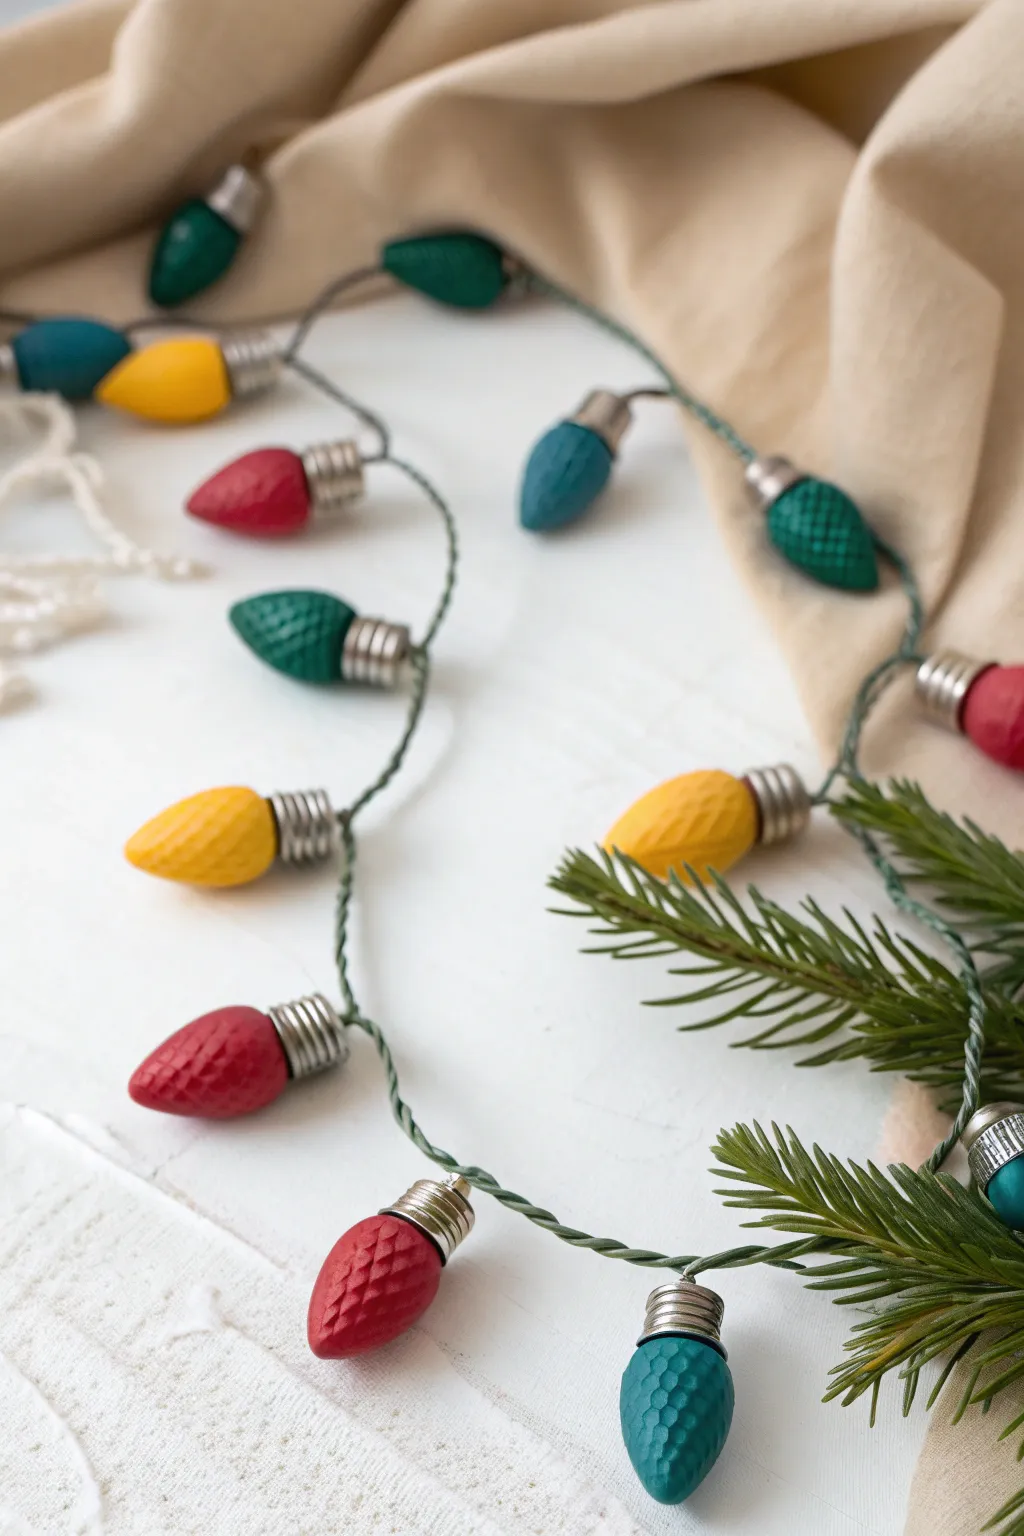
These charmingly nostalgic Christmas light bulbs are actually durable clay creations that won’t shatter if dropped. With their textured surfaces and silver-painted bases, they mimic the look of vintage C9 bulbs perfect for decking your halls or miniature trees.
Step-by-Step
Materials
- Polymer clay (red, blue, green, yellow, grey)
- Textured blending tool or coarse sandpaper
- Silver acrylic paint
- Small flat paintbrush
- Jewelry eye pins (silver)
- Green floral wire or fabric-covered wire
- Wire cutters
- Needle-nose pliers
- Gloss glaze or polyurethane (optional)
- Texture tool (like a small checkering file or stiff brush)
Step 1: Shaping the Bulbs
-
Prepare your clay:
Condition your colored polymer clay blocks (red, blue, forest green, and mustard yellow) by kneading them until soft and pliable. I find this prevents cracking later. -
Form the base shape:
Pinch off small pieces of clay, roughly the size of a large marble. Roll each piece into a smooth ball between your palms. -
Refine the bulb silhouette:
Gently roll one end of the ball to taper it into a classic teardrop or strawberry shape. Keep the top end slightly rounded rather than super sharp, mimicking real glass bulbs. -
Create the texture:
To achieve that vintage faceted glass look without carving intricate facets, gently roll the surface of your clay bulb over a textured tool or press a coarse sanding sponge into the clay. You want a subtle, pitted surface. -
Repeat the process:
Continue forming bulbs until you have your desired number. The garland looks best with a repeating pattern of colors, so try to make equal numbers of each hue.
Uneven Texture?
If the texture looks too messy, lightly roll the bulb back in your palms to soften the impressions before baking. It should look like faceted glass, not damaged clay.
Step 2: Adding the Socket
-
Make the socket base:
Take your grey clay and roll a thin, even snake. Cut small segments, about 1/4 inch long. -
Attach the sockets:
Press one grey segment onto the wider, rounded end of each colored bulb. Flatten it slightly so it sits flush. -
Add screw threads:
Use a needle tool or a knife edge to press horizontal rings around the grey clay. This creates the illusion of the screw threads found on real light bulbs. -
Insert the hardware:
Trim your eye pins so the stems are about half an inch long. Push an eye pin straight down through the center of the grey socket and into the colored bulb.
Step 3: Baking and Finishing
-
Bake the clay:
Arrange your bulbs on a baking sheet lined with parchment paper. Bake according to your customized clay package instructions (usually 275°F for 15-30 minutes). -
Cool completely:
Allow the pieces to cool fully before handling. The clay hardens as it returns to room temperature. -
Paint the sockets:
Using a small flat brush, carefully paint the grey screw-thread areas with silver acrylic paint. This gives them a realistic metallic shine. -
Optional glazing:
If you want your lights to look like shiny glass, apply a coat of gloss glaze to the colored portion of the bulb only, avoiding the silver socket.
Realistic Tip
Mix a tiny amount of translucent clay into your colored clay before shaping. This adds a subtle depth that mimics the semi-opaque nature of vintage glass bulbs.
Step 4: Assembly
-
Prepare the wire:
Cut a long length of green floral wire or a twisted fabric cord. If using floral wire, gently twist two strands together to create a thicker, more realistic cable. -
Attach the bulbs:
Thread the wire through the eye pin of your first bulb. Use your pliers to twist a small loop in the wire to lock the bulb in place, or simply use jump rings to attach them at regular intervals. -
Space them out:
Continue attaching bulbs about 2 to 3 inches apart. I prefer alternating the colors randomly for a more playful, organic look. -
Final shaping:
Once all bulbs are attached, gently bend and twist the main wire so the bulbs face different directions, just like a real tangled string of lights.
Now you have a festive, everlasting string of lights ready to drape across a mantle or wrap around a miniature tree
Penguins in Santa Hats
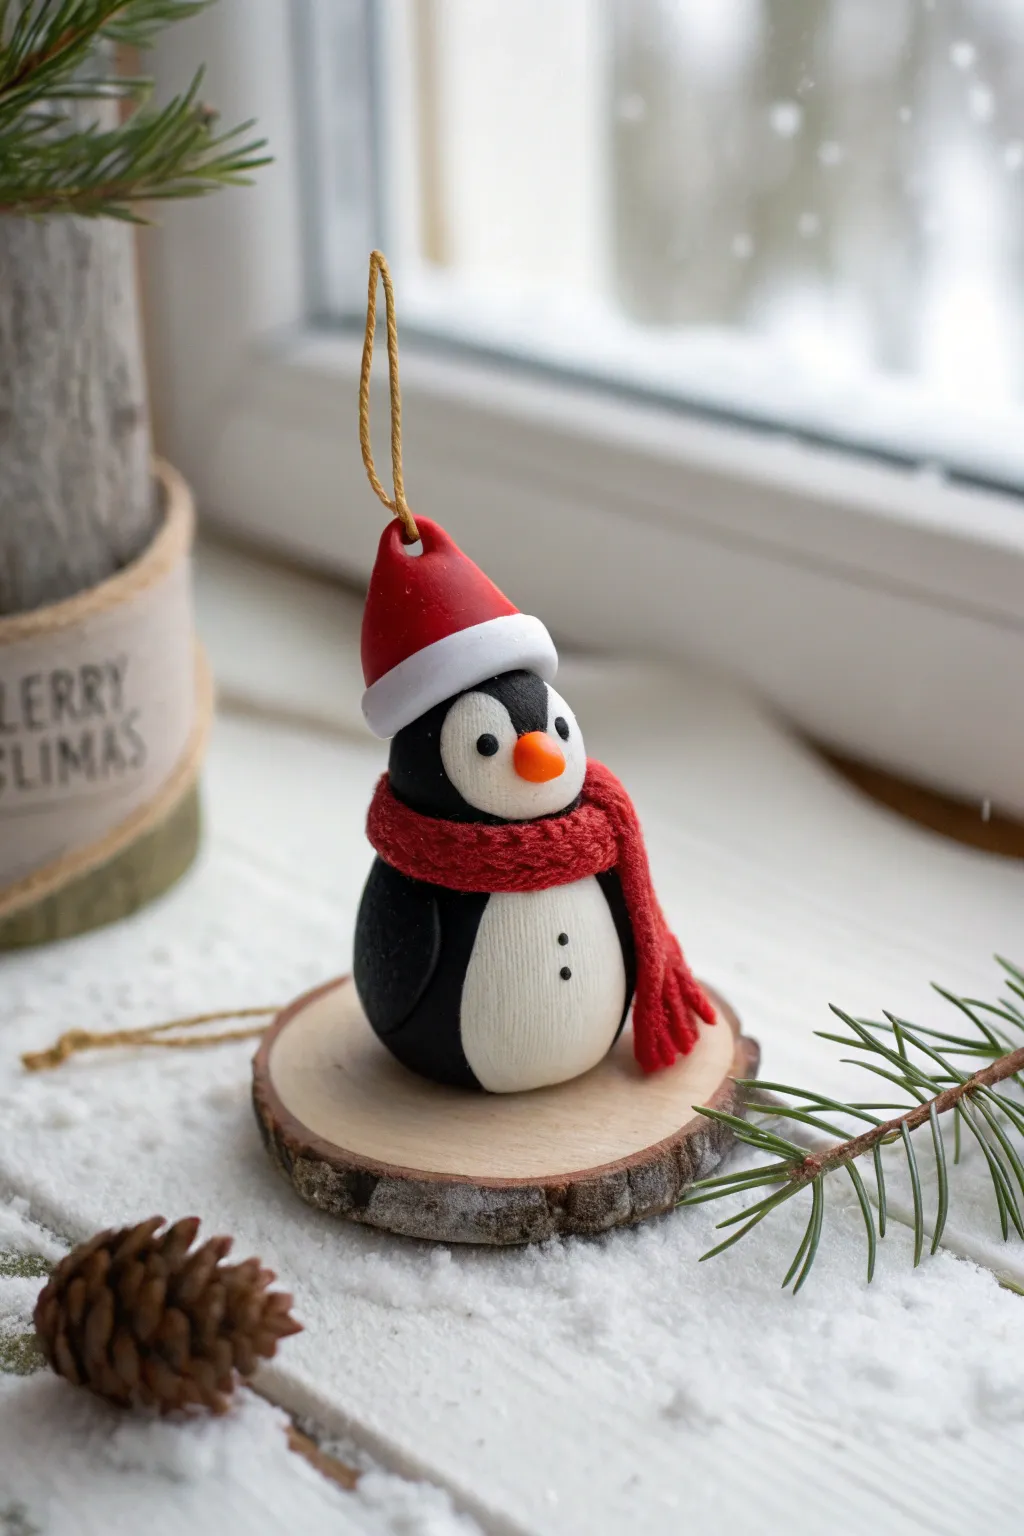
This adorable polymer clay penguin brings festive cheer with his textured red scarf and jaunty Santa hat. Simple shapes come together to create a charming, durable ornament perfect for hanging on the tree or gifting.
How-To Guide
Materials
- Black polymer clay
- White polymer clay
- Red polymer clay
- Orange polymer clay
- Clay sculpting tools (needle tool, ball tool)
- Small eye pin (gold or silver)
- Acrylic roller or pasta machine
- Liquid clay or Bake & Bond (optional)
- Small wood slice (for display)
- Gloss glaze (optional)
Step 1: Shaping the Body
-
Form the base:
Condition a chunk of black clay until soft and roll it into a smooth, egg-shaped oval. This will form the main body of your penguin. Flatten the bottom slightly on your work surface so it stands upright on its own. -
Create the tummy:
Roll a smaller ball of white clay and flatten it into a thin oval sheet. It needs to be proportionally smaller than the black body. -
Attach the white patch:
Press the white oval onto the front of the black body. Use your thumb to smooth the edges gently so it integrates seamlessly with the black clay without distorting the egg shape. -
Added texture:
Using a needle tool, you can create very faint vertical lines on the white tummy to mimic the look of feathers or fabric, as seen in the photo. -
Add the face details:
Roll two tiny specs of black clay for eyes and a small cone of orange clay for the beak. Press the beak into the center of the face area and place the eyes evenly on either side. -
Refine the expression:
If the eyes aren’t sticking well, use a tiny dot of liquid clay. Gently press them flat so they don’t protrude too much. -
Make the wings:
Form two small teardrop shapes from black clay. Flatten them slightly and press them against the sides of the body, curving the tips slightly forward to hug the tummy. -
Mark the buttons:
Roll two microscopic balls of black clay and press them vertically down the center of the white tummy to look like buttons.
Step 2: Winter Accessories
-
Roll the scarf:
Roll a long, thin snake or rope of red clay. Flatten it slightly with your roller so it looks like a ribbon. -
Texture the scarf:
Before wrapping it, use a needle tool to scratch a repetitive knit pattern or simple cross-hatching along the entire length of the red strip. This texture really brings the piece to life. -
Dress the penguin:
Wrap the textured scarf around the penguin’s neck area (where the head would distinguish from the body). Overlap the ends slightly on the right side, letting one end dangle down. -
Create fringe:
Use your needle tool or a craft knife to cut small slits into the ends of the scarf to resemble yarn fringe. -
Form the hat base:
Roll a cone of red clay. Bend the tip slightly to the side or keep it perky and straight depending on the look you want. -
Add the trim:
Roll a white snake of clay, flatten it, and wrap it around the base of the red cone. Add a small white ball to the tip of the hat. -
Attach the hat:
Place the finished hat onto the penguin’s head. I like to tilt it slightly backward so the face remains visible. -
Insert hardware:
Carefully push a gold eye pin through the top of the hat and deep into the body structure. This secures the head and provides a way to hang it later. -
Bake carefully:
Bake the penguin according to your clay package instructions (typically 275°F/130°C for 15-30 minutes). Let it cool completely before handling. -
Mount (Optional):
For a standing decoration, glue the cooled penguin onto a small rustic wood slice using strong craft glue.
Clean Clay Tip
White clay picks up dust instantly! Wash your hands thoroughly and wipe down your work surface with a baby wipe before handling the white clay, or handle it first before the dark colors.
Make it Sparkle
Before baking, lightly brush the white parts of the hat and tummy with white mica powder or clear glitter to give the penguin a frosted, snowy appearance.
Now you have a frosty little friend ready to watch over your holiday festivities
Mini Snow Globe Scene Ornaments
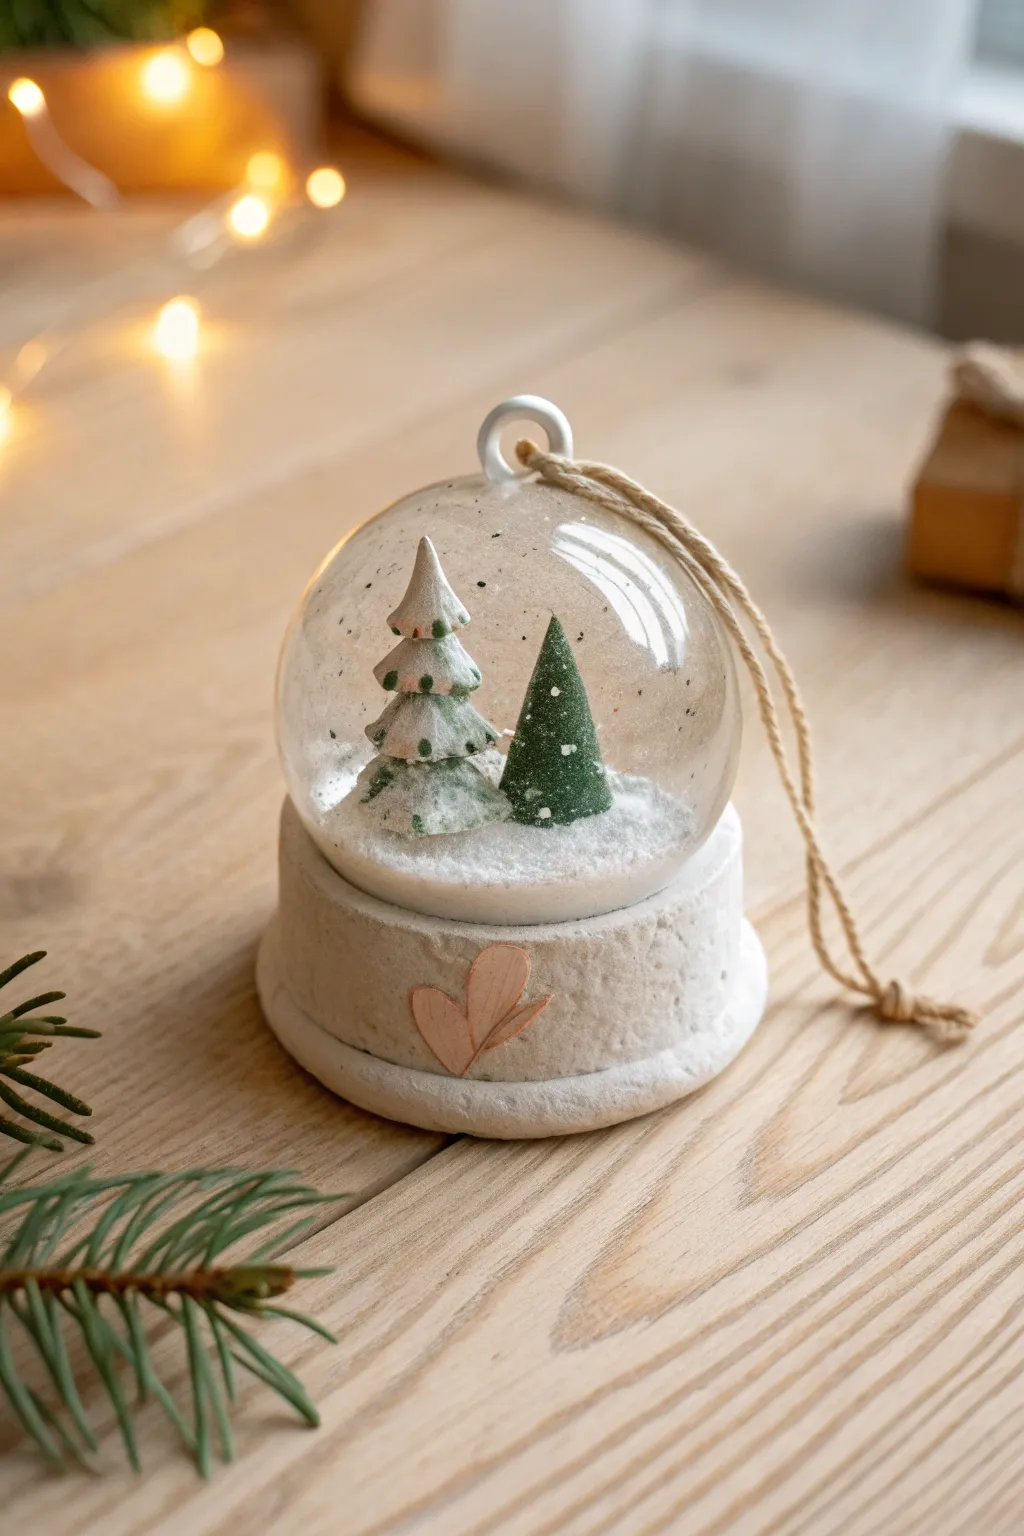
Capture the magic of winter in a tiny, shakeable world with this charming snow globe ornament. Featuring a textured white clay base and miniature evergreen trees, this project combines traditional sculpting with simple assembly for a nostalgic holiday keepsake.
Step-by-Step Guide
Materials
- White air-dry clay or polymer clay (oven-bake)
- Small clear plastic or glass craft dome (approx. 2-3 inches)
- Miniature bottle brush trees (one green, one white)
- Faux snow or white glitter
- Strong craft glue (E6000 or clear tacky glue)
- Small eye hook or wire loop
- Twine or jute string
- Pink or terra cotta colored clay (tiny amount for heart)
- Rolling pin
- Circle cutter (slightly larger than dome base)
- Sandpaper (fine grit)
Step 1: Sculpting the Base
-
Prepare the Clay:
Condition your white clay by kneading it until it is soft and pliable. Roll it out into a thick slab, approximately 3/4 inch high. This needs to be sturdy enough to support the dome. -
Cut the Circle:
Using a circle cutter or a jar lid as a template, cut a round base. Ensure the diameter is slightly wider than your glass dome so there is a nice rim visible once assembled. -
Add Texture:
Take a piece of rough fabric, a toothbrush, or a ball of aluminum foil and gently press it into the side edges of the clay base. This gives it that stone-like, snowy texture seen in the photo. -
Create the Snow Mound:
From your leftover white clay, form a smaller, slightly domed circle that fits *inside* the diameter of your glass cover. Adhere this to the top of your main base. This inner rise ensures the trees sit prominently within the globe.
Static Cling Tip
If the faux snow sticks to the glass dome due to static, wipe the inside of the glass with a dryer sheet before assembly to keep the view crystal clear.
Step 2: Adding Details & Curing
-
Form the Heart:
Take a tiny amount of pink or terra cotta clay. Roll it very thin and cut out two small teardrop shapes. -
Attach the Accent:
Press the two teardrops together onto the front of the white base to form a simple heart. Angle them slightly so they look like sketched leaves or a rustic heart shape. -
Insert the Attachment Point:
While the clay is still soft, gently screw a small eye hook into the top center of the glass dome if it’s plastic, or prepare a wire loop to be glued later. If your dome has a handle like the photo, you can skip this. -
Cure the Clay:
If using polymer clay, bake according to the package instructions (usually 275°F for 15-30 minutes). If using air-dry clay, allow it to dry fully for 24-48 hours. I find letting it air dry slowly prevents cracking. -
Sand and Finish:
Once fully cured or dry, lightly sand the bottom of the base so it sits perfectly flat.
Make it a shaker
Add a pinch of iridescent white glitter along with the faux snow. It catches the tree lights beautifully when the ornament is shaken.
Step 3: Assembly & Snow Effects
-
Prepare the Trees:
Take your miniature bottle brush trees. If the green one looks too clean, dab a little white paint or glue and white glitter onto the tips to mimic fresh snow. -
Secure the Scene:
Apply a strong adhesive to the bottom of the trees and press them firmly onto the inner mound of your clay base. Let the glue set completely so they don’t tip over. -
Add the drifts:
Brush a layer of regular white craft glue all over the ‘ground’ around the trees. Generously sprinkle faux snow or coarse white glitter over the wet glue to create a winter floor. -
Fill the Globe:
Pour a teaspoon of loose faux snow into the glass dome. When you flip the project over later, this will fall down to create the loose snow effect. -
Seal the Globe:
Run a thin bead of strong clear glue (like E6000) around the rim of the glass dome. Carefully invert your clay base (with trees attached) and press it into the dome. Hold firmly until the bond grabs. -
Clean the Edges:
Wipe away any excess glue that squeezes out immediately with a damp cloth or cotton swab before it hardens. -
Attach the Twine:
Once the glue is fully cured, thread a piece of natural jute twine through the loop on top of the dome. Tie a simple knot to create a hanging loop.
Hang your new miniature winter wonderland on the tree to add a touch of handmade, rustic elegance to your holiday decor
Nativity Silhouette Ornaments
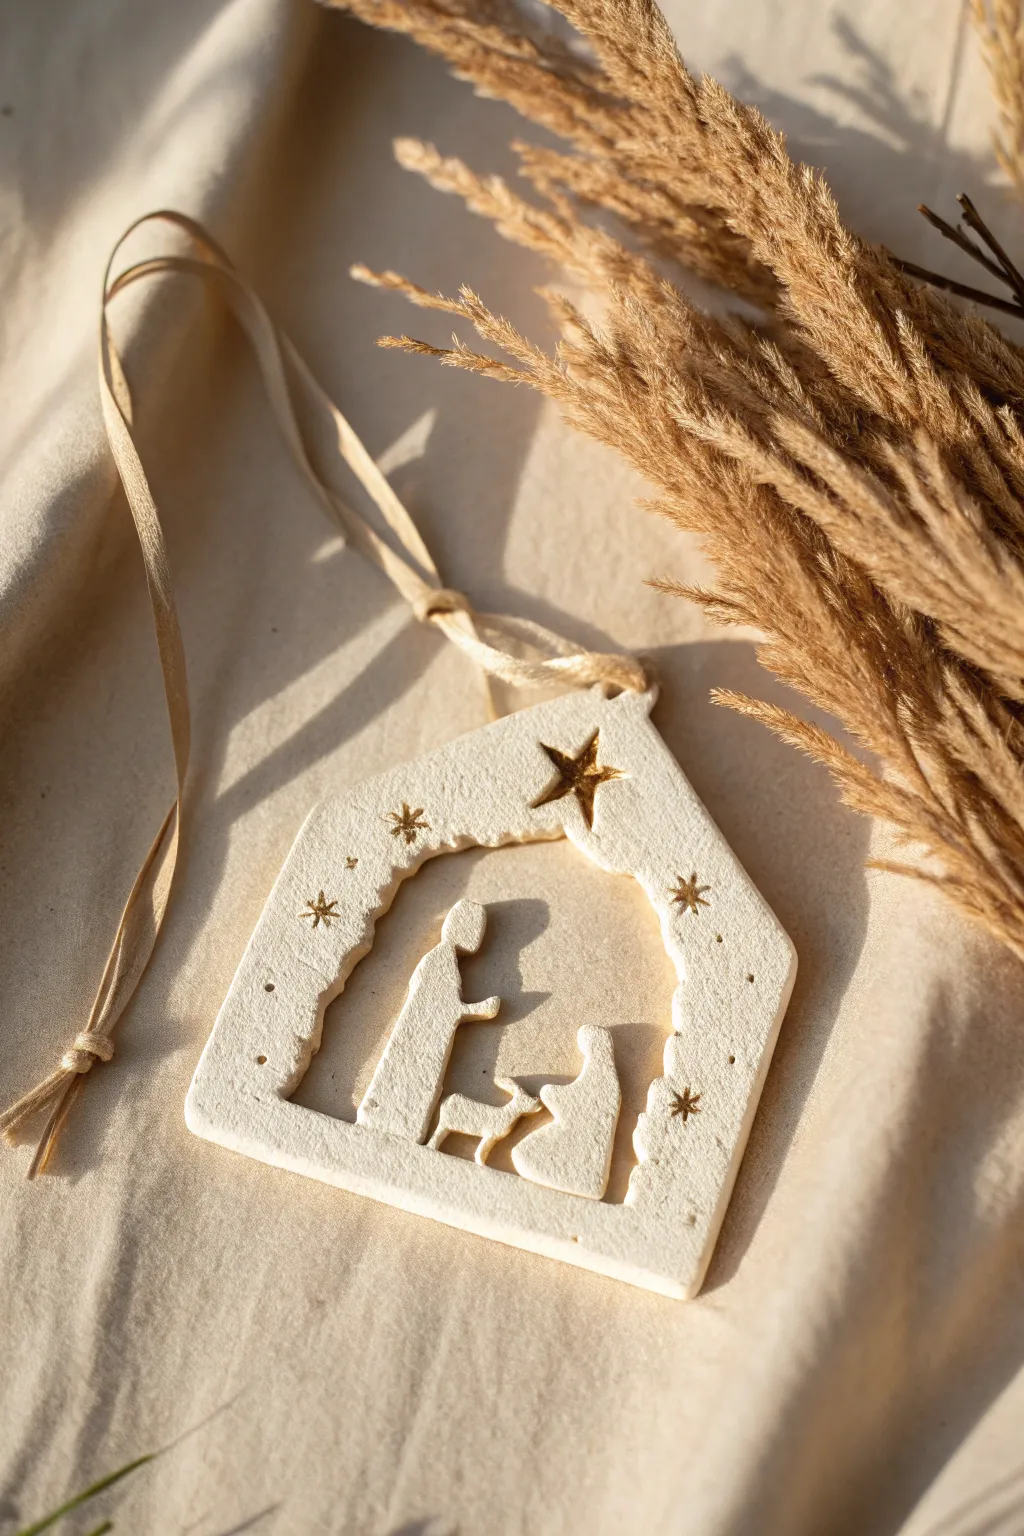
This minimalist ornament captures the serene beauty of the nativity scene using a clever negative space technique. The result is a crisp, white clay silhouette framed by a house shape, accented with delicate gold stars.
Detailed Instructions
Materials
- White polymer clay or air-dry clay
- Rolling pin
- House-shaped cookie cutter (large)
- Nativity scene cookie cutter or craft knife
- Small star stamps
- Gold metallic paint or gold leaf pen
- Fine detail paintbrush
- Sandpaper (fine grit)
- Ribbon or twine for hanging
- Straw or toothpick for making a hole
- Parchment paper
Step 1: Preparing the Base
-
Condition the Clay:
Begin by warming up a handful of white clay in your hands. Knead it thoroughly until it is soft, pliable, and free of any cracks or air bubbles. -
Roll the Sheet:
Place the conditioned clay on a sheet of parchment paper. Use a rolling pin to flatten it into an even sheet, aiming for a thickness of about 1/4 inch (6mm) to ensure the ornament is sturdy. -
Cut the Outer Shape:
Press a large house-shaped cookie cutter firmly into the clay. Give it a slight wiggle to ensure a clean cut, then gently lift the cutter away. Remove the excess clay from around the shape.
Cracking Up?
If your air-dry clay cracks while drying, mix a tiny bit of fresh clay with water to make a paste and fill the cracks, then sand smooth once dry.
Step 2: Creating the Silhouette
-
Outline the Scene:
If you are using a specialized nativity cutter, position it carefully in the center of the house shape. If creating this freehand, lightly sketch the outlines of Joseph, Mary, and the manger onto the clay surface with a needle tool. -
Cut the Negative Space:
Using a craft knife, carefully cut away the background space around the figures, leaving the figures themselves attached to the bottom edge of the house frame. You are essentially cutting out the ‘air’ around them to create a window effect. -
Refine the Edges:
Once the negative space clay is removed, use a slightly damp finger or a clay tool to smooth any rough interior edges where the cut was made. This softens the silhouette. -
Create the Hanging Hole:
Use a straw or a toothpick to poke a clean hole at the very peak of the house shape. Make sure the hole is wide enough to accommodate your chosen ribbon.
Step 3: Adding Details
-
Stamp the Main Star:
Press a medium-sized star stamp into the upper right corner of the ‘sky’ area, directly above the silhouette figures. Press deep enough to create a texture but not through the clay. -
Add Decorative Accents:
Using a smaller star stamp or a needle tool, press tiny star shapes or dots sporadically around the arch of the silhouette to mimic a night sky. -
Dry or Bake:
Follow the instructions for your specific clay type. If using polymer clay, bake it on a parchment-lined tray at the recommended temperature. If using air-dry clay, leave it in a cool, dry place for 24-48 hours, flipping occasionally.
Make it Sparkle
While the gold paint is wet, sprinkle a tiny pinch of super-fine gold glitter into the large star for extra holiday shimmer under the tree lights.
Step 4: Finishing Touches
-
Sand for Smoothness:
Once fully cured and cooled, use fine-grit sandpaper to gently buff the outer edges of the house shape. This removes any sharp burrs left from the cutter. -
Paint the Gold Star:
Dip a fine detail brush into gold metallic paint. Carefully fill in the impression of the large star. I find a second coat really makes the gold pop. -
Highlight the Mini Stars:
Lightly dab gold paint into the centers of the smaller stamped stars around the border for a cohesive look. -
Attach the Ribbon:
Cut a length of beige or gold ribbon. Thread it through the hole at the top and tie a secure knot to create a hanging loop.
Hang this elegant piece on your tree or gift it as a handmade treasure that celebrates the season with simplicity