Whenever I’m craving a creative reset, I reach for air dry clay—it’s low-pressure, forgiving, and you can still make pieces that look totally display-worthy. Here are my favorite air clay sculpture ideas, starting with the classic crowd-pleasers and drifting into some fun, weirder studio experiments.
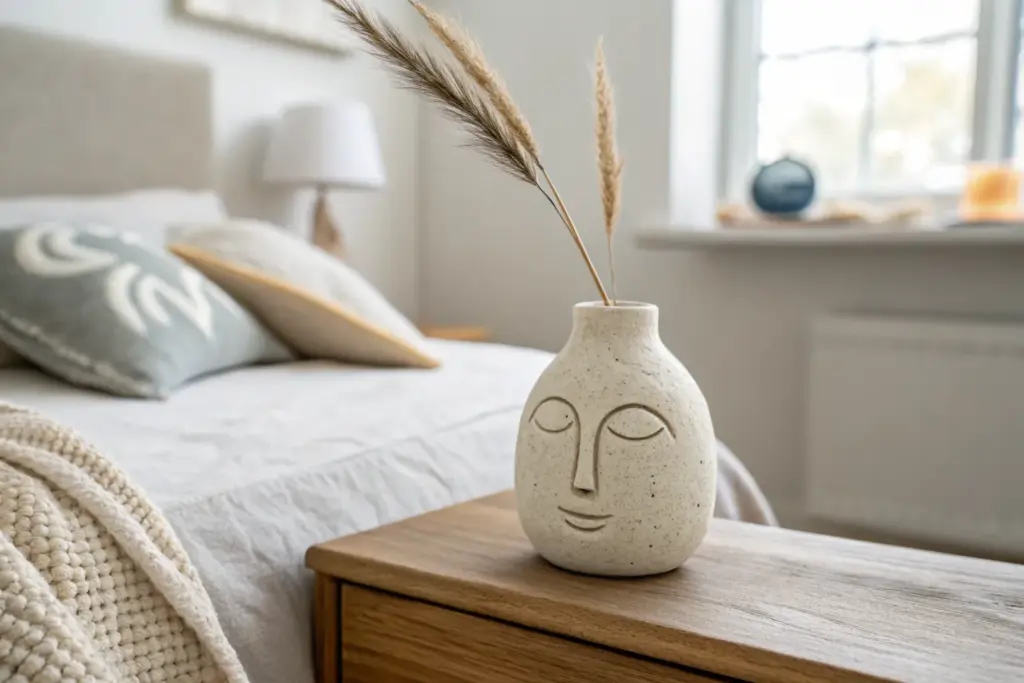
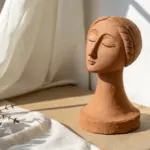
Minimalist Face Vase Sculpture
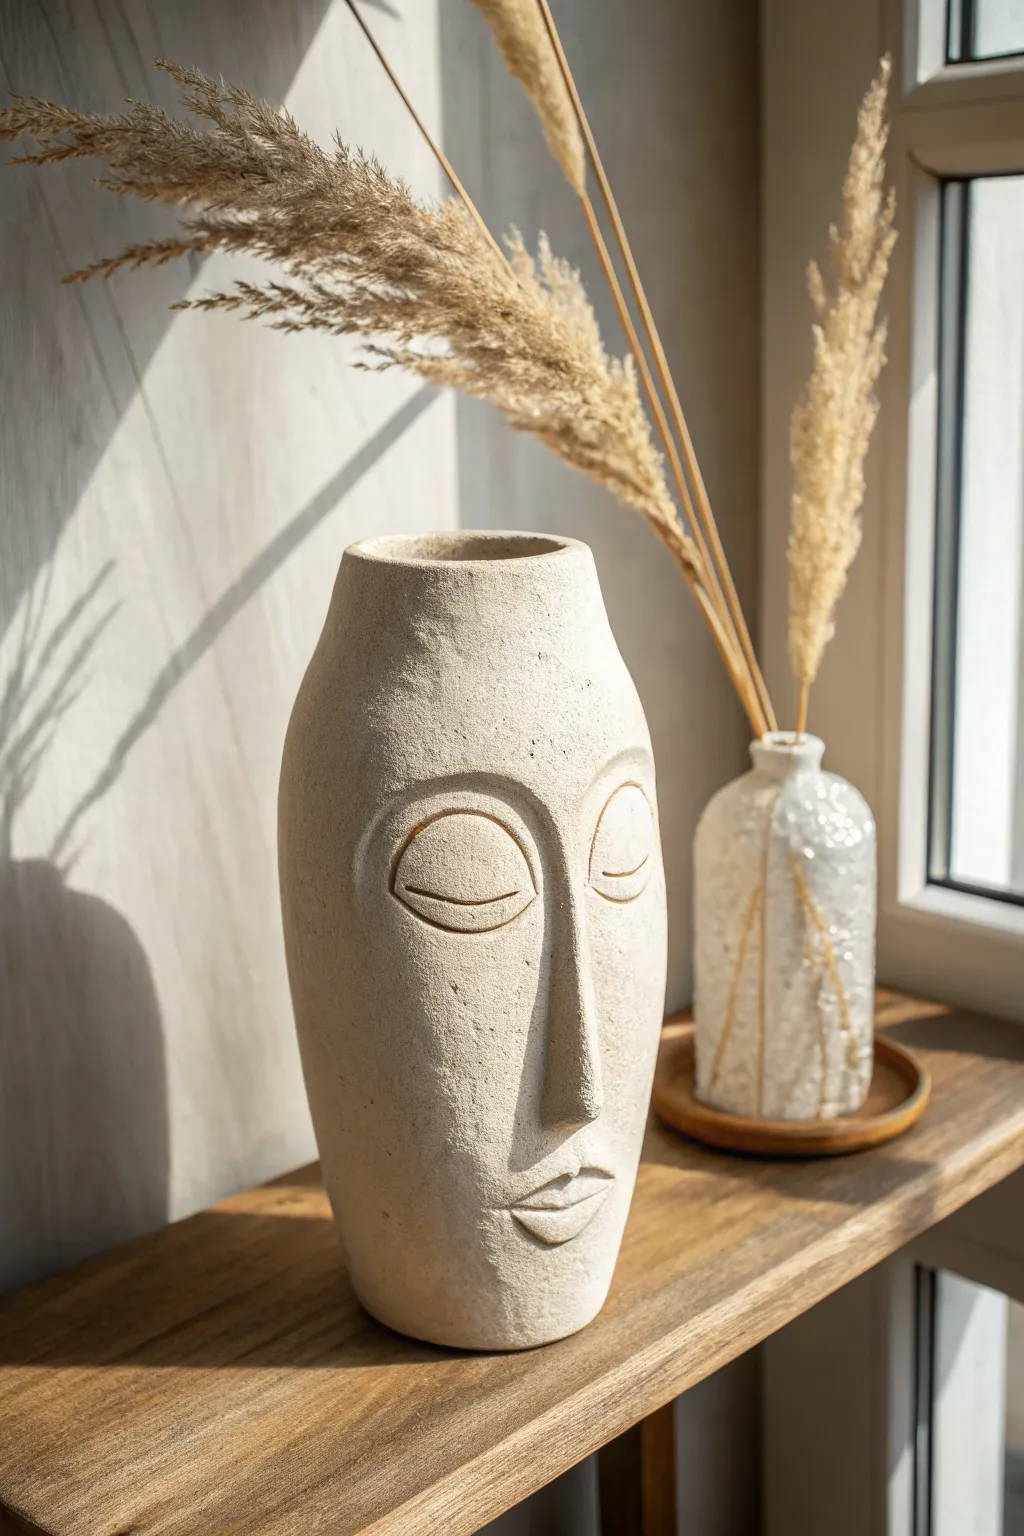
Capture the serene essence of modern minimalism with this elongated face vase sculpture. Using air-dry clay and a simple armature technique, you’ll create a textured, stone-like vessel perfect for displaying dried pampas grass or wheat.
Step-by-Step
Materials
- High-quality white air-dry clay (approx. 1kg)
- Glass or plastic cylinder vase (to serve as the hidden armature)
- Acrylic rolling pin
- Modeling tools (specifically a needle tool and a small loop tool)
- Sponge and water
- Sandpaper (medium and fine grit)
- Cream or off-white acrylic paint
- Baking soda (for texture)
- Dark brown or grey acrylic paint (for antiquing)
- Matte spray varnish
Step 1: Building the Base Form
-
Prepare the armature:
Clean and dry your cylinder vase thoroughly. This glass or plastic vessel will stay inside the final sculpture to hold water, ensuring your air clay doesn’t disintegrate. -
Roll out the slab:
Roll your air-dry clay into a large, even rectangular slab about 1/4 inch thick. Ensure the slab is tall enough to cover your armature with a little extra height at the top to form the narrowed neck. -
Wrap the cylinder:
Carefully lift the clay slab and wrap it around the cylinder vase. Press the clay firmly against the glass to remove air pockets. -
Join the seam:
Where the clay edges meet, score both sides with a needle tool and apply a little water or slip. Press the edges together and smooth the seam down with your thumb until it disappears completely. -
Shape the neck:
Towards the top of the vase, gently pinch and taper the clay inward to create a curved, slightly narrowed rim. This shouldn’t be sharp; aim for a soft, rounded lip.
Step 2: Sculpting the Features
-
Map the face:
Lightly sketch a vertical centerline with your needle tool. Mark the position for the nose bridge and the mouth, keeping the proportions elongated for that abstract, minimalist look. -
Add the nose:
Roll a long triangular coil of clay. Score and slip the center of the face, then attach the coil. Blend the sides of the nose seamlessly into the cheeks, leaving the bridge distinct and sharp. -
Carve the eye sockets:
Use a loop tool to gently carve out shallow, crescent-shaped recesses where the eyes will sit. I find this creates a natural shadow that adds depth before we add the lids. -
Sculpt the eyelids:
Roll two small balls of clay and flatten them into curved almond shapes. Attach them into the recesses. Use a needle tool to incise a sharp, curved line defining the closed eyelid crease. -
Form the lips:
Roll a small oval of clay and attach it below the nose. Use your needle tool to slice a horizontal line for the mouth, then shape the upper and lower lips to be subtle and pouty. -
refine the surface:
Dip a sponge in water and wring it out almost completely. Gently wipe the entire sculpture to smooth out fingerprints, but don’t over-smooth; a little irregularity adds character.
Stone Texture Trick
For an even rougher, ancient stone look, press a piece of coarse sandpaper or a real rock into the wet clay surface before it dries.
Step 3: Finishing and Texturing
-
Allow to dry:
Let the sculpture dry slowly for 24-48 hours away from direct sunlight. Turn it occasionally to ensure even drying. -
Sand imperfections:
Once fully hard, use fine-grit sandpaper to knock back any sharp jagged bits or rough patches on the rim. -
Create textured paint:
Mix cream acrylic paint with a teaspoon of baking soda. This mixture will simulate the gritty, porous look of limestone or sandstone. -
Apply base coat:
Paint the entire vase with your baking soda mixture. Use a stippling motion (dabbing the brush up and down) rather than long strokes to enhance the stone texture. -
Antique the crevices:
Dilute a tiny drop of dark brown or grey paint with water to make a wash. Paint this into the eye creases, around the nose, and lips, then immediately wipe away the excess with a paper towel to leave subtle shadows. -
Seal the piece:
Protect your work with a coat of matte spray varnish. This seals the paint and prevents yellowing over time.
Cracking Issues?
If hairline cracks appear during drying, make a paste of clay and water (slip) and fill them in immediately, then smooth over with a damp finger.
Place your finished vase near a window where the natural light can play across the sculpted features


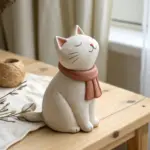
Pinch Pot Animal Figurines
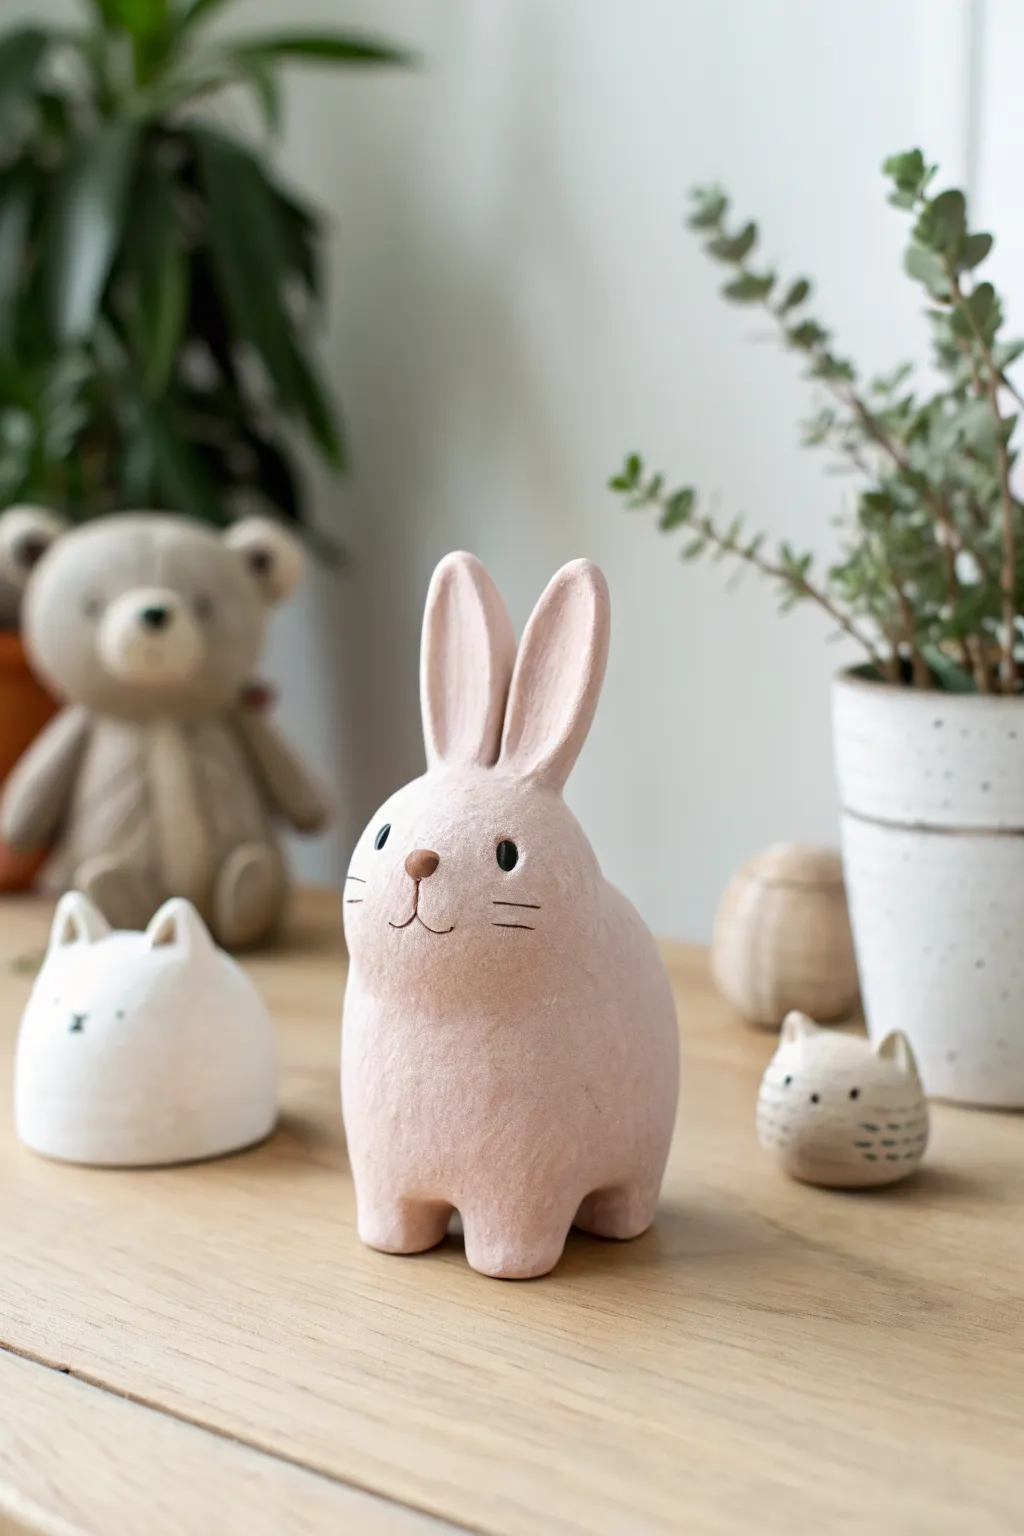
This charming, pastel-pink bunny figurine captures a minimalist aesthetic with its smooth lines and sweet expression. Created starting from a simple pinch pot technique, it makes for a delightful desk companion or nursery decoration.
How-To Guide
Materials
- White air-dry clay (paper-based or stone clay works best for this texture)
- Pink acrylic paint (or pre-colored pink clay)
- Black and brown acrylic paint
- Fine grit sandpaper (for smoothing)
- Small bowl of water
- Pointed detailing tool or toothpick
- Small round paintbrush
- Fine detail brush
Step 1: Forming the Base
-
Prepare the Clay:
Start by kneading a fist-sized ball of white air-dry clay until it is soft and pliable. If you want the color integrated throughout, knead a small amount of pink acrylic paint directly into the clay until you achieve a consistent pastel blush tone. -
Create the Body Shape:
Roll the clay into a smooth egg shape. This bunny has a hefty, rounded bottom rather than a defined neck, so keep the form continuous and slightly tapered toward the top. -
Smooth the Surface:
Dip your finger in a little water and run it over the entire surface to remove any fingerprints or cracks. The texture should look matte and slightly organic, not perfectly plastic. -
Form the Legs:
Instead of attaching separate legs, we will pull them from the main body. Gently pinch and pull four small, stubby nubs from the bottom of the shape. -
Refine the Stance:
Press the figurine down onto your work surface firmly. This flattens the bottom of the little legs ensuring the bunny stands stably without wobbling. -
Shape the Tail:
Pinch a very small, rounded mound at the rear of the body for a tail. Use a damp finger to smooth the seam where it connects to the body so it looks like one solid piece.
Seamless Ears
When attaching ears, don’t just stick them on. Drag clay from the ear down onto the head to physically lock the pieces together.
Step 2: Adding Features
-
Shape the Ears:
Roll two medium-sized sausage shapes of clay for the ears. They should be relatively thick and tapered at the tips. -
Indent the Ears:
Using your thumb or a modeling tool, gently press a shallow groove down the length of the front of each ear to create depth. -
Attach the Ears:
Score the top of the head and the bottom of the ears with a scratching tool. Add a dab of water or clay slip, then press the ears firmly into place. -
Blend the Seams:
Use a modeling tool or your finger to smooth the clay from the base of the ears down into the head. The transition should be seamless. -
Dry the Form:
Let the bunny dry completely. This usually takes 24-48 hours depending on humidity. I like to rotate the figure occasionally so the bottom dries evenly.
Unsteady Bunny?
If the bunny tips over after drying, glue a small metal washer or coin to the bottom center, or sand the feet flat again.
Step 3: Painting & Finishing
-
Sand for Texture:
Once fully dry, lightly sand the surface with fine-grit sandpaper. You aren’t aiming for porcelain-smooth; a little bite remains to mimic the stone-like texture in the photo. -
Base Coat (If needed):
If you didn’t mix paint into the clay earlier, apply two thin coats of pastel pink acrylic paint now, letting the first dry before applying the second. -
Paint the Snout:
Using brown acrylic paint and a small round brush, paint a small, inverted triangle for the nose. Keep the corners rounded for a soft look. -
Draw the Mouth:
With a very fine detail brush or a black fine-liner pen, draw a simple ‘w’ shape connecting to the bottom of the nose. -
Add Eyes:
Paint two small, solid black ovals for eyes on either side of the nose. Place them somewhat wide apart to enhance the cute factor. -
Add Whiskers:
Using the thinnest brush you have or a pen, draw three short, horizontal lines on each cheek for whiskers. -
Final Seal:
Protect your work with a matte varnish or spray sealant. Avoid glossy finishes, as this piece looks best with a natural, matte stone effect.
Place your finished bunny alongside a small potted plant for a perfect pastoral vignette


Hand-Shaped Trinket Dish Sculpture
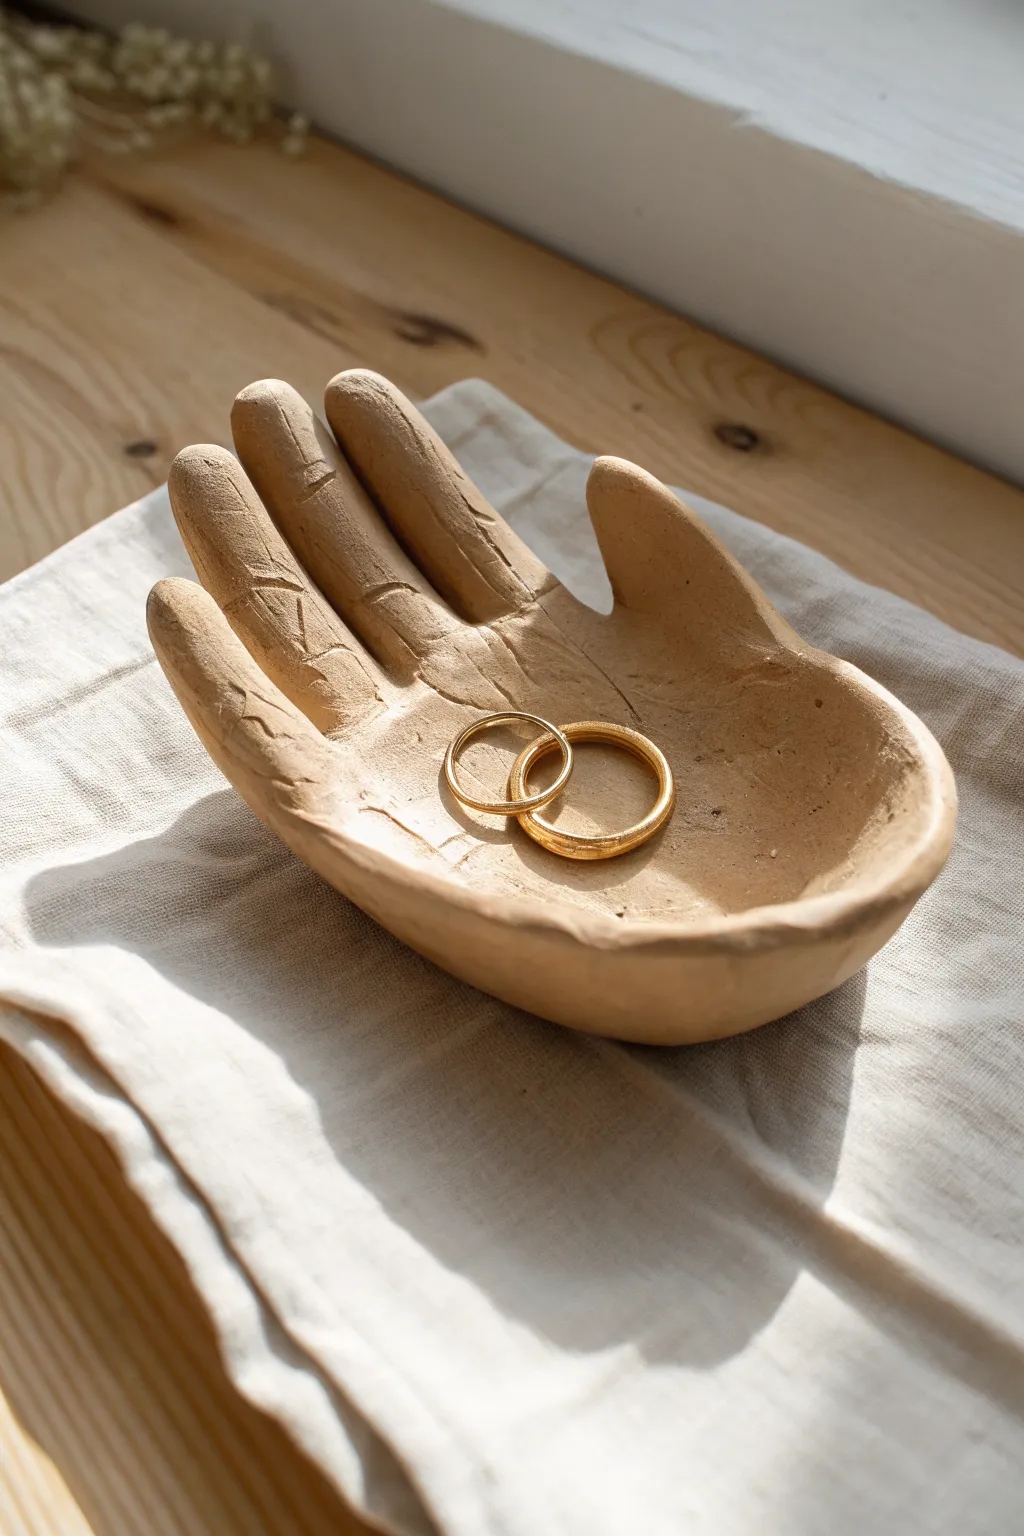
Capture the beauty of human touch with this functional sculpture that serves as both decor and storage. The final piece features a gentle, cupped palm design with earthy textures, perfect for holding your most precious rings.
Detailed Instructions
Materials
- Air-dry clay (terracotta or white)
- Rolling pin
- Craft knife or clay tool
- Small bowl or sphere (for molding)
- Sponge
- Water cup
- Sandpaper (fine grit)
- Acrylic sealer (optional but recommended)
Step 1: Shaping the Foundation
-
Prepare the clay:
Start by taking a handful of air-dry clay and kneading it until it is soft and pliable. If the clay feels too dry or crumbly, dip your fingers in water and work the moisture into the material. -
Roll the slab:
Place your clay on a smooth surface or canvas mat. Use your rolling pin to flatten it into an oval slab that is slightly larger than your own hand, aiming for a thickness of about 1/4 inch. -
Trace your hand:
Place your actual hand gently onto the clay slab. Using a needle tool or a dull knife, carefully trace around your fingers and palm. Leave a little extra space around the edges so the fingers aren’t too fragile. -
Cut out the shape:
Remove your hand and use your craft knife to cut along the traced lines. Peel away the excess clay, which you can save for future projects in an airtight container. -
Smooth the edges:
Dip your finger in a little water and run it along the cut edges of the clay hand. This rounds off the sharp corners and prevents cracking as it dries.
Step 2: Forming the Gesture
-
Create palm lines:
Before shaping the curve, take a clay tool or a toothpick and gently etch lines into the palm and fingers. Mimic the natural creases of your hand for that realistic, rustic texture seen in the photo. -
Curve the palm:
Gently lift the clay hand and place it into a small bowl or over a sphere. Press the center of the palm down so the sides curve upward, creating a dish shape deep enough to hold rings. -
Pose the fingers:
Arrange the clay fingers so they look relaxed and slightly curled. I like to lift the thumb slightly higher than the other fingers to give it a natural, cupped appearance. -
Initial smoothing:
Use a damp sponge to lightly dab any areas that look too rough, but remember that the goal is a textured, organic look, so don’t over-smooth the surface details. -
Dry partially:
Let the hand sit in the supporting bowl for about 2-3 hours until it holds its shape on its own but isn’t fully hard.
Cracking Up?
If you see tiny cracks forming while drying, mix a small amount of clay with water to make a paste (slip) and fill them in immediately.
Step 3: Refining and Finish
-
Remove supports:
Once the clay is leathery and holds its shape, carefully remove it from the bowl. Place it on a flat drying rack to allow air circulation underneath. -
Full drying:
Allow the piece to dry completely for 24-48 hours. The color will lighten significantly as the moisture evaporates. -
Check for imperfections:
Inspect the dried piece. If you find any sharp burrs on the edges, gently sand them away with fine-grit sandpaper. -
Enhance texture:
If you want to highlight the carved lines, you can do a light wash with watered-down brown acrylic paint, wiping it off quickly so pigment remains only in the creases. -
Seal the piece:
Apply a clear matte varnish or sealant to protect the clay from moisture, especially if you plan to keep this in a bathroom or kitchen area.
Gilded Touch
Paint the rim of the dish or just the tips of the fingers with liquid gold leaf for a stunning, high-contrast luxury finish.
Now you have a unique, personalized sculpture ready to cradle your jewelry on your nightstand


Mushroom Cottage Sculpture
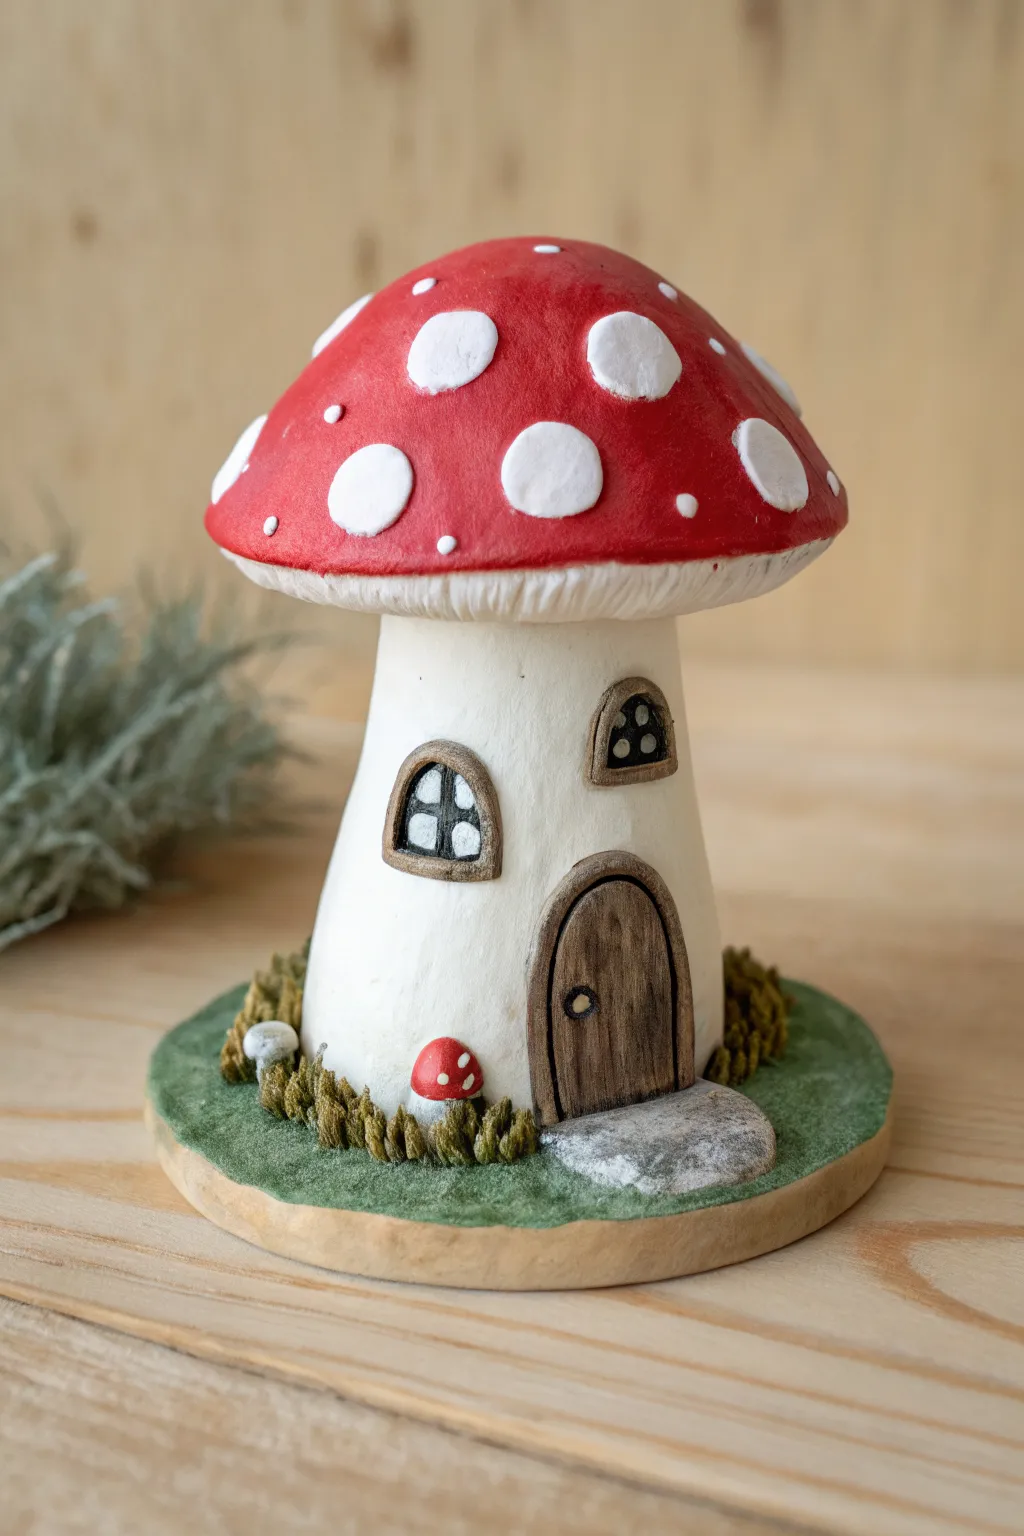
Transport yourself to a fairy village with this charming mushroom house sculpture. Featuring a classic red-and-white toadstool roof, tiny arched windows, and a textured grassy base, this project is a delightful way to practice structural sculpting.
Step-by-Step Guide
Materials
- Air dry clay (white)
- Acrylic paints (Red, White, Black, Brown, Green)
- Aluminum foil
- Rolling pin
- Sculpting tools (needle tool, small ball stylus)
- Paintbrushes (flat and fine detail)
- Water cup
Step 1: Forming the Base Structure
-
Create the armatures:
Start by scrunching aluminum foil into two distinct shapes: a cone-like cylinder for the stem and a wide, doomed disk for the cap. This saves clay and keeps the sculpture lightweight. -
Cover the stem:
Roll out a sheet of air dry clay to about 1/4 inch thickness. Wrap it around your foil stem armature, smoothing the seam with a bit of water until invisible. Flare the bottom slightly for the base. -
Sculpt the cap:
Cover the domed foil piece with a separate sheet of clay. Smooth the surface carefully, ensuring it’s a nice, even round shape. Underneath the rim, use a sculpting tool to press in fine lines radiating from the center to mimic mushroom gills. -
Assemble the pieces:
Score (scratch) the top of the stem and the underside of the cap. Apply a little water or liquid clay (slip) to the scored areas and press them firmly together. Blend the clay slightly at the connection point for stability.
Foil trick
Pack your foil armature very tightly. If the foil is too loose, the clay surface might crack or cave in when you try to smooth it firmly during the sculpting phase.
Step 2: Adding Details
-
Shape the base:
Form a flat, circular disk of clay to serve as the ground. Place your mushroom structure in the center and blend the bottom of the stem onto this disk so it stands securely. -
Sculpt the door:
Roll a small oval of clay and flatten it. Press it onto the bottom of the stem for the door. Use a needle tool to etch vertical wood grain lines and a tiny ball of clay for the doorknob. -
Create the doorframe:
Roll a very thin snake of clay and wrap it over the top arch of the door to create a defined frame. Blend the outer edges into the wall. -
Add windows:
Make two smaller, arched shapes for windows. Attach them higher up on the stem. Like the door, add thin snakes of clay for frames and use your needle tool to impress a grid pattern for the panes. -
Texture the grass:
Around the base of the house, add small bits of clay and rough them up with a needle tool or stiff brush to look like tufts of grass. I prefer to vary the height of these tufts for a more natural look. -
Tiny mushroom accents:
Roll tiny balls and stems to create minuscule mushrooms. Attach these near the door within the grass texture for extra charm. -
Dry completely:
Let the sculpture dry for at least 24-48 hours. It should feel room temperature to the touch, not cold, when fully dry.
Step 3: Painting
-
Base coat the stem:
Paint the stem and the window panes a warm, creamy white. You might need two coats for opaque coverage. -
Paint the cap:
Apply a bright, primary red to the top of the mushroom cap. Be careful near the rim to keep a clean line where the red meets the white gills underneath. -
Add the spots:
Once the red paint is dry, paint large, irregular white circles onto the cap. Add tiny white dots between the larger ones for variety. -
Wood details:
Paint the door and window frames brown. Once dry, use a slightly darker brown wash (paint diluted with water) to settle into the wood grain texture, then wipe the surface gently to highlight the details. -
Paint the grass:
Paint the textured base green. Paint the flat ground area a lighter, mossy green, and use a slightly darker shade for the textured tufts to create depth. -
Make the stone step:
Paint the flat area right in front of the door a soft grey to resemble a stone entryway. -
Final touches:
Paint the tiny accent mushrooms red and white to match the roof. Use a fine liner brush to paint the window grids black for high contrast.
Make it a Lantern
Before drying, cut the windows all the way through and leave the bottom of the stem open (hollow). Once dry, place it over a battery-operated LED tea light for a glowing nightlight.
Place your finished cottage on a shelf or among your houseplants for a magical touch

What Really Happens Inside the Kiln
Learn how time and temperature work together inside the kiln to transform clay into durable ceramic.
Cute Bird Pair Sculpture
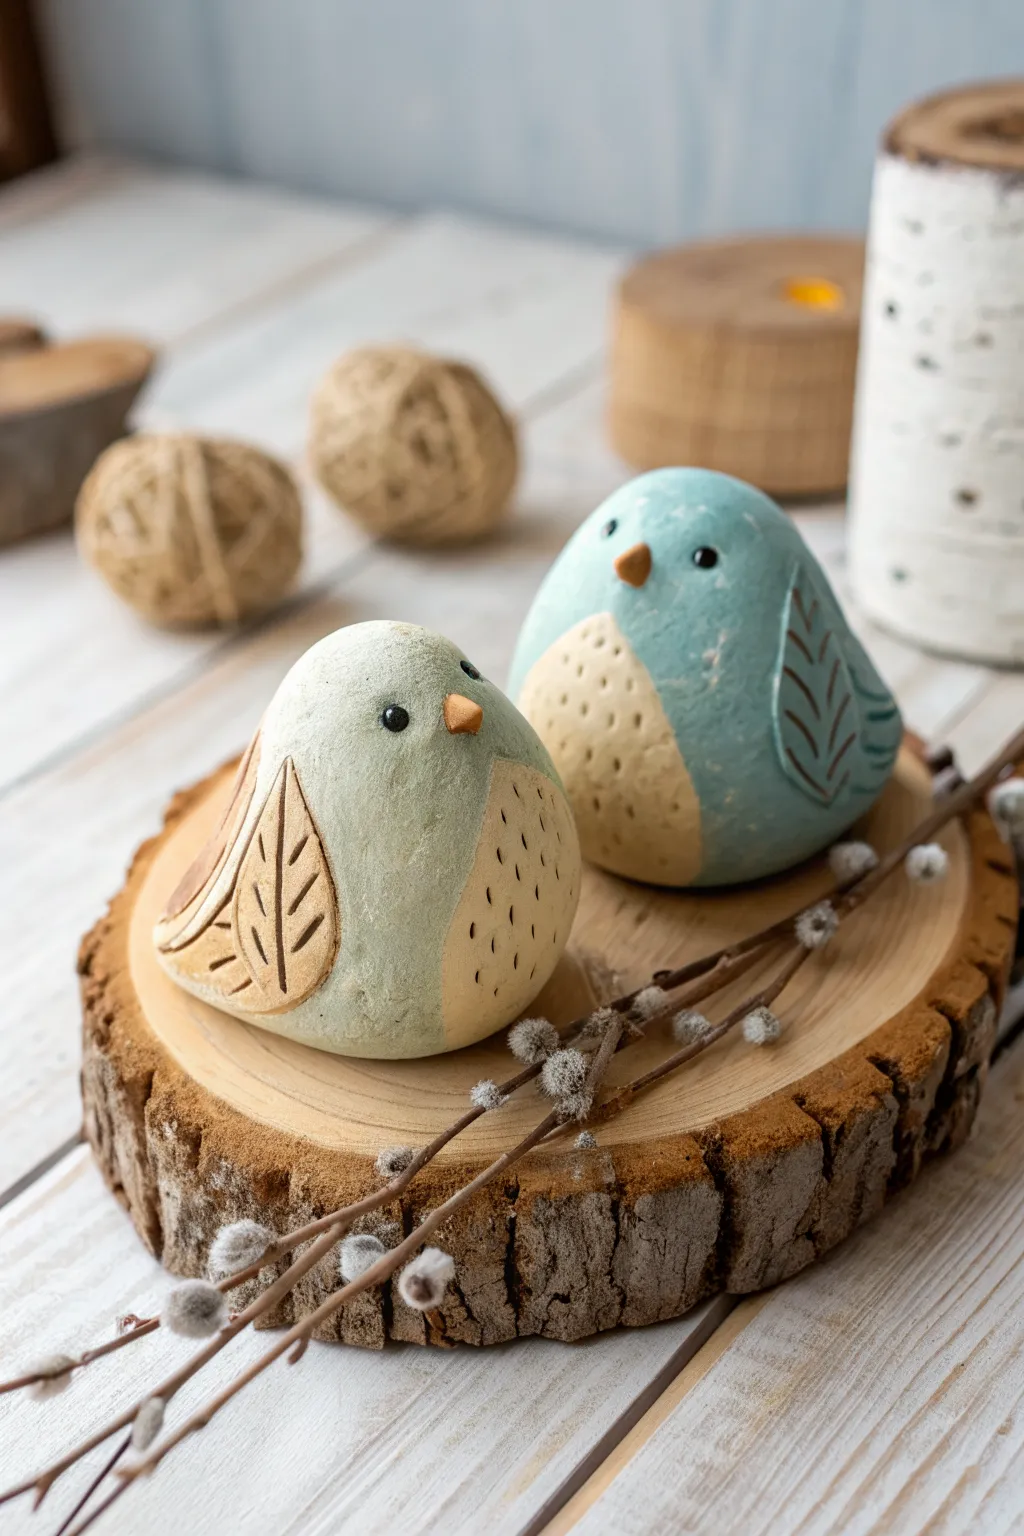
These charming, pebble-shaped bird sculptures bring a touch of rustic woodland magic to your decor with their textured wings and soft, matte finish. Perfect for beginners, this project transforms simple rounded forms into expressive characters using basic air-dry clay techniques and earthy acrylic tones.
Step-by-Step
Materials
- White air-dry clay (approx. 500g)
- Acrylic paints (pale sage green, teal blue, cream/beige, burnt orange, black)
- Clay sculpting tools (needle tool, small loop tool)
- Small rolling pin
- Aluminum foil (for core)
- Water and sponge for smoothing
- Fine-grit sandpaper (220 grit)
- Matte varnish or sealant
- Paintbrushes (small detail brush, medium flat brush)
Step 1: Forming the Base
-
Create the foil core:
Crumple a piece of aluminum foil into a tight, egg-shaped ball about the size of a lemon. This reduces drying time and saves clay. -
Roll out the clay:
Roll a sheet of air-dry clay to about 1/4 inch thickness. Ensure it’s large enough to fully wrap around your foil core. -
Wrap the core:
Encase the foil egg in the clay sheet. Trim away excess clay and pinch the seams together tightly to remove trapped air. -
Shape the body:
Roll the clay egg between your palms to smooth it completely. Gently tap the bottom on your work surface to create a flat base so the bird stands securely. -
Repeat for the pair:
Create a second bird body, perhaps slightly larger or smaller than the first, to create a cute mismatched pair.
Crack Control
If small cracks appear while drying, don’t panic. Mix a small amount of fresh clay with water to make a paste (slip) and fill the cracks, then sand smooth once dry.
Step 2: Sculpting Details
-
Add the beak:
Roll a tiny cone of fresh clay. Score the back of the cone and the face area, dampen with a little water, and press the beak firmly onto the center of the face. -
Blend the beak:
Use a small modeling tool or your finger to smooth the seam where the beak meets the body, ensuring it looks integrated rather than just stuck on. -
Form the wings:
Roll out two teardrop shapes of clay for the wings. I find flattening them slightly to about 1/8 inch thickness works best for this stylized look. -
Attach the wings:
Score and slip the sides of the bird body, then press the teardrop wings into place. The pointed end should aim toward the tail. -
Carve wing texture:
Using a needle tool or small knife, carve a leaf-like vein pattern into the wings. Make one central line with diagonal lines branching off. -
Add chest texture:
Use the tip of a needle tool to poke shallow, random dots on the lower chest area to mimic fluffy down feathers.
Step 3: Finishing and Painting
-
Allow to dry:
Let the birds dry completely for 24-48 hours. They should feel room temperature and look chalky white when fully cured. -
Sand imperfections:
Gently sand the main body with fine-grit sandpaper to remove fingerprints, but leave the carved wing areas rough for contrast. -
Paint the base coats:
Paint the body of one bird sage green and the other teal blue. Leave the chest area and wings unpainted for now. -
Paint the accents:
Fill in the chest area and the wings with a creamy beige paint. You may need two coats to cover the white clay fully. -
Highlight the carving:
Mix a tiny amount of brown into your beige paint. Carefully paint inside the carved wing grooves to make the leaf pattern pop. -
Detail the face:
Paint the beaks a warm burnt orange. Use the handle end of a paintbrush dipped in black paint to dot on the eyes. -
Seal the work:
Once the paint is dry, apply a coat of matte varnish to protect the surface while maintaining that lovely stone-like finish.
Make it Organic
Instead of painting the wings solid cream, try a ‘dry brush’ technique with brown paint over the textured clay to give them a weathered, wood-carved appearance.
Place your new feathered friends on a mantle or bookshelf for a serene nature-inspired display
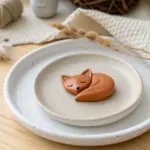
Cat Sculpture With Armature Pose
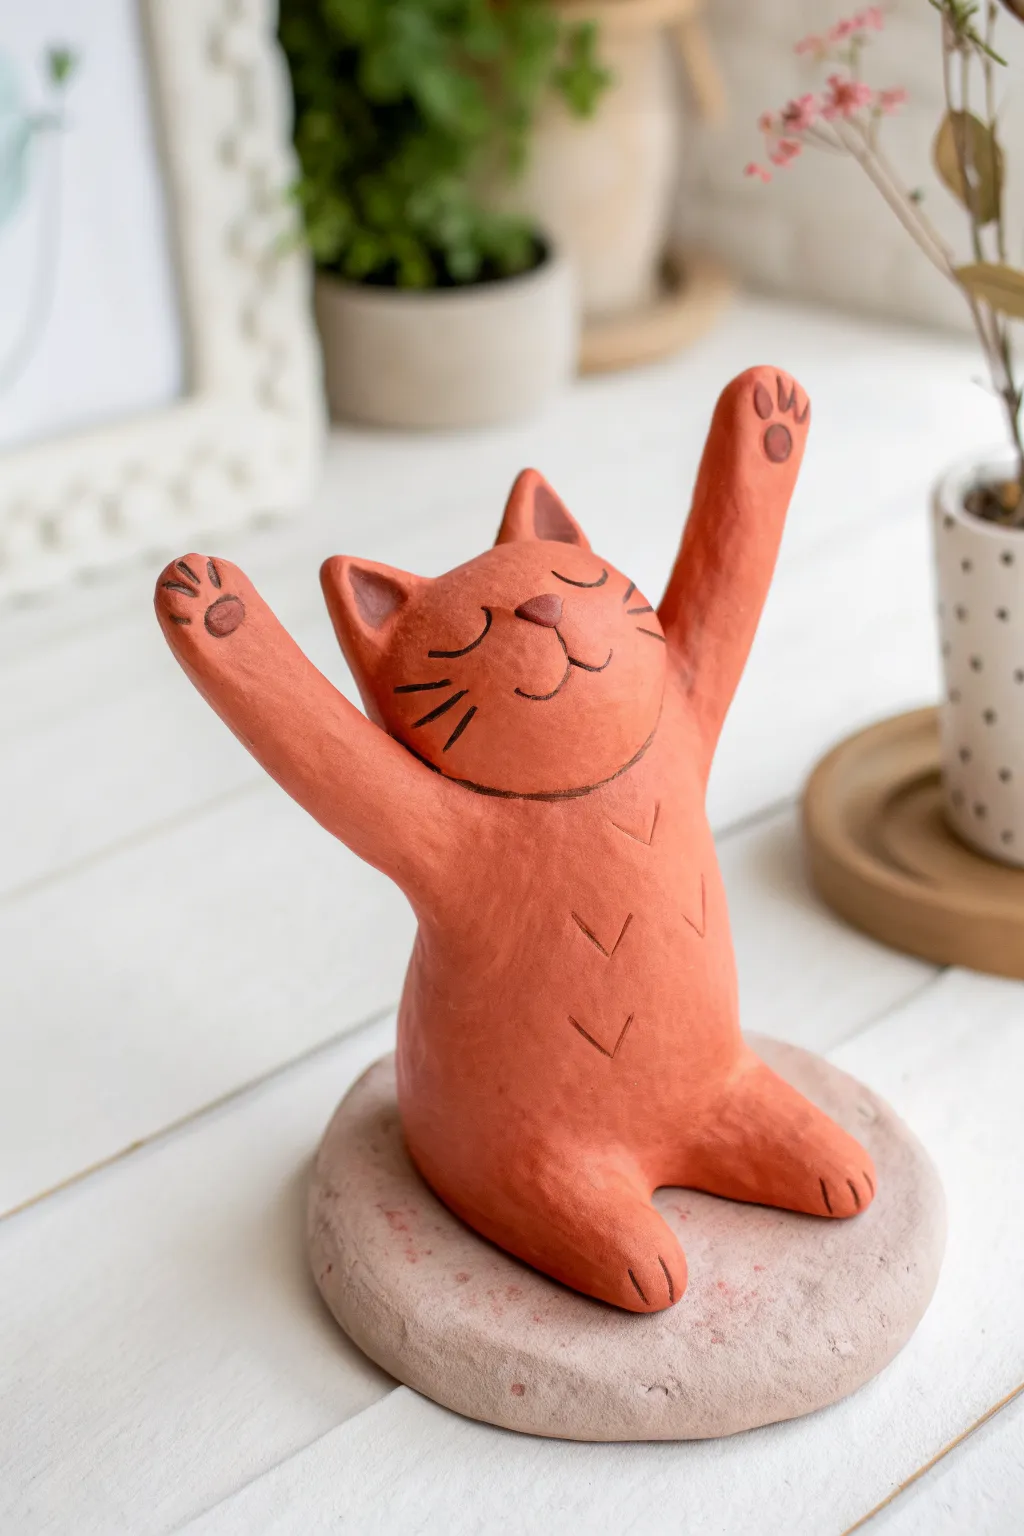
Capture the pure joy of a morning stretch with this charming cat sculpture. Made from warm, terracotta-colored air dry clay, this piece features a whimsical pose supported by a simple armature and rests on a textured stone-like base.
How-To Guide
Materials
- Terracotta colored air-dry clay
- Stone gray or white air-dry clay (for the base)
- Aluminum foil
- Floral wire or sturdy crafting wire
- Clay sculpting tools (needle tool, rubber shapers)
- Small rolling pin
- Water in a small cup
- Acrylic paint (dark brown or black)
- Fine detail paintbrush
- Sandpaper (fine grit)
- Matte varnish
Step 1: Building the Core
-
Form the armature:
Cut a length of wire about 8 inches long. Fold it in half and twist the bottom slightly to create a ‘spine.’ Bend the two loose ends upwards into a V-shape to act as the core for the raised arms. -
Bulking with foil:
Crumple aluminum foil tightly around the wire structure. Create a teardrop shape for the body at the bottom and two thinner cylinders extending up the wire arms. This saves clay and reduces drying time. -
Prepare the base:
Take a ball of the gray/white clay and flatten it into a rough, organic disc shape about 1/2 inch thick. Press the bottom of your foil armature into the center to create a seating indentation, then set the base aside to firm up slightly.
Make It Stable
Leave a little extra wire sticking out the bottom of your armature. You can poke this directly into the base clay for a much stronger, permanent connection.
Step 2: Sculpting the Body
-
Cover the body:
Roll out a sheet of terracotta clay to about 1/4 inch thickness. Wrap this around the foil body, smoothing the seams together with a bit of water on your finger. -
Sculpt the arms:
Add ropes of clay over the wire arms. Blend the clay seamlessly where the arms meet the shoulders, ensuring the transition is smooth and not lumpy. -
Shape the head:
Roll a separate ball of clay for the head. It should be slightly oval-shaped. Attach it to the top of the body using the ‘score and slip’ method—scratch both surfaces, add water, and press firmly. -
Blend the neck:
Use a modeling tool or your thumb to drag clay from the neck area down to the body and up to the head, eliminating any visible gap. Smooth it out until the head looks like an extension of the body. -
Add the legs:
Roll two thick sausages of clay for the legs. Attach them to the bottom front of the body, posed as if the cat is sitting. Blend the upper thighs into the main body mass.
Crack Control
If you see small cracks forming as it dries, mix a tiny amount of clay with water to make a paste and fill them in immediately with a small brush.
Step 3: Refining Details
-
Create ears:
Shape two small triangles for ears. Press your thumb into the center of each to create the inner ear curve, then score and slip them onto the top of the head. -
Define the paws:
Flatten the ends of the raised arms and the seated legs slightly. Use a needle tool to press two vertical lines into each paw end to create toes. -
Carve the face:
Using a needle tool, gently carve two curved lines for closed, happy eyes. Add a small triangle nose of clay, then carve the mouth lines curving upward from it. -
Add whiskers and texture:
Carve three short lines on each cheek for whiskers. I like to use a small V-gouge tool for the chest fur details, creating small downward arrows to suggest texture. -
Mount on base:
Place the cat onto the prepared base. Use a little clay slip (water and clay mixed) to secure it permanently. You can gently texture the base with a rock or crumpled foil for a stone effect.
Step 4: Finishing Touches
-
Smoothing:
Dip a soft brush in water and go over the entire sculpture to remove fingerprints and harsh tool marks. -
Drying:
Allow the sculpture to dry completely. This usually takes 24-48 hours depending on humidity. Flip carefully halfway through if the bottom of the base feels damp. -
Painting details:
Once dry, use a fine brush with dark brown or black acrylic paint to carefully fill in the carved lines of the eyes, whiskers, mouth, and paw pads. Wipe away excess surface paint quickly with a damp cloth if you go outside the lines. -
Seal:
Apply a coat of matte varnish to protect the clay and deepen the terracotta color without making it look plasticky.
Place your stretching cat on a shelf near a plant for a cozy decorative touch


The Complete Guide to Pottery Troubleshooting
Uncover the most common ceramic mistakes—from cracking clay to failed glazes—and learn how to fix them fast.
Body-Positive Torso Sculpture
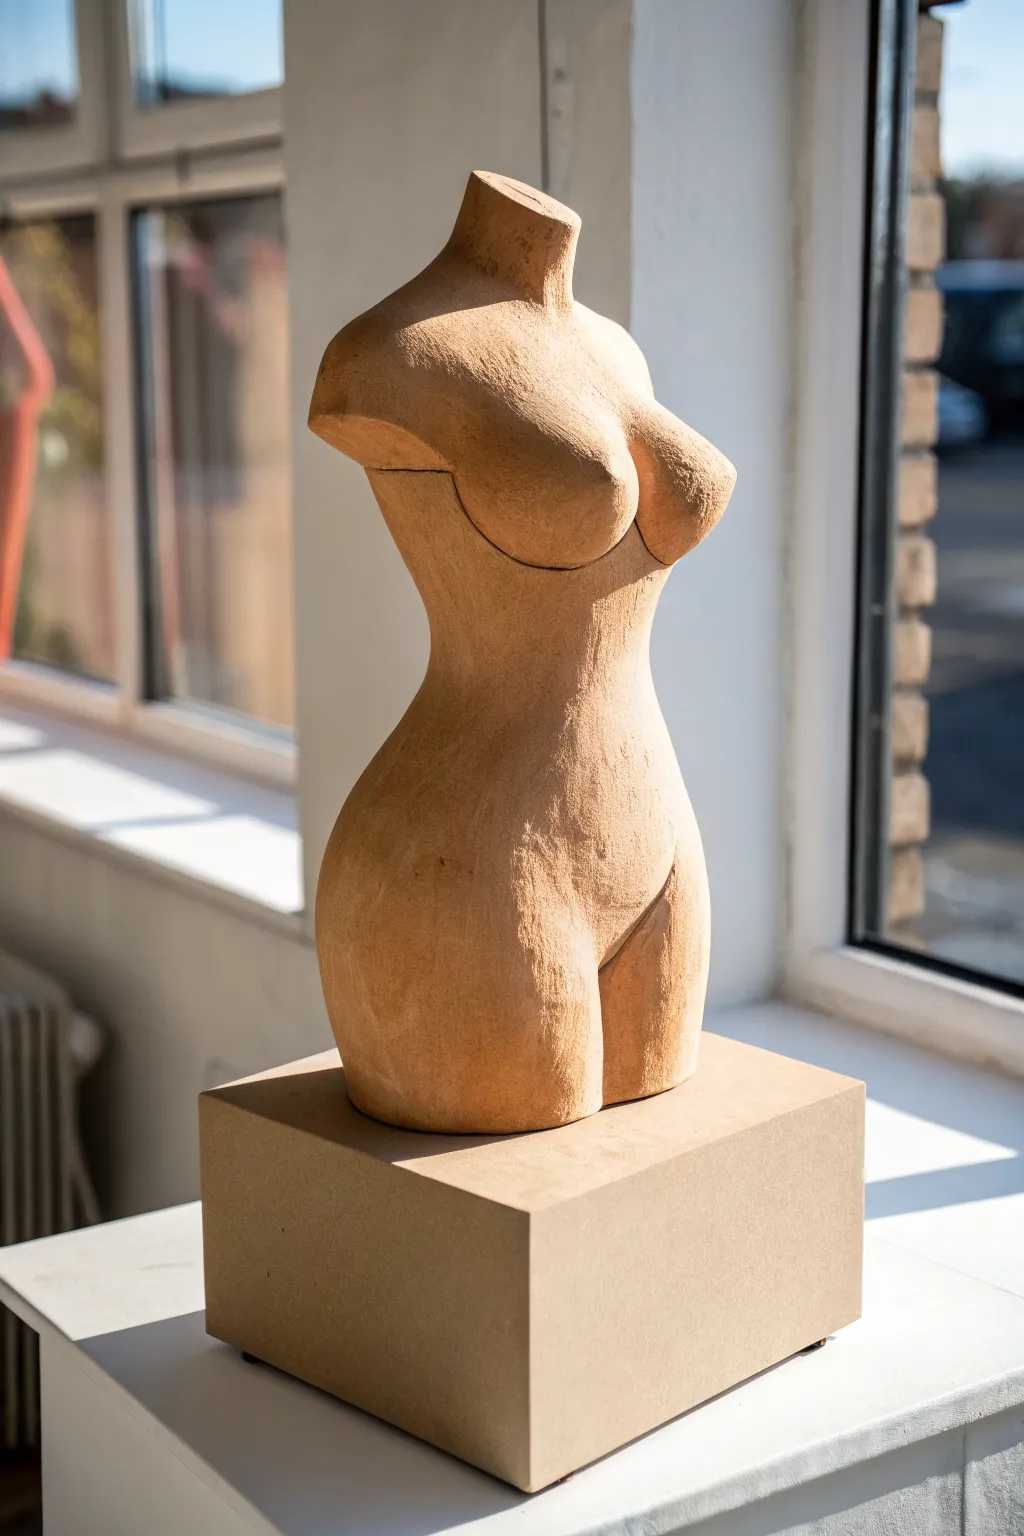
Celebrate the beauty of the feminine figure with this rustic, textured torso sculpture. Its warm, terracotta-like finish and raw surface details give it the timeless feel of an archaeological find, making it a striking centerpiece for any shelf.
Step-by-Step Guide
Materials
- Air-dry clay (terra cotta color or natural)
- Aluminum foil
- Masking tape
- Wooden dowel or thick wire (armature)
- Wooden block (for base/plinth)
- Sculpting tools (loop tool, needle tool)
- Sponge and water
- Sandpaper (coarse and fine grit)
- Strong craft glue or epoxy
Step 1: Building the Armature
-
Prepare the base:
Begin by securing a wooden dowel or strong wire vertically into your wooden block base. This will act as the spine and principal support for the clay weight. -
Form the core:
Crumple aluminum foil into a dense, elongated shape around the dowel. Build it up to resemble the basic dimensions of a torso, focusing on the ribcage area and the wider hip section. -
Refine the shape:
Wrap the foil tightly with masking tape. This smooths out sharp foil edges and creates a surface the clay can grip onto. Ensure you create an hourglass taper at the waist.
Step 2: Applying the Clay
-
Roll out slabs:
Roll your air-dry clay into consistent slabs, roughly 1/4 inch thick. I find this ensures even drying later on. -
Cover the form:
Drape the clay slabs over the foil armature. Press them firmly against the tape, joining the seams by scoring the edges and smoothing them together with a bit of water. -
Build the chest:
Add two rounds of clay to the upper chest area to form the breasts. Blend the edges seamlessly into the main torso body so they look organic, not just stuck on. -
Define the waist:
Use your thumbs to press in at the waistline, exaggerating the curve slightly as the clay will shrink a tiny bit when drying. -
Shape the hips:
Add extra clay to the hip area if needed to create a full, rounded silhouette. Smooth the transition down to where the thighs would be cut off.
Keep it Moist
Keep a spray bottle of water handy. If the clay starts cracking while you work, a light misting helps rework the surface without making it muddy.
Step 3: Sculpting Details
-
Refine the surface:
Use a damp sponge to smooth out major fingerprints, but don’t aim for perfection. The charm of this piece lies in its slight ruggedness. -
Carve the neckline:
Use a needle tool or knife to cut a clean, angled line at the neck and shoulders, creating the appearance of a fragmented statue. -
Add definition lines:
Gently carve a shallow line underneath the breast area to define the form. You can also add faint lines near the hip flexors. -
Create texture:
Take a rough bristle brush or a crumpled ball of foil and lightly dab the surface of the clay. This gives it that stone-like, porous texture seen in the photo. -
Introduce “cracks”:
If you want that antiqued look, refrain from smoothing every single seam perfectly. Allowing a visible join line under the bust or at the shoulder adds character.
Metallic Wash
Mix a tiny amount of gold mica powder into clear wax and buff it onto the high points (chest and hips) for a subtle, high-end bronze effect.
Step 4: Finishing Touches
-
Dry thoroughly:
Let the sculpture dry slowly away from direct heat. This connects back to the thickness of the clay; slow drying prevents unwanted deep cracking. -
Sand the plinth:
While the torso dries, sand your wooden block base until it is perfectly smooth and geometric. -
Final assembly:
Once the clay is fully hardened, use strong glue or epoxy to permanently fix the torso’s armature into the wooden base if it feels loose. -
Optional tinting:
If your clay isn’t naturally terracotta-colored, brush on a wash of burnt sienna acrylic paint, wiping most of it off immediately to leave color just in the textures.
Place your finished sculpture near a window where natural light can highlight the beautiful curves and textures you have created