When I’m in the studio making DIY clay ornaments, I love how a simple slab of clay can turn into something that feels genuinely special. Here are my favorite diy clay ornaments ideas—starting with the classics you’ll reach for every year, then drifting into a few creative twists once you’ve got momentum.
Classic Cookie-Cutter Holiday Shapes
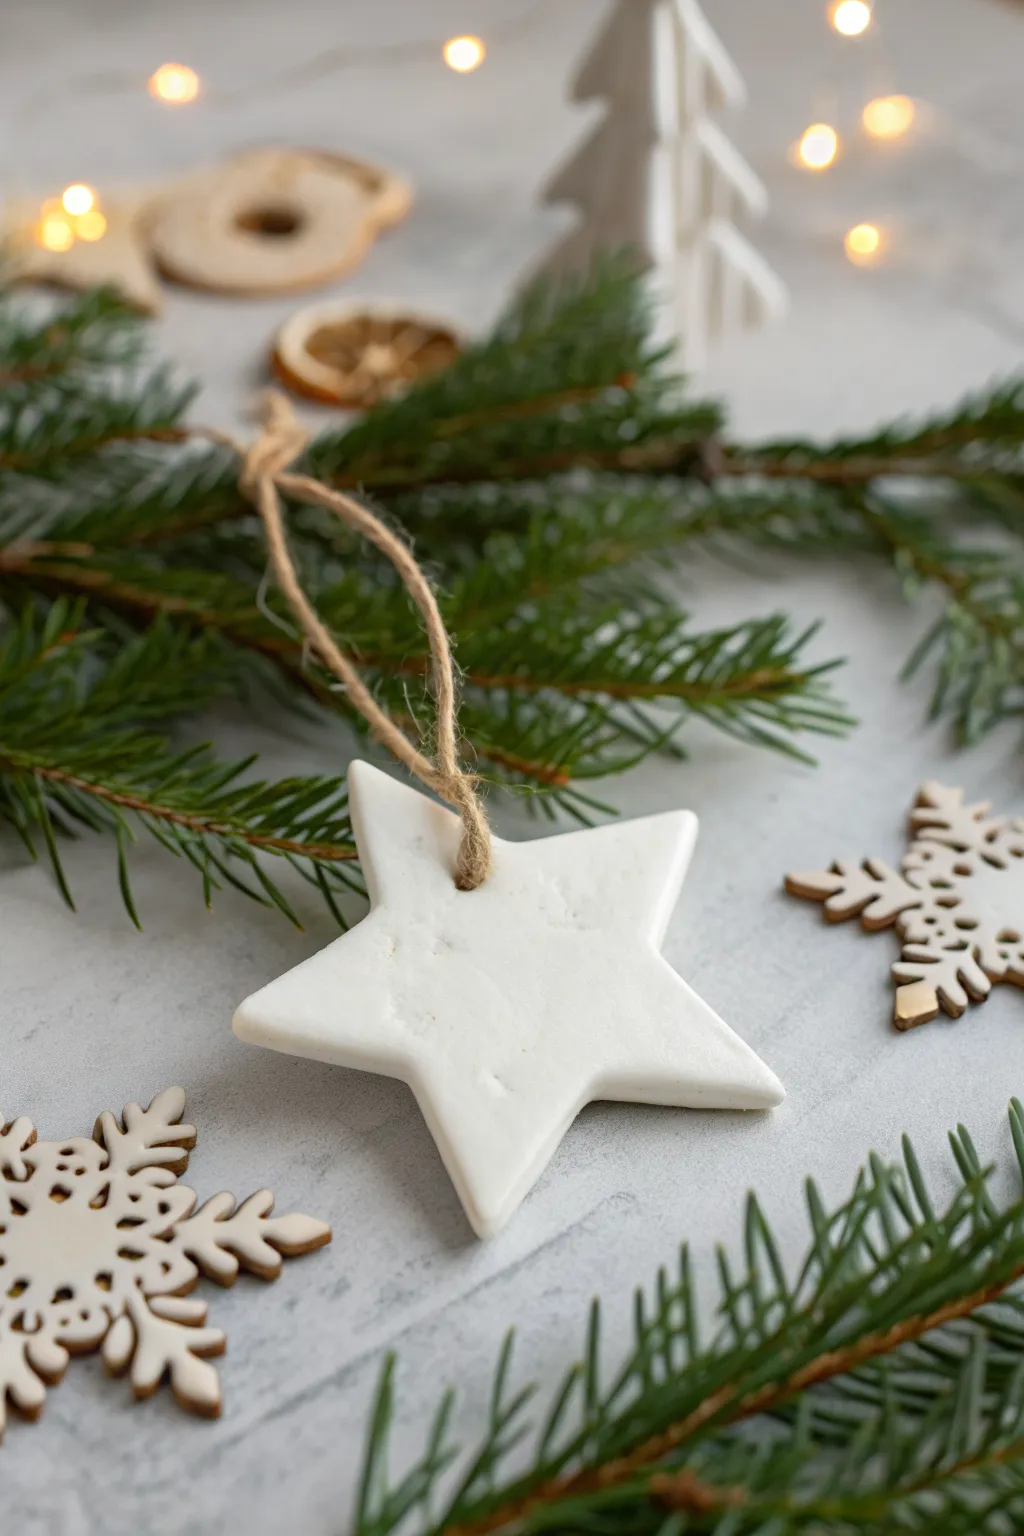
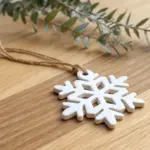
Capture the essence of winter simplicity with this elegant star ornament made from white clay. Its smooth, matte finish and rustic twine hanger create a timeless look that pairs beautifully with fresh pine branches.
How-To Guide
Materials
- White polymer clay air-dry modeling clay
- Rolling pin
- Parchment paper or silicone baking mat
- Star-shaped cookie cutter (medium size)
- Straw or narrow drinking straw
- Fine-grit sandpaper (400-600 grit)
- Natural jute twine
- Scissors
Step 1: Preparing the Clay
-
Condition the materials:
Begin by taking a handful of white clay and kneading it thoroughly in your hands. The warmth and pressure will soften the clay, making it pliable and eliminating any trapped air bubbles which could crack later. -
Set up your workspace:
Lay down a sheet of parchment paper or a silicone mat on a flat surface. This prevents the clay from sticking to your table and ensures the back of your ornament stays clean and smooth. -
Roll out the slab:
Place your ball of clay in the center of the mat. Using a rolling pin, roll the clay out evenly. Aim for a thickness of about 1/4 inch (6mm)—too thin and it becomes fragile, too thick and it gets heavy. -
Check consistency:
Look closely at the surface of your rolled clay. If you see any large bumps or air pockets, prick them gently with a pin and smooth over with your finger before proceeding.
Smooth Moves
To get perfectly even thickness when rolling, place two wooden rulers or dowels on either side of your clay ball as guide rails for your rolling pin.
Step 2: Shaping the Ornament
-
Cut the shape:
Press your star-shaped cookie cutter firmly into the rolled clay. Wiggle it very slightly to ensure a clean separation from the surrounding clay, then lift the cutter straight up. -
Remove excess clay:
Peel away the scrap clay from around your star shape first. This makes it easier to lift the star later without distorting its points. -
Smooth the edges:
Dip your finger in a tiny bit of water. Gently run your damp finger along the cut edges of the star to soften the sharp corners created by the cutter, giving it a more finished, ceramic look. -
Create the hanging hole:
Take a plastic drinking straw or a similar small cylindrical tool. Press it into one of the star’s points, about 1/4 inch from the top edge, to punch a clean hole for the twine. -
Eject the plug:
Lift the straw out and ensure the small clay plug comes with it. If the clay plug stays inside the hole, use a toothpick to gently push it out. -
Final smooth:
Do one last quick inspection. If handling the star left any fingerprints, lightly buff them out with a drop of water.
Step 3: Drying and Finishing
-
Let it dry:
Leave the star on the parchment paper to air dry. This usually takes 24-48 hours depending on humidity. Flip the star over halfway through the drying process to ensure both sides dry evenly and prevent curling. -
Wait for the color change:
You will know the clay is fully dry when it turns a brighter, chalkier white and feels hard to the touch with no cool, damp spots. -
Sand for perfection:
Once fully cured, take a piece of fine-grit sandpaper. Gently sand the edges and the surface in circular motions to remove any roughness or sharp burrs left from the cutting process. -
Dust it off:
Wipe the ornament with a clean, dry cloth or a soft brush to remove the fine clay dust generated by sanding. -
Prepare the hanger:
Cut a length of natural jute twine, approximately 8-10 inches long. -
Thread the loop:
Fold the twine in half. Push the folded loop end through the hole in the star from front to back. -
Secure the twine:
Open the loop you just pushed through and pull the two loose tail ends of the twine through that loop. Pull tight to create a lark’s head knot right at the top of the ornament. -
Tie the ends:
Tie the two loose ends of the twine together in a simple overhand knot to close the hanger loop.
Make Your Mark
Before drying, gently press lace, pine needles, or letter stamps into the wet clay surface to create subtle, personalized textures.
Hang your finished star on a branch and enjoy the peaceful, homemade charm it adds to your space


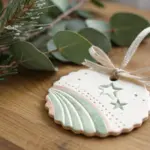
Simple Painted Ornament Discs
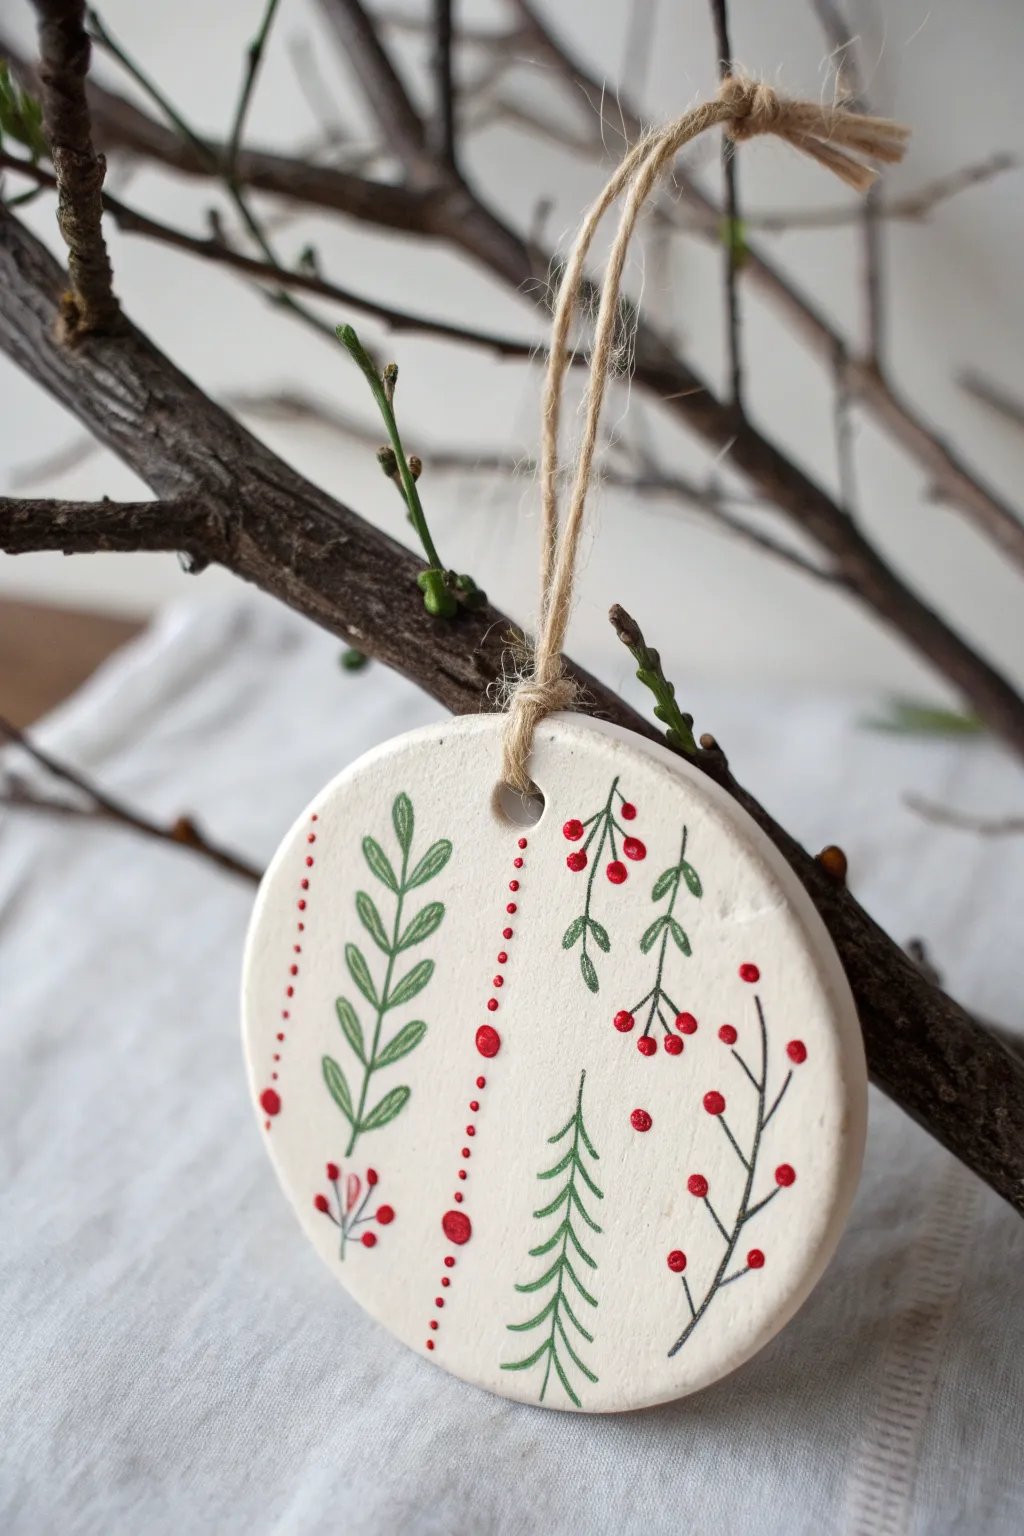
Embrace the charm of simplicity with this Scandinavian-inspired clay ornament featuring delicate botanical sketches. The clean white background makes the festive red berries and evergreen sprigs pop, creating a modern yet timeless addition to your holiday decor.
Step-by-Step Tutorial
Materials
- Air-dry clay (white) or polymer clay
- Rolling pin
- Circle cookie cutter (approx. 3-inch diameter)
- Straw or stirring stick (for creating the hole)
- Fine grit sandpaper
- Acrylic paints (Forest Green, Bright Red)
- Very fine detail paintbrush (size 0 or 00)
- Small dotting tool or toothpick
- Jute twine or hemp cord
- Matte finish clear sealant (optional)
- Parchment paper
Step 1: Shaping the Base
-
Prepare the Clay:
Take a handful of white air-dry clay and knead it gently in your hands until it becomes pliable and smooth, removing any potential air bubbles. -
Roll it Out:
Place the clay on a sheet of parchment paper to prevent sticking. Use a rolling pin to flatten the clay to an even thickness of about 1/4 inch. -
Cut the Shape:
Press your circle cookie cutter firmly into the clay. Give it a tiny wiggle before lifting to ensure a clean cut. -
Create the Loop Hole:
Use a drinking straw or a stirring stick to punch a hole near the top edge of the circle. Make sure it isn’t too close to the rim to prevent cracking later. -
Smooth the Edges:
Dip your finger in a little bit of water and run it along the cut edges of the circle to smooth out any roughness. -
Dry Completely:
Set the ornament aside on a flat surface to dry. Depending on your clay type and humidity, this usually takes 24-48 hours. Flip it halfway through to ensure even drying. -
Sand for Perfection:
Once fully cured and hard, gently sand the surface and edges with fine-grit sandpaper to create a smooth canvas for your painting.
Smooth Surface Secret
If your air-dry clay dries with a slightly fibrous texture, paint the entire disc with white acrylic gesso before adding your design. This creates a silky, non-porous base.
Step 2: Painting the Design
-
Planning the Layout:
Visualize four vertical ‘columns’ for your design. I find it helpful to lightly mark these positions with a pencil, though you can freehand it if you feel confident. -
Paint the Leafy Sprig:
Starting on the left side, use your fine detail brush and forest green paint to draw a slightly curved vertical line. Add small, paired leaves extending upward along the stem. -
Create the Dotted Garlands:
Using red paint and a very small dotting tool (or the tip of a toothpick), stamp vertical lines of dots. Vary the spacing slightly for a hand-drawn look. -
Add Larger Accents:
Intersperse slightly larger red dots among your smaller dotted lines to create visual rhythm, mimicking larger berries. -
Draw the Pine Tree:
towards the center-right, paint a simple vertical line for a tree trunk. With quick, downward strokes, add pine needle branches on either side, getting wider as you go down. -
Detail the Berry Branches:
On the far right, paint thin, dark green branch lines. At the end of each twig, place a bright red dot to represent winter berries. -
Add Hanging Foliage:
Fill any empty upper space with small, hanging sprigs. Think of these as mistletoe or ivy drooping down from the top edge. -
Let Paint Set:
Allow the acrylic paint to dry completely. This usually happens quickly, but give it at least 20 minutes to be safe.
Gilded Glamour
Swap the red paint for metallic gold or copper to give the ornament a more elegant, shimmering aesthetic suitable for evening light.
Step 3: Finishing Touches
-
Seal the Surface:
For longevity, apply a thin coat of matte clear sealant over the front of the ornament. This protects the painted details from scratching. -
Add the Hanger:
Cut a length of jute twine, about 8 inches long. Fold it in half and thread the loop through the hole in the ornament. -
Secure the Knot:
Pass the loose ends of the twine through the loop and pull tight (a larks head knot), then tie the ends together at the top to create the hanger.
Hang your new handcrafted piece on a sturdy branch and enjoy the natural aesthetic it brings to your home


Handprint Keepsake Clay Ornaments
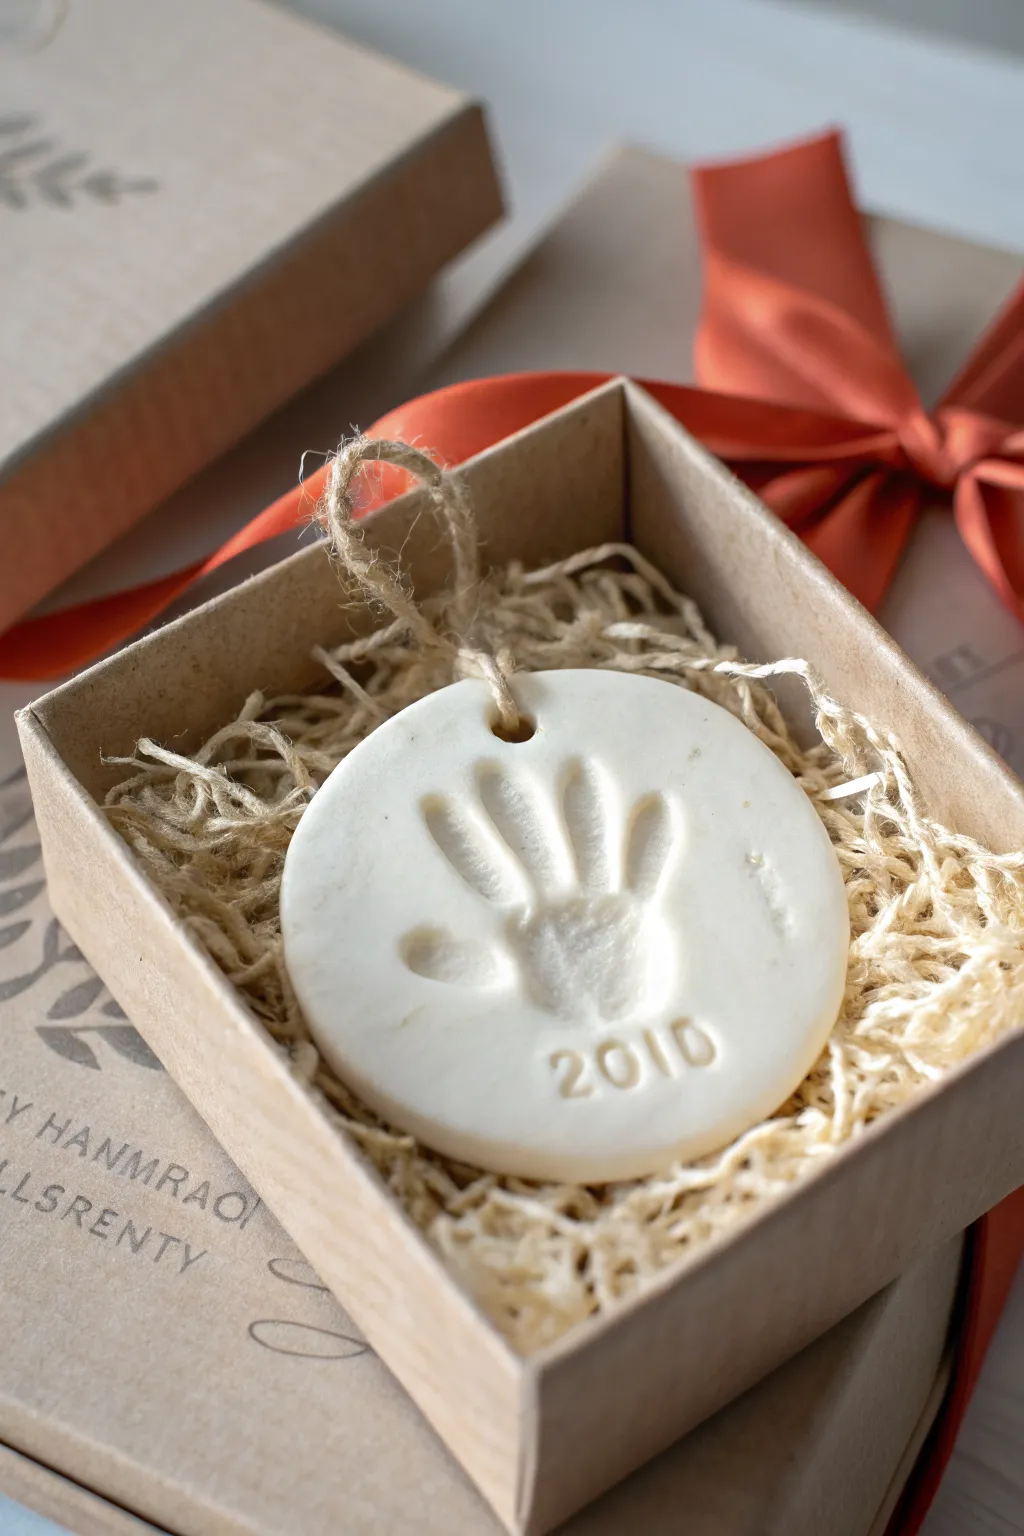
Capture a fleeting moment in time with this classic round clay ornament featuring a deep handprint impression. The smooth, white finish and simple stamped date give it a professional, boutique look that makes for a perfect gift.
Detailed Instructions
Materials
- White air-dry clay (or polymer clay)
- Rolling pin
- Round cookie cutter (approx. 4-5 inches)
- Number stamps
- Straw or skewer
- Fine-grit sandpaper
- Jute twine
- Parchment paper
Step 1: Preparation and Shaping
-
Knead the clay:
Begin by taking a generous handful of white air-dry clay. Knead it thoroughly in your hands to warm it up and remove any air bubbles, ensuring a smooth consistency without cracks. -
Roll out the slab:
Place the clay on a sheet of parchment paper to prevent sticking. Use a rolling pin to flatten it into a slab about 1/4 to 1/2 inch thick; you want it substantial enough to take a deep impression without breaking. -
Smooth the surface:
Dip your finger in a little bit of water and gently run it over the surface of the clay slab to smooth out any rolling pin marks or tiny imperfections. -
Cut the circle:
Press your large circular cookie cutter firmly into the clay. Do not remove the excess clay from the outside ring just yet, as it helps support the shape during the next step.
Clean Edges Pro-Tip
Before cutting your circle, lay a piece of plastic wrap over the clay. Press the cutter *over* the plastic. This creates a soft, rounded ‘pillow’ edge that needs zero sanding later.
Step 2: Creating the Impression
-
Position the hand:
With the clay still on the stable surface, guide the child’s hand over the circle. Aim to center the palm, but fingers can splay naturally. -
Press firmly:
Press the hand down firmly and evenly. Applying pressure to each individual finger and the center of the palm ensures a clear, deep print. I find it helpful to gently hold their wrist steady while doing this. -
Lift carefully:
Slowly lift the hand straight up to avoid smudging the edges of the print. If the print is too faint, you can ball up the clay and start over. -
Remove excess clay:
Now, carefully peel away the excess clay from around the outside of the cookie cutter ring before lifting the cutter itself. -
Smooth the edges:
Dip your finger in water again and gently run it around the cut edge of the circle to soften the sharp corner left by the cutter.
Step 3: Details and Finishing
-
Stamp the date:
Using your number stamps, press the year (like the ‘2010’ seen in the example) into the clay near the bottom curve or wherever there is negative space. -
Create the hanging hole:
Use a straw or a skewer to punch a hole near the top center of the ornament. Make sure it goes all the way through and has enough clearance from the edge so it won’t crack. -
Initial drying:
Leave the ornament on the parchment paper in a cool, dry place. Let it dry for about 24 hours on one side. -
Flip and dry:
Carefully flip the ornament over to let the backside dry. This helps prevent curling. Allow another 24-48 hours until the clay is completely white and hard. -
Sand imperfections:
Once fully dry, take a piece of fine-grit sandpaper and very lightly buff the edges or surface if there are any rough spots. -
Add the hanger:
Cut a length of natural jute twine. Thread it through the hole and tie a simple loop knot. -
Tie a bow (optional):
For the look in the photo, tie the twine ends into a loose, rustic knot or bow just above the ornament.
Level Up: Color Wash
Mix a tiny drop of acrylic paint with water to create a wash. Brush it into the handprint and wipe the surface with a damp cloth; the color will stay in the deep crevices.
Place your finished keepsake in a kraft box with shredded paper for a gift presentation that will be cherished for years


Paw Print Pet Keepsake Ornaments
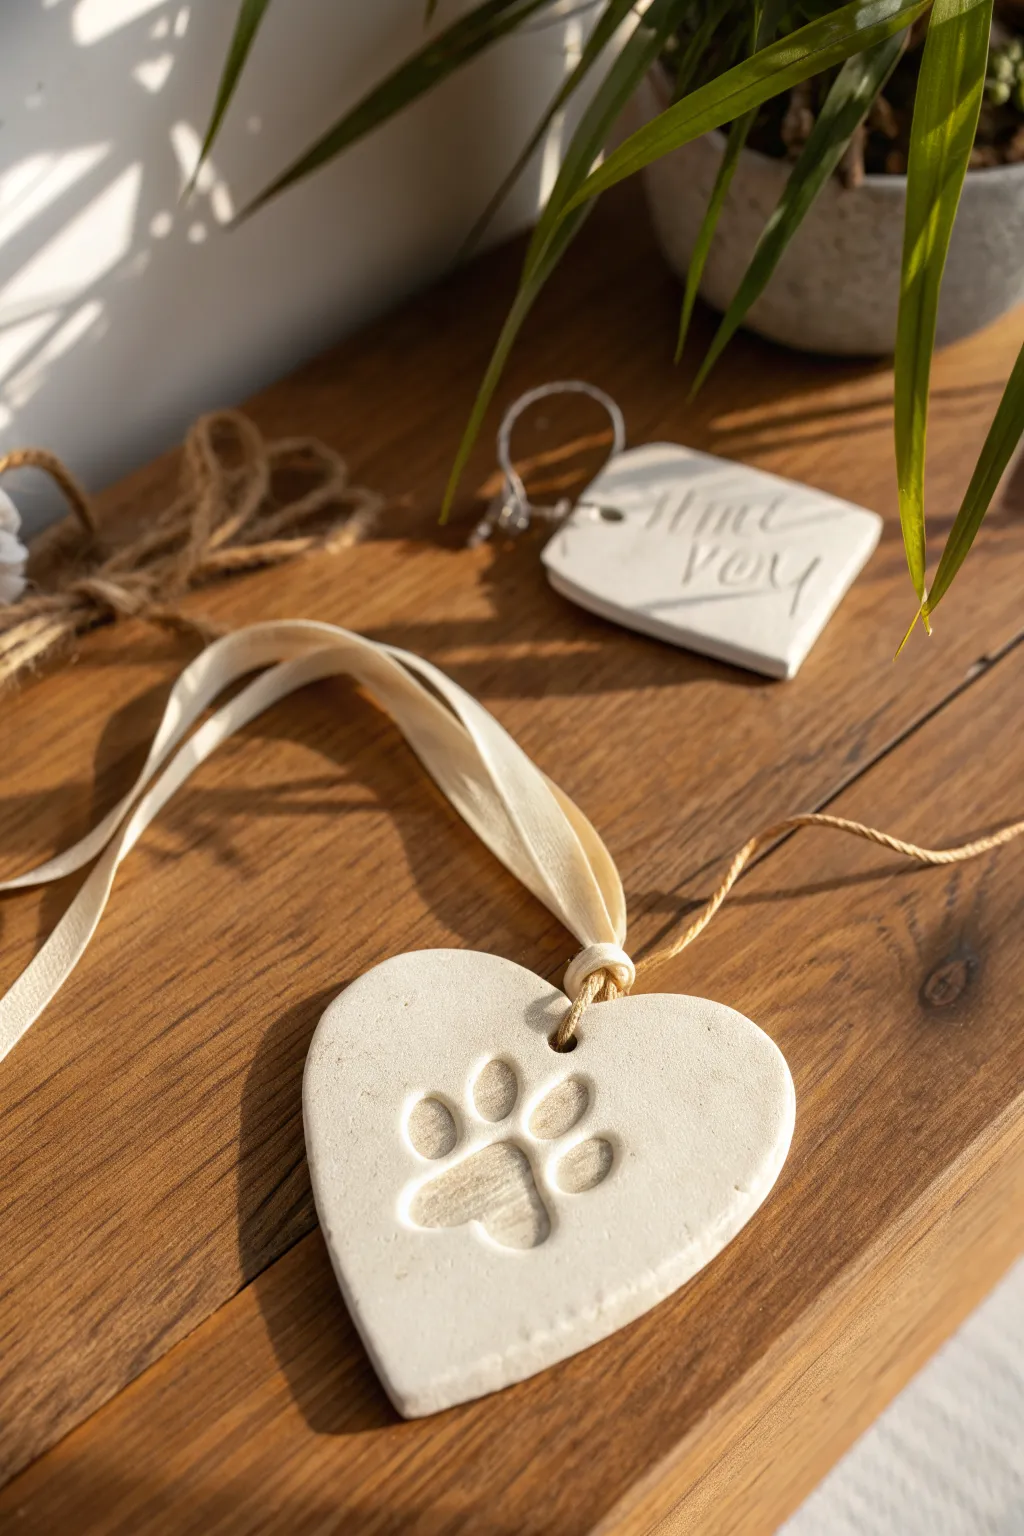
Capture your furry friend’s presence forever with this simple, pure white clay keepsake. The soft, rounded heart shape encases a deep, detailed paw print impression, finished with a rustic ribbon for hanging.
How-To Guide
Materials
- Air-dry clay (white)
- Rolling pin
- Heart-shaped cookie cutter (medium size)
- Drinking straw or small circular tool
- Fine-grit sandpaper (400-600 grit)
- Cream or beige satin ribbon
- Jute twine
- Wax paper or parchment paper
- Small bowl of water
- Your pet’s paw (clean and dry)
Step 1: Preparing the Clay Base
-
Condition the clay:
Take a handful of white air-dry clay and knead it in your hands for a minute until it feels soft, warm, and pliable. This prevents cracking later. -
Roll it out:
Place the clay on a sheet of wax paper or parchment paper. Use your rolling pin to flatten it to an even thickness of about 1/4 inch (6mm). Avoid going too thin, or the paw print won’t have enough depth. -
Cut the shape:
Press your heart-shaped cookie cutter firmly into the rolled clay. Wiggle it slightly to ensure a clean cut, then lift the cutter away. -
Remove excess:
Carefully peel away the excess clay from around the heart shape, leaving just your cutout on the paper. -
Smooth the edges:
Dip your finger lightly in the bowl of water and run it gently around the cut edges of the heart to soften any sharp ridges or rough spots.
Paw Print Pro Tip
Can’t get your pet to stay still? Create the impression in a separate scrap piece of clay first, let it harden, and use that as a ‘stamp’ to press into your pristine heart ornament.
Step 2: Creating the Impression
-
Position the paw:
Bring your pet over. Gently clean their paw pad to ensure no dirt gets into the white clay. Position their paw over the center of the heart. -
Press firmly:
Press the main pad and the toe pads down firmly and evenly. Applying steady pressure is key here, rather than a quick stomp. Lift the paw straight up to avoid smudging the edges. -
Refine the print:
If the print looks a little shallow, you can carefully use a rounded sculpting tool or your fingertip to deepen the impression slightly while keeping the shape authentic. -
Create the hanging hole:
Use a drinking straw to punch a hole near the top center of the heart, specifically in the ‘V’ dip. Twist the straw as you pull it out to remove the clay plug cleanly.
Step 3: Drying and Finishing
-
Initial drying:
Leave the ornament on the wax paper in a cool, dry place away from direct sunlight. Let it sit undisturbed for 24 hours. -
Flip for even drying:
After the top feels dry to the touch, gently flip the heart over. I like to let this dry for another 24 hours to ensure moisture escapes from the bottom, preventing warping. -
Sand for smoothness:
Once fully cured and hard, take your fine-grit sandpaper and very lightly buff the edges and surface. This removes any final fingerprints and gives it that professional, stone-like matte finish. -
thread the ribbon:
Cut a length of cream satin ribbon about 12 inches long. Fold it in half and thread the loop through the hole from front to back. -
Secure the loop:
Pass the loose ends of the ribbon through the loop and pull tight to create a lark’s head knot at the top of the heart. -
Add texture with jute:
For the layered look in the photo, take a small piece of jute twine and tie a simple knot around the base of the ribbon knot, letting the short ends fray slightly.
Cracking Prevention
If you see tiny hairline cracks appearing as it dries, smooth a tiny amount of fresh clay paste (water + clay) into the potential crack with your finger immediately.
Step 4: Optional: Personalization
-
Engrave a name:
If you wish to add a name like the tag in the background, use a needle tool to scratch cursive letters into a separate clay tag while wet. -
Highlight the print:
Alternatively, after the heart is dry, you can paint inside the paw impression with a diluted grey acrylic paint for subtle contrast.
Hang this sweet memento on your tree or wall to keep a piece of your companion close by always

The Complete Guide to Pottery Troubleshooting
Uncover the most common ceramic mistakes—from cracking clay to failed glazes—and learn how to fix them fast.
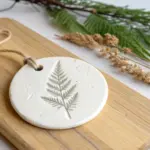
Evergreen Sprig Imprint Ornaments
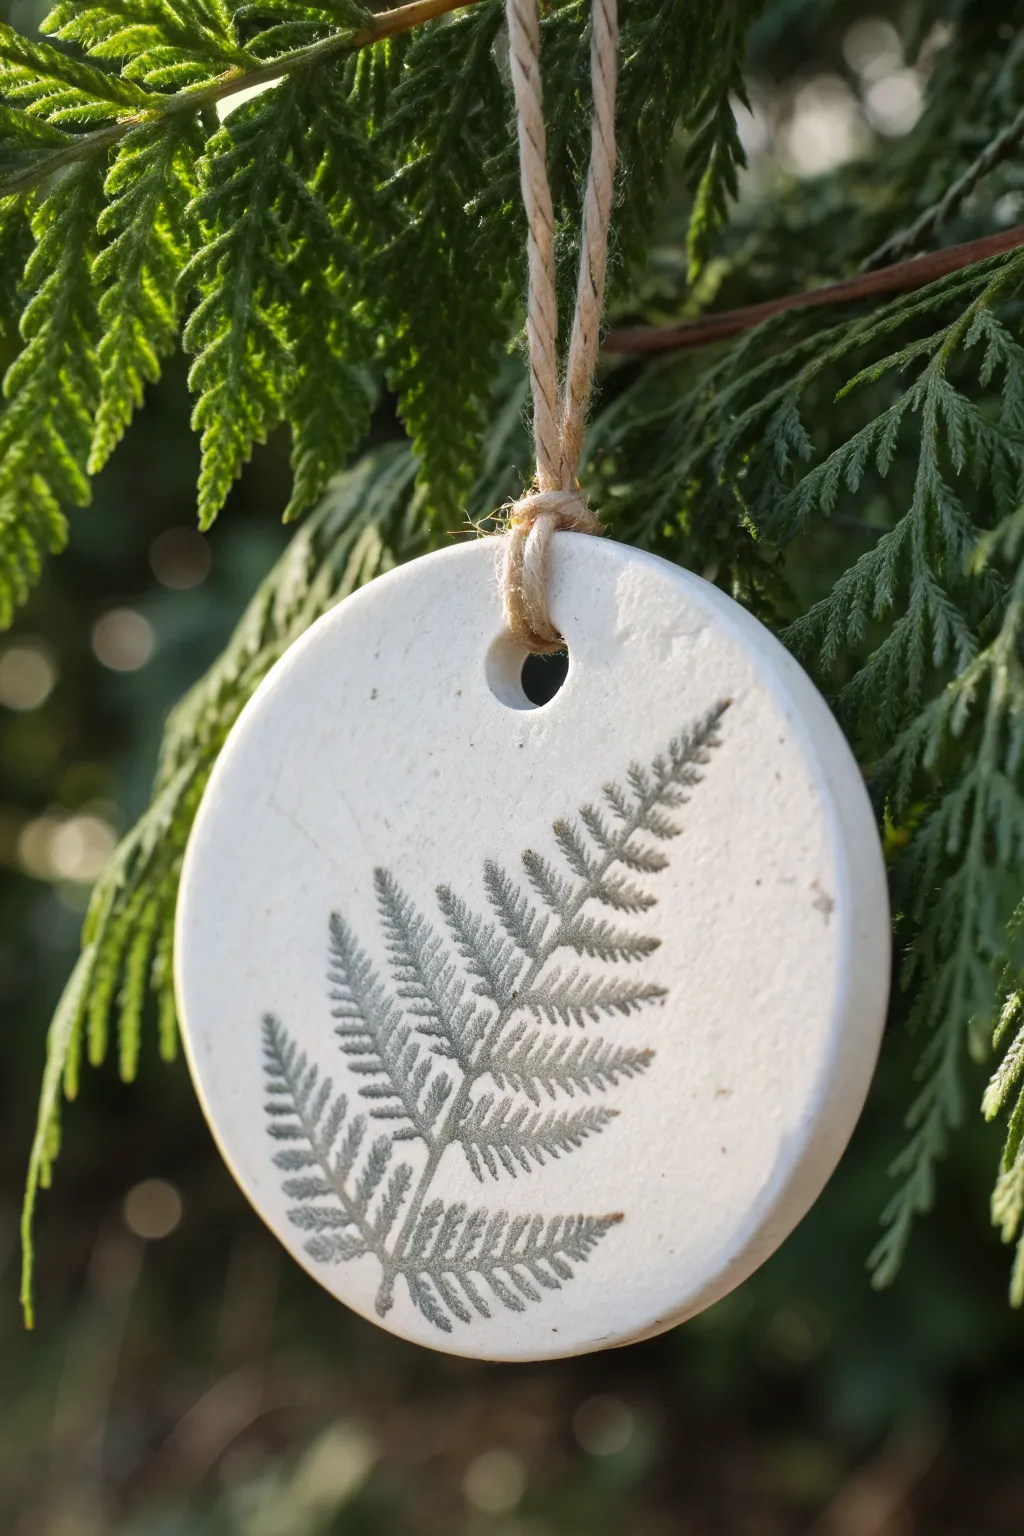
Capture the delicate beauty of the woods with these simple clay ornaments that feature a realistic evergreen impression. The soft white clay provides the perfect backdrop for the subtle, grey-green tinted fern detail, creating a natural and timeless holiday decoration.
Step-by-Step Guide
Materials
- White air-dry clay (or polymer clay)
- Small evergreen or fern sprigs (fresh is best)
- Rolling pin
- Round cookie cutter (approx. 3 inches)
- Drinking straw or small circular cutter
- Fine grit sandpaper
- Acrylic paint (sage green or grey-green)
- Cup of water
- Paper towel or soft cloth
- Natural jute twine
- Clear matte sealant (optional)
- Parchment paper or craft mat
Step 1: Preparing the Clay Base
-
Condition the clay:
Begin by taking a handful of air-dry clay. Knead it in your hands for a minute or two until it feels warm, pliable, and free of any stubborn lumps. -
Roll out the slab:
Place the ball of clay onto a sheet of parchment paper. Use your rolling pin to flatten it into an even slab, aiming for a thickness of about 1/4 inch so the ornament feels substantial but not heavy. -
Smooth the surface:
Before imprinting, run your finger or a slightly damp sponge over the clay surface to remove any small cracks or rolling pin marks.
Fixing warped edges
If your ornament curls up like a potato chip while drying, it’s drying unevenly. Place a light book on top of it once it’s semi-dry to keep it flat.
Step 2: Creating the Impression
-
Select your botanical:
Choose a fresh sprig of evergreen or fern that is slightly smaller than your intended cutter size. Ensure the leaves are flat and not withered. -
Position the sprig:
Lay the sprig gently onto the center of your clay slab. Arrangement is key here, so take a second to center it nicely. -
Press the botanical:
Using the rolling pin, roll firmly over the sprig one single time. You want to press the vegetation deep enough to catch the veins and texture, but not so deep that it distorts the clay’s thickness. -
Remove the sprig:
Carefully lift the stem of the plant and peel it away from the clay. Do this slowly to ensure no bits of leaf get stuck inside the impression.
Step 3: Cutting and Drying
-
Cut the shape:
Position your round cookie cutter over the imprint, centering the design. Press straight down firmly, give it a tiny wiggle to separate the edges, and lift the cutter. -
Create the hanging hole:
Take a drinking straw and press it into the top center of the circle, about half an inch from the edge, to punch out a clean hole for the twine. -
Smooth the edges:
Dip your fingertip in a little water and gently run it around the cut edge of the circle to soften any sharp ridges left by the cutter. -
Allow to dry:
Move the ornament on its parchment paper to a flat area to dry. Let it sit for 24-48 hours depending on humidity, flipping it once halfway through so both sides dry evenly. -
Sand imperfections:
Once fully bone dry, inspect the edges. If there are any rough spots, use fine-grit sandpaper to buff them away gently.
Crisper impressions
For the sharpest details, use fresh, stiff greenery. Dry leaves tend to crumble into the clay, leaving messy bits that are hard to remove.
Step 4: Finishing Touches
-
Prepare a wash:
Mix a small dab of sage green or grey acrylic paint with a generous amount of water. You want a watery, ink-like consistency, not thick paint. -
Apply the wash:
Brush this watery mixture over the entire imprinted area. Don’t worry if it looks messy; just ensure the paint gets into the deep crevices of the leaf design. -
Wipe away excess:
Immediately take a slightly damp paper towel and wipe strictly across the surface of the clay. This removes the paint from the high flat spots but leaves the color trapped in the recessed leaf veins, highlighting the detail. -
Seal (optional):
If you want extra protection, apply a thin coat of clear matte sealant spray over the ornament once the paint is dry. -
Add the twine:
Cut a 6-inch length of natural jute twine. Thread it through the hole, tie a simple knot at the ends to create a loop, and rotate the knot so it sits close to the clay.
Hang your new botanical ornament on the tree or use it as a special gift tag for a loved one
Leaf Vein Botanical Texture Ornaments
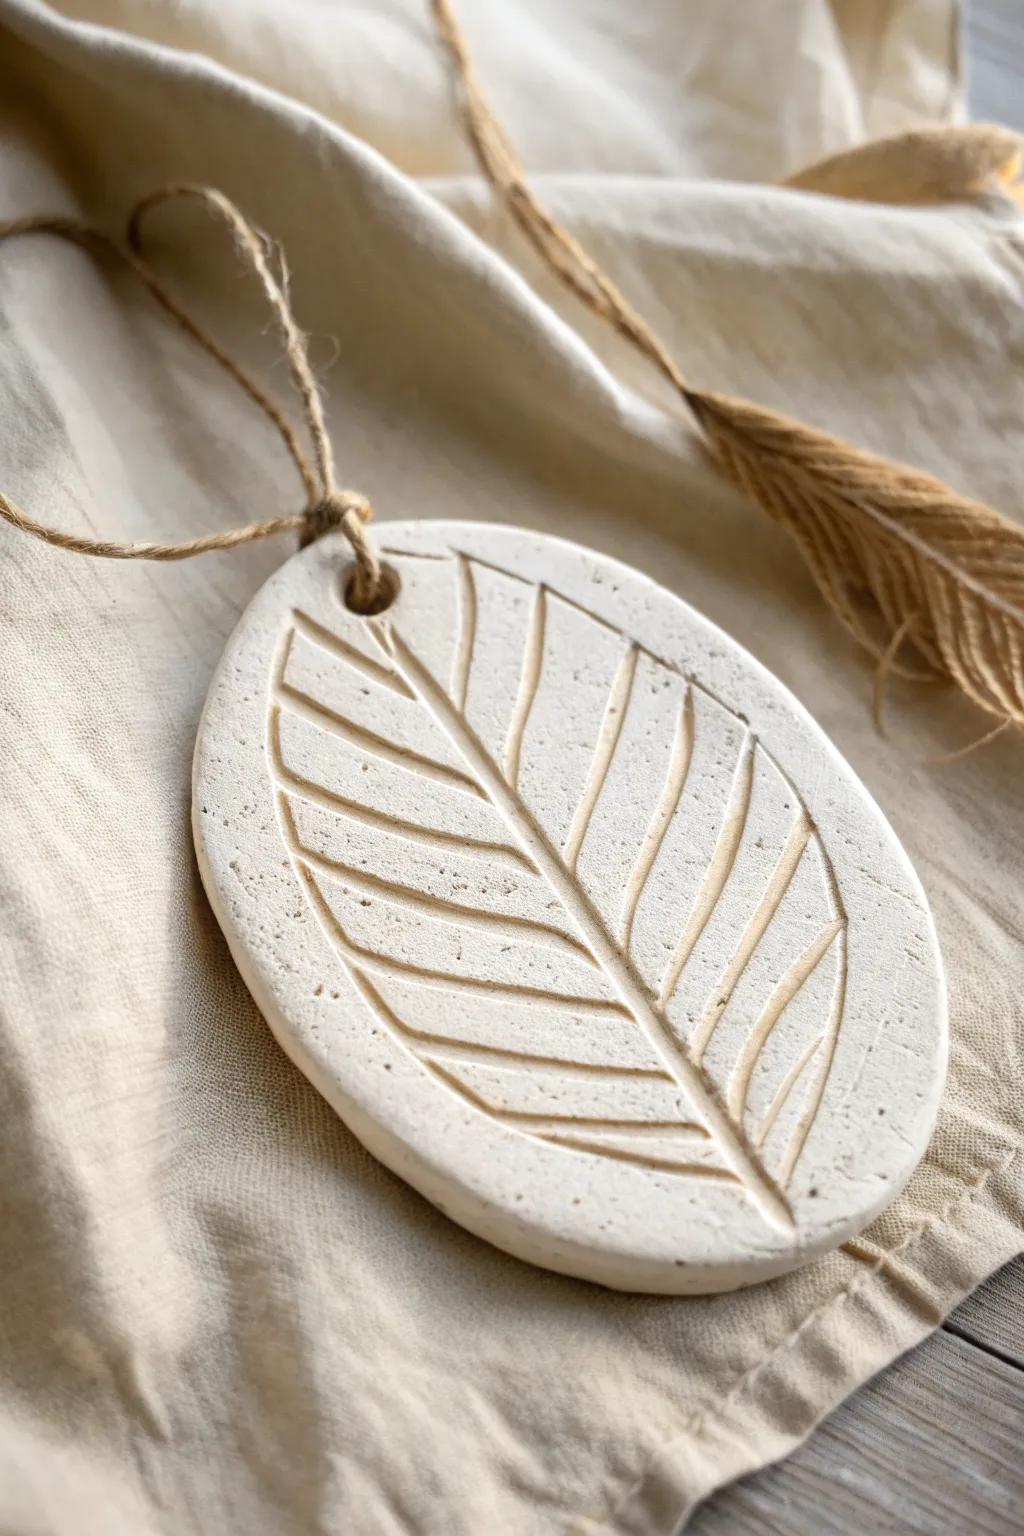
Bring a touch of organic minimalism to your decor with these textured botanical ornaments. Using simple carving techniques on neutral clay creates a sophisticated, earthy look that works beautifully as a gift tag or year-round wall hanging.
Step-by-Step Tutorial
Materials
- White or cream air-dry clay (preferably with a stone texture/speckle)
- Circular or oval cookie cutter
- Rolling pin
- Parchment paper or canvas mat
- Stylus tool, needle tool, or toothpick
- Small straw or drinking straw (for the hole)
- Jute twine or natural hemp cord
- Fine-grit sandpaper (optional)
- Small cup of water
Step 1: Shaping the Base
-
Prepare your workspace:
Lay down a sheet of parchment paper or a canvas mat to prevent the clay from sticking. This also makes it easier to move the ornaments later without warping them. -
Condition the clay:
Take a handful of your air-dry clay and knead it briefly in your hands until it feels pliable and smooth. If looks dry, dip your fingers in water and work it in. -
Roll it out:
Use your rolling pin to flatten the clay to an even thickness of about 1/4 inch (6mm). You want it thick enough to hold the carving but not so heavy it takes days to dry. -
Cut the shape:
Using an oval or circular cookie cutter, press firmly into the clay to cut your base shape. If you don’t have a cutter, you can hand-cut an oval using a craft knife and a paper template. -
Smooth the edges:
Dip your finger in a little water and gently run it around the cut edge of the oval to soften any sharp ridges or crumbs left by the cutter. -
Create the hanging hole:
Use a straw to punch a hole near the top of the oval. Position it centered, about a half-inch from the top edge, ensuring there is enough clay above it to support the twine later.
Smooth Moves
Use a little bit of baby oil on your fingertips to smooth the clay surface before carving. It eliminates fingerprints better than water and prevents the clay from getting mushy.
Step 2: Carving the Design
-
Identify the center line:
Using your needle tool or stylus, lightly mark a curved line running from near the hole down to the bottom right. This will serve as the central vein/midrib of your leaf design. -
Carve the central vein:
Go back over your guide line, pressing deeper this time to carve a clear channel. I find it helpful to wiggle the tool slightly to widen the groove rather than just scratching the surface. -
Mark the side veins:
Beginning at the top left, lightly sketch diagonal lines extending outward from the central vein toward the edges of the oval. -
Repeat on the other side:
sketch corresponding veins on the right side of the central line. Try to stagger them slightly rather than making them perfectly symmetrical for a more natural look. -
Deepen the side veins:
Once you are happy with the placement, carve these lines deeper. The grooves should be distinct enough to catch shadows. -
Clean up the carving:
As you carve, small balls or crumbs of clay might build up along the edges of the lines. Use a soft, dry paintbrush or your finger to gently sweep these away. -
Check texture:
If you are using plain white clay but want the speckled look from the photo, you can gently press coarse sand or dried coffee grounds into the surface now, avoiding the carved grooves.
Antique Wash
Once dry, dilute brown acrylic paint with water and brush it over the carving. Wipe the surface immediately with a damp cloth; the dark paint will stay in the grooves.
Step 3: Finishing Touches
-
Dry the ornament:
Place the ornament in a safe, flat spot to dry. Depending on humidity and clay brand, this usually takes 24 to 48 hours. Flip it over halfway through to ensure even drying and prevent curling. -
Sand edges:
Once completely bone dry, inspect the edges. If there are any sharp spots or burrs, lightly sand them away with fine-grit sandpaper. -
Prepare the twine:
Cut a length of jute twine roughly 8-10 inches long. -
Attach the hanger:
Fold the twine in half creates a loop. Push the folded end through the hole in the ornament from front to back. -
Secure the loop:
Pull the loose tails of the twine through the loop you just pushed through the hole (a lark’s head knot) and tighten it gently against the clay. -
Tie it off:
Knot the ends of the twine together to finish the hanger.
Hang your finished piece in a sunny spot to let the shadows accentuate your beautiful carving work


What Really Happens Inside the Kiln
Learn how time and temperature work together inside the kiln to transform clay into durable ceramic.
Lace-Textured Medallion Ornaments
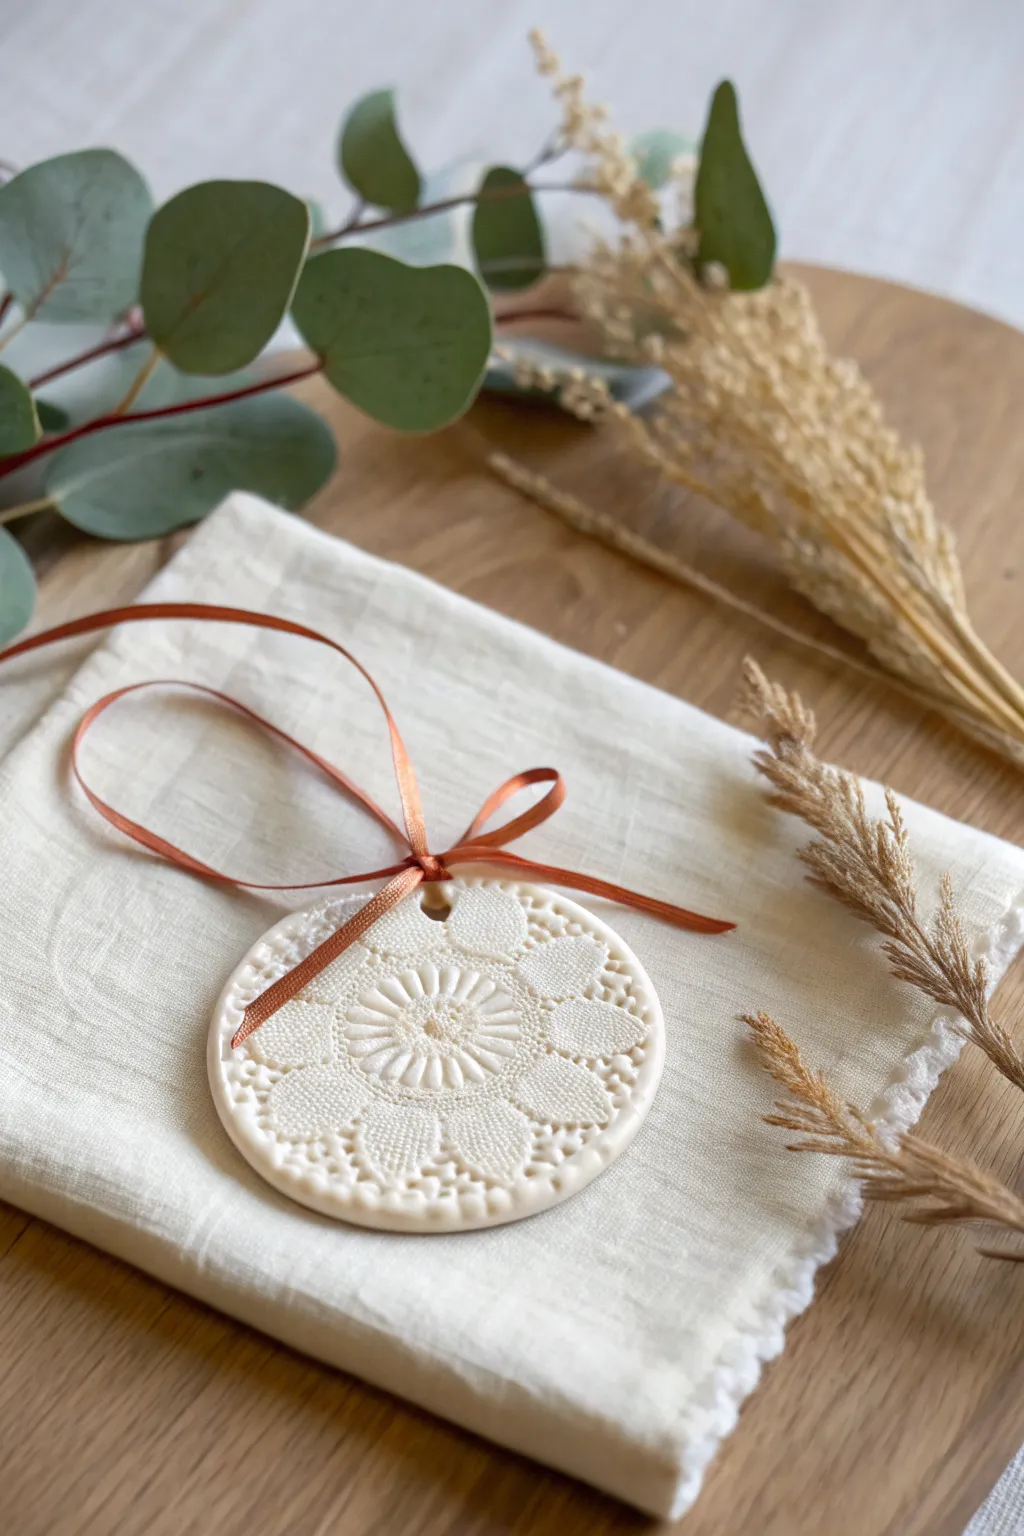
Capture the delicate beauty of vintage textiles with these elegant embossed clay ornaments. By pressing intricate lace or doilies into soft clay, you can create a sophisticated raised pattern that looks far more complex than it actually is to make.
How-To Guide
Materials
- White or cream air-dry clay (or polymer clay)
- Vintage lace doilies or textured lace fabric scraps
- Rolling pin
- Round cookie cutter (approx. 3-4 inches diameter)
- Wax paper or parchment paper
- Drinking straw or skewer (for the hole)
- Fine-grit sandpaper (optional)
- Thin satin ribbon in burnt orange or copper
- Clear matte sealant spray (optional)
Step 1: Preparing the Clay Canvas
-
Set Up Your Work Surface:
Begin by taping down a sheet of parchment or wax paper to your table. This prevents the clay from sticking and ensures a smooth removal later. -
Condition the Clay:
Take a handful of your air-dry clay and knead it in your hands for a minute. The warmth from your hands will make it more pliable and less prone to cracking. -
Roll the Base Slab:
Place the ball of clay onto your parchment paper. Using a rolling pin, roll it out evenly until it is about 1/4 inch thick. Try to keep the thickness consistent so the ornament is sturdy. -
Smooth the Surface:
If you see any tiny wrinkles or fingerprints, dip your finger in a tiny bit of water and gently smooth them out. A flat, pristine surface is essential for capturing the lace details cleanly.
Sticky Situation?
If the lace sticks to the clay while peeling, lightly dust the clay surface with cornstarch or baby powder before laying down your fabric. This acts as a release agent.
Step 2: Imprinting the Pattern
-
Position the Lace:
Select your lace doily or fabric scrap. Lay it carefully over the rolled-out clay slab. If your doily has a central motif, like a flower, decide roughly where you want that center to be. -
Pressing the Texture:
Take your rolling pin and roll it firmly over the lace one single time. Avoid rolling back and forth, as this can shift the fabric and create a ghost image. You want one confident pass to embed the texture deeply. -
Reveal the Design:
Find the edge of your lace and slowly peel it back from the clay. I love this moment—seeing the intricate textile pattern transferred perfectly into the smooth clay surface is so satisfying. -
Cut the Shape:
Position your round cookie cutter over the most attractive part of the pattern. Press down firmly to cut out your circle. Give it a tiny wiggle before lifting to ensure a clean cut. -
Remove Excess Clay:
Peel away the scrap clay from outside the ring first, leaving just your patterned medallion on the parchment paper. -
Create the Hanging Hole:
Using a drinking straw or a skewer, punch a neat hole near the top edge of the ornament. Make sure it’s not too close to the rim to prevent breakage.
Gold-Kissed Details
Highlight the raised texture by lightly brushing a metallic gold wax or dry-brushing gold paint over the highest points of the lace pattern for a luxe, vintage effect.
Step 3: Finishing Touches
-
Smooth the Edges:
Dip your finger in a little water again and run it gently around the cut outer edge of the circle. This softens any harsh cutting lines for a more professional ceramic look. -
Drying Process:
Let the ornament dry flat on the parchment paper. Air-dry clay usually takes 24-48 hours. I recommend flipping it over gently halfway through the drying time to prevent curling. -
Sanding (Optional):
Once fully cured and hard, check the edges for rough spots. Use fine-grit sandpaper to lightly buff away any imperfections on the rim. -
Seal the Texture:
To protect that crisp white finish from dust over time, give the ornament a light coat of clear matte sealant spray. Let it dry completely. -
Add the Ribbon:
Cut a length of thin satin ribbon—burnt orange or copper looks lovely against the white clay. Thread it through the hole. -
Tie the Bow:
Tie a simple knot at the top to create a hanging loop, then tie a small, neat bow right at the base of the loop, close to the ornament itself.
Hang your finished medallion on a branch or wrap it as a stunning gift topper for a handmade touch
Minimalist Geometric Cutout Ornaments
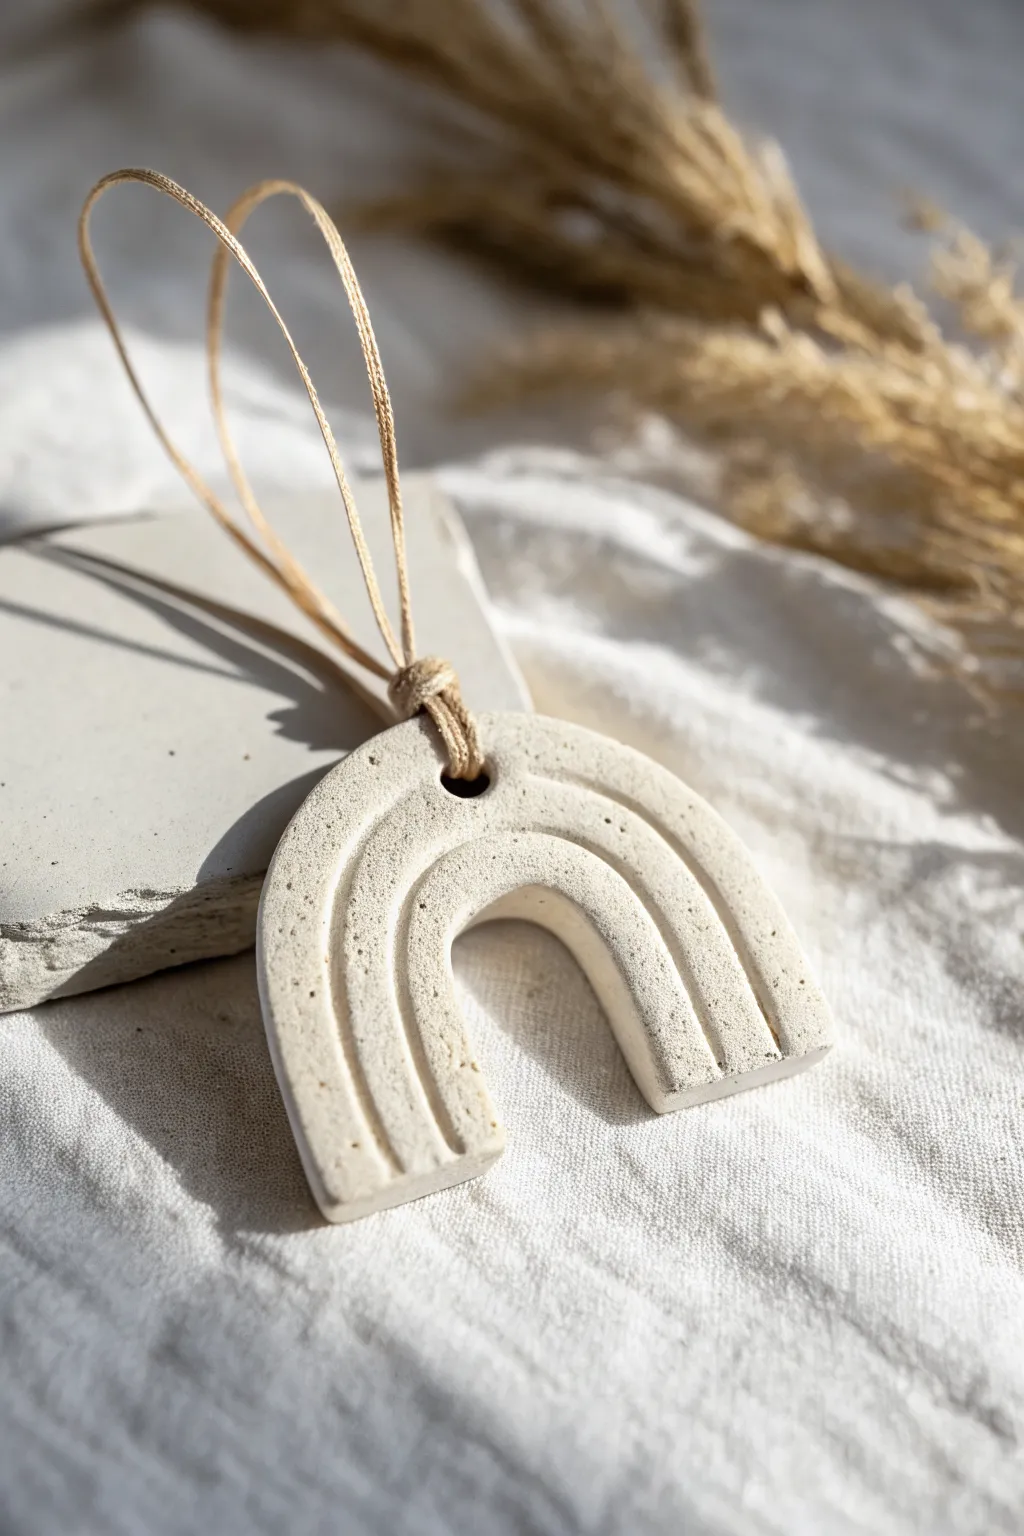
Capture the essence of modern minimalism with this U-shaped clay ornament. featuring subtle incised lines and a natural speckled stone finish, it complements any neutral or boho holiday decor perfectly.
Detailed Instructions
Materials
- Air-dry clay (white or cream)
- Used coffee grounds or fine black pepper (for speckling)
- Rolling pin
- Parchment paper or silicone mat
- U-shape cookie cutter (or a sharp craft knife and paper template)
- Needle tool or toothpick
- Straw or small circle cutter
- Fine-grit sandpaper
- Jute twine or hemp cord
- Small bowl of water
- Scissors
Step 1: Preparing the Clay
-
Condition the clay:
Start by taking a handful of air-dry clay and kneading it in your hands to warm it up and make it pliable. -
Create the texture:
To achieve that beautiful faux-stone look, sprinkle a small pinch of used (dried) coffee grounds or fine black pepper onto the clay and knead it thoroughly until the speckles are evenly distributed. -
Roll it out:
Place your clay onto a sheet of parchment paper. Roll it out to an even thickness of about 1/4 inch (6mm). Using depth guides or two stacks of playing cards on either side of your roller can ensure a perfectly flat surface.
Step 2: Shaping and Detailing
-
Cut the shape:
Press your U-shaped cutter firmly into the clay. If you don’t have a cutter, sketch an arch shape on paper, cut it out, place it on the clay, and carefully trace around it with a sharp craft knife. -
Clean the edges:
Dip your finger in a little water and gently run it along the cut edges to smooth down any roughness or jagged bits left by the cutter. -
Add the hole:
Use a drinking straw or a small circular cutter to punch a hole at the very top center of the arch. Make sure it’s not too close to the edge to prevent cracking later. -
Mark the lines:
Take your needle tool or a dull toothpick. Carefully draw two curved lines that follow the shape of the arch. Press deeply enough to make a distinct groove, but be careful not to slice all the way through. -
Smooth the grooves:
Often, dragging a tool creates tiny burrs of clay. Gently tap these down with a slightly damp fingertip to keep the lines clean and minimal.
Clean Lines Secret
If your incised lines look messy, lay a piece of plastic wrap over the clay before pressing your tool down. This softens the edges and prevents crumbles.
Step 3: Finishing Touches
-
Let it dry:
Leave the ornament on a flat surface to dry completely. This usually takes 24-48 hours. I like to flip it over halfway through the drying process to ensure the bottom dries evenly and to prevent warping. -
Sand for perfection:
Once fully cured and hard, take a piece of fine-grit sandpaper and lightly buff the edges and surface. This removes any fingerprints and gives it that professional, matte finish. -
Prepare the hanger:
Cut a length of jute twine or hemp cord, approximately 8-10 inches long. -
Create a Lark’s Head knot:
Fold the twine in half to create a loop. Push this folded loop through the hole in your ornament from front to back. -
Secure the knot:
Take the two loose tail ends of the twine and pull them through the loop you just pushed through the hole. Pull tight to secure the knot against the clay. -
Complete the loop:
Tie the two loose ends together in a simple overhand knot at the top to create the hanger space.
Curling Edges?
If the clay edges start lifting while drying, place a lightweight book on top of the ornament (with parchment paper in between) once it’s mostly dry but still slightly cool.
Hang your new geometric ornament on a branch or use it as a chic gift topper to share your creativity

TRACK YOUR CERAMIC JOURNEY
Capture glaze tests, firing details, and creative progress—all in one simple printable. Make your projects easier to repeat and improve.
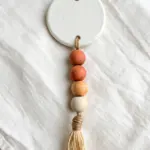
Marbled Swirl Clay Ornaments
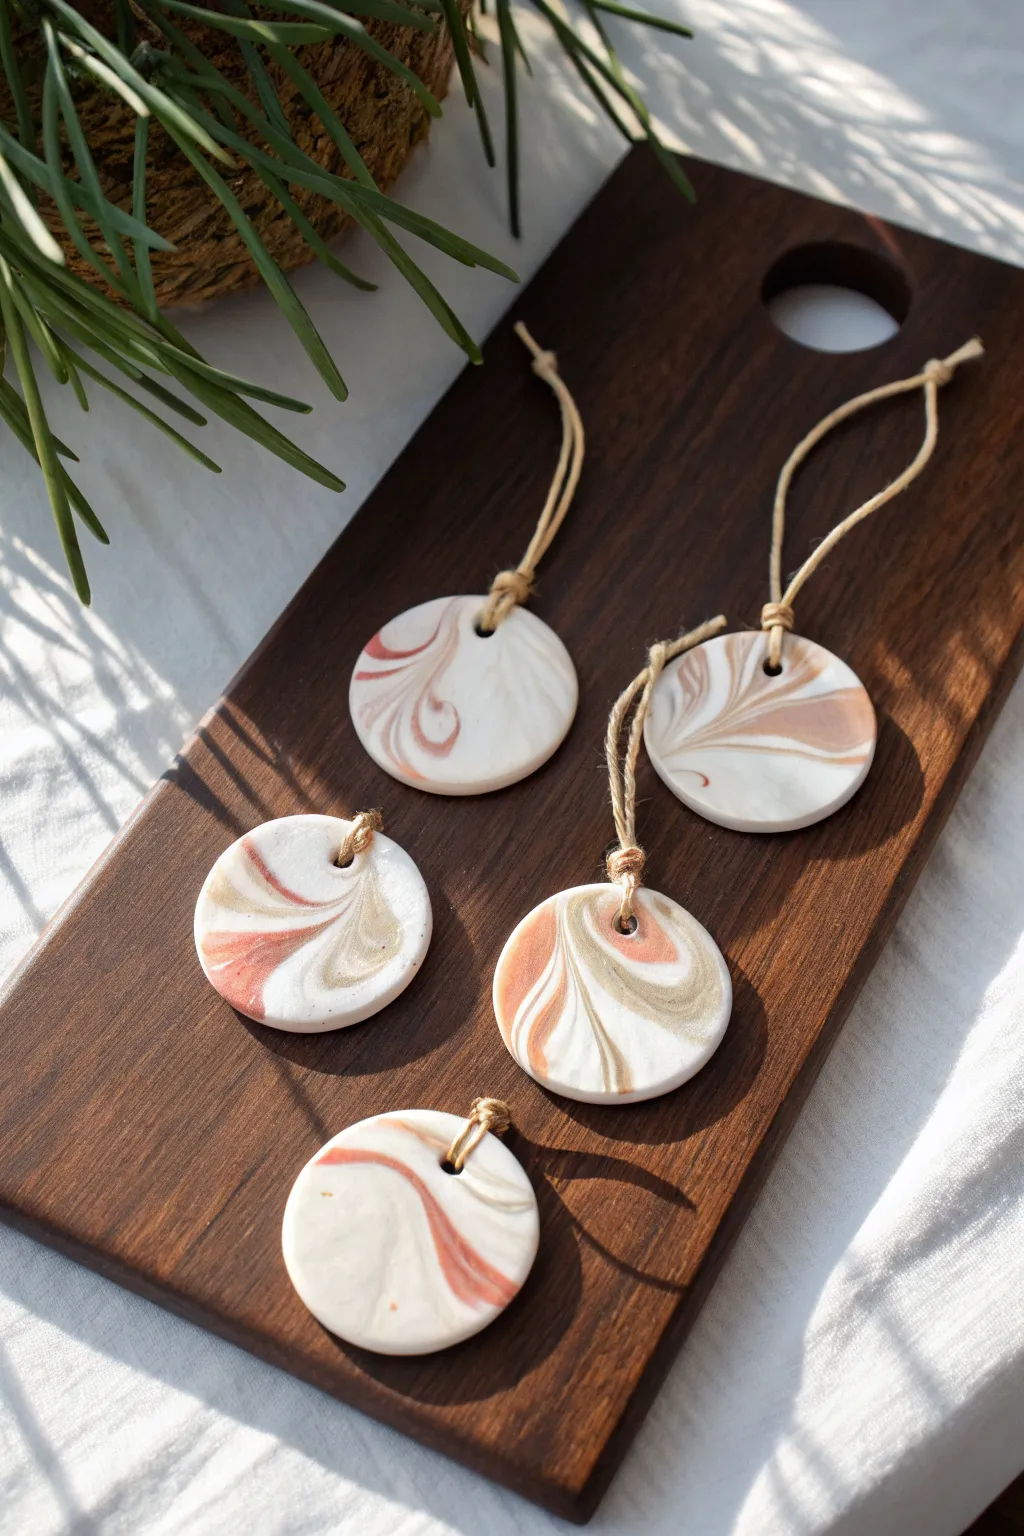
These sophisticated ornaments bring a touch of organic beauty to your holiday decor with their mesmerizing, stone-like swirls. The technique mimics high-end marbling using simple polymer clay, resulting in unique, one-of-a-kind patterns on every single piece.
Step-by-Step Tutorial
Materials
- White or translucent polymer clay (base)
- Terracotta or rust-colored polymer clay
- Beige or gold polymer clay
- Rolling pin or acrylic clay roller
- Circle cookie cutter (approx. 2-3 inches)
- Drinking straw or small circular cutter (for hole)
- Jute twine or thin hemp cord
- Baking sheet
- Parchment paper
- Fine-grit sandpaper (optional)
- Gloss glaze (optional, for shine)
Step 1: Preparing the Clay
-
Condition the clay:
Start by kneading each color of clay separately. You want them to be soft, pliable, and warm to the touch so they blend smoothly later. -
Create the base logs:
Roll the white clay into a thick log, about 1 inch in diameter. This will be your primary color. -
Prepare accent coils:
Roll the terracotta and beige/gold clays into much thinner snakes, roughly the thickness of a pencil lead or spaghetti strand. -
Combine the colors:
Lay the thin accent strands along the length of the thick white log. You can twist them slightly or lay them straight, depending on how much movement you want.
Pro Tip: Clean Cuts
To prevent the clay from sticking to your cutter or distorting when you pull it up, place a piece of plastic wrap over the clay slab before pressing the cutter down.
Step 2: Marbling and Shaping
-
Twist the log:
Gently grip both ends of the combined log and twist in opposite directions. Keep twisting until the lines look like a candy cane. -
Fold and roll:
Fold the twisted log in half, bringing the ends together, and roll it into a smooth log again. I like to repeat this twist-fold-roll process 2-3 times to create intricate swirls without muddying the colors. -
Form a ball:
Once you are happy with the marbling visible on the surface, mash the clay into a compact ball. -
Flatten the clay:
Place the ball on a smooth surface or parchment paper. Use your roller to flatten the clay to a consistent thickness of about 1/4 inch. -
Check the pattern:
Look at your flattened slab. If the swirls aren’t distinct enough, you can fold it once more and re-roll, but be careful not to over-mix.
Step 3: Cutting and Baking
-
Cut the shapes:
Use your circle cookie cutter to punch out discs from the most interesting parts of the marbled slab. -
Clean the edges:
Gently smooth the cut edges with your fingertip to remove any stray clay bits or sharpness. -
Create the hanging hole:
Use a drinking straw to punch a clean hole near the top edge of each circle. Make sure it’s not too close to the edge to prevent breaking. -
Bake:
Transfer the discs to a baking sheet lined with parchment paper. Bake according to your specific clay package instructions (usually 275°F for 15-30 minutes). -
Cool down:
Allow the ornaments to cool completely on the baking sheet before handling. They harden as they cool.
Level Up: Gold Leaf
Before baking, press tiny flakes of gold leaf onto the surface of the clay. Roll over it gently to embed the gold into the clay for a hidden sparkle.
Step 4: Finishing Touches
-
Sand edges (optional):
If there are any rough spots on the edges after baking, lightly sand them with fine-grit sandpaper under running water. -
Cut the twine:
Cut lengths of jute twine, approximately 8-10 inches long for each ornament. -
String the ornaments:
Fold a piece of twine in half, push the loop through the clay hole, and pull the loose ends through the loop (lark’s head knot). Alternatively, just thread and tie a simple knot at the top.
Hang these beauties on your tree or use them as sophisticated gift tags for present wrapping
Terrazzo-Speckled Confetti Ornaments
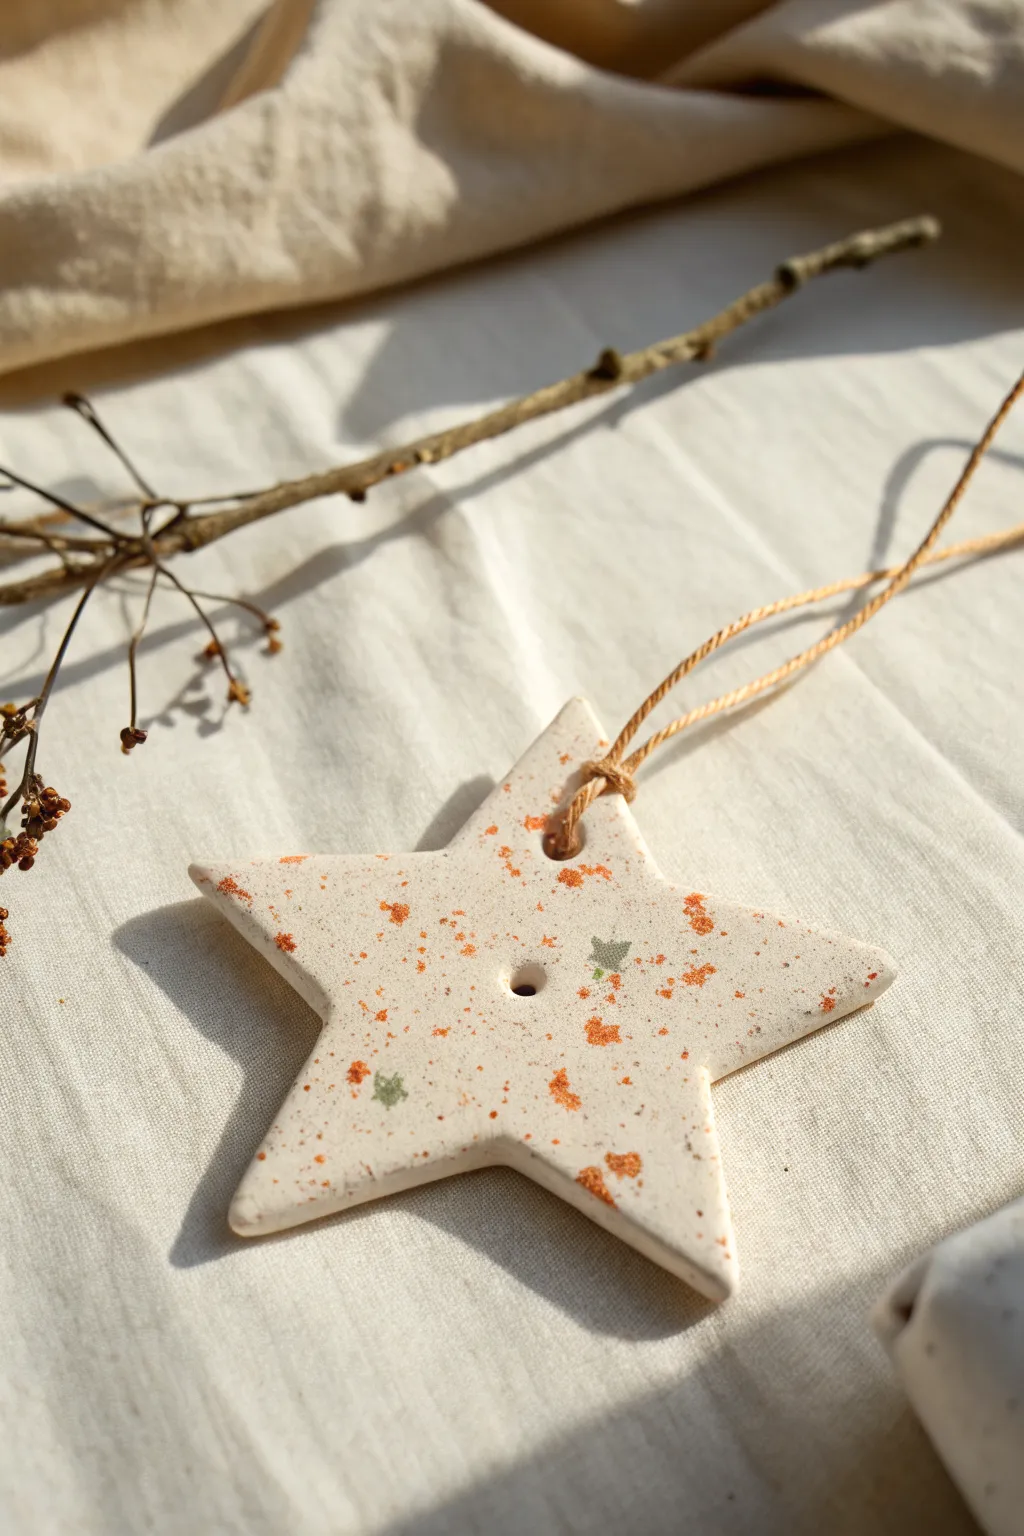
Bring a modern, playful touch to your holiday decor with these charming terrazzo-inspired ornaments. Using a simple splatter technique, you can transform plain clay into a high-end looking piece that features bursts of rust and sage green against a creamy backdrop.
How-To Guide
Materials
- Air-dry clay (white or cream)
- Small rolling pin
- Star-shaped cookie cutter
- Acrylic paints (burnt orange/rust, sage green)
- Old toothbrush or stiff bristle brush
- Drinking straw or skewer
- Thin shimmer twine or jute cord
- Fine-grit sandpaper
- Matte finish sealant (optional)
- Parchment paper
Step 1: Shaping the Clay
-
Prepare the workspace:
Lay down a sheet of parchment paper on a flat surface to prevent your clay from sticking while you work. -
Condition the clay:
Take a handful of air-dry clay and knead it in your hands for a minute until it feels soft, warm, and pliable. -
Roll it out:
Use your rolling pin to flatten the clay to an even thickness, aiming for about 1/4 inch so the ornament feels substantial but not too heavy. -
Cut the shape:
Press the star-shaped cookie cutter firmly into the clay. Give it a tiny wiggle before lifting it up to ensure clean edges. -
Smooth the edges:
Dip your finger in a little water and gently run it along the cut edges of the star to smooth out any roughness left by the cutter. -
Create the hanging hole:
Use a straw to punch a clean hole near the top point of the star for the string. Twist the straw as you pull it out to keep the hole circular. -
Add a center detail:
Using a smaller tool, like a skewer or a very small straw, punch a decorative hole directly in the center of the star for visual interest.
Splatter Control
Make a “splatter box” by placing your clay inside a cardboard box before flicking paint. This keeps your table clean and contains the mess.
Step 2: Creating the Terrazzo Effect
-
Mix the splatter paint:
Squeeze a small amount of rust-colored acrylic paint onto a palette and dilute it with a few drops of water until it has an inky consistency. -
Apply the rust speckles:
Dip your old toothbrush into the diluted rust paint. Hold it over the damp clay and run your thumb across the bristles to flick droplets onto the surface. -
Vary the coverage:
Aim for an organic spread; some areas can have dense speckling while others remain sparse. -
Add the secondary color:
Clean your brush thoroughly (or use a second one) and repeat the process with diluted sage green paint to add depth and contrast. -
Press into clay:
I like to gently run the rolling pin over the wet paint speckles just once. This presses the paint slightly into the clay surface for a flatter, more inlaid terrazzo look. -
Let it dry completely:
Allow the ornament to dry flat on the parchment paper for 24-48 hours, flipping it halfway through to ensure even drying.
Step 3: Finishing Touches
-
Sand the edges:
Once fully hard, inspect the edges. If there are any sharp points, gently buffer them down with fine-grit sandpaper. -
Seal the surface:
For longevity, brush on a thin layer of matte sealant. This protects the splatter paint and gives the clay a lovely finished sheen. -
Prepare the hanger:
Cut a 6-inch length of thin, golden-hued twine or jute cord. -
Attach the loop:
Thread the twine through the top hole, pull the ends even, and tie a simple overhand knot near the clay to secure it, leaving the rest of the loop open for hanging.
Make it Sparkle
Mix a tiny pinch of gold mica powder or metallic paint into your secondary splatter color for a subtle festive shimmer that catches the light.
Hang your new speckled star on a branch or use it as a sophisticated gift topper
Metallic Edge-Dipped Ornaments
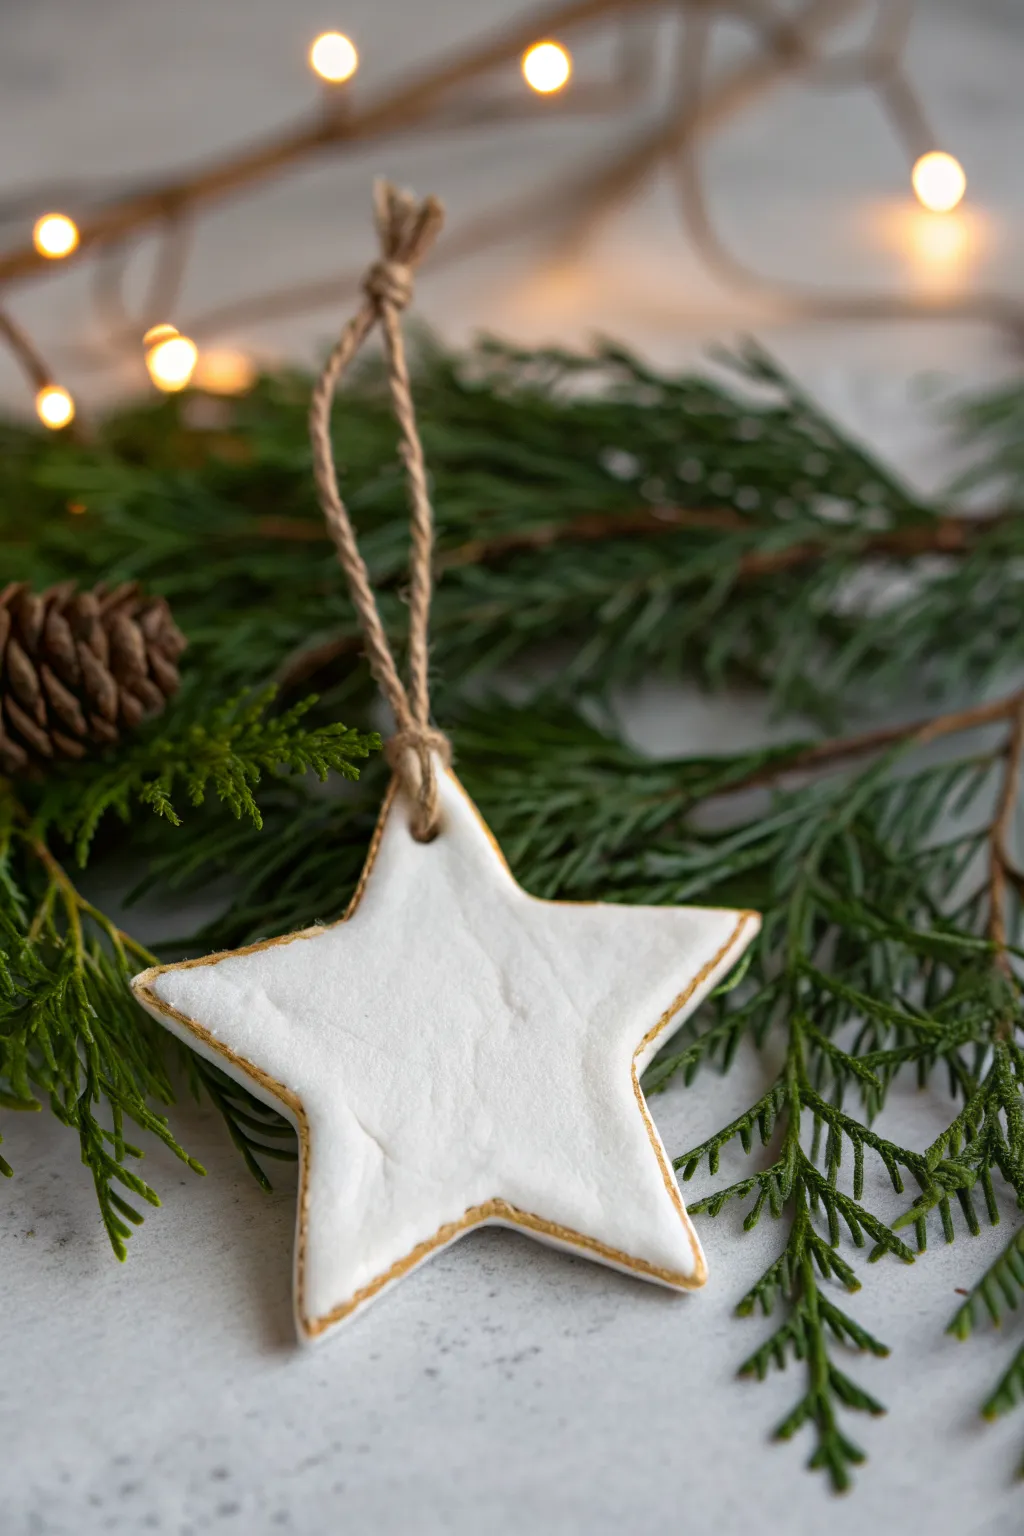
Add a touch of minimalist elegance to your holiday decor with these charming handmade clay stars. Their bright white finish and subtle gold edges reflect twinkling lights beautifully, making them perfect for a rustic or modern festive theme.
Step-by-Step Tutorial
Materials
- Air-dry clay (white)
- Star-shaped cookie cutter
- Rolling pin
- Parchment paper or non-stick mat
- Straw or skewer (for hole punching)
- Fine-grit sandpaper
- Gold acrylic paint or liquid gilding
- Small fine-point paintbrush
- Jute twine or rustic string
- Scissors
- Small bowl of water (for smoothing)
Step 1: Shaping the Stars
-
Prepare your workspace:
Lay down a sheet of parchment paper or a non-stick silicon mat on a flat surface. This prevents the clay from sticking and makes cleanup much easier later on. -
Condition the clay:
Take a handful of air-dry clay and knead it in your hands for a minute until it feels soft, pliable, and warm. This helps prevent cracking as it dries. -
Roll it out:
Place the clay on your mat and use the rolling pin to flatten it. Aim for an even thickness of about 1/4 inch (approx. 5-6mm). If you want a perfectly uniform thickness, you can place guide sticks on either side of the clay. -
Cut the shapes:
Press your star-shaped cookie cutter firmly into the clay. Give it a tiny wiggle before lifting to ensure a clean cut. -
Remove excess clay:
Gently peel away the scrap clay from around your star shape. If the clay is sticky, wait a minute or two before trying to move the star itself. -
Create the hanging hole:
While the clay is still wet, use a drinking straw or a skewer to punch a hole near the top point of the star. Make sure the hole isn’t too close to the edge to prevent breakage later. -
Smooth the surface:
Dip your finger in a little bit of water and gently rub over any rough edges or surface imperfections. I find this steps makes the final painting process much smoother.
Use Water Sparingly
When smoothing wet clay, use only a tiny drop of water on your finger. Too much water can weaken the clay structure or cause it to crack as the moisture evaporates unevenly.
Step 2: Drying and Refining
-
Let it dry completely:
Place the stars on a clean sheet of parchment paper in a safe spot. Allow them to dry for at least 24-48 hours. Flip them over halfway through the drying time to ensure the bottoms dry evenly and to prevent warping. -
Check for dryness:
The clay should look chalky white and feel room temperature to the touch (not cold) when fully dry. -
Sand edges lightly:
Take a piece of fine-grit sandpaper and very gently sand the edges of the star. Remove any sharp burs left from the cookie cutter to get that soft, finished look. -
Wipe away dust:
Use a dry cloth or soft brush to wipe away any clay dust from sanding. The surface needs to be clean for the paint to adhere properly.
Add Texture
Before cutting the stars, gently press a piece of lace or a textured fabric into the wet clay with your rolling pin to create a beautiful, embossed surface pattern.
Step 3: Gilding and Hanging
-
Prepare the gold paint:
Shake your gold acrylic paint or liquid gilding well. Squeeze a tiny amount onto a palette or a scrap piece of paper. -
Paint the rim:
Using a fine-point paintbrush, carefully paint along the thin side edge of the star. Let the brush naturally overlap just slightly onto the front face to create a delicate, uneven border characteristic of hand-dipped pottery. -
Dry the paint:
Allow the gold paint to dry completely. Acrylics dry quickly, usually within 15-20 minutes. -
Cut the twine:
Cut a length of jute twine, about 6-8 inches long, depending on how low you want the ornament to hang. -
Thread the loop:
Fold the twine in half and push the looped end through the hole in the star from front to back. -
Secure the hanger:
Pass the loose ends of the twine through the loop you just pushed through, and pull tight to create a lark’s head knot. Tie the two loose ends together at the top to close the loop.
Hang your shimmering new creation on the tree and enjoy the natural beauty it brings to your holiday season
Black Line Art Ornament Illustrations
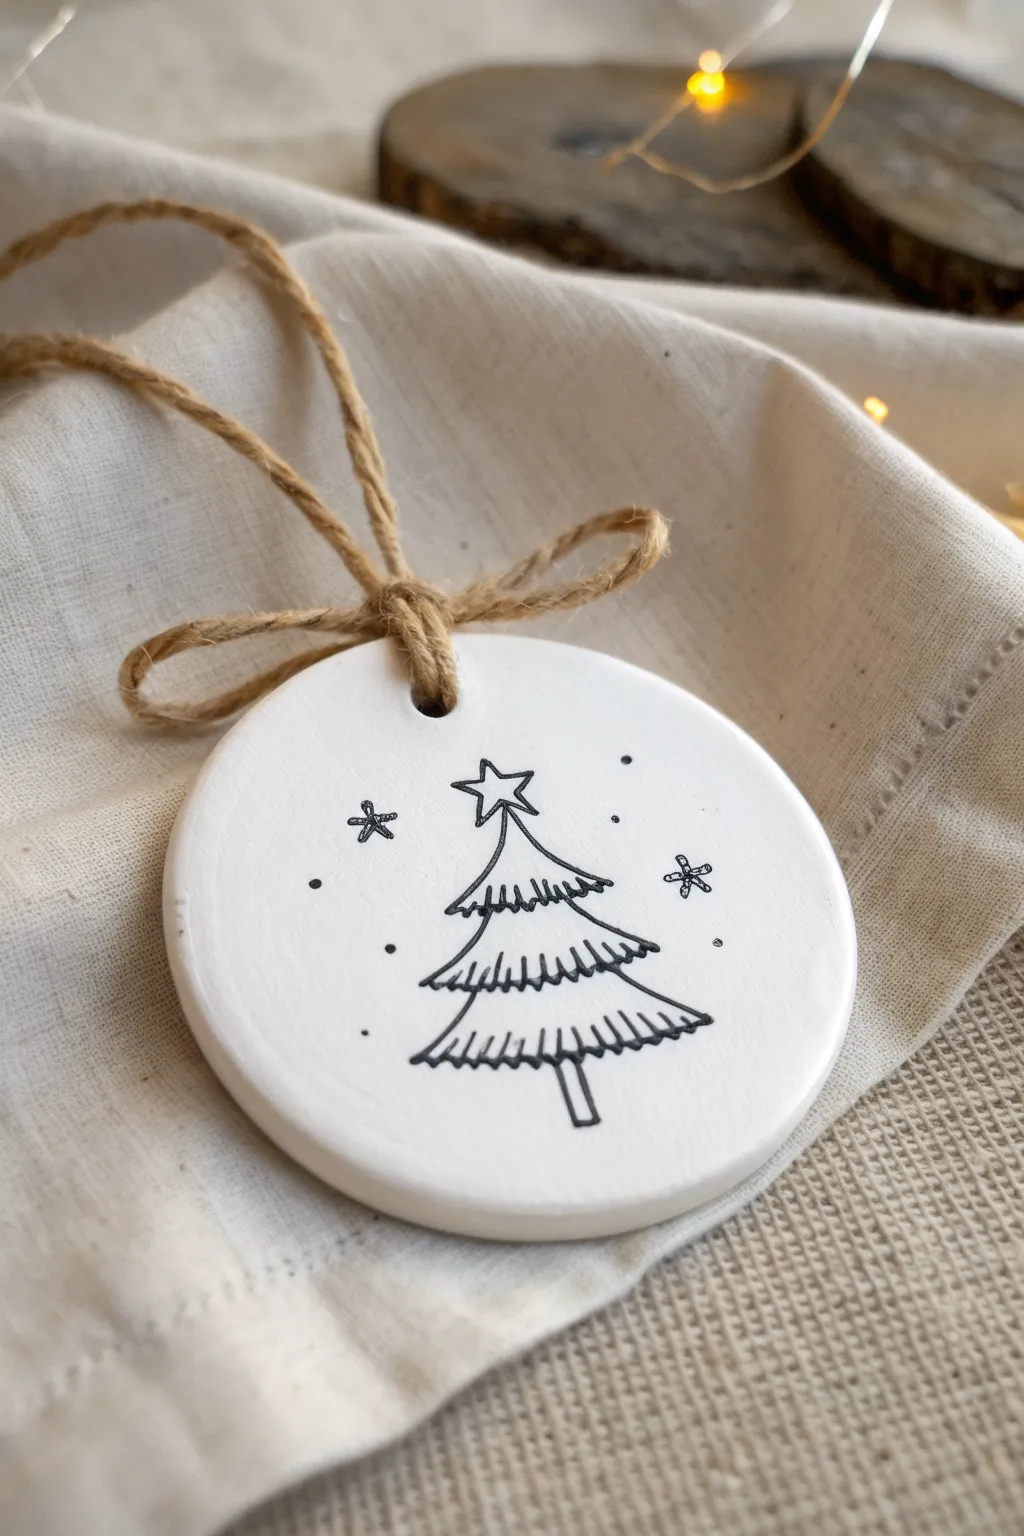
Achieve a modern, Scandinavian-inspired holiday look with these simple yet striking clay ornaments. The crisp black ink against stark white clay creates a timeless decoration that feels both handmade and polished.
Step-by-Step Guide
Materials
- Air-dry clay (white)
- Rolling pin
- Circle cookie cutter (approx. 3 inches)
- Sandpaper (fine grit)
- Fine-point permanent marker or archival ink pen (black)
- Drinking straw or skewer
- Jute twine
- Acrylic sealer (matte finish, optional)
- Parchment paper
Step 1: Shaping the Base
-
Prepare your workspace:
Lay down a sheet of parchment paper to protect your surface and prevent the clay from sticking. -
Roll out the clay:
Take a handful of white air-dry clay and knead it briefly to warm it up. Roll it out evenly until it is about 1/4 inch thick. Try to keep the thickness consistent so it dries flat. -
Cut the shape:
Use your circle cookie cutter to punch out a clean round shape. If the edges are jagged, dip your finger in a little water and smooth them down gently. -
Create the hanging hole:
Using a drinking straw or a skewer, punch a hole near the top edge of the circle. Make sure it’s not too close to the edge to prevent cracking later. -
Let it dry:
Place the clay circle on a flat surface away from direct heat. Let it dry completely according to the package instructions, usually for 24-48 hours. I like to flip mine over halfway through so both sides dry evenly.
Ink Bleeding?
If your ink feathers into the clay, the surface might be too porous. Try sealing the clay with a thin layer of matte Mod Podge *before* drawing your design.
Step 2: Refining and Drawing
-
Sand for smoothness:
Once fully dry and hard, lightly sand the surface and edges with fine-grit sandpaper. This creates a pristine, smooth canvas for your ink. -
Dust off debris:
Wipe the ornament with a dry cloth or soft brush to remove any clay dust. This is crucial—dust will clog your pen tip instantly. -
Draw the star:
Start your design by drawing a simple five-point star near the top center, just below the hole. -
Outline the tree shape:
From the bottom points of the star, draw a swooping curved line downward to the left, and another to the right, forming the top tier of your tree. -
Add detail to the tier:
Connect the bottom of those two lines with a jagged, zig-zag line to simulate pine needles. -
Draw the middle tier:
Repeat the process for a second, slightly wider tier below the first one. -
Draw the bottom tier:
Create the third and final tier, making it the widest part of the tree. -
Add the trunk:
Draw a small rectangular trunk at the very bottom center. -
Embellish the background:
Add small black dots and tiny asterisk shapes around the tree to look like falling snow or distant stars.
Add Some sparkle
For a subtle festive touch, apply clear glitter glue over just the star or the snow dots. It catches the light beautifully on the tree.
Step 3: Finishing Touches
-
Seal the design:
If you want the ornament to last for years, apply a very light coat of matte acrylic sealer. Be careful not to smudge the ink; spray sealers often work best here. -
Cut the twine:
Cut a length of jute twine, approximately 10-12 inches long. -
Thread the loop:
Fold the twine in half and push the looped end through the hole in the ornament. -
Secure the hanger:
Pull the loose ends of the twine through the loop and tighten it against the clay (a lark’s head knot). -
Tie a bow:
Use the loose ends to tie a small, neat bow right at the base of the string, sitting against the top of the ornament.
Now you have a charming, minimalistic piece ready to hang on the tree or gift to a friend
Raised Dot Snowflake Texture Ornaments
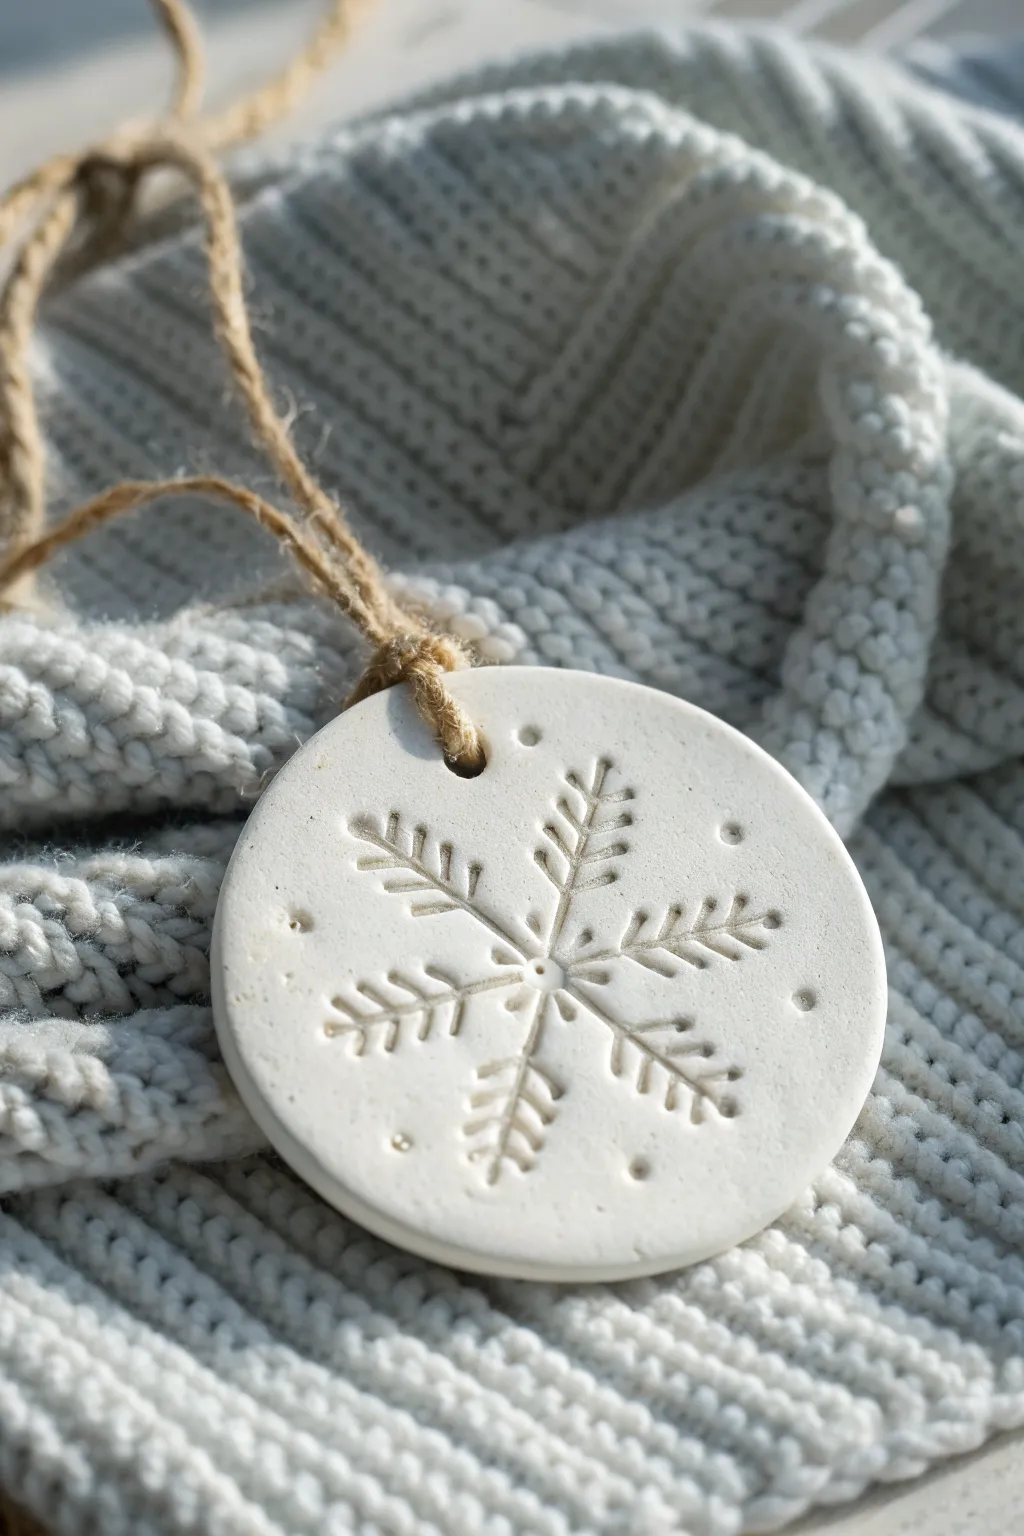
Capture the cozy essence of winter with these charming, minimalist clay ornaments that mimic the texture of a classic knitted sweater. The simple stamped snowflake design and organic white finish make them a perfect addition to any rustic or Scandinavian-inspired holiday decor.
Detailed Instructions
Materials
- White specialized air-dry clay (or polymer clay)
- Rolling pin
- Circle cookie cutter (approx. 3 inches)
- Snowflake stamp or embossing tool
- Small straw or cocktail stick
- Fine-grit sandpaper (optional)
- Jute twine or rustic string
- Parchment paper or non-stick craft mat
- Small bowl of water (for smoothing)
Step 1: Preparing the Clay Base
-
Condition the clay:
Start by taking a handful of your white clay and kneading it in your hands until it becomes soft, pliable, and warm. This prevents cracking later on. -
Roll it out:
Place the clay on a sheet of parchment paper to prevent sticking. Use your rolling pin to flatten the clay to an even thickness of about 1/4 inch. -
Check for bubbles:
Inspect the surface for any air bubbles. If you spots any, gently pop them with a needle and smooth the area over with your finger. -
Cut the shape:
Press your circle cookie cutter firmly into the rolled clay. Give it a slight wiggle before lifting to ensure a clean cut. -
Smooth the edges:
Dip your index finger into a little water and run it gently around the circumference of the circle to soften any sharp or rough edges left by the cutter.
Step 2: Creating the Snowflake Design
-
Position the stamp:
Identify the center of your clay circle. If you are using a single large snowflake stamp, align it carefully before pressing down. -
Press the design:
Apply firm, even pressure to the stamp to create a deep impression. You want the snowflake to be clearly visible, with distinct lines for the ‘branches’ and ‘leaves’. -
Add texture dots:
To mimic the ‘raised dot’ look around the snowflake, use a blunt tool or the end of a small paintbrush to gently press small indentations scattered around the main design. -
Create the hanging hole:
Using a small straw or a skewer, punch a hole near the top edge of the ornament. Make sure it’s not too close to the edge to prevent tearing when hanging. -
Refine the details:
Look closely at the impression. If any clay has pushed up unevenly around the stamp lines, gently tap it down with a smooth tool or your finger.
Stamp trick
Dust your snowflake stamp with a tiny bit of cornstarch before pressing it into the clay. This acts as a release agent and prevents the clay from sticking inside the detailed crevices.
Step 3: Drying and Finishing
-
Initial drying:
Leave the ornament on the parchment paper in a cool, dry place. Let it air dry for at least 24 hours. I usually flip mine over halfway through so the back dries evenly too. -
Check for dryness:
The clay should look chalky white and feel hard to the touch with no cold spots. -
Sand imperfections:
Once fully dry, take a piece of fine-grit sandpaper and very lightly buff the edges or surface if there are any unwanted bumps. -
Add the hanger:
Cut a length of jute twine, about 8 inches long. -
Thread the twine:
Fold the twine in half and push the loop end through the hole from front to back. -
Secure the loop:
Pull the loose ends of the twine through the loop and tighten gently to create a lark’s head knot at the top of the ornament. -
Tie it off:
Tie the two loose ends of the twine together in a simple knot to create the hanging loop.
Add a scent
Mix a few drops of essential oil like cinnamon or pine directly into the clay while kneading. Your ornaments will subtly release a festive fragrance as they hang on the tree.
Now you have a beautiful set of textured ornaments ready to hang or gift to loved ones
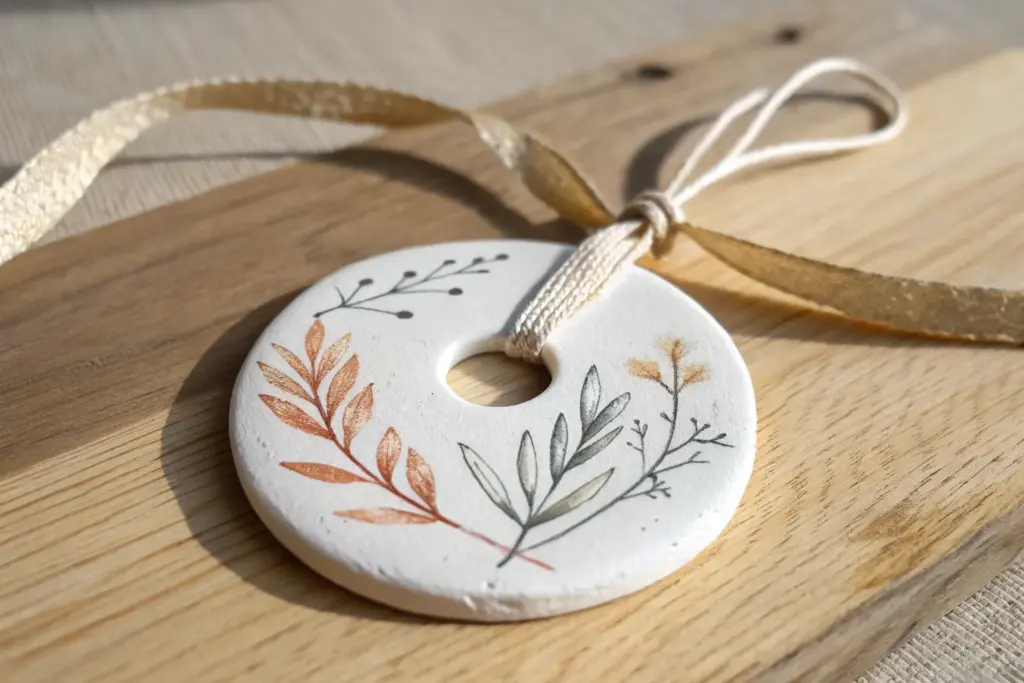
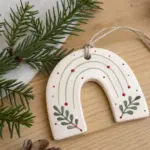
Mini 3D Wreath Clay Ornaments
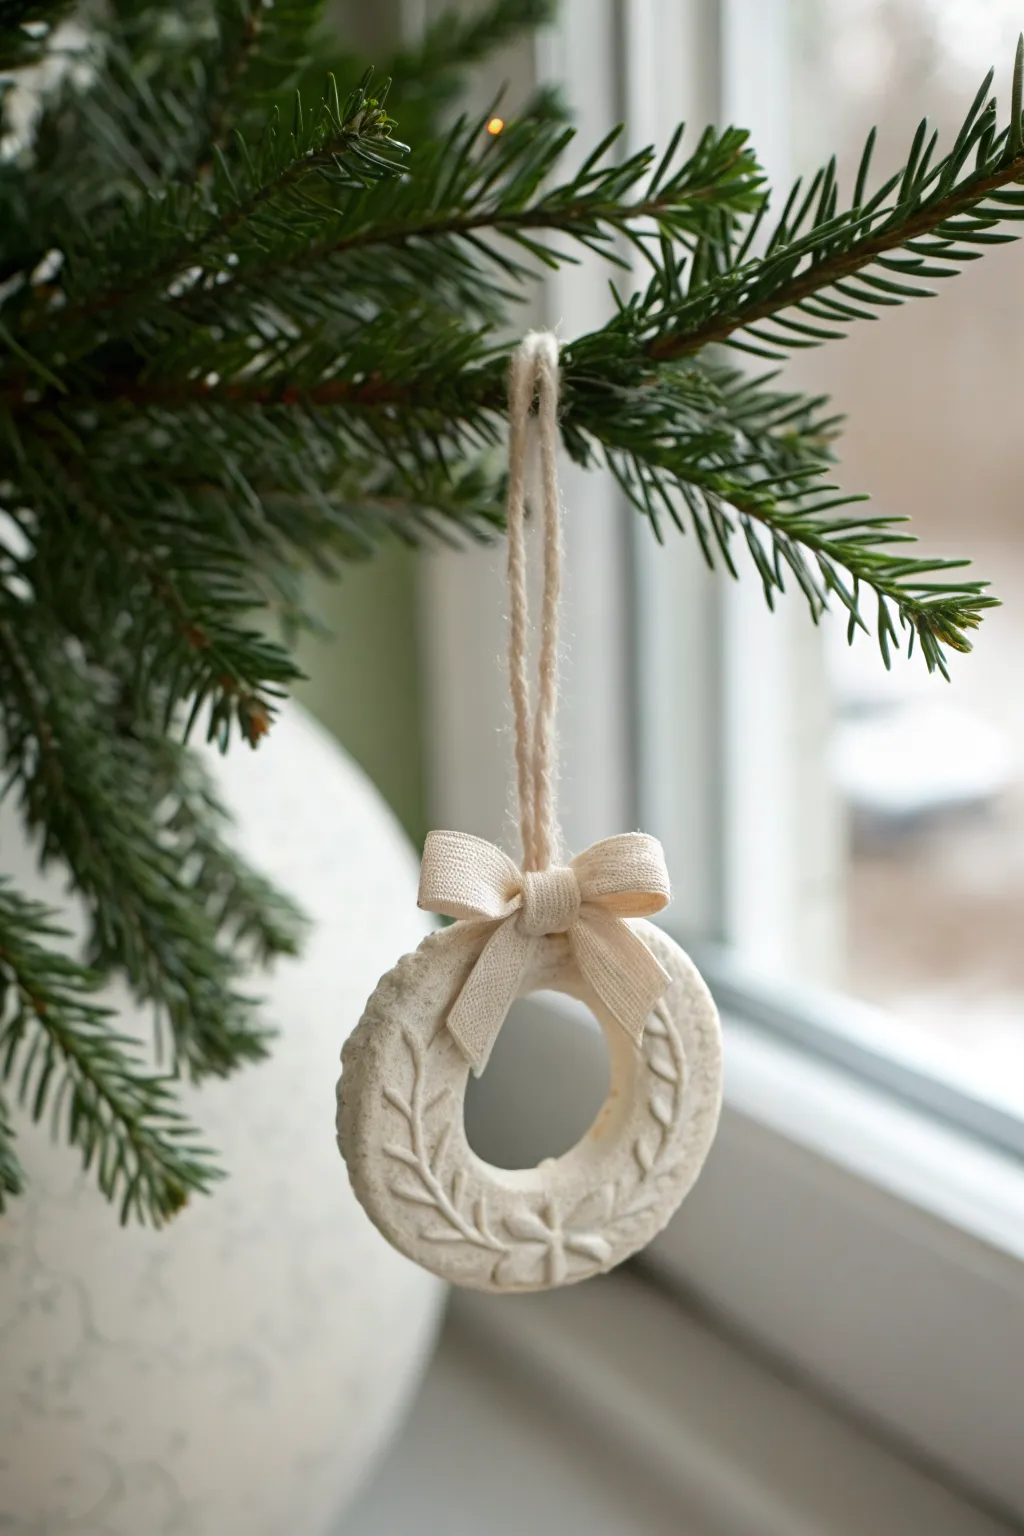
These charming miniature wreaths bring a soft, natural elegance to your holiday decor with their subtle embossed botanicals and creamy white finish. The simple canvas ribbon bow adds just the right touch of rustic texture to complete the look.
Step-by-Step Tutorial
Materials
- Air-dry clay (white) or salt dough
- Rolling pin
- Donut cutter or two circle cutters (one large, one small)
- Clay sculpting tool or dull needle tool
- Small patterned stamp (optional)
- Sandpaper (fine grit)
- Narrow canvas or cotton ribbon (cream color)
- Jute twine or cotton cord
- Straw or toothpick (for hole)
- Clear matte varnish (optional)
Step 1: Shaping the Base
-
Condition the Clay:
Begin by taking a handful of your air-dry clay and kneading it in your hands until it is warm, pliable, and free of cracks. -
Roll it Out:
Flatten the clay on a clean surface or silicone mat. Use a rolling pin to roll it out to an even thickness of about 1/4 inch to ensure sturdy ornaments. -
Cut the Shape:
Using a donut cutter, press firmly into the clay to create the ring shape. If you don’t have a donut cutter, use a larger circle cutter first, then center a smaller circle cutter inside it to remove the middle. -
Smooth the Edges:
Dip your finger in a little bit of water and gently run it along the inner and outer raw edges of the clay ring to smooth out any roughness.
Step 2: Adding the Details
-
Create the Stem Lines:
Using a sculpting tool or a dull needle, lightly score a curved line running up the left and right sides of the wreath face to act as the central stems for your leaves. -
Emboss the Leaves:
Press small, angled indentations branching off your stem lines to create a leaf pattern. You can do this by pressing the side of a small tool into the clay rather than dragging it. -
Add a Central Motif:
At the very bottom center of the wreath ring, press a small geometric or floral design. You can hand-carve a simple asterisk star or use a tiny stamp for precision. -
Create the Hanging Hole:
At the very top of the wreath, punch a hole straight through the clay using a plastic straw or a toothpick. Wiggle it slightly to ensure the opening is clean.
Stamp Secret
Don’t have sculpting tools? The textured handle of a spoon or a evergreen sprig pressed gently into the wet clay creates beautiful organic patterns instantly.
Step 3: Finishing Touches
-
Dry Completely:
Place the ornament on a flat wire rack to dry. This usually takes 24-48 hours depending on humidity; turn it over halfway through for even drying. -
Sand Imperfections:
Once fully hardened, inspect the edges. Use a piece of fine-grit sandpaper to gently buff away any sharp burrs or uneven spots on the rim. -
Seal (Optional):
If you want to protect your ornament from moisture, brush on a thin coat of matte clear varnish and let it dry completely. -
Prepare the Hanger:
Cut a length of jute twine or cotton cord, loop it through the hole at the top, and knot the ends together to create the hanging loop. -
Make the Bow:
Take a small strip of cream canvas ribbon and tie a tiny, neat bow. Trim the tails short so they don’t obscure the wreath design. -
Attach the Bow:
Place a dab of strong craft glue or hot glue right over the hole at the top of the ornament. -
Secure and Set:
Press your fabric bow onto the glue, covering the base of the hanging cord. Hold it there for a few seconds until secure.
Level Up: Scented Clay
Mix a few drops of cinnamon or pine essential oil into your clay dough before rolling it out. Your ornaments will smell like winter every time you walk by.
Hang these delicate creations on a tree branch near a window to catch the winter light beautifully
Cozy Little House Ornaments

These charming, miniature dwellings bring a touch of Nordic hygge to your holiday decor with their textured finishes and earthy tones. Crafted from simple air-dry clay, they evoke the feeling of cozy winter cottages tucked away in a snowy forest.
How-To Guide
Materials
- Air-dry clay (white or stone color)
- Roller or rolling pin
- Sharp crafting knife (X-Acto)
- Drinking straw (for hanging holes)
- Modeling tools or a toothpick
- Jute twine or rustic string
- Fine-grit sandpaper
- Acrylic paint (burnt umber or dark brown)
- Paper towel or sponge
- Matte sealant (optional)
- Parchment paper (for working surface)
Step 1: Shaping the Base
-
Prepare the Clay:
Start by kneading a handful of air-dry clay until it is soft and pliable. If the clay feels dry, I like to dampen my fingers slightly to rehydrate it. -
Roll the Slab:
Roll the clay out onto a piece of parchment paper until it is an even slab, approximately 1/4 to 1/2 inch thick. You want it substantial enough to stand but not too heavy. -
Create a Template:
Sketch a simple house shape (a rectangle with a triangle on top) on a scrap of paper and cut it out to use as a guide, or freehand the shape if you feel confident. -
Cut Out the House:
Place your template on the clay slab and use your craft knife to slice straight down through the clay, tracing the outline. Remove the excess clay carefully. -
Smooth the Edges:
Dip your finger in a little water and gently run it along the cut edges of the house to round them off slightly and remove any sharp burrs.
Rustic Texture Trick
Before cutting your shapes, roll a piece of linen fabric or burlap over the clay slab. This imprints a subtle woven texture that looks amazing.
Step 2: Adding Architectural Details
-
Carve the Roofline:
Using a modeling tool or the back of your knife, gently press a line across the house where the roof triangle meets the walls to define the roof separation. -
Create Roof Texture:
Use a small, flat tool or a toothpick to press vertical indentations along the bottom edge of the roof area, creating the look of shingles or overhangs. -
Carve the Door:
Outline an arched door at the base of the house using a needle tool. Press gently to create an outline without cutting all the way through. -
Add Door Details:
Draw a vertical line down the center of the door and add two tiny dots for doorknobs to give it character. -
Make the Windows:
For the upper story, carefully cut out small squares or use a square cutter. Alternatively, simply imprint the shape deeply. -
Detail the Windows:
If you cut the windows out, leave them open. If you imprinted them, use your needle tool to draw a cross in the center for window panes. -
Add the Round Window:
Press a small circular object (like a pen cap) into the peak of the gable to create an attic window, then add cross-hatching inside it. -
Create the Hanging Hole:
Using a drinking straw, punch a clean hole through the very top of the roof peak. Twist the straw as you pull it out to remove the clay plug.
Help! My Clay Curled
Clay curls as it dries unevenly. To fix this, gently dampen the concave side and place it under a heavy book overnight to flatten it back out.
Step 3: Finishing and Assembly
-
Dry Completely:
Let the ornaments dry flat on parchment paper for at least 24-48 hours. Flip them over halfway through so the back dries evenly. -
Sand Imperfections:
Once fully cured, use fine-grit sandpaper to gently smooth any rough spots on the edges or back. -
Prepare the Wash:
Mix a small amount of burnt umber acrylic paint with water until it has an inky, watery consistency. -
Apply the Wash:
Brush the watery paint over the entire front surface of the house, ensuring it gets into all the carved grooves and textures. -
Wipe Back:
Immediately wipe the surface with a damp paper towel or sponge. The dark paint will stay in the crevices (windows, door lines, roof texture) while staining the surface a rustic beige. -
Final Seal:
If desired, apply a clear matte sealant to protect the finish, though leaving it unsealed maintains that raw, stone-like texture. -
Thread the Twine:
Cut a length of jute twine, thread it through the hole at the top, and tie a secure knot to create a hanging loop.
Now you have a village of miniature cottages ready to warm up your tree or mantle
Hollow Bell-Shaped Clay Ornaments
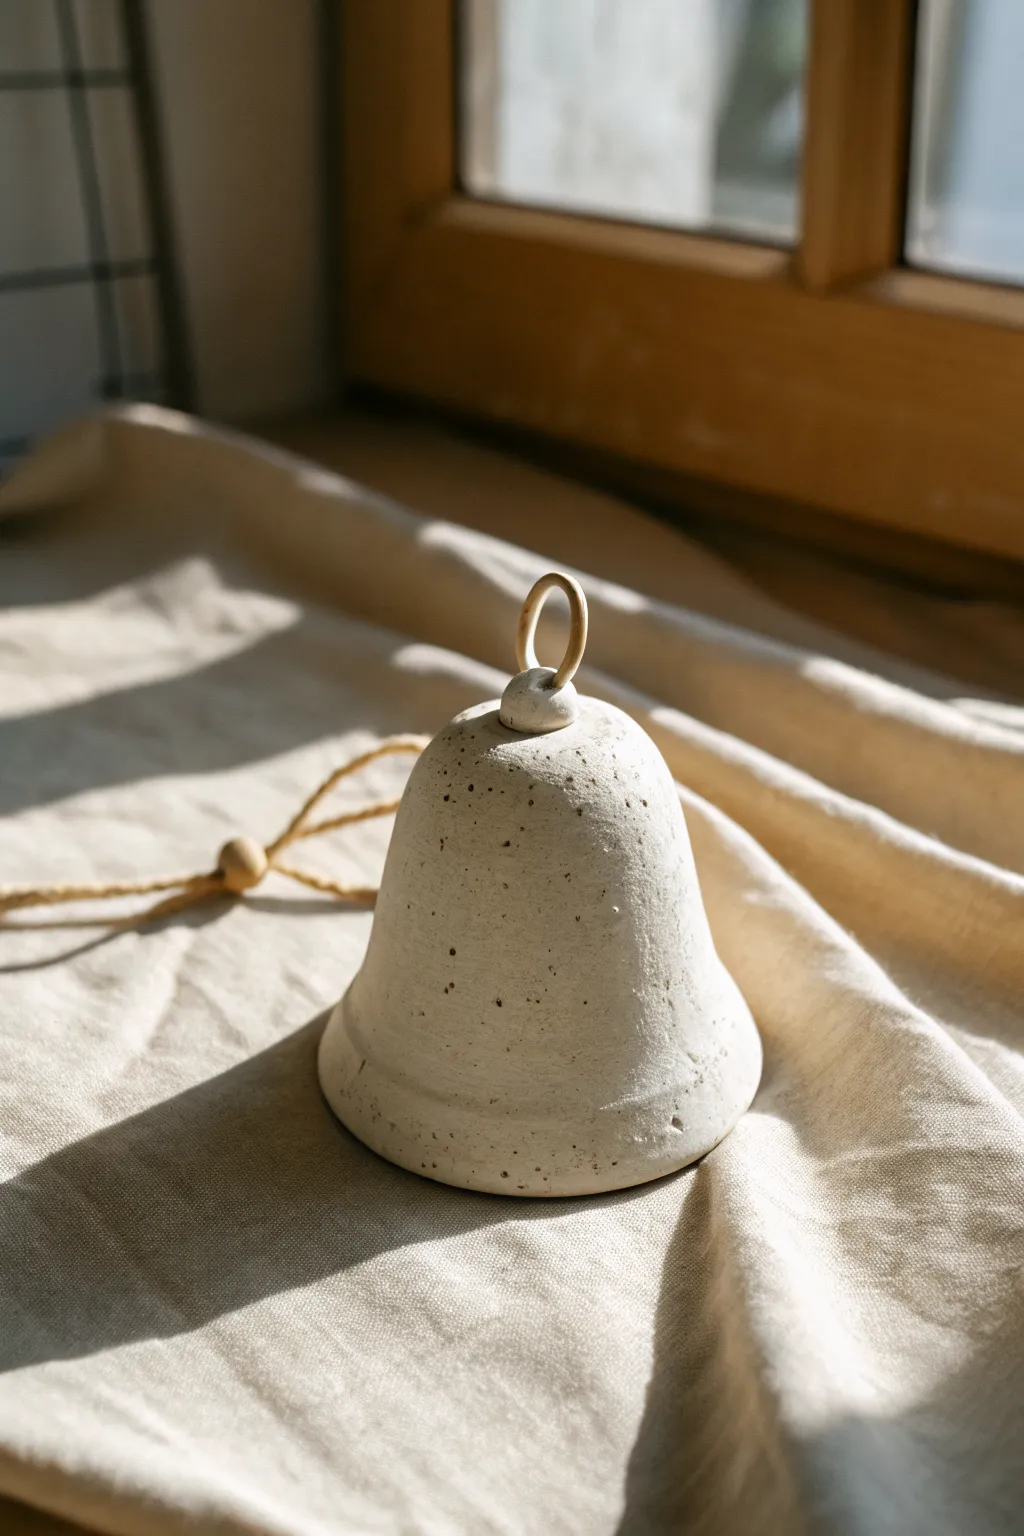
Capture the charm of handmade pottery with this beautifully textured bell ornament. Its speckled finish and organic shape bring a warm, Scandinavian simplicity to your holiday decor.
Step-by-Step Tutorial
Materials
- White air-dry clay or polymer clay
- Rolling pin
- Small cup or bell-shaped mold (for forming)
- Plastic cling wrap
- Ground black pepper or dried coffee grounds (for speckling)
- Small wire loop or metal eyehook
- Twine or jute cord
- Small wooden bead
- Water (for smoothing)
- Sandpaper (fine grit)
Step 1: Preparing the Clay
-
Create the Speckle Mix:
Before working the clay, you’ll need to create that signature texture. Take a handful of white clay and sprinkle a generous pinch of ground black pepper or dried coffee grounds onto it. If you want a subtler look, use less seasoning. -
Knead Thoroughly:
Fold the clay over the speckles and knead repeatedly until the particles are evenly distributed throughout the batch. The clay should look like vanilla bean ice cream. -
Roll it Out:
Roll your speckled clay out on a flat surface to a thickness of about 1/4 inch. Keep the thickness consistent so the bell dries evenly.
Crack Prevention
If using air-dry clay, cracks happen if it dries too fast. Keep the bell away from direct sunlight or heat vents. Drape a loose plastic bag over it for the first 12 hours to slow drying.
Step 2: Shaping the Bell
-
Prepare Your Form:
Find a small cup, egg cup, or foam cone that has the bell shape you desire. Cover the outside of this form tightly with plastic cling wrap to prevent sticking. -
Drape the Clay:
Gently drape your rolled clay over the top of the form. Smooth it down the sides with your hands, pressing it against the form to take its shape. -
Trim the Excess:
Use a craft knife or a needle tool to trim the excess clay around the base. I like to leave it slightly uneven or flared for a more organic, handmade feel. -
Shape the Rim:
Dip your finger in a little water and run it along the cut bottom edge to smooth out any harsh lines and create a soft, rounded rim. -
Refine the Surface:
While the clay is still on the mold, gently pat the surface to remove any fingerprints. If you want extra texture, you can lightly dab it with a damp sponge.
Make it Ring
Before hanging, tie a small ceramic bead or metal washer to a separate string and attach it inside the bell. This adds a functional clapper so it makes a soft sound when moved.
Step 3: Adding the Hook
-
Form the Top Detail:
Roll a very small ball of clay (about the size of a marble) and flatten it slightly. Score the top of your bell and the bottom of this ball, add a drop of water, and press the ball firmly onto the very top center. -
Insert the Loop:
Take a small metal eyehook or form a U-shape from stiff wire. Push the ends deep into the decorative top ball you just added. Smooth the clay around the metal so it is secure.
Step 4: Finishing Touches
-
Initial Drying:
Let the bell sit on the mold for about 2-3 hours until it holds its shape but is still slightly leathery. -
Remove the Mold:
Very carefully slide the bell off the mold and peel away the plastic wrap. This allows the inside to dry properly. -
Full Cure:
Set the bell upright on a drying rack. Allow it to air dry for 24-48 hours, or bake according to your polymer clay instructions if using that medium. -
Optional Sanding:
Once fully hard, check for any sharp edges. A quick pass with fine-grit sandpaper can smooth out the rim if needed, but be careful not to sand away the speckled texture. -
Stringing:
Cut a length of jute twine. Thread one end through the metal loop at the top of the bell. -
Add the Bead:
Thread both loose ends of the twine through a small wooden bead and slide the bead down so it rests closer to the bell, securing the look. -
Secure the Knot:
Tie a knot at the end of the twine loop to finish the ornament, ready for hanging.
Hang your new rustic bell near a window to let the natural light highlight its beautiful texture
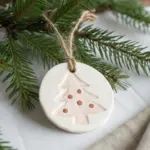
Spice-Studded Scented Clay Ornaments

This rustic project combines the clean, classic look of white air-dry clay with the warm, spicy aroma of star anise. The result is a charming, textured ornament that brings a cozy, natural feel to your holiday decor.
How-To Guide
Materials
- White air-dry clay (or salt dough)
- Small whole star anise spices
- Tree-shaped cookie cutter
- Rolling pin
- Parchment paper or non-stick mat
- Jute twine
- Drinking straw or skewer
- Tweezers (optional)
- Sandpaper (fine grit)
- Clear matte sealant spray (optional)
Step 1: Preparing the Base
-
Condition the Clay:
Begin by taking a handful of white air-dry clay and kneading it in your hands until it becomes soft, pliable, and free of cracks. -
Roll Out the Slab:
Place the clay on a sheet of parchment paper to prevent sticking. Use your rolling pin to flatten it into an even slab, aiming for a thickness of about 1/4 inch (6mm) so it is sturdy enough to hold the spices. -
Cut the Shapes:
Press your tree-shaped cookie cutter firmly into the rolled clay. Wiggle it slightly to ensure a clean cut, then carefully lift the cutter away. -
Clean Edges:
Peel away the excess clay from around the tree shape. If the edges are a bit jagged, dip your finger in a little water and smooth them down gently.
Shrinkage Check
Clay shrinks as it dries! Make your initial cutout slightly larger than you want the final ornament to be, and ensure the hanging hole is punchy and wide.
Step 2: Patterning and Embedding
-
Create Hanging Hole:
While the clay is still wet, use a drinking straw or a thick skewer to punch a hole at the very top of the tree. Make sure the hole is big enough for your twine to pass through later. -
Select Your Spices:
Sort through your star anise and pick out the smallest, most complete stars. You can also break off individual points (carpels) from larger stars to use as tiny accents. -
Press Large Stars:
Starting near the bottom or center, gently press the whole star anise pieces into the clay. Push them deep enough so they sit flush with the surface but not so deep that they poke through the back. -
Add Smaller Accents:
Fill in the gaps with the smaller broken spice points. I find that using tweezers here helps place these tiny pieces precisely without denting the surrounding clay. -
Add Texture:
To mimic the look in the photo, take a toothpick or the blunt end of a skewer and gently stipple tiny dots all over the surface of the tree, avoiding the area immediately around the spices.
Scent Boost
Mix a drop of cinnamon or clove essential oil directly into the clay while kneading, or rub oil on the back of the dried ornament for extra fragrance.
Step 3: Finishing Touches
-
Allow to Dry:
Leave the ornament flat on the parchment paper to air dry. This usually takes 24-48 hours depending on humidity. Flip it over halfway through the drying process to ensure the back dries evenly. -
Sand Imperfections:
Once fully hard and white, check the edges for any sharp spots. Use a fine-grit sandpaper to lightly buff the rim of the ornament for a professional finish. -
Secure the Spices:
As clay shrinks when drying, spices can sometimes pop loose. If any feel loose, secure them with a tiny drop of super glue or clear craft glue. -
Seal (Optional):
If you want to protect the ornament from moisture, mist it lightly with a clear matte sealant spray. Do this in thin coats to avoid making the clay look glossy. -
Prepare Twine:
Cut a piece of jute twine approximately 8 inches long. -
Attach Hanger:
Fold the twine in half and thread the loop end through the hole from front to back. Pull the loose ends through the loop to create a lark’s head knot. -
Knot to Finish:
Tie the loose ends of the twine together in a simple overhand knot to close the loop, trimming any excess fraying for a tidy look.
Now you have a beautifully textured, aromatic ornament ready to hang or gift to a friend