Every December, I pull out a box of Christmas clay keepsakes and instantly remember the tiny hands that made them. Here are my favorite kid-friendly projects that turn air-dry clay or polymer clay into ornaments and little holiday decorations you’ll actually want to display year after year.
Cookie-Cutter Christmas Ornaments
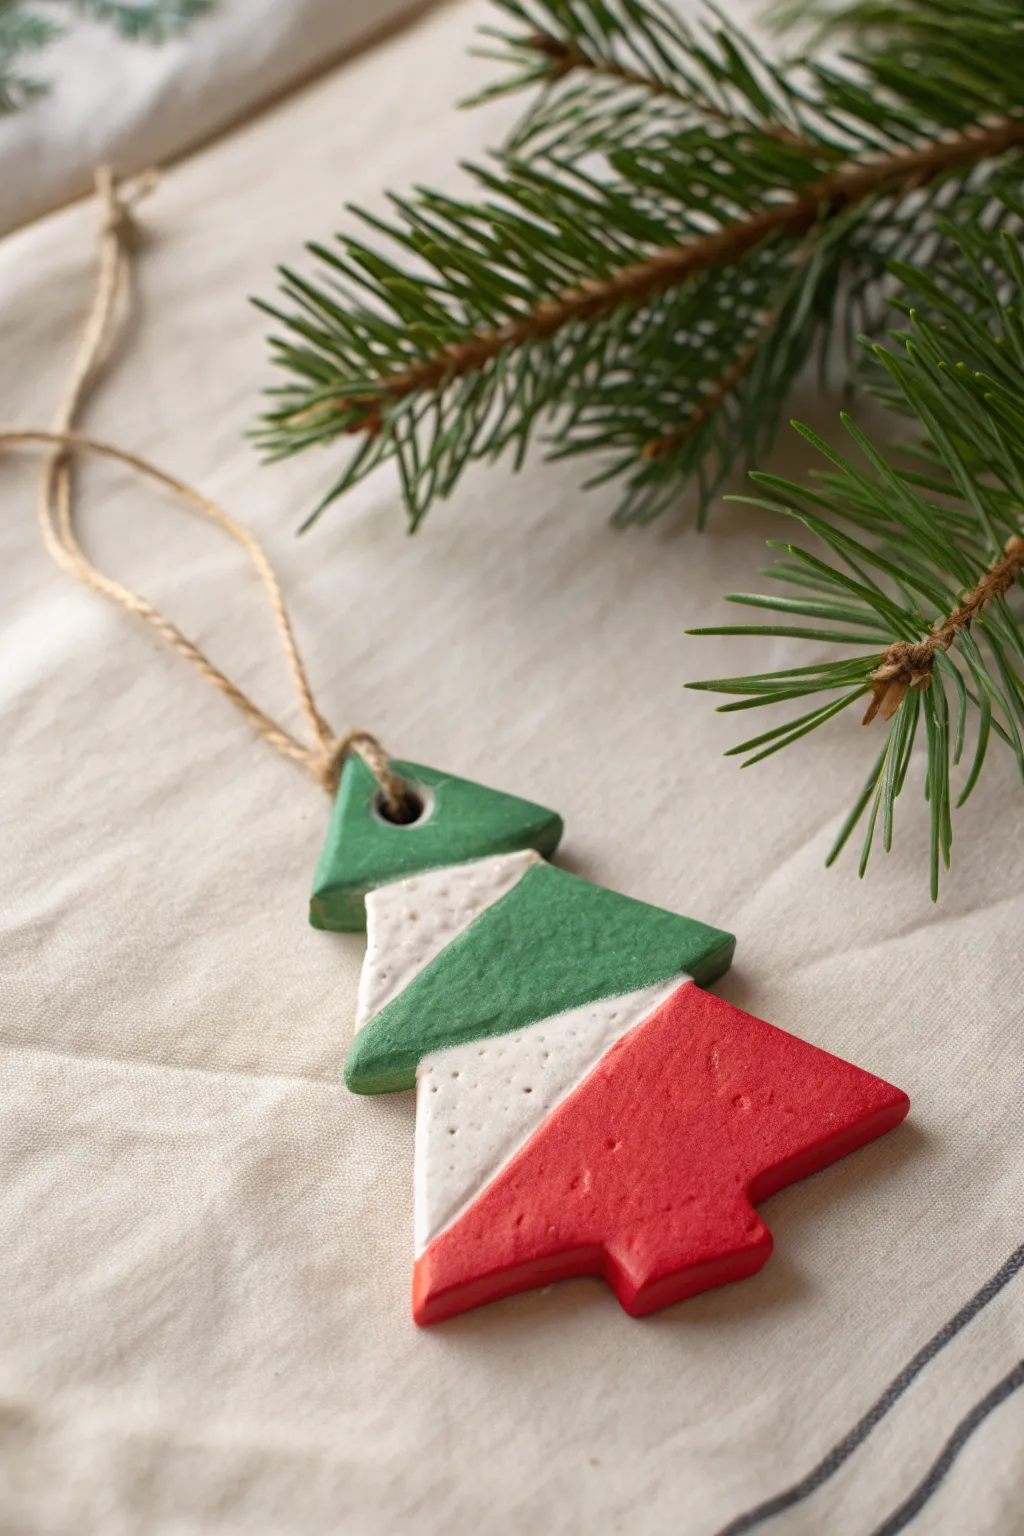
Celebrate the season with a touch of European flair using this charming segmented tree ornament. Its simple geometric shapes and bold bands of color mimic the Italian flag, making it a sophisticated addition to your holiday decor.
Step-by-Step Tutorial
Materials
- White polymer clay or air-dry clay
- Rolling pin
- Christmas tree cookie cutter (medium size)
- Sharp craft knife or clay blade
- Acrylic paints (Forest Green, Bright White, Christmas Red)
- Small flat paintbrush
- Thin round paintbrush (for details)
- Straw or skewer (to make the hole)
- Jute twine or ribbon
- Wait paper or parchment paper (for work surface)
- Fine-grit sandpaper (optional)
Step 1: Shaping the Clay Base
-
Prepare your workspace:
Lay down a sheet of parchment or wax paper to protect your table and prevent the clay from sticking. Knead your clay until it is soft and pliable. -
Roll out the slab:
Using your rolling pin, roll the clay out to an even thickness, roughly 1/4 inch thick. Try to keep it consistent so the ornament hangs straight. -
Cut the tree shape:
Press your Christmas tree cookie cutter firmly into the clay slab. Wiggle it slightly to ensure a clean cut, then carefully remove the excess clay from around the shape. -
Define the segments:
This tree has a distinct ‘layered’ look. Using a sharp craft knife or clay blade, lightly score diagonal lines across the tree to divide it into three sections, creating a dynamic, tilted effect. -
Deepen the cuts (optional):
For a more 3D look like the photo, you can actually cut the sections apart and then gently press them back together, or simply carve the grooves deeper to simulate separate stacked pieces. -
Smooth the edges:
Dip your finger in a little water (for air-dry clay) or baby oil (for polymer) and run it along the cut edges to smooth out any roughness. -
Create the hanging hole:
At the very top of the tree, press a straw or skewer through the clay to create a hole for the twine. Make sure it’s not too close to the edge to prevent tearing.
Clean Lines Hack
Use thin painter’s tape or washi tape to mask off the sections before painting. This guarantees crisp, straight lines between the red, white, and green without needing a steady hand.
Step 2: Drying and Painting
-
Dry or bake the clay:
Follow the manufacturer’s instructions for your specific clay. If baking polymer clay, place it on a foil-lined baking sheet. If air-drying, let it sit for 24-48 hours until fully hard. -
Sand imperfections:
Once fully cured and cool, check for any sharp burrs or rough spots. Use fine-grit sandpaper to gently smooth them away. -
Paint the top section:
Start with the top triangle segment. Apply two coats of forest green acrylic paint, letting the first coat dry completely before adding the second. Use a small flat brush for clean lines. -
Paint the bottom section:
Skip to the bottom section next to avoid smudging. Paint this area a vibrant Christmas red, ensuring you cover the sides of the clay as well for a finished look. -
Paint the middle band:
Finally, paint the middle diagonal band with bright white paint. I find using a smaller brush here helps keep the edges crisp where the colors meet. -
Add texture (optional):
The ornament in the photo has a slight speckled texture. You can achieve this by flicking a toothbrush with diluted grey paint lightly over the white section, or just letting the natural clay texture shine through. -
Seal the ornament:
To protect your paint job, apply a matte varnish or sealant over the entire front and sides. This step is crucial if you want the ornament to last for years.
Texture Twist
Before baking or drying, gently press a piece of rough fabric or a clean sponge onto the clay surface. This mimics the organic, stone-like texture seen in the inspiration photo.
Step 3: Finishing Touches
-
Thread the twine:
Cut a length of jute twine, about 8 inches long. Fold it in half and thread the loop end through the hole from the front to the back. -
Secure the loop:
Pass the tail ends of the twine through the loop and pull tight to create a lark’s head knot directly on the ornament. -
Tie the ends:
Tie the loose ends of the twine together in a simple overhand knot to create the hanging loop.
Hang your new geometric creation on a sturdy branch where its bold colors can stand out against the pine needles


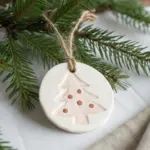
Handprint Keepsake Tree Ornament
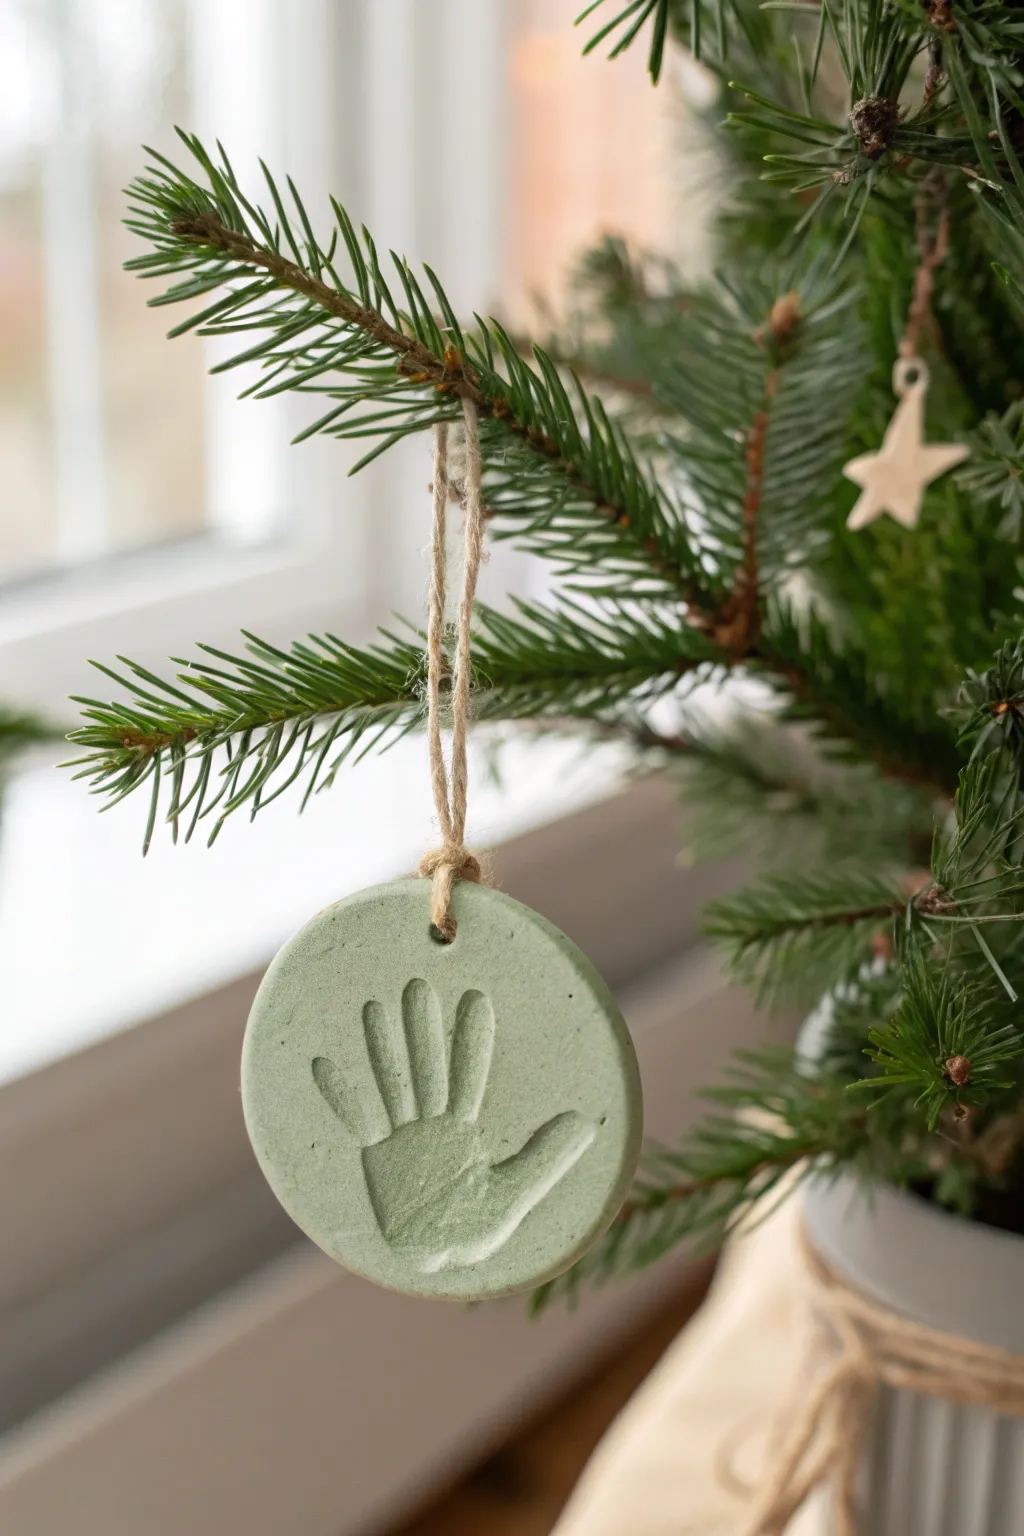
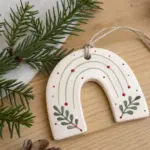
Capture a moment in time with this charming, sage-green handprint ornament that hangs delicately from a rustic twine loop. The soft, matte finish and organic feel make it a perfect, heartwarming addition to any Christmas tree.
Step-by-Step Guide
Materials
- White air-dry clay (or salt dough)
- Sage green acrylic paint
- Rolling pin
- Round cookie cutter (approx. 4-5 inches depending on hand size)
- Straw or skewer
- Jute twine
- Fine grit sandpaper
- Baking paper or non-stick mat
Step 1: Preparing the Clay
-
Tint the clay:
Start with a handful of white air-dry clay. Add a small drop of sage green acrylic paint into the center of the ball. -
Knead thoroughly:
Fold the clay over the paint and knead it repeatedly in your hands. Continue until the color is completely uniform and streak-free. -
Prepare your surface:
Lay down a sheet of baking paper or a non-stick craft mat to prevent sticking. Place your green clay ball in the center. -
Roll it out:
Using a rolling pin, flatten the clay to an even thickness of about 1/4 inch (6mm). Aim for a consistent surface without dips.
Clean Press Tip
Does the clay stick to little hands? Lightly dust the palm with cornstarch before pressing it into the clay for a clean release.
Step 2: Creating the Impression
-
Position the hand:
Guide the child’s hand to the center of the rolled clay. Ensure their fingers are spread slightly apart. -
Press down:
Firmly press down on the palm and each individual finger to create a clear, deep indentation. -
Check the print:
Gently lift the hand straight up. Inspect the impression; if it’s too shallow, ball up the clay and repeat the rolling and pressing steps. -
Cut the shape:
Center your large round cookie cutter over the handprint. Press down firmly to cut a clean circle around the impression. -
Remove excess:
Peel away the scrap clay from the outside of the circle, leaving just your perfect round ornament. -
Smooth the edges:
Dip your finger in a tiny bit of water and run it gently around the cut edge to soften any sharp ridges. -
Make the hole:
Using a plastic straw or a skewer, poke a hole near the top edge of the circle. Make sure it goes all the way through and is wide enough for your twine.
Make It Sparkle
Before the clay dries, sprinkle fine translucent glitter into the hand indentation and press gently to seal it in.
Step 3: Finishing Touches
-
Let it dry:
Place the ornament on a wire rack or clean sheet of parchment paper. Let it air dry for 24-48 hours, flipping it halfway through for even drying. -
Sand imperfections:
Once fully hard, inspect the edges. If there are any rough spots, lightly buff them with fine-grit sandpaper. -
Seal the piece (optional):
For longevity, brush on a thin layer of matte varnish. This preserves that soft look while protecting the clay from moisture. -
Cut the twine:
Cut a piece of jute twine about 8 inches long. -
Thread the loop:
Thread one end of the twine through the hole in the ornament. -
Secure the knot:
Bring the two ends of the twine together and tie a secure overhand knot near the clay, or leave a loop for hanging depending on your preference. -
Hang firmly:
Find a sturdy branch on your Christmas tree that can support the weight of the clay.
Now you have a timeless keepsake that perfectly preserves how tiny those hands once were


Fingerprint Light String Ornament
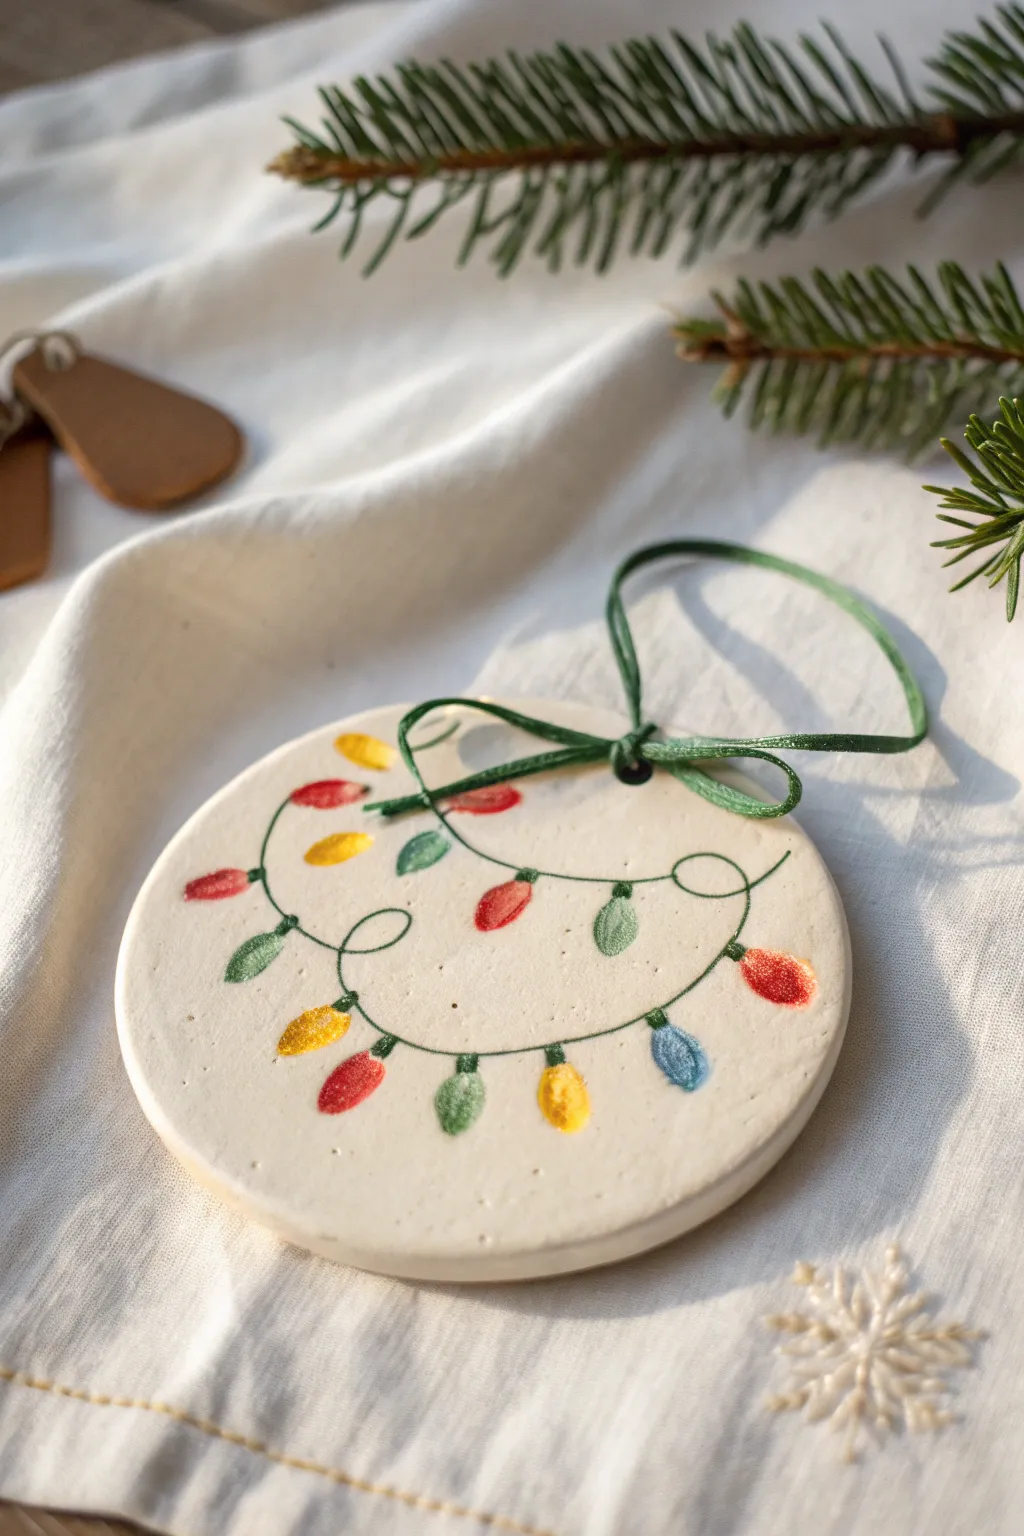
These charming keepsakes capture the tiny size of your child’s fingertips forever in the form of glowing holiday lights. The simple white clay background makes the colorful prints pop, creating a bright and cheery addition to your Christmas tree.
How-To Guide
Materials
- White air-dry clay or polymer clay
- Rolling pin
- Circle cookie cutter (approx. 3-4 inches)
- Acrylic paints (red, yellow, green, blue)
- Fine-point black permanent marker or paint pen
- Straw or skewer (for hole punching)
- Fine grit sandpaper (optional)
- Green ribbon or twine
- Clear sealant or Mod Podge (glossy finish recommended)
Step 1: Shaping the Base
-
Prepare the Clay:
Start by kneading a ball of white air-dry clay or polymer clay until it is soft, smooth, and pliable. Getting the lumps out now ensures a nice, flat surface later. -
Roll it Out:
Use a rolling pin to flatten the clay to an even thickness, roughly 1/4 inch thick. If the clay sticks, you can roll it out on a piece of parchment paper or a silicone mat. -
Cut the Circle:
Press your circle cookie cutter firmly into the clay to create a perfect round shape. Peel away the excess clay from the outside before lifting the cutter. -
Smooth the Edges:
Dip your finger in a tiny bit of water and run it gently around the cut creates to smooth out any rough or jagged edges from the cutter. -
Punch the Hole:
Take a plastic drinking straw or a skewer and press a hole near the top edge of the circle. Twist it slightly as you pull it out to get a clean opening for the ribbon. -
Let it Dry:
Place the clay circle on a flat drying rack or parchment paper. If using air-dry clay, let it sit for 24-48 hours, flipping it halfway through to prevent curling. If using polymer clay, bake according to the package instructions.
Step 2: Adding the Lights
-
Draw the String:
Once the clay is completely hard and dry, use a fine-point black permanent marker or paint pen to draw a swirly line across the face of the ornament. Add a few loops to mimic a tangled string of lights. -
Add Bulb Sockets:
Along the black line you just drew, add small rectangular stubs at irregular intervals. These will serve as the base where the colorful bulbs attach. -
Prepare the Paint:
Squeeze small amounts of red, yellow, green, and blue acrylic paint onto a palette or paper plate. -
Print the Lights:
Have your child dip their index finger or pinky finger into one color of paint. Dab off the excess on a paper towel so the texture isn’t goopy. -
Apply the Fingerprints:
Press the painted finger firmly onto the clay directly beneath one of the black rectangular sockets. Repeat for all sockets, alternating colors to create a multi-colored pattern. -
Add Highlights:
I like to take a very fine detail brush with a tiny dot of white paint and add a small ‘reflection’ mark on each dried fingerprint bulb to make them look like shiny glass.
Smudge Control
Work one color at a time and dry hands thoroughly between switches. Baby wipes are life-savers here for quick finger cleaning to keep yellow prints from turning green.
Step 3: Finishing Touches
-
Seal the Ornament:
Protect your artwork by applying a coat of clear sealant or glossy Mod Podge over the entire front of the ornament. This also gives the ‘lights’ a nice sheen. -
Attach the Ribbon:
Cut a length of thin green ribbon, about 8 inches long. Thread it through the hole at the top of the ornament. -
Tie the Knot:
Bring the ends of the ribbon together and tie a secure knot or bow just above the clay edge to finish the loop.
Year & Name
Before sealing, use your fine-point pen to write the child’s name and the current year on the back of the ornament for a complete memory.
Hang this sweet creation on the tree and enjoy the glow of those little fingerprints for years to come


Easy Stacked Snowman Ornament
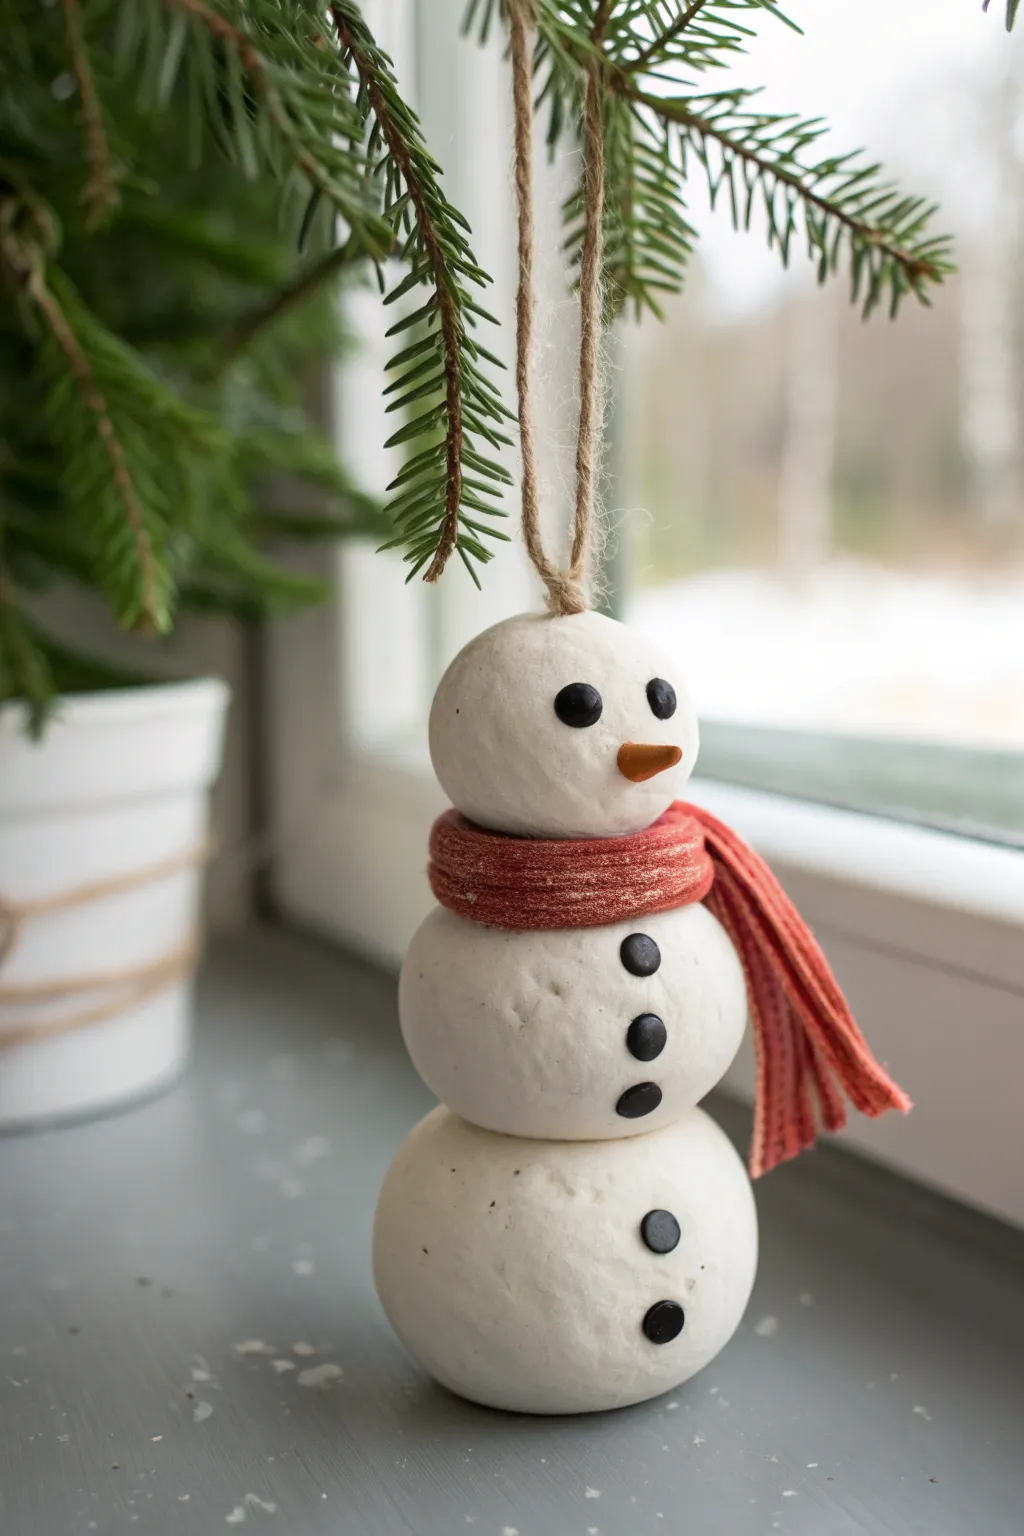
This charming, rustic snowman ornament brings a handmade touch to your holiday decor with its simple stacked design and cozy fabric scarf. The matte white finish and imperfect, pebbled texture give it the look of freshly packed snow, perfect for hanging on a tree branch or propping up on a windowsill.
Step-by-Step Guide
Materials
- White or light gray air-dry clay (or polymer clay)
- Black clay (very small amount) or black peppercorns/beads
- Orange clay or orange paint
- Jute twine or rustic string
- Red fabric scrap or felt strip
- Toothpicks or a thin skewer
- Clear craft glue or PVA
- Sculpting tool or pencil point
- Parchment paper or craft mat
Step 1: Forming the Body
-
Portion the clay:
Start by dividing your white clay into three distinct portions. You need a large piece for the base, a medium piece for the torso, and a slightly smaller piece for the head. -
Roll spheres:
Roll each portion of clay between the palms of your hands to create three smooth balls. Don’t worry if they aren’t perfectly round; a little unevenness adds to the natural snow look. -
Create the structural support:
Take a toothpick or a skewer and insert it vertically through the center of the largest ball. Leave enough sticking up to impale the next two sections. -
Stack the snowballs:
Gently slide the medium ball onto the toothpick so it sits atop the base. Press down slightly to flatten the contact point, creating a stable bond. -
Insert the hanger loop:
Before adding the head, cut a loop of jute twine. Knot the ends together and press the knot firmly into the top of the smallest clay ball (the head). -
Secure the hanger:
Use a tiny dab of clay to smooth over the insertion point of the twine knot so it’s buried securely inside. -
Attach the head:
Place the head onto the exposed tip of the toothpick on the torso section. Press gently to secure the stack without crushing the spheres.
Step 2: Adding Details
-
Make the buttons and eyes:
Roll very tiny balls of black clay. You will need two for the eyes and roughly five for the buttons down the front. -
Attach the buttons:
Press three black balls firmly into the middle snowball and two into the bottom snowball. Flatten them slightly as you press so they stick well. -
Place the eyes:
Press the remaining two black balls onto the face area. Position them slightly wide apart for a cute expression. -
Sculpt the nose:
Take a tiny amount of orange clay and roll it into a small cone or carrot shape. -
Attach the nose:
Press the carrot nose onto the center of the face, just below the eyes. If the clay is feeling dry, a tiny dab of water or glue helps it adhere. -
Add texture:
Using an old toothbrush or a stiff bristle brush, gently tap the white surfaces of the snowman to give it a porous, snowy texture rather than a smooth finish. -
Initial Drying:
I prefer to let the clay firm up for about 30 minutes before adding the scarf so I don’t accidentally fingerprint the soft surface.
Pro Tip: Rustic Texture
Mix a small pinch of used coffee grounds or black pepper into the white clay before rolling. This creates tiny speckles that mimic real, dirty snow!
Step 3: Finishing Touches
-
Prepare the scarf:
Cut a thin strip of red fabric or felt, approximately 6 inches long and 1/4 inch wide. Fray the ends slightly with scissors for a worn look. -
Wrap the scarf:
Wrap the fabric strip around the snowman’s neck area, between the head and the middle section. -
Secure the scarf:
Tie the scarf in a simple knot off to the side, letting the ends drape down naturally over the shoulder. -
Glue the scarf:
Apply a tiny dot of clear craft glue under the knot of the scarf to keep it from slipping off as the clay shrinks slightly during drying. -
Final dry:
Allow the entire ornament to dry completely according to your clay package instructions (usually 24 hours for air-dry clay) in a cool, dry place.
Oops! Head Falling Off?
If the head feels wobbly on the central toothpick, use a dab of PVA glue between the sections. The glue dries clear and reinforces the clay bond.
Hang your new frosty friend on the tree and enjoy the winter charm it brings to your home

The Complete Guide to Pottery Troubleshooting
Uncover the most common ceramic mistakes—from cracking clay to failed glazes—and learn how to fix them fast.
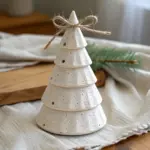
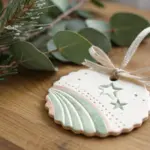
Cone Christmas Tree Minis
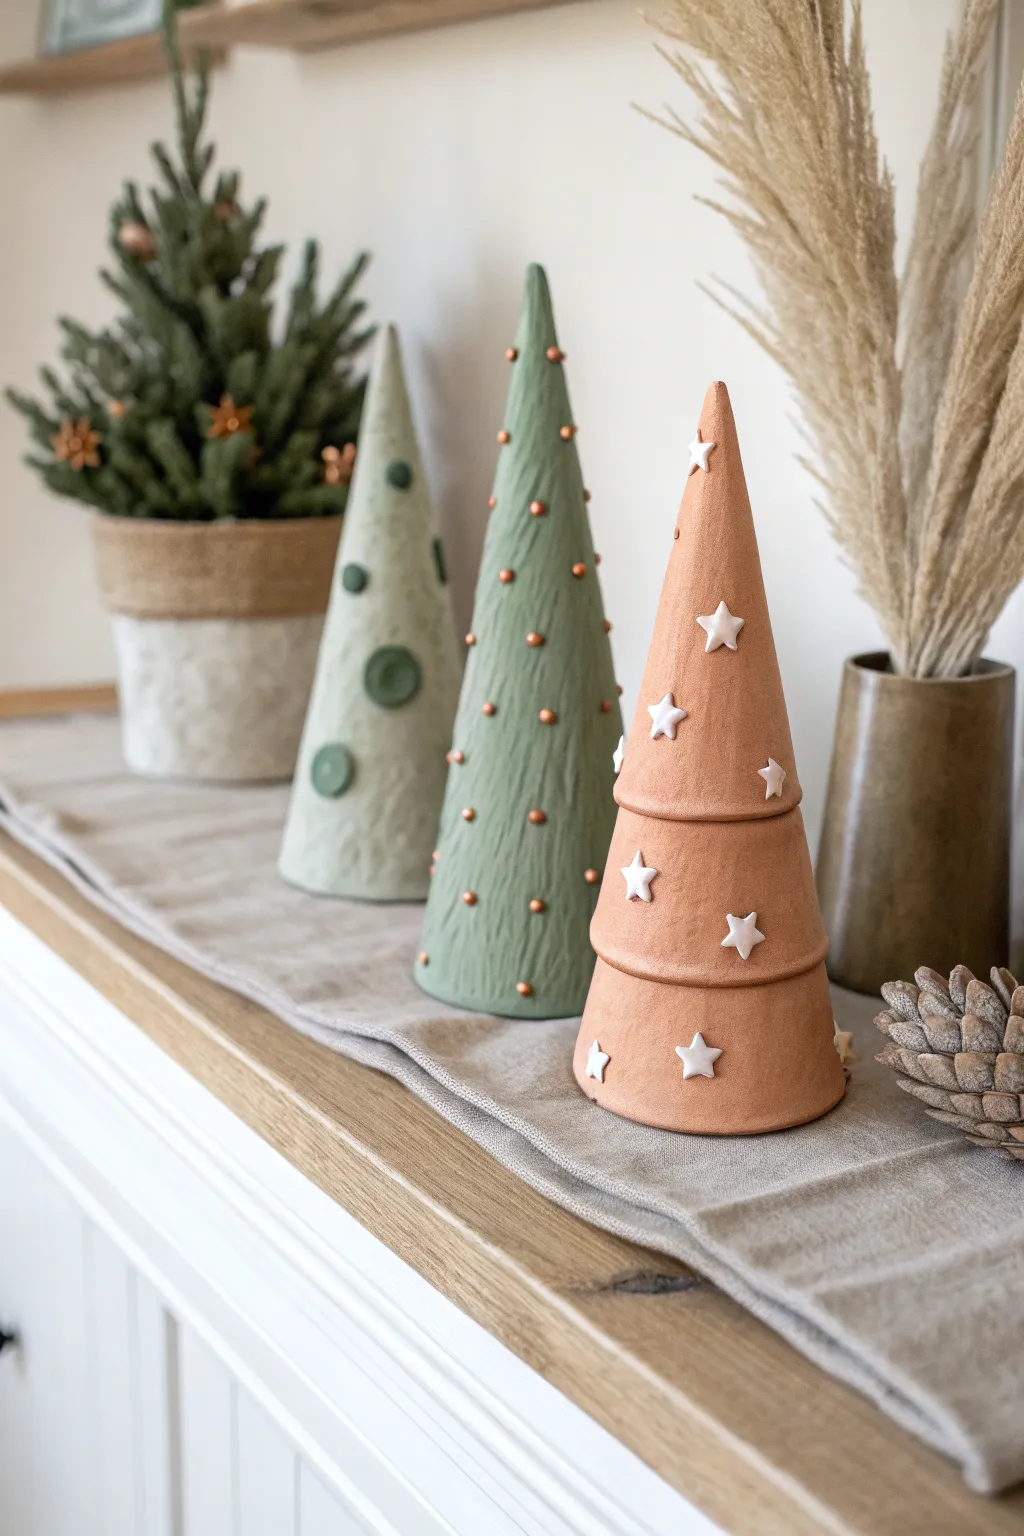
Create a minimalist holiday forest with these charming clay cones, showing off three distinct textures and styles. This trio features a dusty sage button tree, a textured emerald bead tree, and a terracotta-colored tiered tree with white stars.
Step-by-Step
Materials
- Air-dry clay (white)
- Acrylic paints (pale sage, forest green, terracotta)
- Rolling pin
- Cardstock or thick paper (for cone templates)
- Tape
- Clay tools (knife, sponge)
- Texture tools (fork, comb, or stiff brush)
- Small round piping tip or straw (for buttons)
- Small star cutter or star plunger cutter
- Copper or gold beads (optional, for the middle tree)
- Super glue or craft glue
- Paintbrushes (flat and fine tip)
- Water cup
Step 1: Forming the Base Cones
-
Make specific templates:
Cut three semi-circles from cardstock to use as forms. Secure them into cone shapes with tape to help support the clay while you work. -
Roll out clay slabs:
Roll your air-dry clay into a flat, even sheet about 1/4 inch thick. You will need enough to cover all three cones. -
Wrap the cones:
Drape the clay sheet over your cardstock forms. Trim the excess clay with a knife where the edges meet. -
Seal the seams:
Score (scratch) the meeting edges, add a little water, and smooth them together with your finger or a tool until the seam disappears.
Step 2: Sculpting the Textures
-
Texture the left tree:
For the first cone, use a crumpled piece of aluminum foil or a textured fabric to press a subtle uneven pattern all over the surface. -
Create the button accents:
Roll small balls of extra clay and flatten them into discs. Press a smaller circle into the center to mimic a button rim. -
Attach the buttons:
Score and slip the back of your clay buttons and press them randomly onto the textured cone. -
Texture the middle tree:
Drag a fork or a clay rake tool vertically from the bottom to the top of the second cone to create deep, bark-like grooves. -
Add metallic beads:
While the clay is still damp, gently press small copper beads into the clay surface. Alternatively, roll tiny clay balls to glue on later. -
Sculpt the right tree:
Divide the third cone visually into three sections. Roll two thin snakes of clay. -
Create the tiers:
Wrap the clay snakes around the cone to create the ridges that separate the tiers. Smooth the top edge of the snake into the cone above it, leaving the bottom edge distinctive. -
Cut out stars:
Roll a small piece of clay very thin and use a mini star cutter to punch out several stars. Set these aside to dry separately so they remain crisp.
Cracking Issues?
If you see small cracks appearing as the clay dries, mix a tiny bit of fresh clay with water to make a paste and smooth it into the cracks with a finger.
Step 3: Painting and Assembly
-
Dry completely:
Allow all your trees and star pieces to dry for at least 24-48 hours until they are hard and white. -
Paint the button tree:
Mix a very pale sage green and paint the entire first tree. Once dry, use a slightly darker green to paint just the internal circle of the buttons for contrast. -
Paint the textured tree:
Coat the middle tree in a rich forest green, ensuring you get paint into all the vertical crevices. If you used clay balls instead of beads, paint them copper now. -
Paint the tiered tree:
Apply a warm terracotta or clay-pot orange paint to the third tree, keeping the strokes even. -
Attach the stars:
Leave the little stars unpainted white. Use a dot of super glue to attach them to the terracotta tree once the paint is fully dry.
Make it Shine
For a festive finish, brush a layer of matte varnish over the painted trees, or mix fine glitter into the white paint for the stars to make them twinkle.
Set your trio on a mantle or table runner for a sophisticated handmade display
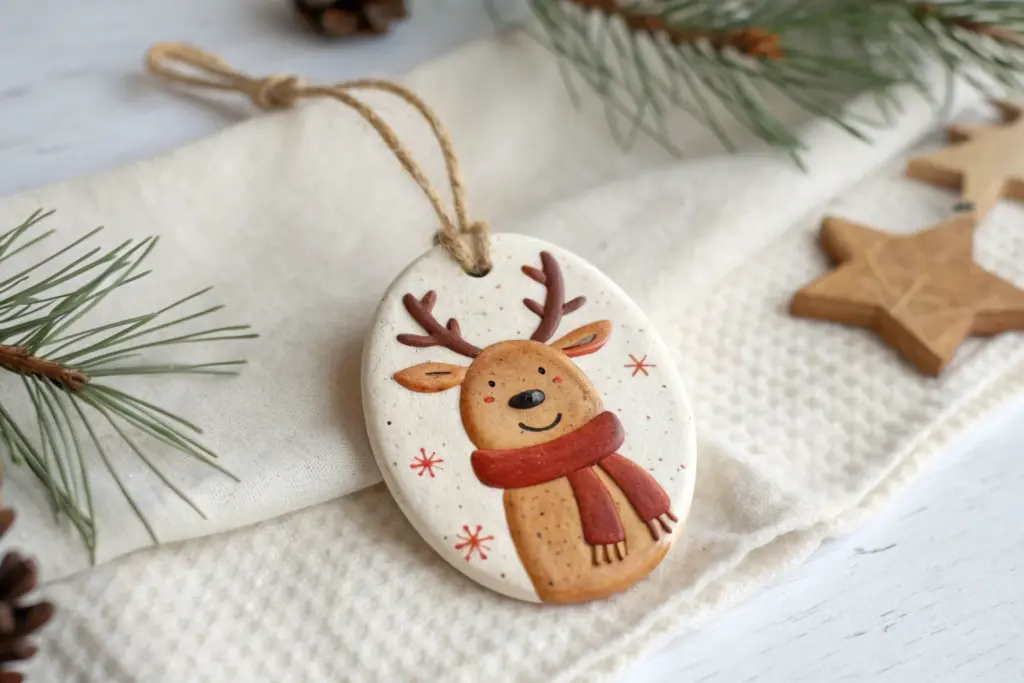
Reindeer Face Ornaments
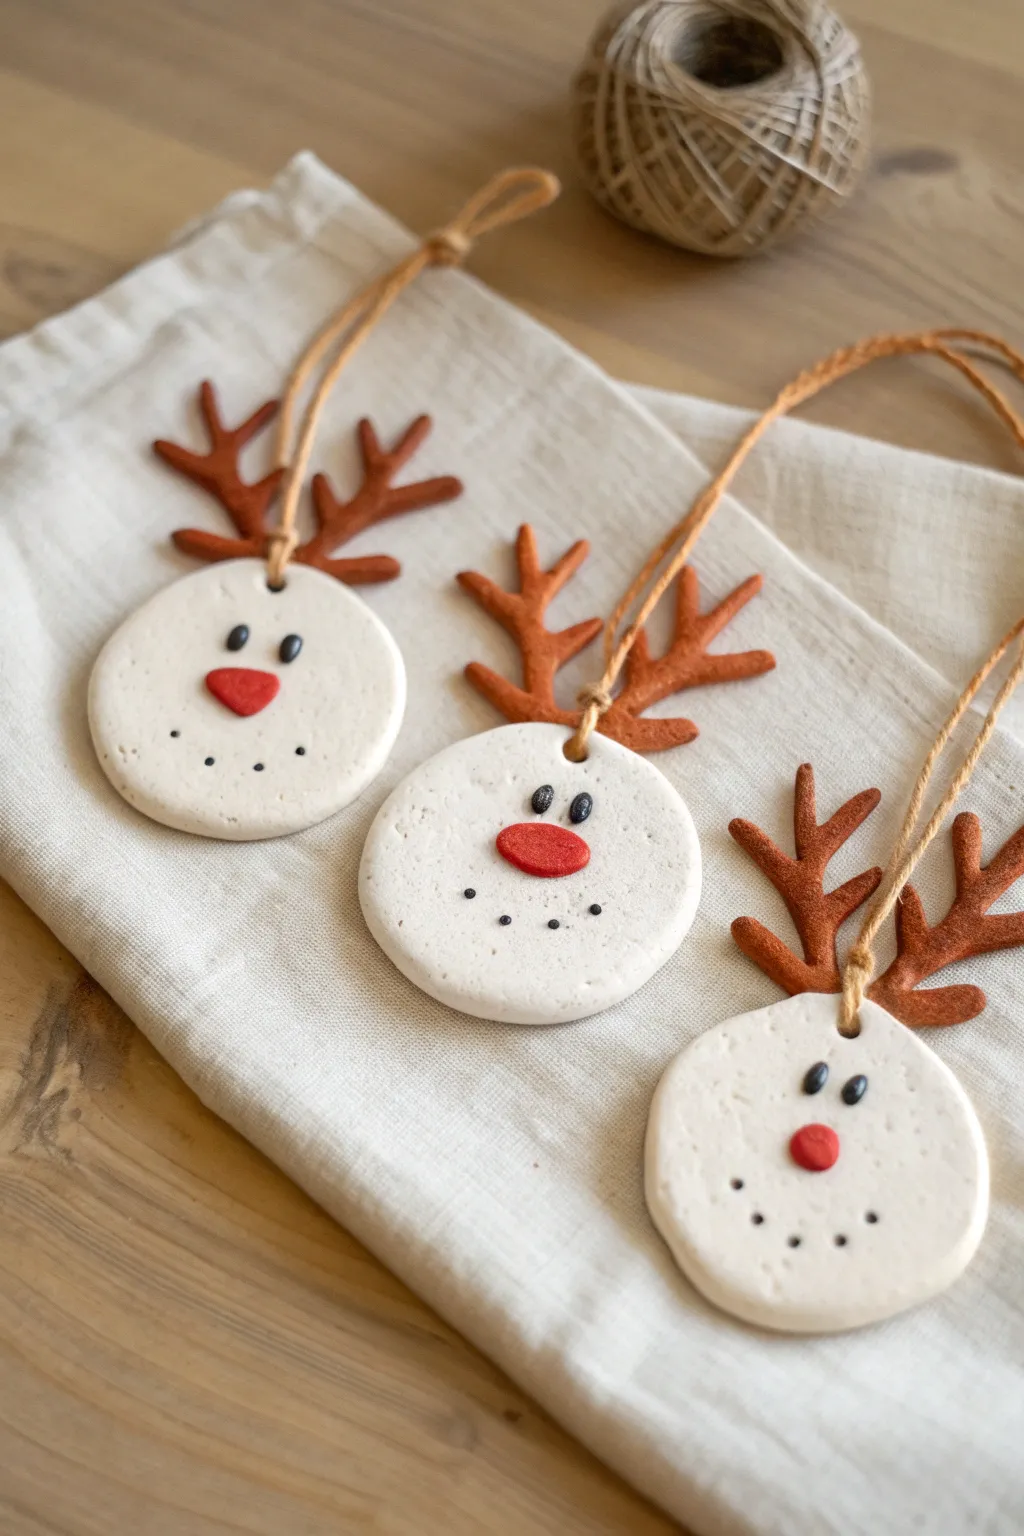
These charming, rustic reindeer ornaments combine simple round faces with adorable, antlered charm. They have a lovely matte finish and a homespun feel that looks perfect hanging on the Christmas tree.
How-To Guide
Materials
- White original Sculpey or air-dry clay
- Brown polymer clay (or paint for air-dry clay)
- Red polymer clay
- Small black beads or black clay for eyes
- Rolling pin
- Round cookie cutter (approx. 2-3 inches)
- Baking sheet and parchment paper
- Thin crafting wire or strong glue
- Needle tool or toothpick
- Natural jute twine
- Black acrylic paint and fine detail brush (optional)
Step 1: Shaping the Reindeer Face
-
Prepare the workspace:
Lay down a clean sheet of parchment paper or a silicone mat to prevent the white clay from picking up dust or lint. -
Roll the white base:
Condition a ball of white clay by kneading it until soft, then roll it out to an even thickness of about 1/4 inch. -
Cut the circles:
Press your round cookie cutter firmly into the clay to create the main face shape. -
Smooth the edges:
Gently run your finger around the rim of the circle to soften any sharp edges left by the cutter. -
Create the hanging hole:
Using a straw or a needle tool, punch a hole near the very top edge of the circle for the twine later. -
Form the antlers:
Taking your brown clay, roll two small snakes and press them gently to flatten them slightly. Branch off smaller pieces to simulate antler points. -
Attach the antlers:
Press the base of each antler firmly onto the back of the white circle near the top. I like to blend the clay slightly at the seam on the back to ensure a strong hold.
Loose Antlers?
If antlers feel wobbly after baking, secure them from the back with a dab of super glue or reinforce the connection with a strip of clay before baking.
Step 2: Adding Facial Details
-
Make the nose:
Roll a small amount of red clay into a ball, then flatten it slightly into an oval or rounded triangle shape. -
Position the nose:
Press the red nose gently into the center of the white face. -
Add the eyes:
Take two tiny pieces of black clay or two small black beads and press them into the clay just above the nose. If using clay, roll them into tiny ovals first. -
Create the mouth:
Using a needle tool or the tip of a toothpick, poke a series of small, shallow dots in a curved smile shape below the nose. -
Add detail to the mouth holes:
If you want the smile to stand out more, you can lightly fill these poked holes with tiny specks of black clay or wait to paint them after baking. -
Refine the texture:
Check the surface for any unwanted fingerprints and smooth them out lightly.
Add Sparkle
Before baking, brush a tiny amount of mica powder over the white clay for a snowy shimmer, or coat the red nose in glossy glaze for a wet look.
Step 3: Finishing Touches
-
Bake or dry:
Follow the manufacturer’s instructions for your specific clay. If using polymer, bake on a parchment-lined sheet. If using air-dry, let them sit undisturbed for 24-48 hours. -
Cool down:
Allow the ornaments to cool completely before handling them to prevent breakage. -
Paint details (optional):
If you didn’t use colored clay, now is the time to paint the antlers brown, the nose red, and add black dots for the eyes and mouth using a fine brush. -
Seal the surface:
For longevity, apply a thin coat of matte varnish or Mod Podge, though leaving the clay natural gives it a nice rustic look. -
String the hanger:
Cut a length of natural jute twine, thread it through the top hole, and tie a secure knot to create a loop.
Now you have a trio of festive faces ready to bring cheer to your holiday decor


What Really Happens Inside the Kiln
Learn how time and temperature work together inside the kiln to transform clay into durable ceramic.
Santa Hat Thumbprint Characters
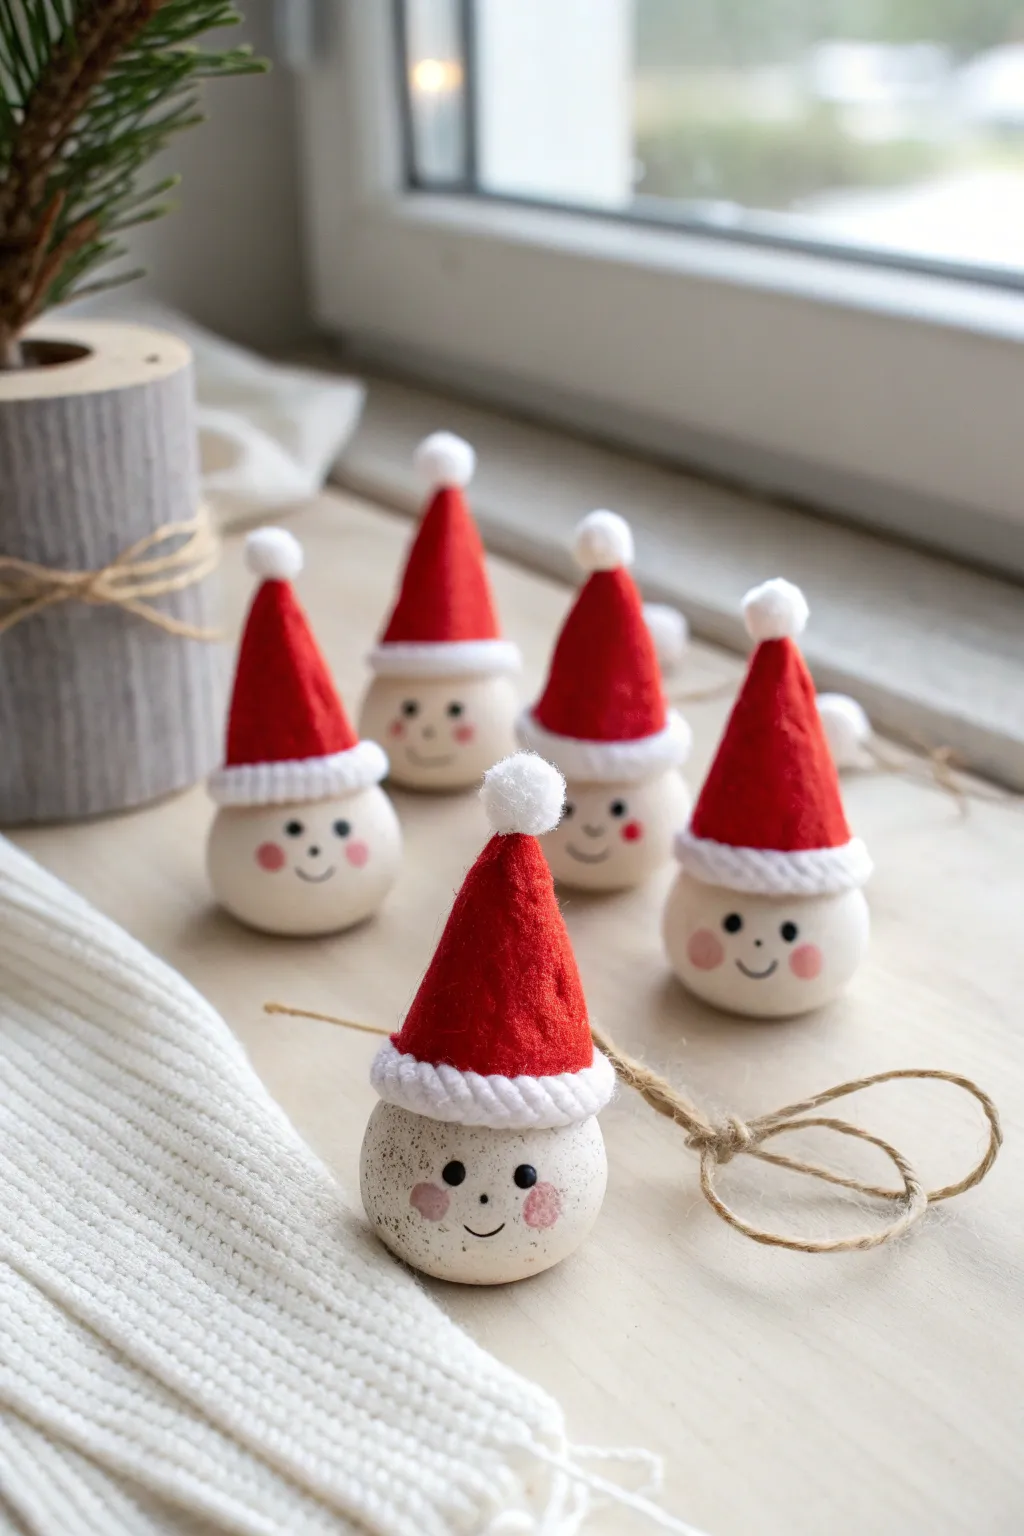
These adorable little Santa heads are a perfect holiday craft, featuring cheerful pink cheeks and cozy red hats. They make charming windowsill decorations or can be strung up as festive ornaments for your tree.
Step-by-Step Tutorial
Materials
- White air-dry clay or polymer clay
- Red felt fabric
- Small white pom-poms (approx. 0.5 cm)
- White yarn (chunkier weight works best)
- Black acrylic paint or fine-tip permanent marker
- Pink acrylic paint or blush powder
- Craft glue or hot glue gun
- Scissors
- Fine paintbrush or dotting tool
- Jute twine (optional for hanging)
Step 1: Shaping the Clay Base
-
Roll the heads:
Start by taking a chunk of white clay and rolling it between your palms to create a smooth, round ball about the size of a ping-pong ball. Make one for each Santa you want to create. -
Create a flat base:
Gently tap the bottom of each sphere onto your work surface so it flattens slightly. This ensures your little characters will stand upright without rolling away. -
Smooth the surface:
Dip your finger in a tiny bit of water and rub it over the clay to smooth out any cracks or fingerprints. Let the clay dry completely according to the package instructions. I find waiting overnight usually yields the best results with air-dry clay.
Sticky Situation?
If the felt hat keeps popping off the curved clay surface, use hot glue instead of craft glue for an instant, stronger bond.
Step 2: Painting the Faces
-
Add rosy cheeks:
Once the clay is dry, mix a tiny drop of pink acrylic paint with water for a wash, or use actual cosmetic blush. Dab two soft pink circles onto the lower half of the sphere for cheeks. -
Paint the eyes:
Using a dotting tool or the wrong end of a paintbrush dipped in black paint, place two small dots between the cheeks. Keep them widely spaced for a cute look. -
Draw the smile:
With a very fine liner brush or a fine-tip black marker, draw a tiny, simple ‘U’ shape right between the eyes for the mouth. -
Optional texture:
For a rustic look like the front-most figure in the image, you can lightly speckle the face by flicking a toothbrush with diluted brown paint before adding the features.
Pro Tip
To shape the clay heads perfectly identical, use a small cookie scoop or measuring spoon to portion out the clay before rolling.
Step 3: Crafting the Hats
-
Cut the felt cones:
Cut a semi-circle out of red felt. The straight edge should be long enough to wrap around the top of your clay ball. -
Form the cone shape:
Roll the felt semi-circle into a cone shape. Test the fit on a clay head to ensure it sits snugly, then secure the seam with a line of craft glue. -
Secure the hat:
Apply a thin ring of glue around the top third of the clay head and press the felt cone firmly onto it. Hold it in place for a moment to let the glue set.
Step 4: Adding Cozy Details
-
Add the brim:
Cut a length of white yarn long enough to encircle the base of the red hat. Glue this around the rim where the felt meets the clay to create a fluffy brim. -
Attach the pom-pom:
Put a dab of glue on the very tip of the red felt cone and press a small white pom-pom onto it. -
Add a hanger (Optional):
If you want to hang these on a tree, thread a piece of jute twine through the tip of the felt hat before gluing on the pom-pom, tying a knot inside the cone. -
Final touches:
Check all your glue points and gently fluff the yarn brim if it got flattened during assembly.
Now you have a whole family of jolly clay faces to cheer up your winter decor
Gingerbread House Tile Ornaments

Capture the cozy charm of holiday baking without the crumbs using this delightful clay ornament that looks good enough to eat. It features classic white icing details and festive touches of green and red against a warm gingerbread-colored base.
Detailed Instructions
Materials
- Polymer clay (gingerbread/tan color)
- Polymer clay (white, green, red)
- House-shaped cookie cutter (or knife and template)
- Rolling pin
- Liquid polymer clay (white) or white puffy paint
- Fine-point detailing tool or needle tool
- Tiny star cutter (optional)
- Jute twine for hanging
- Oven and baking sheet
- Parchment paper
Step 1: Shaping the Base
-
Prepare the dough:
Begin by conditioning your gingerbread-colored clay until it is soft and pliable. If you don’t have a pre-mixed gingerbread color, mixing brown with a tiny amount of translucence, orange, and white creates a realistic baked look. -
Roll it out:
Roll the clay into a slab approximately 1/4 inch thick. You want it substantial enough to hold its shape but not too heavy for a tree branch. -
Cut the shape:
Use a house-shaped cookie cutter to stamp out your tile. Alternatively, cut a simple pentagon shape with a craft knife using a paper template. -
Texture the surface:
For that authentic baked cookie texture, gently tap the surface with a clean toothbrush or a ball of crinkled aluminum foil. This removes the plastic shine. -
Add the hole:
Use a straw or a large detailing tool to punch a hole at the very apex of the roof for stringing later.
Pro Tip: Realistic Texture
Gently rub a bit of real cinnamon or shaded artist chalk pastels onto the edges of the unbaked clay to give it a convincing ‘toasted’ edge look.
Step 2: Decorating the House
-
Create the trees:
Roll out a small amount of green clay thinly. Use a tiny cutter or a knife to shape two triangles for the side trees. -
Attach the trees:
Press the green triangles gently onto the bottom corners of the house. Ensure they adhere well to the base. -
Pipe the icing details:
Using liquid white polymer clay in a fin-tip applicator bottle (or puffy paint if you prefer air-drying), carefully draw the ‘icing’ outline along the roof edge. -
Add roof zig-zags:
Draw a zig-zag line just below the roofline to mimic decorative piping. Taking a deep breath before drawing long lines usually helps steady my hand. -
Tree details:
Pipe small scalloped lines across the green trees to represent snowy branches. -
Windows and door:
Draw two square outlines for windows and a rounded arch for the door using the white applicator. Add a cross inside each window square for panes. -
Circular attic window:
Pipe a circle in the gable area (the triangle part of the roof). Draw intersecting lines inside to create a wheel or snowflake pattern.
Level Up: Scented Clay
Mix a tiny drop of clove or cinnamon essential oil into the brown clay during conditioning so the ornament actually smells like baking spices.
Step 3: Adding Candy Accents
-
Make red candies:
Roll very tiny balls of red clay. Place two on the door as buttons, one in the center of the attic window, two or three scattered on the roof, and one as a decorative dot. -
Secure the candies:
Press each red ball gently into the clay so they don’t pop off later. You can use a dotting tool to push them in slightly. -
White stars:
If you have a micro-cutter, cut tiny white stars for the tops of the trees. Otherwise, shape tiny amounts of white clay into star shapes by hand. -
Roof scallops:
Roll tiny balls of white clay and press them along the very top edge of the roof to look like dollops of cream or marshmallows. -
Final inspection:
Check your ornament carefully for any fingerprints or lint. Smooth them out gently with a finger or tool if needed.
Step 4: Baking and Assembly
-
Bake:
Place the tile on a parchment-lined baking sheet. Bake according to your polymer clay package instructions (usually 275°F for 15-30 minutes depending on thickness). -
Cool down:
Let the ornament cool completely on the baking sheet. It is fragile while warm. -
Seal (Optional):
If you used unsealed paint for details, add a matte varnish now. If used liquid clay, no sealing is required unless you want a different sheen. -
String it up:
Cut a length of twisting jute twine. Thread it through the top hole and tie a secure knot to create a loop.
Now you have a permanent piece of gingerbread art to enjoy on your tree year after year

TRACK YOUR CERAMIC JOURNEY
Capture glaze tests, firing details, and creative progress—all in one simple printable. Make your projects easier to repeat and improve.
Classic Wreath Ring Ornaments
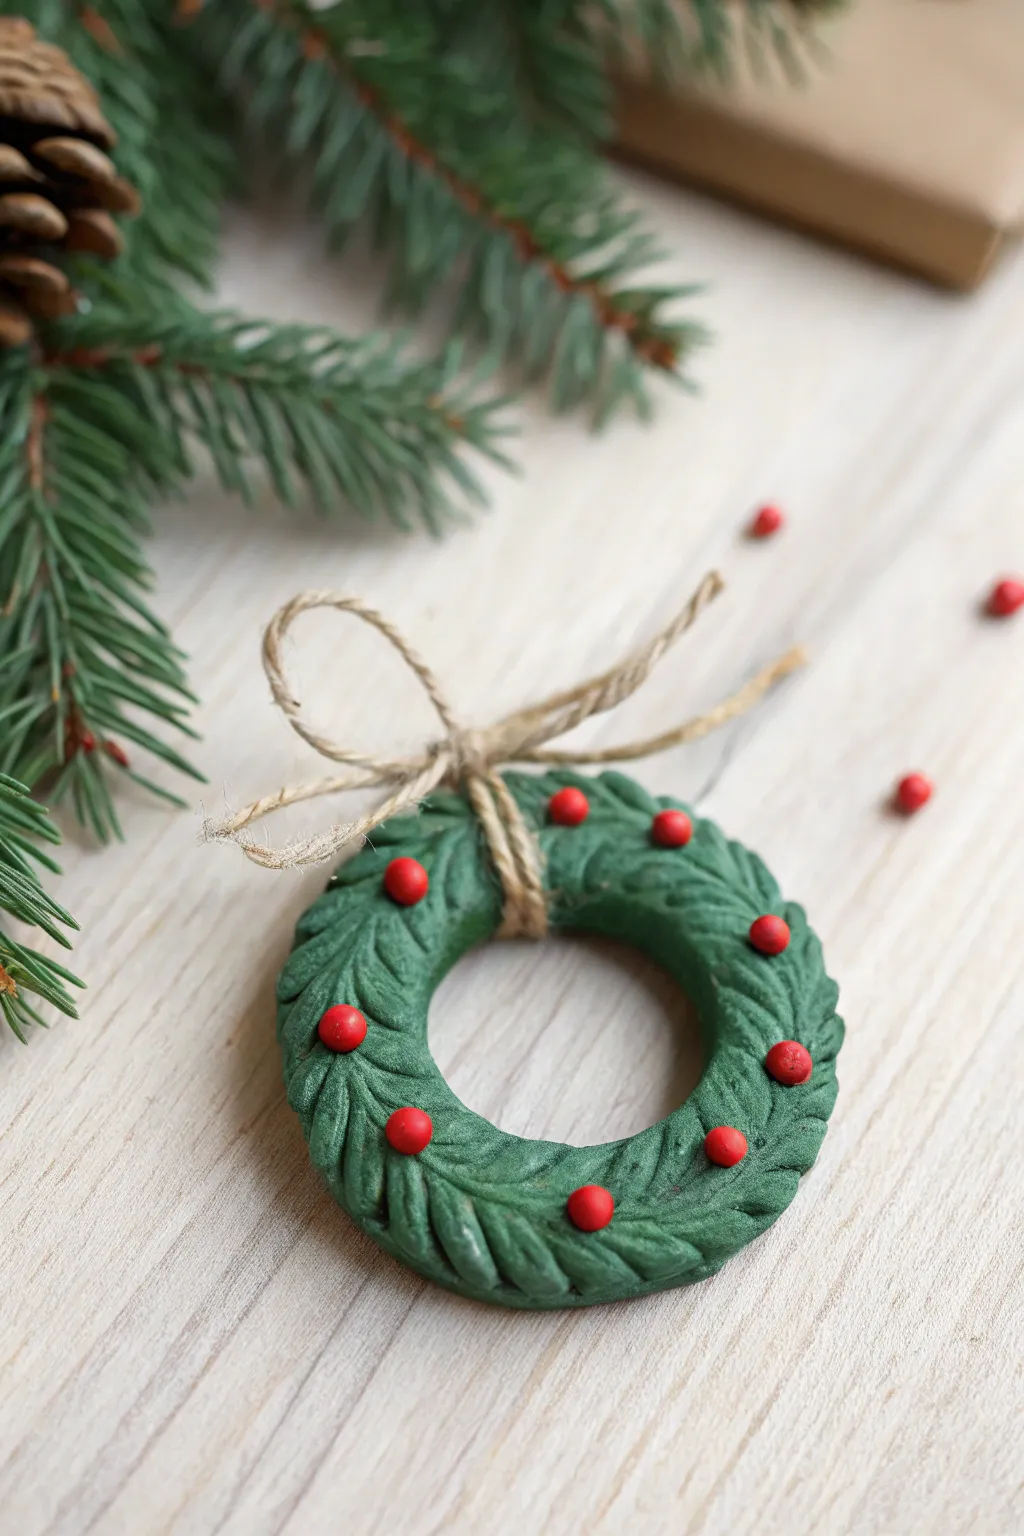
Capture the evergreen spirit of the season with this charming, textured wreath ornament. Featuring delicate carved leaves and tiny pops of berry red, this rustic decoration brings a festive woodland feel to any Christmas tree.
Step-by-Step Guide
Materials
- Green polymer clay or air-dry clay
- Red polymer clay or air-dry clay
- Clay roller or smooth rolling pin
- Small circular cookie cutter (approx. 2-3 inches)
- Smaller circular cutter (approx. 1 inch for the center)
- Needle tool or toothpick
- Small spatula tool or clay knife
- Jute twine or thin hemp cord
- Oven (for polymer clay) or drying rack (for air-dry clay)
- Parchment paper
Step 1: Forming the Wreath Base
-
Condition the Clay:
Begin by taking a chunk of green clay. Knead it thoroughly in your hands until it becomes soft, warm, and pliable. This prevents cracking later on. -
Roll it Out:
Place the clay on a sheet of parchment paper. Use your roller to flatten it into an even sheet, aiming for a thickness of about 1/4 inch. -
Cut the Outer Circle:
Press your larger circular cookie cutter firmly into the clay. Give it a little wiggle to ensure a clean cut, then lift the cutter away. -
Create the Ring:
Center the smaller cutter in the middle of your green circle. Press down to remove the center, leaving you with a perfect donut shape. -
Smooth the Edges:
Dip your finger in a tiny bit of water (for air-dry clay) or baby oil (for polymer) and run it gently around the cut edges to soften any sharpness.
Texture Trick
Don’t have clay tools? A plastic disposable knife or even the edge of a credit card works perfectly for pressing the leaf pattern into the clay.
Step 2: Adding Texture and Detail
-
Start Texturing:
Using a small clay knife or a spatula tool, gently press into the surface of the ring. You want to create angled impressions that mimic overlapping leaves or pine needles. -
Work in Sections:
I find it helpful to work in small sections, creating a repeating chevron pattern all the way around the ring. Keep the pressure light so you don’t distort the circle shape. -
Refine the Leaves:
Use a needle tool to add very fine lines inside some of your larger impressions. This adds realistic vein details to the greenery. -
Make the Berries:
Pinch off tiny amounts of red clay. Roll them between your thumb and forefinger to create small spheres, about the size of a peppercorn. -
Attach the Berries:
Place the red berries randomly around the wreath on top of the green texture. Press them down firmly enough to stick, but gently enough to keep them round. -
Secure the Bond:
If using air-dry clay, a tiny dot of water under each berry helps adhesion. For polymer clay, they usually stick well on their own if the clay is conditioned.
Snowy Sparkle
After baking or drying, lightly brush the textured ridges with white acrylic paint or glitter glue to give the wreath a fresh, snow-dusted look.
Step 3: Finishing Touches
-
Harden the Ornament:
Bake your polymer clay wreath according to the package instructions (usually 275°F for 15-30 minutes). If using air-dry clay, leave it on a flat surface for 24-48 hours. -
Cool Down:
Allow the ornament to cool completely or dry fully before handling. It will be fragile while warm or damp. -
Prepare the Hanger:
Cut a piece of jute twine about 8 inches long. -
Loop the Twine:
Feed one end of the twine through the center hole of the wreath. Bring the ends together at the top. -
Tie the Bow:
Tie the twine securely around the top of the ring, forming a rustic bow right against the clay. Ensure the loops are even for a balanced look. -
Trim Excess:
Snip the ends of the twine to your desired length to complete the charming, rustic aesthetic.
Your tiny evergreen masterpiece is now ready to hang on the tree or be gifted to someone special
Candy Cane Twist Charms
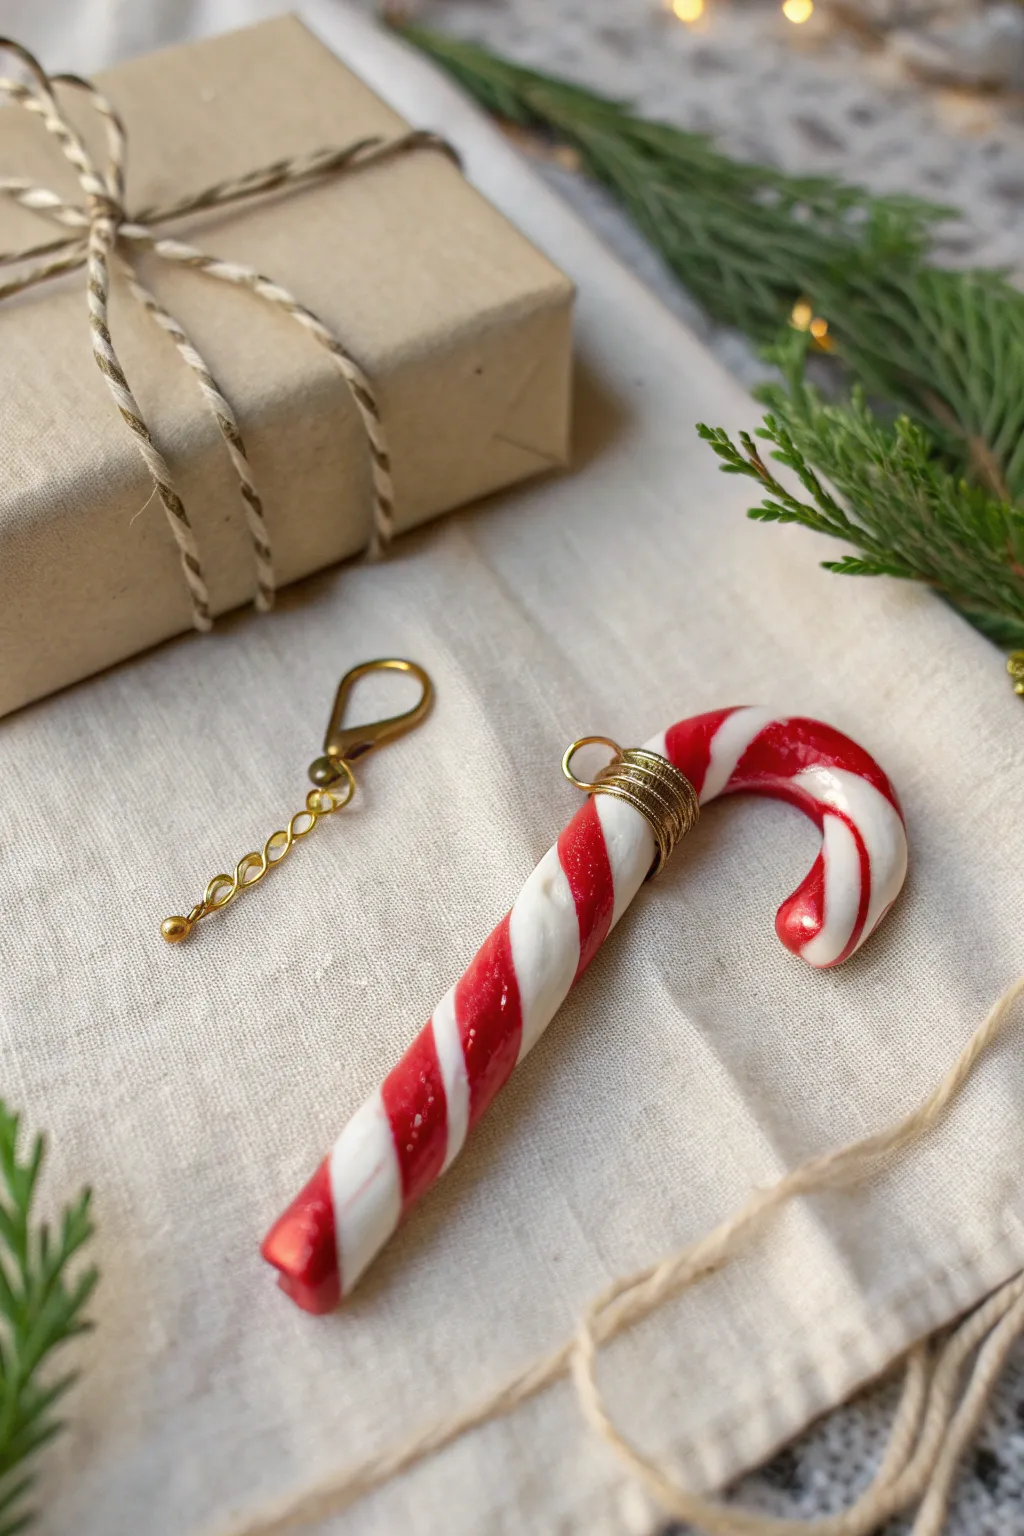
These festive peppermint charms look good enough to eat with their realistic red and white swirls. Finished with a touch of gold hardware, they make perfect stitch markers, zipper pulls, or sweet additions to any holiday necklace.
Detailed Instructions
Materials
- White polymer clay
- Red polymer clay (translucent red or standard red with a touch of glitter works well)
- Glossy clay glaze or varnish
- Gold craft wire (20-22 gauge)
- Wire cutters and round nose pliers
- Gold jump rings and lobster clasp chain
- Smooth work surface (ceramic tile or glass)
- Basic clay blade
- Small paintbrush for glazing
Step 1: Creating the Cane
-
Condition the clay:
Start by kneading the white and red clay separately until they are soft, pliable, and free of cracks. -
Roll perfect snakes:
Roll each color into a long, even snake about the thickness of a pencil. Aim for them to be roughly the same length and diameter. -
Start the twist:
Lay the two snakes side-by-side. Pinch them together at one end to anchor them. -
Create the spiral:
Gently twist the two strands around each other. I like to hold one end stationary and roll the other end across my work surface to get an even twist. -
Smooth the seam:
Once twisted, gently roll the combined rope on your work surface. This helps fuse the two colors together and creates that classic smooth candy surface. -
Cut to size:
Using your clay blade, cut the rope into segments about 2-3 inches long, depending on how large you want your final charm.
Smudged Colors?
If the red bleeds onto the white while rolling, clean your hands and surface with a baby wipe. Roll the snake gently without too much downward pressure to keep lines crisp.
Step 2: Shaping and Baking
-
Form the hook:
Take one segment and gently bend the top third over to create the classic shepherd’s hook shape. Smooth out any fingerprints. -
Refine the ends:
Check the cut ends of your cane. If they look squashed, gently round them off with your fingertip for a polished look. -
Add wire wrapping:
Cut a short piece of gold wire (about 3 inches). Wrap it neatly around the top curve of the cane 4-5 times to create a decorative bail. -
Create the loop:
With the remaining tail of the wire, use round nose pliers to form a small loop at the top for hanging. -
Bake:
Place your charms on a baking sheet or tile. Bake according to your clay manufacturer’s instructions (usually 275°F/135°C for 15-30 minutes). -
Cool down:
Let the pieces cool completely before handling them. They are fragile while warm.
Dusty Snow Effect
Before baking, lightly brush the white sections with white iridescent mica powder or extra fine glitter. It mimics the look of sugar dusting on real candy.
Step 3: Finishing Touches
-
Apply gloss:
Paint a thin layer of glossy glaze over the entire candy cane to give it that realistic, shiny hard-candy finish. -
Let dry:
Allow the glaze to dry fully, checking for any drips. -
Attach hardware:
Open a gold jump ring using two pairs of pliers (twist sideways, don’t pull apart). -
Connect parts:
Thread the jump ring through the wire loop you made earlier and attach your lobster clasp chain. -
Close the ring:
Twist the jump ring back deeply to close it securely, ensuring your charm won’t slip off.
Now you have a sweet little charm ready to wear or gift to a friend
Stocking Ornaments With Stamped Texture
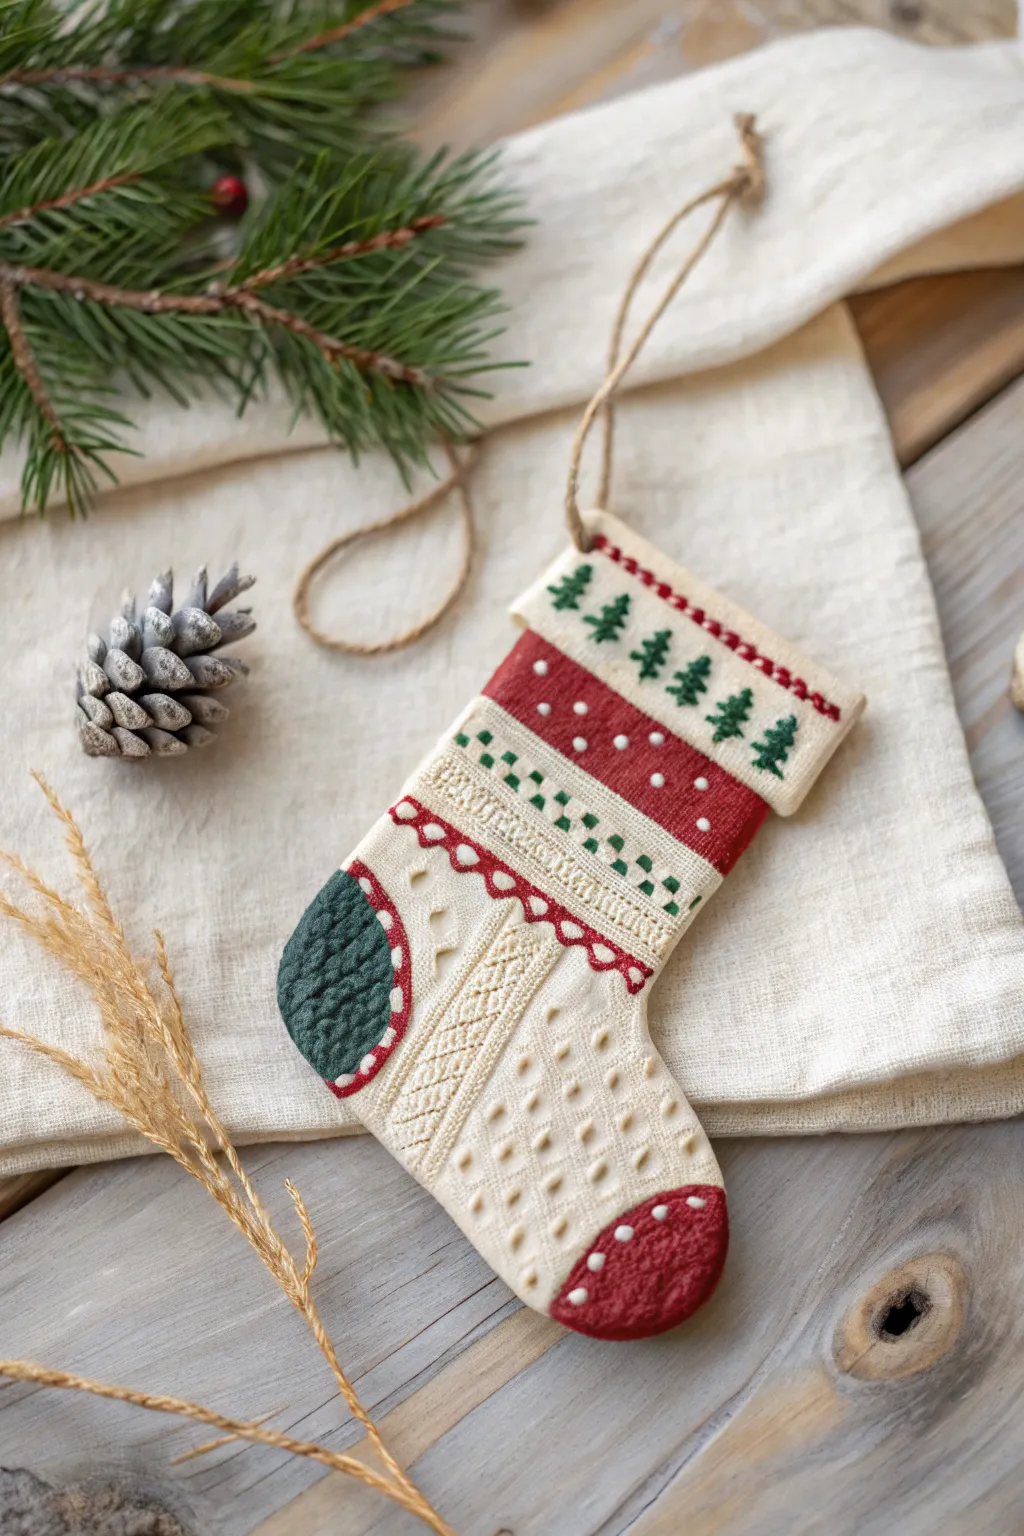
Transform simple clay into a cozy, knit-like masterpiece with this clever stocking ornament. By using everyday objects to stamp intricate textures before painting, you can mimic the look of classic woolen winter wear.
Step-by-Step Guide
Materials
- Air-dry clay or polymer clay (white)
- Rolling pin
- Stocking cookie cutter (or knife and paper template)
- Texture tools: burlap scrap, old sweaters, lace, or clay texture mats
- Skewer or toothpick
- Acrylic paints: barn red, forest green, warm white
- Fine detail paintbrushes (size 0 and 1)
- Jute twine for hanging
- Parchment paper
- Sandpaper (fine grit)
Step 1: Shaping and Texturing
-
Prepare the Clay:
Start by kneading your white clay until it is soft and pliable. Roll it out on parchment paper to an even thickness of about 1/4 inch, ensuring there are no air bubbles. -
Create the Zones:
Before cutting the shape, lightly mark horizontal lines across the clay slab to define where your different patterns will go. This helps map out the bands of the stocking design. -
Stamp the Textures:
This is where the magic happens. Press different items into the clay to create the ‘knit’ look. A piece of burlap or coarse fabric creates a great base weave texture for the toe and heel areas. -
Add Knit Details:
For the cuff and cable-knit sections, use a toothpick or a clay tool to gently press repetitive ‘V’ shapes or braided lines. You want deep, clear impressions so the paint can highlight them later. -
Cut the Shape:
Once you are happy with the textures, use your stocking cookie cutter or a sharp knife to cut out the final shape. Doing this *after* texturing ensures the edges stay clean and the clay doesn’t warp while you stamp. -
Smooth the Edges:
Dip your finger in a little water and gently run it along the cut edges of the stocking to remove any burrs or sharpness. -
Make the Hanging Hole:
Use a skewer to poke a hole at the top corner of the stocking cuff. Wiggle it slightly to ensure the opening is wide enough for your twine. -
Dry Completely:
Lay the ornament flat on a safe surface. Allow air-dry clay to cure for at least 24-48 hours, flipping halfway through to prevent curling. If using polymer clay, bake according to the package instructions.
Step 2: Painting and Finishing
-
Base Coat:
Paint the entire ornament with a warm white or cream acrylic paint. This provides a fresh canvas and seals the clay surface. -
Paint the Heel and Toe:
Using your forest green paint for the heel and barn red for the toe, carefully fill in these sections. The texture you stamped earlier will catch the paint beautifully. -
Create the Wide Red Band:
Paint a thick horizontal stripe of red across the upper portion of the stocking, leaving the cuff white. -
Detail the Cuff:
For the cuff, use a very fine brush to paint tiny green triangles to represent pine trees. Add a thin line of red dots or dashes just below the cuff edge for a stitched look. -
Add Geometric Patterns:
In the middle ‘knit’ section, paint small green checkerboards or diamonds using the smallest brush tip you have. Keep your hand steady and brace your pinky on the table for support. -
Highlight the Textures:
Once the colored blocks are dry, add tiny white dots on top of the red and green sections to simulate snow or the ‘purl’ of a knitting stitch. -
Outline the Sections:
To define the different patterned areas, paint thin, scalloped red lines separating the white cable-knit section from the heel and upper bands. -
Final White Dry Brushing:
I find that lightly dry-brushing a tiny bit of white paint over the colored textured areas (like the green heel) makes the pattern pop and look more fabric-like. -
Attach the Hanger:
Cut a length of jute twine, thread it through the hole you made earlier, and tie a secure knot to create the hanging loop.
Fixing Fuzziness
If your drilled hole or cut edges look rough after drying, use fine-grit sandpaper to gently buff them smooth before you start painting.
Make it Sparkle
While the paint is still wet on the white cuff or the tiny snow dots, sprinkle a pinch of iridescent glitter for a frosty, wintery effect.
Now hang your charming faux-knit stocking on the tree and enjoy the cozy vibes
Simple Angel Ornaments
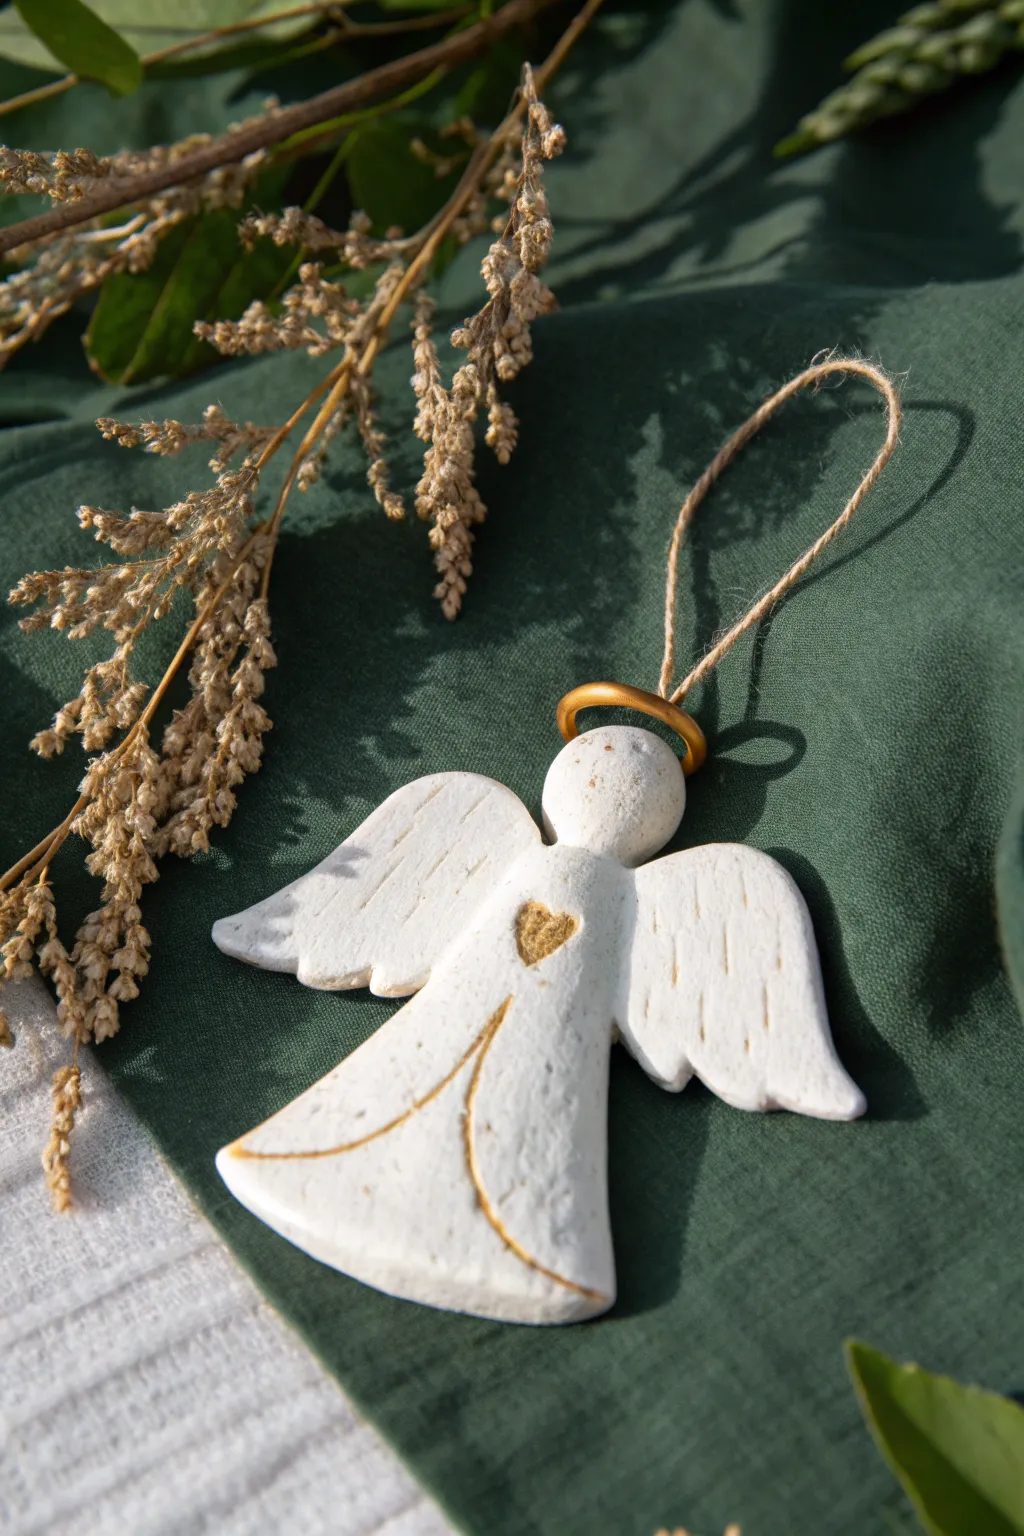
This rustic and charming angel ornament captures the warmth of the season with its simple silhouette and touches of gold. It’s a wonderful project for children that results in a keepsake resembling old-fashioned cookie dough ornaments.
Step-by-Step
Materials
- White air-dry clay or polymer clay
- Rolling pin
- Angel-shaped cookie cutter (optional, for the basic shape)
- Small round cutter (for the head, if assembling separate pieces)
- Plastic knife or clay sculpting tool
- Small bowl of water
- Gold acrylic paint
- Fine detail paintbrush
- Small metal wire or gold ring (for halo)
- Jute twine or ribbon
- Straw or toothpick (for poking a hole)
Step 1: Shaping the Figure
-
Prepare the clay:
Start by taking a handful of white clay and kneading it until it is soft and pliable. If the clay feels too dry, dip your fingers in a little water to smooth it out. -
Roll it out:
Roll the clay out on a smooth surface until it is roughly 1/4 inch thick. Aim for an even thickness so the ornament dries without cracking. -
Cut the body:
If you have an angel cookie cutter, press it firmly into the clay. Alternatively, use a plastic knife to cut a simple triangle shape for the dress. -
Add the head:
Roll a small ball of clay about the size of a marble. Flatten it slightly and attach it to the top point of the triangle body. Use a dab of water to help the pieces bond securely. -
Create the wings:
Cut or mold two wing shapes that look like teardrops or leaves. Attach these to the back of the body, positioning them so they flare out to the sides. -
Smooth the seams:
Using a wet finger, gently rub the areas where the head and wings join the body until the seams disappear and the figure looks like one solid piece.
Step 2: Adding Details
-
Texture the wings:
Take your sculpting tool or a toothpick and gently press vertical lines into the wings to mimic the look of feathers. -
Imprint the heart:
In the center of the angel’s chest, press a small tool or the end of a paintbrush handle to create a small heart-shaped indentation. -
Carve the dress folds:
Draw two curved lines starting from the waist and flowing down to the bottom hem of the dress to suggest folds in the fabric. -
Insert the hanger loop:
Before the clay dries, insert a small metal loop or use a straw to poke a hole through the top of the head for hanging. -
Attach the halo:
Form a tiny ring from clay or a small gold jewelry ring. Press this gently onto the top or back of the head. If utilizing clay for this, make sure to attach it securely with water.
Cracking Clay?
If small cracks appear while drying, don’t panic. Mix a tiny bit of fresh wet clay with water to make a paste and smooth it over the crack.
Step 3: Finishing Touches
-
Dry the ornament:
Place the angel on a flat surface lined with parchment paper. Let it air dry completely for 24-48 hours, flipping it over halfway through to ensure even drying. -
Sand edges:
Once fully dry and hard, inspect the edges. I find that a quick rub with fine-grit sandpaper removes any rough burrs and gives it a professional finish. -
Paint the details:
Dip a fine paintbrush into gold acrylic paint. Carefully fill in the indented heart and trace the carved lines on the dress. -
Gild the halo:
Paint the clay halo gold to match the other details. If you used a metal ring, you can skip this step. -
String it up:
Cut a length of natural jute twine. Thread it through the hole or metal loop at the top, tying a secure knot to create the hanger.
Textured Dress
Before cutting the shape, press a piece of lace doily or a textured fabric onto the raw clay slab to imprint a beautiful pattern on the angel’s dress.
Your little angel is now ready to watch over the Christmas festivities from the tree branches
Holly Leaf Print Ornaments
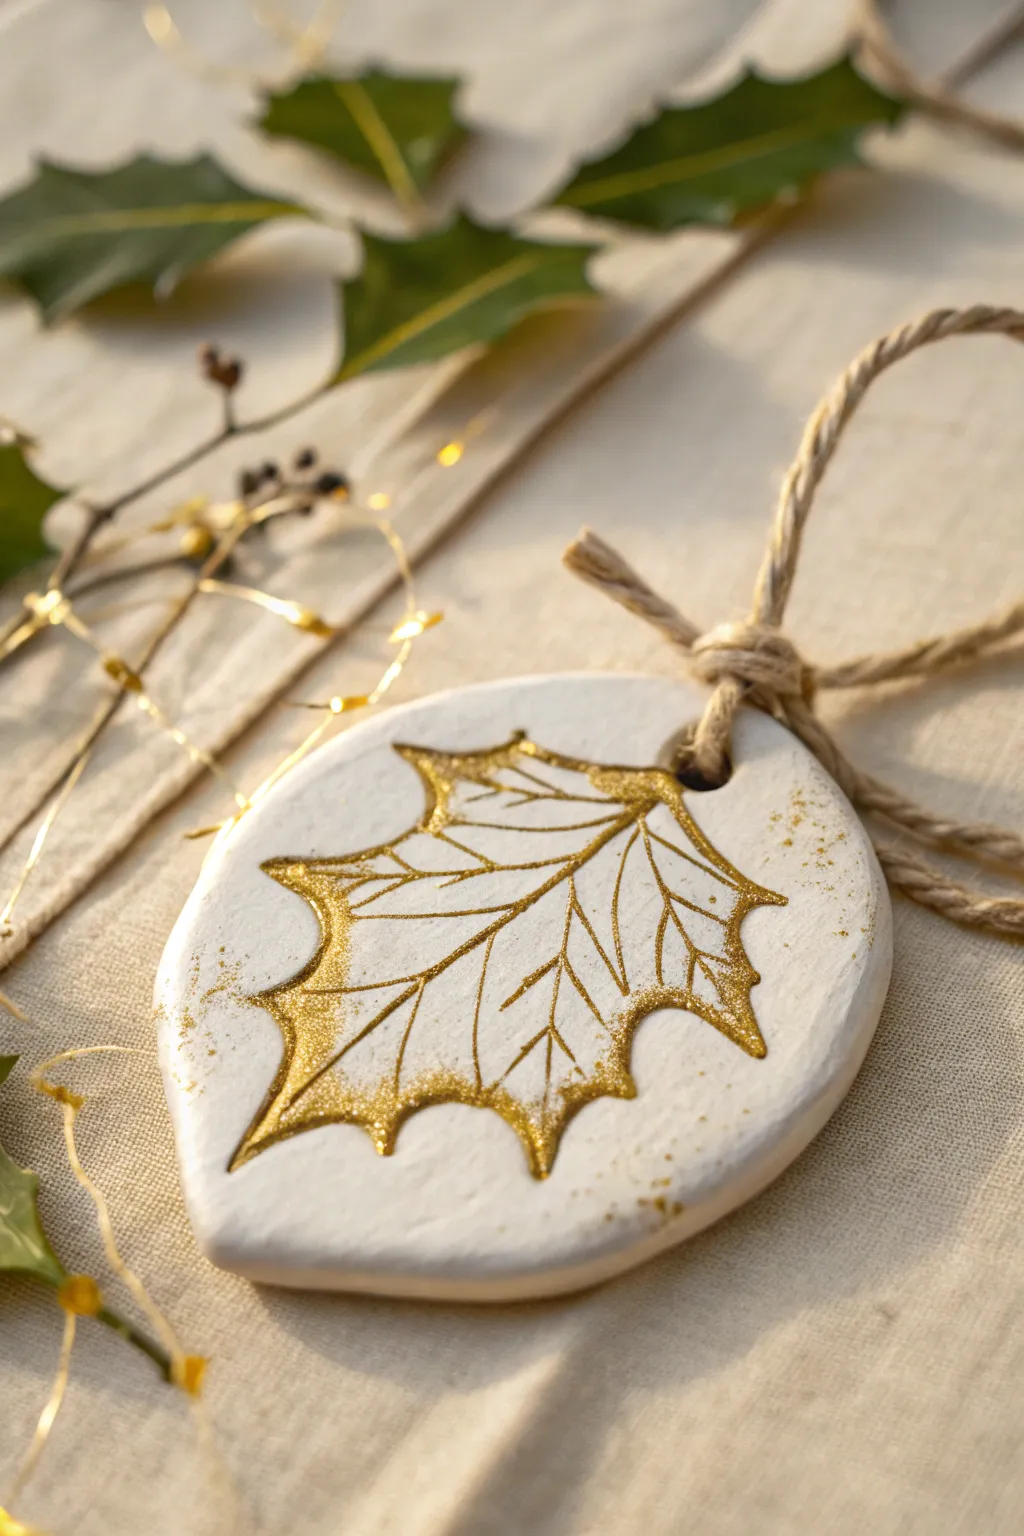
Capture the delicate details of nature with these sophisticated air-dry clay ornaments. Features a stunning gold-painted imprint of a holly leaf on a smooth white base, creating a timeless decoration that gleams beautifully against Christmas tree lights.
Step-by-Step Guide
Materials
- White polymer clay or air-dry clay
- Rolling pin
- Fresh holly leaves (firm, with distinct veins)
- Leaf-shaped cookie cutter (teardrop or broad leaf shape)
- Small straw or cocktail stick (for the hole)
- Fine grit sandpaper
- Gold metallic acrylic paint or liquid gold leaf
- Fine detail paintbrush (size 0 or 1)
- Gold glitter (ultra-fine)
- Jute twine
- Gloss varnish (optional)
Step 1: Shaping the Clay Base
-
Condition the clay:
Begin by kneading your white clay in your hands until it becomes soft, pliable, and warm. This prevents cracks from forming later. -
Roll it out:
On a clean, smooth surface, roll the clay out to an even thickness of about 1/4 inch (5-6mm). If the clay sticks, you can use a tiny bit of cornstarch on your surface. -
Cut the shape:
Using a teardrop or broad leaf-shaped cutter, press firmly into the clay to create your main ornament shape. Alternatively, you can hand-cut a smooth organic shape with a craft knife. -
Smooth the edges:
Dip your finger in a little water and gently run it along the cut edges of the clay to round them off and remove any sharp ridges left by the cutter.
Fixing Faint Prints
If the leaf veins aren’t showing up well, the clay might be too dry. Mist the clay surface lightly with water before pressing the leaf down again for a deeper print.
Step 2: Creating the Impression
-
Select your leaf:
Choose a holly leaf that is stiff and has prominent veins on the back. The back of the leaf always gives the best texture. -
Position the leaf:
Place the holly leaf, vein-side down, into the center of your clay shape. Arrange it carefully so the spiky edges fit nicely within the borders. -
Press the design:
Using your rolling pin, gently but firmly roll over the leaf once. Avoid rolling back and forth, as this can shift the leaf and cause a double image. -
Reveal the print:
Locate the stem of the leaf and carefully peel it back to reveal the detailed impression underneath. -
Add a hanging hole:
Use a straw or a cocktail stick to poke a hole near the top of the ornament. Make sure the hole is large enough for your jute twine to pass through later. -
Dry the ornament:
Let the clay dry completely according to package instructions. For air-dry clay, I usually let them sit for 24-48 hours, flipping them halfway through to ensure even drying.
Level Up: Antique Look
After the gold paint dries, rub a tiny amount of diluted brown acrylic paint over the gold and wipe it back immediately. This settles in the cracks for an aged look.
Step 3: Gilding and Finishing
-
Sand imperfections:
Once bone dry, take fine sandpaper and very lightly buff the edges and surface to ensure a porcelain-smooth finish. -
Paint the veins:
Dip a fine detail brush into your gold metallic paint. Carefully trace inside the depressed lines of the holly leaf impression. The paint should pool slightly in the deepest veins. -
Highlight the edges:
Fill in the rest of the leaf shape with the gold paint, staying strictly within the impressed outline to keep the design crisp. -
Add sparkle:
While the gold paint is still wet, sprinkle a pinch of ultra-fine gold glitter over the painted area. Tap off the excess immediately so the glitter only sticks to the leaf design. -
Add subtle splatters:
Load your brush with gold paint and, using your finger, flick the bristles near the ornament to create tiny, subtle gold speckles on the white background. -
Seal the piece:
If you want extra durability, apply a coat of gloss varnish over the entire piece once the paint is fully dry. -
String it up:
Cut a length of jute twine, thread it through the hole, and tie a simple knot at the base of the loop to secure it.
Now you have a stunning, nature-inspired ornament ready to hang or gift
Mini Christmas Gnomes
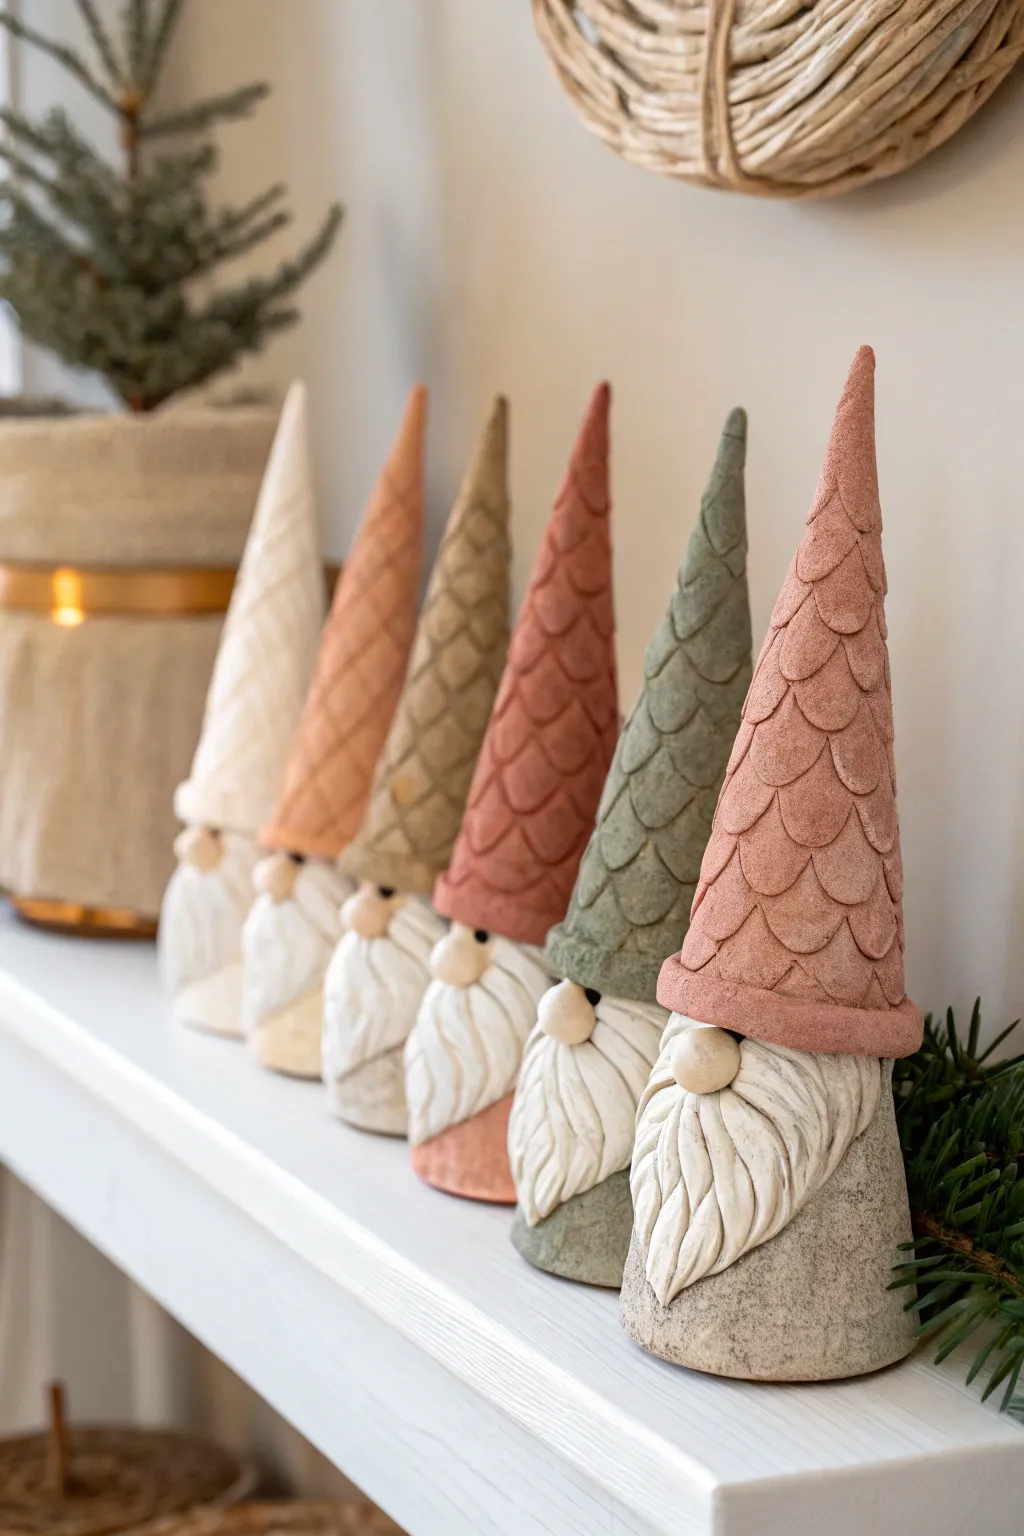
Create a charming village of Scandinavian-inspired gnomes with these textured clay figures that mimic the look of carved stone. With their tall, scale-patterned hats and flowing beards, these timeless decorations utilize simple texture tools to achieve a high-end, artisan finish.
Detailed Instructions
Materials
- Air-dry clay (stone or white color)
- Small rolling pin
- Pointed modeling tool or toothpick
- Small round cutter or piping tip (approx. 0.5 inch)
- Acrylic paints (terracotta, sage green, cream, beige)
- Matte clear sealant
- Water cup and sponge
- Textured fabric or sandpaper (optional)
Step 1: Forming the Base Body
-
Shape the core:
Begin by rolling a ball of clay roughly the size of a tangerine, then gently roll it against your work surface to elongate it into a thick cylinder. This will be the hidden body of your gnome. -
Flatten the base:
Tap the bottom of your cylinder firmly on the table to create a flat, stable base so the gnome won’t wobble. -
Create the robe texture:
Take a small pinch of clay and roll it flat. Wrap this around the lower part of the cylinder to create the ‘robe.’ For that stone-like texture visible in the photo, I like to gently press a piece of coarse sandpaper or rough fabric against the wet clay.
Step 2: Sculpting the Beard and Nose
-
Form the beard shape:
Roll a teardrop shape of clay, flatten it slightly, and press it onto the front of the body, starting about halfway up. The point of the teardrop should hang down towards the base. -
Add hair details:
Using a pointed modeling tool or a toothpick, draw deep, waving lines vertically down the beard. Vary the pressure to create thick, flowing strands that mimic real hair. -
Shape the nose:
Roll a small, smooth pea-sized ball of clay. Place this directly at the top center of the beard, pressing gently so it adheres without losing its round shape.
Clean Scale Patterns
If you don’t have a rounded cutter for the scales, the cap of a marker or even a drinking straw cut in half lengthwise makes a perfect tool for stamping those U-shapes.
Step 3: Crafting the Signature Hat
-
Make the cone:
Roll a larger cone shape that is taller than the body. The base of this cone needs to be wide enough to cover the top of the body and overlap slightly over the nose. -
Position the hat:
Place the cone on top of the body. Pull the front brim down slightly so it rests right on top of the nose, looking like it’s tucked snugly. -
Create the brim detail:
Roll a very thin snake of clay and wrap it around the bottom edge of the hat to create a distinct brim. Blend the upper edge of this snake into the hat for a seamless transition. -
Imprint the scales:
This is the crucial step for the look. Use a small U-shaped tool (like the end of a bobby pin or a small piping tip) to press scale patterns into the hat. Start at the bottom rim and work your way up to the tip, overlapping rows like roof shingles.
Hat Tip Drooping?
If the tall hat starts to bend or sag while wet, insert a toothpick or a crumpled cone of aluminum foil inside the clay cone to act as an internal armature for support.
Step 4: Finishing Touches
-
Smooth and refine:
Look over your gnome for any unintentional fingerprints. Dip your finger in a little water to smooth out rough spots on the nose or hat brim. -
Dry thoroughly:
Let the gnomes dry completely. Air-dry clay can take 24-48 hours depending on thickness. Flip them occasionally if the bottom stays damp. -
Apply base colors:
Paint the hat in muted, earthy tones like terracotta, sage green, or sandstone beige. Keep the paint matte for a natural look. -
Whitewash for texture:
Once the base color is dry, mix a tiny bit of white paint with water. Brush it over the textured hat and beard, then immediately wipe most of it off with a rag. This highlights the scale pattern and beard strands. -
Seal:
Finish with a coat of matte sealant to protect your work without making it shiny.
Arranging these little gnomes in a row creates a wonderful festive display for your mantelpiece
Star And Snowflake Hanging Set
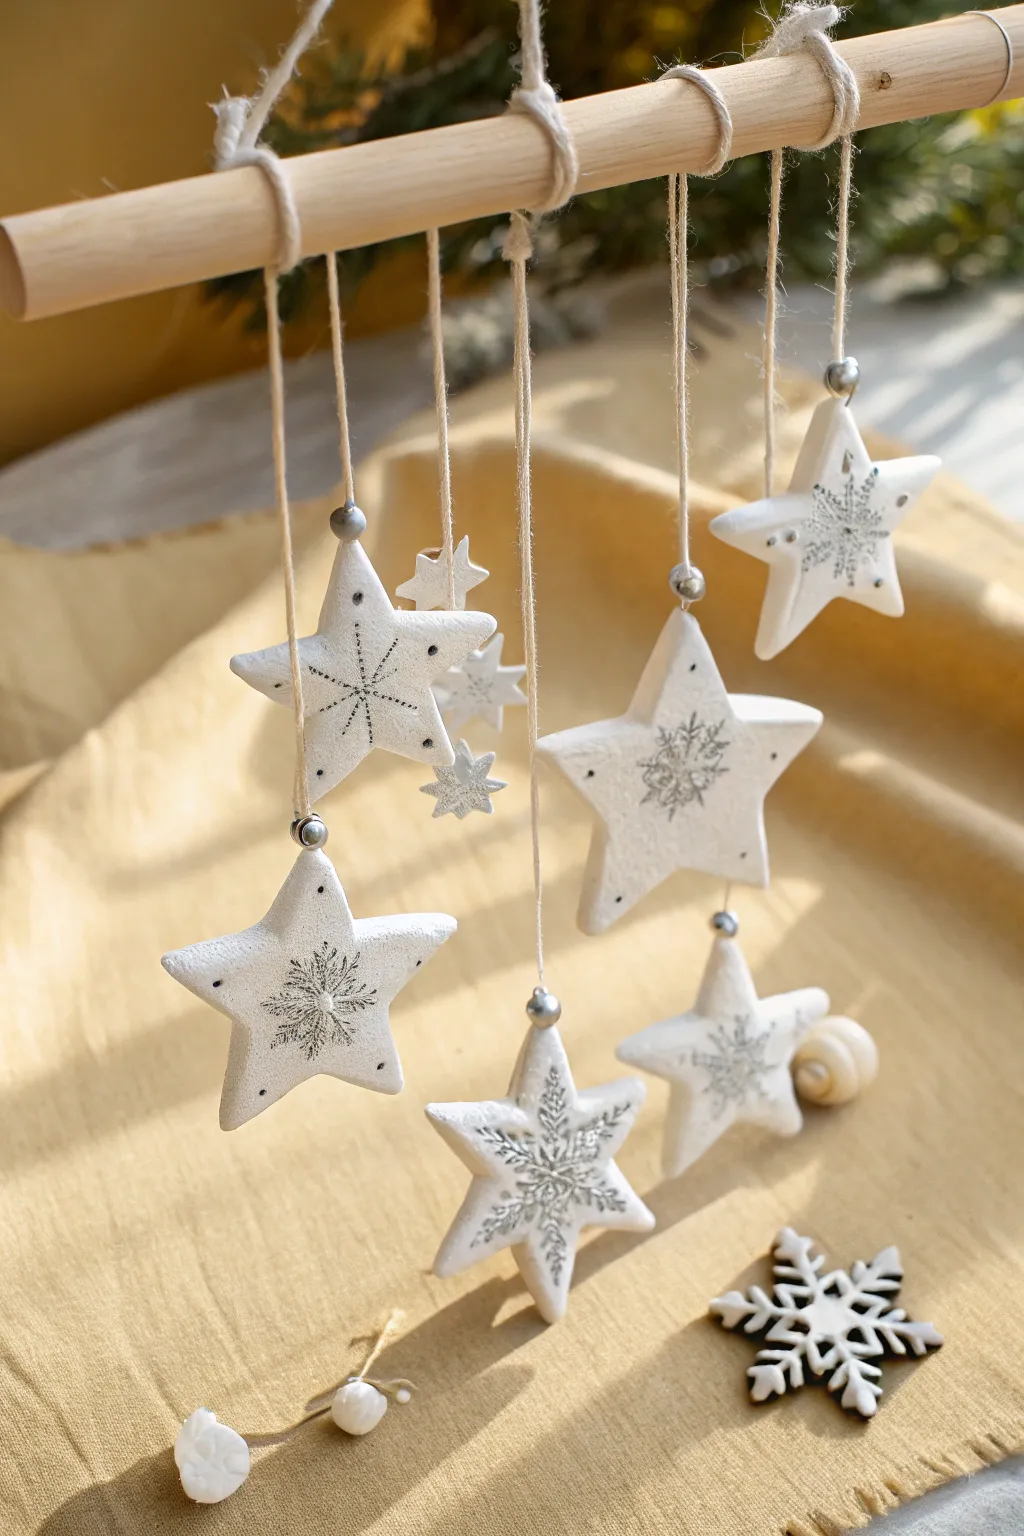
Create a dreamy winter wonderland with this elegant hanging mobile made from simple white clay stars. The delicate silver snowflake details and natural wooden elements give it a cozy, rustic-chic look perfect for a kid’s room or holiday corner.
Step-by-Step Tutorial
Materials
- White air-dry clay (or polymer clay)
- Star-shaped cookie cutters (various sizes)
- Wooden dowel (approx. 12 inches long)
- Natural jute twine or thin hemp string
- Silver metallic paint pen or fine brush with silver acrylic paint
- Small silver craft beads
- Rolling pin
- Straw or toothpick (for making holes)
- Parchment paper
- Sandpaper (fine grit)
Step 1: Shaping the Stars
-
Prepare the Clay:
Start by kneading a handful of white air-dry clay until it is soft and pliable. If the clay feels too dry, dip your fingers in water to rehydrate it slightly. -
Roll it Out:
Place the clay on a sheet of parchment paper to prevent sticking. Use a rolling pin to flatten the clay to an even thickness of about 1/4 inch. -
Cut the Shapes:
Press star-shaped cookie cutters into the clay. Cut out around 6 to 8 stars in varying sizes for visual interest. You can also hand-cut a few tiny jagged snowflake shapes if you’re feeling adventurous. -
Adding Holes:
Before the clay dries, use a drinking straw or a toothpick to poke a neat hole through the top point of each star. This is essential for hanging them later. -
Smoothing Edges:
Dip your finger in a little water and gently run it along the cut edges of each star to smooth out any roughness from the cutter. -
Drying Time:
Lay the stars flat on the parchment paper and let them air dry completely. This usually takes 24-48 hours depending on humidity. Flip them halfway through so the bottom dries evenly. -
Refining:
Once fully hardened, inspect your stars. If there are any sharp burrs or rough spots, gently sand them down with fine-grit sandpaper until smooth.
Step 2: Decoration & Assembly
-
Drawing Snowflakes:
Using a silver metallic paint pen, draw delicate snowflake patterns on the front of each star. Start with a central cross and add smaller ‘V’ shapes to the arms. -
Adding Detail:
For variety, make some snowflakes large and central, while adding tiny dots or smaller flakes to the tips of other stars. -
Preparing the Frame:
Take your wooden dowel and tie a long piece of twine to both ends to create the main hanger. Secure the knots with a dab of glue if necessary so they don’t slip. -
Cutting Strings:
Cut 5 to 7 lengths of twine in varying sizes. Having stars hang at different heights creates a much more dynamic look. -
Attaching Stars:
Thread a piece of twine through a star’s hole. I like to string a small silver bead onto the twine first so it sits right on top of the star for a finished look. -
Second Bead Trick:
If you want a bead below the star, tie a large knot at the very end of the string, thread a bead, then threading the star so it rests on the bead. -
Mounting to Dowel:
Tie the free end of each star’s string onto the wooden dowel. Arrange them so the lengths are staggered, perhaps keeping the longest ones in the middle. -
Securing Knots:
Once you are happy with the arrangement, slide the loops to space them evenly. You can secure each loop to the dowel with a tiny drop of clear glue to keep them from sliding together. -
Final Adjustments:
Trim any excess twine from your knots for a tidy appearance and give the mobile a gentle spin to make sure everything balances well.
Clean Cuts Pro-Tip
If your clay sticks to the cookie cutter, dip the cutter into a bit of cornstarch or flour before pressing it into the clay. The shapes will pop out cleanly every time.
Level Up: Scented Stars
Mix a few drops of cinnamon or pine essential oil into the clay while kneading. Your mobile will release a gentle, festive scent as it spins in the air.
Hang your beautiful star mobile near a window where the light can catch the silver details as it slowly turns
Photo Frame Wreath Ornaments
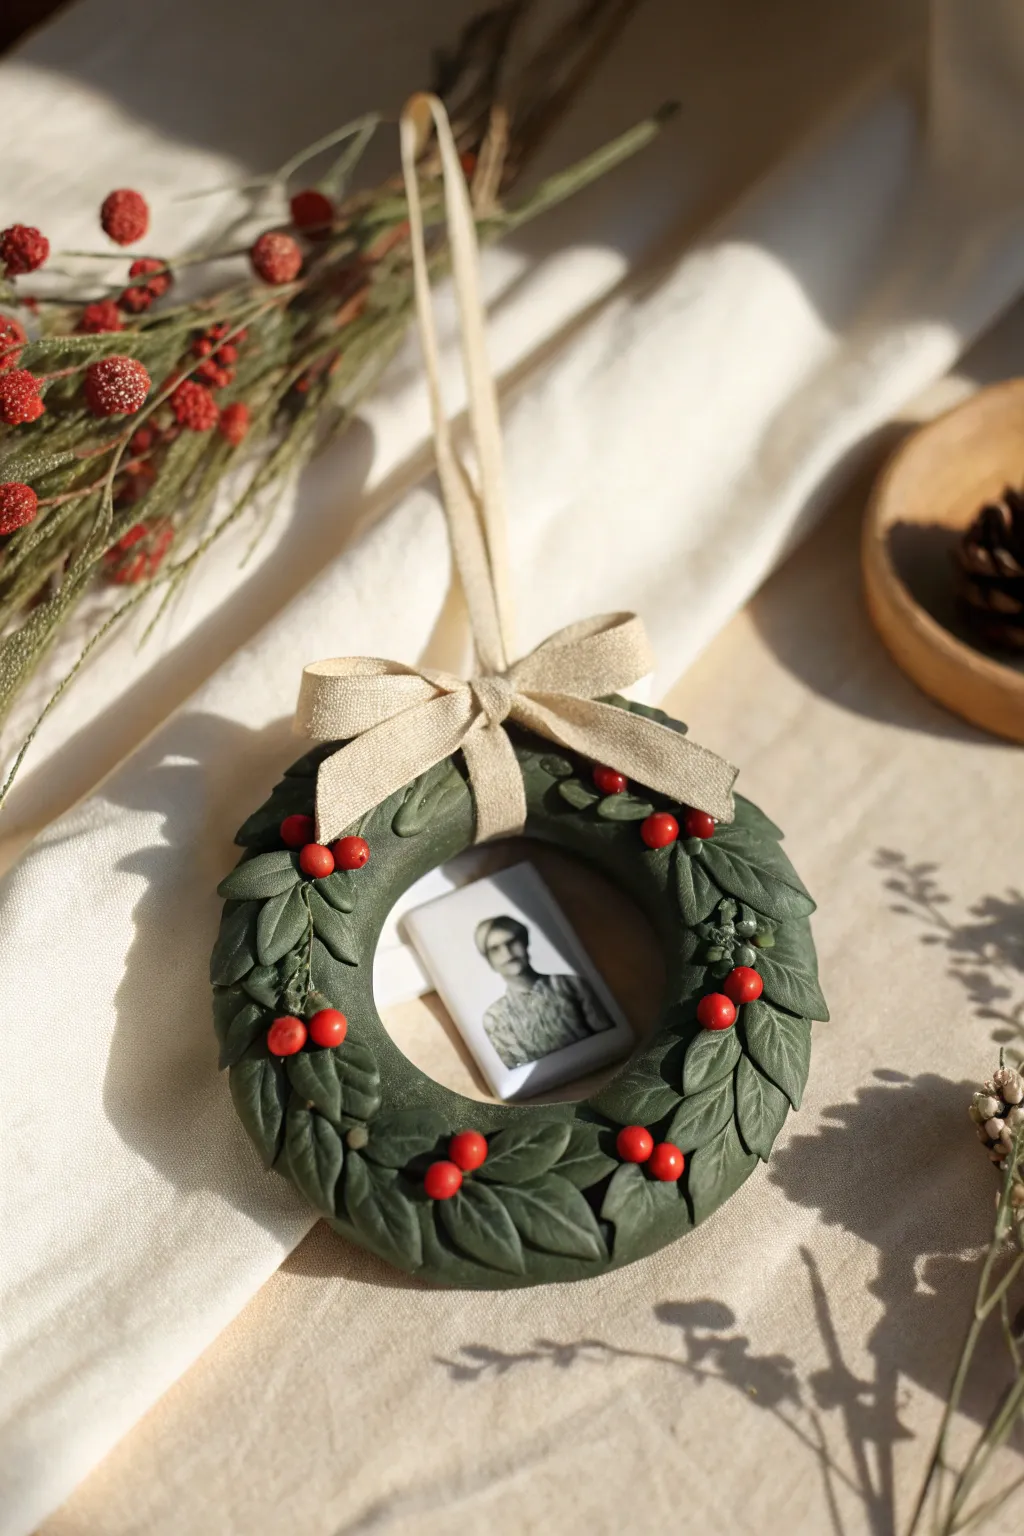
Immortalize a favorite memory inside a charming, handmade evergreen wreath. This polymer clay ornament features delicate, detailed leaves and bright holly berries, creating a timeless decoration that feels both rustic and refined.
Detailed Instructions
Materials
- Dark green polymer clay
- Red polymer clay for berries
- Small square photo print (approx. 1-1.5 inches)
- Glossy glaze or polyurethane varnish
- Thin beige cotton ribbon or twill tape
- Leaf veining tool or needle tool
- Small teardrop cutter (optional, can hand-shape)
- Rolling pin
- Liquid clay or bake-and-bond
- Craft knife
- Super glue or strong craft glue
Step 1: Forming the Base
-
Create the wreath ring:
Start by rolling a snake of dark green clay about 1/2 inch thick and 6 inches long. Join the ends together to form a circle, smoothing the seam so it is invisible. This doesn’t need to be perfectly smooth as it will be covered. -
Prepare the leaves:
Roll out a sheet of dark green clay to about 1/8 inch thickness. Use a small teardrop cutter to punch out approximately 40-50 small leaves. If you don’t have a cutter, simply roll tiny balls and pinch one end to create a teardrop shape. -
Add veining texture:
Take each leaf and use a needle tool or specialized veining tool to press a central line down the middle. Add tiny diagonal veins branching off the center line to give them a realistic foliage look.
Clean Edges Pro-Tip
Before baking, run a baby wipe or a brush dipped in rubbing alcohol over the red berries. This removes fingerprints and ensures they bake smooth and bright.
Step 2: Building the Foliage
-
Layer the first leaves:
Apply a very thin layer of liquid clay to your base ring to help adhesion. Start pressing leaves onto the ring, overlapping them slightly so the tips point in the same direction (clockwise or counter-clockwise). -
Create density:
Continue layering leaves around the entire circle. I like to tilt some slightly inward and others outward to create a three-dimensional, fluffy wreath effect rather than a flat ring. -
Cover any gaps:
Inspect your wreath for any spots where the base clay shows through. Tuck smaller, extra leaves into these gaps to ensure a lush, full appearance.
Step 3: The Berry Details
-
Make the holly berries:
Roll tiny amounts of red clay into small, smooth spheres. You will need clusters of two or three berries for various spots on the wreath. -
Attach the berries:
Place small dots of liquid clay on top of the leaves where you want your accents. Gently press the red berries into place in clusters of three or pairs, ensuring they stick well to the foliage beneath. -
Bake the clay:
Place your finished wreath on a baking sheet lined with parchment paper or cardstock. Bake according to the manufacturer’s instructions for your specific brand of polymer clay (usually around 275°F/135°C for 15-30 minutes). -
Cool and seal:
Allow the wreath to cool completely. Once cool, apply a satin or matte varnish to seal the piece, giving it a professional finish without being too shiny.
Heirloom Upgrade
Use a black-and-white or sepia filter on your photo before printing. This matches the rustic clay tones and gives the ornament a vintage, timeless feel.
Step 4: Assembly
-
Prepare the photo:
Trim your printed photo into a small square or rectangle that fits nicely behind the wreath’s center opening. It’s helpful to hold the wreath over the photo first to check the framing. -
Attach the photo:
Apply a rim of strong craft glue to the back of the clay wreath opening. Press the photo firmly against the back, face down, so the image shows through the center. -
Tie the bow:
Cut a length of beige cotton ribbon. Tie a small, neat bow and trim the tails at an angle so they drape nicely over the top of the wreath. -
Secure the hanger:
Cut a second loop of ribbon for hanging. Glue the loop to the top back of the wreath. Finally, glue your decorative bow onto the front of the wreath, right at the top center, covering the hanging loop attachment point.
Hang this lovely memory on your tree and enjoy seeing a familiar face surrounded by festive greenery each year
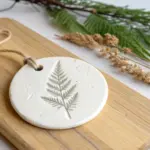
Personalized Clay Gift Tags
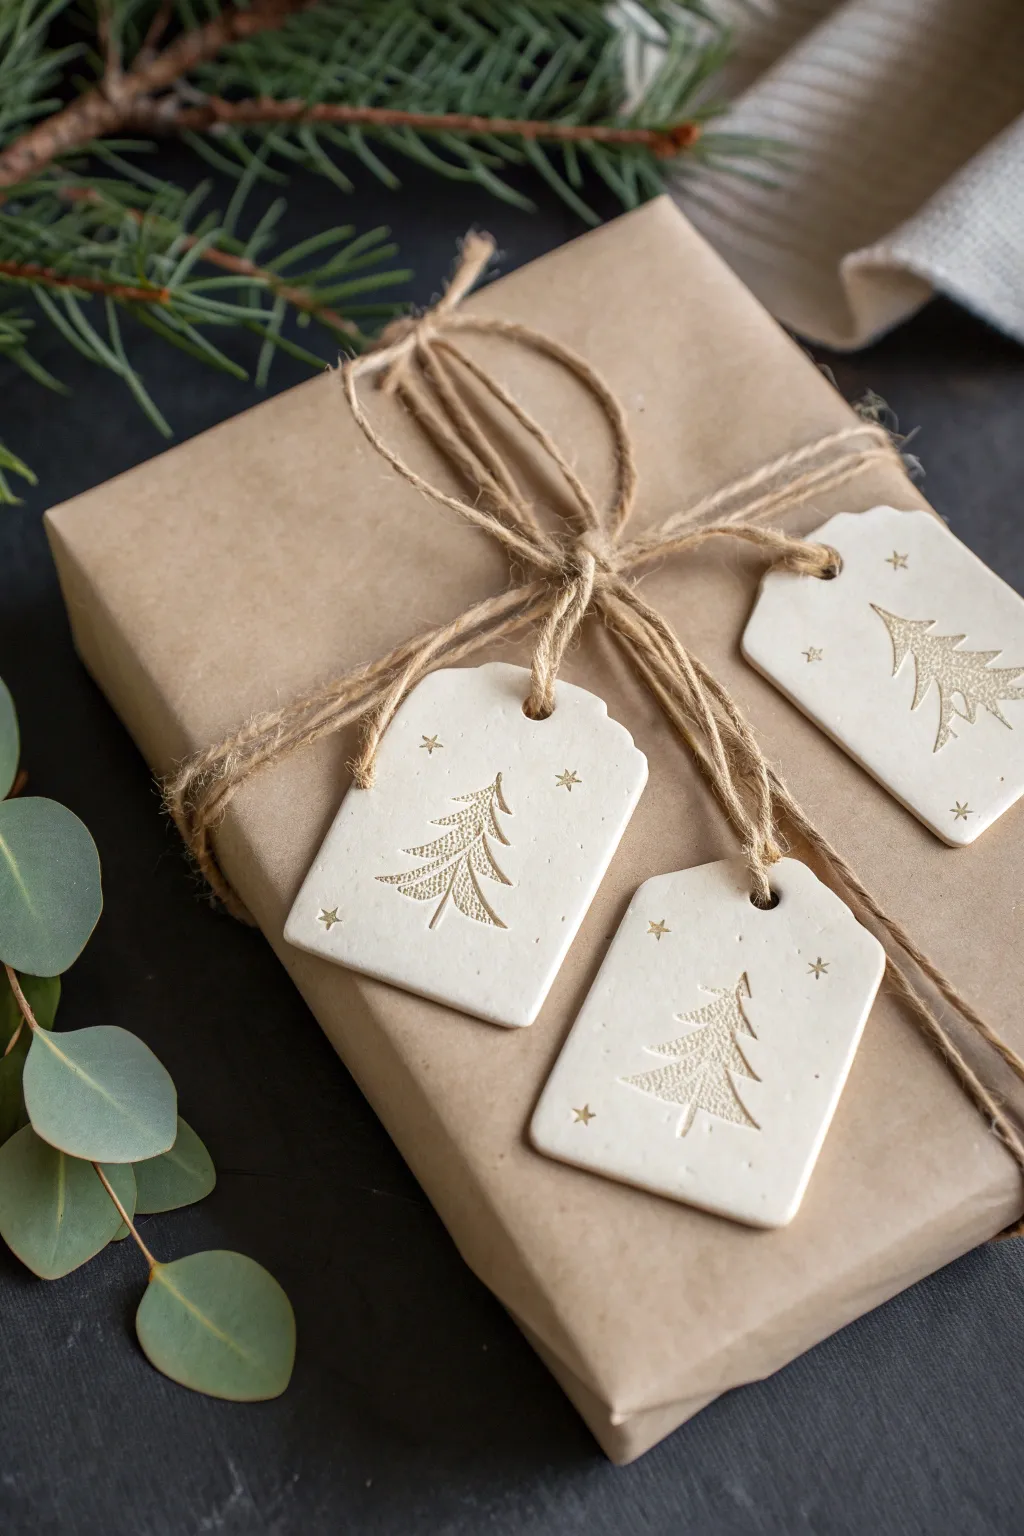
Add a touch of simple, rustic elegance to your holiday wrapping with these beautiful white clay tags. Featuring a minimalist embossed tree design and delicate stars, they look stunning against plain kraft paper and fresh greenery.
Step-by-Step Guide
Materials
- White ozone air-dry clay or polymer clay
- Rolling pin
- Parchment paper or smooth work surface
- Rectangular tag cookie cutter (or ruler and knife)
- Small evergreen tree rubber stamp (clean, without ink)
- Tiny star stamp or toothpick
- Straw or skewer (for the hole)
- Fine grit sandpaper (optional)
- Jute twine for tying
- Small bowl of water (for smoothing)
Step 1: Preparation & Cutting
-
Prepare your workspace:
Lay down a sheet of parchment paper to protect your table and prevent the clay from sticking. Tape the corners down so it doesn’t slide around while you work. -
Condition the clay:
Take a handful of white clay and knead it in your hands until it becomes soft, pliable, and free of cracks. This ensures a smooth finish later on. -
Roll out the slab:
Place the clay on the parchment and use your rolling pin to flatten it. You want an even thickness of about 1/4 inch (or 5-6mm)—too thin and they become fragile; too thick and they look chunky. -
Cut the shapes:
Press your rectangular tag cutter firmly into the clay. If you don’t have a specific cutter, simply use a ruler and a craft knife to cut neat rectangles, then snip off the top two corners to create a traditional tag shape. -
Punch the hole:
Use a drinking straw or a skewer to punch a clean hole at the top center of each tag. Make sure the hole is big enough for your jute twine to pass through easily.
Step 2: Design & Drying
-
Smoothing edges:
Dip your finger in a tiny bit of water and run it gently along the cut edges of the tags to soften any sharp ridges or loose bits of clay. -
Stamp the focal point:
Take your clean evergreen tree stamp. Without using any ink, press it firmly into the center of the tag. Apply even pressure so the entire tree outline debosses clearly into the surface. -
Add starry details:
Using a tiny star stamp or the tip of a toothpick, gently press small stars randomly around the tree. Keep it sparse for that minimalist look shown in the photo. -
Dry the tags:
Place the tags on a wire rack or leave them on the parchment to dry. If using air-dry clay, let them sit for 24-48 hours. I find flipping them over halfway through helps them dry flat without curling. -
Final smooth:
Once fully hard, check the edges again. If there are any rough spots, lightly sand them with fine-grit sandpaper for a professional finish. -
Assembly:
Cut lengths of rustic jute twine. Thread several strands through the hole of each tag to match the bundle look in the inspiration photo. -
Wrapping:
Tie the tags securely onto your gift, knotting the jute into a casual bow to complete the natural presentation.
Fixing Cracks
If tiny cracks appear while drying, mix a pea-sized amount of fresh clay with water to make a paste. Fill the crack, smooth it over, and let dry again.
Stamp Stickiness
Dust your rubber stamp lightly with cornstarch or baby powder before pressing it into the wet clay. This ensures a clean release without pulling up the design.
Now your gifts will have a handcrafted, personal touch that recipients might cherish just as much as what’s inside
Mini Holiday Village Scene
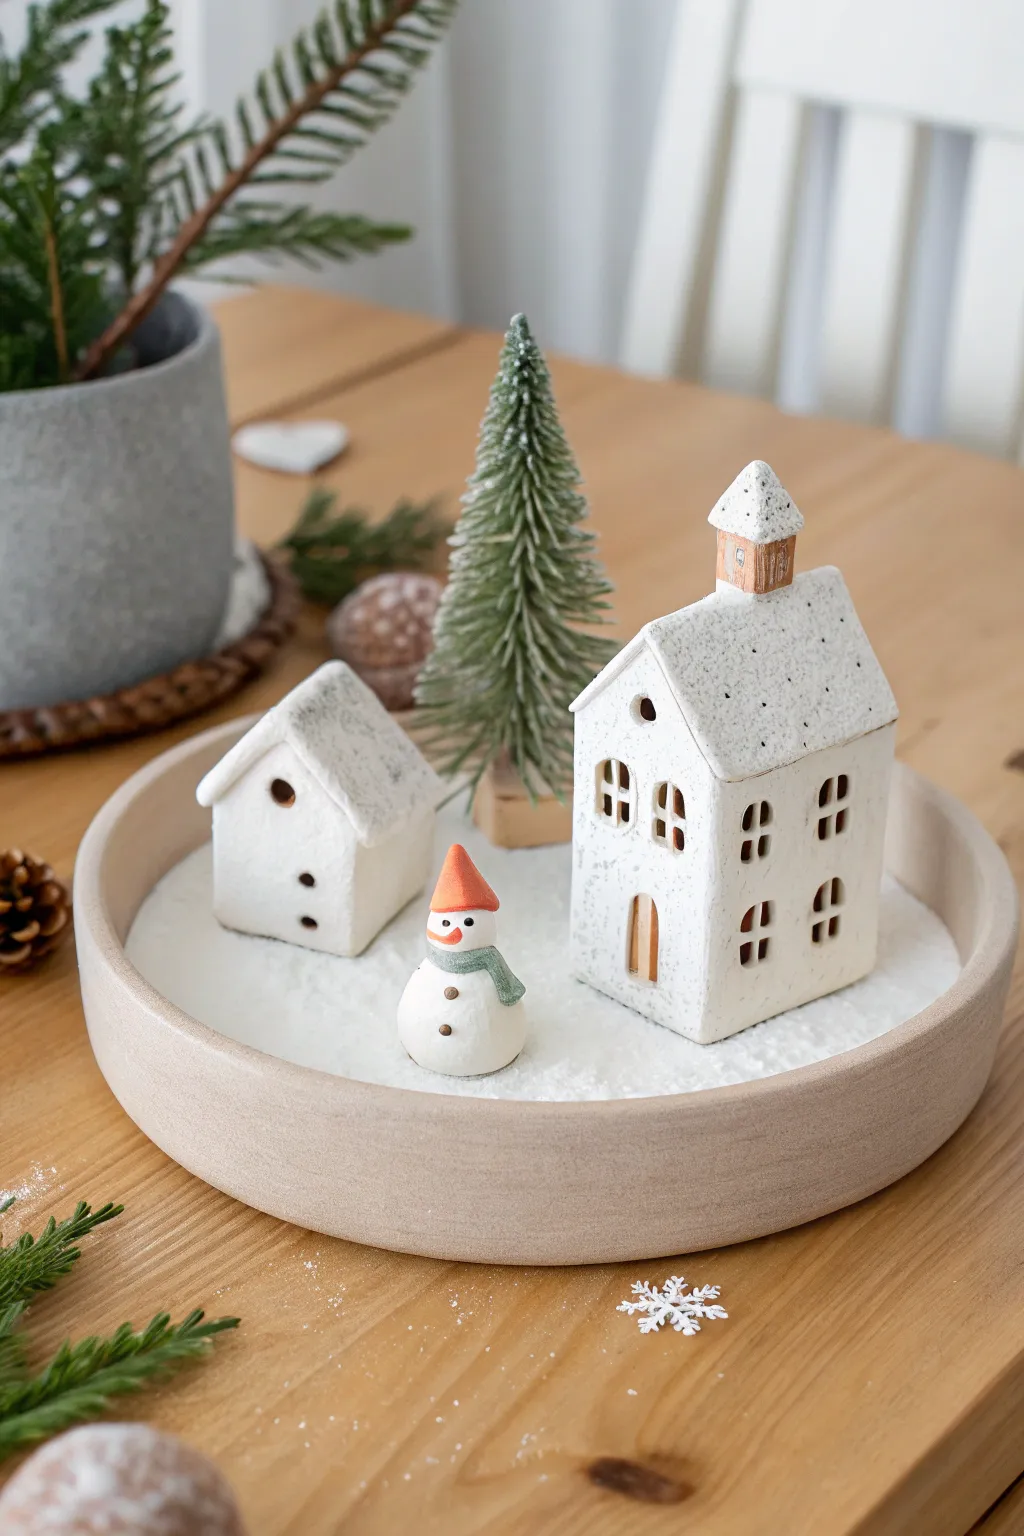
Create your own miniature snowy village that fits perfectly on a tabletop or shelf. Using air-dry clay, this project features charming tiered cottages, a friendly snowman, and frosted evergreen touches for a cozy holiday scene.
How-To Guide
Materials
- White air-dry clay
- Rolling pin
- Craft knife or clay tools
- Textured sponge or toothbrush
- Acrylic paints (orange, black, teal/green, brown)
- Fine detail paintbrush
- Round wooden tray or bowl
- Faux snow, white sand, or Epsom salts
- Small bottle brush tree
- Water and slip (clay water glue)
- Sandpaper (fine grit)
Step 1: Sculpting the Houses
-
Roll your slabs:
Start by rolling out a portion of white air-dry clay to an even thickness of about 1/4 inch. For kids, placing two rulers on either side of the clay can help keep the rolling pin level. -
Cut the walls:
For the taller house, cut four rectangular strips and two pieces with peaked triangles at the top for the front and back gables. For the small cottage, cut smaller, lower rectangles. -
Add windows and doors:
Before assembling, use a small square cutter or a craft knife to cut out window openings. For arched windows or doors, use a straw or a rounded tool to gently press the top arch shape out. -
Texture the surfaces:
Take a textured sponge or an old toothbrush and gently tap it all over the flat clay pieces to give them a rough, stony texture similar to the photo. -
Assemble the structures:
Score the edges of your walls (scratch them up) and add a little water or slip. Press the walls together to form the box shape of the house, smoothing the seams with your finger. -
Attach the roofs:
Cut rectangular slabs for the roofs. Score the top edges of your house walls and press the roof slabs on. For the chimney on the tall house, form a tiny cube and attach it near the peak.
Cracking Clay?
If small cracks appear as the clay dries, mix a tiny bit of fresh clay with water to make a paste and fill the gaps. Smooth it over with a wet finger.
Step 2: Creating the Snowman
-
Form the body:
Roll two balls of clay, one slightly larger for the base and a smaller one for the head. Flatten the bottom of the large ball slightly so it stands upright. -
Stack the snowman:
Score and slip the top of the body and press the head firmly onto it. Smooth the connection slightly so it doesn’t fall off as it dries. -
Add accessories:
Roll a tiny cone for the carrot nose and attach it. Flatten a thin strip of clay to wrap around the neck as a scarf, creating a little overlap for a natural look. -
Make the hat:
Shape a small cone for a party-style hat and gently press it onto the snowman’s head, tilting it slightly for character.
Step 3: Details & Assembly
-
Let it dry:
Allow all your clay pieces to dry completely for 24 to 48 hours. I find flipping them occasionally helps the bottoms dry evenly. -
Sand edges:
Once fully dry, use fine-grit sandpaper to gently smooth out any sharp corners or rough seams on the houses. -
Paint the snowman:
Use a fine brush to paint the snowman’s nose orange and his hat reddish-orange. Paint the scarf a muted teal or green, and use the handle of the brush dipped in black paint to dot the eyes and buttons. -
Paint house accents:
Dilute some brown paint with water to make a wash. Carefully paint the inside edges of the windows and the door reveal to add depth. Paint the chimney orange-brown. -
Apply the speckled finish:
Dilute black or gray paint slightly. Dip a stiff brush (like a toothbrush) in it and run your thumb over the bristles to flick tiny speckles onto the white houses and roofs for a stone effect. -
Prepare the tray:
Fill your round wooden tray with a layer of faux snow, white sand, or Epsom salts to act as the snowy ground. -
Final arrangement:
Nestle your clay houses and snowman into the snow. Add a small bottle brush tree behind them to complete your festive winter village.
Light It Up
Leave the bottom of your houses open/hollow. Once dry, place a battery-operated LED tea light inside each house to create a warm window glow.
Now you have a serene little winter scene to enjoy all season long
Tealight Luminary Christmas Houses
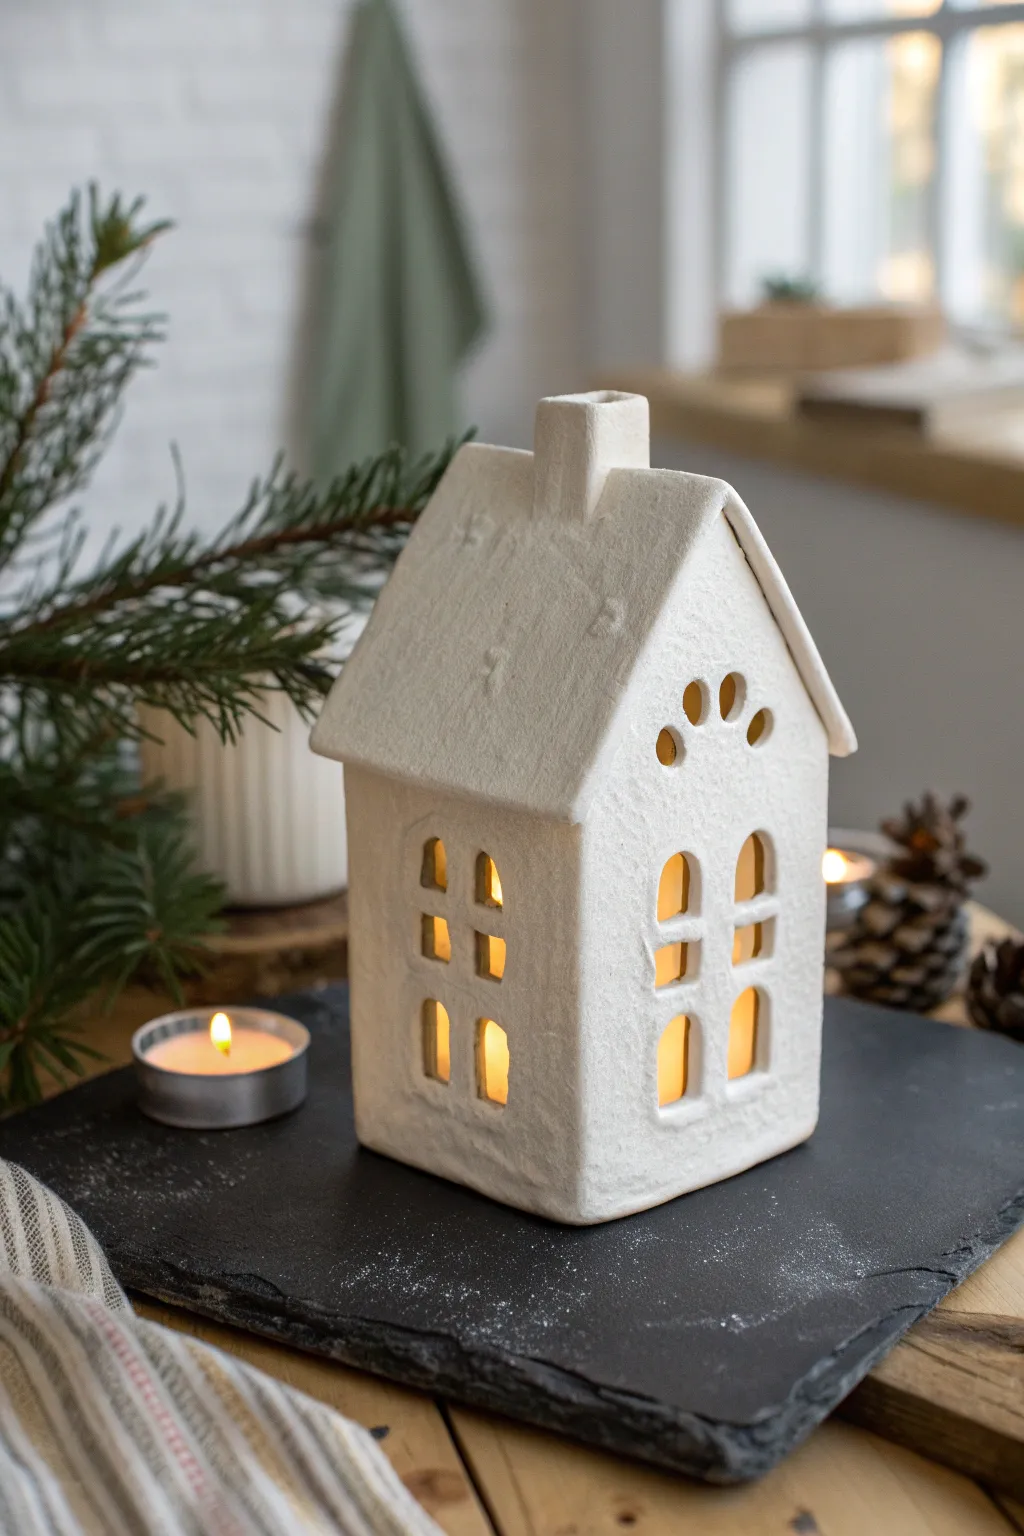
Create a charming winter village scene right on your table with this handmade clay house luminary. Its rustic white finish and warm glowing windows make it a perfect centerpiece for cozy holiday evenings.
Step-by-Step Guide
Materials
- Air-dry clay (white) or polymer clay
- Rolling pin
- Parchment paper or craft mat
- Ruler
- Craft knife or clay cutting tool
- Small clay cutters (rectangle and arch shapes) or a cocktail stick
- Slip (water mixed with a little clay)
- Sanding sponge or fine-grit sandpaper
- White acrylic paint (optional, for a brighter finish)
- Matte sealant spray
Step 1: Preparing the Walls
-
Roll the slab:
Start by rolling out a generous chunk of clay on parchment paper until it is an even thickness, roughly 1/4 inch thick. You want it sturdy enough to stand but thin enough to look delicate. -
Measure and cut walls:
Using a ruler and craft knife, cut out two rectangles for the side walls (approx. 3×5 inches). Then, cut two pentagon shapes for the front and back walls, ensuring the vertical sides match the height of your side rectangles. -
Create window cutouts:
While the pieces are flat, plan your window placement. Use small cutters or carefully trace and cut out arched windows with your knife. For the front, create a symetrical look with upper and lower windows. -
Add decorative vents:
Near the peak of the front gable, punch out a few small circular holes or teardrop shapes. This adds charm and also helps heat escape if you use real candles. -
Texture the surface:
If you want that rustic, stone-like look shown in the photo, gently dab a crumpled ball of aluminum foil or a stiff bristle brush over the exterior surfaces of your clay pieces.
Clean Cuts Matter
If your window cutouts look ragged, wait 15 minutes for the clay to firm up slightly, then re-cut or smooth the edges with a wet paintbrush.
Step 2: Constructing the House
-
Score the edges:
Take your needle tool and scratch up the vertical edges where the walls will meet. This rough texture helps the clay bond. -
Apply slip:
Dab a little clay slip (liquid clay mixture) onto the scored edges acting as a glue. -
Assemble the walls:
Stand the walls up and press the scored edges together. I find it helpful to place a small box or block inside temporarily to support the walls while I work on the seams. -
Smooth the seams:
Use your finger or a modeling tool to blend the clay at the corners so the seams disappear and the structure becomes solid.
Make a Village
Make varied heights and widths to create a whole street. Try adding textured ‘shingles’ to one roof using a popsicle stick for variety.
Step 3: The Roof and Chimney
-
Cut roof panels:
Roll out more clay and cut two rectangular roof panels. They should be slightly wider and longer than the house frame to create an overhang. -
Attach the roof:
Score and slip the top angled edges of the house walls. Place the roof panels on top, joining them at the peak. Smooth the top ridge where they meet. -
Make the chimney:
Form a small rectangular tube from clay scraps. Cut the bottom at an angle that matches the slope of your roof. -
Attach the chimney:
Score the spot on the roof where you want the chimney, add slip, and press it firmly into place, blending the seams carefully.
Step 4: Finishing Touches
-
Let it dry:
Allow the house to dry completely. For air-dry clay, this usually takes 24-48 hours. Rotate it occasionally so all sides dry evenly. -
Sand imperfections:
Once bone dry, use a sanding sponge to gently smooth any sharp edges or rough spots on the roofline and windows. -
Paint (Optional):
If your clay dried off-white or gray, apply a coat of matte white acrylic paint to achieve that snowy, crisp look. -
Seal:
Protect your work with a matte spray sealant, then place an LED tealight inside to illuminate your new home decor.
Enjoy the gentle glow of your handmade village as it lights up your holiday shelf