When I want handmade holiday magic without a big, fussy setup, I reach for air-dry clay or polymer clay and make a batch of simple ornaments. These ideas are my go-to favorites for pieces that look charmingly homemade, dry or bake up nicely, and are easy to personalize.
Classic Cookie-Cutter Ornaments
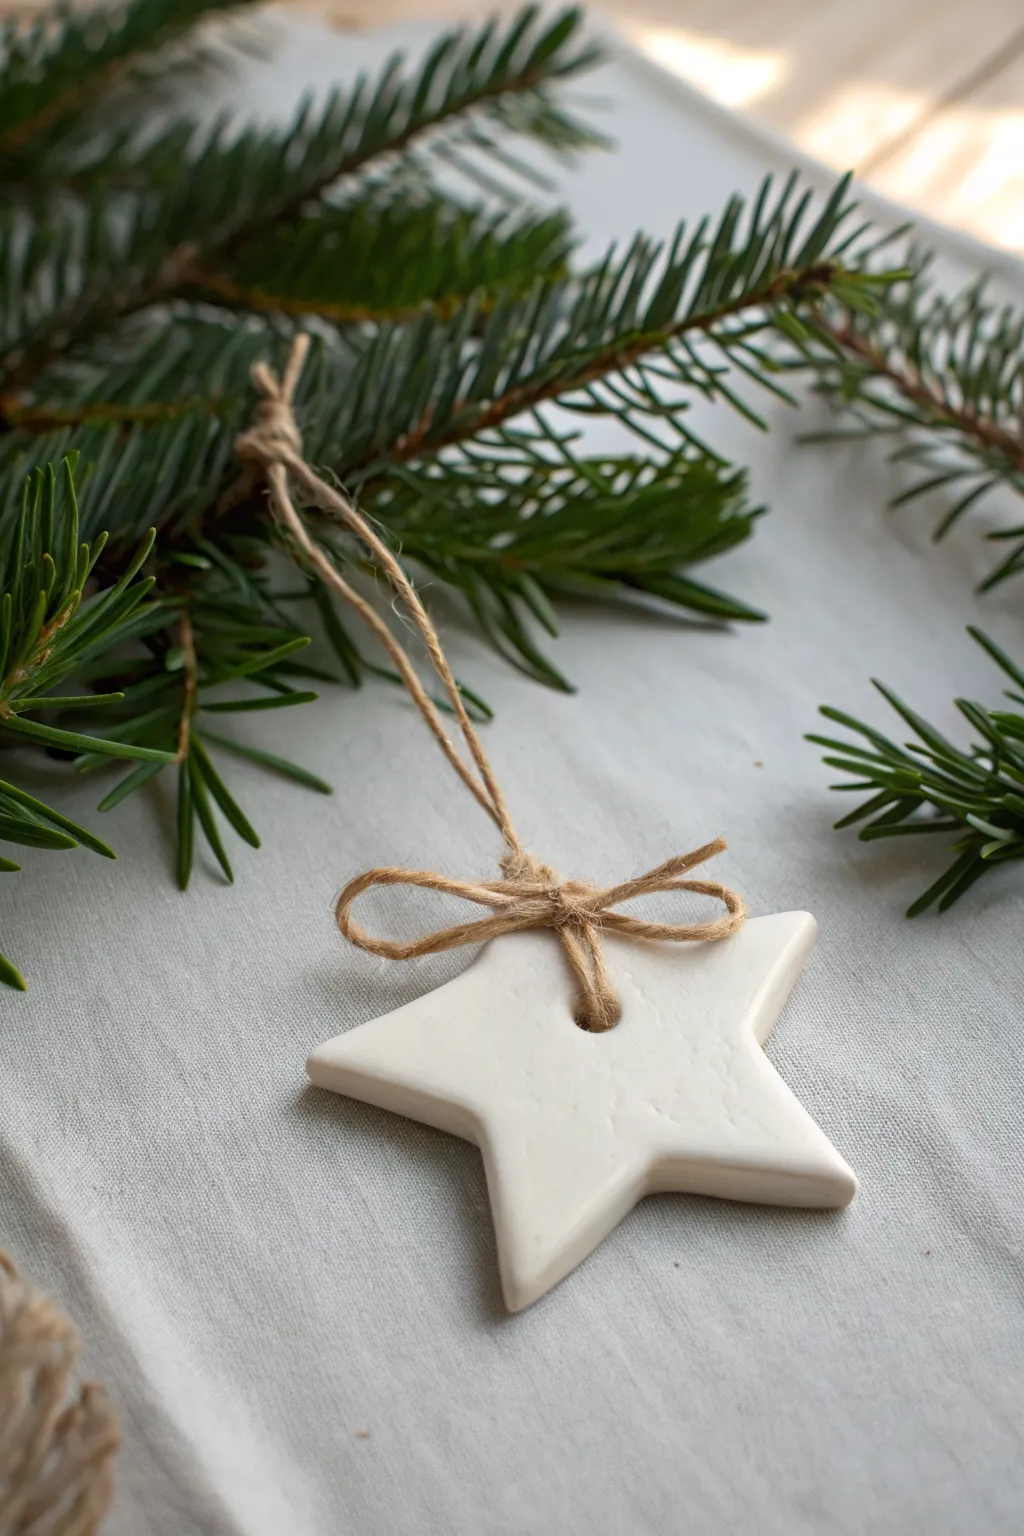
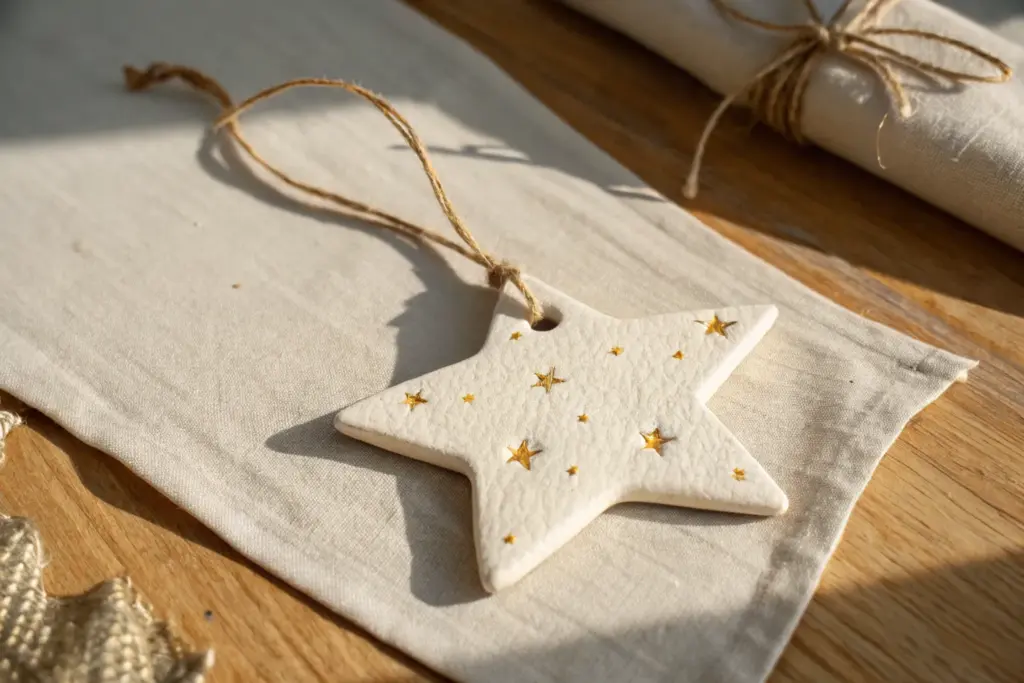
Embrace simplicity with this five-pointed star ornament, featuring a smooth, matte white finish that perfectly complements natural evergreen boughs. The central hole and charming jute twine bow give it a classic, homespun feel that is incredibly easy to achieve.
Step-by-Step Guide
Materials
- White air-dry clay (or polymer clay)
- Small rolling pin
- Star-shaped cookie cutter (medium size)
- Parchment paper or silicone mat
- Drinking straw or small circular cutter
- Fine-grit sandpaper (optional)
- Jute twine
- Scissors
Step 1: Shaping the Clay
-
Prepare your workspace:
Lay down a sheet of parchment paper or a silicone mat on a flat surface to prevent the clay from sticking. -
Condition the clay:
Take a handful of white air-dry clay and knead it in your hands until it becomes soft, pliable, and free of cracks. -
Roll it out:
Place the clay ball on your surface and use the rolling pin to flatten it. Aim for an even thickness of about 1/4 inch (6mm) to ensure the ornament is sturdy but not too heavy. -
Check for smoothness:
Inspect the surface for any air bubbles or textures. If you see any, gently smooth them over with a damp finger before cutting. -
Cut the star:
Press your star-shaped cookie cutter firmly into the clay. Give it a tiny wiggle to ensure it cuts all the way through, then lift the cutter straight up. -
Create the center hole:
Instead of punching a hole at the top point, position your straw or small circular tool directly in the center of the star. Press down to create a clean hole for the twine. -
Remove excess clay:
Carefully peel away the scrap clay from around the star shape. Keep the star on the parchment paper to avoid distorting its points while moving it.
Curling Points?
If the star’s points curl upward while drying, place a lightweight book or board gently on top of the clay once the surface is dry to touch.
Step 2: Drying and Refining
-
Smooth the edges:
Dip your finger in a little bit of water and run it gently along the cut edges of the star to soften any sharpness left by the cutter. -
Let it dry:
Allow the star to dry completely according to package instructions. I usually let mine sit for at least 24 hours, flipping it over halfway through to ensure even drying. -
Inspect dry clay:
Once fully hardened, check the edges again. If any rough spots remain, you can lightly buff them away with fine-grit sandpaper.
Step 3: Adding the Twine
-
Cut the twine:
Cut a length of jute twine, roughly 12 inches long. This will form both the hanging loop and the bow. -
Thread the loop:
Fold the twine in half to create a loop. Push the folded end through the center hole of the star from front to back. -
Secure the loop:
Pull the two loose tails through the loop you just pushed through the back, creating a lark’s head knot. Note: For the specific look in the photo, you actually want to tie a separate bow, so simply thread a single piece through for hanging first if you prefer, then tie a separate bow. -
Tie the bow:
Alternatively, to match the photo exactly, thread a piece of twine through the hole and tie it into a small, neat shoelace bow right against the clay surface. -
Create the hanger:
Take the long tails extending from the bow (or use a second piece of twine threaded behind the bow) and tie the ends together in a simple overhand knot to create the hanging loop. -
Trim the ends:
Snip the ends of the bow at an angle so they look neat, ensuring the bow sits flat against the white star.
Clean Edges
Dip your cookie cutter into a bowl of cornstarch or flour before pressing into the clay. This prevents sticking and ensures crisp, clean lines.
Hang your finished star on a branch to enjoy its minimalist charm


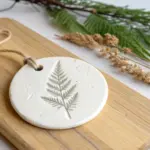
Evergreen Sprig Imprint Discs
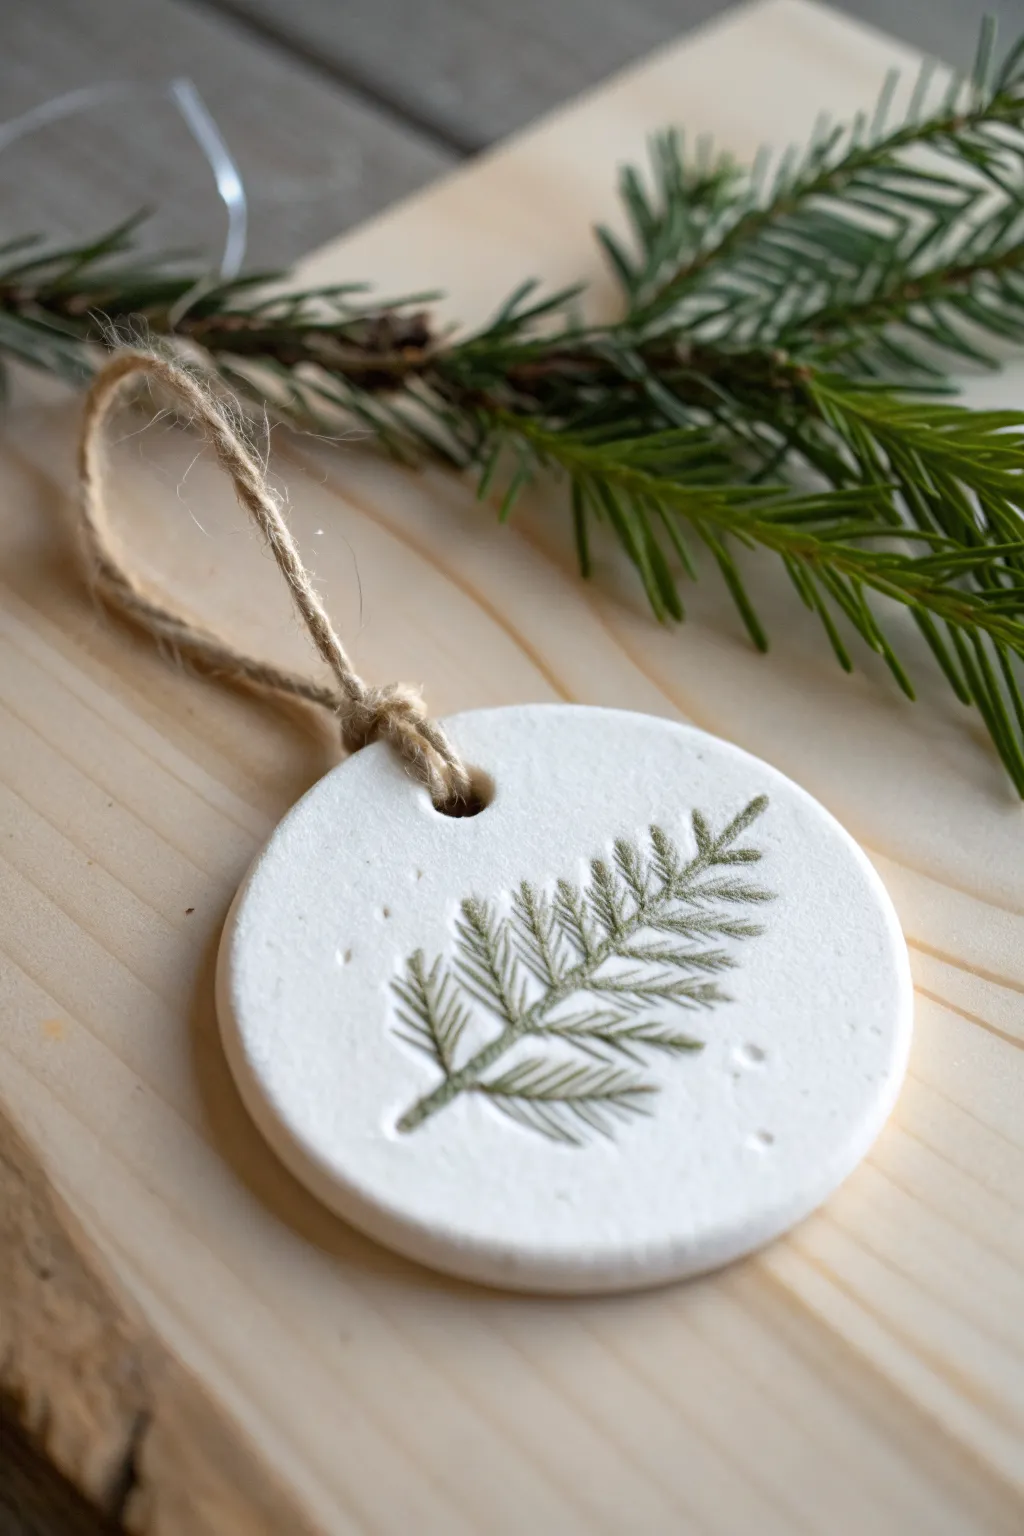
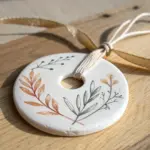
Capture the delicate beauty of winter foliage with these elegant clay discs, featuring a realistic pressed evergreen design. The stark white clay contrasts beautifully with the soft green imprint and rustic twine, creating a timeless decoration perfect for gifts or your own tree.
Step-by-Step Guide
Materials
- Air-dry clay (white) or polymer clay
- Fresh evergreen sprigs (pine, spruce, or fir)
- Small rolling pin
- Circular cookie cutter (approx. 2-3 inches)
- Parchment paper or non-stick craft mat
- Drinking straw or small boba straw
- Fine-grit sandpaper (optional)
- Acrylic paint or watercolor (forest green/olive mix)
- Small flat paintbrush
- Jute twine or rustic hemp cord
- Clear matte sealant (optional)
Step 1: Preparing the Clay Base
-
Condition the clay:
Begin by taking a handful of white air-dry clay and kneading it in your hands until it feels soft, pliable, and free of cracks. Warming it up this way prevents crumbling later. -
Roll out the slab:
Place the clay on a sheet of parchment paper to prevent sticking. Use your rolling pin to flatten the clay into an even slab, aiming for a thickness of about 1/4 inch. -
Cut the shape:
Press your circular cookie cutter firmly into the clay slab. Wiggle it slightly and lift straight up to create a clean-edged disc. -
Smooth the edges:
Dip your finger in a tiny bit of water and gently run it around the circumference of the cut circle to smooth out any rough bits or stray clay fragments. -
Add the hole:
Before the clay hardens, use a drinking straw to punch a hole near the top edge of the circle. Position it centered, about a half-inch down from the rim to ensure the clay remains strong enough to hang.
Clean Impressions
To stop the greenery from sticking to your roller, place a small piece of parchment paper over the sprig before rolling it into the clay.
Step 2: Creating the Botanical Impression
-
Select your greenery:
Choose a fresh sprig of evergreen that is flat and has well-defined needles. Size it so it fits comfortably within the circle without spilling over the edges too much. -
Press the sprig:
Lay the sprig onto the center of your clay disc. Take the rolling pin and gently roll over the greenery once with firm, even pressure to embed it into the surface. -
Reveal the imprint:
Carefully lift the stem of the evergreen sprig and peel it away from the clay. I find using tweezers here helps avoid accidentally denting the soft surface with fingernails. -
Dry completely:
Allow the clay to dry fully according to the package instructions. Flip the ornament over halfway through the drying process to prevent the edges from curling upward. -
Sand for perfection:
Once fully cured and hard, check the edges again. If there are sharp spots, lightly buff them away with fine-grit sandpaper for a professional finish.
Enhance the Detail
Try using gold leaf paint inside the impression instead of green for a glamorous, high-contrast look that catches the holiday lights beautifully.
Step 3: Painting and Finishing
-
Prepare the paint:
Mix a small amount of forest green acrylic paint with a drop of brown or olive to get a natural, earthy tone. Dilute it slightly with water so it flows easily into the crevices. -
Apply the color:
Brush the paint wash over the impressed area. Don’t worry about being perfectly tidy; the goal is to get pigment into the deep needle impressions. -
Wipe away excess:
Immediately take a slightly damp paper towel or cloth and wipe strictly across the surface of the clay. This removes paint from the raised flat areas but leaves the color settled deep inside the imprinted needles. -
Let the paint set:
Allow the paint to dry completely. The result should look like a fossil or a botanical illustration. -
Seal (optional):
If you want extra durability, apply a thin coat of clear matte sealant over the front and back. -
Thread the loop:
Cut a 6-inch length of jute twine. Thread one end through the hole you created earlier. -
Tie the knot:
Bring the ends of the twine together and tie a secure overhand knot near the base, close to the clay, or further up depending on how long you want the hanging loop to be.
Hang your new botanical ornament on a sturdy branch where the light can highlight the texture of the imprint


Lace-Textured Keepsake Ornaments
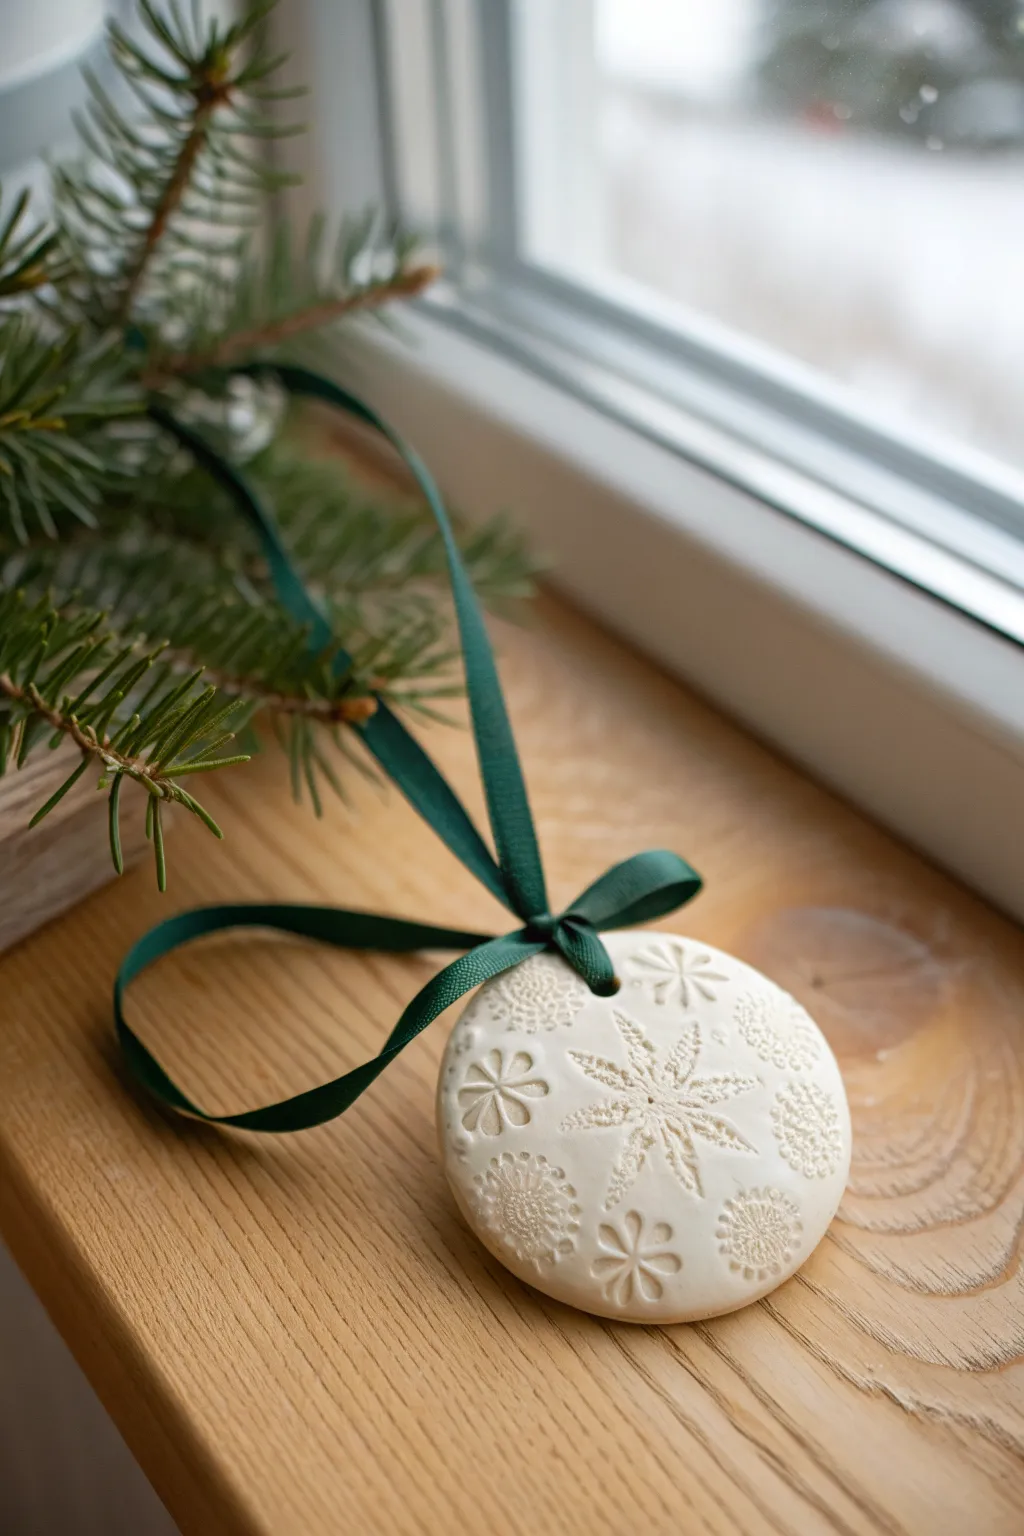
Capture the delicate beauty of winter by pressing intricate lace patterns into smooth, white clay. This elegant medallion features a central starburst motif surrounded by detailed floral textures, all suspended by a rich emerald ribbon for a classic holiday look.
How-To Guide
Materials
- White air-dry clay (or polymer clay)
- Small rolling pin
- Round cookie cutter (approx. 3-inch diameter)
- Assorted lace doilies or textured snowflake stamps
- drinking straw or small circular cutter (for the hole)
- Fine-grit sandpaper (optional)
- Emerald green satin ribbon (1/4 inch wide)
- Parchment paper or non-stick mat
Step 1: Preparation and Rolling
-
Prepare the workspace:
Lay down a sheet of parchment paper or a non-stick silicone mat to protect your surface and prevent the clay from sticking. -
Work the clay:
Take a handful of white air-dry clay and knead it gently in your hands until it becomes warm, pliable, and free of cracks. -
Roll the slab:
Place the clay on your mat and use the rolling pin to flatten it into an even slab. Aim for a thickness of about 1/4 inch—thick enough to hold a deep impression but not too heavy. -
Smooth the surface:
Run your wet finger lightly over the surface of the clay to smooth out any minor imperfections or fingerprints before you begin texturing.
Step 2: Creating the Texture
-
Plan your design:
Before pressing, visualize where your patterns will go. I like to place the largest element right in the center. -
Impress the center motif:
Take a large snowflake stamp or the center of a coarse lace doily and press it firmly into the middle of your clay slab. Apply even pressure to ensure a deep, crisp imprint. -
Add surrounding details:
Use smaller stamps, lace scraps, or textured buttons to create a ring of patterns around the central snowflake. Leave a little negative space between them to keep the design from looking too cluttered. -
Cut the shape:
Position your round cookie cutter over the stamped design. Ensure the pattern is centered exactly how you want it, then press down firmly to cut the circle. -
Remove excess clay:
Peel away the excess clay from around the outside of the cutter before lifting the cutter itself. This prevents the circle from deforming. -
Clear edges:
Gently lift the clay circle. If there are any rough, jagged edges from the cutter, smooth them down softly with a fingertip dipped in a tiny bit of water.
Clean Impressions
Dust your stamps or lace lightly with cornstarch or baby powder before pressing into the clay. This acts as a release agent and ensures the clay doesn’t stick inside the detailed crevices.
Step 3: Finishing Touches
-
Create the hanging hole:
Use a drinking straw to punch a clean hole near the top edge of the ornament. Twist the straw slightly as you pull it out to remove the clay plug cleanly. -
Let it dry:
Place the ornament on a clean sheet of parchment paper in a cool, dry place. Allow it to air dry for at least 24-48 hours, flipping it halfway through to ensure even drying. -
Sand imperfections:
Once fully cured and hard, check the edges. If there are any sharp spots, very gently buff them away with fine-grit sandpaper. -
Prepare the ribbon:
Cut a length of emerald green satin ribbon, approximately 12 inches long. -
Thread the loop:
Fold the ribbon in half and push the folded loop through the hole in the ornament from front to back. -
Secure the knot:
Pull the loose ends of the ribbon through the loop and tighten gently to create a ‘larks head’ knot that sits securely at the top of the clay.
Adding Contrast
After drying, rub a light brown wax or diluted acrylic paint into the textured grooves, then wipe the surface clean. This antiquing effect makes the white lace pattern pop visibly.
Hang your beautiful new creation in the window or on a tree branch to admire the textures.


Simple Painted Holly Discs
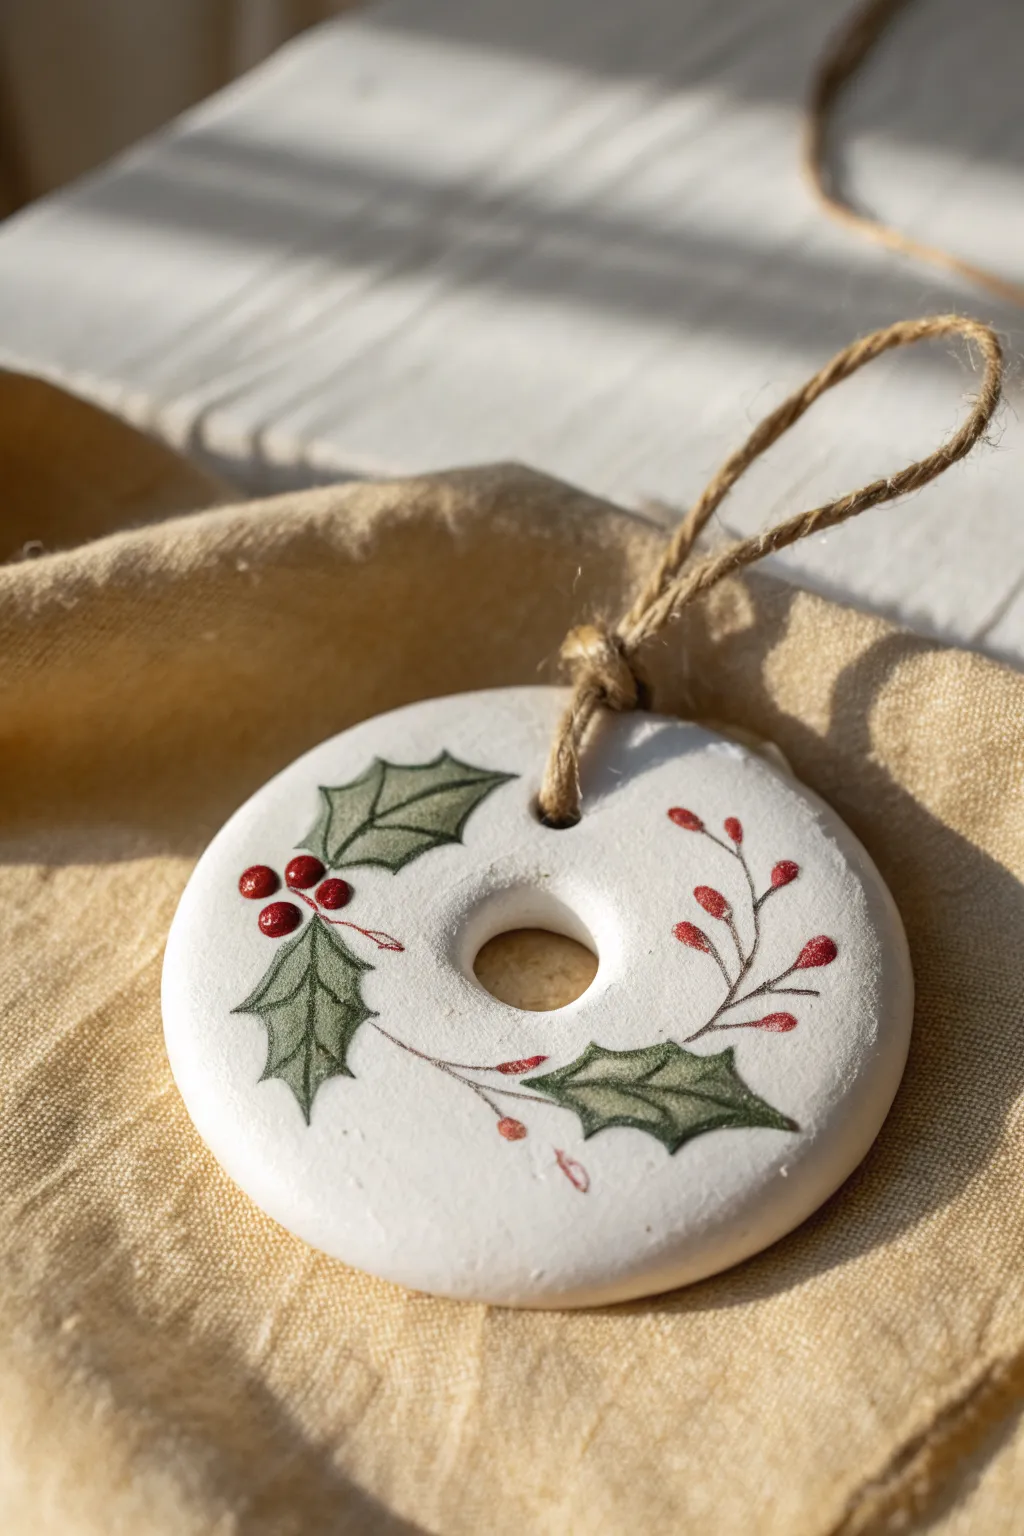
Create a sophisticated, vintage-inspired holiday ornament using simple white clay and delicate brushwork. This project captures the timeless beauty of winter foliage with realistic holly leaves and red berry sprigs on a crisp white ceramic-like background.
Step-by-Step
Materials
- White polymer clay (or air-dry clay)
- Round cookie cutter (approx. 2.5-3 inches)
- Small circle cutter (or straw) for the center hole
- Rolling pin
- Acrylic paints (Forest green, Dark olive, bright red, deep burgundy, brown)
- Fine detail paintbrushes (Size 00 or 0)
- Jute twine
- Parchment paper
- Water cup and paper towel
- Gloss or matte varnish (optional)
Step 1: Shaping the Clay Base
-
Condition the Clay:
Begin by warming a small block of white clay in your hands, kneading it until it is smooth and pliable to prevent cracks. -
Roll Out the Slab:
Place the clay between two sheets of parchment paper and roll it out evenly to a thickness of about 1/4 inch. -
Cut the Circle:
Press your round cookie cutter firmly into the clay to create the main disc shape, gently peeling away the excess clay. -
Create the Center Hole:
Use a small circle cutter or a sturdy straw to punch a hole exactly in the center. This turns your disc into a modern donut shape and provides the hanging point. -
Smooth the Edges:
Dip your finger in a tiny bit of water (for air-dry) or baby oil (for polymer) and gently run it along the cut edges to soften any sharpness or burrs. -
Initial Cure:
Bake the ornament according to the package instructions for polymer clay, or let air-dry clay set for 24-48 hours until completely hard and white.
Fixing Smudges
Make a mistake? If the base is polymer clay, you can often gently scratch away dried acrylic paint with a toothpick or a damp cotton swab before sealing.
Step 2: Painting the Foliage
-
Outline the Holly:
Using your finest brush and a very diluted wash of forest green, faintly sketch three or four holly leaves spaced evenly around the ring. -
Fill the Leaves:
Mix forest green with a touch of olive. Fill in the leaf shapes, keeping the paint relatively translucent to mimic a watercolor effect. -
Add Leaf Details:
Once the base green is dry to the touch, use a tiny amount of darker green or even a black-green mix to paint the central vein and the sharp, pointy edges of each leaf. -
Paint the Berries:
Dip the tip of a brush or a stylus tool into bright red paint. Dot clusters of three berries near the base of one of the holly leaves. -
Add Berry Highlights:
I like to add a tiny dot of white or very light pink to the top of each berry while the red is wet to give it a dimensional shine. -
Paint the Twigs:
Mix brown with a little water to make it flow easily. Paint delicate, thin branches curving out from the other side of the ring, opposite the main holly cluster. -
Add Red Buds:
Along these brown twigs, paint small, elongated red tear-shapes to represent winter buds. -
Connect the Design:
Extend a very fine, faint brown line connecting the holly cluster to the twig cluster so the design flows cohesively around the circle.
Step 3: Assembly
-
Seal the Artwork:
Once all paint is thoroughly dry, apply a thin coat of matte or satin varnish to protect the design and give the ornament a finished porcelain look. -
Thread the Loop:
Cut a 6-inch length of jute twine. Fold it in half and push the looped end through the center hole of the ornament from front to back. -
Secure the Hanger:
Pull the loose ends of the twine through the loop you just created and pull tight to create a lark’s head knot at the top of the ornament. -
Tie the Ends:
Knot the very ends of the twine together to finish the hanging loop.
Add Sparkle
Before the red paint on the berries dries fully, sprinkle a pinch of ultra-fine iridescent glitter on them for a frosted, icy winter effect.
Hang your beautiful hand-painted creation on a sturdy branch where the light can catch the delicate details

The Complete Guide to Pottery Troubleshooting
Uncover the most common ceramic mistakes—from cracking clay to failed glazes—and learn how to fix them fast.
Easy Snowflake Cutout Shapes
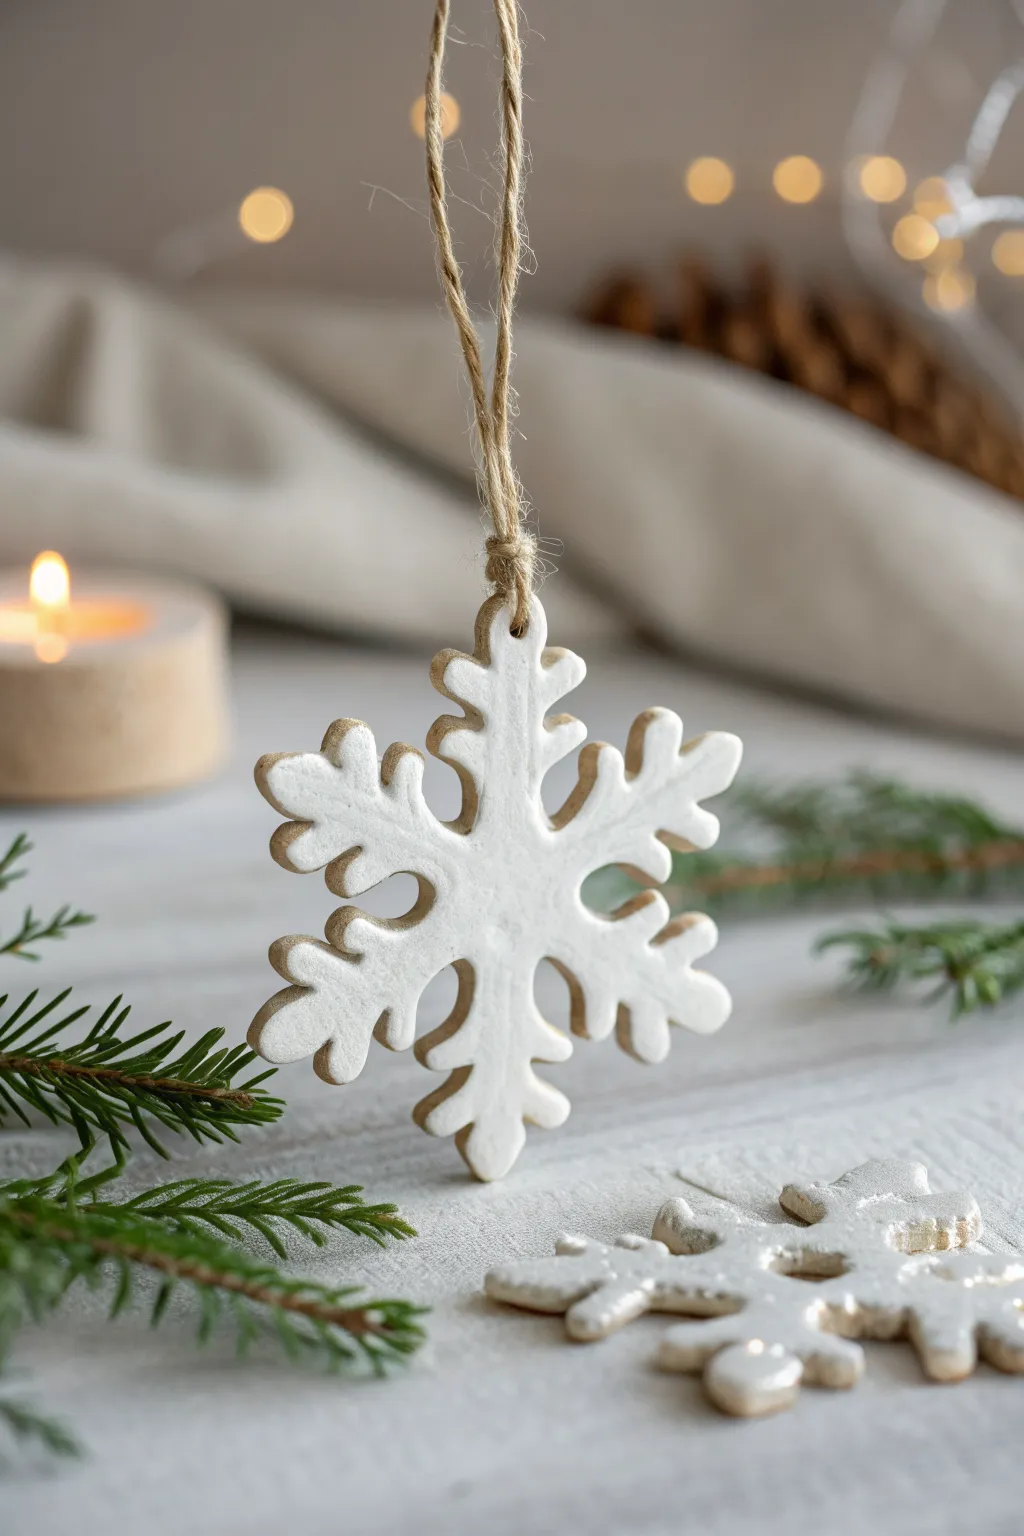
Capture the magic of winter with these charming, rustic snowflake ornaments that look lovely on any tree. Using simple air-dry clay or polymer clay, you can create durable, elegant decorations with a natural, handmade feel.
Step-by-Step Guide
Materials
- White or natural air-dry clay (or polymer clay)
- Snowflake cookie cutters
- Rolling pin
- Parchment paper or canvas mat
- Straw or small circular tool
- Fine-grit sandpaper
- White acrylic paint
- Small paintbrush or sponge
- Jute twine or rustic string
- Matte sealant (optional)
Step 1: Preparation & Cutting
-
Prepare your workspace:
Lay down a sheet of parchment paper or a canvas mat on a flat surface. This prevents the clay from sticking and picks up less lint than a bare table. -
Condition the clay:
Take a portion of your clay and knead it until it creates a soft, pliable consistency. Warm clay is less likely to crack at the edges when you roll it. -
Roll it out:
Use your rolling pin to flatten the clay to an even thickness, roughly 1/4 inch thick. If you want them to look substantial like the photo, don’t roll them too thin. -
Cut the shapes:
Press your snowflake cookie cutter firmly into the rolled clay. Give it a tiny wiggle before lifting to ensure a clean cut. -
Remove excess clay:
Peel away the scrap clay from around the cutter first, then gently push the snowflake out of the cutter if it stuck inside. -
Create the hanging hole:
While the clay is still wet, use a straw or a small circular tool to punch a hole near the top of one snowflake arm. Make sure it’s not too close to the edge to prevent breaking later. -
Smooth the edges:
Dip your finger in a little water and gently run it along the cut edges of the snowflake to smooth out any roughness or burrs left by the cutter.
Preventing Curling
To stop edges curling up while drying, place a light book over the clay (with parchment in between) once the surface isn’t tacky.
Step 2: Drying & Finishing
-
Let it dry:
Place your snowflakes on a flat surface lined with parchment paper. Depending on your clay type and humidity, drying can take 24 to 48 hours. Flip them halfway through so the bottom dries evenly. -
Check for imperfections:
Once fully hard, inspect your ornament. Use fine-grit sandpaper to gently buff away any sharp points or uneven areas on the rim. -
Apply the white wash:
To achieve the specific look in the photo where the edges seem slightly tan or natural, don’t use a heavy coat of paint. Instead, use a “dry brush” technique or a sponge. -
focus on the surface:
Dab a small amount of white acrylic paint onto your brush and wipe most of it off. Lightly brush over the top surface of the snowflake. -
Detailing the edges:
I like to leave the very edges of the ornament unpainted or very lightly painted. This allows the natural beige tone of the clay to peek through, giving it that dimensional, cookie-like appearance. -
Let the paint set:
Allow the paint to dry completely. Since it’s a light layer, this should only take about 15-20 minutes. -
Seal the ornament (Optional):
If you want extra durability, apply a thin coat of matte sealant over the clay. This protects the finish without making it too shiny. -
Cut the twine:
Cut a length of jute twine, roughly 6 to 8 inches long, depending on how low you want the ornament to hang. -
Thread and tie:
Thread the twine through the hole you made earlier. Tie a secure knot at the base near the clay, or loop it through itself for a simple hitch, and knot the top ends together.
Natural Texture
For a rustic look, mix a tiny bit of coffee grounds into the clay before rolling to create subtle speckles and texture.
Hang your new handcrafted snowflakes on a branch or tuck them into a gift ribbon for a festive touch
Gingerbread People With Painted “Icing”

Create the cozy warmth of fresh-baked gingerbread without ever turning on the oven using this simple clay project. These durable ornaments feature realistic cookie texture and dimensional ‘icing’ that will fool Santa himself.
Step-by-Step Guide
Materials
- Air-dry clay (white or terra cotta)
- Acrylic paint (burnt umber, raw sienna, white)
- Gingerbread man cookie cutter
- Rolling pin
- Parchment paper or wax paper
- Fine grit sandpaper
- Old toothbrush or stiff bristle brush
- Puffy paint (white) or white acrylic in a fine-tip applicator bottle
- Matte spray varnish
- Straw or toothpick (for hole punching)
- Red and white baker’s twine
Step 1: Shaping the Dough
-
Prepare your workspace:
Lay down a sheet of parchment paper to protect your table and prevent the clay from sticking. Tape the corners down if needed to keep it flat. -
Condition the clay:
Take a handful of air-dry clay and knead it in your hands until it becomes soft, pliable, and free of cracks. If you are using white clay, you can pre-mix a small amount of brown acrylic paint into it now for a base color, though painting later works just as well. -
Roll it out:
Use a rolling pin to flatten the clay to an even thickness of about 1/4 inch to 3/8 inch. You want it thick enough to look like a sturdy cookie. -
Texture the surface:
This is the secret to realism: gently tap the surface of the wet clay with an old toothbrush or a stiff bristle brush. This creates a stippled texture that mimics the porous look of baked dough. -
Cut the shapes:
Press your gingerbread man cookie cutter firmly into the clay. Give it a little wiggle to ensure a clean cut, then gently lift the cutter away. -
Clean the edges:
Peel away the excess clay. If the edges of your gingerbread man are a bit rough, dip your finger in a little water and gently smooth them down to round them off slightly. -
Add a hanging hole:
Before the clay dries, use a straw or a large toothpick to poke a hole near the top of the head for the string. Make sure the hole goes cleanly all the way through. -
Let it dry completely:
Place the clay shape on a flat surface to dry. I prefer to flip them over halfway through the drying process to prevent warping. This usually takes 24-48 hours depending on humidity.
Realistic Icing Trick
If you don’t have puffy paint, mix white acrylic paint with a little baking soda. This thickens the paint, allowing it to hold its 3D shape just like royal icing.
Step 2: Baking and Decorating
-
Sand imperfections:
Once bone dry, lightly sand any sharp edges with fine grit sandpaper. Wipe away all dust with a slightly damp cloth. -
Mix the cookie color:
Mix burnt umber with a touch of raw sienna and a tiny dot of white. You want a warm, golden-brown hue that looks like gingerbread, not dark chocolate. -
Paint the base:
Apply the brown paint to the front, back, and sides of the ornament. You might need two coats for full opacity. Let this base coat dry completely. -
Dry brush for texture:
Dip a dry brush into a slightly lighter shade of brown, wipe most of it off on a paper towel, and lightly brush over the textured surface. This highlights the ‘baked’ texture you created earlier. -
Seal the cookie:
Spray the ornament with a matte varnish. This protects the paint and gives it that velvety, non-shiny cookie finish before you add the icing. -
Apply the icing face:
Using white puffy paint or acrylic in a fine-tip bottle, pipe two small dots for eyes and a curved line for a smile. Keep the pressure steady for even lines. -
Pipe the details:
Add zig-zag lines or squiggles near the wrists and ankles to represent cuffs. These little details really sell the ‘icing’ effect. -
Add the buttons:
Squeeze three small, distinct dots down the center of the chest for gumdrop buttons. Allow the paint to puff up slightly as it settles. -
Finish with twine:
Once the ‘icing’ is fully hard and dry (give it overnight to be safe), thread a loop of red and white baker’s twine through the hole and tie it off.
Scented Ornament
Knead cinnamon, ground cloves, and ginger directly into the wet clay. Your ornaments will smell like real cookies for years to come.
Hang your new creation on the tree and enjoy the sweet, handmade charm it adds to your holiday decor


What Really Happens Inside the Kiln
Learn how time and temperature work together inside the kiln to transform clay into durable ceramic.
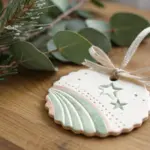
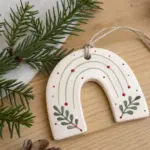
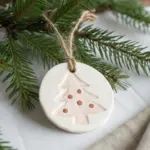
Simple Tree Silhouettes With Dots
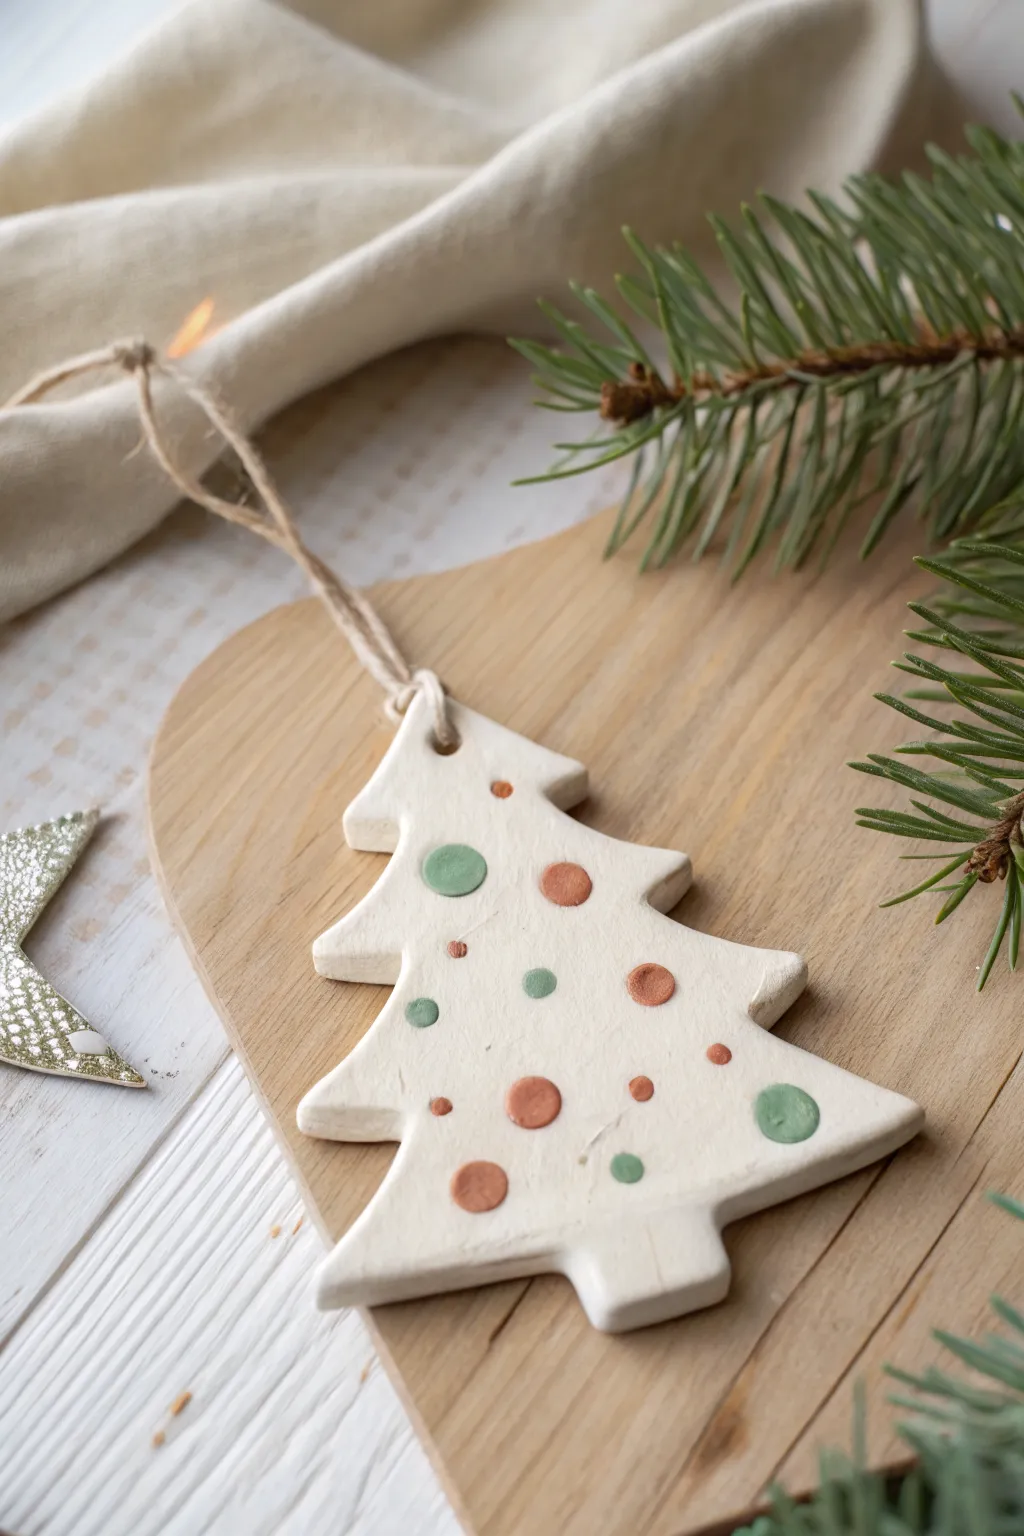
Embrace the imperfect charm of handmade holiday decor with this minimalist clay tree ornament. Its simple silhouette is elevated by a playful pattern of indented dots painted in soft, earthy hues of sage and terracotta.
Detailed Instructions
Materials
- White air-dry clay (or polymer clay)
- Small Christmas tree cookie cutter (approx. 3-4 inches)
- Acrylic rolling pin
- Various round tools for impressing (stylus, brush handles, straw)
- Fine-grit sandpaper
- Acrylic paints: Sage green and terracotta/rust
- Small detail paintbrush
- Jute twine
- Drinking straw (for the hanging hole)
- Parchment paper or craft mat
Step 1: Shaping the Base
-
Condition the Clay:
Begin by taking a small handful of white air-dry clay and kneading it in your hands until it feels soft, pliable, and free of cracks. -
Roll it Out:
Place your clay onto a piece of parchment paper or a craft mat. Use an acrylic rolling pin to flatten the clay to an even thickness of about 1/4 inch. -
Cut the Shape:
Firmly press your Christmas tree cookie cutter into the clay. Wiggle it slightly to ensure a clean cut, then lift the cutter away. -
Smooth the Edges:
Remove the excess clay from around the tree. Dip your finger in a tiny bit of water and gently run it along the cut edges of the tree to smooth out any roughness. -
Create Hanging Hole:
Use a drinking straw to punch a clean hole at the very top tip of the tree. Twist the straw as you pull it out to remove the clay plug cleanly.
Step 2: Adding Texture & Color
-
Plan Your Pattern:
Before pressing into the clay, visualize a random scatter of polka dots across the surface of the tree. -
Impress Large Dots:
Select a tool with a rounded end, like the back of a large paintbrush or a designated clay tool. Press vertically into the damp clay to create several large, shallow circular indentations. -
Add Medium Dots:
Variable sizes make the design interesting, so switch to a slightly smaller tool and add medium-sized indentations in the empty spaces. -
Fill with Small Dots:
Finally, use a very small stylus or toothpick to add tiny accent dots, ensuring the pattern looks balanced but not overly uniform. -
Let it Dry:
Move the ornament on its parchment paper to a flat, safe spot. Allow it to air dry completely for 24-48 hours, flipping it over halfway through to prevent curling. -
Sand Imperfections:
Once fully hard, inspect the edges. If there are any sharp bits, gently buff them away with fine-grit sandpaper. -
Paint the Green Dots:
Dip a fine detail brush into sage green acrylic paint. Carefully fill in about half of the indented circles, letting the paint pool slightly in the recess. -
Paint the Rust Dots:
Clean your brush thoroughly, then switch to the terracotta paint. Fill in the remaining indented circles. -
Clean Up Edges:
If any paint spilled over the edges of the dots onto the white surface, quickly wipe it away with a damp cotton swab or wait for it to dry and gently sand it off. -
Attach the Hanger:
Cut a 6-inch length of jute twine. Thread it through the hole at the top, bring the ends together creates a loop. -
Secure the Knot:
Tie a simple overhand knot near the ends of the twine to close the loop, completing your rustic ornament.
Fix Cracking Clay
If you see tiny hairline cracks as the clay dries, mix a tiny bit of fresh clay with water to make a paste and smooth it over the cracks like spackle.
Pro Tip: Depth Control
Don’t press your dot tools all the way through the clay! You only need a shallow depression to hold the paint. About halfway through the thickness is perfect.
Hang these on your tree for a touch of handmade warmth or use them as unique gift tags for your holiday presents
Little Snowman Stacks
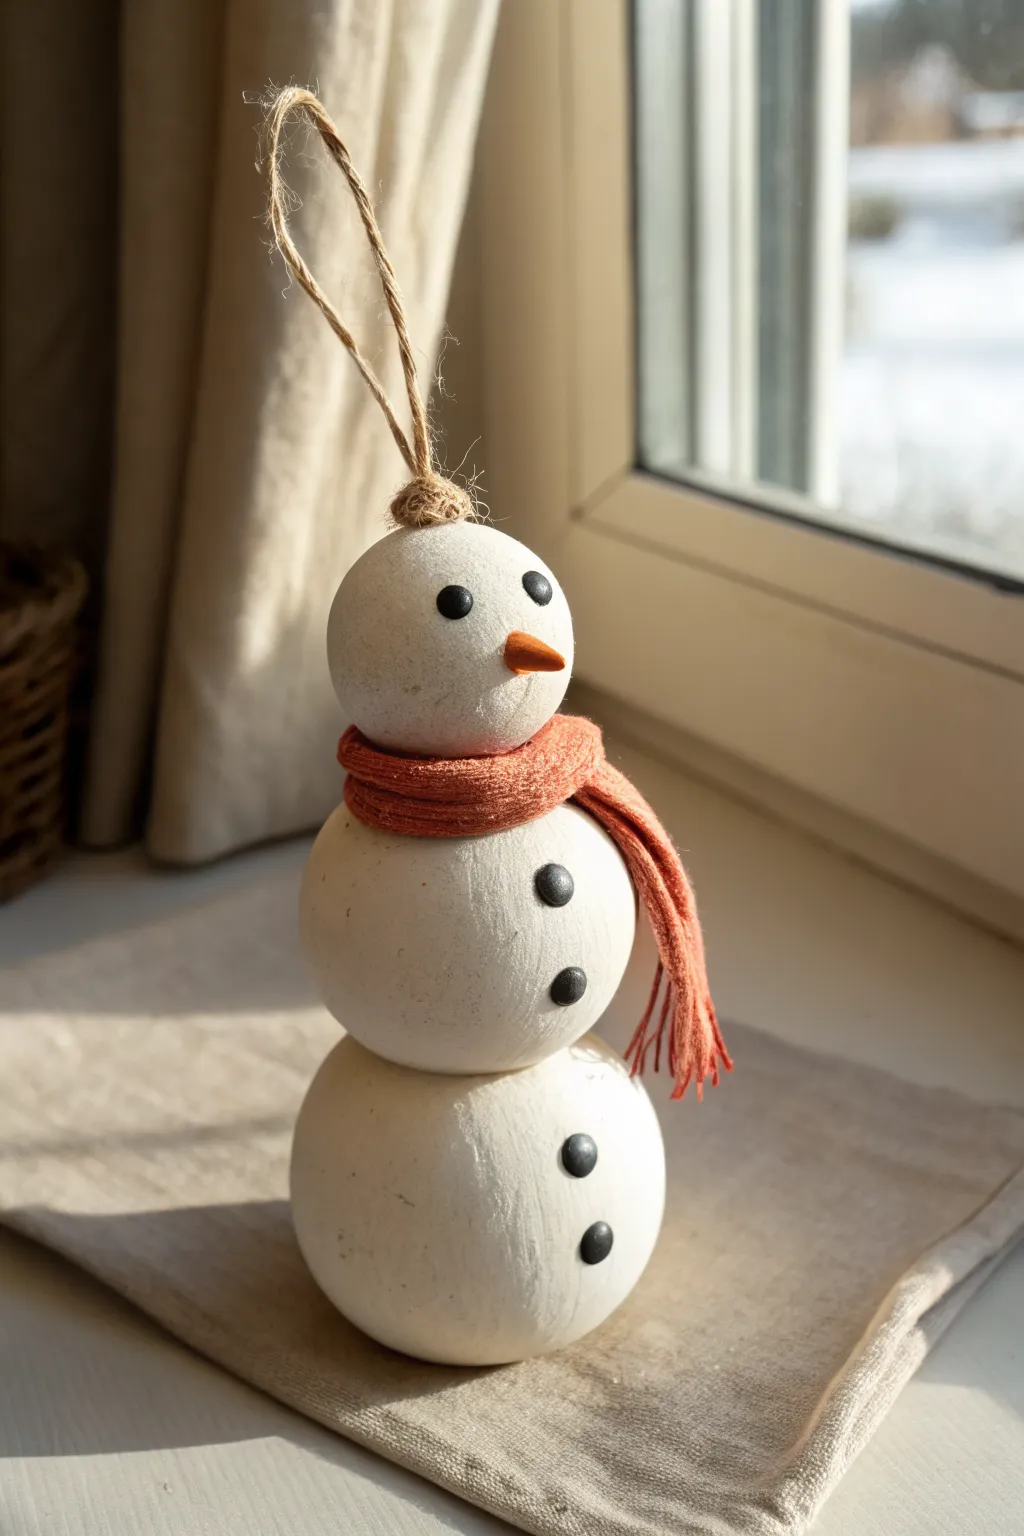
Bring winter charm indoors with this rustic, three-tiered snowman ornament. Made from simple white clay and accented with a tiny knit scarf, this project captures the whimsical imperfection of a real snowman.
Step-by-Step Tutorial
Materials
- White air-dry clay
- Orange polymer clay (small amount) or orange paint
- Small black beads or black clay
- Textured orange fabric scrap or thick orange yarn
- Jute twine
- Toothpicks or a thin metal skewer
- Tacky glue or strong craft glue
- Scissors
- Sandpaper (optional)
Step 1: Shaping the Body
-
Prepare the clay:
Begin with a generous handful of white air-dry clay. Knead it in your hands for a minute until it is soft, pliable, and free of cracks. -
Divide the portions:
Separate your clay into three distinct portions, each slightly smaller than the last. You want a large base, a medium middle, and a smaller head. -
Roll the spheres:
Roll each portion between your palms to create smooth balls. Don’t worry if they aren’t geometric spheres; a little organic lopsidedness adds character. -
Create the stack:
Gently press the medium ball onto the large base ball, flattening the contact points slightly so they sit securely. -
Add the head:
Press the smallest ball onto the top of the stack. Check the balance to ensure your snowman stands upright without tipping. -
Insert support:
For extra stability, I like to insert a toothpick or thin skewer vertically through the center of all three balls while the clay is still wet. Trim any excess sticking out the top.
Smooth Seams
use a wet finger to smooth the join lines between the clay balls. This blends the clay slightly and creates a stronger bond than just stacking them.
Step 2: Adding Details
-
Shape the nose:
Take a tiny pinch of orange clay and roll it into a small cone shape to simulate a carrot. If you don’t have orange clay, shape white clay now and paint it later. -
Attach the nose:
Press the carrot nose firmly onto the center of the head sphere. Use a dab of glue if the clay feels dry. -
Place the eyes:
Press two small black beads into the face for eyes. Push them deep enough so they adhere well as the clay shrinks slightly during drying. -
Add buttons:
Press two more black beads into the middle body section and two into the bottom section to create the classic coal buttons. -
Create the hanger loop:
Cut a length of jute twine. Fold it into a loop and tie a knot at the bottom. -
Embed the hanger:
Press the knotted end of the twine into the very top of the snowman’s head. Smooth the clay around the twine base to secure it. -
Texture the top:
Rough up the clay slightly right where the twine exits the head to create a little textured mound, mimicking a hat or hair tuft. -
Let it dry:
Set the snowman in a warm, dry place. Allow it to cure completely for 24-48 hours, turning it occasionally for even drying.
Twig Arms
Before drying, press two tiny real twigs into the middle section for rustic arms. Secure with a drop of glue after the clay is fully dry.
Step 3: The Finishing Touch
-
Prepare the scarf:
Cut a thin strip of textured orange fabric, about 6-8 inches long. I prefer using an old t-shirt or a knit fabric scrap for a cozy look. -
Fringe the ends:
Use scissors to make tiny vertical snips at both ends of your fabric strip to create a fringed scarf effect. -
Wrap the scarf:
Wrap the fabric strip around the snowman’s neck, between the head and the middle body section. -
Secure the knot:
Tie a simple overhand knot on the side or front, letting the fringed ends drape down naturally. -
Glue in place:
Apply a tiny dot of glue under the scarf knot to keep it from sliding off or rotating.
Hang your charming new friend in a window or on the tree to add a touch of handmade warmth to your winter decor

TRACK YOUR CERAMIC JOURNEY
Capture glaze tests, firing details, and creative progress—all in one simple printable. Make your projects easier to repeat and improve.
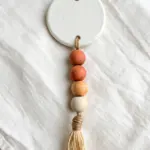
Mini Gnome Hat Ornaments
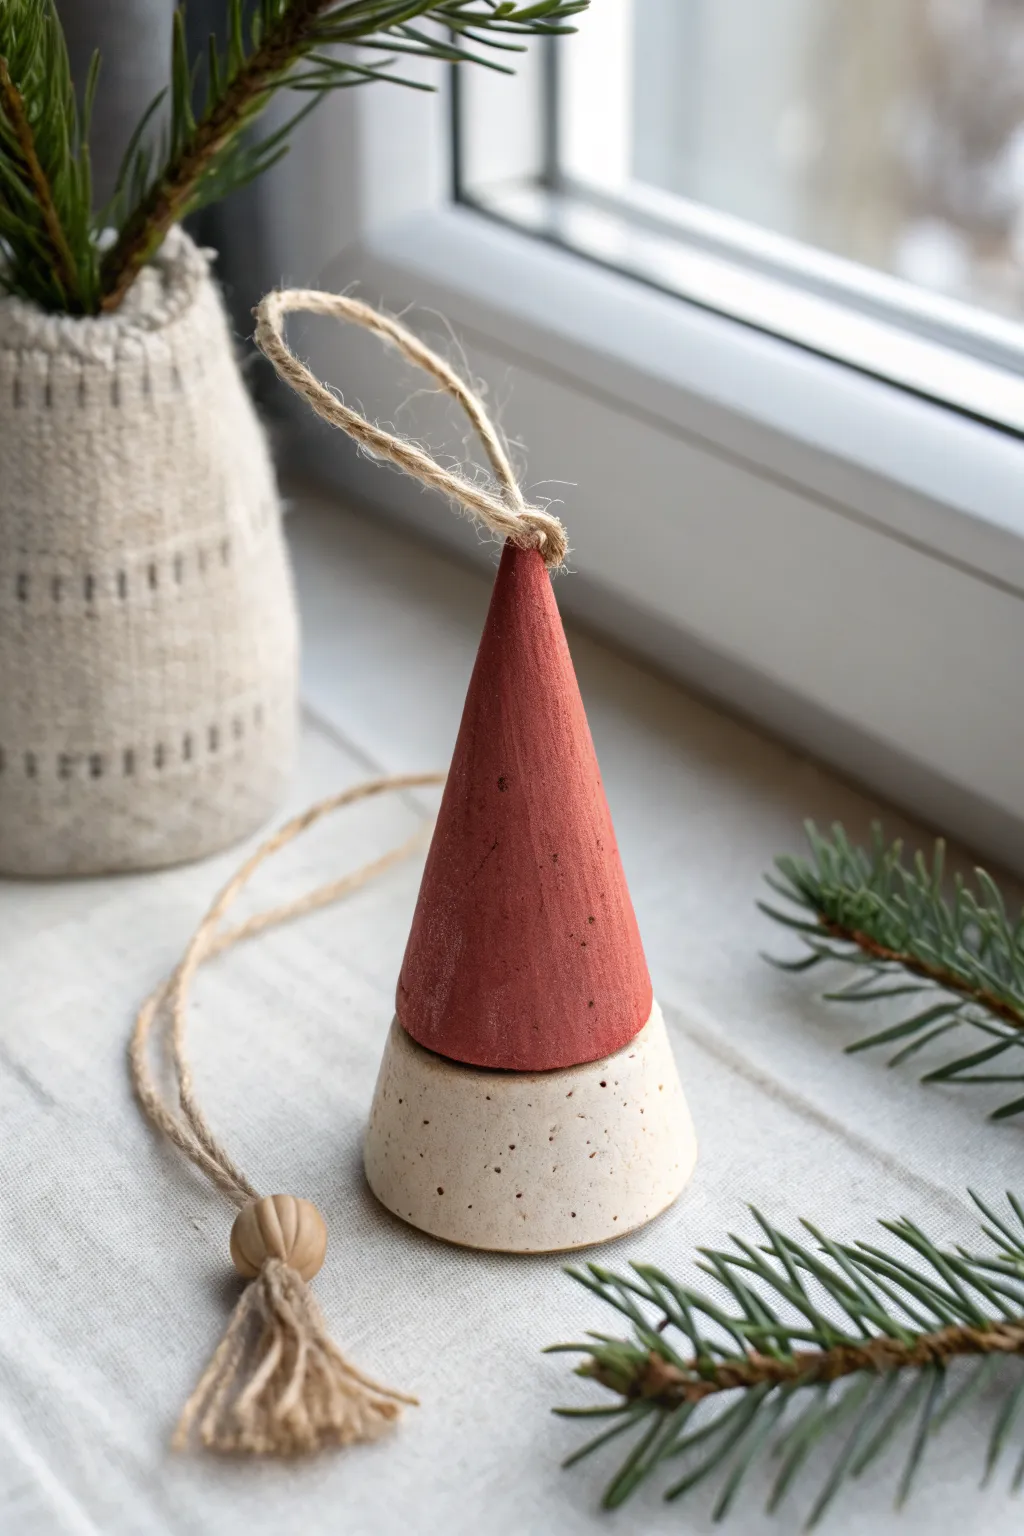
These minimalist ornaments possess a charming, Scandinavian vibe with their simple geometric shapes and earthy textures. By combining a speckled white base with a striking terracotta red top, you create an abstract gnome figure that looks perfect dangling from a spruce branch.
How-To Guide
Materials
- Air-dry clay (white)
- Acrylic paint (deep terracotta/brick red)
- Pottery sponge or old toothbrush
- Brown acrylic paint (for speckling)
- Rolling pin
- Clay knife or craft blade
- Jute twine
- Small wooden bead
- Toothpick or skewer
- Fine-grit sandpaper
- Paintbrush (flat shader)
- Water cup
- Super glue or strong craft glue
Step 1: Shaping the Clay Components
-
Condition the clay:
Begin by taking a chunk of white air-dry clay and kneading it in your hands until it becomes soft, pliable, and free of cracks. -
Form the base cylinder:
Roll a small ball of clay, roughly the size of a walnut. Flatten the bottom against your work surface and gently shape the sides to create a short, tapered cylinder that is wider at the bottom. -
Create the hat cone:
Take a slightly larger amount of clay for the hat. Roll it into a smooth ball first, then roll one side between your palms to elongate it into a tall, slender cone shape. -
Check the fit:
Place the cone on top of the base cylinder to ensure the proportions look right. The base of the cone should be virtually the same width as the top of the cylinder. -
Create the cord tunnel:
Using a skewer or toothpick, carefully poke a hole horizontally through the very top tip of the cone. Wiggle it slightly to ensure the hole is wide enough for your jute twine to pass through. -
Initial drying:
Set your two clay pieces aside on a flat surface or a wire rack. Let them air dry completely, which usually takes 24-48 hours depending on humidity. -
Sanding:
Once fully dry, use fine-grit sandpaper to smooth out any fingerprints or rough edges. Pay special attention to the base of the cone and the top of the cylinder so they will sit flush together.
Step 2: Painting and Assembling
-
Speckle the base:
Dilute a tiny drop of brown acrylic paint with water. Dip an old toothbrush into this mixture and run your thumb across the bristles to flick tiny specks onto the white cylinder base to mimic stoneware. -
Paint the hat:
Paint the entire cone section with the deep terracotta red acrylic paint. You may need two thin coats for opaque coverage, allowing it to dry fully between layers. -
Glue the pieces:
Apply a strong craft glue or super glue to the top surface of the speckled base. Center the red cone on top and press firmly for roughly 30 seconds to bond. -
Thread the loop:
Cut a length of jute twine about 10 inches long. Thread one end through the hole at the top of the cone.
Clean Lines
For a super crisp line between the red hat and white base, you can wrap a piece of masking tape around the bottom edge of the cone before painting the red section.
Step 3: Adding the Tassel Detail
-
Secure the loop:
Bring the two ends of the twine together and tie a simple overhand knot near the top of the cone to create the hanging loop. -
Prepare the tassel strings:
Cut 4-6 shorter pieces of jute twine, each about 3 inches long. Lay them flat in a bundle. -
Attach the bead:
Thread the long tail ends of your main hanging loop through a small wooden bead. Slide the bead up, but don’t secure it yet. -
Tie the tassel:
Place the bundle of short strings between the tail ends of the main loop, just below the bead. Tie the main loop tails tightly around the center of the bundle. -
Hide the knot:
Slide the wooden bead down over the knot where you tied the bundle. A tiny drop of glue inside the bead can help keep it in place. -
Trim the fringe:
Comb out the jute strands of your new tassel and use sharp scissors to trim them evenly at the bottom.
Cracking Issues?
If small cracks appear as the clay dries, mix a tiny bit of fresh clay with water to create a slip paste. Smooth this into the cracks with your finger and let dry again.
Now your modern gnome is ready to add a touch of handcrafted whimsy to your holiday decor
Marbled Swirl Baubles
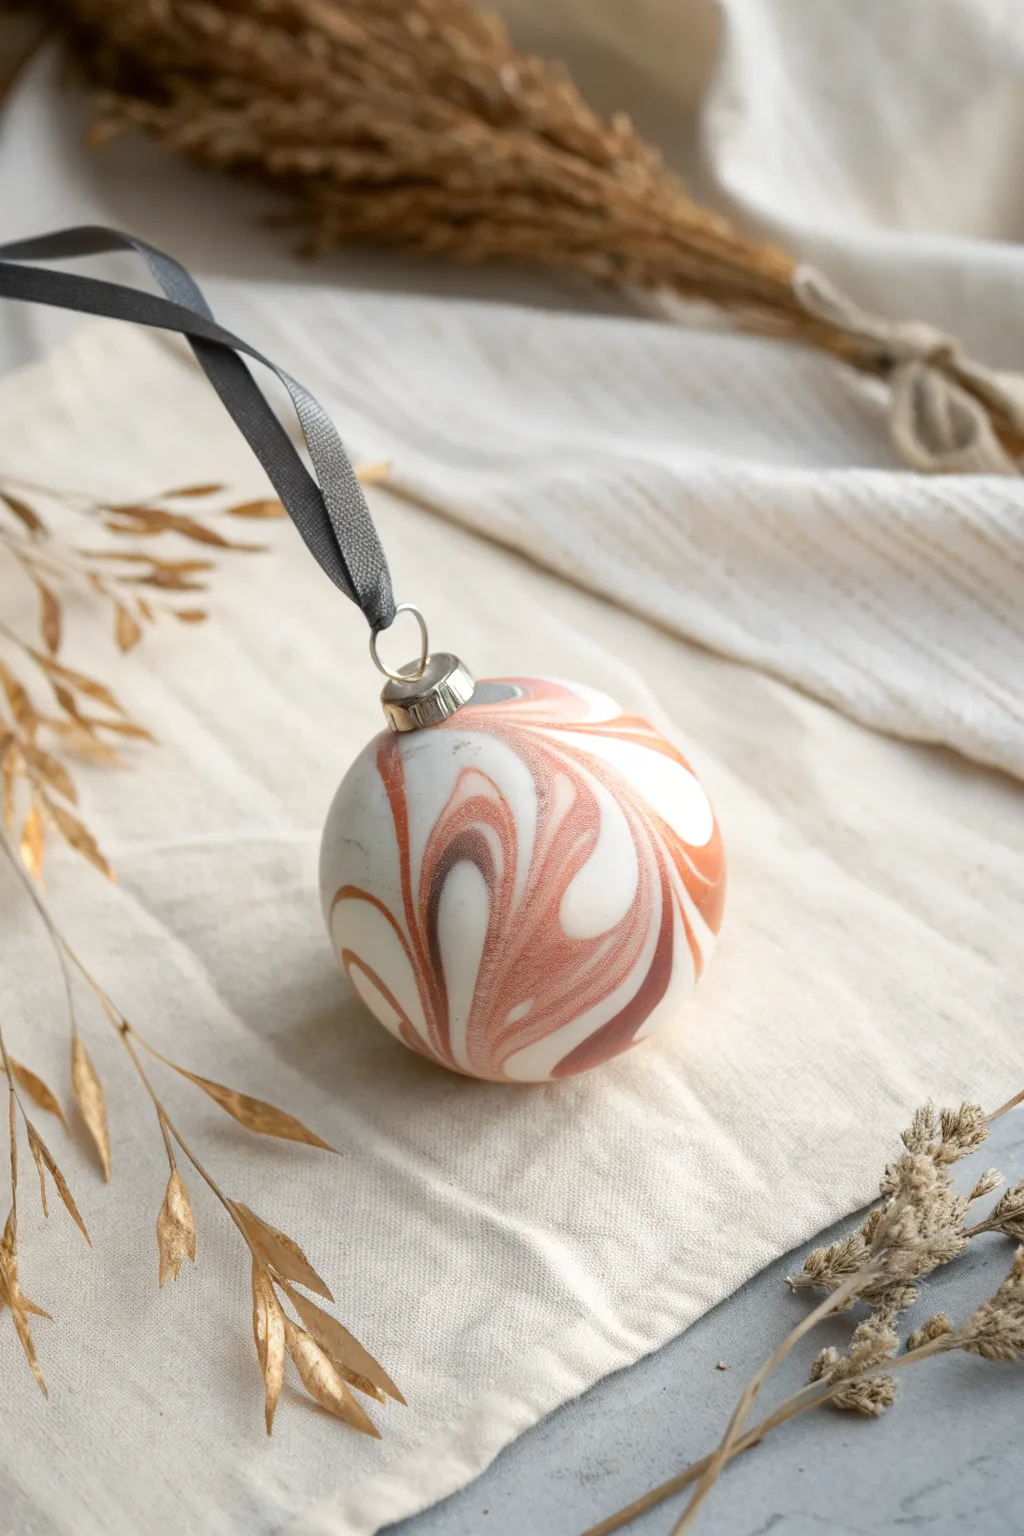
Achieve a sophisticated, high-end look with these mesmerizing marbled ornaments that blend creamy white with earthy terracotta tones. The swirling technique ensures that no two baubles are ever exactly alike, giving you a truly unique set for your tree.
Detailed Instructions
Materials
- White or translucent polymer clay
- Terracotta or rust-colored polymer clay
- Dark brown polymer clay (optional, for depth)
- Round ornament base (glass or shatterproof plastic)
- Acrylic rolling pin
- Craft knife or clay slicer
- Silver or gold ornament caps
- Charcoal gray satin ribbon (1/4 inch)
- Gloss glaze or polyurethane varnish
- Soft paintbrush
- Oven (for baking polymer clay) or baking tray
Step 1: Preparing the Clay
-
Condition the white clay:
Begin by taking a large block of white polymer clay. Knead it thoroughly in your hands until it becomes soft, warm, and pliable. This base color will form the majority of your surface, so ensure it is free of air bubbles. -
Prepare accent colors:
Condition equal, smaller amounts of the terracotta and dark brown clay separately. Roll them into thin snakes or ropes, about 4 inches long. -
Create the base log:
Roll your white clay into a thick log, approximately 1 inch in diameter. This will serve as the canvas for your marbling. -
Apply accent stripes:
Lay the thin snakes of terracotta and brown clay lengthwise along the white log. Press them gently so they adhere but don’t squish flat just yet.
Air Pockets?
If you spot a trapped air bubble under the clay while smoothing it onto the base, pierce it gently with a sewing needle and smooth the air out with your thumb.
Step 2: Creating the Marbled Pattern
-
Twist the log:
Grasp both ends of the clay log and twist in opposite directions. Keep twisting until tight ‘candy cane’ stripes form along the entire length. -
Fold and roll:
Fold the twisted log in half, doubling it over on itself. Roll it on your work surface to smooth it back into a single, thick cylinder. -
Twist again:
Repeat the twisting motion. The more you twist and fold, the finer and more intricate the marbling lines will become. Stop when you see distinct, flowing ribbons of color rather than chunky stripes. -
Consolidate to a ball:
Once satisfied with the swirl pattern, roll the entire mass into a smooth ball. You should see the beautiful agate-like layers beginning to emerge.
Step 3: Covering the Bauble
-
Flatten the clay:
Use your acrylic rolling pin to roll the marbled ball flat. Aim for a thickness of about 1/8 inch. Lift and rotate the clay frequently to prevent sticking. -
Cut to size:
Place your ornament ball on top of the sheet to estimate size. Use your craft knife to cut a circle of clay large enough to wrap almost entirely around the bauble. -
Apply to ornament:
Gently drape the clay sheet over the ornament base. I find it easiest to work from the bottom center upwards, smoothing the clay against the surface with your thumbs. -
Smooth the seams:
carefully nudge the clay edges together at the top near the neck of the ornament. Gently rub the seams with your finger until they vanish into the pattern. -
Trim excess:
Slice away any bulky excess clay around the ornament’s opening neck. Ensure the surface is smooth and fingerprint-free.
Add Metallic Flair
For a luxe touch, press small bits of gold leaf onto the raw clay surface right before baking. The metal leaf will adhere during baking for a gilded finish.
Step 4: Finishing Touches
-
Bake the ornament:
Place the clay-covered bauble on a baking sheet or foil. Bake according to the specific manufacturer instructions on your clay package (usually 275°F for 15-30 minutes). -
Let it cool:
Allow the ornament to cool completely inside the oven by cracking the door slightly, which prevents accidental cracking from thermal shock. -
Apply glaze:
For that ceramic shine, brush a thin coat of gloss glaze or varnish over the cooled surface. Let it dry completely. -
Attach the cap:
Squeeze the prongs of the silver or gold cap and insert it into the neck of the ornament. If the fit is loose due to clay thickness, a dab of superglue helps secure it. -
Add the ribbon:
Cut a length of charcoal gray satin ribbon. Thread it through the cap’s loop and tie a knot at the top to create a hanging loop.
Hang your new marbled masterpiece on a sturdy branch to showcase those beautiful organic swirls
Terrazzo Speckle Ornaments
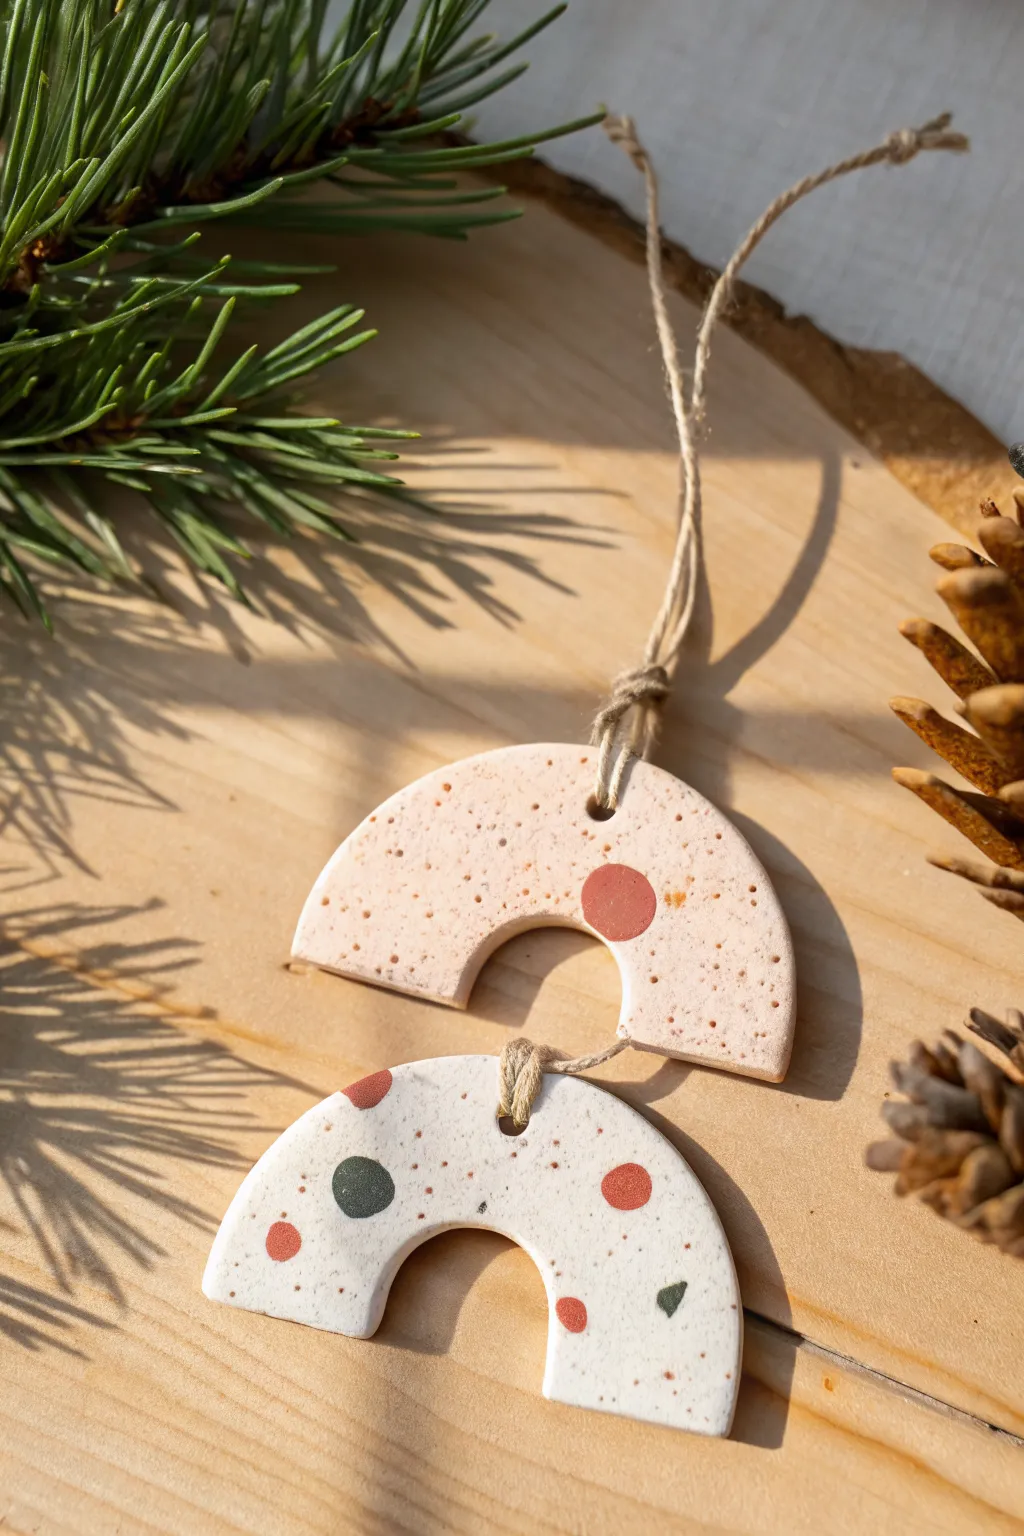
Achieve a chic, high-end ceramic look using polymer clay with this terrazzo-inspired technique. These dangling rainbow shapes feature delightful speckled textures and contrasting embedded chips for a modern twist on classic holiday decor.
Step-by-Step
Materials
- Polymer clay (white, beige/blush, terracotta, dark green)
- Acrylic rolling pin
- Circle cutters (one large approx. 3 inches, one small approx. 1 inch)
- Craft knife or clay blade
- Coarse black pepper or brown acrylic paint (for speckles)
- Toothbrush (if using paint)
- Twine or jute cord
- Parchment paper
- Toothpick or skewer
- Sandpaper (fine grit)
Step 1: Prepping the Dough
-
Condition the base clay:
Start by warming up your white and beige clay in your hands until it is soft and malleable. This prevents cracking when you stamp out your shapes. -
Create the terrazzo chips:
Take very small amounts of your contrast colors (terracotta and dark green). Roll them into paper-thin sheets, bake them for just 10 minutes to harden slightly, and then chop them into irregular, tiny fragments with your craft blade. -
Mix the speckles:
For the organic, sandy texture seen in the beige ornament, knead in a pinch of coarse black pepper directly into the unbaked clay. Alternatively, you can use granite-effect clay that comes pre-mixed.
Step 2: Forming the Rainbows
-
Roll out the slab:
Roll your conditioned base clay—one slab of white and one of beige—onto parchment paper until they are about 1/4 inch thick. Ensure the surface is smooth and even. -
Add the terrazzo:
Scatter your chopped clay fragments onto the white slab and press a few larger, flattened circles of terracotta clay onto the beige slab. -
Embed the design:
Gently roll over the slabs again with your acrylic roller. You want to press the colored chips flush into the surface without distorting the base shape too much. -
Cut the outer curve:
Use your large circle cutter to punch out a full circle from the patterned area of your slab. -
Cut the inner arch:
Position the small circle cutter slightly below the center line of your large circle to create an arch with thicker legs. Press down firmly to remove the center. -
Slice in half:
Use your clay blade to cut the resulting doughnut shape perfectly in half horizontally. This creates two rainbow arches from a single circle cut. -
Smooth the edges:
I always take a moment here to gently rub the cut edges with my finger to soften any sharp angles left by the cutters. -
Pierce holes:
Using a toothpick or skewer, poke a hole at the top center of the arch. Make sure the hole is wide enough for your twine to pass through later.
Clean Cuts Only
Before cutting your shapes, dust your clay with a tiny bit of cornstarch. This prevents the clay from sticking to the cutters and warping when you pull them away.
Step 3: Finishing Touches
-
Bake the ornaments:
Transfer the parchment paper to a baking sheet. Bake according to your clay manufacturer’s instructions—usually around 275°F (135°C) for 15-30 minutes. -
Cool and sand:
Allow the clay to cool completely. Dip your fine-grit sandpaper in water and gently sand the surface to reveal the crisp edges of the embedded terrazzo chips. -
Add faux speckles:
If you didn’t add pepper earlier, dilute a tiny drop of brown acrylic paint with water. Dip a toothbrush in it and flick the bristles to spray a fine mist of speckles over the white ornament. -
Clean connection points:
Check your stringing holes. If they closed up slightly during baking, gently twist a small drill bit or craft knife tip inside to clear them. -
String them up:
Cut a length of jute twine. Fold it in half, push the loop through the hole from front to back, and pull the tails through the loop to create a lark’s head knot. -
Connect the pair:
To create the double-decker look, tie the twine from the bottom ornament around the center of the top ornament, securing it with a sturdy knot hidden behind the top arch.
Fixing Fingerprints
If you notice fingerprints on your unbaked clay, lightly brush them with a little baby oil or rubbing alcohol before baking to smooth them out instantly.
Hang these modern pieces on a tree branch or use them as unique gift toppers for special presents
Cut-Out Frame Ornaments
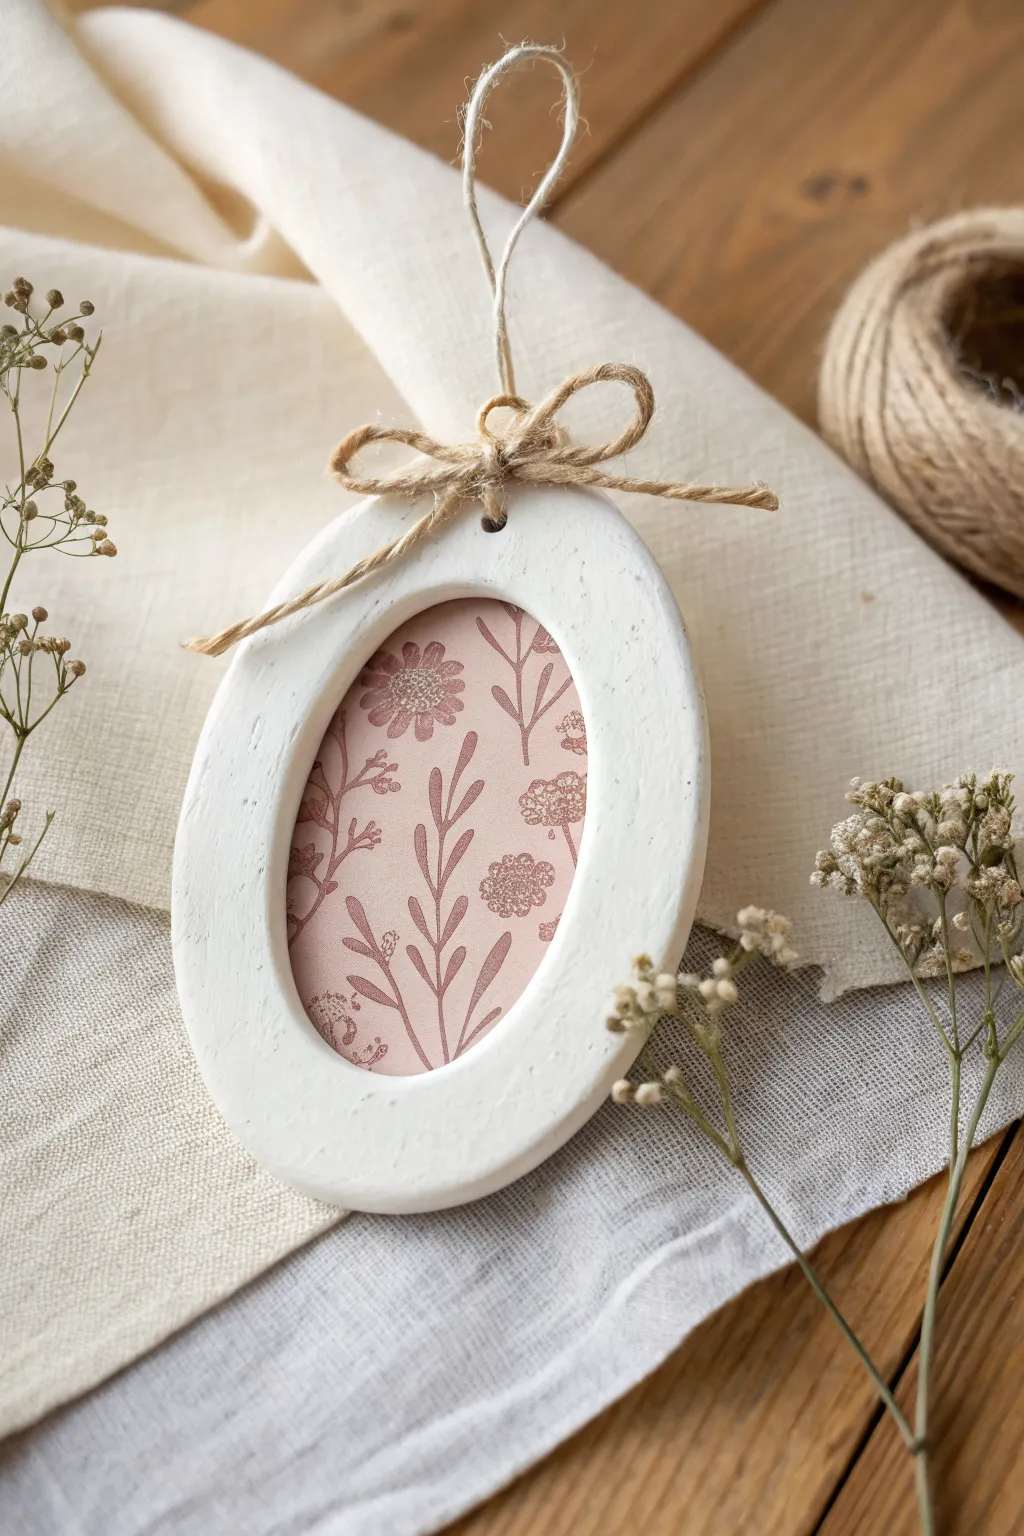
Transform simple air-dry clay into an elegant, rustic frame that showcases a lovely floral motif. This project combines the clean matte finish of white clay with warm, patterned paper for a timeless decoration perfect for spring or the holidays.
Detailed Instructions
Materials
- White air-dry clay
- Rolling pin
- Two oval cookie cutters (one large, one slightly smaller)
- Straw or cocktail stick
- Sandpaper (fine grit)
- White acrylic paint (optional, matte finish)
- Floral scrapbook paper or patterned cardstock
- Jute twine
- Craft glue or hot glue gun
- Scissors
Step 1: Shaping the Frame
-
Condition the clay:
Begin by taking a handful of air-dry clay and kneading it in your hands until it becomes soft, pliable, and free of cracks. -
Roll it out:
Using a rolling pin, flatten the clay to an even thickness of about 1/4 inch. If the clay sticks to your surface, try rolling it on a piece of parchment paper. -
Cut the outer shape:
Press the larger oval cookie cutter firmly into the rolled clay to create the exterior shape of your ornament. -
Create the window:
Center the smaller oval cutter inside the first shape and press down to remove the middle section, creating a frame. -
Make the hanger hole:
Use a straw or a cocktail stick to poke a hole through the top center of the clay frame. Make sure it’s large enough for your twine to pass through later. -
Smooth the edges:
Dip your finger in a little water and gently run it along the cut edges to smooth out any roughness or stray bits of clay. -
Let it dry completely:
Place the frame on a flat surface to dry. Depending on humidity and thickness, this usually takes 24-48 hours. Turn it over halfway through to ensure even drying.
Step 2: Refining and Painting
-
Sand imperfections:
Once the clay is fully hardened, use fine-grit sandpaper to gently buff away any rough spots on the surface or edges. -
Dust it off:
Wipe the frame down with a dry cloth or soft brush to remove any clay dust from sanding. -
Add a coat of paint:
For a pure, bright white look like the photo, paint the frame with matte white acrylic paint. This helps seal the clay and gives a uniform finish. -
Dry the paint:
Allow the paint to dry fully before moving on to the assembly steps.
Uneven Clay?
If your clay is warping as it dries, place a heavy book on top of it once it’s semi-dry (leather hard) to keep it perfectly flat.
Step 3: Assembly
-
Trace the backing:
Place the clay frame onto your floral patterned paper. Lightly trace the outer oval shape with a pencil. -
Cut the paper insert:
Cut out the oval shape from the paper, but trim just inside your pencil line so the paper won’t peek out past the clay edges. -
Attach the backing:
Apply a thin line of craft glue along the back rim of the clay frame and press the floral paper (pattern side facing front) firmly onto it. -
Create the hanger:
Cut a length of jute twine, thread it through the hole at the top, and knot the ends together to form a loop. -
Form a bow:
Cut a second piece of twine and tie a small, neat bow. Adjust the loops until they look balanced. -
Attach the bow:
Using a small dab of hot glue or strong craft glue, secure the twine bow directly over the hole at the top of the frame.
Backing Variations
Instead of scrapbook paper, try gluing a real pressed flower onto a piece of cardstock, or use a vintage book page for a literary twist.
Hang your new ornament in a bright spot where the floral pattern can be admired
Clay-and-Wood Bead Angels
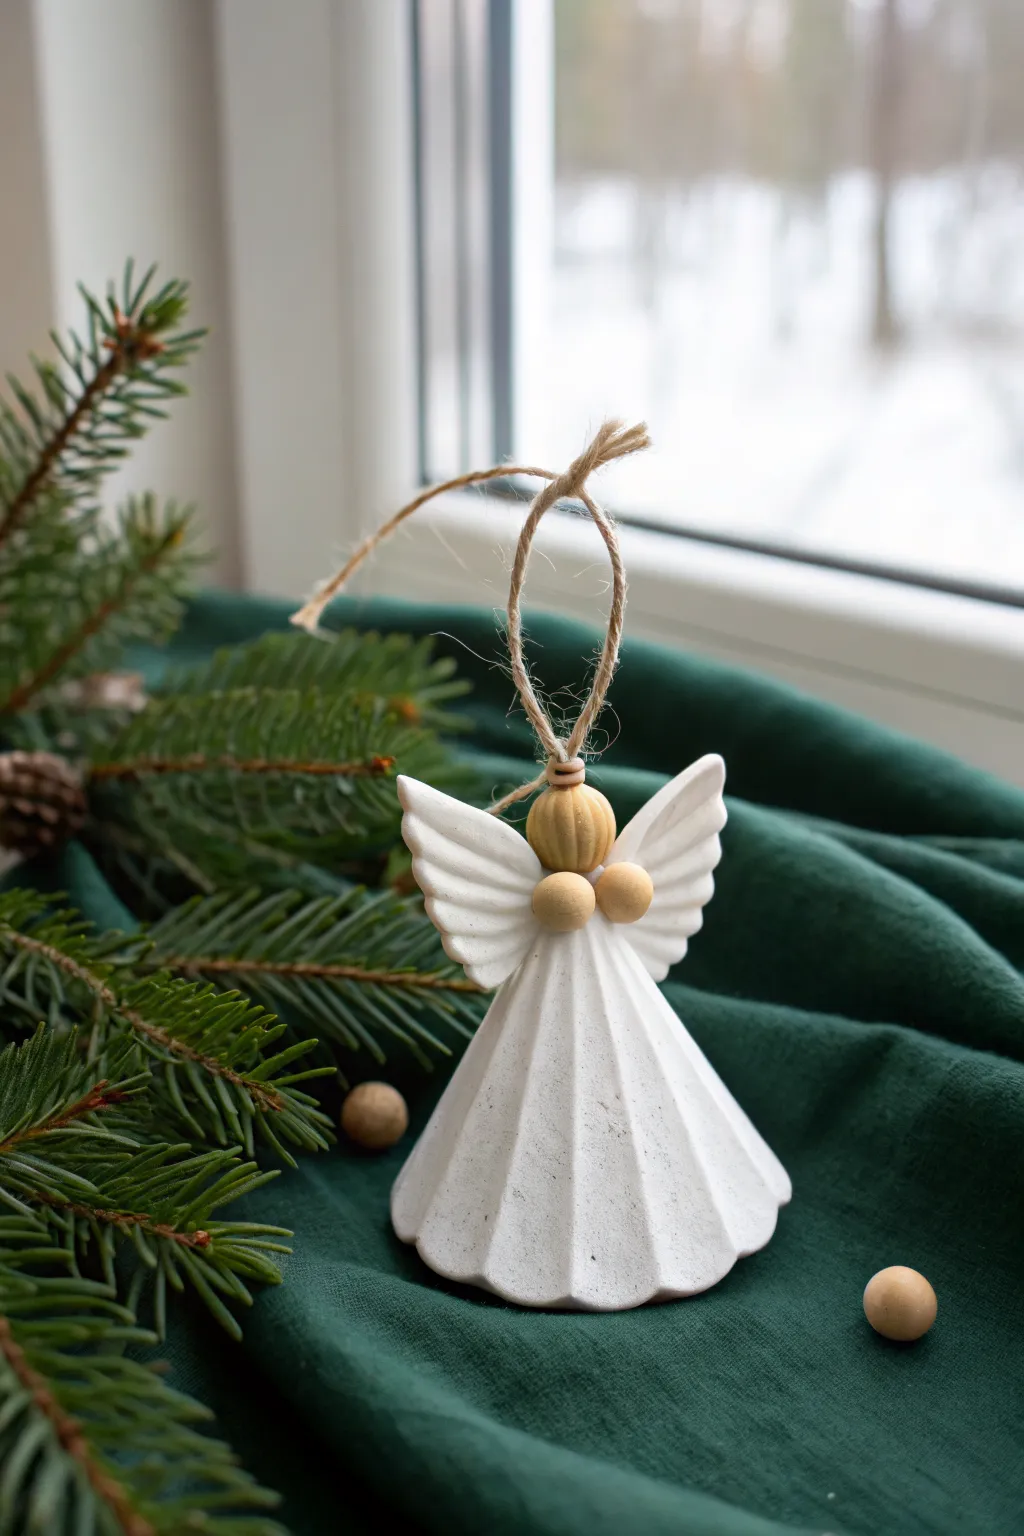
Embrace the serene beauty of winter with this elegant angel ornament, combining the smooth, matte texture of white clay with the warmth of natural wood. The pleated skirt and simple wings create a modern, Scandinavian-inspired look that is perfect for hanging on a tree or gifting to a loved one.
Step-by-Step Guide
Materials
- Air-dry clay (white)
- Wooden bead (approx. 12-15mm) for the head
- Two small wooden beads (approx. 6-8mm) for connecting wings/hands
- Jute twine
- Rolling pin
- Circle cookie cutter (approx. 4-5 inches)
- Small heart-shaped cookie cutter (for wings)
- Sharp crafting knife or scalpel
- Skewer or toothpick
- Sandpaper (fine grit)
- Strong craft glue or hot glue gun
Step 1: Shaping the Skirt
-
Roll the clay:
Begin by conditioning a chunk of white air-dry clay until it is pliable. Roll it out on a smooth surface to an even thickness of about 1/4 inch. -
Cut the circle:
Use your large circle cutter to stamp out a perfect round shape. This will form the body of the angel. -
Create the center hole:
Use a straw or the tip of your crafting knife to create a very small hole in the absolute center of the circle. This allows room for the twine knot later. -
Add texture:
If you want a subtle texture, you can lightly press a piece of fabric or sandpaper onto the surface, though smooth looks beautiful too. -
Cut the wedge:
Using your knife, cut a triangular wedge out of the circle, similar to slicing a pie. Removing about 1/4 of the circle works well to create a cone shape without too much overlap. -
Score the pleats:
Lightly score straight lines radiating from the center to the edge of your clay piece. Don’t cut all the way through; these lines are guides for folding. -
Fold the dress:
Gently accordion-fold the clay along your scored lines to create the pleated skirt effect. Press the top point firmly together to secure the conical shape.
Step 2: Wings and Final Assembly
-
Cut the wings:
Roll out a fresh, slightly smaller piece of clay. Use a heart-shaped cutter, or cut a freehand wing shape that mimics the image—two rounded lobes connected in the middle. -
Detail feathers:
Take your knife and gently press identifying lines into the wings to simulate feathers. I like to fan these out slightly for a more dynamic look. -
Dry the pieces:
Set both the pleated skirt and the wings aside to dry completely. This usually takes 24-48 hours depending on humidity. Rotate them occasionally for even drying. -
Sand the imperfections:
Once bone dry, use fine-grit sandpaper to smooth out any rough edges on the bottom of the skirt or the tips of the wings. -
Prepare the hanger:
Cut a length of jute twine. Fold it in loop and tie un-looped ends into a sturdy knot. -
Thread the body:
Thread the loop of the twine upward through the hole in the top of the clay skirt so the knot catches inside the cone. -
Attach the head:
Thread the large wooden bead onto the twine loop and slide it down until it rests securely on top of the skirt. A dab of glue underneath helps keep it stable. -
Position the wings:
Glue the clay wings to the back of the skirt/body. Ensure they are centered and hold them in place for a minute until the glue tacks. -
Add the ‘hands’:
Glue the two smaller wooden beads onto the front of the joint where the wings meet the body. They act as stylized hands or simply decorative buttons holding the cloak. -
Finalize the loop:
Tie a final knot at the top of your twine loop if desired, creating a defined hanger length for your tree branch.
Keep it Clean
White clay picks up dust and lint instantly. Wipe your work surface and hands with a damp cloth or baby wipe before starting to keep the clay pristine.
Crack Control
If you see tiny hairline cracks appearing as the clay dries, mix a tiny bit of fresh wet clay with water to make a paste and smooth it over the crack.
Hang your finished angel near a window or on the tree to let the natural textures shine in the light